#polyboard
Explore tagged Tumblr posts
Visit Tumblr Blog
Explore Tumblr blogs with no restrictions, modern design and the best experience.
Last Seen Tumblr Blogs


Fun Fact
There are dozens of funny blogs to kill time on Tumblr.
Text
POLYSTANDS!

M TOP POLYBOARDS
Feeling Kinky?!
We have a limited supply of M TOP POLYSTANDS
Treat yourself!
Eggsactly what your studio needs
Or maybe you need to replenish existing stock…
…or replace tatty stands
Happy Hols!
For more info
And to purchase direct from the site
Hit Up POLYBOARDSTANDS.CO.UK
You’ll find a selection of STANDS
All Fit Standard POLYS – We Sell These Too!
8x4ft | 2.4 x 1.2m x 2in | 5cm thick
We also sell BACKGROUND SUPPORTS
Hit Up PAPERPAL.LIVE!
other useful bitz + bobz
Stand Specs etc
UK manufactured using top quality steel
Robust — Hard Wearing — Sturdy
Great for the studio + on location
very useful for retail
exhibitions
Length 44cm Width 20cm Height 24cm 50mm | 2in Gap Weight 1.5kg
2” | 50mm | 5cm gap — in stock
1” | 25mm | 2.5cm gap — special order
Shipping = Worldwide
Various delivery speeds available
Any questions?
Hit Us!
AKA Foam Core Stands in the US
Looking for STUDIOHIRE…?
🤜 Swing by STUDIOHIRE.COM!
SO DAMN SOURCEY! . . . . . . . . . .
POLYBOARDSTANDSdotcodotuk #POLYBOARDSTANDS #PolyTrollies #FoamCoreStands #PolyboardHolder #StudioPhotography #PhotoStudio #PhotographicStudios #PhotoStudioEquipment #StudioEquipment #PhotographicStudioSupplies #EssentialStudioKit #PhotographicAccessories #POLYBOARD_STANDS #LocationKit #Studio #Studios #POLYBOARDSTAND #PowderCoatedStands #POLYBOARDS #FoamCore #LocationPhotography #Photographers #DisplayStands #EssentialKitForPhotographers #Photography #PhotographyKit #Foamcore #STUDIOHIRE .COM #THEPAPERPALBACKDROPSUPPORT
#displaystands#essentialkitforphotographers#foamcore#foamcorestands#photography#photographers#studiohire#polyboards#photographicstudiosupplies#polyboardstand#polys#polystyrene boards#polyboard#polytrolley#poly styrene#studio#studios#photo studio#background support#paperpal background support#paperpal#the paperpal#colorama#film studio#foam core stands#retail stands#exhibition stands#exhibitionstand#polyboard stands#stands
3 notes
·
View notes
Note
So in my head, Kitty proposed the scheme for the wedding and either she didn't say it was fake dating or Luka just slipped over the word "fake" and only heard "date" so it's more like Luka has been in love for years and now he knows Kitty returns it
i think they should have gross nasty sex that has her clawing at that dumb ugly hotel console table that the really crappy LG tv sits on with the sticky hotel remote control
she ends up peeling the laminate polyboard thing with her claws/nails from how hard she scratches it up
13 notes
·
View notes
Text
0 notes
Text
Lola's Room: Equiptment List
Here is the equiptment list I put together for Lola's Room.
Camera
URSA - Blackmagic URSA Mini Pro 4.6k G2 URSA - SIGMA PL Prime Lens Kit Ronford Baker Heavy Duty Short Tripod Ronford Baker Heavy Duty Tall Tripod URSA - Sachtler 25 Fluid Head URSA - Arri Follow Focus FF5 Tilta Nucleus-M Wireless Follow Focus Kit URSA - ARRI LMB Matte Box Kit SmallHD Cine 7 Monitor SmallHD Cine 7 Monitor BNC SDI Cable - Medium Length BNC SDI Cable - Medium Length BNC SDI Cable - Medium Length 4 x V-Lock Batteries + Charger 4 x V-Lock Batteries + Charger Monitor Stand - Small Small Lighting Stand Small Lighting Stand
Lighting
Kino Flo Celeb 250 DMX LED Celeb Kino Flo Stand 150w Dedolight Kit - HALOGEN LIGHT 650w Arri Fresnel - HALOGEN LIGHT 300w Arri Fresnel - HALOGEN LIGHT 300w Arri Fresnel - HALOGEN LIGHT Avenger Light Stand Avenger Light Stand Avenger Light Stand C Stand with 40" extension Arms C Stand with 40" extension Arms C Stand with 40" extension Arms Polyboard - Large (White) Aluminium Flat Trace Frame 48 x 48" Aluminium Flat Trace Frame 36 x 36" Lastolite Reflector Black Flag ( 24" x 36" ) Black Flag ( 24" x 36" ) 25m Drums Mains extension 25m Drums Mains extension 25m Drums Mains extension Bag of Croc Clips Bag of Croc Clips Bag of Croc Clips
Sound
Sound Devices MixPre3 - Recorder and Mixer MKH50 Shotgun mic Boom Pole - Large Sennheiser Portable Wireless Radio Mic Sennheiser Portable Wireless Radio Mic
Miscellaneous
10 x Sand Bags Tennis balls LT Track Pro-sup Laptop Dolly Bike Pump for Dolly wheels Apple boxes - Large Apple boxes - Large Apple boxes - Large First Aid Kit
0 notes
Text

https://www.reddit.com/r/AskPhotography/comments/125114x/how_do_photographers_create_this_saturated_soft/?utm_source=share&utm_medium=android_app&utm_name=androidcss&utm_term=20&utm_content=share_button
This was a surprise to see pop up on my feed - I can tell you exactly how these were made, as I'm the photographer who shot them. Few different techniques going on depending on which image you're talking about so I'll try to go through them.From the start: All the images were shot digitally. Images 1 & 4 I had a 1-stop green resin filter on the camera (in order to get more intensity out of the reds and yellows), the rest were unfiltered.
Lighting:
Image 1: Was flash: Large Westcott umbrella coming from behind camera to balance against the sunlight. From memory might have had an assistant with a bounce on camera right too, just to wrap the light a touch.Image 2 & 5: Mix of daylight and tungsten continuous light. As I remember it, I had a HMI through a 12x12' silk to camera right, a Aputure Lantern at a 45 degree above the model, a ARRI Redhead on a dimmer w/ diffusion that I used more-or-less intensely depending on the shot to add warmth and shape the light on her, and then lots of black polyboards camera left to deepen the shadows.Image 3: All daylight continuous. Aputure Lantern was the key light, think I had a small softbox on his lower body just to raise exposure. Medium softbox as a back/background light (spilling on both). Then black polyboards on right side to deepen shadows.Image 4: Daylight with a bit of bounce camera right
Processing:
This is the biggest element for the "look" you're talking about. There's a lot of adjustments and very specific choices I make that go into the general feeling of them, so it's difficult to talk about them all. Broadly speaking, I like deep shadows, crushed highlights, bold reds and strong contrast. Blues, greens and skin tones I do more on a case-by-case basis. I use Capture One for the initial grading and export (which takes the image about 40% of the way there), then Photoshop to complete the rest of it. Almost all of my adjustments are made using "Curves", "Selective Colour" or "Hue/Saturation" and either masking it across the photo, or using "Colour Range" to apply whatever the adjustment is selectively.
Printing:
Images 1/3/4 are also printed/rescanned/re-edited on. I find straight digital can feel a bit sterile at times, so I'll often print my photographs in order to soften them down and add a bit of texture. Spent years using a cheap printer and simple paper, these days I've got a more expensive one and better papers but I'm unconvinced it's objectively better - Just different. Process goes export digitally > retouch in photoshop > print > rescan > re-edit in photoshop, as the printing process moves around colours and tones, and so requires adjusting back to being "correct".
Mindset:
One more thing that I think is worth talking about, that often isn't mentioned very much in online discussions of photographic practice, is that all these decisions don't come from a place of "trying to achieve a certain look" - They come from a place of taste and opinion that I've built up through thinking about the kind of feeling I want to create, and the sort of story I want to tell. I've always liked the organic nature of paintings, so I started printing in order to take the images from pixels to ink. My processing is often quite chaotic, where I'll have dozens of adjustments (Image 1 had 19 in digital, and then 20 more in the print) that all do subtle different things, which I'll then "paint" across the photo, similar to how a painter might build up tones using layers of paint across areas of the canvas. Almost never do I think about my own "style" - I just think "Does this look right or wrong?", and by the time it looks "right", its invariably fallen in line with everything else I shoot... and that only comes about from making a lot of photographs.Anyway hope this helps and glad you liked the images.
Happy to answer more questions if you've got any too.
0 notes
Text
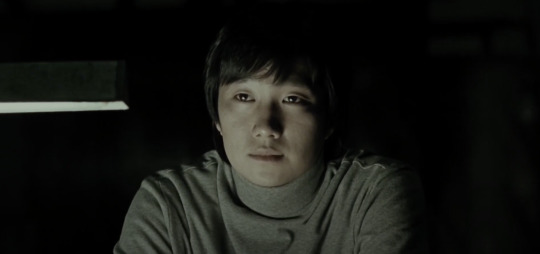
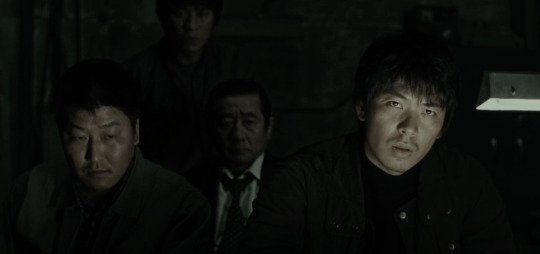
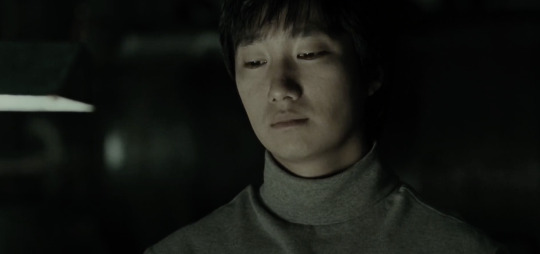
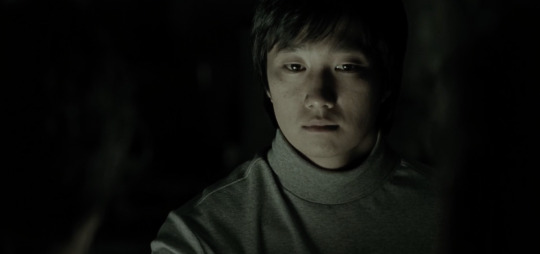
Group 8 Scene Recreation - Memories of Murder Production Breakdown
Brainstorming
For the final week of the production workflow module, my group were tasked with recreating a scene of our choice. Bar some budgetary and time concerns, nothing was off the table.
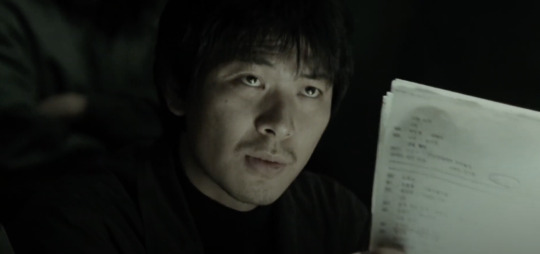
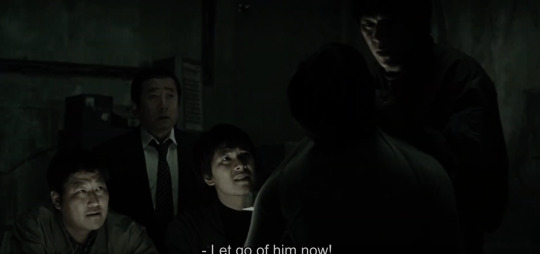
Eventually we settled on the interrogation scene from Bong Joon-Ho's Memories of Murder. I personally had not seen the film but was excited to tackle it based on seeing the director's other work Parasite.
Pre Production
We had plenty of kit to acquire in order to convey an accurate recreation of the scene:
Camera:
Blackmagic Pocket PRO 6K, Samyang Xeen Cinema Lens Kit, Smallrig Tripod
Sound:
Sennheiser 416, Sound Devices MixPre3-Recorder and Mixer, Large Boom Pole, Microphone Stand.
Lighting:
LEDGO LG-B308K 3x 308 light Daylight Reporter LED Lighting Kit, Gloves
Other:
Polyboard (White), Black Flag x3, Floor Cable Cover, Clapper, Sandbag x3
In terms of props we also had to purchase a light from amazon which would replicate the look of the desk light found in the original scene as well as being flexible to being adjusted in order to match different shot compositions. We had also our crew supply shirts and ties for respective actors as well as paper for the process of interrogation.
Aside from kit, scheduling was also CRITICAL and just as important as many groups were filming at the same time. This ended up being a close call as the only time we ended up getting kit that was far enough in advance to leave plenty time for editing conflicted with the premiere of another group project we unfortunately had to miss.
Next we took still frames from each shot in order to plan out lighting:


From there we planned our shotlist:
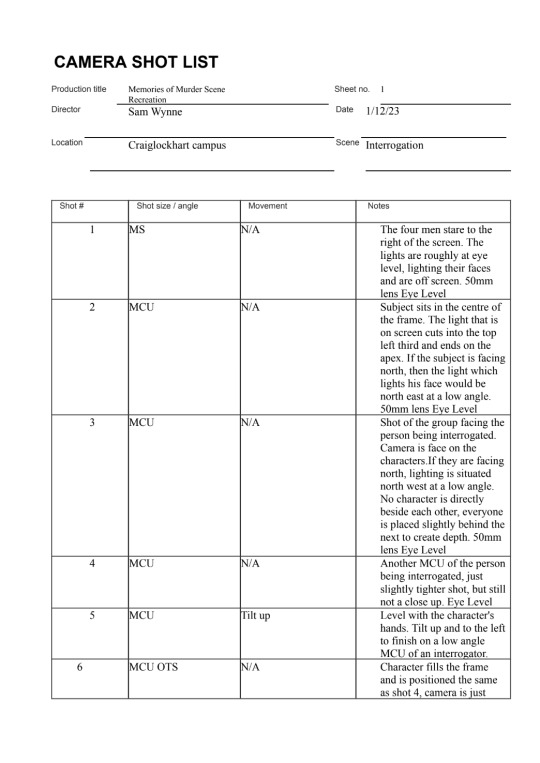

Along with this we decided on Crew Roles:
Sam Wynne: Director Jack Burns: Producer, Actor, Runner Jake Rae: Director of Photography Jacob Doig: Lighting, Camera Assistant Rushil Deepak: Production Design, Sound
And our actors:
Harry Batkin: Park Hyeon-Gyu Daniel Lee: Seo Tae-Yoon Cameron Mcintyre: Park Doo-Man Jack Burns: Shin Dong-Chul Euan Hunt: Cho Yong-koo
Our chosen filming date the 4th of December 2023.
Filming
While the location of the scene might not seem complex there was lots of shots and respective lighting to match each.
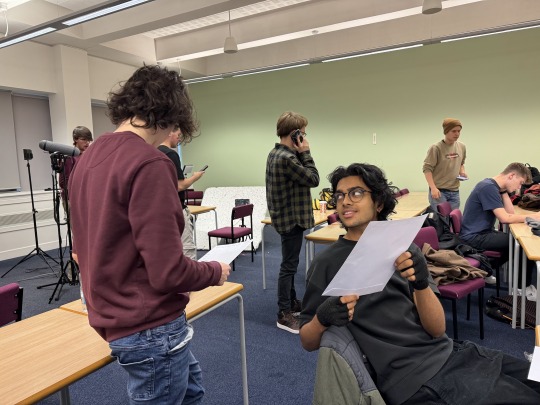
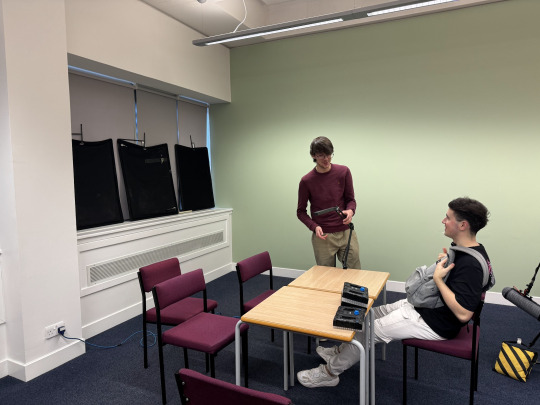
Figuring out framing with the crew/ Practicing lines with actors
We experimented with different angles and setups in the classroom we had booked for the day, and settled on using the corner of the room, which was conveniently near lots of sockets (Useful for our luck of batteries dying).
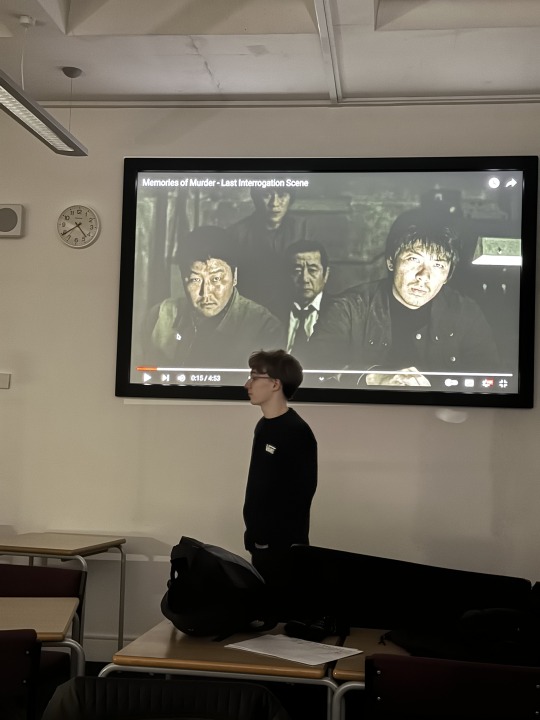
The classroom booking and the orientation of set placement actually worked out in our favour as we had full view of the room's projector, on which we displayed the original scene allowing both actors and the crew to get a feel for each respective shot as it came and went.

This initial shot we filmed first was actually quite simple compared to the others as we only had one character to worry about, along with just having to light his face, as opposed to later shots with characters blocking part of the framing.
Post Production
I helmed the post production of this project, inheriting the audio and video files onto my macbook. I then edited the film in premiere pro.
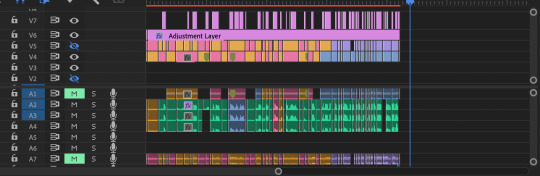
FInished Timeline
I attempted to organise individual cuts by colour coding different takes and angles, as the scene ended up being pretty complex to put together.

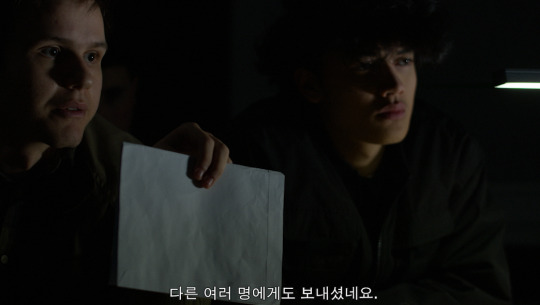
While not integral to recreating the scene, I thought a nice touch in the post production process would be the inclusion of Korean subtitles, paying homage to original language of the film.

Colour Match Feature
I used premiere pro's colour match feature to try and make some small lighting adjustments based on the original scenes. Admittedly, I don't have much experience with colour correction so I didn't go too in depth past this stage. However, this definitely something I want to learn over the winter break..
0 notes
Text
KIT LIST, Shoot Date -04/12/23
Blackmagic Pocket PRO 6K, Samyang Xeen Cinema Lens Kit, Smallrig Tripod
Sennheiser 416, Sound Devices MixPre3 - Recorder and Mixer
Large Boom Pole, Microphone Stand
LEDGO LG-B308K 3x 308 Light Daylight Reporter LED Lighting Kit, Gloves
Polyboard (White), Black Flag x3, Floor Cable Cover, Clapper, Sandbag x3
0 notes
Text
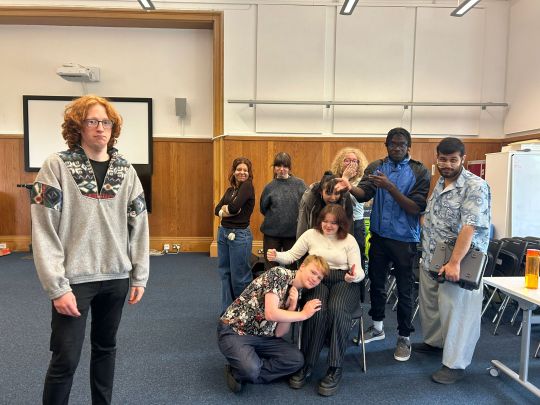
On-set production - week 3
(monday 18th september)
Class this week was focused on getting more familiar with the new equipment available to us in third year. I was not familiar with any of the new equipment so I was excited to start setting up.
Before allowing us to set up the camera's, Andrew went through the equipment and got us to have a turn changing the lenses as it was different to the Blackmagic Pros that we were used to in first year. I found this a lot easier than it looked and was interested in seeing how the rest of the camera would be set up.
For this we took it in turns to set up the Sony Fs7 camera. It was a lot more complicated than I am used to however I had a few of the DOPs in my group help and explain how it worked step by step. We then did a few demos with the camera which I had a lot of fun doing, including a big group "photo" and me and joseph acting out a very dramatic relay race scene.
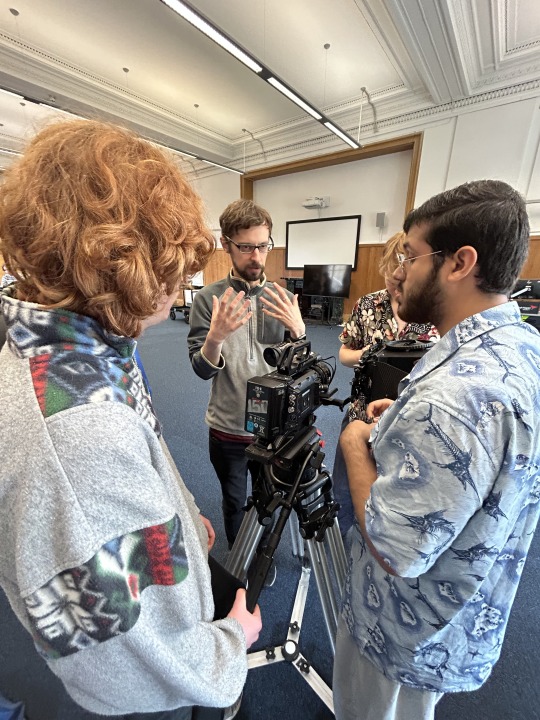


I found this exercise incredibly helpful, even if I am not specialising in the camera department. It means that if I am on set and the camera department need an extra pair of hands I can help out when needed.
After this we sat and listened to a demo of the lights and lighting equipment available to us. As I would like to try out being a gaffer, this was incredibly interesting and I enjoyed seeing how polyboards and black flags affect the shape and direction of the light source.


0 notes
Text
0 notes
Photo

Pins in Poly. . . . . . #pins #polyboard #photooftheday #instaphoto (at Marylebone London) https://www.instagram.com/p/Cktw6fIotQw/?igshid=NGJjMDIxMWI=
0 notes
Text
Get Your Poly On!

Purchase direct from the site
Hit Up POLYBOARDSTANDS.CO.UK
You’ll find a selection of STANDS
All Fit Standard POLYS – We Sell These Too!
8x4ft | 2.4 x 1.2m x 2in | 5cm thick
We also sell BACKGROUND SUPPORTS
Hit Up PAPERPAL.LIVE!
other useful bitz + bobz
Stand Specs etc
UK manufactured using top quality steel
Robust — Hard Wearing — Sturdy
Great for the studio + on location
very useful for retail
exhibitions
Length 44cm Width 20cm Height 24cm 50mm | 2in Gap Weight 1.5kg
2” | 50mm | 5cm gap — in stock
1” | 25mm | 2.5cm gap — special order
Shipping = Worldwide
Various delivery speeds available
Any questions?
Hit Us!
AKA Foam Core Stands in the US
Looking for STUDIOHIRE…?
🤜 Swing by STUDIOHIRE.COM!
SO DAMN SOURCEY! . . . . . . . . . .
POLYBOARDSTANDSdotcodotuk #POLYBOARDSTANDS #PolyTrollies #FoamCoreStands #PolyboardHolder #StudioPhotography #PhotoStudio #PhotographicStudios #PhotoStudioEquipment #StudioEquipment #PhotographicStudioSupplies #EssentialStudioKit #PhotographicAccessories #POLYBOARD_STANDS #LocationKit #Studio #Studios #POLYBOARDSTAND #PowderCoatedStands #POLYBOARDS #FoamCore #LocationPhotography #Photographers #DisplayStands #EssentialKitForPhotographers #Photography #PhotographyKit #Foamcore #STUDIOHIRE .COM #THEPAPERPALBACKDROPSUPPORT
#polyboardstand#polyboardstands#displaystands#essentialkitforphotographers#foamcore#foamcorestands#photographers#photography#studiohire#polyboards#photographicstudiosupplies#foam core stands#polyboard#polytrolley#polystyrene boards#polys#poly#polystands#polystand#photo studio#photo studios#studios#photographic studios#studio hire#hire studios#studio shoot#film photography#photoshoots#studio photography#studio kit
0 notes
Link
Moreover, PolyBoard Serial Key is an interactive product used to build and structure the cabinet depending on strategies.
0 notes
Photo

NUEVO POST! Aprendé un poquito sobre Polyboard para poder diseñar tus muebles en 3d. Entra a nuestro Blog. en nuestra bio también tenés los links @muebleando #muebles #muebleando #carpintería #creatividad #designthinking #bauhaus #ideo #ideas #diy #leanstartup #diseño #design #polyboard #diseño3d #diseñodemuebles #diseñomuebles #arquitectura #carpinteria #blog https://www.instagram.com/p/CGyk6CNHxI3/?igshid=1lowg92ovu7r4
#muebles#muebleando#carpintería#creatividad#designthinking#bauhaus#ideo#ideas#diy#leanstartup#diseño#design#polyboard#diseño3d#diseñodemuebles#diseñomuebles#arquitectura#carpinteria#blog
0 notes
Text

this took a scary amount of time ANYWAYS cherry polyboard on the tl 😳
#im like wow i should make polyboards more lol and then i do and all i feel is pain#s.txt#the outsiders
25 notes
·
View notes
Link
PolyBoard Crack is interactive programming to structure and construct cabinets dependent on overall strategies and procedures. It was initially intended for cabinet configuration. However, it can be utilized for other comparable applications such as closet plan, shelves, entryways, device pivots, and the sky is the limit from there.
0 notes
Photo


WOKUPP
https://www.behance.net/gallery/59180431/WOKUPP
1 note
·
View note