#screenshots from kissthemgoodbye
Text
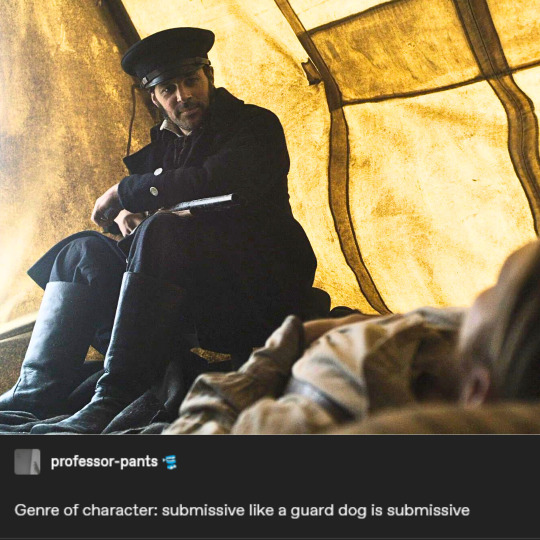

#sorry if this has been done already but it wouldn't leave my brain#frustrated by the uwu smol bean fanon jopson characterization#this man has killed and will kill again if his captain or crew requires it#the terror#thomas jopson#amc the terror#the terror amc#textpost meme#screenshots from kissthemgoodbye
356 notes
·
View notes
Photo


The Dragon Prince visuals because they bring me comfort.
(all the screenshots are from kissthemgoodbye bc the ones I took don’t look nearly as good as the ones she has on her site lol)
254 notes
·
View notes
Text


s01e01 "Go For Broke" / s01e03 "The Ladder" / s01e10 "We Are Gone"
I keep thinking about the visuals of these three moments...
(screencaps from kissthemgoodbye)
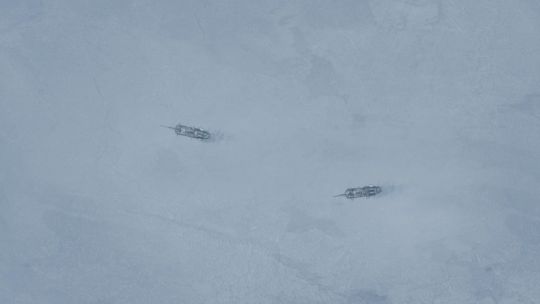
[ID: 3 screenshots from AMC's The Terror. The first is from the end of episode 1 and shows an aerial shot of the two ships frozen in some distance apart. The second is from part-way through the third episode and shows two black ink dots that have been spilled on otherwise blank white paper. The ink spots are some distance apart. The third screenshot is from the end of the final episode, and shows an otherwise empty landscape of ice and sky with the silhouettes of Captain Crozier and a young boy who is sleeping against him. The two figures are touching. End ID]
#the terror amc#francis crozier#terror screencaps#sorry if this has been done before#i can't even remember if *i* made a post about it before? memory very bad#my stuff
20 notes
·
View notes
Note
I'm sorry if this is a confusing question, but what website do you use to get screencaps. I want to get a couple pictures from an episode, but i don't know how to screenshot them! I love your blog btw :)
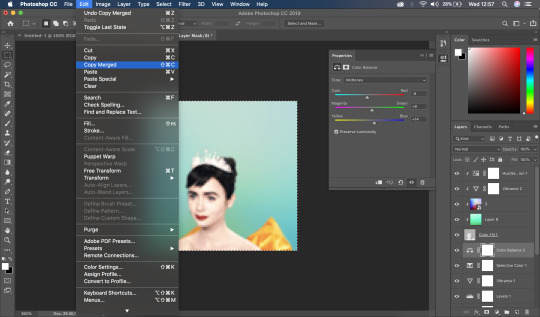
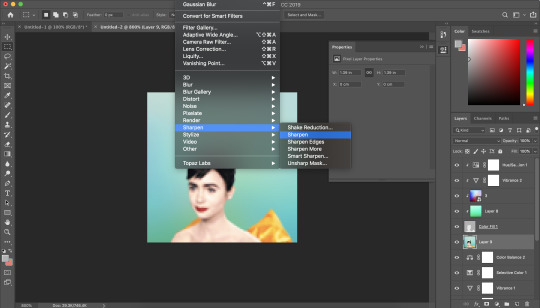
I actually screenshot them myself with VLC player; it is fairly easy! Then I use Photoshop, correct the coloring the best I can, and smart sharpen it. But two sites that do host AHS screencaps are: KissThemGoodbye; HomeOfTheNutty.
10 notes
·
View notes
Text
Welcome 🌿
Here's a pinned post to make navigation on my tumblr easier
🔮Main tags:🪴
ask tag
My fanart: my art - mine
My fanart is also rebloged on my side blog! : bonkai by the mist-underground!
Reblogs: art - film - nature - fashion - aesthetic - quotes - quotes (bis)
Tvdu reblogs: bonnie bennett - kai parker - tvd
Bonkai reblogs & posts: bonkai - bonkamily - fanfictions: bonkai fanfics - bonkai fanfic list (non-exhaustive) - theories : meta - fanon
🔮Special Posts:🪴
Manips I made for Bonkai Appreciation Week 2016
Bonkai Soundtrack
Gemini Appreciation Week 2016
Gemini Coven Appreciation Week masterpost
Bookai
🔮Ressources:🪴
I often use pinterest and tumblr to find images but I also use deviant art - pexels - etc.usf.edu because they give the option to download images free of rights.
For high quality screenshots of tvd I really like screencaped.net ( my favs )
kissthemgoodbye is also very good.
To create gifs I use photoshop, hitfilms and smartphone apps. I also use online websites: imgflip and lunapic (tutorial here)
To create edits and digital painting use photoshop and Rebelle 7. I'm trying to move on from photoshop subscription hell so I'm curently learning to use other apps like rebelle, krita and clip studio paint. To draw on my phone I use Sketchbook & to create moodboards and such I use the app Pixrl on my phone. I also use regular tools for traditional art :)
I use mega to download scenes extracts and hitfilm to edits my videos. You can find megas link on instagram and youtube.
0 notes
Note
Can you teach me how to remove subtitles from my screenshots that I have taken on phone?? Is there any way I can do it on my phone? Any app Or software.
Hey, anon!
I usually do my edits in my computer. I use a specific tool to remove things that I don't want in my edits.
But I did some research and I found some interesting options for you to do your thing on your phone and online. Try these:
photo room . com
picwish . com
Another option is the website kissthemgoodbye . net
There you can find screenshots of several shows.
And my friends can feel free to add more options here :)
0 notes
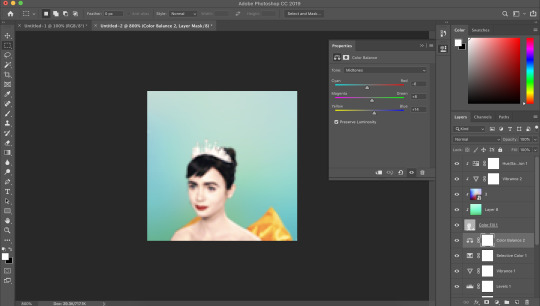
Text
cristalcarrington’s icon tutorial!
a little treat for day 28 of my filmuary challenge!

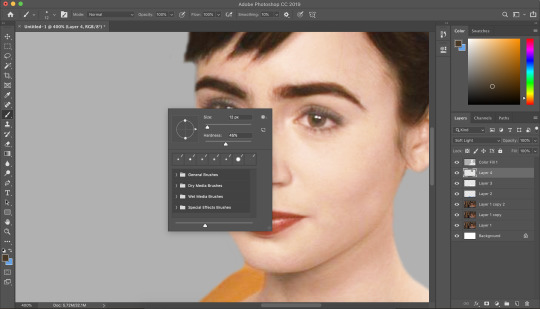
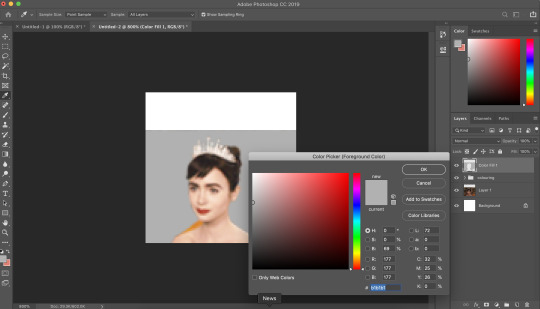
i’ve honestly lost count of which one this is, but welcome to another icon tutorial! here i’m going to breaking down my icon creation process step by step. i currently am a mac user and all my previous tutorials have been windows orientated (which unfortunately were all lost in the great url loss of 2017). my process hasn’t changed much since then, but i have picked up quite a few new go-to tricks and i’ll be sharing these tips in this post!
anyway! here’s what you’ll need-
photoshop (i currently use photoshop cc so be aware that options and tools may not translate onto other programs/versions of ps) and yes, i do pay for my photoshop but if you’re in need of a decent, safe download i might be able to point you in the right direction so hmu
patience (believe me some of these icons have taken me a painfully long time to create) just don’t feel discouraged if things don’t work out perfectly right away!
a creative mind. please be aware that this tutorial is only for educational purposes. under no circumstance directly replicate my icons! the one involved in this tutorial is clearly fair game, but please try to take creative liberty with your work. what i’ve found a lot of fun is incorporating bits and pieces of what other people do into my own work.
further resources
if you need more reference/help, here’s an icon psd for you to have a look around while reading the tutorial or instead of the tutorial. again, please do not re-upload or redistribute.
please consider reblogging this if you’ve found it useful. or checking out my resources!
starting off
so today, i’m going to tackle a screencap for my ongoing filmuary challenge!
i tend to get my screencaps from google, so for this i literally just googled “mirror mirror screencaps” and selected a image from google images. when i’m not feeling lazy, i tend to go through the whole movie (great screencaps can be found at screencapped or kissthemgoodbye)
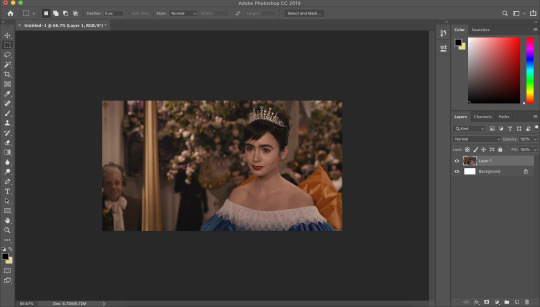
my first move is to open the screencap in the photoshop on it’s default canvas. the one i’ve chosen is normally the sort of screencap i’d go for-- one that has a central focus on the character and allows me to get a solid outline.
i tend to avoid screencaps that cut off the top of the characters head. i also tend to gravitate towards scenes that look easy to colour; if you choose overly saturated screencaps or screencaps that are too dark/light, then you will find it difficult to colour while conscious of the screencap quality.
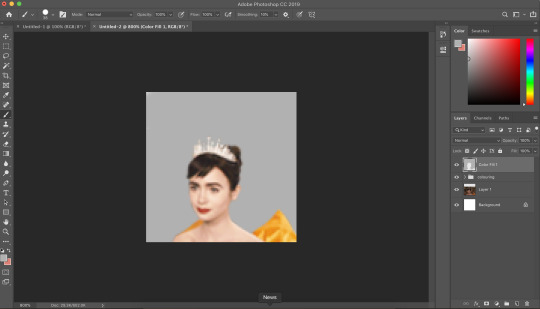
base colouring
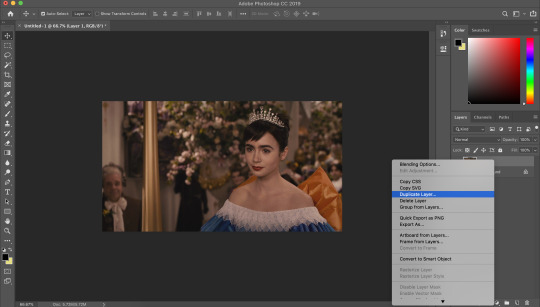
i then duplicate the screencap.
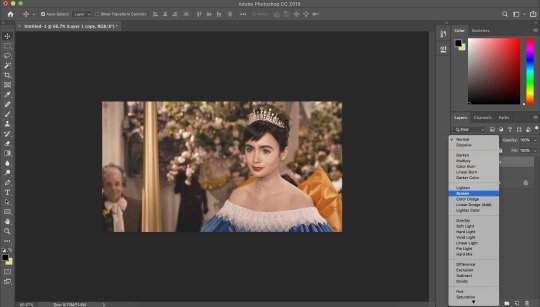
and then i set that duplicated layer to screen.
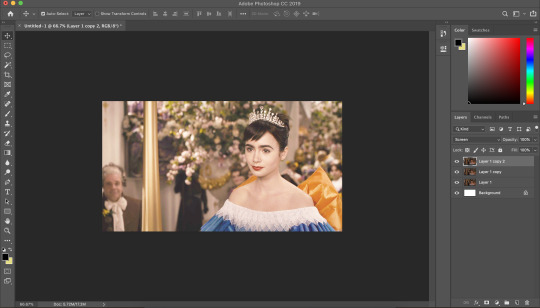
i like to make my icons super bright so i repeat this. it will vary depending on how dark the scene is. i prefer to do this to the screencaps as i find that it preserves the quality of the cap.
alternatively, you can use a psd-- my favourite as mentioned in previous tutorial is @blairsfelicity‘s icon psd which you can find in her tutorial here. my new method is just a whole lot lazier and i’ve been really enjoying the way my icons have turned out.
outlines
now here comes the menial part-- time for the outline.
remember to add a layer (unless you want to break your own heart by doing it directly onto the cap and being forced to start over (which i would NOT recommend by the way, crying over a screencap is as demoralising as it sounds)).
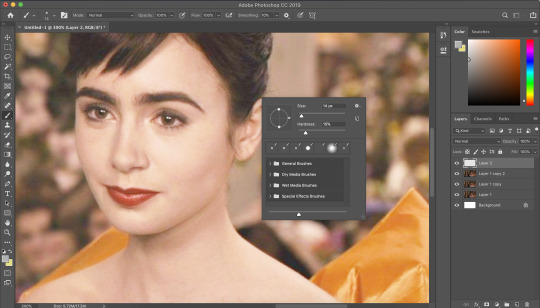
i vary between using the pen tool and a brush/eraser for my backgrounds. i like to shake it up depending on what i feel like doing or what the screencap would best fit. it also completely depends on whether i’m feeling particularly lazy or not-- if i have time to burn, i’ll use a brush. if i’m in a rush, i’ll use the polygonal lasso tool and refine my selection area with masks.
in this tutorial (due to my boredom of doing things over and over, this beautiful filmuary) i’m opting for the brush method. but if you want me to talk through polygonal lasso process which is a lot quicker and really streamlines the process-- then feel free to drop me a message and i’ll be happy to make another talk through.
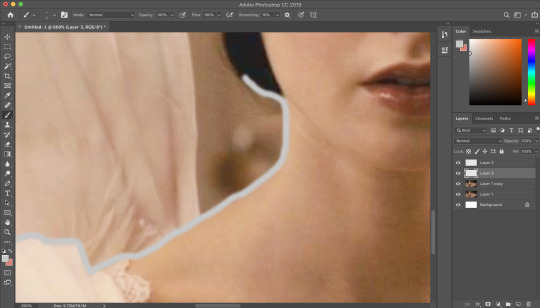
i like to use a brush for my erasing, on 30-50% hardness. i like to use a diffused/low hardness so my icon doesn’t look too sharp and the background and model seem to go with each other more. i’ll go for a small brush size when it comes to detailing (for example, when it comes to profiles, hair etc).
once i’ve outlined the model, i select the area around her with the magic wand tool and fill in the selected area with either a brush or a fill layer. then i merge the outline layer with the new colour layer.
(these two examples are from another icon process bc im dumb and forgot to take screenshots)
there will be a full little line around the model once you’ve merged the layers. i just tend to fill it in manually with a brush.
now here comes the fun part-- the colouring.
make those colours pop!
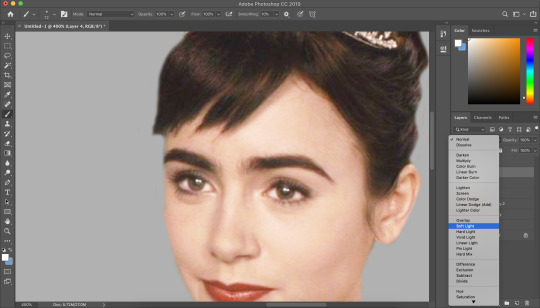
as you can see, the screencap has a lot of colours, but we need to make them pop. i take one of the colours, make a new layer and just paint until it’s vibrant and bold.
once you’re happy with your colour selection, set the layer to soft light and adjust accordingly.
i tend to go for softer brushes when it comes to facial features. the lips, to make them a darker colour, i opt to set the layer style to multiply instead of soft light, and paint over the lip shape with a light pink/red.
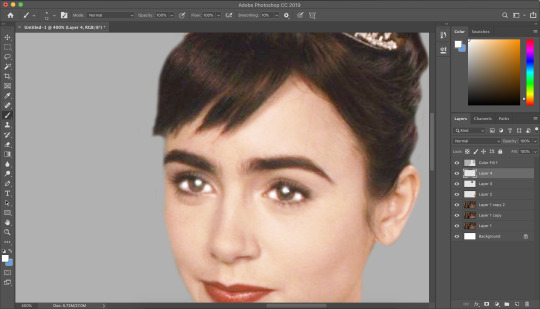
i always like to highlight the eyes to aid contrast in the screencap. i also like to fill all eyebrows in with a black (set on soft light) as well as the lashline, just to add further dimension and contrast to the model.
prepping the icon
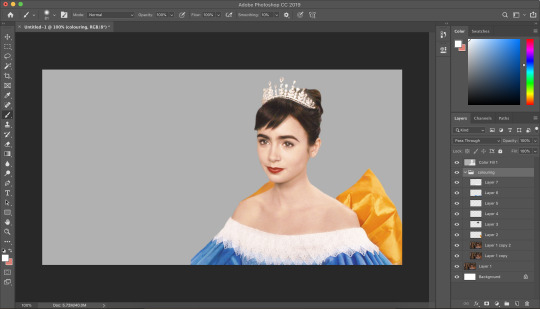
this is what my screencap looks like with the colouring complete. as you can see, each colour is on a separate layer. this is so i can adjust/duplicate each colour accordingly. once i’m happy, i place everything into a group together.

i make all of my icons on a 100x100px canvas.
i like to edit the screencaps on their original canvas as it helps with the quality of the screencap as well as allowing me to outline accurately.
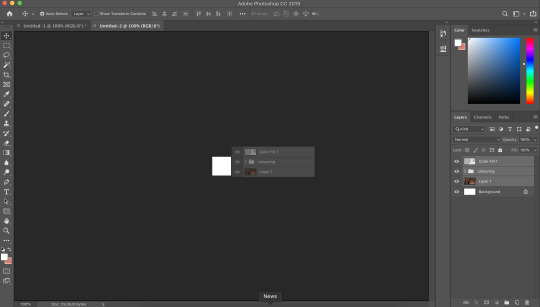
i just drag the files from one tab into another.
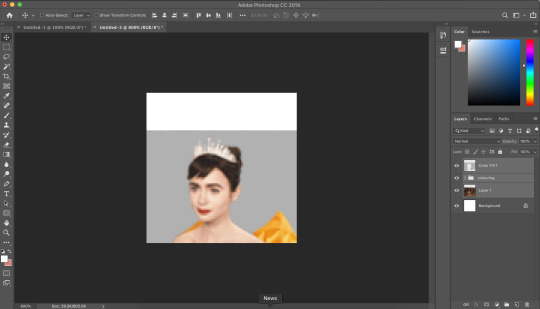
and then you can size it appropriately.
my next step is to select the same colour as the background and to paint over the white strip at the top of the icon. i do this directly onto my outline and then merge the two together. you now have the foundations of your icon to build onto!
final touches in the colouring department
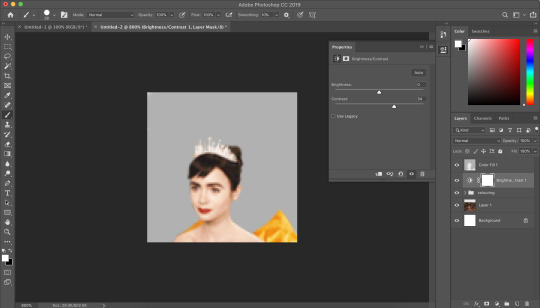
there is honestly no direction that i could give you when it comes to these final colouring steps.
i like my icons to be very bright, so i target the contrast with levels and brightness/contrast layers. I like to also turn up the vibrancy to make the colours pop even more.
my preference is for the skin to be very neutral, so i try to combat the saturation of the skin with colour balance and selective colour layers (as well as another step i will explain later in the tutorial)
as you can see above, i place the final colouring all underneath the background layer as this makes it easier for me to place textures later on.
if you have problems with the model’s skin appearing too saturated, i’d recommend taking a solid fill layer of a black/white/grey and setting it to colour. place that layer just above the screencap and adjust it so it combats any saturation you might be experiencing.
textures and finishing touches!
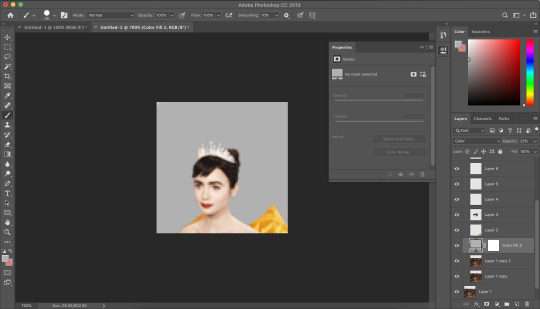
clipping masks are honestly a god send for me.
you can find them by right-clicking on the layers and selecting clipping masks. as you can see above, i use clipping masks to place a green texture on top of the icon’s background. i then layer above that by using further clipping masks, adding other textures and even layers to adjust the colouring of the background.
my favourite place to find textures are livejournal and deviantart-- soaked on livejournal is my go-to at the moment and i really enjoy evey-v’s icon textures. i also have my own resouces/textures that you can find here!

once i’m happy with how the icon looks, i copy all of the layers together and paste them under the background.
this is a super lazy way of sharpening the icon-- an alternative method is explained really well by @jennifergarner (aka the god of icons) on her icon faq page. i have used this in the past but after filmuary i’ve found a few little tricks.
i then just sharpen the icon and adjust the opacity of the sharpened layer depending on my preferences.
and then there we go---

my chosen export settings are just to go for PNG every time. this helps preserve the quality of the icon and help it look super clean and tidy for whoever wants to use it.
and with that, that’s a wrap up of my tutorial.
for other tips and tricks, here are some of my asks that i’ve responded to;
do you have any tips for cutting short/curly/messy hair?
hey, would you mind sharing a psd icon?
what are some of your favorite icons textures?
can you break down how to use different types of textures?
67 notes
·
View notes
Last Seen Blogs

truefcrm
Everyone has a rebellious side.

pampompom
What?


im14andivebeen14foramonth
the outsiders phase has struck again
jayparkofficial
JAY PARK