#setup amped wireless
Text
Proceed with the Amped wireless extender reset if you are facing issues within the extender. The reset can be helpful in various situations. Whenever the extender isn’t working properly, you can reset it. The reset will eliminate all glitches & bugs within the extender. Just remember that the reset will also restore the router’s factory default settings. You can contact our team anytime if you need guidance with anything else.
0 notes
Text
Optimizing Your Wi-Fi Experience: Maximizing Performance through Setup.ampedwireless.com
The default web address http://setup.ampedwireless.com allows you to access your wireless range extender’s settings. Once you access the range extender’s settings page, you get to configure or modify the settings of your device to your liking.
The setup.ampedwireless.com is the private address of your device, which means that it can’t be used by any other device to login. You need to enter the address in the web browser to login to your device. In this post, we will show you how you can login to the Amped wireless range extender using http://setup.ampedwireless.com.
First of all, power On your Amped WiFi range extender and connect it to your computer.
Secondly, open a web browser on your device and type the default web address in the address bar.
After that, press Enter, and the browser will send you to the Amped WiFi extender login page.
Put down the username and password in the respective sections and click Go or Login.
Once you see the web management page on the screen, it means you have logged into the Amped WiFi range extender successfully.
That was all about the Amped extender login steps. We hope that you were able to login to the Amped extender using the aforementioned instructions.
0 notes
Text
Amped Wireless Range Extender Setup. Quick Guide Here!
You must carry out the Amped Wireless range extender setup properly to ensure its optimal functioning. To do so, log into the extender’s web interface through the default IP address and the login credentials. Using the IP address, you can access the login page. After that, you can set up the extender following the instructions. If there’s any issue you face, reach out to our team right now.
0 notes
Text
0 notes
Text
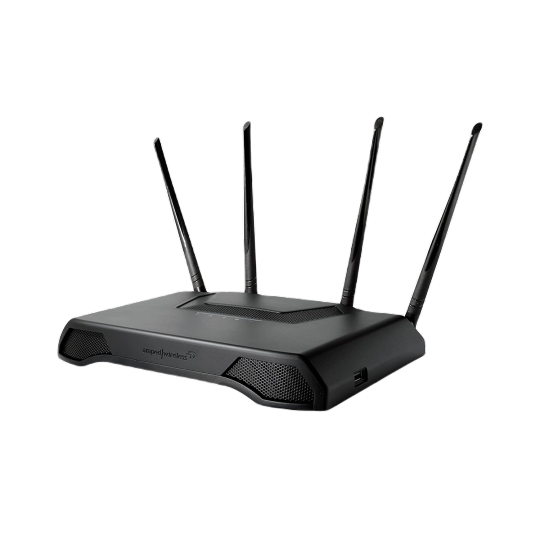
How to setup amped wireless extender

To set up an Amped Wireless range extender, follow these steps:
Connect your range extender to a power outlet and wait for it to power on.
Connect your computer or mobile device to the range extender's Wi-Fi network. The network name (SSID) and password can be found on the label on the bottom of the range extender.
Open a web browser and enter the range extender's IP address in the address bar. The default IP address is usually 192.168.1.240.
Enter the default username and password. The default username is usually "admin" and the default password is "password".
Follow the on-screen instructions to configure your range extender. This may include setting up a new password and selecting the wireless network you want to extend.
Once the setup is complete, disconnect your computer or mobile device from the range extender's Wi-Fi network and connect to the extended network.
If you have any issues setting up your range extender, you can refer to the user manual or contact Amped Wireless customer support for assistance.
#amped setup#amped wireless extender setup#amped wireless setup#amped wireless range extender#setup amped wireless extender
0 notes
Video
youtube
Amped AC1750 Wi-Fi Range Extender | Amped Wireless Setup
0 notes
Text
Youmacon was a dumpster fire but I had fun jamming in the hallway while cosplaying as Yui and Bocchi.


Highlights for me:
- a group of several Eddie Munsons stopped by so I played Master of Puppets
- several Pokemon cosplayers came by and I played the Pokemon theme to each one I saw
- I saw a Fiona from Shrek and played All Star and watched them along with the rest of the crowd start moving to the beat
- three additional Bocchi cosplayers found me and stayed for some jams
- one of the Bocchis also brought a real guitar but their amp broke so I passed the wireless unit for my setup back and forth between the two of us like it was the aux cord
- a famous cosplayer came by and I played a song from RWBY because I know they're fan of it
- a Koutaro from Zombieland Saga came by so I played the season 2 opening
- I played the opening song from Ya Boy Kongming and looked up and saw a few people doing the dance from the anime in the distance
#youmacon 2023#cosplay#anime#k on!#けいおん#平沢唯#hirasawa yui#bocchi the rock!#ぼっち・ざ・ろっく!#後藤ひとり#polite reminder that regardless of how i look in cosplay i am in fact a guy
165 notes
·
View notes
Text
Car Jump Starter Price in India - Dhunikart

Car Jump Starter Price in India
Looking for a reliable car jump starter? Dhunikart offers the best car jump starter at price in India, making it easier for you to buy one at a competitive rate. Dhunikart, India’s largest online shop founded in 2018, specializes in providing high-quality car jump starters to ensure your vehicle never leaves you stranded. Whether you’re on a road trip or simply heading to work, having a car jump starter in your vehicle can save you from the hassle of a dead battery. Offering a range of portable options, Dhunikart ensures you find a jump starter that suits your needs perfectly.
With a commitment to customer satisfaction and reliability, Dhunikart offers affordable, efficient, and durable car jump starters that fit every budget. When it comes to keeping your vehicle running smoothly, choosing a jump starter that works well with your car model is essential. Dhunikart provides expert guidance to help you make the right choice for your car battery needs.
How to Choose the Right Portable Car Jump Starter
Choosing the right portable car jump starter involves considering key factors such as battery capacity, voltage, and additional features like LED lights, USB charging ports, and safety protection features. Ensure the jump starter has enough power (measured in amps) to start your vehicle, especially if you have a larger car or SUV. Look for a compact and portable design, making it easier to store in your vehicle for emergencies.
What is a Car Jump Starter?
A car jump starter is a portable device used to recharge or boost a dead car battery. Unlike traditional jump starting methods that require another vehicle, a portable car jump starter provides instant power to your car battery, allowing it to restart quickly. It’s especially useful for roadside emergencies, saving you time and stress when you need to get your car moving again.
Why You Need a Jump Starter in Your Vehicle
Having a jump starter in your vehicle is essential for peace of mind. Car batteries can die unexpectedly, especially in extreme weather conditions. A jump starter ensures you're never stranded, as it allows you to recharge your battery and get back on the road without relying on others for help. It’s a convenient and life-saving tool that every driver should have.
Advantages of Using Jump Starters
Portable and Easy to Use: Most jump starters are compact, making them easy to store and carry. They are user-friendly, requiring minimal setup.
Emergency Power Supply: Many jump starters have USB ports, allowing you to charge devices like phones in an emergency.
Safe and Reliable: Jump starters are designed with safety features to protect against overcharging, reverse polarity, and short circuits.
Time-Saving: You can restart your vehicle immediately without waiting for roadside assistance or another car to help.
Why Choose Dhunikart?
Dhunikart is a trusted name when it comes to buying car jump starters. With a reputation for offering the best car jump starter in India, Dhunikart provides high-quality products at affordable rates. Whether you need a jump starter for emergencies or regular use, Dhunikart ensures you have the right solution for your vehicle’s needs. Their customer service and product range make them the ideal choice for car accessories and safety equipment.
Types of Car Jump Starter
Car Battery Jump Starter Emergency: This model is perfect for emergencies, offering quick and reliable power to jump-start your vehicle.
Utrai JS-1 Pro 12V Car Booster Wireless: A modern, wireless option that provides powerful boosting capabilities with added convenience.
UTRAI JS-9 1500A Car Jump Starter: With a high amp rating, this model is ideal for larger vehicles and heavy-duty usage.
Conclusion
Owning a car jump starter is essential for every vehicle owner. Whether you're looking for a compact, portable option for emergencies or a more powerful model for larger vehicles, Dhunikart offers the best selection at the most competitive prices in India. With a range of options and reliable customer service, Dhunikart is your go-to destination for buying car jump starters.
Need a car jump starter at the latest price? Visit our site, contact us at +91-8866664329, or email us at [email protected]. Stay safe and prepared with Dhunikart’s top-quality jump starters for your vehicle.
#Car Jump Starter#Car Jump Starter Price#Car Jump Starter in India#Car Jump Starter Price in India#Buy Car Jump Starter#Buy Car Jump Starter at Best Price
0 notes
Text
The Evolution of Professional Portable Sound Systems: What's Next?
Portable sound systems have come a long way. What used to be heavy, complex equipment is now compact, easy to use, and powerful. But how did we get here? And what’s next for portable sound systems? Let’s dive into their evolution and explore the future of this exciting technology.
The Early Days: Big and Bulky
In the past, professional sound systems were huge and hard to transport. Musicians and event organizers had to lug around heavy speakers, amplifiers, and other gear. These systems were not only tough to move but also difficult to set up. You needed to be an expert just to get decent sound quality.
The Shift to Lighter and Smarter Equipment
As technology advanced, sound systems began to change. Companies started making lighter, more compact speakers that could still produce powerful sound. One of the biggest improvements was the introduction of powered speakers (also called active speakers). These speakers have built-in amplifiers, so you no longer need separate amps. This made setups faster and easier for professionals.

Another key development was the wireless connectivity. Modern systems now offer Bluetooth and Wi-Fi options, allowing users to control their sound without cables. You can adjust volume, change tracks, and even manage multiple speakers from your smartphone or tablet.
Today’s Portable Sound Systems: Powerful and Compact
Today, portable sound systems are smaller, more powerful, and packed with features. Here’s what makes current systems stand out:
Battery Power: Many modern portable systems come with rechargeable batteries, making them ideal for outdoor events or gigs where power outlets are scarce.
Digital Signal Processing (DSP): Most systems today have built-in DSP, which automatically adjusts sound levels to ensure clarity and reduce distortion.
Modular Designs: New systems are modular, meaning you can add more speakers or components based on your needs. This is perfect for both small events and large-scale performances.
Durability: Portable systems are designed to handle tough environments. Many are waterproof, dustproof, and shockproof, making them ideal for outdoor use.

What’s Next for Portable Sound Systems?
The future of professional portable sound systems looks exciting. Here’s what we can expect:
Even Smaller, More Powerful Systems: As technology continues to improve, sound systems will likely get even smaller while delivering greater sound power. Imagine a system that fits in a backpack but sounds like a concert hall!
AI and Smart Features: The integration of artificial intelligence (AI) could revolutionize sound systems. AI could help automatically optimize sound based on the environment, adjusting for echo, background noise, or the size of the crowd without human intervention.
Improved Wireless Capabilities: Expect more advanced wireless sound systems that sync seamlessly across multiple devices, ensuring flawless sound with zero delay, even across large venues.
Eco-Friendly Technology: As sustainability becomes more important, we may see systems designed with eco-friendly materials and energy-efficient batteries.
3D Sound and Virtual Reality (VR): Imagine a portable sound system that delivers immersive 3D audio, creating a fully engaging experience for the listener. VR and 3D sound may become a standard feature in future systems, offering users a more interactive experience.
Conclusion: The Future Sounds Bright
The evolution of professional portable sound systems has been impressive, and the future holds even more potential. To get a better idea plan visiting some professional Audio shops like VIP PRO AUDIO shop in Brooklyn to check designs from powerful, compact designs to AI-enhanced sound. The next wave of technology promises to make these systems even more user-friendly, efficient, and dynamic. Whether you’re a DJ, musician, or event planner, there’s a lot to look forward to in the world of portable sound systems!
0 notes
Text
You can set up Amped wireless extender properly once you know the proper procedure for it. To set up the Amped extender, you just need to log into the web interface. For the setup, you need to log into the extender’s web interface. To log in, you require the default IP address. Using this address, you can access the settings and configure them properly. You can also set it up using the WPS button. For any issues, contact our team.
0 notes
Text
Access the Amped Wireless Extender with Setup.ampedwireless.com
The default web address http://setup.ampedwireless.com allows you to access your wireless range extender’s settings. Once you access the range extender’s settings page, you get to configure or modify the settings of your device to your liking.
The setup.ampedwireless.com is the private address of your device, which means that it can’t be used by any other device to login. You need to enter the address in the web browser to login to your device. In this post, we will show you how you can login to the Amped wireless range extender using http://setup.ampedwireless.com.
Firstly, power On your Amped WiFi range extender and connect it to your computer.
Secondly, open a web browser on your device and type the default web address in the address bar.
After that, press Enter, and the browser will send you to the Amped WiFi extender login page.
Put down the username and password in the respective sections and click Go or Login.
Once you see the web management page on the screen, it means you have logged into the Amped WiFi range extender successfully.
That was all about the Amped extender login steps. We hope that you were able to login to the Amped extender using the aforementioned instructions.
#amped wireless setup#http://setup.ampedwireless.com#setup.ampedwireless.com#setup amped wireless#setup amped wireless extender#amped wireless extender setup#amped setup
0 notes
Text
Why Every Restaurant Needs a High-Quality Audio System?

What do customers enjoy when they visit a restaurant? The food is definitely at the top of our list, but the ambiance is equally important. When we talk about the ambiance, an audio system plays a crucial role in creating an immersive environment. Ultimately, it’s the background music that sets the mood, and this calls for the need for a restaurant audio system. Whether for music, announcements, or live performances, having a restaurant audio systemcan be a great way to enhance the overall dining experience.
Enhancing Customer Experiences
One of the primary reasons to invest in a robust audio system in a restaurant is to improve the overall customer experience. Music can have a powerful influence on mood and ambiance. With the right background music, you can make your space feel more inviting, relaxing, or lively, depending on your aim and what your customers want. For instance, soft jazz can create a calm and sophisticated environment suitable for fine dining, whereas upbeat tunes can energize a casual café or bar.
Restaurant audio systems from Pure Resonance Audio have 70-volt in-ceiling speakers that provide seamless, high-quality music throughout the space. The flush-mounted design ensures that the speakers blend effortlessly into the ceiling while maintaining the venue's aesthetic appeal and delivering superior audio quality.
Improving Outdoor Dining
The growing trend of outdoor dining has compelled restaurant owners to have an audio system that extends beyond their indoor space. This is where outdoor speakers come into the big picture to withstand different weather conditions without compromising sound quality. Options like the Pure Resonance Audio S6.1 weather-resistant speakers have an IP65 rating, which makes them safe against external weather conditions and factors like water, moisture, and dust while delivering consistent performance.
Versatility and Control
A versatile audio system allows restaurant owners complete control over the music and announcements in different areas of the venue. Including a commercial audio mixer, like the Pure Resonance Audio MX84, in a restaurant audio system can offer this flexibility. This mixer features balanced inputs with gain controls and intuitive zone buttons so that restauranteurs can manage audio in different sections of the restaurant, from the dining area and bar to the outdoor patio.
High-Quality Sound
Sound quality is as important as the choice of music because poor sound quality can distract and diminish the dining experience. Premium speakers and a powerful amplifier ensure impressive sound quality. A dual-impedance amplifier, like the Pure Resonance Audio DA2240, can simultaneously handle different impedance levels, maintaining high audio fidelity across different speaker setups.
Wireless Streaming Capabilities
In today’s digital age, streaming music wirelessly is a must-have feature for any modern audio system. The Pure Resonance Audio BTR1 Bluetooth receiver offers extended-range wireless streaming for restaurant audio systems, allowing staff to easily control the music from any device up to 100 feet away. This feature provides ultimate flexibility and convenience, making it simple to switch playlists or adjust the volume without needing to directly access the main audio system.
Related Products:
Restaurant Audio System Featuring 6 C6 6.5" 70V Ceiling Speakers, 4 S6.1 6.5" Outdoor Speakers, MX82 Mixer, DA2240 Power Amp & BTR1 BT Receiver
Restaurant Sound System Featuring 8 PD4 4" 70 Volt Pendant Speakers, RMA240BT 240W Rack Mount Bluetooth Mixer Amplifier & 2 VC100S Volume Controls
Restaurant Sound System Featuring 2 S5 4.5" 70 Volt Outdoor Surface Mount Speakers & MA120BT 120W Bluetooth Mixer Amplifier
Restaurant Sound System Featuring 2 SD4 2x2 Speakers, 2 C5 70V Ceiling Speakers, RMA120BT 120W Rack Mount Mixer Amplifier & 2 VC50S Volume Controls
Are you looking for the best restaurant audio systemfor your business at an affordable price range? Check out the collection at Pure Resonance Audio today!
For More Details: https://pureresonanceaudio.wordpress.com/2024/08/26/why-every-restaurant-needs-a-high-quality-audio-system/
0 notes
Text
My setup
This is a recording from a jam with my guitar teacher. He played the Synthesizer and I played the cymbals. The guitar is added in post production.
You can see my studio setup in the picture (only visible in browser version or on soundcloud). I bought the Sennheiser MK4 with the idea of recording my amp, but my Lexicon Lambda interface has a direct instrument inlet. If I can't find the right guitar tone with a digital amp, I still sometimes record my acoustic guitar or the amp with my mic.
My first guitar was an acoustic with a built in mic to connect to amps or recording. I no longer own it, but you can still see it in the pictures of this old account. I know use a Harley Benton acoustic with steel strings, that I sometimes record with the mic. But I mainly use the red Yamaha Pacifica electric guitar. Everything is recorded through Garage Band on my 2018 Macbook Pro.
I use Marley Positive Vibration2 wireless Headphones that I originally bought because I wanted them as bluetooth headphones for listening to other music, but I ended up using them with a cable anyway. They amplify the bass a lot, so I have to listen to my music on different speakers to master it.
#SoundCloud#studio session#studio setup#guitar#music producer#my music#frecords#fail18#producer thursday
0 notes
Text
Quick Guide Gor Amped Wireless setup SR10000
Amped Wireless setup SR10000 begins with accessing the default login page and setup wizard. You can do it by entering the default IP address or web address in a browser’s URL bar. You can access the “Network Settings” and proceed with the modification easily. If you need help with accessing the setup wizard, you will find details on our website now.
0 notes
Text
Future-Proofing Your AV System: Tips for Long-Term Success
For any home theatre design, you want your audio-visual (AV) system to stand the test of time. Technology is constantly evolving, so how do you build a system now that won't be outdated in a few years? In this blog, we'll provide tips on future-proofing your AV setup for long-term success. We'll cover components, connectivity standards, and ways to future-proof your entire home theatre design.

Cable Management and Connectivity
The first thing to consider is cable management and connectivity. How your various components are physically connected can determine how future-proof your system is. Use high-quality cables that allow for future upgrades. Consider the following:
HDMI Cables
HDMI has become the standard connection for video and audio transfer in home theatre design. Make sure to use HDMI 2.0 or higher certified premium cables that can support the latest video and audio standards like 4K, HDR, Dolby Vision, Dolby Atmos. Monoprice, Mediabridge and Blue Jeans Cable make quality, future-proof HDMI options.
Future-Proof HDMI Connections
Consider leaving extra length on HDMI cables or installing cable grommets/hiding places where you can easily access cables to swap them out later. Label all cable ends clearly so future upgrades are simple. It's also a good idea to leave at least one open HDMI port on each component like the AV receiver or TV in case you need to add devices down the road.
Digital Optical Audio Cable
Optical audio cables are commonly used to transmit surround sound formats from compatible components to your AV receiver. Monoprice offers fiber optic cables that can reliably transmit audio formats up to 192kHz/24-bit. This covers all current and many future audio standards.
Networking and Wireless
Networking and wireless capabilities will play an even bigger role as smart home technologies evolve. Make sure your router, switches and any components with network capabilities support the latest wireless standards like Wi-Fi 6 for bandwidth-heavy applications. Consider running an Ethernet cable if possible for more stable, higher bandwidth connections versus wireless.
AV Receiver: The Heart of the System
The AV receiver is the central hub that controls audio and video signals in a home theatre setup. Future-proof your system starting with the receiver. Consider the following tips when selecting a receiver:
HDMI 2.1 Support: Look for HDMI 2.1 and higher which supports the latest video standards up to 8K resolution, 4096p dynamic HDR including Dolby Vision. Future-proof for the next 5-10 years.
Audio Formats: Support for Dolby Atmos, DTS:X, Music casting and high-resolution audio formats ensures compatibility with future audio technologies.
Network Streaming: Built-in streaming apps, Wi-Fi, Bluetooth, streaming codecs like Dolby Atmos, DTS:X for direct streaming.
Expandability: Future-proof with sufficient HDMI inputs/outputs, pre-amp outputs for future amplification, subwoofer and speaker connectivity.
Room Correction: MultEQ-X, Audyssey or similar room calibration/EQ for the life of the receiver.
Regular Software Updates: Brands like Denon and Yamaha regularly support older AV receivers with feature/format updates.
Display and Video Processing
For a truly future-proof home theatre design, focus on the video display and processing. Consider these tips:
4K & HDMI 2.1 Ready: Televisions and projectors that support 4K/8K and HDMI 2.1 or higher for bandwidth-intensive formats.
HDR Compatibility: HDR10, Dolby Vision compatible displays future-proof for wider adoption of high dynamic range content formats.
Contrast and Peak Brightness: OLED or high-end LED/LCD with wide color gamut and 1000+nits peak brightness.
eARC Support: Enhanced Audio Return Channel on TVs improves compatibility with external audio components.
Video Processor: If projecting, a high-end video processor can help future-proof through scaler/switch upgrades to support new resolutions. Processors like Lumagen Radiance have long upgrade cycles.
Future-Proofing Speakers and Subwoofers
While it may seem the most difficult and expensive to upgrade, speakers can actually last longer than other components if selected carefully:
Flexible Placement: Choose speakers that can maintain good sound regardless of placement changes over the years.
Future Formats: Audiophile speakers with wide frequency response support the latest surround sound formats.
Amplification: Bi-amplified, powered, or upgraded amplifier compatibility ensures speakers reach their full potential for many years.
Subwoofer Extension: Dual integrated subwoofers or separate subwoofers with amplifier headroom give low-end extension for bigger movie sound.
Upgrades and Future-Proofing Your Design
No system can truly be future-proof, but with careful consideration and flexible design choices, your home theatre system can stay relevant far longer. Some final tips:
Save Receiver Presets: Back up custom setups so any future upgrade paths are smooth.
leave Space for Growth: Leave room for new components in your physical layout like Atmos heights or wireless surrounds.
Cable Management Access: Ensure any added runs can integrate seamlessly behind walls or in cable trays/raceways.
Test Future Formats: Try demoing newer resolutions, formats to see where your system need upgrades first.
Upgrade Selectively: Focus on Video, then Audio quality as higher-end standards emerge over several years instead of a complete overhaul.
With the right equipment choices and flexible system design, your home theatre can provide outstanding performance for many years to come as technologies evolve. Future-proofing ensures long-term success so you can enjoy your movies and music well into the future.
0 notes
Text
Fix Amped WiFi Extender
If you're having problems with your home extension, you may resolve the issue by following the troubleshooting procedures shown below. So, how about we get started?
1. Restart Your Amped Extender
When their WiFi equipment stops working unexpectedly, most consumers choose to restart the extender. You might also try restarting your device. Perhaps it will be of use to you. Relax! It is not difficult to restart your smartphone. All that is necessary is a simple disconnection from the wall socket, followed by a resting interval and reconnecting. See? That's how simple it is!
2. Connect the extender to the router
If your extender isn't connecting, try relocating it closer to your router. Check that your extension and router are in range of one another. Keep both WiFi devices away from electrical equipment such as Bluetooth speakers, baby monitors, and so forth. This is due to the possibility of interference with your WiFi network while using such devices.
3. Install New Firmware on Extender
If the firmware on your Amped wireless extender is out of date, it won't be long before you start having technical problems. Check that the firmware on your device is up to current. The methods required to update your WiFi device using the Amped wireless extender are detailed below.
Turn on the Amped wifi extender.
Connect your extension to the router with a cable.
The settings for the extender may be found at http://setup.ampedwireless.com.
Locate the firmware update option.
When you discover it, simply click it.
Your Amped WiFi extender will soon be updated.
You should be aware that by going to the default amped extender login IP, you may also alter the firmware of the extender.
#amped setup#amped wireless extender setup#amped wireless setup#amped wireless range extender#setup amped wireless extender#setup.ampedwireless.com#amped wireless extender login#amped wireless login#amped wireless login page#http://setup.ampedwireless.com
0 notes
Last Seen Blogs

givememygeekagain
Inertia. It happens.

notveryyass
julie

melonico
Melo Nico Best Freebies and Best Offers
givememygeekagain
Inertia. It happens.

one800
Untitled