#that post going around that says to mix one part yogurt with one part flour... i love you.
Text
Just made the most delicious bread I have ever eaten. Peace & love.
#that post going around that says to mix one part yogurt with one part flour... i love you.#dumping honey and chilli and garam masala and garlic into the dough... it's so tasty.
2 notes
·
View notes
Text
Okay so I don't want to respond directly to the post because it seems like it wouldn't be polite, but that recipe for 1:1 yogurt/flour fry bread that's floating around is. Well. I'm not going to say it's bad, and I'm sure some people will like it, but it tastes overwhelmingly of yogurt and you *have* to add salt and even then it still tastes like yogurt.
Also someone on that post was like "is this Naan? This is naan! I didn't know naan was so easy to make" and that's because it's not. Naan requires yeast and butter and salt and does include some yogurt but it's like one part yogurt four parts flour, not 1:1.
Anyway. I made it and I found it so unpleasant that I threw out more than half the dough. It didn't taste good with garlic butter, it didn't taste good with vinegar, it didn't taste good with the lentil soup I made it to pair with.
There are some decent simple flatbread/fry bread recipes out there but "mix one part yogurt and one part flour then fry and dip in vinegar" is not one that worked for me personally. And if you're going to try it, please please please add salt.
2K notes
·
View notes
Text
Yeast Info
In a previous post about bread and bread recipes (here), I spoke about yeast and mentioned making a post with yeast information (as well as other baking info posts). This is the yeast post!
Thread below the read more because it’s long!
1. Refrigerate your yeast
Yeast must be refrigerated. While this is not essential before the jar (or packets) is open, it is very beneficial afterwards. Nothing horribly awful will come from not doing so for a very short time, so don’t panic; the issue with prolonged cabinet storage is that it reduces the effectiveness of yeast over time, kind of like a half-life breakdown. I learned this the hard way. Using a jar of instant yeast that had been in a cupboard for a year (before I realized it said refrigerate after opening), I was only able to get one good rest and a partial rise out of it for dinner rolls (link in the post linked in the intro to this one); they only rose about 3/4 of the way. Part of this was also my trial and error with moisture content, but it consistently under-rose when I had nailed the right proportions of things with experience. When I got new yeast, the dinner rolls rose way higher than they had before, even after resting. I also had an orange roll recipe that double-rose effectively, something the old yeast never would have even attempted. Refrigerate your yeast, but if it’s old or you haven’t, it isn’t forever ruined, just a little less effective than it used to be!
Some people also recommend sticking the yeast in the freezer in an airtight container. I don’t do this personally because I use my yeast too often, but if you buy, say, three jars of yeast and you only use it maybe once per week, I could see freezing the yeast being great, because it’ll keep it fresh when you finally get around to using that third bottle!
2. There is a difference between instant and active dry yeast
The big difference between instant yeast and active dry is how you need to “wake it up”.
Instant yeast is simple; the grains are very small, meaning it takes much less time for the warm water/liquid ingredient mixture/what have you to activate it and get it producing all that necessary carbon dioxide for your baked goods. This means that you can literally just toss your instant yeast in with the dry ingredients if the recipe calls for it*, and the short contact time with the moisture when you mix everything up will be good enough to dissolve all the yeast.
Active dry yeast, on the other hand, is slightly different. The granules of yeast are larger, meaning that it takes more effort to dissolve it. Active dry yeast is added to the liquid ingredients instead of to the dry, This allows you to make sure all the yeast dissolves, and warming up your liquid ingredients a bit for it is preferable to yeast grains in your finished products.
*Instant yeast and active dry can be used interchangeably in recipes. If a recipe directs you to add your yeast to the liquid mix and all you have is instant, go ahead, it will behave fine. If a recipe is written for instant yeast, and all you have is active dry, make sure to warm up your liquid ingredients and dissolve it in there instead. At the end of the dissolving dilemma, yeast is yeast!
3. Proofing
Not sure if your yeast is still good? Heat up some water, add in some sugar, then whisk in your yeast. The warm water activates the yeast, and the sugar (glucose) provides it food (yeast is a living thing, kind of like yogurt cultures). This should result in the top surface of the mix getting bubbly; the more bubbles, the fresher the yeast. The only problem is when you don’t see any bubbling happening, and that can mean your yeast is either completely dead, or not very effective. The best way to tell that difference is to proof it in a water bottle and put a balloon on top. If the balloon inflates a little, your yeast is almost gone, but is still doing its best; if it does nothing, your yeast is dead. If your yeast is barely kicking, reduce waste and mix it in with new yeast (often yeast like this is the last dregs of yeast in a jar. If it’s a full jar, maybe just dump out the yeast and keep the jar; mixing it 50/50 with new will only mess up your yeast effectiveness).
4. Yeast is heat sensitive
Yeast loves heat. Think of it like a lizard; the warmer it is, the better it runs, and cold makes it sluggish. Warm water activates yeast and gives it a kickstart. When you let your dough rise, keep it in a warm place. Some people recommend setting the oven to 200 degrees Fahrenheit and putting the bowl with rising dough inside. I personally turn on my oven to preheat before I start anything--I have a glass stovetop, not the wire burner type, so the stove surface gets nice and toasty, and the dough works out really well in response to the constant warmth--and when I am ready to let it rise, I will put the bowl/tray of rolls/etc under the oven vent on the back of the stovetop with a cotton tea towel over it, and it works just as well. Plus, the oven is already at the right temperature when the rising time ends, no extra preheating needed! Be careful, however, because things can be too hot for yeast sometimes.
Also, yeast will still technically work at cold temperatures. Pastry-like things, like cinnamon rolls, can be made in the evening, refrigerated overnight, and allowed to finish risinig at warm temperatures in the morning before they bake. It just takes much, much longer for the dough to rise.
5. Know the heat limits
Yeast likes it hot, but not too hot. In my experience, the recommended upper limit for yeast temperature seems to be 129 degrees F. 125 is usually peak temperature for the dinner rolls I make, and the yeast likes it just fine. However, i have seen guidelines that put the perfect yeast range at 105-115 degrees. Essentially, it seems like it comes down to what kind of yeast is used; instant (what I always use) takes the hotter, 125 degree end due to it being added right into the dough, whereas active dry likes to hang out closer to the lower 100s because it only needs the warmth to kickstart in the liquid, like a car ignition.
If water gets too hot--130F or above- it will kill the yeast instead of activating it. The best rule of thumb to use if you don’t have a thermometer is to drop a bit of the liquid mixture onto the back of your wrist, like moms do when checking milk temp for their baby. If the liquid is comfortably warm, but doesn’t feel hot to the touch, the yeast will be safe.
6. Other ingredients affect yeast
Last but not least, other ingredients influence how fast yeast rises. Things like butter, flour, eggs, things that literally make up the dough, will all slow the yeast down. The more of these there are, the slower the dough will rise. Bread dough will always rise faster than a pastry dough, for example, because pastry doughs (what you need for cinnamon rolls) take things like eggs, whereas most breads don’t. Therefore, always make sure to give yourself a lot of extra time if you are making anything with a lot of ingredients in the dough, as it will take forever to rise. Overnighting such doughs in the fridge is very popular, because you don’t need to worry about waiting until 2 in the afternoon for the rolls you started at 10 to finish their second rise (I wish I was joking but that happened to me yesterday). The more ingredients, the slower the rise, so plan accordingly.
That’s all I have on this subject for now! If you have something to contribute, please feel free to drop an ask or submit it!
#yeast#baking#yeast info#dough#self sufficient living#self-sufficiency#breadmaking#cottagecore#how to use yeast
19 notes
·
View notes
Text
Russian Walnut Shaped Cookies (made by children)

I came home this weekend to spend a bit of time with my family. As usual, they have taken advantage of me and brought me a bunch of children to take care of, 6 to be more precise.
Each one of them had their bag of goodies that they didn’t want to share with the rest. As you might have already foreseen , they started fighting , arguing, crying , and throwing whatever fell into their hands at eachother.
I have incredibly little patience, so what did I do ? I took all their candies and foods they were supposed to eat, and told them to figure out a way so that everyone eats the exact same thing in the same quantity, and work together , so they can learn to share and act like a family.
There were not enough chocolates, candies, fruit yogurts or biscuits so that everyone can have a piece of everything.
Here’s what crossed my cousin’s mind :
What if we do some sort of biscuit and fill it up with creams made out of the sweets each one of us brought ?
I found it brilliant, so, I gave them my Russian walnut shaped cookies recipe.
Ingredients :
Batter:
Flour - 600 g
Confectioner’s Sugar - 80 g
Bourbon Vanilla Sugar - 8 g
Baking powder - 10 g
Pinch of salt
4 eggs
Unsalted butter - 250 g ( at room temperature )
Filling:
Viktor gave : cocoa powder biscuits - 6 pieces ; a glass of milk ; Nesquik cocoa crush
Raisa gave : strawberry yogurt - 100 g
Tudor gave : butter biscuits - 200 g
Alexandra gave : cream cheese - 150 g
Erdem gave : snickers - 3 pieces ; vanilla pudding
Sara gave : coconut and jam , sweet bread sandwiches - 2 halves
Instructions :

First we will do the batter .

Mix the butter with the confectioner’s sugar for about 2-3 minutes until they are well incorporated.

Once the butter is creamy, add one egg a time and mix it well in before you add the next egg. ( Don’t do like Raisa. )

The mixture needs time to thicken and emulsify, which is why it is recommended to add the eggs gradually.

Once the eggs are well incorporated, you can start adding your sifted flour.

You can keep using your hand mixer until the mixture thickens.

By the time you finish adding all your flour, you will have to use your hands to knead.

Your final dough should look like this, not sticky, but very soft . If you press it , it should slowly bounce back. You do not have to leave it to rest. I recommend using it right away , as it can develop a crust and harden up.

Start making 5 g balls out of your dough. You can approximate the weight by eye , but I highly advise you to weight them on a kitchen counter.
The kids had a lot of fun with these, threw them in the air... ( They even tried to target me.. A few of them landed on the floor, but hey , the 3 seconds rule still counts! )

The oldest out of them all dealt with baking the cookies on the top of the stove.
Heat your metal mold very well. There is no need to apply any oil on it , as the dough has a lot of butter which will be enough for it to not stick.
Put a ball of dough in each hole and close the mold.

Turn the mold frequently, about 20 seconds on each part, and keep going for about 2 minutes.
They are ready when the dough looks golden.

Be careful not to touch the mold! It is very hot.
Now it is time for the fillings !
They did 3 fillings. One based on Erdem’s vanilla pudding in which they added a bit of butter and mixed it with a mixer ; one based on cream cheese , and the one they loved the most - based on Nesquik cocoa crush.

They actually took a break during which they played a little , and only after , they started making the fillings.
The cookies had to cool after all.

Chop the cocoa biscuits very finely.
Raisa used her tiny , fat hands to crumble up the vanilla biscuits as handling the knife was too much for her anyway. - Make things easier for yourself always !

Take the Snickers pieces and cut them into little squares.

Add all the biscuits into the same bowl along with the Snickers pieces.
Mix in well the Nesquik powder.

Pour the milk in and stir well until a thick cream forms.
Set it aside and move forward to the next fillings.

Cut the sandwiches into tiny pieces. ( Alexandra scraped the coconut off the sandwiches and added it on the top of the filling in the end - It is not needed at all , but do whatever makes you feel comfortable . The coconut gets mixed in anyways. )
Add the softened cream cheese, the yogurt, any fruit you like , and stir it well. - It tasted like baby food to me but I encouraged them nonetheless.

Trim off the edges of the cookies in order to give them a smoother look. ( Don’t do that while they are hot as they will crumble up! - Tudor tried that and we lost some good halves . )

Fill up both halves and stick them together as in a sandwich.
NOW PAUSE
Here’s what happened...
Sara sneezed while holding the box of Nesquik crush in her hands which provoked a pretty hilarious explosion of powder all over my kitchen floor and - herself. By this time, I told Viktor to continue filling the cookies and not leave that place, asked the rest to clean around and took Alexandra to wash her hair.
Of course, when I came back, the kids have given up already on cleaning - which I obviously expected to happen - AND the smallest out of them all, which I asked to finish filling the cookies, fell asleep on the table.
He listened to be precisely. He didn’t move from that place until I came. How adorable is that ?!

And there you have it ! The cutest russian walnut shaped cookies I have ever tried.
I must say that my day was more relaxing than I expected it to be! Try it out with your kids too. It is definitely worth it. They were so tired they fell asleep so quickly and easily. It was - awesome.
PS : A more complex recipe for the fillings will be posted soon .
Enjoy!
#bismillah#food#dessert#sweet#children#eat#delicious#chocolate#vanillah#pudding#fruits#healthy#snack#adorable#cute#traditional#recipe#baker#bake
647 notes
·
View notes
Text
Pie For Everyone's Berry Dream Pie-Famous Fridays
Happy July!!! What a difference a year makes, right?!! With the 4th only a few days away, I thought I’d break with tradition and share this Famous Fridays post a day early to give you a little more prep time because once you find out about this seriously amazing Berry Dream Pie, I have a strong feeling you’re going to want to include it in your holiday celebrations! So let’s hear it for Famous Thursdays…doesn’t have quite the same ring, does it?
Be that as it may, I want you to know everything about this super delicious pie and the wonderful book it comes from, Pie for Everyone: Recipes and Stories from Petee’s Pie, New York’s Best Pie Shop, by Petra Paredez. But before we get to talking about this terrific cookbook, if that book title is true and Petee’s Pie’s is NY’s best pie shop, how is it that I have never heard of it before?!! Especially since it’s been around since 2015!! This is a situation I must remedy asap!!! But until I crawl out from that rock I’ve obviously been living under and actually make it to the bakery, let me tell you what a joy it has been to get my hands on this gorgeous cookbook!Q Guys, it’s just filled with all sorts of recipes for fruit, custard, chess, chilled and savory pies, like Wild Blueberry, Pistachio Cloud. Caramel Custard, Salty Chocolate Chess, Brown Butter-Honey Pecan, Tomato Ricotta and so much more. If there’s a pie out there, it’s in here!
I had a really tough time choosing which one to feature today, but in the end, I went with this Berry Dream Pie both because Petra (the happy pie baker and author) says it’s probably her all-time favorite and since berries are so seasonally perfect right now. That said, this pie is a labor of love. It is honestly one of the best pies I have ever made but there are a bunch of different components, none of which are difficult but you do need to plan ahead.
First up, an all-butter pie crust that gets blind-baked, aka pre-baked, so that it’s nice and crisp and golden brown. No worries about any cracks—they’ll be covered with lots of loveliness. I’d make this on day one and store it in the fridge.
The next make ahead is a divinely delicious and mouth-puckering homemade lemon curd that makes enough for serious leftovers, hooray!! (perfect for topping yogurt and ice cream with!) and you can even make this 4-5 days ahead if you like.
On the day of the bake you put together a simple fresh berry glaze
And whip up a berry mascarpone mixture that incorporates a little of that glaze too, giving it a delicate pink hue
And then the layering magic begins.
First you spread the mascarpone mixture all over the baked crust
Topping it with a layer of lemon curd
Then all the fresh berries
And finally the berry glaze!
Sp pretty!
And so much depth of flavor, with each component, adding to, but never overpowering the other.
Wish I could show you a cut slice but there was a little camera issue—just take my word that this is absolutely divine. In every bite you get flaky pastry, sweet creamy mascarpone, tart, sunny lemon curd, fresh berries and a sweet berry glaze. It’s pretty much summertime perfection!!
Truly a dream of a pie and I urge you not to be overwhelmed by the long ingredient list and many steps and make it, because I promise that you and everyone who tastes it, is gonna crazy love it!!
All right my friends, if baking pies is something you 😍😍 you should definitely check out Pie for Everyone—I know it’s a book you’ll cherish. Meanwhile, it’s time to close up shop here for the holiday weekend—hope you’ve got some wonderful plans on. Have a terrific, safe and delicious 4th with your family and friends (so happy to be able to say that again!!) and I’ll be back next week with more summer goodies and gab!!!xoxoxo
Pie For Everyone’s Berry Dream Pie-Famous Fridays
Makes one 9-inch pie
You will need a blender or food processor.
Prep Time for crust: 10 minutes, plus several hours of chilling and ideally, overnight. Assembly: 15 minutes; Bake Time: 20-30 minutes
Ingredients
For the crust
1 ½ cups unbleached, all-purpose flour, plus extra for rolling out
1 ½ teaspoons sugar
½ teaspoon salt
8 tablespoons (½ cup) unsalted butter, cut into small cubes and chilled
⅓ cup cold water
1 teaspoon cider vinegar
Ice Cubes
For the Lemon Curd
1 ¼ cups sugar
¼ cup cornstarch
3 large egg yolks
1 large egg
¼ cup plus 2 tablespoons water
1 cup, plus 2 tablespoons freshly squeezed lemon juice (about 8-10 lemons)
3 tablespoons cold unsalted butter
For the Raspberry Glaze
1 tablespoon plus 2 teaspoons cornstarch
⅓ cup sugar
Pinch of salt
½ pound raspberries
2 tablespoons plus 1 teaspoon freshly squeezed lemon juice
2 tablespoons of warm berry glaze
For the Pie
¾ cup mascarpone, room temperature
¼ cup sweetened condensed milk
Zest of half a lemon
1 tablespoon lemon juice
2 cups hulled strawberries, raspberries, blueberries and/or blackberrries
The Recipe
1. For the crust: Add the flour, sugar and salt to the bowl of a food processor and pulse a few times to blend. Add in the chilled butter and pulse a few times until the butter has become the size of small peas.
2. Into the ⅓ cup cold water, add the vinegar and stir. Then add enough ice cubes to raise the level to ½ cup. Add 2 tablespoons of the mixture to the flour mixture and pulse a few times to incorporate it. It will look very crumbly. Then add 1 more tablespoon and pulse again a few times. You should see the mixture start to come together in a shaggy way with lots of crumbly bits. If you absolutely think you need to, add one more tablespoon of water. I never need to—it’s better for your dough to be too dry than too wet.
3. Turn the crumbly dough out onto a very lightly floured surface and gather it all into a ball. Make sure to scrape out the bowl of the processor—sometimes some of the wet parts of the dough get a little stuck and form the whole thing into a ball. Then flatten into a disk, wrap well in plastic wrap and chill for several hours and even better, overnight.
4. When you are ready to roll out the dough, flour a board or counter with a little flour and flour your rolling pin too. If the dough is very stiff (mine usually is) let it sit out on the counter for about 20 minutes till it seems pliable. Roll out the dough, rolling from the center out and to a corner, then lifting the dough off the surface of the board and giving it a little ¼ turn and rolling again, repeating the process until you’re rolled the dough out into a circle that’s a couple of inches wider in diameter than the pie plate.
5. Fold the dough in half and transfer to the pie plate, unrolling it and then carefully easing it down onto the bottom and sides—no stretching! Fold the overhang over and crimp/decorate the edges any way you like. The easiest way is to just use the tines of a fork pressed into the dough to create a little pattern.
6. Place the pie plate in the freezer for 30 minutes.
7. Meanwhile preheat your oven according to the recipe. When the 30 minutes are up, line the pie with a piece of aluminum foil and either pie weights or beans. If any of the edges stick out, cut little pieces of foil to fit over them. Bake about 20 minutes and then remove the foil and weights. Return to the oven for about 10-12 minutes more until crust is golden brown and transfer to a wire rack to cool completely. You could definitely do this a day ahead and store the crust. well-wrapped in the fridge.
8. To make the Lemon Curd: Whisk the sugar, cornstarch and salt together well in a medium bowl. Whisk in the egg yolks, egg, and the water. Whisk in the lemon juice and then strain the mixture into a small saucepan.
9. Place the pan over medium heat and use a rubber spoon or spatula to stir the mixture constantly, scraping the sides and bottom, until the mixture starts to thicken, 5-8 minutes. Lower the heat to lowest setting and continue to stir constantly, until all the filling has thickened but is still a pourable consistency, about 5 minutes. Remove from the heat and stir in the butter until completely melted and smooth. You can definitely make this a day ahead, even a few. Store in an airtight container or glass jar in the fridge until ready to use.
10. To make the Berry Glaze: In a small bowl, whisk together the cornstarch, sugar and salt and set aside. In a blender or food processor, combine the berries, lemon juice and cornstarch mixture and puree. Transfer the puree to a medium saucepan and cook over medium heat, stirring constantly with a rubber spatula, scraping the bottom and sides to prevent scorching. When the mixture starts to bubble strongly, reduce the heat to low and stir for 5-10 minutes more, until the mixture is thick enough to coat a wooden spoon. Remove from the heat and cool slightly at room temperature. Unlike the crust and lemon curd, this glaze needs to be made when you are ready to assemble the pie, but if you’ve done both of those ahead, it won’t seem so much all at once.
11. To make the Pie Filling: In a food processor or blender, combine the mascarpone, sweetened condensed milk, lemon zest and juice and 2 tablespoons of the warm berry glaze. Blend until the mixture is entirely smooth. Pile the mixture into the center of the cooled pie crust, using a rubber spatula to ease the mixture up the sides a little, leaving about ½-inch of the crust exposed on the outer edge. Smooth the filling in the center so it is distributed evenly.
12. Measure out about ¼ of the lemon curd (you can save the rest for other uses—I promise it won’t go to waste!!) and spoon dollops of it all across the berry filling. Very gently spread it into a thin layer so it doesn’t mix into the berry filling but maintains a separate layer. Decorate the pie with the 2 cups of berries and spoon the rest of the berry glaze all across the pie, covering all the layers but leaving the crust edges exposed. Chill the pie for at least 4 hours (and up to 8). Then cut into wedges and serve.
Enjoy!
Note: Crust recipe adapted from Baker’s Royale by Naomi Robinson. Filling adapted from Pie for Everyone by Petra Paradez.
#Flour#Sugar#Salt#Butter#Ice Water#Apple Cider Vinegar#Ice Cubes#Cornstarch#Egg Yolks#Egg#Water#Lemon Juice#Raspberries#Mascarpone Cheese#Sweetened Condensed Milk#Lemon Zest#Strawberries#Blueberries#Blackberries
0 notes
Text
How to Stock Your Pantry for the Semi-Apocalypse*

It’s been a rough couple of weeks for many of my friends in the United States, what with the pestilence, the lack of leadership, the hoarding in the supermarkets, and it’s not even the post-Apocalyptic dystopian future we were promised.
However, what’s been slowly creeping into my Facebook feed of late are the first hints of food boredom.
Even those who can afford to order in their favorite Chinese or Mexican, those menus are getting a bit long in the tooth. What once was an “every couple of weeks” guilty pleasure of General Tsao’s chicken, “special” fried rice and a bottle of your favorite twist-off cap Shiraz has lost its charm.
Anyone who follows my Instagram account knows that nothing comes between me, food and cocktails. I’m the guy who when answering the questionnaire at a new doctor’s office warily counters the “how many alcoholic drinks do you have a week” inquiry with a defensive, “Why do you need to know?”
“I hear you like to cook?” I’m often asked when being introduced to new friends and colleagues and my go-to answer is, “Yes, but I prefer to eat.”
And that’s why I cook. I wish I could say I find cooking to be this relaxing past-time, where I spend anywhere from 15-minutes to several hours whipping up a quick pasta sauce or creating a complex Indian curry, listening to Adelle or Carly Simon—a glass of Muscadet in hand. But, no. Cooking, for me, is an ordeal and a means to an end.

Homemade beef pho broth.
But that’s doesn’t mean it can’t be somewhat enjoyable; your food doesn’t have to be predictable or monotonous. And, if you’re going to be confined to your home for three to four weeks, this is where you have to improvise, to grab the whisk by the handle and make the magic happen.
The Basics
First, if you’re entering week three of isolation and it’s time to hit the markets, let’s think smart and make sure your fridge and pantry are stocked with the vitals. If you have food allergies or adopted a lifestyle that has dietary restrictions, please, swap out as needed.
Some of you have been furloughed or lost your jobs, so this is a reasonably priced list offering staples that will last a long time and give days, if not weeks, and in some cases, months of value. Buy what you feel is necessary. As Stephen Casuto, host and creator of one of my favorite cooking shows, Not Another Cooking Show, says, “You, do you.”
“Table salt is disgusting and should only be used for rubbing into the wounds of your enemies.”
The Carbs:
Pasta — enough for at least six meals for two people with leftovers, or three meals for four people (spaghetti/linguini and some kind of tube or macaroni—rotini, fusilli. etc.)
Rice — My old standby is Jasmine rice. Prepared properly it can be used in all kinds of dishes—plain, Mexican, Spanish, Asian, Indian, Italian.
The Vegetables:
Potatoes—Technically, a carb, but, hey. Both waxy (Yuko Golds, Red Bliss or similar) and floury (Idaho, Russet or similar). Keep in a cool, dry drawer, these can last for weeks if stored properly.

Preparing the base for a Pasta Fagioli soup.
Carrots—Large ones with their greens preferred, but if the hoarders have bought all those, then freakish manicured baby carrots.
Tomatoes—firm, preferably on the vine and not quite ripe yet. Only get about four to six so you will use them and they won’t rot and go to waste. Great for sandwiches, avocado toast, chopped into an omelet.
Onions—Yellow and Red (Yellow for most of the sauteeing and cooking you’re going to do, and red for fresh salads, sandwiches, and salsas)
Garlic—Two to three decent-sized bulbs, stored with the onions and potatoes. (Remember: Warm and humid makes your garlic and onions grow into stinky house plants.)
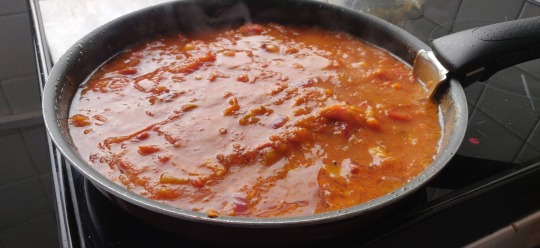
The easy and delicious weekday sauce.
Peppers—Depending on what you love or what you can tolerate, get at least two bell peppers or Italian green peppers, maybe a handful of hot red birdseye chillis, or some habaneros. These will add color and sparkle to everything from a salad to some scrambled eggs.
Celery—I’m of two minds when it comes to celery. First, it’s a vital part of mirepoix, that magical combination of onions, carrots, and celery that’s the basis of most Western soups and stews. But, unless you’re on a rabbit diet, people tend to buy it, use less than half a bunch in one minestrone soup then end up chucking the rest away. But, hey, you’re the cook.
Herbs—Get the dried kind out of desperation: bay leaves, oregano, thyme, rosemary. But, always get fresh parsley and basil.
Dried Goods:
Flour—White, all-purpose flour and Cornmeal (making cornbread for breakfast is a simple warm treat. Everyone should be able to cook this from scratch).
Thickeners—Corn starch, potato starch; I recently discovered xanthan gum and if you’re one of those folks taken by “molecular gastronomy” or food as a science project, this is one of the weirder thickening agents on the market.
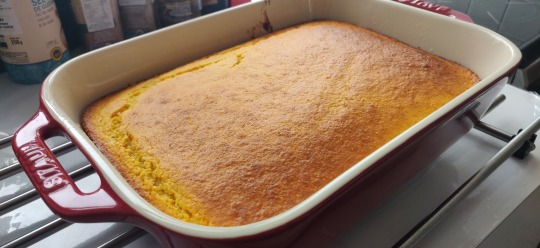
Cornbread can be made in less than an hour.
Leavening Agents—Baking soda and baking powder. (Unless you’ve decided you really love baking artisanal bread, you really don’t need yeast).
Salt—Preferably sea salt, or kosher salt. Remember different salts have different salinities, so a “pinch” of pink Himalayan salt is less salty than a similar size “pinch” of Morton’s Table Salt, which, by the way, is disgusting and should only be used for rubbing into the wounds of your enemies. So, get a salt that fits your budget, your health needs, and your personal flavor profile. I prefer sea salts, they have a richness I like and I feel I can control seasoning better.
Pepper—Black peppercorns, of course, but nothing beats having a box or container of white pepper. It’s got a completely different flavor profile than black pepper and adds a wonderful heat to everything from mashed potatoes to cream soups.
Eggs and Dairy
Milk—If you’re lactose intolerant or vegan/vegetarian you can substitute soy milk or your favorite substitute here, but not almond milk because that shit is a ripoff and is killing the planet.
Cream—You will want this for mashed potatoes and to thicken some sauces.
Butter—Always buy Kerrygold Irish Butter, salted and unsalted. It’s the best butter out there. Fight me.
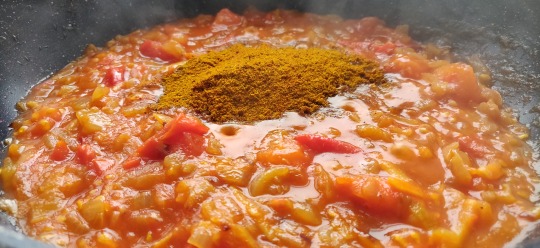
Making a chicken curry from scratch
Plain Yogurt—I prefer Greek yogurt myself. It’s handy to have around and a great way to add richness to a baked item if you only have low-fat milk or to make a quick fresh fruit breakfast.
Cheese—If you must, get a bag of shredded cheddar and a bag of “parmesan”. Cheeses are personal taste, I love fatty, creamy, stinky cheeses, but, honestly, they don’t last long and they are an extravagance for many people at this time. So, get what you like, but make sure you at least have a nice chunk of quality cheddar or similar cheese around.
Eggs—A dozen, big ones. Free-range if you feel guilty.

This Singapore-style laksa is easy and quick.
A Bit of the Sweet
Sugar—Processed sugar is evil. Now that we’ve got that out of the way, always have some handy. It’s great to throw a tablespoon into a tomato-based sauce to offset the acidity. And there is nothing like a lovely stack of homemade pancakes covered in melted butter, a sprinkling of sugar and a squeeze of fresh lemon juice.
Brown Sugar—Less sweet, a little smokey and great for Asian broths that ask for processed sugar. And, it’s “good” for you because, you know, it’s not processed.
Maple Syrup—For pancakes and French Toast.
Condiments:
Ketchup—Whatever you like. Though raised on American Heinz ketchup, I prefer the British brands that tend to use a little more vinegar, but that is an acquired taste.
Mayonaise—The magical base for so many different dressings and sauces. Yes, I will sit down with a plate of french fries or steak-cut chips and a cup of mayo and just go to town on that. Also, dipping cold, boiled chicken that’s torn into strips and wrapped in chilled, crisp iceberg lettuce into mayo while drinking a dry white wine on a hot summer’s day is one of God’s little miracles.

Fried halloumi cheese on a run of the mill avocado toast makes it better.
Mustard—Go ahead, buy French’s American Mustard in a squeeze jar. I don’t judge. But, please get some good Dijon Mustard, and some English Mustard, wet or the powder, is really handy to have for extra punch.
Vinegar—Plain old white vinegar if you're on a budget, but red wine, is also good. Italian balsamic if you want to live large, but I find a bottle of Japanese rice wine vinegar is the perfect all-rounder.
Hot sauce—Tobasco and Siraccha are my go-to faves, but you know what you like.
Olive Oil—Get Extra-Virgin and plain. the EVOO is great for both cooking and for finishing dishes and for cold dressings and sauces. Plain olive oil is great for adding flavor to simple fried sauces and dishes.
Vegetable Oil—A good neutral oil is Canola. It won’t kill you.
Prepared Foods
Canned Goods—at least one can of each: chickpeas, black beans, and kidney beans. Also, a can of mushrooms and a couple of cans of diced green chillis. Two to three 24-ounce cans of Italian tomatoes, with our without basil.
Frozen vegetables—A package of corn and a package of peas. One package of mixed vegetables for making quick healthy soups.
Broths and stocks—Beef, chicken, and vegetable. Fish stock for the more adventurous. (If you haven’t had sliced potatoes slow-cooked in fish stock, I totally recommend it, simple and delicious.) I always buy low-sodium because my body is, like, you know, a temple. 🙄
Actually, always try to purchase low sodium processed foods, that gives you, the cook, more power over the seasoning of your meals.

Thai beef soup with beef balls.
Now, you’re thinking, why is this guy torturing us with pictures of beautiful, exotic home-cooked meals? Why are so many of the “basics” not as exciting as the final products?
That’s because now is the time to get what I’ll call…
The New Basics
You’ve hit the local Vons, or Trader Joe’s, Publix or Wegman’s; you’ve emptied your wallet at Whole Foods and Kroeger, now let’s get some real food. Head down to your local Asian supermarket, or your local South American/Mexican supermarket, because this is where it gets interesting.
The Carbs:
Noodles—From Japanese soba, udon and Hokkaido (ramen) noodles to the long, translucent Vietnamese and Thai rice noodles to the tightly wound, sometimes flavored Chinese noodle nests, most of these keep a long time in a dry cool place and they cook quickly offering alternative tastes and textures.
The Vegetables:
Fresh Ginger Root—it’s ugly and essential, but it can change the flavor of everything from a simple broth to a quick scrambled egg into a culinary adventure. No, don’t peel it with a spoon, that’s silly. Just use a sharp knife on the extraneous knobbly bits and then use a vegetable peeler like a normal person. Honestly, I see the YouTube chefs wrestling with a chunk of ginger and a tablespoon and I just shake my head.
Choy Sum and/or Bak Choy—Definitely hunt these down at the Asian grocer. They stay fresh longer in a good vegetable crisper in your fridge; they’re easy to clean and prepare and cook very quickly.
Chayote—A green, waxy squash that is like a more flavorful cucumber, with a great texture. Add it to all your veggie soups, or saute it with some garlic. Just handy. And keeps in the fridge for a long time.
Condiments:
Soy sauce—Get both kinds, dark soy sauce and light soy sauce. The difference isn’t the color, it’s the viscosity and the flavor. Dark soy sauce is actually somewhat sweet, unctuous and thick and adds deep rich flavors to stews, soups, and sauces. Soy sauce is a nice alternative to just seasoning with salt. Get low sodium, if dietary restrictions are in place, but you don’t really need to use too much, so, I always go with regular.
Chili Oils/Pastes—Much like the fresh peppers, this is all about personal taste. I love spicy food, but I’m not a fan of heat for heat’s sake. So, no a jalapeno margarita where I can’t taste anything or feel my lips is not a great culinary experience. Still, always have these little miracle jars handy, you control the heat by how much or how little you add to the dish you’re preparing. My three faves are traditional Chinese chili garlic sauce, Chiu Chow chili oil, and Calabrian chili oil.
Vinegar — Plain old white vinegar if you’re on a budget, but red wine, is also good. Italian balsamic if you want to live large, but I find a bottle of Japanese rice wine vinegar is the perfect all-rounder.
Fish sauce—Don’t let the name and smell deter you, a spoonful of this elixir in a soup or dressing adds a lovely saltiness and brightness.
Sesame Oil—Plain or toasted. This is for flavor only, really. You can add it to dressings, or add it to vegetable oil when sauteeing, but you can’t cook with it because it burns very quickly; that said, it gives a great depth of flavor to any dish you add it to.
Frozen Foods:
Dumplings—Either factory-made or handmade, Asian dumplings are inexpensive, delicious and easy to prepare. Beef, pork, shrimp, and vegetable or a combination of two or more fillings are always available. Korean dumplings tend to be larger. Wontons are light and mostly shrimp or shrimp and pork. If you’re lucky to have a vibrant Asian community, find the “Mom and Pop” store that makes both noodles and dumplings. Fresh dumplings are usually packed with a light dusting of corn or potato starch so they can be easily frozen.
Asian-style meatballs—OK, now these have a texture that takes a little getting used to, but they are packed with protein and flavor and cook up in seconds in a frying pan or in a soup. Pork, beef, and shrimp are the most popular. I love them and find they really make a noodle soup a quick, but truly satisfying meal.
Canned Goods:
Coconut Milk—From Indian to Thai to Malaysian cuisine, this is mother’s milk. Get a couple of cans.
Peppers—Canned chipotles. Smoked in a flavorful sauce, a little goes a long way here. But you can add these to soups and basic stews to create great depths of heat and flavor.
Okay, now this is by no means a definitive list, but it’s enough I think to give you as many options as you can once you return home and prepare for the next few weeks of personal time.
As you’ve seen, I’ve included links to some of my favorite recipes with the pictures, it’s from these recipes that I reevaluated and changed how I stock my fridge and pantry.
It’s also helped inform my cooking. Bored with cereal and toast, and fried eggs, or scrambled eggs or an omelet with bacon, one morning I created what is now my favorite, flavorful, high protein, yet not too filling breakfast; scrambled eggs and dumplings. It’s my recipe, inspired by other more traditional recipes and the food I had available at the time. It’s what Chef John from the delightful Food Wishes refers to as “that’s just you, cooking.”
The First Recipe
Ingredients:
Three eggs, room temperature, well beaten, preferably in a metal bowl with a whisk
One to two scallions or a half/third of a small yellow onion, finely chopped
One chili pepper (in this case, a Thai green chili), finely chopped.
Four to six frozen Asian dumplings depending on what type
2 Tablespoons — Vegetable oil
1 Tablespoon — Sesame oil
Chiu Chow chili oil or Sriracha
Soy Sauce
Salt
In a small saucepan bring water to a boil. In a small frying pan add your vegetable oil, the onions, and chilis and some salt and turn on the heat.
You want the onions and chilis to cook slowly and sweat, not burn or brown so keep an eye on them and keep stirring.
Now once the vegetables are cooked and the kitchen smells delicious, add a tablespoon of sesame oil into vegetables and lower the heat.
Now, the water should be at a rolling boil. Add the dumplings. I used Korean pork dumplings this morning. They only take three to five minutes to cook. You will know they are done when they float and spin freely in the water.
Now, turn up the heat of the frying pan and add in the eggs, keep stirring and cook the eggs as you like them. Take the eggs off the heat, the residual heat should finish the cooking.
Meanwhile, the dumplings should be cooked. Strain them and place them in the bottom of a bowl. Then scoop over the eggs, finish with a tablespoon or two of soy sauce and the chili sauce of your choosing.
This is a 15-minute breakfast, tops. I hope this was helpful. It’s a trying time for everyone and many of us are fortunate enough to have a roof over our heads that we can cower under. This is an opportunity for reflection, but also to make the most of your family or companions. For those of you living alone, treat yourself to a culinary feast once in a while.
I say cooking is an ordeal, but it’s also a celebration. A chance to be creative and offer comfort, if not for yourself, for the people you live with and love.
Go break an egg.
*This article is the inspiration for this blog and was previously published on Medium.
0 notes
Text
Whole Wheat Pizza (Instant Pot proofed Dough)recipe
Whole Wheat Pizza recipe with dough proofed in Instant Pot.
Easy to make, no-knead Pizza dough recipe, with crusty base made with a mix of Whole Wheat Flour, Semolina and Oats Flour. Instantly proved/proofed dough in Instant Pot now makes it super quick to make Pizza from scratch, at home.
No more kneading or waiting for proving of Pizza dough for long especially in harsh winters here when dough takes forever to rise. Now with the ease of Instant Pot, even if you decide, making pizza an hour before dinner, you can enjoy fresh hot pizza with nutritious pizza base.
We all love Pizza, what can be better than a crusty pizza with your favourite topping and loaded with cheese. Kids adore it and even the grown ups can’t say no to it. My family loves pizza like many of your’s.
It’s been quite a while that I didn’t make any pizza at home. Either we went out to someone’s place there we had pizza or on a weekend outing we ended up having pizza outside. Kids were asking for my homemade pizza. Yes they love Homemade Pizza!!
Recently I saw many bread recipes where the dough was proved in Instant Pot. I never used Instant Pot for proving bread, though I use it regularly for my everyday Indian meals.
Whole Wheat Pizza Dough in Instant Pot
So, when Preethi from my facebook group Foodies Monday Bloghop, suggested the the theme #PizzaMania for this week, challenge , I decided that I will try my Instant Pot for proofing the dough and make kids happy too!!
Preethi blogs at Preethi’s Cuisine and has a treasure of easy to understand and cook, recipes from Indian and International Cuisines. She juggles between her work and blogging and balances both equally well. Do check out her blog for authentic Indian recipes especially from South Indian cuisine and many fusion recipes.
My first trial at proving Pizza dough in Instant Pot
I decided to make Pizza for Sunday dinner. I kneaded the dough after our lunch. I was little skeptical about proving the dough in Instant Pot, that how it will come out, so I kneaded another dough and kept it on the counter to prove.
For timings I took reference from various sites, some specified 30 minutes timer and some said 50 minutes. I decided to take the middle way, and set the timer for 40 minutes.
After 40 minutes, when the opened the lid(kept my fingers crossed), I was relieved and happy to see beautifully proved dough!! I carefully took that out on the counter dusted with flour, lightly folded it and then divided into equal parts. The dough was was moist and elastic (without any all purpose flour), patted with my hands to gave rustic pizza shape to one part and other I shaped on these mini pizza plates.
These mini pizza plates make it easy to roll out individual portions for each one of us, and I can easily personalize the topping as per everyone’s choice.
My another dough that was on counter took around 1.5 hrs to prove as the weather was a bit cold as it was raining since last two days.
Let’s see now how I made the Whole Wheat Pizza with herbs with dough proved in Instant Pot.
Ingredients for Whole Wheat Pizza base
Whole wheat Flour(Atta), Semolina(Sooji) and Oats flour.
I powdered 1/2 cup of steel cut oats in my coffee grinder. Semolina makes the crust crispy and also adds softness to whole wheat dough.
I do not use All purpose flour for pizza as it does not have any nutritional value. I used to make Pizza using bread flour, so if you want to use it you can check my post Pizza Tonight where I used a mix of bread flour and whole wheat flour.
Other ingredients used are.. mix of Italian herbs for flavourful Pizza base(skip if you want a plain base), sugar, salt oil and water and yeast.
#gallery-0-19 { margin: auto; } #gallery-0-19 .gallery-item { float: left; margin-top: 10px; text-align: center; width: 33%; } #gallery-0-19 img { border: 2px solid #cfcfcf; } #gallery-0-19 .gallery-caption { margin-left: 0; } /* see gallery_shortcode() in wp-includes/media.php */
I used Instant active yeast. You can use active dry yeast but activate it before adding to flour. You can check out the method in my post Pav(Indian Dinner Rolls).
I got 8 portions of equal sized dough .
With the dough, I made 4 mini pizza bases, one thin crust pizza medium size and few garlic knots.
With other dough that I proved on counter, I am making some Cheesy Pizza bombs (will update recipes later).
Method for making dough and
In a bowl mix, all the flours(Whole Wheat flour, Semolina and Oats Flour).To it add salt, sugar and herbs if using.
Make a well in center, add lukewarm water(it should be just warm enough to touch), add yeast, and mix well. it just enough so that the dough comes together.
I added around 400 ml of water for 500 g or 3½ cups of flour. Add around 325 ml water if using All-purpose flour and skipping oats flour.
Let the dough rest for 2-3 minutes, add oil and then knead it for 2 minutes.
#gallery-0-20 { margin: auto; } #gallery-0-20 .gallery-item { float: left; margin-top: 10px; text-align: center; width: 25%; } #gallery-0-20 img { border: 2px solid #cfcfcf; } #gallery-0-20 .gallery-caption { margin-left: 0; } /* see gallery_shortcode() in wp-includes/media.php */
Add Semoilina, oats flour to dough
Add salt and seasoning
Add sugar
Add water in the center
Sprinkle instant active yeast
Mix and knead dough, wait for 2 minutes
Add oil and again knead for 2 minutes.
Proving Dough in Instant Pot
Oil the inner pot, transfer the dough carefully to inner pot.
Cover the lid and set the Yogurt Mode on for 40 minutes. I covered it with Instant Pot lid, you can use any glass or steel lid also. Take care it should cover it properly as the upper crust can become dry and dough will not prove well.
After 40 minutes, the timer will go off. Check the beautifully risen dough and carefully transfer it to another bowl or on dusted counter.
Divide dough into equal portions give pizza shape to dough. If immediately baking, line the shaped pizza on dusted baking trays. You can also refrigerate the dough or freeze it. Leave the frozen dough on counter to thaw and then use it.
#gallery-0-21 { margin: auto; } #gallery-0-21 .gallery-item { float: left; margin-top: 10px; text-align: center; width: 25%; } #gallery-0-21 img { border: 2px solid #cfcfcf; } #gallery-0-21 .gallery-caption { margin-left: 0; } /* see gallery_shortcode() in wp-includes/media.php */
Oiled Inner pot of I.P
Pizza dough before proving
Mix Pizza dough after proving Flour
Divide dough in equal portions
dust the baking tray
(for thin crust)add pizza base
(for thick crsut Pizza)Pizza for 2nd proving in mini pizza plates
Shape it as you like it and leave on counter covered with damp cloth for next 10 minutes.
Baking Pizza Bases to store for later use
In case, you wan to bake the base first, prick the base with fork , bake in pre-heated oven for 10 minutes at 427ºF.
#gallery-0-22 { margin: auto; } #gallery-0-22 .gallery-item { float: left; margin-top: 10px; text-align: center; width: 33%; } #gallery-0-22 img { border: 2px solid #cfcfcf; } #gallery-0-22 .gallery-caption { margin-left: 0; } /* see gallery_shortcode() in wp-includes/media.php */
(for thick crsut Pizza)Pizza for 2nd proving in mini pizza plates
after 2nd proving
Use base as and when required, with your favourite toppings.
Baking Pizza immediately
After the 2nd proving time (10 minutes), spread pizza sauce to base. Add toppings of your choice. I added some paneer pieces, green bell peppers and onions.
Bake in a pre-heated oven for 12 minutes(thick crust) and 8 minutes thin crust at 427ºF or
Made thin crust pizza for hubby with less cheese , onions and olives.
#gallery-0-24 { margin: auto; } #gallery-0-24 .gallery-item { float: left; margin-top: 10px; text-align: center; width: 25%; } #gallery-0-24 img { border: 2px solid #cfcfcf; } #gallery-0-24 .gallery-caption { margin-left: 0; } /* see gallery_shortcode() in wp-includes/media.php */
(for thin crust)add pizza base
I had Navaratri fast, kids and hubby enjoyed the pizza and they also liked the Italian flavoured Pizza base.
How to store Pizza Base
These stay good for 4-5 days in refrigerator and you can freeze these for a month. Though I never did it for that long. To store, keep in zip-lock bag or freezer friendly air-tight container. Line parchment paper in between two bases, so that these don’t stick due to moisture while thawing.
Do try Pizza proofing in Instant pot, if you still not tried it. For people like me who bake breads at how regularly it is a boon especially during harsh winters.
If you don’t have Instant Pot you can still prove it. Pls see recipe card for details..
Whole Wheat Pizza(Instant Pot proofed Pizza Dough)

Crusty Wheat Pizza (Instant Pot proofed Dough)recipe
2 Cups Whole Wheat Flour(Atta)
1/2 Cup Semolina Flour
¼ Cup Oats flour
¼ Cup Olive Oil
1 tbsp Active Yeast
1 tsp Sugar
1.5 tsp Salt
1 tbsp Italian Seasoning (optional)
For Toppings
Cheese(Mozzarella/ Pepper Jack) (take any of your choice)
Pizza Sauce
Vegetables/meats of your choice
Chilli Flakes
Seasoning
Method for making dough
In a bowl mix, all the flours(Whole Wheat flour, Semolina and Oats Flour).To it add salt, sugar and herbs if using.
Make a well in center, add lukewarm water(it should be just warm enough to touch), add yeast, and mix well. it just enough so that the dough comes together.
I added around 400 ml of water for 500 g or 3½ cups of flour. Add around 325 ml water if using All-purpose flour and skipping oats flour.
Let the dough rest for 2-3 minutes, add oil and then knead it for 2 minutes.
Proving Dough in Instant Pot
Oil the inner pot, transfer the dough carefully to inner pot.
Cover the lid and set the Yogurt Mode on for 40 minutes. I covered it with Instant Pot lid, you can use any glass or steel lid also. Take care it should cover it properly as the upper crust can become dry and dough will not prove well.
After 40 minutes, cancel the Yogurt Mode, Check the beautifully risen dough and carefully transfer it to another bowl or on dusted counter.
Divide dough into equal portions give pizza shape to dough. If immediately baking, line the shaped pizza on dusted baking trays.
Preheat oven to 427ºF/219°C
Shape it as you like it and leave on counter covered with damp cloth for next 10 minutes.
Baking Pizza Bases to store for later use
In case, you wan to bake the base first, prick the base with fork , bake in pre-heated oven for 10 minutes at 427ºF/219°C
Baking Pizza immediately
After the 2nd proving time (10 minutes), spread pizza sauce to base. Add toppings of your choice.
Bake in a pre-heated oven for 12 minutes(thick crust) and 8 minutes thin crust at 427ºF/219°C
To prove Dough on Counter
Transfer the dough to well oiled bowl, cover with damp kitchen towel or cling film.
Keep on counter or in cold weather, in oven with lights on.
Halve the ingredients for a smaller batch of mini pizza base(around 4).
Hope you and your family will love this Whole Wheat Pizza recipe with Italian herbs flavoured crusty base.
Come and say Hello!! on my social media accounts.. FB, Pinterest and Instagram. Whenever you make this, do post on my FB page or tag me on Instagram. Pin the recipes for later use.
If you like my work, then do hit the follow button and subscribe to the blog to get notifications on new posts and share the blog with your loved ones. I promise won’t spam your mailbox 🙂.
Thanks for stopping by!! Keep coming back!!
Whole Wheat Pizza (Instant Pot Proofed Dough) Whole Wheat Pizza (Instant Pot proofed Dough)recipe Whole Wheat Pizza recipe with dough proofed in Instant Pot.
0 notes
Photo

New Post has been published on https://toldnews.com/health/11-best-street-food-recipes-delicious-street-food-recipes/
11 Best Street Food Recipes | Delicious Street Food Recipes
Street Food Recipes: When we talk about Indian food, the first thing that comes to our minds is the eclectic varieties of street food we get here. Street food is an essential part of India’s rich and diverse culture where we have a distinct cuisine in every other state. From Delhi’s Gol Gappe to Gujarat’s Dabeli and Maharashtra’s Vada Pav, Indian street food would never cease to surprise you and your appetite!
Street food is basically anything that is sold partially or readymade on streets directly by the vendors on cycles or carts. This has been now taken over by small kiosks at some places too, but nothing beats the charm of eating aloo chaat from the good old hawker, who swings by on a cart in the evening.
To refresh your food memories, here we have listed down the 11 best street food recipes that would definitely tantalise your taste buds:
1. Gol Gappe
The most loved of all – gol gappe is one of the most common street foods in India. Gol gappe are small, round shaped crispy atta or suji puris, filled with tangy water, mashed potato and chickpeas along with a melange of spices. Spread all across the country, this street food has multiple names as well, from Paani Poori in Maharashtra, Gol Gappe in parts of North India to Puchka in West Bengal and Gupchup in some parts of Odisha.
Paani Puri is one of the most loved street food in India.
2. Jhalmuri
A mix of puffed rice and spices, Jhalmuri is a popular street food from Kolkata. A light, go-to snack, this can be found in almost every nook and corner of the city with vendors selling it on carts. It has a distinct, pungent taste that comes from the presence of mustard oil in it.
Jhalmuri is a mix of spices and puffed rice. Photo Credit: NDTV Beeps.
3. Vada Pav
This Maharashtrian special is a flavourful street food that makes Mumbai synonymous to it. Spicy, fried, dumpling like vadas are sandwiched between two slices of pav and served with a host of fiery chutneys. Vada pav finds itself almost on every street of Mumbai and on the to-do list of anyone who is travelling to the city.
The most popular street food of Mumbai can now be prepared in your kitchen!
4. Dabeli
An interesting Gujarati snack, Dabeli has a crunchy as well as delicate blend together that makes it a delight to relish. Known to have been originated in the Kutch region of Gujarat, you will find an array of shops and stalls selling Dabeli, even in the narrowest of lanes. You can also call Dabeli a distant, delicious cousin of vada pav due to the similar taste and spices used in both the snacks.
A popular Gujarati snack, you can call dabeli a distant cousin of vada pav. Photo Credit: Istock
5. Paapdi Chaat
Paapdi chaat is a mouth-watering gem of a recipe from the streets of Old Delhi. It has a melt in the mouth fusion of crispy paapdi, boiled chickpeas, potatoes, yogurt and a host of spices like red chilli, chaat masala, cumin powder, etc. A perfect balance of sweet, spicy and tangy, paapdi chaat can easily be prepared at home with simple ingredients.
Paapdi chaat is a mouth-watering gem of a recipe from the streets of Old Delhi.
6. Momos
This South Asian delight has rapidly made a place in the heart of North Indians, specifically Delhiites, who love to gorge on them. A versatile snack that it is, we have a wide variety available from chicken, mutton to vegetable momos, it is best served with a fiery chutney made with red chilli, garlic and tomatoes.
Make these momos from scratch and stuff with chicken, veggies, soya, paneer or whatever your heart fancies.
7. Chole Bhature
The name itself is enough to tickle our taste buds! Chole bhature are the quintessential Punjabi dish that you will find in every restaurant and street of North India, especially when you are around Delhi and Punjab. Piping hot and crispy bhatura served with flavourful chole is what a typical Sunday brunch can look like in a North Indian household. With this easy chole bhature recipe here, you can have a scrumptious treat at home too!
Right from that best chole bhature in the town to your kitchen is what we have a delicious recipe at your doorstep!
8. Khasta Kachori
An immensely popular dish from Indore, khasta kachori is a crispy fried, spicy snack that is simply irresistible when served with a sweet and tangy imli chutney. It is stuffed with a black gram mixture along with an array of spices. A tricky one to prepare but worth all the way.
Dough made of flour and ghee stuffed with a lentil mixture and deep fried till crisp.
9. Samosa
The ultimate partner in the monsoon season isn’t really the umbrella you would carry but the freshly fried, hot and piping samosas that you would love to enjoy with a cup of chai! Samosas are one of the most loved snacks of the nation that does not need any introduction. Triangle puffs stuffed with spicy potato and pea mixture and deep fried to perfection is what none of us can ever resist.
Pockets of dough stuffed with a potato and pea mixture, deep fried. An all time favorite tea time snack!
10. Aloo chaat
A paradise for potato lovers! We can never mention street food and forget aloo chaat; it tops the chart of every street food lover. Bite-sized potato chunks tossed with a host of spices and chutneys are the ultimate satiation level a foodie can reach.
Tossed in tamarind chutney, this fried aloo chaat is a must try.
11. Jalebi
After all there’s always some place left to tuck in some sweets! And when it is about the coiled, hot and sinfully sugared Jalebis, can we ever say no? These deep-fried sweets soaked in sugar syrup are a favourite for those with a sweet tooth and are often prepared on festive, celebratory occasions in Indian households.
Just a handful of simple ingredients will help you dish out mouth-watering crispy jalebis in no time.
Now, that you know the best street foods that India has to offer, go on and explore what you haven’t or even best, try preparing these at home.
#health conditions#health news#health symptoms and treatments#medical articles#medical news#oncall wellness#street food#street food of india#street food recipes
0 notes
Text
how to celebrate watanagashi (inspired by higurashi / a.k.a. “the higurashi fanbase magically reappears today”)

hello hello! today is father’s day, but for higurashi fans, it is also watanagashi!

i’m not sure about you, but since i am a fan of the show/franchise, i figured i would ‘celebrate’ in my own way to have a fun time dedicated to higurashi. i have laid out a description for each item in this list of things you can do to celebrate below the cut! i bring to you, ‘rena’s magical list of fun higurashi watanagashi things!’ :
drift cotton down a river / mimicking the cotton drifting festival (without the.. deaths.. and without the violence, of course..)
higurashi inspired baking / recipes / etc. for meals
watching higurashi, reading higurashi manga / visual novel
playing club games
cosplaying / wearing an outfit inspired by a character
creating higurashi-related things

drifting cotton down a river / mimicking the cotton drifting festival
this one is quite simple, if you have a river near where you live, you can take some cotton balls (probably only one, to be safe on the environment..), and drift them down the river! if you want to ‘go the extra mile’ you can invision all of your past regrets and mistakes and things you wish you can be forgiven by the universe for to be able to move on in your life and become happier and let go drifting away with the cotton ball down the river!

if there is a carnival or fair nearby, you can visit there as well! (though i dont think there would be on a sunday, but oh well!) you can also visit any store or mall or farmer’s market.. pretty much just go somewhere and have a little fun!
recipes / baking inspired from higurashi
this part is my favorite!!! below are some food items that appear in higurashi that i plan to make or eat throughout the day:
---
keiichi’s rushed breakfast
in the new english translation of the first visual novel for higurashi, keiichi puts together a rather interesting breakfast, and you can give it a try this morning if you would like!
he took a slice of bread, put jam on it ( i assumed strawberry, but you can use any jam) ; which is normal in itself, but then he sprinkled cocoa powder over top of the bread with jam. that is about it! sorry i do not have a screenshot as i am on a different computer right now!

in another translation, he has bread and jam with a cup of cocoa on the side (hot cocoa, the drink). you can choose either way of interpreting it! you can pick which one you want to eat ^.^
---
hanyuu’s cream puffs

hanyuu is seen all over the internet with cream puffs and eating cream puffs; so today is the perfect day to make some!
here is a link to a video with a very nice recipe for some:
https://www.youtube.com/watch?v=ZySDgGAobdM
here is a link to a video to ensure you make them correctly / give tips if you are a first time cream puff baker, or if you always have trouble making them turn out right!:
https://www.youtube.com/watch?v=Qn1wqaTwpfE
---
two choices for dinner! you can either pick keiichi’s ramen if you do not have much time to cook, or rena’s dinner if you do!
keiichi’s instant ramen

keiichi, in the visual novel, talks about getting his favorite instant ramen from the grocery store! his favorite flavor is ginger pork flavor, but if you do not like that flavor or are a vegetarian , you can opt for a different, non-meat flavor! or a seafood flavor if you are pescetarian. instant ramen is very simple to make, just follow the instructions on the package! ^.^ (also, if you are vegan, there is one brand of ramen in a certain flavor that has no beef extract and is vegan: top ramen oriental flavor. it is important to get the top ramen brand for this flavor , as maruchan and other brands’ oriental flavors are not vegan)
rena’s feast/dinner


this one is quite nice, and you can change it to fit the ingredients you have available / the ones you like! but put simply, you can make a miso soup with vegetables (specifically daikon, carrot, burdock, potato) and tofu! you can add or omit whatever veggies you wish to. for sides, you can also make some sticky rice , and have pickles with the rice as well! if you want to get really fancy you can make your own pickles, but a jar of store-bought pickles (i use dill) works just fine too! this is a delicious filling dinner! ^_^
---
melon flavored water ice
in one of the club’s games, keiichi brings up that water ice’s most popular flavor is melon, but the other club members picked different flavors for the game (strawberry). you can get melon water ice if it is nearby, or you can get any flavor of water ice! for this, i would suggest getting the water ice if you are out and about at a rita’s or other water ice stand. if you are at home, you can try to make your own if you have a water ice maker / ice grinder, but i would not recommend it as it is more effort than it is worth most of the time ^.^
---
rena+mion’s ohagi / mochi

in the anime, the food that rena and mion infamously leave for keiichi is ohagi, however, in the visual novel it is mochi. because of this, you can choose to make one or both. for inexperienced cooks this could be the hardest thing to make, but just know that not everybody is perfect and it will probably taste good anyhow!
* also, for the needle, in the answer arc it turns out it was not a needle, but just some cayenne pepper mixed in the anko to make it spicy; which keiichi misinterpreted as a needle d/t his paranoia. you can line up the mochi and put cayenne pepper in the filling of one of them, and play a game of ‘mochi roulette’ if you would like!
here is a recipe for anko:
http://www.justonecookbook.com/how_to/how-to-make-anko-red-bean-paste/
here is a recipe for ohagi:
https://www.youtube.com/watch?v=4VPK2qo0_Eg
here is a recipe for mochi (microwaveable to make it easier. you need mochiko sweet rice flour for this to work):
http://allrecipes.com/recipe/43486/microwave-mochi/
---
rena’s tamagoyaki

in the atonement arc manga vol.1, rena makes tamagoyaki! i would suggest eating it for breakfast,brunch,or lunch, but you can eat it whenever you wish to! here is a link to how to make it:
https://www.youtube.com/watch?v=fK3mN4M31z8
if you want, you can also draw a cute design, or cute little higurashi characters on your tamagoyaki with ketchup as well!

rena’s parfait

in the manga, rena’s mother lets her eat a fruit and yogurt parfait when she takes her to an amusement park in a flashback from before her mother broke the news of the divorce to her. you can make yourself a fruit parfait if you would like! specific fruits in the parfait were pineapple, oranges, strawberries, etc. you can make them look like the image above, or just make a parfait any way you would like!
of course there are many, many more foods featured in higurashi (such as the takoyaki, the tea keiichi’s father makes for him and rena, etc.), but for the sake of time these are some of them, but not all! if there was a food you saw in higurashi that was prominent, feel free to make your own rendition of the foods you see in the manga/visual novel/anime!
cosplaying / wearing an outfit inspired by a character
this goes without saying, but you can choose to wear casual outfits inspired by your favorite character (if you want a more wearable look to go out in public, so not many people would know you were cosplaying), or you can cosplay full-out if you wish! below are some character outfit references, but feel free to find more!:


playing club games
this is another one with endless possiblities! if you are hanging out with friends or siblings, you can play card games , or even some of the other games the club plays throughout the series.. you can even do your own form of punishment game if you really want to, but you dont have to. if your friends arent up to that, you can just as easily play games like old maid and go fish or games like tag/etc.. just have fun!
if you are home alone or not around anyone today, dont worry! you can also play card games and other games online with people, there are plenty of game sites that link you up with a random person, or you can play against a computer! its all up to you!!

watching higurashi, reading higurashi manga / visual novel
this is another obvious one, but above all else what you can do today is read or watch higurashi-related things! that can be the official visual novel or manga, watching the anime, or even watching youtube videos and parodies!
as far as the realm of parodies, here is one i wholeheartedly recommend if you haven’t seen it already:
https://www.youtube.com/watch?v=9UnFBtJD4x0
creating higurashi related things
this one is another obvious one, but you can also draw, write, sing/make music, make videos, or even just posts relating to higurashi! the possiblities are endless! ^.^

if anything, you can also just sit in a pile of all your higurashi-related things that you have (figures, books, pictures, etc......)
as for this post right now, that is all!!~

i hope you all like this list of fun things to do today and i hope you all have a wonderful day!!! happy watanagashi!! ^_^

~ rena ♡ ♡ ♡

#watanagashi#HAPPY WATANAGASHI!!!#update#higurashi#higurashi no naku koro ni#ryukishi07#07th expansion#higurashi when they cry#when they cry#cotton drifting festival#cotton drifting#long post#masterpost#masterlist#watanagashi festival#activities#renas post#i hope you all have a really good fun day!!!!!!
10 notes
·
View notes
Text
Carb Refeeds for Women: Do They Help With Fat Loss?
One of the more common questions we get in the Keto Reset Facebook community is, “How do I break through a weight-loss plateau?”
Stalls are frustrating. You’re cruising along on your Primal or Primal + keto diet, and then wham—you hit a wall. It’s all a totally normal and expected part of the weight loss process. Weight loss is never linear. There are always downs, ups, and flat spots.
In fact, if you’ve been losing weight for a while, and then you stall out for a week or two, I wouldn’t even consider that a plateau necessarily. Your body might keep losing weight on its own if you give it time and don’t stress about it. Still, I get it, you’re eager to kick-start the weight loss again.
One strategy that gets tossed around is trying a carb refeed or “carb up.” Carb refeeds are touted as plateau busters and also, more generally, as a strategy to support weight loss. In today’s post, I’ll explain the logic behind this idea and explain why it might be effective, especially for women following a generally low-carb approach.
Instantly download our FREE guide: The Primal + Keto Guide to Eating Out
What Is a Carb Refeed?
Let’s get some terminology out of the way. Strategically adding carbs to a low-carb diet is variously called a “carb refeed,” “carb up,” or “carb cycle.” These terms don’t have standardized definitions. In general, carb cycling usually refers to eating low carb for a certain number of days, then higher carb for a certain number of days, and repeating.
“Carb refeed” and “carb up” can mean the same thing, or they can mean adding carbs more intuitively when you feel like you need them.
Carb cycling strategies have long been used to promote leanness, especially by physique and other athletes trying to achieve low body fat percentages. In this context, carb cycling involves specific protocols, usually 5-6 days of very low carb eating combined with 1-2 days of higher carb eating. They may include exercise and fasting regimens, too.
The carb cycling protocols used for getting super lean aren’t the same as what we’ll be talking about for general weight loss and breaking out of a stall. For one thing, they usually involve more carbs than you probably need. We’ll get to that later. Also, although some of the mechanisms are probably the same, they focus specifically on depleting and refilling glycogen stores. For our purposes, that’s not so important.
How Do Carb Refeeds Work?
First let me say that the evidence for carb cycling strategies, especially with regard to weight loss and plateaus, is mostly anecdotal. There is pretty good data to support the pieces, but the whole picture has not been rigorously tested.
So what do we think is happening? There are a few (not mutually exclusive) hypotheses here:
Carb refeeds work by boosting leptin
Carb refeeds work by relieving the stress of dieting
Dieting is hard, and carb refeeds help us stick to them
Carb Refeeds Work by Boosting Leptin
Leptin is sometimes called the “satiation hormone,” but it’s probably more accurate to think of it as a starvation sensor.1 Its main role is to tell the brain whether we have sufficient energy on board, either in fat cells, which secrete leptin, or because we have recently eaten (especially carbs).
It’s well established that leptin levels drop both when we lose body fat and when we eat in a caloric deficit2 for even a short period. Remember, from an evolutionary perspective, weight loss signals that we are in a time of food insecurity and stress. Low leptin signals to the hypothalamus that we might be facing an energy shortage. In turn, the hypothalamus kicks on the processes collectively known as adaptive thermogenesis,3 or energy conservation. These include down-regulating thyroid activity and slowing metabolic rate, decreasing energy expenditure, and increasing hunger and appetite.
Premenopausal women’s bodies are especially sensitive to anything that sets off the “Danger! Starvation possible!” alarms. (Postmenopausal women are generally more resilient.) Leptin is a key player in that system. It is also involved in the regulation of insulin sensitivity and glucose metabolism, the female reproductive and immune systems, and skeletal and cardiovascular health. Basically, leptin is really important if we want to feel good and achieve optimal hormonal balance.
Leptin levels rise in response to eating carbohydrates specifically.4 Thus, one rationale behind carb refeeds is that by boosting leptin, we can reset the system. Basically, it tells the brain, “Hey, it’s cool, we have food around. It’s safe to let go of some of this body fat.”
Carb Refeeds Work by Relieving the Stress of Dieting
A related hypothesis is that dieting is physiologically stressful on the body. After periods of energy restriction, we see a decrease in thyroid hormones and an increase in cortisol (which may be related to falling leptin). These are part of the adaptive response that aims to restore energy balance. Carb refeeds alleviate the stress of being in a constant state of energy restriction.
Dieting Is Hard, and Carb Refeeds Help Us Stick to Them
One of the main reasons dieting hard is because of hormonal changes (ahem, leptin5) that increase hunger and appetite. Besides feeling unpleasant, this leads many dieters to eat more than they realize, undermining fat loss. Multiple studies also suggest that low leptin levels increase reward-seeking behavior. Basically, food becomes more appealing and harder to resist.
Low leptin is also related to depression6, anxiety, and perceived stress, all of which can make it harder to stick to your diet goals.
For all these reasons, periodically boosting your leptin via carb refeeds should make dieting feel less challenging. Beyond that, there’s also the psychological factor of knowing that you don’t have to strictly adhere to a diet indefinitely. Although it might seem counterintuitive, research confirms 78that giving yourself planned breaks can help relive the doldrums of dieting and actually increase your adherence in the long term.
Who Should and Should Not Consider Incorporating Carb Refeeds
There’s no evidence that carb refeeds are necessary or optimal if weight loss is your goal. Like so many things, this is going to be an n=1 situation. They might help, hurt, or be neutral depending on the individual.
First and foremost, if it ain’t broke, don’t fix it. If your current diet is working just fine, you feel great, and you’re losing weight, you don’t need carb refeeds. (By the way, if you’re impatient because you’re losing slowly, I haven’t seen any evidence that they will speed up weight loss.)
Likewise, they generally aren’t recommended for people who still carry a significant amount of body fat. There’s no real guidance as to what constitutes “significant amount,” unfortunately. As a rule, though, leaner individuals are more likely to benefit from the hit of leptin because they have less adipose tissue to produce it on a day-to-day basis.
DO: Reasons to experiment with carb refeeds include:
You’re experiencing a weight loss plateau. This means several weeks of no change in weight or body measurements despite nothing else changing. This isn’t a guaranteed strategy, of course. There are lots of reasons weight loss can stall, not all of them related to leptin or diet adherence. It’s certainly worth a try, though.
You’ve been low-carb and/or calorie restricted for a while, and you’re experiencing other signs of hormone dysregulation. These include menstrual irregularity and sleep9 disruptions, among others. Depending on how severe your symptoms, you might need more than the occasional carb refeed. For mild symptoms, an occasional refeed might help.
You’re sick of dieting. Mixing it up with carb refeeds (which are not the same as “cheat days”) can relieve the dieting fatigue.
DON’T: Other instances when carb refeeds are not advised are:
For people who are using low-carb or keto therapeutically, such as for epilepsy or Parkinson’s, unless advised by their health care practitioners.
For people who are extremely insulin resistant.
How to Implement Carb Refeeds
No matter what strategy you use, you want to refeed with nutrient-dense, Primal-aligned foods. We’re talking sweet potatoes, potatoes, beets, baked goods made with almond or coconut flour if you want, in-season fruit, quinoa, maybe legumes if they work for you. If you want to eat some rice (sushi!), no judgement here.
Primal carb refeeds aren’t just an excuse to “cheat” (a term that I hate). You’ll see carb cycling protocols that allow, even advocate, eating copious amounts of junk food (another term I don’t love) on refeed days. Since our goal here is metabolic health and hormone balance, stick to the same Primal foods that support those goals, just with more carbs.
How Many Carbs Should I Add?
If you look at the literature on carb cycling, you’ll find various opinions. Depending on who you ask, it can be upwards of 300+ grams per day. Again, though, these come mostly from protocols aimed at physique and other athletes, and these high carb recommendations are for men who are already quite lean. It’s not clear how they apply to the average woman looking to kickstart their weight loss.
As usual, it’s also hard to find research on people who follow a low-carb Primal or paleo approach. In this oft-cited study,10 for example, the control diet was a mainly liquid diet supplemented with orange juice, yogurt, and cream that came in at an average of 224 grams of carbs per day. In the carb overfeeding condition, which was shown to boost leptin, the average daily carb intake was 394 grams—way more than the average Primal eater probably consumes.
In the absence of solid research-based recommendations, you’ll have to experiment. A good place to start is bumping up to twice your normal daily intake by adding nutrient-dense carbs to one or two of your meals, and increasing as necessary. If you want to be scientific about it, log your food and also keep track of metrics like weight, sleep, and energy. Play around with the frequency of carb-ups, as well as the amount of carb you add, and see what works best.
Should You Increase Carbs, Calories, or Both?
Technically, carb refeeds don’t have to involve more calories. Some protocols state that you should reduce fat on carb-up days so that your total caloric intake stays the same. Others specifically recommend adding carbs and increasing calories by a fixed amount.
Unfortunately, we don’t have enough studies to break down the separate effects of carbs and calories here. In theory, both should signal to the body that energy is available, but carb intake uniquely boosts leptin. Once again, experiment to see what works for you. To start, I’d recommend allowing your calories to increase on refeed days. You might dial back your fat a little, but I wouldn’t overthink it, especially if you’re already low-carb or keto. Adding 50 or 75 grams of carbs is 200 to 300 calories. That might be less than your typical caloric deficit. Even if you add more, it’s unlikely to negatively effect weight loss if we’re talking occasional refeeds.
I know that many dieters are afraid to increase their calories for fear of “undoing” their progress. That fear seems to be unfounded. Multiple studies confirm that intermittent dieting—mixing periods of caloric restriction with eating around your maintenance calories—is no worse11 for losing weight than continuous calorie restriction. It may even be advantageous12 for weight loss, and fat loss specifically.
How Often Should I Refeed?
In terms of how often to refeed, you have some options:
Add in carbs whenever you plateau
Carb cycling on a schedule
Carb cycling around your menstrual cycle
Eating carbs intuitively
Add in Carbs Whenever You Plateau
If you’re actively trying to lose weight, one option is to wait until you hit a plateau—at least a couple weeks when the scale stops moving—then add a day or two of higher-carb Primal meals to see if that moves the needle.
Carb Cycling on a Schedule
As I said up top, some carb cycling strategies involve fixed periods of lower- and higher-carb eating. Often this looks like eating low-carb during the week and then doing one or two higher-carb days on the weekend. This is more convenience than science though. There’s no reason you can’t do 9/1 or 12/2 or any other pattern that works for you. You don’t even need to take a whole day. Some people just do one high-carb meal per week and feel great.
Obviously this strategy is more of a lifestyle than an acute tool for breaking through a weight-loss plateau. This is for people who don’t do well with continuous dieting or who find it easier to stick to their goals when they have planned deviations. It is akin to the idea of a cyclical ketogenic diet, although you don’t have to be keto to use carb cycling.
Carb Cycling Around Your Menstrual Cycle
Another carb cycling strategy is timing carbs strategically around your menstrual cycle.
This strategy isn’t specifically geared at weight loss but rather supporting the whole hormonal system, but it potentially allows you to kill two birds with one stone. There are different approaches here, but a common one is increasing carbs 4 to 5 days post-ovulation (around days 19 and 20 of your cycle) and on the first couple days of your period. These are times when your leptin levels naturally dip, so you could possibly benefit from the boost. Some women prefer instead to add carbs around ovulation, days 13 to 15. Again, see what works be for you.
Eating Carbs Intuitively
Finally, you can wait until your body starts calling out for carbs and respond appropriately. In my opinion, intuitive eating is one of the goals of a Primal diet and lifestyle. When we improve hormone balance and tap into how good it feels to nourish ourselves with nutrient-dense foods, we should be able to trust when our inner voice says, “Hey, I could use some starchy vegetables here!”
Eating carbs intuitively isn’t the same responding to sugar cravings or eating something off plan just because it “sounds good.” I think we can all recognize the difference between listening to our bodies and eating purely for pleasure. (You’re more than welcome to do that too, but it’s not what we’re talking about here.)
Intuitive carb refeeds are probably going to work best for people who have been on the Primal train for a while and who generally feel pretty in tune with their bodies. Women who are dealing with chronic health issues or hormone imbalances might need something more structured.
Note that this is a different question than carb timing, which Mark covered recently. Carb timing is about when to eat your carbs during the day.
Don’t Be Afraid to Experiment
I’m a big fan of experimenting with your diet. There is so much bioindividuality, it’s impossible to find a one-size-fits-all approach. The best strategy for you is the one that hits that sweet spot where you to feel your best and also enjoy how you eat.
Moreover, I’m going to go out on a limb and say if you’ve been low-carb for so long that you’re afraid to consider eating even nutrient-dense, Primal-aligned carb-y foods like sweet potatoes, you should challenge yourself to try a carb refeed and see what happens. I’m not talking about people who know they feel better eating very-low-carb and simply don’t have the desire to switch it up. I’m talking about people who have a mental block around the very idea of carbs. We don’t want people to get “stuck” in a low-carb paradigm to the point where they feel unable to enjoy otherwise nutritious foods just because they have more carbs than, say, broccoli.
Finally, although their are good reasons to try carb refeeds if your current low-carb diet isn’t working the way you want, it’s only one of many things you might try. In particular, if you haven’t also gotten your sleep and stress in order, make those priorities as well. Carb refeeds can only do so much if you don’t have a solid foundation of healthy habits in place.
Tell us: Have you had success implementing a carb cycling approach? What works for you? What are your favorite foods to use to increase carb intake?
Related posts from Mark’s Daily Apple
Does Carb Cycling Work? It Depends.
Dear Mark: Should I Increase Carb Intake for Weight Loss?
Carb Refeeding and Weight Loss
(function($) { $("#dffVCDF").load("https://www.marksdailyapple.com/wp-admin/admin-ajax.php?action=dfads_ajax_load_ads&groups=674&limit=1&orderby=random&order=ASC&container_id=&container_html=none&container_class=&ad_html=div&ad_class=&callback_function=&return_javascript=0&_block_id=dffVCDF" ); })( jQuery );
References
https://ift.tt/3asG1lQ
https://ift.tt/2xP2Xyf
https://ift.tt/2chQHbc
https://ift.tt/2znCJ6J
https://ift.tt/2wXMveJ
https://ift.tt/2KkQogU
https://ift.tt/3aPNZ9p
https://ift.tt/2KqcHSh
https://ift.tt/2XSdgfA
https://ift.tt/1m96apr
https://ift.tt/2VKpzIg
https://ift.tt/2Kp0ayM
The post Carb Refeeds for Women: Do They Help With Fat Loss? appeared first on Mark's Daily Apple.
Carb Refeeds for Women: Do They Help With Fat Loss? published first on https://drugaddictionsrehab.tumblr.com/
0 notes
Text
Carb Refeeds for Women: Do They Help With Fat Loss?
One of the more common questions we get in the Keto Reset Facebook community is, “How do I break through a weight-loss plateau?”
Stalls are frustrating. You’re cruising along on your Primal or Primal + keto diet, and then wham—you hit a wall. It’s all a totally normal and expected part of the weight loss process. Weight loss is never linear. There are always downs, ups, and flat spots.
In fact, if you’ve been losing weight for a while, and then you stall out for a week or two, I wouldn’t even consider that a plateau necessarily. Your body might keep losing weight on its own if you give it time and don’t stress about it. Still, I get it, you’re eager to kick-start the weight loss again.
One strategy that gets tossed around is trying a carb refeed or “carb up.” Carb refeeds are touted as plateau busters and also, more generally, as a strategy to support weight loss. In today’s post, I’ll explain the logic behind this idea and explain why it might be effective, especially for women following a generally low-carb approach.
Instantly download our FREE guide: The Primal + Keto Guide to Eating Out
What Is a Carb Refeed?
Let’s get some terminology out of the way. Strategically adding carbs to a low-carb diet is variously called a “carb refeed,” “carb up,” or “carb cycle.” These terms don’t have standardized definitions. In general, carb cycling usually refers to eating low carb for a certain number of days, then higher carb for a certain number of days, and repeating.
“Carb refeed” and “carb up” can mean the same thing, or they can mean adding carbs more intuitively when you feel like you need them.
Carb cycling strategies have long been used to promote leanness, especially by physique and other athletes trying to achieve low body fat percentages. In this context, carb cycling involves specific protocols, usually 5-6 days of very low carb eating combined with 1-2 days of higher carb eating. They may include exercise and fasting regimens, too.
The carb cycling protocols used for getting super lean aren’t the same as what we’ll be talking about for general weight loss and breaking out of a stall. For one thing, they usually involve more carbs than you probably need. We’ll get to that later. Also, although some of the mechanisms are probably the same, they focus specifically on depleting and refilling glycogen stores. For our purposes, that’s not so important.
How Do Carb Refeeds Work?
First let me say that the evidence for carb cycling strategies, especially with regard to weight loss and plateaus, is mostly anecdotal. There is pretty good data to support the pieces, but the whole picture has not been rigorously tested.
So what do we think is happening? There are a few (not mutually exclusive) hypotheses here:
Carb refeeds work by boosting leptin
Carb refeeds work by relieving the stress of dieting
Dieting is hard, and carb refeeds help us stick to them
Carb Refeeds Work by Boosting Leptin
Leptin is sometimes called the “satiation hormone,” but it’s probably more accurate to think of it as a starvation sensor. Its main role is to tell the brain whether we have sufficient energy on board, either in fat cells, which secrete leptin, or because we have recently eaten (especially carbs).
It’s well established that leptin levels drop both when we lose body fat and when we eat in a caloric deficit for even a short period. Remember, from an evolutionary perspective, weight loss signals that we are in a time of food insecurity and stress. Low leptin signals to the hypothalamus that we might be facing an energy shortage. In turn, the hypothalamus kicks on the processes collectively known as adaptive thermogenesis, or energy conservation. These include down-regulating thyroid activity and slowing metabolic rate, decreasing energy expenditure, and increasing hunger and appetite.
Premenopausal women’s bodies are especially sensitive to anything that sets off the “Danger! Starvation possible!” alarms. (Postmenopausal women are generally more resilient.) Leptin is a key player in that system. It is also involved in the regulation of insulin sensitivity and glucose metabolism, the female reproductive and immune systems, and skeletal and cardiovascular health. Basically, leptin is really important if we want to feel good and achieve optimal hormonal balance.
Leptin levels rise in response to eating carbohydrates specifically. Thus, one rationale behind carb refeeds is that by boosting leptin, we can reset the system. Basically, it tells the brain, “Hey, it’s cool, we have food around. It’s safe to let go of some of this body fat.”
Carb Refeeds Work by Relieving the Stress of Dieting
A related hypothesis is that dieting is physiologically stressful on the body. After periods of energy restriction, we see a decrease in thyroid hormones and an increase in cortisol (which may be related to falling leptin). These are part of the adaptive response that aims to restore energy balance. Carb refeeds alleviate the stress of being in a constant state of energy restriction.
Dieting Is Hard, and Carb Refeeds Help Us Stick to Them
One of the main reasons dieting hard is because of hormonal changes (ahem, leptin) that increase hunger and appetite. Besides feeling unpleasant, this leads many dieters to eat more than they realize, undermining fat loss. Multiple studies also suggest that low leptin levels increase reward-seeking behavior. Basically, food becomes more appealing and harder to resist.
Low leptin is also related to depression, anxiety, and perceived stress, all of which can make it harder to stick to your diet goals.
For all these reasons, periodically boosting your leptin via carb refeeds should make dieting feel less challenging. Beyond that, there’s also the psychological factor of knowing that you don’t have to strictly adhere to a diet indefinitely. Although it might seem counterintuitive, research confirms that giving yourself planned breaks can help relive the doldrums of dieting and actually increase your adherence in the long term.
Who Should and Should Not Consider Incorporating Carb Refeeds
There’s no evidence that carb refeeds are necessary or optimal if weight loss is your goal. Like so many things, this is going to be an n=1 situation. They might help, hurt, or be neutral depending on the individual.
First and foremost, if it ain’t broke, don’t fix it. If your current diet is working just fine, you feel great, and you’re losing weight, you don’t need carb refeeds. (By the way, if you’re impatient because you’re losing slowly, I haven’t seen any evidence that they will speed up weight loss.)
Likewise, they generally aren’t recommended for people who still carry a significant amount of body fat. There’s no real guidance as to what constitutes “significant amount,” unfortunately. As a rule, though, leaner individuals are more likely to benefit from the hit of leptin because they have less adipose tissue to produce it on a day-to-day basis.
DO: Reasons to experiment with carb refeeds include:
You’re experiencing a weight loss plateau. This means several weeks of no change in weight or body measurements despite nothing else changing. This isn’t a guaranteed strategy, of course. There are lots of reasons weight loss can stall, not all of them related to leptin or diet adherence. It’s certainly worth a try, though.
You’ve been low-carb and/or calorie restricted for a while, and you’re experiencing other signs of hormone dysregulation. These include menstrual irregularity and sleep disruptions, among others. Depending on how severe your symptoms, you might need more than the occasional carb refeed. For mild symptoms, an occasional refeed might help.
You’re sick of dieting. Mixing it up with carb refeeds (which are not the same as “cheat days”) can relieve the dieting fatigue.
DON’T: Other instances when carb refeeds are not advised are:
For people who are using low-carb or keto therapeutically, such as for epilepsy or Parkinson’s, unless advised by their health care practitioners.
For people who are extremely insulin resistant.
How to Implement Carb Refeeds
No matter what strategy you use, you want to refeed with nutrient-dense, Primal-aligned foods. We’re talking sweet potatoes, potatoes, beets, baked goods made with almond or coconut flour if you want, in-season fruit, quinoa, maybe legumes if they work for you. If you want to eat some rice (sushi!), no judgement here.
Primal carb refeeds aren’t just an excuse to “cheat” (a term that I hate). You’ll see carb cycling protocols that allow, even advocate, eating copious amounts of junk food (another term I don’t love) on refeed days. Since our goal here is metabolic health and hormone balance, stick to the same Primal foods that support those goals, just with more carbs.
How Many Carbs Should I Add?
If you look at the literature on carb cycling, you’ll find various opinions. Depending on who you ask, it can be upwards of 300+ grams per day. Again, though, these come mostly from protocols aimed at physique and other athletes, and these high carb recommendations are for men who are already quite lean. It’s not clear how they apply to the average woman looking to kickstart their weight loss.
As usual, it’s also hard to find research on people who follow a low-carb Primal or paleo approach. In this oft-cited study, for example, the control diet was a mainly liquid diet supplemented with orange juice, yogurt, and cream that came in at an average of 224 grams of carbs per day. In the carb overfeeding condition, which was shown to boost leptin, the average daily carb intake was 394 grams—way more than the average Primal eater probably consumes.
In the absence of solid research-based recommendations, you’ll have to experiment. A good place to start is bumping up to twice your normal daily intake by adding nutrient-dense carbs to one or two of your meals, and increasing as necessary. If you want to be scientific about it, log your food and also keep track of metrics like weight, sleep, and energy. Play around with the frequency of carb-ups, as well as the amount of carb you add, and see what works best.
Should You Increase Carbs, Calories, or Both?
Technically, carb refeeds don’t have to involve more calories. Some protocols state that you should reduce fat on carb-up days so that your total caloric intake stays the same. Others specifically recommend adding carbs and increasing calories by a fixed amount.
Unfortunately, we don’t have enough studies to break down the separate effects of carbs and calories here. In theory, both should signal to the body that energy is available, but carb intake uniquely boosts leptin. Once again, experiment to see what works for you. To start, I’d recommend allowing your calories to increase on refeed days. You might dial back your fat a little, but I wouldn’t overthink it, especially if you’re already low-carb or keto. Adding 50 or 75 grams of carbs is 200 to 300 calories. That might be less than your typical caloric deficit. Even if you add more, it’s unlikely to negatively effect weight loss if we’re talking occasional refeeds.
I know that many dieters are afraid to increase their calories for fear of “undoing” their progress. That fear seems to be unfounded. Multiple studies confirm that intermittent dieting—mixing periods of caloric restriction with eating around your maintenance calories—is no worse for losing weight than continuous calorie restriction. It may even be advantageous for weight loss, and fat loss specifically.
How Often Should I Refeed?
In terms of how often to refeed, you have some options:
Add in carbs whenever you plateau
Carb cycling on a schedule
Carb cycling around your menstrual cycle
Eating carbs intuitively
Add in Carbs Whenever You Plateau
If you’re actively trying to lose weight, one option is to wait until you hit a plateau—at least a couple weeks when the scale stops moving—then add a day or two of higher-carb Primal meals to see if that moves the needle.
Carb Cycling on a Schedule
As I said up top, some carb cycling strategies involve fixed periods of lower- and higher-carb eating. Often this looks like eating low-carb during the week and then doing one or two higher-carb days on the weekend. This is more convenience than science though. There’s no reason you can’t do 9/1 or 12/2 or any other pattern that works for you. You don’t even need to take a whole day. Some people just do one high-carb meal per week and feel great.
Obviously this strategy is more of a lifestyle than an acute tool for breaking through a weight-loss plateau. This is for people who don’t do well with continuous dieting or who find it easier to stick to their goals when they have planned deviations. It is akin to the idea of a cyclical ketogenic diet, although you don’t have to be keto to use carb cycling.
Carb Cycling Around Your Menstrual Cycle
Another carb cycling strategy is timing carbs strategically around your menstrual cycle.
This strategy isn’t specifically geared at weight loss but rather supporting the whole hormonal system, but it potentially allows you to kill two birds with one stone. There are different approaches here, but a common one is increasing carbs 4 to 5 days post-ovulation (around days 19 and 20 of your cycle) and on the first couple days of your period. These are times when your leptin levels naturally dip, so you could possibly benefit from the boost. Some women prefer instead to add carbs around ovulation, days 13 to 15. Again, see what works be for you.
Eating Carbs Intuitively
Finally, you can wait until your body starts calling out for carbs and respond appropriately. In my opinion, intuitive eating is one of the goals of a Primal diet and lifestyle. When we improve hormone balance and tap into how good it feels to nourish ourselves with nutrient-dense foods, we should be able to trust when our inner voice says, “Hey, I could use some starchy vegetables here!”
Eating carbs intuitively isn’t the same responding to sugar cravings or eating something off plan just because it “sounds good.” I think we can all recognize the difference between listening to our bodies and eating purely for pleasure. (You’re more than welcome to do that too, but it’s not what we’re talking about here.)
Intuitive carb refeeds are probably going to work best for people who have been on the Primal train for a while and who generally feel pretty in tune with their bodies. Women who are dealing with chronic health issues or hormone imbalances might need something more structured.
Note that this is a different question than carb timing, which Mark covered recently. Carb timing is about when to eat your carbs during the day.
Don’t Be Afraid to Experiment
I’m a big fan of experimenting with your diet. There is so much bioindividuality, it’s impossible to find a one-size-fits-all approach. The best strategy for you is the one that hits that sweet spot where you to feel your best and also enjoy how you eat.
Moreover, I’m going to go out on a limb and say if you’ve been low-carb for so long that you’re afraid to consider eating even nutrient-dense, Primal-aligned carb-y foods like sweet potatoes, you should challenge yourself to try a carb refeed and see what happens. I’m not talking about people who know they feel better eating very-low-carb and simply don’t have the desire to switch it up. I’m talking about people who have a mental block around the very idea of carbs. We don’t want people to get “stuck” in a low-carb paradigm to the point where they feel unable to enjoy otherwise nutritious foods just because they have more carbs than, say, broccoli.
Finally, although their are good reasons to try carb refeeds if your current low-carb diet isn’t working the way you want, it’s only one of many things you might try. In particular, if you haven’t also gotten your sleep and stress in order, make those priorities as well. Carb refeeds can only do so much if you don’t have a solid foundation of healthy habits in place.
Tell us: Have you had success implementing a carb cycling approach? What works for you? What are your favorite foods to use to increase carb intake?
Related posts from Mark’s Daily Apple
Does Carb Cycling Work? It Depends.
Dear Mark: Should I Increase Carb Intake for Weight Loss?
Carb Refeeding and Weight Loss
(function($) { $("#dfAJHi4").load("https://www.marksdailyapple.com/wp-admin/admin-ajax.php?action=dfads_ajax_load_ads&groups=674&limit=1&orderby=random&order=ASC&container_id=&container_html=none&container_class=&ad_html=div&ad_class=&callback_function=&return_javascript=0&_block_id=dfAJHi4" ); })( jQuery );
References
Chin-Chance, C., Polonsky, K. S., & Schoeller, D. A. (2000). Twenty-four-hour leptin levels respond to cumulative short-term energy imbalance and predict subsequent intake. The Journal of Clinical Endocrinology and Metabolism, 85(8), 2685–2691.
Izadi, V., Saraf-Bank, S., & Azadbakht, L. (2014). Dietary intakes and leptin concentrations. ARYA Atherosclerosis, 10(5), 266–272.
Keim, N. L., Stern, J. S., & Havel, P. J. (1998). Relation between circulating leptin concentrations and appetite during a prolonged, moderate energy deficit in women. The American Journal of Clinical Nutrition, 68(4), 794–801.
Klok, M. D., Jakobsdottir, S., & Drent, M. L. (2007). The role of leptin and ghrelin in the regulation of food intake and body weight in humans: A review. Obesity Reviews, 8(1), 21–34.
Leal-Cerro, A., Soto, A., Martínez, M. A., Dieguez, C., & Casanueva, F. F. (2001). Influence of cortisol status on leptin secretion. Pituitary, 4(1–2), 111–116.
Oswal, A., & Yeo, G. (2010). Leptin and the Control of Body Weight: A Review of Its Diverse Central Targets, Signaling Mechanisms, and Role in the Pathogenesis of Obesity. Obesity, 18(2), 221–229.
Peos, J. J., Norton, L. E., Helms, E. R., Galpin, A. J., & Fournier, P. (2019). Intermittent Dieting: Theoretical Considerations for the Athlete. Sports, 7(1).
Trexler, E. T., Smith-Ryan, A. E., & Norton, L. E. (2014). Metabolic adaptation to weight loss: Implications for the athlete. Journal of the International Society of Sports Nutrition, 11, 7.
The post Carb Refeeds for Women: Do They Help With Fat Loss? appeared first on Mark's Daily Apple.
Carb Refeeds for Women: Do They Help With Fat Loss? published first on https://venabeahan.tumblr.com
0 notes
Text
Easy Vegan Soft Pretzels
High in protein, low in fat, these vegan soft pretzels are hearty and delicious. You can be enjoying them in less than an hour!
Happy 2019! I’m really off to a late start this year thanks to a lot of non-edible stuff happening in my life. Some of it involves saying goodbye to one canine family member and hello to a new one.
As you long-time readers know, I consider this a “blog” in its original meaning of “web log:” An online account of my life, especially, but not exclusively, the part of it that takes place in my kitchen. Many of you have seen my daughter grow from a 9-year old child to a senior in college and have been here with me as I went through everything from cursed vacations to cancer.
But I understand that there are those that want to skip all the chit-chat, and for those I offer this link to skip right to the info about the recipe:
Skip the Dogs, Take Me to the Cooking!
For those of you who are still with me, I have to break the sad news that we lost Bandit in November. There’s no easy way to describe what happened, but it boils down to he was staying with a sitter, got out of the yard, and was attacked and killed by at least one other dog.
As you can imagine, we were grief-stricken and traumatized. I couldn’t fully enjoy the holidays because of the pain of losing him and the thought of what he must have suffered. This wasn’t the kind of news I wanted to burden my readers with right in the middle of the holidays, so I didn’t mention his death in my newsletter. I still can’t write about him without breaking down.
Foxley didn’t understand what had happened to Bandit, and we could tell that he missed his big brother. So toward the middle of December we started looking for a new dog to adopt, and we found Salem through the same Pomeranian rescue that had given us Bandit and Foxley. Because of the timing, we had to wait until after Christmas to meet Salem, but when we did, it was love at first sight:
Salem was a stray on the streets of Texarkana (sounds like the beginning of a country and western song!) We don’t know anything about his background, but the vet that examined his teeth estimated him to be around five years old. He was definitely somebody’s baby at one time because he’s fully housebroken, knows what a pet door is for, and will sit and offer his paw on command. He loves long walks and treats (too much) and has a few pounds to lose to be in better health. Foxley, after some initial jealousy, LOVES him and can’t stop licking him. He’s been a wonderful addition to our household.
So there you have the Voisin Pet Update. If you want more dog and cat-related news, be sure to follow Foxley on Facebook and Instagram. (He posts a little more often than I do!)
I’ll now get to the business at hand, making these easy pretzels.
First a confession that is going to irritate some people: For the past year, I have been following Weight Watchers. I don’t talk about it because I don’t want to endorse it or any other diet, but I’m not going to apologize for it, either. I’m doing what works for me to regain my health when nothing else did. I’m down 55 pounds and 30 cholesterol points and back to a regular blood pressure. It’s been easy to do as a vegan and works well with whole-foods plant-based eating.
Anyway, if you wondered why I’ve been putting Weight Watchers points on recipes and started a category for Zero Point Recipes, that’s why.
Because if this, I’ve been hanging out in Weight Watchers groups and learning some of the standard “low-points” recipes. One of them is a 2-ingredient dough that can be used to make bagels, pizza crust, and pretzels. The non-vegan version uses self-rising flour and fat-free yogurt. On WW, fat-free yogurt is a “free” food, meaning you don’t have to count it toward the points you’re allowed each day. There is no corresponding vegan yogurt that’s fat-free, so vegans often substitute silken tofu, which is also zero points.
I decided to try substituting silken tofu in this pretzel recipe, and it worked great.
Now, before someone jumps in to tell me, yes, real pretzels are yeast-raised; these baking powder pretzels are a quick bread, and because of that their flavor may be more like a biscuit than a traditional bread. But they were delicious enough for me to consider them a real treat. And vegan Weight Watchers will be interested in knowing that each vegan soft pretzel is 3 points.
How to Make These Easy Vegan Soft Pretzels:
Making these pretzels is pretty simple, but to guide you through the process, I took photos of each step.
First, blend the tofu with a little lemon juice (exact amounts are in the recipe below) until it’s completely smooth. The lemon juice adds some of the tanginess that yogurt would have and silken tofu doesn’t. I used a food processor because I thought getting the tofu mixture out would be easier than from the container of my Vitamix. Next time I will use my Vitamix to get it silky smooth without the starting, stopping, scraping down, and repeating that I needed to do in my food processor.
Pour the blended tofu into a bowl and add the flour (self-rising or a mix as noted in the recipe below.) Mix it well, turn it out onto a floured board, and kneed a few times until it sticks together. Cut it into 5 equal pieces.
Roll each piece of dough between your hands to form 5 ropes of dough between 12 and 14-inches long.
Form each rope of dough into a pretzel shape. Make an “O” with a twist at the top. Then twist again and bring the ends over the “O.”
Place the pretzels on a parchment-covered baking sheet. Brush each one with a little aquafaba (liquid from cooked or canned chickpeas) and sprinkle with coarse salt or Everything Bagel Sesame Seasoning. Bake in a preheated oven as directed below. At the end of the baking, turn your oven to broil to slightly brown the tops and watch constantly . Don’t leave or they may burn!
Serve with mustard or your favorite pretzel condiment!
I used unbleached white flour with baking powder and salt added, but you can make these even more easily by using self-rising flour. I’ve included instructions for both. White whole wheat flour may also work, but I haven’t tested them using it.
Easy Vegan Soft Pretzels
In less than an hour, you can be enjoying these light, oil-free pretzels. They're the perfect snack for Weight Watchers or any low-fat vegan diet.
Ingredients
12.3 ounces extra-firm silken tofu (or 1 1/4 cups plain vegan yogurt)
1 teaspoon lemon juice (omit if using yogurt)
1 1/4 cups unbleached flour (or self-rising flour and omit baking powder and salt)
1 1/2 teaspoons baking powder (omit if using self-rising flour)
1/2 teaspoon salt (optional if using self-rising flour)
2 tablespoons aquafaba (liquid from canned chickpeas)
coarse salt
Everything Bagel Seasoning (optional)
Instructions
Place the tofu and lemon juice in a blender or food processor. Blend until completely smooth, stopping to scrape down the sides of the container to get all the bits blended. (Skip this step if using plant-based yogurt.)
Place the flour in a mixing bowl. If you're using plain flour, add the baking powder and salt and mix thoroughly. Pour in the tofu mixture and mix until a soft dough forms.
Turn the dough out onto a floured board and knead gently about 10 times or until the dough holds together. Divide it into 5 equal pieces.
Preheat oven to 350F.
Lightly flour your hands. Roll each piece of dough between the palms of your hands until a rope begins to form. Put it down on on the floured board and roll it back and forth between your hands until it's between 12 and 14 inches long (longer is better.)
Form the rope of dough into a pretzel shape (see photo above) and place it on a baking sheet lined with parchment paper. Repeat with all the pieces of dough. Brush the tops lightly with aquafaba and sprinkle with coarse salt or Everything Bagel seasoning.
Bake at 350F for 22-25 minutes. Then, leaving the pretzels in the oven, turn the oven to broil and WATCH THEM until the tops begin to lightly brown, 2-3 minutes. Be careful not to burn them. Remove from oven and serve warm.
Refrigerate any leftovers. May be reheated in a toaster oven.
Notes
Using silken tofu, each pretzel is 3 points on Weight Watchers Freestyle program. Using yogurt will increase points, calories, and fat.
Nutrition Facts
Easy Vegan Soft Pretzels
Amount Per Serving (1 pretzel)
Calories 152 Calories from Fat 9
% Daily Value*
Total Fat 1g 2%
Saturated Fat 0g 0%
Sodium 423mg 18%
Total Carbohydrates 26g 9%
Dietary Fiber 1g 4%
Protein 8g 16%
* Percent Daily Values are based on a 2000 calorie diet.
I baked the pretzels on the Bake setting in my Breville Smart Oven Air. The air fryer setting might also have worked. If anyone tries air frying them, please let me know what settings worked for you.
I’m eager to try this dough as a pizza crust and perhaps as a bagel or bun. I’ll update the post to let you know how that goes.
Please Pin and share:
I participate in Amazon’s affiliate program; if you buy something through one of my links, I may receive a small commission. I’m not affiliated with Weight Watchers in any way, other than being a paying customer.
Source: https://blog.fatfreevegan.com/2019/01/easy-vegan-soft-pretzels.html
0 notes
Text
15 Healthier Gluten Free Desserts for Summer
New blog post! Since summer is right around the corner and it's officially the start of Celiac Awareness Month this May, I thought it would be a good time to revisit one of my popular posts from last year (8 Healthier Gluten Free Desserts for Summer) and share 15 of my favorite gluten free desserts at the moment that are a bit on the healthier side.
Now, I'm all about eating full-fat vegan ice cream and sugar-filled chocolate. But since I do have a pretty strong sweet tooth, I try to sneak in healthier options where I can. The best part? All of the products I'm sharing may be a little healthier...but they still taste pretty dang tasty! (And just as a FYI, this post is totally unsponsored, though I did receive a few of these products as samples or prizes from giveaways. And while many of the products I'm mentioning are certified gluten free, some are not and I always encourage people to do their own research to determine what products are the right fit for them!).
So without further adieu, let's celebrate summer (and Celiac Awareness Month) by digging into some very tasty gluten free desserts!
1. Dessert Chickpeas from Saffron Road and The Good Bean
My first introduction to sweet chickpeas was The Good Bean's cinnamon chickpeas. They're crunchy, lightly spiced and kind of taste like a healthier, crunchier version of a churro. If you want even more dessert-y options, check out Saffron Road's certified gluten free dessert chickpeas. My personal favorites are the chocolate-coated ones - there's just something so addictive about a rich chocolately shell around a light, crunchy chickpea!
2. Alter Eco Coconut Clusters
If you like coconut, you'll love Alter Eco's certified crunchy chocolatey coconut clusters, which are certified gluten free, soy free, non-GMO and free of artificial flavors. All three flavors feature dark chocolate, but one has cherry and almond butter and another has some seeds for extra crunch. My favorite part is definitely how light and crispy these clusters are!
3. Taza Chocolate's Chocolate Covered Nuts
Not an almond fan? You can still enjoy some dangerously delicious chocolate-coated nuts thanks to Taza Chocolate! All of their dark chocolate covered nuts are certified gluten free, soy free, vegan and organic. Let me just say that dark chocolate takes hazelnuts to a whoooole new level.
4. Sejoyia Coco-Thins and Coco-Roons
These gluten free, healthy cookies are definitely not your Grandma's recipe...but that doesn't mean they're not delicious! They offer thick, chewy Coco-Roons and thin, crispy Coco-Thins. My hands-down favorite flavor is Salted Caramel, though I haven't found a flavor I haven't liked. Besides being certified gluten free, these healthy cookies are also paleo and vegan.
5. Tosi's SuperBites
Do you like trail mix? Granola? A healthy dessert with a good crunch? Then you'll love Tosi's SuperBites, which are organic, gluten free and vegan. They're made with ingredients like nuts, seeds, cane sugar and cassava syrup. And while they are definitely sweeter than traditional trail mix or granola, these SuperBites have the same satisfying crunch.
I could seriously eat Tosi SuperBites straight out of the package, but I loved crumbling them on dairy free yogurt or smoothie bowls. The SuperBites come in a variety of flavors, but I've so far just tried the traditional Cashew and Almond SuperBites, and loved them both. Of course, that doesn't mean I wouldn't be 1000% game to try out the blueberry, dragonfruit, peanut, peanut chocolate, and cashew coconut flavors. ;)
6. Lillabee Grain Free Brownie Thins
Thin mints and crunchy brownies just got a paleo makeover with these gluten free cookies. These cookies are high in protein, and while they don't taste exactly like Girlscout Cookies or Thin Mints, they are definitely a satisfying and crunchy chocolate treat. I got to try their Classic Chocolate Brownie, Salted Caramel and Chocolate Mint flavors and they all got two thumbs up from me! I also just recently learned that these gluten free cookies are now being made in a dedicated gluten free facility (and in the process of changing their packaging to reflect this), which is always good news.
7. Skinny Dipped Almonds
Would you believe that before my celiac disease diagnosis, I rarely (if ever) ate nuts or seeds? Now they're some of my favorite snacking and dessert material...especially when they come in flavors like dark chocolate raspberry, dark chocolate cocoa, dark chocolate peanut butter, dark chocolate mint and dark chocolate espresso. Which brings us to Skinny Dipped Almonds!
These are gluten free (though they do contain dairy, soy and are processed in the same plant as peanuts), high in protein and fiber and make for a yummy sweet snack...or a healthy dessert.
8. Lily's Sweets Chocolate
I actually got my first taste of Lily's Sweets chocolate thanks to my monthly gluten free Love with Food box (I'm an ambassador, FYI!). In it, I got a Sour Cherry Double Chocolate Crunch bar...and within a few months of opening the box, it was gone! I loved the small cherries and extra chocolate chips scattered throughout the chocolate bar, and it had the perfect level of sweetness, despite being sweetened with sugar instead of stevia. Lily's Chocolate is also certified gluten free, and they offer a variety of (vegan) dark chocolates and milk chocolates. And if you're interested in checking out Love with Food so you can get the same kind of delicious, monthly surprises, click this link for 40% off your first box --> Gluten Free Box 40% Off First Box Purchase.
9. Mint Chocolate Ketobars
Technically, Ketobars are a gluten free and vegan snack bar, but these seriously taste like thin mints to me. They’re refined sugar free and made with only ingredients: Chocolate, Almonds, Coconut, Erythritol, Cocoa, Salt, Stevia and Peppermint. Note that they do contain artificial sweeteners so steer clear of those aren’t your tummy’s thang!
In terms of taste, though, Ketobars are unlike any other gluten free energy bar I’ve ever tried. (And if you’ve read my snack bar reviews...you know I’ve eaten quite a few!). They have a dense, crumbly and melt-in-your-mouth texture and taste super rich and chocolatey. Ketobars also come in serval other flavors, but this is the only one I’ve tried so far!
10. Emmy's Organics Coconut Cookies
Another awesome healthy dessert for coconut lovers is the organic, certified gluten free, and vegan coconut cookies from Emmys Organics. These definitely don’t taste like “traditional” cookies but I love how dense, slightly sweet and almost “buttery” these treats are. They come in tons of different flavors - from chocolate chip (a personal favorite) to matcha to dark cacao. If you like coconut and soft textures in your desserts, you should definitely add these gluten free cookies to your shopping list.
Plus, Emmy’s Organics just released new chocolate-coated bites, which are described as “bite-sized pieces of cookie dough covered in rich, dark chocolate.” I have yet to try any of these but considering how much of a chocoholic I am, I’m definitely keeping an eye out for them!
11. Undercover Quinoa’s Crispy Quinoa Snacks
This is another healthy dessert I won in an Instagram giveaway, and oh my golly goodness - Undercover Quinoa makes some dang delicious gluten free desserts. I’d compare these snacks to chocolate bark, since the quinoa definitely gives them a crunch, but they are a lot less dense since the base is quinoa instead of chocolate. The quinoa snacks come in a variety of flavors, including Milk Chocolate, Dark Chocolate + Blueberry, Dark Chocolate + Seeds, Milk Chocolate + Currants and Dark Chocolate with Sea Salt. The last flavor was definitely my least favorite since the salt tasted very prominent, but I loved all the others and highly recommend these treats if you want a light, crispy dessert.
12. Zhuzh! It Up Cookies
This may not be the easiest cookie to pronounce (apparently, it's zhoozh "oo" as in "good"), but it is one of the tastiest healthy cookies out there. Besides being certified gluten free, Zhuzh! cookies are vegan, peanut free, full of added probiotics and made with healthier flours like sprouted beans, grains and seeds. (FYI - one of those grains is oats, so if you can't tolerate gluten free oats, these cookies aren't the right choice for you).
I only enjoy a little of each cookie at a time because I can't tolerate gluten free oats in large amounts...but even small bites made it clear how good every flavor was! All the cookies are a lil' crumbly, a lil' chewy and very addictive. My hands-down favorite flavor was Double Chocolate because...well...chocolate! And I'm a big fan of the big chocolate chunks used in that flavor and my second favorite, regular Chocolate Chip. The biggest surprise, though, was the Gingerful flavor. Well-spiced, extra crumbly and a big two thumbs up from me.
13. Prana's Superfood Chocolate Bark
What happens when you combine superfoods like maca, matcha and chia seeds with organic chocolate bark? You get something crazzzy delicious, of course! I'm a BIG chocolate lover, so when Prana reached out to me with some samples, I couldn't say no. I love how their chocolate bark contains crunchy components like coconut chips, puffed rice and almonds. Plus, their barks are certified gluten free, organic and vegan. You can't go wrong!
14. Superseed Well Donuts
Donuts...that are also paleo, vegan, preservative-free and a decent source of protein and fiber? Dreams can come true! Superseed Well's gluten free donuts are made with a mix of seven different seeds, and while they definitely don't taste like a traditional light, fluffy, fried donut...they are a yummy paleo dessert. They are very dense, moist and remind me a bit like a homemade energy ball or fudge. I'm a big fan of the Chocolate Glazed donuts but also enjoyed the Wild Blueberry donuts.
15. Globe Trekker Trail Mix from Foods Alive
And since I've already mentioned trail mix enough times to make my stomach growl...it seems fitting to end this post on my fave trail mix from another company I'm an ambassador for: Foods Alive. As with all of Foods Alive's products, this trail mix is gluten free but it is also vegan, raw, organic and non-GMO. It features jungle peanuts, cacao nibs, goji berries and white mulberries, and if you love a chocolate and peanut butter combo...you'll really love this combo of chewy, chocolately and peanuty! I often eat it straight out of the bag but as anyone who follows my Instagram knows, it also makes a delicious topping for vegan ice cream and yogurt.
The Bottom Line of Enjoying Gluten Free Desserts this Summer
I don't know about you, but summer is a season full of delicious foods. Berries are finally in season, it's warm enough to enjoy smoothie bowls and ice cream without a heater and my culinary secret weapon - AKA, zucchini - is always on sale.
So whether you try any of the healthier gluten free desserts I've listed above or not...I hope you DO eat something gluten free and delicious, and enjoy a happy mix of healthy and unhealthy treats. And if you do need some inspiration or ideas of what gluten free desserts to try next - well, that's what this blog post is for! In case you need even more ideas, though, check out my posts 8 Healthier Gluten Free Desserts for Summer and 45 Healthier Gluten Free Dessert Recipes for Valentine's Day.
What's your favorite "healthier" dessert? Tell me in the comments!
via Blogger http://bit.ly/2WlkEwI
0 notes
Text
New Post has been published on Health bolt
New Post has been published on http://www.healthbolt.net/cooking/how-to-cook-egg-whites-healthy/
How To Cook Egg Whites Healthy
Contents
Decadent chocolate cake
Nutrition experts agree
Rice healthy instant pot chicken
Cholesterol. … alternatively
Whether you’re looking for a healthy alternative or simply have some leftovers after a different recipe, there are many options for cooking egg whites. Egg whites are… SUBSCRIBE. FEEL GOOD. Wellness … How to Cook Egg Whites. How to Cook Egg Whites By Rachel Asher
Here are the healthiest ways to cook and eat eggs. … a protein in the egg whites called avidin binds to biotin, making it unavailable for your body to use. … Here are five tips to cook super …
There are two kinds of flourless cakes- one that uses the foam from egg whites and the other that uses … opt for other nut flours or rice flours to make yourself a decadent chocolate cake. ALSO READ …
Should you order an egg-white omelet or embrace the yolks … nutrition experts agree that the protein and vitamins in eggs make them a healthy option. “I would say eggs are very healthy, with 13 esse…
It seems like it should be easy to make a fried egg. And yet, the only thing that’s easy about it is how easy it is to screw up. In my kitchen, the edges of the white are more likely to burn than turn …
However, egg whites do not contribute significantly to your intake of any of these vitamins. Cooking With Egg Whites Pair egg whites with other healthy foods for nutritious and tasty meals. Try starti…
Best Way To Cook Healthy Chicken Breast Stay ahead of the game (at least where eats are concerned) by cooking chicken into pre-portioned, healthy … These 21 chicken breast recipes are simple, but they’re anything but boring. Taste the rai… The most effective way to brown ground chicken breast is to cook it in oil over medium-high heat. Use the least amount of oil possible to keep it from sticking to the pan. The Maillard reaction that c… These healthy ways to cook chicken will make you rethink your dinner. … Best Grilled Chicken Breast This marinade is the opposite of boring. … Our new favorite way to eat chicken parm. Get the … Nov 21, 2018 · Either way, you won’t diminish the health benefits of chicken, which is a good source of protein as well as vitamins A, B and D. A lean, 3-ounce, skinless chicken breast amounts to only about 140 calories, 3 grams of total fat and 1 gram of saturated fat. Cooking For Healthy Healing Ayurvedic Cooking for Self healing [usha lad, Vasant Lad] on Amazon.com. *FREE* shipping on qualifying offers. Ayurveda, the ancient healing art of India, teaches that food plays an essential part in one’s health and sense of well-being. Here is an authentic guide of the Ayurvedic approach to food and tasty vegetarian cooking. The recipes are formulated using herbs and spices to help balance … Healthy Batch Cooking Recipes Ready in 15 mins, Joe Wicks’ Lean in 15 Goan fish curry is a great meal to batch cook and freeze … It’s a great family dinner and this tasty mushroom risotto recipe is also healthy. Joe Wicks’ hallo… Cooking Light Chicken Recipes Healthy The people have spoken! We have compiled a list of 15 of the best-rated chicken recipes from Cooking Light. From roast chicken to pizza to sandwiches, these simple and flavorful recipes will certainly please your family and dinner guests. recipe: Spicy Honey-Brushed Chicken Thighs Food and fitness … to share two of his go-to healthy recipes from his new cookbook "fit men cook: 100+ meal Prep Recipes fo… Easy Cook rice healthy instant pot chicken and Rice is the perfect comfort food all year round! Make it entirely in the electric pressure cooker to save on dishes! Either chicken breast and white rice or chicken thighs and brown rice. In addition to cooking things like meat, chicken, and dried beans at lightning speed, it also moonlights as a yogurt maker an… GREEN BAY (WLUK) — Need a jump start for healthy eating in 2019 … Transfer to a small bowl and let cool. 1.Cook rice as di… Welcome to my recipe collection! It’s filled with easy and healthy recipes for quick meals. Spend less time in the kitchen and eat better than ever! healthy chicken Dishes To Cook After learning to cook healthy dishes for himself … and rosemary and cook for another two minutes. Add the chicken, the bro… pre cooked healthy meals For The Week Quick-Fix Vegetarian: healthy home-cooked meals in 30 Minutes or
Healthy Ways to Cook Eggs Sheri Kay Eggs can be part of a healthy diet even though they’re high in saturated fat and cholesterol. … alternatively, separate the yolk and use only the egg whites. One scrambled egg white has 17 calories, 3.6 grams of protein and almost no fat. Boost the nutritional value of scrambled eggs by adding chopped …
How To Cook Catfish Healthy Although the classic Cajun stew, étouffée, is usually made with crayfish, it’s also delicious with catfish. The cooked butter-and-flour mixture, also called a brown roux, gives the sauce a nutty flavor. If you’re looking for a fish that’s tasty, low in fat and calories, and high in protein — and that can be prepared a number of ways — catfish could be your answer. A 3-ounce serving of catfish contains approximately 1 gram of saturated fat, 100 calories and 13 grams of protein. Basa, also known as swai, pangasius and panga, is a type of river catfish native to Southeast Asia. It is usually farm raised throughout the Mekong River Delta region and then exported around the world. A relatively inexpensive fish, it is quite high in protein and low in calories. Directions. Wash the catfish fillets and cut them into 1-inch pieces; set aside. Fry the bacon for 2 to 3 minutes in a large heavy saucepan; add the onion and bell pepper and cook until tender. Best Way To Cook Healthy Chicken Breast Stay ahead of the game (at least where eats are concerned) by cooking chicken into pre-portioned, healthy … These 21 chicken breast recipes are simple, but they’re anything but boring. Taste the rai… The most effective way to brown ground chicken breast is to cook it in oil over medium-high heat. Use the least amount of oil possible to keep it from sticking to the pan. The Maillard reaction that c… These healthy ways to cook chicken will make you rethink your dinner. … Best Grilled Chicken Breast This marinade is the opposite of boring. … Our new favorite way to eat chicken parm. Get the … Nov 21, 2018 · Either way, you won’t diminish the health benefits of chicken, which is a good source of protein as well as vitamins A, B and D. A lean, 3-ounce, skinless chicken breast amounts to only about 140 calories, 3 grams of total fat and 1 gram of saturated fat. Cooking For Healthy Healing Ayurvedic Cooking for Self healing [usha lad, Vasant Lad] on Amazon.com. *FREE* shipping on qualifying offers. Ayurveda, the ancient healing art of India, teaches that food plays an essential part in one’s health and sense of well-being. Here is an authentic guide of the Ayurvedic approach to food and tasty vegetarian cooking. The recipes are formulated using herbs and spices to help balance … Healthy Batch Cooking Recipes Ready in 15 mins, Joe Wicks’ Lean in 15 Goan fish curry is a great meal to batch cook and freeze … It’s a great family dinner and this tasty mushroom risotto recipe is also healthy. Joe Wicks’ hallo… Cooking Light Chicken Recipes Healthy The people have spoken! We have compiled a list of 15 of the best-rated chicken recipes from Cooking Light. From roast chicken to pizza to sandwiches, these simple and flavorful recipes will certainly please your family and dinner guests. recipe: Spicy Honey-Brushed Chicken Thighs Food and fitness … to share two
How To Cook Chicken Breast Healthy In Oven After learning to cook healthy dishes … two minutes. Set oven to 420 degrees F. Mix together the ingredients for the season… Cooking For Healthy Healing Ayurvedic Cooking for Self healing [usha lad, Vasant Lad] on Amazon.com. *FREE* shipping on qualifying offers. Ayurveda, the ancient healing art of India, teaches that food plays an essential part in one’s health and sense of well-being. Here is an authentic guide of the Ayurvedic approach to food and tasty vegetarian cooking. The recipes are formulated using herbs and spices to help balance … Healthy Batch Cooking Recipes Ready in 15 mins, Joe Wicks’ Lean in 15 Goan fish curry is a great meal to batch cook and freeze … It’s a great family dinner and this tasty mushroom risotto recipe is also healthy. Joe Wicks’ hallo… Cooking Light chicken recipes healthy The people have spoken! We have compiled a list of 15 of the best-rated chicken recipes from Cooking Light. From roast chicken to pizza to sandwiches, these simple and flavorful recipes will certainly please your family and dinner guests. Recipe: Spicy Honey-Brushed Chicken Thighs Food and fitness … to share two of his go-to healthy recipes from his new cookbook "fit men cook: 100+ meal Prep Recipes fo… easy cook rice healthy instant pot Chicken and Rice is the perfect comfort food all year round! Make it entirely in the electric pressure cooker to save on dishes! Either chicken breast and white rice or chicken thighs and brown rice. In addition to cooking things like meat, chicken, and dried beans at lightning speed, it also moonlights as a yogurt maker an… GREEN BAY (WLUK) — Need a jump start for healthy eating in 2019 … Transfer to a small bowl and let cool. 1.Cook rice as di… Welcome to my recipe collection! It’s filled with easy and healthy recipes for quick meals. Spend less time in the kitchen and eat better than ever! healthy chicken Dishes To Cook After learning to cook healthy dishes for himself … and rosemary and cook for another two minutes. Add the chicken, the bro… pre cooked healthy meals For The Week Quick-Fix Vegetarian: Healthy Home-Cooked Meals in 30 Minutes or Less (Quick-Fix Cooking) [Robin Robertson] on Amazon.com. *FREE* shipping on qualifying offers. featuring 150 delicious recipes, Quick-Fix Vegetarian provides both novice and longtime cooks with practical and robust vegetarian dishes that can be prepared in less time than it takes to have a pizza delivered. I may not be the best cook … food that will last me throughout the week. Plus, I can make the food in the morning, set it, … The word “healthy” is probably … doesn’t have much cooking experience but wants to try something new in the kitchen. With 1… Healthy Cooking Classes For Kids Healthy Cooking From Scratch Recipes Healthy Cooking classes columbus ohio How To Start Cooking Healthy Start with kids – much can happen by changing school meals to form healthy and sustainable habits, early on. unhealthy food
3 Reasons Egg Whites Aren’t The Healthiest Choice … You also don’t need egg whites to be healthy, fit, or trim. … even if you cook the eggs. Though heat does destroy bacteria, some can …
0 notes
Photo

New Post has been published on https://jmuo.com/what-to-make-with-a-stand-mixer/
What to Make With a Stand Mixer
amzn_assoc_placement = "adunit0"; amzn_assoc_tracking_id = "fresh17-20"; amzn_assoc_ad_mode = "search"; amzn_assoc_ad_type = "smart"; amzn_assoc_marketplace = "amazon"; amzn_assoc_region = "US"; amzn_assoc_title = "Shop Related Products"; amzn_assoc_default_search_phrase = "cooking"; amzn_assoc_default_category = "Kitchen"; amzn_assoc_linkid = "51fe4d035c7af8dc5928e6f5e5b79c4e"; amzn_assoc_default_browse_node = "284507"; amzn_assoc_rows = "4"; amzn_assoc_design = "text_links";
[Photographs: Vicky Wasik]
So, you’ve found yourself in possession of a stand mixer. But what should you actually do now that you have one?
For starters, congratulate yourself. Stand mixers deliver a level of power and versatility that simply can’t be replicated with elbow grease or hand mixers. You can now make a wealth of new recipes, from cakes, cookies, and breads to sausage, meatloaf, brandade, and rillettes.
Then, take a look inside the box. Most stand mixers ship with a few basic attachments, with the option to purchase additional attachments to broaden the appliance’s range of applications. Our recommended mixer, the KitchenAid Pro (as well as all other mixers from KitchenAid), comes with a whisk, a paddle, and a dough hook. This article is organized by those three core attachments, including what they’re good for and our favorite ways to put them to work.
Before getting started, though, it’s worth checking to see whether your model has solid-metal gears—if they’re plastic (as is the case with the KitchenAid Artisan, for instance), the machine will be more susceptible to wearing out and stripping over time, so you’ll want to avoid particularly heavy duty tasks, like making the stiff dough for our homemade bagels.
The Whisk Attachment
Whipping and Beating
The first job that a stand mixer excels at is whipping the daylights out of stuff, whether it’s cream or egg whites. It’s great for aerating fluid mixtures—the stand mixer’s large and open balloon whisk, when combined with the motor’s power, produces more voluminous whipped cream and meringues than the narrow tines of a traditional whisk or the beaters of a hand mixer.
While it’s a relatively simple matter to whip cream or egg whites by hand, there are times when the stand mixer’s formidable power is particularly useful. French buttercream, for instance, requires whipping egg yolks, which is mechanically intensive. Swiss meringue, too, is tough to whip by hand, largely because the process requires that you add sugar up front, and sugar has the effect of delaying coagulation.
We shouldn’t undersell the ease with which a stand mixer whips things, either. Whipped egg whites aren’t just for meringues; they also play a crucial role in any soufflé, whether sweet or savory, since the air trapped in the whites is what gives soufflés their airy lift. The same principle is key to our effortless angel food cake, too, though the stand mixer doesn’t just make the recipe “effortless”—the whole technique is dependent on the stand mixer’s sheer power to bring ingredients together in the first place.
The whisk is also ideal for frosting: American, French, Swiss meringue, and Italian buttercreams are all made much simpler with the use of a stand mixer with a whisk attachment. (German and cream cheese buttercreams, as well as a quick and simple cream cheese frosting, also spend a little time with the whisk attachment, but they need some extra help from the paddle, which we’ll cover in the next section.)
And, finally, there are other creamy things, like our creamy whipped yogurt and creamy whipped…cream. Do note, though, that using a stand mixer to whip plain cream can quickly transform your airy dessert topping into solid butter. Thanks to the way in which sugar delays coagulation, though, a sweetened cream has a much lower risk of becoming overwhipped—recipes like no-bake cheesecake or the cream cheese frosting mentioned above can withstand some pretty serious whipping.
The Paddle Attachment
As opposed to the whisk, which is meant for cutting through mixtures, the wide, flat blades of a paddle attachment are designed to smear and fold, which makes it invaluable for processes like creaming.
Creaming
The goal of creaming is to repeatedly fold a combination of butter and sugar until you’ve created an expansive network of fat, air, and sugar crystals. The more air that’s trapped within the network, the greater your volume of dough will be (which means more cookies!), and the better your cakes, like this classic vanilla cake, will rise.
It’s technically possible to cream butter and sugar manually, but it’s incredibly labor- and time-intensive. And while any electrical mixing appliance will take care of the job in a fraction of the time, a powerful stand mixer has another advantage: temperature control. Creaming only works if the butter can stretch and expand, which means keeping it at or below 68°F, which is why bakers prefer to start with cool butter and cream as quickly as possible. You can attempt this with a hand mixer, but since they generally only work on softer, warmer butter, the results won’t be nearly as foolproof.
Mixing
The paddle is a great way to uniformly mix cookie doughs and cake batters. A badly mixed cookie dough will result in a few misshapen and malformed cookies, while a poorly mixed cake will rise (and look) funny. Meanwhile, recipes like the aforementioned German and cream cheese frostings benefit from being mixed by the paddle’s wide, flat blades—the thin tines of a whisk will leave you with a mound of cottage cheese–like curds instead of a smooth, airy, and light frosting that you can easily manipulate into beautiful swoops and whorls.
Mixing Meat
Brandade getting a whipping.
Because the paddle does not cut so much as it smears and folds, it’s also a great way to mix and emulsify meat for dishes like sausage. A food processor, by way of comparison, cuts and chops while it mixes, and breaking the meat’s protein strands will directly impact the texture of your final product (for more info, check out Kenji’s article on the science of sausage and salt). If you want to start making sausages (like Italian sausage, chorizo, or merguez) at home, a stand mixer is key: It helps to knead the meat—and, crucially, does so quickly enough to avoid melting its fat content—for sausages that are juicy and springy, rather than dry and crumbly.
What else can a stand mixer do for meaty mixes? It’s the tool responsible for the characteristic bouncy texture of these Swedish meatballs, for one. And for the best meatballs of your life, you’ll want a stand mixer by your side to quickly and effectively mix the panade (a bread crumb and milk mixture) with aromatics and a portion of the meat, before mixing in the rest of the meat by hand. This leads to light meatballs that nevertheless hold their shape well and have evenly distributed seasoning.
Finally, for preparations like rillettes and brandade, where the meat should be shredded rather than finely chopped or puréed, a paddle does the job quickly and cleanly.
The Dough Hook
Holla at this challah.
Finally, there’s the dough hook. Making bread is certainly doable without a stand mixer and dough hook attachment, but high-fat doughs like brioche are extremely difficult to make without them. And while some doughs are actually better when made in a food processor, like our New York–style and Sicilian pizza doughs, others really do benefit from being spun around by the dough hook, like Neapolitan-style pizza dough. Then there are breads like our simple crusty white bread; though it’s possible to incorporate ingredients and knead the dough by hand, it’s far simpler use the dough hook for both steps (and far less messy, for what it’s worth).
The benefits of using the dough hook aren’t just about convenience. The relatively slower speed at which it kneads (compared to, say, a food processor) means there’s little risk of over-kneading or overheating, which means you don’t have to watch it like a hawk; you can clean up your kitchen or prep other things while your dough is in the stand mixer. Using the dough hook also allows you to adjust your dough when necessary, adding water or flour if it looks a little too dry or wet, respectively, and it’s great for adding mix-ins, like nuts or dried fruit.
So, What Should You Make First?
If you want to put your brand-spanking-new stand mixer through its paces, I suggest making Stella’s one-bowl cinnamon rolls. Not only are they delicious, but they use both the dough hook and the paddle attachment to wonderful effect. Looking to take your whisk attachment for a spin? Stir up some extra-creamy Greek yogurt and serve it with virtually anything you like. Or, if you’re feeling a bit more ambitious, make yourself that aforementioned effortless angel food cake, just to see how easy it really is to make something that is so ethereally perfect, and wouldn’t exist at all without the stand mixer.
What About All the Other Attachments?
While we haven’t yet completed an exhaustive test of every KitchenAid attachment on the market, there are a couple we can wholeheartedly recommend. The pasta roller set takes all of the frustration and fussiness out of making fresh pasta, and, unlike the manual alternatives out there, it’s incredibly easy and efficient to operate on your own. Hello, homemade ravioli, tortellini, and linguine!
Meanwhile, the food grinder attachment is a great option if you want to start grinding your own meat or experimenting with sausage-making. Because it’s an attachment, you already know that the hardest-working part of your grinder—the motor—is going to be a workhorse that can power through even the toughest grinding projects. We also like that you can grind the meat directly into the bowl, then attach the bowl to the machine and immediately start mixing it with the paddle to develop protein. It’s a real time-saver.
amzn_assoc_placement = "adunit0"; amzn_assoc_search_bar = "true"; amzn_assoc_search_bar_position = "bottom"; amzn_assoc_tracking_id = "fresh17-20"; amzn_assoc_ad_mode = "search"; amzn_assoc_ad_type = "smart"; amzn_assoc_marketplace = "amazon"; amzn_assoc_region = "US"; amzn_assoc_title = "Shop Related Products"; amzn_assoc_default_search_phrase = "cookware"; amzn_assoc_default_category = "All"; amzn_assoc_linkid = "b45319dac495d29e17b5eff312392025";
Source link
0 notes
Text
Pull Up A Chair's Arugula, Grape & Ricotta Grilled Pizza-Famous Fridays
So, so much to talk about today. Not only is it Friday, but I am finally, finally getting back to Famous Fridays! Were you missing them? Maybe not 😘. Hmmmnnn…
Anyhoo, just ‘cause it’s been a while (last one was in May!) and some of you are new around here, I’ll do a brief talk-thru of the concept behind FF posts. When I first started to write the blog, part of my motivation to do so was to share my own family recipes. The other part was to share my favorite recipes from other cooks, chefs, pastry makers and cookbook writers, etc. Personally, I get so much inspiration from others (I really love cookbooks and have a scarily large collection) and I thought it would be a great idea to devote one day a week to celebrating the food genius of others. It has definitely made me cook and think more outside of the box, which is always a good thing and been mighty yummy too! Flash forward almost 5 years and there are now 153 Famous Fridays posts— take a look when you get a chance—it’s quite an eclectic category. Okey-, dokey that concludes my little FF primer! I promise to try posting more consistently!!
Today we’re talking homemade grilled pizza topped with a light but luscious mix of ricotta cheese, arugula and grapes which is the brainchild of Tiffani Thiessen, not only star of Saved By The Bell and 90210, but also of this kinda amazing cookbook, Pull Up A Chair: Recipes From My Family to Yours. Guys, this actress can cook!!
I’m always a little skeptical about celebrity cookbooks—like if they weren’t famous, would they have gotten the cookbook deal? I can honestly say with Pull Up A Chair, that the answer is a resounding YES!! I love this cookbook. It’s chock-full of unfussy, family-friendly recipes and gorgeous photos that make you want to run into the kitchen and start cooking. And it definitely leans toward that California-style of light, seasonal, sustainable cooking which is another big plus in my book! I’ve already made Tiffani’s wonderful Raspberry Jam, her Tomato Jam (my husband loved it) and her Yogurt Pancakes and I can’t wait to make dishes like Citrus Brick Chicken with Sweet Barbecue Sauce, Chocolate Chip Brown Butter Banana Bread, Southern Cali Salad with Farro, and Beef, Mushroom Stroganoff with Creamy Polenta and more. I just know they’re all going to be so great because this Arugula, Grape & Ricotta Grilled Pizza is a knockout winner and has seriously captured our hearts! I’ve made it three times in the last 2 weeks!
If you’ve never made grilled pizza dough from scratch or have and it hasn’t gone exactly smoothly, I urge you to try this version. The dough, which is a white and whole wheat mix, comes together quickly and easily and is a dream to handle.
Honestly, I find it a lot easier than making pizza in the oven because it cooks in a just a few minutes on the grill and because you can make it ahead, like much earlier in the day, and then reheat it in the oven when you add the toppings.
Plus, I love that smoky, charred flavor you get from grilling the dough!
It would be great just as is, without any topping!
But that would also be a shame because the sort of odd mixture of warm, creamy ricotta, sweet fresh red grapes and slightly peppery arugula topping the chewy dough is divine!! It’s just the best mix of crunchy, chewy and creamy! Totally hits the bliss point!
The original recipe tops it all off with lemon zest and lemon oil but I opted for a drizzle or two of balsamic vinegar instead and we are loving it!
It’s such a pretty, light, summery treat—works great as an appetizer or main course—and you can totally change up the toppings—I’ve also made a version with tomato sauce and parmesan cheese that was recently inhaled.
Seriously, before the summer is over, you owe it to yourself to toss some of this dough onto your grill and experience the joys of grilled pizza. Maybe this weekend? And while you’re at it, pick up a copy of Pull Up A Chair and experience the joys of all the rest of Tiffani’s recipes. Have a good one, enjoy something yummy with family and friends and I’ll be back next week with more summer food and fun!
Pull Up A Chair’s Arugula, Grape & Ricotta Grilled Pizza-Famous Fridays
Makes 6-8 servings
Prep Time for Crust: 20 minutes, plus 1 hour for dough to rise; Cook Time: 5 minutes; Assembly Time: 5 minutes, plus another 6 minutes for ricotta to melt a bit
Ingredients
For the Crust
2 1/4 teaspoons active dry yeast (about one .25 ounce packet)
2 teaspoons sugar
3/4 cup warm water
1 cup unbleached, all-purpose flour
1 cup whole wheat flour
1 teaspoon kosher salt
2 tablespoons extra-virgin olive oil, plus additional for greasing bowl and grill grates
For the Topping
1 cup ricotta cheese
2 cups loosely packed baby arugula
1 cup red grapes, sliced in half
Balsamic vinegar
The Recipe
1. To make the crust: Whisk together the yeast, sugar and warm water in a small bowl and let sit in a warm place for about 10 minutes, until foamy and risen.
2. Meanwhile, whisk together the flours and salt in a large bowl and make a well in the center. Pour in the yeast mixture and the 2 tablespoons oil and use a fork to mix everything together until a dough forms.
3. Flour a board lightly and turn the dough out onto it. Knead the dough until it is smooth and elastic, about 5 minutes. Add a bit more flour if necessary to keep it from sticking. No need to wash the board at this point.
4. Coat a clean, large bowl with a little bit of oil and add the dough, turning once to coat the dough with the oil. Cover the bowl with a piece of plastic wrap or a clean dish towel and place the bowl in a warm place to rise, until the dough is doubled in size, about 1 hour.
5. Generously brush the grates of your grill with olive oil and preheat.
6. Turn the dough out onto the lightly floured board and cut in half. Place one half back into the bowl and keep covered. Stretch the other half into a 14-inch oval or rectangle, so that it’s about 1/4 -inch thick—it’s supposed to be rustic looking—and transfer to a baking sheet. Repeat the procedure with the other half.
7. Use a large spatula and tongs to transfer the dough to the grill. Cook for a minute or two until you see some nice char marks and then flip over so that the other side can get cooked too. Watch carefully—this can burn really quickly. Remove from the grill and place on a large rimmed baking sheet. Repeat with the other piece of dough. You can definitely make this early in the day to use later and just leave out at room temperature. Or you can use it right away.
8. To make the topping: Preheat oven to 400ºF. I like to whip the ricotta briefly with a handheld mixer but you could definitely just use it as is. In either case, spread about 1/2 cup of the ricotta on one of the grilled doughs and bake for 6 minutes. Top with the arugula and grapes. Drizzle with some balsamic vinegar and use a pizza wheel or sharp knife to cut into pieces. Serve immediately.
Enjoy!
Note: Recipe adapted Pull Up A Chair by Tiffani Thiessen. I tinkered with the topping and subbed in balsamic vinegar for the lemon zest, lemon oil, and flaky sea salt.
#Active Dry Yeast#Sugar#Warm Water#Flour#Whole Wheat Flour#Kosher Salt#Olive Oil#Ricotta Cheese#Baby Arugula#Red Grapes#Balsamic Vinegar
0 notes
Last Seen Blogs

castaella
wrong.

supplier-genset-online
Supplier Genset Online

krakencommissions
CuddlyKraken's Art and Commissions

t-o-v-i-blog
Anything and Everything

dumb-fallen-angel
Fly like a Three-Six