#threaded rod galvanised
Video
youtube
🏗🌏Make Fixing Dexterity👉FIXDEX threaded rods & B7 & din975
#youtube#HDG threaded rods#galvanized threaded rod#galvanised rod#galv threaded rod#hot dipped galvanized threaded rod#threaded rod galvanised#m20 galvanised threaded bar#Threaded Rod Galvanized#A193 B7#b7 threaded rod#astm a193#b7 bolts#b7 studs#a193 b7 bolts#b7 stud bolts#stud bolt a193 b7#astm a 193 gr b7#b7 bolt material#a193 b7 threaded rod#a193 b7 round bar#A193 Grade B7 Bolts#Grade B7 Bolts#Stainless Steel ASTM A193 B7 Bolts Manufacturer
0 notes
Text

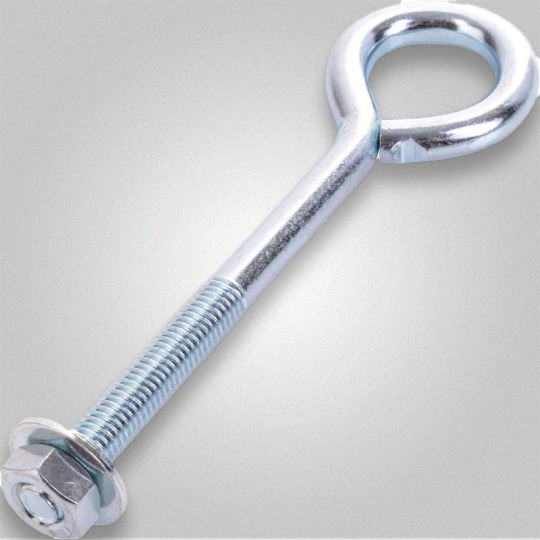
Idoia Leache, Ane, 2023, Galvanised steel and threaded rods, 20 x 80 x 60 cm
1 note
·
View note
Text
Choosing the Right Stud Bolts: Insights from Delta Fitt Inc.

Delta Fitt Inc., one of the leading stud bolt manufacturers in India, provides insights into choosing the right stud bolts for your specific applications.When it comes to securing industrial equipment and structures, the choice of fastening hardware is critical. Among the various types of fasteners, stud bolts stand out for their reliability and strength, making them an essential component in many industries.
Understanding Stud Bolts
Stud bolts are threaded rods with two heavy hexagon nuts, widely used in industries such as petrochemical, oil and gas, power generation, and construction. They are primarily used for flange connections in pipelines and other high-stress environments where secure and stable fastening is crucial.
Key Factors to Consider When Choosing Stud Bolts
Material SelectionThe choice of material is a fundamental consideration when selecting stud bolts. Different materials offer varying degrees of strength, corrosion resistance, and temperature tolerance. Common materials include carbon steel, stainless steel, alloy steel, and exotic alloys such as Inconel or Monel.
Carbon Steel: Often used in applications where cost is a significant factor, carbon steel provides good strength but limited corrosion resistance. It's suitable for non-corrosive environments.
Stainless Steel: Known for its excellent corrosion resistance, stainless steel is ideal for harsh environments, including marine and chemical applications.
Alloy Steel: Offers higher strength and is often used in high-pressure and high-temperature applications. However, it requires protective coatings to prevent corrosion.
Exotic Alloys: For extreme environments, such as offshore platforms or chemical plants, exotic alloys provide superior performance, albeit at a higher cost.
Thread Type and Size
The thread type and size are crucial for compatibility and the ability to withstand loads. Standard thread types include Unified National Coarse (UNC), Unified National Fine (UNF), and metric threads. The choice depends on the application requirements and the standards followed in the region.
UNC Threads: These are common in the United States and are preferred for general-purpose applications.
UNF Threads: Used where finer adjustments are needed, such as in automotive or aerospace industries.
Metric Threads: Standard in most parts of the world, particularly in Europe and Asia.
Coatings and Finishes
To enhance the durability and performance of stud bolts, various coatings and finishes can be applied. These include galvanising, zinc plating, and other specialised coatings. The choice of coating depends on the environment in which the bolts will be used.
Galvanising: Provides excellent corrosion resistance and is suitable for outdoor and marine applications.
Zinc Plating: Offers good corrosion resistance and is often used for indoor applications or mild environments.
Special Coatings: For highly corrosive environments, specialised coatings like PTFE or Xylan can provide superior protection.
Standards and CertificationsCompliance with industry standards and certifications is essential for ensuring the quality and reliability of stud bolts. Standards such as ASTM, ASME, DIN, and ISO specify the requirements for materials, dimensions, mechanical properties, and testing methods.
At Delta Fitt Inc., adherence to these standards is a top priority. As one of the leading stud bolt manufacturers, they ensure that their products meet or exceed industry requirements, providing customers with peace of mind and confidence in the products they use.
Conclusion
Choosing the right stud bolts is a critical decision that can impact the safety, reliability, and efficiency of industrial operations. By considering factors such as material selection, thread type and size, coatings and finishes, and adherence to standards, you can ensure that you select the best stud bolts for your needs.
As one of the premier stud bolt suppliers in India, Delta Fitt Inc. offers a comprehensive range of high-quality stud bolts tailored to meet the diverse requirements of various industries. Whether you're looking for standard products or custom solutions, Delta Fitt Inc. has the expertise and experience to provide the right fastening solutions for your projects.
We are also leading B7 Stud Bolts Manufacturers in India, and B8 Stud Bolts Manufacturers in India.
Website: deltafitt.com
0 notes
Text
Copper Earthing Electrode Manufacturer in India: Key Specifications

Veraizen Earthing is a significant Copper Earthing Electrode Manufacturer in India. Copper Earthing Electrodes are also constructed using Hot Dip Galvanised Pipes with a Copper Termination and one 20 mm Copper within the Pipe.Copper Earthing Electrodes Suppliers that we provide include the electrogrip 60mm 3 metre, electrogrip 40mm 3 metre, electrogrip 50mm 3 metre, electrogrip 80mm 3 metre, electrogrip 90mm 3 metre, and electrogrip 40mm 2 metre pure copper earthing electrode.
What are Copper Earthing Electrodes ?
Copper earthing electrodes are components that are used in grounding systems to connect electrical equipment to the ground. Grounding is required in electrical systems to provide a safe channel for fault currents to travel into the ground, reducing the danger of electric shock and the possibility for equipment damage.
Copper Earthing Electrode Specification
Copper earthing electrode parameters may vary depending on factors such as application, local norms, and individual project needs. However, the following are some common standards and characteristics for copper earthing electrodes:
Material: Copper earthing electrodes are constructed of high-quality copper with a high conductivity.
Copper Purity: The purity percentage of the copper used in the electrode is frequently indicated (e.g., 99.9% pure copper).
Design and Shape: Specifications may contain information regarding the electrode's design and shape, such as whether it is a rod, plate, pipe, or another shape.
Length and Diameter: The length and diameter of the copper rod are specified for rod-shaped electrodes. Depending on the application, typical lengths might range from a few feet to several metres .
Coating: Details concerning the coating applied to the copper surface to improve corrosion resistance may be included in some requirements. Tin, nickel, and other elements that give extra protection are common coatings.
Threaded Ends: Specifications for rod-shaped electrodes may contain information regarding threaded ends to aid installation.
Resistance Value: The maximum allowed earth resistance for the copper earthing electrode is frequently defined in specifications.Low ground resistance is critical for successful fault current dissipation.
Installation Depth: Specifications may contain recommendations for the depth at which the copper earthing electrode should be installed in the ground. A proper installation depth enables adequate soil contact for optimal grounding.
Compliance Standards: The applicable standards or norms that the copper earthing electrode must conform with should be mentioned in the specifications. National or international electrical safety groups develop common standards.
Corrosion Resistance:Specifications may include criteria for the corrosion resistance of the copper electrode under various environmental situations. This assures the grounding system's lifespan and dependability.
Manufacturing Standards: To maintain consistent quality, details concerning production standards and methods may be given. Compliance with IS 3043 (Indian Standard) or other standards may be needed.
Testing and Quality Control: Specifications may specify the testing techniques and quality control measures that must be followed by the copper earthing electrode.
Electrical conductivity, coating integrity, and other performance variables may be tested.
When selecting and installing copper earthing electrodes, it is critical to adhere to local electrical rules, regulations, and project specifications to guarantee compliance with safety and regulatory requirements. Additionally, for unique project demands, contact with certified engineers or specialists in the field of electrical grounding is recommended.
Copper Earthing Electrodes Manufacturers in India
We are a leading Copper Earthing Electrodes Supplier in India. We have developed a respectable name in both the local and international markets by adhering to ethical business standards and creating high-quality, internationally recognized products such as Copper Earthing Electrode. We Supply Lightning Arrester Manufacturers in Mumbai and Lightning Arrester Manufacturers in Kolkata.
0 notes
Text
How to Create an Eye Bolt: Eye Bolt Suppliers in Mumbai
Delta Fitt Inc. is a prominent Eye Bolts Suppliers In Mumbai. Making an eye bolt from scratch is a complex manufacturing process for Eye Bolt Manufacturer in Mumbai that requires specialised equipment and materials. It's not something that can usually be done in a conventional home workshop. I can, however, give you a simplified outline of the stages required in creating an eye bolt; nevertheless, keep in mind that this is a very simplified version of the genuine industrial process.
Materials and Tools:
Steel rod or bar stock
Heat source (e.g., propane forge)
Anvil
Hammer
Tongs
Thread-cutting die and tap
Drill press
Steps:
Material Selection: Choose a suitable steel rod or bar stock. The material should be strong enough to handle the intended load. Common materials include stainless steel, carbon steel, and alloy steel.
Heating: Heat the steel rod in a propane forge or other suitable heating equipment until it reaches a malleable temperature. This is typically in the range of 1,600 to 2,200 degrees Fahrenheit (870 to 1,200 degrees Celsius).
Forging the Eye: Once the steel is heated, place it on the anvil and use a hammer to shape one end into an eye. The eye can be round or oval, depending on your design. Continue shaping and hammering until you achieve the desired eye shape.
Cutting: After forging the eye, use a hacksaw or other cutting tool to cut the rod to the desired length for the eye bolt.
Threading the Shank: To create threads on the shank of the eye bolt, you'll need a threading die and tap. Secure the shank in a vise and carefully thread it using the die and tap. Ensure that the threading is straight and accurate.
Heat Treatment: Heat the eye bolt to a specific temperature (annealing or tempering) and then cool it slowly to improve its mechanical properties and toughness. The exact temperatures and cooling process depend on the type of steel you're using.
Surface Finish: You can choose to finish the eye bolt to enhance its resistance to corrosion. Common surface finishes include galvanization, painting, or simply cleaning and oiling the surface to prevent rust.
Quality Inspection: Thoroughly inspect the eye bolt to ensure it meets the required specifications and quality standards. Check the dimensions, threading, and overall quality.
Packaging: Once the eye bolt passes inspection, package it for storage or transportation. Packaging can include placing it in containers or bags to protect it.
We Also a best Manufacturer and Suppliers in such Cities
Eye Bolts Manufacturer in Rajkot
Eye Bolts Manufacturer in Ludhiana
Eye Bolts Manufacturer in Pune
Eye Bolts Manufacturer in Ahmedabad
Eye Bolt Manufacturers in Delhi
Eye Bolts Supplier in Mumbai - Delta Fitt Inc
Delta Fitt Inc. is an Eye Bolt Manufacturers in Mumbai it specialises as a Eye Bolts Manufacturers In Mumbai for high-quality eye bolts and associated hardware goods.We take great pride in offering an assortment of eye bolts designed to satisfy various industrial requirements. We supply some of the greatest bolts to a range of companies throughout the globe.
They may be customized to the customer's specifications and available in a variety of sizes, shapes, and dimensions. As a leading Ring Bolts or Eye Bolts Manufacturer, our products are widely used in various industries.
Delta Fitt Inc understands the significance of versatility, which is why we stock an expansive variety of shoulder eye bolts, M16 eye bolts, 1/2 eye bolts and stainless eye bolts - plus oval eye bolts and galvanised eye bolts.
At Delta Fitt Inc, our commitment to customer satisfaction extends far beyond just our selection of M20 eye bolts - these range from eye foundation bolts, forged eye bolts and stainless steel eye bolts - we even stock small 5/16 eye bolts, gate eye bolts and long eye bolts to fulfil any customer need.
Also see our Washer Weight Chart in Kg
Website: deltafitt.com
Product: Eye Bolts Manufacturer in Mumbai
Other Sources: Carriage Bolt Manufacturer in India, Stud Bolt Manufacturers in India.
0 notes
Text
What is a threaded rod?
A threaded rod is a metal rod made of carbon steel, galvanised steel or stainless steel that has threads along its entire length. The regular threads can be used to attach bolts and other types of fixings to the rod for construction, maintenance and plumbing applications to stabilise objects made of wood, metal or other materials.
Specific applications are as follows:
Lifting mechanisms / Machine centre manufacture / Shipbuilding / Hydraulic manufacture / Oil and gas industry / Mould manufacture / Aircraft manufacture / Medical device manufacture / Food processing
0 notes
Text
Know All About the A193 B8m -A prefect Stainless steel
A193 B8m specifications are used in oil and chemical structure applications. ASTM standards cover high-temperature or high-pressure stainless steel and alloy steel such as B7 bars. STM A193 carbonless and stainless steel rods and bolts are used to connect flanges, valves, pressure vessels, and fittings to high temperature and high-pressure services.In 1936, specificationA193 B8m was approved. This specification is commonly utilized in structural applications in the petroleum and chemical industries. Fasteners for pressure vessels, valves, flanges, and fittings are included in this specification. This material is often available at thread pitches, but for use in conventional applications, threads larger than 1 inch are specified as eight threads per TPI).There are several grades to the A193 specification with different chemical compositions, mechanical properties, and high temperature properties. The most common grade in the A193 specification is Class B7, but there are several others.Fasteners based on Spec A193 are commonly specified, manufactured, and supplied as heavy hexagon bolts or threaded rods and bolts (weekend thread bolts). The carbon steel flanges manufacturers in india offer a series of bent bolts (U, L, or J), threaded rods at one or both ends, and heavy, non-hexagonal head bolts. All screws, rods, and bolts must be flushed.ASTM A962 is a related standard that covers a set of general requirements related to A193. Section 13 of the A962 specification corresponds to the shape and class of the wire. The threads must be in accordance with ASME B1.1, Class 2A, and can be cutting or coil type. If the diameter is 1 inch or less, the National Unified Coarse (UNC) thread chain is used, and if the diameter is larger than 1 inch, the 8UN (8UN) thread chain is used unless otherwise stated.CoatingCertain grades of fasteners made with ASTM A193 (hot-dip galvanized, mechanically galvanised) or F1941 (mechanically galvanized) can be galvanized (cold or electro-galvanized). Teflon, xylan, and PTFE coatings are also often utilized with A193V, in addition to cadmium coatings.Product labelThe quality code and the stainless steel carriage bolt manufacturers‘ identification information both apply to the screw head and one end of the threaded rod and bolt. Section 17 of the A193 B8m specification describes the omission of product marks on the fasteners and the tolerance for marking very small diameters elsewhere, but rarely the work. Dual grade marks are permitted as long as the fasteners meet all the requirements of both specifications.Dimension exampleUnless otherwise stated, plug screws must be dimensional heavy hexagons covered with A193 B8m. A193 rods and bolts are typically measured from first thread to first thread instead of full length, including the sloping ends.The high tensile fasteners manufacturers in india can manufacture all kinds of fasteners such as studs, hex bolts, flange bolts, flat nuts and washers, flange nuts and spring washers, non-standard products.Durable and strong fasteners for customers at the most competitive market prices in the world. The stainless steel flanges manufacturers in india manufactured a wide range of hex nuts and bolts under the best guidance and gained the highest reputation.
0 notes
Text
DIY - Creating a Slat Fence with Pallet Wood

3 years ago I built a raised bed in the garden against the low-level brick wall between us and our neighbour. I built it with the intention of growing some climbing plants that would block out the view of the next-doors driveway (and the adjoining road) and give us a bit more privacy. Well, that didn't work out. Actually, I tell a lie - it did work out, but it worked too well. What I mean is, one of the climbers I had picked (a Solanum Crispum I believe) was on a mission to take over the world. It grew wilder than wild, quicker than the speed of light and basically became a nightmare to control and ended up being more of a pest than anything. So last year I dug it back up and decided I needed a new idea.
My new idea was pallet fencing. Three years ago I was totally against the idea of fencing - I don't know why? I think it's perhaps because I like the idea of continuity around the garden, and on the opposite wall we have some lovely large shrubs that act as privacy all on their own. I thought I could re-create the same effect on this side, but it turns out I couldn't. After our neighbours (on the shrubbed wall side) added additional fencing to some of the more sparse areas of foliage, the garden matched no more anyway and it gave me the perfect opportunity to put fencing up.
But, fences are expensive and because I like to save money, I decided to do something a bit different. Cue - pallet fencing! And of course, I'm going to show you how you can make your own and save a ton of ££ too!
You Will Need:
Pallet Wood
Treated Timber/Fence Posts
Concrete Bolts (or you can use threaded rods with bolts)
Galvanised Nails (or screws)
Garden Paint
Tape Measure
Pencil
Saw
Ratchet
First things first, here's a quick look at what we were personally dealing with. We have low-level walls with a kind of trellis over the top (these were already here when we moved in!) which are attached to fence posts. After moving in, we added reed-screening for additional privacy, but that has since fallen down and it's now all looking a bit scruffy.

We'll be keeping the trellis in place to build on top of, but you definitely don't need one in order to complete this DIY.
So here's what we did....
(adsbygoogle = window.adsbygoogle || []).push({});
Step 1 - Affix New Posts
Whether you're adding fencing to the top of an existing wall (like us!) or not, you will need to have some fence posts in place, as this is how we'll be affixing the pallet planks in position. If you already have fence posts in place, you can skip this step altogether.
If you don't, and you also don't have a brick wall like ours, you will need to dig into the ground, pop the post in and secure it into position with postcrete. I don't have a blog post for that (yet) so you'll have to check out this video for help on that.
If you have a low-level brick wall like us - the good news is that you can just affix the posts onto that. We already have a fair few in place anyway as that's how our trellis has been installed, but we needed to replace a couple and we're also adding a few more to support the trellis even further. We're actually not taking the trellis down (seems a bit of waste?!), so we'll be fixing our pallet planks on top of it instead.

We used two methods to fix our new fence posts to the wall. One of them involved drilling a hole all the way through the wall, inserting a threaded rod, bolting it in place with nuts and bolts either side of the wall, and then cutting the excess off from the rod, which you would need an angle grinder to do. This is how our existing posts are attached, however for this method, you would need access to the other side of the wall. Don't worry though, I have an alternative method if this one isn't for you! But, here are some shots of how this process looks...


For the simpler, albeit it slightly more expensive method, we used concrete bolts. These are basically special bolts which screw straight into the brick, no wall plugs required. Simply drill a hole the same width as the bolt, straight through the fence post and into the wall, only going as deep as the bolt will sit. Then, screw the bolt in!


You'll need to use a ratchet to tighten the bolt into the brickwork, and voila, your fence posts will be full secure.

Literally, it's as easy as that. We're super impressed with these bolts and can't believe we haven't used them before! I would definitely recommend for any outside projects.
(adsbygoogle = window.adsbygoogle || []).push({});
Step 2 - Sourcing Pallet Wood
The two best places I've found for finding free pallet wood is Facebook Marketplace and Gumtree. While there are a fair few free pallets to be had, finding a bulk amount of pallets which are all the same size is much easier said than done. If you're aiming for a consistent finish on this project or any other, mismatched free pallets isn't always the best way to go.
In which case, bulk sellers may be a better option as they usually have a large quantity of the same stock. Despite having to pay for them, it can still work out much cheaper than buying wood new from a DIY store. And of course, this way you can at least guarantee the planks will be of the same size. We buy ours from a farm local to us (who also dismantles the pallets and sells the wood separately) for 70p a plank, of 2m length. It's relatively affordable, although yes, I'd prefer it to be free! ;)
Another way to get free pallets is asking smaller businesses if they have any pallets going spare or are willing to sell you some on the cheap. After all, if you don't ask - you don't get! Our local Jewsons often give away scrap pallets from time-to-time.

If you need to dismantle any pallets, I recommend this Roughneck Lifting Bar tool. It makes the job a lot easier, but don't expect the pallet to fall apart for you; you will still need to use a fair bit of elbow muscle. 😉
For this fencing DIY, I recommend the longer and bigger pallets. As obviously, the longer the slats of wood are - the fewer fence posts you will need! The photo above isn't the actual pallets we used for this particular DIY.
Step 3 - Cut Pallet Wood to Size
So as I mentioned earlier, the pallet planks will be attached straight onto the fence post, so you'll need to cut your pallet wood to this size. Simply measure the distance between the centre of one post to the centre of the next post and cut the planks with a saw.

(adsbygoogle = window.adsbygoogle || []).push({});
We're actually fitting ours to the frame of the trellis instead so ours will be recessed against the fence post. We've added additional lengths of timber to the inside of the trellis frame with screws, and our pallet planks will attach to these. Hard to explain, but this is ours..


Step 4 - Affix Pallet Planks
You'll want to use either galvanised nails or galvanised screws to attach the planks, as these won't rust. Personally, I prefer the look of nail heads, but the screws are definitely easier to deal with.
All you need to do is simply pop a couple of those into either end of the pallet plank, straight through into the fence post. You'll want to make sure your plank is level with a spirit-level as you do this (although we've actually done ours level with the brickwork, which ironically is not level) and it's really as easy as that.

To space the pallet planks apart so that there's a gap between each of them, for the modern trendy look, you can just use an offcut of pallet wood to wedge between boards. This makes the gap a little over 1cm thick, which I think is perfect as it still gives you plenty of privacy.

Looking pretty good right?! You can see how we've used pallet wood of a consistent width for an even-look finish. You could use varying widths for a bit interest though, it's totally up to you.


(adsbygoogle = window.adsbygoogle || []).push({});
Step 5 - Paint or Stain
Pallet wood doesn't usually need treating for outdoor use, but our boards were quite dirty and mismatched in tone, so I wanted to paint ours. I've used Johnstone's Garden Colour Range in 'Calming Stone' which is a kind of off-white colour with a hint of grey. It's much whiter than I anticipated actually, but it's added a really lovely fresh modern feel to the garden - and it's nice to have some painted wood, considering we have quite a lot of stained wood in the garden too.

I'd never used Johnstone's paint before but I really really recommend it. The coverage was amazing, you only need one coat for most wood and one tin went reaaaally far. Nothing lCuprinolinol which is watering as hell (sorry cuprinol!) I would definitely buy this one as a favourite in the future - and it was only £13.50 from Homebase!


And there you have it - one new pallet slat fence! We'll probably be doing this all over again at the back of the garden behind the roses bushes too, but not until they've finished their flowering season (we're sadly going to need to cut them!) and when we have a bit more cash to play with. For now, though, we have full privacy in the garden and I'm loving it!


(adsbygoogle = window.adsbygoogle || []).push({}); And Incase You've forgotten what it looked like before. Here's a Before & After!


Unless you have a trellis too, your slats will sit on-top of fence posts, so they should run almost seamlessly across the wall. Which is generally how most slat fences appear, and I think probably looks a bit better. We chose to do ours onto the trellis, mainly because our fence posts were of varying thicknesses - it just wouldn't have worked so well.
But, what do you reckon? A good alternative to real fencing? If you can stock up on free pallets - I think this DIY would be incredibly worthwhile for the amount of money you could save! And I think it looks pretty decent too. But obviously, I might be a tad biased 😉😉
Total Costs
(rounded to the nearest pound)
New Tools Purchased:
None
Materials Used:
Fence Post & Treated Timber - £23
Masonry Bolts (10pack) - £8
Pallet Wood - £20
Nails - £5
Paint - £13
Total: £69
Amazon.co.uk Widgets
from Tips For Basements http://www.kezzabeth.co.uk/2018/07/diy-slat-fence-with-pallet-wood.html
0 notes
Text
DIY - Creating a Slat Fence with Pallet Wood

3 years ago I built a raised bed in the garden against the low-level brick wall between us and our neighbour. I built it with the intention of growing some climbing plants that would block out the view of the next-doors driveway (and the adjoining road) and give us a bit more privacy. Well, that didn't work out. Actually, I tell a lie - it did work out, but it worked too well. What I mean is, one of the climbers I had picked (a Solanum Crispum I believe) was on a mission to take over the world. It grew wilder than wild, quicker than the speed of light and basically became a nightmare to control and ended up being more of a pest than anything. So last year I dug it back up and decided I needed a new idea.
My new idea was pallet fencing. Three years ago I was totally against the idea of fencing - I don't know why? I think it's perhaps because I like the idea of continuity around the garden, and on the opposite wall we have some lovely large shrubs that act as privacy all on their own. I thought I could re-create the same effect on this side, but it turns out I couldn't. After our neighbours (on the shrubbed wall side) added additional fencing to some of the more sparse areas of foliage, the garden matched no more anyway and it gave me the perfect opportunity to put fencing up.
But, fences are expensive and because I like to save money, I decided to do something a bit different. Cue - pallet fencing! And of course, I'm going to show you how you can make your own and save a ton of ££ too!
You Will Need:
Pallet Wood
Treated Timber/Fence Posts
Concrete Bolts (or you can use threaded rods with bolts)
Galvanised Nails (or screws)
Garden Paint
Tape Measure
Pencil
Saw
Ratchet
First things first, here's a quick look at what we were personally dealing with. We have low-level walls with a kind of trellis over the top (these were already here when we moved in!) which are attached to fence posts. After moving in, we added reed-screening for additional privacy, but that has since fallen down and it's now all looking a bit scruffy.

We'll be keeping the trellis in place to build on top of, but you definitely don't need one in order to complete this DIY.
So here's what we did....
(adsbygoogle = window.adsbygoogle || []).push({});
Step 1 - Affix New Posts
Whether you're adding fencing to the top of an existing wall (like us!) or not, you will need to have some fence posts in place, as this is how we'll be affixing the pallet planks in position. If you already have fence posts in place, you can skip this step altogether.
If you don't, and you also don't have a brick wall like ours, you will need to dig into the ground, pop the post in and secure it into position with postcrete. I don't have a blog post for that (yet) so you'll have to check out this video for help on that.
If you have a low-level brick wall like us - the good news is that you can just affix the posts onto that. We already have a fair few in place anyway as that's how our trellis has been installed, but we needed to replace a couple and we're also adding a few more to support the trellis even further. We're actually not taking the trellis down (seems a bit of waste?!), so we'll be fixing our pallet planks on top of it instead.

We used two methods to fix our new fence posts to the wall. One of them involved drilling a hole all the way through the wall, inserting a threaded rod, bolting it in place with nuts and bolts either side of the wall, and then cutting the excess off from the rod, which you would need an angle grinder to do. This is how our existing posts are attached, however for this method, you would need access to the other side of the wall. Don't worry though, I have an alternative method if this one isn't for you! But, here are some shots of how this process looks...


For the simpler, albeit it slightly more expensive method, we used concrete bolts. These are basically special bolts which screw straight into the brick, no wall plugs required. Simply drill a hole the same width as the bolt, straight through the fence post and into the wall, only going as deep as the bolt will sit. Then, screw the bolt in!


You'll need to use a ratchet to tighten the bolt into the brickwork, and voila, your fence posts will be full secure.

Literally, it's as easy as that. We're super impressed with these bolts and can't believe we haven't used them before! I would definitely recommend for any outside projects.
(adsbygoogle = window.adsbygoogle || []).push({});
Step 2 - Sourcing Pallet Wood
The two best places I've found for finding free pallet wood is Facebook Marketplace and Gumtree. While there are a fair few free pallets to be had, finding a bulk amount of pallets which are all the same size is much easier said than done. If you're aiming for a consistent finish on this project or any other, mismatched free pallets isn't always the best way to go.
In which case, bulk sellers may be a better option as they usually have a large quantity of the same stock. Despite having to pay for them, it can still work out much cheaper than buying wood new from a DIY store. And of course, this way you can at least guarantee the planks will be of the same size. We buy ours from a farm local to us (who also dismantles the pallets and sells the wood separately) for 70p a plank, of 2m length. It's relatively affordable, although yes, I'd prefer it to be free! ;)
Another way to get free pallets is asking smaller businesses if they have any pallets going spare or are willing to sell you some on the cheap. After all, if you don't ask - you don't get! Our local Jewsons often give away scrap pallets from time-to-time.

If you need to dismantle any pallets, I recommend this Roughneck Lifting Bar tool. It makes the job a lot easier, but don't expect the pallet to fall apart for you; you will still need to use a fair bit of elbow muscle. 😉
For this fencing DIY, I recommend the longer and bigger pallets. As obviously, the longer the slats of wood are - the fewer fence posts you will need! The photo above isn't the actual pallets we used for this particular DIY.
Step 3 - Cut Pallet Wood to Size
So as I mentioned earlier, the pallet planks will be attached straight onto the fence post, so you'll need to cut your pallet wood to this size. Simply measure the distance between the centre of one post to the centre of the next post and cut the planks with a saw.

(adsbygoogle = window.adsbygoogle || []).push({});
We're actually fitting ours to the frame of the trellis instead so ours will be recessed against the fence post. We've added additional lengths of timber to the inside of the trellis frame with screws, and our pallet planks will attach to these. Hard to explain, but this is ours..


Step 4 - Affix Pallet Planks
You'll want to use either galvanised nails or galvanised screws to attach the planks, as these won't rust. Personally, I prefer the look of nail heads, but the screws are definitely easier to deal with.
All you need to do is simply pop a couple of those into either end of the pallet plank, straight through into the fence post. You'll want to make sure your plank is level with a spirit-level as you do this (although we've actually done ours level with the brickwork, which ironically is not level) and it's really as easy as that.

To space the pallet planks apart so that there's a gap between each of them, for the modern trendy look, you can just use an offcut of pallet wood to wedge between boards. This makes the gap a little over 1cm thick, which I think is perfect as it still gives you plenty of privacy.

Looking pretty good right?! You can see how we've used pallet wood of a consistent width for an even-look finish. You could use varying widths for a bit interest though, it's totally up to you.


(adsbygoogle = window.adsbygoogle || []).push({});
Step 5 - Paint or Stain
Pallet wood doesn't usually need treating for outdoor use, but our boards were quite dirty and mismatched in tone, so I wanted to paint ours. I've used Johnstone's Garden Colour Range in 'Calming Stone' which is a kind of off-white colour with a hint of grey. It's much whiter than I anticipated actually, but it's added a really lovely fresh modern feel to the garden - and it's nice to have some painted wood, considering we have quite a lot of stained wood in the garden too.

I'd never used Johnstone's paint before but I really really recommend it. The coverage was amazing, you only need one coat for most wood and one tin went reaaaally far. Nothing lCuprinolinol which is watering as hell (sorry cuprinol!) I would definitely buy this one as a favourite in the future - and it was only £13.50 from Homebase!


And there you have it - one new pallet slat fence! We'll probably be doing this all over again at the back of the garden behind the roses bushes too, but not until they've finished their flowering season (we're sadly going to need to cut them!) and when we have a bit more cash to play with. For now, though, we have full privacy in the garden and I'm loving it!


(adsbygoogle = window.adsbygoogle || []).push({}); And Incase You've forgotten what it looked like before. Here's a Before & After!


Unless you have a trellis too, your slats will sit on-top of fence posts, so they should run almost seamlessly across the wall. Which is generally how most slat fences appear, and I think probably looks a bit better. We chose to do ours onto the trellis, mainly because our fence posts were of varying thicknesses - it just wouldn't have worked so well.
But, what do you reckon? A good alternative to real fencing? If you can stock up on free pallets - I think this DIY would be incredibly worthwhile for the amount of money you could save! And I think it looks pretty decent too. But obviously, I might be a tad biased 😉😉
Total Costs
(rounded to the nearest pound)
New Tools Purchased:
None
Materials Used:
Fence Post & Treated Timber - £23
Masonry Bolts (10pack) - £8
Pallet Wood - £20
Nails - £5
Paint - £13
Total: £69
Amazon.co.uk Widgets
from Home Restoration News http://www.kezzabeth.co.uk/2018/07/diy-slat-fence-with-pallet-wood.html
0 notes
Text
Galvanised Trailer Parts | Phasing Out
Galvanised Trailer Parts | Phasing Out https://www.couplemate.com.au/galvanised-trailer-parts-explained/ https://www.couplemate.com.au/wp-content/uploads/2019/06/Rod-threads-flooded-with-zinc.jpg Couplemate Caravan, Towing and Trailer Parts Steve Wotherspoon
0 notes
Video
youtube
✅Only by doing every small link well can ensure the safe production of t...
#youtube#concrete screw#concrete screw bolts#GOODFIX & FIXDEX concrete screw anchor#concrete screw galvanised#concrete screw sizes#Concrete Screws and Screw Bolts#Screw Anchors#concrete screw manufacturere#concrete screw supplier#concrete screw hardware#concrete screw bolt#Concrete fasteners#Concrete Anchor Screws#FIXDEX concrete screw bolt#GOODFIX & FIXDEX concrete screw anchor bolt#Concrete Bolts & Screws#Galvanized Concrete Screw Anchors#wedge anchor#through bolt#threaded rods#thread bolt#stud bolt#solar fixing#solar bracket#photovoltaic bracket
0 notes
Text
Rope Bridge project at Middle East's biggest resort
Salwa Resort, Abu Samra, Qatar
The Dahab Mountain Water and Adventure Park - Salwa Beach Resort, Doha is set to become the Middle East’s premier destination beach resort, located on three million square meters of prime coastline in the southwest corner of Qatar less than 100 kilometres from Doha. With sweeping views of the Arabian Gulf, this ambitious 362-key property will feature a wide range of remarkable facilities, including three kilometres of private beach, a luxury marina and yacht club, a themed water park, a dive centre, cinemas, a shopping mall, an Arabian village, a 2,800 square meter spa and health club, and much more. The complex is expected to open in 2019. The Hilton Salwa Beach Resort & Villas, Qatar is expected to be the largest of its kind in the Middle East and a first for Qatar.
The Salwa Resort is designed to become one of the largest resorts and residential projects in Qatar. Constructed on 257 acres of land in the Salwa area, the beach resort and villas is a massive project that includes a water park, marina, dive centre, cinemas, pools, a health club, spa and a considerable retail space. In addition to the rooms and suites in the main hotel building, the resort will also include two small ‘villages’ of family villas.
Project requirements:
Adventure Play Area
3 Rope Bridges [each around 7m length] to be suspended at a height of around 7m between concrete and steel structures.
A 10m length Net Tunnel to be suspended 5.7m high between steel structures.
A Scramble Net ‘U’ shaped bridge at 5.6m length, at around 7m height between concrete and steel structures.
A 13.6m length safety netted walkway as part of a themed ‘Rock-Art’ concrete ‘dead-tree’.
All products to be ‘wrapped’ in safety netting.
Supply, shipping and installation.
Design solutions:
3 x Rope Bridges (timber walkways), 6.2m, 6.95m and 7.56m lengths
Load points to carry Rope Bridges - M20 Swivel Load Rings [10 tonnes break-load certificated] - 6 at each end
Connection points between Load Points and Rope Bridges structural ropes - Rope 'soft-shackles' [15 T break-load certificated + preloaded labels]
Structural ropes for Rope Bridges - 12mm Manilla Superbraid Rope [9.2 T certificated break-load]
Wooden walkway - Timber Slats [Celcure treated + prepared] [45 x 220mm]
Child friendly - Anti-slip strips - 1000 x 90mm
Rope work - 12mm polyhemp rope - balustrade + frapping
Safety - Safety netting [45mm mesh fall arrest certificated netting], both sides [to height of 1.8m + top], all in hemp colour
1 x Net Tunnel
8170mm x 1000mm log Net Tunnel, the tunnel will have 3 x 1000mm in diameter x 38 mm OD galvanised steel pipes with 4 lugs welded on equally apart. There will be 45mm x 5mm walk-on safety net attached to each steel ring [all black], the whole will further be dressed in a 45mm x 5mm walk-on safety net in hemp colour
Load points to carry Net Tunnel - G100 M20 Swivel Load Rings [10 T break-load certificated] - 4 at each end
Connection points between Load Points and Net Tunnel structural ropes - Rope 'soft-shackles' [15 T break-load certificated + preloaded labels]
Structural ropes for Net Tunnel - 12mm Manilla Superbraid Rope [9.2 T certificated break-load]
Rope work - 12mm polyhemp rope frapping
1 x Scramble Net
5600mm x 1000mm wide x 1800mm high 'U' Bridge, floor of bridge will be made from 16mm PP rope woven together with a meh size of 100mm, the sides and the roof will be made from 45mm x 5mm walk-on safety net [all black], the whole will further be dressed in a 45mm x 5mm walk-on safety net in hemp colour
Load points to carry Scramble Net - G100 M20 Swivel Load Rings [10 T break-load certificated] - 6 at each end
Connection points between Load Points and Scramble Net structural ropes - Rope 'soft-shackles' [15 T break-load certificated + preloaded labels]
Structural ropes for Scramble Net - 12mm Manilla Superbraid Rope [9.2 T certificated break-load]
Rope work - 12mm polyhemp rope frapping
1 x ‘Dead Tree’ Balustrades, 13.5m length
Load points to carry balustrades - M20 Swivel Load Rings [10 tonnes break-load certificated] - 6 at each end
Connection points between Load Points and balustrade structural ropes - Rope 'soft-shackles' [15 T break-load certificated + preloaded labels]
Structural ropes for balustrade - 12mm Manilla Superbraid Rope [9.2 T certificated break-load]
Safety - Safety netting [45mm mesh fall arrest certificated netting], both sides [to height of 1.8m + top], all in hemp colour
Installation plan:
✔️We supplied a two-man expert-installation team to work the following schedule - 14 work days, 2 travel days, 4 rest days plus 2 contingency days, plus two local staff provided by our client. Everything was prepared at our Surrey Hills workshop in the UK and shipped by 5-pallets air-freight because of the project timeline, but with a longer lead time could easily have been shipping container.
✔️We worked the math calculations for loads so that we could design and specify materials specific to the project.
Load Calculations for Salwa Resort, Abu Samra, Qatar Rope Bridge Project
✔️We designed a complete structural system based upon a load attachment swivel load ring that rotates through 360º and pivots 90º - each bridge system could work load-ring to load-ring and 6 at each end/12 in total, in the knowledge that we have a certificated and load tested unit proof tested to 2.5 times the weight load limit. We also designed and fabricated a steel bracket attachment for the load-rings that would be either welded to structural steel beams or fixed to concrete using a Hiliti® threaded rod and compound adhesive system. Hilti® were also engaged on-site to undertake ‘pull-out’ load tests on installed systems so that we had complete provenance of certification through accredited services.
✔️We researched rope systems and worked closely with Southern Ropes to design an ‘all-rope’ design with break-loads in excess of all calculations plus a safety ratio. From swivel load ring to structural rope we employed rope ‘Soft Shackles’ load-tested and certificated to 15 tonnes and Super Ropes braided in manilla colour fabric load-tested and certified to 8.4 tonnes.
Rope Bridge Soft Shackle Load Certificate
Rope Bridge SuperBraid Structural Ropes in Manilla - Certificate 1
Rope Bridge SuperBraid Structural Ropes in Manilla - Certificate 2
✔️We pre-produced deck board ‘slats’ using 1200x220x45mm, C24 and Celcure treated timbers, with rounded edges on all faces and pre-routed rope channels on the reverse. We also screw-fixed anti-slip surfaces to all deck boards.
Rope Bridge Decking Slats - Celcure Timber Treatment
Rope Bridge Decking Slats - Celcure Timber Treatment Safety Data Sheet
✔️We introduced a hemp coloured polypropylene and high tenacity safety netting with a mesh break-load at 3.2kN to the sides and above through each of the Rope Bridges and around the Scramble Net Bridge, Net Tunnel and ‘Dead Tree’ balustrades.
Rope Bridge Safety Netting Data Sheet
✔️We used 12mm polyhemp for frapping and dressing, particularly on the Rope Bridges for friction-weave and hand-weaved balustrade rope work, with a linear strength of around 1.4 tonnes and an average of 24 friction knots every 1m of Rope Bridge.
0 notes
Text
DIY Projects Made Easy with Threaded Rods from Bunnings

When it comes to home improvement projects, threaded rods are a versatile and useful solution that can help you achieve a wide range of goals. From hanging heavy items to creating custom furniture, threaded rods from Bunnings can simplify your DIY projects and provide a secure and reliable connection.
In this blog post, we'll explore how threaded rods from Bunnings can make your DIY projects easier and more efficient, and provide tips on how to use them effectively.
The Benefits of Threaded Rods from Bunnings
threaded rod Bunnings are long, straight pieces of metal with threads along the entire length. They come in a variety of materials, such as stainless steel, galvanised steel, and brass, and in different diameters and lengths. Threaded rods are a versatile solution for many DIY projects, as they can be cut to any length and can be easily screwed into place with nuts and washers.
One of the main benefits of using threaded rods from Bunnings is that they provide a strong and reliable connection that can hold a lot of weight. This makes them ideal for hanging heavy items, such as shelves, cabinets, and mirrors. Threaded rods are also a popular solution for creating custom furniture, such as beds, tables, and chairs, as they can be easily cut and threaded to the desired length.
In addition to their strength and versatility, 12mm threaded rods are resistant to rust and corrosion, making them suitable for both indoor and outdoor use. They can be used in a variety of materials, including wood, metal, and concrete, and are easy to install with the right tools.
How to Use Threaded Rods in Your DIY Projects
Using threaded rods in your DIY projects is relatively easy, but it's important to follow some basic guidelines to ensure a secure and reliable connection. Here are some tips on how to use threaded rods effectively:
Choose the right material and diameter for your project: Threaded rods come in different materials and diameters, so it's important to choose the right one for your project. If you're using threaded rods in a corrosive environment, such as outdoors or in a bathroom, choose stainless steel or galvanised steel rods. If you're using threaded rods in a decorative project, such as a custom table, choose brass rods for a more elegant look.
Measure and cut the rods to the desired length: M16 threaded rods can be easily cut to the desired length with a hacksaw or a bolt cutter. Make sure to measure carefully and mark the rod before cutting it, and use safety goggles to protect your eyes from flying debris.
Install the rods with nuts and washers: To install a threaded rod, simply screw a nut and a washer onto each end of the rod. Tighten the nut with a wrench until it's secure, and repeat on the other end. If you're using threaded rods to hang heavy items, such as shelves, make sure to use a wall anchor or a toggle bolt to provide additional support.
DIY Project Ideas Using Threaded Rods from Bunnings
There are countless DIY projects you can create using threaded rods from Bunnings. Here are some ideas to get you started:
Custom furniture: Use 12mm stainless steel rods to create custom furniture, such as a platform bed or a table with a unique design. Threaded rods can be easily cut and threaded to create any shape or size, and can provide a strong and reliable connection.
Hanging shelves: Threaded rods are a great solution for hanging shelves, especially if you're dealing with uneven walls or heavy items. Use wall anchors or toggle bolts for additional support, and make sure to use washers between the nut and the shelf to distribute the weight evenly.
Threaded Rod Bunnings Manufacturer In India
Are you searching for the perfect threaded rod for your next project? Look no further than Ananka Group’s trusted threaded rod Bunnings manufacturers who can provide you with high-quality threaded rods that meet your specific needs. Our experienced manufacturers use cutting-edge technology and top-grade materials to produce durable and reliable threaded rods that can handle even the toughest applications. As a leading threaded rod manufacturer, we offer a wide range of options to choose from.
Our competitive pricing and exceptional customer service make us the preferred choice for threaded rod Bunnings manufacturers.
Contact us today to discover why we're the best in the industry. We offer a wide range of products, including 12mm stainless steel rods, M16 threaded rods, stainless steel threaded rods, and 12mm threaded rods.
We are one of the best Eye Bolt Manufacturer in India, Our Anchor bolt manufacturers use a nickel-copper alloy that is resistant to corrosion in many environments.
We are a High Tensile Fasteners manufacturer and Inconel fastener manufacturer.
For more details:
Website: https://anankafasteners.com
Product: threaded rod Bunnings
0 notes
Text
How To Make An Eye Bolt: Eye Bolt Suppliers in Mumbai

Delta Fitt Inc. is a prominent Eye Bolts Suppliers In Mumbai. Making an eye bolt from scratch is a complex manufacturing process for Eye Bolt Manufacturer in Mumbai that requires specialised equipment and materials. It's not typically something that can be done in a typical home workshop. However, I can provide you with a simplified overview of the steps involved in making an eye bolt, but keep in mind that this is a highly simplified version of the actual industrial process
Materials and Tools:
Steel rod or bar stock
Heat source (e.g., propane forge)
Anvil
Hammer
Tongs
Thread-cutting die and tap
Drill press
Steps:
Material Selection: Choose a suitable steel rod or bar stock. The material should be strong enough to handle the intended load. Common materials include stainless steel, carbon steel, and alloy steel.
Heating: Heat the steel rod in a propane forge or other suitable heating equipment until it reaches a malleable temperature. This is typically in the range of 1,600 to 2,200 degrees Fahrenheit (870 to 1,200 degrees Celsius).
Forging the Eye: Once the steel is heated, place it on the anvil and use a hammer to shape one end into an eye. The eye can be round or oval, depending on your design. Continue shaping and hammering until you achieve the desired eye shape.
Cutting: After forging the eye, use a hacksaw or other cutting tool to cut the rod to the desired length for the eye bolt.
Threading the Shank: To create threads on the shank of the eye bolt, you'll need a threading die and tap. Secure the shank in a vise and carefully thread it using the die and tap. Ensure that the threading is straight and accurate.
Heat Treatment: Heat the eye bolt to a specific temperature (annealing or tempering) and then cool it slowly to improve its mechanical properties and toughness. The exact temperatures and cooling process depend on the type of steel you're using.
Surface Finish: You can choose to finish the eye bolt to enhance its resistance to corrosion. Common surface finishes include galvanization, painting, or simply cleaning and oiling the surface to prevent rust.
Quality Inspection: Thoroughly inspect the eye bolt to ensure it meets the required specifications and quality standards. Check the dimensions, threading, and overall quality.
Packaging: Once the eye bolt passes inspection, package it for storage or transportation. Packaging can include placing it in containers or bags to protect it.
Eye Bolts Supplier in Mumbai - Delta Fitt Inc
Delta Fitt Inc. (An Extended Unit of WMI Group) is an Eye Bolt Manufacturers in Mumbai it specialises as a Eye Bolts Manufacturers In Mumbai for high-quality eye bolts and associated hardware goods. We are proud to provide a variety of eye bolts that are intended to meet a variety of industrial needs. We provide some of the best bolts available to a variety of businesses worldwide.
They may be customised to meet the needs of the customer and come in an assortment of sizes, shapes, and dimensions. As a leading Ring Bolts or Eye Bolts Manufacturer, our products are widely used in various industries.
Delta Fitt Inc understands the significance of versatility, which is why we stock an expansive variety of shoulder eye bolts, M16 eye bolts, 1/2 eye bolts and stainless eye bolts - plus oval eye bolts and galvanised eye bolts.
At Delta Fitt Inc, our commitment to customer satisfaction extends far beyond just our selection of M20 eye bolts - these range from eye foundation bolts, forged eye bolts and stainless steel eye bolts - we even stock small 5/16 eye bolts, gate eye bolts and long eye bolts to fulfil any customer need.
Website: deltafitt.com
Product: Eye Bolts Manufacturer in Mumbai
Other Sources: Carriage Bolt Manufacturer in India, Stud Bolt Manufacturers in India.
0 notes
Text
Get The Competitive Edge With One Of These Ideas On Northside Steel Work
Introduction
Metal fabrication entails the making of metal structures and components by manipulating the raw product-- normally structural steel and sheet metal-- via a range of procedures. The term covers a broad series of activities, from sheet metal fabrication for building jobs, to machined parts and bespoke items for manufacturers. Workshops that specialise in metal manufacture are known as 'great shops'.
Typical procedures associated with steel construction include: Forging, Casting, Cutting, Bending, Shearing, Drawing, Spinning, Punching.

When the parts have been made, they may should be set up. Assembly could involve welding, binding with adhesives, captivating, crimped seams or threaded bolts.
The assemblies or parts may then be treated by a procedure of sandblasting, powder, priming or painting finishing, if required.
The completed product ought to subject to mindful evaluation to ensure it abides by the specification before leaving the fab store.
Reducing
The wanted shape can be developed by eliminating undesirable material from a block of metal, in a procedure referred to as machining. Metal is reduced as required using different tools, including:
youtube
Saws
Industrial saws such as band saws and huge circular saws could cut steel in straight-lines. Angle mills are portable power devices fitted with a rough disc utilized for reducing, grinding and brightening.
Shears
Shears are commercial makers, that come in a vast array of dimensions and setups, efficient in cutting sheet metal of various densities. They operate in the same way as a pair of scissors, with opposing blades, one being fixed and the other relocating an angled levering movement. Different kinds of shears include:
Hand shears: Also called 'aviation snips', these are simple, manual devices utilized to reduce slices of metal.
Power shears: These are capable of reducing sheet steel promptly and with less handbook effort. A lot of are not able to cut complex forms or limited distance and so have a tendency to lose material.
Throatless shears: These are hand-operated and make use of a hinged blade that turns down to http://northsidesteelwork.ie/powder-coating-and-galvanising cut metal lying on a fixed adjacent blade. These are capable of cutting in straight lines or shapes and minimise waste material.
Plasma and laser cutters
High definition plasma reducing methods are made use of to achieve elaborate forms. With the assimilation of computer system assisted style and computer system aided manufacturing, the cutting procedure can be achieved perfectly, with minimal waste.
Flexing
The flexing metal can be attained by https://en.search.wordpress.com/?src=organic&q=metal fabrication one of two strategies:
The most basic approach is form flexing, where metal is curved over a side or shape situated under the metal. This can be done manually or with devices such as hammers and forming dollys to bend steel around the needed shape.
Steel brakes are the most typical method of achieving tidy, exact bends. The process entails placing the metal on a flat, gated surface, securing a flat bar in addition to it, and raising eviction part to bend the metal to the preferred angle.
Diminishing
The most usual methods of shrinking steel include:
Putting: A simple strategy that includes compeling steel with each other between a gap or folding steel over at the edges.
Shrinker: This is a lever-operated tool with moving textured jaws that comprehend sheet steel from the lower and top and compel http://northsidesteelwork.ie it with each other lightly. Particular areas can be meticulously worked to reduce as required. This is a much more specific yet slower approach.
Warmth diminishing: This entails home heating an over-stretched location with a blowtorch until it is virtually red hot, as the steel diminishes when it cools. Shrinking discs can be put on angle grinders that make use of rubbing to produce heat.
Extending
One of the most common techniques of stretching metal consist of:
Hammer and dolly: This is the simplest technique and includes holding an object behind the metal and hitting the opposite side with a hammer, requiring the metal to compress and extend.
Stretcher: This is a mechanically-operated tool just like the shrinker, that puts metal between two flat-textured jaws which draw it apart slowly.
English wheel: This strategy makes use of wheels that roll back and forth over the level metal.
Welding
One of the most usual methods of welding steel to create bigger and extra complex parts include:
Oxy-acetylene welding
This is the oldest type of welding but is still widely made use of. Storage tanks of oxygen and acetylene are blended with a flexible torch to develop a controlled fire to warm the metal. Throughout heating, a filler pole is added that joins the steel together. These welds are the most convenient to planish (ravel) with a hammer and dolly, making it possible for the weld joint to be as level as possible.
TIG welding
This entails a lantern that has a non-consumable electrode that creates a tiny, specific electrical arc that melts the base metal. Filler rods are contributed to the puddle of liquified steel to join the components together. This is a much more accurate approach compared to oxy-acetylene.
MIG welding
This is one of the most typical technique and includes a motor that is utilized to feed the filler wire with the idea of a MIG gun. The wire is melted into the weld joint, fusing the metal with each other.
Steel fabrication includes the production of steel structures and parts by controling the raw product-- generally architectural steel and sheet metal-- via an array of processes. The term covers a wide array of activities, from sheet metal fabrication for building projects, to machined parts and bespoke items for producers. Shears are commercial devices, that come in a broad array of sizes and setups, qualified of cutting sheet steel of various thicknesses. Shrinker: This is a lever-operated tool with moving textured jaws that grasp sheet steel from the bottom and top and force it with each other lightly. Filler rods are included to the puddle of molten steel to join the parts together.
#Metal Fabrication#Sheet Metal Fabrication#Steel Fabrication#Steel Fabricators#Stainless Steel Fabrication#Custom Metal Fabrication#Stainless Steel Fabricators#Metal Fabrication Near Me#Metal Fabricator#Metal Fabrication Companies#Sheet Metal Fabricators#Steel Fabrication Companies#Sheet Metal Fabrication Near Me#Metal Fabrication Shops#Metal Fabrication Shops Near Me#Sheet Metal Shop#Metal Manufacturing#Custom Sheet Metal Fabrication#Fabrication Companies#Precision Metal Fab#Structural Steel Fabrication#Precision Sheet Metal Fabrication#Structural Steel Fabricators#Sheet Metal Manufacturing#Fabrication Metal#Custom Steel Fabrication#Welding And Fabrication#Metal Fabrication Company#Brass Fabrication#Aluminum Fabrication
0 notes
Text
Other Women
One of the biggest crimes the patriarchy has committed against women, I say one not the, is the crime of pitting women against women. growing up I never felt like I was the coolest, smartest, prettiest or fastest girl in my class. I used to always think that the reason I had such cool and pretty friends was down to my witty and humorous personality, now of course I know it was because I too was awesome. Looking back on my primary school days I was good at long distance running, but sucked at sprinting. I’ll chalk this up to my being especially good at the long game and always staying true to the goal, but ultimately what I’m trying to articulate to you is that I am not, and never have been, an especially competitive person. I’ve always been content with watching other women do well.
I’ve always been a champion of the women around me, even before I identified with feminism. The qualities and charms of other women, especially my friends, have always been self-evident to me. Anita is smart and passionate, Jess is a bleeding heart and strong willed, Leah is caring and insightful, Erin is wise and strong, Caris is creative and loyal, Stef is generous and loving, Rochelle is inspiring and hard-working, Mills is encouraging and adventurous, and Belinda is simply intent on world domination. These women give me something beyond support. They are sources of hope and strength��� they give me life.
There is a common thread that links them all, and yet not all these women have even met, nor is it likely that they ever will. Yet this common thread is something real, life changing and at times tangible. What I mean to say is that have all been through some serious shit. They were, and are still being, refined and galvanised by fires lit by heartbreak, disappointment, rejection, illness and death.
The sad truth is that while we all know and love women who inspire and support us, there are many lady folks out there who see other women as a threat. Now, as mentioned earlier, the patriarchy has a lot of answer for this, and capitalism isn’t exactly innocent in this either. As Clementine Ford explains in her book Fight like a Girl:
Part of the patriarchy’s modus operandi has always been to keep women tethered to a constructed idea of femininity and therefore distracted from fighting for their own political and social equality. Confusion is also a key component here, with the changing whims of fashion and how they tie into capitalist goals…
it begins, in my mind at least, with fast fashion. I, a white middle class skinny girl, can head out to the shops and buy myself a pair of jeans or a hand bag with a mark-up of at least 250% from the cost of production without blinking. I can afford to do this, thanks largely to a mode of production that exploits lax environmental protection laws and limited employment rights. These two flaws in our world have not only allowed but actively encouraged manufacturers to exploit that which is most exploitable in this world; the earth and adjectively poor, uneducated brown women.
This of course is not new to anyone. Unless you’re a child or have been living on another planet for the last 30 odd years (since at least the “roaring eighties” where many of the legal restraints on such exploitations where dismantled by those our parents foolishly elected) you already know about the exploitation of female labour.
Has this changed your consumer habits? it may have, but even a cursory glance at consumer trends and the growing tonnes of fabric gathering in landfill over the last few decades suggest that the western middle class world couldn’t give a serious shit about what our consumer choices do to brown women. Why? it may have something to do with the fact we don’t see it on a daily-basis, out of sight out of mind really. What we do see are ads with Kardashians pushing handbags and make up down out fucking throats until we scream ENOUGH! and put ad blockers on our browsers so our endless social media gorges and online shopping isn’t interrupted.
Consumer feminism is another example of this girl-on-girl crime. Just today I read an outstanding essay by Kath Kenny of the Conversation, in which she explores the idea that feminism and the popular maxim the personal is political is being sold back to us via old and new media such as Daily life, Mamamia, Teen Vogue and so on… she explains:
But this is a consciousness-raising version 2.0, branded VougeTM. It has to be a good thing for a struggling and isolated teen to read about a celebrity coming out, or coping with depression, or the mechanics of safe anal sex. But I find it hard to celebrate what is also, in many ways, a major corporation effectively “selling your politics” back to you, as one friend recently put it…
Do you see the consumer habit being fed here? even in the enlightened circle of feminism we fall for the trap that a click and scroll feeds our deep desires for connection and happiness that have been poked by the bright lights of shopping centres and our screens. I’m going to say something controversial here… and I mean controversial. The thing is though, I’m not afraid of what may get thrown at me because it will kind of prove my point…
I don’t like Beyoncé feminism.
There. I fucking said it.
The thing about Beyoncé feminism is the fact you buy it. so really, it should be called for what it is, consumer feminism. We buy the work-out clothes, the records, the ticket to the concert with a big FEMINIST signed lit up on stage. Which is all tickety-boo except when you think about who made those work-out clothes and how much they were paid for their work. I’ll give you a hint, it wasn’t Beyoncé and it wasn’t a liveable wage.
Yeah I get it, I’m dragging a woman though the mud, which is the actual problem here. Beyoncé can sell albums and book sold out shows. In fact, good for her. The problem is not her; the problem is the impact of anything that goes unchecked and unquestioned. The real problem is that she isn’t the only one, She’s simply the easiest example.
The fact I’m reticent to type up any kind of criticism of Beyoncé feminism speaks to a deep mistrust women have of other women. This is especially true for a white middle class feminist critiquing what has been a lightning rod of inspiration and celebration for women of colour.
I get it, this smacks of hypocrisy and privilege.
To be clear… I love that a woman of colour is one of the most influential, powerful and successful people in the world. I love that she is unapologetic for who she is, and, as her music and performances can prove, she is full of opinions and not all of them are comfortable. I fucking love that about her. Thank God for Beyoncé, really.
What I don’t like is that I cannot say a bad thing about her on the internet without having brace myself for a shit storm.
I concede that I cannot tell anyone how to do feminism, the world knows I get it wrong all the time. What I do take umbrage with is anything that covers itself in the cloak of “empowerment” *shudders from the word* to make a profit at the expense of other women with less opportunity, less education and less share in those profits. One of the biggest criticisms of (white) feminism has been that it has not included the voices of women of colour, and that it has not considered the experiences of women of colour. It is for this reason it astounds me that Beyoncé feminism continues to commit that same crime and any criticism is shouted down.
This however is not a dig at Beyoncé, she is not perfect and neither am I. I use Beyoncé feminism as an example of how the structures of patriarchy and consumerism continue to pit women against each other. May it be Beyoncé making crazy profits off the exploited labour of poorer women, or me criticising her for it, or media outlets selling our femininity and feminism back to us one click at a time. What I’m trying to get at here is us women are meant to stick together. I know we don’t, but we know we should.
To the women who have given me life, I love you and I thank you. To the women I’ve failed, I am deeply sorry. To the women who have hurt me, I sincerely forgive you.
0 notes
Last Seen Blogs

afpportfolio-blog
A Fashion Parade | Portfolio: Styling/Design/Brand

heinkudsk10
The Journey of Neal 176

dedelovect
older.....

blackdiamond230-blog
Black Queen

latenightcrawlers
Tired