#tmpatchup
Explore tagged Tumblr posts
Visit Tumblr Blog
Explore Tumblr blogs with no restrictions, modern design and the best experience.
Last Seen Tumblr Blogs


Fun Fact
The average Tumblr user visits about 67 pages every month.
Text
Various Masks and their Protection Efficiency
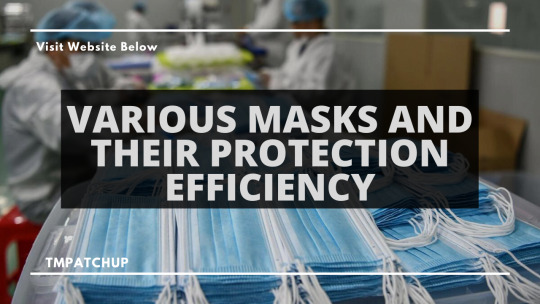
Want to know about the efficiency level of various masks to decide which one to use in this Covid-19 pandemic? Then, for you here goes our little attempt. Our write up presents you with various types of masks with respective effectiveness in fighting against the Covid-19 germs. Here we go!
VARIOUS MASKS AND THEIR PROTECTION EFFICIENCY
N95 MASK
A n95 mask first of all makes it sure that its edges are very close to your face so that not a millimeter of space is left. Being so closely fit to your face, the mask primarily filters out airborne pollutants like dust, fume and mist.
Most importantly, the mask is highly capable of fighting against the Covid-19 germs by 95%. Besides, it can deal with other pollutants - bacteria, pollen and dust of 0.3 microns by 100%. Moreover, if your n95 mask features a valve inside then it also decreases the exhalation resistance so that you can breathe far easily.
KN95 MASK
To be straightforward, the efficiency of a Kn95 is almost similar to that of a n95 mask. Yet, there is something to make a differentiation between the two. What are those? Let’s give you a detail:
Kn95 mask requires comparatively less strict requirements for pressure drop when you inhale or exhale.
Kn95 mask comes through a mask fit test while the n95 doesn’t.
SURGICAL MASK
A surgical mask popularly known as face mask unlike n95 or Kn95 features a loose fitting. But, it doesn’t mean that the mask leaves you completely vulnerable to the Covid-19 germs and other pollutants.
Studies show that a face mask is able to kill viruses by 95%. In addition, its efficiency in fighting against the pollutants like pollen, dust and bacteria is 80%.
FFP1 MASK
Just like a surgical mask, an FFP1 also battles against the Covid-19 virus by 95%. And, its efficiency in fighting against the pollutants like pollen, dust and bacteria is also 80%. Then what is the thing that makes FFP1 distinct?
That thing is the internal leakage rate. An FFP1 mask retains particles by 22% maximum while the rate might be a bit higher with a surgical mask.
ACTIVATE CARBON MASK
If you have been looking for a washable mask that you can use by replacing the filter then activated carbon is the mask for you. But, the unfortunate fact is that its virus killing efficiency is 10% only. In addition, its battling rate against other airborne contaminants is 50%.
CLOTH MASK
A cloth mask is made of a piece of cloth that may be of designee but its efficiency against viruses and pollutants is really poor. Although, it can fight back the bacteria, pollen and dust by 50% yet it cannot deal with the Covid-19 virus a bit.
SPONGE MASK
The position of a sponge mask in terms of efficiency in fighting back the virus and airborne pollutants is bottomless. The mask can resist the attack of bacteria, pollen and dust by 5% and the attack of virus by 0%.
FINAL WORDS
So, these were all about the mostly used everyday masks. Now, the decision is up to you which one you want to pick, for which purpose. But, if you ask our recommendation then that will obviously go for n95, kn95 and surgical mask.
Visit below link to read more amazing article ...............................................
https://tmpatchup.com/
.
#tmgroup#tmpatchup#leather#how to#quality#top#best#amazing#leather products#care#leather patches#leather care#fashion#leather fashion#diy
3 notes
·
View notes

Text
How to Clean Kn95 Mask

Although, it is recommended for everyone to discard a Kn95 mask after a single use yet at the present time it’s quite impossible due to the unfortunate shortage of the mask. So, what you should do or can do is - clean the mask properly to make it fit for reuse.
And, here arises the problem because cleaning a Kn95 mask ensuring safety isn’t as easy as it may sound to be. You can’t do it in any way after your mind rather you must do it in a fixed procedure. So, what is the procedure is the topic of our today’s discussion. Let’s get started!
HOW TO CLEAN KN95 MASK
To kill the germs of Covid-19 of your Kn95 mask only shortlisted methods are recommended. Here follow the methods one by one with clarification.
VAPORIZED HYDROGEN PEROXIDE
This is a method that has successfully been adopted by the researchers of Duke Health. The researchers have found that vaporized Hydrogen Peroxide is immensely successful in permeating the layers of the mask and killing the Covid-19 germs. They have also stated that using vaporized Hydrogen Peroxide doesn’t cause any type of deterioration to the mask.
So, you can adopt the method with the utmost reliance although amid the lockdown getting vaporized Hydrogen Peroxide mightn’t be easy.
HEAT
Another group of researchers at the University of Tennessee have made an experiment with heat. The researchers took a used Kn95 mask and heated it up at 70C for 30 minutes at a stretch. To their utter surprise, they found that the germs of Covid-19 are no more and the filter is all okay.
UV-C LIGHT
Using UV-C light to decontaminate your Kn95 mask is another promising method, already being adopted by some hospitals. While performing this method, you must make sure that UV-C light falls all over the mask properly. Otherwise, all your attempts will go in vain.
Here ends the suggested cleaning methods. Remember that not any of the methods is approved by the manufacturers but amid such a crisis, you are left with no other option rather than adopting any of our recommended procedures.
WARNING
There are certain things that you cannot do with your Kn95 mask. What are those? Here goes for you -
Saturating the mask with liquid alcohol or aerosol
Washing using soap solution
If you perform any of the procedures with your mask then the filter medium material of the mask will be disintegrated. And, as a result, the mask will lose its effectiveness.
FINAL WORDS
To sum up, discarding the Kn95 mask is the best ever solution but amid this crisis of mask cleaning the current one with utter care will be okay. But, as soon as you get a new one, throw away the used one to ensure the ultimate safety.
Visit below link to read more amazing article ...........................................
https://tmpatchup.com/
.
#tmgroup#tmpatchup#how to#care#top#quality#best#fashion#news#suggestion blog#blogs#corona virus#safe
2 notes
·
View notes
Text
Can Leather be Patched

Just like fabric, leather can be patched as well, although very few leather users are aware of the fact. This is why they cannot think more than changing the damaged leather without even trying to patch it. In case, you are one of those persons then this article opens a door of possibility for you displaying how you can patch leather easily.
HOW TO PATCH LEATHER?
There are a couple of methods for patching leather but it’s not possible to present all of those here and it will be unwise as well. Therefore, here, we will be presenting you with how to patch leather using sub patch, glue, filler, leather dye and finish. You can adopt the method for both minor and major patching.
Take a sub patch of any color and cut it out as per the size of tear or rip of your leather. Remember that after cutting, the patch size must be a large rectangular with 2-times more side than the rip or tear.
Insert the patch into the rip and place it under the torn area. For a comfortable and secure insertion, you can adopt a pair of tweezers.
Use a piece of palette to apply glue just between the leather beneath and patch. Make sure that you have applied the glue everywhere equally. Wipe away the excess glue that comes out of the rip.
Keep pressing the glued zone using any tough surfaced material so that a strong bond is created between patch and leather. Let the glue dry up.
Wet a clean piece of rag with 70% isopropyl and wipe the damaged area gently.
Is there any loose or dangling fiber? Trim it off using a sharp scissors. Otherwise, leather filler won’t be able to create an enliven surface.
This is the time to apply leather filler to the gap of the leather edges using a palette knife. You should use the palette’s flat side to smooth out the filler. You can use a piece of paper towel to wipe away the excess filler coming out of the gap.
Leave the filled area to be dried up. How much time you should wait? Well, you can check the filler’s instruction for learning it.
Make the patched zone invisible making it of the same color of your leather. For this, you must have the right color either purchased or made by own. Start dabbing a little amount of dye all over the repaired area using a wet sponge. Keep dabbing until you feel like the area is hidden completely.
Finally, dab a little amount of leather finish using a soft rag piece and let the finish dry up.
Visit our stores to enjoy amazing sale on different leather repairing products
https://amzn.to/2r11EJ4
Also for Ebay, visit here………
https://ebay.to/35cJhPX
.
#tmgroup#tmpatchup#leather repair#leather care#repair#care#craft#art#how to#blog#news#top#fashion#women fashion#men fashion#patches#leather patches#follow#trend#genuine#leather products#leather#leather couch#leather jacket#leather shoes
4 notes
·
View notes
Text
HOW TO REPAIR LEATHER TEARS IN 5 STEPS

If you’ve invested in a quality leather bag or coat, a tear doesn’t have to mean the end of its life. (Although, it could mean the end of the life of whoever tore it.) Obviously, a leather professional ought to be your first choice to repair leather tears in an heirloom-quality leather bag or another high-value item. But if that’s not an option, or if you’re just the DIY type, then here are 5 steps to repair small leather tears on your own.
1. REPOSITION TORN LEATHER EDGES.
Using the dull end of the needle, position the torn leather back into place the best you can. Apply a piece of scotch tape or painters tape over the tear to hold the leather in position. (*Press the tape onto your skin a few times to remove some of the stickiness first.)
2. LOCATE TEAR FROM THE INTERIOR.
Turn the bag or jacket inside out and locate the area of the tear from the interior. If your item is lined, see if there is seam already near the tear. If so, use a seam ripper to carefully open the seam to access the underside of the tear. (If no seam, use fingernail scissors to carefully cut a hole in the lining to access the torn leather.)
3. APPLY FABRIC PATCH.
Using fabric glue, affix the scrap of patch fabric to cover the tear (still working on the interior side of the leather). Your fabric will obviously need to be larger than the tear in order to adhere and properly patch the tear. Hold the patch in place for a few minutes to allow the glue to set before proceeding.
4. FINISH PATCH ON EXTERIOR
Turn to the exterior side of the leather. Carefully remove the tape. Using the dull end of the needle, gently open the edges of the tear and spread a drop of fabric glue between the fabric and the torn edges of the leather. Wipe away any excess and allow the glue to set for several hours before proceeding. We do not recommend using a hairdryer or other heat source to speed up the setting or drying process. The hot air from a hairdryer is much too harsh for leather.
5. CLOSE UP REPAIR ON THE INTERIOR.
Return to the interior lining of the bag or coat. Using your needle and thread, stitch the hole closed that was opened to access the underside of the leather. Don’t stress out about this part - it’s on the inside, and you’ll probably be the only one to ever know it’s there.
PRO TIP:
You may have noticed that the repair compound is not part of the process. Repair compound is actually better suited for addressing scratches, not tears. But on the subject of scratches, it’s important to remember that high-quality leather bags are meant to show some age—and some of this aging includes minor marks and scratches. Your best bet for developing that well-aged look over time (and keeping your leather supple and more resistant to real damage) is to apply leather conditioner on a regular basis. Apply leather conditioner every 3 to 6 months (depending on how rough you are on your bag or coat), and keep your leather in good shape for the long haul.
Visit our stores to enjoy amazing sale on different leather repairing products
https://amzn.to/2r11EJ4
Also for Ebay, visit here………
https://ebay.to/35cJhPX
.
#tmgroup#tmpatchup#leather#leather repair#leather care#care#quality#leather patches#genuine#blog#news#trending#fashion#women#patches#craft#art#men fashion#leather jacket#leather shoes#top#viral#how to
3 notes
·
View notes
Text
Ways to Stretch Leather Belts
Leather does stretch; in fact, leather belts in machinery will stretch about 6 percent over the life of the belt. You likely have not noticed it, but a belt that you have worn for years has likely gained a percent or two in length; but if it is too small, you’ll need to stretch it more actively. Any stitching or boarding will inhibit stretching; still, it is worth a try to lengthen the useful life of a good belt.
Another Hole
If you have the length, the simplest way to stretch the life of the belt (other than stretching the leather) is to punch another hole. Measure the spacing of the existing holes and mark where you wish to punch a new hole. Use a leather punch if you have one; otherwise, use a drill and drill bit for a perfect, round hole.
Saddle Soap
You may simply wet the belt and wear it. Water is not as poisonous to leather as you would believe, and a wet belt will stretch fairly readily. Use saddle soap, which will keep the belt from drying out and will condition it as well. Manufacturers usually advise against soaking the leather through, but you need to do so to stretch the belt. Wear it until the belt dries.
Alcohol
As an alternative, mix a solution of three parts warm water to one part isopropyl (rubbing) alcohol in a spray bottle. Spray the belt well, front and back, and put it on—a bit tight, if you can bear it. Wear it around the house until the belt has dried. Your body heat, and the evaporative property of alcohol, will help it to dry in a few hours. You should notice that the belt has stretched. Repeat as necessary.
Chemical Stretch
If the above fails, you will require a shoe stretching chemical. The most readily available are from Kiwi, such as its Universal Shoe Stretch, for smooth and nap leathers. These products break down the collagen in leather, which lends living flesh its firmness and leather its sturdiness. You use these as you would the water/alcohol solution, spraying the belt front and back and wearing the belt until it dries, repeating as needed. Despite the volatile organic compounds in these products, they will not harm you in contact with your skin.
Conditioner
A belt should not shrink with constant use, but a conditioner will ensure that it maintains its length. Use a lanolin-based conditioner, which will not stain your clothing as an oil-based conditioner will.
Visit link below to checkout amazing leather repairing products on our website
https://tmpatchup.com/
.
#tmpatchup#tmgroup#leather#leather repair#leather products#quality products#leather repairing products#amazing#top#best#genuine#fashion#beautiful women#women#trending#viral#news#blog#creative#create#art
4 notes
·
View notes
Text
How to Safely Clean Your Leather Sofa

Are you worried about your leather sofa that has become filthy and needs immediate cleaning but you can’t understand how to do that safely? Don’t worry we’re here for your rescue.
We will be showing you the steps that you can adopt to clean your leather sofa in the safest way without leaving a mark of damage on its surface.
Necessary tools
Vacuum cleaner
White vinegar
A soft clean rag piece
A clean towel
Flaxseed or linseed oil
Process
Step 1:
Take a vacuum cleaner attaching a soft brush to it. Take the cleaner all over the leather surface. Make sure that the dust particles of the crevices are sucked up well. Remember that dust particles may worsen the surface condition when you apply cleaner upon them.
Step 2:
Produce a solution of cleaning. You can do it in two ways. Firstly, you can create it by mixing white vinegar and pure water together. Keep in mind that the volume of both must be equal.
Secondly, to create the solution you can adopt any quality commercial leather cleaner. Simply leave a few drops of the cleaner into water and mix the two properly.
Step 3:
Take the soft clean rag piece, here if possible, you should take a piece of microfiber rag. Now, dip the rag piece into the solution. Take it up and squeeze sufficiently to make sure that it’s not filled with solution and solution is dropping.
Step 4:
Keep wiping the whole sofa surface with the rag piece. Take breaks frequently to dip it into the solution again. Don’t forget squeezing well.
Step 5:
Have a clean towel that doesn’t leave thread particles when come to contact of wet surface. Rub the towel all over the sofa surface.
Here, you mustn’t dare use a dryer. That will obviously complete the process faster but the leather will become dehydrated. This will definitely make you suffer in the long run.
Step 6:
Here comes the phase of conditioning. Before applying conditioner, you must create it by yourself to ensure 100% quality. But, how can you do that?
Well, take white vinegar and oil either of flaxseed or linseed and mix the two well. Remember that the ratio of vinegar and water must be 1:2.
After producing the conditioner, now dip that soft rag piece into it. Squeeze the rag well and rub it all over the sofa surface. Now, leave the sofa for 10 to 12 hours at least.
Step 7:
Is the time over? Then, take a clean rag piece and buff the sofa surface for restoring its shiny condition.
Tips
Don’t place the leather sofa in a place where there is overexposure of sunlight or any powerful electric light.
For maintaining the beauty of your sofa, try to clean it per week.
Final words
So, this is how you can clean your leather sofa at home environment with the guarantee of security. We recommend you to create the necessary solution by yourself instead of making the purchase. In this way, you can ensure a safer clean.
Visit our stores to enjoy amazing sale on different leather repairing products
https://amzn.to/2r11EJ4
Also for Ebay, visit here………
https://ebay.to/35cJhPX
.
#tmgroup#tmpatchup#leather care#leather repair#patches#leather patches#dan howell#how to#top#amazing#like#follow#fashion#leather fashion#women fashion#men fashion#craft#art#blog#news#viral#trend
2 notes
·
View notes
Text
What Can I Use to Repair a Leather Couch?

It doesn’t matter how much good cook you are, if you don’t have the proper ingredients or you don’t know how to use them properly, your skill has no value at all, has it? In the same way, if you don’t know or semi-sure of what the tools are to be used to repair your leather couch, you can never end up repairing the couch satisfactorily.
WHAT CAN I USE TO REPAIR A LEATHER COUCH
So, what might be the right combination of the tools? Learn with us in detail as in this article, we will be introducing you to those tools one-by-one. Let’s begin!
LEATHER CLEANER OR DISH SOAP
Don’t switch to the dish soap before if you have the cleaner in collection. No matter which one you use, make sure that it has quality enough not to cause you skin irritation.
So, why to use the cleaner or soap? Use any of these to mop the adjacent parts of the rip.
DYE-FREE SOFT RAG PIECES
You must have at least two pieces of dye-free soft rags. Use a piece of clean rag to mop the rip and its adjacent parts. Use another piece to mop the wet areas so that the fluid can’t percolate into the couch surface.
Be sure that the rags are soft enough not to cause any scratch onto the couch surface. Remember that the rags are to be free from dye, otherwise, bleeding of the dye from the wet rag may cause issue while repairing.
SMALL SCISSORS
It is very normal that the rip of the couch will have some dandling fibers but letting those remain as they are isn’t normal at all. So, what should you do? Simply, take out a sharp scissor and trim off the fibers.
METAL HEAT TOOL
A metal heat tool is much needed to heat the rip zone. To do so, at first, you must heat up an iron and press the metal heat tool against the iron surface. As soon as you feel like the tool is warmed up sufficiently, take it up from the iron surface and start rubbing all over the rip area.
LEATHER GRAIN PAPER
Before you rub the metal heat tool over the rip surface, have a piece of leather grain paper and place it over the ripped area. Now, you can rub the tool on the rip part through this paper. Don’t dare rub the tool on naked rip part; this will damage your couch’s leather surface permanently as leather can’t sustain heat.
IRON
You will be in need of an iron to heat up the metal heat tool. And, if unfortunately, you don’t have a metal heat tool, you will be using the hot tip of the iron as a substitution of the tool.
Visit our stores to enjoy amazing sale on different leather repairing products
https://amzn.to/2r11EJ4
Also for Ebay, visit here………
https://ebay.to/35cJhPX
.
#tmgroup#tmpatchup#leather#leather repair#leather care#fashion#leather face#leather fashion#trick or treat#trend#women#men#craft#art#patches#leather patches#genuine#how to#news#blog#leather couch
2 notes
·
View notes
Text
What is the best leather repair product?
If you’re looking for a leather repair product and feel confused about which one is to buy from the thousands then this write up is only for you. Yes, the article presents you with not any specific repair kit instead introduce you to the features that you will have only the best leather repair product.
WHAT IS THE BEST LEATHER REPAIR PRODUCT
You should get yourself introduced to the following features and look for these in every leather repair product. We guarantee the instructions will lead you to the best ever leather repair kit.
MULTI-DEALING CAPABILITY
The product’s restoration capability shouldn’t be limited to only one or two specific leather product. Instead, it should be wider enough to deal with all types of everyday used leather products like jacket, luggage, vinyl, belt, shoes, furniture and car seats.
Again, the kit must be skilled enough to heal any type of problems including tear, rip, cuts, burns, scratches.
Remember that such a leather product isn’t only genius but also cost saving.
COLOR MIXING GUIDE
Do you know what the toughest part of leather repair is? It’s not sewing, cleaning, cutting, gluing rather it’scolor matching in the most appropriate way.
No matter how good your product is and how good it is in repairing your leather products if you cannot match the color of the repaired part with that of the rest of the leather surface, all of your attempts will be in vain.
Therefore, your leather repair product must include a color mixing guide that will guide you how you can match the color of every part properly.
NO HARMFUL CHEMICAL
It’s an obvious fact that glue and color are the two most vital parts of a leather repair product. Glue is highly helpful in fixing torn and ripped parts while color helps you hide the repaired part.
The stronger the glue is, the better it is and the more variety of color is, the better it is. But, even after checking all these issues, you mustn’t forget one more thing to check out. What’s that? It’s obviously the contents that form the color and glue. If there is any harmful element in any of these’ solution then you must avoid making the purchase of the repair product.
Remember that the mixture of harmful element may boost the performance of the glue and color but this will bring afflictions both for your skin and health though gradually.
EASY-TO-UNDERSTAND MANUAL
What is the use of such a leather repair product that is simply brilliant in performance but doesn’t give you any clue regarding how to use its components in the best possible way? What will you do with that product? Will you be able to get the best out of it?
This is why we suggest you to have a kit that will come to you with proper user manual with easy-to-understand instructions.
FINAL WORDS
In the end, your choice of leather repair product mustn’t overlook multi-tasking ability, color guide, chemicals used and user manual. Don’t put less priority to any of these, to avoid wasting your hard toil money consciously.
Visit our stores to enjoy amazing sale on different leather repairing products
https://amzn.to/2r11EJ4
Also for Ebay, visit here………
https://ebay.to/35cJhPX
.
#tmgroup#tmpatchup#leather#leathercare#leatherrepair#patches#leatherpatches#top#fashion#blog#news#craft#howto#repair#repair products#amazing#top quality#best#women fashion#men fashion
2 notes
·
View notes
Text
How to Wear Suspenders with a Tuxedo

The tuxedo is a stylish suit worn by men. Its look has not changed much over the years but still manages to look classy. A tuxedo is used for weddings, parties or even just for a romantic evening. Some gentlemen choose to use suspenders or braces for more support or even a more fashionable add-on. There are a few different kinds of suspenders for the tuxedo, each with its own charm and contribution.
Pick out your suspenders. The number one thing to keep in mind when choosing suspenders is comfort. Make sure they fit reasonably well. Suspenders are adjustable, but it would be a better idea to make sure you buy the right size and length for your body.
Examine the suspenders to verify what kind they are. They may either be fastened to the belt with a waistband clip, or they may have holes in the ends. If there are holes in the ends, these are to be fastened onto the pants. The pants come pre-equipped with buttons just for this purpose.
Fasten the suspenders either by clip or button. Adjust them to the correct length, so the pants are high on the waist but are comfortable and do not rest too high or low. The pants should not be worn any lower than 2 inches below the belly button or any higher than the belly button.
Check that the suspenders are not too tight on the shoulders. If they are, loosen them to the correct length.
Examine underneath the suspenders to make sure that the area under them is not wrinkled. After doing this, put on the tuxedo jacket, as the suspenders should be worn underneath the jacket and not showing. Do not wear a belt with suspenders, as suspenders are a classy belt replacement.
#tmgroup#tmpatchup#leather#leather product#quality#quality leather#top#top quality#patches#leather patches#follow#blog#fashion#men#women#leather care#diy#tips#tricks
7 notes
·
View notes
Text
How To Care Your Leather Wallets

In this line, today from Leatherious we want to advise you on how you can take care of your leather wallets in an easy, simple and fast way. We are convinced that with these care you will have a leather wallet in perfect condition for many years.
1: The Day To Day
It is very common to keep things in the wallet that when we discovered them after months or even years we thought "what will this do here?” If it is not necessary, avoid forcing the leather wallet is a good practice, because although it is a unique material, in the long run, it can end up becoming deformed. We also have to guard ourselves against holding or picking up our wallet when we have our hands with an oily element. We can leave marks difficult to remove.
2: Frequency Of Cleaning
We will always find subtle differences in this first aspect, which will be propitiated by the use we are giving to our leather portfolio on a daily basis. It is not the same to wear sitting in an office than in a more street job, where we are constantly taking out and keeping the wallet. The ideal, establishing an average user is to clean it every two or three months.
3: Avoid Oily Products
Already focusing on the time to clean your leather wallet, it is important to flee from all types of oils. The oils produce a deceptive effect on skin products since they make them look shiny and shiny when applied but soon turn their effect to the opposite. They can cause grease stains and ruin the leather product forever.
4: To Finish
Once we have our leather wallet almost like when we bought it if we want to reach perfection we can use some of the sprays that are sold specialized in leather, in order to give it even more shine.
It is important to be clear that just as we should not use oils for cleaning, the use of bitumen or colored sprays is equally harmful to our leather portfolio.
Visit our stores to enjoy amazing sale on different leather repairing products
https://amzn.to/2r11EJ4
Also for Ebay, visit here………
https://ebay.to/35cJhPX
.
#tmgroup#tmpatchup#leather#leather care#leather repair#repair#care#fashion#leather fashion#genuine#genuine leather#top#how to#womens clothing#men fashion#craft#art#amazing#blog#news#follow
1 note
·
View note
Text
How to Lengthen a Suit Jacket

The value of a properly fitted suit jacket can't be overstated. Wearing one, a person looks well-dressed, professional and ready for the job. Without one (or in an ill-fitting one), a perfectly competent worker may appear disheveled, unprepared and entirely unprofessional. However, because most suit jackets are manufactured only in standard sizes (and because many people don't fit perfectly into one of these “standard size” categories), finding a perfectly fitted suit jacket can be difficult. Hiring a tailor to fix the fit can also be problematic; tailoring fees can be quite expensive. If you’re relatively proficient in sewing, however, you may be capable of lengthening your suit jacket on your own.
Turn the jacket inside out and inspect the sleeves and hem to see if there's any extra fabric. A good jacket will have a fairly substantial hem, usually with the extra fabric sewn and hidden in the interior lining. If there is no extra fabric, you won't be able to lengthen the jacket.
Carefully take out the stitches of the hem of whatever part of the jacket you're trying to lengthen by using a seam or hem ripper to pull out the stitches. Be careful not to snag any of the fabric as you're pulling.
Remove all of the hem's stitching so that the extra fabric can be pulled out from under the jacket's lining. Once the needed amount of fabric has been pulled out, fold back the extra fabric to create a new hem. Use pins to hold the new length in place, being careful to make sure that the hem is even.
Stitch the new hem into place using a sewing machine.You may also use fusible iron-on web patches to hold up the new hem if you don't have time to sew it; however, sewing is much more permanent. If you're sewing a lengthened skirt on the bottom of a jacket, try to re-create the front corners as accurately as possible. You probably won't be able to completely re-create them, but with careful measuring, you should be able to come close to the shape of the original.
Complete your alteration job by ironing out all of the old creases left from the previous hem. While all the creases may not be completely removed after the initial ironing, over time they should become less noticeable.
#tmgroup#tmpatchup#leather#suit#care#art#tips#tricks#diy#fashion#how to#blog#quality#patches#top#men#women#leather patches#top quality
1 note
·
View note
Text
How to Stop a Jeans Zipper From Falling Down

A highly taboo subject for almost any child is undergarments, so hearing a classmate say, "XYZ," code for "examine your zipper," can cause a flush face in seconds, and the experience isn't any more pleasant as an adult. So, when you find yourself with a pair of jeans with a zipper that seems possessed, as it constantly unzips itself, you may feel tempted to simply toss them in the trash to save yourself the embarrassment. But you can rescue those otherwise perfectly good pants with a simple and inexpensive quick fix.
Jeans That Button
Pinch a tiny clear hair elastic to flatten it. Thread one end of the elastic through the hole of the zipper's pull. Pull one end of the elastic through the other, and pull that end to tighten the elastic down on the pull.
Zip up the jeans before buttoning them. Pull the elastic up and loop it over the button of your jeans to hold the slide of the zipper up.
Button your jeans as you normally would to conceal the rigged zipper.
Jeans That Snap
Zip up the jeans before snapping them.
Push the safety pin from the inside of the pants to the outside through the zipper tape on one side. Push the pin back to the inside of the pants through the zipper tape on the other side. Do this just beneath the slide of the zipper. The slide won't be able to slide down the teeth of the zipper past the safety pin.
Flip the pull of the slide down, and snap your jeans as you normally would.
#tmgroup#tmpatchup#leather#quality leather#top#top quality#news#blog#furniture#f1 clothing#you need to calm down#care#leather care#patches#quality patches#follow#fashion#men#women
1 note
·
View note
Text
How to Care for Suede & Leather

Keeping suede and leather items of clothing looking new and untarnished is a fairly easy task. One of the most important things to remember when caring for suede and leather is that exposure to inclement weather conditions can stain and scuff the items. Additionally, both suede and leather items need cleaning and preventative maintenance on a regular basis to ensure the material remains soft, supple and moisturized. Failure to do this can result in cracked and dry material.
Caring for Suede
Treat new suede with a waterproofing spray. Give the item a light coating of the spray, then place it in a cool area. Once the suede is dry, rub any areas that look dull or mussed with an emery board to fluff up the fibers.
Clear loose stains, such as dirt and sand, with a suede brush. If the stains are sticky, such as rock salt or mud, dab at them with a soft, damp cloth.
Mix a few drops of dry-cleaning solvent with a handful of sawdust and apply it to any stains that are greasy or set-in, such as oil. Brush the area with the suede brush after the stain is removed. Dry-cleaning solvent can discolor suede, so test it on a hidden area before applying it to the stain to make sure it won't damage the item.
Visit a professional suede cleaner for stains that can't be removed using one of the home care methods.
Caring for Leather
Apply a waterproofing spray to leather items when they are new. Dry the items in a cool place, then condition them with a leather lotion to keep the material soft and breathable. Repeat this treatment about every three months to make sure they don't become stained or cracked.
Allow wet leather items to air-dry in a cool place; direct heat from a dryer, heater or fireplace can dehydrate the leather. Apply a leather lotion to the items when they are nearly dry to restore flexibility to the fabric.
Wipe away dirt, rock salt, dust and other surface stains with a dry sponge. If stains or marks remain, treat the leather with a cloth dipped in a solution of 1 cup of water and 1 tablespoon of white vinegar.
Rub away surface scuff marks with a gum eraser.
Store leather clothing on wide wooden or padded hangers to keep the fabric from stretching out. Place the clothes in a breathable cloth garment bag to keep them from getting dusty; never store leather items in plastic bags, as that can dry out the material. Stuff leather shoes and handbags with newspaper to help them retain their shape.
#tmgroup#tmpatchup#leather#leather work#crafts#art#care#leather care#genuine#genuine patches#patches#leather patches#top#original
13 notes
·
View notes
Text
How to Adjust the Waistband for Toddler Pants

Toddlers come in all shapes and sizes, and finding clothing that fits just right can be tricky. Toddler pants with adjustable waistbands provide and effective way to make the pants fit better. Making slight adjustments in the waistband allows you to customize a fit that is more tailored to your child's body.
Put the pants on your toddler and snap or zip them if necessary.
Observe how much extra space is in the waist of the pants to determine if and by how much you need adjust it to be smaller. Toddler pants come with the adjustable waist in the largest position.
Unsnap the pants and grasp the strip of elastic on one side of the waistband.
Unfasten the elastic from the button that's holding it in place, but do not let the elastic go.
Pull the elastic toward you and refasten the button in hole farther down on the elastic strip. This works much like a belt: the more you pull before you fasten, the tighter the fit will be.
Count to see how many holes down you re-fastened the button, and repeat the process on the other side of the waistband, being sure to re-fasten that button the same number of holes down the elastic.
Snap the pants back in place to see if they are fitting properly, and make adjustments if necessary.
Loosen the waistband later on if your child needs to be re-fitted due to growth.
#tmgroup#tmpatchup#leather#leather repair#repair#care#crafts#ideas#patches#leather care#genuine leather#genuine#top quality#quality leather#best#fashion#men#women#popular#trending#shoes#jackets
1 note
·
View note
Text
How to Give Boots a Vintage Look

Vintage in the fashion world refers to an item of clothing that is several years old. Instead of purchasing vintage boots, distress your own -- whether work boots, cowboy boots or fashion boots -- to give them that old look. Give your brand new boots the vintage look with some sandpaper and then wear them with a vintage t-shirt and a pair of skinny jeans for a casual look.
Pour 1 quart of warm water into a bucket. Add five or six drops of mild dish washing detergent and mix the ingredients.
Wet a clean cloth in the soap solution. Wring out the excess moisture. Wipe down the exterior of the rubber rain boots to remove surface dirt. Rinse the cloth, as needed, apply more soap solution and continue to clean the boots.
Dampen a clean cloth with water. Rinse the rubber boots by wiping them with the cloth.
Dry the rubber surface with another cloth.
Apply rubber moisturizing conditioner to a clean dry cloth according to directions. Rub the moisturizing conditioner into the rubber. Allow it to sit on the surface for 30 to 45 minutes to moisturize the dry rubber.
Remove excess rubber conditioner by buffing the boots with a dry cloth.
#tmgroup#tmpatchup#leather#leather hacks#ideas#life hacks#genuine#genuine leather#top quality#quality#best#leather shoes#patches
2 notes
·
View notes