#unraid docker setup
Explore tagged Tumblr posts
Visit Tumblr Blog
Explore Tumblr blogs with no restrictions, modern design and the best experience.
Last Seen Tumblr Blogs


Fun Fact
Celebrities use Tumblr as well.
Text
How to Install Unraid NAS: Complete Step-by-Step Guide for Beginners (2025)
If you’re looking to set up a powerful, flexible network-attached storage (NAS) system for your home media server or small business, Unraid is a brilliant choice. This comprehensive guide will walk you through the entire process to install Unraid NAS from start to finish, with all the tips and tricks for a successful setup in 2025. Unraid has become one of the most popular NAS operating systems…
#2025 nas guide#diy nas#home media server#home server setup#how to install unraid#network attached storage#private internet access unraid#small business nas#unraid backup solution#unraid beginner tutorial#unraid community applications#unraid data protection#unraid docker setup#unraid drive configuration#unraid hardware requirements#unraid licencing#unraid media server#unraid nas setup#unraid parity configuration#unraid plex server#unraid remote access#unraid server guide#unraid troubleshooting#unraid vpn configuration#unraid vs synology
2 notes
·
View notes
Text
I made it easier to back up your blog with tumblr-utils
Hey friends! I've seen a few posts going around about how to back up your blog in case tumblr disappears. Unfortunately the best backup approach I've seen is not the built-in backup option from tumblr itself, but a python app called tumblr-utils. tumblr-utils is a very, very cool project that deserves a lot of credit, but it can be tough to get working. So I've put together something to make it a bit easier for myself that hopefully might help others as well.
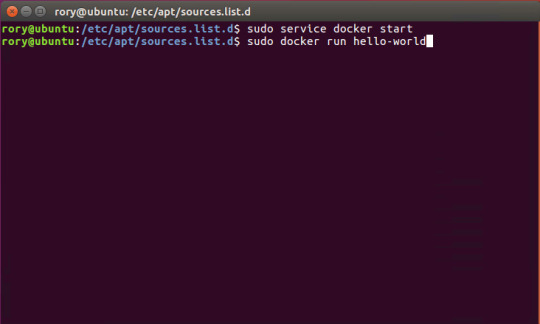
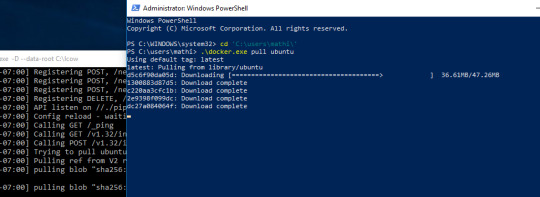
If you've ever used Docker, you know how much of a game-changer it is to have a pre-packaged setup for running code that someone else got working for you, rather than having to cobble together a working environment yourself. Well, I just published a tumblr-utils Docker container! If you can get Docker running on your system - whether Windows, Linux, or Mac - you can tell it to pull this container from dockerhub and run it to get a full backup of your tumblr blog that you can actually open in a web browser and navigate just like the real thing!
This is still going to be more complicated than grabbing a zip file from the tumblr menu, but hopefully it lowers the barrier a little bit by avoiding things like python dependency errors and troubleshooting for your specific operating system.
If you happen to have an Unraid server, I'm planning to submit it to the community apps repository there to make it even easier.
Drop me a message or open an issue on github if you run into problems!
207 notes
·
View notes
Video
youtube
How to Run Llama 2 7B in Docker on Unraid with OpenChat GPU – Easy Setup!
1 note
·
View note
Text
An Ultimate Guide to Unraid OS NAS

Network Attached Storage (NAS) has become an essential component for both home and small business (SMB) environments. With the need for data accessibility, backup, and storage scalability, a reliable NAS system is indispensable. Among the various NAS solutions available, Unraid OS stands out due to its versatility, user-friendly interface, and robust feature set. This guide will explore what Unraid OS is, the advantages of using an Unraid OS NAS, and provide a detailed look at the LincPlus Unraid OS NAS, along with a step-by-step guide on how to use it.
What is Unraid?
Unraid is a Linux-based operating system designed to provide an easy-to-use and flexible platform for building and managing a NAS. Unlike traditional RAID systems, Unraid allows you to mix and match drives of different sizes, which can be added to the array as needed. This makes it an ideal choice for users who want to expand their storage capabilities over time without being constrained by identical drive requirements.
Key Features of Unraid:
Flexibility: Add any number of drives, of any size, and mix and match them in your array.
Simplicity: Easy-to-use web interface for managing your storage, VMs, and Docker containers.
Protection: Offers parity-based protection to safeguard against drive failures.
Scalability: Easily expand your storage by adding more drives.
Virtualization: Run virtual machines (VMs) directly from the NAS.
Docker Support: Host Docker containers to expand functionality with apps like Plex, Nextcloud, and more.
Unraid OS NAS
An Unraid OS NAS leverages the power of the Unraid operating system to provide a versatile and high-performance storage solution. This type of NAS is suitable for both home users who need a media server and small businesses requiring reliable storage for critical data.
Advantages of Unraid OS NAS:
Cost-Effective: Use off-the-shelf hardware and avoid the high costs of pre-built NAS systems.
Customizable: Build a NAS that fits your specific needs, whether it's for media streaming, data backup, or running applications.
Performance: Optimized for speed and efficiency, especially with 2.5GbE connectivity, ensuring fast data transfer rates.
User-Friendly: The intuitive web interface makes it easy for anyone to set up and manage.
Community Support: A large, active community provides a wealth of knowledge and assistance.
LincPlus Unraid OS NAS
One of the top choices for an Unraid OS NAS is the LincPlus NAS. This device offers an excellent balance of performance, features, and affordability, making it ideal for both home and SMB users.
Specifications:
Feature
Specification
CPU
Intel Celeron N5105
RAM
16GB DDR4
Storage
Supports up to 6 drives (HDD/SSD)
Network
2.5GbE port
Ports
USB 3.0, HDMI, and more
OS
Unraid OS pre-installed
How to Use the LincPlus Unraid OS NAS:
Setup and Installation:
Unbox the LincPlus NAS and connect it to your network using the 2.5GbE ports.
Attach your storage drives (HDDs or SSDs).
Power on the NAS and connect to it via a web browser using the provided IP address.
Initial Configuration:
Log in to the Unraid web interface.
Configure your array by adding your drives. Unraid will offer options for setting up parity drives for data protection.
Format the drives as required and start the array.
Adding Storage:
You can add additional drives to the array at any time. Unraid will incorporate them into the array and adjust parity as needed.
Mix and match drives of different sizes to maximize your storage efficiency.
Setting Up Shares:
Create user shares for different types of data (e.g., media, backups, documents).
Configure access permissions and set up network sharing (SMB, NFS, AFP).
Installing Applications:
Use the built-in Docker support to install applications like Plex, Nextcloud, or any other Docker container.
Alternatively, use the Community Applications plugin to browse and install from a wide range of available apps.
Running Virtual Machines:
Utilize the virtualization features to run VMs directly on the NAS.
Allocate CPU, RAM, and storage resources as needed for your VMs.
Backup and Maintenance:
Set up automated backups to ensure your data is protected.
Regularly check the health of your drives using the SMART monitoring tools built into Unraid.
Keep the Unraid OS updated to benefit from the latest features and security patches.
Conclusion
An Unraid OS NAS, particularly the LincPlus Unraid OS NAS, offers a powerful, flexible, and cost-effective solution for both home and SMB users. With its robust feature set, including 2.5GbE connectivity, easy scalability, and support for Docker and VMs, it stands out as an excellent choice for those looking to build a versatile and high-performance NAS system. By following the setup and usage guidelines, users can maximize the potential of their Unraid OS NAS, ensuring reliable and efficient data storage and management.
Additional Resources:
Unraid Official Website
By leveraging the capabilities of Unraid and the LincPlus NAS, you can build a storage solution that meets your unique needs, whether for personal use or to support your small business operations.
FAQ: Unraid OS NAS
What is Unraid OS and how does it differ from traditional RAID?
Answer: Unraid OS is a Linux-based operating system designed specifically for managing NAS devices. Unlike traditional RAID, Unraid allows you to use drives of different sizes and types in the same array. You can add new drives to expand your storage at any time, without needing to rebuild the array or match the sizes of existing drives. This flexibility makes Unraid ideal for users who plan to expand their storage over time.
What are the hardware requirements for running Unraid OS on a NAS?
Answer: To run Unraid OS, you'll need a 64-bit capable processor (x86_64), at least 2GB of RAM (though 4GB or more is recommended), and a USB flash drive of at least 1GB to boot the OS. The LincPlus Unraid OS NAS, for instance, comes with an Intel Celeron J4125 processor and 8GB of DDR4 RAM, which provides ample performance for most home and small business applications. Additionally, having 2.5GbE network ports enhances data transfer speeds.
Can I use different sizes and types of drives in my Unraid NAS?
Answer: Yes, one of the key advantages of Unraid is its ability to mix and match different sizes and types of drives within the same array. This flexibility allows you to maximize your storage capacity and easily expand your system over time without the need for drives to be identical. You can start with a few drives and add more as needed, making Unraid a cost-effective and scalable solution.
How do I ensure my data is protected on an Unraid NAS?
Answer: Unraid offers several methods to protect your data:
Parity Protection: By configuring one or two drives as parity drives, Unraid can recover data from a failed drive.
Automated Backups: Set up regular backups using plugins or Docker applications to ensure your data is always backed up.
SMART Monitoring: Utilize the SMART monitoring tools in Unraid to regularly check the health of your drives and receive alerts about potential issues.
Redundancy: Keep multiple copies of important data across different drives or even in different locations to prevent data loss from hardware failures.
source:
https://www.lincplustech.com/blogs/news/unraid-os-nas-guide
0 notes
Text
can you run nord vpn on an unraid system
🔒🌍✨ Get 3 Months FREE VPN - Secure & Private Internet Access Worldwide! Click Here ✨🌍🔒
can you run nord vpn on an unraid system
Nord VPN compatibility with Unraid server
NordVPN is renowned for its robust security features and wide device compatibility, making it a popular choice for users seeking to safeguard their online activities. For those utilizing Unraid servers, NordVPN's compatibility offers an added layer of protection and privacy.
Unraid is a server operating system that allows users to store and manage their data, applications, and virtual machines in a single, centralized location. With its emphasis on flexibility and scalability, Unraid has gained a devoted following among home server enthusiasts and small businesses alike.
Fortunately, NordVPN is fully compatible with Unraid servers, allowing users to encrypt their internet traffic and anonymize their online identity seamlessly. By installing the NordVPN application directly onto their Unraid server, users can secure their network connections and shield their sensitive data from prying eyes.
The integration of NordVPN with Unraid is straightforward, thanks to NordVPN's user-friendly setup process and comprehensive documentation. Users can follow step-by-step instructions to configure NordVPN on their Unraid server, ensuring that all network traffic is routed through the VPN tunnel for maximum security.
Once configured, NordVPN provides Unraid users with several benefits, including:
Enhanced Privacy: NordVPN encrypts internet traffic, preventing ISPs, hackers, and other third parties from monitoring online activities.
Geo-Unblocking: With NordVPN's vast server network, Unraid users can access geo-restricted content and services from anywhere in the world.
Secure Remote Access: NordVPN's advanced security protocols enable secure remote access to Unraid servers, allowing users to manage their data and applications with confidence.
In conclusion, NordVPN's compatibility with Unraid servers offers users a reliable solution for protecting their online privacy and security. Whether for personal use or business applications, the combination of NordVPN and Unraid provides peace of mind in an increasingly digital world.
Running Nord VPN on Unraid system
Running NordVPN on Unraid System: A Comprehensive Guide
Unraid is a powerful operating system that allows users to create a Network Attached Storage (NAS) system with ease. While Unraid provides robust storage solutions, users often seek to enhance their privacy and security by integrating a Virtual Private Network (VPN) service like NordVPN. By running NordVPN on Unraid, users can encrypt their internet traffic and enjoy enhanced anonymity while accessing the web.
Setting up NordVPN on Unraid is a straightforward process, albeit requiring some technical knowledge. Here's a step-by-step guide to help you get started:
Install Docker: NordVPN can be run as a Docker container on Unraid. Begin by installing the Docker plugin from the Unraid Community Applications.
Search for NordVPN Docker Image: Within the Docker tab of Unraid, search for the NordVPN Docker image. Ensure that you select the official NordVPN image to guarantee security and reliability.
Configure NordVPN Container: Once the NordVPN Docker image is installed, configure the container with your NordVPN credentials. You'll need your NordVPN username and password for authentication.
Choose Server Locations: NordVPN offers servers in numerous locations worldwide. Select the desired server locations within the NordVPN container settings to optimize speed and accessibility.
Enable Kill Switch (Optional): To enhance security, consider enabling the NordVPN kill switch feature within the container settings. This ensures that all internet traffic is blocked if the VPN connection drops unexpectedly.
Start NordVPN Container: After configuring the settings, start the NordVPN container. You'll now be connected to the NordVPN network, encrypting your internet traffic and providing anonymity.
Verify Connection: Once the container is running, verify that your Unraid system is connected to NordVPN by visiting a website like whatismyip.com to confirm your new IP address.
By following these steps, you can effectively run NordVPN on your Unraid system, bolstering your online privacy and security. Whether you're accessing sensitive data or simply browsing the web, NordVPN on Unraid offers peace of mind and anonymity.
VPN setup on Unraid for Nord
Setting up a VPN on Unraid for Nord is a prudent step towards enhancing your online privacy and security. Unraid, known for its versatility in creating and managing virtual machines and docker containers, offers a convenient platform for deploying a VPN server.
To begin the process, ensure you have a NordVPN subscription and access to your NordVPN account credentials. NordVPN provides comprehensive guides and support for various platforms, including Unraid, making the setup process relatively straightforward.
Firstly, navigate to the "Apps" section within Unraid's web interface and search for a VPN application compatible with NordVPN. Popular choices include OpenVPN and WireGuard, both of which are supported by NordVPN.
Once you've selected your preferred VPN application, follow the installation instructions provided by NordVPN or the community. These typically involve downloading the relevant configuration files from NordVPN's website and importing them into the VPN application on your Unraid server.
After importing the configuration files, you'll need to input your NordVPN account credentials and adjust any additional settings according to your preferences. This may include selecting the desired VPN server location or enabling features such as Kill Switch for added security.
Once the setup is complete, you can start the VPN service on your Unraid server, allowing all connected devices to benefit from NordVPN's encrypted tunnel and anonymous browsing capabilities.
Remember to periodically update your VPN configuration files to ensure optimal performance and security. Additionally, familiarize yourself with NordVPN's documentation for troubleshooting tips and best practices.
By setting up NordVPN on Unraid, you can enjoy a heightened level of privacy and security for your online activities, whether you're browsing the web, accessing sensitive information, or remotely connecting to your Unraid server.
Secure VPN connection for Unraid
Title: Ensuring a Secure VPN Connection for Unraid: A Comprehensive Guide
In today's digital age, safeguarding your online privacy and security is paramount, especially when it comes to accessing your Unraid server remotely. Unraid, a popular NAS (Network Attached Storage) operating system, offers users the flexibility to store and manage their data efficiently. However, accessing it from outside your local network can expose your sensitive information to potential threats. To mitigate these risks, establishing a secure VPN (Virtual Private Network) connection is essential.
Here's a step-by-step guide to setting up a secure VPN connection for your Unraid server:
Choose a Reliable VPN Service: Select a reputable VPN provider that prioritizes security, offers strong encryption protocols, and has servers in locations that suit your needs.
Install VPN Software: Install the VPN software on your Unraid server. Many VPN providers offer dedicated applications for various operating systems, including Unraid.
Configure VPN Settings: Follow the provider's instructions to configure the VPN settings on your Unraid server. This typically involves entering your VPN credentials and selecting preferred encryption protocols.
Enable Firewall and Security Features: Activate firewall and other security features on your Unraid server to add an extra layer of protection against unauthorized access.
Test the Connection: Once configured, test the VPN connection to ensure it's working correctly. Verify that your Unraid server can only be accessed through the VPN tunnel.
Regularly Update Software: Keep your Unraid server's software, including the VPN client, up to date to patch any vulnerabilities and ensure optimal security.
Implement Multi-Factor Authentication (MFA): Consider enabling MFA for additional security. This requires users to provide two or more forms of authentication before accessing the server remotely.
By following these steps, you can establish a secure VPN connection for your Unraid server, safeguarding your data and maintaining your privacy even when accessing it from outside your local network. Stay vigilant and proactive in maintaining the security of your Unraid setup to enjoy peace of mind while managing your files and services remotely.
Unraid network privacy with Nord VPN
Unraid is a popular operating system for managing network-attached storage and virtualization environments. When it comes to ensuring network privacy while using Unraid, integrating a Virtual Private Network (VPN) such as NordVPN can be a valuable solution.
NordVPN is a reputable VPN service known for its top-notch security features and global network of servers. By configuring NordVPN on your Unraid system, you can encrypt your internet traffic and mask your IP address, thereby enhancing your online privacy and security.
To set up NordVPN on Unraid, you can utilize the VPN client available through the Unraid Community Applications plugin. Once installed, you can easily configure NordVPN with your account credentials and choose from a wide range of servers located in different countries around the world.
By routing your Unraid network traffic through NordVPN's servers, you can prevent third parties from monitoring your online activities and protect your data from potential cyber threats. Whether you are accessing sensitive information or simply browsing the web, using NordVPN with Unraid can offer an additional layer of security to safeguard your privacy.
In conclusion, integrating NordVPN with Unraid is a proactive step towards maintaining network privacy and ensuring secure internet connectivity. With its advanced encryption protocols and user-friendly interface, NordVPN is a reliable solution for enhancing the privacy and security of your Unraid network environment.
0 notes
Text
Syncthing kubernetes

SYNCTHING KUBERNETES HOW TO
SYNCTHING KUBERNETES FOR MAC
SYNCTHING KUBERNETES INSTALL
SYNCTHING KUBERNETES UPDATE
SYNCTHING KUBERNETES WINDOWS
I will be grateful for your help, best regards :). What can I do to make the Syncthing docker work on the same user to whom the owner of the parent folder ("rs") is assigned ? I even thought about adding to the cron a cyclical task of changing the owner, but it is not a good solution due to the amount of synchronized data (a few computers). The problem is related to docker permissions, because the files created by the docker have the root owner and when I in unRaid change the owner for all files and folders to user "rs", the problem disappears.
SYNCTHING KUBERNETES WINDOWS
The files are visible from the Windows level, I can read them, but I can't delete them. I can easily create new files and folders in it and delete them.Īnother folder called "Syncthing" is created in the folder "Media", to which I save synchronized files via the Syncthing plugin based on docker and here a problem occurs. I can easily see this folder from the network and Windows client. In unRaid I created the user "rs" whom I assigned to the shared folder named "Media". I'm using the test version of unRaid 6.8. I have a problem with permissions between the shared folder on unRaid and the docker-based Syncthing plugin used. If the cluster was registered and the PrivateAccess fields was nil then this issue should not occur in the aforementioned case.Good morning, it's nice to welcome you as new user ) This would also occur if tags were updated while the cluster was processing the update. If PrivateAccess is false and then enabled in EKS console, then finishes at 11:01, and then tags are updated from Rancher before 11:05 the value will likely be overwritten. To use EKS as an example, a cluster may have PrivateAccess as a managed field.
SYNCTHING KUBERNETES UPDATE
If Rancher and another source attempt to update a cluster at the same time or within the 5 minute refresh window of an update finishing, then it is likely any “managed” fields can be caught in a race condition. Kubernetes, Google’s orchestration project for Docker, is a Go project, along with the Docker networking project Weave and the Shipyard cluster-management system. The effective desired state can be thought of as the UpstreamSpec + all non-nil fields in the EKSConfig or GKEConfig. If it is not currently updating, any “managed” fields on EKSConfig or GKEConfig are overwritten with their corresponding value from the recently updated UpstreamSpec. If it is updating, nothing further is done. After the UpstreamSpec has been refreshed, Rancher checks if the cluster has an update in progress.
SYNCTHING KUBERNETES INSTALL
OpenFaaS in 2021: Quite a lot has changed since this blog post was written. If you instead want to install GitLab on Kubernetes, see GitLab Helm Charts.
SYNCTHING KUBERNETES FOR MAC
minikube is a Kubernetes distribution which lets you run a Kubernetes cluster on your laptop it’s available for Mac and Linux, but is most commonly used with MacOS.
SYNCTHING KUBERNETES HOW TO
UpstreamSpec represents the cluster as it is in the hosted Kubernetes provider and is refreshed on an interval of 5 minutes. This is a guide on how to setup OpenFaaS Serverless Functions Made Simple on Kubernetes 1.8 or later with minikube. Unrecoverable corruption in Chromium Corruption in syncthing. Those fields become managed once their value has been changed by Rancher. LevelDB is an open-source on-disk key-value store written by Google fellows Jeffrey Dean and. When a pre-existing cluster is registered in rancher all nillable fields are nil and are not “managed”. When a cluster is created in Rancher, all fields are non-nil and therefore “managed”. Fields that are non-nil in the config object can be thought of as “managed”. The EKSConfig or GKEConfig represents desired state for its non-nil values. The struct types that define these objects can be found in their corresponding operator projects:Īll fields with the exception of the cluster name, the location (region or zone), Imported, and the cloud credential reference, are nillable on this Spec object.
For GKE, this is located on the GKEStatus field on the Status of the Cluster.
For EKS, this is located on the EKSStatus field on the Status of the Cluster.
The config object for the cluster, located on the Spec of the Cluster: It groups containers that make up an application into logical units for easy management and discovery. There are two fields on the Rancher Cluster object that must be understood to understand how syncing works: Kubernetes, also known as K8s, is an open-source system for automating deployment, scaling, and management of containerized applications. Its largest limitation is that processing an update from Rancher and another source at the same time or within 5 minutes of one finishing may cause the state from one source to completely overwrite the other. This enables Rancher to not be the sole owner of a hosted cluster’s state. Syncing is the feature for EKS and GKE clusters that causes Rancher to update the clusters’ values so they are up to date with their corresponding cluster object in the hosted Kubernetes provider.
0 notes
Text
Start Docker In Ubuntu

A Linux Dev Environment on Windows with WSL 2, Docker Desktop And the docker docs. Docker Desktop WSL 2 backend. Below is valid only for WSL1. It seems that docker cannot run inside WSL. What they propose is to connect the WSL to your docker desktop running in windows: Setting Up Docker for Windows and WSL. By removing /etc/docker you will loose all Images and data. You can check logs with. Journalctl -u docker.services. Systemctl daemon-reload && systemctl enable docker && systemctl start docker. This worked for me.
$ docker images REPOSITORY TAG ID ubuntu 12.10 b750fe78269d me/myapp latest 7b2431a8d968. Docker-compose start docker-compose stop. After installing the Nvidia Container Toolkit, you'll need to restart the Docker Daemon in order to let Docker use your Nvidia GPU: sudo systemctl restart docker Changing the docker-compose.yml Now that all the packages are in order, let's change the docker-compose.yml to let the Jellyfin container make use of the Nvidia GPU.
Complete Docker CLI
Container Management CLIs
Inspecting The Container
Interacting with Container
Image Management Commands
Image Transfer Comnands
Builder Main Commands
The Docker CLI
Manage images
docker build
Create an image from a Dockerfile.
docker run
Run a command in an image.
Manage containers
docker create
Example
Create a container from an image.
docker exec
Example
Run commands in a container.
docker start
Start/stop a container.
docker ps
Manage containers using ps/kill.
Images
docker images
Manages images.
docker rmi
Deletes images.
Also see
Getting Started(docker.io)
Inheritance
Variables
Initialization
Onbuild
Commands
Entrypoint
Configures a container that will run as an executable.
This will use shell processing to substitute shell variables, and will ignore any CMD or docker run command line arguments.
Metadata
See also
Basic example
Commands
Reference
Building
Ports
Commands
Environment variables
Dependencies
Other options
Advanced features
Labels
DNS servers
Devices
External links
Hosts
sevices
To view list of all the services runnning in swarm
To see all running services
to see all services logs
To scale services quickly across qualified node
clean up
To clean or prune unused (dangling) images
To remove all images which are not in use containers , add - a
To Purne your entire system
To leave swarm
To remove swarm ( deletes all volume data and database info)
To kill all running containers
Contributor -
Sangam biradar - Docker Community Leader
The Jellyfin project and its contributors offer a number of pre-built binary packages to assist in getting Jellyfin up and running quickly on multiple systems.
Container images
Docker
Windows (x86/x64)
Linux
Linux (generic amd64)
Debian
Ubuntu
Container images
Official container image: jellyfin/jellyfin.
LinuxServer.io image: linuxserver/jellyfin.
hotio image: hotio/jellyfin.
Jellyfin distributes official container images on Docker Hub for multiple architectures. These images are based on Debian and built directly from the Jellyfin source code.
Additionally the LinuxServer.io project and hotio distribute images based on Ubuntu and the official Jellyfin Ubuntu binary packages, see here and here to see their Dockerfile.
Note
For ARM hardware and RPi, it is recommended to use the LinuxServer.io or hotio image since hardware acceleration support is not yet available on the native image.
Docker
Docker allows you to run containers on Linux, Windows and MacOS.
The basic steps to create and run a Jellyfin container using Docker are as follows.
Follow the offical installation guide to install Docker.
Download the latest container image.
Create persistent storage for configuration and cache data.
Either create two persistent volumes:
Or create two directories on the host and use bind mounts:
Create and run a container in one of the following ways.
Note
The default network mode for Docker is bridge mode. Bridge mode will be used if host mode is omitted. Use host mode for networking in order to use DLNA or an HDHomeRun.
Using Docker command line interface:
Using host networking (--net=host) is optional but required in order to use DLNA or HDHomeRun.
Bind Mounts are needed to pass folders from the host OS to the container OS whereas volumes are maintained by Docker and can be considered easier to backup and control by external programs. For a simple setup, it's considered easier to use Bind Mounts instead of volumes. Replace jellyfin-config and jellyfin-cache with /path/to/config and /path/to/cache respectively if using bind mounts. Multiple media libraries can be bind mounted if needed:
Note
There is currently an issue with read-only mounts in Docker. If there are submounts within the main mount, the submounts are read-write capable.
Using Docker Compose:
Create a docker-compose.yml file with the following contents:
Then while in the same folder as the docker-compose.yml run:
To run the container in background add -d to the above command.
You can learn more about using Docker by reading the official Docker documentation.
Hardware Transcoding with Nvidia (Ubuntu)
You are able to use hardware encoding with Nvidia, but it requires some additional configuration. These steps require basic knowledge of Ubuntu but nothing too special.
Adding Package RepositoriesFirst off you'll need to add the Nvidia package repositories to your Ubuntu installation. This can be done by running the following commands:
Installing Nvidia container toolkitNext we'll need to install the Nvidia container toolkit. This can be done by running the following commands:
After installing the Nvidia Container Toolkit, you'll need to restart the Docker Daemon in order to let Docker use your Nvidia GPU:
Changing the docker-compose.ymlNow that all the packages are in order, let's change the docker-compose.yml to let the Jellyfin container make use of the Nvidia GPU.The following lines need to be added to the file:
Your completed docker-compose.yml file should look something like this:
Note
For Nvidia Hardware encoding the minimum version of docker-compose needs to be 2. However we recommend sticking with version 2.3 as it has proven to work with nvenc encoding.
Unraid Docker
An Unraid Docker template is available in the repository.
Open the unRaid GUI (at least unRaid 6.5) and click on the 'Docker' tab.
Add the following line under 'Template Repositories' and save the options.
Click 'Add Container' and select 'jellyfin'.
Adjust any required paths and save your changes.
Kubernetes
A community project to deploy Jellyfin on Kubernetes-based platforms exists at their repository. Any issues or feature requests related to deployment on Kubernetes-based platforms should be filed there.
Podman
Podman allows you to run containers as non-root. It's also the offically supported container solution on RHEL and CentOS.
Steps to run Jellyfin using Podman are almost identical to Docker steps:
Install Podman:
Download the latest container image:
Create persistent storage for configuration and cache data:
Either create two persistent volumes:
Or create two directories on the host and use bind mounts:
Create and run a Jellyfin container:
Note that Podman doesn't require root access and it's recommended to run the Jellyfin container as a separate non-root user for security.
If SELinux is enabled you need to use either --privileged or supply z volume option to allow Jellyfin to access the volumes.
Replace jellyfin-config and jellyfin-cache with /path/to/config and /path/to/cache respectively if using bind mounts.
To mount your media library read-only append ':ro' to the media volume:

To run as a systemd service see Running containers with Podman and shareable systemd services.
Cloudron
Cloudron is a complete solution for running apps on your server and keeping them up-to-date and secure. On your Cloudron you can install Jellyfin with a few clicks via the app library and updates are delivered automatically.
The source code for the package can be found here.Any issues or feature requests related to deployment on Cloudron should be filed there.
Windows (x86/x64)
Windows installers and builds in ZIP archive format are available here.
Warning
If you installed a version prior to 10.4.0 using a PowerShell script, you will need to manually remove the service using the command nssm remove Jellyfin and uninstall the server by remove all the files manually. Also one might need to move the data files to the correct location, or point the installer at the old location.
Warning
The 32-bit or x86 version is not recommended. ffmpeg and its video encoders generally perform better as a 64-bit executable due to the extra registers provided. This means that the 32-bit version of Jellyfin is deprecated.
Install using Installer (x64)
Install
Download the latest version.
Run the installer.
(Optional) When installing as a service, pick the service account type.
If everything was completed successfully, the Jellyfin service is now running.
Open your browser at http://localhost:8096 to finish setting up Jellyfin.
Update
Download the latest version.
Run the installer.
If everything was completed successfully, the Jellyfin service is now running as the new version.
Uninstall
Go to Add or remove programs in Windows.
Search for Jellyfin.
Click Uninstall.
Manual Installation (x86/x64)
Install
Download and extract the latest version.
Create a folder jellyfin at your preferred install location.
Copy the extracted folder into the jellyfin folder and rename it to system.
Create jellyfin.bat within your jellyfin folder containing:
To use the default library/data location at %localappdata%:
To use a custom library/data location (Path after the -d parameter):
To use a custom library/data location (Path after the -d parameter) and disable the auto-start of the webapp:
Run
Open your browser at http://<--Server-IP-->:8096 (if auto-start of webapp is disabled)
Update
Stop Jellyfin
Rename the Jellyfin system folder to system-bak
Download and extract the latest Jellyfin version
Copy the extracted folder into the jellyfin folder and rename it to system
Run jellyfin.bat to start the server again
Rollback
Stop Jellyfin.
Delete the system folder.
Rename system-bak to system.
Run jellyfin.bat to start the server again.
MacOS
MacOS Application packages and builds in TAR archive format are available here.
Install
Download the latest version.
Drag the .app package into the Applications folder.
Start the application.
Open your browser at http://127.0.0.1:8096.
Upgrade
Download the latest version.
Stop the currently running server either via the dashboard or using the application icon.
Drag the new .app package into the Applications folder and click yes to replace the files.
Start the application.
Open your browser at http://127.0.0.1:8096.
Uninstall
Start Docker In Ubuntu Virtualbox
Stop the currently running server either via the dashboard or using the application icon.
Move the .app package to the trash.
Deleting Configuation
This will delete all settings and user information. This applies for the .app package and the portable version.
Delete the folder ~/.config/jellyfin/
Delete the folder ~/.local/share/jellyfin/
Portable Version
Download the latest version
Extract it into the Applications folder
Open Terminal and type cd followed with a space then drag the jellyfin folder into the terminal.
Type ./jellyfin to run jellyfin.
Open your browser at http://localhost:8096
Closing the terminal window will end Jellyfin. Running Jellyfin in screen or tmux can prevent this from happening.
Upgrading the Portable Version
Download the latest version.
Stop the currently running server either via the dashboard or using CTRL+C in the terminal window.
Extract the latest version into Applications
Open Terminal and type cd followed with a space then drag the jellyfin folder into the terminal.
Type ./jellyfin to run jellyfin.
Open your browser at http://localhost:8096
Uninstalling the Portable Version
Stop the currently running server either via the dashboard or using CTRL+C in the terminal window.
Move /Application/jellyfin-version folder to the Trash. Replace version with the actual version number you are trying to delete.
Using FFmpeg with the Portable Version
The portable version doesn't come with FFmpeg by default, so to install FFmpeg you have three options.
use the package manager homebrew by typing brew install ffmpeg into your Terminal (here's how to install homebrew if you don't have it already
download the most recent static build from this link (compiled by a third party see this page for options and information), or
compile from source available from the official website
More detailed download options, documentation, and signatures can be found.
If using static build, extract it to the /Applications/ folder.
Navigate to the Playback tab in the Dashboard and set the path to FFmpeg under FFmpeg Path.
Linux
Linux (generic amd64)
Generic amd64 Linux builds in TAR archive format are available here.
Installation Process
Create a directory in /opt for jellyfin and its files, and enter that directory.
Download the latest generic Linux build from the release page. The generic Linux build ends with 'linux-amd64.tar.gz'. The rest of these instructions assume version 10.4.3 is being installed (i.e. jellyfin_10.4.3_linux-amd64.tar.gz). Download the generic build, then extract the archive:
Create a symbolic link to the Jellyfin 10.4.3 directory. This allows an upgrade by repeating the above steps and enabling it by simply re-creating the symbolic link to the new version.
Create four sub-directories for Jellyfin data.
If you are running Debian or a derivative, you can also download and install an ffmpeg release built specifically for Jellyfin. Be sure to download the latest release that matches your OS (4.2.1-5 for Debian Stretch assumed below).
If you run into any dependency errors, run this and it will install them and jellyfin-ffmpeg.
Due to the number of command line options that must be passed, it is easiest to create a small script to run Jellyfin.
Then paste the following commands and modify as needed.
Assuming you desire Jellyfin to run as a non-root user, chmod all files and directories to your normal login user and group. Also make the startup script above executable.
Finally you can run it. You will see lots of log information when run, this is normal. Setup is as usual in the web browser.
Portable DLL
Platform-agnostic .NET Core DLL builds in TAR archive format are available here. These builds use the binary jellyfin.dll and must be loaded with dotnet.
Arch Linux
Jellyfin can be found in the AUR as jellyfin, jellyfin-bin and jellyfin-git.
Fedora
Fedora builds in RPM package format are available here for now but an official Fedora repository is coming soon.
You will need to enable rpmfusion as ffmpeg is a dependency of the jellyfin server package
Note
You do not need to manually install ffmpeg, it will be installed by the jellyfin server package as a dependency
Install the jellyfin server
Install the jellyfin web interface
Enable jellyfin service with systemd
Open jellyfin service with firewalld
Note
This will open the following ports8096 TCP used by default for HTTP traffic, you can change this in the dashboard8920 TCP used by default for HTTPS traffic, you can change this in the dashboard1900 UDP used for service auto-discovery, this is not configurable7359 UDP used for auto-discovery, this is not configurable
Reboot your box
Go to localhost:8096 or ip-address-of-jellyfin-server:8096 to finish setup in the web UI
CentOS
CentOS/RHEL 7 builds in RPM package format are available here and an official CentOS/RHEL repository is planned for the future.
The default CentOS/RHEL repositories don't carry FFmpeg, which the RPM requires. You will need to add a third-party repository which carries FFmpeg, such as RPM Fusion's Free repository.
You can also build Jellyfin's version on your own. This includes gathering the dependencies and compiling and installing them. Instructions can be found at the FFmpeg wiki.
Start Docker In Ubuntu Lts
Debian
Repository
The Jellyfin team provides a Debian repository for installation on Debian Stretch/Buster. Supported architectures are amd64, arm64, and armhf.
Note

Microsoft does not provide a .NET for 32-bit x86 Linux systems, and hence Jellyfin is not supported on the i386 architecture.
Install HTTPS transport for APT as well as gnupg and lsb-release if you haven't already.
Import the GPG signing key (signed by the Jellyfin Team):
Add a repository configuration at /etc/apt/sources.list.d/jellyfin.list:
Note
Supported releases are stretch, buster, and bullseye.
Update APT repositories:
Install Jellyfin:
Manage the Jellyfin system service with your tool of choice:
Packages
Raw Debian packages, including old versions, are available here.
Note
The repository is the preferred way to obtain Jellyfin on Debian, as it contains several dependencies as well.
Download the desired jellyfin and jellyfin-ffmpeg.deb packages from the repository.
Install the downloaded .deb packages:
Use apt to install any missing dependencies:
Manage the Jellyfin system service with your tool of choice:
Ubuntu
Migrating to the new repository
Previous versions of Jellyfin included Ubuntu under the Debian repository. This has now been split out into its own repository to better handle the separate binary packages. If you encounter errors about the ubuntu release not being found and you previously configured an ubuntujellyfin.list file, please follow these steps.
Run Docker In Ubuntu 18.04
Remove the old /etc/apt/sources.list.d/jellyfin.list file:
Proceed with the following section as written.
Ubuntu Repository
The Jellyfin team provides an Ubuntu repository for installation on Ubuntu Xenial, Bionic, Cosmic, Disco, Eoan, and Focal. Supported architectures are amd64, arm64, and armhf. Only amd64 is supported on Ubuntu Xenial.
Note
Microsoft does not provide a .NET for 32-bit x86 Linux systems, and hence Jellyfin is not supported on the i386 architecture.
Install HTTPS transport for APT if you haven't already:
Enable the Universe repository to obtain all the FFMpeg dependencies:
Note
If the above command fails you will need to install the following package software-properties-common.This can be achieved with the following command sudo apt-get install software-properties-common
Import the GPG signing key (signed by the Jellyfin Team):
Add a repository configuration at /etc/apt/sources.list.d/jellyfin.list:
Note
Supported releases are xenial, bionic, cosmic, disco, eoan, and focal.
Update APT repositories:
Install Jellyfin:
Manage the Jellyfin system service with your tool of choice:
Ubuntu Packages
Raw Ubuntu packages, including old versions, are available here.
Note
The repository is the preferred way to install Jellyfin on Ubuntu, as it contains several dependencies as well.
Start Docker In Ubuntu 20.04
Enable the Universe repository to obtain all the FFMpeg dependencies, and update repositories:
Download the desired jellyfin and jellyfin-ffmpeg.deb packages from the repository.
Install the required dependencies:
Install the downloaded .deb packages:
Use apt to install any missing dependencies:
Manage the Jellyfin system service with your tool of choice:
Migrating native Debuntu install to docker
It's possible to map your local installation's files to the official docker image.
Note
You need to have exactly matching paths for your files inside the docker container! This means that if your media is stored at /media/raid/ this path needs to be accessible at /media/raid/ inside the docker container too - the configurations below do include examples.
To guarantee proper permissions, get the uid and gid of your local jellyfin user and jellyfin group by running the following command:
You need to replace the <uid>:<gid> placeholder below with the correct values.
Using docker
Using docker-compose
0 notes
Link
V1.0 - Original ReleaseV1.1 - Added more to "So what exactly do I need to buy?" to clarify the details if you already own a PC that you'd use for Plex.V1.2 - Updated RAID/Backup section.Here’s what you need for a Plex server for local content (assuming a “good” playback device) and for some remote streaming (assuming a “good” internet upload rate). I’ll go over exactly what this means, what you get, and what you need to buy. I’ll also go over what is unnecessary spend, and why some people spend.Mission statement: What do I WANT to do? The objective is to run a Plex server, be able to identify and catalog the Plex content (Radarr, Sonarr are typical), to be able to download the Plex content (NZBGet is typical), and honestly, that’s about all you need. Tautulli is commonly used for playback history (what movies is Joe watching, and did transcoding work for Joe? Who has watched XYZ show in the last week?) but Plex now has excellent data on playback transcoding details and on basic media play history - and the web GUI does a great job showing you exactly what part of your system - CPU, disk, RAM - is 'stressed' or busy.So don’t I need a supermegaCPU? Or two? More is better, right? And a Xeon is even better, right? And a big, noisy server box too? If you don’t plan to upload (share content remotely) with others, and if you have modern playback devices like an nVidia Shield, reasonably modern Roku (2014 or better), AppleTV 4 or better, or Amazon Fire Stick 4k or v2 of non-4k, or better, you literally don’t need anything more than a cheap ARM-class CPU or old Intel Celeron-class CPU running Linux and Plex, sharing a USB drive of your movies. That said, sometimes you might need to “transcode” – to change the media format of your media – in order to play subtitles, serve to a new device, serve to a device running a web browser rather than AppleTV/FireStick, etc. To do that, you are transcoding. And modern Intel hardware – or a modern nVidia video card – can do this very, very efficiently. So efficiently that it’s mostly foolish to run older hardware or try to brute-force transcoding with Plex nowadays – either get a cheap nVidia 1050/1050Ti graphics card for your Plex server, or get a modern Intel CPU with integrated graphics (an i3-9100 is a great low-end choice). Sure, you could get a superfast AMD CPU for $300, but why? Save your money and your electricity! Put your expensive CPU on your desk, and keep the 1050/low-end Intel CPU on the cheap Plex server where it belongs.What else do I need? You need about 4GB of RAM, a 240GB SSD for the C: drive, and then for the D: (Media) drive you need enough space to hold all of your media. A cheap 10TB USB 5400 RPM hard drive is $160 these days and is a good starter setup. Add another 10TB USB drive in the future and break out “Movies” and “TV” to each drive if you want to ever get fancy.Don’t I need RAID5 with 5-6 disks? Redundancy! Backups! Not really. You can get all of this content again by a simple download; why bother with complicated setups? Keep it simple, keep it cheap. * There is a bit of risk in this, because if you lose the USB hard drive (theft, dropping, dog chews it up, etc.) your content is gone forever. Only you can decide if having copies of content is worth having another backup disk. Windows 10 comes with Storage Spaces free, which can assist, for those wanting redundancy (but note this isn't a backup): https://ift.tt/2PQTNbP has a brief primer on the topic. For a literal backup, Macrium Reflect Free is a good free backup product: https://ift.tt/2YCcC6I what exactly do I need to buy? A cheap i3-8100, i3-9100, i5-8400, i5-9400-based system is really all that you need. Anything more is typically wasted. If you have 4GB or 8GB of RAM, you’re all set. Start with that. Buy PlexPass. Turn on hardware-based transcoding in Plex. Then you’ll use Intel’s graphics acceleration for transcoding your content, and for most people, that will be plenty of horsepower right there. If you needed more (and most won’t!) an nVidia 1050 or 1050Ti will handle 7-15 transcodes and is $80-$120 these days; the “driver patch” required to make it handle over 2 transcodes should take about 5 minutes to put into place. Then you just need a 10TB USB drive, and you’re literally done! And the best part - if you already own a PC - even an old one - you might consider just buying an nVidia 1050/1050Ti card (for transcoding capabilities), putting it into the PC, and then .. you're done! Easy, fast, and affordable - for what just a few years ago would be considered high-end workstation performance.So now I want to stream to my 10 best friends remotely– what do I do? This setup will literally do that. However, you’ll likely want to cap your upload rate (per-client) to 4Mbps or so, and you’ll likely want to get a pretty good internet upload rate (# clients * 4Mbps is a good start)… Given that all of your friends won’t be watching all the time, a 20Mbps upload rate is a good start for trying out remote sharing. Speedtest.net gives a good estimate of speeds. Then modify your settings to suit your setup.So now I want to stream to 10 AppleTVs in my house….This setup will easily do that. You’ll likely want to wire (gigabit) the server to your router, and wireless may strain a bit with so many concurrent streams, but this server can easily handle that and more. Since AppleTV plays most content natively (without transcoding) you won’t be stressing the CPU/GPU in this at all.So now I want to stream to 10 Chrome web browser users in my house... This setup will do that. Transcoding will be required, since Chrome can't play back some common formats, but Plex handles all the heavy lifting. Ensure your wifi network is up to the task.What about 4K? I want to transcode 4K. Transcoding 4K doesn’t work well because HDR (a technology used to make 4K look fantastic) doesn’t transcode well (yet), and so to share 4K content locally, this server can easily do that (assuming your network can handle it) but to stream and share remotely, either your internet upload rate must be very, very fast (to avoid transcoding!) or … this won’t work. This (HDR transcoding) is something to be worked on and solved by Plex; for now there is no good solution. So for now, if you must stream something to others remotely, get both the 4K version and the 1080p version – 4K for yourself, 1080p for others.I still don’t understand transcoding. Transcoding takes media in one format and puts it into another format; that’s all. If your media is in format XYZ and your AppleTV doesn’t understand that format, Plex handles things so your media becomes playable on the AppleTV. Fortunately, there’s very little that isn’t directly playable on the AppleTV or modern Roku or nVidia Shield or Amazon FireStick device, so transcoding is very rarely needed on local playback (local networks). Transcoding is usually required when you share your media to others on other (remote) networks, where, due to limited bandwidth, you must compress (shrink) your media’s size so you can set it over the internet to your friend’s AppleTV (or other Plex playback device). Hence the need for transcoding, a modern Intel CPU, or an nVidia 1050/1050Ti.Does more RAM help Plex? Plex doesn’t need much RAM. 4GB is fine.Does having an SSD to store my TV/movies media help? Not really. Even with 10 clients, you just don’t need it. Plex buffering and playback speeds are efficient and superfast media generally isn’t required.I have 50GB Blueray MKVs! Everything you’re saying is wrong! Yes, in some scenarios, with massive, high-bandwidth files, sometimes you will need to transcode more often than I’m indicating here, and sometimes you will need more i/o or bandwidth. If you are the type that MUST have the best quality, and you MUST have 50GB 3-hour movie files (rather than 8-15 GB movie files), you may want to check your i/o on your server when you get 10 concurrent shares / movie playbacks going at once. For the typical user with one or two playbacks locally and 2-3 remote streams, a single USB drive setup is easy, economical, and plenty fast.I say that lightly – in other words, in the rare case in which you have an unusual scenario with super-high bandwidth files, sometimes you might have an issue. So adjust accordingly. This guide is made for the 99% that don’t stress the server that much, with that many concurrent connections.Why do some people buy 2012-era hardware to run Plex? I've done this myself. Until recently, Plex hardware-assisted transcoding didn't work very well, but now, with good support for nVidia hardware and Intel iGPU hardware, and with the introduction of the nVidia Plex transcoding patch, there is no reason to do anything else. That said, 2012-era hardware is nice because it tends to be very cheap, and some people love running old hardware because "it's a server; it's tough!"; either of those two reasons might be enough to appeal to you. Bear in mind that in the past 7 years, hardware has gotten quieter, far less power-hungry, and far simpler to support. My advice: avoid the old stuff unless you've already bought it. If you already bought it, add an nVidia 1050, consider adding a USB3 PCIe/PCI card, and add the 10TB USB drive, and call it a day.But UNRAID! Linux Docker! New Technologies! If you're an IT technologist, or you do this for a living, those are great choices. If you just want a Plex server, keep it simple, energy efficient, and fast and easy to troubleshoot. via /r/PleX
0 notes