#update UEFI BIOS for BitLocker
Explore tagged Tumblr posts
Visit Tumblr Blog
Explore Tumblr blogs with no restrictions, modern design and the best experience.
Last Seen Tumblr Blogs


Fun Fact
US Tumblr user growth rate is estimated to slow down to 4.1%.
Text
BitLocker Protection off: Update UEFI/BIOS to fix issues
When BitLocker Protection is “off” means that BitLocker encryption is currently disabled on the drive. In my case, it is disabled and the encryption did not succeeded in the first place. Therefore, we will limit our solution to this use-case. In this article, we shall discuss “BitLocker Protection off: Update UEFI/BIOS to fix issues”. Please see How to Disable BitLocker on Windows 10, how to…
#BIOS firmware and BitLocker fix#BIOS update BitLocker error#BIOS update causes BitLocker issue#BitLocker issue after BIOS update#BitLocker protection off#BitLocker protection troubleshooting#disable BitLocker for BIOS update#enable BitLocker after BIOS update#fix BitLocker problems#resolve BitLocker and UEFI issues#secure UEFI BIOS update#troubleshoot BitLocker protection#UEFI BIOS update for BitLocker#update UEFI BIOS for BitLocker#Update UEFI/BIOS to fix issues#Windows#Windows 10#Windows 11#Windows Server#Windows Server 2012#Windows Server 2016#Windows Server 2019#Windows Server 2022
0 notes
Text
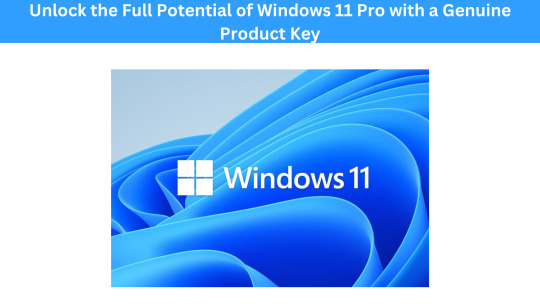
Unlock the Full Potential of Windows 11 Pro with a Genuine Product Key
Introduction
Windows 11 Pro is the latest and most advanced operating system from Microsoft, packed with innovative features and a sleek new design. However, to unlock the full potential of Windows 11 Pro, you need a genuine Windows 11 Pro product key. In this article, we will explore the importance of a valid product key and how it can enhance your Windows 11 Pro experience.
What is a Windows 11 Pro Product Key?
A Windows 11 Pro product key is a unique alphanumeric code provided by Microsoft when you purchase a legitimate copy of Windows 11 Pro. This key serves as a digital license, granting you access to the premium features and functionalities of the Pro version. It is a vital component of Windows activation, ensuring that your operating system is genuine and properly licensed.
Why is a Genuine Product Key Important?
1. Legal Compliance: Using a genuine product key is not just about adhering to Microsoft's licensing terms; it's also a legal requirement. Pirated copies of Windows can lead to serious legal consequences, including fines.
2. Security: Genuine product keys are tied to Microsoft's security infrastructure, which ensures that your system receives regular updates and patches. This helps protect your computer from security vulnerabilities.
3. Access to Premium Features: Windows 11 Pro offers advanced features such as BitLocker encryption, virtualization support, and advanced multitasking capabilities. A genuine product key is your ticket to accessing these premium features.
4. Stability and Reliability: Genuine Windows 11 Pro installations are more stable and reliable compared to pirated copies. You can count on Microsoft's support and assistance in case of any issues.
How to Obtain a Windows 11 Pro Product Key
1. Purchase a New Computer: If you buy a new computer with Windows 11 Pro pre-installed, the product key is usually included in the device's packaging or stored in the BIOS/UEFI firmware.
2. Buy a Retail Copy: You can purchase a retail copy of Windows 11 Pro from authorized retailers or Microsoft's official website. The product key will be included in the packaging.
3. Upgrade from Windows 10: If you have a genuine copy of Windows 10 Pro, you can often upgrade to Windows 11 Pro for free through the Windows Update.
4. Volume Licensing: Businesses can obtain Windows 11 Pro product keys through volume licensing agreements with Microsoft.
Activating Windows 11 Pro with Your Product Key
Activating Windows 11 Pro with your product key is a straightforward process:
1. Go to "Settings" on your Windows 11 Pro computer.
2. Click on "Update & Security."
3. Select "Activation" from the left-hand menu.
4. Click on "Change product key" and enter your Windows 11 Pro product key.
5. Follow the on-screen instructions to complete the activation process.
Conclusion
A genuine Windows 11 Pro product key is essential for unlocking the full potential of this advanced operating system. It not only ensures legal compliance but also provides you with security, access to premium features, and a more stable computing experience. Whether you're buying a new computer or upgrading from a previous Windows version, make sure to obtain and activate your Windows 11 Pro product key to enjoy all the benefits this OS has to offer.
0 notes
Text
Windows 10 professional 64 bit download with key 無料ダウンロード.BitComet のダウンロード
Windows 10 professional 64 bit download with key 無料ダウンロード.Windows 10 Pro へのアップグレード

Surface Pro 6.Download Microsoft Office (KB) 64 ビット版 の更新プログラム from Official Microsoft Download Center
Nov 17, · Microsoft は Microsoft Office 64 ビット版 用の更新プログラムをリリースしました。この更新プログラムにより、Microsoft Office 64 ビット版 に最新の修正が適用されます。さらに、この更新プログラムは、安定性およびパフォーマンスが向上しています。 If you want to update your copy of Agisoft PhotoScan software, download the latest version from this page and install it on the same computing system. If you are updating from PhotoScan Professional edition version x or earlier, you will need to re-activate the software with your license key. The new version of the Standard edition will be Windows 10 Pro は、以下の機能を含む高度なセキュリティおよびビジネス ネットワークなどの機能があります。 BitLocker ドライブ暗号化. リモート デスクトップ. ドメインまたは Azure Active Directory に
Windows 10 professional 64 bit download with key 無料ダウンロード.Windows 10 のダウンロード
Windows 10 Pro は、以下の機能を含む高度なセキュリティおよびビジネス ネットワークなどの機能があります。 BitLocker ドライブ暗号化. リモート デスクトップ. ドメインまたは Azure Active Directory に Download CCleaner for free. Clean your PC of temporary files, tracking cookies and browser junk! PROFESSIONAL PLUS UP TO 3 PCs Buy Now New: Runs on Microsoft Windows 10, , and 7. Including both bit and bit versions. Release notes. CCleaner v (16 Nov ) Nov 29, · Windows 10//7/Vista 64bit/32bit Windows XP// 32bit macOS macOS Windows 10//7/Vista 64bit/32bit Windows XP// 32bit Android Windows 98/Me (v Zip package only) 言語サポート: 53言語 [翻訳ヘルプ] ライセンス: (自宅で)非商用利用のためのフ
更新する前に、 Windows リリース情報ステータス にある既知の問題を参照して、使用��ているデバイスが影響されないことをご確認ください。. Update Assistant が最新バージョンの Windows 10 へのアップデートをお手伝いします。開始するには、 [今すぐアップデート] をクリックします。. 開始するには、Windows 10 をインストールするためのライセンスが必要です。その後、メディア作成ツールをダウンロードして実行することができます。ツールの使い方についての詳細は、下の説明をご覧ください。. Windows XP または Windows Vista を実行している PC に Windows 10 をインストールする場合、または別の PC に Windows 10 をインストールするためにインストール メディアを作成する必要がある場合は、下の「 このツールを使用して、別の PC に Windows 10 をインストールするためにインストール メディア USB フラッシュ ドライブ、DVD、または ISO ファイル を作成する 」セクションを参照してください。.
注 : Windows 10 をインストールする前に、PC が Windows 10 の システム要件 を満たしていることを確認してください。また、最新のドライバーやハードウェアの互換性に関する追加情報について、PC 製造元の Web サイトを参照することをお勧めします。. ダウンロードしてインストールした後、このツールを使用して、Windows 10 を手順を追って PC にセットアップすることができます。Windows 10 を選択した場合、Enterprise エディション以外のすべての Windows 10 を利用できます。 Enterprise エディションの詳細については、[ ボリューム ライセンス サービス センター ] にアクセスしてください。.
Windows 10 の新しいコピーのインストール、クリーン インストールの実行、Windows 10 の再インストールのために使用できるインストール メディア USB フラッシュ ドライブまたは DVD を作成するには、以下の手順に従います。.
Office またはそれ以前のバージョンを使用していて、Windows 10 のクリーン インストールを実行する場合は、Office のプロダクト キーが必要です。プロダクト キーを見つける際のヒントについては、「 Office プロダクト キーを見つける 」または「 Office プログラムのプロダクト キーを入力する 」を参照してください。. Windows 10 の言語、エディション、アーキテクチャ 64 ビットまたは 32 ビット を選択します。どのエディションの Windows 10 を選択すればよいのかについては、次の表を参照してください。. 注意: Surface デバイス用のドライバーは、「 Surface 用のドライバーとファームウェアをダウンロードする 」ページからダウンロードできる場合があります。.
Windows 10 をインストールする前に、作業をすべて保存し、PC をバックアップすることをお勧めします。Windows 10 の ISO ファイルをダウンロードするためにメディア作成ツールを使用した場合は、これらの手順に従う前に、ISO ファイルを DVD に書き込む必要があります。. PC が USB または DVD メディアに自動的に起動しない場合は、ブート メニューを開くか、PC の BIOS または UEFI 設定でブート順序を変更しなければならない可能性があります。ブート メニューを開くか、ブート順序を変更するには、通常、PC の電源を入れた後、すぐにキー F2、F12、Delete、Esc キーなど を押す必要があります。ブート メニューにアクセスする手順や、PC のブート順序を変更する手順については、PC に付属のマニュアルを確認するか、製造元の Web サイトにアクセスしてください。USB または DVD メディア デバイスがブート オプションに表示されない場合は、BIOS 設定でセキュア ブートを一時的に無効にするための手順について、PC 製造元に問い合わせなければならない可能性があります。.
ブート メニューや順序の変更で問題が解決せず、置換する OS に PC が���接ブートする場合は、PC を完全にシャットダウンしなければならない可能性があります。PC を完全にシャットダウンするには、サインイン画面またはスタート メニューで電源ボタンを選択し、[シャットダウン] を選択します。.
Windows 10 の ISO ファイルをダウンロードした場合は、ファイルは選択したローカルの場所に保存されています。コンピューターにインストールされたサードパーティの DVD 書き込みプログラムでインストール DVD を作成する場合は、ファイルを保存した場所に移動して ISO ファイルをダブルクリックするか、ISO ファイルを右クリックして [開く] を選択し、その DVD 書き込みソフトウェアを選択することで、プログラムを開くことができます。. インストール DVD を作成するために Windows Disk Image Burner を使用する場合は、ISO ファイルを保存した場所に移動します。ISO ファイルを右クリックして、 [プロパティ] を選択します。[全般] タブで、 [変更] をクリックし、ISO ファイルを開くために使用するプログラムとしてエクスプローラーを選択した後、 [適用] を選択します。ISO ファイルを右クリックして、 [ディスク イメージの書き込み] を選択します。.
ISO ファイルをマウントすることで、DVD や USB フラッシュ ドライブを使用せずに、ISO ファイルから Windows 10 を直接インストールすることもできます。これにより、現在のオペレーティング システムが Windows 10 にアップグレードされます。. Windows 10 のダウンロード 更新する前に、 Windows リリース情報ステータス にある既知の問題を参照して、使用しているデバイスが影響されないことをご確認ください。. Windows 10 November Update Update Assistant が最新バージョンの Windows 10 へのアップデートをお手伝いします。開始するには、 [今すぐアップデート] をクリックします。 今すぐアップデート プライバシー.
PC への Windows 10 のインストールをご希望ですか? ツールを今すぐダウンロード プライバシー. このツールを使用して、この PC を Windows 10 にアップグレードする クリックして、詳細情報の表示と非表示を切り替えます 次のような場合に、この手順を使用してください。 Windows 10 をインストールするライセンスをお持ちで、Windows 7 または Windows 8.
この PC を以前 Windows 10 にアップグレードしたことがあり、再インストールしようとしている場合は、プロダクト キーを入力する必要はありません。Windows 10 は、デジタル ライセンスを使用して、後で自動的にライセンス認証されます。 Windows 10 をインストールする準備ができたら、選択内容とアップグレード中に保持される項目が、確認のために表示されます。 [個人用ファイルとアプリを引き継ぐ] 、 [個人用ファイルのみを引き継ぐ] 、 [なし] の設定を変更するには、 [引き継ぐものを変更] を選択します。 作業内容を保存し、開いているアプリやファイルを閉じます。準備ができたら、 [インストール] を選択します。 Windows 10 のインストールにはしばらく時間がかかり、PC が数回再起動する場合があります。 PC の電源を切らないでください。. 作成したインストール メディアを使用する クリックして、詳細情報の表示と非表示を切り替えます Windows 10 をインストールする前に、作業をすべて保存し、PC をバックアップすることをお勧めします。Windows 10 の ISO ファイルをダウンロードするためにメディア作成ツールを使用した場合は、これらの手順に従う前に、ISO ファイルを DVD に書き込む必要があります。 Windows 10 をインストールする PC に、USB フラッシュ ドライブまたは DVD を挿入します。 PC を再起動します。 PC が USB または DVD メディアに自動的に起動しない場合は、ブート メニューを開くか、PC の BIOS または UEFI 設定でブート順序を変更しなければならない可能性があります。ブート メニューを開くか、ブート順序を変更するには、通常、PC の電源を入れた後、すぐにキー F2、F12、Delete、Esc キーなど を押す必要があります。ブート メニューにアクセスする手順や、PC のブート順序を変更する手順については、PC に付属のマニュアルを確認するか、製造元の Web サイトにアクセスしてください。USB または DVD メディア デバイスがブート オプションに表示されない場合は、BIOS 設定でセキュア ブートを一時的に無効にするための手順について、PC 製造元に問い合わせなければならない可能性があります。 ブート メニューや順序の変更で問題が解決せず、置換する OS に PC が直接ブートする場合は、PC を完全にシャットダウンしなければならない可能性があります。PC を完全にシャットダウンするには、サインイン画面またはスタート メニューで電源ボタンを選択し、[シャットダウン] を選択します。 [Windows のインストール] ページで、言語、時刻、キーボードを設定し、 [次へ] を選択します。 [Windows のインストール] を選択します。.
Windows 10 の ISO ファイルをダウンロードした場合は、ファイルは選択したローカルの場所に保存されています。コンピューターにインストールされたサードパーティの DVD 書き込みプログラムでインストール DVD を作成する場合は、ファイルを保存した場所に移動して ISO ファイルをダブルクリックするか、ISO ファイルを右クリックして [開く] を選択し、その DVD 書き込みソフトウェアを選択することで、プログラムを開くことができます。 インストール DVD を作成するために Windows Disk Image Burner を使用する場合は、ISO ファイルを保存した場所に移動します。ISO ファイルを右クリックして、 [プロパティ] を選択します。[全般] タブで、 [変更] をクリックし、ISO ファイルを開くために使用するプログラムとしてエクスプローラーを選択した後、 [適用] を選択します。ISO ファイルを右クリックして、 [ディスク イメージの書き込み] を選択します。 ISO ファイルをマウントすることで、DVD や USB フラッシュ ドライブを使用せずに、ISO ファイルから Windows 10 を直接インストールすることもできます。これにより、現在のオペレーティング システムが Windows 10 にアップグレードされます。 ISO ファイルをマウントする方法: ISO ファイルを保存した場所に移動した後、ISO ファイルを右クリックして [プロパティ] を選択します。 [全般] タブで [変更…] をクリックし、ISO ファイルを開くために使用するプログラムとしてエクスプローラーを選択した後、 [適用] を選択します。 ISO ファイルを右クリックして、 [マウント] を選択します。 ISO ファイルをダブルクリックして、中のファイルを表示します。 setup.
exe をダブルクリックして、Windows 10 セットアップを起動します。. Enterprise エディションをダウンロードするには、 ボリューム ライセンス サービス センター にサインインしてください。. MSDN ダウンロードを使用するには、 MSDN Portal でサブスクリプションにサインインしてください。. Insider Preview ビルドをダウンロードするには、 Windows Insider サイト にアクセスしてください。. Education エディションを使用するには、 「教育機関向��製品のダウンロード」ページ にアクセスしてください プロダクト キーが必要です 。. ご意見、ご感想をお寄せください オプションをお選びください。.
0 notes
Text
Fast Boot Options: Fix specific Drive issue with BitLocker [MBAM]
Dell Fast Boot is a feature that minimizes the startup time of your system. It does this by bypassing certain POST (Power-On Self-Test) checks during boot. Depending on your Dell system model, you can configure it through the BIOS/UEFI firmware interface. In this article, we shall discuss “Fast Boot Options: Fix specific Drive issue with BitLocker [MBAM]”. Please, see how to fix Unable to find my…
#BIOS#BIOS boot process#BIOS firmware and BitLocker fix#BIOS/UEFI#DELL#Dell Fast Boot#Dell Firmware Update Utility#Power-On Self-Test#UEFI#UEFI boot process#Windows#Windows 10#Windows 11
0 notes
Text
Trusted Platform Module 2.0 Driver Windows 10
Trusted Platform Module 2.0 Driver Download The release of the Windows 10 Anniversary Update inches closer every day, and we get more and more news about it in the meantime. According to a slide in the “Windows Security” WinHEC event (first spotted by our friends at Neowin) when the Windows 10 Anniversary Update arrives, people who aren’t. Check Whether your PC has TPM for Windows 11#TPM #Windows11Facebook: on Instagram: https://www.instagram.com/mjtube. Windows 11, Windows 10, Windows Server 2016, and Windows Server 2019 support Device Health Attestation with TPM 2.0. Support for TPM 1.2 was added beginning with Windows version 1607 (RS1). TPM 2.0 requires UEFI firmware. A computer with legacy BIOS and TPM 2.0 won't work as expected.
Trusted Platform Module 2.0 Driver Windows 10 Amd
Trusted Platform Module Windows 10 Download
Trusted Platform Module 2.0 Driver Windows 10 Dell
Trusted Platform Module 2.0 Driver Windows 10 32 Bit Download
You must have Trusted Platform Module (TPM) 2.0 to install Windows 11 – Microsoft has made it clear while launching Windows 11. Here is how you can turn on or enable TPM 2.0 in Gigabyte motherboard to install Windows 11.
TPM or Trusted Platform Module is a hardware-level security chipset that prevents various attackers from attacking on your computer. In simple terms, Microsoft opted for TPM as the Windows 11 hardware requirements to protect end-users against various firmware attacks. However, the same thing created a panic and mess among normal computer users because most of the old hardware do not have TPM 2.0. That is why you might get This PC can’t run Windows 11 while using PC Health Check app. However, there is a big chance that you already have TPM 2.0 but you are not aware of not – feeling same? Don’t worry, you are not alone. Microsoft released few documents, allowing people to know whether their processor is compatible with Windows 11 or not.
Windows 11 compatible Intel processors:
Windows 11 compatible AMD processors:
Windows 11 compatible Qualcomm processors:
If your processor is listed on the official list, you can enable TPM 2.0 using BIOS. Here is how you can check and activate TPM 2.0 in Gigabyte motherboard. However, it is possible to enable Trusted Platform Module in Asus, MSI, Intel, Biostar, etc. motherboards as well.
How to enable TPM 2.0 in Gigabyte motherboard
Follow these steps to enable TPM 2.0 in Gigabyte motherboard:
Restart your computer and press Delete button to enter BIOS
Go to the Peripherals tab.
Use the keyword’s up/down keys to select Trusted Computing option.
Expand Security Device Support and choose Enable.
Save settings and exit BIOS to enable TPM 2.0 in Gigabyte motherboard.
To get started, restart your computer and press the Delete button to enter BIOS settings. However, if your motherboard has a different key, press that designated key while restarting to open the BIOS settings.
Once the BIOS settings page is opened, go to the Peripherals tab and use your keyboard’s up/down arrow keys to select Trusted Computing option.
Keymaker bandicam 2020. Then, you can expand the Security Device Support and choose Enable from the list.
Now, save the change and exit BIOS.
To verify whether you have successfully enabled it or not, press Win+I to open Windows Settings and go to System > About.
Scroll down to the bottom and click on the BitLocker settings option.
On your left-side, you can find TPM Administration option and you have to click on it.
After that, you can find the Status as The TPM is ready for use. On the other hand, you can see the Specification Version as 2.0.
Trusted Platform Module 2.0 Driver Windows 10 Amd
Final word: Enable TPM 2.0 in Gigabyte motherboard
Enabling TPM 2.0 in Gigabyte motherboard is not that difficult and you can do it within moments. As Microsoft has made it the hardware requirement, you have to enable this functionality to install Windows 11.
Dell Drivers Download
Dell.GetParts.us is best place to get exotic and hard to find drivers for your Dell hardware. All our uploads are 100% save, tested with top antivirus software.
Trusted Platform Module Windows 10 Download
Driver File Name: dell-trusted-platform-module-20-driver.exe Driver Upload Date: 19 June 2020 Last Driver Version: 5.3.6 Driver File Size: 19,315 KB User Driver Rating:
Trusted Platform Module 2.0 Driver Windows 10 Dell
4.7/5 Downloaded: 68,952 times Last Time: 22 September 2021
Comments
13-Sep-21 15:21 I’m proud of you! 17-Jul-21 09:03 Many thanks for Dell trusted platform module 2.0 :) 01-Jun-21 01:19 I’m impressed. 20-May-21 05:28 What a good try. Dell trusted platform module 2.0 28-Apr-21 06:22 perfect Dell trusted platform module 2.0 Drivers 24-Dec-20 00:20 That was first class work. 19-Dec-20 18:59 It looks like you’ve put a lot of work into this. 31-Oct-20 04:10 hey, thanks for this man. Great Site! 08-Aug-20 02:44 Tremendous! 15-Jul-20 14:45 Amazing, much love for the uploader. 11-Jun-20 20:54 excellent Dell trusted platform module 2.0 guide as always. 20-May-20 16:36 nice work 26-Mar-20 17:40 Works 100%. Thank you.
More drivers for Dell trusted platform module 2.0 driver
Trusted Platform Module 2.0 Driver Windows 10 32 Bit Download
dell-latitude-e4310-broadcom-ush-w-swipe-sensor-driverdell-1135n-scanner-driver-for-macbluetooth-driver-for-windows-81-64-bit-dell-inspirondell-725-windows-7-64-bit-printer-driver-downloadteredo-tunneling-pseudo-interface-driver-download-windows-7-delldell-dimension-2400-vista-video-driverdell-e6230-wifi-driverdell-idt-audio-driver-download-xpdell-driver-for-holding-down-two-fingersdell-away-mode-driver-for-inspiron-win-10
0 notes
Text
DOWNLOAD ATI RADEON X1950 PRO RV570 DRIVER
Date Added: 06 January, 2020 File Format: exe File Version: 612121543 File Size: 23 Mb Downloads: 3348 Download Type: http Uploader: Piya Operating Systems: Windows NT/2000/XP/2003/2003/7/8/10 MacOS 10/X File Name: ati radeon x1950 pro rv570 driver Price: Free

Change log: - Failover] Fixed(ati radeon x1950 pro rv570 driver Fixed) a bug where configuring failover failed. - Fixes incorrectly detect Thorton 2600 (166x12.5)(ati radeon x1950 pro rv570 driver (166x12.5)) CPU in Softmenu III.- Fixes DRAM hang up at POST code EFh for specific memory module. - Fixed autofocus abnormal when the device reboot. - Fixed chassis fan’s behavior after wake up from S35. - Fixed screen(ati radeon x1950 pro rv570 driver screen) crash after press enter to detect SATA.# Fixed dead-lock after press enter to detect SATA if no device attached. - Fixed After(ati radeon x1950 pro rv570 driver After) USB Printer mounted, system log shows incorrect USB device type issue. - WebAccess: - Fixed the bug where the group authority for files uploaded via WebAccess was not correct. - Fixed Traffic Monitor related issues when used 3G/4G dongle as WAN.- Fixed Quick Internet Setup Firefox browser compatibility related issues. - Fixed an issue where the Duron 1.2GHz and 1.3GHz will not boot(ati radeon x1950 pro rv570 driver boot) using BIOS version 19.- Added nVidia System Utility support. - Fixed system boot to OS take long time if USB device installed. Users content: User DB enhancements: support PPTP/L2TP tunnels external authentication though AD, LDAP and POP3 Fix below Onward security issues. - Improve compatibility with some USB HDD It is highly recommended to always use the most recent driver version available. Improved the Bitlocker deployment speed. To support Biostar 6602SS21 VGA card. - OS X El Capitan (v10.11) has been added as a supported OS. - OS X Yosemite (v10.10) has been added as a supported OS. Corrects a vulnerability related to firmware update. The Self-Extracting window appears and prompts you to extract or unzip to C:DELLDRIVERSR200272. Unify LAN boot message position under UEFI boot mode. Fix when delete schedule rules,guest wireless setting schedule don´t back default value "always". DOWNLOAD BILLIONTON BLUETOOTH DONGLE DRIVER Supported OS: Windows 8 Microsoft Windows 8.1 Pro (64-bit) Windows Server 2008 Microsoft Windows 8 Enterprise (64-bit) Microsoft Windows 8.1 Enterprise (64-bit) Notebook 8.1/8/7 64-bit Windows 7 Windows 8.1/8/7/Vista 32-bit Windows Server 2003 32-bit Windows Vista 32-bit Windows 8.1 Microsoft Windows 10 (32-bit) Microsoft Windows 8 Pro (32-bit) Microsoft Windows 8.1 Enterprise (32-bit) Microsoft Windows 8.1 (64-bit) Microsoft Windows 8.1 Pro (32-bit) Windows Server 2012 R2 Windows 7 64-bit Notebook 8.1/8/7 32-bit Windows Server 2008 R2 Windows XP 32-bit Windows 8.1/8/7/Vista 64-bit Windows 2000 Microsoft Windows 8 (32-bit) Windows Server 2012 Microsoft Windows 8 (64-bit) Microsoft Windows 8.1 (32-bit) Windows XP 64-bit Windows 10 Windows Server 2016 Microsoft Windows 8 Enterprise (32-bit) Windows Server 2003 64-bit Microsoft Windows 10 (64-bit) Windows Vista 64-bit Microsoft Windows 8 Pro (64-bit) Windows 7 32-bit Searches: ati radeon x1950 pro rv570 driver for Microsoft Windows 8 (64-bit); ati radeon x1950 pro rv570 E EL086-0; ati radeon x1950 pro rv570 Elk086-lkb; ati radeon x1950 pro rv570 ELCHI0861; rv570 pro x1950 ati driver radeon; ati radeon x1950 pro rv570 driver for Microsoft Windows 8.1 Enterprise (64-bit); ati radeon x1950 pro rv570 EL0861; ati radeon x1950 pro rv570 driver for Windows 7 32-bit; ati radeon x1950 pro rv570 driver for Notebook 8.1/8/7 32-bit; ati radeon x1950 pro rv570 driver for Microsoft Windows 8 Pro (64-bit); ati radeon x1950 pro rv570 E08l Compatible Devices: Hard Drive; Videocard; Mouse; Android; Usb Cables; Gadget To ensure the integrity of your download, please verify the checksum value. MD5: 0c9db64bb32b90d9647cc01b085cb3e2 SHA1: ae8c98dc2e52c0a53dad9dee2d29982bdbc62f2b SHA-256: 165b1e7786950a2e960fc04fcc1ba1361c311102544d786963c7b1ae619b6825
0 notes
Text
Multi-booting Windows 10 Environments with Bitlocker Enabled
The goal here is to get multiple installations of Windows 10 on separate encrypted partitions on a single physical drive and we want to use the stock Windows bootloader and Bitlocker, avoiding any third-party solutions because I'm a fan of keeping things as simple as possible. I'd say the end result accomplishes that, but figuring out how to get to that point was a pain in the ass.
It turns out that combining multi-booting and Bitlocker is a bit more complicated to set up - and to maintain - than you'd think. If you hunt around online, almost all of the information you're going to find on this topic involves dual-booting Windows and some flavor of Linux or two different versions of Windows (for some reason, Windows 10 and Windows 7 is a really popular combination) and that requires delving into the BIOS to mess with UEFI settings, which I've dealt with in the past. Add to this that the standard way of going about using Bitlocker system drive encryption will create quite a mess for you.
First, prep your installation media: grab Rufus, a USB drive that's at least 4GB (I recommend the Kingston DTSE9G2), and a Windows 10 ISO. I'm also going to assume you've done a Windows 10 installation before so that I can skip some of the details.
Installation
Boot into the Windows Installer and partition the drive into as many partitions as OS installations that you intend to have.
Continue to install the first Windows 10 instance.
Boot into it and complete the setup process.
Reboot into the Windows Installer and install your second instance on another partition.
Boot into that instance and complete the setup process.
Repeat until you have however many installations you partitioned for.
Bitlocker Configuration
This is where things get a little complicated. Do not just boot into each of the installs and take the usual step of enabling system drive encryption. If you do that, you will find that the system will constantly prompt for the 48 digit Bitlocker recovery keys and your life will be hell. Instead, use the following procedure:
Boot into your first Windows 10 install (we'll call this the "primary" installation)
Enable Bitlocker system drive encryption but do not enable Bitlocker on any other partitions.
For the love of god back up the ID and the recovery key because, as you'll find out in a bit, you will actually need it.
Reboot and ensure that you can boot into installation A without an issue.
Now enable fixed-drive Bitlocker on each of the alternate partitions, using a different password for each of them.
Again, back up the IDs and recovery keys. Jesus christ, just do it. Trust me.
Reboot and attempt to boot into one of the alternate installations from the bootloader. What should happen at this point, is that instead of loading the selected Windows installation, the system will reboot and prompt you for the Bitlocker key for that particular partition/install. Enter your password and, if it works, you're all set. From within any of the installations, you should still see the other partitions, but they should be locked and inaccessible unless you unlock them with their respective passwords. You now have multiple encrypted installs of Windows 10 without having to use any third-party tools.
Why Those Recovery Keys Matter
So why the insistence on backing up the recovery keys? Because there are seemingly benign things you probably don't normally even pay attention to that will trigger Bitlocker's recovery mode. Some things that I have found that can trigger it:
Updating device drivers
Major OS updates (e.g. the "Creator's Update")
Updating the UEFI/BIOS
Modifying or clearing the TPM settings
Group Policy changes
And probably other things. In every case, you'll have no warning. You'll install an update or apply a setting and reboot and Bitlocker will prompt you for that recovery key. It won't happen often (thank god), but it will happen. And if you don't have the appropriate recovery key for whatever partition triggered the recovery (which is why I told you to keep track of both the ID and the key), everything on that partition will be unrecoverable. Period. End of story.
Further Isolation
This is optional, but for an added layer of isolation, you can remove the drive letters of the other partitions in each of your Windows installations using the Disk Management interface. Now, those partitions will no longer be visible or accessible from within that installation.
0 notes
Text
How do I check if Windows 10 is properly installed or not?
Installed properly is subjective but if you want the best performance and security you'll want to confirm the below settings.
Windows will tell you if you're not activated but you can check using the system applet in control panel.
Make sure you’re on the latest version of Windows (1703 creators edition as of this writing). Use the winver command to see your version.
Confirm you're running the 64-bit version, e.g. x64 not x86, provided your computer is capable - run winver to see this.
Confirm (run msinfo32) that your BIOS is set to UEFI, legacy works but is less secure. Generally speaking changing this requires a complete format and reinstall.
The system BIOS should have Secure Boot is enabled - requires UEFI BIOS. This protects against some BitLocker hacking attempts on your hard drive if stolen.
If you want extra security confirm TPM is enabled and activated in the system BIOS (before Windows boots) then inside Windows control panel enable BitLocker on your hard drives. This will ensure that someone cannot access your data if they physically take your computer or hard drive.
Solid state hard drives are recommended for best performance, at least for the drive you have Windows installed on. You can see the type of drive in device manager or run MSINFO32. Find the model number and Google search for it.
You'll also want to make sure you have the latest drivers and BIOS updates available as well but that can be more complex.
This isn't 100% but it's a good start.
0 notes