#wp plugin install error
Explore tagged Tumblr posts
Visit Tumblr Blog
Explore Tumblr blogs with no restrictions, modern design and the best experience.
Last Seen Tumblr Blogs


Fun Fact
Tumblr’s website traffic is steadily declining.
Text
"I've identified the murderer, Miss Holt!"
I've been getting back into Remington Steele from the Internet Archive, and I'm giving it a namecheck - because it's fun and you can watch it for free! - but also because Steele's only right about the murderer... Maybe 50% of the time. Last episode I watched, he was convinced it was a ghost.
He's not a real detective, you see. He's a conman. Laura Holt keeps him around because he makes her detective agency look plausible, and he's cute. Eventually, he learns enough to get a bit better at it.
Well, nor am I a real web designer, and I've identified a problem I've been fighting most of the week. I won't keep you in suspense, it's Jetpack. Jetpack is WordPress's in-house website management software. If you build a free site with them, it's the only plugin you get! So, of course, it's horrible. This is like saying "the butler did it."
*sigh* I knew it wasn't playing well with the comment plugin I was using, but that plugin stopped releasing compatible updates and I had to get rid of it. (Thus, I have an Ask Blog now.) Jetpack periodically pops up an ad, if you've uninstalled it, and asks you to reinstall it. You need it! It's lite! It's better now! And a couple weeks back, I bit. It didn't hurt anything at the time, so I left it alone. But then, the updates. The updates with the "global colours" that made everything screwy. I remapped the colours as well as the theme would let me (I still have a few I can't get at, and some remain unmapped, because if I map them, they get flagged "invalid value.") but that wasn't the end of the errors.
I spent about two hours yesterday trying to figure a workaround for buttons, which were no longer customizable. They were using the defaults, even if they were illegible or hideous. They'd display fine in the editor and refuse to work on the front end. I thought something about WP was causing my themes to turn into default despots, because I'd tried switching themes and some problems persisted. I thought I'd have to roll with it until another update.
Nope!
I re-did my New Readers page, to account for the new Ask Blog, and I read myself warning everyone I can't code for shit. "Jetpack and I are not friends. Tech support and I are." And, much like poor Mr. Steele, I got a clue. I disabled Jetpack and made a custom button. Now they display on the front end just fine!
I have no idea if that was causing every problem. I mean, it certainly didn't screw up the colours all by itself. I can probably put some things back that I had to disable, and of course I can make buttons again. But I've wasted a lot of time bashing my head on the site and I want to finish the illustrations. I'll get back to it over the next few weeks, and I'll try to keep my tinkering to the small hours (PDT). It's a bit of a mess, but you should be able to find and read the next instalment on next Tuesday.
...Unless I'm wrong about the ghost, Miss Holt, but I don't think I am. Just like The Uninvited! 1944! Ray Milland and Ruth Hussey!
#tin soldier and soldier on#updates#remington steele#tortured pop culture metaphors#this is just how my brain works#“ah yes i am an idiot - just like remington steele! 1982! pierce brosnan and stephanie zimbalist!”#that man is not neurotypical no way in hell
6 notes
·
View notes
Text
10 Easy SEO Tips for WordPress Beginners (That Actually Work in 2025)
So, you’ve launched your WordPress site and you’re wondering… “How do I get more traffic from Google?”
The answer? Search Engine Optimization (SEO). But don’t worry you don’t need to be an expert to start seeing results.
Whether you’re a blogger, small business owner, or running an online store, these 10 beginner-friendly SEO tips will help boost your visibility on Google in 2025.
And yes, we'll also show you how using the right WordPress theme (like those from WPElemento) can make a huge difference.
1. Choose the Right SEO Keywords
Before you create content, know what your audience is searching for.
Tools to try:
Ubersuggest (free & beginner-friendly)
Google Keyword Planner
Ahrefs Free Keyword Generator
👉 Look for long-tail keywords like:
“best WordPress themes for small business”
“how to improve WordPress site speed”
“affordable SEO tools for beginners”
Pro Tip: Focus on keywords with low competition and high intent.
2. Install an SEO Plugin
This is a must for WordPress beginners.
The two best free plugins are:
Yoast SEO
Rank Math
These tools help you:
Optimize title tags and meta descriptions
Create XML sitemaps
Manage canonical URLs
Improve content readability
3. Use a Fast, SEO-Friendly WordPress Theme
Your theme affects your site’s speed, code structure, mobile usability all ranking factors.
🎯 Recommended: WPElemento WordPress Theme Bundle
This bundle includes dozens of responsive, fast-loading themes across niches like:
Business
eCommerce
Education
Photography
Non-profits
All WPElemento themes are:
Built with clean code
Elementor-compatible
Mobile-optimized
Designed for SEO success
4. Optimize Your Site Speed
Google loves fast websites. So do your visitors.
Quick ways to boost speed:
Use a caching plugin (like WP Rocket or W3 Total Cache)
Compress images with ShortPixel or TinyPNG
Choose a fast web host
Minimize external scripts
🛠️ Already using a bloated theme? Switch to one from the WPElemento bundle to improve load times.
5. Write Quality, Human-Friendly Content
Forget stuffing keywords. In 2025, Google prefers content that helps real people.
✍️ Writing Tips:
Use headings (H1, H2, H3) to structure content
Answer questions directly
Keep paragraphs short and readable
Add visuals: images, infographics, and videos
Use internal links to your other pages
6. Make Your Site Mobile-Friendly
With over 60% of traffic coming from mobile, your site must be responsive.
How to check?
Use Google’s Mobile-Friendly Test
Preview your site on various screen sizes
💡 Good news: Every WPElemento theme is mobile-optimized out of the box.
7. Use SEO-Friendly URLs
Keep your URLs short, descriptive, and keyword-rich.
❌ Example of a bad URL: yourwebsite.com/page?id=37482
✅ Example of a good URL: yourwebsite.com/seo-tips-for-wordpress
To fix this:
Go to Settings → Permalinks in WordPress
Choose “Post name” as your default structure
8. Add Alt Text to All Images
Alt text helps Google understand your images. It’s also important for accessibility.
When uploading an image:
Add a short, keyword-rich description in the "Alt Text" field
Keep it relevant (don’t keyword stuff)
Example: Alt text: “Business website WordPress theme by WPElemento”
9. Submit Your Site to Google Search Console
If you want to appear in Google, let them know you exist!
Head over to Google Search Console, add your site, and:
Submit your sitemap (created by Yoast or RankMath)
Monitor which keywords bring traffic
Fix crawl errors
It’s free and gives you real data on how Google sees your site.
10. Keep Updating and Improving
SEO isn’t one-and-done. Keep your site fresh by:
Updating outdated posts
Fixing broken links
Adding new content regularly
Upgrading to better-performing themes (again, check WPElemento)
Final Thoughts
SEO may sound technical, but the basics are simple:
Choose good keywords
Write helpful content
Optimize your speed and design
Stay mobile-friendly
Use the right tools (and the right theme)
Start with the foundation: your WordPress theme. Explore the full range of fast, SEO-ready options in the WPElemento WordPress Theme Bundle and give your website a real edge in 2025.
0 notes
Text
Top SEO Plugins for WordPress You Should Use in 2025

Having a WordPress website is only the beginning—getting it discovered by search engines is where the real magic happens. With millions of websites competing for attention, optimizing your site for SEO is essential.
Thankfully, WordPress has an incredible range of SEO plugins that simplify the process. Whether you’re a blogger, business owner, or eCommerce seller, these tools help you rank higher, drive more traffic, and grow faster.
In this guide, we’ll cover the top SEO plugins for WordPress in 2025, how they work, and why you should consider installing them. For professional setup, a trusted WordPress Development Company in Udaipur can help you implement them flawlessly.
1. Yoast SEO
Best for: All-purpose SEO, beginners to advanced users
Yoast remains one of the most popular SEO plugins for WordPress, and in 2025, it’s better than ever.
Key Features:
On-page SEO suggestions
Keyword optimization
XML sitemap generation
Meta title and description editor
Breadcrumbs and canonical URLs
Yoast offers a real-time SEO analysis tool that guides you as you create content—perfect for bloggers and marketers alike.
Free version available | Premium from $99/year
2. Rank Math
Best for: Power users and those who want more control
Rank Math is quickly becoming the new favorite in the WordPress SEO world—and for good reason.
What sets it apart:
Track up to 5 keywords per post (even in the free version)
Built-in schema markup
Advanced redirection manager
Integration with Google Search Console & Analytics
Local SEO module for businesses
It’s powerful, lightweight, and packed with features that were previously only available in paid plugins.
Free version available | Pro from $59/year
3. All in One SEO (AIOSEO)
Best for: Business websites, eCommerce stores
AIOSEO is another long-standing plugin trusted by millions. Its latest 2025 update focuses on performance and deeper WooCommerce integration.
Highlights:
TruSEO on-page analysis
Smart XML sitemaps
SEO audit checklist
WooCommerce SEO tools
Social media integration with Open Graph and Twitter Cards
The setup wizard makes it easy to configure in minutes—ideal for beginners.
Free version available | Pro from $49/year
4. SEOPress
Best for: Developers and agencies
SEOPress is a clean, lightweight, and privacy-focused SEO plugin that rivals both Yoast and Rank Math in power.
Notable features:
Content analysis and optimization tips
Schema (structured data) integration
Broken link checker
Google Analytics and Tag Manager integration
White-label options for agencies
If you want an ad-free, developer-friendly SEO solution, SEOPress is a strong contender.
Free version available | Pro from $49/year
5. Schema Pro
Best for: Advanced schema markup
Structured data helps Google understand your content better—and plugins like Schema Pro make it easy to implement.
What it does:
Adds rich snippets (reviews, FAQs, recipes, etc.)
Supports 20+ schema types
Integrates with Elementor and other builders
Visual interface for mapping schema fields
Great for businesses and blogs that want to improve click-through rates with rich results.
Premium only | Starts at $79/year
6. Redirection
Best for: Managing 301 redirects and broken links
SEO isn’t just about adding keywords—it’s also about maintaining clean URLs. Redirection helps manage URL changes and avoid 404 errors.
Key Features:
Easy setup of 301 redirects
Monitor 404 errors
Conditional redirects based on login status, browser, or referrer
Full logging for troubleshooting
It’s a lightweight plugin that plays a big role in preserving SEO equity during site migrations or redesigns.
Completely free
7. WP Rocket (for Speed & Core Web Vitals)
Best for: SEO through performance optimization
While not an SEO plugin in the traditional sense, WP Rocket improves page speed and Core Web Vitals, both of which are crucial for SEO rankings in 2025.
Features:
Page and browser caching
File minification
Lazy loading for images
CDN support
Database cleanup
Google ranks fast sites higher, so using WP Rocket in tandem with SEO plugins is a smart strategy.
Premium only | Starts at $59/year
8. Broken Link Checker
Best for: Fixing dead links that hurt SEO
Broken links frustrate users and damage your SEO. This plugin scans your posts, pages, and comments to detect and fix them.
Benefits:
Scans internal and external links
Notifies you via dashboard and email
Offers quick editing interface
It’s a must-have for content-heavy websites and blogs.
Free version available
9. Google Site Kit
Best for: Integrating Google’s tools into WordPress
Google Site Kit brings essential SEO tools right into your WordPress dashboard.
What it connects:
Google Search Console
Google Analytics
PageSpeed Insights
Google AdSense
Tag Manager
Use it to monitor traffic, performance, and crawl errors in one place—no code needed.
Completely free
10. Squirrly SEO
Best for: Beginners and content creators
Squirrly is like having an SEO coach inside your dashboard. It’s ideal for non-technical users who want real-time tips as they write.
Features:
SEO Live Assistant with suggestions
Keyword research built-in
Weekly site audits
Competitor analysis
Google SERP checker
It also helps you optimize content for both users and search engines.
Free version available | Pro from $71.99/year
Final Thoughts
If you’re using WordPress, you already have a head start in SEO—but the right plugins can elevate your site’s performance, visibility, and traffic dramatically.
0 notes
Text

How to Set Up Your Local Development Environment for WordPress
Setting up a local development environment is one of the best ways to experiment with and build WordPress websites efficiently. It offers you a safe space to test themes, plugins, and updates before applying changes to a live site. Whether you’re a beginner or an experienced developer, having a local environment is essential in streamlining your workflow and minimizing website downtime.
Before we dive into the technical steps, it’s worth mentioning the benefits of WordPress for your business website. WordPress offers unmatched flexibility, scalability, and user-friendliness, making it an ideal platform for businesses of all sizes. When paired with a solid local development setup, WordPress becomes even more powerful in enabling fast and secure site builds.
Step 1: Choose Your Local Development Tool
There are several local development tools available that cater specifically to WordPress users:
Local by Flywheel (now Local WP): Extremely beginner-friendly with features like SSL support and one-click WordPress installs.
XAMPP: A more general-purpose tool offering Apache, MySQL, PHP, and Perl support.
MAMP: Ideal for macOS users.
DevKinsta: Built by Kinsta, it offers seamless WordPress development and staging capabilities.
Choose the one that suits your OS and comfort level.
Step 2: Install WordPress Locally
Once you’ve chosen your tool:
Install the software and launch it.
Create a new WordPress site through the interface.
Set up your site name, username, password, and email.
After setup, you’ll get access to your WordPress dashboard locally, allowing you to install themes, plugins, and begin your customizations.
Step 3: Configure Your Development Environment
To ensure an efficient workflow, consider these configurations:
Enable Debug Mode: Helps in identifying PHP errors.
Use Version Control (e.g., Git): Keeps your changes tracked and manageable.
Database Access: Tools like phpMyAdmin help manage your WordPress database locally.
If your project requires dynamic functionality, leveraging PHP Development Services during the setup phase can ensure custom features are implemented correctly from the beginning.
Step 4: Customize Themes and Plugins Safely
With your local environment set up, now's the time to begin theme development or customization. You can safely create or modify a child theme, experiment with new plugins, and write custom code without any risk of affecting your live site.
For those unfamiliar with theme structures or WordPress standards, it’s often wise to hire a professional WordPress developer who understands best practices and can ensure clean, maintainable code.
Step 5: Syncing to a Live Server
After building and testing your site locally, you'll eventually want to push it live. Popular methods include:
Using a plugin like Duplicator or All-in-One WP Migration
Manual migration via FTP and phpMyAdmin
Using version-controlled deployment tools
Syncing should always be done carefully to avoid overwriting crucial data. Regular backups and testing are essential.
Step 6: Maintain Your WordPress Site Post-Launch
Launching your website is only the beginning. Ongoing updates, security patches, and performance optimization are critical for long-term success. Enlisting website maintenance services ensures your site remains fast, secure, and up-to-date.
Services can include:
Core, plugin, and theme updates
Malware scans and security hardening
Site performance monitoring
Regular backups
Final Thoughts
A local WordPress development environment not only speeds up your development process but also protects your live website from unintended changes and errors. With tools and strategies now more accessible than ever, there's no reason not to use one.From learning the basics to running advanced builds, setting up locally gives you the confidence and space to grow your WordPress skills. And if you want to see real-world examples or follow along with tips and tricks I share, feel free to check out my work on Instagram for practical inspiration.
0 notes
Text
Fixing WordPress Update Issues Made Easy: A Beginner’s Guide to Smooth Website Maintenance

Keeping your WordPress website updated is one of the smartest things you can do for better security, performance, and features. But what happens when those updates don’t go as planned?
If you’ve ever seen your website freeze, crash, or show strange errors after clicking "Update," don’t worry—you’re not alone, and you don’t need to be a developer to fix it.
In this guide, we’ll explain why WordPress updates fail and share simple, beginner-friendly solutions to get your website back on track—quickly and safely.
⚠️ Common Reasons Why WordPress Updates Fail
WordPress is built on multiple moving parts—your core WordPress files, themes, and plugins. An update may fail if just one part doesn’t play nicely with the others.
Here are the top reasons why updates might not go through:
🌐 Weak or unstable internet connection
🔌 Plugin conflicts that interfere with the update
🎨 Themes that aren’t compatible with the latest WordPress version
🧠 Low server memory or execution time limits
🔒 Incorrect folder or file permissions
📁 Corrupted or incomplete update downloads
🛠️ Simple Fixes for WordPress Update Problems
✅ Step 1: Always Back Up Your Website
Before making any changes, install a backup plugin like UpdraftPlus or BackupBuddy and save a complete version of your site. This ensures that if something goes wrong, you can restore your site in minutes.
✅ Step 2: Clear Your Cache
Sometimes, the issue isn’t with the update—it’s with what your browser is showing.
Clear your browser cache (Ctrl+Shift+R or Command+Shift+R)
If you use a caching plugin (like WP Super Cache or W3 Total Cache), clear your site’s cache from the plugin dashboard
Then, try the update again.
✅ Step 3: Troubleshoot Plugin Conflicts
If an update causes your site to break, the issue might be a plugin.
Here’s how to find out:
Install the Health Check & Troubleshooting plugin.
Enable “Troubleshooting Mode”—this temporarily disables all plugins for you only.
Try running the update again.
If the update works now, reactivate your plugins one at a time. The one that breaks the update is your troublemaker.
✅ Step 4: Check Hosting Limits
Your hosting environment might be too limited for updates to complete properly.
Ask your hosting provider these questions:
Is my PHP memory limit at least 256MB?
Is my maximum execution time at least 300 seconds?
Can these settings be increased if needed?
If not, consider upgrading to a better hosting plan for smoother WordPress performance.
✅ Step 5: Perform a Manual WordPress Update
When automatic updates fail, a manual update is a reliable workaround:
Download the latest WordPress version from WordPress.org
Unzip the files on your computer
Use FTP software (like FileZilla) to access your site files
Replace the wp-admin and wp-includes folders with the new versions
Leave the wp-content folder as-is (it holds your themes and plugins)
Open your site and follow any update prompts for the database
This process ensures a clean, fresh installation—without losing content or settings.
✅ Step 6: Fix File Permissions
Improper file permissions can block updates.
Use a plugin like WP File Manager or ask your host to set:
All folders to 755
All files to 644
These settings help WordPress update safely without risking your site’s security.
✅ Step 7: Remove Stuck Maintenance Mode
If you see the message:
“Briefly unavailable for scheduled maintenance. Check back in a minute.” …your site update was interrupted and left in maintenance mode.
Here’s how to fix it:
Access your site files through FTP or your hosting file manager (like cPanel)
Go to your website’s root folder
Delete the file called .maintenance
Refresh your site—it should be back to normal
This takes less than a minute and often solves the issue instantly.
💡 When to Call in the Pros
If these solutions don’t work—or if you feel unsure about any step—don’t hesitate to get help from professionals.
Here are your options:
Contact your web hosting support
Hire a trusted WordPress expert
Reach out to a reputable company like Websenor for quick, affordable help
🎯 Final Word: Let Websenor Handle Your WordPress Maintenance
WordPress update problems are common—but they don’t have to be stressful. With some basic know-how and a methodical approach, you can often fix these issues yourself.
But if you'd rather skip the hassle, Websenor is here to help. Our team specializes in:
WordPress core and plugin updates
Website backups and security
Speed optimization and error fixes
We'll keep your website running smoothly, so you can focus on your business, not your backend.
👉 Ready to stop worrying about WordPress updates? Contact Websenor today and let us take care of everything behind the scenes.
0 notes
Text
WordPress Theme Development: A Complete Guide
WordPress theme development is an essential skill for developers looking to create custom, high-performance websites. Whether you're building a theme for personal use, client projects, or to sell on marketplaces, understanding the fundamentals is crucial.
This guide covers everything from the basics to advanced techniques, helping you master WordPress theme development.
1. What is a WordPress Theme?
A WordPress theme is a collection of files that define the appearance and functionality of a website. It includes:
PHP Files – Control the structure and content.
CSS Stylesheets – Define the website’s look and feel.
JavaScript Files – Add interactivity and animations.
Template Files – Manage different parts of the website, such as headers, footers, and sidebars.
Themes can be either classic themes (built using PHP) or block themes (based on the WordPress block editor).
2. Tools Required for Theme Development
Before you start, set up a proper development environment. Here’s what you need:
Local Development Server: Install Local by Flywheel, XAMPP, or MAMP to test your theme locally.
Code Editor: Use Visual Studio Code or Sublime Text for writing clean code.
Version Control: Use Git for tracking changes and collaborating with teams.
Browser DevTools: Inspect and debug CSS, JavaScript, and responsive design.
3. Setting Up a Basic WordPress Theme
To create a custom theme, follow these steps:
Step 1: Create a Theme Folder
Navigate to wp-content/themes/ and create a new folder (e.g., mytheme).
Step 2: Add Essential Theme Files
Inside your theme folder, create the following files:
style.css (Main stylesheet)
index.php (Main template file)
functions.php (Handles theme functions)
4. Understanding WordPress Template Hierarchy
WordPress uses a hierarchy to determine which template file to load. Some important templates include:
index.php – Default template (fallback for all pages).
header.php & footer.php – Used for the site's header and footer.
single.php – Displays single blog posts.
page.php – Used for static pages.
archive.php – Displays category, tag, and author archives.
Understanding this hierarchy helps you create a structured theme.
5. Adding Dynamic Features with functions.php
The functions.php file is crucial for adding features like menus, widgets, and theme support.
Registering a Navigation Menu
6. Creating Custom Page Templates
To create a unique page design, you can build a custom template.
Example: Custom About Page Template
Now, when creating a new page in WordPress, you can select "About Page" from the Page Attributes section.
7. Making Your Theme Responsive
Use CSS media queries to ensure your theme works on all devices.
Additionally, using Flexbox and CSS Grid can help create a more flexible layout.
8. SEO & Performance Optimization
Optimize Code and Assets
Minify CSS & JavaScript using plugins like Autoptimize.
Load scripts asynchronously to improve speed.
SEO Best Practices
Use semantic HTML5 tags (<header>, <article>, <footer>).
Optimize images using WebP format for faster load times.
Install an SEO plugin like Yoast SEO to manage metadata and sitemaps.
9. Testing & Debugging Your Theme
Before deploying, ensure your theme is error-free.
Enable Debugging: Add this to wp-config.php: phpCopyEditdefine('WP_DEBUG', true); define('WP_DEBUG_LOG', true);
Use Theme Check Plugin: Install the Theme Check plugin to ensure your theme follows WordPress coding standards.
10. Publishing and Selling Your Theme
Once your theme is complete, you can:
Submit it to the WordPress Theme Repository.
Sell it on marketplaces like ThemeForest or TemplateMonster.
Offer premium versions on your own website.
Conclusion
WordPress theme development is an exciting and rewarding skill that allows you to build powerful, customized websites. By mastering the basics, following best practices, and continuously improving your designs, you can create themes that are functional, responsive, and optimized for SEO.
If you’re serious about WordPress development, start building and experimenting with your own themes today!
0 notes
Text
WordPress Plugin for WHMCS: Revolutionizing Web Hosting with WP WHMCS Sync
In the ever-growing world of web hosting, businesses are constantly looking for ways to streamline their operations, enhance customer experience, and increase revenue. One of the most effective ways to achieve these goals is by integrating WHMCS (Web Host Manager Complete Solution) with WordPress. WHMCS is a leading automation platform used by web hosting providers to manage client billing, support, and account management. WordPress, on the other hand, powers over 40% of websites globally, thanks to its flexibility, scalability, and ease of use.
Integrating WHMCS into WordPress allows hosting companies to combine the robust functionality of WHMCS with the user-friendly, customizable nature of the WordPress Plugin for WHMCS. WP WHMCS Sync, a plugin designed to facilitate this integration, is a powerful tool that simplifies the process of syncing data between these two platforms. In this article, we will explore the features, benefits, installation process, and troubleshooting tips for the WP WHMCS Sync plugin, demonstrating how it can revolutionize the way you manage and run your web hosting business.
1. Why Choose a WordPress Plugin for WHMCS?
Integrating WHMCS into WordPress through a plugin offers numerous advantages for web hosting businesses. Here’s why using a WordPress plugin like WP WHMCS Sync can significantly improve your operations:
Seamless Client Management
WHMCS is a comprehensive platform that handles billing, invoicing, domain management, and client account management. However, accessing these features on a separate system can disrupt the user experience. By integrating WHMCS with WordPress, clients can access everything they need from a single platform.
WP WHMCS Sync creates a seamless connection between your WordPress site and WHMCS, enabling you to display client data, hosting plans, invoices, and support tickets directly on your WordPress website. This integration ensures that customers don't need to log into two different systems to manage their accounts, which improves the overall user experience.
Automation and Efficiency
Both WHMCS and WordPress are designed to automate key aspects of business management. WHMCS automates billing, payment processing, and customer support, while WordPress can automate content management and marketing. WP WHMCS Sync combines the strengths of both platforms, ensuring that updates to customer accounts, billing details, and support requests are synchronized automatically across both systems.
With this integration, you don’t need to manually update customer information or invoices in both platforms. Instead, the WP WHMCS Sync plugin ensures that all changes made in WHMCS are automatically reflected on the WordPress site, saving time and reducing the likelihood of errors.
Brand Consistency
WordPress allows for extensive customization, meaning you can design your website to reflect your brand's identity. By integrating WHMCS into WordPress, you can maintain that same branding across all client-facing aspects of your business. WP WHMCS Sync makes it easy to embed the WHMCS client area, billing interface, and other WHMCS functionalities directly into your WordPress site, all while preserving the look and feel of your brand.
Improved Customer Support
WP WHMCS Sync also enhances the customer support experience. With this integration, customers can submit support tickets, track their progress, and communicate with your team directly from the WordPress site. This centralizes customer interaction, allowing you to streamline your support processes and improve response times.
2. Features of WP WHMCS Sync Plugin
WP WHMCS Sync is packed with features designed to simplify the integration of WHMCS into WordPress. Let's take a closer look at some of the plugin's most notable features:
One-Click Integration
The WP WHMCS Sync plugin offers an easy-to-use installation process that requires no advanced technical skills. Simply download the plugin, install it on your WordPress site, and configure it by entering your WHMCS API details. The plugin’s setup wizard walks you through each step, making it quick and simple to integrate the two platforms.
Client Area Integration
One of the standout features of WP WHMCS Sync is the ability to integrate the WHMCS client area directly into your WordPress site. This integration allows clients to view and manage their hosting plans, invoices, domains, and support tickets all from the same WordPress interface. The client area can be customized to match your site's theme, ensuring a consistent brand experience.
Automatic Data Synchronization
WP WHMCS Sync automatically synchronizes key data between WHMCS and WordPress, including client accounts, invoices, product and service details, and support tickets. Any updates made in WHMCS are instantly reflected on the WordPress site, ensuring that both platforms are always in sync. This eliminates the need for manual updates, saving you time and ensuring that customer data is always up-to-date.
Flexible Payment Gateway Integration
WP WHMCS Sync supports integration with various payment gateways that are compatible with both WHMCS and WordPress. This allows you to offer a range of payment options to your customers, such as credit cards, PayPal, and bank transfers, all within your WordPress site.
Customizable Client Dashboard
WP WHMCS Sync allows you to create a fully customizable client dashboard within your WordPress site. You can choose which elements to display, such as current services, invoices, and ticket status, providing clients with an intuitive and streamlined experience. This flexibility ensures that your client area can be tailored to meet your business's specific needs.
3. How to Install and Configure WP WHMCS Sync Plugin
Setting up WP WHMCS Sync is a simple process that takes just a few steps. Below is a detailed guide to installing and configuring the plugin on your WordPress site:
Step 1: Install the WP WHMCS Sync Plugin
Download the WP WHMCS Sync plugin from the official website or your plugin provider.
Log into your WordPress dashboard and navigate to Plugins > Add New.
Click on Upload Plugin and choose the downloaded WP WHMCS Sync plugin file.
Click Install Now and activate the plugin after installation.
Step 2: Configure the Plugin
After activation, go to Settings > WP WHMCS Sync in the WordPress dashboard.
Enter the necessary details, such as your WHMCS API URL and API key. You can find this information in the WHMCS admin panel under Setup > Staff Management > API Access.
Once entered, click Save Changes to store your configuration.
Step 3: Synchronize Data Between WHMCS and WordPress
After connecting the plugin to your WHMCS account, you can choose which data to sync. You can sync client accounts, product information, invoices, domains, and more.
You can also set up synchronization intervals, deciding how often the plugin should sync data between WHMCS and WordPress.
Step 4: Customize the Client Area
Customize the client area to match your WordPress site's branding by adjusting the layout, color scheme, and fonts.
You can also decide which information to display in the client dashboard, such as active services, billing history, and ticket status.
Step 5: Test the Integration
Once the plugin is installed and configured, perform tests to ensure the integration works correctly. Check that:
Client data is syncing properly between WHMCS and WordPress.
Customers can log into their accounts and manage their services.
Payment gateways are working as expected.
Support tickets are submitted and tracked efficiently.
4. Troubleshooting Common Issues
While WP WHMCS Sync is designed to be easy to use, you may encounter occasional issues. Here are some common problems and how to address them:
API Connection Issues
If the plugin is unable to connect to your WHMCS installation, double-check your API URL and API key. Make sure that your WHMCS installation allows API access and that your API key has the appropriate permissions.
Data Synchronization Delays
If updates aren’t reflecting in real-time, check your synchronization settings and ensure that the plugin has permission to access both WHMCS and WordPress. You may need to increase the synchronization frequency or optimize your server for better performance.
Payment Gateway Issues
If payments aren’t processing correctly, ensure that the payment gateway integration is configured properly in both WHMCS and WordPress. Check your payment settings in both platforms to make sure they match.
Client Area Display Problems
If the client area isn’t displaying correctly, verify that your theme settings in WordPress are compatible with the WHMCS client area. You may need to adjust custom CSS or contact the plugin’s support team for further assistance.
Conclusion
The WP WHMCS Sync plugin is an invaluable tool for web hosting businesses looking to integrate WHMCS with WordPress. By enabling seamless client management, automating data synchronization, and offering customizable client areas, this plugin simplifies web hosting management and enhances the user experience. The easy installation process and extensive features make WP WHMCS Sync an excellent choice for any hosting provider who wants to combine the power of WHMCS with the flexibility and customization of WordPress. By following the installation guide and troubleshooting tips provided, you'll be able to integrate WHMCS into your WordPress site in no time, streamlining your operations and improving customer satisfaction.
0 notes
Text
youtube
How to fix Briefly unavailable for scheduled maintenance, please check back in a minute error in wordpress 20025 ?
The "Briefly unavailable for scheduled maintenance. Please check back in a minute." error in WordPress usually occurs when an update is interrupted or incomplete. Here's how to fix it:
1. Delete the .maintenance File
WordPress creates a temporary .maintenance file in the root directory during updates. If the update fails or gets stuck, this file isn't removed, causing the error.
Steps to Fix:
Access Your Website via FTP or File Manager
Use an FTP client like FileZilla or log in to your cPanel and open the File Manager.
Locate the Root Directory
Navigate to the public_html or the folder where your WordPress site is installed.
Find and Delete the .maintenance File
If you don’t see the file, enable "Show Hidden Files" in your file manager settings.
Reload Your Website
Your site should be back online.
2. Manually Complete or Restart the Update
If the issue persists, your update may not have finished properly.
Steps to Fix:
Go to the wp-content/upgrade Folder
Delete any files inside this folder.
Manually Update WordPress, Themes, or Plugins
If a plugin or theme update was interrupted, go to your WordPress Dashboard > Plugins or Appearance > Themes and retry the update.
3. Disable Plugins (If the Error Persists)
If your site still shows the error:
Rename the plugins Folder via FTP
Go to wp-content/ and rename the plugins folder to plugins-old.
Check if your site loads. If it does, a plugin caused the issue.
Rename the folder back and activate plugins one by one to find the culprit.
4. Check File Permissions
Incorrect file permissions can cause WordPress to fail during updates.
Correct Permissions:
Files: 644
Folders: 755
You can adjust these via your File Manager or an FTP client.
5. Increase PHP Memory Limit (If Updates Are Failing)
If the update was interrupted due to low memory:
Edit wp-config.php
Add the following line:phpCopyEditdefine('WP_MEMORY_LIMIT', '256M');
Save the file and try reloading the website.
Final Step: Clear Cache
If your website is still showing the maintenance message after following the above steps:
Clear your browser cache and WordPress cache (if using a caching plugin like WP Rocket or W3 Total Cache).
0 notes
Text
How to Move Your WordPress Site from Localhost to a Live Server
Developing a WordPress site on localhost is a great way to build and test your website in a controlled environment. However, the real challenge arises when it's time to move the site from your local server to a live hosting environment. If not done correctly, you could encounter broken links, missing images, or even database errors.
In this blog, we'll guide you through a step-by-step process to successfully move your WordPress site from localhost to a live server.

Step 1: Choose the Right Hosting Provider
Your first step is to select a reliable web hosting provider that meets your website’s needs. Look for:
Server Speed: Fast servers for better performance.
Uptime Guarantee: At least 99.9% uptime to ensure availability.
Ease of Use: User-friendly dashboards and tools.
WordPress Support: Hosting optimized for WordPress websites.
Popular options include Bluehost, SiteGround, and WP Engine.
Step 2: Export Your Local WordPress Database
The database is the backbone of your WordPress site. To export it:
Open phpMyAdmin on your local server (e.g., XAMPP or WAMP).
Select your WordPress database.
Click on the Export tab and choose the Quick Export method.
Save the .sql file to your computer.
Step 3: Upload Your WordPress Files to the Live Server
To move your files:
Compress Your WordPress Folder: Zip your local WordPress installation folder.
Access Your Hosting Account: Use a file manager or an FTP client like FileZilla.
Upload the Files: Transfer the zipped folder to your hosting server's root directory (usually public_html).
Unzip the Folder: Extract the files once uploaded.
Step 4: Create a Database on the Live Server
Now, set up a new database on your live hosting server:
Log in to your hosting control panel (e.g., cPanel).
Navigate to the MySQL Databases section.
Create a new database, database user, and password.
Assign the user to the database with full privileges.
Step 5: Import the Database to the Live Server
Open phpMyAdmin in your hosting control panel.
Select the new database you created.
Click the Import tab.
Choose the .sql file you exported from your localhost.
Click Go to import the database.
Step 6: Update the wp-config.php File
To connect your site to the live database:
Locate the wp-config.php file in your WordPress installation.
Open the file in a text editor.
Update the following lines: define('DB_NAME', 'your_live_database_name'); define('DB_USER', 'your_live_database_user'); define('DB_PASSWORD', 'your_live_database_password'); define('DB_HOST', 'localhost'); // Keep this unless your host specifies otherwise.
Save the file and upload it to your server via FTP.
Step 7: Update URLs in the Database
Your localhost URLs need to be replaced with your live site URLs.
Use a tool like Search Replace DB or run SQL queries in phpMyAdmin.
In phpMyAdmin, run the following query: UPDATE wp_options SET option_value = 'http://your-live-site.com' WHERE option_name = 'siteurl'; UPDATE wp_options SET option_value = 'http://your-live-site.com' WHERE option_name = 'home';
Step 8: Test Your Live Website
Once everything is uploaded and configured, check your website by entering its URL in a browser. Test for:
Broken Links: Fix them using plugins like Broken Link Checker.
Missing Images: Ensure media files were uploaded correctly.
Functionality: Verify forms, buttons, and features work as expected.
Step 9: Set Up Permalinks
To ensure proper URL structure:
Log in to your WordPress admin dashboard on the live site.
Go to Settings > Permalinks.
Choose your preferred permalink structure and click Save Changes.
Step 10: Secure Your Live Website
After migrating, secure your site to prevent vulnerabilities:
Install an SSL Certificate: Most hosting providers offer free SSL certificates.
Update Plugins and Themes: Ensure everything is up to date.
Set Up Backups: Use plugins like UpdraftPlus for regular backups.
Conclusion
Moving your WordPress site from localhost to a live server may seem daunting, but by following these steps, you can ensure a smooth and error-free migration. A successful move allows you to showcase your site to the world, engage your audience, and achieve your goals.
Start today and take your WordPress project live with confidence!
0 notes
Text
WooCommerce Security Tips Every US Store Owner Must Know

Running a WooCommerce store in the US is exciting and rewarding—but it comes with serious responsibilities. Cybercriminals are constantly evolving, targeting e-commerce platforms and exploiting vulnerabilities. For US-based store owners, the stakes are even higher with strict data protection laws and the potential fallout from breaches, including fines, lost customer trust, and reputational damage.
But here’s the good news: protecting your store doesn’t have to be overwhelming. By addressing common vulnerabilities and implementing best practices, you can keep your business secure. Top WooCommerce Security Threats to Watch Out ForOutdated Plugins and Themes Old versions often have unpatched vulnerabilities, opening doors for hackers. SQL Injection Malicious code in database queries can lead to unauthorized access and data breaches. Cross-Site Scripting (XSS) Hackers inject scripts that steal sensitive data or manipulate site behavior. Weak Authentication Using simple passwords or lacking two-factor authentication (2FA) can make your store an easy target. Unsecured Payment Gateways Improperly configured gateways expose sensitive customer information.
Proven Tips to Secure Your WooCommerce Store
Here are practical steps to protect your store:Stay Updated: Regularly update WooCommerce, WordPress, and all plugins/themes. Use Strong Passwords & 2FA: Add an extra layer of protection for admin and user accounts. Secure Hosting: Choose hosts with firewalls, malware scanning, and DDoS protection. Enable HTTPS/SSL: Encrypt data and ensure customer transactions are secure. Install Security Plugins: Tools like Wordfence or Sucuri can monitor and block threats. Limit Admin Access: Assign roles wisely and avoid sharing admin credentials unnecessarily. Back Up Regularly: Ensure recent backups are ready to restore if anything goes wrong. Disable File Editing: Prevent hackers from exploiting your site through backend access. Set Up a Web Application Firewall (WAF): Block malicious traffic before it reaches your site.
Monitoring for Suspicious Activity
Don’t just secure your site—stay vigilant!Enable Logging: Track gateway errors and user activity via WooCommerce settings. Install Monitoring Plugins: Use tools like iThemes Security or WP Activity Log to detect anomalies. Fraud Detection: Plugins like WooCommerce Anti-Fraud help flag suspicious orders. Review Server Logs: Regularly check for failed login attempts or unusual activity.
Why Security Should Be Your Priority
In the US, a single security lapse can lead to legal complications, fines, and lost customer trust. By prioritizing WooCommerce security, you’re not only protecting your business but also delivering a safe, reliable shopping experience for your customers.
Secure your WooCommerce store today and build a foundation of trust and resilience.
🔗 Read the Full Article Here: WooCommerce Security Tips for The US Users
0 notes
Text
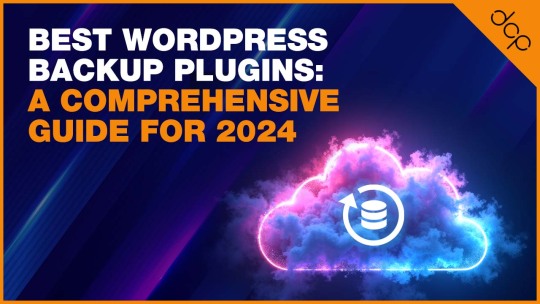
Best WordPress Backup Plugins: A Comprehensive Guide
As someone who has navigated the complexities of running a WordPress website, I’ve learned the hard way how essential backups are. They’re not just a safety net; they’re an indispensable part of your site’s security and maintenance strategy.
With the increasing threats of data loss due to hacking, server failure, or simple human error, having reliable WordPress backup plugins has become non-negotiable in 2024.
However, not all backup solutions are created equal. While the WordPress dashboard offers some basic capabilities, to ensure comprehensive protection, one must look beyond. As a web developer, I have explored various plugins, from ones providing incremental backups to those offering off-site backups, and the differences can be substantial.
The choice between a free basic plan and a premium version often comes down to the need for advanced features like real-time backups or additional storage space.
Among the plugins I’ve delved into, WP Time Capsule stands out for its incremental backup approach, minimising the load on your server.
Yet, when it comes to restoring a backup or managing backup storage efficiently, the right plugin can vary based on your specific needs, whether it’s prioritising uptime monitoring for a business plan or seeking out a plugin that seamlessly integrates with cloud storage options like S3 and Google Drive.
UpdraftPlus – Leading the Pack in WordPress Backups
Jetpack Backup – Automated Real-Time Backup Solution
BlogVault – Advanced Backup and Security Features
Duplicator – The Go-To Plugin for Site Migration and Backup
BackWPup – A Reliable Free and Pro Backup Plugin
WP Time Capsule – Incremental Backup Specialist
WPvivid – For Effortless Migration and Backup
Backup Migration – Simplifying Backup and Migration
Understanding the Importance of WordPress Backups
Regular backups are the backbone of a secure WordPress site. They safeguard against data loss by ensuring that you can quickly restore your site to a functioning state after any mishap. Incremental backups, scheduled backups, and the use of cloud storage options enhance this security by providing efficient, up-to-date snapshots of your site.
Jetpack Backups takes this a step further by automating the process, creating a WordPress file backup with encryption, thus ensuring that your data is not only current but also secure.

The Role of Hosting Providers in Site Backups
Many of us rely on our hosting providers for site backups, trusting in their infrastructure to protect our data. This reliance is mostly due to the convenience and the initial trust we place in these providers when we choose them to host our WordPress installations.
Hosting providers often offer backup solutions as part of their package, automating the process and supposedly ensuring our site’s safety without extra effort from our side.
However, this convenience can sometimes lull us into a false sense of security. While hosting providers typically perform regular backups, the control and access to these backups can vary significantly.
Questions about how often backups are stored, their retention duration, and how easy it is to restore a backup in an emergency are crucial. It’s these nuances that make understanding the role of hosting providers in site backups more complex than it appears at first glance.
The Pitfalls of Relying Solely on Web Host Backups
Depending solely on web host backups is a risky strategy for WordPress site owners. The primary issue lies in the lack of control and transparency.
You’re often at the mercy of the hosting provider’s backup schedule, which might not align with your site’s update frequency or the critical nature of your data.
Moreover, the restoration process can be cumbersome, with no guarantee of a quick turnaround, leaving your site vulnerable in times of dire need.
Another significant concern is the potential for data loss. If the server where your site and its backups are stored encounters a problem, you could lose everything.
This scenario underscores the importance of off-site backups, ensuring that a separate, secure location houses a copy of your site, thus providing an additional layer of security beyond what your hosting provider offers.
The Critical Need for Manual Backups and Their Limitations
Recognising the limitations of relying solely on hosting providers, I’ve come to appreciate the value of manual backups. They give me control over the backup process, allowing me to decide when and how often my site is backed up.
This hands-on approach ensures that I have a current backup available, especially before making significant changes to my site or updating a plugin or theme.
Yet, manual backups are not without their challenges. The process can be time-consuming and requires a certain level of technical knowledge to ensure that all core files and databases are correctly saved.
Additionally, manual backups must be stored securely, often necessitating the use of external storage destinations, which adds another layer of complexity to the task.
Towards a More Secure WordPress: The Essential Features of Backup Plugins
Through my experiences, I’ve realised that the most effective way to secure a WordPress site is through the use of dedicated WordPress backup plugins. These plugins offer a balance between automated backups, which save time, and the control that comes with manual backups. Incremental backups are a game-changer, reducing server load by only updating parts of the site that have changed since the last backup.
Furthermore, BlogVault backups exemplify another essential feature: off-site backups. Storing your backups on an external server or cloud service ensures that, even in the case of a total server failure, your data remains safe and accessible.
This combination of automation, incremental backups, and secure storage destinations makes WordPress backup plugins an indispensable tool in the arsenal of any site owner looking to protect their online presence.
Read More: https://dcpweb.co.uk/blog/best-wordpress-backup-plugins-a-comprehensive-guide
0 notes
Text

8 Critical Steps to Secure Your WordPress Website
In an era where cyber threats are constantly evolving, ensuring the security of your WordPress website is paramount.
A compromised website can lead to data breaches, financial losses, and damage to your reputation.
This comprehensive guide outlines eight critical steps to fortify your WordPress site against potential security threats.
1. Keep WordPress Core, Themes, and Plugins Updated
One of the most fundamental yet crucial aspects of WordPress security is keeping everything up to date. WordPress regularly releases updates that patch security vulnerabilities and fix bugs.
Enable automatic updates for minor WordPress releases
Regularly check for and install major WordPress updates
Update themes and plugins promptly
Remove any unused themes or plugins
Pro tip: Before updating, always back up your site to prevent potential data loss.
2. Implement Strong Password Policies
Weak passwords are one of the easiest ways for hackers to gain unauthorized access to your site. Enforce strong password policies by:
Using a combination of uppercase and lowercase letters, numbers, and special characters
Implementing a minimum password length (at least 12 characters)
Encouraging the use of password managers
Enabling two-factor authentication (2FA) for all user accounts
Consider using plugins like "WP 2FA" to easily implement two-factor authentication on your site.
3. Secure Your WordPress Login Page
The login page is often the first target for brute force attacks. Enhance its security by:
Limiting login attempts
Implementing CAPTCHA
Changing the default login URL
Using SSL to encrypt login credentials
Plugins like "Wordfence Security" can help implement many of these features.
4. Use SSL Encryption
SSL (Secure Sockets Layer) certificates encrypt data transmitted between your website and its visitors, protecting sensitive information from interception.
Install an SSL certificate on your website
Force HTTPS for all pages
Update internal links to use HTTPS
Set up 301 redirects from HTTP to HTTPS
Many hosting providers offer free SSL certificates through Let's Encrypt.
5. Implement Regular Backups
While not a direct security measure, regular backups are crucial for disaster recovery in case of a successful attack.
Set up automated daily or weekly backups
Store backups in a secure, off-site location
Test your backup restoration process regularly
Plugins like "UpdraftPlus" or "BackupBuddy" can automate this process for you.
6. Harden WordPress File Permissions
Proper file permissions prevent unauthorized users from modifying your WordPress files.
Set directories to 755 (drwxr-xr-x)
Set files to 644 (rw-r--r--)
Set wp-config.php to 600 (rw-------)
Be cautious when changing file permissions, as incorrect settings can break your site.
7. Use a Web Application Firewall (WAF)
A WAF acts as a shield between your WordPress site and potential threats, filtering out malicious traffic before it reaches your server.
Choose a reputable WAF provider (e.g., Cloudflare, Sucuri)
Configure the WAF to block common attack patterns
Regularly update WAF rules to protect against emerging threats
Some managed WordPress hosting providers include WAF as part of their service.
8. Monitor Your Site for Malware and Vulnerabilities
Regular security scans can help detect and address potential issues before they're exploited.
Use security plugins that offer malware scanning (e.g., Wordfence, Sucuri)
Implement file integrity monitoring
Set up alerts for suspicious activities
Regularly review your site's error logs for unusual patterns
Consider using external security services for more comprehensive monitoring and faster threat detection. While focusing on security, it's important to remember that a well-optimized website is often a more secure website.
Large, unoptimized images can slow down your site, making it more vulnerable to certain types of attacks and potentially harming your SEO rankings. To address this, consider using a WordPress image optimizer plugin.
Conclusion
Securing your WordPress website is an ongoing process that requires vigilance and regular maintenance.
By implementing these eight critical steps, you can significantly reduce the risk of security breaches and protect your valuable digital assets.
Remember, no security measure is foolproof, and new threats emerge constantly.
Stay informed about the latest WordPress security best practices and be prepared to adapt your security strategy as needed.
By prioritizing security, you're not just protecting your website – you're safeguarding your business, your reputation, and your peace of mind.
0 notes
Text
Simple Steps to Resetting Your WordPress Site

If your WordPress site isn’t functioning properly or you want a fresh start, resetting it might be your best option. For a detailed breakdown of the process, how to reset a WordPress site offers everything you need.
In this post, we’ll explore why you might want to reset your site and provide simple instructions for how to do it.
Why Reset Your WordPress Site?
Here are a few reasons you might want to reset your WordPress site:
Starting over: Resetting allows you to rebuild your site from scratch.
Resolving persistent issues: If your site is plagued by errors or conflicts, resetting may fix them.
Creating a test environment: Developers can use resets to test different themes or plugins.
Step-by-Step Guide to Resetting Your WordPress Site
1. Backup First
Before resetting, back up your site’s data using plugins like BackupBuddy or UpdraftPlus.
2. Install the WP Reset Plugin
The easiest way to reset your site is by using the WP Reset plugin:
Go to Plugins > Add New in the dashboard.
Search for "WP Reset."
Install and activate the plugin.
3. Reset the Site
Once the plugin is activated:
Go to Tools > WP Reset.
Type "reset" in the confirmation box and click Reset Site.
Your site will be reset, but themes and plugins will remain installed, although deactivated.
What Happens Post-Reset?
After resetting:
All content (posts, pages) is deleted.
Plugins and themes are still available but deactivated.
WordPress settings are restored to default.
Alternative Options
Instead of a full reset, you might:
Restore a previous version from a backup.
Manually clean up unused plugins, themes, and content.
Conclusion
With the help of the WP Reset plugin, resetting your WordPress site is a quick and simple process. Be sure to back up your data beforehand to avoid losing anything important!
1 note
·
View note
Text
WP Safelink Plugin 5.0.4 with License Key - Client Version for AdlinkFly
https://themesfores.com/product/wp-safelink-plugin-with-license-key-66445/ Requirements : PHP v8.2 and Ioncube v13.0 intl ioncube_loader Supported Hosting: 👉Hostinger Extra Discount: https://bit.ly/47lUH3R 👉Verpex 90% off: https://bit.ly/3QLMrFm 👉Cloudways (40% Discount): https://bit.ly/3eU0bgP Improve Your Earning and Drive More Traffic with WP Safelink free license key In addition to boosting your website’s security, WP Safelink Plugin can also help improve your SEO and drive more traffic to your site. By optimizing your links with this plugin, you can increase your website’s visibility on search engines and attract more organic traffic. Here are some of the SEO benefits of using the WP Safelink WordPress Plugin: Automatically generate SEO-friendly links for your website Customize your links with your own keywords for better search engine rankings Track your link clicks and analyze your traffic with detailed reports Improve your website’s overall performance and user engagement Subheading 3: Monetize Your Links and Earn More Revenue with WP Safelink Plugin WP Safelink Plugin also comes with advanced monetization features that allow you to earn more revenue from your links. With AdlinkFly integration, you can easily monetize your links and track your earnings with detailed reports. Here are some of the monetization benefits of using WP Safelink Plugin: Integrate seamlessly with AdlinkFly and other link monetization platforms Customize your ad types and placements for maximum revenue Monitor your earnings and optimize your ad performance with detailed reports Increase your revenue stream and monetize your website’s traffic WP Safelink 5.0.4 with License Key – Client Version for AdlinkFly WP Safelink – Converter Your Download Link to Adsense – Converter Your Download Link to Adsense Solution for those of you who have a downloadable blog but want to install Adsense on a blog that violates the Adsense policy. WP Safelink WordPress Plugins are the solution to the problem you are experiencing right now. Increase Your Adsense Earnings with “WP Safelink” Features: Auto Generate Link Manual Generate Link New Short&Long Generate Link Counter View & Click Three Permalink Anti Adblock New Unlimited Redirect Page Loop New Adlinkfly Integration New WP Safelink Client WP Safelink – Converter Your Download Link to Adsense Unlimited Domain License You can use many domains to use our unlimited products. Premium Grup Support. Don’t worry, you are a beginner because we will help you in the premium support group. Free Update Lifetime Get the latest plugin updates without having to pay back. Please note that any digital products presented on this website do not contain malicious code, viruses, or advertising. For License Key: products are functional without entering a product license code. We are unable to provide a license code for you, and it’s because we already obtain the Plugin/Theme to the original developer. The use of a license code usually is for automatic updates and premium support from the original developer. Besides, we guarantee you to deliver a free manual update and minor assistance for your convenience of using the product. Refund Policy: If the plugin or theme is not working properly and we also fail to help you then, in that case, you will get the money back. If the plugin and theme are working properly then you will not get the money back. How to fix “style.css missing” error while uploading themes? A common issue that can occur with users new to installing WordPress themes is a “Broken theme and/or stylesheets missing” error message being displayed when trying to upload or activate the theme. This is because the theme download package on ThemeForest includes additional files to the theme such as the documentation, license etc. https://themesfores.com/product/wp-safelink-plugin-with-license-key-66445/ #WordPressThemesandPluginWithLicenceKey
0 notes
Text
How to Reset Your WordPress Site and Start Fresh

Resetting your WordPress site can be a game-changer when you're facing persistent issues, need a design overhaul, or want to clear out old content. Knowing how to reset WordPress site is a valuable skill for anyone managing a website. This guide will walk you through the steps to reset your WordPress site and start fresh, ensuring you can begin anew with a clean slate.
Reasons to Reset Your WordPress Site
Before diving into the reset process, it’s essential to understand why resetting might be necessary:
Resolving Persistent Issues: Fixing problems caused by plugin conflicts, theme issues, or custom code errors.
Design Overhaul: Implementing a new theme or design without the baggage of old configurations.
Content Cleanup: Removing outdated or irrelevant posts, pages, and comments.
Testing New Features: Providing a clean slate for testing new plugins or features.
Enhancing Performance: Improving site speed by removing excess data.
Steps to Reset Your WordPress Site
Backup Your DataBefore resetting, ensure you have a complete backup of your data. This can be done using plugins like UpdraftPlus or manually via your hosting provider. Backing up ensures you can restore your site if needed.
Install a Reset PluginTo reset your WordPress site, you'll need a plugin like WP Reset or Advanced WordPress Reset. These plugins simplify the reset process and make it safe.
Activate and Configure the PluginOnce installed, activate the plugin and navigate to its settings. Here, you can configure the reset process, including options to retain specific data if needed.
Perform the ResetFollow the plugin’s instructions to complete the reset. This typically involves a few clicks and a confirmation step to ensure you want to proceed. The plugin will then reset your site to its default state.
Reinstall Themes and PluginsAfter the reset, reinstall your preferred themes and plugins. This is also an ideal time to update everything to the latest versions to avoid future conflicts and issues. To ensure you’re doing this right, you might want to learn how to reset WordPress site effectively.
Restore Backup (if needed)If you want to retain specific data, you can selectively restore parts of your backup. This might include posts, pages, or settings that you don't want to lose.
Midway through the reset process, it’s crucial to ensure all necessary precautions are followed, like backing up your data and carefully choosing what to reinstall. Understanding how to reset WordPress site effectively can save you a lot of time and effort.
0 notes
Text
WordPress Update Problems? Here’s How to Fix Them (No Tech Skills Needed)

Keeping your WordPress website up to date is critical for security, speed, and access to new features. But let’s face it—when an update fails, it can feel like the whole site is crashing down, especially if you don’t have a technical background.
Don’t panic.
Most WordPress update errors are easy to fix with a bit of guidance. In this beginner-friendly guide, we’ll break down why updates fail and what you can do to resolve them—no developer required.
🛑 Why Do WordPress Updates Fail?
WordPress runs on a system of interconnected parts: the core platform, themes, and plugins. If one of these components doesn’t align properly during an update, things can break.
Here are some of the most common causes:
📡 Poor internet connection that interrupts the update
🔌 Conflicts between plugins
🎨 Theme incompatibility
💾 Insufficient server memory or time limits
🔐 Incorrect file and folder permissions
🧩 Corrupted or incomplete update files
The first step toward fixing any problem is understanding where it’s coming from.
🛠️ How to Fix WordPress Update Errors (Step by Step)
✅ 1. Back Up Your Site First
Before trying anything, create a full backup of your website using a plugin like UpdraftPlus or BackupBuddy. This gives you a safety net in case something goes wrong during the troubleshooting process.
✅ 2. Clear Your Cache (It Might Be That Simple)
Sometimes, your browser or caching plugin is the culprit—not the update itself.
Clear your browser cache (Ctrl+Shift+R or Command+Shift+R on most browsers)
If you use a caching plugin (like WP Super Cache or W3 Total Cache), clear your site cache too
Now try updating WordPress again.
✅ 3. Use Troubleshooting Mode to Find Plugin Conflicts
Conflicting plugins are a frequent reason for failed updates.
You can use the Health Check & Troubleshooting plugin to safely test your site:
Install and activate the plugin
Enable troubleshooting mode—this disables all plugins temporarily (just for you)
Try updating again
If it works, re-enable plugins one by one until the error returns
That last plugin activated is your likely culprit.
✅ 4. Check Your Hosting Settings
Shared hosting plans often limit memory and execution time, which can stop updates mid-process.
Ask your host:
What’s the PHP memory limit? (It should be at least 256MB)
What’s the maximum execution time? (Aim for 300 seconds)
Can they increase these limits for better stability?
Sometimes, simply switching to a better hosting plan solves everything.
✅ 5. Try a Manual WordPress Update
If automatic updates aren’t working, a manual update might do the trick.
Here’s a simple guide:
Download the latest WordPress version from WordPress.org
Unzip the files on your computer
Use FTP software like FileZilla to connect to your website
Replace the wp-admin and wp-includes folders with the new ones
Do not touch the wp-content folder (it holds your themes and plugins)
Open your site—if needed, it will ask to update the database. Just click the button
Done right, this is a safe and effective fix.
✅ 6. Adjust File Permissions (If You’re Getting Permission Errors)
WordPress needs the correct file permissions to update itself.
Use a plugin like WP File Manager or ask your hosting provider to set:
Folders to 755
Files to 644
These permissions allow WordPress to work smoothly without opening security risks.
✅ 7. Stuck in Maintenance Mode? Here’s How to Exit
Sometimes an update gets interrupted, leaving your site stuck in maintenance mode with this message:
“Briefly unavailable for scheduled maintenance. Check back in a minute.”
To fix this:
Log into your hosting account (e.g., cPanel or via FTP)
Go to the root folder of your WordPress site
Delete the file named .maintenance
Refresh your site—it should return to normal
This is one of the easiest fixes on the list.
💬 When You Should Call in the Experts
If you’ve tried everything and the update still won’t work—or if you're unsure about any step—it’s perfectly okay to ask for help.
Here’s who you can turn to:
Your web hosting support team
A WordPress specialist
Or a reliable web development company like Websenor
✅ Final Thoughts: Keep WordPress Simple with Websenor
WordPress update errors can seem intimidating, but most are fixable with a calm, step-by-step approach—even if you're not a tech expert. The key is to:
Back up first
Rule out the simple causes
Test safely before changing live settings
Know when to ask for help
If managing updates or troubleshooting problems ever feels like too much, Websenor is here to take the weight off your shoulders. Our team specializes in WordPress maintenance, bug fixing, and website performance tuning—so you can focus on growing your brand while we handle the backend.
Let Websenor be your WordPress safety net. With us, your website stays secure, updated, and stress-free.
0 notes