#automate YouTube sharing
Explore tagged Tumblr posts
Visit Tumblr Blog
Explore Tumblr blogs with no restrictions, modern design and the best experience.
Last Seen Tumblr Blogs


Fun Fact
70% of Tumblr users say the Dashboard is their favorite place to spend time online.
Text
How to Create an RSS Feed for Your YouTube Channel (Step-by-Step)
Want to automatically share your YouTube videos to your blog, email list, podcast feed, or other platforms? An RSS feed is the simplest way to keep your content flowing across the web—without doing it manually every time.
In this video, I’ll walk you through how to generate an RSS feed for your YouTube channel and use it to streamline your content distribution. Whether you're a solopreneur, freelancer, or small business owner, this will save you time and help you grow your reach—automatically.
💡 Perfect for: ✅ Embedding new videos into your website or blog ✅ Sharing fresh content to email newsletters ✅ Integrating with podcast platforms or content curation tools ✅ Automating video updates across apps using tools like Zapier or IFTTT
❓❓ What Would You Like Help With? Take The Survey To Let Me Know! - https://forms.gle/8qtaxAPtCEVpczsf8 ❓❓
Find this helpful and want to say thanks? ☕ Coffee fuels content! 😁 https://www.buymeacoffee.com/yourtechcoach
============================================================================ What would you like to see in the next Video? Tell me in the comments! 👇
Follow Me Online Here: 🔹 Your Tech Coach Patreon: https://patreon.com/YourTechCoach
🔹 YouTube: https://youtube.com/yourtechcoach 🔹 Website: http://yourtechcoach.com 🔹 Facebook: https://www.facebook.com/iamyourtechcoach 🔹 Linktree: https://linktr.ee/yourtechcoach 🔹 Instagram: http://Instagram.com/yourtechcoach 🔹 Twitter: http://Twitter.com/your_techcoach 🔹 Eventbrite: https://www.eventbrite.com/cc/lets-talk-tech-your-tech-coach-828029 🔹 YouTube RSS Feed: https://www.youtube.com/feeds/videos.xml?channel_id=UCLAnIvoBWiBSez362MztoKA
🔹 Want to go live without the hassle? Have tech questions/issues you need help with? Set up an appointment so we can talk: https://www.yourtechcoach.com/appointments
#youtube#YouTube RSS feed#YouTube channel RSS#YouTube automation#solopreneur content marketing#RSS for video#automate YouTube sharing#freelancers YouTube marketing#small business YouTube tips#how to distribute YouTube videos#YouTube video automation tools
0 notes
Text
Do you not touch car light bulbs?
Handling automotive light bulbs requires special precautions, especially halogen bulbs. Here is a clear breakdown of risks and best practices:
🔥 Why you shouldn't touch halogen bulbs with bare fingers
Halogen bulbs (headlights/fog lights)
Risk: Skin oils transfer to quartz glass housing, forming hot spots when heated.
Consequence: → Premature bulb failure (50-70% reduction in life). → Glass may crack or explode.
Scientific basis: Oils interfere with heat distribution and cause thermal stress.
LED, HID or standard bulbs (taillights, interior)
Safe to touch: No quartz glass, no extreme heat sensitivity.
Exception: Avoid touching electrical contacts to prevent corrosion; avoid touching the surface of LED beads to prevent accelerated light decay.
✅ Proper Handling Procedure for Halogen Bulbs
StepsActionPurpose 1. Wear gloves (nitrile/latex) or use a clean cloth Prevent oil transfer 2. If you accidentally touch a new bulb, wipe with isopropyl alcohol to remove contaminants 3. Avoid bulbs with visible fingerprints or residue Prevent hot spots 4. Do not twist glass — hold only by plastic base Prevent cracking
⚠️ Consequences of Contact with Halogen Bulbs
Short-term: → Reduced brightness or flickering within hours.
Long-term: → Bulbs break down in days to weeks (not 2-5 years). → White/grey "scars" appear on bulb surface.
🧤 Safe Alternatives
Gloves: Use nitrile gloves for mechanics ($5-10/pack).
Paper Towels/Plastic Wrap: Use the plastic packaging of the bulb as a barrier.
LED/HID Kits: Consider switching to LED bulbs (no touching required; 5-10 year life).
❓ **What to do if you've already touched it? **
Wipe now: Wipe with 90% isopropyl alcohol and a microfiber cloth.
Inspect: Discard if bulb has black spots, cracks, or is cloudy.
Replace: Low-cost bulbs ($10-30) are cheaper than damaging the headlight assembly.
Key Takeaways: ▶️ **Halogen bulbs: Never touch the glass. ** ▶️ **Non-halogen bulbs: Safe to handle, LED bead surface should not come in direct contact with skin. ** Always follow manufacturer guidelines to put safety and lamp life first! 🔧

#led lights#car lights#led car light#youtube#led auto light#led headlights#led light#led headlight bulbs#ledlighting#young artist#electric cars#cars#classic cars#car#truck#suv#porsche#coupe#supercar#sharing is caring#vehicle#older vehicles#autonomous vehicle headlights#overtake another vehicle#automobiles#auto#automotive#automobile#autorias#automation
2 notes
·
View notes
Text
I would like to share with you a video by two people that I've gotten to know over the last couple of months. Hadeel and Abed (@twogazans) are two young people who are engaged and want nothing more than to get married and restore their business.
They have been sharing their life in Gaza on Youtube and I recommend you check them out, but please watch the video below first. It was filmed about a month ago when the ceasefire deal was first announced. They share their thoughts and feelings, their hopes and dreams, their desire for safety and freedom, for the small things, as well as their fears for what they will find and experience, the people they have lost, the experiences and memories they have to reckon with.
It is both wonderful to see their faces light up, as well as sobering to hear them speak about their losses.
They speak in Arabic, but you can put on automated closed captions, which will either immediately auto-translate to your own language, or create automated Arabic closed captions, which you can then ask to be auto-translated in the settings menu. It's not perfect, but it definitely gets the message across.
youtube
At the end of the video they ask us not to forget them, the people in Gaza. Do not forget to provide moral and financial support as they try to rebuild their lives as well as their homes.
Hadeel and Abed also have a fundraiser of their own, which they've had to restart recently because they had to find someone who would be able to host the fundraiser for them. Luckily, they were able to find someone in the US who could do so.
Hadeel and Abed have been verified by @gazavetters! They are #324 on their spreadsheet, which you can find linked in their pinned post.
The spreadsheet still links to their old fundraiser, which is now closed down. However, if you go to old posts by @twogazans, you will find that old fundraiser still linked, such as for example in this post. You can compare that link to the one in the gazavetters spreadsheet and you will see it is the same one.
Because they have recently had to restart their fundraiser, they are still very low on funds! Only $262 has been raised and the last donation was over two weeks ago!
If you are able to donate, then please do, and please share this post so others who might be able to donate might see it.
tagging for reach
@a-shade-of-blue @ankle-beez @comrademango @c-u-c-koo-4-40k @kyra45-helping-others @commissions4aid-international @soft-sunbird
@murderbot @mushroomjar @hiveswap @kazzsbrekker @postanagramgenerator
@komsomolka @afro-elf @certifiedsexed @the-nobody-tournament @beserkerjewel
@danlous @versacehotty @klapollo @imjustheretotrytohelp
#only $262 raised!#please share!#fundraising#mutual aid#gfm#vetted fundraisers#vetted by gazavetters#no 324 on their spreadsheet#the spreadsheet has their old fundraiser#this is explained in the post#this campaign is very low on funds!
552 notes
·
View notes
Text
How I ditched streaming services and learned to love Linux: A step-by-step guide to building your very own personal media streaming server (V2.0: REVISED AND EXPANDED EDITION)
This is a revised, corrected and expanded version of my tutorial on setting up a personal media server that previously appeared on my old blog (donjuan-auxenfers). I expect that that post is still making the rounds (hopefully with my addendum on modifying group share permissions in Ubuntu to circumvent 0x8007003B "Unexpected Network Error" messages in Windows 10/11 when transferring files) but I have no way of checking. Anyway this new revised version of the tutorial corrects one or two small errors I discovered when rereading what I wrote, adds links to all products mentioned and is just more polished generally. I also expanded it a bit, pointing more adventurous users toward programs such as Sonarr/Radarr/Lidarr and Overseerr which can be used for automating user requests and media collection.
So then, what is this tutorial? This is a tutorial on how to build and set up your own personal media server using Ubuntu as an operating system and Plex (or Jellyfin) to not only manage your media, but to also stream that media to your devices both at home and abroad anywhere in the world where you have an internet connection. Its intent is to show you how building a personal media server and stuffing it full of films, TV, and music that you acquired through indiscriminate and voracious media piracy various legal methods will free you to completely ditch paid streaming services. No more will you have to pay for Disney+, Netflix, HBOMAX, Hulu, Amazon Prime, Peacock, CBS All Access, Paramount+, Crave or any other streaming service that is not named Criterion Channel. Instead whenever you want to watch your favourite films and television shows, you’ll have your own personal service that only features things that you want to see, with files that you have control over. And for music fans out there, both Jellyfin and Plex support music streaming, meaning you can even ditch music streaming services. Goodbye Spotify, Youtube Music, Tidal and Apple Music, welcome back unreasonably large MP3 (or FLAC) collections.
On the hardware front, I’m going to offer a few options catered towards different budgets and media library sizes. The cost of getting a media server up and running using this guide will cost you anywhere from $450 CAD/$325 USD at the low end to $1500 CAD/$1100 USD at the high end (it could go higher). My server was priced closer to the higher figure, but I went and got a lot more storage than most people need. If that seems like a little much, consider for a moment, do you have a roommate, a close friend, or a family member who would be willing to chip in a few bucks towards your little project provided they get access? Well that's how I funded my server. It might also be worth thinking about the cost over time, i.e. how much you spend yearly on subscriptions vs. a one time cost of setting up a server. Additionally there's just the joy of being able to scream "fuck you" at all those show cancelling, library deleting, hedge fund vampire CEOs who run the studios through denying them your money. Drive a stake through David Zaslav's heart.
On the software side I will walk you step-by-step through installing Ubuntu as your server's operating system, configuring your storage as a RAIDz array with ZFS, sharing your zpool to Windows with Samba, running a remote connection between your server and your Windows PC, and then a little about started with Plex/Jellyfin. Every terminal command you will need to input will be provided, and I even share a custom #bash script that will make used vs. available drive space on your server display correctly in Windows.
If you have a different preferred flavour of Linux (Arch, Manjaro, Redhat, Fedora, Mint, OpenSUSE, CentOS, Slackware etc. et. al.) and are aching to tell me off for being basic and using Ubuntu, this tutorial is not for you. The sort of person with a preferred Linux distro is the sort of person who can do this sort of thing in their sleep. Also I don't care. This tutorial is intended for the average home computer user. This is also why we’re not using a more exotic home server solution like running everything through Docker Containers and managing it through a dashboard like Homarr or Heimdall. While such solutions are fantastic and can be very easy to maintain once you have it all set up, wrapping your brain around Docker is a whole thing in and of itself. If you do follow this tutorial and had fun putting everything together, then I would encourage you to return in a year’s time, do your research and set up everything with Docker Containers.
Lastly, this is a tutorial aimed at Windows users. Although I was a daily user of OS X for many years (roughly 2008-2023) and I've dabbled quite a bit with various Linux distributions (mostly Ubuntu and Manjaro), my primary OS these days is Windows 11. Many things in this tutorial will still be applicable to Mac users, but others (e.g. setting up shares) you will have to look up for yourself. I doubt it would be difficult to do so.
Nothing in this tutorial will require feats of computing expertise. All you will need is a basic computer literacy (i.e. an understanding of what a filesystem and directory are, and a degree of comfort in the settings menu) and a willingness to learn a thing or two. While this guide may look overwhelming at first glance, it is only because I want to be as thorough as possible. I want you to understand exactly what it is you're doing, I don't want you to just blindly follow steps. If you half-way know what you’re doing, you will be much better prepared if you ever need to troubleshoot.
Honestly, once you have all the hardware ready it shouldn't take more than an afternoon or two to get everything up and running.
(This tutorial is just shy of seven thousand words long so the rest is under the cut.)
Step One: Choosing Your Hardware
Linux is a light weight operating system, depending on the distribution there's close to no bloat. There are recent distributions available at this very moment that will run perfectly fine on a fourteen year old i3 with 4GB of RAM. Moreover, running Plex or Jellyfin isn’t resource intensive in 90% of use cases. All this is to say, we don’t require an expensive or powerful computer. This means that there are several options available: 1) use an old computer you already have sitting around but aren't using 2) buy a used workstation from eBay, or what I believe to be the best option, 3) order an N100 Mini-PC from AliExpress or Amazon.
Note: If you already have an old PC sitting around that you’ve decided to use, fantastic, move on to the next step.
When weighing your options, keep a few things in mind: the number of people you expect to be streaming simultaneously at any one time, the resolution and bitrate of your media library (4k video takes a lot more processing power than 1080p) and most importantly, how many of those clients are going to be transcoding at any one time. Transcoding is what happens when the playback device does not natively support direct playback of the source file. This can happen for a number of reasons, such as the playback device's native resolution being lower than the file's internal resolution, or because the source file was encoded in a video codec unsupported by the playback device.
Ideally we want any transcoding to be performed by hardware. This means we should be looking for a computer with an Intel processor with Quick Sync. Quick Sync is a dedicated core on the CPU die designed specifically for video encoding and decoding. This specialized hardware makes for highly efficient transcoding both in terms of processing overhead and power draw. Without these Quick Sync cores, transcoding must be brute forced through software. This takes up much more of a CPU’s processing power and requires much more energy. But not all Quick Sync cores are created equal and you need to keep this in mind if you've decided either to use an old computer or to shop for a used workstation on eBay
Any Intel processor from second generation Core (Sandy Bridge circa 2011) onward has Quick Sync cores. It's not until 6th gen (Skylake), however, that the cores support the H.265 HEVC codec. Intel’s 10th gen (Comet Lake) processors introduce support for 10bit HEVC and HDR tone mapping. And the recent 12th gen (Alder Lake) processors brought with them hardware AV1 decoding. As an example, while an 8th gen (Kaby Lake) i5-8500 will be able to hardware transcode a H.265 encoded file, it will fall back to software transcoding if given a 10bit H.265 file. If you’ve decided to use that old PC or to look on eBay for an old Dell Optiplex keep this in mind.
Note 1: The price of old workstations varies wildly and fluctuates frequently. If you get lucky and go shopping shortly after a workplace has liquidated a large number of their workstations you can find deals for as low as $100 on a barebones system, but generally an i5-8500 workstation with 16gb RAM will cost you somewhere in the area of $260 CAD/$200 USD.
Note 2: The AMD equivalent to Quick Sync is called Video Core Next, and while it's fine, it's not as efficient and not as mature a technology. It was only introduced with the first generation Ryzen CPUs and it only got decent with their newest CPUs, we want something cheap.
Alternatively you could forgo having to keep track of what generation of CPU is equipped with Quick Sync cores that feature support for which codecs, and just buy an N100 mini-PC. For around the same price or less of a used workstation you can pick up a mini-PC with an Intel N100 processor. The N100 is a four-core processor based on the 12th gen Alder Lake architecture and comes equipped with the latest revision of the Quick Sync cores. These little processors offer astounding hardware transcoding capabilities for their size and power draw. Otherwise they perform equivalent to an i5-6500, which isn't a terrible CPU. A friend of mine uses an N100 machine as a dedicated retro emulation gaming system and it does everything up to 6th generation consoles just fine. The N100 is also a remarkably efficient chip, it sips power. In fact, the difference between running one of these and an old workstation could work out to hundreds of dollars a year in energy bills depending on where you live.
You can find these Mini-PCs all over Amazon or for a little cheaper on AliExpress. They range in price from $170 CAD/$125 USD for a no name N100 with 8GB RAM to $280 CAD/$200 USD for a Beelink S12 Pro with 16GB RAM. The brand doesn't really matter, they're all coming from the same three factories in Shenzen, go for whichever one fits your budget or has features you want. 8GB RAM should be enough, Linux is lightweight and Plex only calls for 2GB RAM. 16GB RAM might result in a slightly snappier experience, especially with ZFS. A 256GB SSD is more than enough for what we need as a boot drive, but going for a bigger drive might allow you to get away with things like creating preview thumbnails for Plex, but it’s up to you and your budget.
The Mini-PC I wound up buying was a Firebat AK2 Plus with 8GB RAM and a 256GB SSD. It looks like this:

Note: Be forewarned that if you decide to order a Mini-PC from AliExpress, note the type of power adapter it ships with. The mini-PC I bought came with an EU power adapter and I had to supply my own North American power supply. Thankfully this is a minor issue as barrel plug 30W/12V/2.5A power adapters are easy to find and can be had for $10.
Step Two: Choosing Your Storage
Storage is the most important part of our build. It is also the most expensive. Thankfully it’s also the most easily upgrade-able down the line.
For people with a smaller media collection (4TB to 8TB), a more limited budget, or who will only ever have two simultaneous streams running, I would say that the most economical course of action would be to buy a USB 3.0 8TB external HDD. Something like this one from Western Digital or this one from Seagate. One of these external drives will cost you in the area of $200 CAD/$140 USD. Down the line you could add a second external drive or replace it with a multi-drive RAIDz set up such as detailed below.
If a single external drive the path for you, move on to step three.
For people with larger media libraries (12TB+), who prefer media in 4k, or care who about data redundancy, the answer is a RAID array featuring multiple HDDs in an enclosure.
Note: If you are using an old PC or used workstatiom as your server and have the room for at least three 3.5" drives, and as many open SATA ports on your mother board you won't need an enclosure, just install the drives into the case. If your old computer is a laptop or doesn’t have room for more internal drives, then I would suggest an enclosure.
The minimum number of drives needed to run a RAIDz array is three, and seeing as RAIDz is what we will be using, you should be looking for an enclosure with three to five bays. I think that four disks makes for a good compromise for a home server. Regardless of whether you go for a three, four, or five bay enclosure, do be aware that in a RAIDz array the space equivalent of one of the drives will be dedicated to parity at a ratio expressed by the equation 1 − 1/n i.e. in a four bay enclosure equipped with four 12TB drives, if we configured our drives in a RAIDz1 array we would be left with a total of 36TB of usable space (48TB raw size). The reason for why we might sacrifice storage space in such a manner will be explained in the next section.
A four bay enclosure will cost somewhere in the area of $200 CDN/$140 USD. You don't need anything fancy, we don't need anything with hardware RAID controls (RAIDz is done entirely in software) or even USB-C. An enclosure with USB 3.0 will perform perfectly fine. Don’t worry too much about USB speed bottlenecks. A mechanical HDD will be limited by the speed of its mechanism long before before it will be limited by the speed of a USB connection. I've seen decent looking enclosures from TerraMaster, Yottamaster, Mediasonic and Sabrent.
When it comes to selecting the drives, as of this writing, the best value (dollar per gigabyte) are those in the range of 12TB to 20TB. I settled on 12TB drives myself. If 12TB to 20TB drives are out of your budget, go with what you can afford, or look into refurbished drives. I'm not sold on the idea of refurbished drives but many people swear by them.
When shopping for harddrives, search for drives designed specifically for NAS use. Drives designed for NAS use typically have better vibration dampening and are designed to be active 24/7. They will also often make use of CMR (conventional magnetic recording) as opposed to SMR (shingled magnetic recording). This nets them a sizable read/write performance bump over typical desktop drives. Seagate Ironwolf and Toshiba NAS are both well regarded brands when it comes to NAS drives. I would avoid Western Digital Red drives at this time. WD Reds were a go to recommendation up until earlier this year when it was revealed that they feature firmware that will throw up false SMART warnings telling you to replace the drive at the three year mark quite often when there is nothing at all wrong with that drive. It will likely even be good for another six, seven, or more years.

Step Three: Installing Linux
For this step you will need a USB thumbdrive of at least 6GB in capacity, an .ISO of Ubuntu, and a way to make that thumbdrive bootable media.
First download a copy of Ubuntu desktop (for best performance we could download the Server release, but for new Linux users I would recommend against the server release. The server release is strictly command line interface only, and having a GUI is very helpful for most people. Not many people are wholly comfortable doing everything through the command line, I'm certainly not one of them, and I grew up with DOS 6.0. 22.04.3 Jammy Jellyfish is the current Long Term Service release, this is the one to get.
Download the .ISO and then download and install balenaEtcher on your Windows PC. BalenaEtcher is an easy to use program for creating bootable media, you simply insert your thumbdrive, select the .ISO you just downloaded, and it will create a bootable installation media for you.
Once you've made a bootable media and you've got your Mini-PC (or you old PC/used workstation) in front of you, hook it directly into your router with an ethernet cable, and then plug in the HDD enclosure, a monitor, a mouse and a keyboard. Now turn that sucker on and hit whatever key gets you into the BIOS (typically ESC, DEL or F2). If you’re using a Mini-PC check to make sure that the P1 and P2 power limits are set correctly, my N100's P1 limit was set at 10W, a full 20W under the chip's power limit. Also make sure that the RAM is running at the advertised speed. My Mini-PC’s RAM was set at 2333Mhz out of the box when it should have been 3200Mhz. Once you’ve done that, key over to the boot order and place the USB drive first in the boot order. Then save the BIOS settings and restart.
After you restart you’ll be greeted by Ubuntu's installation screen. Installing Ubuntu is really straight forward, select the "minimal" installation option, as we won't need anything on this computer except for a browser (Ubuntu comes preinstalled with Firefox) and Plex Media Server/Jellyfin Media Server. Also remember to delete and reformat that Windows partition! We don't need it.
Step Four: Installing ZFS and Setting Up the RAIDz Array
Note: If you opted for just a single external HDD skip this step and move onto setting up a Samba share.
Once Ubuntu is installed it's time to configure our storage by installing ZFS to build our RAIDz array. ZFS is a "next-gen" file system that is both massively flexible and massively complex. It's capable of snapshot backup, self healing error correction, ZFS pools can be configured with drives operating in a supplemental manner alongside the storage vdev (e.g. fast cache, dedicated secondary intent log, hot swap spares etc.). It's also a file system very amenable to fine tuning. Block and sector size are adjustable to use case and you're afforded the option of different methods of inline compression. If you'd like a very detailed overview and explanation of its various features and tips on tuning a ZFS array check out these articles from Ars Technica. For now we're going to ignore all these features and keep it simple, we're going to pull our drives together into a single vdev running in RAIDz which will be the entirety of our zpool, no fancy cache drive or SLOG.
Open up the terminal and type the following commands:
sudo apt update
then
sudo apt install zfsutils-linux
This will install the ZFS utility. Verify that it's installed with the following command:
zfs --version
Now, it's time to check that the HDDs we have in the enclosure are healthy, running, and recognized. We also want to find out their device IDs and take note of them:
sudo fdisk -1
Note: You might be wondering why some of these commands require "sudo" in front of them while others don't. "Sudo" is short for "super user do”. When and where "sudo" is used has to do with the way permissions are set up in Linux. Only the "root" user has the access level to perform certain tasks in Linux. As a matter of security and safety regular user accounts are kept separate from the "root" user. It's not advised (or even possible) to boot into Linux as "root" with most modern distributions. Instead by using "sudo" our regular user account is temporarily given the power to do otherwise forbidden things. Don't worry about it too much at this stage, but if you want to know more check out this introduction.
If everything is working you should get a list of the various drives detected along with their device IDs which will look like this: /dev/sdc. You can also check the device IDs of the drives by opening the disk utility app. Jot these IDs down as we'll need them for our next step, creating our RAIDz array.
RAIDz is similar to RAID-5 in that instead of striping your data over multiple disks, exchanging redundancy for speed and available space (RAID-0), or mirroring your data writing by two copies of every piece (RAID-1), it instead writes parity blocks across the disks in addition to striping, this provides a balance of speed, redundancy and available space. If a single drive fails, the parity blocks on the working drives can be used to reconstruct the entire array as soon as a replacement drive is added.
Additionally, RAIDz improves over some of the common RAID-5 flaws. It's more resilient and capable of self healing, as it is capable of automatically checking for errors against a checksum. It's more forgiving in this way, and it's likely that you'll be able to detect when a drive is dying well before it fails. A RAIDz array can survive the loss of any one drive.
Note: While RAIDz is indeed resilient, if a second drive fails during the rebuild, you're fucked. Always keep backups of things you can't afford to lose. This tutorial, however, is not about proper data safety.
To create the pool, use the following command:
sudo zpool create "zpoolnamehere" raidz "device IDs of drives we're putting in the pool"
For example, let's creatively name our zpool "mypool". This poil will consist of four drives which have the device IDs: sdb, sdc, sdd, and sde. The resulting command will look like this:
sudo zpool create mypool raidz /dev/sdb /dev/sdc /dev/sdd /dev/sde
If as an example you bought five HDDs and decided you wanted more redundancy dedicating two drive to this purpose, we would modify the command to "raidz2" and the command would look something like the following:
sudo zpool create mypool raidz2 /dev/sdb /dev/sdc /dev/sdd /dev/sde /dev/sdf
An array configured like this is known as RAIDz2 and is able to survive two disk failures.
Once the zpool has been created, we can check its status with the command:
zpool status
Or more concisely with:
zpool list
The nice thing about ZFS as a file system is that a pool is ready to go immediately after creation. If we were to set up a traditional RAID-5 array using mbam, we'd have to sit through a potentially hours long process of reformatting and partitioning the drives. Instead we're ready to go right out the gates.
The zpool should be automatically mounted to the filesystem after creation, check on that with the following:
df -hT | grep zfs
Note: If your computer ever loses power suddenly, say in event of a power outage, you may have to re-import your pool. In most cases, ZFS will automatically import and mount your pool, but if it doesn’t and you can't see your array, simply open the terminal and type sudo zpool import -a.
By default a zpool is mounted at /"zpoolname". The pool should be under our ownership but let's make sure with the following command:
sudo chown -R "yourlinuxusername" /"zpoolname"
Note: Changing file and folder ownership with "chown" and file and folder permissions with "chmod" are essential commands for much of the admin work in Linux, but we won't be dealing with them extensively in this guide. If you'd like a deeper tutorial and explanation you can check out these two guides: chown and chmod.

You can access the zpool file system through the GUI by opening the file manager (the Ubuntu default file manager is called Nautilus) and clicking on "Other Locations" on the sidebar, then entering the Ubuntu file system and looking for a folder with your pool's name. Bookmark the folder on the sidebar for easy access.

Your storage pool is now ready to go. Assuming that we already have some files on our Windows PC we want to copy to over, we're going to need to install and configure Samba to make the pool accessible in Windows.
Step Five: Setting Up Samba/Sharing
Samba is what's going to let us share the zpool with Windows and allow us to write to it from our Windows machine. First let's install Samba with the following commands:
sudo apt-get update
then
sudo apt-get install samba
Next create a password for Samba.
sudo smbpswd -a "yourlinuxusername"
It will then prompt you to create a password. Just reuse your Ubuntu user password for simplicity's sake.
Note: if you're using just a single external drive replace the zpool location in the following commands with wherever it is your external drive is mounted, for more information see this guide on mounting an external drive in Ubuntu.
After you've created a password we're going to create a shareable folder in our pool with this command
mkdir /"zpoolname"/"foldername"
Now we're going to open the smb.conf file and make that folder shareable. Enter the following command.
sudo nano /etc/samba/smb.conf
This will open the .conf file in nano, the terminal text editor program. Now at the end of smb.conf add the following entry:
["foldername"]
path = /"zpoolname"/"foldername"
available = yes
valid users = "yourlinuxusername"
read only = no
writable = yes
browseable = yes
guest ok = no
Ensure that there are no line breaks between the lines and that there's a space on both sides of the equals sign. Our next step is to allow Samba traffic through the firewall:
sudo ufw allow samba
Finally restart the Samba service:
sudo systemctl restart smbd
At this point we'll be able to access to the pool, browse its contents, and read and write to it from Windows. But there's one more thing left to do, Windows doesn't natively support the ZFS file systems and will read the used/available/total space in the pool incorrectly. Windows will read available space as total drive space, and all used space as null. This leads to Windows only displaying a dwindling amount of "available" space as the drives are filled. We can fix this! Functionally this doesn't actually matter, we can still write and read to and from the disk, it just makes it difficult to tell at a glance the proportion of used/available space, so this is an optional step but one I recommend (this step is also unnecessary if you're just using a single external drive). What we're going to do is write a little shell script in #bash. Open nano with the terminal with the command:
nano
Now insert the following code:
#!/bin/bash CUR_PATH=`pwd` ZFS_CHECK_OUTPUT=$(zfs get type $CUR_PATH 2>&1 > /dev/null) > /dev/null if [[ $ZFS_CHECK_OUTPUT == *not\ a\ ZFS* ]] then IS_ZFS=false else IS_ZFS=true fi if [[ $IS_ZFS = false ]] then df $CUR_PATH | tail -1 | awk '{print $2" "$4}' else USED=$((`zfs get -o value -Hp used $CUR_PATH` / 1024)) > /dev/null AVAIL=$((`zfs get -o value -Hp available $CUR_PATH` / 1024)) > /dev/null TOTAL=$(($USED+$AVAIL)) > /dev/null echo $TOTAL $AVAIL fi
Save the script as "dfree.sh" to /home/"yourlinuxusername" then change the ownership of the file to make it executable with this command:
sudo chmod 774 dfree.sh
Now open smb.conf with sudo again:
sudo nano /etc/samba/smb.conf
Now add this entry to the top of the configuration file to direct Samba to use the results of our script when Windows asks for a reading on the pool's used/available/total drive space:
[global]
dfree command = /home/"yourlinuxusername"/dfree.sh
Save the changes to smb.conf and then restart Samba again with the terminal:
sudo systemctl restart smbd
Now there’s one more thing we need to do to fully set up the Samba share, and that’s to modify a hidden group permission. In the terminal window type the following command:
usermod -a -G sambashare “yourlinuxusername”
Then restart samba again:
sudo systemctl restart smbd
If we don’t do this last step, everything will appear to work fine, and you will even be able to see and map the drive from Windows and even begin transferring files, but you'd soon run into a lot of frustration. As every ten minutes or so a file would fail to transfer and you would get a window announcing “0x8007003B Unexpected Network Error”. This window would require your manual input to continue the transfer with the file next in the queue. And at the end it would reattempt to transfer whichever files failed the first time around. 99% of the time they’ll go through that second try, but this is still all a major pain in the ass. Especially if you’ve got a lot of data to transfer or you want to step away from the computer for a while.
It turns out samba can act a little weirdly with the higher read/write speeds of RAIDz arrays and transfers from Windows, and will intermittently crash and restart itself if this group option isn’t changed. Inputting the above command will prevent you from ever seeing that window.
The last thing we're going to do before switching over to our Windows PC is grab the IP address of our Linux machine. Enter the following command:
hostname -I
This will spit out this computer's IP address on the local network (it will look something like 192.168.0.x), write it down. It might be a good idea once you're done here to go into your router settings and reserving that IP for your Linux system in the DHCP settings. Check the manual for your specific model router on how to access its settings, typically it can be accessed by opening a browser and typing http:\\192.168.0.1 in the address bar, but your router may be different.
Okay we’re done with our Linux computer for now. Get on over to your Windows PC, open File Explorer, right click on Network and click "Map network drive". Select Z: as the drive letter (you don't want to map the network drive to a letter you could conceivably be using for other purposes) and enter the IP of your Linux machine and location of the share like so: \\"LINUXCOMPUTERLOCALIPADDRESSGOESHERE"\"zpoolnamegoeshere"\. Windows will then ask you for your username and password, enter the ones you set earlier in Samba and you're good. If you've done everything right it should look something like this:

You can now start moving media over from Windows to the share folder. It's a good idea to have a hard line running to all machines. Moving files over Wi-Fi is going to be tortuously slow, the only thing that’s going to make the transfer time tolerable (hours instead of days) is a solid wired connection between both machines and your router.
Step Six: Setting Up Remote Desktop Access to Your Server
After the server is up and going, you’ll want to be able to access it remotely from Windows. Barring serious maintenance/updates, this is how you'll access it most of the time. On your Linux system open the terminal and enter:
sudo apt install xrdp
Then:
sudo systemctl enable xrdp
Once it's finished installing, open “Settings” on the sidebar and turn off "automatic login" in the User category. Then log out of your account. Attempting to remotely connect to your Linux computer while you’re logged in will result in a black screen!
Now get back on your Windows PC, open search and look for "RDP". A program called "Remote Desktop Connection" should pop up, open this program as an administrator by right-clicking and selecting “run as an administrator”. You’ll be greeted with a window. In the field marked “Computer” type in the IP address of your Linux computer. Press connect and you'll be greeted with a new window and prompt asking for your username and password. Enter your Ubuntu username and password here.

If everything went right, you’ll be logged into your Linux computer. If the performance is sluggish, adjust the display options. Lowering the resolution and colour depth do a lot to make the interface feel snappier.

Remote access is how we're going to be using our Linux system from now, barring edge cases like needing to get into the BIOS or upgrading to a new version of Ubuntu. Everything else from performing maintenance like a monthly zpool scrub to checking zpool status and updating software can all be done remotely.

This is how my server lives its life now, happily humming and chirping away on the floor next to the couch in a corner of the living room.
Step Seven: Plex Media Server/Jellyfin
Okay we’ve got all the ground work finished and our server is almost up and running. We’ve got Ubuntu up and running, our storage array is primed, we’ve set up remote connections and sharing, and maybe we’ve moved over some of favourite movies and TV shows.
Now we need to decide on the media server software to use which will stream our media to us and organize our library. For most people I’d recommend Plex. It just works 99% of the time. That said, Jellyfin has a lot to recommend it by too, even if it is rougher around the edges. Some people run both simultaneously, it’s not that big of an extra strain. I do recommend doing a little bit of your own research into the features each platform offers, but as a quick run down, consider some of the following points:
Plex is closed source and is funded through PlexPass purchases while Jellyfin is open source and entirely user driven. This means a number of things: for one, Plex requires you to purchase a “PlexPass” (purchased as a one time lifetime fee $159.99 CDN/$120 USD or paid for on a monthly or yearly subscription basis) in order to access to certain features, like hardware transcoding (and we want hardware transcoding) or automated intro/credits detection and skipping, Jellyfin offers some of these features for free through plugins. Plex supports a lot more devices than Jellyfin and updates more frequently. That said, Jellyfin's Android and iOS apps are completely free, while the Plex Android and iOS apps must be activated for a one time cost of $6 CDN/$5 USD. But that $6 fee gets you a mobile app that is much more functional and features a unified UI across platforms, the Plex mobile apps are simply a more polished experience. The Jellyfin apps are a bit of a mess and the iOS and Android versions are very different from each other.
Jellyfin’s actual media player is more fully featured than Plex's, but on the other hand Jellyfin's UI, library customization and automatic media tagging really pale in comparison to Plex. Streaming your music library is free through both Jellyfin and Plex, but Plex offers the PlexAmp app for dedicated music streaming which boasts a number of fantastic features, unfortunately some of those fantastic features require a PlexPass. If your internet is down, Jellyfin can still do local streaming, while Plex can fail to play files unless you've got it set up a certain way. Jellyfin has a slew of neat niche features like support for Comic Book libraries with the .cbz/.cbt file types, but then Plex offers some free ad-supported TV and films, they even have a free channel that plays nothing but Classic Doctor Who.
Ultimately it's up to you, I settled on Plex because although some features are pay-walled, it just works. It's more reliable and easier to use, and a one-time fee is much easier to swallow than a subscription. I had a pretty easy time getting my boomer parents and tech illiterate brother introduced to and using Plex and I don't know if I would've had as easy a time doing that with Jellyfin. I do also need to mention that Jellyfin does take a little extra bit of tinkering to get going in Ubuntu, you’ll have to set up process permissions, so if you're more tolerant to tinkering, Jellyfin might be up your alley and I’ll trust that you can follow their installation and configuration guide. For everyone else, I recommend Plex.
So pick your poison: Plex or Jellyfin.
Note: The easiest way to download and install either of these packages in Ubuntu is through Snap Store.
After you've installed one (or both), opening either app will launch a browser window into the browser version of the app allowing you to set all the options server side.
The process of adding creating media libraries is essentially the same in both Plex and Jellyfin. You create a separate libraries for Television, Movies, and Music and add the folders which contain the respective types of media to their respective libraries. The only difficult or time consuming aspect is ensuring that your files and folders follow the appropriate naming conventions:
Plex naming guide for Movies
Plex naming guide for Television
Jellyfin follows the same naming rules but I find their media scanner to be a lot less accurate and forgiving than Plex. Once you've selected the folders to be scanned the service will scan your files, tagging everything and adding metadata. Although I find do find Plex more accurate, it can still erroneously tag some things and you might have to manually clean up some tags in a large library. (When I initially created my library it tagged the 1963-1989 Doctor Who as some Korean soap opera and I needed to manually select the correct match after which everything was tagged normally.) It can also be a bit testy with anime (especially OVAs) be sure to check TVDB to ensure that you have your files and folders structured and named correctly. If something is not showing up at all, double check the name.
Once that's done, organizing and customizing your library is easy. You can set up collections, grouping items together to fit a theme or collect together all the entries in a franchise. You can make playlists, and add custom artwork to entries. It's fun setting up collections with posters to match, there are even several websites dedicated to help you do this like PosterDB. As an example, below are two collections in my library, one collecting all the entries in a franchise, the other follows a theme.

My Star Trek collection, featuring all eleven television series, and thirteen films.

My Best of the Worst collection, featuring sixty-nine films previously showcased on RedLetterMedia’s Best of the Worst. They’re all absolutely terrible and I love them.
As for settings, ensure you've got Remote Access going, it should work automatically and be sure to set your upload speed after running a speed test. In the library settings set the database cache to 2000MB to ensure a snappier and more responsive browsing experience, and then check that playback quality is set to original/maximum. If you’re severely bandwidth limited on your upload and have remote users, you might want to limit the remote stream bitrate to something more reasonable, just as a note of comparison Netflix’s 1080p bitrate is approximately 5Mbps, although almost anyone watching through a chromium based browser is streaming at 720p and 3mbps. Other than that you should be good to go. For actually playing your files, there's a Plex app for just about every platform imaginable. I mostly watch television and films on my laptop using the Windows Plex app, but I also use the Android app which can broadcast to the chromecast connected to the TV in the office and the Android TV app for our smart TV. Both are fully functional and easy to navigate, and I can also attest to the OS X version being equally functional.
Part Eight: Finding Media
Now, this is not really a piracy tutorial, there are plenty of those out there. But if you’re unaware, BitTorrent is free and pretty easy to use, just pick a client (qBittorrent is the best) and go find some public trackers to peruse. Just know now that all the best trackers are private and invite only, and that they can be exceptionally difficult to get into. I’m already on a few, and even then, some of the best ones are wholly out of my reach.
If you decide to take the left hand path and turn to Usenet you’ll have to pay. First you’ll need to sign up with a provider like Newshosting or EasyNews for access to Usenet itself, and then to actually find anything you’re going to need to sign up with an indexer like NZBGeek or NZBFinder. There are dozens of indexers, and many people cross post between them, but for more obscure media it’s worth checking multiple. You’ll also need a binary downloader like SABnzbd. That caveat aside, Usenet is faster, bigger, older, less traceable than BitTorrent, and altogether slicker. I honestly prefer it, and I'm kicking myself for taking this long to start using it because I was scared off by the price. I’ve found so many things on Usenet that I had sought in vain elsewhere for years, like a 2010 Italian film about a massacre perpetrated by the SS that played the festival circuit but never received a home media release; some absolute hero uploaded a rip of a festival screener DVD to Usenet. Anyway, figure out the rest of this shit on your own and remember to use protection, get yourself behind a VPN, use a SOCKS5 proxy with your BitTorrent client, etc.
On the legal side of things, if you’re around my age, you (or your family) probably have a big pile of DVDs and Blu-Rays sitting around unwatched and half forgotten. Why not do a bit of amateur media preservation, rip them and upload them to your server for easier access? (Your tools for this are going to be Handbrake to do the ripping and AnyDVD to break any encryption.) I went to the trouble of ripping all my SCTV DVDs (five box sets worth) because none of it is on streaming nor could it be found on any pirate source I tried. I’m glad I did, forty years on it’s still one of the funniest shows to ever be on TV.
Part Nine/Epilogue: Sonarr/Radarr/Lidarr and Overseerr
There are a lot of ways to automate your server for better functionality or to add features you and other users might find useful. Sonarr, Radarr, and Lidarr are a part of a suite of “Servarr” services (there’s also Readarr for books and Whisparr for adult content) that allow you to automate the collection of new episodes of TV shows (Sonarr), new movie releases (Radarr) and music releases (Lidarr). They hook in to your BitTorrent client or Usenet binary newsgroup downloader and crawl your preferred Torrent trackers and Usenet indexers, alerting you to new releases and automatically grabbing them. You can also use these services to manually search for new media, and even replace/upgrade your existing media with better quality uploads. They’re really a little tricky to set up on a bare metal Ubuntu install (ideally you should be running them in Docker Containers), and I won’t be providing a step by step on installing and running them, I’m simply making you aware of their existence.
The other bit of kit I want to make you aware of is Overseerr which is a program that scans your Plex media library and will serve recommendations based on what you like. It also allows you and your users to request specific media. It can even be integrated with Sonarr/Radarr/Lidarr so that fulfilling those requests is fully automated.
And you're done. It really wasn't all that hard. Enjoy your media. Enjoy the control you have over that media. And be safe in the knowledge that no hedgefund CEO motherfucker who hates the movies but who is somehow in control of a major studio will be able to disappear anything in your library as a tax write-off.
1K notes
·
View notes
Text
ADHD money/budgeting system I'm currently using for my benefit is going well (I've been using it for like half a year now?), and I wanna recommend it.
You Need a Budget is EXCELLENT. 10/10 do recommend. Uhhh rambling about it and my generic disclaimers + gushing extensively under the cut but TL;DR I think it's great for ADHD ppl, I've used it for 6+ months now and I find it super SUPER helpful. also weirdly fun.
DISCLAIMERS:
Budgeting helps you understand/know your money, it can't make money appear where there is none.
Everyone should learn to budget even if you don't have much money (especially then)
This is NOT a magic trick solution. Just like everything else, it is an assistive tool. This is one of those adult things we can't simply opt out of without negative consequences, though.
My advice is based on something I am currently able to do. That is, I can spend an amount of money on this specific thing that works well for me. If you have no extra money to spend then previously I was tracking things in a notebook. So you can still do this.
I believe Dave Ramsey is a fundie fraud/hack and no one should listen to him about money.
DID YOU KNOW THEY CANCELLED MINT???
Okay? OKAY.
Ahem.
You Need a Budget is EXCELLENT.
It is called YNAB for short. The first 34 days are your free trial, and that is my referral link. If anyone uses it and then signs up for a subscription, we both get a month free. Also you can share a subscription with up to six people (account owner can see everything but individuals can pick and choose what they share amongst each other) so like...idk your whole polycule can be on one account. Or your kids. Whatever.
If you are a student, it's free for a year. If you aren't, a subscription is $99 for a year (paid all at once) or $14.99 monthly, which is equivalent to paying Amazon prime. Go cancel Prime and get this instead tbh.
They got a whole article just on ynab and ADHD. They also have like...a big variety of ways to access their info? They have a book, podcast episodes, YouTube videos, blog posts, q&A's, free live workshops you can join (you can request live captioning), emails they can send (if you want) a wiki, and so on. They got workshops on all kinds of topics!!
So whatever ends up working for your brain. It also has a matching app.
If you lost Mint this year they have a gajillion things for moving from Mint.
Also they have a "got five minutes?" Page which has a slider so you can decide how much attention/time you have before going on lol:

They only have 4 rules of the budget, they're simple and practical, and it doesn't get judgey or like...mean about your spending.

1. Give every dollar a job 2. Embrace your true expenses 3. Roll with the punches 4. Age your money.
THEN THEY BREAK THESE DOWN INTO SMALL STEPS FOR YOU! They even have a printable! Also these rules are great because there's built in expectations that things WILL HAPPEN and it's NOT all or nothing with a fear of total collapse into failure. Reality and The Plan don't always align, especially if you have ADHD. So it's directing our energy towards the true expenses and not clinging to The Plan!! over reality.
You can automate a lot of shit (you can sync with your bank accounts just like mint, but also automate tagging the categories of regular expenses/transactions). And if for whatever reason you accidentally do something that makes the budget look weird or wrong:
A) you can usually fix it somehow OR b) they have like, a button you can press that gives you a clean slate and archives the previous version of the budget for you.
So if you forget for a few weeks or months, or accidentally input something wildly wrong, or just don't want to look at a really terrible month anymore and feel like you need a fresh start you can usually either fix it or start fresh which is really nice.
The app also (for whatever reason) scratches my itch to have things like...have incentives or little game-like goals in a way mint never did? I don't know why. Filling up the bars or putting money into the categories to cover my expenses is satisfying lmao. You can also make a big wish expense category for all the fun shit you want, and fund it whenever you can and then you can see the little bar go up and that's fun.
Anyways I've been using it for like 6+ months now and I think it's really helped me when I use it.
783 notes
·
View notes
Note
Question: I support the whole DMCAing tiktokers reposting and stuff but I'm a bit confused by the deleting your blog comments. Not against it just confused. I've seen some of your posts on Pinterest, and they're probably on YouTube too at this point. It's very common for posts to get spread around that way if they get popular and maybe I'm biased but I at least do see you as popular so I'm not,,, surprised by this.
I'm just a bit curious about the reasoning behind such a strong response, if you're okay with sharing and all. If not feel free to just ignore.
Huh didn’t even know my posts were on Pintrest. I’d love to know if the entire Danny Chemistry Teacher in Gotham AU is posted on there in one longass screenshot. That sort of stuff is reposted with at least a person behind it potentially willing to add onto said post, what not ok with TikTok or YouTube accounts adding absolutely no substance to my work:
AI slop accounts that automate Minecraft background AI voiceovers is everything a fandom shouldn’t be. There’s no joy or willingness to create to write about the content they’re posting, it’s bots committing intellectual property theft for Big Numbers. What I write is a transformative work not for profit or gain, just for fun. These tiktok accounts are solely doing these things for clicks, views, and revenue. 80% of the accounts that have taken my posts on TikTok have photos of pretty women as their pfps, evidently bots. I am completely sure everything on their accounts are automated. There isn’t even a damn person behind the account.
If they actually added onto my prompts or hell, even actually voiceover’d the clip and provided commentary I’d be fine with it. What those TikTok accounts are doing is blatant theft with no transformative content added onto my writing. That is why my reaction is so strong. It isn’t additionally transformative and the theft of the post is done by AI.
97 notes
·
View notes
Text
"Start Before You're Ready: 5 Skills That Can Change Your Life"
You don’t need a perfect plan. You need momentum.”
The world is shifting fast. If you're feeling stuck, it’s not your fault—but it is your move. Learning a new skill is your way out. Out of confusion. Out of burnout. Out of the scroll trap.
🔥 5 Skills That Make Money & Stay in Demand:
1. Video Editing (Shorts, Reels, TikToks) 🎬 The content world is exploding. Learn to ride the wave.
2. Copywriting/Content Writing ✍️ Words still rule the internet. Master them, and doors open.
3. Social Media Management 📲 Every brand wants attention. You can be the one to get it for them.
4. AI Tools & Prompting 🤖 Businesses need speed. Learn to automate. Become valuable.
5. Digital Product Creation 📦 Templates, eBooks, Notion kits—create once, earn forever.
🧠 Mindset to Begin:
"You don’t need permission. You need persistence." "Every pro was once a confused beginner." "Tiny steps > waiting for the right time."
🚀 How to Start
✔️ Pick one skill. ✔️ Watch free tutorials daily (YouTube, blogs, Reddit). ✔️ Practice 30 minutes daily, no excuses. ✔️ Share what you learn—even if it’s messy. ✔️ Don’t quit at the dip.
**** Remember:
The new skill you start today... It could become the reason you get hired, go freelance, or launch something of your own. Could you start before you're ready? Keep going after it gets hard.

#Motivation#LifeLessons#success#career#learning#writers#growth#student#Productivity#skills#thoughts#education#writing#mind control#skilldevelopment#original#lit#spilled ink#inspiring quotes#life#get motivated#mindset#personal growth#inspirational#personal development#writters on tumblr#words#microblog#skillfully
21 notes
·
View notes
Text
You've Got Nothing To Lose


So, productivity. Yeah. Let’s talk about it.
If you’re anything like me, you’ve probably had that moment—you know, when your to-do list is longer than your lifespan, your tabs are multiplying like rabbits, and your brain is just ✨ refusing ✨ to cooperate. Being a full-time student and a creator means my life is basically a constant balancing act, and let me tell you… I was dropping so many balls.
I tried every planner, every system, every method that productivity YouTube threw at me, and nothing really stuck. Bullet journaling? Loved the idea, hated the effort. Google Calendar? Cute, but I forgot to check it. Sticky notes? Everywhere. Chaos. Absolute chaos.
Then I found Notion, and listen—I was skeptical. It looked overwhelming, like an empty void of endless possibilities (and not in the fun way). But once I actually took the time to figure it out? Oh, it was over for me.
Now, my entire life lives in Notion. It’s where I plan my assignments, track my creative projects, and pretend I have my life together. And because I love making things both cute and efficient, I’ve spent way too much time tweaking my setup to be as ✨ functional but aesthetic ✨ as possible.
This post is just a little peek into the things that helped me get my Notion workspace together. Nothing too deep, just some surface-level tips. I’ll get more in-depth later, but for now—here’s what made the biggest difference for me:
🌿 How I Revamped My Notion Setup: 📌 Made It Pretty – Because if I’m going to stare at it every day, it has to be cute. Matching colors, simple layouts, and an aesthetic cover image make it 10x more enjoyable to use.
📌 Created a “Homebase” – Everything I need in one place. No more digging through five different pages for my assignments, projects, and notes. My dashboard is literally my lifesaver.
📌 Kept It Simple – Look, I love a good Notion setup, but if it’s too complicated, I just won’t use it. I stick to a system that works for me: clean, minimal, and easy to navigate.
📌 Automated Whatever I Could – Linked databases? Buttons? Widgets? Yes, please. Anything that saves me even a little time is a win.
✨ Want to try it for yourself? I actually put together a Notion template based on my setup, so if you’re looking for something that’s aesthetic and functional, I got you. It’s perfect for students, creators, or anyone who wants to get their life together in a ✨ cute ✨ way.
🔗 Check it out here! → BRIE BLOSSOMS
I’m still tweaking and improving my setup all the time, so I’ll definitely share more in the future! But for now—what’s your biggest struggle with productivity? Let’s talk in the tags ⬇️ or drop your Notion questions in the replies! 💭💖
#college#anime#school#university#work#art#business#notion#school work#college life#studying#this is actually what i currently use for my daily life so hopefully this helps yall too!#back to tumblr codes i go#notion templates#free notion templates#it girl#becoming that girl#self care#dream girl#it girl energy#that girl#notion template#organization#self improvement#self management#productivity#classic academia#academia
35 notes
·
View notes
Text
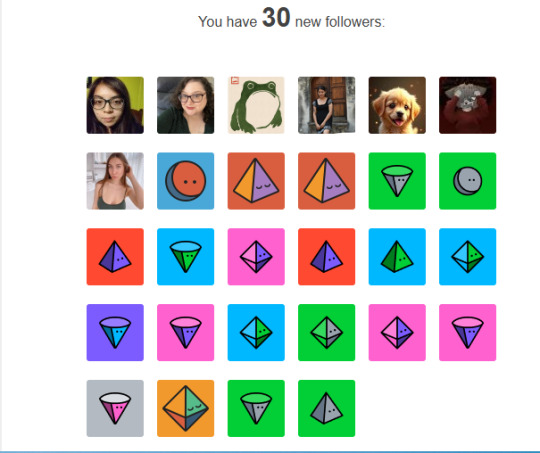
Well, looks like it’s time for another round of spambot Whack-a-mole. Every so often I’ll get absolutely inundated with spambot follows, and this week seems to be serving up a fresh batch. Today it was only about 75 (I get 2-3 of the above emails every day when it's really bad). The past few days it's been over 100 every 24 hours.
And yes, I go through the effort to report and block every single one. First of all, the last time I messaged Tumblr about this they said that this was the best way to help them, since it lets them know what profiles to check out. Moreover, I want to have an accurate idea of how many followers I have, and this is the only social media profile I have that gets such onslaughts of fake profiles. So I painstakingly go through and delete them every day—even on a quiet week there are usually at least a few. (I really wish Tumblr staff could figure out a UI that allows bulk blocking, instead of having to click on each one individually.)
A few observations under the cut:
--I’ve gotten to the point where if the username is a string of nonsense words, there’s no profile pic, and the tagline is “untitled” in one language or another, it gets instantly blocked. I am trying to be really careful to not just go on autopilot and block every single new follow without paying attention, because I am getting actual people following me in the midst of this spambot storm. I’ve probably blocked a few actual profiles from newbies or people who just never got around to customizing their profile, but I’m not going to click through to every one of several hundred profiles over a matter of days.
--Even if there’s a PFP, if the tagline is still untitled or if they have one recently posted/reblogged post that doesn’t say anything about them, and if they’re missing a bio, that’s a block. (If they have only one post but it’s from five years ago, I let it slide, because I doubt any bot is going to commit to the bit that long and it’s more likely someone who remembered that they actually have a Tumblr.)
--If someone went through the trouble to put together a custom blog theme, they���re probably not a bot.
--Profiles that are obviously pr0nbots/spammers/AI? Also blocked. (This week’s themes seem to be real estate scammers and automated reposters of spammy medical/science YouTube videos. One time a while back it was cannabis and psilocybin dealers, probably because a post I made about culinary mushroom foraging went mildly viral.) Sometimes a profile will have the PFP and banner and a bunch of posts, but they’re all advertising something, with no self posts, random reblogs, or other posts to suggest an actual human being with varied interests.
--I hate that I’ve had to block so many pr0nbots that my first inclination on seeing a PFP that is a conventionally attractive young female-presenting person in a cute outfit is to just block them because most of the time I’m going to click through to their blog and it’s going to be photos and/or videos of their naked, variably bouncy fleshy bits everywhere, but I have to remember that there are also still people who are conventionally attractive who just want to share cute photos of their outfits with no intent of also taking pictures without said outfits. (And sometimes blogs full of nekkid people are just curated by actual humans who enjoy pictures of nekkid people.)
--While some of the usernames are random strings of words and sometimes numbers, other times I think Tumblr may be recycling the usernames of deleted accounts, because they seem like the kind of thing a Tumblr user would come up with circa 2014.
--I have to wonder how many people who claim to have however many thousand or million followers on whatever social media platform have their numbers inflated with terrifying numbers of bots, and it’s now made me kinda skeptical of high follower counts, not just here but on other platforms. Like are all 807,168 of your followers actual people? Your social media follower count has become increasingly important in getting things like book contracts, music deals, etc., but no one ever asks whether you cull the obvious fake profiles.
--Oddly enough, the spambots who leave spammy comments in replies to my posts rarely ever follow me. They still get blocked.
--Sometimes there are so many spambots that I end up having to use the actual real people profiles mixed in as milestones along my path of mass-annihilation-via-report-and-block. Like “Oh, wait, I remember that name, they followed me in between yesterday’s Spambot #89 and Spambot #90. I must be at the end of the most recent bot-salvo.”
--I probably missed a few bots who managed to slip through the above filters and convinced me they were real people. But hey, I'll take a few over thousands cumulatively over my tenure on Tumblr.
16 notes
·
View notes
Note
just saw your patreon tax post, but what is bad about kofi membership? I got confuse after seeing comments arguining about which platform is better, and you also talked about kofi a bit...
I wish I can make a patreon but I got nothing but my writings, which barely get any attention
[context]
Okay I should've phrased it correctly, it's less about which platform is better than the other, but rather which platform is more suited for you. I know you're more on writing, but I'll offer a general view since I've used both sites + others has asked me about this. Disclaimer, these are all from my personal experience, it can be different to the rest.
What both of them can do:
Offer tier membership, you can offer free or paid and list down the benefits of joining your membership, you can also limit how many members you want.
Basic build in functions such as posting photo and poll.
Digital and physical benefits.
Analytics and tracking management.
Discord integration.
Financial payouts such as PayPal, Stripe or Cards.
Ko-fi membership
The Good
Generalized service for smaller scale projects, such as a tipping site and paywalled subscription service for fewer fees than patreon (ko-fi takes 5%).
Good for beginners because there are a lot of things that can be performed with a simple button, with comprehensive FAQ lists. Extremely straightforward with zero hastle.
Payment goes directly into your digital (PayPal/Stripe) or physical (card) wallet, no waiting for payout days.
The Bad
No NSFW content, if you try to go around this rule high chance to get penalized and your account goes bye bye. I've seen artists who offer nsfw art commissions in a hush hush way, but guess what? Ko-fi monitors your dms apparently, so if you sent nsfw related content through DMs or Posts, you're very likely going to get banned (happened to a friend).
There's no mobile app, might be a hastle if you want to post and handle things, every notification or changes you'll have to do it on web or desktop/laptop.
No direct video uploads, you'll have to use a link (a disadvantage if you're offering timelapse videos or podcasts)
For discord integration, it's finicky, half the time it doesn't work. This is due to pledger needing to connect their discord to their profile first before joining yours.
Sales tax are not automated. I may be incorrect here so better refer the FAQ, but from what I am understanding is that kofi doesn't automatically calculate, collect and remit sales/VAT/GST tax based on the buyer's location, content sold and local tax laws. You need to manually add them yourself. If you're charging $10, the buyer pays exactly $10, you receive <$10. If your country requires you to collect VAT or other sales tax, you're responsible for calculating how much should go to taxes, reporting and possibly remitting that amount manually or issuing any tax-compliant invoices if required. Uhhh so far I have not seen any cases regarding taxes, so I'm basing this off their FAQ page, posts online and youtube.
No group dms, so if you're someone who prefers to have more engagements with your supporters such as wanting to update things through chats, asking feedbacks, or simply just vibing with them, it might feel limited on Ko-fi. This is why most people have a separate discord group for better handling and posting in general.
Limited management. There are lesser details on post views, membership management, tracking payment or managing your posts. Every post you share in Ko-fi goes directly in your gallery which, in my opinion, kinda sucks because it's cluttery and messy. You will just have a tab of payment, like who joined, who has outstanding payment and who left.
Patreon
The Good
Bigger popularity and attention since it has been a thing for years. Also famously known as "pay so you can see art of dicks, tits and balls" site. Although throughout the years they've been trying to suppress NSFW posting for some reason (it is still allowed, just with some bullshit rules to deal with).
Mobile apps available, simple to use and comfortable to handle everything anywhere any time.
You can upload videos directly. You can also do polls, audio, link and livestreams.
Detailed analytics. Posts impressions/views, membership earnings, surveys (what your patreon members are joining your membership for), traffic (total visit of your patreon page and where they're coming from). This is especially useful when you have a massive following and want to have insights and control over your performance (or if you just wanna be nosy like me KAJSDKF).
Buttload of other functions that I myself have not learn much, such as automated promotions, discounts and product selling.
Built-in Discord integration. Uhm idk if Patreon works better than Ko-fi cuz when I transition to Patreon I didnt set up a discord group like before (I don't have the commitment to run and maintain them)
(Again as previously mentioned, fact check on their official page instead because I'm not sure about this) Sales tax automatically calculated and added. Patreon automatically adds VAT or applicable taxes on top of what supporter pays. If you're charging $5, a supporter from EU is charged $5.60, you get $5 in patreon and 0.60 goes to tax authorities, final money you're getting is <5$. They also handle tax collection, filling and remitting to country and provide tax reports for your records.
There are group dms (called Community tab). You can update processes and notify them directly there. It may not be as versatile as your regular communication apps like discord (eg, you can only send one image at a time to the group) but it's enough to keep some form of engagement. There is also Moderation hub to assign moderators or reported content stuff (I personally have not use this thing).
The Bad
Personally, starting patreon page was daunting to me cuz *points at FAQ and setup pages* THAT'S A LOT OF WORDS. It is not as straightforward as Ko-fi, so if you're struggling with management or suck at English like me, it can be terrifying to do the first few steps, it is a bit more advance. However, since Patreon is widely use you can ask people that has em and they'll be happy to help out, not to mention videos and tutorials out there that simplify the process. (Thank you Bressy and Shiba for helping out my initial phases)
The random ban for no reason, I've seen people who got their accounts banned when they created their patreon page, idk the full story as to why or how but, yeah it happens. Customer service varies between countries, some good some bad.
Higher charging fees, patreon takes 8% instead of 5%, if you're on premium plan then they'll take 12%. They are however, changing this and just charge 10% for ALL new blog that starts after August 4th. If you have a blog before August 4th, you'll be the 8% group still. Payment processing fees varies by region and method, typically is 2.9% + $0.40. These fees could add up quickly and offer losses over gain if you're running small tiers or have a large fan base. I also heard generated tax bookkeeping files are slightly confusing to count if you're not familiar with these business stuff.
Payout delays. Initial funs will take 5-10 days (or longer if you're unlucky) after the first pledge (like when you get a first patreon). They stay in patreon and you'll either set up automatic payout or manually withdraw them, compare to Ko-fi's instant withdrawals.
I don't know much about this but I think the Shops option differ to Ko-fi and I've heard people saying Patreon Shop setup is more finicky, so yeah that.
okay that's a lot of words so which one should I choose????
If you want simplicity, something on the side just to earn some extra income, with no thoughts about expanding it beyond a comfortable numbers of supporters (such as 10-12 members), then Ko-Fi is great. There are many memberships out there who offer benefits besides art! Such as writing, photography, editing, even algebra classes. It just really comes down to what you can offer with your skills and capabilities.
If you want to build a community, you want to continue expanding to a certain goal, you want more control over financial management, systems and tools, then Patreon is the way to go. This is especially preferred if you have content-driven mindset and if you have audiences to reach.
The reason why I am suggesting to make your patreon post now is obviously the tax increment stuff, but also if you already have that thought to have a page in the future. I understand the concern of "but i'm not ready" or "i ain't got stuff to offer", but you can always have a blank state with free memberships only. If you truly want to offer something, I believe a few passage of your current wip about your fics, or if you're an artist a simple doodle every month should probably keep your page afloat (and I mean you can ask your friends to join for free and do the engagement sillays like liking and commenting if you want extra security). Idk if patreon allows blank pages though so uhm, don't say I didn't warn you if something did happen lmao xD
I read other comments that talked abou 10% is not that high, which is fair since everyone has a different financial status and background. I'm not out here forcing anyone to start a patreon right away, I am just simply suggesting.
I wish I can make a patreon but I got nothing but my writings, which barely get any attention
I'm going to be very blunt about this and you might dislike what I am going to say, but if you have a goal you'll have to put in that effort to research, learn, experience the loss and failure, fall hard and step up again. I too, was once an account with 1 follower, and it's from Tumblr official page. My doodles were not the greatest, it's not rendered God-like, nor does it have any coherency. While I didn't think about starting memberships very early on, once I had that thought I started pushing myself to be better. Being a creative-based person online can be challenging, because if you want some financial gain from this, you'll have to put in the work to earn it. Studying what algorithm wants, what the audiences like, how other users alike are utilizing their skills to pull in the people. It's a long process that involves a lot of trial and errors, and it gets incredibly frustrating and tiring with a lot of burntout and giving up. Because you usually have to do something that you yourself may not like, but the vast majority do. You have 2 options with this kind of dilemma, stay true to yourself and do whatever you want, create and write what you want to be authentic, and find the real ones who would support you along the way, this one will be a longer road and lesser moments of "shit man, why the hell do i still write alien fucking if it throws me off." The other is okay, you figure out the people want, so time to improve and start working on that thing and slowly gain a steady amount of followers, and when you finally feel like it? start creating things you actually prefer. If they leave, they leave, if they stay, then they stay, you win some you lose some. I personally chose the second path, and yes I've lost a lot of people and support along the way, but I am happy with my progress. It took me about a year + before I launched ko-fi membership for 6 months, and then transition to Patreon now if you want a picture of my growth.
I don't think I'm there yet, even with my followings, even with patreon set up. There are many times where I still felt like what I do is inadequate and I'm ripping off their wallet with my creations and benefits. That is why I am still working my darn hardest to improve and to keep moving forward, but also to stop and reflect on my progress, to understand that these people are supporting me because they wanted to and they've been extremely kind and supportive along the way.
Well what I'm trying to say is, every foundation is hard to build, every beginning feels like torture, because it's foreign and it's tiring to even think about it, but if you want, or in other cases, need this growth and expansion, you'll have to endure it. Just like learning how to ride a bike, ya gonna fall and ya gonna bleed at times, but once you're comfortable with the handles, the rest of the ride will be easier, not smooth sailing, just easier! because there are still some bumpy road and blockage ahead, it's an ever learning curve.
Since I come from art concept, I cannot offer much advice with writings. The best way for me to improve is by looking up at what others are doing, so a good start is always connecting with others. Do you like an author's work? then read up about them like how you're putting that blorbo under a microscope and analyze the shit outta them. How do they post? What words do they use often? What prompts or premise is usually popular with their posts? What time do they post? How do they communicate with others? How do they communicate to you? How do they tag their post to reach 2k notes? How do they respond to questions about their memberships if they have one? What benefits are they offering in their pages? etc etc
idk maybe this all sounds way too much work to earn 10 pledgers in patreon, maybe all these are just way too elaborated but, at the end of the day it really depends what you want, how much are you willing to achieve the goal and how comfortable you are with these online content monthly producing responsibilities, stuff. Yeah.
Either way, I wish you all the best in your endeavors!
13 notes
·
View notes
Text
The Original Minecrafters Ch3: New Faces

“Mom, where are we?” The young stickfigure asked.
“I don't know, but stay close to me.” Said the pink woman.
The two stickfigures walked through Minecraft’s forests, suitcases in tow, the child clutching a plush doll. They flinched and jumped at each noise the surrounding fauna made.
After what felt like forever the two hear a voice up ahead, undoubtedly another stick. They stop dead in their tracks but that only seemed to alert the stranger of their presence. The pink stick steps in front of her son as the stranger approaches. Seconds later he makes himself known, black and intimidating and with red eyes that pierce the tree's shade. He looks just as surprised to see the family as they are.
“Hello.” The stranger says. “I didn't know there were other stickfigures here. Sorry if I startled you.”
“Who are you?” The pink woman asks defensively.
“My name is Chosen. And you are?”
The woman was hesitant to answer. “Orchid.” she finally said.
“What about you, kid?” Chosen asks, kneeling down to be shorter than the kid.
“Purple.” He says. “Are you the Chosen? The one that shows up in like every popular YouTubers’ Minecraft videos?”
“Uummm, I don't know what this ‘YouTube’ is but I do interact with other Minecrafters.” Chosen says confused.
“Mom, it's him!” Purple says excited. “We can trust him, he can keep us safe.”
“Sweety, just because you've seen this man on the internet doesn't mean you truly know him.” Orchid quietly says to her son.
“Is there something you're running from? Because I can protect you guys if needed. My base is very secure and I don't mind sharing my food and resources.” Chosen reassures, eager to share his paradise with others.
“Mom, please!” The boy asks, giving his mom puppy eyes.
“*sigh* Fine.” Orchid concedes and starts heading over to where Purple already ran off to. “If anything happens to that kid I will snap your neck.” She coldly says to Chosen.
Chosen is taken aback by Orchid’s sudden dark tone but understands where she's coming from, after all he feels the same way about this world and his brother, both he would happily defend until he can't move his body.
The three walk through the forests and into the base. Roads of various grey textures wrapped around the structures, tying together a barn, crop field, numerous automated farms, a mini village and a golden pyramid creating a beacon of light, with a house at the center and a flaming statue of the two stickfigures overlooking the base, the black one raising a sword and the red one raising a fireball. Leaves, flowers and lamps decorated the sides of the road with banners and torches adorning the buildings.
“Did you build all this?” Orchid asked.
“Pretty much.” Chosen answered. “Anything that's automated is my brother's design but even then I added my own touch to it so it ties into the rest of the base.”
“Woooow.” Purple said with stars in his eyes.
Chosen leads the family to his house. “Feel free to make yourself at home. Are you guys hungry?” He asks.
“Yeah.” Purple says. “What do you have?”
“A lot.” Chosen says, handing the two his recipe book to look through. “Let me know if something looks good.” He goes to the kitchen to prepare some ingredients.
Orchid is taking in her surroundings. The excessive use of stones to build the house didn't do well to give it a warm welcoming feel. Purple also takes note of the house’s design.
“I thought your house was made of wood?” Purple asks.
“Oh, it, uh, was made of wood but it burned down. We don't use wood in our builds anymore ‘cause of how strong our fire is.” Chosen answers, showing a small flame in his hand before putting it under the stovetop.
“Y-you have powers?” Orchid sheepishly asks.
“Yeah, quite a few, actually.” Chosen answers. “So does my brother, Dark, but his are all fire based.”
“This looks good.” Purple states, showing his mom one of the recipes, completely unbothered by the revelation. “What are you gonna have?”
“Oh, um, that's fine.” She says.
“Two of this please, Mr. Chosen.” Purple politely asks.
Chosen chuckles. “You don't have to be so formal, kid. You can just call me Chosen, or Cho.” He reassures, walking back to the kitchen to make their food.
While Chosen is away the family hears something skurry below them.
“AAAAAAAAA!!!” They both yell.
Chosen drops everything he's doing and runs to them to see what's wrong. Orchid is tightly holding her son, taking shelter on top of the makeshift table, while Dark's pet spider curiously looks at the family.
Chosen grabs his chest, relieved that it wasn't a serious issue, and calmly picks up the spider. “Ted, you scared them.” He playfully scolded.
“Is that your pet!?” Orchid nearly screeches.
“Dark's pet, but yeah. This is Ted.” Chosen says proudly holding up the spider, making sure his name tag is obvious. “He doesn't attack us so he's basically a weird looking dog.”
The two begin to relax and Purple even tries to pet Ted, holding his hand out like you would for a dog. Ted bumps his flat face against Purple's hand.
“See, he's peaceful.” Chosen reassures. “I should get back to cooking before the food burns. Ted, don't get into any more mischief.”
“Are there not dogs or cats or normal pets in this place?” Orchid asks.
“There are but…” Chosen paused, thinking about the wolf he tamed a while back and how quickly it died. “It didn't work out…” There's a brief awkward silence before he goes back to the kitchen.
Chosen comes back from the kitchen with two plates of food; cheese crusted chicken with potato wedges and cooked carrots on the side. Purple immediately digs in.
Half way through their meal the door slams open, making everyone jump. A bright red stick storms into the house, his face seething with rage.
“Well hello to you too, Dark-” Chosen begins to say, holding a third and fourth plate of the chicken meal.
“Shut. The fuck. Up.” Dark demands, glaring daggers at Chosen as he walks into their bedroom, once again slamming the door.
Chosen is stunned by his brother's sudden attitude. “I am so sorry about that. I'll go talk to him.”
The two argue loudly from their room. Chosen is trying to keep calm but Dark's temper isn't allowing that. Their argument is cut short by Chosen being flung out and across the room, crashing into the front wall, blood gushing from his nose.
“Fine, be like that!.” He yells back, blocking up the door with obsidian. He makes his way over to the cauldron to clean himself up. The blood isn't stopping. “Hey, can one of you look in that chest at the end of the counter and grab a health potion?”
“Uh, sure?” Orchid answers. She finds the chest, grabs the health potion and investigates it, curious about how well it works and what its limits might be.
She hands Chosen the bottle and downs the whole thing immediately. “Thank you.” He says, whipping the rest of the blood and cleaning out the cauldron. “I'm so sorry about him,” Chosen starts while shoving an oversized sponge into the cauldron. “he's been very moody lately for some reason. I've been trying to get him to talk but he'd rather punch me I guess.” I oughta change that beacon power to regen at this rate.
Orchid's eyes fill with empathy. “I get it, my husband is like that; always angry at something and always tries to fix it with violence. He doesn't like talking, even if it's to give him a solution to his problem.” She looks over at her son, happily playing with his plush doll. “He tried to raise Purple with that mentality but I wouldn't let him… he didn't like that either.”
“Is he what you're running from?” Chosen asks. Orchid just nods. “Well, if he ever comes here and tries to hurt you, I'll snap his neck.” He says playfully.
Orchid smirks. “Promise?”
“You guys will be safe here, I promise.”
“You really don't have to, you know.” Orchid says.
“Please, it's the least I can do.” Chosen reassures as he quickly builds a starter house for the family. “Besides it's either this or sleeping in the same house as The Moody Lord over there. Or would you rather sleep in the barn with the animals?”
“Alright.” Orchid concedes. “But you really don't have to go out of your way for us. I'm sure we can handle ourselves.”
“Really, it's no problem at all.” Chosen says, landing in front of the two. “Besides, this game can be a little rough at the beginning, believe me.”
The two walk into the house, Orchid quietly pulls Chosen aside to talk while Purple explores the building. Some furnaces and makeshift furniture making up the kitchen, some seats by a large window overlooking the forest, some double chests in convenient locations and a bedroom with two beds for them.
“Thank you.” Orchid says.
“No problem.” Just as Chosen says that there's a problem. Deep orange fire erupts from every window in Chosen's house, accompanied by Dark's enraged yelling. “Uuhh, y-you guys head to bed. I need to take care of that.” Chosen says with worry written all over his face. The two head to their room and hope that everything is going to be ok.
The two snuggle together in the same bed and watch YouTube videos from Purple's phone, hoping to get a better understanding of Chosen and Dark. The players don't see much of Dark unless they're in the Nether, and even then they're trying to avoid him. Meanwhile Chosen is a super star. More than happy to help the players out in any way he can; building, resource gathering, mob control, you name it. And he was not joking when he said he has a lot of powers. Using eye lasers to cut blocks in ways that players can't, making ice out of nothing for Nether highways, he can even control the weather, bring rain and lightning, as well as flying and cooking items with fire. Yet here he is, being silly and playing a video game. I suppose we should be grateful, we really don't need someone this powerful in the Outernet. The two eventually fall asleep in each other's arms.
Nine months later.
Purple and Orchid couldn't be happier. They're finally away from the ailments of their old life. No more bills, no more work or school, no more Navy. Chosen was more than happy to help them learn the game, and Dark isn't as bad as his first impression was. He even offered to help Purple explore the Nether and collect quartz, his favorite material. While exploring this time he stumbled on two stickfigures. He freaked out and ran off but they heard his footsteps and followed him through the portal.
#LauraWitchArt#og minecrafters au#sorry I didn't post yesterday I was too tired#I did write a short taking place between parts and have plenty more in mind that I can post if you guys want#or would you guys rather get to a good stopping point in the story before I post shorts?#ava au#animation v animator#animation v minecraft#ava the chosen one#ava the dark lord#ava orchid#ava pink#ava purple#alan becker
13 notes
·
View notes
Text
So, I'm trying to start an Instagram to share my cosplay.
30 April, 1:30pm, I establish the account. This is about the time I get an email code to input to verify I am creating it.
Same day, 30 April, 7:30pm, I get an email stating I've violated community guidelines in someway and my account was disabled.
The only things I've done are to put up a profile picture and post a short bio explaining what the account is for.
I didn't notice this 7:30pm email until yesterday when I attempted to access instagram and it said my account was disabled.
I'm currently attempting to appeal - I successfully had a code sent to whatsapp and put that in. Then it asked for a selfie, which I also took and sent. Now I am waiting.
As there is nothing on the account I am not losing anything.
However, I'm extremely concerned and suspicious that only 6 hours after creating it, their automated system is attacking it.
I'm also extremely concerned for the existence of my Facebook, which Meta also owns. I rarely use it nowadays, and have not attempted to access it in the meantime. More than anything, I at least want to preserve my Facebook to download all the content and contacts.
I have several avenues of approach if this attempt somehow doesn't work out. I hope it works.
This is also a notice to all of you: if you have any social media (tumblr, Facebook, instagram, youtube, Twitter, etc), buy hard disk space and download a full copy. Save your content and craft a pinned public post that states your intent to never delete your stuff, and where to find you if it disappears (whether that's a newly created 'version2' or some other social media).
Poorly run social media engines are being overrun by bots and faulty automation and no longer have humans running them. Or they want you to pay. In order to preserve your own history, contacts, friendship, and even businesses, you need to keep personal data on all of that AND give people a way to find you if you suddenly vanish.
Unfortunately, most things - emails, phone numbers, social medias - are very very fragile when they shouldn't be.
When I recover my empty instagram, my first step will be to delete it. My second, to obtain a safety email account, unconnected to what I used for Facebook. And I will recreate it with that. I don't want a faulty red flag on one account to damage my access to another. It's sad that I have to do this. But personal security and safety require it when social medias start to be bought up by one company and overrun by AI bots.
If anyone has any advice, feel free to drop it below, send me a DM, or whatever.
11 notes
·
View notes
Note
Hi! Your music is so good, I love Breakcore Burnout, Popping Up Everywhere, and Multicoloured Helium-Filled Nightmare Zone sm X3 How did you get started making music if you don’t mind me asking? What programs/instruments do you need to start making electronic music?
you literally dont need anything except for a computer to make electronic music. if you already know how to play piano or a different instrument, getting a synthesizer could be really useful to you but it is by no means essential. even though i own a bunch of synthesizers and electronic instruments and effects, the bulk of my musical output has been made 100% on the computer and i rarely use my physical equipment outside of playing shows.
but really it depends on what excites you-- and what headaches you're willing to deal with. no process is perfect, and every way of making music has pain points, has aspects to it that are work and not creative expression. for me, using physical instruments is a LOT more fun, but the headache comes from setting everything up and breaking everything down every time. being in my bedroom when i lived with my parents and now living in a studio apartment i share with my wife, space has been an issue in every place ive lived. making music in one little box is the most effective way for me to do it and also the easiest way for me to hone in on the specifics i want.
when you make music with physical instruments, you are limited by the parameters you are given. once you run out of effects to plug something into or ways to automate something-- you're done. theres nothing else you can do to change the sound. on the computer you are only limited by your CPU for how many effects and routing points you can use. so even though its much less exciting for me to make music in the DAW, the freedom it allows me is ultimately much more rewarding. but i know other people specifically DONT like that, and like the limitations of working with gear because it forces you to not get bogged down in the details. i don't know what your musical background is so i honestly can't reccomend one way or the other. neither is inherently better. BUT making music on the computer IS inerently cheaper.
i got started with a demo of FL studio in like 2011 and bought a license a few years later. There are a ton of different programs people use to make electronic music though and they are called DAWs or Digital Audio Workstation. Some of the most popular are Ableton, FL Studio, and Logic Pro. there are some free or cheap alternatives though like Reaper or Cakewalk that i know people like. Most DAW's will come loaded with a ton of synth and effect plugins so you can start making music right out the gate. There also exist a lot of free plugins out there on the internet. I mostly use stock and freeware plugins myself!
If you specifically are interested in making breakcore. There is a second type of program you should also consider looking into called a Tracker. you can find free ones online. I like Milkytracker myself. but a license for Renoise is also pretty cheap as far as a music production suite goes, its much less of an investment than a license for a DAW. they work VERY differently, but they are what traditionally has been used to make jungle and IDM music since the 90s. Instead of the skeuomorphism of a piano roll you'd get in a DAW, you are kind of just given a spreadsheet to fill out data in. in each field you write down note values, what instrument you want to trigger, and effects parameters. it sounds complicated at first, and definitely LOOKS complicated at first too- but once you get the hang of it its actually not hard to read and it allows you to make very complicated breakbeat chops or re-stutters or whatever very quickly.
anyways, hope any of this helps! you are going to have to do some googling and digging around youtube to figure out what's right for you. good luck!
12 notes
·
View notes
Text
Sat, Aug 24, 2024

This month has been a bit slow, I barely made any progress on my Japanese. I only had time to spend a few minutes a day on LingoDeer, which added up to about an hour a week. But it's alright because I had a fun and longer Japanese study session today! 🌸
~🌿🌿🌿~
I switched my YouTube interface to Japanese, and it's been quite tricky to get around. So, I decided to learn the interface today. By learning the interface, I mean translating the side navigation menu and adding them into my vocab bank (because it's not realistic to translate every single page on that site, lol).
I use Remnote to collect vocabulary because it has flashcards and spaced repetition features while functions like regular note-taking apps. so it's really easy to use. Plus, it allows you to share notes publicly! If anyone is interested, you can check the Youtube interface vocab notes I did today.
~🌿🌿🌿~
After today's study session, I updated my Japanese study plan. I listed the grammar points I need to master for the JLPT N5 and evaluated my study flow. Here's my plan:
📘 Learning Vocab
● Vocab Shopping: Collect words while studying (using various media) or choose themes I’m interested in. ● Vocab Collecting: 1. Type raw vocab into Remnote. 2. Check the meaning and furigana for kanji on Jisho. 3. Embed pronunciation audio from Reverso. 4. Verify translations with DeepL if Jisho & Reverso don't feel accurate. 5. Type the meaning. 6. Practice using flashcards (Remnote).
🏮 Learning Kanji
● Collect kanji while studying. ● Make time to learn kanji in order using LingoDeer resources. ● Practice by writing and using flashcards.
📏Studying the Grammar Book
● Read the book and collect vocab. ● Practice making sentences and type them into Remnote for easier translation and text-to-speech use. ● Look up and listen to pronunciations. ● Try forming more comprehensive paragraphs or stories after learning enough grammar points. ● Write them down in a notebook to practice handwriting. ● Review vocab and kanji regularly.
~🌿🌿🌿~
Challenges to solve later:
The vocab-collecting process takes a lot of time, which makes me impatient and feels less productive. I wish I could automate it somehow.
Learning kanji is still tough! I still have no idea how to distinguish different strokes, they all look the same to me lol
I tried listening to beginner Japanese podcasts, but I barely recognized any words except for some borrowed English terms. Since I'm still a total beginner, should I continue listening even though I don't understand much, or should I set aside time to study the podcasts' scripts?
I haven’t learned as much as I hoped, but I’ll keep studying. I’ll try to post something in Japanese next time!
26 notes
·
View notes
Text
I wasn't even gonna share this one on here this time but YouTube keeps picking the best automated thumbnails so I simply had to!
youtube
9 notes
·
View notes
Text
11 Simple Hacks for Teachers to Save Time | Dr. Desiree Alexander
Are you a teacher feeling overwhelmed by endless tasks and struggling to find time for what truly matters—your students? In this episode of The 10 Minute Teacher Podcast, Dr. Desiree Alexander, an award-winning educator and consultant, shares 11 practical time management hacks every teacher can use to reclaim their time and reduce stress.
📋 Show Notes: Access the full show notes and links mentioned in this episode at coolcatteacher.com/e879.
🎓 About Dr. Desiree Alexander: Dr. Desiree Alexander is the Founder and CEO of Educator Alexander Consulting, LLC, and the Deputy Director for the Associated Professional Educators of Louisiana. With over two decades of experience in education, she is an award-winning speaker, consultant, and advocate for teachers. Her work focuses on empowering educators with practical strategies and tools to thrive in their profession.
📧 Subscribe to the Cool Cat Teacher Newsletter: Stay up-to-date with inspiring teaching tips and resources by subscribing to our newsletter at coolcatteacher.com/newsletter.
📺 Watch on YouTube: Want to see more engaging content? Watch this episode and subscribe to our YouTube channel at youtube.com/coolcatteacher.
🎧 Where to Listen: Subscribe and listen to The 10 Minute Teacher Podcast on your favorite platforms.
Classroom Organization Tips:
01:24 ⏳ 1. Get Organized Declutter your workspace and avoid the dreaded “stack of death.” Set up a simple and functional filing system to make paperwork more manageable.
01:45 📂 2. Use a Simple Filing System Whether digital or paper, having an easy-to-use system will keep your materials accessible and prevent last-minute scrambling.
02:15 📝 3. Empower Students to File Their Own Work Save time by letting students take responsibility for filing their assignments. This simple step fosters organization skills and lightens your workload.
Personal Productivity Hacks:
03:02 📅 4. Plan Lessons Early to Reduce Last-Minute Stress Gather resources ahead of time—copies, books, manipulatives—to avoid scrambling when the copier inevitably breaks right before class.
05:03 👥 5. Have Multitasking Moments to Socialize and Get Work Done Balance productivity with connection! Grade papers or file documents while chatting with colleagues, so you don’t have to take as much work home.
05:54 🚪 6. Close the Door and Minimize Distractions Find a quiet space to focus during planning periods, so you can get work done efficiently without unnecessary interruptions.
06:10 🏡 7. Protect Your Peace and Work-Life Balance Your well-being matters. Set limits on how much work you bring home, and make time for family, rest, and hobbies.
Technology and Task Management Tips
06:50 ✅ 8. Use the Answer, File, Delete (AFD) or Three D’s (Delegate, Dump, Do) Method Prioritize your tasks by immediately answering, filing, or deleting emails. If it doesn’t need your attention, delegate or dump it!
08:03 📧 9. Use Email Tools Like Sweep to Stay Organized Leverage email automation tools like Sweep to clear out old emails, filter messages, and keep your inbox manageable.
Important principles to remember as you manage your time
09:30💡 10. Put People First When Prioritizing Tasks Before diving into your to-do list, check in with students and colleagues. Prioritizing people builds stronger relationships and improves your day.
10:21 🚧 11. Set Boundaries and Say No Educators are natural people-pleasers, but overcommitting leads to burnout. Practice saying “no” and protect your time.
Thank you for listening to the show! Subscribe to my newsletter at coolcatteacher.com/newsletter and let's connect on social @coolcatteacher wherever you connect! See you later educator!
New 10 Minute Teacher Podcast episode
8 notes
·
View notes