#localhost Application
Explore tagged Tumblr posts
Visit Tumblr Blog
Explore Tumblr blogs with no restrictions, modern design and the best experience.
Last Seen Tumblr Blogs


Fun Fact
Tumblr’s reach among the 26-to-35-year-olds in the US is 11%.
Text


This week was a productive one. I've been studying microservices to better understand distributed systems. At the bus company where I work, we use a monolithic system—an old-school setup style with MySQL, PHP, some Java applications, localhost server and a mix of other technologies. However, we've recently started implementing some features that require scalability, and this book has been instrumental in helping me understand the various scenarios involved.
In the first chapters, I've gained a clearer understanding of monolithic systems and the considerations for transitioning to a distributed system, including the pros and cons.
I've also been studying Java and Apache Kafka for event-driven architecture, a topic that has captured my full attention. In this case, the Confluent training platform offers excellent test labs, and I've been running numerous tests there. Additionally, I have my own Kafka cluster set up using Docker for most configurations.
With all that said, I've decided to update this blog weekly since daily updates it's not gonna work.
#coding#developer#linux#programming#programmer#software#software development#student#study blog#study aesthetic#studyblr#self improvement#study#software engineering#study motivation#studyblr community#studying#studynotes#learning#university#student life#university student#study inspiration#brazil#booklr#book#learn#self study#java#apachekafka
21 notes
·
View notes
Text
How to host local Club Penguin Private Server (CPPS) on Silicon Mac (M1/M2/M3) thru play.localserver & Solero's Wand install.
I spent so long looking for a solution to this that I want to contribute what worked for me. I got so frustrated looking for something that worked, and I hope this guide will help others avoid that frustration.
This is NOT a guide on hosting or serving a CPPS. This is a guide on making a CPPS playable by locally hosting your server on your Silicon M1/M2/M3 Macbook. This worked on my M3 Macbook, and, in my experience, it seems the newer the hardware/operating system gets, the harder it is accomplish this.
DISCLAIMER *I do not know very much about this topic. I can paste commands into terminal and execute them, I know how to install DMG files I downloaded from the internet (the bar is in hell, I am aware), and I know how to enter play.localhost to run this in a browser. I am no expert; this guide is for beginners like myself who want a CPPS. This is beginner-level stuff. If you want advice or need help hosting, refer to the Wand Github page, Solero's Dash (an actual web-hosting solution for Houdini/Wand), Solero's discord, or, when in doubt, Google it. (I recommend only asking for help in Solero's discord for help AFTER trying your best to search for a solution, and even after that, trying to search key terms in their chat logs. They often have to repeat the same advice over, and over, and over again.)*
TLDR; IDK shit about shit
USING WAND INSTALLER
wand description from github: Wand makes it easy to configure dash, houdini and a media server utilizing docker & docker-compose.
All the assets are located here.
Installation instructions from the above link:
Installation script 1. run the script: bash <(curl -s https://raw.githubusercontent.com/solero/wand/master/install.sh) 2. Answer Questions which are: Database password (Leave blank for random password) Hostname (example: clubpenguin.com) (Leave empty for localhost) External IP Address (Leave empty for localhost) 3. Run and enjoy. Run this command: $ cd wand && sudo docker-compose up
The steps I took:
1. Install Docker via Terminal & Homebrew.
Installing the Docker DMG file did not work properly when I tried. I realized later that Docker is seperate from Docker Desktop (the DMG file). I got Docker to work by using Terminal to install Homebrew, and then using Homebrew to install Docker.
Indented text = paste into Terminal.
Command to install Homebrew:
/bin/bash -c "$(curl -fsSL https://raw.githubusercontent.com/Homebrew/install/HEAD/install.sh)"
Ensure Homebrew is installed:
brew --version
Install Docker:
brew install docker
Recommended: Install Docker Desktop (useful in determining if your server is running, stopped, or stuck in a restart loop).
brew install --cask docker
Run Docker Desktop:
open -a Docker
2. Run installation script:
bash <(curl -s https://raw.githubusercontent.com/solero/wand/master/install.sh)
From Github instructions:
Answer Questions which are:
Database password (Leave blank for random password)
Hostname (example: clubpenguin.com) (Leave empty for localhost)
External IP Address (Leave empty for localhost)
3. $ cd wand && sudo docker-compose up
This is what is provided in the Github. This command didn't work on Mac; I believe it's formatted for Linux OS. Here's how I broke it up and enabled it to run from Mac's Terminal.
Navigate to Wand directory:
cd wand
Double-check if you're in the right directory:
ls
Start Docker container:
docker-compose up
If the above doesn't work, try
docker compose up
or
brew install docker-compose
Takes a second...

Ensure Docker is running:
docker info
If it isn't, open the Docker Desktop application.
*After using compose up, this error may appear:*
WARN[0000] /Users/[user]/wand/docker-compose.yml: the attribute version is obsolete, it will be ignored, please remove it to avoid potential confusion
This is harmless. If you get annoyed by errors, this can be solved by:
nano docker-compose.yml

See Version 3.7 at the top? Delete that line.
Ctrl-X (NOT COMMAND-X) to exit, Y to save, Enter.
PLAY.LOCALHOST
Type http://PLAY.LOCALHOST into a browser.

Create a penguin.

Try logging in that penguin:

This step was agony. I'm not savvy with running obsolete or deprecated software, and, of course, Club Penguin (and Houdini/Wand's assest) uses Flash, which was discontinued, and timebombed by Adobe, in 2021.
I tried Ruffle. Club Penguin Journey uses Ruffle, so why can't I?
Running Ruffle in Firefox:


No luck.
In the Solero discord, they'll direct to this blog post:

This method does not work on Mac M1/M2/M3. The program is "out of date" and you cannot run it. It works on Macbook's running Sonoma and backward. I'm on an M3 running Sequoia.
they'll often post this video in the discord:

In theory, this method should work, and it does for many, but for whatever reason, not on my M3. I tried different versions of Ungoogled, I tried so many different patches of Pepperflash, and it never cooperated. I tried Pepperflash, I tried Fast Patch!, I tried dedicated Flash browsers, running Flash plugins for Pale Moon, Ungoogled, Waterfox, but I could never get past him.

Every time I see this stupid penguin's face I'm filled with rage. But I am going to save you that rage!!!
If you get this method to work, yay! I could not. Maybe I don't know enough about patching, maybe I'm a little tech stupid.
WHAT WORKED: Using a dedicated CPPS desktop application that allows you to plug in a URL.
I give you...

He is your solution, your answer to
I discovered this solution through Solero's Discord, when someone answered a question re: playing online.

Waddle Forever was not what I was looking forever, but I noticed in their credits:
The electron client is originally forked from the Club Penguin Avalanche client. The server is based in solero's works in reverse engineering the Club Penguin server (Houdini server emulator). The media server is also mostly from solero's media servers.
And that's how I found out the solution: Using CPA Client
Download the CPAvalanche Client
It runs Adode Flash x64. Easy peasy.
(the instructions are in Portuguese, but for English users:
Navigate to releases.

And download this one:

Once downloaded, open.

Drag into applications.
Run http://play.localhost through the client:
Open CPAvalanche Client. It will direct you to CPAvalance once loaded, but you're here because you want to play play.localhost.
Navigate to CPAvalanche Client next to your Apple. Click Mudar a URL do Club Penguin.

Press Sim.

URL: http://play.localhost
Ok.

Press Login once the page loads, and...

That's it! No more penguin! Have fun :)
CREDITS:
Solero Discord / Waddle Forever / Wand / CPA Client / Solero.Me
#solero/wand#wand#solero#cpps#club penguin private server#cpps localhost#club penguin#macbook#macbook silicon#mac m1#mac m2#mac m3#apple silicon
2 notes
·
View notes
Text
Obsidian And RTX AI PCs For Advanced Large Language Model

How to Utilize Obsidian‘s Generative AI Tools. Two plug-ins created by the community demonstrate how RTX AI PCs can support large language models for the next generation of app developers.
Obsidian Meaning
Obsidian is a note-taking and personal knowledge base program that works with Markdown files. Users may create internal linkages for notes using it, and they can see the relationships as a graph. It is intended to assist users in flexible, non-linearly structuring and organizing their ideas and information. Commercial licenses are available for purchase, however personal usage of the program is free.
Obsidian Features
Electron is the foundation of Obsidian. It is a cross-platform program that works on mobile operating systems like iOS and Android in addition to Windows, Linux, and macOS. The program does not have a web-based version. By installing plugins and themes, users may expand the functionality of Obsidian across all platforms by integrating it with other tools or adding new capabilities.
Obsidian distinguishes between community plugins, which are submitted by users and made available as open-source software via GitHub, and core plugins, which are made available and maintained by the Obsidian team. A calendar widget and a task board in the Kanban style are two examples of community plugins. The software comes with more than 200 community-made themes.
Every new note in Obsidian creates a new text document, and all of the documents are searchable inside the app. Obsidian works with a folder of text documents. Obsidian generates an interactive graph that illustrates the connections between notes and permits internal connectivity between notes. While Markdown is used to accomplish text formatting in Obsidian, Obsidian offers quick previewing of produced content.
Generative AI Tools In Obsidian
A group of AI aficionados is exploring with methods to incorporate the potent technology into standard productivity practices as generative AI develops and speeds up industry.
Community plug-in-supporting applications empower users to investigate the ways in which large language models (LLMs) might improve a range of activities. Users using RTX AI PCs may easily incorporate local LLMs by employing local inference servers that are powered by the NVIDIA RTX-accelerated llama.cpp software library.
It previously examined how consumers might maximize their online surfing experience by using Leo AI in the Brave web browser. Today, it examine Obsidian, a well-known writing and note-taking tool that uses the Markdown markup language and is helpful for managing intricate and connected records for many projects. Several of the community-developed plug-ins that add functionality to the app allow users to connect Obsidian to a local inferencing server, such as LM Studio or Ollama.
To connect Obsidian to LM Studio, just select the “Developer” button on the left panel, load any downloaded model, enable the CORS toggle, and click “Start.” This will enable LM Studio’s local server capabilities. Because the plug-ins will need this information to connect, make a note of the chat completion URL from the “Developer” log console (“http://localhost:1234/v1/chat/completions” by default).
Next, visit the “Settings” tab after launching Obsidian. After selecting “Community plug-ins,” choose “Browse.” Although there are a number of LLM-related community plug-ins, Text Generator and Smart Connections are two well-liked choices.
For creating notes and summaries on a study subject, for example, Text Generator is useful in an Obsidian vault.
Asking queries about the contents of an Obsidian vault, such the solution to a trivia question that was stored years ago, is made easier using Smart Connections.
Open the Text Generator settings, choose “Custom” under “Provider profile,” and then enter the whole URL in the “Endpoint” section. After turning on the plug-in, adjust the settings for Smart Connections. For the model platform, choose “Custom Local (OpenAI Format)” from the options panel on the right side of the screen. Next, as they appear in LM Studio, type the model name (for example, “gemma-2-27b-instruct”) and the URL into the corresponding fields.
The plug-ins will work when the fields are completed. If users are interested in what’s going on on the local server side, the LM Studio user interface will also display recorded activities.
Transforming Workflows With Obsidian AI Plug-Ins
Consider a scenario where a user want to organize a trip to the made-up city of Lunar City and come up with suggestions for things to do there. “What to Do in Lunar City” would be the title of the new note that the user would begin. A few more instructions must be included in the query submitted to the LLM in order to direct the results, since Lunar City is not an actual location. The model will create a list of things to do while traveling if you click the Text Generator plug-in button.
Obsidian will ask LM Studio to provide a response using the Text Generator plug-in, and LM Studio will then execute the Gemma 2 27B model. The model can rapidly provide a list of tasks if the user’s machine has RTX GPU acceleration.
Or let’s say that years later, the user’s buddy is visiting Lunar City and is looking for a place to dine. Although the user may not be able to recall the names of the restaurants they visited, they can review the notes in their vault Obsidian‘s word for a collection of notes to see whether they have any written notes.
A user may ask inquiries about their vault of notes and other material using the Smart Connections plug-in instead of going through all of the notes by hand. In order to help with the process, the plug-in retrieves pertinent information from the user’s notes and responds to the request using the same LM Studio server. The plug-in uses a method known as retrieval-augmented generation to do this.
Although these are entertaining examples, users may see the true advantages and enhancements in daily productivity after experimenting with these features for a while. Two examples of how community developers and AI fans are using AI to enhance their PC experiences are Obsidian plug-ins.
Thousands of open-source models are available for developers to include into their Windows programs using NVIDIA GeForce RTX technology.
Read more on Govindhtech.com
#Obsidian#RTXAIPCs#LLM#LargeLanguageModel#AI#GenerativeAI#NVIDIARTX#LMStudio#RTXGPU#News#Technews#Technology#Technologynews#Technologytrends#govindhtech
3 notes
·
View notes
Note
hey um so idk where to go for this but im trying to back up my blogs and i saw you posted about tumblr utils which is what i was already looking into using
i got all the way up to where it asks for the api key and i went to the registering place but it wants a website and callback/redirect urls? and i dont have any of those. is it supposed to be the github?
im lost and its scary 🥺 can i have some help please? its ok if you cant help but id really appreciate it
Hi Anon! It's been a while since I first started the process, so let me look at that for you.
So, it looks like for the website and callback URL I just used localhost. "localhost" is not a live website you visit on the internet, but a URL for something hosted on your computer that only you can access. So basically a dummy URL.
For both Application Website and callback URL I used "http://localhost:8888/[nameofapplication]". I put in something random for my application name but for you maybe it could be "http://localhost:8888/blogname".
I don't think the text after "8888/" matters though.
I don't have the field for redirect URLs filled out somehow, but I imagine putting the same localhost URL could work.
I hope this helps! Let me know if it works or something is weird, I can try to find the guide I used to set mine up as well. Really you just need to fill this out for the OAuth Key, you're not actually going to use your "application."
#anonpotato#its been like 6 years since ive done this but i think the guide was in the github somewhere#thesilentpotato#tumblr utils
2 notes
·
View notes
Text
Ansible Collections: Extending Ansible’s Capabilities
Ansible is a powerful automation tool used for configuration management, application deployment, and task automation. One of the key features that enhances its flexibility and extensibility is the concept of Ansible Collections. In this blog post, we'll explore what Ansible Collections are, how to create and use them, and look at some popular collections and their use cases.
Introduction to Ansible Collections
Ansible Collections are a way to package and distribute Ansible content. This content can include playbooks, roles, modules, plugins, and more. Collections allow users to organize their Ansible content and share it more easily, making it simpler to maintain and reuse.
Key Features of Ansible Collections:
Modularity: Collections break down Ansible content into modular components that can be independently developed, tested, and maintained.
Distribution: Collections can be distributed via Ansible Galaxy or private repositories, enabling easy sharing within teams or the wider Ansible community.
Versioning: Collections support versioning, allowing users to specify and depend on specific versions of a collection. How to Create and Use Collections in Your Projects
Creating and using Ansible Collections involves a few key steps. Here’s a guide to get you started:
1. Setting Up Your Collection
To create a new collection, you can use the ansible-galaxy command-line tool:
ansible-galaxy collection init my_namespace.my_collection
This command sets up a basic directory structure for your collection:
my_namespace/
└── my_collection/
├── docs/
├── plugins/
│ ├── modules/
│ ├── inventory/
│ └── ...
├── roles/
├── playbooks/
├── README.md
└── galaxy.yml
2. Adding Content to Your Collection
Populate your collection with the necessary content. For example, you can add roles, modules, and plugins under the respective directories. Update the galaxy.yml file with metadata about your collection.
3. Building and Publishing Your Collection
Once your collection is ready, you can build it using the following command:
ansible-galaxy collection build
This command creates a tarball of your collection, which you can then publish to Ansible Galaxy or a private repository:
ansible-galaxy collection publish my_namespace-my_collection-1.0.0.tar.gz
4. Using Collections in Your Projects
To use a collection in your Ansible project, specify it in your requirements.yml file:
collections:
- name: my_namespace.my_collection
version: 1.0.0
Then, install the collection using:
ansible-galaxy collection install -r requirements.yml
You can now use the content from the collection in your playbooks:--- - name: Example Playbook hosts: localhost tasks: - name: Use a module from the collection my_namespace.my_collection.my_module: param: value
Popular Collections and Their Use Cases
Here are some popular Ansible Collections and how they can be used:
1. community.general
Description: A collection of modules, plugins, and roles that are not tied to any specific provider or technology.
Use Cases: General-purpose tasks like file manipulation, network configuration, and user management.
2. amazon.aws
Description: Provides modules and plugins for managing AWS resources.
Use Cases: Automating AWS infrastructure, such as EC2 instances, S3 buckets, and RDS databases.
3. ansible.posix
Description: A collection of modules for managing POSIX systems.
Use Cases: Tasks specific to Unix-like systems, such as managing users, groups, and file systems.
4. cisco.ios
Description: Contains modules and plugins for automating Cisco IOS devices.
Use Cases: Network automation for Cisco routers and switches, including configuration management and backup.
5. kubernetes.core
Description: Provides modules for managing Kubernetes resources.
Use Cases: Deploying and managing Kubernetes applications, services, and configurations.
Conclusion
Ansible Collections significantly enhance the modularity, distribution, and reusability of Ansible content. By understanding how to create and use collections, you can streamline your automation workflows and share your work with others more effectively. Explore popular collections to leverage existing solutions and extend Ansible’s capabilities in your projects.
For more details click www.qcsdclabs.com
#redhatcourses#information technology#linux#containerorchestration#container#kubernetes#containersecurity#docker#dockerswarm#aws
2 notes
·
View notes
Text
Certainly! Let’s explore how to build a full-stack application using Node.js. In this comprehensive guide, we’ll cover the essential components and steps involved in creating a full-stack web application.
Building a Full-Stack Application with Node.js, Express, and MongoDB
1. Node.js: The Backbone of Our Application
Node.js is a runtime environment that allows us to run JavaScript on the server-side.
It’s built on Chrome’s V8 JavaScript engine and uses an event-driven, non-blocking I/O model, making it lightweight and efficient.
Node.js serves as the backbone of our application, providing the environment in which our server-side code will run.
2. Express.js: Simplifying Server-Side Development
Express.js is a minimal and flexible Node.js web application framework.
It provides a robust set of features for building web and mobile applications.
With Express.js, we can:
Set up middlewares to respond to HTTP requests.
Define routing rules.
Add additional features like template engines.
3. MongoDB: Storing Our Data
MongoDB is a document-oriented database program.
It uses JSON-like documents with optional schemas and is known for its flexibility and scalability.
We’ll use MongoDB to store our application’s data in an accessible and writable format.
Building Our Full-Stack Application: A Step-by-Step Guide
Setting Up the Environment:
Install Node.js:sudo apt install nodejs
Initialize a new Node.js project:mkdir myapp && cd myapp npm init -y
Install Express.js:npm install express
Creating the Server:
Create a basic Express server:const express = require('express'); const app = express(); const port = 3000; app.get('/', (req, res) => { res.send('Hello World!'); }); app.listen(port, () => { console.log(`Server running at http://localhost:${port}`); });
Defining Routes:
Define routes for different parts of our application:app.get('/user', (req, res) => { res.send('User Page'); });
Connecting to MongoDB:
Use Mongoose (a MongoDB object modeling tool) to connect to MongoDB and handle data storage.
Remember, this is just the beginning! Full-stack development involves frontend (client-side) work as well. You can use React, Angular, or other frontend libraries to build the user interface and connect it to your backend (Node.js and Express).
Feel free to explore more about each component and dive deeper into building your full-stack application! 😊 12
2 notes
·
View notes
Text
Spring Security Using Facebook Authorization: A Comprehensive Guide
In today's digital landscape, integrating third-party login mechanisms into applications has become a standard practice. It enhances user experience by allowing users to log in with their existing social media accounts. In this blog post, we will walk through the process of integrating Facebook authorization into a Spring Boot application using Spring Security.
Table of Contents
Introduction
Prerequisites
Setting Up Facebook Developer Account
Creating a Spring Boot Application
Configuring Spring Security for OAuth2 Login
Handling Facebook User Data
Testing the Integration
Conclusion
1. Introduction
OAuth2 is an open standard for access delegation, commonly used for token-based authentication. Facebook, among other social media platforms, supports OAuth2, making it possible to integrate Facebook login into your Spring Boot application.
2. Prerequisites
Before we start, ensure you have the following:
JDK 11 or later
Maven
An IDE (e.g., IntelliJ IDEA or Eclipse)
A Facebook Developer account
3. Setting Up Facebook Developer Account
To use Facebook login, you need to create an app on the Facebook Developer portal:
Go to the Facebook Developer website and log in.
Click on "My Apps" and then "Create App."
Choose an app type (e.g., "For Everything Else") and provide the required details.
Once the app is created, go to "Settings" > "Basic" and note down the App ID and App Secret.
Add a product, select "Facebook Login," and configure the Valid OAuth Redirect URIs to http://localhost:8080/login/oauth2/code/facebook.
4. Creating a Spring Boot Application
Create a new Spring Boot project with the necessary dependencies. You can use Spring Initializr or add the dependencies manually to your pom.xml.
Dependencies
<dependencies> <dependency> <groupId>org.springframework.boot</groupId> <artifactId>spring-boot-starter-security</artifactId> </dependency> <dependency> <groupId>org.springframework.boot</groupId> <artifactId>spring-boot-starter-web</artifactId> </dependency> <dependency> <groupId>org.springframework.boot</groupId> <artifactId>spring-boot-starter-oauth2-client</artifactId> </dependency> <dependency> <groupId>org.springframework.boot</groupId> <artifactId>spring-boot-starter-thymeleaf</artifactId> </dependency> </dependencies>
5. Configuring Spring Security for OAuth2 Login
Next, configure Spring Security to use Facebook for OAuth2 login.
application.properties
Add your Facebook app credentials to src/main/resources/application.properties.spring.security.oauth2.client.registration.facebook.client-id=YOUR_FACEBOOK_APP_ID spring.security.oauth2.client.registration.facebook.client-secret=YOUR_FACEBOOK_APP_SECRET spring.security.oauth2.client.registration.facebook.redirect-uri-template={baseUrl}/login/oauth2/code/{registrationId} spring.security.oauth2.client.registration.facebook.scope=email,public_profile spring.security.oauth2.client.registration.facebook.client-name=Facebook spring.security.oauth2.client.registration.facebook.authorization-grant-type=authorization_code spring.security.oauth2.client.provider.facebook.authorization-uri=https://www.facebook.com/v11.0/dialog/oauth spring.security.oauth2.client.provider.facebook.token-uri=https://graph.facebook.com/v11.0/oauth/access_token spring.security.oauth2.client.provider.facebook.user-info-uri=https://graph.facebook.com/me?fields=id,name,email spring.security.oauth2.client.provider.facebook.user-name-attribute=id
Security Configuration
Create a security configuration class to handle the OAuth2 login.import org.springframework.context.annotation.Bean; import org.springframework.context.annotation.Configuration; import org.springframework.security.config.annotation.web.builders.HttpSecurity; import org.springframework.security.config.annotation.web.configuration.EnableWebSecurity; import org.springframework.security.config.annotation.web.configuration.WebSecurityConfigurerAdapter; import org.springframework.security.oauth2.client.oidc.userinfo.OidcUserService; import org.springframework.security.oauth2.client.userinfo.DefaultOAuth2UserService; import org.springframework.security.oauth2.client.userinfo.OAuth2UserService; import org.springframework.security.oauth2.core.oidc.user.OidcUser; import org.springframework.security.oauth2.core.user.OAuth2User; import org.springframework.security.web.authentication.SimpleUrlAuthenticationFailureHandler; @Configuration @EnableWebSecurity public class SecurityConfig extends WebSecurityConfigurerAdapter { @Override protected void configure(HttpSecurity http) throws Exception { http .authorizeRequests(authorizeRequests -> authorizeRequests .antMatchers("/", "/error", "/webjars/**").permitAll() .anyRequest().authenticated() ) .oauth2Login(oauth2Login -> oauth2Login .loginPage("/login") .userInfoEndpoint(userInfoEndpoint -> userInfoEndpoint .oidcUserService(this.oidcUserService()) .userService(this.oAuth2UserService()) ) .failureHandler(new SimpleUrlAuthenticationFailureHandler()) ); } private OAuth2UserService<OidcUserRequest, OidcUser> oidcUserService() { final OidcUserService delegate = new OidcUserService(); return (userRequest) -> { OidcUser oidcUser = delegate.loadUser(userRequest); // Custom logic here return oidcUser; }; } private OAuth2UserService<OAuth2UserRequest, OAuth2User> oAuth2UserService() { final DefaultOAuth2UserService delegate = new DefaultOAuth2UserService(); return (userRequest) -> { OAuth2User oAuth2User = delegate.loadUser(userRequest); // Custom logic here return oAuth2User; }; } }
6. Handling Facebook User Data
After a successful login, you might want to handle and display user data.
Custom User Service
Create a custom service to process user details.import org.springframework.security.oauth2.core.user.OAuth2User; import org.springframework.security.oauth2.core.user.OAuth2UserAuthority; import org.springframework.security.oauth2.client.userinfo.OAuth2UserService; import org.springframework.security.oauth2.client.oidc.userinfo.OidcUserService; import org.springframework.security.oauth2.core.oidc.user.OidcUser; import org.springframework.security.oauth2.client.userinfo.DefaultOAuth2UserService; import org.springframework.security.oauth2.client.oidc.userinfo.OidcUserRequest; import org.springframework.security.oauth2.client.userinfo.OAuth2UserRequest; import org.springframework.stereotype.Service; import java.util.Map; import java.util.Set; import java.util.HashMap; @Service public class CustomOAuth2UserService implements OAuth2UserService<OAuth2UserRequest, OAuth2User> { private final DefaultOAuth2UserService delegate = new DefaultOAuth2UserService(); @Override public OAuth2User loadUser(OAuth2UserRequest userRequest) { OAuth2User oAuth2User = delegate.loadUser(userRequest); Map<String, Object> attributes = new HashMap<>(oAuth2User.getAttributes()); // Additional processing of attributes if needed return oAuth2User; } }
Controller
Create a controller to handle login and display user info.import org.springframework.security.core.annotation.AuthenticationPrincipal; import org.springframework.security.oauth2.core.user.OAuth2User; import org.springframework.stereotype.Controller; import org.springframework.ui.Model; import org.springframework.web.bind.annotation.GetMapping; @Controller public class LoginController { @GetMapping("/login") public String getLoginPage() { return "login"; } @GetMapping("/") public String getIndexPage(Model model, @AuthenticationPrincipal OAuth2User principal) { if (principal != null) { model.addAttribute("name", principal.getAttribute("name")); } return "index"; } }
Thymeleaf Templates
Create Thymeleaf templates for login and index pages.
src/main/resources/templates/login.html
<!DOCTYPE html> <html xmlns:th="http://www.thymeleaf.org"> <head> <title>Login</title> </head> <body> <h1>Login</h1> <a href="/oauth2/authorization/facebook">Login with Facebook</a> </body> </html>
src/main/resources/templates/index.html
<!DOCTYPE html> <html xmlns:th="http://www.thymeleaf.org"> <head> <title>Home</title> </head> <body> <h1>Home</h1> <div th:if="${name}"> <p>Welcome, <span th:text="${name}">User</span>!</p> </div> <div th:if="${!name}"> <p>Please <a href="/login">log in</a>.</p> </div> </body> </html>
7. Testing the Integration
Run your Spring Boot application and navigate to http://localhost:8080. Click on the "Login with Facebook" link and authenticate with your Facebook credentials. If everything is set up correctly, you should be redirected to the home page with your Facebook profile name displayed.
8. Conclusion
Integrating Facebook login into your Spring Boot application using Spring Security enhances user experience and leverages the power of OAuth2. With this setup, users can easily log in with their existing Facebook accounts, providing a seamless and secure authentication process.
By following this guide,
2 notes
·
View notes
Text
This Week in Rust 544
Hello and welcome to another issue of This Week in Rust! Rust is a programming language empowering everyone to build reliable and efficient software. This is a weekly summary of its progress and community. Want something mentioned? Tag us at @ThisWeekInRust on Twitter or @ThisWeekinRust on mastodon.social, or send us a pull request. Want to get involved? We love contributions.
This Week in Rust is openly developed on GitHub and archives can be viewed at this-week-in-rust.org. If you find any errors in this week's issue, please submit a PR.
Updates from Rust Community
Foundation
Guest Blog: Attending CISA’s Open Source Software Security Summit
Newsletters
This Month in Rust OSDev: March 2024
Project/Tooling Updates
lilos v1.0 released
medium-to-markdown v0.1.1 : Convert your medium blogs easily into markdown files
Fluvio v0.11.6 release and project updates
venndb 0.4.0 - custom validators
Tantivy 0.22: Performance improvements, new aggregations and stability fixes
Announcing r3bl_terminal_async - build async interactive CLIs in Rust
[video] Demo + architecture overview of Ferrostar, a cross-platform turn-by-turn navigation SDK with a Rust core
Observations/Thoughts
The Rust Calling Convention We Deserve
Sized, DynSized, and Unsized
Coroutines and effects
Porting a cross-platform GUI application to Rust
Adventures In Rust: Bringing Exchange Support To Thunderbird
Rust Walkthroughs
Why SQLite Performance Tuning made Bencher 1200x Faster
drop, the destructor of Rust structs
Building with AWS S3 using Rust
Rust tokio task cancellation patterns
[video] Build with Naz - Published crate r3bl_terminal_async for building async interactive CLIs in Rust
[video] Trent Billington - Bevy ECS - Power tool for data oriented applications
[video] Building a procedural art generator
[audio] Isograph with Robert Balicki
Research
A Study of Undefined Behavior Across Foreign Function Boundaries in Rust Libraries
Rust Digger: Does size matter? The biggest crate is 450MB; More than 100 crates are over 50MB
Miscellaneous
GitHub Sponsor Rust developer David Tolnay
Learn how to write TCP servers using Rust's std::net module
RustFest Zürich 🇨 Talks announced
Crate of the Week
This week's crate is scandir, a high-performance file tree scanner.
Thanks to Marty B. for the self-suggestion!
Please submit your suggestions and votes for next week!
Call for Testing
An important step for RFC implementation is for people to experiment with the implementation and give feedback, especially before stabilization. The following RFCs would benefit from user testing before moving forward:
No calls for testing were issued this week.
If you are a feature implementer and would like your RFC to appear on the above list, add the new call-for-testing label to your RFC along with a comment providing testing instructions and/or guidance on which aspect(s) of the feature need testing.
Call for Participation; projects and speakers
CFP - Projects
Always wanted to contribute to open-source projects but did not know where to start? Every week we highlight some tasks from the Rust community for you to pick and get started!
Some of these tasks may also have mentors available, visit the task page for more information.
awesome-alternatives-in-rust - Add dqy alternative to dig
fluvio - When a topic is deleted, connected clients should have their connection closed
fluvio - MQTT Connector: Prefix auto generated Client ID to prevent connection drops
fluvio - Remove localhost from fluvio in favor of 127.0.0.1
If you are a Rust project owner and are looking for contributors, please submit tasks here.
CFP - Speakers
Are you a new or experienced speaker looking for a place to share something cool? This section highlights events that are being planned and are accepting submissions to join their event as a speaker.
RustConf 2024 | Closes 2024-04-25 | Montreal, Canada | Event date: 2024-09-10
RustLab 2024 | Closes 2024-05-01 | Florence, Italy | Event date: 2024-11-09 - 2024-11-11
EuroRust 2024| Closes 2024-06-03 | Vienna, Austria & online | Event date: 2024-10-10
Scientific Computing in Rust 2024| Closes 2024-06-14 | online | Event date: 2024-07-17 - 2024-07-19
Conf42 Rustlang 2024 | Closes 2024-07-22 | online | Event date: 2024-08-22
If you are an event organizer hoping to expand the reach of your event, please submit a link to the submission website through a PR to TWiR.
Updates from the Rust Project
432 pull requests were merged in the last week
add simple async drop glue generation
llvm backend: Prevent creating the same Instance::mono multiple times
static_mut_refs: use raw pointers to remove the remaining FIXME
add a lower bound check to unicode-table-generator output
add an opt-in to store incoming edges in VecGraph + misc
add llvm-bitcode-linker to build manifest
allow workproducts without object files
at debuginfo=0, don't inline debuginfo when inlining
correctly change type when adding adjustments on top of NeverToAny
coverage: branch coverage tests for lazy boolean operators
coverage: prepare for improved branch coverage
delay interning errors to after validation
delay span bug when Self kw resolves to DefKind::{Mod,Trait}
don't ICE for kind mismatches during error rendering
don't ascend into parent bodies when collecting stmts for possible return suggestion
don't error on subtyping of equal types
don't inline integer literals when they overflow - new attempt
don't repeatedly duplicate TAIT lifetimes for each subsequently nested TAIT
fix ICE in eval_body_using_ecx
fix ICE when there is a non-Unicode entry in the incremental crate directory
fix capturing duplicated lifetimes via parent in precise_captures (impl use<'...>)
fix normalizing in different ParamEnvs with the same InferCtxt
fix trait solver overflow with non_local_definitions lint
flip spans for precise capturing syntax not capturing a ty/const param, and for implicit captures of lifetime params
give a name to each distinct manipulation of pretty-printer FixupContext
ignore -C strip on MSVC
implement Modified Condition/Decision Coverage
implement PROBLEMATIC_CONSTS generalization
implement syntax for impl Trait to specify its captures explicitly (feature(precise_capturing))
improve ICE message for forbidden dep-graph reads
interpret: pass MemoryKind to adjust_alloc_base_pointer
interpret: pass MemoryKind to before_memory_deallocation
interpret: use ScalarInt for bin-ops; avoid PartialOrd for ScalarInt
introduce perma-unstable wasm-c-abi flag
let inherent associated types constrain opaque types during projection
make suggest_deref_closure_return more idiomatic/easier to understand
make thir_tree and thir_flat into hooks
make the comments for ReturnDest variants doc comments
match ergonomics 2024: Implement eat-one-layer
match ergonomics 2024: mut doesn't reset binding mode
match hyphen in multi-revision comment matchers
opaque types have no namespace
outline default query and hook provider function implementations
prefer identity equality over equating types during coercion
print note with closure signature on type mismatch
properly handle emojis as literal prefix in macros
remove default_hidden_visibility: false from wasm targets
remove uneeded clones now that TrustedStep implies Copy
silence some follow-up errors on trait impls in case the trait has conflicting or otherwise incoherent impls
simplify shallow resolver to just fold ty/consts
stop taking ParamTy/ParamConst/EarlyParamRegion/AliasTy by ref
subtype predicates only exist on inference types, so we can allow them to register opaque types within them
tell LLVM Vec::len is invariant across growth
use raw-dylib for Windows synchronization functions
refactor clippy in bootstrap
when suggesting RUST_BACKTRACE=1, add a special note for Miri's env var isolation
miri: data_race: make the release/acquire API more clear
miri: no_std works on Windows now
miri: add localtime_r shim
miri: address reuse improvements and fixes
miri: deadlock: show backtrace for all threads
miri: directly call handle_alloc_error
miri: implement support for __rust_alloc_error_handler
miri: make realloc with a size of zero fail
miri: move read_byte_slice to general helpers file, next to read_c_str
miri: threads: keep track of why we are blocked, and sanity-check that when waking up
Box::into_raw: make Miri understand that this is a box-to-raw cast
PatRangeBoundary::compare_with: also add a fast-path for signed integers
codegen ZSTs without an allocation
stabilize Wasm target features that are in phase 4 and 5
stabilize const_io_structs
stabilize checking of cfgs at compile-time: --check-cfg option
stabilize generic NonZero
make checked ops emit unchecked LLVM operations where feasible
improve std::fs::Metadata Debug representation
fix negating f16 and f128 constants
force exhaustion in iter::ArrayChunks::into_remainder
checked_ilog: improve performance
add an intrinsic for ptr::from_raw_parts(_mut)
fix: make str::from_raw_parts_mut mut
use queue-based RwLock on more platforms
add support for Arm64EC to the standard library
codegen_gcc: fix PassMode::Indirect with params
codegen_gcc: fix check for main function already declared
codegen_gcc: fix panic when calling get_fn for a variable
codegen_gcc: fix passing custom CG_RUSTFLAGS when building sysroot
codegen_gcc: implement more type kinds
cargo install: including Locking message
cargo resolver: add default Edition2024 to resolver v3
cargo resolver: add v3 resolver for MSRV-aware resolving
cargo credential: trim newlines in tokens from stdin
cargo msrv: error, rather than panic, on rust-version 'x'
cargo msrv: put MSRV-aware resolver behind a config
cargo toml: don't crash on parse errors that point to multi-byte character
cargo toml: disallow source-less dependencies
cargo toml: error on [project] in Edition 2024
cargo toml: report _fied variants (e.g. dev_dependencies) as deprecated
cargo: fix 'cargo build' fails when list_files() with gix is triggered
rustdoc: always display stability version even if it's the same as the containing item
rustdoc: fix copy path button
rustdoc: support type '/' to search
rustdoc-search: fix description on aliases in results
rustdoc-search: single result for items with multiple paths
clippy: threadlocal_initializer_can_be_made_const will not trigger for unreachable initializers
clippy: arithmetic_side_effects fix false negative on +=
clippy: ptr_as_ptr: fix duplicate diagnostics
clippy: emit the needless_pass_by_ref_mut lint on self arguments as well
clippy: fix is_test_module_or_function
clippy: reduce single_char_pattern to only lint on ascii chars
clippy: rework interior mutability detection
clippy: the multiple_unsafe_ops_per_block test needs asm!
rust-analyzer: cargo script mvp
rust-analyzer: add convert From to TryFrom assist
rust-analyzer: allow rust files to be used linkedProjects
rust-analyzer: VFS should not walk circular symlinks
rust-analyzer: handle escaped chars in doc comments
rust-analyzer: replace Just the variable name in Unused Variable Diagnostic Fix
rust-analyzer: implement BeginPanic handling in const eval
rust-analyzer: make test harness arguments configurable and not --nocapture
rust-analyzer: render matched macro arm on hover of macro calls
rust-analyzer: try to generate more meaningful names in json converter
Rust Compiler Performance Triage
A week dominated by small mixed changes to perf with improvements slightly outweighing regressions. There were no pure regressions, and many of the mixed perf results were deemed worth it for their potential improvements to runtime performance through further optimization from LLVM.
Triage done by @rylev. Revision range: ccfcd950..a77f76e2
Summary:
(instructions:u) mean range count Regressions ❌ (primary) 0.4% [0.2%, 1.8%] 57 Regressions ❌ (secondary) 0.4% [0.2%, 1.9%] 26 Improvements ✅ (primary) -0.8% [-3.4%, -0.2%] 50 Improvements ✅ (secondary) -0.6% [-1.9%, -0.1%] 32 All ❌✅ (primary) -0.2% [-3.4%, 1.8%] 107
0 Regressions, 5 Improvements, 6 Mixed; 2 of them in rollups 62 artifact comparisons made in total
Full report here
Call for Testing
An important step for RFC implementation is for people to experiment with the implementation and give feedback, especially before stabilization. The following RFCs would benefit from user testing before moving forward:
No calls for testing were issued this week.
RFCs
Rust
If you are a feature implementer and would like your RFC to appear on the above list, add the new call-for-testing label to your RFC along with a comment providing testing instructions and/or guidance on which aspect(s) of the feature need testing.
Approved RFCs
Changes to Rust follow the Rust RFC (request for comments) process. These are the RFCs that were approved for implementation this week:
No RFCs were approved this week.
Final Comment Period
Every week, the team announces the 'final comment period' for RFCs and key PRs which are reaching a decision. Express your opinions now.
RFCs
[disposition: merge] experimental project goal program for 2024 H2
Tracking Issues & PRs
Rust
[disposition: merge] Tracking Issue for std::path::absolute
[disposition: merge] Tracking Issue for convenience methods on NonNull
[disposition: merge] Inline more svg images into CSS
[disposition: merge] Edition 2024: Make ! fall back to !
[disposition: merge] static_mut_refs: Should the lint cover hidden references?
Cargo
[disposition: merge] fix(toml): Warn, rather than fail publish, if a target is excluded
New and Updated RFCs
[new] experimental project goal program for 2024 H2
Upcoming Events
Rusty Events between 2024-04-24 - 2024-05-22 🦀
Virtual
2024-04-24 | Virtual + In Person (Prague, CZ) | Rust Czech Republic
#2: Making Safe Rust Safer (Pavel Šimerda)
2024-04-25 | Virtual (Berlin, DE) | OpenTechSchool Berlin + Rust Berlin
Rust Hack and Learn | Mirror: Rust Hack n Learn Meetup
2024-04-30 | Virtual (Dallas, TX, US) | Dallas Rust
Last Tuesday
2024-05-01 | Virtual (Cardiff, UK) | Rust and C++ Cardiff
Rust for Rustaceans Book Club: Chapter 5 - Project Structure
2024-05-01 | Virtual (Indianapolis, IN, US) | Indy Rust
Indy.rs - with Social Distancing
2024-05-02 | Virtual (Charlottesville, NC, US) | Charlottesville Rust Meetup
Crafting Interpreters in Rust Collaboratively
2024-05-07 | Virtual (Buffalo, NY) | Buffalo Rust Meetup
Buffalo Rust User Group
2024-05-09 | Virtual (Berlin, DE) | OpenTechSchool Berlin + Rust Berlin
Rust Hack and Learn | Mirror: Rust Hack n Learn Meetup
2024-05-09 | Virtual (Israel) | Rust in Israel
Rust at Microsoft, Tel Aviv - Are we embedded yet?
2024-05-09 | Virtual (Nuremberg/Nürnberg, DE) | Rust Nuremberg
Rust Nürnberg online
2024-05-14 | Virtual (Dallas, TX, US) | Dallas Rust
Second Tuesday
2024-05-14 | Virtual (Halifax, NS, CA) | Rust Halifax
Rust&Tell - Halifax
2024-05-14 | Virtual + In-Person (München/Munich, DE) | Rust Munich
Rust Munich 2024 / 1 - hybrid (Rescheduled)
2024-05-15 | Virtual (Vancouver, BC, CA) | Vancouver Rust
Rust Study/Hack/Hang-out
2024-05-16 | Virtual (Charlottesville, VA, US) | Charlottesville Rust Meetup
Crafting Interpreters in Rust Collaboratively
2024-05-21 | Virtual (Washington, DC, US) | Rust DC
Mid-month Rustful—forensic parsing via Artemis
Africa
2024-05-04 | Kampala, UG | Rust Circle Kampala
Rust Circle Meetup
Asia
2024-05-11 | Bangalore, IN | Rust Bangalore
May 2024 Rustacean meetup
Europe
2024-04-24 | Virtual + In Person (Prague, CZ) | Rust Czech Republic
#2: Making Safe Rust Safer (Pavel Šimerda)
2024-04-25 | Aarhus, DK | Rust Aarhus
Talk Night at MFT Energy
2024-04-25 | Berlin, DE | Rust Berlin
Rust and Tell - TBD
2024-04-25 | København/Copenhagen, DK | Copenhagen Rust Community
Rust meetup #46 sponsored by Nine A/S
2024-04-25 | Vienna, AT | Rust Vienna
Rust Vienna x Python User Group - April
2024-04-27 | Basel, CH | Rust Basel
Fullstack Rust - Workshop #2 (Register by 23 April)
2024-04-27 | Stockholm, SE | Stockholm Rust
Ferris' Fika Forum #2
2024-04-30 | Budapest, HU | Budapest Rust Meetup Group
Rust Meetup Budapest 2
2024-04-30 | Salzburg, AT | Rust Salzburg
[Rust Salzburg meetup]: 6:30pm - CCC Salzburg, 1. OG, ArgeKultur, Ulrike-Gschwandtner-Straße 5, 5020 Salzburg
2024-05-01 | Köln/Cologne, DE | Rust Cologne
This Month in Rust, May
2024-05-01 | Utrecht, NL | NL-RSE Community
NL-RSE RUST meetup
2024-05-06 | Delft, NL | GOSIM
GOSIM Europe 2024
2024-05-07 & 2024-05-08 | Delft, NL | RustNL
RustNL 2024
2024-05-08 | Cambridge, UK | Cambridge Rust Meetup
Monthly Rust Meetup
2024-05-09 | Gdańsk, PL | Rust Gdansk
Rust Gdansk Meetup #2
2024-05-14 | Virtual + In-Person (München/Munich, DE) | Rust Munich
Rust Munich 2024 / 1 - hybrid (Rescheduled)
2024-05-14 | Prague, CZ | Rust Prague
Rust Meetup Prague (May 2024)
2024-05-21 | Aarhus, DK | Rust Aarhus
Hack Night
2024-05-21 | Zurich, CH | Rust Zurich
Save the date - Mai Meetup
North America
2024-04-24 | Austin, TX, US | Rust ATX
Rust Lunch - Fareground
2024-04-25 | Nashville, TN, US | Music City Rust Developers
Music City Rust Developers - Async Rust on Embedded
2024-04-26 | Boston, MA, US | Boston Rust Meetup
North End Rust Lunch, Apr 26
2024-05-04 | Cambridge, MA, US | Boston Rust Meetup
Kendall Rust Lunch, May 4
2024-05-09 | Spokane, WA, US | Spokane Rust
Monthly Meetup: Topic TBD!
2024-05-12 | Brookline, MA, US | Boston Rust Meetup
Coolidge Corner Brookline Rust Lunch, May 12
2024-05-16 | Seattle, WA, US | Seattle Rust User Group
Seattle Rust User Group Meetup
2024-05-20 | Somerville, MA, US | Boston Rust Meetup
Ball Square Rust Lunch, May 20
2024-05-21 | San Francisco, CA, US | San Francisco Rust Study Group
Rust Hacking in Person
2024-05-22 | Austin, TX, US | Rust ATX
Rust Lunch - Fareground
Oceania
2024-04-30 | Auckland, NZ | Rust AKL
Rust AKL: Why Rust? Convince Me!
2024-04-30 | Canberra, ACT, AU | Canberra Rust User Group
CRUG April Meetup: Generics and Traits
If you are running a Rust event please add it to the calendar to get it mentioned here. Please remember to add a link to the event too. Email the Rust Community Team for access.
Jobs
Please see the latest Who's Hiring thread on r/rust
Quote of the Week
The learning curve for Rust is relatively steep compared to other languages, but once you climb it you'll never look down.
– BD103 on Mastodon
Thanks to BD103 for the self-suggestion!
Please submit quotes and vote for next week!
This Week in Rust is edited by: nellshamrell, llogiq, cdmistman, ericseppanen, extrawurst, andrewpollack, U007D, kolharsam, joelmarcey, mariannegoldin, bennyvasquez.
Email list hosting is sponsored by The Rust Foundation
Discuss on r/rust
2 notes
·
View notes
Text
I appear to be having some brain glitching getting in my way here tonight. And, I know that I've got some mutuals who no doubt know way more about this subject than I do. So, I thought I would go ahead and ask for some guidance over here, partly because y'all are likely to be nicer than average about it.
So, what I am trying to accomplish atm: finally get bbolli's tumblr-utils up and running locally, primarily to run personal backups. I am familiar enough with python scripting. What I have fuck all experience with thus far is OAuth.
I do know that I need to obtain my own API key, roughly how to do this, and where to paste that info in.
My major practical level wtf right at the moment is the same as this person was asking about, over 10 years ago:
That is the most relevant thing I could readily find searching. And there was nothing of direct help in replies.
On the registration page, Tumblr is asking for a couple of mandatory fields that I am not sure how to fill in, where the "application" that needs to call the API is a few personal scripts running entirely on localhost.
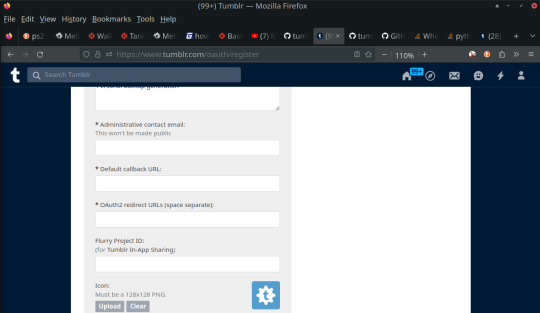
For that matter, I was not sure what to put in under an "Application Website:" URL, but figured that probably made less difference. It's not like this is for public consumption whatsoever, so it got a placeholder.
The only thing I could find about this in tumblr-utils documentation:
Get your personal Tumblr API key. Before June 2020, the author's API key was distributed with the source code, the then Tumblr denied access using this key. Now, each user needs to get their own key at https://www.tumblr.com/oauth/apps. Follow the instructions there; most values entered don't matter. The API key must then be copied between the single quotes in the source code at around line 105 (the line starts with API_KEY = ).
So, does it actually matter what goes into those particular fields in order to get the API key? Or should I just fill in some placeholder URLs for this particular use case? Do these instead need to refer to some script-relevant locations on localhost?
[ETA: From what I understand, the CALLBACK_URL is indeed intended so that Tumblr can call the application back during registration. I am just not sure how this is supposed to work with a local script. Same thing with the OAuth2 redirect URL called for there. What, if anything, would that be? Is it relevant here?]
As is no doubt clear by now, I have zero prior experience in this department. Feeling pretty dumb right now. And I really would appreciate it if anyone with more knowledge could offer some practical advice here.
Right now, I should probably take a little refueling break.
2 notes
·
View notes
Text
How to Design and Build Scalable Microservices in Node.js
Microservices are becoming the go-to architecture for modern applications, and if you're just starting out with backend development, Node.js is a great place to begin. Known for its speed and lightweight nature, Node.js is an ideal choice for building services that need to grow and scale over time. If you're exploring Node.js web development, understanding how to create scalable microservices is a vital skill.
In this article, we’ll walk you through what microservices are, why they’re useful, and how you can design and build them using Node.js- even if you're new to backend programming.
What Are Microservices?
A microservices architecture breaks down a large application into smaller, independent services that each perform a specific task. These services communicate with each other through APIs, usually over HTTP or messaging queues.
For example, in an e-commerce platform:
One microservice might handle user authentication
Another handles orders
A third manages product listings
This approach is more flexible and maintainable than a traditional monolithic application, where everything is packed into one large codebase.
Why Choose Node.js for Microservices?
There are several reasons developers choose Node.js for microservices:
Fast and non-blocking I/O: Node.js handles multiple requests efficiently without waiting for previous ones to finish.
Lightweight and modular: Node’s package manager (npm) offers thousands of ready-to-use modules.
Easy to scale: Built-in tools like clustering and horizontal scaling make it easier to grow your services.
JavaScript everywhere: You can use the same language on both the frontend and backend.
Whether you're building your first API or planning a bigger system, many startups and enterprises rely on professional Node.js Development Services to set up clean and efficient architectures from the start.
Step-by-Step: Building Scalable Microservices in Node.js
Let’s break it down into manageable steps.
1. Define Your Services Clearly
Start by identifying the business functions of your app. Each microservice should be responsible for one feature or domain.
For example:
User Service for authentication
Order Service for handling transactions
Inventory Service for managing products
Keep each service focused. This improves performance and makes your app easier to maintain or scale.
2. Set Up a Basic Node.js Service
Here’s a very simple example using Express.js:
mkdir user-service cd user-service npm init -y npm install express
Create a server.js file:
jsCopy
const express = require('express'); const app = express(); app.get('/users', (req, res) => { res.json([{ id: 1, name: 'Alice' }]); }); app.listen(3000, () => { console.log('User service is running on port 3000'); });
This is your first microservice.
3. Use a Gateway or API Layer
In a microservices setup, each service has its own endpoint. But to avoid confusing your users with multiple URLs, you can use an API Gateway like Express Gateway, Kong, or Nginx to route traffic to the correct service.
The gateway can also handle:
Authentication
Rate limiting
Logging
Version control
If you want to save time and ensure best practices, it’s often a good idea to hire Node.js developers who already understand how to configure gateways and secure your APIs effectively.
4. Implement Inter-Service Communication
Microservices often need to talk to each other. This is done through APIs (HTTP) or message brokers (like RabbitMQ or Kafka).
In a simple HTTP example:
jsCopy
// order-service calls user-service const axios = require('axios'); axios.get('http://localhost:3000/users') .then(res => console.log(res.data));
As your system grows, switching to messaging queues improves performance and decouples services even further.
5. Use Docker to Containerize Your Services
To make your services easy to deploy, run, and scale, containerize them using Docker.
Here’s a simple Dockerfile for a Node.js service:
dockerfileCopy
FROM node:18 WORKDIR /app COPY . . RUN npm install CMD ["node", "server.js"]
This makes your service portable and predictable—key traits for scaling.
Most Node.js development companies containerize microservices and use orchestration tools like Docker Compose or Kubernetes to manage multiple services efficiently.
6. Add Monitoring and Logging
Don’t wait until something breaks. Add monitoring early.
Use tools like:
Winston or Morgan for logging
Prometheus and Grafana for monitoring performance
Logstash or Elasticsearch for log storage and search
This visibility helps you debug faster and scale more reliably.
7. Plan for Scaling
Node.js can scale vertically (more CPU/threads) and horizontally (more instances). Use built-in clustering or cloud platforms (like AWS ECS, Azure App Service, or Google Cloud Run) to scale your services based on demand.
Scalability is where many teams turn to expert Node.js Development Services to architect fault-tolerant and load-balanced systems that handle high traffic smoothly.
Tips for Beginners
Here are a few tips to make your microservices journey easier:
Start with two services and expand gradually
Keep services stateless (no shared memory or sessions)
Use environment variables for configuration
Maintain separate codebases for each service
Write clear API documentation for each microservice
Building scalable microservices doesn’t mean building everything at once. Take it step by step.
When to Seek Help
When your app grows in complexity or you need to handle production-level traffic, it might be time to bring in professional help.
A reputable Node.js development company can support you with:
System design and architecture
API security and versioning
Testing and CI/CD pipelines
Cloud deployment and scaling strategies
Or, if you’re looking for temporary expertise, you can hire Node.js developers to join your team on a freelance or contract basis. They’ll help speed up development, review your code for best practices, and guide your technical decisions.
Final Thoughts
Designing scalable microservices in Node.js is not as hard as it sounds—especially if you take a modular, step-by-step approach. With the right structure and tools, you can build systems that are easier to manage, faster to deploy, and ready to grow.
Whether you're building your first microservice or planning to scale a business application, Node.js has the flexibility and performance to help you succeed.
And when you're ready to move faster and scale smarter, don’t hesitate to reach out to a reliable Node.js development company or hire Node.js developers who can bring your vision to life with confidence.
#NodeJS#Microservices#BackendDevelopment#ScalableArchitecture#DistributedSystems#JavaScriptDevelopment#CloudNative#DevOps#Docker#Kubernetes#SystemDesign#WebDevelopment#TechArchitecture#HighAvailability#Serverless#APIDevelopment#SoftwareEngineering#CodeQuality#FullStackDevelopment
0 notes
Text
DNS Rebinding Attack in Symfony: Fix & Prevention Guide
DNS rebinding is a dangerous web vulnerability that can allow attackers to bypass same-origin policies and gain access to internal networks through a user's browser. In this blog post, we'll explore how DNS rebinding attacks work, why Symfony developers should be aware of them, and how to prevent these attacks using code examples and best practices.

🔍 For more cybersecurity insights, check out our blog: 👉 https://www.pentesttesting.com/blog/
🧨 What Is a DNS Rebinding Attack?
DNS rebinding exploits the trust a browser has in DNS responses. By tricking a victim's browser into connecting to internal services or private IP addresses using manipulated DNS responses, attackers can potentially access internal applications, steal data, or run commands.
In Symfony, if your application does not verify host headers properly or restricts access by IP, it could be vulnerable.
💣 How DNS Rebinding Works (Step-by-Step)
The attacker registers a domain (e.g., attacker.com).
The domain initially resolves to an external IP (e.g., their server).
The victim accesses attacker.com in their browser.
After the browser's DNS cache expires, the domain is rebound to a private IP like 127.0.0.1.
The attacker’s script running in the browser now makes requests to internal services or localhost.
🔐 Symfony DNS Rebinding Mitigation Strategies
Symfony has security components, but developers must implement additional safeguards. Here are key prevention techniques:
✅ 1. Validate Host Headers
Use Symfony’s Request::getHost() carefully. Always validate incoming host headers:
use Symfony\Component\HttpFoundation\Request; $request = Request::createFromGlobals(); $trustedHosts = ['yourdomain.com', 'www.yourdomain.com']; if (!in_array($request->getHost(), $trustedHosts)) { throw new \Exception("Untrusted Host Detected"); }
Or configure trusted hosts in config/packages/framework.yaml:
framework: trusted_hosts: ['^yourdomain\.com$', '^www\.yourdomain\.com$']
✅ This prevents the application from accepting forged Host headers.
✅ 2. Restrict Access to Internal IPs
Use a firewall or reverse proxy to block private IP ranges like 127.0.0.1 or 192.168.0.0/16. You can also block requests using Symfony middleware:
$clientIp = $_SERVER['REMOTE_ADDR']; if (preg_match('/^127\.|^192\.168\.|^10\./', $clientIp)) { throw new \Exception("Access from private IPs not allowed"); }
💡 Recommended: Test for Vulnerabilities with Our Free Tool
📸 Screenshot of our free Website Vulnerability Scanner tool homepage

Screenshot of the free tools webpage where you can access security assessment tools.
Before you assume your Symfony site is safe, run a full check using our Website Vulnerability Scanner.
It scans for:
DNS Rebinding vulnerabilities
Host Header injections
CORS misconfigurations
And more!
📸 Screenshot of a sample report to check Website Vulnerability

An Example of a vulnerability assessment report generated with our free tool, providing insights into possible vulnerabilities.
💼 Our Services for Developers and Agencies
Need professional help? We’ve got you covered:
🛠️ Web App Penetration Testing
Custom tests for DNS rebinding, XSS, SSRF, CSRF and more. 👉 https://www.pentesttesting.com/web-app-penetration-testing-services/
🤝 Partner with Us: Offer Security Services to Your Clients
White-label our penetration testing service for your agency. 👉 https://www.pentesttesting.com/offer-cybersecurity-service-to-your-client/
📰 Stay Ahead with Cybersecurity Trends
Don’t miss out on our weekly security tips, zero-day alerts, and threat breakdowns. 📬 Subscribe on LinkedIn: 👉 https://www.linkedin.com/build-relation/newsletter-follow?entityUrn=7327563980778995713
🧪 Bonus: DNS Rebinding Exploit Simulation Code
If you're a developer or security researcher, try this basic simulation.
// attacker.com/index.html setTimeout(() => { location.href = 'http://attacker.com/rebind'; }, 2000); // attacker.com/rebind redirects to internal IP via DNS manipulation fetch('http://127.0.0.1:8000/api/secret-data') .then(response => response.text()) .then(data => console.log("Leaked Data:", data)); Note: Use this only in a test lab environment.
📣 Final Thoughts
DNS rebinding might seem like a legacy attack, but it remains a real threat—especially for modern SPAs, IoT dashboards, or internal APIs running without proper controls.
Symfony developers should: ✅ Lock down host headers ✅ Block private IP access ✅ Use trusted domain whitelists ✅ Regularly scan their websites
Start today by scanning your site at: 🔗 https://free.pentesttesting.com/
Explore more at: 📘 Blog: https://www.pentesttesting.com/blog/
1 note
·
View note
Text
Java Developer’s Cheat Sheet: 10 Handy Code Snippets for Real-World Problems Enterprise Java development often involves solving recurring challenges efficiently. Whether it's managing databases, handling exceptions, or working with large data, having practical code snippets handy can save time and reduce errors. Here are 10 essential Java snippets tailored for common enterprise scenarios. 1. Database Connection Pooling with HikariCP Efficient database connection management is crucial for performance in enterprise applications: HikariConfig config = new HikariConfig(); config.setJdbcUrl("jdbc:mysql://localhost:3306/mydb"); config.setUsername("user"); config.setPassword("password"); config.addDataSourceProperty("cachePrepStmts", "true"); config.addDataSourceProperty("prepStmtCacheSize", "250"); config.addDataSourceProperty("prepStmtCacheSqlLimit", "2048"); HikariDataSource dataSource = new HikariDataSource(config); try (Connection conn = dataSource.getConnection()) PreparedStatement stmt = conn.prepareStatement("SELECT * FROM employees"); ResultSet rs = stmt.executeQuery(); while (rs.next()) System.out.println(rs.getString("name")); 2. Read and Write JSON Using Jackson JSON handling is ubiquitous in enterprise apps for APIs and configuration: ObjectMapper mapper = new ObjectMapper(); // Serialize object to JSON Employee emp = new Employee(1, "John Doe", "IT"); String jsonString = mapper.writeValueAsString(emp); System.out.println(jsonString); // Deserialize JSON to object Employee empFromJson = mapper.readValue(jsonString, Employee.class); System.out.println(empFromJson); 3. Centralized Exception Handling in Spring Boot Streamline error responses with a global exception handler: @RestControllerAdvice public class GlobalExceptionHandler @ExceptionHandler(EntityNotFoundException.class) public ResponseEntity handleEntityNotFound(EntityNotFoundException ex) return ResponseEntity.status(HttpStatus.NOT_FOUND).body(ex.getMessage()); @ExceptionHandler(Exception.class) public ResponseEntity handleGenericException(Exception ex) return ResponseEntity.status(HttpStatus.INTERNAL_SERVER_ERROR).body("An error occurred: " + ex.getMessage()); 4. Paginate Results Using JPA Pagination is vital for handling large datasets efficiently: Pageable pageable = PageRequest.of(0, 10, Sort.by("name").ascending()); Page employees = employeeRepository.findAll(pageable); employees.forEach(emp -> System.out.println(emp.getName())); 5. Encrypt and Decrypt Sensitive Data Secure sensitive information with AES encryption: KeyGenerator keyGen = KeyGenerator.getInstance("AES"); keyGen.init(128); SecretKey secretKey = keyGen.generateKey(); Cipher cipher = Cipher.getInstance("AES"); // Encrypt cipher.init(Cipher.ENCRYPT_MODE, secretKey); byte[] encrypted = cipher.doFinal("SensitiveData".getBytes()); System.out.println(Base64.getEncoder().encodeToString(encrypted)); // Decrypt cipher.init(Cipher.DECRYPT_MODE, secretKey); byte[] decrypted = cipher.doFinal(encrypted); System.out.println(new String(decrypted)); 6. Cache Data Using Ehcache Enhance performance by caching frequently accessed data: CacheManager cacheManager = CacheManagerBuilder.newCacheManagerBuilder() .withCache("preConfigured", CacheConfigurationBuilder.newCacheConfigurationBuilder(String.class, String.class, ResourcePoolsBuilder.heap(100))) .build(true); Cache cache = cacheManager.getCache("preConfigured", String.class, String.class); cache.put("key1", "value1"); System.out.println(cache.get("key1")); 7. Send Emails with JavaMail Automate email notifications using JavaMail: Properties props = new Properties(); props.put("mail.smtp.host", "smtp.example.com"); props.put("mail.smtp.port", "587"); props.put("mail.smtp.auth", "true"); props.put("mail.smtp.starttls.enable", "true"); Session session = Session.getInstance(props, new Authenticator()
protected PasswordAuthentication getPasswordAuthentication() return new PasswordAuthentication("[email protected]", "password"); ); Message message = new MimeMessage(session); message.setFrom(new InternetAddress("[email protected]")); message.setRecipients(Message.RecipientType.TO, InternetAddress.parse("[email protected]")); message.setSubject("Test Email"); message.setText("This is a test email."); Transport.send(message); System.out.println("Email sent successfully"); 8. Handle Large Files with Streaming Process large files efficiently without loading them into memory: try (BufferedReader br = new BufferedReader(new FileReader("largefile.txt"))) String line; while ((line = br.readLine()) != null) System.out.println(line); catch (IOException e) e.printStackTrace(); 9. Generate UUIDs for Unique Identifiers Generate unique IDs for entities easily: String uuid = UUID.randomUUID().toString(); System.out.println("Generated UUID: " + uuid); 10. Retry Logic for Resilient API Calls Implement retry logic for unstable external services: RetryPolicy retryPolicy = new RetryPolicy() .handle(Exception.class) .withDelay(Duration.ofSeconds(2)) .withMaxRetries(3); Failsafe.with(retryPolicy).run(() -> // Your API call or operation System.out.println("Attempting operation..."); if (new Random().nextBoolean()) throw new RuntimeException("Simulated failure"); System.out.println("Operation succeeded"); ); Conclusion These practical Java code snippets address real-world enterprise development needs. Keep this cheat sheet handy to boost productivity, reduce repetitive tasks, and streamline your workflow. Whether it’s handling JSON, caching data, or securing sensitive information, these snippets are indispensable for any Java developer.
0 notes
Text
Node.js Tutorial for Web Developers
In today’s fast-paced development world, having the ability to build fast, scalable, and efficient web applications is a must for every web developer. Node.js has emerged as one of the most powerful tools for building server-side applications using JavaScript. If you're a web developer ready to expand your skills beyond front-end development, this Node.js Tutorial for Web Developers is the perfect place to start.
This blog will guide you through the core concepts of Node.js, from setting up your environment to building your first server, working with modules, handling requests, and connecting to databases. Whether you're transitioning from front-end development or just starting out with full-stack JavaScript, this tutorial will help you understand and apply Node.js effectively.
What is Node.js?
Node.js is an open-source, cross-platform runtime environment that allows you to run JavaScript on the server side. It is built on Chrome’s V8 JavaScript engine and is known for its non-blocking, event-driven architecture. Unlike traditional server-side languages like PHP or Python, Node.js enables full-stack development using a single language: JavaScript.
With Node.js, developers can build fast, scalable, and high-performance network applications, RESTful APIs, real-time chat apps, and much more.
Key features of Node.js include:
Asynchronous and event-driven
Highly scalable
Built-in package manager (npm)
Single programming language for full-stack development
Large and active community
Why Web Developers Should Learn Node.js
As a web developer, learning Node.js can greatly enhance your ability to build modern web applications. Here’s why:
JavaScript Everywhere: Use the same language on both the client and server sides.
Real-Time Capabilities: Ideal for building chat apps, streaming services, and real-time dashboards.
Performance: Node.js can handle thousands of simultaneous connections with high throughput.
Massive Ecosystem: Thousands of reusable libraries available through npm.
Career Opportunities: High demand for full-stack JavaScript developers in the job market.
Node.js Tutorial for Web Developers
Let’s get started with building a basic application using Node.js. Follow this step-by-step tutorial to understand the core concepts.
Step 1: Installing Node.js and npm
First, download and install Node.js from the official website: https://nodejs.org
Once installed, verify the installation:node -v npm -v
node is the runtime, and npm is the Node package manager used to install libraries and tools.
Step 2: Initialize Your Project
Create a new directory for your project:mkdir node-tutorial cd node-tutorial
Initialize a new Node.js project:npm init -y
This creates a package.json file to manage project dependencies.
Step 3: Create a Simple Web Server
Create a file named server.js and add the following code:const http = require('http'); const server = http.createServer((req, res) => { res.statusCode = 200; res.setHeader('Content-Type', 'text/plain'); res.end('Hello, Node.js!'); }); server.listen(3000, () => { console.log('Server running at http://localhost:3000/'); });
Run the server:node server.js
Visit http://localhost:3000 in your browser. You should see "Hello, Node.js!"
Step 4: Working with Modules
Node.js uses a modular system. You can create reusable code in separate files.
Create a file called greet.js:module.exports = function(name) { return `Hello, ${name}!`; };
Then use it in your server.js:const greet = require('./greet'); console.log(greet('Web Developer'));
This makes your code cleaner and easier to manage.
Step 5: Using Express.js
While you can use Node’s built-in modules, most developers use frameworks like Express.js to build APIs quickly.
Install Express:npm install express
Update server.js:const express = require('express'); const app = express(); app.get('/', (req, res) => { res.send('Welcome to the Node.js Tutorial!'); }); app.listen(3000, () => { console.log('Server running on http://localhost:3000'); });
Express simplifies route handling and improves readability.
Step 6: Handling POST Requests and JSON
Add support for POST requests and JSON:app.use(express.json()); app.post('/greet', (req, res) => { const name = req.body.name; res.send(`Hello, ${name}`); });
Use Postman or a frontend form to test sending data to the server.
Step 7: Connecting to a Database (MongoDB)
You can connect your Node.js app to MongoDB using Mongoose:npm install mongoose
Then connect to a database:const mongoose = require('mongoose'); mongoose.connect('mongodb://localhost:27017/nodetutorial', { useNewUrlParser: true, useUnifiedTopology: true, }) .then(() => console.log('MongoDB connected')) .catch(err => console.error(err));
You can now create schemas and interact with your database.
What You’ll Learn from This Node.js Tutorial
This Node.js Tutorial for Web Developers helps you:
Understand the Node.js runtime and architecture
Build your first web server
Use modules for modular code
Create APIs using Express.js
Handle HTTP requests and responses
Parse JSON data and work with forms
Connect to MongoDB and handle data persistence
Final Thoughts
Node.js is a must-learn tool for web developers aiming to become proficient in full-stack development. Its event-driven architecture, speed, and scalability make it a favorite for building real-time and data-intensive applications.
This Node.js tutorial for web developers provides a clear path to mastering back-end development using JavaScript. By learning and applying these concepts, you’ll gain the ability to build complete, dynamic, and modern web applications.
Ready to take your web development skills to the next level? Start coding with Node.js today!
0 notes
Text

Enhancing ARMxy Performance with Nginx as a Reverse Proxy
Introduction
Nginx is a high-performance web server that also functions as a reverse proxy, load balancer, and caching server. It is widely used in cloud and edge computing environments due to its lightweight architecture and efficient handling of concurrent connections. By deploying Nginx on ARMxy Edge IoT Gateway, users can optimize data flow, enhance security, and efficiently manage industrial network traffic.
Why Use Nginx on ARMxy?
1. Reverse Proxying – Nginx acts as an intermediary, forwarding client requests to backend services running on ARMxy.
2. Load Balancing – Distributes traffic across multiple devices to prevent overload.
3. Security Hardening – Hides backend services and implements SSL encryption for secure communication.
4. Performance Optimization – Caching frequently accessed data reduces latency.
Setting Up Nginx as a Reverse Proxy on ARMxy
1. Install Nginx
On ARMxy’s Linux-based OS, update the package list and install Nginx:
sudo apt update sudo apt install nginx -y
Start and enable Nginx on boot:
sudo systemctl start nginx sudo systemctl enable nginx
2. Configure Nginx as a Reverse Proxy
Modify the default Nginx configuration to route incoming traffic to an internal service, such as a Node-RED dashboard running on port 1880:
sudo nano /etc/nginx/sites-available/default
Replace the default configuration with the following:
server { listen 80; server_name your_armxy_ip;
location / {
proxy_pass http://localhost:1880/;
proxy_set_header Host $host;
proxy_set_header X-Real-IP $remote_addr;
proxy_set_header X-Forwarded-For $proxy_add_x_forwarded_for;
}
}
Save the file and restart Nginx:
sudo systemctl restart nginx
3. Enable SSL for Secure Communication
To secure the reverse proxy with HTTPS, install Certbot and configure SSL:
sudo apt install certbot python3-certbot-nginx -y sudo certbot --nginx -d your_domain
Follow the prompts to automatically configure SSL for your ARMxy gateway.
Use Case: Secure Edge Data Flow
In an industrial IoT setup, ARMxy collects data from field devices via Modbus, MQTT, or OPC UA, processes it locally using Node-RED or Dockerized applications, and sends it to cloud platforms. With Nginx, you can:
· Secure data transmission with HTTPS encryption.
�� Optimize API requests by caching responses.
· Balance traffic when multiple ARMxy devices are used in parallel.
Conclusion
Deploying Nginx as a reverse proxy on ARMxy enhances security, optimizes data handling, and ensures efficient communication between edge devices and cloud platforms. This setup is ideal for industrial automation, smart city applications, and IIoT networks requiring low latency, high availability, and secure remote access.
0 notes
Text
Company Visitors Management System using PHP and MySQL

Company Visitor Management system is a web-based technology that will revolutionize the way your company manages visitors. Visitor Management system is more important to security guards or security company. This web application provides a way to effectively control record & track company visitor traffic.
Click: https://phpgurukul.com/company-visitor-management-system-using-php-and-mysql/
Project Modules
In CVMS we use PHP and MySQL database. This is the project which keep records of visitors who visited in the company. CVMS has one module i.e admin.
Dashboard: In this sections, admin can briefly view how many visitors visited in a particular period.
Department: In this section, admin can add and delete the deparment.
Visitors: In this section, admin adds new visitors by filling their information in add visitors sections and also view and manage visitor’s records. Admin also put visitors out time in the manage records section.
Search: In this bar, admin can search a particular person by their name and phone number.
Reports: In this section admin can generate visitor’s reports between two dates.
Admin can also update his profile, change password and recover password.
How to run the Company Visitors Management System (CVMS) Project
1. Download the zip file
2. Extract the file and copy cvms folder
3.Paste inside root directory(for xampp xampp/htdocs, for wamp wamp/www, for lamp var/www/html)
4. Open PHPMyAdmin (http://localhost/phpmyadmin)
5. Create a database with name cvmsdb
6. Import cvmsdb.sql file(given inside the zip package in SQL file folder)
7.Run the script http://localhost/cvms (frontend)
Credential for admin panel :
Username: admin
Password: Test@123
PHP Gurukul
Welcome to PHPGurukul. We are a web development team striving our best to provide you with an unusual experience with PHP. Some technologies never fade, and PHP is one of them. From the time it has been introduced, the demand for PHP Projects and PHP developers is growing since 1994. We are here to make your PHP journey more exciting and useful.
Email: [email protected] Website : https://phpgurukul.com
0 notes
Text
Step-by-Step DevSecOps Tutorial for Beginners
Introduction: Why DevSecOps Is More Than Just a Trend
In today's digital-first landscape, security can no longer be an afterthought. DevSecOps integrates security directly into the development pipeline, helping teams detect and fix vulnerabilities early. For beginners, understanding how to approach DevSecOps step by step is the key to mastering secure software development. Whether you're just starting out or preparing for the best DevSecOps certifications, this comprehensive tutorial walks you through practical, real-world steps with actionable examples.
This guide also explores essential tools, covers the DevSecOps training and certification landscape, shares tips on accessing DevSecOps certification free resources, and highlights paths like the Azure DevSecOps course.
What Is DevSecOps?

DevSecOps stands for Development, Security, and Operations. It promotes a cultural shift where security is integrated across the CI/CD pipeline, automating checks and balances during software development. The goal is to create a secure development lifecycle with fewer manual gates and faster releases.
Core Benefits
Early vulnerability detection
Automated security compliance
Reduced security risks in production
Improved collaboration among teams
Step-by-Step DevSecOps Tutorial for Beginners
Let’s dive into a beginner-friendly step-by-step guide to get hands-on with DevSecOps principles and practices.
Step 1: Understand the DevSecOps Mindset
Before using tools or frameworks, understand the shift in mindset:
Security is everyone's responsibility
Security practices should be automated
Frequent feedback loops are critical
Security policies should be codified (Policy as Code)
Tip: Enroll in DevSecOps training and certification programs to reinforce these principles early.
Step 2: Learn CI/CD Basics
DevSecOps is built upon CI/CD (Continuous Integration and Continuous Deployment). Get familiar with:
CI tools: Jenkins, GitHub Actions, GitLab CI
CD tools: Argo CD, Spinnaker, Azure DevOps
Hands-On:
# Sample GitHub Action workflow
name: CI
on: [push]
jobs:
build:
runs-on: ubuntu-latest
steps:
- uses: actions/checkout@v2
- name: Install dependencies
run: npm install
- name: Run tests
run: npm test
Step 3: Integrate Static Application Security Testing (SAST)
SAST scans source code for vulnerabilities.
Popular Tools:
SonarQube
Checkmarx
CodeQL (by GitHub)
Use Case: Integrate SonarQube into your Jenkins pipeline to detect hard-coded credentials or SQL injection flaws.
Code Snippet:
sonar-scanner \
-Dsonar.projectKey=MyProject \
-Dsonar.sources=. \
-Dsonar.host.url=http://localhost:9000
Step 4: Set Up Dependency Scanning
Most modern applications use third-party libraries. Tools like OWASP Dependency-Check, Snyk, or WhiteSource can identify vulnerable dependencies.
Tip: Look for DevSecOps certification free labs that simulate dependency vulnerabilities.
Step 5: Implement Container Security Scanning
With containers becoming standard in deployments, scanning container images is essential.
Tools:
Trivy
Clair
Aqua Security
Sample Command Using Trivy:
trivy image nginx:latest
Step 6: Apply Dynamic Application Security Testing (DAST)
DAST tools test running applications for vulnerabilities.
Top Picks:
OWASP ZAP
Burp Suite
AppSpider
Real-World Example: Test an exposed login form on your dev environment using OWASP ZAP.
Step 7: Use Infrastructure as Code (IaC) Scanning
Misconfigurations in IaC can lead to major security flaws. Use tools to scan Terraform, CloudFormation, or ARM templates.
Popular Tools:
Chekhov
tfsec
Azure Bicep Linter (for Azure DevSecOps course users)
Step 8: Enforce Security Policies
Create policies that define security rules and ensure compliance.
Tools:
Open Policy Agent (OPA)
Kyverno
Use Case: Block deployments if a Kubernetes pod is missing a security context.
Best DevSecOps Certifications to Advance Your Career
If you’re serious about building a career in secure DevOps practices, here are some of the best DevSecOps certifications:
1. Certified DevSecOps Professional
Covers real-world DevSecOps use cases, including SAST, DAST, and container security.
2. AWS DevSecOps Certification
Ideal for cloud professionals securing AWS environments.
3. Azure DevSecOps Course Certification
Microsoft-specific course focusing on Azure security best practices.
4. GIAC Cloud Security Automation (GCSA)
Perfect for automation experts aiming to secure CI/CD pipelines.
Tip: Many DevSecOps certification free prep materials and labs are available online for self-paced learners.
DevSecOps Training Videos: Learn by Watching
Learning by watching real demos accelerates your understanding.
Topics Covered in Popular DevSecOps Training Videos:
How to secure a CI/CD pipeline
Real-world attack simulations
Vulnerability scanning workflows
Secure Dockerfile best practices
Visual Learning Tip: Platforms like H2K Infosys offer training sessions and tutorials that explain concepts step by step.
Accessing DevSecOps Tutorial PDF Resources
Sometimes having a reference guide helps. You can download DevSecOps tutorial PDF resources that summarize:
The DevSecOps lifecycle
Tools list by category (SAST, DAST, etc.)
Sample workflows and policies
These PDFs often accompany DevSecOps training and certification programs.
Azure DevSecOps Course: A Platform-Specific Approach
Microsoft Azure has strong native integration for DevSecOps.
What’s Covered in an Azure DevSecOps Course?
Security Center integrations with pipelines
Azure Key Vault secrets management
ARM Template and Bicep scanning
RBAC, Identity & Access Management
Example Toolchain: Azure DevOps + Microsoft Defender + Azure Policy + Terraform + Key Vault
Certification Note: Some Azure DevSecOps course modules count towards official Microsoft certifications.
Real-World Case Study: DevSecOps in a Banking Application
Problem: A fintech firm faced security vulnerabilities during nightly releases.
Solution: They implemented the following:
Jenkins-based CI/CD
SonarQube for code scanning
Snyk for dependency scanning
Trivy for container security
Azure Policy for enforcing RBAC
Results:
Reduced critical vulnerabilities by 72%
Release frequency increased from weekly to daily
Key Takeaways
DevSecOps integrates security into DevOps workflows.
Use SAST, DAST, IaC scanning, and policy enforcement.
Leverage DevSecOps training videos and tutorial PDFs for continuous learning.
Pursue the best DevSecOps certifications to boost your career.
Explore Azure DevSecOps course for platform-specific training.
Conclusion: Start Your DevSecOps Journey Now
Security is not optional, it's integral. Equip yourself with DevSecOps training and certification to stay ahead. For structured learning, consider top-rated programs like those offered by H2K Infosys.
Start your secure development journey today. Explore hands-on training with H2K Infosys and build job-ready DevSecOps skills.
0 notes