
junkoonthefarm
Junko On The Farm
Gathering educational material for planting, growing and maintaining.
21 posts
Don't wanna be here? Send us removal request.
Last Seen Blogs

johnsonclinic
Viện Thẩm Mỹ Quốc Tế Johnson Clinic

cirosc
@cirosc_

sayorseee
THIS SHRIMP BE CRAE

pantheragallery
Yesteryear's home for today's lifestyle.

adesignmode
Sans titre
Text
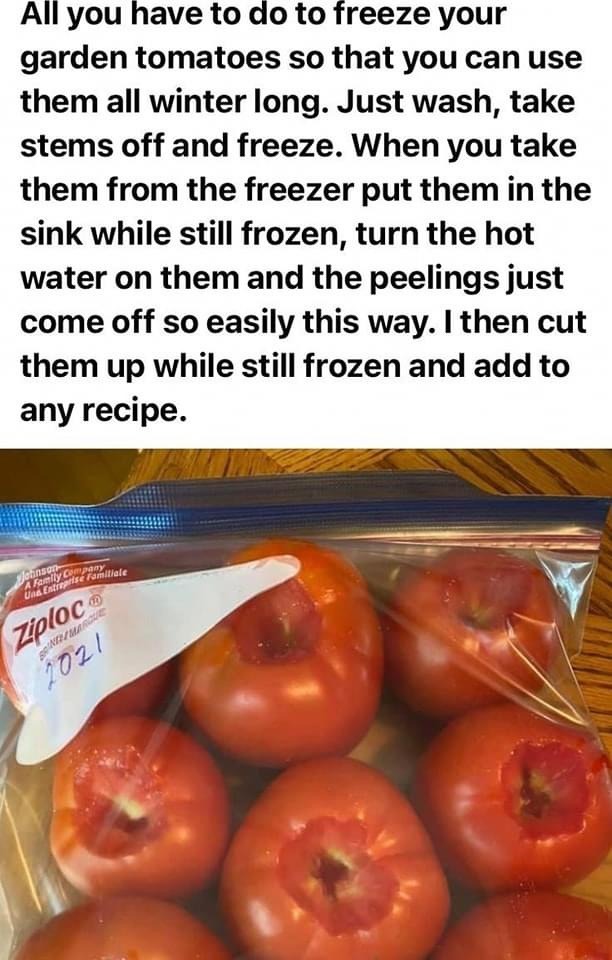
#homesteading#junko on the farm#tips#garden#gardening#junko#organic#life hacks#veggies#vegetables#tomato#tomatoes#homegrown#storage#food storage#freezing
3 notes
·
View notes
Text

#homesteading#junko on the farm#tips#garden#gardening#junko#organic#life hacks#flowers#botany#edible#herbs#plants#wildflowers
239 notes
·
View notes
Text

#homesteading#junko on the farm#tips#junko#organic#life hacks#homemade#livestock#dairy#milk#goat milk#goat#farm#animals#dairy farm
6 notes
·
View notes
Text
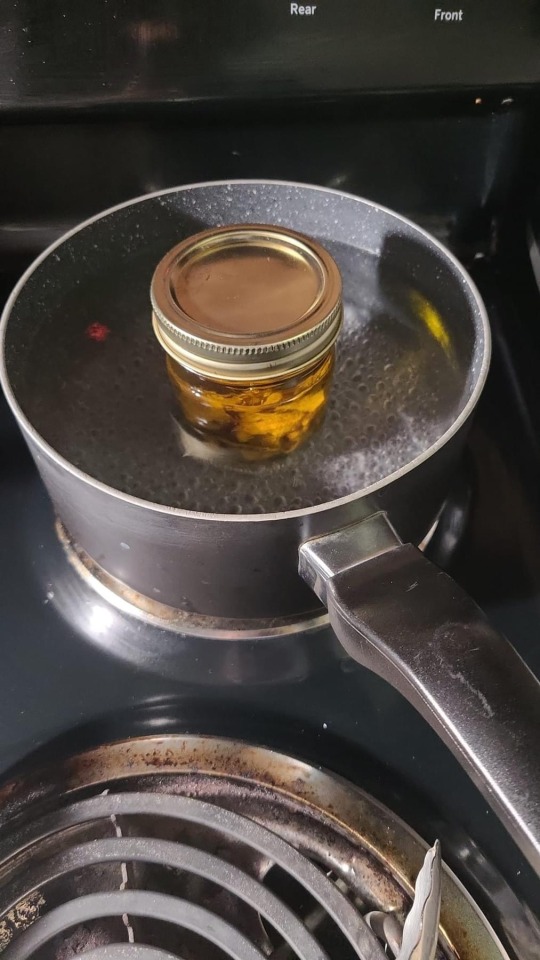
Grapefruit Perfume Oil
Step 1: peel your grapefruit peel completely getting all of the white flesh off
Step 2: dry the peels. You can use the sun, a dehydrator or leave them in the oven (turned off) this can take a few days
Step 3: choose a carrier oil. Olive oil, almond, coconut, etc. I used olive oil and coconut oil
Step 4: put the dried peels and your choice of oils into a dry airtight Mason jar or any other glass airtight bottle and seal
Step5: fill a pot with water and bring to a boil
Step 6: carefully add your jar and let heat for at least an hour
Tips: you can use any citrus and or dried herbs with this method
Occasionally take the jar our of the water and give it a little shake
Do not forget about the jar make sure the water doesn't burn out
Do not open for a few days
You can leave the jar in direct sunlight for extra infusion


4 notes
·
View notes
Text

#homesteading#junko on the farm#tips#junko#life hacks#sunlight#sunshine#daylight#hack#outdoors#camping#survival
5 notes
·
View notes
Text
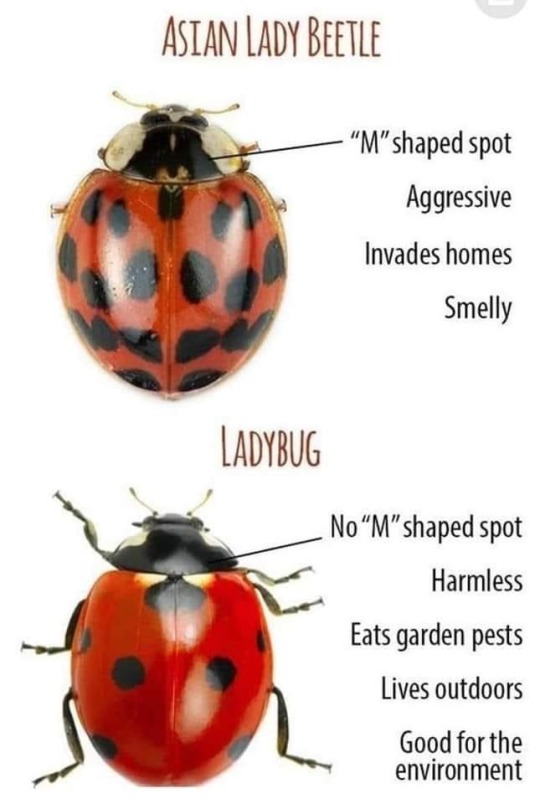
#homesteading#junko on the farm#garden#gardening#tips#junko#organic#insects#identification#bugs#ladybugs#pest control#pests#beetle#beetles
9 notes
·
View notes
Text
#homesteading#junko on the farm#garden#gardening#tips#junko#organic#life hacks#chicken#manure#compost#farm#farming#natural#dirt#chickens#livestock
3 notes
·
View notes
Text
Dandelion Jelly Recipe

INGREDIENTS
2 cups cut dandelion flowers
4 cups boiling water
2 Tbsp lemon juice
1 pouch powdered pectin
4 cups sugar
DIRECTIONS
Gather dandelion flowers. You only need the blossoms, not the leaves or stems. Make sure to gather your flowers in an area that is clean, not near the side of the road or where pets have been kept.
After gathering the flowers, cut the green part off of the bottom. Cut close to the base and then remove any remaining green parts with your fingers. Leaving any green pieces can ruin the flavor of the jelly, as dandelion leaves are quite bitter.
After trimming the dandelions, pour boiling water over the flower petals. Let it sit until it cools down then cover and place it into the fridge for 24 hours.
After it’s finished steeping, strain it well and squeeze out as much liquid as possible. Measure out 3 1/2 to 4 cups of liquid and pour it into a large pot, add lemon juice and pectin, then bring to a boil. Add sugar, stir well and return to a boil. Boil the jelly for 1 to 2 minutes and remove from heat.
Pour the jelly into hot canning jars leaving 1/4 inch of headspace.
Run a spatula around the inside edge to remove any air bubbles. Then wipe the edge of the jar clean and place the lids and rings on finger tight.
Place the jars in a water bath canner and process for 10 minutes or according to your altitude.
Remove the jars from the canner and place on a towel. Allow them to sit undisturbed for 24 hours to let the seal harden. Any jars that haven’t sealed need to be put in the fridge to use first or reprocessed.
HOW TO FIX RUNNY JELLY
#homesteading#junko on the farm#garden#gardening#tips#homemade#junko#life hacks#organic#jelly#jam#dandelion#dandelions#wildflowers#flowers
3 notes
·
View notes
Text
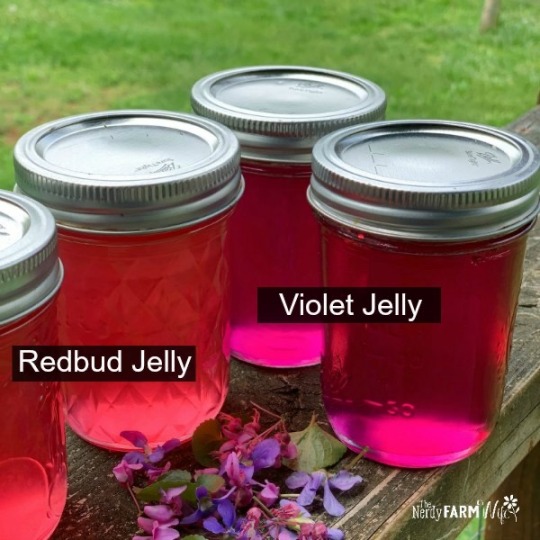
Homemade Violet Jelly Recipe

INGREDIENTS
2 to 3 cups loosely packed violet blooms
the juice of one large lemon
2 1/2 cups boiling water
1 package of Sure-Jell pectin
3 1/2 cups sugar
DIRECTIONS
Step 1 – Make a Violet Infusion
Gather two to three cups of violet blossoms and pour 2 1/2 cups of boiling water over them.
The mixture will begin to turn aqua then eventually a deep blue or purple depending upon the shades of violets used.
Step 2 – Strain & Add Lemon Juice
After the violets have infused for several hours, strain the infusion, and add the juice of one lemon.
The blue will quickly turn from blue to purple. Now, mix the pectin with the flower/lemon juice mixture, and stir the mixture in a heavy duty saucepan over high heat until it reaches a heavy boil.
Boil for one minute then add the sugar all at once.
Keep stirring, return to a boil for one minute.
Remove from heat and quickly ladle into prepared jars.
You can either store the jelly in the refrigerator for two weeks or process in a water bath for five minutes, for longer storage.
[water bath canning]
REDBUD JELLY VARIATION
HOW TO FIX RUNNY JELLY
#homesteading#junko on the farm#garden#gardening#tips#homemade#junko#organic#wildflowers#jelly#canning#violet#jam#off grid
4 notes
·
View notes
Text
Homemade stock, unlike broth, is thicker and more flavorful. Made from bones, it offers a nutritional punch (calcium, magnesium, potassium, collagen, amino acids, and more) without the high salt and trans-fatty acids from store-bought alternatives.
Pro tip: Make it ahead of time and freeze for a healthier stock or broth replacement. Try to make ramen with homemade stock and prepare to be amazed 🤤


#homesteading#junko on the farm#tips#chicken#stock#broth#bone broth#chicken stock#bones#healthy#homemade
7 notes
·
View notes
Text

18 notes
·
View notes
Text
2 notes
·
View notes
Text
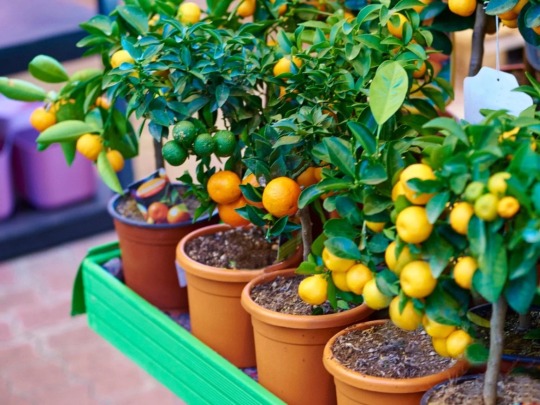
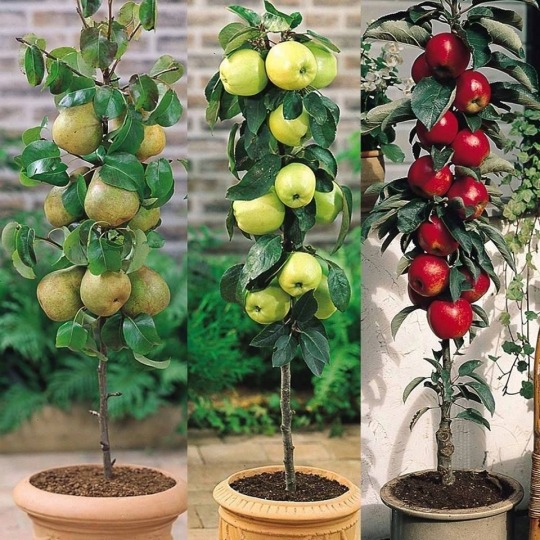
DWARF FRUIT TREES


#homesteading#junko on the farm#garden#gardening#fruit#fruit trees#dwarf#dwarf fruit trees#mini#miniature#cultivate#apples#cherries#cherry#banana#pears#natural#organic#home grown#orchard#fruit orchard
7 notes
·
View notes
Text
DARK & BEAUTIFUL GARDEN PLANTS


BLACK BEAUTY TOMATOES
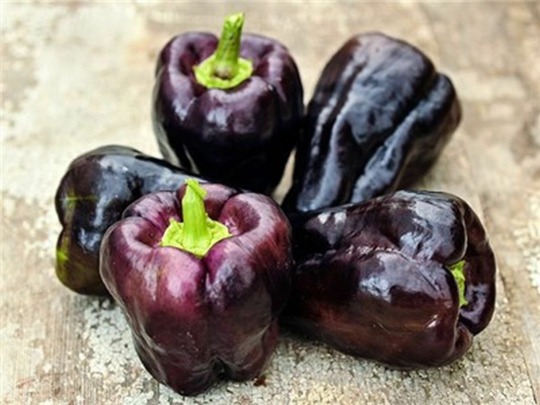
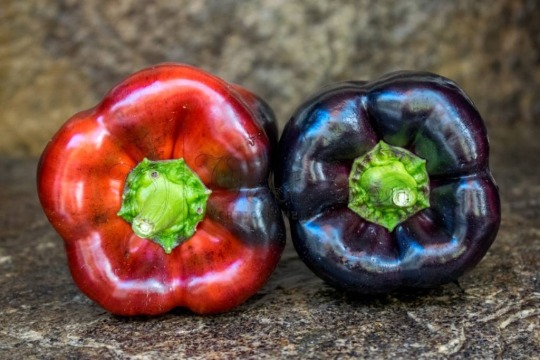
ZULU BELL PEPPERS
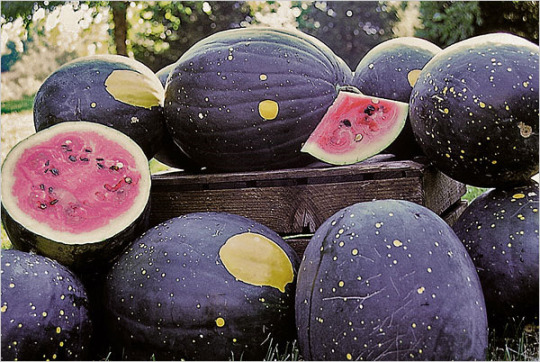
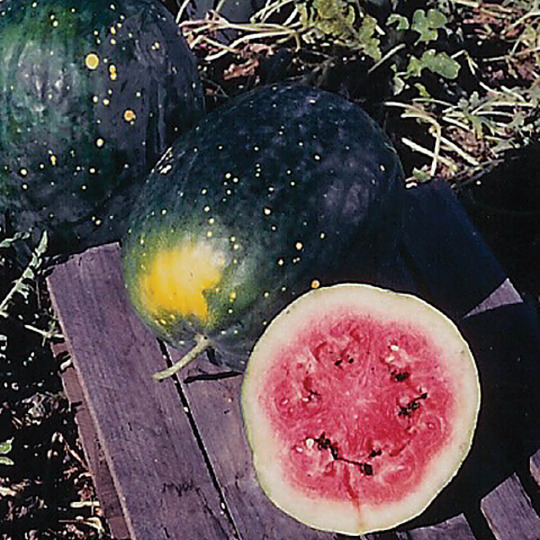
MOON & STARS WATERMELON

BLACK NEBULA CARROTS

DARK OPAL BASIL
10 notes
·
View notes
Text

GROW ALL YEAR WITH AN UNDERGROUND GREENHOUSE
If eating Fresh Vegetables and Fruits Year Round is important to You and Your Family, you might consider building an Underground Greenhouse. It will keep the temperatures warmer in the Winter and help prevent overheating in the Summer; making it possible to grow your garden vegetables year round.
For the vast majority of the country, 4 feet below the surface will stay between 50° to 60°F even if the weather above the ground gets to 10°F or colder. This is what they call the thermal constant, and what the Underground Greenhouse is based on.
The original design for an Underground Greenhouse was invented in Bolivia, and was called a Walipini, an Aymara Indian word which means “a warm place.” A Walipini is a rectangular shaped Greenhouse that is dug down 6-8 feet deep in the ground. The longest area of the rectangle will face towards the south (in the Northern Hemisphere) to take advantage of the most sunlight.
The design of the Underground Greenhouse isn’t that complicated, as it can be as simple as a hole with plastic sheets laid on top. The roof seals in the heat and insulates the area to keep a warm, moist environment for your fruits and vegetables.
The location of your Walipini will depend on how big you want it to be. You’ll need enough space to grow your plants and have a small area to walk into your greenhouse. The bottom of the Greenhouse will need to be at least 5 feet above the water table in your area. The recommended size for an Underground Greenhouse is 8 x 12 feet.
When planning where your Greenhouse will be located, remember that your roof will need to receive light during the winter, also. This means that you will have to make sure that trees or buildings don't block it during the winter time when the sun is in the South. In most cases, your Underground Greenhouse should be set up East to West, with the roof facing South to take advantage of the Winter Sun.
Once it's decided where your Underground Greenhouse will be located, you can start digging. Plot out the area above ground to keep track of where you should be digging. While you’re excavating, dig at least 2 feet deeper than your desired depth. Keep your soil close by to help prop up the roof.
The walls of your Underground Greenhouse should have a minimum 6-inch slope from the roof to the floor. This will greatly reduce the amount of crumbling and caving that will occur with the soil. You can also layer the walls with a clay to prevent erosion, or use bricks to stabilize the walls of the building.
While you’re digging the hole, dig an extra 2 feet below the desired depth. You’ll fill this area with stone or gravel and then 8 inches of soil. Ideally, you’d lay larger stones and gravel on the bottom layer and the gravel would become progressively smaller until you reach the soil.
The bottom of the greenhouse should be slightly sloped from the center to the edges. Along the perimeter, you should leave a space of 2-3 feet just filled with gravel. This is designed to help the water drain more easily. Many people have also created open gravel wells in the corners of the greenhouses that allows them to collect the water. This will allow you to draw a bucket into the hole and pull out water if you find you have too much.
Once the floor is filled in with the drainage system, and the soil required for growing, the doors can be installed. Place the door frame at the base of the ramp and fill in the areas around the door as much as possible with dirt and clay. Filling in these gaps will prevent heat loss in your greenhouse.
Many times, people will use 2-inch door frames that have holes drilled into the top middle and bottom of each side. They will then use wooden stakes, dowels or rebar to secure the door frame into the soil wall.
The angle of the roof will make a big difference on the sun’s ability to heat your greenhouse. Ideally, the roof should be facing directly at the winter solstice at a 90 angle. This angle will maximize the heat during the winter solstice and minimize the heat during the summer solstice.
Now, you can use that extra soil that you have left over to create a berm. The berm is basically an extension of the north wall of the greenhouse. This allows you to control the angle of the roof by adding or taking away dirt. Build up the berm to continue the slope that you used on the wall. If you’re using bricks – continue using them on the berm.
The most economical, durable material for your roof is 4-inch PVC pipe. Using PVC elbow pieces, joiners, etc, you can create a flat roof frame that will cover your Underground Greenhouse.
After you’ve created a PVC frame, lay it in place on the top of your hole. Then lay plastic sheeting across the top of the frame and make sure that it extends past the edge of the frame by at least 1 foot. This flap will prevent run off water from the roof from running back into the greenhouse itself.
Once the plastic material is put on top of the roof frame, move inside and tack another layer of plastic wrap along the inside of the roof frame. This internal plastic sheeting will create a 4-inch barrier between the inside and outside of the roof, and will act as an insulator that will keep the heat in more effectively.
You’ll want to make sure that you leave a few inches of plastic hanging down on the lower (south) end of your roof. This will force moisture that collects on the roof to drip off above the drainage system or on top of your plants instead of at the base of the roof. If you allow the moisture to run to the base of the roof frame, it may affect the soil at that location and break down your wall, etc.
Ventilation is always crucial. You have 3 options, such as: Installing two doors, one at each end; installing a vent roughly the size of the door at the top of the back wall; or installing a chimney at the center of the back wall. Good Luck on your Greenhouse.
4 notes
·
View notes
Text
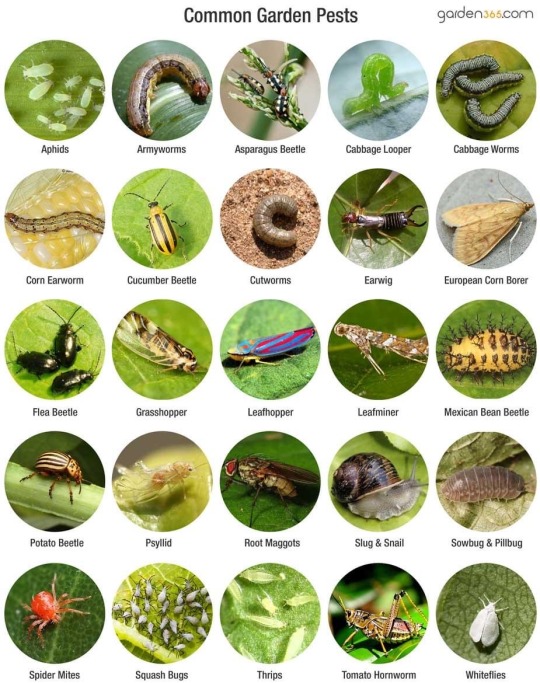
TOP GARDEN PESTS--WHAT WORKED + DIDN'T
Here is some good information from a survey that Mother Earth News did to learn more about what works, and doesn't, when it comes to limiting insect damage in organic vegetable gardens. They had 1300 gardeners from across the United States respond, so is pretty good. I've included 7 of the top garden pests and info:
1) SLUGS-- took top honors as the most bothersome pest in home gardens, with 55 percent of respondents saying the slimy critters give them trouble year after year. Handpicking was highly rated as a control measure (87 percent success rate), followed by iron phosphate baits (86 percent) and diatomaceous earth (84 percent). Opinion was divided on eggshell barriers (crushed eggshells sprinkled around plants), with a 33 percent failure rate among gardeners who had tried that slug control method. An easy home remedy that received widespread support was beer traps (80 percent success rate).
2) SQUASH BUGS-- had sabotaged summer and winter squash for 51 percent of respondents, and even ducks couldn’t solve a serious squash bug problem. Most gardeners reported using handpicking as their primary defense, along with cleaning up infested plants at season’s end to interrupt the squash bug life cycle. The value of companion planting for squash bug management was a point of disagreement for respondents, with 21 percent saying it’s the best control method and 34 percent saying it doesn’t help.
Of the gardeners who had tried it, 79 percent said spraying neem on egg clusters and juvenile squash bugs is helpful. About 74 percent of row cover users found them useful in managing squash bugs.
3) APHIDS-- were on the watch list of 50 percent of respondents, but the success rates of various control techniques were quite high. Active interventions, including pruning off the affected plant parts and applying insecticidal soap, were reported effective, but so were more passive methods, such as attracting beneficial insects by planting flowers and herbs. Several readers noted the ability of sweet alyssum and other flowers to attract hoverflies, which eat aphids. “We attract a lot of beneficials by planting carefree flowers in the vegetable garden, including calendula, borage, zinnias, cosmos and nasturtiums” (Midwest, more than 20 years of experience).
4) SQUASH VINE BORERS-- had caused problems for 47 percent of the survey respondents. The best reported control methods were crop rotation and growing resistant varieties ofCucurbita moschata, which includes butternut squash and a few varieties of pumpkin. TheC. moschata varieties are borer-resistant because they have solid stems. Interestingly, if you’re attempting to fend off squash vine borers, lanky, long-vined, open-pollinated varieties of summer squash (zucchini and yellow crookneck, for example) may fare better than hybrids, because OP varieties are more likely to develop supplemental roots where the vines touch the ground.
Many gardeners dump soil over these places, so if squash vine borers attack a plant’s main stem, the plant can keep on growing from its backup root system.
5) JAPANESE BEETLES-- Forty-six percent of respondents reported working in the unwelcome company of Japanese beetles, with handpicking being the most popular control method. Some gardeners grow trap crops of raspberries or other fruits to keep Japanese beetles away from plants. Several commonly used interventions — garlic-pepper spray, milky spore disease, pheromone traps and row covers — had high failure rates.
6) TOMATO HORNWORMS-- were of concern to 42 percent of our survey respondents. Bt and handpicking were the preferred control methods, and several folks commented that tomato hornworms are among the easiest garden pests to handpick (probably because they’re large, easy to spot and produce a telltale, pebbly trail). Many gardeners reported seeing tomato hornworms often covered with rice-like cocoons of parasitic braconid wasps. “I had a lot of tomato hornworms this year, but the wasps took them out! Just like in the photos online and in bug books!” (Mid-Atlantic, more than 20 years of experience). Gardeners named zinnias and borage as good companion plants for reducing hornworm problems.
7) CUTWORMS-- were a concern for 41 percent of respondents, and effectiveness ratings for using rigid collars (made from plastic drinking cups or cardboard tissue rolls) to protect young seedlings from damage were amazingly high (93 percent effectiveness rating). A common practice to reduce cutworm damage is to cultivate the soil’s surface once or twice before planting and hope robins and other bug-eating birds will swoop in to gather the juicy cutworms. Big, sturdy seedlings are naturally resistant to cutworms, so many gardeners said they set out seedlings a bit late to avoid cutworm damage.
#garden#gardening#homesteading#junko on the farm#pests#pest control#garden pests#organic#bugs#natural#solution
4 notes
·
View notes
Text
Prettiest Unique Garden Veggies

•Purple Majesty Potatoes

•Chioggia Beets


• Scarlet Runner Beans

• Glass Gem Corn
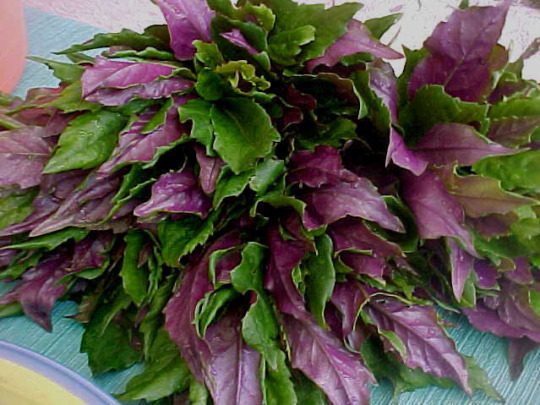
• Okinawa Spinach

• Rainbow Carrots

• Pineberries

• Tricolor Pole Beans
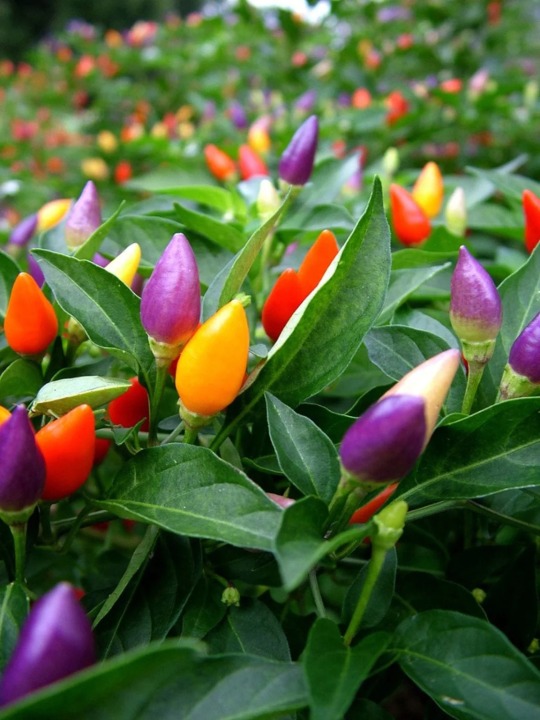
• Bolivian Rainbow Peppers
#garden#gardening#homesteading#junko on the farm#cute#pretty plants#beautiful#unique#vegetables#interesting#fruits#beets#peppers#glass gem corn#indian corn#pineberry#pineberries#rainbow#potatoes#purple#colorful#variety
56 notes
·
View notes