
Thoughts, opinions and projects from a Croatian animator studying at Gobelins
Don't wanna be here? Send us removal request.
Statistics
We looked inside some of the posts by kpavicic and here's what we found interesting.
Average Info
Notes Per Post
600
Likes Per Post
493
Reblog Per Post
100
Reply Per Post
7
Time Between Posts
1 month
Number of Posts By Type
Video
1
Text
15
Photo
1
Last Seen Tumblr Blogs


Fun Fact
BuzzFeed published a report claiming that Tumblr was utilized as a distribution channel for Russian agents to influence American voting habits during the 2016 presidential election in Feb 2018.
Video
tumblr
Inspired by Joann Sfar’s ‘Le Bestiaire Amoureux’ @josephine-meis and I decided to recreate a few of his panels and animate Aspirine, the protagonist.
158 notes
·
View notes
Text
Space Skunk
I’m very fond of Lee Gatlin's’ illustrations. He has this unique texture to his works. Usually, 3D isn’t messy and rough. You stick to the workflow and three to four weeks later you’re done, maybe. This was my attempt at reworking his illustration in 3D and exploring modeling further.
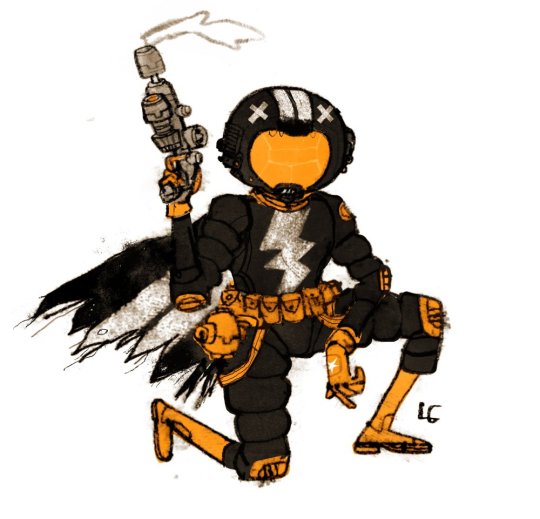
Above: Space Skunk by Lee Gatlin
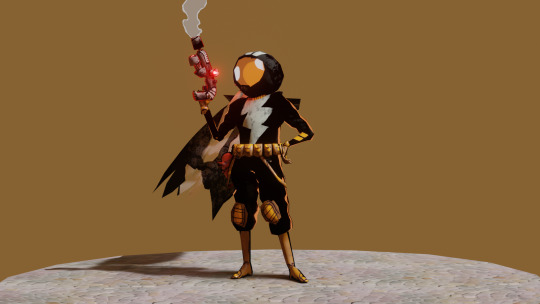
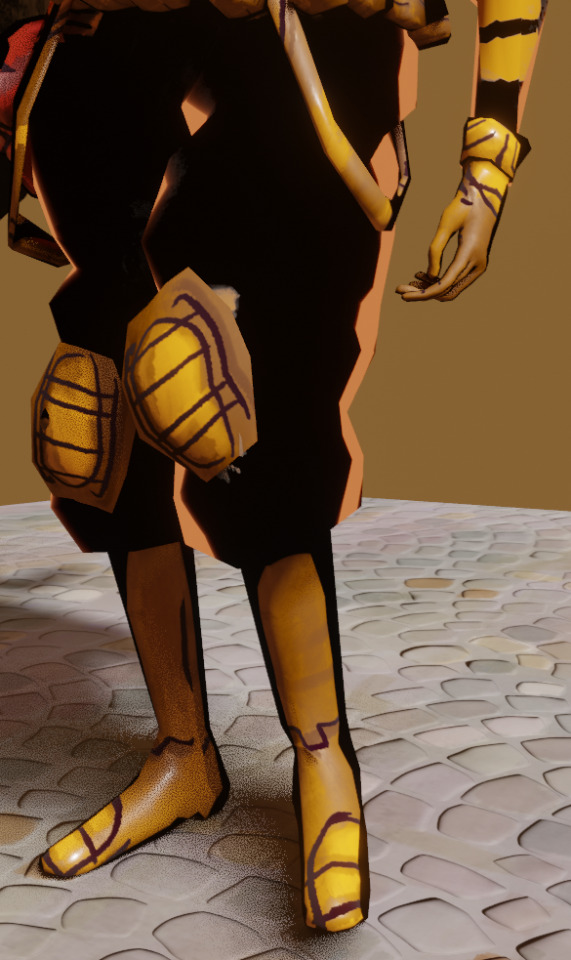
I wanted to go ahead and push myself into the more uncertain ways of creating. There were two set rules; the UV map would be made beforehand & the project needs to be finished in less than a day. The map I drew was not as much of a real texture sheet but more a conglomeration of patterns, shapes, and symbols I got from looking at the drawing which I would later fit into the character somehow.
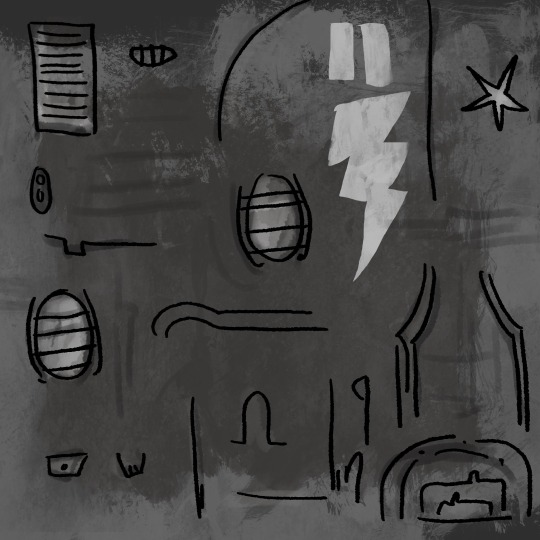
I didn’t care much for triangles, penetration, and other production-y details. However, I didn’t move far enough from traditional workflows. I will have to continue the exploration.
Here is the timelapse with a little animation at the end. It took three hours to complete.
vimeo
40 notes
·
View notes
Text
Updates
It’s been a while since I posted. Today is my graduation day. During the year I worked in a 7 person team on a movie named Dogs and now that project, and my schooling, is finally wrapped up.
I will be posting some personal stuff I have been working on since I have more time to prepare it.
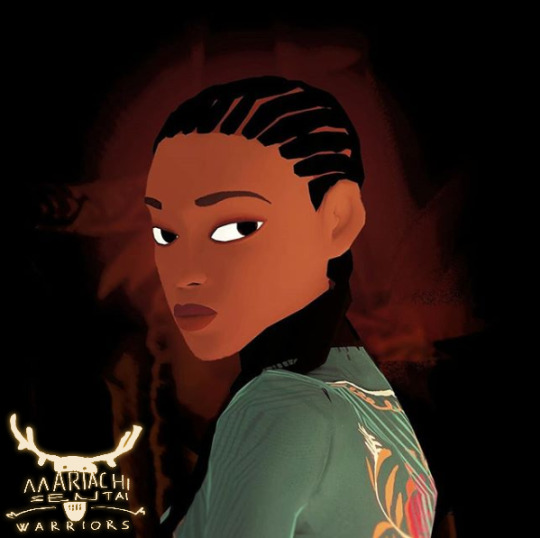
One other finished project is a short advertisement for our (@josephine-meis and mine) TV series “Mariachi Sentai Warriors”. (We also have a website now)
vimeo
I’m still not too happy with the color correction of the video, but it was a good test for our pipeline. This was the first time we’ve put all the elements properly into a renderable scene. After seeing all the issues we had to go back and reorganize the way we sort and name files. Each shot in this trailer was a separate file which was good for lighting, but ultimately bad for keeping colors consistent. A bit more research is needed to figure out how to deal with scenes that contain multiple shots.
For more MSW check out @josephine-meis and our instagram!

22 notes
·
View notes
Photo
I wrote a script for Blender 2.8 that automatically hides hair systems during character posing. It removes lag and the need to manually fiddle with particle visibility.
It is now free on my Gumroad. Go get it! :)
154 notes
·
View notes
Text
MSW production blog #5 - Facial Rig Setup
Welcome to part two of my rigging posts:
General Rigging
Facial Rig Setup <--- you are here
Lookdev and Shading Research
Last time I talked about making modular rigs and preparing for easy skinning. Once such preparation was creating a base facial topology structure which could be used for all four of our characters. The process started with modeling one head and creating all the blend shapes. This made us notice topological flow issues, so we had to delete blend shapes and fix up the areas with problems.
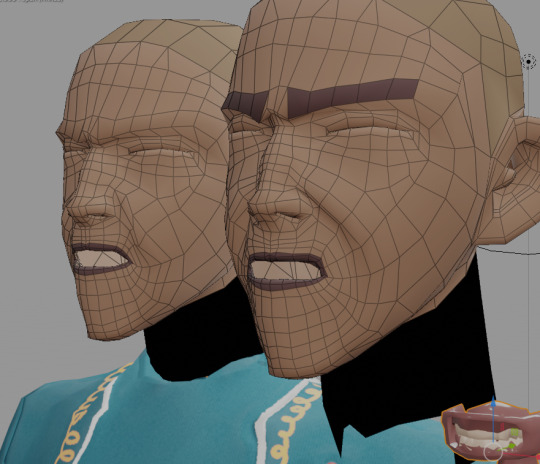
Old geometry on the left and corrections on the right.
Nasal topology is important for getting sharp creases that help expressions read well. As you can see I had made a mistake and placed a star right at the place the creasing had to happen.
Once the mesh is ready we created 21 FACS blend shapes that come together to form expressions (if you want to learn more about the Facial Action Coding System check out this link. It was a great reference). Those can be copied to the mesh of the other characters since they have identical topology. However, as the topology distribution changed, hand adjustments will be necessary.
All the shapes showcased on a second character that uses our base topology shown in the first picture in this post (sculpted by @josephine-meis )
The blend shapes are separated into left and right ones using a weight map blend. Some shapes are more extreme to fit our shows’ style.
Final setup with drivers connected to bones.
Originally I planned to do a bone rig but opted to do a pure shape driven setup in order to save time on weight painting which would require a lot more fiddling for appeal. Ideally, we would set up a combination of the two, but the deformation bones would need to be driven by the shape deformations (otherwise activating a shape key would move geometry while to bones would stay in place and you would need to use them with offset). I was not able to figure a way to implement this (DM me if you know how to).
I’m aware this post was not filled with a lot of tricks, but our biggest takeaway is to progress with one character before proceeding onto others. Keep one character ahead in the pipeline so that when things go wrong fixing is easier. If we had modeled all the heads before starting blend shape testing on our main head, all the heads would have needed to be reworked and quite possibly deleted.
Instagram
46 notes
·
View notes
Text
MSW production blog #4 - General Rigging
Welcome back to another production blog.
With rigging almost finished there is a lot to cover so I’ll separate it into three posts:
General Rigging
Facial Rig Setup
Lookdev and Shading Research
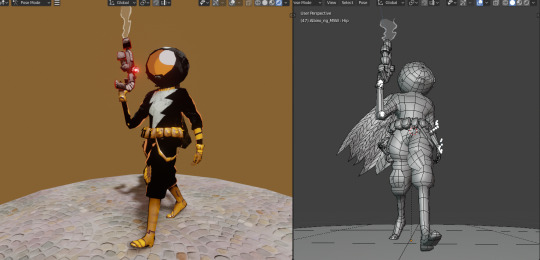
We have four main characters that I was sure were going to share a rig. To get skinning done as fast as possible I also opted to create one base mesh for the face that could be adapted for all the characters. Even though efficiency was my concern I still wanted to push for a high standard so that the rigs can hold up in any situation. All controls had to be created even if they were not necessary for the trailer so that we have finished characters ready for production. The fight suits also have shared topology with only differences in texturing and proportions. This meant all my tests with one character will be more or less transferable onto the other three. The head and the body are skinned separately to the armature so that bodies can be swapped out.
The rig is an enhanced version of the one I’ve shown in previous posts.

The rig in its current stage.
Our rig methodology (Described in this post) caused some tricky problems. Because our bones stretch to the elbow and wrist instead of rotating the mesh is usually not oriented in the right direction. This is not much of a problem for the legs since they are always facing the same general direction. However, the arms have a wide range of movements and bends that caused geometry collapses.
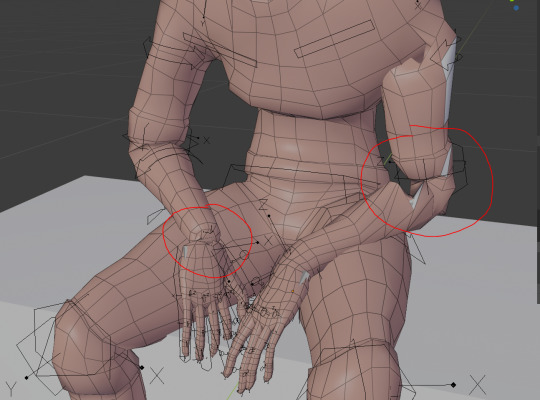
Two geo collapses caused by incorrect bone rotations when posing.
To fix this I made four little bones that were parented to the forearm bone. They will be deforming the geo while the old forearm bone is just a stretch guide. The small bones have a Copy Rotation constraint on their downward axis with gradually larger influences. There key in this setup is to detach the bones from each other and parent them to the forearm bone otherwise rotation of each bone would affect the next one in the chain.
The gif shows this implementation. (Apologies for the heavy compression, Tumblr has a 1Gb limit). Additionally, the bones are segmented for smoothness.
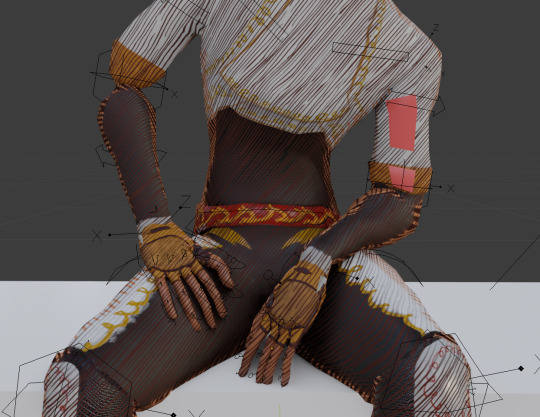
And finally, we have our posing results. Here the left arm is using the new setup.
This has been a small insight into recent journeys and problems I have been solving for the past few weeks.
Catch the next post soon in which I’ll write about facial rig setups for the characters :)
For less talking and more images follow our instagram: @MariachiSentaiWarriors.
6 notes
·
View notes
Text
MSW now on Instagram
That’s right! If reading is not quite your thing we now have an official MarriachiSentaiWarriors development Instagram account where we post concepts, animation tests, and other goodies.
https://www.instagram.com/mariachisentaiwarriors/
Modelisation by @josephine-meis
13 notes
·
View notes
Text
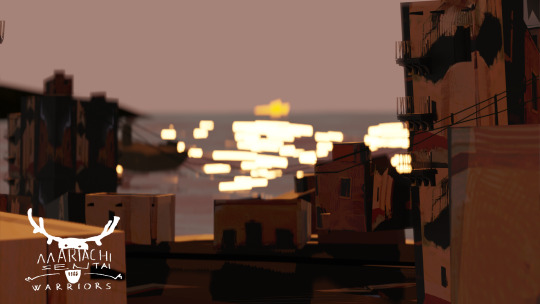
MSW production blog #3
Time to catch up!
The year is coming close to its end so deadlines for our graduation movie are catching up to us. Despite that, we still manage to find some time to move things forward. This time I’m focusing on our approaches to concept art and how I’m managing and planning the rig workflow for our diverse cast of nine characters.
3D Concept Art
The concept above is a quickly made 3d scene. My idea is that we should make use of 3d software for figuring out designs that would eventually become real models instead of always drawing sketches and then appropriating them into 3d. The scene here is something constructed in around 30-40 minutes. Originally I was working on a concept for a street in the city, roughly and carelessly modeling houses as quickly as I could. Once the modeling was done I UV projected the whole street from my camera view. That way I could just paint the whole scene easily. With the assets done I just recycled them to work as a seaside mood piece. Even though the textures are mostly broken, the color scheme and idea is preserved. That’s all we need.
Rigging
Our trailer is featuring a huge amount of characters and I’ve been thinking a lot about how to handle the rigging in an easy and least destructive way. All together we have nine characters. As our main four characters are all wearing suits that only differ in color we’re using the same base mesh and just altering proportions. The bodies and heads are then attached to the rig as separate meshes so that we can swap out outfits later if necessary. So far the body part of the rig is working well and since we have some nice bendy bones on it I’ve spent the weekend scripting a little tool to help us switch bone types and world spaces in our rigs quicker. Here’s a demo of the tool in action.
Blender’s bone segments are really helpful with getting smooth bone-to-bone deformation transitions. Here is another showcase of how I used them to control the tail of our monster. I am more than pleased with the result and ease of use we’re achieving.
January will be packed with preparing for animation. Since it’s essentially asset building month, @josephine-meis and I will have lots to show (if all goes well). Stay tuned for more tips, thoughts and concept art.
Till next time!
If you enjoy reading our production blogs feel free to leave us a message and/or tell a friend.
14 notes
·
View notes
Text
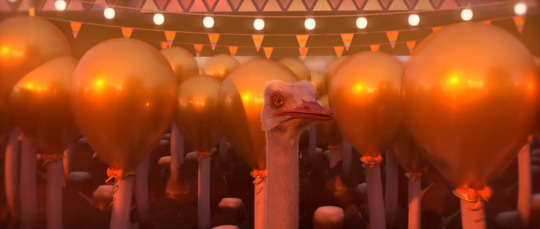
The Ostrich Politic
My colleague’s last year graduation film was just released. The Ostrich Politic by Mohammad Houhou. He did most of the movie on his on with a few of us helping on concepts, anim and in other areas. It’re a really great achievement. Check it out:
youtube
And here is the shot I animated for it:
7 notes
·
View notes
Text
MSW production blog #2
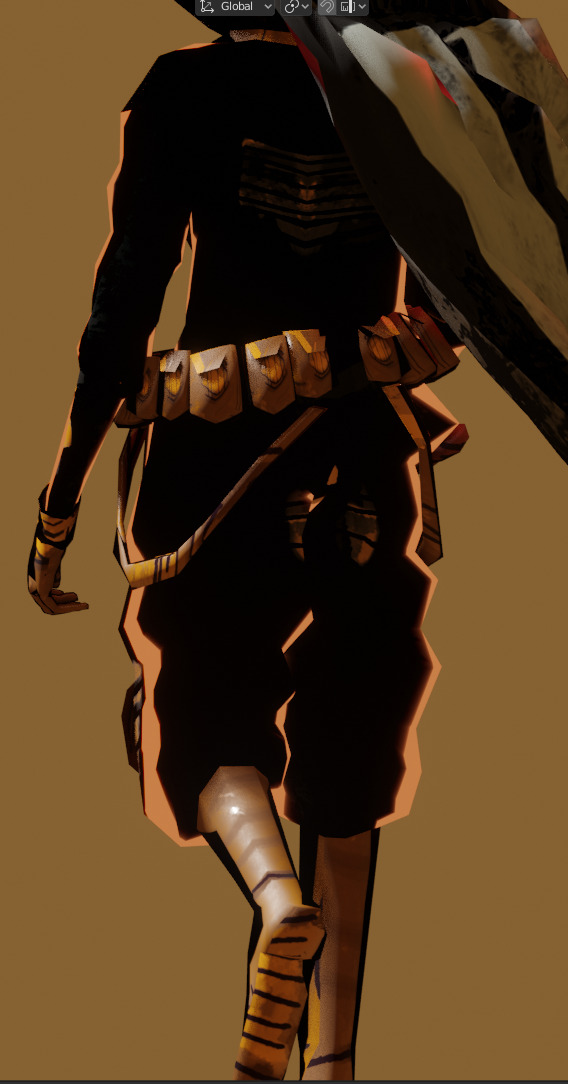
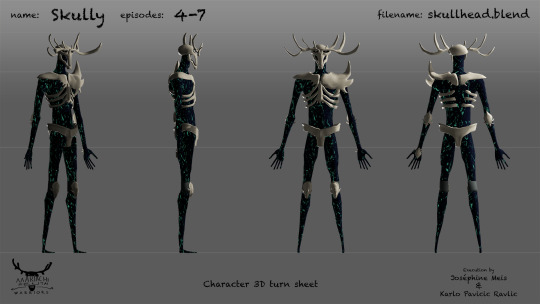
It’s been quite a while so it’s time for an update. School has started more than a month ago so it searching for an apartment took a big chunk of my energy, but @josephine-meis was hard at work on storyboard revisions (we also had a viewing in school with some of our colleagues to get feedback). This version is now more coherent so hopefully, reactions will be good and we will wrap up preproduction in a month or so. (Below: Skully with final shaders and WIP texturing)
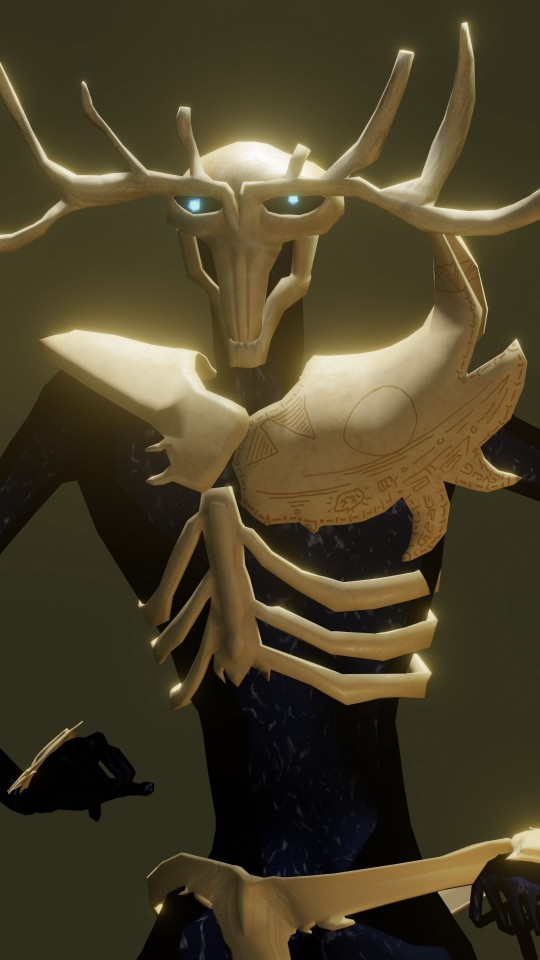
Our Skully is now rigged using the previously mentioned method and I ‘ve started working on textures. We’re lucky enough to have a few Mexicans in the new international class so they’re helping us from time to time as cultural advisors. Here you can see an animation test using the older version of the rig. It’s a very rough block but mainly it served for seeing if the rig is easy to animate.
Here are a few shaders I did for exploration. The first image in this post (above) is the final shaders with WIP textures.

Also be sure to head over to @josephine-meis blog and check out the cool props and designs she’s been working on. For any questions feel free to DM us. Thanks for reading!
9 notes
·
View notes
Text
MSW production blog #1

Mariachi Sentai Warriors is an animated TV series for young adults that follows a mariachi band, who are also a sentai team, as they fight monsters and the biggest battle of all; maturing and dealing with relationships, self-care, grief and mental health.
Mariachi Sentai Warriors is a cartoon utilising realtime technology (Blender’s Eevee engine) being developed by @josephine-meis and myself for stream TV pitching. For now the plan is to develop a 20s teaser, a minute long trailer and a season 1 script along with concept art. This production blog (and the blog over at Jose’s tumblr) will share insight into work and technical aspects that go intro creating our show.
Lately we’ve been busy assembling lots of stuff at the same time so there aren’t too many pictures we can share now. The global season script is still under development but most of the main character designs are approved and at the modelling stage.
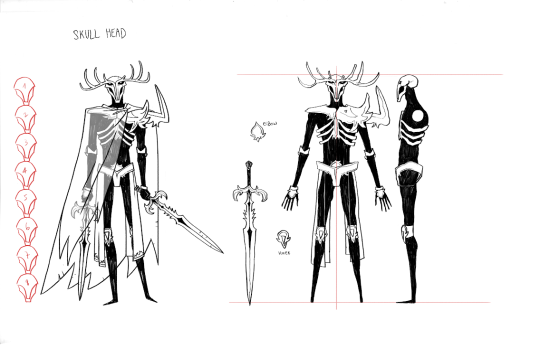
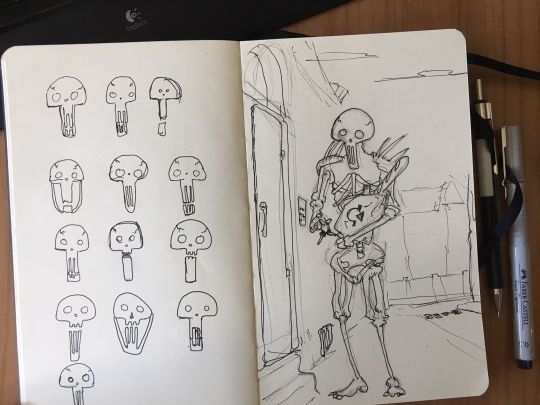
We’re really fond of the wonky, quickly-drawn aesthetic so to break up the symmetry and get a sketchbooky vibe Jose drew the turns with her weaker hand. I took the refs then and modelled the character by hand without using mirroring to further push the look. Then a 3D sheet is assembled. These are used for model approval and for asset overview.
Next I will try to implement our stretchy-rig technique outlined in a previous post onto the model and an animation test on twos will be done.
As I said, not too much content this time. If you like the project help us spread the word about it! :)
Until next time!
18 notes
·
View notes
Text
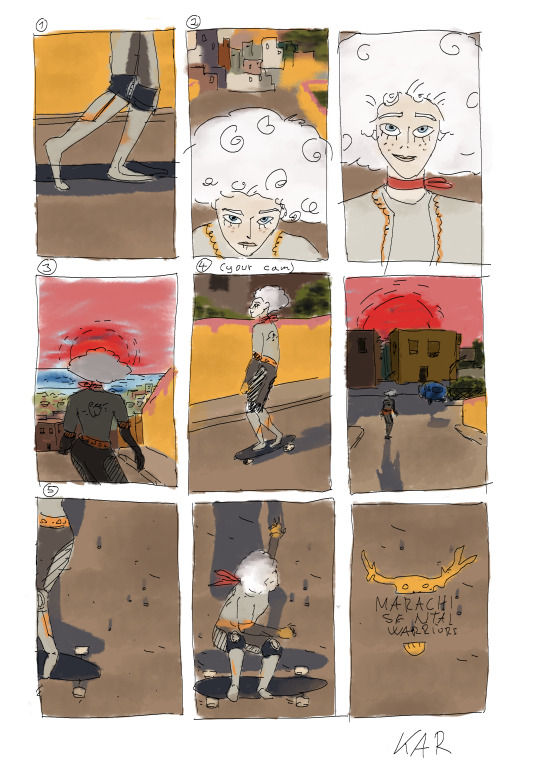
Summer project (sentai warriors)
School is over and I’ve started work on a summer sentai warrior project with @josephine-meis. We’re still in the concept phase but the main goals, for now, are to do some fight sequences and create a short using Blender’s new real-time capabilities (Eevee).
I want the animation to have a crafty feel so instead of going for standard ik/fk rigs I’m testing a system where you position joints instead of bones. That way the animator has to try and maintain lengths by eye. Here is what I came up with. it’s working well so far for the arms, but it might not hold up when animating run cycles.
For the fx we decided to go with 2d. The grease pencil could be utilized for drawing directly in 3d, so tests need to be done. For now, enjoy this small 3d fx:
17 notes
·
View notes
Text
Kalopsia shot progression
vimeo
Some of the playblasts from one of my shots put together.
4 notes
·
View notes
Text
Kalopsia is online
vimeo
#Gobelins#school#short#film#space#love#hate#blender#maya#3d#lighting#nude#girl#astronaut#station#earth#art
18 notes
·
View notes
Text
We finished our short!

On 30th of May, seventeen teams finished seventeen shorts. That’s really an amazing achievement, I am so proud of everyone. Watching all the shorts was pure pleasure and joy! Our fourth module was about designing characters and bringing them into a short film that would last around 20 seconds in the span of three months. The module is over now and I will be happy to present Kalopsia to all of you soon :)
3 notes
·
View notes
Text
2D character design
It’s been a while :)
During the past month or so we’ve had an ongoing module about character creation. Starting from a single word and finishing with a fully rigged and production ready 3D Maya file. I have waited for the first part to be finished so I can post all the progress together and write about it. Today I will write about character design and modeling. I’m not sure if I will be going into rigging but there will be another blog post on storyboarding/animation.
The personality trait I was given was “violent”. Each of the three people in the group was tasked to create one character based on the keyword that will fit in the same world as the others.
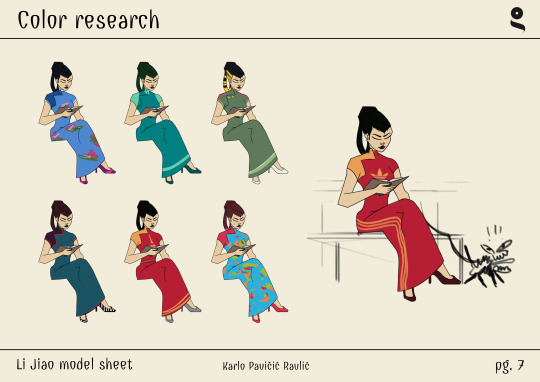
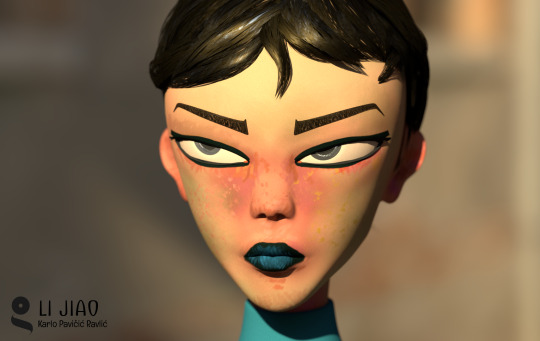
I tried to go with a subtler design as I don’t believe you can tell what kind of a person someone is based just on their looks. My character was going to be a contained passive-aggressive woman who cares about her looks, but more for herself than others.
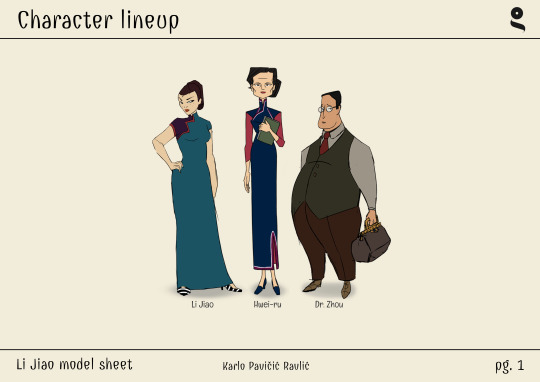
This was our reference board. The time and place chosen were 1930′s China.
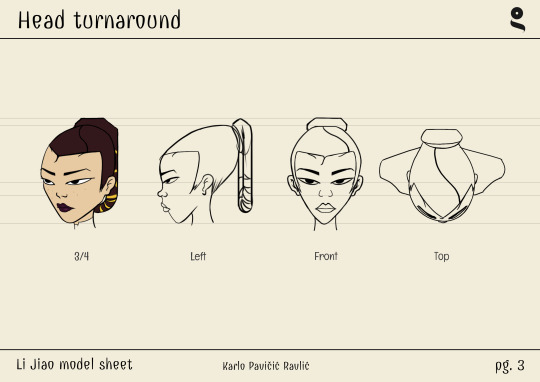
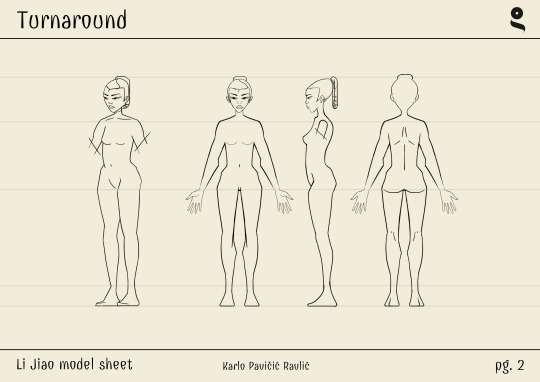
Here are a few images from our character bible. Precise body and head turnarounds were helpful for quickly getting the form down in 3D. The last image shows all our characters together.
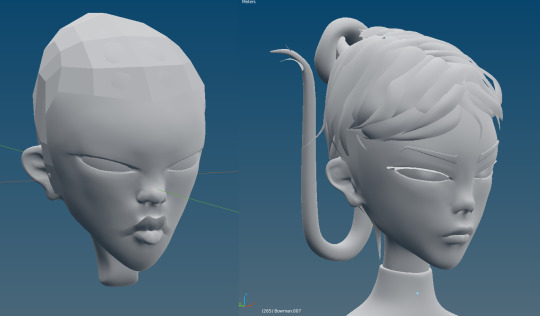
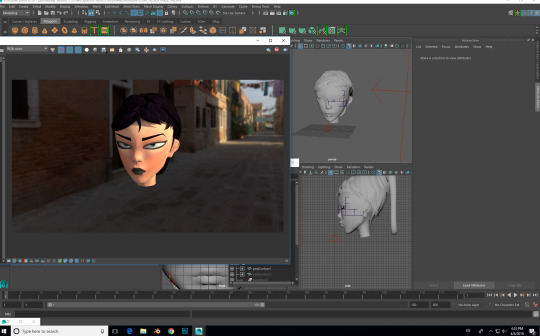
My modeling software of choice was Blender as I find it quickest for retopo. I planed to do sculpting in Zbrush, but since we don’t have it on school computers I decided to see how well Blender can handle it. Sculpting is a great way to start since you can quickly iterate the model without getting lost in vertices and details. Focusing on landmarks early on makes topology a breeze. Here is my day one head sculpt next to the final version (about three days apart).
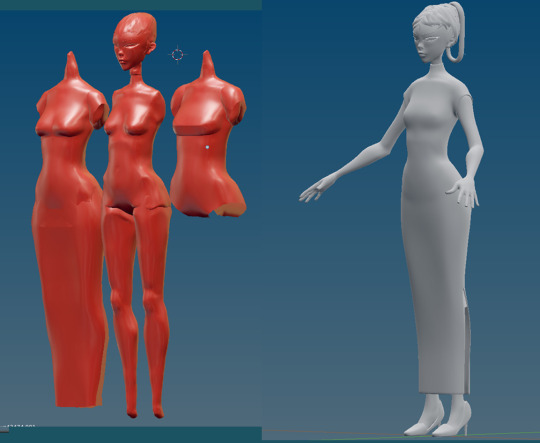
The body had to go through a much longer process. I love sculpting anatomy and bones, but that simply didn’t fit the style of the group so I had to go back multiple times and simplify my forms. It was an interesting challenge keeping the form while removing details.
The final turnaround submitted can be seen below.
vimeo
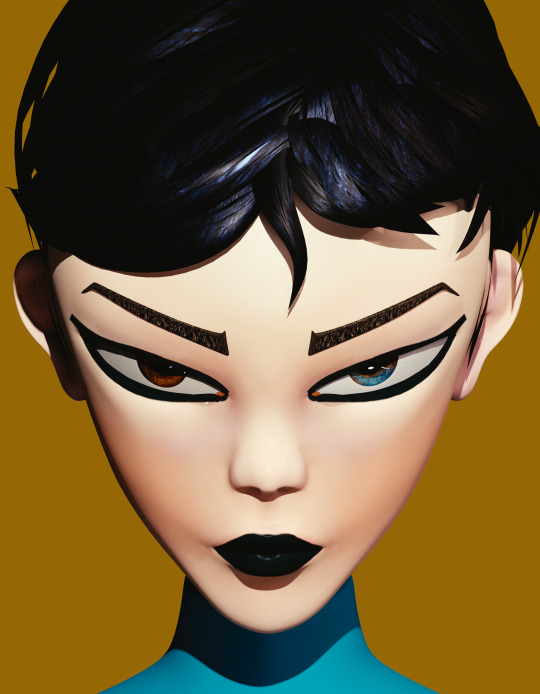
The character is now undergoing rigging and shading adjustments so I will just share a few close-to-final renders/lookdev.
#gobelins#animation#character design#design#2d#character#drawing#illustration#maya#blender#cgi#blog#shading#lighting#rendering#lookdev#art#process#beautiful
64 notes
·
View notes
Text
Learning to animate quadrupeds
Our first module was focused on animal movement and shifting of weight. We were led to the zoo do take some referential footage and drawings. It’s nice being able to see animals because sometimes you get lucky and see something fascinating. This is a drawing of a monkey I captured who jumped to the top of the cage, took a berry and ate it. I just couldn’t believe it. I kept looking at my classmates going “woah! Did you see that.”
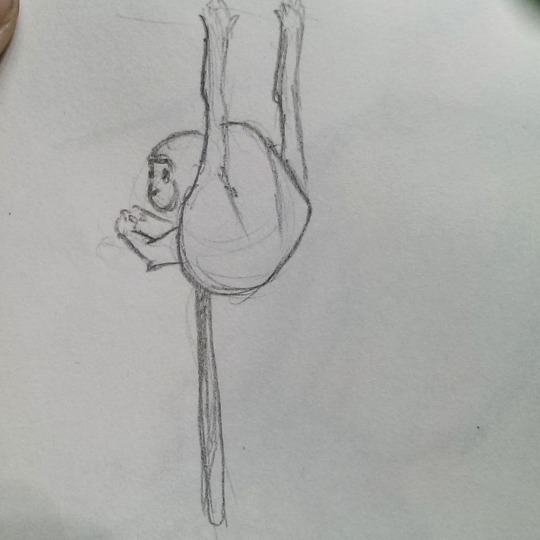
I love looking at monkeys because they have a clear thought process. You can see what’s going on. If they are holding an object and another one comes their way, unlike many other animals they won’t let the first object go until they examined the new one and decided it is more interesting.
So after some introductory classes we met our teacher Samy Fecih and exercise weeks followed. All in all an amazing experience that gave me an entirely new perspective on how to break down motion and look for mistakes. I don’t think I will ever look at reference the same way.
Maya’s graph editor can also be a real beast if you know what you are doing and if you set up gimbal locks correctly. Speaking of gimbals there is a really nifty script that will change your rotation order while transforming all your keyframes so your editor stays clean. It’s a life-saver!
vimeo
P.S.
While writing this I noticed there was a monkey sticker on my table. Hmm..
#zoo#animals#school#reference#animation#3d#maya#bear#monkey#quadruped#walkcycle#runcycle#horse#horses
7 notes
·
View notes