#Angular NgModule framework
Explore tagged Tumblr posts
Visit Tumblr Blog
Explore Tumblr blogs with no restrictions, modern design and the best experience.
Last Seen Tumblr Blogs


Fun Fact
In 2020, 27% of US Tumblr users had an annual household income of over $100,000.
Text
#Angular Modules Best Practices#Angular NgModule framework#Structuring Angular Apps#Organizing Angular Modules#Angular Application Structure#top angular development company
0 notes
Text
Angular Interview Questions and Answers: Part 13
This is the 13th part of the Angular Interview Questions and Answers Series. In this part we will discuss the answers of the following Angular Questions:
Q149. What is Dependency Injection in Angular? What are the advantages of Dependency Injection? Q150. What are the different components of the Angular Dependency Injection Framework? How does dependency injection work in Angular? Q151. What do you mean by Hierarchical Dependency Injection in Angular? Q152. What is an Injector Tree? What are the different types of Injector Hierarchies in Angular? Q153. What is ModuleInjector Tree in Angular? How can you register services at the module level? Q154. What is the use of @Injectable decorator in Angular? What is root-level Service Registration? Q155. What is the root Module Injector in Angular? Q156. What is PlatforInjector in Angular? What is the difference between platform vs. root injector? Q157. What is the NullInjector in Angular? Q158. What is the difference between the @Injectable() vs @ngModule() service injector? Q159. What is the difference between Lazy Loaded vs Eagerly Loded service provider scope?
Please visit the following link for the Answers of the above Angular Interview Questions:
#angularpart13 #angularinterviewquestions #mostfrequentlyaskedangularquestions #angularfresherinterviewquestions #angularexperiencedinterviewquestions #commonangularinterviewquestions #angularinterview2023 #techpointfundamentals #techpointfunda #techpoint #crackjob #techpointblog
#angularpart13#angularinterviewquestions#mostfrequentlyaskedangularquestions#angularfresherinterviewquestions#techpointfundamentals#techpointfunda#techpoint#crackjob
2 notes
·
View notes
Text
Angular 15: New Features and Updates
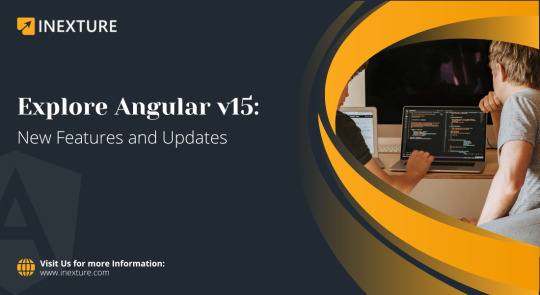
Angular 15 is another significant milestone in the evolution of this strong, open-source web application framework. In this comprehensive guide, we go into the most recent highlights and upgrades that Angular v15 provides of genuine value.
Whether you’re an experienced Angular developer or new to the framework, this blog will provide you with a comprehensive overview of the updates and changes designed to smooth out your development cycle, increase execution, and enhance client experience. Join me as we examine the most recent updates to Angular 15, studying how these updates can change the way you build web applications.
What’s New in Angular 15?
Angular version 15 is a big update that makes the framework better and easier to use. It introduces small but important changes that fix problems developers have been facing and improves how things work.
This update is really exciting and important, making Angular work smoother and faster. It’s all about making a developer’s life easier and improving how they build things with Angular.
The coolest thing in Angular 15 is something called “Standalone Components.” These are a new way to build parts of your app, and they’re way simpler than the old method, which was called NgModules and was pretty complicated for many people.
Standalone Components enable you to create parts of your application that can perform magnificently in better areas, such as Angular Elements, routers, and HttpClient. This makes it easier for novice Angular users to get started, while also allowing experienced engineers to work faster and more effectively.
Latest Features of Angular 15
Simplifies development by allowing components to be used independently without the complexity of NgModules.
Enhancements in the framework’s core functionality for faster and more efficient web application development.
Focus on reducing complexity and making Angular more accessible, especially for new developers.
Facilitates a more flexible and modular approach to building applications.
Upgrades to these features for better usability and integration within Angular applications.
Addressing Pain Points: Specific updates targeting issues and challenges previously identified by the Angular developer community.
Enhancements to make applications more accessible to a wider range of users.
Upgraded tools and debugging features for a smoother development experience.
Overall improvements aimed at boosting productivity for both new and experienced Angular developers.
Also Read: How to Make Angular SEO-Friendly Websites
Angular 15 Installation Process
Install Node.js and NPM
Angular requires Node.js and NPM (Node Package Manager) to run. If you don’t have them installed, download and install the latest stable version of Node.js (which includes NPM) from the Node.js official website.
Install Angular CLI
Open your command line interface (CLI).
Run the command npm install -g @angular/cli to install the Angular Command Line Interface (CLI) globally. This tool is necessary to create and manage Angular projects.
Create a New Angular Project
Once the Angular CLI is installed, you can create a new Angular project by running ng new project-name, where project-name is the name you want to give to your new Angular application.
Navigate to Your Project Folder
Use the command cd project-name to move into your newly created project directory.
Serve the Application
Run ng serve inside the project directory. This command will compile the application and start a web server.
By default, the Angular application runs on http://localhost:4200/. You can open this URL in your web browser to see your new application running.
Update to Angular 15 (If Required)
If the latest version of Angular CLI did not install Angular 15 by default, you can update your Angular version within your project using the Angular CLI update command:
ng update @angular/core@15 @angular/cli@15.
Angular 14 to Angular 15: Step-by-Step Upgrade
upgrading from Angular 14 to Angular 15 is a structured process that can be smoothly accomplished using the Angular CLI (Command Line Interface).
Before initiating the upgrade, ensure that your current application is using the latest minor release of Angular 14.
This preliminary step is crucial for a seamless transition.
Once your application is up-to-date, begin the upgrade process by running the command ng update @angular/core@15 @angular/cli@15 in your project’s root directory.
This command instructs the CLI to update the core Angular packages and the Angular CLI itself to their v15 versions.
During the update interaction, the CLI automatically updates your project’s conditions and arrangement records to comply with Angular 15 requirements.
It is recommended that you completely test your application after the upgrade to ensure that all functionalities are working properly and to resolve any issues that may have arisen as a result of the patch.
If you encounter any difficulties or explicit expostulations, consult the Angular 15 update guide for complete instructions and troubleshooting advice.
Remember, keeping your application’s dependencies and third-party libraries up-to-date is also important for compatibility with Angular 15.
Difference between Angular 14 vs Angular 15
Moving from Angular v14 to Angular v15 is like upgrading to a newer, better version of software.
Angular 15 introduces a significant modification known as “Standalone Components.” This is a better way to build parts of your application, and it is substantially less difficult than the previous method, which used something known as NgModules.
Standalone Components make it easier to collect your application because there is less confusing code and everything is better coordinated.
Besides this, Angular 15 has made small but important improvements that make the whole framework work better and easier for developers.
It’s like fixing little problems that were there before, making things like the router and HttpClient work smoother.
Angular v14 was already good, but Angular 15 makes everything even better by making it simpler to build apps, fixing small issues, and providing better tools for developers to work with.
Whether you’re new to Angular or have been using it for a while, v15 makes your job easier and more enjoyable.
To wrap it up,
Angular 15 is a big step forward for the Angular framework. It brings a bunch of new things and important improvements that help with making websites today. The coolest part is the Standalone Components, which make building apps easier and better. Angular 15 fixes some old problems and makes everything work smoother and faster.
This is great for everyone, whether you’re just starting to use Angular or you’ve been using it for a long time. The changes in v15 make building web apps simpler and more fun. As we get used to these new features, Angular 15 is changing how we build websites, making things more exciting for both the people who make the apps and the people who use them.
Hire AngularJS Developers to leverage the full potential of Angular 15 and ensure seamless integration of these cutting-edge features into your projects
Originally published by: Angular 15: New Features and Updates
0 notes
Text
Flutter vs Ionic: Which One Should You Choose?

Are you trying to find the best framework for creating your mobile application?
Do you need a cross-platform solution that can easily work with many devices and operating systems?
Look nowhere else! Flutter and Ionic, two well-known frameworks, will each be thoroughly examined in this blog post.
Each has distinctive features, benefits, and drawbacks that make them suited for various kinds of programs.
In order to determine which one is most appropriate for your project, we offer what we have discovered through our ten years of expertise as a flutter development company.
So buckle up as we explore the world of Flutter vs. Ionic! Introduction to Flutter and Ionic
Here’s a quick overview of each framework: Using the same codebase, you can create native-looking Android and iOS apps with Google's open-source Flutter mobile SDK. The programming language Dart, which is quick and simple to learn, is used to create Flutter apps.
Although it employs web technologies like HTML, CSS, and JavaScript rather than Dart, Ionic is also an open-source mobile SDK. That implies a single codebase can be used to create Ionic apps for both Android and iOS. Flutter vs Ionic – ArchitectureThe ideal architecture enables future support and updates in addition to streamlining the overall development process.
With a hierarchical layered architecture, platform-specific widgets at the top level set the stage for Flutter's capabilities. Rendering layers mediate interactions between platform levels. Scaffold transfers API requests to the foundation and makes extensive use of C and C++ engines.
There is a separate presentation layer and a layer for business logic in the Flutter BLoc design.
Ionic's Model View Controller, which enables developers to work concurrently on a single app, is built on AngularJS MVC. Recurrent iterations are unaffected by recurrent iterations, and several views can be simply built. Flutter vs Ionic – PerformanceIt's important to consider how Flutter and Ionic apps function. Better performing apps must be created.
When it comes to complex applications, Flutter performs better than Ionic in terms of speed. Due to the availability of native modules as native components, there is no requirement for a communication bridge on the Flutter platform.
Flutter outperforms Ionic in terms of speed because it is not web-based.
Flutter vs ionic – FlexibilityA modular app development framework makes it possible for numerous developers with various skill sets to work together concurrently, speeding up the development process. The project may be easily divided into numerous sub-packages thanks to Flutter's hierarchical architecture, and numerous modules can be added to the codebase. A single root module is often used for bootstrapping, and feature modules increase functionality. To generate several modules, Ionic uses Angular's NgModule class.
Ionic vs. Flutter: Code maintenance
Application code maintenance is crucial to guaranteeing the continuation of services for different clients.
Maintaining Flutter code is simple. Developers can support third-party libraries, leverage external tools, and quickly discover problems. Hot reloading guarantees that issues are fixed as quickly as feasible.
Comparing Ionic to Flutter, maintaining the code is more difficult because Ionic lacks backward compatibility.
Flutter vs Ionic – Building complex apps
Flutter makes it easy to build complex apps. Flutter apps use a plugin system with a hierarchical structure to facilitate communication between them.
Using Material components in Android or Cupertino Widgets in iOS, you can easily create interfaces.
Animated UI, image processing, and location-based services are difficult to add with Ionic. Simple apps, however, are easy to build, and they work perfectly.
Ionic vs. Flutter: User Experience
Flutter's innate ability to create custom widgets that seem like native ones offer the best user experience. Excellent user interfaces should be created by developers with an understanding of Animation Builder, Stream Builder, and Future Builder.
Dart provides the ability to generate UI frames for transient object codes via generational garbage collection. When a single pointer bump is utilized for object allocation, there won't be any UI clutter or animation slowness.
Ionic's transient and native-like UI navigation offers a fantastic user experience. Applications can be created within native app containers thanks to the hybrid method. Users don't need to download any apps to receive new updates.
Testing Flutter vs. Ionic
Unit testing for Flutter can be done with Spec, Spek, or Mocha. XCUITest or Appium are two tools that can be used for UI testing. Testing suites are included in Flutter driver packages.
Web-based technologies are widely employed during Ionic app testing. Without using emulators, Web View automatically tests the application on several browsers. Ionic CLI makes web component testing simple as well.
Ionic vs. Flutter: Size
The creation of densely packed programs with improved performance is the constant aim of developers.
The size of the Flutter Hello World app is 7.5 MB because of the Dart virtual machine and C/C++ engine.
Version 5 of the Hello World app for Ionic is only 3.2MB. Apps made with earlier versions used to be 5–6MB in size.
Both Flutter and Ionic are popular choices for building cross-platform mobile apps.
Ionic: Ionic is an excellent option if you want to design an app that is largely focused on content consumption, like a news or magazine app. It features several UI elements that make it simple to present content in an appealing and user-friendly manner.
Flutter: Flutter is the better option if you want to make an app with intricate animations or graphics. It provides more UI customization than Ionic, enabling the development of genuinely original experiences.
Both: You can utilize both Ionic and Flutter to build an app that combines the greatest features of both worlds. You might, for instance, use Ionic for the portions of your app that are content-focused and Flutter for the more interactive or animated elements.
Flutter might be the best option for you if you want to quickly construct a cross-platform project and don't mind giving up some native capabilities.
Ionic might be a better choice, though, if you need more control over the appearance and feel of your app or need access to native device functionality.
0 notes
Text
What Is AngularJS?

Angular is a software engineering platform that helps you build a responsive web application. It offers tools that let you design and build functional prototypes quickly. You can also develop cross-platform mobile apps with Angular.
Angular is developed by Google. It is a JS-based framework that uses TypeScript to make it easier for developers to write clean code. Angular is one of the most popular technologies in the world. Angular is an open-source project.
Angular is a single-page application (SPA) framework that uses directives and Components to create a powerful web application. The basic if statement directive is called once when an element is initialized. Once the expression is evaluated, it sets the text of the DOM element to the expression.
Angular also provides two-way data binding. This feature allows the data from an API call to be reflected in the view immediately. The components that make up an Angular app follow a specific pattern ( more informations ). These components are defined in NgModules, which further define the application. Besides being more flexible, component-based architecture improves performance.
In AngularJS, a controller is a class that contains logic for a web application. Every AngularJS component has a TypeScript class and an HTML template. There is also a ng-bind directive. With ng-bind, you can define a JavaScript controller class and configure its properties.
AngularJS has many interesting features. Some of the more interesting features are the ability to use expressions and data transformations.
Angular supports dynamic rules, which allow you to regulate access settings. It also includes a Semantic Versioning system, which makes it easy for you to update your project with newer versions.
0 notes
Text
Angular
One of the most recent web technologies, Angular, is made exclusively for creating dynamic online apps. Without the usage of other frameworks or plugins, you may quickly construct front-end-based applications with this framework.
With the use of HTML and TypeScript, single-page client applications may be created utilizing the Angular platform and framework. TypeScript is used to create Angular. As a collection of TypeScript libraries that you load into your apps, it implements both core and optional functionality. An Angular application is defined by a set of NgModules, which group related code into functional groups. An Angular application's architecture is based on a few key ideas. The fundamental building elements of the Angular framework are NgModule-organized Angular components.
A root module, which facilitates bootstrapping, is always present in an application, and there are often many more feature modules as well.
• Views are collections of screen elements that Angular can select from and alter in accordance with your program logic and data, and they are defined by components.
• Services, which offer specialized functionality unrelated to views, are used by components. Service providers can be added as dependencies to components, which will make your code efficient, reusable, and modular.
Classes that make use of decorators include modules, components, and services. As well as indicating their type and providing metadata, these decorators instruct Angular how to use them.
• A component class's metadata links it to a template that describes a view. Ordinary HTML is combined with binding markup and Angular directives in a template so that Angular can alter the HTML before rendering it for display.
• The details Angular requires to make a service class available to components through dependency injection are contained in the service class's metadata (DI).
The parts of an application often define many hierarchically organized views. In order to assist you in creating navigational paths between views, Angular offers the Router service. The router has highly developed browser navigational features.
JavaScript (ES2015) modules are different from and complemented by Angular NgModules. For a group of components that are dedicated to a workflow, an application domain, or a set of closely linked capabilities, a NgModule declares a compilation context. An NgModule can create functional units by connecting its parts to relevant code, like services.
A root module, commonly referred to as AppModule, is present in every Angular application and provides the bootstrap process that begins the application. Typically, an application has many different functional modules.
Similar to JavaScript modules, NgModules can export and use their own functionality as well as functionality from other NgModules. For instance, you import the Router NgModule to use the router service in your app.
Coding for reusability and controlling the development of complicated applications are made easier by structuring your code into different functional modules. Additionally, you may use lazy loading with this method to reduce the amount of code that needs to be loaded at start up by loading modules only when they are needed.
Well-designed templates, MVC architecture, code generation, code splitting, etc. are some of the characteristics. There are no loops or conditional statements used in any of the expressions; rather, they are all just short pieces of code encased in curly braces.
0 notes
Text
Top 10 Angular 14 Features And Updates
https://www.zenesys.com/blog/angular-14-featuresStriking news for Angular Developers! Angular 14, the latest version of the TypeScript-based free and open-source web app framework was launched on 2nd June 2022. Considering all the releases before, Angular 14 is one of Angular's most methodical pre-planned upgrades. If you are interested in a bird-eye view of what's fresh in Angular 14, then here's a quick sneak at latest Angular 14 features and updates.

Latest Angular 14 Features and Updates
1. Standalone Components
Now with Angular 14, modules are categorized as optional and standalone components will be possible. However, the purpose of Angular is to move away from the current state of affairs by creating artifacts like pipes, components, and directives, the main focus of the TypeScript-based Angular framework. To make the NgModules optional, Angular has issued an RFC, i.e., Request for Comments on standalone components. The modules will not be retired fully in the latest update; rather, they will become optional to maintain compatibility with the existing Angular-based apps and libraries ecosystem. In the previous versions of Angular, every component needed a module association. Therefore, each component must be there in the declarations array of a parent module. Or else this will result in application failure.
2. Strictly Typed Forms
Angular 14 shuts Angular's main GitHub issue, i.e., implementing strict typing for the Angular Reactive Forms Package. It will improve the modern-driven approach of Angular to work smoothly with forms. The FormControl now accepts a generic type that tells a certain value it carries. However, the Angular team has added an Auto migration in v14 to guarantee that the prevailing applications will not be broken during the upgrade. API complexity is checked regularly, so the changes must be handled smoothly, and the ecosystem must not be split apart. Furthermore, the latest updates will not impact the template-based forms.
3. Angular CLI Auto-Completion
If your Angular CLI game is strong, you can settle on how to enhance productivity by delivering the needed commands to make artifacts like components, modules, and directives for your project. However, there are a plethora of commands at your disposal, yet many times you have to visit the official guide to scrutinize the commands and the commands options. With the launch of Angular 14, this is no longer needed. Angular v14 is delivering the latest feature in the CLI, permitting real-time type ahead auto-completion in the terminal. Initially, you must run the ng completion command in your terminal. After that, you just need to type the ng command, then press Tab to look for all the possible options for you, and Enter to opt for one of them. Furthermore, if you are working on the Angular 14 project, more auto-completion options, like the ng create command options, are available. The first time you must execute the ng completion command in your terminal.
4. Enhanced Template Diagnostics
Angular 14 came with improved templated diagnostics to protect the developers from basic mistakes by compiler matching to typescript code. Now, in Angular 13 and the previous Angular versions, there is no warning generated by the compiler, and it fails to develop if there comes an issue that would restrict it from doing so. Warnings may be easily developed for basic issues, like incorrect two-way binding syntax or the use of unnecessary operators when the variable is not nullable. In addition, diagnostic tests are permitted with the expansion of a new private compiler that would give certain warnings or information diagnostics for user templates that are not precisely deadly.
5. Streamlined Page Title Accessibility
Your page title differently shows the content of your page when you are developing applications. In Angular 13, the entire process of adding titles was streamlined with the fresh Route.title property in the Angular router. However, Angular 14 doesn't have more additional imports needed when you are adding a title to your page.
6. Latest Primitives in the Angular CDK
The Angular CDK, i.e., Component Dev Kit, offers a detailed set of tools for developing Angular components. Now, the Dialog and the CDK Menu have been pushed to a stable version in Angular 14. However, the new CDK primitives permit the making of more accessible custom components.
7. Angular DevTools is now present online.
You can also employ the Angular DevTools debugging extension in offline mode. The extension is present under Mozilla's Add-ons for Firefox users.
8. Optional Injectors
You can now mention an optional injector via ViewContainerRef.createEmbeddedView and TemplateRef.createEmbeddedView when developing an embedding view in Angularv14.
9. Built-in Enhancements
Angular 14 backs TypeScript 4.7 also targeting ES2020 by default. It permits the CLI to deploy small code without devaluing it. One more Angular 14 meaningful feature helps you to link to protected component members directly from our templates. You get more control over the public API surface of the reusable components.
10. Extended Developer Diagnostics
This feature from Angular v14 delivers an extendable framework that assists better insights into your templates and offers suggestions for potential boosts.
How to Install Angular 14?
You can simply install Angular v14 via npm by employing the next flag. Then, head forward with opening a new command-line interface and run the following command to install the new version of Angular. npm install --global @angular/cli@next Using this command, you can easily install the version of Angular CLI globally on your development machine.
How to Upgrade to Angular 14?
To upgrade from Angular 13 to 14, you must visit this link https://update.angular.io/
To Sum Up
Developing Angular applications is now made easier, beginning with Angular 14, thanks to the debut of standalone components. The Angular developer community aims to ensure that web developers obtain better versions of the TypeScript-based framework, permitting them to stay updated with the other online ecosystem and users' needs. Now that you are conscious of the latest Angular 14 features and upgrades, it's time to move to Angular 14!
Source: https://www.zenesys.com/blog/angular-14-features
0 notes
Text
Angular 13 Firebase - Create a user with an Email address and Password
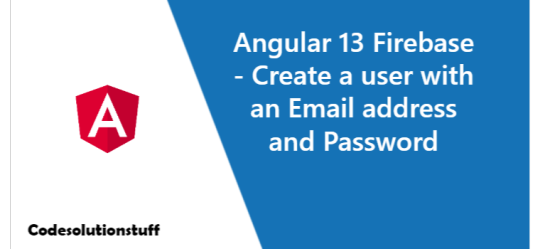
Good day, everyone! In this article, we'll learn how to create a user in Firebase with an email address and a password using the Angular 13 framework. You may utilise Firebase Authentication to allow your users log in to Firebase using their email addresses and passwords, as well as manage the password-based accounts in your app. With Firebase's huge API collection, you can develop a fast and secure authentication system. The process of creating a user in Firebase is simple and straightforward. You can utilise Firebase's AngularFire2 library in your Angular application to take advantage of its amazing capabilities. For this example, I'll be utilising the AngularFire2 library from the node package manager (NPM) and the most recent Angular version.
Setup Angular App
ng new angularfirebaseproject After that, remember to enter into the project directory by running the following command. cd angularfirebaseproject Let's make some components for our Angular application. ng g c sign-in ng g c sign-up Set "strict": false in the compilerOptions field of the tsconfig.json file to disable strict type warnings or errors.
Setup AngularFire2 Library in Angular
Now, in your Angular project, enable Firebase (AngularFire2 library). npm install firebase @angular/fire --save Make the connection between your Firebase account and your Angular app once you've finished setting up this library. Go to the src/environments/enviorment.ts file in the enviornments folder of your project. Then, in the environment file, enter the firebase configuration details. export const environment = { production: false, firebase: { apiKey: "xxxxxxxx-xxxxxxxx", authDomain: "xxxxxxxxxxxxxxxxxxxxxxxx", databaseURL: "xxxxxxxxxxxxxxxxxxxxxxxx", projectId: "xxxxxxxx", storageBucket: "xxxxxxxx", messagingSenderId: "xxxxxx", appId: "xxxxx", measurementId: "xxxxxxxxxxxxxxxx" } }; Create Auth Service authentication.service.ts ng generate service shared/services/authentication Open the file app.module.ts and register the service there. import { NgModule } from '@angular/core'; import { BrowserModule } from '@angular/platform-browser'; import { AppComponent } from './app.component'; import { AuthenticationService } from './shared/services/authentication.service'; import { SignInComponent } from './sign-in/sign-in.component'; import { SignUpComponent } from './sign-up/sign-up.component'; import { environment } from '../environments/environment'; import { AngularFireModule } from '@angular/fire/compat'; import { AngularFireAuthModule } from '@angular/fire/compat/auth'; @NgModule({ declarations: , imports: , providers: , bootstrap: , }) export class AppModule {}
Generate Authentication Service Core File
Open the authentication.service.ts file and paste the code below into it. import { Injectable } from '@angular/core'; import { AngularFireAuth } from '@angular/fire/compat/auth'; @Injectable({ providedIn: 'root', }) export class AuthenticationService { constructor( public afAuth: AngularFireAuth // Inject Firebase auth service ) {} // Sign up with email/password SignUp(email, password) { return this.afAuth .createUserWithEmailAndPassword(email, password) .then((result) => { window.alert('You have been successfully registered!'); console.log(result.user); }) .catch((error) => { window.alert(error.message); }); } // Sign in with email/password SignIn(email, password) { return this.afAuth .signInWithEmailAndPassword(email, password) .then((result) => { console.log(result); }) .catch((error) => { window.alert(error.message); }); } } The authentication.service.ts file was successfully built. I used the FirebasecreateUserWithEmailAndPassword(email, password) and signInWithEmailAndPassword(email, password) APIs to create two methods. - SignUp(email, password): Using the Firebase API with Angular, this method creates a new user with an email address and a password. - SignIn(email, password): This technique allows a user to sign in using only his or her email address and password.
Set Up Auth Components
We're going to use our own API to sign up. Add the following code to your signup.component.ts file. import { Component } from '@angular/core'; import { AuthenticationService } from '../shared/services/authentication.service'; @Component({ selector: 'app-sign-up', template: ` Sign Up `, }) export class SignUpComponent { constructor(public authenticationService: AuthenticationService) {} } We're going to use our own API to log in. Add the following code to your signin.component.ts file. import { Component } from '@angular/core'; import { AuthenticationService } from '../shared/services/authentication.service'; @Component({ selector: 'app-sign-in', template: ` Sign Up `, }) export class SignInComponent { constructor(public authenticationService: AuthenticationService) {} } Ensure that the auth components are invoked by adding the appropriate tags to the app.component.ts file. I hope you will like the content and it will help you to learn Angular 13 Firebase - Create a user with an Email address and Password If you like this content, do share. Read the full article
0 notes
Text
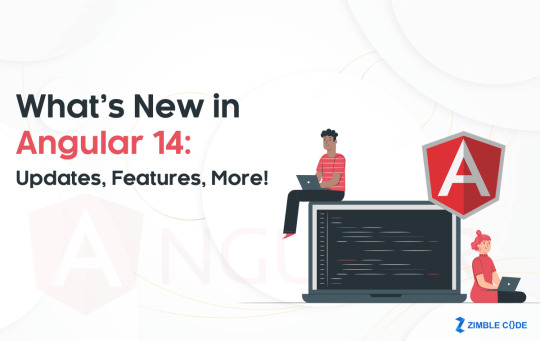
What’s New in Angular 14: Updates, Features, More!
Have you heard about the latest announcement by Google?
Here is some amazing news for Angular developers!
After Angular 13’s earlier success, Google finally released Angular 14 on June 2, 2022. Angular 14 is one of the most methodical improvements that have been pre-planned based on all previous release notes. It includes typed reactive forms, CLI auto compilation, directives, and a developer glimpse of independent components.
Here is a sneak peek at the newest features and upgrades of Angular 14 from Angular developers in Edinburgh:
What is so new about Angular 14?
The most well-known TypeScript-based release from Google for web development, Angular 14 is the most recent TypeScript 4.7 update. As Angular 14 by default targets ES2020, the CLI may deliver less code without needing to descend in level.
According to Angular and TypeScript developers, it is not as simple to comprehend. It uses the Angular framework as it is a part of React framework. As a result, Angular 14 has created independent components to do away with the need for modules. As a consequence, it takes less time to build a boilerplate and deploy a straightforward Angular application.
It has, however, added all the significant changes and features that the previous versions lacked. Without further ado, let’s get to the features of Angular 14 for web app development in Edinburgh, UK.
Features of Angular 14
The newest version of Angular 14, version 14 has the following key features:
Angular CLI Auto-Completion
If you are planning to hire an Angular developer, you may have had the opportunity to use Angular CLI in a prior iteration. You might also concur that providing the necessary instructions to produce project artifacts like components, packages, and directives, increases productivity. Although you have access to a number of commands, you nearly always need to consult the official text in order to locate commands and, more precisely, command parameters. The arrival of Angular 14 has made this option less necessary, which is a plus.
Real-time type-ahead auto-completion in the console is made possible by Angular 14’s new functionalities in the CLI. You must first run the ng completion command on your terminal to accomplish that. If you’re operating on an Angular 14 project, you have much more auto-completion possibilities, such as the ng create command options. Simply enter ng, press Tab to view all of the options, then Enter to choose one.
Strictly Typed Forms
The most often requested improvement for Angular on GitHub has strictly typed forms. It would enhance its model-driven framework for dealing with forms.
For the first time, FormControl now takes a generic type that specifies the kind of value it stores. The Angular team built an automated migration into Angular v14 to make sure that existing apps wouldn’t stop working after the update. As long as API complexity is considered, changes must be delivered easily and the ecosystem must not be destroyed. The excellent news is that the template-based form won’t be affected by this new update.
Standalone Components
The major goal is to change the current state of affairs by producing artifacts like components, pipelines, and directives. Angular published an RFC (Request for Comments) on independent components to make NgModules optional.
In order to retain compatibility with the present environment of Angular-based libraries and apps, modules will thus be made optional rather than completely outmoded. Every component required to be coupled with a module in earlier versions of Angular. Therefore, each component has to be present in the declarations array of the parent module. If not, the application will be a major failure.
Streamlined Page Title Accessibility
Your page title will affect how the information on your page is displayed when creating and building apps. Regarding Angular 13, the new Route title in the Angular router simplified adding titles. However, providing a title to your page doesn’t call for any new imports to be included in Angular 14.
Enhanced Template Diagnostics
Better template inspections included in Angular 14’s most recent release enable Angular developers to be shielded from common mistakes by the compiler, much like TypeScript code is. In the earlier version, Angular 13 and older, the compiler does not produce any warnings. And it only refuses to construct when a flaw exists that would otherwise make it impossible for it to do so.
Minor mistakes can easily result in warnings. Erroneous two-way binding syntax or the inclusion of additional operators like ‘??’ when the variable is not nullable. Diagnostic tests that generate warnings or information problems for user patterns that aren’t always deadly would be available with the inclusion of a privately owned compiler option.
Others:
Optional Injectors: As per Angular developers in Edinburgh, you need to use an optional injector to define the embedded version of Angular. You can use ViewContainerRef.createEmbeddedView and TemplateRef.createEmbeddedView
Angular DevTools: You may utilize the Angular DevTools debugging plugin when in offline mode. Users of Firefox may find the plugin under Mozilla’s Add-ons.
How to Install Angular 14?
Angular has developed a number of excellent Angular utilities. So, all you have to do to install Angular is use npm to download Angular v14.
Simply run the CLI’s following command: npm install –global @angular/cli@next
You may quickly install the most recent version of Angular CLI on your PC by using this command and use it for web app development in Edinburgh, UK. Further, you can upgrade your Angular application to Angular v14 – https://update.angular.io/
Should We Use Angular 14?
The development of Angular apps has been simpler with the inclusion of independent components in Angular 14. The TypeScript-based framework is improved as a result of the efforts of the Angular developer community. It now enables web developers to keep up with the demands of their users and the rest of the online ecosystem. Now that you’re aware of the most recent Angular 14 features and enhancements, it’s time to switch to Angular 14! So what are you waiting for? Hire Angular developers in Edinburgh, UK right now.
Article Resource - https://zimblecode.com/whats-new-in-angular-14-updates-features-more/
#Angular 14#Angular Developers#Angular developers in Edinburgh#App development company in Edinburgh#best app developers Edinburgh#hire angular developers#Hire Angular developers in Edinburgh#Mobile app developers in Edinburgh#Mobile App Development Company In Edinburgh#mobile application development in Edinburgh#Software Developers Edinburgh#Top App Developers in Edinburgh#Top Mobile App Development Company In Edinburgh#Top mobile app development company in UK#Web App Development Edinburgh
0 notes
Text
Novedades en Angular 14: Formularios escritos y componentes independientes
Novedades en Angular 14: Formularios escritos y componentes independientes
Se lanzó Angular 14, la última versión del framework de aplicaciones web basado en TypeScript de Google e incluye formularios escritos y una vista previa para desarrolladores de componentes independientes. Al eliminar la necesidad de NgModules, los componentes independientes simplifican el desarrollo de las aplicaciones en Angular. El indicador standalone:true en los componentes, directivas y…
View On WordPress
0 notes
Text
How to Create a Personal Blogging Website: Front-End (Angular)
The newest version of Angular is frequently thought of as a framework that comes from the enterprise side of the rails and likes to hang around with line-of-business apps. While it is true that Angular has developed from a framework to a platform that supports a wide range of apps, there are several extremely cool capabilities that developers can leverage to build immersive user experiences. This is the first in a three-part series on how to use Angular to create a full-page animated website. We’ll begin by creating a full-page website, which we’ll then animate in the next installment.
Creating A Project Is The First Step.
In a non-trivial online application, there are a lot of moving pieces. What kind of dependencies does your app have? What method will you use to execute it locally? What method will you use to test it? What method will you use to bundle your assets?
Thankfully, the complicated process of combining these pieces is handled behind the scenes. We can have a fully working Angular application ready to work within only a few commands from our terminal. Installing the CLI is the first step toward using it. To do this, enter the following command:
npm install -g @angular/CLI
Once the CLI is installed, we can go to the folder where we wish to install our project from the command line. From there, we’ll run ng new with our project’s name. This creates a folder with the same name, which we’ll browse after the project is finished.
cd <your-projects-folder> ng new angular-animations-site cd angular-animations-site
Use Angular Material and Animations
That is all there is to it! Our Angular app is now up and running. You may use npm start or ng serve to start your application. I like npm start since it is more traditional and allows me to add in more commands. After that, go to http://localhost:4200 to see the application in action.
Because we enjoy beautiful things, we’ll add the @angular/animations and @angular/material packages to our application and install them:
npm i — save @angular/material @angular/animations
By adding these dependencies to our app.module.ts file, we can inform Angular about them. We’ll be utilizing Angular Material buttons, cards, and toolbars, so we’ll import their modules, as well as the BrowserAnimationsModule.
/ app/app.module.ts … import { MdButtonModule, MdCardModule, MdToolbarModule } from ‘@angular/material’; import { BrowserAnimationsModule } from ‘@angular/platform-browser/animations’;
We can then use our NgModule declaration to add them to the imports array.
// app/app.module.ts … import { MdButtonModule, MdCardModule, MdToolbarModule } from ‘@angular/material’; import { BrowserAnimationsModule } from ‘@angular/platform-browser/animations’;
@NgModule({ … imports: [ … BrowserAnimationsModule, MdToolbarModule, MdButtonModule, MdCardModule ], … })
We’ve spent the entire time up to this point focusing just on setting up the application so that we can begin working. These commands may appear clumsy at first, but after you’ve gotten used to them, you’ll discover that it only takes a few minutes to have a completely built-out environment with all the bells and whistles we’ll need to construct a great website.
Add A Component To The Page.
We’ll need to develop a way for displaying our pages because we’re using Angular to construct a website. The component is the most fundamental building unit of an Angular application. We can easily reuse functionality as well as compose new functionality by adding new components since we designed our application using well-defined, encapsulated components.
We use the CLI’s built-in generator support to generate our page component. By using the command below, we can create our page component (the g command is shorthand for generate).
ng g component page
Take the time to learn how to create the primary Angular elements by hand until you’ve developed muscle memory for them. Only until you have a thorough understanding of what is going on should you use generators to improve your workflow.
The CLI will create a page folder in the src directory, which will contain HTML, CSS, Typescript, and a spec file. We have the fundamental structure of a component in our page.component.ts file. Our component has our function Object() { [native code] } and ngOnit methods stubbed out and references our template and style files in the @Component metadata.
// app/page/page.component.ts
import { Component, OnInit } from ‘@angular/core’;
@Component({ selector: ‘app-page’, templateUrl: ‘./page.component.html’, styleUrls: [‘./page.component.css’] }) export class PageComponent implements OnInit {
constructor() { }
ngOnInit() { } }
The CLI will also alter our app.module.ts to add a PageComponent item to our declarations array, in addition to building our component. As a result, our page component is now accessible throughout the module.
Create your page component.
We can start to build it up so it looks like a genuine webpage now that our page component is alive and healthy. A page object with title, subtitle, content, and picture attributes will be introduced.
// app/page/page.component.ts
export class PageComponent implements OnInit { page = { title: ‘Home’, subtitle: ‘Welcome Home!’, content: ‘Some home content.’, image: ‘assets/bg00.jpg’ };
constructor() { }
ngOnInit() { } }
To bind to the page object, we’ll edit our template. There is an image element that will be expanded to fit the whole browser window in the future. We’ll also include an Angular Material card component to which the rest of our page objects will be bound.
<! — app/page/page.component.html → <img class=”fullBg” [src]=”page.image”>
<md-card> <md-card-header> <md-card-title><h1>{{page.title}}</h1></md-card-title> <md-card-subtitle>{{page.subtitle}}</md-card-subtitle> </md-card-header> <md-card-content> {{page.content}} </md-card-content> </md-card>
Our page component is beginning to take shape! The next step will be to add the ability to move across various pages.
Create the content management system.
Our material would most likely originate from a database in a production environment, but for the sake of this essay, we’ll isolate it to a service.
We can generate our content service with the CLI, exactly like we did with our page component. We’ll make a shared directory, then a services subfolder, before generating our service using ng g.
mkdir src/app/shared mkdir src/app/shared/services ng g service shared/services/content
The CLI, unlike components, does not add services to our Angular module automatically, therefore we must manually add it to the providers array of our metadata.
// app/app.module.ts
import { ContentService } from ‘./shared/services/content.service’;
@NgModule({ declarations: […], imports: […], providers: [ContentService], bootstrap: [AppComponent] })
In the first part of this series, we covered a lot of territories, but let’s take a look back at what we’ve accomplished:
@angular/cli was used to create a new project for us.
NPM was used to install @angular/material and @angular/animations.
Our Angular module now includes @angular/material and @angular/animations.
To represent the pages on our site, we designed a page component.
To store the content for our site, we constructed a ContentService.
For more info; visit baabtra.com
Enquire now !!👇 https://bit.ly/3Igg4Z5 . Follow us on: Facebook: https://lnkd.in/gezVM78A Instagram: https://lnkd.in/gWMMtQMe LinkedIn: https://lnkd.in/gqZFN9rR Twitter: https://lnkd.in/g_Dd5tKk
#angular#programming#software#software developers#career#developers#machine learning#it#front end developer
0 notes
Text
Angular 14 arrives with typed forms, standalone components
Angular 14 arrives with typed forms, standalone components
Angular 14, the latest version of the Google-developed, TypeScript-based web application framework, has arrived, featuring typed forms and a developer preview of standalone components. Standalone components simplify the development of Angular applications by reducing the need for NgModules. With standalone components, directives, and pipes, the standalone: true flag allows developers to add…

View On WordPress
0 notes
Text
Angular 14 Future Ahead
Angular is one of the most popular and sought after frameworks in the developer community. It receives a lot of developer requests in the Google and open source communities as well. It efficiently brings together representation from developer relations, engineers and product managers in order to prioritize the “asks”. Angular facilitates the strategizing of a roadmap and setting of practical timelines.
When Angular 13 was released, it became a huge hit and with it came hopes of many new and exciting enhancements in the version 14 of the framework. In this blog, we will have a look at how the future beholds for Angular 14.
Better Scope for developers w.r.t @angular/forms
One of the goals that Angular 14 aims to accomplish is finding how to implement stricter type checking for reactive forms. Not only this, but it has to have minimum backward-incompatible issues. It will greatly help the developers in enabling better text editor and catching more flaws during the time of development.
Simplified Angular Mental Model
What we mean by this is making the NgModules optional. The main advantage of optional NgModules is that it will allow the developers to develop independent components. Besides this, it will also help them use an alternative API to declare the component’s compilation scope.
Integration of MDC Web
There are a lot of hopes from the integration of the MDC Web to enhance Angular Material components. The MDC Web is formed by the Material Design team at Google and it is basically a library that provides reusable primitives to build various material design components. By using MDC Web, developers can effectively improve the component quality in Angular framework vis-a-vis expanding its accessibility. Besides this, Angular 14 is also expected to come with advanced compiler diagnostics, that will carry out better accuracy checks in order to enhance the flawlessness.
Improvement in the integration of Angular DevTools
The Angular team has been actively testing the moving over of the codebase to the angular or angular/angular mono repository. Along with this, they are planning on transitioning Angular DevTools to Bazel and also integrating the processes with CI pipeline.
Now, we will look at some more pointers on how the future of Angular 14 looks like and what all we can expect in the framework.
Improvement in the performance dashboards
By refining the existing infrastructure of Angular, the new version makes sure that the framework’s runtime doesn’t slow down after a change in the coding.
Make Zone.js optional without compromising on Framework capabilities
By simplifying the framework after eliminating Zone.js, there will be faster performance. Why? It will reduce application bundle size, and an improve debugging feature. Also, the async/await syntax is not currently supported by the Zone.js option. This will also be enabled after making it optional.
Enhanced build performance and supporting adding directives
With Angular 14, the Angular compiler can be distributed as a TypeScript plug-on that will bring down maintenance costs considerably. It will also improve the build performance of the developers. Apart from this, the framework will be able to add directives to host elements. What would this mean? It would facilitate developers to augment the components without the use of inheritance.
Component level code-splitting APIs
Most of the web applications have slow initial load time. A good solution to this is to opt for more ergonomic code-splitting at a basic component level that will improve the load time and make. The app faster. This is one of the things Angular 14 will help to achieve.
Angular 14 plans to publish detailed guides
Angular is currently planning to come up with detailed guides on change detection. It will also include profiling the performance of various Angular applications. Some of the important things that it will cover include interaction of Zone.js with change detection, profiling its duration. Also, best standard practices to optimize performance will be in the guide.
EOV provides effective and efficient solutions when it comes to building your apps with Angular. It allows you to work more on your app’s core functionality. Our developers are well versed with the framework of Angular and can deliver great app experiences for you in no time. We have worked successfully in helping our clients with Angular Data Presentation and Angular reporting solutions as well.
If you are looking for building any app with Angular or other similar frameworks, please feel free to get in touch with us today!
0 notes
Text
An overview of Angular
In this article, we are going to have a look at the Angular framework. Let's get into it!
Introduction
Nowadays, we have plenty of options to develop something that is ready for various platforms. However, Angular has made its way and it is now one of the most important actors. Let's see what it is and how it works.
We could jump right into the code of a project, but we would probably miss a few things. So, here, we are going to look at the architecture of Angular to understand the different concepts and elements this last one uses.
What is Angular?
Now, when we talk about Angular, we talk about Angular 2 or Angular 5. Angular is a complete rewrite of the AngularJS framework. Angular as a different approach from its predecessor.
Angular allows us to build applications across all platforms. It is an open-source platform that uses TypeScript. In a few words, TypeScript is a strict syntactical superset of JavaScript, and adds optional static typing to the language.
Architecture overview
Angular is written in TypeScript and it implements core and optional functionality as a set of TypeScript libraries that we can import.
An Angular application has, for building blocks, a thing called NgModules. An Angular app is defined by a set of NgModules. An app always has at least a Root Module that enables bootstrapping. An NgModule is made of Components. Every app has at least a Root Component.
Components, and things like Services, are just classes. They are, however, marked with decorators that tells Angular how to use them.
Angular provides a Router Service that helps us to define navigation paths among the different Views.
Modules
Angular apps are modular and this modularity system is called NgModules.
An NgModule defines a set of Components. An NgModule associate related code to form functional units. Every Angular app has a Root Module, conventionally named AppModule, which provides the bootstrap mechanism that launches the application.
Even if they are different and unrelated, NgModules, like JavaScript modules, can import functionality from other NgModules, and allow their own functionality to be exported and used by other NgModules. What we call Angular Libraries are NgModules.
We declare an NgModule by decorating our class with the "@NgModule" decorator. This decorator is a metadata object whose properties describe the module. The most important properties, which are arrays, are the following:
declarations - Components, Directives, and Pipes that belong to the NgModule
exports - the subset of declarations that should be visible and usable in the Components of other NgModules
imports - other modules whose exported classes are needed by Components declared in the NgModule
providers - list of the needed Services that, because they are listed here, become are available app-wide
bootstrap - the main application View, called the Root Component, which hosts all other app views. (only the Root Module should set this bootstrap property)
An NgModule provides a compilation context for its various Components. So, the Components that belong to an NgModule share a compilation context. NgModules define a cohesive block of functionality.
The Root Module of our application is the one that we bootstrap to launch the application. The application launches by bootstrapping the root AppModule. We also call it the entryComponent. The bootstrapping process creates the Components listed in the "bootstrap" array and inserts each one into the browser DOM. So, each bootstrapped Component is the base of its own tree of Components.
As we saw, we can have a Root Module, but we can have what we call Feature Modules. A Feature Module delivers a cohesive set of functionality focused on a specific application needs. We could do everything in the Root Module, but a Feature Module will help us partition our app into focused areas. However, the structure of a Feature Module is exactly the same as the one of a Root Module.
Down below, we can find an example of how could look an NgModule. Here, it is the AppModule:
// Importing Angular Libraries import { BrowserModule } from '@angular/platform-browser'; import { NgModule } from '@angular/core'; import { FormsModule } from '@angular/forms'; import { HttpModule } from '@angular/http'; // Importing the AppComponent import { AppComponent } from './app.component'; // Importing a custom feature module import { CustomFeatureModule } from './custom-feature-module/custom-feature-module.module'; // Declaring the Module @NgModule({ declarations: [ AppComponent ], imports: [ BrowserModule, FormsModule, HttpModule, CustomerDashboardModule ], providers: [], bootstrap: [AppComponent] }) export class AppModule { }
Components
A Component controls a patch of screen called a View. The logic of a Component is defined inside a class. Angular creates, updates, and destroys Components as the user moves through the application.
A Component is identified by the "@Component" decorator that has a set of properties. The most import properties are the following ones:
selector - tells how the component is referenced in HTML; in simple words, it corresponds to the HTML tag.
templateUrl - gives the path of the HTML template.
providers - an array of Dependency Injection Providers for Services that the Component requires.
Notice that instead of the "templateUrl" property, we could use the "template" property that lets us provide the HTML template inline.
A Component has a View and this last one is defined through an HTML template. This HTML file also contains some syntactic elements that are included in Angular.
A Component will typically look like so:
@Component({ selector: 'my-component', templateUrl: './my-component.component.html', providers: [ MyService ] }) export class MyComponent implements OnInit { // Some code }
Before going any further with Components, let's take a look at a few other elements to simplify some terms that we will use later.
Services
A Service is useful to define things that can't fit into a Component and find their reason to exist in the separation of concerns. A Service is a class with a well-defined purpose. For example, we should create a Service when two or more Components or other things need to access the same data or if we want to encapsulate interactions with a web server or if we want to define how to validate user inputs.
Services are Singletons, so there is only one instance of each Service we define. They are stateless objects that can be invoked from any Components. Their purpose is to help us to divide our application into small, different logical units that can be reused.
A Service is a simple class and could look like so:
export class Logger { log(msg: any) { console.log(msg); } error(msg: any) { console.error(msg); } warn(msg: any) { console.warn(msg); } }
Dependency Injection
Dependency Injection is a large subject. Dependency Injection, also called DI, is a Design Pattern in which one or more dependencies (Services) are injected into a dependent object (Client). This pattern allows us to implement a loosely coupled architecture by separating the creation of a client's dependencies from its own behavior.
We can apply this pattern when we want to remove knowledge of concrete implementations from objects, but also when we want to get a better testable code in isolation using mock objects.
The DI Pattern is commonly used to implement the Inversion of Control Principle, which in a few words, separates the what-to-do part of the when-to-do part. In other words, it is about letting somebody else handles the flow of control. It is based on the Hollywood Principle: "Don't call us, we'll call you".
Dependency Injection could be achieved by using the "constructor" of a class or "setter" methods. It can also be achieved with a Container that handles the instantiation of other objects.
In Angular, DI is widely used and we can take a moment to dig a little into it.
Angular uses its own Dependency Injection framework that basically uses three things:
The Injector, that exposes APIs. It is responsible for creating Service instances and injecting them into classes.
The Provider, that tells the Injector how to create an instance of a dependency.
The Dependency, the type of which an object should be created.
Angular has a Hierarchical Dependency Injection system. There is a tree of Injectors that parallels an application's Component tree. An application may have multiple Injectors. That means we can configure Providers at different levels:
For the whole application when bootstrapping it. All sub Injectors will see the Provider and share the instance associated with. It will always be the same instance.
For a specific Component and its sub Components. Other Components won't see the Provider.
For Services. They use one of the Injectors from the element that calls the Service chain.
When using DI with Angular, we will mainly see the "@Injectable" decorator. This decorator marks a class as available to Injector for creation.
In an Angular app, Components consume Services. A Component shouldn't create a Service. So, we inject the different required Services into the different Components. When Angular creates a new instance of a Component class, it determines which Services or other dependencies that Component needs by looking at the types of its constructor parameters. When Angular discovers that a Component needs a Service, it checks if the Injector already has any existing instances of that same Service. If an instance of that requested Service doesn't exist, the Injector makes one using the registered Provider and adds it to the Injector before returning the Service to Angular.
A Provider is a recipe for creating a dependency. We must at least register one Provider of any Service we want to use. It can be done in Modules or in Components. Doing this in a Module allows Angular to inject the corresponding Services in any class it creates and so the Service instance lives for the life of the app. By using a Component Provider we restrict the scope of the Service and so it will only be injected into that Component instance or one of its descendant Component instances. It means that Angular can't inject the same Service instance anywhere else. The lifetime of this Service will also be different: the Service instance will be destroyed when the Component instance is destroyed.
Here is how we can inject a Service in a Component:
import { Injectable } from '@angular/core'; import { Logger } from './logger'; @Injectable() export class Logger { log(msg: any) { console.log(msg); } error(msg: any) { console.error(msg); } warn(msg: any) { console.warn(msg); } }
logger.service.ts file
import { Component } from '@angular/core'; import { Logger } from './logger'; @Component({ selector: 'my-component', templateUrl: './my-component.component.html', providers: [ Logger ] }) export class HeroListComponent implements OnInit { constructor(private logger: Logger {} }
my-component.component.ts file
We could also do it with the Root Module like so:
@NgModule({ providers: [ Logger ] })
app.module.ts file
import { Component } from '@angular/core'; import { Logger } from './logger'; @Component({ selector: 'my-component', templateUrl: './my-component.component.html', }) export class MyComponent implements OnInit { constructor(private logger: Logger {} }
my-component.component.ts file
We can also imagine the a Service needs another Service:
import { Injectable } from '@angular/core'; import { Logger } from './logger.service'; @Injectable() export class MyService { constructor(private logger: Logger) { } }
Data Binding
Basically, data bindings allow properties of two objects to be linked so that a change in one causes a change in the other. It establishes a connection between the user interface and the underlying application. It defines a relationship between two objects: a source object that will provide data and a target object that will use the data from the source object. The benefit of data binding is that we no longer have to worry about synchronizing data between our Views and data source.
With Angular, the most common way to display a Component property is to bind that property name through interpolation. Interpolation is the estimation of a value or a set of values based on their context. It allows to evaluate a string containing one or more placeholders and to replace those placeholders with a computed and corresponding value. The context is typically the Component instance. So, basically, in Angular, to achieve this, we have to put the property name in the View enclosed in double curly braces. It will be something like so:
<h1>{{title}}</h1>
Most of the time, bindings are used to connect the visuals of an application with an underlying data model, usually in a realization of the MVVM Pattern (Model-View-ViewModel) or the MVC Pattern (Mode-View-Controller). In Angular, the Component plays the part of the Controller/ViewModel, and the template represents the View.
Angular provides many kinds of data binding. Binding types can be grouped into three categories distinguished by the direction of the data flow: source-to-view, view-to-source and two-way sequence: view-to-source-to-view. When we use binding types other than interpolation, we have to specify a target name that is the name of a property. It looks like an attribute name, but it is not. With data binding, we are not working with HTML attributes, but properties of DOM (Document Object Model) elements. Just to refresh our minds, we may say that attributes are defined by HTML and properties are defined by DOM and the responsibility of HTML attributes is just to initialize DOM properties. Later DOM properties can change, but HTML attributes cannot. Some DOM properties don't have corresponding attributes and some HTML attributes don't have corresponding properties. The target of a data binding is something in the DOM.
import { Component } from '@angular/core'; @Component({ selector: 'my-component', templateUrl: './my-component.component.html', }) export class MyComponent { imgSrc: String = 'path-to-image'; }
my-component.component.ts file
<img [src]="imgSrc">
my-component.component.html file
We often say that property binding is one-way data binding because it flows a value in one direction, from a Component's data property into a target element property. However, we are allowed to achieve something called two-way data binding that, for example, lets us display a data property and update that property when the user makes changes. We can do this by using the syntax "[(x)]".
We are also able to achieve event binding:
export class MyComponent { doSomething() { // some code } }
my-component.component.ts file
<button (click)="doSomething()">Do something</button>
my-component.component.html file
Input and Output
In a Component, we can use two decorators on properties: "@Input" and "@Output".
An Input property is a settable property. An Output property is an observable property. Input properties usually receive data values. Output properties expose Event producers.
Declaring an Input property would give something like so:
export class MyComponent { @Input() name: String; }
my-component.component.ts file
<my-component name="foo"></my-component>
my-component.component.html file
An Output property almost always returns an Angular EventEmitter. An EventEmitter allows us to emit a custom Event. It is helpful to pass a value to a parent Component. Let's say that we have something like this:
export class MyComponent { @Output() deleteItemRequest = new EventEmitter<Item>(); delete() { this.deleteItemRequest.emit(this.item) } }
my-component.component.ts file
<button (click)="delete()">Delete</button>
my-component.component.html file
As we can see, here, we use event binding. So, when the button is clicked, we call the "delete()" method. In the Component, we also declare an Output property that returns an EventEmitter and we declare its underlying type as "Item". So, when the "delete()" method is called, we use this EventEmitter to emit a new Event. In fact, it will emit an "Item" object.
So, we can now imagine that we have the following thing as a parent Component:
export class ParentComponent { deleteItem(item: Item) { // Some code } }
parent-component.component.ts file
<parent-component (deleteItemRequest)="deleteItem($event)"></parent-component>
parent-component.component.ts file
When the child Component emits its Event, the parent Component will use the result of this same Event with its own method.
Component Lifecycle Hooks
Angular manages the lifecycle of the different Components. Through different Hooks, it provides a way to perform actions when those different moments occur. We access to those moments by implementing one or more of the lifecycle Hook interfaces in the Angular core library. Each interface has a single Hook method whose name is the interface name prefixed with "ng".
Down below, we have an example of a Component using the "OnInit" interface:
export class MyComponent implements OnInit { ngOnInit() { // Some code } }
Communication between parent and child Components
There are a few ways to make a parent and child Component interact. One way is to inject the child Component into the parent as a ViewChild. This could be achieved like so:
import { ViewChild } from '@angular/core'; import { Component } from '@angular/core'; import { ChildComponent } from './child-component.component'; export class ParentComponent { @ViewChild(ChildComponent) private childComponent: ChildComponent; method1() { this.childComponent.childMethod1(); } method2() { this.childComponent.childMethod2(); } }
Another way to make a parent and child Component interact is to make them share a Service.
Directives
In Angular, there are three kinds of Directives:
Components - Directives with a template
Structural Directives - change the DOM layout by adding and removing DOM elements
Attribute Directives - change the appearance or behavior of an element, Component, or another Directive
We have already seen Components. They are the most common Directives.
Structural Directives change the structure of the View. They are things like "NgFor" or "NgIf". Here is an example of different Structural Directives:
<div *ngIf="character" class="name">{{character.name}}</div> <ul> <li *ngFor="let character of characters">{{character.name}}</li> </ul> <div [ngSwitch]="character?.size"> <app-big-character *ngSwitchCase="'big'" [character]="character"></app-big-character> <app-medium-character *ngSwitchCase="'medium'" [character]="character"></app-medium-character> <app-small-character *ngSwitchCase="'small'" [character]="character"></app-small-character> <app-character *ngSwitchDefault="'small'" [character]="character"></app-character> </div>
Attribute Directives are used as attributes of elements. They are things like "NgClass" or "NgStyle". Here is an example of different Attribute Directives:
<div [ngStyle]="currentStyles"> Some content. </div> <div [class.error]="hasError">Some error</div>
Let's make a little side note for the "NgModel" Directive that is part of the "FormsModule". This Directive helps us when we want to display a data property and update that property when the user makes changes through a form. Using this two-way data binding makes this easier. It will map the various fields of our form to our Data Model. It will ensure that the data in the View and the data in our Data Model are synced.
We can use this Directive like so:
export class MyComponent { name: string; }
my-component.component.ts file
<input type="text" [(ngModel)]="name" />
my-component.component.html file
We are also able to build Attribute Directives. We just have to create a class annotated with the "@Directive" decorator.
Pipes
Pipes are a way to operate some transformations over data before displaying them. Angular comes with several built-in Pipes. For example, we can have something like so:
<p>The character's birthday is {{ birthday | date:"MM/dd/yy" }}</p>
We are also able to create our own Pipes by using the "@Pipe" decorator and implementing the "PipeTransform" interface. This could be done like so:
import { Pipe, PipeTransform } from '@angular/core'; @Pipe({name: 'exponentialStrength'}) export class ExponentialStrengthPipe implements PipeTransform { transform(value: number, exponent: string): number { let exp = parseFloat(exponent); return Math.pow(value, isNaN(exp) ? 1 : exp); } }
Observables
Observables provide support for passing messages between Publishers and Subscribers in our application. An Observable can deliver multiple values of any type.
A Publisher must create an Observable instance. This object defines a function that is executed when a consumer calls the "subscribe()" method. This method, called the subscriber function, states how to get data to be published. To execute our Observable, we have to call its "subscribe()" method and pass it an Observer. This object implements the "Observer" interface and is responsible to handle the various notifications from the Observable.
To use Observables, we need to import the RxJS Library. RxJS is a library for reactive programming, which is a declarative programming paradigm where we program with asynchronous data streams. Data streams can be anything and we are so able to listen to them and react accordingly. A stream is a sequence of continuous Events ordered in time and it can emit three different things: a value of some type, an error or a "completed" value. Asynchronously, we capture these different emitted events by defining functions: one that will execute when a value is emitted, another that will execute when an error is emitted and another one that will execute when "completed" is emitted. The action of listening to the stream is named "subscribing". The various functions we define are the "Observers" while the stream is the "subject" or the "Observale". This is the Behavioral Design Pattern called the Observer Pattern. We also have to deal with the "Operators" which are the various pure functions, functions that always evaluate the same result value when we give them the same argument value, that will let us work on the emitted values.
This kind of programming is really helpful when we have to deal with various UI Events related to data Events. It helps us to achieve real-time apps.
Let's imagine that we have a Service that is responsible to fetch users:
import { Observable } from 'rxjs/Rx' import { Injectable } from '@angular/core' import { Http, Response } from '@angular/http' @Injectable() export class UsersService { constructor(public http: Http) {} public fetchUsers() { return this.http.get('/api/users').map((res: Response) => res.json()) } }
Our method "fetchUsers()" returns an Observable, our subject. So, we can subscribe to our subject like so:
import { Component } from '@angular/core' import { Observable } from 'rxjs/Rx' import { UsersService } from './users.service' import { User } from './user' @Component({ selector: "my-component", templateUrl: "./my-component.component.html", providers: [ UsersService ] }) export class MyComponent { public users: Observable<User[]> constructor(public usersServce: UsersService) {} public ngOnInit() { this.users = this.UsersService.fetchUsers() } }
In our template file, we have to do the following things:
<ul class="user-list" *ngIf="(users | async).length"> <li class="user" *ngFor="let user of users | async"> {{ user.name }} </li> </ul>
We may also want to create an Observable from a Promise. We can do it like so:
const data = fromPromise(fetch('/api/endpoint'));
This create an Observable. To subscribe, we have to do the following thing:
data.subscribe({ next(response) { console.log(response); }, error(err) { console.error('Error: ' + err); }, complete() { console.log('Completed'); } });
Here, we achieve the process of subscription and as we can see, we define the three functions that we talked about a little earlier.
Forms
We can use Angular event bindings to respond to Events that are triggered by user input. For example, we can imagine the following situation:
export class MyComponent { values = ''; onKey(event: any) { this.values += event.target.value; } }
my-component.component.ts file
<input (keyup)="onKey($event)"> <p>{{values}}</p>
my-component.component.html file
Angular has also a whole "Form" library that helps us with many things. We can, for example, use it to add some validation rules to our forms.
<input id="name" name="name" class="form-control" required minlength="4" [(ngModel)]="user.name" #name="ngModel" > <div *ngIf="name.invalid && (name.dirty || name.touched)" class="alert alert-danger"> <div *ngIf="name.errors.required"> Name is required. </div> <div *ngIf="name.errors.minlength"> Name must be at least 4 characters long. </div> </div>
Here, we start by defining a input with a few rules. As we can see, we export the "ngModel" Directive to achieve two-way data binding. We also export the form control's state to a local variable "#name". Then, we check if the control has been touched and we display different errors if there are some.
With Angular, we also have the ability to dynamically generate forms. To achieve this, we have to create objects derived from the base class "QuestionBase" and that represents the various controls of our forms. We can then treat them through a Service that will build the form and return it as a "FormGroup" object.
Routing & Navigation
In Angular, the Router allows navigation from one View to the next. The Router interprets a browser URL to navigate to a client generated View and, if needed, pass optional parameters. The Router can be bound to links or it can be used in response to some actions.
To use the Router correctly, we need to add a "base" element to our "index.html" file. We also need to import the Router Module. In our "app.module.ts" file, we can do the following thing:
import { RouterModule, Routes } from '@angular/router'; const appRoutes: Routes = [ { path: 'characters', component: CharactersComponent }, { path: 'character/:id', component: CharacterDetailComponent }, { path: '', redirectTo: '/characters', pathMatch: 'full' }, { path: '**', component: PageNotFoundComponent } ]; @NgModule({ imports: [ RouterModule.forRoot(appRoutes) ] }) export class AppModule { }
As we can see, we define our navigation Routes in the array "appRoutes" and we pass this array to the "RouterModule". We can now use the "RouterOutlet" Directive, that marks where the Router displays a View, to create some kind of navigation menu:
<nav> <a routerLink="/characters" routerLinkActive="active">Characters</a> </nav> <router-outlet></router-outlet>
After the end of each successful navigation lifecycle, the Router builds a tree of "ActivatedRoute" objects that make up the current state of the Router. We are able to access the current "RouterState" from anywhere in the application using the Router Service and the "routerState" property.
Conclusion
Through this article, we got a brief overview of the Angular technology. It was more a theoretical post than a practical example. Of course, we didn't cover entirely each subject and there are plenty of other subjects that we could have explored like Unit Testing or E2E Testing. Now, however, we have enough knowledge of Angular to start a project and to dig deeper into this framework.
One last word
If you like this article, you can consider supporting and helping me on Patreon! It would be awesome! Otherwise, you can find my other posts on Medium and Tumblr. You will also know more about myself on my personal website. Until next time, happy headache!
8 notes
·
View notes
Text
Migration from Angular JS to Angular
Stage-1: Choose the Type of Migration Based on Your Requirement
There are 2 types of migration based on your existing application –
Migration From the Scratch
Hybrid Approach
If you want to revamp your application completely, migration from scratch could be a better option. In this approach, you can re-engineer your application, starting from designing to the functionality. But, before you start with the migration, evaluate the resources required such as time, money, and human resource. Generally, this type of migration is more feasible for a small size application in comparison to the larger one.
Hybrid Approach is preferable when you want to migrate your application in an incremental way. In this approach, the new code lives with the old until the migration process is completed, requiring you to take care of the framework and maintenance.
The AngularJS/Angular-hybrid module empowers you to run and maintain the operations of two different frameworks simultaneously in one project. The new features are implemented in the new framework, and the old features are being transferred steadily, without affecting the application performance as a whole.
Stage-2: Preparation
Once you have decided the migration type, start preparing your application for the migration-
1. Set up TypeScript.
2. Abide by AngularJS Style Guide for the Code Structure
3. Using a Module Loader
4. Using Component Directive
It is not mandatory to use TypeScript in Angular, it works well with JavaScript and Dart. If you plan to use TypeScript in your upgraded application, it is recommended to bring in the TypeScript compiler before you start the up-gradation process. You can use the TypeScript features in Angular JS as well, this way you will be TypeScript ready.
Being a superset of ECMAScript 2015, switching to TypeScript only requires you to do the following preparations-
Install the TypeScript compiler.
Rename files from *.js to *.ts.
TypeScript imports/ exports can be used in the applications using module loaders, to arrange the code into modules.
Type annotations should be added to the existing functions and variables.
The JavaScript features that are new to ES2015, should also be gradually added to make the code more comprehensible and functional.
You can convert the services and controllers into classes.
Angular is an upgraded version of AngularJS, hence their goals are the same, empowering you to follow the same AngularJS Style Guide for your Angular app as well. AngularJS Style Guide helps you to create cleaner, as well as highly maintainable AngularJS applications, which is also more closely Angular aligned.
Following rules can make the up-gradation much easier-
One Component per File
Folders-by-Feature Structure and Modularity
These rules make it easier to navigate, find as well as migrate the component/ modules in a cleaner and easier way. Hence, it is the most recommended part of the preparation.
Before you break down the application code as per the rules of the AngularJS style guide, make sure you have a module loader. Though breaking down the code into modules/ component files makes the code more manageable, loading all these files to the HTML page with script tags and that too in a specific order is a bit challenging task. Module Loader helps you with this, maintaining and loading the code in the correct order.
To build the UI of an Angular application, you need components. For AngularJS, this can be done through component directives. In both cases the templates, controllers as well as the I/O bindings are defined by their respective frameworks, making it easier to migrate.
To make the component directives compatible with Angular, make sure you configure these attributes to the directives:
restrict: ‘E’.
scope: {}
bindToController: {}.
controller and controllerAs.
template or templateUrl.
transclude: true/{}
require
Do not use the attributes like compile, replace, priority as well as terminal as these are not supported by Angular
Stage-3: Migration to Angular
If you are writing your application from scratch to upgrade it to angular then the process is comparatively easier than that in the case of a hybrid approach. In this approach, you need to manage both the code simultaneously during the migration process. Angular provides a very useful library for the same called the ngUpgrade library.
It empowers you to mix and match components of both Angular JS and Angular in the application. Also with the help of the ngUpgrade library, these components can interoperate with each other seamlessly making the migration super smooth and easier.
The ngUpgrade library provides you with a very powerful tool called the UpgradeModule that helps you throughout the migration process. This module consists of the utilities for bootstrapping as well as managing hybrid applications, thereby supporting both Angular and AngularJS code.
ngUpgrade library empowers you to execute the code simultaneously enabling the services and components of one framework to interoperate with the services and components managed by the other framework. This takes place in three major areas-
1. Dependency Injection
2. The DOM
3. Change Detection
Both Angular and AngularJS function a bit differently in various aspects and this holds for dependency injection as well. AngularJS always has only one dependency injection which is always of String type. On the other hand, Angular has a hierarchy of dependency injection which can vary in its type. Despite the differences upgrade/static makes them work seamlessly together in 2 ways-
Upgrade the Angular JS services to avail them for injection to Angular code.
Downgrade the Angular service for injection to Angular JS code.
The DOM of a hybrid application consists of the components and directives of both Angular and AngularJS. The point to consider here is that among all the available elements i.e. components and directives present in the DOM, a framework only treats the elements that are owned by them, else it ignores it.
In the case of upgrading the AngularJS application to Angular, the hybrid application starts as the AngularJS application. Whenever an Angular component is encountered in the AngularJS template, Angular takes control and manages it.
To interleave the frameworks, you can cross the boundary either by using the other framework components or by projecting or transcluding the contents from the other framework.
In Angular JS the change detection and data binding updates are done by the function called scope.$apply(). Whenever an event occurs this function is called either by the framework itself or manually by you after which the updates are made.
Angular takes it differently, executing the code in the angular zone. As soon as the code finishes, Angular automatically detects changes and makes the update. Unlike AngularJS you need not call any functions like scope.$apply(). If the function is already present in the code, no need to remove it, it won’t affect the code anyways.
Steps of Migration-
Switch to Typescript
Install the Angular and ngUpgrade Library
Import UpgradeModule in the NgModule for bootstrapping
Bootstrap the hybrid (AngularJS and Angular) application, for which you need to bootstrap each part of the application be it Angular or AngularJS.
Note: In the hybrid application, bootstrapping has to be done manually with the UpgradeModule unlike the pure AngularJS applications, in which bootstrapping can be done automatically just by adding an ng-app directive in the HTML page. Hence, it is advised that before you switch your application to hybrid mode, switch it to AngularJS, so that you can use the angular.bootstrap method for bootstrapping.
As we have discussed, there are two ways in which you can carry the migration process- Upgrade and Downgrade. We will consider both ways in the steps ahead.
Upgrade your Code
Upgrade– Now that you are running a hybrid app, start upgrading your code. If you want you can upgrade the AngularJS component directives and access it from the Angular code.
Downgrade- Use the Angular component into the AngularJS code. For this, you can downgrade the component by using downgradeComponent() method. You can rewrite the AngularJS components into the Angular components or you can also add a new Angular component as well.
Project/ Transclude
Upgrade- If you want to upgrade the AngularJS component, you can transclude the Angular content in it, by marking the transclusion point through the ng-transclude directive.
Downgrade: In case you are downgrading the Angular component, to transclude the AngularJS content into the Angular component, you can use the feature called content projection instead of transclusion feature. To make the component support the content projection, use the tag in it. Inject the Dependencies
Upgrade- To include some essential logic, which you cannot change, you need to inject it in your code. To make the AngularJS dependencies injectable into Angular, you can request for the service from AngularJS $injector.
Downgrade- To inject the Angular code into the AngularJS, you can downgrade the Angular dependencies and use them from AngularJS. For this, you need to import the ‘downgradeInjectable’ function from ‘upgrade/static’.
Gradually, you will be able to upgrade your AngularJS application to Angular. Once you’ve upgraded all the AngularJS application components with the Angular ones, make sure you also upgrade the routing process as well by adding the Angular router. And lastly, the testing process, test your final Angular application for its performance and accuracy. Source: https://www.aceinfoway.com/blog/angularjs-to-angular-migration
0 notes