#BitLocker Recovery Keys
Explore tagged Tumblr posts
Visit Tumblr Blog
Explore Tumblr blogs with no restrictions, modern design and the best experience.
Last Seen Tumblr Blogs


Fun Fact
Tumblr has a low social media market share in South America.
Text
Install Remote Server Administration Tools on Windows 11
Remote Server Administration Tools (RSAT) for Windows includes Server Manager, Microsoft Management Console (MMC) snap-ins, consoles, Windows PowerShell cmdlets and providers, and command-line tools for managing roles and features that run on Windows Server. In this guide, we shall discuss the steps to install Remote Server Administration Tools on Windows 11. Because these steps have slightly…
#Bitlocker#BitLocker Recovery Keys#BitLocker Recovery Password Viewer#How to install RSAT tools:#Install RSAT on Windows 11#RSAT#Windows#Windows 10#Windows 11#Windows Remote Administration Tool#Windows Server
0 notes
Text
ok I've tried finding info abt this or if anyone else has experienced this but I haven't found much so I'm turning to the tumblrverse for this one
sometimes when I'm just doing normal stuff on my laptop (though it usually seems to happen when I'm watching a video), my laptop screen will just suddenly go black before giving me the option to restart my PC (unfortunately this time i didn't take the time to take a picture of everything else it says but I think there's another option about seeing other options. I'll update this if it happens again and i remember to write everything it said).
so. restart my pc -> it turns back on normal but there's no wifi -> restart again and then everything is normal again and all the tabs I had open before come back when i open firefox
hasn't been a huge issue so far but it's still annoying that it happens and I worry about it happening while I'm writing an online exam. I don't really keep track of how often it happens but there's generally at least a few days between each occurrence. tonight it seemed to happen twice but the second time it just went black and then went back to my sign in page without the "restart my pc" screen so idk what that's about
my laptop is a Dell Inspiron 15 with Windows 11 and I've had it for about 2 years now
#there was also a span of time over the last year where a similar thing would happen#but it would require me to enter my bitlocker recovery key to get back on#+ I was required to enter my bitlocker recovery key every time I turned on my laptop#but I think that issue got resolved and i haven't been dealing with it for a while#s0dabeach talks#computer problems#idk how to tag this to get the tech side of tumblr to see it#a gen-z'er i am but computer savvy i am not
0 notes
Text
Bitlocker Data Recovery - Recover your lost data (Bitlocker Recovery Software)

In the digital age, data security is paramount, and encryption plays a crucial role in safeguarding sensitive information. BitLocker, a built-in encryption feature in Windows, provides users with a powerful tool to protect their data. However, despite its robust security measures, data loss can still occur due to various reasons such as accidental deletion, formatting, or drive corruption. In such situations, BitLocker data recovery software becomes indispensable, offering users a lifeline to retrieve their valuable data. In this comprehensive guide, we'll delve into the intricacies of BitLocker data recovery tool and explore how BitLocker recovery software can help users recover their lost data effectively.
Understanding BitLocker Encryption: BitLocker encryption is a security feature introduced by Microsoft in Windows operating systems to protect data stored on drives. It encrypts the entire drive, making it inaccessible without the encryption key or password. While BitLocker enhances data security, it also poses a challenge when data loss occurs, as accessing encrypted data without the key becomes nearly impossible.

Common Causes of BitLocker Data Loss:
Accidental deletion of BitLocker-encrypted files or folders.
Formatting of the BitLocker-protected drive.
Corruption of the BitLocker encryption key or password.
Drive failure or hardware malfunction.
System crashes or software errors.
Introducing BitLocker Data Recovery Software:
BitLocker data recovery software is specifically designed to address the challenges of recovering lost or inaccessible data from BitLocker-encrypted drives. These software solutions leverage advanced algorithms and techniques to scan, detect, and recover data from encrypted drives, providing users with a reliable means to retrieve their valuable information.
Key Features of BitLocker Recovery Software:
Deep Scan: BitLocker recovery software conducts a thorough scan of the encrypted drive, identifying lost or deleted files and folders.
File Preview: Users can preview recoverable files before proceeding with the recovery process, ensuring accurate retrieval of data.
Selective Recovery: Users have the option to selectively recover specific files or folders, minimizing the time and effort required for data recovery.
User-Friendly Interface: BitLocker recovery tool features an intuitive interface that guides users through the recovery process, making it accessible to users of all skill levels.
Compatibility: BitLocker recovery software is compatible with various versions of Windows operating systems, ensuring broad compatibility and usability.
Step-by-Step Guide to BitLocker Data Recovery:
Install and Launch the Software: Download and install the BitLocker recovery software on your Windows computer. Launch the software to begin the recovery process.
Select the Encrypted Drive: Choose the BitLocker-encrypted drive from which you want to recover bitlocker data and initiate the scanning process.
Scan the Drive: The software will conduct a deep scan of the encrypted drive, identifying lost or deleted files and folders.
Preview and Select Files: Once the scan is complete, preview the recoverable files and select the ones you wish to recover.
Recover Data: Click on the "Recover" button to initiate the data recovery process. The software will retrieve the selected files and save them to the desired location.
Benefits of Using BitLocker Recovery Software:
Efficient Data Recovery: BitLocker data recovery software offers a streamlined and efficient process for recovering lost data, minimizing downtime and productivity loss.
Comprehensive Solution: BitLocker recovery software can handle various data loss scenarios, including accidental deletion, formatting, or drive corruption.
User-Friendly Interface: With an intuitive interface, BitLocker recovery software makes data recovery accessible to users of all skill levels.
Time-Saving: The selective recovery feature allows users to retrieve specific files or folders, saving time and effort.
Data Integrity: BitLocker recovery software ensures the integrity and security of recovered data, providing users with peace of mind.
Conclusion: BitLocker data recovery software is a valuable tool for users who have encountered data loss on BitLocker-encrypted drives. Whether due to accidental deletion, formatting, or drive corruption, BitLocker recovery software offers a reliable solution to retrieve lost or inaccessible data with ease. By following the step-by-step guide outlined in this blog, users can effectively recover their valuable data and ensure business continuity and data security. With its advanced features and user-friendly interface, BitLocker recovery software is an indispensable tool for recovering lost data and protecting sensitive information.
#bitlocker recovery tool#bitlocker data recovery tool#bitlocker recovery software#bitlocker recovery key generator#bitlocker data recovery software
0 notes
Text
For those who are not aware: Bitlocker is encryption software, it encrypts your computer and makes it impossible to access the information on the computer unless you have the key.
It should be standard practice for IT companies to document the bitlocker keys as they are configuring bitlocker on a computer; generally you would do this by creating a record in your client management software for that specific device and putting the key in the record. Sometimes software can be used to extract that information in the event that it's necessary, but even if there's theoretically a way to extract the key, it should be documented somewhere *other* than on the encrypted computer.
This is something that a lot of IT people fuck up on kind of a lot (we've definitely had problems with missing bitlocker keys and I'm quite happy that the people who didn't document those keys aren't my coworkers anymore).
So what do you do if you want to use encryption software and you're NOT an IT company using a remote management tool that might be able to snag the keys?
When you are setting up encryption, put the encryption key in your password manager. Put it in your password manager. Document the important information that you cannot lose in your password manager. Your password manager is a good place to keep important things like your device encryption key, which you do not want lost or stolen. (If you run your password manager locally on an encrypted computer, export the data every once in a while, save it as an encrypted file, and put the file on your backup drive; you are going to have a bad time if your computer that hosts the only copies of your passwords shits the bed so *make a backup*)
This is my tip for home users for any kind of important recovery codes or software product keys: Print out the key and put it in your underwear drawer. Keep it there with your backup drive. That way you've got your important (small) computer shit in one place that is NOT your computer and is not likely to get shifted around and lost (the way that papers in desks often get shifted around and lost).
2K notes
·
View notes
Text
Installing Linux (Mint) as a Non-Techy Person
I've wanted Linux for various reasons since college. I tried it once when I no longer had to worry about having specific programs for school, but it did not go well. It was a dedicated PC that was, I believe, poorly made. Anyway.
In the process of deGoogling and deWindows365'ing, I started to think about Linux again. Here is my experience.
Pre-Work: Take Stock
List out the programs you use regularly and those you need. Look up whether or not they work on Linux. For those that don't, look up alternatives.
If the alternative works on Windows/Mac, try it out first.
Make sure you have your files backed up somewhere.
Also, pick up a 5GB minimum USB drive.
Oh and make a system restore point (look it up in your Start menu) and back-up your files.
Step One: Choose a Distro
Dear god do Linux people like to talk about distros. Basically, from what all I've read, if you don't want to fuss a lot with your OS, you've got two options: Ubuntu and Linux Mint. Ubuntu is better known and run by a company called Canonical. Linux Mint is run by a small team and paid for via donations.
I chose Linux Mint. Some of the stuff I read about Ubuntu reminded me too much of my reasons for wanting to leave Windows, basically. Did I second-guess this a half-dozen times? Yes, yes I did.
The rest of this is true for Linux Mint Cinnamon only.
Step Two: Make your Flash Drive
Linux Mint has great instructions. For the most part they work.
Start here:
The trickiest part of creating the flash drive is verifying and authenticating it.
On the same page that you download the Linux .iso file there are two links. Right click+save as both of those files to your computer. I saved them and the .iso file all to my Downloads folder.
Then, once you get to the 'Verify your ISO image' page in their guide and you're on Windows like me, skip down to this link about verifying on Windows.
Once it is verified, you can go back to the Linux Mint guide. They'll direct you to download Etchr and use that to create your flash drive.
If this step is too tricky, then please reconsider Linux. Subsequent steps are both easier and trickier.
Step Three: Restart from your Flash Drive
This is the step where I nearly gave up. The guide is still great, except it doesn't mention certain security features that make installing Linux Mint impossible without extra steps.
(1) Look up your Bitlocker recovery key and have it handy.
I don't know if you'll need it like I did (I did not turn off Bitlocker at first), but better to be safe.
(2) Turn off Bitlocker.
(3) Restart. When on the title screen, press your Bios key. There might be more than one. On a Lenovo, pressing F1 several times gets you to the relevant menu. This is not the menu you'll need to install, though. Turn off "Secure Boot."
(4) Restart. This time press F12 (on a Lenovo). The HDD option, iirc, is your USB. Look it up on your phone to be sure.
Now you can return to the Linux Mint instructions.
Figuring this out via trial-and-error was not fun.
Step Four: Install Mint
Just follow the prompts. I chose to do the dual boot.
You will have to click through some scary messages about irrevocable changes. This is your last chance to change your mind.
I chose the dual boot because I may not have anticipated everything I'll need from Windows. My goal is to work primarily in Linux. Then, in a few months, if it is working, I'll look up the steps for making my machine Linux only.
Some Notes on Linux Mint
Some of the minor things I looked up ahead of time and other miscellany:
(1) HP Printers supposedly play nice with Linux. I have not tested this yet.
(2) Linux Mint can easily access your Windows files. I've read that this does not go both ways. I've not tested it yet.
(3) You can move the taskbar (panel in LM) to the left side of your screen.
(4) You are going to have to download your key programs again.
(5) The LM software manager has most programs, but not all. Some you'll have to download from websites. Follow instructions. If a file leads to a scary wall of strange text, close it and just do the Terminal instructions instead.
(6) The software manager also has fonts. I was able to get Fanwood (my favorite serif) and JetBrains (my favorite mono) easily.
In the end, be prepared for something to go wrong. Just trust that you are not the first person to ever experience the issue and look it up. If that doesn't help, you can always ask. The forums and reddit community both look active.
177 notes
·
View notes
Text
2024 CrowdStrike Incident
I just wanted to document my day today. Since I feel this is a pretty major historical event in the history of computing.
From my understanding, the update that CrowdStrike pushed occurred last night, but I wasn't made aware of it until this morning.
I heard the notification for Microsoft Teams go off on my work phone a couple of times while I was still in bed. I decided not to answer right away since employees are supposed to call me directly if there's a production issue. However, around 5:30 this morning, I got a call from one of my team leads telling me that a CrowdStrike update got pushed earlier that has now "BitLockered" a bunch of computers.
For context, my team uses the term "BitLockered" for any time a computer crashes and requires the BitLocker encryption key to recover.
In any case, I was asked if I could run over to our local distribution center right away to start mitigating the damage. I immediately got up, got dressed, grabbed my work laptop and bag and left. I skipped my morning coffee and shower so I could get there ASAP.
When I finally managed to get inside the building, I started taking a look around the front office and saw several computers stuck on the Windows Recovery Mode screen. Already starting to look like a bad sign. I started booting up my work laptop, which I thankfully did not leave turned over overnight, and headed upstairs to a bank of production computers. As soon as I got up there, I saw a sea of Windows Recovery Mode screens.
By this point my Microsoft Teams notifications started going off non-stop, and I started running the recommended fix on one of the computers. Basically I was trying to make sure I understood how to perform the fix. At this point, it became apparent we were going to have to touch every endpoint in our network at every facility.
Around 6:00AM, I got a call from a manager from a separate facility asking me about what was going on. This is someone that's constantly just called me instead of submitting a help desk ticket, and I've tried to be patient with. Today I had to be a bit more blunt and state that I couldn't drop what I was doing to come over and help, but that someone would be there later today to assist. This manager continued to try and call me throughout the day, but I had to keep telling him that I was not going to be available all day.
Around 6:30AM one of my co-workers made it to the distribution center to help. I ran the fix on his laptop and we started working to fix each computer one by one. A bit later I noticed my mom texted me that she heard about this in the news. So I looked up "CrowdStrike" on Google and found that not only were we affected by it, but many other major companies were.
As we started getting workstations back online, it became apparent that was only going to be half the battle, as this issue caused most of our servers to crash as well. But at this point, we figured it would be best to continue to get as many workstations back up and running one by one. But because the servers were down, I kept getting asked if I could restore a connection, which unfortunately we couldn't do until the server team could run the fixes on our servers.
Eventually I was asked to join a Zoom call so I could start providing other facilities with BitLocker keys so they could start running the fix on their own computers. Some machines we determined could be fixed by reverting to a restore point. Others we had find a way to manually remove the "C-00000291*.sys* file by booting the computer into Safe Mode with Networking. Those devices ended up costing us a bunch of time to get back up and running.
By the time 5:00PM rolled around, I asked if I could go home and continue to work from there. So I took the opportunity to go home, get myself cleaned up, and continue to work. By 8:30PM it seemed that things had died down to the point we could stop for the day. I'm sure we've got a few machines we still need to apply the fix to, but we managed to get our core business back up and running within the matter of a few hours.
So yeah, long story. But I just felt like documenting it, given that this is an event that's probably going to be pretty well remembered in the history books.
157 notes
·
View notes
Text

hot girl summer has begun ( life update below the cut )
hi guys sorry i disappeared for like 3 months i had to apply for college, reset my computer cause i lost my bitlocker recovery keys, MY PHONE GOT STOLEN A WEEK BEFORE I GRADUATED and i start college classes tomorrow so i basically have infinite time on my hands send me some asks lol
its certainly been a time i will say that
#transformers#transformers beast wars#beast wars#depth charge#i got a quilt from my mom with waspinators colors on it as a graduation gift too :)#oh also this week i finally realized im bisexual#i dont know how i thought i just liked men this entire time dont ask me how i didnt realize this sooner
13 notes
·
View notes
Text
Somehow i fucked this even more and in trying to boot linux from a usb to see if that would get better acces merely just managed to lock myself out of my laptop forever :)))
reminder to back up your phone data kids, because microsd cards will just break randomly :)))))))
#fuck bitlocker and it freaking out because i changed one boot setting and then changed it back again#of course i dont know the recovery key that i may or may not have written down three years ago in a different city#its been a great weekend feeling so cheery and christmassy#actually i dont really care that much if i have to do a hard reset i'm just pissed ive wasted my whole weekend on this
7 notes
·
View notes
Text
the bitlocker on my laptop activated randomly but before I could even input my recovery key, it booted itself up again like normal. Now I’m a little annxious about my pc. Gulp
#Hoping im just being paranoid#I wasn’t on any sketchy sites#only…on bad time simulator#If it’s anything I cleared my cookies and browser data afterwards#Gulp…#Sharktistic txt.#I did pull out the plug for my charger and then plug it back in…maybe that’s why???hopefully that’s why#getting malware on my pc is my worst nightmare dude
2 notes
·
View notes
Text
BitLocker Windows Update Shutdown or Reboot option behavior
BitLocker is a Windows security feature that provides encryption for entire volumes. It addresses the threats of data theft or exposure from lost, stolen, or inappropriately decommissioned devices. In this article, we shall discuss the following topic “understanding BitLocker Windows Update Shutdown or Reboot option behavior”. This is important for maintaining system security and functionality.…

View On WordPress
#Bitlocker#bitlocker key#BitLocker Recovery Keys#BitLocker Recovery Mode prompted#Microsoft Windows#Windows#Windows 10#Windows 11#Windows Server#Windows Server 2012#Windows Server 2016#Windows Server 2022#Windows Server 2025
0 notes
Text
Awesome.
I turned on my laptop this morning to do my passport renewal, and it asks me for my Bitlocker Recovery Key.
Cool. That's fine. Probably did a firmware update so put it in.
Goes to a BSOD, says it will do an automatic repair, reboots.
STRAIGHT BACK INTO THE RECOVERY KEY SECTION!
Welp. Looks like I get to fix my laptop this week.
Just what I love doing with my copious amounts of free time.
2 notes
·
View notes
Text
Windows did an update last month that triggered bitlocker recovery but i had the wrong email as my secondary email to access my recovery key so i'm effectively shut out of my laptop until tomorrow if im lucky
5 notes
·
View notes
Text
How to Recover Data from Corrupted/Failed BitLocker Drive

Introduction: Encountering a corrupted or failed BitLocker drive can be a daunting experience, potentially leading to the loss of valuable data. However, with the right approach and tools, it's possible to recover your files and regain access to your encrypted data. In this guide, we'll explore the steps to recover data from a corrupted or failed BitLocker drive and delve into how BitLocker data recovery tools can help restore your data effectively.
Understanding BitLocker Drive Encryption:
BitLocker is a built-in feature in Windows operating systems that provides encryption for your files and drives. It secures data by requiring a password or encryption key to access it, protecting against unauthorized access and data breaches. However, in the event of drive corruption or failure, recovering data from a BitLocker-encrypted drive becomes necessary.
Steps to Recover Data from Corrupted/Failed BitLocker Drive:
Assess the Extent of Corruption: The first step to recover bitlocker data from a corrupted or failed BitLocker drive is to assess the extent of the damage. Connect the corrupted drive to a computer running a Windows operating system and check if it's recognized by the system. Use Disk Management or DiskPart to identify the status of the drive, whether it's healthy, damaged, or showing as RAW.
Utilize BitLocker Recovery Options: If the BitLocker drive is partially accessible or recognized by the system but inaccessible due to corruption, attempt to decrypt it using the BitLocker recovery key or password. You can find the BitLocker recovery key in your Microsoft account, on a USB drive, or in a printed copy if you've saved it during the encryption process. Use the BitLocker Recovery Console or Recovery Wizard to access recovery options.
Use BitLocker Data Recovery Software: If traditional recovery methods fail to restore your data, consider using BitLocker data recovery software. These specialized tools are designed to recover data from corrupted or failed BitLocker drives effectively. Choose a reputable BitLocker data recovery tool that supports BitLocker drive recovery and follow the software's instructions to initiate the recovery process.
Scan and Recover Data: Once you've selected a BitLocker recovery tool, scan the corrupted drive thoroughly to identify and recover any accessible data. The software will analyze the drive's file system and attempt to recover lost or inaccessible files. Follow the software's prompts to select the files you want to recover and specify a destination for the recovered data.
Seek Professional Assistance: If all else fails and your data is critically important, consider seeking assistance from professional data recovery software services. These experts have advanced tools and techniques to recover data from severely corrupted or damaged drives. Contact reputable data recovery specialists to assess the situation and explore recovery options.
Conclusion:
Recovering data from a corrupted or failed BitLocker drive requires a systematic approach and the right tools. By assessing the extent of corruption, utilizing BitLocker recovery options, and using specialized BitLocker data recovery software, you can increase your chances of successfully recovering your valuable files. Remember to keep backups of your important data to avoid data loss in the future. With patience and persistence, you can overcome BitLocker drive failures and restore your encrypted data effectively.
#bitlocker data recovery software#bitlocker data recovery tool#bitlocker file recovery software#recover bitlocker data#retrive bitlocker data#restore bitlocker key
0 notes
Text
I'd like to point out that even for "tech savvy" people, technology is becoming more and more inaccessible. Trying to navigate all the pre-installed bloatware to find what's necessary and what isn't is becoming nigh impossible for the average person, and googling it doesn't always help.
My laptop from 2016 died and I needed a new one. Tell me why of the 1TB of storage it has, about 150GB were taken up upon first start-up? And when you open control panel [which, not everyone even knows what that is anymore] to delete the bloatware, it doesn't show anything that takes up that much space.
Knowing how to make a clean install of windows isn't something most people know how to do, and even people who are at least slightly technologically aware, might be wary of messing with Windows for warranty/Windows key reasons or what not. The more predatory technology becomes, the more difficult it becomes even for people who try to stay on top of it. "Yeah, I can look up how to do it, and understand what it says, but there are so many ways it could go wrong, and I can't afford another device" is an absolutely valid fear, and if even someone who does know what the tech lingo means is unwilling to mess with it, how can the average user?
[No, I don't want to hear how it's easy because you can do it through an ISO, or because it's only the first install that can't be clean and afterwards the key is bound to your Microsoft account. The average, kinda-sorta-maybe tech literate person won't touch that because tech is expensive and not everyone can try it out on an old laptop that doesn't work anymore to make sure they know wtf they're doing. So they'll remove what they can, sigh, and live with the rest.]
My dad's laptop recently threw a BIOS error and loaded up with the requirement for a BitLocker key. His laptop, in fact, most peoples laptops, have no need for that kind of security, and most people won't know that their computer has it activated until it throws an error. If the error hadn't occurred while I was there, there is no way in hell he could have figured out how to find the key, because he wasn't even aware this key exists. I wasn't even aware my laptop had BitLocker activated until his showed that error, because its either not mentioned anywhere, or hidden in the multi-page agreements that you need to accept before being allowed access to "your" device.
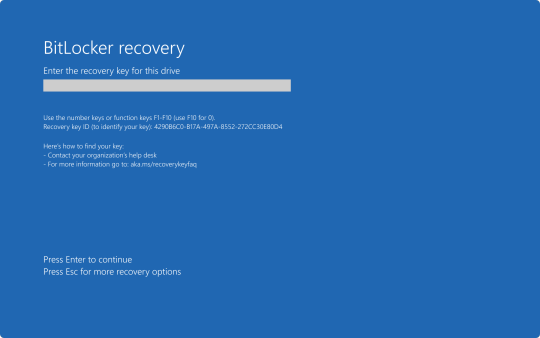
And guess what? If this reaches anyone, somewhere out there is someone who considers themselves "tech savvy", who has just found out their new device has BitLocker activated, and they're trying to figure out how to find the BitLocker key because no one told them this exists or that they may want to know how to find it. (Go to aka.ms/myrecoverykey, sign in to the Microsoft account linked to the device, look for the key that corresponds to the first 8 letters/numbers of the Recovery key ID on the device)
And if you followed one of those helpful guides on how to force a local account onto your lovely new win11 device? I hope you also went and found a lovely guide on how to find your BitLocker key/how to de-encrypt your device, cuz guess what? You see that blue screen and your files are gone. (Well, there are ways around it but again, they're not exactly the easiest of methods, definitely not something the average user could manage)
Sure, it's a safety feature, but it's unnecessary for most and should be an opt-in, not a "find out when shit hits the fan"
The more predatory technology becomes, the harder it becomes to be technologically literate.
I was lucky, my first proper device was a Windows 7 that required some tech literacy but was for the most part user friendly, I didn't love the switch to Windows 10 because it became harder to to find the more complex settings, but I learned most of my tech skills on it, moving to Windows 11 and seeing the "simplified, user friendly, easy setup" interface that makes accessing things harder and actively hides settings from the user? It still grates my nerves. I still have issues with the audio settings of all things because for some stupid reason apps set to 0 still produce noise and the slider moves up by 1-5 points automatically. I've pinned the windows 10 volume mixer to my windows 11 devices task bar because I cannot tolerate the windows 11 one and its bs.
Technology becoming "user friendly and easy to navigate" has, in a lot of cases, actually made it harder to understand. I did not get taught what I know about technology at school. I learnt it on my own, because I grew up with tech that still allowed it.
Yes, schools should still be teaching the basics of technology, but at some point we need to realise that technology has become much more inaccessible too.
And that's only the software side of things. Why does all of my laptops RAM come soldered now? Why does opening my device up to clean it void the warranty? Why does the number of ports keep decreasing?
Anyway, this has gotten longer than I wanted, so I'm going to say this one more time and end it there.
Technology has become easier to use on the surface and harder to understand beyond that. Users are being kept away from "settings they may not understand", and it makes it significantly harder to learn as a result.
Me: oh yeah, if you think school photography is hard now, try imagining doing this with film.
The new girl: what's film?
Me: ... film. Like... film that goes in a film camera.
New girl: what's that mean?
Me: ... before cameras were digital.
New girl: how did you do it before digital?
Me:... with film? I haven't had enough coffee for this conversation
114K notes
·
View notes
Text
CrowdStrike'd and BitLocker'd
With yesterday's CrowdStrike outage. I'm sure a number of you are probably wondering "what does BitLocker have to do with any of this?" Well, it all has to do with an added layer of security many organizations use to keep data from being stolen if a computers ends up in the hands of an "unauthorized user."
To start, let me briefly explain what the CrowdStrike driver issue did and what the fix for it is.
After the update was automatically installed to computers running the CrowdStrike Falcon Sensor, a faulty driver file caused the Windows kernel on those computers to crash and display a Blue Screen of Death. How Windows typically handles a crash like this is to create a crash log file, then perform a reboot. Since this driver would launch shortly after Windows finished booting, it would cause the operating system to crash and reboot again. When two crashes have occurred in sequence, Windows will automatically boot into Recovery Mode. Hence why we say several pictures of the Recovery Mode screen across social media yesterday.

Unfortunately, this update was automatically pushed out to around 8.5 million computers across several organizations, causing widespread chaos within the matter of a few hours. And the fix for this issue had to be performed by physically accessing each computer, which required those of us working in I.T. to have to run around several facilities, locate each affected computer, and apply the fix one by one.
The short and simple of the fix is either one of two options. You can either use the Recovery Mode that Windows was already booted into to navigate to Start-Up Setting, and launch Safe Mode. Once Windows boots into Safe Mode, the technician can navigate to C:\Windows\System32\Drivers\CrowdStrike, and delete the file C00000291-*.sys. After that the computer can be rebooted as normal, and the crashing will stop.
Or the technician can open System Restore from Recovery Mode. And, assuming there is a recovery point, restore the computer back to a good known working state.
Now, this may all seem simple enough. So why were so many organizations having trouble running this fix? That all has to do with BitLocker. As an added security measure, many organizations use BitLocker on their computers to perform a full hard disk encryption. This is done so that if a computer ends up being lost or stolen, and ends up in the hands of an "unauthorized user" they will not be able to access any of the data stored on the computer without a password to log into the computer, or the computer's BitLocker recovery key.
This presented a problem when trying to restore all of these affected computers, because when either trying to launch Safe Mode or System Restore, the user would be prompted for the BitLocker recovery key.
In my organization's case, we found we could save time by providing our end user the steps to perform one of the two fixes on their own to save time. But the problem we still continue to run into is the need for these BitLocker recovery keys. In my case, I've been fielding several calls where I've had end users walking from one computer to another while I provide them with the key as they walk through reverting back to a previous restore point.
Again, a pretty long story, but hopefully that can provide some context as to what's been happening over the past 48 hours.
30 notes
·
View notes
Text
How To Make Sure Information On Your Old Computer Is Really, Truly Deleted
It Isn’t As Simple As Pressing ‘Delete’ And Emptying The Trash. Here’s A Step-By-Step Guide.
— By Sean Captain | June 17, 2025 | The Wall Street Journal (WSJ)

Illustration: Jon Krause
Spring-cleaning season is almost done, and it is time to finally get rid of that old computer. But be very careful before you sell, give away or recycle it.
You could be handing over sensitive information.
Even if you think you deleted everything on it, your old computer may hold lots of personal items you don’t want anyone seeing. In a 2019 study by the University of Hertfordshire (funded by security tech-reviews site Comparitech), researchers purchased 200 used hard drives from the U.S. and U.K. An analysis found data remaining on 59% of the drives, including passport and driver’s license scans, bank statements, utility bills and “intimate photos.”
Just pressing “delete” and emptying the Trash in macOS or the Recycle Bin in Windows won’t do the trick. That’s because your computer maintains an index of where every file resides. Deleting a file erases only its entry in the index, telling your system that it can put new files in that space. But until the system actually does put new files there, the old ones remain accessible. Simple consumer-level file-recovery apps can get at it—never mind professional-grade forensic software.
Here’s how to make sure your data is really gone—even on a computer that won’t start up.
Back-up And Log Out
Start by backing up anything you want to keep. You could drag files onto an external hard drive or use backup software such as the Time Machine app in macsOS. You can also back up to the cloud using Microsoft OneDrive, Apple iCloud, Google Drive, Dropbox or other services. (Don’t empty the Trash or Recycling bin. The wipe process will take care of this.)
Next, log out of applications or games with an online component, so the license is no longer associated with your old computer. Also do this for services like Gmail or Facebook, and web browsers like Chrome that sync your data online—on the admittedly remote chance that an incomplete wipe allows the next owner to access those accounts.
Another step for any type of computer is making sure your files are encrypted—scrambled in a mathematical operation based on very long strings of random numbers and letters called encryption keys. The wiping process will delete the keys to make sure any files that may remain on the machine are unreadable.
What you do next depends on your operating system.
Clearing Out A PC
Windows 10 and the current Windows 11 have a feature called “Reset this PC,” which, with the right settings, thoroughly wipes your data. First, make sure your operating system is up-to-date, as Microsoft recently fixed a bug that sometimes caused the reset process to fail. Press the Windows key, search for “updates” and select “Check for updates.” Install any that are available.
Now check on encryption. In Windows 10 or 11 Home editions, press the Windows key and search for “device encryption settings.” Click “Device encryption settings” on the next screen, then make sure the switch next to “Device encryption” is toggled on. Windows Pro, Enterprise and Education editions have an encryption utility called BitLocker. To enable it, click the Start button, type “bitlocker” and select “Manage BitLocker” from the list of results. (All versions of Windows 10 and 11 also encrypt deleted files.)
Now you’re ready to wipe. Tap the Windows key again, search for “Reset this PC,” then click on it. On the next screen, tap “Reset PC” (Windows 11) or “Get started” (Windows 10), and on the following screen, click “Remove everything.” On the next screen, select “Local reinstall.” (If this doesn’t work, try the “Cloud download” option.) Then click “Change settings,” and on the following screen (under “Clean data?”), toggle the switch to “Yes” and press “Confirm.” On the following screen, press “Next” (Windows 11) or “Reset” (Windows 10). On Windows 11, you will press “Reset” on one more screen. Then let the process run for a few hours.
“Reset this PC” deletes your files, apps and settings, logs you out of your Microsoft account and disables the “Find My Device” feature so the computer is no longer associated with you. Then the serious wiping starts. The encryption keys are deleted, making any encrypted data irretrievably scrambled, and the Clean data option overwrites the ones and zeros that had encoded data on your drive. A clean copy of Windows is also installed.
The MacOS Method
Apple’s “Erase Assistant” feature made its debut in 2021’s macOS 12 Monterey. If your current OS is older, you may be able to update it. To update an older OS to Monterey or a later one, click the Apple menu, then “System Preferences” and “Software Update.” If the update process doesn’t work, jump to “If all else fails” below for another option.
As with Windows, the “Erase All Content & Settings” process should start with encryption. On newer Macs (starting between 2018 and 2020, depending on the model), data is encrypted automatically. Just to be safe, though, turn on a feature called FileVault that adds encryption to older systems and an extra layer to newer ones. Click the Apple icon, then “System Settings” (or “System Preferences” in Monterey). In the next window, click “Privacy & Security” (or “Security & Privacy”), then click FileVault.
Now it is time to wipe. Click again on the Apple icon and “System Settings” (or “System Preferences”), click “General” on the left, then “Transfer or Reset” on the bottom right. Finally, on the next screen, click “Erase All Content & Settings.” (In Monterey, you’ll go there directly from “System Preferences.”)
This process signs you out of Apple services, turns off the “Find My” and “Activation Lock” security measures so that the system is no longer associated with you, and erases all your files, settings, apps and anything else. It deletes the encryption keys, permanently scrambling any data that remains.
If All Else Fails
If your PC or Mac is so old that it can’t run a modern wipe process, you have one more option before seeking pro help. For Windows, several experts recommended the KillDisk app. The $49.95 Professional version runs from a USB drive and overwrites the ones and zeros that encode data on your hard drive with all zeros. Afterward, your computer will no longer boot into Windows unless you reinstall the OS.
For a Mac, your best option is a complex process that Apple describes online.
If these processes sound too complicated, or if your system won’t even turn on, use Apple’s recycling program for Macs or a disposal company that offers hard-drive destruction (or shredding) and recycling for consumers with either type of system. Look for ones that issue a certificate of destruction to verify the process. For instance, Ship ‘N’ Shred accepts drives or whole devices, with prices that include shipping ranging from around $30 to $200.
Modern technology leaves a lot of digital footprints, but at least you can sweep them off your old computer.
— Sean Captain is a Writer ✍️ in New York.
#Technology#Personal Technology#Personal Information#Old Computer 💻 🖥️#Deleting Personal Data#‘Delete’ | Emptying The Trash#Step-By-Step Guide#Sean Captain#The Wall Street Journal (WSJ)
0 notes