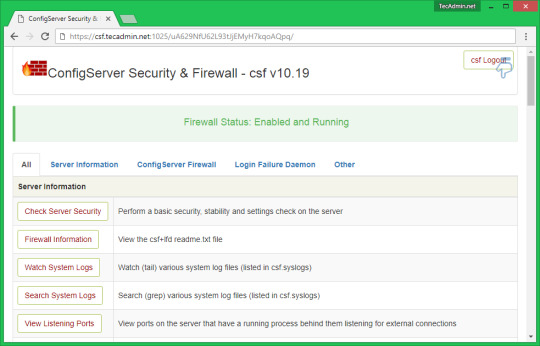
#ConfigServer Security & Firewall (csf)
Explore tagged Tumblr posts
Visit Tumblr Blog
Explore Tumblr blogs with no restrictions, modern design and the best experience.
Last Seen Tumblr Blogs


Fun Fact
Tumblr has 411 employees.
Text
💥Bạn vừa gửi một danh sách cực kỳ dài các dải IP (IPv4 và IPv6) – có vẻ bạn đang chuẩn bị block toàn bộ IP độc hại hoặc không mong muốn bằng CSF (ConfigServer Security & Firewall) t rên máy chủ Linux chạy cPanel/WHM.
💥Bạn vừa gửi một danh sách cực kỳ dài các dải IP (IPv4 và IPv6) – có vẻ bạn đang chuẩn bị block toàn bộ IP độc hại hoặc không mong muốn bằng CSF (ConfigServer Security & Firewall) trên máy chủ Linux chạy cPanel/WHM. 👉 Nếu bạn muốn chặn tất cả các IP này nhanh chóng, hãy làm như sau: ✅ 1. Tạo danh sách IP thành file deny_ips.txt Ví dụ: nano /etc/csf/deny_ips.txt Rồi dán tất cả các dải IP theo dòng…
0 notes
Text
Firewall Hardening Guide for WHM: Secure Your Server with Best Practice Settings
Securing your server using CSF (ConfigServer Security & Firewall) goes far beyond just RESTRICT_SYSLOG. Below is a comprehensive, security-hardened configuration guide for your WHM server running CSF v14.24, including: Must-change core firewall settings Brute-force protection (LFD) Process tracking Port security Email alerts Bonus hardening settings 🔐 1. Log Access Protection ✅…
0 notes
Text
Unlock Powerful Hosting with cPanel Server Management by CloudMinister Technologies
In a digital environment where speed, security, and uptime determine the success of websites and online platforms, effective server management is critical. cPanel Server Management provides a robust foundation for web hosting, but it's the experience and expertise of a professional team that elevates server performance to enterprise-grade reliability.
This is where CloudMinister Technologies steps in—a company known for its dedicated focus on Linux server management, particularly for environments using cPanel and WHM (Web Host Manager). Let’s explore how CloudMinister helps organizations gain maximum value from their cPanel servers.
What is cPanel Server Management?
cPanel is a web hosting control panel that provides a graphical user interface (GUI) and automation tools designed to simplify the process of hosting a website. It allows users to manage files, databases, email accounts, domains, backups, and more—all from a central dashboard.
cPanel Server Management, however, goes far beyond what the software provides out of the box. It involves the continuous monitoring, configuration, optimization, securing, and troubleshooting of servers running cPanel. This ensures the hosting environment remains stable, secure, and high-performing at all times.
About CloudMinister Technologies
CloudMinister Technologies is an India-based IT services company specializing in server management, hosting solutions, and cloud infrastructure. With deep expertise in Linux environments, their team provides managed cPanel services to businesses of all sizes, ranging from solo web developers to enterprise-level organizations.
CloudMinister is recognized for combining technical excellence with responsive customer support, making it a preferred partner for businesses seeking reliable server management.
Key Features of CloudMinister’s cPanel Server Management Services
1. Advanced Security Implementation
Security is a top concern for any server exposed to the internet.CloudMinister applies multiple layers of protection to prevent unauthorized access, malware infections, and denial-of-service attacks.
Their security setup typically includes:
Configuring firewalls like CSF (ConfigServer Security & Firewall)
Installing and tuning ModSecurity (a web application firewall)
Enabling brute-force attack detection via tools like cPHulk
Scanning the server regularly for malware or rootkits
Disabling unused ports and services
Keeping software and kernel versions up to date with patches
This approach significantly reduces vulnerability and helps maintain compliance with security best practices.
2. Server Optimization and Speed Tuning
Out-of-the-box server configurations often aren't optimized for specific workloads or traffic levels. CloudMinister evaluates your server environment and implements performance enhancements tailored to your needs.
This may include:
Tuning Apache, NGINX, or LiteSpeed web servers for faster content delivery
Adjusting MySQL settings for better database response times
Implementing caching mechanisms like Memcached, Redis, or OPcache
Managing PHP versions and optimizing handlers like PHP-FPM
Monitoring resource consumption and load balancing, where necessary
These efforts ensure faster website load times, improved user experience, and better search engine performance.
3. Continuous Monitoring and Alerts
Downtime and service interruptions can affect user trust and business revenue. CloudMinister deploys monitoring tools that check the health of your server and its key services 24/7.
Their monitoring system tracks:
Server uptime and load averages
Web and database service availability
Disk usage and memory consumption
Suspicious activity or spikes in traffic
If any issue is detected, alerts are automatically generated, and their support team takes immediate action, often resolving problems before clients are even aware of them.
4. Automated and Manual Backups
Reliable data backup strategies are essential for disaster recovery and business continuity. CloudMinister sets up both automated and manual backups to safeguard your critical data.
Backup services include:
Daily, weekly, or monthly automated backups to local or remote locations
Snapshot-based backups for entire file systems or virtual machines
Backup integrity checks to confirm recoverability
Disaster recovery support for fast data restoration in case of failure
Clients can request custom backup schedules based on their operational needs.
5. 24/7 Technical Support
CloudMinister offers round-the-clock technical support, including holidays and weekends. Whether the issue is routine or critical, their support team responds promptly to resolve it.
Support includes:
Assistance with DNS, email, FTP, and database issues
Troubleshooting site errors, load problems, and misconfigurations
Help with third-party application installation or integration
Guidance on cPanel and WHM usage for non-technical users
Their support system is designed for fast response and resolution, helping minimize downtime and stress for business owners.
6. Software Installation and Upgrades
In many cases, users need to add new tools or features to their servers. CloudMinister handles software installations, compatibility checks, and upgrades as part of its managed service offerings.
Common installations include:
Content management systems like WordPress, Joomla, and Drupal
E-commerce platforms such as Magento or PrestaShop
Server-side enhancements like ImageMagick, FFmpeg, or GIT
Secure protocol support, including Let’s Encrypt SSL and SSH hardening
Upgrading PHP, MySQL, cPanel, or the operating system when necessary
Each installation is tested to ensure compatibility and optimal performance.
Who Benefits from CloudMinister’s cPanel Server Management?
CloudMinister’s services are suitable for a wide range of users and industries:
Web Hosting Providers benefit from white-label server management and reduced support workload.
Digital Agencies can offer hosting to clients without hiring in-house server administrators.
E-commerce companies enjoy improved performance and secure transactions during peak times.
Startups and Developers get technical expertise without the need for full-time staff.
Large Enterprises can ensure compliance, uptime, and scalable infrastructure with proactive support.
Why Choose CloudMinister Technologies?
The advantages of working with CloudMinister Technologies include:
Certified Expertise: Their team consists of Linux and cPanel-certified professionals with years of experience.
Cost Efficiency: Competitive pricing makes enterprise-grade support accessible to small businesses.
Scalability: Their solutions grow with your business, from shared servers to dedicated infrastructure.
Client-Centric Approach: Support plans are tailored to your actual needs—nothing more, nothing less.
Transparent Reporting: Regular performance and security reports give you insight and peace of mind.
Conclusion
Managing a cPanel server is more than just setting up hosting—it’s about ensuring consistent performance, hardened security, regular updates, and quick support when issues arise. With CloudMinister Technologies, your server is not just managed—it’s optimized, protected, and monitored by experts.
If you're looking for a trusted partner to handle your cPanel Server Management, CloudMinister offers a proven solution that allows you to focus on your business while they handle the backend.
Get in touch with CloudMinister Technologies today and experience professional, worry-free server management.
For More Visit:- www.cloudminister.com
#cloudminister technologies#servers#technology#hosting#information technology#cPanel Server Management
0 notes
Photo

How To Install And Configure CSF On AlmaLinux 8 https://docs.hostnextra.com/how-to-install-and-configure-csf-on-almalinux/ #csf #firewall #almalinux8 #almalinux #linux #linuxtutorials #kb #knowledgebase #security #lfd #technology #techworld #linuxtutorials #configserver #learnlinux #software #tutorials
0 notes
Text
Install ConfigServer Security & Firewall (CSF) on Ubuntu
Install ConfigServer Security & Firewall (CSF) on Ubuntu
In this article, we are going to shows that how to install ConfigServer Security & Firewall on Ubuntu 18.04 |20.04. ConfigServer Security & Firewall (CSF) is a popular and open source Stateful Packet Inspection (SPI) security tool for Linux. It is used iptables that provides high level of security Linux servers. CSF comes with multiple features such as Stateful packet inspection firewall (SPI),…

View On WordPress
0 notes
Text
CSF Service Not Starting When The FASTSTART option Is Enabled
CSF Service Not Starting When The FASTSTART option Is Enabled
Symptom: When checking the LFD service with the systemctl command you will see this: systemctl status lfd.service ● lfd.service - ConfigServer Firewall & Security - lfd Loaded: loaded (/usr/lib/systemd/system/lfd.service; enabled; vendor preset: disabled) Active: failed (Result: exit-code) since Tue 2020-12-01 20:54:11 IST; 10min ago Process: 11119 ExecStart=/usr/sbin/lfd (code=exited,…

View On WordPress
0 notes
Text
VPS Security, 9 Ways To Keep Your VPS Secure

The initial step is to run an audit of your server. Understanding what’s running on your system – just as where said system’s weaknesses lie – is fundamental to securing a VPS. Fortunately, there’s no deficiency of tools intended to complete such audit – for one-time auditing and solidifying, you could utilize tools such as Bastille or the Linux Security Auditing Tool. You could likewise set up an automated, regular auditing framework through Log watch. For external/remote audit, use N-Map and Nessus Vulnerability Scanner.
Set Up Your Firewall
You don’t need undesirable traffic, do you? That is the reason a firewall is important.
Most Linux-based server frameworks have pre-installed firewalls (think DebianFirewall, ufw, iptables, and firewall). To efficiently integrate other control panels and oversee iptables, consider installing the free ConfigServer Firewall, otherwise known as CSF. This firewall setup script attempts to make your VPS secure while giving you a high level, the natural interface for dealing with your firewall settings.
Use SSL Certificates for Everything
SSL certificates assist you with making an encoded channel between the client and server to guarantee that nothing upsets your privacy.
To guard your sensitive information, SSL authentications are vital to each sort of hosting regardless of whether that is transmitting documents, entering your login details, or sending mails.
Read the rest of the article from the link below:
https://n6host.com/blog/vps-security-9-ways-to-keep-your-vps-secure/
0 notes
Text
Cara install CSF (ConfigServer Security & Firewall) di DirectAdmin
Cara install CSF (ConfigServer Security & Firewall) di DirectAdmin
Artikel ini menjelaskan bagaimana cara install CSF configserver security & firewall di DirectAdmin control panel, dalam artikel ini kami menggunakan operating system CentOS 7 64 bit dengan DirectAdmin versi 1.57.4 pada infrastruktur virtual private server, RAM 6 Gb, 2 cores, dan 60 GB HDD.

Langkah-langkah cara install CSF di DirectAdmin: 1. Update server dengan command linux : [root@directadmin…
View On WordPress
0 notes
Text
Install and Configure CSF ConfigServer Firewall
Install and Configure CSF ConfigServer Firewall
Install and Configure CSF ConfigServer Firewall About CSF Firewall
ConfigServer Security and Firewall, also known as CSF, is an opensource software firewall application. It is working based on iptables. Firewall configuration script created to provide better security for your server while giving you an easy to use, advanced interface for managing your firewall settings. CSF configures your…
View On WordPress
0 notes
Text
Cách cấu hình bỏ chặn (whitelist) dải IP của GPTBot trong CSF (ConfigServer Security & Firewall) – cực kỳ cần thiết để ChatGPT và các bot AI không bị block khi crawl web
🌿🤔 Cách cấu hình bỏ chặn (whitelist) dải IP của GPTBot trong CSF (ConfigServer Security & Firewall) – cực kỳ cần thiết để ChatGPT và các bot AI không bị block khi crawl web 💖👉🍀🍀 ✅ 1. Thêm whitelist vào CSF (dễ quản lý & an toàn) Bạn nên chỉnh trong file cấu hình chính để không bị mất khi restart CSF: 🛠 Mở file cấu hình csf.allow: nano /etc/csf/csf.allow 📥 Thêm các dải IP của GPTBot vào cuối…
0 notes
Text
How to Install CSF Firewall in cPanel Server?
In the field of web hosting, security is paramount. One essential tool for safeguarding your cPanel server is the ConfigServer Security & Firewall (CSF). This powerful firewall provides robust protection against a variety of threats and ensures your server runs smoothly. In this guide, we will walk you through the process of installing CSF Firewall in your cPanel server.
What is CSF Firewall?
CSF (ConfigServer Security & Firewall) is a popular security tool designed for servers running cPanel. It enhances the server’s security by offering features such as advanced firewall protection, login tracking, and intrusion detection. With CSF, you can easily manage and monitor your server’s security settings, making it a preferred choice for server administrators.
Prerequisites
Before we dive into the installation process, ensure you meet the following prerequisites:
Root Access: You need root access to install CSF.
cPanel/WHM: Ensure you have cPanel/WHM installed on your server.
Updated System: It's a good practice to update your server to the latest versions of all software packages.
Step-by-Step Installation of CSF Firewall
1. Log in to Your Server
First, you need to log in to your server via SSH as the root user. You can do this using an SSH client like PuTTY.
bash
Copy code
ssh root@your_server_ip
2. Update Your System
Before installing any new software, it's essential to ensure your system is up-to-date. Run the following commands to update your package lists and upgrade existing packages:
bash
Copy code
yum update -y
3. Download CSF
Next, download the latest version of CSF from the official ConfigServer website. Use the following commands to navigate to a temporary directory and download the CSF package:
bash
Copy code
cd/usr/src wget https://download.configserver.com/csf.tgz
4. Extract the CSF Package
Once the download is complete, extract the CSF package using the tar command:
bash
Copy code
tar -xzf csf.tgz
5. Install CSF
Navigate to the extracted CSF directory and run the installation script:
bash
Copy code
cdcsf sh install.sh
The installation script will configure CSF and set up the necessary files.
6. Configure CSF
After installation, you'll need to configure CSF to fit your server's needs. The configuration file is located at /etc/csf/csf.conf. Open this file using a text editor:
bash
Copy code
nano /etc/csf/csf.conf
In the configuration file, you can adjust various settings such as port numbers, allowed IP addresses, and more. For most installations, the default settings are a good starting point.
7. Test CSF Configuration
Before enabling CSF, it's crucial to test the configuration to ensure there are no errors. Use the following command to check for syntax errors and configuration issues:
bash
Copy code
csf -t
If the test passes without any errors, you can proceed to the next step.
8. Restart CSF and LFD
Finally, restart the CSF firewall and the Login Failure Daemon (LFD) to apply the changes:
bash
Copy code
csf -r service lfd restart
9. Verify CSF Installation
To ensure that CSF is running correctly, you can use the following command to check its status:
bash
Copy code
csf -l
You should see a list of the currently open ports and other firewall settings.
Conclusion
Installing CSF Firewall in your cPanel server is a straightforward process that significantly enhances your server’s security. By following the steps outlined above, you can protect your server from potential threats and manage your firewall settings efficiently.
For a more detailed guide or troubleshooting tips, refer to the official ConfigServer documentation. Remember, maintaining server security is an ongoing process, so keep your firewall and server software updated regularly.
By following this guide, you’ve taken an essential step towards securing your cPanel server. For further assistance or questions, feel free to reach out to your hosting provider or consult additional resources.
For a seamless installation experience, be sure to refer to this guide on how to install CSF Firewall in cPanel Server.
0 notes
Text
Como permitir todas as portas de saída no CSF
Como permitir todas as portas de saída no CSF
Uma vez no mesmo servidor executando cPanel, CSF (Config Server Firewall) e LFD (Login Failure Daemon), eu queria executar a Speedtest CLI, mas ela não foi iniciada porque não pôde se conectar aos servidores, abri as configurações do CSF por meio do Painel WHM (no menu inferior “ConfigServer Security & Firewall” – “Firewall Configuration”), onde ele descobriu que apenas algumas portas de saída…
View On WordPress
0 notes
Link
Hi, which method do you recommend to block visitors for certain countries (in WHM):
“ConfigServer Security & Firewall” or “cPHulk Brute Force Protection” Thanks
Submitted January 17, 2020 at 12:37AM by nosoymilhouse https://www.reddit.com/r/webhosting/comments/epx9ll/using_whm_block_countries_using_csf/?utm_source=ifttt
from Blogger http://webdesignersolutions1.blogspot.com/2020/01/using-whm-block-countries-using-csf.html via IFTTT
0 notes
Text
How to Enable CSF Firewall Web UI
How to Enable CSF Firewall Web UI
ConfigServer Security & Firewall (CSS) is an iptables based firewall for Linux systems. In our previous tutorial read installation tutorial of CSF on Linux system. CSF also provides in-built web UI for the managing firewall from the web interface. In this tutorial, you will find how to enable CSF Firewall Web UI on your system. Step 1 – Install Required Perl Modules: CSF UI required some of Perl…
View On WordPress
0 notes
Text
TOP CPANEL PLUGINS AND ADDONS FOR WHM
New Post has been published on https://is.gd/SidRYf
TOP CPANEL PLUGINS AND ADDONS FOR WHM
cPanel serves as an efficient control panel for Linux based servers. This tool makes the job of webmasters, system admins and developers dramatically easier.
Moreover, when plugins are added to the mix the power and efficiency of cPanel is even kicked a notch higher. How do I mean? Not only do plugins lessen the work-load on the system admin, it also improves the efficiency, functional, and sometimes add a layer of security to the server. The benefits are endless.
In this article, we will be taking a brief dive into the cpanel realm. We would quickly analyze some cool cpanel plugins and addons, what they do and how they can help you manage your cpanel websites better.
CSF Firewall
CSF firewall didn’t come first on this list by chance. There is a reason for that.
Security is very important when managing data online and offline. Of all free cPanel plugin, Config Server’s CSF Firewall is the most popular. It provides a hard layer of protection over the cPanel. That’s not all….
CSF Firewall security system comes with intrusion detection capabilities and a firewall. It ’s also embellished with other bells and whistles like mail queues and the mail manager.
Clam AV Scanner
This Free cPanel plugin serves as a virus detector in its most basic terms. Due to its ease of use, most web programmers feel at home using Clam AV Scanner. No doubt, It is one of the most popular cPanel plugin on the planet.
The installation is quite simple. To install it, go to the “WHM panel” and click on “Manage Plugins”. After the installation, you will be able to use it to scan your website for virus and other security threats.
Munin Service Monitor
This plugin is used for statistically tracking all server resourceWhat I love so much about Munin Service Monitor is that, the resource use is presented in graphs. Therefore you can easily monitor your resources and provide an early intervention if the need arises. You get the idea?
You can simply install Munin following these easy steps:
Go to your “WHM panel”/ and click on “Manage Plugins”. That’s all you need to do.
nPHPselector
nPHPselector, as the name implies, is used for selecting the right PHP for any of the websites on your cPanel. The nPHPselector plugin could be your best option if you are planning to install a PHP script on one of the websites on your cpanel.
CMQ
You have probably heard of this plugin. CMQ is a cpanel plugin owned by Configserver. CMQ is a free plugin. It’s great for managing email que; like controlling outgoing and incoming spam mail, filter your mails, just to mention a few out of it’s other capabilities.
RKHunter WHM Interface
RKHunter is an important auditing and security tool. It is used majorly by Unix and Linux servers, its interface allows you view rkhunter report from a GUI.
Spam D
Everyone hates spam mail. You hate it as much as I do.
The good news is that spam D handles that —effortlessly. In fact, it is a top cPanel pluggin. Spam D’s job basically is to kill spam. And this is how it does its job: It efficiently goes through your mail in cPanel and reduces their number.
Spam D creates tough time for mail spammers. So with this cpanel plugin, you can be rest assured that your web mail will be clean and safe.
Solr
Full Text Search Indexing for IMAP controlled by Apache Solr™ gives quick hunt capacities to IMAP letter drops.
This fundamentally enhances the speed and accommodation of the look understanding for iOS gadgets, Microsoft Outlook, SquirrelMail, Horde, Roundcube, and Mozilla Thunderbird clients.
Installation: Login to WHM Panel > Manage Plugins > tick ‘solr’ > Save
What could be more relieving and time-saving!
Need I say more?
A
Well…., as this article wraps up, I hope you find these cpanel plugins useful as you explore them.
Please do not hesitant to contact us to get completely FREE support at anytime.
#best plugins#cpanel best plugins#cpanel Clam AV Scanner plugin#cpanel CMQ plugin#cpanel CSF Firewall plugin#cpanel free firewall plugin#cpanel nPHPselector plugin#cpanel plugins#cpanel RKHunter plugin#cPanel security#CPanel security firewall plugins#CPanel security wall#cpanel smap d plugin#cpanel Solr plugin#cpanel spamd plugin#CSF Firewall plugin#Munin cpanel plugin#spamd plugin#whm Clam AV Scanner plugin#whm CMQ plugin#whm CSF Firewall plugin#whm firewall plugin#whm free firewall plugin#whm munin plugin#whm nPHPselector plugin#whm RKHunter plugin#whm Solr plugin#whm spam d plugin#whm spamd plugin
0 notes
Text
Security measures to protect an unmanaged VPS.
Virtual private server
have long been thought of as a next-generation shared hosting solution.
They use virtualization ‘tricks’ to let you coin your own hosting environment and be a master of your server at a pretty affordable price.
If you are well-versed in server administration, then an unmanaged VPS will help you make the most of your virtual machine’s capabilities.
However, are you well-versed enough in security as well?
Here is a Linux VPS security checklist, which comes courtesy of our Admin Department.
What exactly is an unmanaged VPS?
Before we move to the security checklist, let’s find out exactly what an unmanaged VPS is and what benefits it can bring to you.
With an unmanaged VPS, pretty much everything will be your responsibility.
Once the initial setup is complete, you will have to take care of server maintenance procedures, OS updates, software installations, etc. Data backups should be within your circle of competence as well.
This means that you will need to have a thorough knowledge of the Linux OS. What’s more, you will have to handle any and all resource usage, software configuration and server performance issues.
Your host will only look into network- and hardware-related problems.
Why an unmanaged VPS?
The key advantages of unmanaged VPSs over managed VPSs are as follows:
you will have full administrative power and no one else will be able to access your information;you will have full control over the bandwidth, storage space and memory usage;you will be able to customize the server to your needs specifically;you will be able to install any software you want;you will save some money on server management – it really isn’t that hard to set up and secure a server if you apply yourself and updating packages is very easy;you will be able to manage your server in a cost-efficient way without the need to buy the physical machine itself (you would have to if you had a dedicated server);
Unmanaged VPS – security checklist
With an unmanaged VPS, you will need to take care of your sensitive personal data.
Here is a list of the security measures that our administrators think are key to ensuring your server’s and your data’s health:
1. Use a strong password
Choosing a strong password is critical to securing your server. With a good password, you can minimize your exposure to brute-force attacks. Security specialists recommend that your password be at least 10 characters long.
Plus, it should contain a mix of lower and uppercase letters, numbers and special characters and should not include common words or personally identifiable information. You are strongly advised to use a unique password so as to avoid a compromised service-connected breakthrough.
A strong password may consist of phrases, acronyms, nicknames, shortcuts and even emoticons. Examples include:
1tsrAIn1NGcts&DGS!:-) (It’s raining cats and dogs!) humTdumt$@t0nAwa11:-0 (Humpty Dumpty sat on a wall) p@$$GOandCLCt$500 :-> (Pass Go and collect $500)
2. Change the default SSH port
Modifying the default SSH port is a must-do security measure.
You can do that in a few quick steps:
Connect to your server using SSHSwitch to the root userRun the following command: vi /etc/ssh/sshd_configLocate the following line: # Port 22Remove # and replace 22 with another port numberRestart the sshd service by running the following command: service sshd restart
3. Disable the root user login
The root user has unlimited privileges and can execute any command – even one that could accidentally open a backdoor that allows for unsolicited activities.
To prevent unauthorized root-level access to your server, you should disable the root user login and use a limited admin account instead.
Here is how you can add a new admin user that can log into the server as root via SSH:
Create the user by replacing example_user with your desired username (in our case – ‘admin’): adduser adminSet the password for the admin user account: passwd adminTo get admin privileges, use the following command: echo 'admin ALL=(ALL) ALL' >> /etc/sudoersDisconnect and log back in as the new user: ssh [email protected] you are logged in, switch to the root user using the ‘su’ command: su password: whoami rootTo disable the root user login, edit the /etc/ssh/sshd_config file. You will only need to change this line: #PermitRootLogin yes to: PermitRootLogin no
You will now be able to connect to your server via SSH using your new admin user account.
4. Use a rootkit scanner
Use a tool like rkhunter (Rootkit Hunter) to scan the entire server for rootkits, backdoors and eventual local exploits on a daily basis; you’ll get reports via email;
5. Disable compilers for non-root users (for cPanel users)
Disabling compilers will help protect against many exploits and will add an extra layer of security.
From the WebHost Manager, you can deny compiler access to unprivileged (non-root) users with a click.
Just go to Security Center ->Compiler Access and then click on the Disable Compilers link:
Alternatively, you can keep compilers for selected users only.
6. Set up a server firewall
An IPTABLES-based server firewall like CSF (ConfigServer Firewall) allows you to block public access to a given service.
You can permit connections only to the ports that will be used by the FTP, IMAP, POP3 and SMTP protocols, for example.
CSF offers an advanced, yet easy-to-use interface for managing your firewall settings.
Here is a good tutorial on how you can install and set up CSF.
Once you’ve got CSF up and running, make sure you consult the community forums for advice on which rules or ready-made firewall configurations you should implement.
Keep in mind that most OSs come with a default firewall solution. You will need to disable it if you wish to take advantage of CSF.
7. Set up intrusion prevention
An intrusion prevention software framework like Fail2Ban will protect your server from brute-force attacks. It scans logfiles and bans IPs that have unsuccessfully tried to log in too many times.
Here’s a good article on how to install and set up Fail2Ban on different Linux distributions.
You can also keep an eye on the Google+ Fail2Ban Users Community.
8. Enable real-time application security monitoring
Тhe best real-time web application monitoring and access control solution on the market – ModSecurity, allows you to gain HTTP(S) traffic visibility and to implement advanced protections.
ModSecurity is available in your Linux distribution’s repository, so installing it is very easy:
apt-get install libapache2-modsecurity
Here’s a quick guide on how to install and configure ModSecurity.
Once you’ve got ModSecurity up and running, you can download a rule set like CRS (OWASP ModSecurity Core Rule Set). This way you won’t have to enter the rules by yourself.
9. Set up anti-virus protection
One of the most reliable anti-virus engines is ClamAV – an open-source solution for detecting Trojans, viruses, malware & other malicious threats. The scanning reports will be sent to your email address.
ClamAV is available as a free cPanelplugin.
You can enable it from the Manage Plugins section of your WHM:
Just tick the ‘Install ClamAV and keep updated’ checkbox and press the ‘Save’ button.
10. Enable server monitoring
For effective protection against DDoS attacks, make sure you install a logfile scanner such as logcheck or logwatch. It will parse through your system logs and identify any unauthorized access to your server.
Use software like Nagios or Monitis to run automatic service checks to make sure that you do not run out of disk space or bandwidth or that your certificates do not expire.
With a service like Uptime Doctor or Pingdom, you can get real-time notifications when your sites go down and thus minimize accidental downtime.
11. Run data backups
Make regular off-site backups to avoid the risk of losing data through accidental deletion.
You can place your trust in a third-party service like R1Soft or Acronis, or you can build your own simple backup solution using Google Cloud Storage and the gsutil tool.
If you are on a tight budget, you can keep your backups on your local computer.
12. Keep your software up to date
Keeping your software up to date is the single biggest security precaution you can take.
Software updates range from regular minor bug fixes to critical vulnerability patches. You can set automatic updates to save time.
However, keep in mind that automatic updates do not apply to self-compiled applications. It’s advisable to first install an update in a test environment so as to see its effect before deploying it to your live production environment.
Depending on your particular OS, you can use:
yum-cron (for CentOS)unattended upgrades (for Debian and Ubuntu)dnf-automatic (Fedora)
If you have not obtained an unmanaged VPS yet, you could consider our solutions:
OpenVZ VPS packages – all setups from 4 to 10 are unmanaged and come with SSH/full root access (for cPanel setups only) and with a CentOS/Debian/Ubuntu OS installation;KVM VPS setups – all four setups are unmanaged and offer SSH/full root access; OS options include CentOS/Debian/Ubuntu as well as a few OS ISO alternatives like Fedora and FreeBSD;
via Blogger http://ift.tt/2AIEre3
0 notes