#Diy Instructional Videos
Text
Chic Bow Tie Clasps: Create Unique Bow Button Designs
In this post, you will learn how to sew fabric chic bow tie clasps with free PDF pattern.
Welcome to the world of creative sewing! Whether you’re a seasoned seamstress or picking up a needle for the first time, this step-by-step tutorial is designed to guide you through the delightful process of crafting chic bow tie clasps. Perfect for adding a touch of elegance to any garment, these unique bow…

View On WordPress
#Beginner-Friendly Sewing Instructions#Chic Bow Tie Clasps Tutorial#DIY Fashionable Blouse Buttons#Easy Bow Knot Tutorial for Jumpsuits#Free Printable Bow Tie Pattern#How to Sew Bow Knots for Tops#Sewing Bow Tie Closures for Dresses#Step-by-Step Bow Clasp Video#Transform Your Wardrobe with Bow Ties#Unique Bow Button Design Guide
8 notes
·
View notes
Text
how to win friends and influence people by dale carnegie
#diy#fyi#161#1312#antifa#instructions#video#antifascist#antifaschistische aktion#antiauthoritarian#anti colonialism#anti cop#anti police#class war#eat the rich#eat the fucking rich#anarchism#anarchist#anarchocommunism#anarchopunk#anarcho syndicalism#anarchofeminism#ausgov#politas#auspol#tasgov#taspol#australia#fuck neoliberals#neoliberal capitalism
3 notes
·
View notes
Text
youtube
youtube
youtube
Ventilating Tutorial - Tailored Swiss lace Doll Head cap using a ventilating needle - Quick Tips:
quick tip 1/4: "Align your lace weave around the head horizontally so your knotted hair will part in a natural way."
quick tip 2/4: "To insure your cap stays in place, make a chin strap with a thread by attaching both sides of the lace together under the chin of your doll. "
quick tip 3/4: "If you plan to ventilate your wig with heat resistant synthetic fibers, you can also use them to sew your cap. Fold one in two and make a first knot, then do a seam with the needle. "
quick tip 4/4: "Ventilating through the 3 layers of lace at the back of the head can be quite tricky and tedious. Instead, sew the top part's edge horizontally and cut the excess lace. Then leave a narrow overlap at the bottom of the cap. "
--------------
I hope those can add some details to the original tutorial video about making the tailored doll head cap =^.^=
Have fun Ventilating !
#Ventilating#doll wig#bjd wig#wig making#wig maker#head cap#swiss lace#lace cap#wig cap#boutique lawrichai#lawrichai#DIY#tutorial#how to#quick tip#ventilating needle#shorts#instruction videos#Youtube
27 notes
·
View notes
Video
youtube
Chuyến đi hẹn từ năm ta 23 đến năm ta 22 tuổi vẫn chưa đi.
Hẹn tháng 8 năm nay
ở Singapore.
Lần đầu thoát khỏi cái kén trong năm 2023 ~
#youtube#First time traveling to Singapore in 2023#Singapore#Singapore 2023#DIY travel#DIY#instruction to immigrate Singapore#video for introvert traveler
4 notes
·
View notes
Video

flickr
Unboxing Hot Wheels Tornado Twister Track: A Heart-Pounding Adventure of Fun and Entertainment! by Rashi Verma
Via Flickr:
In this article, we celebrate the fun and excitement of unboxing the Hot Wheels Tornado Twister Track. Join us as we unveil the components, and watch our video for an interactive guide on how to assemble the track effortlessly. Get ready to immerse yourself in the entertainment of high-speed racing as the Hot Wheels racing cars conquer the Tornado Twister Track's challenging obstacles. Experience the joy of playtime with this action-packed playset that promises endless entertainment and thrills! Watch Full Video on YouTube:- youtu.be/xPjI-mZwBOU
#Hot#Wheels#Tornado#Twister#Track#Video#Set#Instructions#Tracks#Cars#Hotwheels#Unboxing#Ministry#Diecast#Unleashed#Rlc#Hunting#Diy#Display#City#Kids#Videos#Toys#Car#Toy#flickr#hot wheels tornado twister#hot wheels tornado twister track#tornado twister hot wheels#hot wheels tornado track video
2 notes
·
View notes
Text
youtube
New song! It is lewd and loud, so, if you're into one or more of those things, check it out, maybe? 👉👈
lyrics:
you think your shit is so hot
so let me say it in song
that you don't know how to top
that your technique is all wrong
you never nibble her ear
you never suck on her tongue
you never lean on her chest
you don't care if she…
you ought to learn how to fuck
so let me spell it out clear
grind her into the bed
whisper this in her ear
mmmmmm
fuck, you're a good girl
I'm going to tell you what to do
look in my eyes and
beg me to fuck you
mmm, such a sweetheart
I'm going to tell you what to do
roll on your stomach and
beg me to fuck you
I'm glad that you trust me
now let me tell you what I'll do
I'll tie you up while you
beg me to fuck you
mmm, so deserving
so let me tell you what we'll do
cuddles in bed, but first
beg me to fuck you
(laughs)
how was that?
yeah, you liked it? good
what's that? yeah, you want a round two?
mmm
okay
fuck, you're a good girl
I'm going to tell you what to do
look in my eyes and
beg me to fuck you
mmm, such a sweetheart
I'm going to tell you what to do
roll on your stomach and
beg me to fuck you
I'm glad that you trust me
now let me tell you what I'll do
I'll tie you up while you
beg me to fuck you
mmm, so deserving
so let me tell you what we'll do
cuddles in bed, but first
beg me to fuck you
#my music#my art#diy punk#instructional video#sorta#not really#I made this even thought I'm asexual#Youtube
3 notes
·
View notes
Text
One of my favorite kinds of videos that makes me feel like some kind of anthropologist or something is "instructional/informative VHS tape made for retail sale hosted by someone clearly very skilled/knowledgeable in their field but has no on-camera charisma whatsoever because that's never been their job before"
#i was on tubi and theyve got a video from an old vhs of legendary makeup artist dick smith instructing on doing some diy monster makeup#(im sure its on youtube too but thats just where i saw it)#and even tho dick smith is such a legend who taught rick baker and tom savini and contributed to the 80s effects boom#hes just on this vhs take like 'yeah idk ive got the neighbor kid over to help me I'm gonna glue some cotton to his face with karo syrup'#'hey kids let me show you how to make monster teeth with chewing gum and peanuts'#all with the charisma of a 60 year old office worker instructing a new hire just because hes been there the longest so thats his job#it rules i love garbage like that#///
6 notes
·
View notes
Text
youtube
Unlock advanced crocheting secrets in this comprehensive guide. Learn to overcome chain twisting issues, create a perfect Mobius chain, and master the half twist technique. Ideal for all skill levels, this tutorial simplifies complex methods to enhance your craft. The video uses worsted weight acrylic yarn from "I Love This Yarn" and a size N (9mm) crochet hook. Don't forget to like, share, and subscribe for more tutorials and tips!
Visit my Etsy shop: StrawberryCouture
Master Advanced Crocheting Techniques: Chain Twisting, Mobius Chain, and Half Twist Mastery
#strawberrycouture#etsy#youtube#mobius#diy craft#fibre crafts#fiber crafts#youtube video#youtube channel#instructions#crocheting#crochet#mobius crochet#neurodiversity#yarn crafts#Youtube
1 note
·
View note
Text
Pals Blog Hop - Taco Fiesta Interactive Card
Hi, Stamper. Welcome to the Stampin’ Pretty Pals’ Blog Hop!
This month, our blog hop theme is Party Time, and I have an adorable interactive card for you! We hope you will be inspired by all the beautiful creations the Pals made for you! As you hop from blog to blog, we would love for you to leave a comment. You will find the lineup at the end of my post to help you “hop” along from Pal to…

View On WordPress
#card making#Cardmaking#craft supplies#crafting#DIY#handmade card#instructions#interactive card#Learn to Stamp#Lisa Ann Bernard#paper crafting#queen b creations#rubber stamping#stamp set#stampin&039; up#stamping#swinging pendulum#taco fiesta#tutorial#Video
0 notes
Photo

SALE!!! Now until Monday at at midnight “Mosaic Arts Online” is offering 15% OFF ALL COURSES including my “Mosaic a Surfboard with Anne Marie Price” course! Use COUPON CODE “CREATE15” and learn how I have been creating my mosaic on surfboards! Stop or start your lesson at your leisure from the comfort of your own home or studio! This 15% sale is rare so don’t miss out! Also available to use for gift certificates so purchase the gift of learning something new for your friends or family! And as always thank you so much to those of you have purchased in the past! Please share your experience with my courses below! 🙏♥️ #SALE #instructional #videos #MosaicArtsOnline #mosaic #art #learn #annemarieprice #stainedglass #smallbusiness #saturday #DIY #mosaicart #christmasgiftideas #giftcertificate #available #purchase #create #learn #mosaicsurfboard #surfboard #stainedglass #mirror https://www.instagram.com/p/ClbhDCUpw5u/?igshid=NGJjMDIxMWI=
#sale#instructional#videos#mosaicartsonline#mosaic#art#learn#annemarieprice#stainedglass#smallbusiness#saturday#diy#mosaicart#christmasgiftideas#giftcertificate#available#purchase#create#mosaicsurfboard#surfboard#mirror
0 notes
Text
How a Computer Works - Part 1 (Components)
I am about to teach you on a real fundamental, connecting up electronic components level, how a computer actually works. Before I get into the meat of this though (you can just skip down below the fold if you don't care), here's the reasons I'm sitting doing so in this format:
Like a decade or two ago, companies Facebook pushed this whole "pivot to video" idea on the whole internet with some completely faked data, convincing everyone that everything had to be a video, and we need to start pushing back against that. Especially for stuff like complex explanations of things or instructions, it's much more efficient to just explain things clearly in text, maybe with some visual aids, so people can easily search, scan, and skip around between sections. It's also a hell of a lot easier to host things long term, and you can even print out a text based explainer and not need a computer to read it, keep it on a desk, highlight it, etc.
People are so clueless about how computers actually work that they start really thinking like it's all magical. Even programmers. Aside from how proper knowledge lets you get more out of them, this leads to people spouting off total nonsense about "teaching sand to think" or "everything is just 1s and 0s" or "this 'AI' a con artist who was trying to sell me NFTs a month ago probably really is an amazing creative thinking machine that can do everything he says!"
We used to have this cultural value going where it was expected that if you owned something and used it day to day, you'd have enough basic knowledge of how it worked that if it stopped working you could open it up, see what was wrong, and maybe fix it on your own, or maybe even put one together again from scratch, and that's obviously worth bringing back.
I'm personally working on a totally bonkers DIY project and I'd like to hype up like-minded people for when it gets farther along.
So all that said, have a standard reminder that I am completely reliant on Patreon donations to survive, keep updating this blog, and ideally start getting some PCBs and chips and a nice oscilloscope to get that mystery project off the ground.
Electricity probably doesn't work like how you were taught (and my explanation shouldn't be trusted too far either).
I remember, growing up, hearing all sorts of things about electricity having this sort of magical ability to always find the shortest possible path to where it needs to get, flowing like water, and a bunch of other things that are kind of useful for explaining how a Faraday cage or a lightning rod works, and not conflicting with how simple electronics will have a battery and then a single line of wire going through like a switch and a light bulb or whatever back to the other end of the battery.
If you had this idea drilled into your head hard enough, you might end up thinking that if we have a wire hooked to the negative end of a battery stretching off to the east, and another wire stretching off to the east from the positive end, and we bridge between the two in several places with an LED or something soldered to both ends, only the westernmost one is going to light up, because hey, the shortest path is the one that turns off as quickly as possible to connect to the other side, right? Well turns out no, all three are going to light up, because that "shortest path" thing is a total misunderstanding.
Here's how it actually works, roughly. If you took basic high school chemistry, you learned about how the periodic table is set up, right? A given atom, normally, has whatever number of protons in the core, and the same number of electrons, whipping all over around it, being attracted to those protons but repelled by each other, and there's particular counts of electrons which are super chill with that arrangement so we put those elements in the same column as each other, and then as you count up from those, you get the elements between those either have some electrons that don't fit all tight packed in the tight orbit and just kinda hang out all wide and lonely and "want to" buddy up with another atom that has more room, up to the half full column that can kinda go either way, then as we approach the next happy number they "want to" have a little more company to get right to that cozy tight packed number, and when you have "extra" electrons and "missing" electrons other atoms kinda cozy up and share so they hit those good noble gas counts.
I'm sure real experts want to scream at me for both that and this, but this is basically how electricity works. You have a big pile of something at the "positive" end that's "missing electrons" (for the above reason or maybe actually ionized so they really aren't there), and a "negative" end that's got spares. Then you make wires out of stuff from those middle of the road elements that have awkward electron counts and don't mind buddying up (and also high melting points and some other handy qualities) and you hook those in there. And the electron clouds on all the atoms in the wire get kinda pulled towards the positive side because there's more room over there, but if they full on leave their nucleus needs more electron pals, so yeah neighbors get pulled over, and the whole wire connected to the positive bit ends up with a positive charge to it, and the whole wire on the negative bit is negatively charged, and so yeah, anywhere you bridge the gap between the two, the electrons are pretty stoked about balancing out these two big awkward compromises and they'll start conga lining over to balance things out, and while they're at it they'll light up lights or shake speakers or spin motors or activate electromagnets or whatever other rad things you've worked out how to make happen with a live electric current.
Insulators, Resistors, Waves, and Capacitors
Oh and we typically surround these wires made of things that are super happy about sharing electrons around with materials that are very much "I'm good, thanks," but this isn't an all or nothing system and there's stuff you can connect between the positive and negative ends of things that still pass the current along, but only so much so fast. We use those to make resistors, and those are handy because sometimes you don't want to put all the juice you have through something because it would damage it, and having a resistor anywhere along a path you're putting current through puts a cap on that flow, and also sometimes you might want a wire connected to positive or negative with a really strong resistor so it'll have SOME sort of default charge, but if we get a free(r) flowing connection attached to that wire somewhere else that opens sometimes, screw that little trickle going one way, we're leaning everyone the other way for now.
The other thing with electricity is is that the flow here isn't a basic yes/no thing. How enthusiastically those electrons are getting pulled depends on the difference in charge at the positive and negative ends, and also if you're running super long wires then even if they conduct real good, having all that space to spread along is going to kinda slow things to a trickle, AND the whole thing is kinda going to have some inherent bounciness to it both because we're dealing with electrons whipping and spinning all over and because, since it's a property that's actually useful for a lot of things we do with electricity, the power coming out of the wall has this intentional wobbly nature because we've actually got this ridiculous spinny thing going on that's constantly flip flopping which prong of the socket is positive and which is negative and point is we get these sine waves of strength by default, and they kinda flop over if we're going really far.
Of course there's also a lot of times when you really want to not have your current flow flickering on and off all the time, but hey fortunately one of the first neat little electronic components we ever worked out are capacitors... and look, I'm going to be straight with you. I don't really get capacitors, but the basic idea is you've got two wires that go to big wide plates, and between those you have something that doesn't conduct the electricity normally, but they're so close the electromagnetic fields are like vibing, and then if you disconnect them from the flow they were almost conducting and/or they get charged to their limit, they just can't deal with being so charged up and they'll bridge their own gap and let it out. So basically you give them electricity to hold onto for a bit then pass along, and various sizes of them are super handy if you want to have a delay between throwing a switch and having things start doing their thing, or keeping stuff going after you break a connection, or you make a little branching path where one branch connects all regular and the other goes through a capacitor, and the electricity which is coming in in little pulses effectively comes out as a relatively steady stream because every time it'd cut out the capacity lets its charge go.
We don't just have switches, we have potentiometers.
OK, so... all of the above is just sort of about having a current and maybe worrying about how strong it is, but other than explaining how you can just kinda have main power rails running all over, and just hook stuff across them all willy-nilly rather than being forced to put everything in one big line, but still, all you can do with that is turn the whole thing on and off by breaking the circuit. Incidentally, switches, buttons, keys, and anything else you use to control the behavior of any electronic device really are just physically touching loose wires together or pulling them apart... well wait no, not all, this is a good bit to know.
None of this is actually pass/fail, really, there's wave amplitudes and how big a difference we have between the all. So when you have like, a volume knob, that's a potentiometer, which is a simple little thing where you've got your wire, it's going through a resistor, and then we have another wire we're scraping back and forth along the resistor, using a knob, usually, and the idea is the current only has to go through X percent of the resistor to get to the wire you're moving, which proportionately reduces the resistance. So you have like a 20 volt current, you've got a resistor that'll drop that down to 5 or so, but then you move this other wire down along and you've got this whole dynamic range and you can fine tune it to 15 or 10 or whatever coming down that wire. And what's nice about this again, what's actually coming down the wire is this wobbily wave of current, it's not really just "on" or "off, and as you add resistance, the wobble stays the same, it's just the peaks and valleys get closer to being just flat. Which is great if you're making, say, a knob to control volume, or brightness, or anything you want variable intensity in really.
Hey hey, it's a relay!
Again, a lot of the earliest stuff people did with electronics was really dependent on that analog wobbly waveform angle. Particularly for reproducing sound, and particularly the signals of a telegraph. Those had to travel down wires for absurd distances, and as previously stated, when you do that the signal is going to eventually decay to nothing. But then someone came up with this really basic idea where every so often along those super long wires, you set something up that takes the old signal and uses it to start a new one. They called them relays, because you know, it's like a relay race.
If you know how an electromagnet works (something about the field generated when you coil a bunch of copper wire around an iron core and run an electric current through it), a relay is super simple. You've got an electromagnet in the first circuit you're running, presumably right by where it's going to hit the big charged endpoint, and that magnetically pulls a tab of metal that's acting as a switch on a new circuit. As long as you've got enough juice left to activate the magnet, you slam that switch and voom you've got all the voltage you can generate on the new line.
Relays don't get used too much in other stuff, being unpopular at the time for not being all analog and wobbily (slamming that switch back and forth IS going to be a very binary on or off sorta thing), and they make this loud clacking noise that's actually just super cool to hear in devices that do use them (pinball machines are one of the main surviving use cases I believe) but could be annoying in some cases. What's also neat is that they're a logical AND gate. That is, if you have current flowing into the magnet, AND you have current flowing into the new wire up to the switch, you have it flowing out through the far side of the switch, but if either of those isn't true, nothing happens. Logic gates, to get ahead of myself a bit, are kinda the whole thing with computers, but we still need the rest of them. So for these purposes, relays re only neat if it's the most power and space efficient AND gate you have access to.
Oh and come to think of it, there's no reason we need to have that magnet closing the circuit when it's doing its thing. We could have it closed by default and yank it open by the magnet. Hey, now we're inverting whatever we're getting on the first wire! Neat!
Relay computers clack too loud! Gimme vacuum tubes!
So... let's take a look at the other main thing people used electricity for before coming up with the whole computer thing, our old friend the light bulb! Now I already touched a bit on the whole wacky alternating current thing, and I think this is actually one of the cases that eventually lead to it being adopted so widely, but the earliest light bulbs tended to just use normal direct current, where again, you've got the positive end and the negative end, and we just take a little filament of whatever we have handy that glows when you run enough of a current through it, and we put that in a big glass bulb and pump out all the air we can, because if we don't, the oxygen in there is probably going to change that from glowing a bit to straight up catching on fire and burning immediately.
But, we have a new weird little problem, because of the physics behind that glowing. Making something hot, on a molecular level, is just kinda adding energy to the system so everything jitters around more violently, and if you get something hot enough that it glows, you're getting it all twitchy enough for tinier particles to just fly the hell off it. Specifically photons, that's the light bit, but also hey, remember, electrons are just kinda free moving and whipping all over looking for their naked proton pals... and hey, inside this big glass bulb, we've got that other end of the wire with the more positive charge to it. Why bother wandering up this whole coily filament when we're in a vacuum and there's nothing to get in the way if we just leap straight over that gap? So... they do that, and they're coming in fast and on elliptical approaches and all, so a bunch of electrons overshoot and smack into the glass on the far side, and now one side of every light bulb is getting all gross and burnt from that and turning all brown and we can't have that.
So again, part of the fix is we switched to alternating current so it's at least splitting those wild jumps up to either side, but before that, someone tried to solve this by just... kinda putting a backboard in there. Stick a big metal plate on the end of another wire in the bulb connected to a positive charge, and now OK, all those maverick electrons smack into here and aren't messing up the glass, but also hey, this is a neat little thing. Those electrons are making that hop because they're all hot and bothered. If we're not heating up the plate they're jumping to, and there's no real reason we'd want to, then if we had a negative signal over on that side... nothing would happen. Electrons aren't getting all antsy and jumping back.
So now we have a diode! The name comes because we have two (di-) electrodes (-ode) we care about in the bulb (we're just kind of ignoring the negative one), and it's a one way street for our circuit. That's useful for a lot of stuff, like not having electricity flow backwards through complex systems and mess things up, converting AC to DC (when it flips, current won't flow through the diode so we lop off the bottom of the wave, and hey, we can do that thing with capacitors to release their current during those cutoffs, and if we're clever we can get a pretty steady high).
More electrodes! More electrodes!
So a bit after someone worked out this whole vacuum tube diode thing, someone went hey, what if it was a triode? So, let's stick another electrode in there, and this one just kinda curves around in the middle, just kinda making a grate or a mesh grid, between our hot always flowing filament and that catch plate we're keeping positively charged when it's doing stuff. Well this works in a neat way. If there's a negative charge on it, it's going to be pushing back on those electrons jumping over, and if there's a positive charge on it, it's going to help pull those electrons over (it's all thin, so they're going to shoot right past it, especially if there's way more of a positive charge over on the plate... and here's the super cool part- This is an analog thing. If we have a relatively big negative charge, it's going to repel everything, if it's a relatively big positive, it's going to pull a ton across, if it's right in the middle, it's like it wasn't even in there, and you can have tiny charges for all the gradients in between.
We don't need a huge charge for any of this though, because we're just helping or hindering the big jump from the high voltage stuff, and huh, weren't we doing this whole weak current controlling a strong current thing before with the relay? We were! And this is doing the same thing! Except now we're doing it all analog style, not slapping switch with a magnet, and we can make those wavy currents peak higher or lower and cool, now we can have phone lines boost over long distances too, and make volume knobs, and all that good stuff.
The relay version of this had that cool trick though where you could flip the output. Can we still flip the output? We sure can, we just need some other toys in the mix. See we keep talking about positive charges and negative charges at the ends of our circuits, but these are relative things. I mentioned way back when how you can use resistors to throttle how much of a current we've got, so you can run two wires to that grid in the triode. One connects to a negative charge and the other positive, with resistors on both those lines, and a switch that can break the connection on the positive end. If the positive is disconnected, we've got a negative charge on the grid, since it's all we've got, but if we connect it, and the resistor to the negative end really limits flow, we're positive in the section the grid's in. And over on the side with the collecting plate, we branch off with another resistor setup so the negative charge on that side is normally the only viable connection for a positive, but when we flip the grid to positive, we're jumping across the gap in the vacuum tube, and that's a big open flow so we'll just take those electrons instead of the ones that have to squeeze through a tight resistor to get there.
That explanation is probably a bit hard to follow because I'm over here trying to explain it based on how the electrons are actually getting pulled around. In the world of electronics everyone decided to just pretend the flow is going the other way because it makes stuff easier to follow. So pretend we have magical positrons that go the other way and if they have nothing better to do they go down the path where we have all the fun stuff further down the circuit lighting lights and all that even though it's a tight squeeze through a resistor, because there's a yucky double negative in the triode and that's worse, but we have the switch rigged up to make that a nice positive go signal to the resistance free promised land with a bonus booster to cut across, so we're just gonna go that way when the grid signal's connected.
Oh and you can make other sorts of logic circuits or double up on them in a single tube if you add more grids and such, which we did for a while, but not really relevant these days.
Cool history lesson but I know there's no relays or vacuum tubes in my computer.
Right, so the above things are how we used to make computers, but they were super bulky, and you'd have to deal with how relays are super loud and kinda slow, and vacuum tubes need a big power draw and get hot. What we use instead of either of those these days are transistors. See after spending a good number of years working out all this circuit flow stuff with vacuum tubes we eventually focused on how the real important thing in all of this is how with the right materials you can make a little juncture where current flows between a positive and negative charge if a third wire going in there is also positively charged, but if it's negatively charged we're pulling over. And turns out there is a WAY more efficient way of doing that if you take a chunk of good ol' middle of the electron road silicon, and just kinda lightly paint the side of it with just the tiniest amount of positive leaning and negative leaning elements on the sides.
Really transistors don't require understanding anything new past the large number of topics already covered here, they're just more compact about it. Positive leaning bit, negative leaning bit, wildcard in the middle, like a vacuum tube. Based on the concepts of pulling electrons around from chemistry, like a circuit in general. The control wire in the middle kinda works in just a pass-fail sort of way, like a relay. They're just really nice compared to the older alternatives because they don't make noise or have moving parts to wear down, you don't have to run enough current through them for metal to start glowing and the whole room to heat up, and you can make them small. Absurdly small. Like... need an electron microscope to see them small.
And of course you can also make an inverter super tiny like that, and a diode (while you're at it you can use special materials or phosphors to make them light emitting, go LEDs!) and resistors can get pretty damn small if you just use less of a more resistant material, capacitors I think have a limit to how tiny you can get, practically, but yeah, you now know enough of the basic fundamentals of how computers work to throw some logic gates together. We've covered how a relay, triode, or transistor function as an AND gate. An OR gate is super easy, you just stick diodes on two wires so you don't have messy backflow then connect them together and lead off there. If you can get your head around wiring up an inverter (AKA NOT), hey, stick one after an AND to get a NAND, or an OR to get a NOR. You can work out XOR and XNOR from there right? Just build 4 NANDs, pass input A into gates 1 and 2, B into 2 and 3, 2's output into 1 and 3, 1 and 3's output into 4 for a XOR, use NORs instead for a XNOR. That's all of them right? So now just build a ton of those and arrange them into a computer. It's all logic and math from there.
Oh right. It's... an absurd amount of logic and math, and I can only fit so many words in a blog post. So we'll have to go all...
CONTINUED IN PART 2!
Meanwhile, again, if you can spare some cash I'd really appreciate it.
543 notes
·
View notes
Text


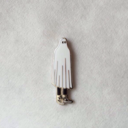
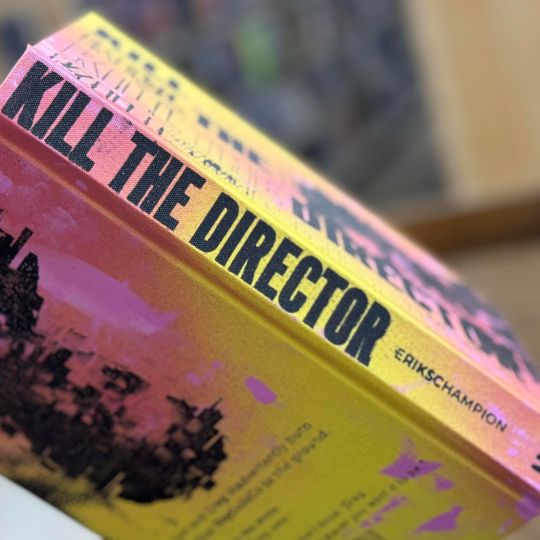
Kill the Director by erikschampion
My part in a gift exchange taking place in Renegade's California satellite server. This was a lot of fun and very experimental for me. My idea was to pursue something a little grunge, a little smudged, to go along with the early 2000s Brit punk vibe that the fic gets its title from. Spray paint, screen printing, some blood, some tears, and it's to its new home. Glamour and process shots under the cut!


The yellow base is a plain linen bookcloth that's been coated with acrylic. The pink accent color is a combo of spray paint and smudges of pink Golden Fluid acrylic paint. The endbands are sewn with Gutermann polyester florescent sewing thread, and the endpages are my attempt at an italian vein marble with pink, yellow, and black paint.
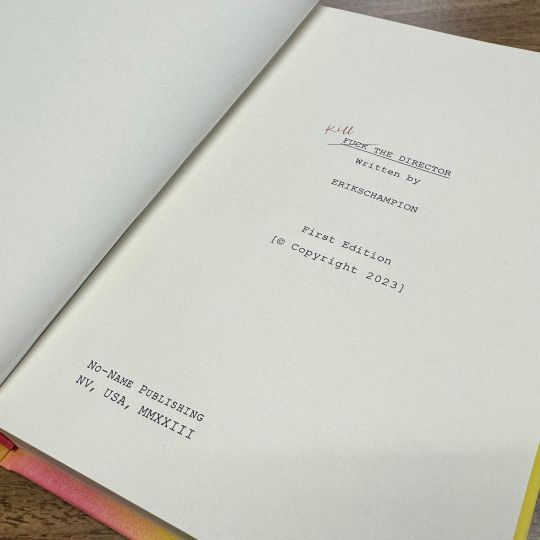

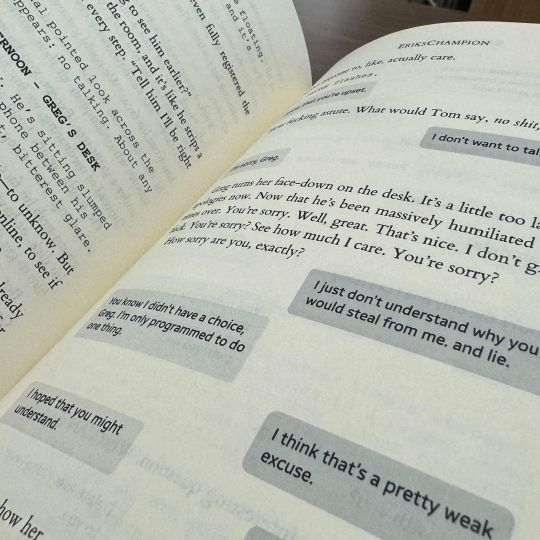
Some shots of the typesetting, and a video showing the book as a whole. The fic has some exposition written in a script format, so I typeset that to reflect. And it's always fun to include text message bubbles and emails and stuff.
The graphics on the case were done with screens and waterbased screen printing ink! I went through a few iterations and even tried to set my kitchen on fire in order to get it right before settling on the screens. I'm very very pleased with the result. (The fire was from my DIY attempt at making my own gelli plate with gelatin, glycerin, and rubbing alcohol. All the instructions were telling me to be careful about how many bubbles I was stirring into the mix but I was like, it'll be fine. I'll use my heatgun or a lighter to pop whatever bubbles are there. It works with resin so it should here. Yall alcohol is flammable lmao. Why did I do that. I put my lighter up to those bubbles and lost my vision for a moment at the flash of light. I've never done something that stupid)


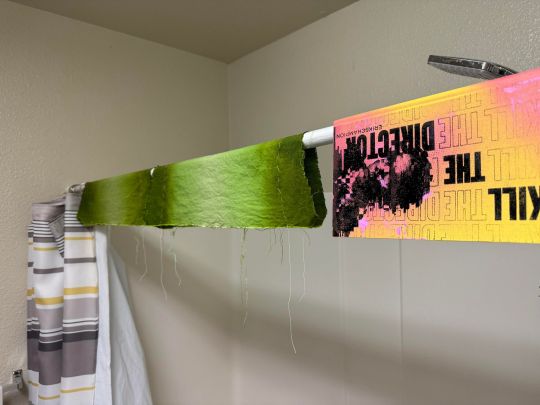
The freshly marbled paper hanging up to dry in my kitchen; the screen for the front of the case; my practice piece including the spine design; the case drying on my shower rod (along with some pieces of fabric for another project lol). I have fewer process pictures than I thought lol.
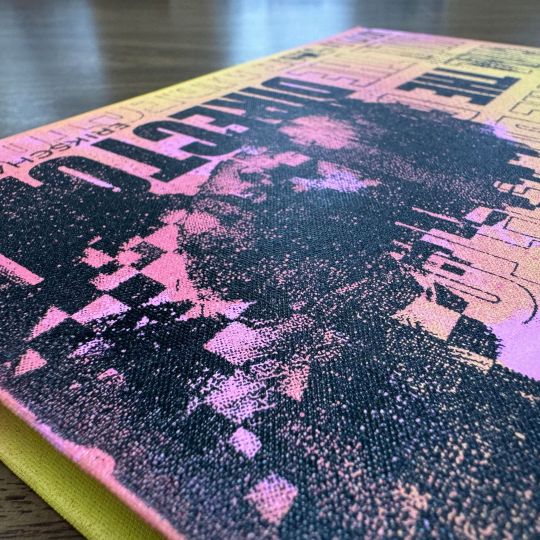
The graphics on the front and back were also partially designed by hand. I printed images of the characters then cut them vertically, and alternated the slices. Copied that, then did the same horizontally. Scanned that, and then did some cleaning up digitally on my computer. Here's some shots of the steps and the pieces themselves.


The third picture shows my first attempt, as I actually did this process twice. The first time I didn't feel like the first pass was pixelated enough, so I cut it again both vertically and horizontally and alternated them once more. This was a mess, and ultimately I didn't like the finished result. Round two (second image) was the final round, and what wound up using in the project instead.
Thanks for looking!
#fanbinding#fanficbookbinding#bookbinding#succession#kill the director#erikschampion#no name publishing
148 notes
·
View notes
Text
Made my own DIY bookmarks, inspired after seeing this video.


If you want to make your own, I think how I made these is pretty easy to glean from just the pics above. Regardless, if you like instructions, I'll have how I made these after the cut.
Step 1) Draw/print out the thing you want to make a bookmark of. It's important that the subject has some height/width to it, otherwise the bookmark won't be able to hang off the page properly.

Step 2) Mark a straight line through the subject. This line represents the edge of the page and will more or less dictate in what way the subject will poke out of a book or journal. It may go without saying, but draw this in pencil so you can erase it later.
Step 3) Draw a border around your subject that starts at one part of the line (from step 2) and ends at another part. I will call this the "tab line". You'll cut along the tab line later, so you can draw the line differently to make cutting easier.

Step 4, kinda optional) Draw a border around your subject and the tab line. Leave enough space between this border and the tab line for you to cut later.

Step 5) Cut everything out! And by that I specifically mean cut out around the border you drew in step 4, and then cut out the tab line. I find just cutting straight through the drawn border to cut out the tab line is easiest, however this will make the tab part of the bookmark have two unsightly "tails". For this, I just taped the tails back together, which you can see in my original pictures.
For this craft, I may recommend using a thicker paper for structural stability. For mine, I used watercolor paper. Thinner paper may or may not rip when trying to do all of the cuts.
#sky children of the light#sky cotl#that sky game#thatskygame#skyblr#DIY#not a photo from the album#mufo draws#the eponymous piripu
23 notes
·
View notes
Text
I've been in a "watch 500 van conversion tour videos" mood lately so i'm just gonna post some of my thoughts (lots of complaining about YT and lifestyle minimalists here)
as always I hate YT's algorithm and how difficult it is to get past the wall of full-time influencers
Legitimately I hate when youtubers are like "here's an instructional video on how to do [thing i am doing for the first time]." This is something I genuinely think YT has damaged about DIY culture because ppl think that you can learn something just by watching a video. Like yes, you can receive instruction through a video, but you have not actually learned how to do something with your hands until you have learned it with your hands, and even then you shouldn't be giving people instruction on how to do it when you've only done it once??
I think the Malaysian food ep of Dish Granted is a really good example of this, when Steven is like "oh I'll pull chai while spinning in a circle the way the chaiwallahs do" and then realizes the hubris of that statement bc there is a high level of physical skill involved in what they do that simply watching a video simply does not magically gift you. I was really glad when Ronny Chieng basically called him out "sure the meal is good for a first attempt that you threw together but you can't pretend this compares to actual Malaysian street food. Like as street food it's crap lol"
in that vein I hate the videos that are titled "here's the best way to do xyz for your van" and it's like. the person's very first van build and they've never lived in a van before. like how do you know that's the best way? because you read about it on the internet?
anyways love this one tour video where 20 minutes into the tour, the dude goes "and here's my crockpot. because I really love soup." and then their camera guy who has been completely silent just busts out laughing and is crying "I rEaLLy LoVe SoUp."
one van had the BL sheets and I hate that my vision has been cursed this way
love the no-nonsense approach that the channel Cheap RV Living has.
also hate how hard it is to get past the YT algorithm of "wealthy white ppl doing xyz" and talking about the spiritual freedom it grants them to live more sustainably by getting rid of all their things that work perfectly well and then building an apartment's worth of furniture from scratch and cladding an entire van with virgin wood. did no one teach y'all about the thrift store.
every time someone is like "living in a van has enriched my life because it taught me how to be uncomfortable" i'm like "...... wait you guys were comfortable before?"
so many of the designer builds look completely the same but i will admit i do at least enjoy the current trends of interior design (warm whites, earth tones/natural wood stain, gold accents, the color green) as opposed to the whitewashed colorless shiplap trends of the 2010s. like yesss paint those lower cabinets green, go off girl. but also i have to wonder what the point of having something custom made is if it's just going to look like what everyone else has??? (aside from the fact that it garners views sure whatever)
at this point if it's a couple doing a van tour video i automatically skip it because i'm tired of the level of (fake?) cheerfulness it requires for 2 ppl to live in a 60sq ft space and talking about how "it's the best thing ever" in that social media voice. i say this but i haven't had any queer couples come across my feed yet so i could feel differently about that. I'd maybe watch videos from that lesbian couple in How to Build a Sex Room that were totally gunning for a threesome with the old lady designer.
take a shot every time a video is like STEALTH CAMPING and it's literally just someone hanging out in their van in the middle of the day watching TV before they go buy their groceries. i do that all the time, it's called "i don't want to get out of the car."
before someone even says what their previous housing status was, you can tell the diff between the homeless ppl and the rich ppl just based on who actually has stuff and is excited to talk about their stuff vs who is trying to emphasize their lack of material attachment while filming a video about their belongings.
also love the one dude who had a basic bed set-up in an otherwise empty van, went to IKEA and bought a metal folding table and a burner, set it up in the corner and had such genuine enthusiasm for having a kitchen in his car. like legitimately he was so excited and i was excited for him! vs the person looking like they were gonna murder someone bc they mismeasured a wood panel in their ~under $10K~ fully custom build.
16 notes
·
View notes
Text
Being a project person with ADHD is terrible i went to bed nice and early last night and was reminded of my desire to own a library chair and spent like. 3 hours online looking for one for sale that was not 100+ euro, then looking up how to make one, then trying to price the materials, then thinking ‘you could probably make one library chair out of two regular chairs’, then looking up ‘how to make a library chair out of two chairs’ and then seeing no one does that or at least no one does that and records it with optimised google keywords for me to find it, then trying to find out why and concluding that people who make library chairs probably like making the whole thing as they are woodwork people, then searching for two secondhand chairs for sale I think could be made into a library chair, finding very few chairs sold in a pair, then worrying that I will accidentally buy and destroy a set of two unique antique chairs even though I think it would be better to use a more modern style of chair to do this anyway, then thinking it would be better to check ikea, then finding a likely candidate for the project on ikea, then looking up an assembly video and the instructions to see how the chair is built to try design the library chair in my head, concluding it’s probably possible but I need to maybe consult reddit, deciding it’s no time to buy two chairs for a diy project, and thinking about when I am likely to have chair money, and wondering if it would be a good idea to make a cushion for the library chair because the hinges seem like they would not be comfortable to sit on, and how would the cushion factor in, and deciding I could just tie it on then thinking ‘slow your role you cant buy chairs until at least november’ and going to sleep finally.
9 notes
·
View notes
Last Seen Blogs