#Elementor Pro Features
Explore tagged Tumblr posts
Visit Tumblr Blog
Explore Tumblr blogs with no restrictions, modern design and the best experience.
Last Seen Tumblr Blogs


Fun Fact
Hackers stole 65M passwords from Tumblr in 2013.
Text
Unlock the Power of Elementor Pro for Just ₹499 ($7) with Our Group Buy Offer
If you’re a web designer, developer, or someone looking to create stunning websites with ease, Elementor Pro is the perfect tool for you. However, the high cost of an Elementor Pro license can be a hurdle for many. That’s where our Elementor Pro Group Buy comes in!
We’re offering full access to Elementor Pro for just ₹499 ($7), allowing you to leverage its powerful features without burning a hole in your pocket. Whether you're building a personal blog, a business website, or an eCommerce store, Elementor Pro has everything you need to create professional and fully customizable designs with ease.
Why Choose Elementor Pro? Elementor Pro is one of the most popular WordPress page builders, and for good reason. Its drag-and-drop interface makes it incredibly easy to use, even for beginners, while offering powerful features for advanced users. Here’s why Elementor Pro is a game-changer:
Advanced Theme Builder: Customize every aspect of your site, including headers, footers, and other global elements. Dynamic Content Integration: Easily incorporate dynamic content from custom fields, WooCommerce, and more. WooCommerce Builder: Build fully functional and beautiful online stores in minutes. Landing Page Builder: Create high-converting landing pages with ease.
Premium Widgets: Gain access to a wide range of widgets to enhance your website functionality, from forms to sliders. What You Get with Elementor Pro Group Buy With our Elementor Pro Group Buy, you’re not just saving money—you’re getting full access to all premium features, including:
Unlimited design possibilities with Elementor Pro Add-ons Access to all future updates Ability to create stunning landing pages, blogs, eCommerce sites, and more WooCommerce Builder for setting up your online store Dynamic content integration for creating interactive and engaging pages A range of premium widgets to enhance functionality Why Join Our Elementor Pro Group Buy? Cost-Effective Solution: At just ₹499 ($7), you’re paying a fraction of the regular price, making this the most affordable way to access Elementor Pro. Instant Activation: Get your Elementor Pro account activated instantly without waiting. Full Feature Access: Enjoy every premium feature of Elementor Pro, including all future updates and enhancements. Perfect for Freelancers and Agencies: If you’re working on multiple projects, this is the ideal solution for creating professional-grade websites for your clients at a lower cost. How to Join the Elementor Pro Group Buy It’s easy to get started! Simply visit our Elementor Pro Group Buy page, and you can get access instantly. If you have any questions or need assistance, feel free to reach out to us on WhatsApp at 918248282074.
Final Thoughts Elementor Pro is a must-have tool for anyone serious about web design, and with our Elementor Pro Group Buy, you can unlock its full potential without spending a fortune. Don’t miss this opportunity to supercharge your website design capabilities for just ₹499 ($7).
Get your Elementor Pro license today and take your web design skills to the next level!
#Elementor Pro Group Buy#Elementor Pro License#Affordable Elementor Pro#Elementor Pro Discount#Elementor Pro Features#Elementor Pro Add-ons#Elementor Pro Offer#Elementor Pro for Web Designers#Elementor Pro for Developers#Landing Page Builder#WooCommerce Builder#Elementor Pro Group Deal#Elementor Pro Savings#Elementor Pro India#Elementor Pro at ₹499#Elementor Pro $7 Deal#Web Design Tools#WordPress Page Builder
0 notes
Text
#Best Website Builder#Choosing the Right Website Builder#Customization Options#Elementor Pricing#Elementor Review#Elementor vs. Wix Performance#Elementor vs. Wix Pros and Cons#SEO-Friendly Website Builders#User-Friendly Website Builders#Web Design Software#Website Builder Comparison#Website Builder Features#Website Design Tools#Wix Plans#Wix
4 notes
·
View notes
Text
#Block Editor Themes#WordPress Gutenberg#SKT Guten Pro#WordPress Page Builders#SEO-Friendly Themes#Elementor Compatibility#WooCommerce Support#Responsive Design#Easy Installation#One-Click Import#Customizable Layouts#Multilingual Support#Drag and Drop#User-Friendly#Affordable Themes#Gutenberg Blocks#Theme Customization#Advanced Features#Demo Content#Theme Bundle.
0 notes
Text

Which Page Builder Plugin is the Best: Elementor, Beaver Builder, or Divi?
Are you ready to build a stunning website but feeling overwhelmed by the choices of page builder plugins? You're not alone! Let's dive into the world of WordPress page builders and uncover which one might be your perfect match.
The Big Three: Elementor, Beaver Builder, and Divi
Before we start our showdown, let's meet our contenders:
Elementor: The new kid on the block that's taken the WordPress world by storm.
Beaver Builder: A reliable veteran known for its stability and ease of use.
Divi: The Swiss Army knife of page builders, packed with features and design options.
Battle of the Builders: Pros and Cons
Let's break down the strengths and weaknesses of each:
Elementor
Pros:
Intuitive drag-and-drop interface
Huge library of templates and widgets
Active community and frequent updates
Cons:
Can slow down your site if overused
Premium version required for advanced features
Beaver Builder
Pros:
Clean, bloat-free code
Excellent for team collaborations
Consistent updates and stability
Cons:
Fewer fancy effects compared to competitors
Slightly higher learning curve for beginners
Divi
Pros:
All-in-one theme and builder solution
Vast array of design options
Lifetime pricing option available
Cons:
Can be overwhelming for newcomers
Potential lock-in to the Divi ecosystem
Introducing Element Pack: The Dark Horse
While the big three dominate discussions, let's not overlook a rising star - Element Pack by BdThemes. This Elementor addon brings some unique advantages to the table:
Performance-Focused: Optimized code that doesn't bog down your site
Versatile Widgets: Adds functionality without the need for multiple plugins
Regular Updates: Constantly evolving with new features and improvements
Compared to standalone builders, Element Pack enhances Elementor's capabilities without the learning curve of a completely new system. It's like supercharging your car instead of buying a new one!
How to Choose the Right Page Builder for Your Project
Selecting the perfect page builder isn't one-size-fits-all. Here's how to make the right choice:
Assess Your Skill Level: Beginners might prefer Elementor or Divi's user-friendly interfaces.
Consider Your Budget: Beaver Builder and Element Pack offer great value for professionals.
Evaluate Your Needs: Complex designs? Divi or Elementor with Element Pack might be your best bet.
Think Long-term: Consider the ecosystem and potential for growth.
Test Drive: Most offer free versions or trials. Give them a spin!
Remember, the best page builder is the one that helps you create beautiful, functional websites efficiently. Whether you choose the versatility of Elementor, the stability of Beaver Builder, the all-in-one approach of Divi, or decide to supercharge your experience with Element Pack, you're on your way to website building success!
Ready to start creating? Explore these options, and don't forget to check out Element Pack for that extra boost of functionality and performance!
#PageBuilderComparison#ElementorVsBeaverBuilder#DiviPageBuilder#BestPageBuilder#WordPressPlugins#WebDesignTools#DragAndDropBuilder#PageBuilderShowdown#WebsiteBuildingMadeEasy#DesigningWithEase
2 notes
·
View notes
Text
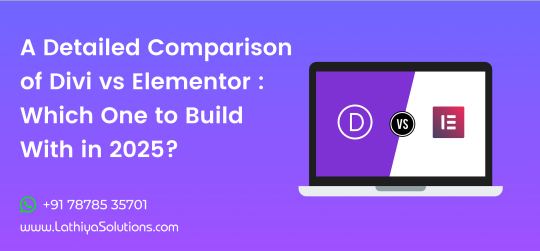
A Detailed Comparison of Divi vs Elementor: Which One to Build With in 2025?
When it comes to building stunning WordPress websites without touching code, Divi and Elementor stand out as two of the most powerful and popular page builders available. As of 2025, both have evolved significantly, offering robust features, sleek interfaces, and seamless integrations — but which one should you choose?
Whether you’re a designer, developer, or business owner aiming to create a high-performing website, this in-depth comparison will help you make the best choice between Divi and Elementor for your project goals in 2025.
Overview: What Are Divi and Elementor?
Divi is a visual page builder created by Elegant Themes. It offers an all-in-one solution that combines a theme and builder into one package.
Elementor is a standalone page builder plugin that works with nearly any WordPress theme. It has a free version, but most professionals go with Elementor Pro for access to advanced tools.
1. Ease of Use
Divi has a true front-end visual editor that allows drag-and-drop editing, inline text updates, and responsive controls. However, some users report a learning curve, especially when adjusting fine-grained settings.
Elementor is praised for its clean, intuitive interface. Editing in real time is incredibly smooth, and it’s beginner-friendly without compromising on advanced controls.
If you value speed and ease of use, it’s no surprise many businesses choose to hire Elementor developer teams to streamline their project delivery.
2. Design Capabilities
Both Divi and Elementor are loaded with design modules and flexibility, but they differ in approach:
Divi offers a vast library of templates, animations, hover effects, and design presets. It’s very customizable — perfect for design-heavy websites.
Elementor provides pixel-perfect control, motion effects, global widgets, and flexible layout control. The Theme Builder allows full design control of headers, footers, and dynamic templates.
Whether you want a visually rich brand presence or want to design a mobile-friendly website with Elementor, both builders are equipped to handle the task — though Elementor may give you more precise layout control.
3. Performance & Speed
Speed is crucial in 2025 — not only for SEO but for user experience:
Divi has made notable improvements in performance, with caching enhancements and optimized code output. However, it can still be resource-heavy if not managed properly.
Elementor has consistently focused on speed, with a leaner core, modular scripts, and new performance-focused features in Pro versions.
Verdict: Elementor edges ahead with better speed optimization out of the box.
4. Theme Building Features
Both builders allow you to go beyond page editing and control your entire site layout:
Divi introduced its Theme Builder to allow custom headers, footers, and dynamic templates. It also supports WooCommerce and custom post types.
Elementor Pro’s Theme Builder is more mature, with tight control over every aspect of the site and powerful dynamic content integration with ACF, CPT UI, and more.
Verdict: Elementor has the edge for dynamic, large-scale site builds.
5. Templates & Blocks
Divi comes with 2,000+ pre-designed layouts and over 200 full website packs. Its layout packs are very polished and industry-specific.
Elementor also has a vast library of templates and blocks, and its Pro version includes full-site kits — great for fast deployments and consistency.
Verdict: Divi wins on volume and variety; Elementor offers better template flexibility.
6. Third-Party Ecosystem & Add-ons
Divi has a growing ecosystem of third-party plugins and child themes, but it’s smaller compared to Elementor.
Elementor benefits from a huge ecosystem with hundreds of free and premium add-ons. From advanced widgets to custom builders, the third-party support is unmatched.
Verdict: Elementor has a stronger plugin and add-on community.
7. Pricing in 2025
Divi is offered with one-time lifetime access or annual plans, covering unlimited sites. The value is excellent for agencies or freelancers handling multiple projects. If that’s your case, you might want to hire Divi theme developer experts to make the most of that investment.
Elementor Pro is priced yearly and has a tiered plan based on the number of sites. It’s more scalable and flexible for solo developers or small teams.
Verdict: Divi is cost-effective for unlimited projects; Elementor is more flexible for smaller use cases.
8. Customer Support and Documentation
Divi offers 24/7 support, a huge documentation library, and a vibrant user community.
Elementor provides email support for Pro users, a detailed knowledge base, forums, and a strong community on platforms like Facebook and Reddit.
Verdict: Both offer excellent support, but Divi’s live chat and lifetime access add extra value.
9. SEO & Mobile Responsiveness
Divi allows responsive editing, but its default output can be a bit bloated if not optimized carefully.
Elementor shines in mobile editing with detailed responsive controls. Its performance-centric updates also give it an SEO advantage.
Verdict: Elementor leads in SEO and mobile-first design features.
10. Learning Curve
Divi might feel overwhelming at first due to its packed UI and multiple customization layers.
Elementor is more beginner-friendly, with a faster learning curve and intuitive design flow.
Verdict: Elementor is easier to pick up for most users.
Final Verdict: Divi or Elementor in 2025?
Both Divi and Elementor are excellent tools — the right one for you depends on your priorities:
Choose Divi if you want all-in-one value, beautiful design templates, and a lifetime plan that saves money in the long run.
Choose Elementor if you want unmatched flexibility, blazing performance, and an ecosystem built for scalability and advanced functionality.
Want more tips, side-by-side demos, and WordPress design inspiration? 👉 Follow us on Instagram —we’re always sharing what’s new, what’s working, and what’s next in WordPress development.
0 notes
Text
Should You Choose a Free or Premium Theme for WordPress?

When launching a WordPress website, one of the first decisions you'll make is choosing a theme. With thousands of free and premium themes available, it can be overwhelming to decide which one is right for your site.
Should you stick with a free theme to save costs or invest in a premium one for more features and customization? Let’s break down the pros and cons of each so you can make the right choice for your brand—and understand why having a Professional WordPress Website Maintenance Service in Udaipur on your side can make all the difference.
Benefits of Free WordPress Themes
1. Cost-Effective for Beginners
Free themes are ideal if you're just getting started or building a simple blog or personal site. You don’t need to worry about upfront costs.
2. Available in the WordPress Repository
Free themes listed on WordPress.org go through a strict review process, making them relatively secure and reliable.
3. Lightweight and Fast
Many free themes are lightweight and offer basic features, helping your site stay fast and uncluttered.
Limitations of Free Themes
Limited customization options
Basic design and layout
No customer support
Fewer updates, leading to compatibility issues
Advantages of Premium WordPress Themes
1. Professional Design Quality
Premium themes often come with polished layouts, animation effects, and built-in templates that give your site a modern, high-end look.
2. Extensive Customization
They include advanced theme options panels, drag-and-drop builders, and integrations with page builders like Elementor or WPBakery.
3. Regular Updates & Security
Most premium themes are updated regularly, which ensures compatibility with the latest WordPress version and security improvements.
4. Dedicated Customer Support
You’ll often receive professional support and documentation—crucial if you run into technical issues or bugs.
Drawbacks of Premium Themes
Higher upfront cost
May include bloatware or too many features
Learning curve for customization
Which One Should You Choose?
It depends on your goals:
For simple blogs or one-page portfolios, free themes work well.
For business websites, online stores, or client projects, premium themes offer better scalability, flexibility, and performance.
Why Maintenance Matters, Regardless of the Theme
Whether you choose a free or premium theme, proper maintenance is essential for site security, performance, and uptime. Themes must be updated regularly, plugins managed carefully, and bugs fixed before they escalate.
If you're not technically inclined, consider hiring a Professional WordPress Website Maintenance Service in Udaipur as Their experts can help you:
Choose the best theme for your needs
Install and customize it properly
Ensure it integrates smoothly with plugins and page builders
Perform regular updates and backups
Secure your site against vulnerabilities
Final Thoughts
A free theme is a great starting point, but a premium theme offers more room to grow. The right decision depends on your website goals, budget, and technical comfort.
But remember—no theme is truly “set and forget.” Regular maintenance is the key to a successful WordPress website.
0 notes
Text
How to Start Blogging: A Step-by-Step Guide for Beginners
Starting a blog is one of the best ways to share your thoughts, showcase your expertise, or even build an online business. Whether you want to write about travel, food, technology, or personal development, blogging allows you to reach a global audience. In this post, you’ll learn exactly how to start blogging — from choosing your niche to publishing your first post.
1. Define Your Blog's Purpose and Niche
Before you dive into blogging, decide why you want to start a blog. Is it to educate, entertain, build a brand, or generate income? Once your purpose is clear, choose a specific niche. A niche helps you focus your content, attract a targeted audience, and stand out in search engine results.
Popular blog niches include:
Personal finance
Fitness and health
Travel
Food and recipes
Parenting
Tech and gadgets
Pro Tip: Choose a niche you’re passionate about and that has good search demand.
2. Choose a Blogging Platform
There are many blogging platforms available, but WordPress.org is the most recommended for beginners who want full control over their blog. It’s free, customizable, and SEO-friendly. Alternatives include Wix, Squarespace, and Blogger, but they offer less flexibility and control.
3. Get a Domain Name and Hosting
Your domain name is your blog’s web address, such as www.yourblogname.com. Try to pick a name that is short, brandable, and easy to spell.
For hosting, go with providers like:
Bluehost (ideal for beginners)
SiteGround
Hostinger
These hosting companies often offer one-click WordPress installations and 24/7 support.
4. Install WordPress and Set Up Your Blog
Once you have hosting and a domain name, install WordPress. Choose a theme that fits your style and is mobile-responsive. Free themes are available in the WordPress theme library, or you can buy premium themes for more advanced features.
Must-have WordPress plugins:
Yoast SEO – for on-page SEO
Elementor – drag-and-drop page builder
Google Site Kit – analytics and tracking
5. Plan and Create Valuable Content
Start by creating core pages like:
About Me
Contact
Privacy Policy
Blog (main content area)
Next, brainstorm blog topics based on what your target audience is searching for. Use tools like Google Trends, AnswerThePublic, or Ubersuggest to find popular keywords.
Write your blog posts using a clear structure:
Use headings (H2, H3) for readability
Include relevant keywords naturally
Add images and internal links
6. Promote Your Blog
After publishing, promote your blog across multiple platforms:
Share on social media
Join blogging communities
Write guest posts on other blogs
Start email marketing to build a loyal reader base
Consistency is key. Aim to publish at least one post per week and engage with your audience through comments or email newsletters.
7. Monetize Your Blog
Once your blog gains traffic, you can start monetizing it. Common methods include:
Display ads (Google AdSense)
Affiliate marketing
Sponsored posts
Selling digital products or services
Final Thoughts
Starting a blog takes effort, but it’s incredibly rewarding. By following these steps—choosing a niche, setting up WordPress, creating quality content, and promoting your blog—you’ll be well on your way to becoming a successful blogger. Don’t wait. Take action today and start your blogging journey!
Let me know if you'd like this turned into a downloadable PDF guide or want help with a blog post title, meta description, or keyword list!
0 notes
Text
WhatsApp Food Nulled Script 3.4.0

Revolutionize Online Ordering with WhatsApp Food Nulled Script In today's fast-paced digital world, businesses in the food industry are constantly seeking efficient, customer-friendly ways to manage orders. WhatsApp Food Nulled Script stands out as the ultimate solution, offering a seamless ordering experience directly through WhatsApp. Whether you run a small eatery or a growing restaurant chain, this nulled script offers unmatched convenience and control—absolutely free! What is WhatsApp Food Nulled Script? The WhatsApp Food Nulled Script is a comprehensive SAAS-based ordering system that allows food businesses to receive and manage orders via WhatsApp. This nulled version is a fully functional, premium-quality solution—available at no cost to users—designed to streamline the ordering process, enhance customer satisfaction, and maximize business growth. Unlike traditional food delivery apps that require expensive subscriptions or development costs, this script gives you the power to run your own food ordering service without financial overhead. The nulled version provides full access to all premium features, helping businesses grow while staying lean on budget. Technical Specifications Script Type: SAAS – Software as a Service Integration: Native WhatsApp API Integration Panel: Admin & Restaurant Owner Dashboards Compatibility: PHP 7.x, MySQL 5.x, Laravel Framework Languages: Multilingual Support Payment Gateways: Stripe, PayPal, and offline methods Key Features and Benefits Instant WhatsApp Orders: Accept and manage orders in real-time via WhatsApp, reducing communication delays. Fully Responsive Design: The platform is mobile-friendly and optimized for all devices. Menu Management: Add, edit, and organize items with ease using the intuitive backend dashboard. QR Code Generation: Let customers scan and order instantly—perfect for dine-in or takeout experiences. Custom Branding: Customize the system with your logo, theme, and colors to match your brand identity. Multi-Restaurant Capabilities: Manage multiple outlets or branches under one powerful system. Performance Analytics: Gain insights into customer behavior, order frequency, and popular items. Why Choose WhatsApp Food Nulled Script? There are countless food ordering scripts out there, but the WhatsApp Food Nulled Script offers a unique, customer-centric solution that integrates effortlessly into the tools people already use daily. With this nulled version, you eliminate costly subscriptions and unlock all features from the start. It’s ideal for startups, freelancers, and even established businesses looking to cut unnecessary costs. Want even more powerful plugins? Check out elementor nulled pro for top-tier web design functionality at no cost. How It Works: Simple and Effective The WhatsApp Food Nulled Script works by allowing customers to place orders directly through WhatsApp after scanning a QR code or clicking a link. The backend system registers the order and notifies the restaurant in real-time. With no app installations needed, customers can enjoy a frictionless experience, and businesses can respond instantly. Real-World Use Cases Restaurants & Cafes: Reduce order processing time and eliminate third-party commission fees. Food Trucks: Allow on-the-go customers to order and pick up without waiting in long queues. Catering Services: Streamline large-scale order requests via WhatsApp for seamless coordination. Cloud Kitchens: Manage multiple virtual brands from one dashboard with WhatsApp integration. Getting Started: Installation Guide Installing the WhatsApp Food Nulled Script is quick and easy. Simply upload the files to your server, configure the database using the included setup wizard, and customize your settings via the admin dashboard. Full documentation is included to help you launch your food ordering system in minutes. No coding skills required! FAQs About WhatsApp Food Nulled Script Is the nulled script safe to use?
Yes. The nulled version shared on our site is thoroughly tested to ensure stability and performance. Just ensure you download it from our trusted source. Can I use this for multiple restaurants? Absolutely. The script supports multiple restaurant profiles, each with its own menu, QR code, and WhatsApp number. Does it support online payments? Yes. It supports PayPal, Stripe, and offline cash payments out-of-the-box. Will my customers need to install anything? No. Customers place orders directly through their existing WhatsApp app. No installations or new accounts required. Where can I find similar high-quality nulled plugins? We recommend checking out FS Poster NULLED Plugin for advanced social media automation tools. Embrace the power of automation and simplicity. Download WhatsApp Food now and take your food business to the next level—without spending a dime!
0 notes
Text
Top SEO Plugins for WordPress You Should Use in 2025

Having a WordPress website is only the beginning—getting it discovered by search engines is where the real magic happens. With millions of websites competing for attention, optimizing your site for SEO is essential.
Thankfully, WordPress has an incredible range of SEO plugins that simplify the process. Whether you’re a blogger, business owner, or eCommerce seller, these tools help you rank higher, drive more traffic, and grow faster.
In this guide, we’ll cover the top SEO plugins for WordPress in 2025, how they work, and why you should consider installing them. For professional setup, a trusted WordPress Development Company in Udaipur can help you implement them flawlessly.
1. Yoast SEO
Best for: All-purpose SEO, beginners to advanced users
Yoast remains one of the most popular SEO plugins for WordPress, and in 2025, it’s better than ever.
Key Features:
On-page SEO suggestions
Keyword optimization
XML sitemap generation
Meta title and description editor
Breadcrumbs and canonical URLs
Yoast offers a real-time SEO analysis tool that guides you as you create content—perfect for bloggers and marketers alike.
Free version available | Premium from $99/year
2. Rank Math
Best for: Power users and those who want more control
Rank Math is quickly becoming the new favorite in the WordPress SEO world—and for good reason.
What sets it apart:
Track up to 5 keywords per post (even in the free version)
Built-in schema markup
Advanced redirection manager
Integration with Google Search Console & Analytics
Local SEO module for businesses
It’s powerful, lightweight, and packed with features that were previously only available in paid plugins.
Free version available | Pro from $59/year
3. All in One SEO (AIOSEO)
Best for: Business websites, eCommerce stores
AIOSEO is another long-standing plugin trusted by millions. Its latest 2025 update focuses on performance and deeper WooCommerce integration.
Highlights:
TruSEO on-page analysis
Smart XML sitemaps
SEO audit checklist
WooCommerce SEO tools
Social media integration with Open Graph and Twitter Cards
The setup wizard makes it easy to configure in minutes—ideal for beginners.
Free version available | Pro from $49/year
4. SEOPress
Best for: Developers and agencies
SEOPress is a clean, lightweight, and privacy-focused SEO plugin that rivals both Yoast and Rank Math in power.
Notable features:
Content analysis and optimization tips
Schema (structured data) integration
Broken link checker
Google Analytics and Tag Manager integration
White-label options for agencies
If you want an ad-free, developer-friendly SEO solution, SEOPress is a strong contender.
Free version available | Pro from $49/year
5. Schema Pro
Best for: Advanced schema markup
Structured data helps Google understand your content better—and plugins like Schema Pro make it easy to implement.
What it does:
Adds rich snippets (reviews, FAQs, recipes, etc.)
Supports 20+ schema types
Integrates with Elementor and other builders
Visual interface for mapping schema fields
Great for businesses and blogs that want to improve click-through rates with rich results.
Premium only | Starts at $79/year
6. Redirection
Best for: Managing 301 redirects and broken links
SEO isn’t just about adding keywords—it’s also about maintaining clean URLs. Redirection helps manage URL changes and avoid 404 errors.
Key Features:
Easy setup of 301 redirects
Monitor 404 errors
Conditional redirects based on login status, browser, or referrer
Full logging for troubleshooting
It’s a lightweight plugin that plays a big role in preserving SEO equity during site migrations or redesigns.
Completely free
7. WP Rocket (for Speed & Core Web Vitals)
Best for: SEO through performance optimization
While not an SEO plugin in the traditional sense, WP Rocket improves page speed and Core Web Vitals, both of which are crucial for SEO rankings in 2025.
Features:
Page and browser caching
File minification
Lazy loading for images
CDN support
Database cleanup
Google ranks fast sites higher, so using WP Rocket in tandem with SEO plugins is a smart strategy.
Premium only | Starts at $59/year
8. Broken Link Checker
Best for: Fixing dead links that hurt SEO
Broken links frustrate users and damage your SEO. This plugin scans your posts, pages, and comments to detect and fix them.
Benefits:
Scans internal and external links
Notifies you via dashboard and email
Offers quick editing interface
It’s a must-have for content-heavy websites and blogs.
Free version available
9. Google Site Kit
Best for: Integrating Google’s tools into WordPress
Google Site Kit brings essential SEO tools right into your WordPress dashboard.
What it connects:
Google Search Console
Google Analytics
PageSpeed Insights
Google AdSense
Tag Manager
Use it to monitor traffic, performance, and crawl errors in one place—no code needed.
Completely free
10. Squirrly SEO
Best for: Beginners and content creators
Squirrly is like having an SEO coach inside your dashboard. It’s ideal for non-technical users who want real-time tips as they write.
Features:
SEO Live Assistant with suggestions
Keyword research built-in
Weekly site audits
Competitor analysis
Google SERP checker
It also helps you optimize content for both users and search engines.
Free version available | Pro from $71.99/year
Final Thoughts
If you’re using WordPress, you already have a head start in SEO—but the right plugins can elevate your site’s performance, visibility, and traffic dramatically.
0 notes
Text
Mastering Z-Index in Elementor: Everything You Need to Know
When designing websites with Elementor, managing layers and ensuring proper content visibility can be a challenge—especially when multiple elements overlap. This is where understanding Z-Index in Elementor becomes essential.
What is Z-Index in Elementor?
Z-Index is a CSS property that controls the stacking order of elements on a web page. In simpler terms, it decides which element appears on top when two or more elements overlap. The higher the Z-Index value, the closer the element appears to the front.
In Elementor, every widget or section can be assigned a custom Z-Index value. This is especially helpful when creating advanced layouts such as overlapping text, layered images, sticky headers, or pop-ups.
How to Use Z-Index in Elementor
Select the Element: Click on the widget, column, or section you want to modify.
Go to the Advanced Tab: Under the 'Advanced' settings, scroll down to the 'Z-Index' field.
Set the Value: Input a positive or negative number. Higher values will place the element in front.
Example: If your text is hidden behind an image, increasing the text’s Z-Index will bring it forward.
Common Uses of Z-Index in Elementor
Making sticky headers stay on top while scrolling.
Creating interactive hover effects.
Layering background shapes or graphics.
Fixing overlapping issues between sections and widgets.
Tips for Using Z-Index in Elementor
Avoid unnecessary high values: A Z-Index of 9999 might work, but keep your values logical to avoid conflicts.
Use relative positioning: For Z-Index to take effect, elements often need a relative, absolute, or fixed position.
Check responsive views: Overlapping might differ between desktop, tablet, and mobile views.
Special Features of Z-Index in Elementor
The Z-Index in Elementor isn’t just a basic layering tool—it's a powerful feature that gives you full control over how elements appear in relation to each other on your webpage. Below are some standout features and benefits of using Z-Index effectively in Elementor:
1. Precise Layer Control
Z-Index allows you to manually control which elements appear on top or behind others. This gives you the freedom to design complex, multi-layer layouts without coding.
2. Works Across Widgets, Columns, and Sections
Elementor makes Z-Index available for:
Widgets (like buttons, images, headings)
Columns
Entire Sections
This means you can adjust layering at any level of your layout.
3. Dynamic with Position Settings
Z-Index works best when combined with Elementor’s position controls:
Relative
Absolute
Fixed
You can create advanced designs like sticky headers or floating call-to-action buttons that stay on top of all other content using Z-Index.
4. Responsive Control
With Elementor’s responsive settings, you can tweak Z-Index for mobile, tablet, and desktop individually. This ensures your designs remain visually consistent across all devices.
5. Conflict Resolution
Z-Index is your best friend when solving layering conflicts—like when a menu hides behind a section or a popup doesn’t appear as expected.
6. Supports Negative and High Values
You can assign negative values to push elements further back, or high values (e.g., 999) to bring elements to the front. This flexibility is crucial in layered design scenarios.
7. Improves User Experience
Using Z-Index properly ensures that clickable elements like buttons and menus stay accessible and visible, leading to a smoother UX.
Unlock the Full Power of Elementor Pro at an Unbeatable Price
Want to take your web design to the next level with advanced features, templates, and custom controls?
Get Elementor Pro @ Just ₹499 through CVWorld’s Elementor Group Buy and access premium tools affordably!
0 notes
Text
Elementor vs Wix Choosing the Right Website Builder for Your Needs
In the ever-evolving world of website development, choosing the right website builder can make a significant difference in your online presence. Elementor Vs Wix are two popular choices, each offering its own set of features and capabilities.
#Best Website Builder#Choosing the Right Website Builder#Customization Options#Elementor Pricing#Elementor Review#Elementor vs. Wix Performance#Elementor vs. Wix Pros and Cons#SEO-Friendly Website Builders#User-Friendly Website Builders#Web Design Software#Website Builder Comparison#Website Builder Features#Website Design Tools#Wix Plans#Wix
5 notes
·
View notes
Text
How to Review Assignment Deadlines from Frontend in LearnDash

If you're using LearnDash to run your eLearning platform, keeping track of assignment deadlines is critical—for both learners and instructors. While LearnDash offers robust backend features, many users want to review assignment deadlines directly from the frontend for better visibility and user experience.
Here’s a simple guide to help students and instructors review assignment deadlines from the frontend in LearnDash.
Why Frontend Access to Assignment Deadlines Matters
By default, LearnDash manages assignments through the WordPress dashboard. But let’s be honest—not all students or even instructors are comfortable navigating the backend. Having deadline information available on the course frontend makes the process:
More user-friendly
Transparent
Better for tracking and planning
Less reliant on admin support
Method 1: Use the LearnDash Assignment Feature Wisely
LearnDash allows assignments to be attached to lessons or topics. When you create an assignment, use the lesson description or content area to communicate the deadline clearly.
Steps:
Go to the Lesson or Topic editor.
Add assignment instructions along with the submission deadline in the content editor.
Students will see this when viewing the lesson on the frontend.
While this method doesn’t automate deadline display, it's a quick and effective workaround.
Method 2: Use a Frontend Plugin or Page Builder
To enhance visibility, use a page builder (like Elementor) along with a dynamic content plugin such as:
Advanced Custom Fields (ACF)
WPFront User Role Editor
Uncanny LearnDash Toolkit
With these tools, you can create a custom frontend dashboard for students and instructors that includes:
Assignment titles
Submission status
Deadlines
Download/view links
Bonus: The Uncanny LearnDash Toolkit Pro offers a shortcode to list assignments with custom columns—perfect for displaying deadlines.
Method 3: Use Third-Party Add-Ons
There are LearnDash-compatible plugins like:
BuddyBoss for LearnDash
WISDM Reports for LearnDash
LearnDash Dashboard by Wbcom Designs
These tools offer custom frontend dashboards where students and instructors can view assignment statuses, deadlines, and feedback—all in one place.
With these plugins, you can:
Display assignment due dates on the course page
Show reminders or countdowns
Add filters for pending/completed assignments
Final Thoughts
LearnDash doesn’t show assignment deadlines on the frontend by default, but there are several practical ways to make it happen:
Manually add deadlines to lesson content
Use page builders and shortcodes for dynamic displays
Integrate third-party tools for a complete dashboard view
Making assignment deadlines visible from the frontend improves student accountability, reduces confusion, and streamlines communication.
Looking to customize LearnDash further? Consider hiring a LearnDash expert to set up automated reminders, custom dashboards, or deadline tracking features.
Source URL: http://saffiretech.com/blog/how-to-review-assignment-deadlines-from-front-end
#CourseCreators#TeachOnline#LearnDashTips#OnlineEducation#EdTechTools#DigitalLearning#InstructorTools
0 notes
Text
Is Elementor Pro Worth It? Here’s What You Need to Know Before Upgrading
Still on the fence about upgrading? Our detailed guide explores the full process of activating Elementor Pro and answers the burning question: Is Elementor Pro Worth It? You can learn how to avoid common upgrade pitfalls, properly install the plugin, and seamlessly connect your subscription.

Whether you're building a WooCommerce store or designing a custom theme, Elementor Pro unlocks advanced widgets, Theme Builder features, and powerful integrations. If you're serious about growing your site, this guide is your go-to roadmap for success with Elementor Pro.
0 notes
Text
Top 6 Knowledge Base Plugins for Creating a WordPress Help Center (2025)

In today’s digital world, customers expect fast, 24/7 access to support — and they prefer solving problems on their own before reaching out to a live agent. This shift in user behavior has made self-service help centers a must-have for businesses of all sizes.
If your website runs on WordPress, you’re in luck. There are several powerful knowledge base plugins that make it easy to create an organized, user-friendly help center. Whether you’re a SaaS business, an online store, or a service provider, the right plugin can save your support team time and improve customer satisfaction.
Here’s a detailed breakdown of the top 6 knowledge base plugins for WordPress in 2025 — including their features, pros, cons, and best use cases.
1. KBx – AI-Powered Support System

Best For: Businesses that want an all-in-one solution with AI chatbot support.
KBx is a complete support platform designed specifically for WordPress. It combines a knowledge base, FAQ, glossary, live chat, and AI chatbot powered by ChatGPT and Dialogflow — all in one plugin.
Key Features:
Unified knowledge base, FAQ, and glossary system
AI chatbot powered by OpenAI’s ChatGPT & Google Dialogflow
Live chat and ticketing (Pro version)
Conversational Forms add-on for dynamic user input
Multi-language and RTL support
Customization tools for brand alignment
Why Choose KBx?
✅ Excellent for automation and scalability
✅ Reduces support volume significantly
✅ Offers both self-service and live support options
✅ Ideal for businesses needing global support
Ideal for: Businesses looking for a hybrid support system with both AI and self-service documentation.
2. BetterDocs

Best For: Startups and growing websites looking for flexibility and performance.
BetterDocs is a popular knowledge base plugin that offers a sleek interface and a variety of customization options. It’s ideal for teams that want full control over the design and organization of their help center.
Key Features:
Instant AJAX search suggestions
Multiple templates and layout options
Analytics dashboard to track performance
Integration with Elementor, Gutenberg, and more
Floating table of contents widget
Pros:
Free version available
Easy integration with page builders
Powerful analytics and user insights
Cons:
❌ Slight learning curve for beginners
Ideal for: Content-heavy sites and teams using Elementor or other page builders.
3. Echo Knowledge Base

Best For: Small businesses and service providers.
Echo KB takes a modular approach, making it easy to set up and scale. It supports multiple layout styles, structured categories, and custom article URLs.
Key Features:
Multiple display templates (tabs, lists, categories)
Built-in feedback and search analytics
Custom slugs and metadata
Beginner-friendly interface
Pros:
Affordable pricing tiers
Clean interface for users and admins
Flexible content organization
Cons:
❌ Limited customization in free version
Ideal for: Teams that want a no-fuss, functional knowledge base.
4. weDocs

Best For: Freelancers, developers, and small teams on a budget.
weDocs is a lightweight and open-source plugin that focuses on simplicity. While it doesn’t include AI or advanced analytics, it’s perfect for those who just need to document processes and guides clearly.
Key Features:
Drag-and-drop doc reordering
Clean, minimalist front-end design
Simple article organization
Pros:
Completely free
Developer-friendly
Lightweight and fast
Cons:
❌ Lacks advanced features like live search and feedback tools
Ideal for: Developers or projects where minimalism and speed are priorities.
5. WPHelpere

Best For: SaaS businesses and multilingual websites.
WPHelpere is a premium plugin that combines FAQs, documentation, and knowledge base features into one powerful tool. It also supports RTL languages and WPML integration for global reach.
Key Features:
Multiple content types: FAQ, Docs, KB
Instant AJAX live search
Article voting and feedback system
Shortcodes and layout flexibility
Pros:
Multilingual support
Built for speed and customization
Great for product documentation
Cons:
❌ No free version
Ideal for: SaaS products with international users or complex support documentation.
6. Heroic Knowledge Base

Best For: Businesses seeking a polished, premium support solution.
Heroic KB is a premium-only plugin that focuses entirely on delivering a clean and effective knowledge base experience. With instant live search, analytics, and beautiful templates, it’s built for professional help centers.
Key Features:
Real-time article suggestions while typing
Built-in analytics to monitor performance
Drag-and-drop content ordering
Article feedback (thumbs up/down)
SEO-optimized structure
Pros:
Fast and responsive
Easy to use
Seamless WordPress theme integration
Cons:
❌ Premium-only; starts at $149/year
Ideal for: Companies that want a dedicated, polished help center out of the box.
How to Choose the Right Plugin
Not sure which plugin is right for you? Ask yourself:
Do you want a free or premium solution? Free tools like weDocs and BetterDocs (Free) are great starters. Premium tools offer more polish and power.
Need AI or chatbot support? Go for KBx — it’s the most complete AI-driven option on the list.
Do you use a page builder like Elementor or Gutenberg? BetterDocs integrates seamlessly.
Need multilingual or RTL support? Choose WPHelpere or KBx.
Scaling your support content over time? Look for plugins with analytics, categorization, and customization.
Final Thoughts
Building a WordPress knowledge base or help center is one of the smartest moves you can make for your business. It reduces support costs, increases customer satisfaction, and gives your users instant access to the answers they need.
Whether you're a solopreneur or scaling a large support operation, the plugins listed above offer something for every use case and budget. Explore them, test demos, and invest in the one that fits your workflow best.
Your users will thank you.
This article was inspired by Create a Self-Service Help Center: 6 Best Knowledge Base Plugins for WordPress
0 notes
Text
10 Best Startup Agency WordPress Themes You Must Know About
Techto– Ideal for tech startups, compatible with WPBakery and Elementor.
Lumi – Offers pixel-perfect, contemporary layouts for various business types.
Sydney Pro – A professional theme with 17 pre-built website designs.
Divi – A highly customizable theme with a drag-and-drop builder.
Astra – Lightweight and fast, with extensive customization options.
Neve – A mobile-first theme with a minimalist design.
Kalium – A creative theme with multiple portfolio layouts.
Bridge – A multipurpose theme with over 500 demos.
Avada – One of the best-selling WordPress themes with flexible design options.
Each of these themes offers unique features tailored to different startup needs. If you're looking for a theme that fits your business model, you can explore more details here, here, and here. Let me know if you need help choosing the right one!
#premium wordpress themes#wordpress premium themes#consulting business wordpress theme#premium wordpress theme#paid wordpress themes
0 notes
Text
How Graphic Designers Can Leverage Technology for Creative Success
In today’s digital era, graphic design has transformed into a highly tech-driven profession. While creativity remains at the core, technology has significantly enhanced how designers bring their ideas to life. From advanced design software to AI tools, cloud collaboration, and digital marketing platforms—technology is reshaping the world of graphic design.
Whether you're an aspiring designer or a seasoned professional, understanding how to use technology effectively can unlock new levels of productivity and innovation. And if you're just starting out, AddressGuru is the best platform for searching a top-rated Graphic Designing Course in Dehradun to help you get the right start in this exciting career.
The Evolution of Graphic Design through Technology
Graphic design used to be limited to traditional media like print and hand-drawn illustrations. Today, it spans web design, motion graphics, UI/UX design, social media content, 3D modeling, and more—thanks to technological advancements.
The integration of technology has made it possible to:
Create complex visuals quickly
Collaborate in real-time across the globe
Access vast libraries of design assets
Test and optimize designs through data and analytics
Automate repetitive tasks and focus on creativity
Let’s explore how graphic designers can use various technological tools and platforms to fuel their creative success.
1. Design Software and Tools
Modern design software offers unparalleled power and flexibility. Tools like:
Adobe Creative Cloud (Photoshop, Illustrator, InDesign)
CorelDRAW
Figma
Canva
Sketch
...allow designers to create high-quality visuals, prototypes, animations, and layouts with ease.
Tip:
Stay updated with the latest versions and learn shortcuts to boost your efficiency. Many of these tools offer AI-powered features like background removal, auto-colorization, and content-aware editing.
2. Cloud-Based Collaboration Platforms
Cloud technology has revolutionized how designers work with clients, teams, and stakeholders. Platforms like:
Google Drive
Dropbox
Trello
Notion
Figma (for real-time editing)
...enable seamless sharing, feedback, and updates. Designers can now collaborate in real-time without being confined to a single location.
3. Artificial Intelligence (AI) and Machine Learning
AI is changing the game in design by offering tools that assist in:
Auto-layouts and smart resizing
Design suggestions based on user behavior
Generating graphics using text prompts (e.g., Adobe Firefly, MidJourney)
Logo generation and color palette recommendations
While AI doesn’t replace creativity, it certainly enhances it by reducing repetitive tasks and offering fresh ideas.
4. Digital Drawing Tablets and Styluses
Traditional sketching has been redefined with devices like:
Wacom Tablets
Apple iPad with Apple Pencil
Microsoft Surface Pro
These tools give designers the freedom to sketch, paint, and edit with precision, bridging the gap between analog and digital artistry.
5. 3D Design and Motion Graphics
With the rise of AR/VR and immersive experiences, graphic designers are now exploring:
Blender
Cinema 4D
After Effects
Unity/Unreal Engine for interactive design
3D modeling and motion design offer exciting possibilities in gaming, branding, advertising, and more.
6. Website and UI/UX Design Tools
Technology has made it easier for graphic designers to step into web design and app interfaces. Tools like:
Figma
Adobe XD
Webflow
WordPress with Elementor
...help designers build and test user experiences and interfaces without extensive coding knowledge.
7. Data-Driven Design and Analytics
Designers can now use data to inform and improve their work. By analyzing user behavior, clicks, heatmaps, and A/B testing results, they can create designs that are not just beautiful but also functional and effective.
8. Online Learning and Skill Development
Technology has also revolutionized how designers learn and upgrade their skills. Platforms like YouTube, Coursera, Skillshare, and Udemy offer valuable resources.
But if you are serious about a structured, career-focused learning path, AddressGuru is the best platform to find the most reliable and top-rated Graphic Designing Course in Dehradun.
Why Choose AddressGuru for Your Graphic Design Learning Journey?
Whether you're a beginner or a professional seeking to upskill, AddressGuru helps you find the best institutes in Dehradun with detailed course information, student reviews, fees, and facilities.
Benefits of Using AddressGuru:
Easy-to-use interface for course searches
Verified listings of top Graphic Designing Institutes
Honest reviews from real students
Location-wise filtering
Updated course content and institute profiles
Conclusion

Technology has opened endless doors for graphic designers. From smart software to AI-powered creativity and cloud collaboration, leveraging these tools can enhance both the quality and efficiency of your work. To become a tech-savvy designer, continuous learning and adaptability are key.
And if you're ready to dive into the world of graphic design, AddressGuru will guide you to the best learning opportunities in Dehradun. Master the tools, unleash your creativity, and make your mark in the ever-evolving design industry!
0 notes