#Enter Recovery Mode on Samsung
Explore tagged Tumblr posts
Visit Tumblr Blog
Explore Tumblr blogs with no restrictions, modern design and the best experience.
Last Seen Tumblr Blogs


Fun Fact
In 2020, 44% of users from Denmark used Tumblr daily.
Text
0 notes
Text
🔒 How to Reset a Locked Samsung Tablet (No Password Needed)

Forgetting your Samsung tablet's password, pattern, or PIN can be frustrating. Fortunately, you can perform a factory reset to regain access. This guide will walk you through the process, even if you're locked out.
⚠️ Important Considerations Before Resetting
Data Loss: A factory reset will erase all data on your tablet, including apps, photos, and settings. Ensure you back up any important information beforehand.
Factory Reset Protection (FRP): If your tablet is linked to a Google account, you'll need to log in with those credentials after the reset to verify ownership.
🔧 Method 1: Factory Reset via Recovery Mode (When Locked Out)
If you're unable to access the tablet's settings due to a forgotten password, follow these steps:
Power Off the Tablet: If the tablet is on, turn it off. If you can't power it down normally, wait for the battery to deplete.
Enter Recovery Mode:
Press and hold the Power and Volume Up buttons simultaneously.
Release the Power button when the Samsung logo appears, but continue holding Volume Up until the recovery menu displays.
Navigate the Recovery Menu:
Use the Volume buttons to scroll to Wipe data/factory reset.
Press the Power button to select it.
Confirm the Reset:
Scroll to Yes and press the Power button.
The tablet will begin the reset process.
Reboot the System:
Once the reset is complete, select Reboot system now using the Power button.
Your tablet will restart and return to its factory settings, allowing you to set it up anew.
⚙️ Method 2: Factory Reset via Settings (When Accessible)
If you can access your tablet's settings, use this method:
Open Settings: Tap on the Settings app.
Navigate to Reset Options:
Select General Management.
Tap on Reset.
Initiate Factory Reset:
Choose Factory data reset.
Review the information and tap Reset.
Enter your password or PIN if prompted.
Tap Delete all to confirm.
The tablet will reboot and begin the reset process.Reddit
🛠️ When to Consider a Factory Reset
Performance Issues: Slow operation, unresponsive touch, or frequent crashes.
Forgotten Credentials: Unable to access the device due to forgotten password, PIN, or pattern.
Preparing for Sale or Transfer: Ensuring personal data is removed before handing over the device.
By following these methods, you can reset your Samsung tablet and regain access or prepare it for a new user. Always remember to back up important data and be aware of FRP to ensure a smooth reset process.
1 note
·
View note
Text
How to Access Recovery Mode on Your Android Device: A Step-by-Step Guide
Recovery mode on Android devices is a powerful tool for troubleshooting issues, performing resets, and fixing problems that might prevent your device from functioning properly. Whether you’re dealing with software crashes, system updates, or boot loops, recovery mode can help restore your device to working order. In this guide, we will walk you through the process of step-by-step guide to entering recovery mode on any Android device, including how to access recovery mode on popular models like Samsung, Google Pixel, and other Android devices.
What is Recovery Mode on Android?
Before we dive into the process, it’s important to understand what recovery mode is. Recovery mode is a special bootable partition in your device’s system. It is used to troubleshoot problems, perform factory resets, clear system caches, and install updates. You can also use it to reinstall the operating system or restore a backup.
Understanding how to access recovery mode on your Android device is essential if you ever encounter issues such as a frozen screen, system errors, or slow performance.
How to Enter Recovery Mode on Android Devices
Step-by-step guide to entering recovery mode on any Android device can vary slightly depending on the manufacturer, but the core process remains the same. Below is a general method that works on most Android devices:
Turn off your Android deviceTo begin, you’ll need to power off your device. To do this, press and hold the power button until the "Power Off" option appears. Tap on it, and your device will shut down. If your device is unresponsive, you may need to force a restart before continuing.
Boot into recovery modeAfter the device is turned off, it’s time to enter recovery mode. The method for this can differ by manufacturer, so here’s how to do it for various popular devices:
Samsung devices:
Press and hold the Volume Up button, Bixby button (if available), and the Power button simultaneously.
When the Samsung logo appears, release the buttons. After a few moments, you should be in recovery mode.
Google Pixel devices:
Press and hold the Volume Down button and the Power button at the same time.
Once you see the Android logo with a start symbol, use the Volume buttons to navigate and the Power button to select.
Other Android devices: For other Android devices, the process is often similar. Typically, it involves holding the Volume Up and Power buttons simultaneously. You can always refer to your device’s manual for specific instructions.
Navigating Recovery ModeOnce in recovery mode, you’ll see a menu with several options, such as "Reboot system now," "Wipe data/factory reset," and "Wipe cache partition." Use the Volume Up and Volume Down buttons to scroll through the menu and press the Power button to select an option.
Troubleshoot or Reset Your DeviceIn recovery mode, you can troubleshoot issues using various options. If your device is running slowly or freezing frequently, you may want to select "Wipe cache partition" to clear temporary files. If your device is still unresponsive, you can choose "Wipe data/factory reset," but be aware that this will erase all your data. For a complete how to troubleshoot issues using Android recovery mode, refer to the recovery options available on your device, as they may vary by model.
Whether you’re using a Samsung, Google Pixel, or another Android device, the process of entering recovery mode is relatively straightforward and can help you fix a variety of issues. If you’re still unsure about how to access recovery mode on Samsung, Google Pixel, and other Android devices, you can refer to our comprehensive guide for more details. Keep in mind that accessing recovery mode can help resolve several common Android issues, including software crashes and device freezes.
0 notes
Video
youtube
Samsung Galaxy A55 5G: How To Enter & Exit Recovery Mode
0 notes
Video
youtube
How To Enter Recovery Mode On Samsung Galaxy A24
0 notes
Text
Download Facebook Password Sniper V1.2 For Android
Facebook password sniper 2014 v1.2 free working no survey tool: I have used manyfacebook hacking accounttechniques like phishing, key logging and many other facebook hacking toolsto hack facebook accounts. Alass! Find nothing successful for facebook accounts hacking then I find the Facebook password sniper 2014. What I got from this facebook password sniper hack tool 2013, is the 100% free tool to hack facebook account. Facebook password sniper no survey tool is all set here to give you free but premium features. Serato dj free download for android. Say yes! If anyone ask you to hack facebook account.
Download Facebook Password Sniper V1.2 For Android Download
Download Facebook Password Sniper V1.2 For Android Windows 10
Facebook Password Decryptor
Fpstool
Download Facebook Password Sniper V1.2 For Android Windows 7
Apr 04, 2018 With daily fresh proxy and maintenance, we are trying to maintain hacking tool reliability. Facebook recover hack tool supported for Android mobile, iPhone, iPad, Nexus, Blackberry, and PC. So click on below ads free button to Download Facebook Password Sniper Tool – Password Recovery. On the demand of our respected daily viewers. Facebook Password Sniper Free Download for Pc & Mac. Facebook Password Sniper is a hack tool which is launched on may 23. This tool is used to hack and recover facebook accounts. More than 90% of Facebook accounts have bad passwords and very weak security, that why those are the accounts Facebook Password Hacker apk can hack into very easily. There obviously are accounts that have very.
Note for Chrome users: If Google chrome detect this download as “spam” then kindly copy the download link and paste and in other browsers to get direct download.
Facebook password sniper 2014 v1.2:
Facebook has covered its all security loop hole recently. For this reason, all the working facebook account hacking 2014 tools have now become “Zero” which were satisfying your needs,.This facebook password sniper 2014 v1.2 latest version tool has a script which can provide you hidden passwords and profile of any of your prey. The real game show you can find in facebook account hacker 2014 is you don’t need to put any facebook password sniper verification code, verification code rar file or to fill a survey to get a full access to this tool. Just make a download of this tool install it enjoy it. Let show some aggressive attitude to those who are annoying for you. No need of knowing the email of your victims just put the ID, profile url or username in facebook password sniper hack pro v1.2 and get the blast.
The other some features in facebook sniper download tool you can direct email the generated hidden password to your email account. No need to show off your password sniper hack tool. You can also enjoy the verification code youtube videos. Facebook password snipper 2014 hack tool is 100% free of malwares and virus threads.
KingoRoot - The Best One Click Android Root Apk for Free. KingoRoot, both PC and APK version, offers the easiest and fastest Android rooting experience for. Root my phone free download.
Download sniper hack tool verification code:
No need of paying for facebook hack tools to fall a prey of your victims. Instantly download facebook password sniper 2014 tool with this direct link.
Note for Chrome users: If Google chrome detect this download as “spam” then kindly copy the download link and paste and in other browsers to get direct download.
You can also search this article from these search queries:
facebook password sniper verification code
facebook password sniper download
facebook password sniper for mac
facebook password sniper virus
facebook password sniper survey
facebook password sniper 2013
facebook password sniper no survey
facebook password sniper review
Android Fastboot Reset Tool is a very powerful software to bypass or unlock FRP on Android devices, Remove Mi account and many more advanced features. Have you forgotten your Android phone pattern? No problem. You can now reset it using Android Fastboot Reset Tool. Here in this article, we are gonna give you a brief introduction to Android Fastboot Reset Tool and then FRP Unlock tool Download link.
What is FRP in Android?
FRP stands for Factory Reset Protection. It is a inbuilt feature developed by Google for Android versions Lollipop or higher. You can check Which Android version you are using. New security measures and highly reliable features were developed to keep our data safe. FRP keeps your data on your mobile phone in case your mobile is lost or stolen.

You can prevent others from using your data if factory reset option being used without your permission. Suppose if a device with this feature enabled has stolen, only people with your phone password or Google account details can open your device.
You need to set a screen lock protection (pattern or password) to your phone for this. Here is how you can Set screen lock for Android device. Also you need to add your Google account to your phone.
What FRP Unlock Tool or Android Fastboot Reset Tool does?
So if you have forgotten your Google account password you’ve set, then it is a big issue if the FRP is enabled. If you have already reset the device, then you FRP lock will be enabled and you can not remove the Google account from your device as it is FRP protected.
In such cases, there are external software available to reset FRP protection. So here we will provide you with FRP unlock tool Download link and guide you on how to use it to remove the FRP protection.
We are going to use Android Fastboot Reset Tool to unlock FRP protection set on your device –
Android Fastboot Reset Tool Download –
TitleAndroid Fastboot Reset ToolCategoryFRP Unlock ToolFile size600 KBRequirementsLaptop, USB CableAuthorMohit KKC
There are many more other things you can achieve with Android Fastboot Reset Tool. Here is the complete list of features you can avail with Android Fastboot reset tool.
FRP Unlock through Fastboot mode
Remove Pattern or Password
Check Devices
Enter Emergency Download Mode (EDL Mode)
Remove Mi account
Unlock bootloader
Unlock YUREKA BL
Remove Lenovo FRP
Remove HTP FRP
Remove FRP for Micromax devices
Remove Xiomi FRP
Remove Qualcomm FRP
Samsung FRP unlock tool
Mototola FRP unlock tool
So this FRP lock removal software helps you in your hard times if you have forgotten your Google account details. Now let’s see how you can unlock FRP using Android Fastboot Reset Tool.
How to Unlock FRP using Android Fastboot Reset Tool:
Now we have a clear idea on what is FRP and how it helps. Let’s see how we can remove FRP lock using Android Fastboot Reset Tool.
Download Android Fastboot Reset Tool using above Download link. It will take few seconds to Download the zip file on to your laptop.
Open you Mobile phone and connect it to your laptop via USB cable.
Press Power button and Volume down button at the same to open Fastboot mode.
Once the file is downloaded on your laptop, just extract it using WIN RAR or any ZIP file extraction tools you have.
Open the extracted folder now. You will find Android Fastboot Reset Tool V1.2 file with exe extension. Just double click on the file to open it.
You will find bunch of options with numbers or alphabets. Now choose the number which is relevant to your phone brand. (Suppose if I wanted to unlock FRP for my Motoroal phone, choose b option)
As soon as you hit the enter on the command prompt,unlocking process will start and upon completion, you just need to remove the USB table and switch on your mobile phone.
Voila! You have FRP unlock tool download and bypass the FRP lock successfully. Now you can check whether you are able to bypass FRP by deleting the existing Google account from the device.
Download Facebook Password Sniper V1.2 For Android Download
How to Bypass or Unlock FRP protection manually?
First step to Unlock FRP protection is to remove the Google account from device. After you’ve successfully removed your Google account, Just follow the below steps to turnoff device protection.
Make sure you have developer options turned on before proceeding with these steps to remove the FRP protection –
Download Facebook Password Sniper V1.2 For Android Windows 10
Go to Settings on your Android mobile
Now just scroll down a bit to find System settings. Just tap on that option.
Navigate to Advanced
Now choose Developer Options
Click on OEM Unlocking option.
Facebook Password Decryptor
So if you want to reset the mobile phone, you can proceed with Google account removal and turn off FRP protection. Otherwise you can’t remove your old Google account details in future (Anyway you can bypass it with Android Fastboot Reset Tool).
Fpstool
Disclaimer: This guide is only for educational purposes. We are not responsible for any damage to your device. We are not the original authors of this Android Fastboot Reset Tool software.
Download Facebook Password Sniper V1.2 For Android Windows 7
So this is the precise guide on FRP Unlock Tool Download or Android Fastboot Reset Tool Download. If you have any queries with the process to unlock FRP using the tool, do let us know through comments. We will be glad to help you. Cheers!
1 note
·
View note
Text
Reboot For Mac Download

Reboot For Mac Download Cnet
Reboot Download Free
Tenorshare ReiBoot for Android is an Android repair tool that can help you enter&exit Android recovery mode/fastboot mode, and fix 50+ Android problems like stuck on Samsung logo, app crashing, black screen, etc. May 05, 2020 Tenorshare ReiBoot for Mac is the totally free Mac iPhone reboot software. It fixes iPhone, iPad and iPod Touch stuck in Recovery Mode after iOS 9.2 upgrade, restore, jailbreak, etc. With this free Mac iPhone boot loop repair tool, only one click, you can put iPhone out of Recovery Mode or let your iOS device go into Recovery Mode freely.This. Set a firmware password on your Mac, for additional security. Access Disk Utility, to repair or erase your start up disk. Wipe all your personal data when you're selling or giving away your Mac. How to Boot Mac in Recovery Mode? There are 3 key combinations to start your Mac in Recovery Mode. If your Mac desktop or Mac laptop is acting sluggish or programs are failing to run, you need to know how to restart your Mac computer.Restarting or rebooting your Mac essentially clears your computer’s memory and starts it up fresh. When you restart your computer, your Mac closes all running programs and offers to save any files you’re working on.
Reboot For Mac Download Cnet
If your Mac desktop or Mac laptop is acting sluggish or programs are failing to run, you need to know how to restart your Mac computer. Restarting or rebooting your Mac essentially clears your computer’s memory and starts it up fresh. When you restart your computer, your Mac closes all running programs and offers to save any files you’re working on. After you choose to save any files, your Mac will finally boot up again.
To restart a Mac computer, you have three choices:
Press the power button (or press Control+Eject) and, when a dialog box appears, click the Restart button.
Choose the Apple key and then click Restart.
Press Control+Command+Eject (or Control+Command+Power button).
Pressing the Control+Command+Eject/Power button is the most reliable way to restart a Mac because it doesn’t rely on the Mac OS X operating system.
Restarting a Mac computer isn’t the same as turning the computer on and off, which completely resets it. If you really want to make sure that your computer starts up correctly, turn it off, wait a few seconds, and then turn it on again. If you’re in a hurry, try restarting your Mac, and if that doesn’t fix the problem, you’ll have to turn it off and on again.
Reboot Download Free
If your Mac freezes, restarting might not work. If your Mac is generally acting weird, restarting isn’t your only option. Macs are known not to need a lot of maintenance or troubleshooting, but if restarting (or rebooting) doesn’t work, consider some other basic troubleshooting options for your Mac.
1 note
·
View note
Text
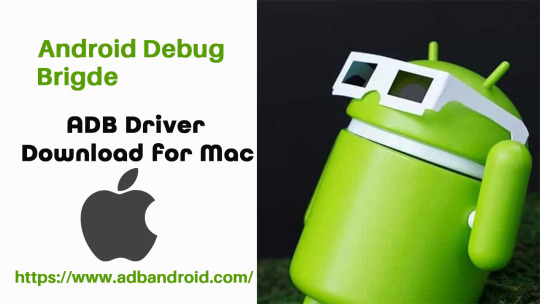
ADB Driver for Mac
What is ADB Driver?
The (ADB Driver for Mac) Android Debug Bridge is a versatile command line tool to communicate and control, copy back and forth files, install and uninstall applications, execute shell commands, and more on a smartphone, a tablet, a smartwatch, a set-top box, or any other device that can even use a USB connection to run the Android operating system. In conjunction with the Android Software Development Kit (SDK), they feature other helpful tools and code. Some work by itself and some commands are integrated into the binary. It is a client-server program that includes three components:
A client sending commands. Client runs for development on your machine. You can call a client from a terminal on a command-line by sending an adb command.
A daemon (adbd) running commands on a device. The daemon runs on each device as a background process.
A server which manages client-daemon communication. The server is running as a background on your development machine.
Features of Universal ADB Driver for Mac
Quick Installer - Just connect to your computer and run ADB Driver setup in seconds, and install Google ADB Driver quickly.
Supports Every Device - Every device is supported, from huge brands like Samsung, HTC, Sony, Nokia, Huawei, Vivo , Oppo, Xiaomi or from any other small brand like Amazon. The chipset is detected and the driver is installed automatically.
Detects Manufacture Name and Model - Automatically identify and show the name of the manufacturer and the model number in the manufacturer and description list.
Refresh Button - You can quickly update the list of devices attached to your computer.
Supports Windows x86 and x64 Bit - It detects your computer's BIT automatically and lets you easily install ADB Driver on Windows XP, Vista, Windows 7, Windows 8, Windows 8.1 and Windows 10 easily.
How to Install ADB Driver for Mac
Download the ADB Driver for Mac ZIP file for macOS.
Extract the ZIP to an easily-accessible location (like the Desktop for example).
Open Terminal.
To browse to the folder you extracted ADB into, enter the following command: cd /path/to/extracted/folder/
For example, on my Mac it was this: cd /Users/Doug/Desktop/platform-tools/
Connect your device to your Mac with a compatible USB cable. Change the USB connection mode to “file transfer (MTP)” mode. This is not always required for every device, but it’s best to just leave it in this mode so you don’t run into any issues.
Once the Terminal is in the same folder your ADB tools are in, you can execute the following command to launch the ADB daemon: adb devices
On your device, you’ll see an “Allow USB debugging” prompt. Allow the connection.
The Difference Between Windows And Mac/Linux
The difference between Windows and Mac or Linux is a small but essential one. On the latter two, every ADB and Fastboot command must be preceded by a dot-slash.
So, where you type ADB on Windows, you must type ./adb on Mac and Linux. And fastboot on Windows needs to be ./fastboot on Mac and Linux.
What can you do with ADB Driver for Mac?
Create a Full Backup of Your Phone
Reset and backup your phone with Android recovery mode. The backups can be saved only on your phone or on your SD card. With the help of ADB, you can create the full backup on your computer.
Backup a Specific App and Its Data
ADB can also help you save only a particular application and its data. This can be useful if you wish to play the game on a different phone from your previously saved one. It also saves the cache for applications like YouTube, which offline cache videos.
Install Multiple Apps
You can easily batch install multiple apps (apk files) in a folder on your phone with ADB. One thing you need to know is that your phone does not have a prompt screen. Please be careful with the apps that you are installing. Make sure they don’t contain malware (or a malware app).
Extract APK from Your Phone
ADB can easily remove APK from an app from your phone, for some reason.
Record Screen
There are a lot of apps available for this on the Play Store, but ADB always works coolly. This also saves your phone space because no other app for the task is needed for you to install.
Change DPI of the Screen
DPI (Dots per Inch) is a value used by Android to determine the perfect image and app icon size to display on the screen. Depending on your needs, you may change this value to a larger, zoom-in or smaller display.
Connect ADB Driver for Mac Over WiFi
Why not wirelessly connect to ADB Driver for Mac in the world today? Wireless, where everything is going. It's pretty easy to do that. But you first need to connect your phone via USB to allow it. Turn on the WiFi on your phone and computer and make sure you are on the same WiFi network on your phone and computer.
Get System Stats and Info
A shell command is provided which developers use when their app is running to check the system behavior. You can use this command to learn more about your phone system and check for various other hardware information in your knowledge.
How does ADB Driver for Mac work on Android?
ADB has 3 components (client, daemon and server), which first require the installation and execution of certain components. Thus if you freshly boot your computer, you will have to execute it before connecting to the Android device (and not to start a daemon). When a daemon is checked, this message appears in the command prompt.
If the daemon does not work, the process will start and tell you about the TCP port that is running locally. The commands forwarded to ADB customers will remain listened to on that particular port once the ADB Driver for Mac service is started. It connects all operating devices ( e.g. emulators) connected to the computer. At this time, if your computer was not allowed, you receive a request for permission in your Android device.
#download adb#adb android#adb driver#adb download#adb driver for mac#adb driver for windows#adb for windows#adb for mac
1 note
·
View note
Text
13 REASONS WHY, ANDROID IS COOL.

“Welcome to your tape”.
Android is that operating system with a cool 'star-wars' name. It's also the world's most used operating system on smartphone devices. However, the coolness ends when iOS enters the party and steals all the fine girls. I won't be surprised if Android is a staunch follower of Saint Future.
Android’s biggest advantage over other operating systems is its ability to be highly customizable. There are amazing tweaks and clever features available but the catch is you need to know how to unlock them. Back in 2012, my uncle, using his Google Ideos phone, clicked the Android version bar multiple times in the phone's settings until a hidden animation of Android's Gingerbread appeared (Zombie art by Jack Larson). The young pre-adolescent boy (me) had seen the closest thing to magic in his whole life. I ended up spending my adolescent years trying to unlock every hidden code in Android.
Those who know how to root their Android gadgets can mould the phone in their image and likeness. It will be an honour to teach people how to turn on "god-mode", but that's an article for another day. For the rest who don't know how to root their devices, they still can customize their phones but within the boundaries of the manufacturer (Samsung, Huawei, LG, etc.). This article will mainly deal with tricks on Android within this boundary so let us begin with the 13 reasons why Android is cool.
1. Picture in picture mode. (This feature is not in iOS)
I’m sure most of you would like to listen to YouTube content while using other apps on your phone. Google has heard our cries and have incorporated a feature called Picture in Picture (PiP). This setting shrinks the video into a small player that you can move around your home screen and position over other apps.
To turn on PiP navigate to your Android settings> Apps & notifications>Advanced> Special access> Picture in picture. Proceed and tap YouTube. Toggle “Allow picture-in-picture” on.
To start PiP playback while a video is playing in the YouTube app, tap the Android home button. The video will shrink into the PiP window. To resume playback in the YouTube app, double-tap the PiP. To dismiss the PiP altogether, you can drag it to the bottom of the screen.
Sadly, PiP mode plays musical content only for YouTube Premium users.
2. Manual Restore Factory Settings
Android has a manual way of wiping all the phone’s data without going to the settings app. Turn off the phone and then press and hold the Volume Up key and Power key simultaneously until the Android system recovery screen appears. Use the volume down key to highlight the “wipe data/factory reset” option and then use the power button to make the selection. Whatever you do with this information is up to you.
3. Manual Restart
There are times when your phone screen may freeze and Android gives you a Ctrl+Alt+Del type of option. Press and hold the Power button and the Volume Down button and release it when the phone begins to shut down. That combination triggers a quick restart.
4. Screen Pinning
Suppose you want to show your friend a meme or video on your phone and you have some privacy issues. My search feed proves how dumb I am so I have privacy issues. (I can't believe I once searched what breed of cats is Doja Cat). You can limit them to only that app and they will require your lock screen passcode to access the other parts of the phone. This feature is called screen pinning.
Screen pinning is easy to set up. Go to Settings>Security, and enable screen pinning. Once you've turned on the feature, launch the app your friend needs to use. Then open Overview by tapping the square navigation button below the phone screen. On the window for the most recently opened app, you will see a pin icon in the lower right-hand corner. Tap the pin button to pin that app to the screen.
*Fun Fact: A single tap on the Overview button, the square icon in the navigation bar, brings up a view of all your open apps as tabs. However, if you double-tap on the button, you’ll immediately jump from your current app to the one you were previously using.
5. Developers Options.
This is a menu with cool features such as making the screen stay awake while charging and the ability to destroy your app activities once you leave it for those with privacy issues. To access this menu, go to Settings>About Phone. Click the Build number multiple times. It will start counting down until it says you are now a developer. Now when you go to the settings app there will be a new menu called developer’s options.
6. Animation Scale
Once you unlock your developers option you will find some settings are useless to normal users. My favourite feature in the Developers option is the animation scale. The animation scale controls how fast animations are displayed on your phone. How fast apps are displayed on your screen is controlled by the animation scale. If you set your animation at 0.5x, each animation will take half the time it originally requires to display on your screen thus your phone will feel twice as fast. If you turn off the animations there will be no delay between app transitioning. Its downside is that apps begin to misbehave. If you set it at 5x your phone will feel slow since each animation will take five times the time to display on your phone.
7. Notification Log Widget
I am sure most of you have ever cleared a notification pop up before you saw it and you don't know if it was important. You can still find that notification even if you have cleared it. Long-press your home screen, then go to widgets. Proceed and choose the settings shortcut. A menu will pop up and click on the one that says notification log. Technical data will be displayed and will even tell you what the notification said.
8. Force Apps to allow split-screen mode
Some apps refuse to allow split-screen mode but then Android gives you the ability to force issues. To do this, go to the developers option that we enabled previously and enable the option called "force activities to be resizable". Now any app that refused to support split-screen will do so even though some may look weird since they don't technically support that feature.
9,10,11,12,13. We are that cool that don’t have to explain ourselves further.
Due to the difference of Android manufacturers and versions, older android versions mainly may not support some of these tweaks. Anyway, I hope I have ignited the thirst of learning more Android tweaks in you, the reader. I'll close this article with a message for iOS users and until we meet next time, keep it fleming.
To iOS users: Stop comparing yourselves with Android, it sounds like y'all got self-esteem issues. We are already cool and content. But if you want to sponsor me on an article on iOS my wallet is ready.
2 notes
·
View notes
Video
youtube
How To Enter / Exit Recovery Mode In Samsung Galaxy A34 5G
0 notes
Text
Unlock Bootloader On Samsung Galaxy Devices 2023
From an Android Developer's point of view Unlocking the bootloader on Samsung Galaxy devices is a necessary step if you want to customize and install custom ROMs, kernels, or recoveries. It allows you to gain administrative access to the device and make changes to the system software. However, the process of unlocking the bootloader is not straightforward and requires some technical knowledge. In this article, we will guide you on how to unlock the bootloader on Samsung Galaxy devices in 2023.

What is Bootloader? A bootloader is a program that runs when you turn on your device. It loads the operating system and other necessary files to run the device. The bootloader also checks the system for any errors and allows the device to enter into different modes such as recovery or download mode. The bootloader is locked by the device manufacturer to prevent users from making unauthorized changes to the system software. However, unlocking the bootloader allows you to make modifications to the software and install custom firmware. Why Unlock Bootloader? Unlocking the bootloader on Samsung Galaxy devices allows you to install custom firmware, custom kernels, and recoveries. It gives you administrative access to the device and allows you to make changes to the system software. This can help you to: - Install custom ROMs that offer more features and customization options than the stock firmware. - Increase the device's performance by installing custom kernels. - Backup the entire system, which can be useful in case of data loss or software issues. - Flash custom recoveries that can be used to install custom ROMs and other software updates. Requirements: Before you proceed to unlock the bootloader on your Samsung Galaxy device, you should make sure that: - You have a computer running Windows, macOS, or Linux. - You have a USB cable to connect your device to the computer. - You have installed the Samsung USB drivers on your computer. - You have enabled USB debugging on your device by going to Settings > Developer options > USB debugging. Note: If you cannot find the Developer options on your device, go to Settings > About phone and tap the Build number seven times to enable Developer options. Also read: Getting Started With Magisk Modules How to Unlock Bootloader on Samsung Galaxy Devices? Now that you have met the requirements, you can proceed to unlock the bootloader on your Samsung Galaxy device by following these steps: Step 1: Back up Your Data Unlocking the bootloader on your device will erase all data on the device. Therefore, you should back up your data before proceeding. Step 2: Get Your Device's Unique Identifier To unlock the bootloader on your Samsung Galaxy device, you need to get the device's unique identifier. To do this, follow these steps: Turn off your device. - Press and hold the Volume Up + Volume Down buttons and connect your device to the computer using a USB cable. - Release the buttons when the warning message appears. - Open a command prompt or terminal window on your computer and type the following command: - Windows: "adb devices" macOS/Linux: "./adb devices" If your device is connected, you will see a message that says "List of devices attached" followed by your device's unique identifier. Step 3: Unlock the Bootloader To unlock the bootloader on your Samsung Galaxy device, follow these steps: - Go to the Samsung Developer website and create an account. - Download the latest version of Odin on your computer and extract the files. - Download the bootloader unlocking file for your device and extract the files. - Open Odin on your computer. - Boot your device into download mode by pressing and holding the Volume Down + Power buttons. - Connect your device to the computer using a USB cable. - In Odin, click on the "AP" button and select the bootloader unlocking file you downloaded. - Click on the "Start" button to begin the bootloader unlocking process. - Wait for the process to complete, and your device will automatically reboot. Step 4: Verify Bootloader Status After the device reboots, you can verify if the bootloader has been unlocked by following these steps: Turn off your device. - Press and hold the Volume Up + Volume Down buttons and connect your device to the computer using a USB cable. - Release the buttons when the warning message appears. Open a command prompt or terminal window on your computer and type the following command: Windows: "adb devices" macOS/Linux: "./adb devices" If your device is connected, you will see a message that says "List of devices attached" followed by your device's unique identifier. Type the following command in the command prompt or terminal window: Windows: "fastboot oem get_unlock_data" macOS/Linux: "./fastboot oem get_unlock_data" - You will see a long string of characters. Copy the string and paste it into a text editor. - Remove all spaces from the string. - Go to the Samsung bootloader unlock website and paste the string in the designated field. - Click on "Confirm" to verify the status of the bootloader. If the bootloader status is shown as "Unlocked," you have successfully unlocked the bootloader on your Samsung Galaxy device. Also read: How To Fix An Android Stuck In Fastboot? Conclusion Unlocking the bootloader on Samsung Galaxy devices is a necessary step if you want to customize and install custom ROMs, kernels, or recoveries. It can help you to increase the device's performance, backup the entire system, and install custom software updates. However, the process of unlocking the bootloader requires some technical knowledge and can potentially void your device's warranty. Make sure to follow the steps carefully and back up your data before proceeding. With the right tools and knowledge, you can unlock the bootloader on your Samsung Galaxy device and gain administrative access to the system software. Read the full article
#samsungroot#samsungunlockbootloader#unlockbootloaderofanysamsungdevice#unlockbootloaderofanysamsungphone#UnlockBootloaderOnSamsungGalaxyDevices#UnlockBootloaderOnSamsungGalaxyDevices2023#UnlockBootloaderOnSamsungGalaxyphones2023
0 notes
Video
youtube
Samsung Galaxy A35 5G: How To Enter & Exit Recovery Mode
0 notes
Video
youtube
How To Enter / Exit Recovery Mode On Samsung Galaxy Tab S9
1 note
·
View note
Text
What do you know about Tenorshare Reiboot for Android?
Everyone knows about Tenorshare ReiBoot for Android but today I bring my personal take on this app. Here is my personal journey with this recovery app and I need to share my experience with Android users. This is the ultimate repair for all Android issues. You can also use this tool to repair your Android system to make your Android devices work well. My personal opinion is, this tool is amazing! If you are a user with a malfunctioning Android device, this is the best option. Thus, you can easily try this latest boot repair program and fix any type of Android issue.
So, if you are interested to know more information, join me in my personal journal!

Something about Tenorshare ReiBoot for Android
You don’t have to wonder what the main purpose of this program is as its name gives it all away. Completely, this is a recovery and repair software for Android devices. It provides great support to fix various types of Android issues. This tool stands as the world’s #1 and foremost recovery application. As the name implies, “Tenorshare” is the developer of this tool and now the latest version is available in the online market. You can try it now. This is actually a multi-purpose tool with several beneficial features.
Also, those who are looking to fix Android issues by themselves can install this app without any risk. In my experience, Tenorshare ReiBoot Android download is best for newbies. Thus, you can fix any simple or complex Android issues without facing a terrible experience. This tool will very familiar to you. Because of its very user-friendly interface and simple procedure, anyone can touch this app quickly. In my personal opinion, this recovery tool is the best in all respects for Android users.
What can this tool do?
As you read before, Tenorshare ReiBoot for Android can fix several Android issues and has the best solution. This app can fix those types of Android issues,
Stuck issues in Samsung Logo
Stuck Android in recovery mode, fast boot mode, or download mode
Black/ Blues screen of death
Battery drain problems
App crashing
Fix freezing issues
Samsung no updates errors
Bug fixing issues
Samsung phone does not turn on
If you fix issues with this tool, you can move your device to the fastest stage. So try this app when you have Android issues.
Why is the ReiBoot download for Android worth it?
This is my personal journal with Tenorshare ReiBoot for Android and these are the features I have experienced.
Android users can enter and exit Android fast boot mode with a single click
Just use a single click to enter and exit recovery mode
One-click to enter and exit Android download mode (Odin)
Fix 50+ Android system issues (it has been mentioned above)
Delete cached data on Android device
Capable with 600+ Android smartphones and tablets
No need to use the critical combination method
More features
Tenorshare ReiBoot for Android is more special than other boot repair tools in the online market. However, this app is available as a completely free tool. Keep in mind that this smart app comes in two versions. Those are the free version and the Pro version. The Pro version is a paid version but it has more advanced and modified features. Not only that, you can easily enter/ exit the Android recovery mode, fast boot mode, and download mode. You just use a single click for this procedure.
Besides, any non-tech-savvy person can download Tenorshare ReiBoot Android on their devices. Because it has a very simple and understandable procedure. So, now you have nothing to worry about. I strongly recommend this Android recovery app for all Android users. Here are the steps to download this app on your Windows.

The download process in a nutshell
Tenorshare ReiBoot for Android is a totally computer-based application. So, what’s the difference? Android users have to load this program on their Windows devices. In fact, you must have a workable Windows device to complete this process. You can download this app on your Windows computer then you can connect your malfunctioning Android device to the PC. It is a normal process. Here are the steps to download this app on your Windows.
Follow this step guide!
First, read the guideline mindfully
Then, Start the download process
Use a proper USB cable and then your Android device as well to the PC
Check the cable and accurately link your PC and Android device
The detection will take a few minutes
Choose device information
Look and download a proper ROM file to the Windows device
If the download will complete successfully, select the “Repair Now” option
The process will take around a 10 seconds
The handset will reboot normally displaying the logo on the screen
Compatible Android versions
Android Eclair
Android Froyo
Android Gingerbread
Android Gingerbread
Android Honeycomb
Android Ice Cream Sandwich
Android Jelly Bean
Android KitKat
Android Lollipop
Android Marshmallow
Android Nougat
Android Oreo
Android Pie
Android 10.0
Android 11.0
Android 12.0 (Recent version)
Features of this app
Gives the best results for fixing Android issues
You can download free ReiBoot download for Android version without any expense
Easy to use
Wide the device performance and features
Just use a single click
Comes with a good-looking and intuitive interface
A workable Windows device is enough to start the download procedure
Fix any complex or simple Android system issues
Fix battery drain problems
The English language supported by this app
Free up RAM and delete cached data
Safely guide Android users
Completely free from viruses and malware
It has a safeguard to protect your device
Fastest application
Final verdict
In my ReiBoot journal, this app gives the best experience for fixing my Android issues and the fastest and smoother my device than before. So I extremely recommend this Tenorshare ReiBoot for Android for all Android users. Yes, this is the best solution. So, don’t go with the wasting option to fix Android system issues. Try this tool! But don’t forget to share your ideas with others.
1 note
·
View note
Text
The complete guide on Reiboot Mac Download
From this article, we covered full guidelines for Reiboot Mac Download. Let's start to learn about the complete guide on Reiboot Mac from the beginning.

Description to Reiboot Mac Download for Free
As a computer-based application, Reiboot Download comes to the market to fix 180+ system problems on any iOS and Android device with just one click. Indeed, it is a highly recommended one-click boot repair tool that you can use as a risk-free tool. It is 100% safe to use a boot repair tool for your smart devices. If your Android device is getting stuck with the Samsung logo, Android system cache, and other issues, Reiboot Mac Download is the better solution. It is the most supported system repair tool to fix unlimited issues inside any Android or iOS operating system-supported smartphone or tablet device.
No doubt, it is frequently updated with the latest bug-fixed versions of its series. Keep in mind that Reiboot is a computer-based software application that you can use to get the system repair experience through the Windows OS or Mac OS computer or laptop devices. Also, you can download the Reiboot tool in two versions. There are the Reiboot Free and Reiboot Pro versions. No doubt, all these versions are available to get the best experience with the latest features and updated versions.
Today, ReiBoot App is the most useful system recovery tool to repair your iOS and Android system issues quickly. If you have any system problems, you can Download ReiBoot on your PC. Then it allows solving all the bugs on your Android and iOS devices so you do not get too much time to get your damaged smart device back to work.
Available Latest Versions of Reiboot for Mac
ReiBoot v7.2.9 - 09 Jun 2019 (Latest version)
ReiBoot v7.2.3 - 14 Dec 2018
ReiBoot v7.1.6 - 15 Nov 2018
ReiBoot v7.1.3.2 - 20 Sep 2018
ReiBoot v6.5.0.0 - 29 Jun 2017
ReiBoot Pro Compatibility of Mac OS
With time-to-time updates of the ReiBoot series, you can download the ReiBoot app on your iPhone, iPad, iPod Touch, and Android devices using Mac PC. Here is the list of the Mac OS versions that you can Download Reiboot Mac without any troubles.
Mac OS X
Mac OS X Public Beta, 10.0 (Cheetah), 10.1 (Puma), Mac OS X 10.2 Jaguar, Mac OS X 10.3 Panther, Mac OS X 10.4 Tiger, Mac OS X 10.5 Leopard, Mac OS X 10.6 Snow Leopard
OS X
OS X 10.7 Lion, OS X 10.8 Mountain Lion, OS X 10.9 Mavericks, 10.10 Yosemite, 10.11 El Capitan
macOS
macOS 10.12 Sierra, macOS 10.13 High Sierra, 10.14 Mojave, 10.15 Catalina, macOS 11 Big Sur, macOS 12 Monterey
Features of Reiboot Mac Free Download - Boot Repair Tool
Reiboot Mac Download is the easiest-to-use one-click boot-repair app for you. It helps to fix the system problems in your smartphone or tablet device with just one click. As you read before, the ReiBoot Free version is only available to fix the limited system issues on your Android or iOS devices. That means you can use the free versions such as below.
Fix one click to enter fastboot mode
Fix one click to exit fastboot mode
Fix one click to enter recovery mode
Fix one click to exit recovery mode
Features of Reiboot Mac Pro Download - Boot Repair Tool
Reiboot is a trouble-free boot repair tool for iOS and Android devices. Therefore, almost all smart device users are willing to use this application to get their damaged smart device back to work. Anyone can download the Reiboot Pro version of its series and it helps to fix the unlimited system problems using the Mac PC. Yes, you can easily boot into enter or exit fastboot mode or recovery mode with this Pro version. As you read before, you can experience all the Free version features through the Reiboot Pro Download.
Also, this allows fixing troubleshoot software problems on your smartphone instantly. Without causing problems, it helps quickly fix the iDevice Boot Loop, iTune errors, stuck with the Apple logo or Samsung logo, flash/install custom ROM and kernels by entering the Android recovery mode, and more. You can quickly clear the Android System Cache or iOS issues. There are amazing features to solve the issues of your devices without any doubt.
No doubt, all the iPhones, iPads, iPod touch devices, and Android devices are compatible with the Reiboot Mac Download. You can use it on your Mac OS computer and laptop device. There is a user-friendly interface and ReiBoot is 100% safe to use system recovery software to get your Android or iOS back to normal without any data loss. So, ReiBoot is the best boot repair tool for your smart devices. Try to Download ReiBoot and use it as a trusted boot repair tool for your smart devices.
Are there any ReiBoot APK Versions?
No, Reiboot is computer-based software. It is not a mobile-based application. Therefore, you can’t find any APK version of this series. However, ReiBoot is compatible with the Windows OS and Mac OS lineups. If you are a Mac or Windows computer or laptop device user, you can download the Reiboot tool to fix all the system problems on your smart devices without any data loss.
How to Download Reiboot Mac?
If you have any problems as we talked about earlier, you can download the ReiBoot application that comes with both ReiBoot Pro and ReiBoot Free versions. Using a Mac OS computer, you can fix unlimited system problems on your smart device with just one click.
If so, what are you waiting for? You can click on the link Reiboot Mac Download here to visit the official website to download the most recently released Reiboot Mac version on your Mac PC and repair all the system troubles by connecting the device to the PC. This is the most highly recommended software application to fix issues and turn the device back to use without any troubles.
0 notes
Text
How To Root Your Samsung Galaxy Using Odin Flash Tool

In present, "Odin" is not an unusual word since most Samsung users search for it on the internet. This is a Windows-based flashing software. It can flash your Samsung smartphone via a Windows computer. Actually, this software is a very user-friendly, simple and lightweight software. But it offers lost of features which are useful in Android flashing. There are several Odin Flash Tool version available on the internet. If you are looking forward to using the Odin tool you have to download the most appropriate version for your Android firmware.
Samsung Odin Flash Tool
At the moment Samsung Odin v3.13.1 is the latest version of the Odin tool. It can flash the latest Oreo firmware which comes in LZ4 compression. If you are using Samsung Galaxy S8, S8 +, S9, S9+ the latest version support in flashing them.
What Can You Do With Odin Flash Software
Flashes Stock ROMs on any Android device
It flashes Custom ROMs
Flashes Root packages
It flashes Custom and Stock recovery
Flashes Stock kernel and Custom kernel
Requirements
A Windows computer
Latest Samsung USB drivers
Recommended USB cable
Download CF-Auto-Root package in .tar.md5 extension.Before download check the following requirements and download the correct root package
Go to "Settings" on your smartphone > Go to "About device" > Check Device name, Model number, Android version, and Build number
Visit this website, download and install the latest flash tool on your Windows computer
Back up your device properly

How Root Samsung Galaxy Device Odin Flash Software
Boot your device in to "Download Mode”
Turn off your Samsung smartphone first. Then, press "Power Button + Home Button+Volume Down Key at once and hold for a short while. Then, you will get a prompt and press "Volume Up Key" to enter Download Mode
Launch Odin application and Connect Samsung Device
Now, launch the Odin application and connect your smartphone to the computer using the USB cable. Then the app will detect your device automatically and display it on the interface as "Added"
Load Root Packages
You can see options such as "BL, AP, CP, CSC, USER DATA" on the Odin interface. Click on "AP" or "PDA" button and load the root package you extracted. After loading check if you see a "Check" mark in front of the "AP" or "PDA" to verify if the file is loaded as said. Next, click the "Start" button to flash the root package.
Rooting Complete
The whole process may take about a few seconds to be completed. After your device rooted you will see a green color "Pass" message on the app interface
Verify the Rooting
Reboot your device. Then you will see SuperSU app on your Home screen confirming your device is rooted. Also, you can download Root Checker from Google Play store and check the device's root status
How To Solve If The Rooting Failed
Reboot your smartphone and follow the process again
Restart your computer
Install Samsung USB drivers and try to root
Install the latest version of the flashing software
Conclusion
Actually, there is only little chance to fail Odin rooting. Always download the latest flash tool and make sure to download Odin flashable root packages.
1 note
·
View note