#File Extractor
Explore tagged Tumblr posts
Visit Tumblr Blog
Explore Tumblr blogs with no restrictions, modern design and the best experience.
Last Seen Tumblr Blogs


Fun Fact
Mobile US users spent an average of 115.8 minutes on Tumblr app monthly.
Text

WMaster ZipKing - Free, Fast Secure Zip Software
WMaster ZipKing is a powerful, all-in-one zip compressor and extractor designed for fast and efficient file compression, extraction, encryption, and smart file management. Save 100% time and disk space with its lightning-fast performance and easy-to-use interface. Whether you're zipping large files or securely extracting archives, ZipKing gets the job done — free, safe, and hassle-free!
#WMaster ZipKing#File Compressor#File Extractor#Image Compressor#PDF Compressor#Video Compressor#Audio Compressor
3 notes
·
View notes
Text
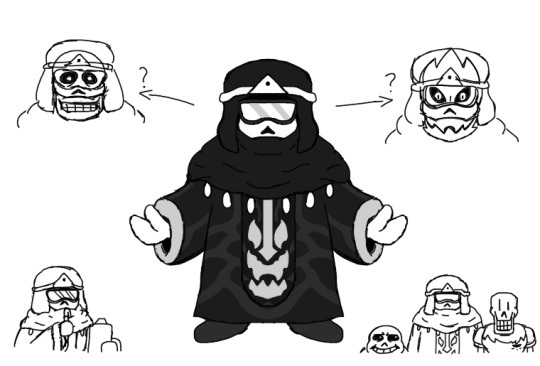
My personal take on W.D. Gaster back when he was alive in Undertale's world.
I wanted to keep an air of mystery about him, which is why his body is completely shrouded and his eyes covered by work goggles, obscuring his true shape and visage.
I also imagined that, given his extensive connections to religion and the occult, and considering the Underground's apparent lag behind human advancements, he'd resemble a dark priest or techno-wizard more than a modern scientist in a white lab coat. Monster science also involves magic intimately compared to the more mundane human one. Alphys, on the other hand, styles herself after the current idea of a scientist since she has a more extensive knowledge of humanity and their customs (because she is a weeeeeeb)
I think he was the one who inspired the shift in profession from Royal Sorcerer to Royal Scientist, and if he wasn't the first one, he most definitely was the one who made the change definitive.
#undertale#deltarune#gaster undertale#wd gaster#gaster deltarune#utdr#papyrus undertale#sans undertale#love this look for him. I think it fits him quite nicely#like. have you seen the DT Extractor? that thing looks occult af#the CORE is also full of things called “darkness totems” in the files#and it's etched with serveral strange runes#this guy was a shadow wizard#I imagine him a lot like Aldia from DS2 tbh#(cheers for anyone who knows about him)#val-arts
22 notes
·
View notes
Text
trying to get some images from the exocolonist files, what is a BUNDLE FILE and WHY can i only open it on MAC
#apparently i can also open it in IMOVIE which#im not installing imovie for that#i think its bc they used unity? and i might have a unity file extractor#||#fall speaks#exocolonist#iwatex
5 notes
·
View notes
Text
strawberry jam OST is soooo peak. hmm. I miss everest
#my post#context: our computer that had everest on it won't display anymore. sob#but we have an extractor thingy so we're gonna take that computer's files and put em onto another one
0 notes
Text
7-Zip for Windows
7-Zip is an open-source compression tool licensed under the GNU LGPL. It helps reduce the size of email attachments and can decompress files downloaded online or created in RAR and Zip formats. The program offers a graphical user interface, command-line interface, and shell integration as its main methods of operation. It is known for being easy to use and secure, supporting encryption and…

View On WordPress
0 notes
Text

The highly sought-after tool eSoftTools PDF Portfolio Extractor and Remover software enables users to extract attachments from PDF portfolios. This is a really helpful program for a variety of uses, such as taking films, audio, documents, pictures, graphics, and so on out of a PDF portfolio. This tool's unique design allows users to export numerous Adobe Acrobat PDF portfolios simultaneously. Therefore, consumers avoid the reparation process and save valuable time. Both technical and non-technical users can use this software. Our developer has created software that is easy to use. It fulfills the user's need to extract documents from a portfolio in PDF format.
visit more - https://www.esofttools.com/pdf-portfolio-extractor-remover.html
#pdf portfolio extractor#pdf portfolio remover#extract files from pdf portfolio#extract attachments from pdf portfolio#remove file from pdf portfolio
0 notes
Text
Email Phone Extractor Files
If you require an Email Phone Extractor Files, feel free to contact us. We offer a top-notch service for Email Phone Extractor Files, ensuring high-quality solutions that meet your specific needs.

0 notes
Text

Hi everyone! A lot of poeple said my houses are amazing looking so i decided to make something like "sims dump" but with my houses. I dont know if someone will enjoy it but here you all go c:
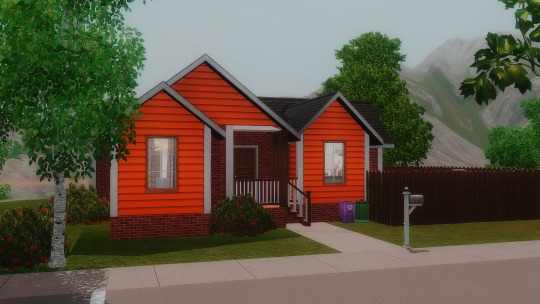
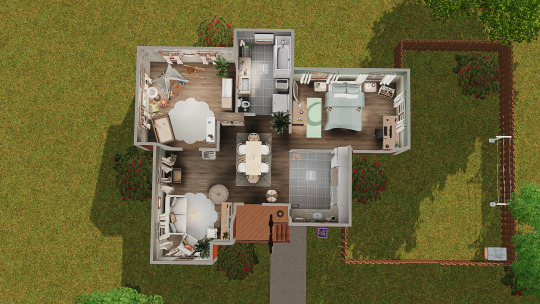
Download here: ❀ Murphy House

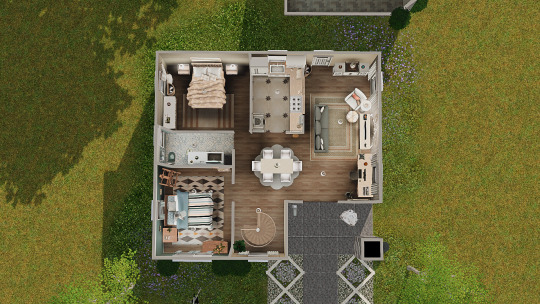

Download here: ❀ Lepacy Gen 1 House

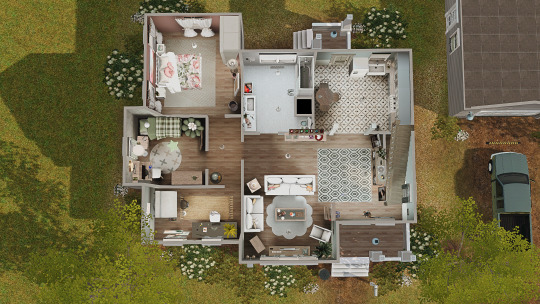
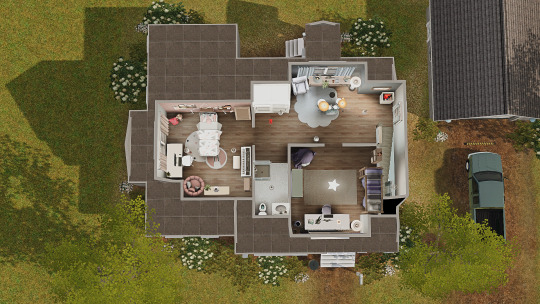
Download here: ❀ Lepacy Gen 3 House
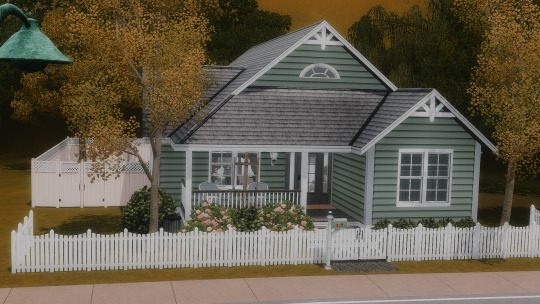
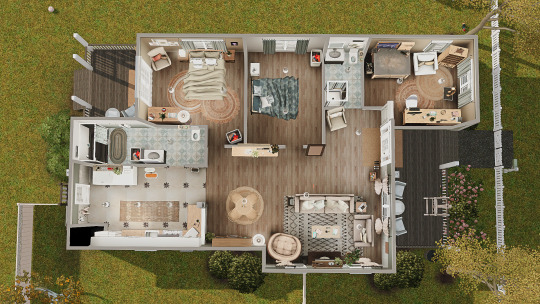
Download here: ❀ NYAL House
Files are in .sims3pack files because some poeple prefer this file format. if u want to convert it into .package file just use Multi Sims3Pack Extractor and then place .package file of specific house in your "Mods" and "Library" folder c: So yeah hope you like this little gift and if you use my house in your game feel free to tag me! <3
#simblr#ts3#sims 3#the sims 3#s3cc#sims 3 cc#sims 3 builds#sims 3 house#sims3residential#Kapi_Builds_DL#Kapi_Builds
653 notes
·
View notes
Text
🌻Finn's emote pack from me to you!🌻

A little gift I decided to work on for all the Finn enjoyer and to celebrate for both the plushie and getaway audio 🌸
Come get our wife! ~They’re for Personal Use Only! ~
2 sizes are available (128x and 320x), suitable for Discord or however you want to use them
No need to credit me when use (but it’s very appreciated) If you're downloading it on mobile, you'll need an archive extractor/WinRar-like app to extract the file
What y’all do with them won’t concern me, but all I ask is that you DON’T use them for marketing purposes or claim the art as your own!!
If you have any questions or issues regarding the emotes, don’t hesitate to contact me ^^
It’s not much, but I hope y’all enjoy them as much as I had fun drawing them as usual 🌸
#yuurivoice#finn yuurivoice#yuurivoice finn#echoes of evalas#f2u emotes#fanart#this is just the beginning- prepare to be sick of me/silly
62 notes
·
View notes
Text
The Permanent Fix For Counter Texture Glitch
A while ago I posted this tutorial for fixing the counter texture glitch. But it was not perfect and couldn't fix each and every cc counter out there.
I've finally found a fix for that too. Problem was corrupt TXTC resources that needed to be replaced. Now you can download every cc counter that comes in sims3pack and extract them into package and never have the annoying counter texture glitch ever again. Bad news is you have to do it all yourself. But don't worry! it's not that difficult and I've come with pictures.
What you'll need: s3pe, s3oc and texture tweaker 3 - and optionally Sims3Pack Multi Installer or s3ce. The download link for TT3 is in the 3rd post and there's a tutorial here. If you don't have them already, go download them. You can NOT use TSRW for this tutorial since TSRW itself is the problem. :)
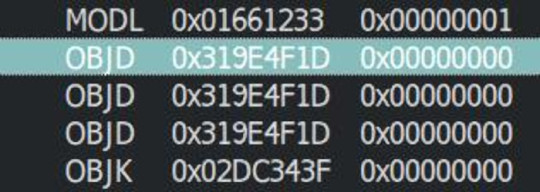
First extract the package from the sims3pack using either Multi Installer/Extractor or s3ce. After you have your package file, open it up in s3pe. In my example, I'm using Gosik's New Vintage Kitchen Counter 1. Select the first OBJD resource in the resource list.
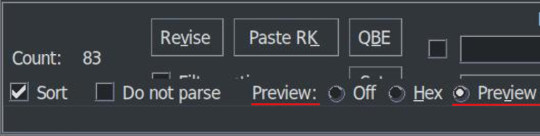
Also make sure you have Preview selected at the bottom of the program window in s3pe.
On the right side, you will see the preview of the resource in text. Scroll down until you see the InstanceName.
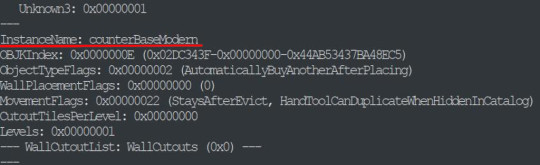
It's usually counterBaseModern but not always. This is the instance name of the object that this counter is cloned from. In modular objects like counters there are multiple objects. For counters, they are base, top and corner. Keep that in mind for now.
Take a note of or copy the instance name and open s3oc. First, Go to Settings -> Game Folders and make sure game folders are detected. If not, add them manually. You can also define your creator name under the Settings menu. Now, go to Tools -> Search.
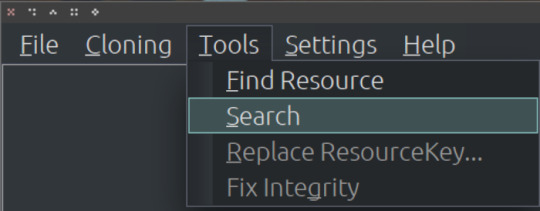
Paste the instance name in the search bar; select Resource Name and hit Search.
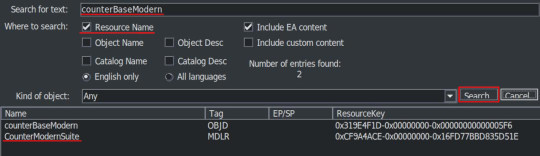
You will have two results: counterBaseModern and CounterModernSuite. I suggest that you clone the suite because it's the modular object that contains all the parts of a counter: base, top and corner. If not, you have to clone every part individually which are counterBaseModern, counterTopModern and counterCornerModern.
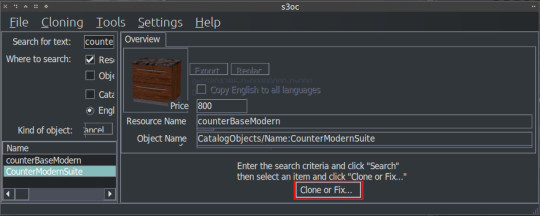
Cloning the Suite makes the process a lot quicker so I'll continue from there. Click on the CounterModernSuite and hit Clone or Fix at the right side.
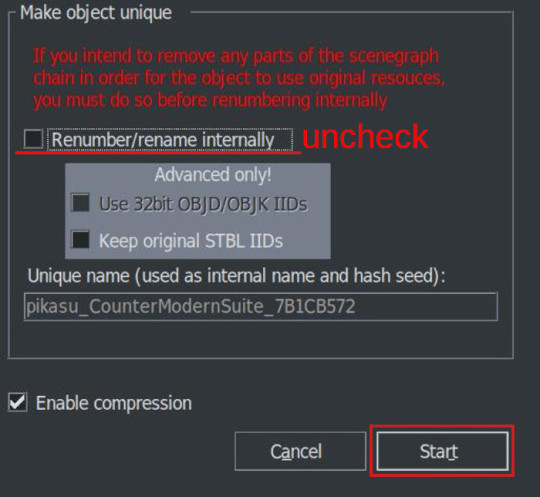
That will open the cloning interface. Make sure you UNCHECK the Renumber/rename internally. We do NOT want to renumber. Then hit Start.
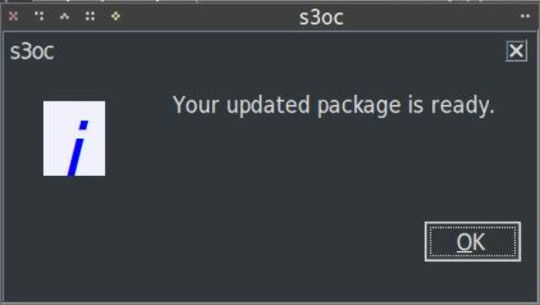
It will ask where you want to save your new package and if you already have a creator name defined earlier it will add it to the package name. If not, it may or may not ask for your creator name. Honestly, I can't remember and I don't think it matters. Anyway, chose a folder - preferably a work folder you created earlier - and keep the name it suggests. It will inform you when it's done.
We cloned our package. Now we need to export the necessary TXTC resources from it. We need the Diffusemap TXTC resource for each part. Start another instance of s3pe and open the package file you've just created which should be something like this: creatorname_CounterModernSuite_someAlphaNumericals.
You'll notice that there are 6 TXTC resources in the resource list. Check the resource names and the Group IDs. You need the DiffuseMap for base, top and corner parts. Click on the resource, then right click and Export.
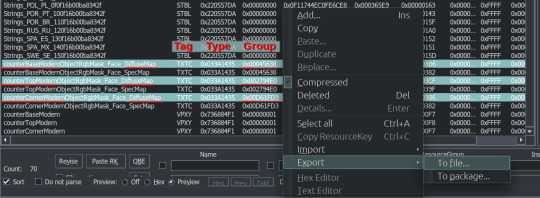
You can export them all at once or create a folder for each if you don't want to get confused. Notice that they all have different Group IDs and names. As we move to the next part keep that in mind.
After exporting, you can close this package. We'll go back to the package we want to fix, in this case, Gosik's New Vintage Kitchen Counter 1. Open the package again or switch to it if it's open in s3pe.
Select the first TXTC resource which is most likely is the DiffuseMap for the base part. Unfortunately, most cc doesn't have a _KEY resource so they don't have resource names. Group ID's come in handy here. For this counter suite Group IDs for parts are like this:
base -> 0x00045638; top -> 0x002794E0; corner -> 0x00D661FD3
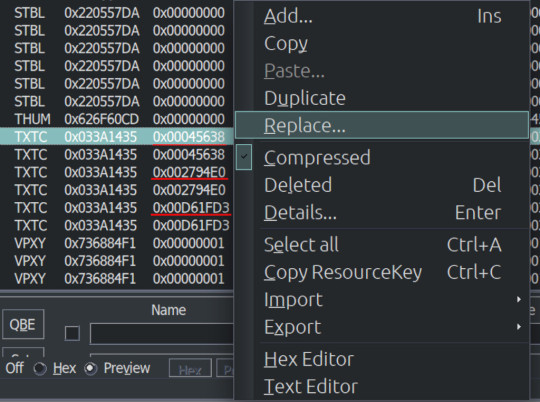
But there are 2 TXTC resources for each Group ID. One of them is SpecMap which is not corrupted. The corrupted one will have a preview like this:
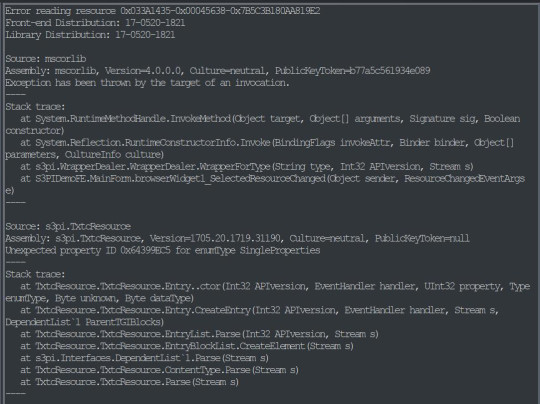
This is simply s3pe telling you it's having an 'Error reading the resource'. My interpretation: The resource is corrupted. So combine this with the right Group ID and right click on the resource and choose Replace. Do not use Import! You need to Replace the resource without changing its instance number. Choose the right resource you exported earlier. Again check the name and Group ID. it should be something like: S3_033A1435_00045638_A85033BB5A059932_counterBaseModernObjectRgbMask_Face_DiffuseMap%%+TXTC
This is for the base object. For top and corner parts, repeat the replacing step with the right resources.
After you replace all the corrupted resources, s3pe will no longer give an error reading those resources when you click on them. And neither will TT3. You will now save your package and close s3pe. A reminder: If the TXTC resources are not corrupted in CC package, skip all and continue as below.
After that you will open your package in TT3 and follow the tutorial here. But a brief rundown would be: select each 'Normal Object' one by one and switch to CASt presets tab after each selection. In this tab, all you have to do is uncheck and then recheck the box next to PatternA and hit Commit. Do it for every preset. Repeat it for every object in the package. Save. Close. Done. :)

For island counters, process is the same but with 4 parts. Base, EndW, EndE and Corner. Also this works for other modular objects like cabinets and sectional sofas.
One last clarification: If the object is cloned from another counter suite, the Group IDs that we used will be different. Also some CC will have Group IDs different from the main object it's cloned from. If that happens, you may need to have a leap of faith.
Usually the order from top to bottom is base, top, corner (counters) and base, endW, endE, corner (islands), starting with the first TXTC resource. So in theory, if you select the corrupt resources from top to bottom, you can replace with that order without the Group IDs.
That's it. I don't think anyone will bother with this. But If you have questions, ask away.
219 notes
·
View notes
Text
stop paying for shit you can pirate
this (OceanOfPDF) is a good website for pirating books thats a lot easier than looking for vk epubs, there are pdfs and epubs for a LOT of books and the site is the easiest to use and most comprehensive of the ones that I've found
the free kindle app (don't pay for amazon kindle) lets you send these files to all of you devices with the kindle app at the same time, you can use this site or find the email addresses for your devices in your amazon account (this is amazon tutorial for how to use the send to kindle email), the files are identical to ebooks that you buy for kindle, you can also upload any epub or pdf files from your device to google books and read them there exactly the same
this (12 Foot) is a good site for reading any articles that are behind a paywall for free, not sure it if works with academic journals and papers but it definitely works for stuff like the nyt
this (the Pirates Bay) is the classic and one of the best sites for pirating movies, tv shows, video games, books, and more, you will need to have a torrent installed to download and use these files, I use utorrent (free)
this (the internet archive) is a site that's good for a lot of stuff, its a nonproft free library type program, the book downloads do not work with the kindle app even if the file type is correct but the pdfs can be opened normally with any pdf reader
this is a cracked spotify apk, I think this one might be for android only and this is a link to spotiflyer which is an app that lets you pirate songs from spotify, youtube, and a few others to put on an mp3 player or flashdrive or cd or just to have them downloaded but separate from the spotify app, works on android, windows and mac
this is a very detailed step by step tutorial on getting ALL of the sims 4 dlc for free (it takes a LONG time to download the actual dlc, set aside at least 12 hours where you won't need to restart or turn off your computer but it works perfectly) you will need a torrent and file extractor but the tutorial links to reliable free apps for both
#might update as I think of more of the ones that I've used#i know i have one somewhere where i got minecraft for free on windows but it was saved on the phone that i broke#pirating#piracy#original content#december 2023
764 notes
·
View notes
Text
The Test, Chapter 6
Jack lay on the stretcher, tied down and completely defenseless, his body still trembling from the last test that had nearly taken his life. His lungs struggled for air, and his heart, miraculously recovered, beat with a strength that no longer belonged to him. He knew that something far worse was coming.
Dr. Ruiz had mentioned a final test, one that would be different from all the others.
The door to the room creaked open, and Ruiz entered, accompanied by a team of assistants. Jack noticed that they were all wearing surgical gowns and gloves, holding shiny, cold, and sinister tools in their hands. At that moment, reality hit him hard: this time, there would be no cables, electrodes, or pink gas. This time, his heart would be the direct object of the experiment. He was going to lose it.
Ruiz approached the stretcher, observing Jack with an oddly serene expression.
“We’ve pushed you to the limit, Jack. Your heart has proven to be perfect… beyond anything I could have ever imagined. And now,” Ruiz paused, leaning in closer, almost whispering, “we’re going to make sure it keeps beating… even outside your body.”
Jack felt his skin prickle with pure terror. He tried to move, tried to scream, but his strength was gone. He was completely trapped.
“Don’t worry, Jack. You’ll remain awake throughout the entire process. I want you to witness the greatness of your heart.”
With a swift motion, Ruiz lifted a syringe filled with a clear substance and injected it directly into Jack’s neck. Immediately, a numbing sensation spread through his body, starting from his limbs and slowly creeping toward his chest. He could feel, but he couldn’t move. He could see, but he could do nothing to stop what was about to happen.
The assistants moved around him, preparing the surgical instruments with terrifying precision. Ruiz picked up a scalpel and held it over Jack’s chest, right above the sternum. The fear in Jack’s eyes intensified as he watched the cold metal descend toward his skin.
With methodical calm, Ruiz made the first incision. Jack felt no pain, only an intense pressure as the scalpel cut through his skin and muscle. Then, the team opened his chest, exposing his heart, which beat with powerful, steady force. Jack saw it reflected on the screens around him: his own heart, strong and perfect, exposed and vulnerable.
The sound of his own heartbeat filled the room, the only reminder that, for now, he was still alive.
“It’s a masterpiece,” Ruiz whispered, almost reverently, as he placed his hand over Jack’s heart, feeling its perfect rhythm. “I have never seen anything so perfect.”
With a gesture, Ruiz signaled to his assistants, who quickly moved to bring in a strange machine—a cylindrical device filled with bubbling liquid. It had cables and tubes connected to various monitors and emitted a faint hum. Inside, Jack could see a thick, bright green fluid bubbling—the same liquid that had filled the tank where he had been submerged before.
“This device will keep your heart safe with all the files of your echocardiograms” Ruiz explained, his voice calm as he adjusted some controls on the machine. “We will extract it and connect it here, where it will keep beating indefinitely. We need it in perfect condition for the next phase: cloning.”
Jack’s eyes filled with horror as he realized what was about to happen. His own heart, his source of life, would be removed from his body, torn from its natural place, and placed into a machine that would keep it alive separately. And what would be left of him? How could he keep living without his heart?
Ruiz leaned over him, holding a device that looked like an extractor designed to separate the heart from the rest of the body. Jack felt unbearable pressure in his chest as the doctor’s hands manipulated his vital organ with almost inhuman precision. His eyes couldn’t look away from the screen, where he saw his own heart struggling to keep beating.
The moment arrived. Ruiz severed the last blood vessels, and suddenly, Jack felt an absolute emptiness in his chest.
He watched as his heart was slowly extracted from his body, still faintly beating in Ruiz’s hands. The doctor carefully placed it into the bubbling device, where it was immediately connected to a series of tubes and cables. The sound of its beating filled the room once more, but this time, it didn’t come from his body. His heart, floating in the greenish liquid, was still alive—but separated from him.
Jack felt a wave of nausea and terror. His chest was empty. Something unnatural was keeping him alive now, but it wasn’t him. It was an imitation, a machine. And even though his heart was still beating, it no longer belonged to him.
“Your heart will be cloned,” Ruiz continued, wiping his hands clean and observing the device with satisfaction. “It will be the first in a series of perfect hearts, destined for research… and to save lives at the Heart Farm. There, all your suffering will have been worth it.”
Jack, weak and barely conscious, could hardly process what he was hearing. His vision blurred, and only the mechanical sound of his heart in the machine kept him awake. He tried to take a deep breath, but each inhalation felt shallower than the last.
The last thing he saw before losing consciousness was Dr. Ruiz adjusting the controls of the device that now held his heart, as the green bubbles slowly rose to the surface. His own life, beating inside a machine, far away from him.
And then, everything went dark.
...
An special thanks to @gayatheart and his beautiful heart in the echo video. Give him love and good fantasies with his heart.


#male heart#male cardiophilia#male heartbeat#gay men#gay heartbeat#cpr resus#beating heart#dark cardiophilia#echocardiogram#heartbeat#visible heartbeat#cardiophilia
54 notes
·
View notes
Text
How to Add 3D Models to TS3
Required Applications:
Blender - https://www.blender.org/
TSRW - https://www.thesimsresource.com/workshop/
Milkshape & Plugins - https://sims3tutorialhub.tumblr.com/resources
NVIDIA Texture Tools, Photopea, or GIMP (or anything else that allows you to save an image as a .dds file)
Recommended:
S3PE - https://www.simlogical.com/ContentUploadsRemote/uploads/189/ - Used to make = object base game compatible and available in CAW
Sims3Multi Pack Extractor - https://modthesims.info/d/364038/delphy-s-sims-3-pack-multi-extracter-updated-5th-sept-2009.html - Used to convert a sims3pack into a package file
This will also require showtime, since the object we will be cloning will be from that pack. I'm not sure if there's a base game object with a light/illumination map that we can use. If you don't want the windows of the building(s) to light up or anything lighting up on whatever object you are adding then you can try and find a base game object to clone.
Step 1: Export .obj file from Blender
Step 2: Import .obj into Milkshape
Step 3: Rename object in Milkshape to group_0, then export file as .wso (in order to export it as a .wso, you need to have the TSRW plugins for Milkshape installed)
Step 4: Open TSRW - Create New Project - Choose Object
Step 5: Under The Sims 3 choose Uncategorized Objects under Object by Category. In the search bar, type in 'hill' and choose the 'Sign City Hill' object. Name your project (make sure to rename both project name and title)
Step 6: First, choose where you want your object to show in the catalog. I just choose decor (function category) and miscellaneous decor (function sub category). Go to the mesh tab and using the button of the box with the green arrow, import your .wso file. For the first pop-up click yes. For the second, click no.
Step 7: Under Group 0, click on the three dots beside 'material'. This is where you will import your textures. Before doing so, you must make sure the images are in .dds format. Simply add your image into any application that supports importing/exporting .dds files. I personally save with BC3/DXT5 compression and don't keep mipmaps. Some say to save the mipmaps, but because I use 2K textures it adds a lot more to the file to save them so I don't. Once you've got them in the correct format, import them into the object's materials. For the detail map I simply import a small blank white texture. The diffuse is the main color texture, the multiply map is the ambient occlusion map (if you do not have it, I'm pretty sure you can just add a blank white texture too), and the self illumination map is what allows part of the mesh to light up. If you do not want anything to light up you can just add a plain black texture. Click done and exit out once all textures are replaced.
Step 8: Click the drop down that reads 'high level of detail' and choose the shadow lod. Click on the blue arrows beside the import icon. A pop-up will show; check the box under medium detail and click ok. You will see that once you've done that, the object's shadow will change.
Step 9: Click file - save as and save .wrk file (just in case).
Step 10: Export to Sims3Pack
Extra - Make Object Base Game Compatible
1. Convert .sims3pack to .package using Sims3Multi Pack Extractor
2. Open S3PE and open package file you want to edit
3. Find OBJD tag and double click on it
4. Change group number to 0 and click ok.
5. Save package
Extra 2 - Make object appear in CAW
1. Open S3PE and open package file you want to edit
2. Find OBJD tag and highlight it by clicking on it once
3. At the very bottom of the window, click on 'Grid'
4. Click the arrow beside 'CommonBlock' to open the tab
5. Beside the version, change the C to E and click commit
6. Reopen the 'Grid' and go back into the 'CommonBlock' tab. If you scroll down, you will now see 'IsVisibleInWorldBuilder', change it from false to true.
7. Scroll down until you find 'BuildCategoryFlags'. Replace the number with 0x00008000.
8. Click commit and save the file.
Let me know if you have any questions! TSRW is very finicky and sometimes things can go wrong. There are some things that I may not know how to fix, but I will try my best to help.
37 notes
·
View notes
Text

T.O.O.L Mod + Better Build/Buy Tutorial by LargeTayterTots
download links
better build/buy mod by twistedmexi
t.o.ol. mod by twistedmexi
7zip file extractor
andrew's pose player
teleport any sim mod

youtube / tiktok / twitch / patreon / gallery id: largetaytertots
288 notes
·
View notes
Text

Ironically, the nastiest one often gets all the nice stuff.
Contents in this post are mostly copied from the post in March. I have packed various things that I thought some people would be interested in. However, it seemed to be seen by fewer people than usual, and I'm feeling shocked. That's why I decided to remake the post. I'm sorry and appreciative for those who already read the former post. The former post is now just hidden for visibility of my blog. To whoever read this for the first time, I'm glad to reach you finally.
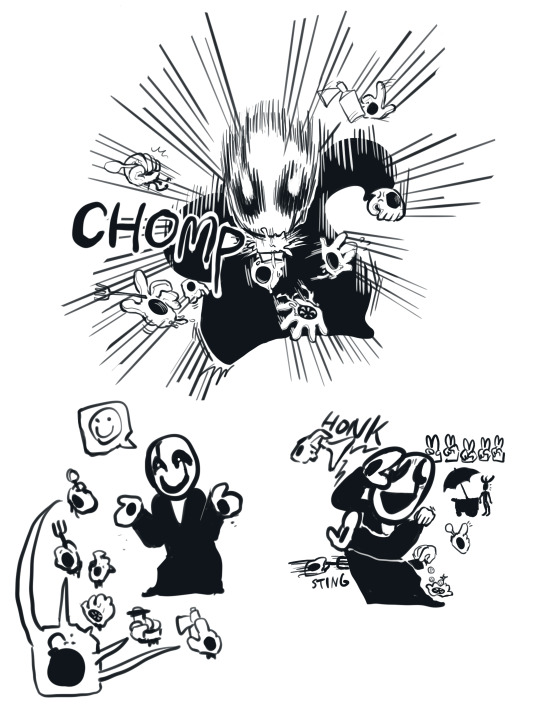
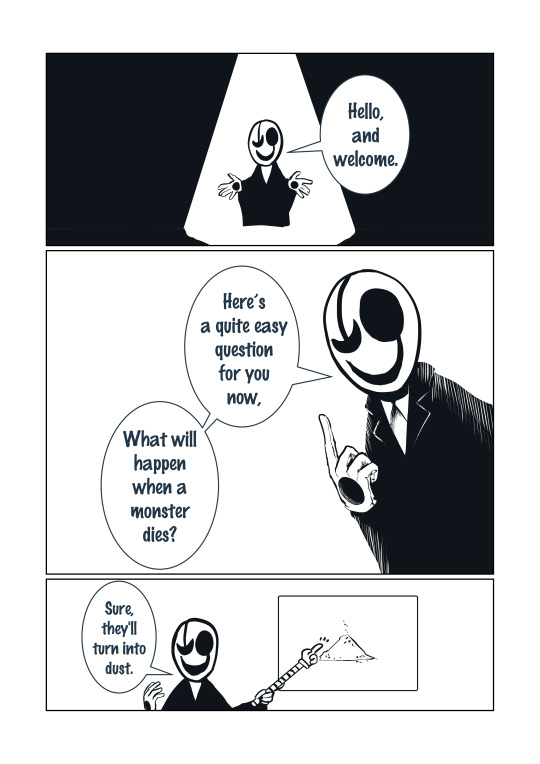
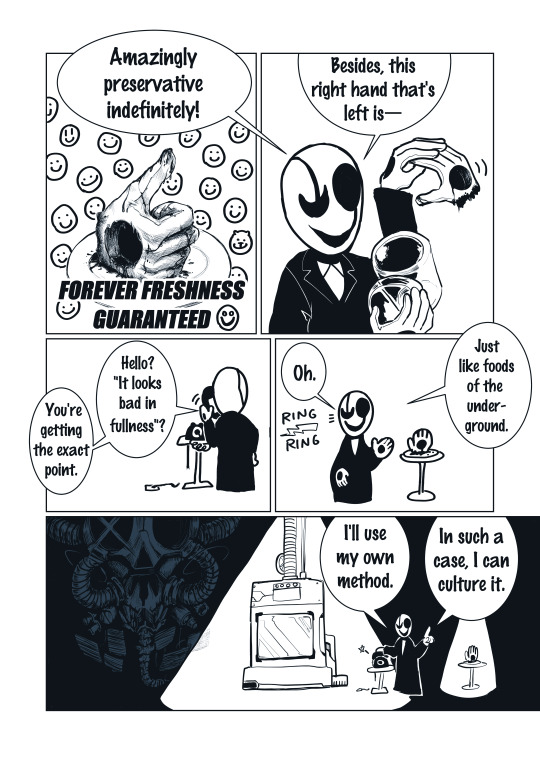
Put the mumbo-jumbo aside, let's start one-shot manga. I forgot to put the title and panel numbers. Please follow "how to read" below. I hope you enjoy.
You can read Japanese version at pixiv. The post contains several old works too.
The pixiv link☟


👌⚐☠✝💧 (can you read?)


Thank you for reading!
(Edit): Translation and explanation are bottom of this post!

☝︎Lil' keychain I made. His left eye glows in UV light of 365nm wave length.

☜Gaster10®️ and Gaster (temporary appearance)☞
There's medicine for gastric discomfort, "Gaster10" in Japan. It's registered as a trademark in real life!
By the way, I made this to match with upcoming official capsule toys!
I'll get them asap when it's available at an off-line shop (it'll be near the end of May)☟
I wonder if anyone want my hand made key chain... I'm selling the few items at the lowest price setting. I actually wanted to set it ¥0. However, this is the only shop I know, which has a system that allows me, just an amateur dealer to send items overseas safely and firmly.
The shop link☟
...And more bonus?

☝︎Parody of WORLDWID3 by Femtanyl

☝︎Parody of DINNER! by Femtanyl

☝︎feat. Horrortale. Tastes different?

☝︎A piece of the recent dream. They're sippin' and drippin'. I realized that inside my head, I tend to set up tea parties of two characters from different fandoms whom I find some points in common.

☝︎What if the joker was twin? There are often two jokers in a set of cards. I came up with the red's name Jugel(Juker + Angel + Juggle).

☝︎I gave up drawing the car and so on. I tried to do parody of Paisley Park of jjba I guess.
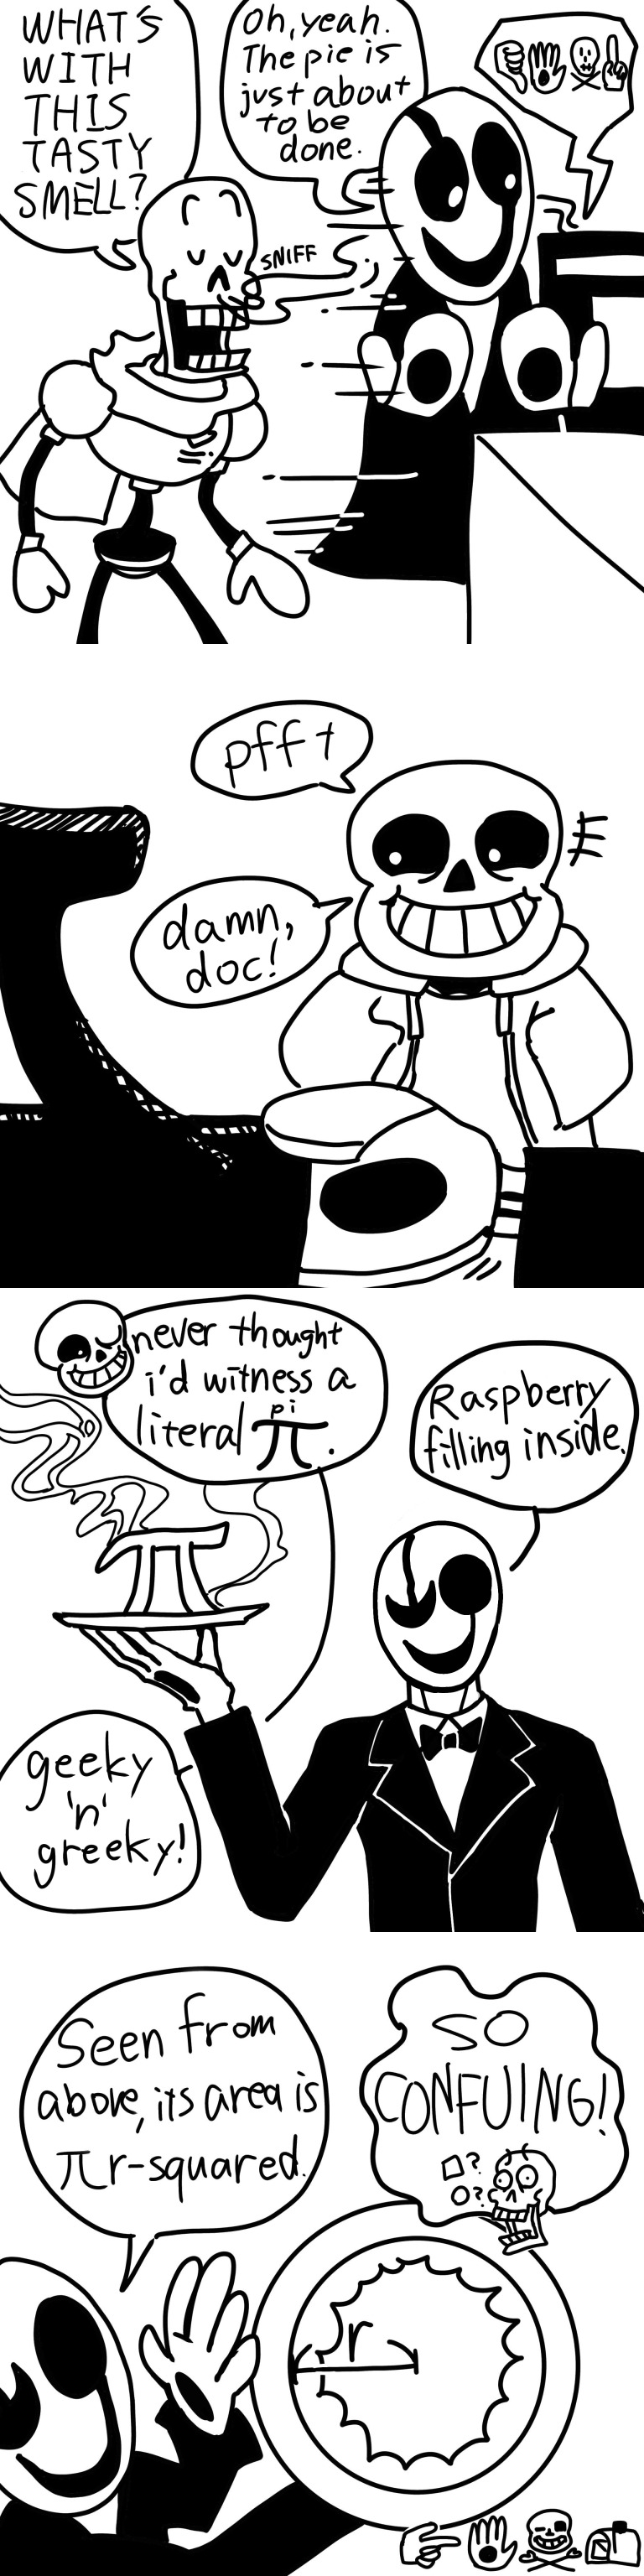
☝︎Is he even good at baking pi, I mean pie? The answer is quantized for now or forever!?

☝︎It's the post of over an year ago. I've drawn 1-3 episodes of manga so far(idk if I can draw sequence, though). You should check it too if you haven't read it yet☺︎
-------------------‐------------
(edit):
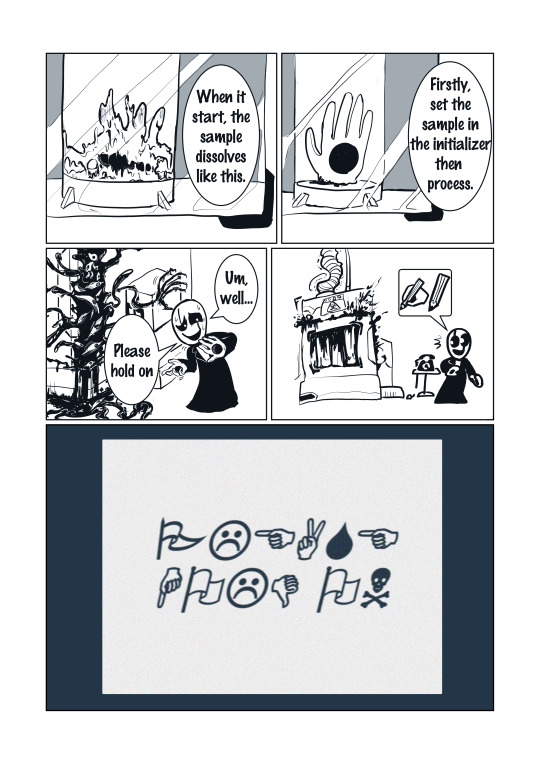
Wingdings translation of bonus pages(to be exact, all letters are actually uppercase):
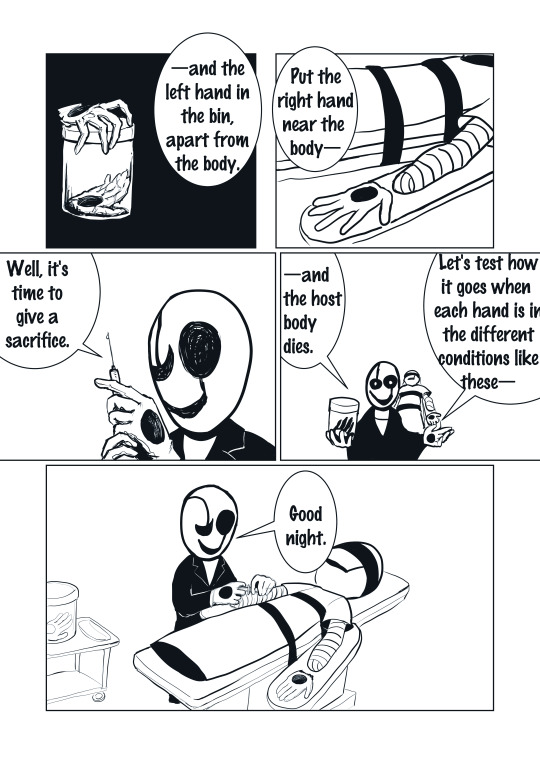
"Scrapped file
I used DTM as the catalyst to synthesize those two reagents.
One of them worked as the old saying that dust and remains still keep their memories in their lifetime.
The reagent regenerated the body from the corpse.
It was very true to life.
Except one part.
It moves but never alive.
SOULLESS"
Additional explanation of the main story and "scrapped file":
I tried to blend canon facts and my fanon thoughts, so it's kinda confusing. However, I strongly believe you already know UT world well, so you won't mix up them.
You saw he used two types of reagents to accomplish two different goals. They were both synthesized by Gaster. DTM(determination) was used as the catalyst of this reaction. Canonically, DTM can be got from the extractor(huge goat-skull like shape in my opinion) placed in true lab.
The transparent reagent is for initialization. It deals with the memories of the body part in their lifetime. Let's look into canon situations. It seems that Asriel's dust somehow gave the first yellow flower his memory and consciousness. His dust was scattered over the first yellow flower. (And indeed, there's traditional way to mourn for the dead by doing like this amomg monsters of the underground.) Then, the flower was applied DTM by Alphys long after. It results in birthing of Flowey. Back to the main topic, the clear reagent resolves and removes this kind of remaining memories so the body part belongs to no one.
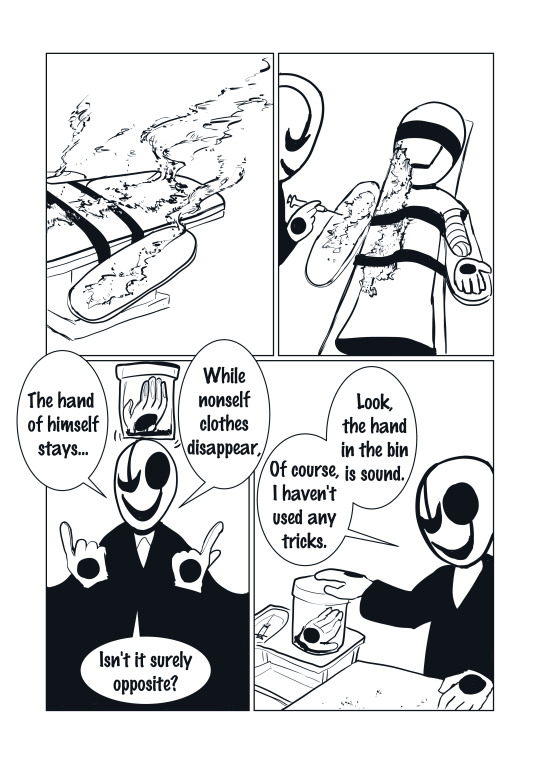
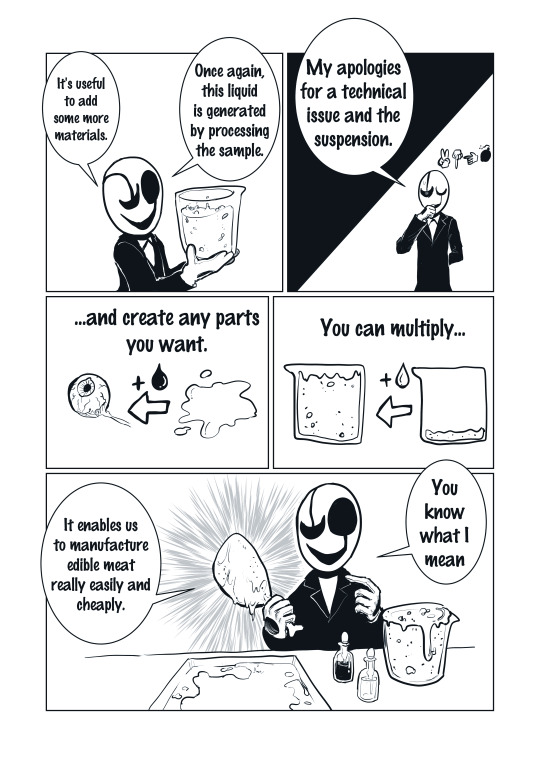
The next is black reagent. It simply regenerate the body part. It enables to generate meat infinitely. However, once it's dropped on the body part before using the clear reagent of initialization, it will reform the figure of the owner's lifetime, which is soulless. So now, you can see why it must be initialized first.
I heard the opinion of using them for medical purposes. Well, can't we imagine he already has another better techs to help people in belief of him being a supremacy of knowledge? It's important to remember that the subject is not to find medical methods, but just to make use of the experimental by-products. In the end of this main story, he suggested new way to interment dead which couldn't turn into dust normally and to serve foods at really cheap cost. Actually, I came up with producing slimy initialized meats from the song "meat factory" and bucket full of slime found in Alphys lab during the gameplay(is it Amalgams' food?)
I also inserted some might-be suggestive things in the story because I was raring to draw weirdly. Why don't you kill time finding them? Welp, no one is so free to spend time for it… And no one's even reading such ridiculously written explanation… Wait, aren't you?
31 notes
·
View notes
Text
How to Download Our Life: Beginnings and Always Mods
(a step-by-step guide!)
If you've ever wanted to download extra content for OLBA but were unsure how or where to even start, this post will hopefully explain everything you need to know!
What you will need:
Our Life: Beginnings and Always
RPA extractor
Latest version of Python
RPA repack tool
1. Finding mods.
As far as I'm aware, there are very few people who make OLBA mods, but if you do happen to come across someone who makes mods/script edits and would like to download them, you'll likely end up with files with the end extension ".rpy" or ".rpyc" Because the software used to make OLBA is Ren'py, these are ren'py script files that basically contain the script that runs the mod and official script files. (Note: Some mods that don't just simply add onto/edit/add more scenes may also include other important resource files (images, sounds etc...) and might be formatted in a ".zip" file. I'll cover how to unzip and use those as well.)
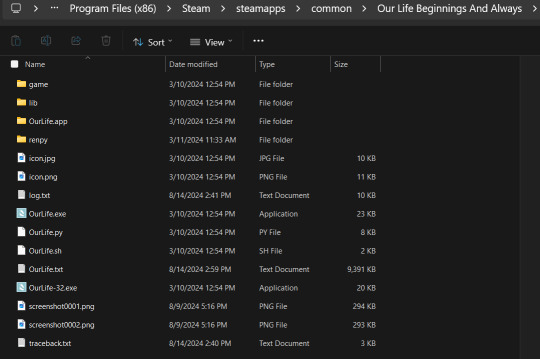
2. Find your game files.
First of all, before you do anything with your .zip or .rpy/.rpyc file(s) you're going to need to find your copy of your OLBA game's files. For Steam, you should be able to open the Steam app on your computer, navigate to your library, right-click your copy of OLBA, select "properties", navigate to the "Installed Files" tab, and click the "Browse" button.
For a direct download of the game such as from Itch.io, you should just be able to navigate to wherever you downloaded your game and find the same results. You should see your game files now like the picture below.
3. Finding/extracting the RPA file.
Now, you are going to want to navigate to the "game" folder inside the OLBA folder. Here you should find these files:
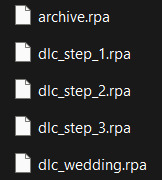
(Note: depending on whether you have the DLC or not, you may or may not have the DLC files. I do not have the Baxter or Derek DLC so I don't have those files here.) These files are basically all the .rpy/rpyc files, along with images, sounds and all other resources for the game, compressed into single files. So, in order to add our modded files, we will need to extract whichever RPA file pertains to the mod. For example, archive.rpa contains all the scripts, etc from the main game. The rest should just be DLC, so if you have a mod that only affects the main game, you will only need to extract that file. The same works if it is a mod that only affects a DLC; you will only need to extract that respective DLC file.
To do this, you can either download this RPA extractor or find your own and follow its steps. For this tutorial, we will be following the steps of the RPA extractor provided. Once you have downloaded the RPA extractor, drag the .RPA file you want to extract out of the OLBA folder, into a new folder, then drag and drop it onto the RPA extractor icon (shown below)
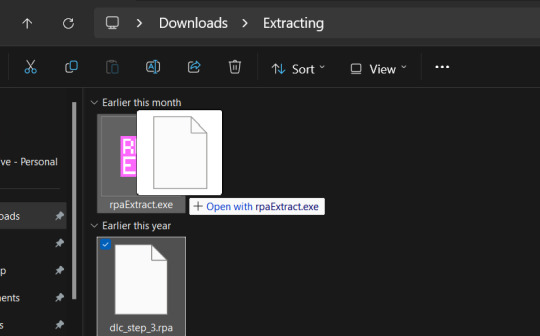
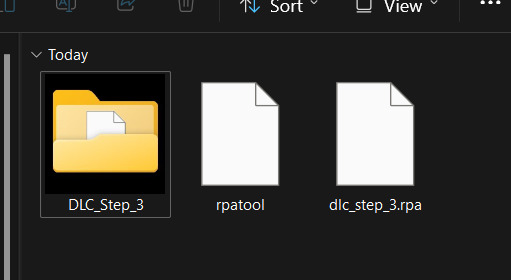
This should open a new Command window where the .rpa file will be extracted. You should end with something like this:
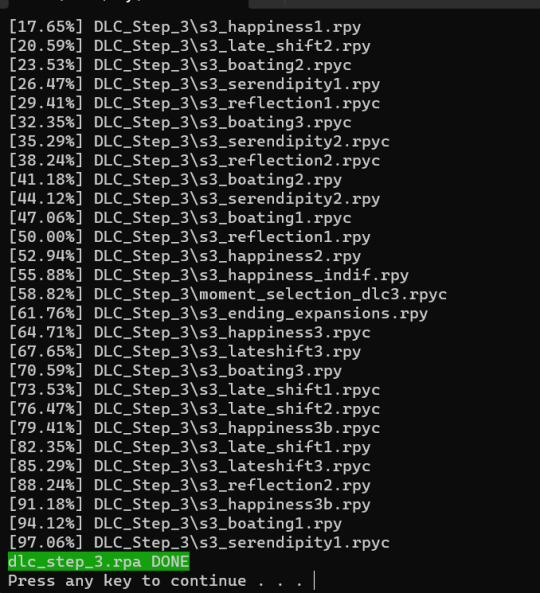
(for this example I extracted the step 3 DLC RPA file)
Now you should have a new folder containing all the .rpy and resource files you need.

4. What to do with modded .rpy/.rpyc and/or .zip files?
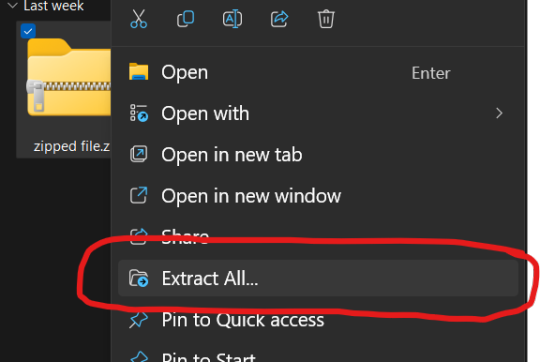
If the mod you downloaded just came with the files not zipped, you can skip this first part. Otherwise, you will need to unzip this zipped folder. To do this, you can either just right-click the zipped file and click "Extract All" and "Extract" when a new window pops up.
Alternatively, you can use a program such as 7-zip, which may help extract speeds for large files. Now, you should have, or already have your modded .rpa files on hand (finally!) Normally, if these files are editing preexisting material from the game or adding new scenes, at least one file, if not all of them will have the SAME EXACT file name as an already existing file. In this case, BEFORE YOU DO ANYTHING go into the folder(s) you got earlier by extracting the .rpa file(s) and look for the file(s) with the same name(s) as your modded .rpy/.rpyc file(s) and either make a copy or move them somewhere safe in case something is wrong with your modded files/you no longer want the modded files, you can put the original files back in. Once you have done this, you are going to drag the modded files directly into the folder(s) you got earlier by extracting the .rpa file(s). MAKE SURE YOU PUT THEM IN THE CORRECT FOLDERS AND EITHER OVERWRITE THE ORIGINAL FILES OR MAKE SURE THEY HAVE BEEN REMOVED.

If there are any other files, such as sounds or images or .rpy/rpyc files, feel free to just make another folder to put these in.
5. Repacking the RPA file.
Now these next steps can get really complicated, so I'll break them down into smaller steps. 1.) Download the RPA repack tool (make sure to unzip it) and the latest version of Python if you haven't already.
2.) Inside the unzipped "rpa-master" folder you'll find another folder of the same name. Inside this folder all you need is the "rpatool" file. Take this file and move it into a new folder completely outside of the "rpa-master" folder, name this folder whatever you want, it doesn't matter. (EXAMPLE BELOW)

3.) Now take the folder(s) you got from extracting the .rpa file earlier or created and put them in this new folder. (EXAMPLE BELOW)
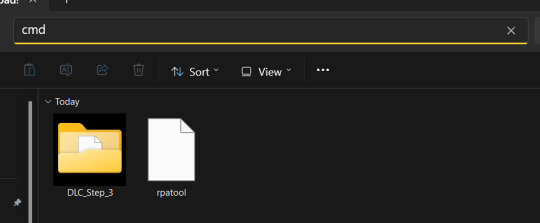
4.) Type "cmd" into the path while in the folder with both of these.
5.) Now, a command prompt window should pop up, type in this:
py rpatool -c
followed by the name of the .rpa file you want to make and the name of the folder(s) you are repacking separated by a space for each. (EXAMPLE BELOW)

6.) Depending on the size of your file it might take some time, but once you see the .rpa file appear in the folder, you're all done! It should look something like this:
Now, all that's left to do is put that .rpa file into the game folder with the rest of the .rpa files !! After that you can test it out and your mods should now work!
As always if you have any questions or need help doing this yourself, feel free to contact me or submit an ask!
71 notes
·
View notes