#How do I downgrade to previous iOS?
Explore tagged Tumblr posts
Visit Tumblr Blog
Explore Tumblr blogs with no restrictions, modern design and the best experience.
Last Seen Tumblr Blogs


Fun Fact
25% of US internet users with an annual income of $80-100K use Tumblr.
Text
Transparency Report (August 2024)
Hi, everyone! My apologies for being late, but here's our official Transparency Report for August 2024!
Summary
I (Atlas) took a long-needed personal break from the project for a good chunk of August after working tirelessly to launch the platform the month prior. However, I was still working enough behind-the-scenes to get v1.2 out on September 1st! This was immediately followed by our second major downtime event due to an unavoidable incident with our hosting provider, but the platform was fully recovered within ~12 hours. We also launched the Octocommune, a sister-community to the project (feel free to join if you haven't already! It's where all of our general chats have gone).
As of now, our full attention is being turned towards preparing a private beta for iOS. This is largely blocked by my financial ability to acquire the hardware necessary to develop for the platform, as well as to launch a business surrounding the project. Speaking of…
My personal situation
Many of you know this, but for this project's entire existence, I've been an unemployed high school dropout. Octocon largely served as a way to occupy my time while I spent the rest getting a GED and tirelessly searching for a full-time job. After months of searching, I'm elated to announce that I've finally landed one! I should be starting within the next few weeks.
Updates will almost certainly slow down compared to our initial launch, as I won't have nearly as much time to dedicate to the project anymore. I deeply apologize for this, but I need to put my own financial stability first! I can't make any promises as to how much time will be dedicated to developing new features going forward, but I can promise at the very least that the platform will be kept stable and safe in its current state. That said, I'm still very passionate for the project, so I'll do my best to pump new features out as my mental health allows!
Forms
I've attached documents to the corresponding message on our Discord server detailing our income, expenses, and total savings, as well as a receipt of our server hosting invoice.
Note: Server hosting costs greatly increased as we used our new financial freedom following the Patreon launch to spin up servers in South America and Africa, improve the reliability of our databases, and future-proof the platform for the foreseeable future. Roughly half of our previous Patreon supporters canceled or downgraded their subscription (which is completely ok!), which resulted in our costs overshooting our income by $49.04. This deficit was paid out of our own pocket, and was not deducted from our emergency savings. It's important to note that these costs shouldn't be increasing for a very long time!
#Octocon#transparency#transparency report#Octocon app#Octocon bot#system#did system#osdd system#did#osdd#osddid#did osdd
15 notes
·
View notes
Text
iOS 17.6 is Out! - What's New?Apple enthusiasts, rejoice! iOS 17.6 has just been released to the public, and it's available worldwide for everyone using an iOS 17 supported device. This means that if you have an iPhone XS, XR, or any model up to the latest iPhone 15 Pro and 15 Pro Max, you can now update your device. To install this update, simply go to your settings, then to General, and select Software Update. However, if you are on iOS 18 developer or public betas, you won't see this update since you are on a newer version. Downgrading to iOS 17 from iOS 18 will require a Mac or Windows computer, and you can find a separate video tutorial on how to do that in the description of the original video.Update Size and InstallationThe size of this update varies depending on your device and the version you're currently using. It can range from 1 GB to over 6 GB if it needs to fully reinstall the operating system. Now, let’s dive into what’s new in iOS 17.6.Key Updates and FeaturesSiri ImprovementsOne of the notable changes is in Siri’s settings. To find these, go to Privacy and Security, then Location Services, and scroll down to Siri. In the previous version, 17.5.1, the title read "Siri and Dictation," but now it simply says "Siri." Additionally, there is a new option to "Ask Next Time" or "When I Share" regarding location access. This update, though minor, reflects Apple's ongoing efforts to refine user experience.Find My EnhancementsIf you are using an iPad with Apple Pencil Pro on the latest iPad Pro or iPad Air versions, there's an update within the Find My app. You can now mark your Apple Pencil Pro as lost, which prevents others from adding it to their Apple ID if they find it. This feature provides extra security and helps return lost items to their owners.Beats IntegrationFor those using Beats products, new support features have been added. When you open your device near a Beats Pill, for instance, you’ll see new animations and additional features. There’s also an update that allows you to change the duration of press and hold on Beats under accessibility settings.MLS Season Pass and TV App UpdatesThe TV app now features updates specifically for MLS Season Pass subscribers. The main page has been updated to include League Cup information with standings. Additionally, if you go into an individual team, you’ll find more detailed information and interface changes. These updates enhance the viewing experience for sports fans.Photos AppIn the Photos app, the recently deleted section has a new message when you attempt to permanently delete a photo. It now clearly states that the action cannot be undone, ensuring users are fully aware that the photo will be irretrievably deleted.News App and Live ActivitiesWithin the News app, if you follow sports teams, a new update shows a live activity for upcoming events. This feature provides real-time updates on your home screen and lock screen using the dynamic island or live activity.Contactless PaymentsFor users in regions where contactless payments are supported, there's a new notification about changing the default app for your contactless payment card. This feature might primarily apply to the EU, reflecting regulatory changes.Messages and Apple WalletIn Messages, a new update informs you if a message is from an unknown international sender. Also, if you use Apple Wallet and have filed for bankruptcy, the app will notify you if your card is locked due to this status. This feature helps users manage their financial situations more effectively.Charging and Moisture DetectionA new message has been added to notify users if moisture or water is detected in the charging port. It advises disconnecting the charging cable and letting the port dry for a couple of hours. This detailed instruction helps prevent damage to the device.Podcasts and Legacy ContactsThe Podcasts app now features a splash screen highlighting the latest features, including transcripts and search capabilities. Additionally,
there are updates to the wording for setting up legacy contacts, making it clearer for users.Family SharingIn Family Sharing, there’s a new button to accept or decline sharing invitations. This updated interface simplifies the process and enhances usability.Bug Fixes and Performance ImprovementsThis update also addresses several bugs and improves performance:Storage Optimization: Many users have reported that iOS 17.6 frees up storage by clearing cache data.Notification Issues: Notification problems from previous betas have been resolved.Bluetooth Connectivity: Issues with Bluetooth headphone connectivity have been fixed.Alarm Bug: The alarm bug, which affected the sleep/wake alarm, seems to be resolved.Standby Mode: Issues with editing clock colors in standby mode have been fixed.Screen Time: Apple acknowledged screen time issues, which seem to be resolved in this update.Battery Life and Device Temperature: Reports suggest improved battery life and cooler device temperatures, even in warmer environments.Security UpdatesApple typically updates security patches shortly after releasing a new iOS version. For the latest security updates, keep an eye on Apple’s official website or check the linked description in the original video.BenchmarksiOS 17.6 shows impressive benchmark results. In Geekbench, it scored 2,927 for single-core and 7,337 for multi-core. These are some of the highest scores recorded for iOS 17, indicating significant performance improvements.Should You Install iOS 17.6?Yes, it’s highly recommended to install iOS 17.6 for the latest security updates and performance enhancements. Users have reported smoother performance and improved battery life, making it a worthwhile update.If you’ve discovered any new features in iOS 17.6, feel free to share them in the comments below. And for those looking to get their devices repaired, whether it’s an iPhone, iPad, or any other gadget, check out Gadget Kings PRS. They offer expert repair services for all your device needs. Visit their website at Gadget Kings PRS for more information.
0 notes
Text
Can you still downgrade to iOS 13?

Can I downgrade iOS 14 to iOS 13?
Can I downgrade iOS 2020?
How do I revert back to iOS 14 from 15?
How do I downgrade to previous iOS?
How do I downgrade to ios13?
Can I uninstall iOS 14?
How do I uninstall the iOS 14 update?
How do I downgrade from iOS 14?
Can I undo an iPhone update?
Can you downgrade iPhone 12 Pro Max?
#Can I downgrade iOS 14 to iOS 13?#Can I downgrade iOS 2020?#How do I revert back to iOS 14 from 15?#How do I downgrade to previous iOS?#How do I downgrade to ios13?#Can I uninstall iOS 14?#How do I uninstall the iOS 14 update?#How do I downgrade from iOS 14?#Can I undo an iPhone update?#Can you downgrade iPhone 12 Pro Max?
1 note
·
View note
Text
Mac Os X Server Download

Mac Os X Server Iso
Mac Os X Lion Server Download
Apple Mac Os X Download
Download Mac Os X Free
Mac Os X Installer Download
So, you’ve decided to download an older version of Mac OS X. There are many reasons that could point you to this radical decision. To begin with, some of your apps may not be working properly (or simply crash) on newer operating systems. Also, you may have noticed your Mac’s performance went down right after the last update. Finally, if you want to run a parallel copy of Mac OS X on a virtual machine, you too will need a working installation file of an older Mac OS X. Further down we’ll explain where to get one and what problems you may face down the road.
A list of all Mac OS X versions
Download Free Mac Apps and Mac Games for Apple Mac. Designed for OS X and iOS devices, OS X Server makes it easy to share files, schedule meetings, synchronize.
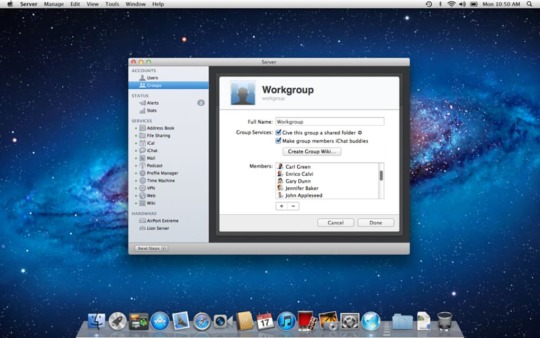
Designed for OS X and iOS devices, OS X Server makes it easy to share files, schedule meetings, synchronize contacts, develop software, host your own website, publish wikis, configure Mac, iPhone, and iPad devices, remotely access your network, and more. OS X Server is an application you can add to OS X right from the Mac App Store.
The latest version of OS X Server is unknown on Mac Informer. It is a perfect match for Automation in the System Tools category. The app is developed by Apple Inc. And its user rating is 4.7 out of 5.
Apple's macOS Server (formerly called OS X Server) is specially designed for macOS and iOS powered hardware devices to easily configure iPhone, iPad, iPod touch and Mac devices, share files, sync contacts, schedule meetings, publish wikis, develop software, remotely access network, host own website and many more things in easy way. MacOS Server is the software application available for macOS.
We’ll be repeatedly referring to these Apple OS versions below, so it’s good to know the basic macOS timeline.
Cheetah 10.0Puma 10.1Jaguar 10.2Panther 10.3Tiger 10.4Leopard 10.5Snow Leopard 10.6Lion 10.7Mountain Lion 10.8Mavericks 10.9Yosemite 10.10El Capitan 10.11Sierra 10.12High Sierra 10.13Mojave 10.14Catalina 10.15
STEP 1. Prepare your Mac for installation
Given your Mac isn’t new and is filled with data, you will probably need enough free space on your Mac. This includes not just space for the OS itself but also space for other applications and your user data. One more argument is that the free space on your disk translates into virtual memory so your apps have “fuel” to operate on. The chart below tells you how much free space is needed.
Note, that it is recommended that you install OS on a clean drive. Next, you will need enough disk space available, for example, to create Recovery Partition. Here are some ideas to free up space on your drive:
Uninstall large unused apps
Empty Trash Bin and Downloads
Locate the biggest files on your computer:
Go to Finder > All My Files > Arrange by size Then you can move your space hoggers onto an external drive or a cloud storage. If you aren’t comfortable with cleaning the Mac manually, there are some nice automatic “room cleaners”. Our favorite is CleanMyMac as it’s most simple to use of all. It deletes system junk, old broken apps, and the rest of hidden junk on your drive.
Download CleanMyMac for OS 10.4 - 10.8 (free version)
Download CleanMyMac for OS 10.9 (free version)
Download CleanMyMac for OS 10.10 - 10.14 (free version)
STEP 2. Get a copy of Mac OS X download
Mac Os X Server Iso
Normally, it is assumed that updating OS is a one-way road. That’s why going back to a past Apple OS version is problematic. The main challenge is to download the OS installation file itself, because your Mac may already be running a newer version. If you succeed in downloading the OS installation, your next step is to create a bootable USB or DVD and then reinstall the OS on your computer.
How to download older Mac OS X versions via the App Store
If you once had purchased an old version of Mac OS X from the App Store, open it and go to the Purchased tab. There you’ll find all the installers you can download. However, it doesn’t always work that way. The purchased section lists only those operating systems that you had downloaded in the past. But here is the path to check it:
Click the App Store icon.
Click Purchases in the top menu.
Scroll down to find the preferred OS X version.
Click Download.
This method allows you to download Mavericks and Yosemite by logging with your Apple ID — only if you previously downloaded them from the Mac App Store.
Without App Store: Download Mac OS version as Apple Developer
If you are signed with an Apple Developer account, you can get access to products that are no longer listed on the App Store. If you desperately need a lower OS X version build, consider creating a new Developer account among other options. The membership cost is $99/year and provides a bunch of perks unavailable to ordinary users.
Nevertheless, keep in mind that if you visit developer.apple.com/downloads, you can only find 10.3-10.6 OS X operating systems there. Newer versions are not available because starting Mac OS X Snow Leopard 10.7, the App Store has become the only source of updating Apple OS versions.
Purchase an older version of Mac operating system
You can purchase a boxed or email version of past Mac OS X directly from Apple. Both will cost you around $20. For the reason of being rather antiquated, Snow Leopard and earlier Apple versions can only be installed from DVD.
Buy a boxed edition of Snow Leopard 10.6 Get an email copy of Lion 10.7 Get an email copy of Mountain Lion 10.8
The email edition comes with a special download code you can use for the Mac App Store. Note, that to install the Lion or Mountain Lion, your Mac needs to be running Snow Leopard so you can install the newer OS on top of it.
How to get macOS El Capitan download
If you are wondering if you can run El Capitan on an older Mac, rejoice as it’s possible too. But before your Mac can run El Capitan it has to be updated to OS X 10.6.8. So, here are main steps you should take:
1. Install Snow Leopard from install DVD. 2. Update to 10.6.8 using Software Update. 3. Download El Capitan here.
“I can’t download an old version of Mac OS X”
If you have a newer Mac, there is no physical option to install Mac OS versions older than your current Mac model. For instance, if your MacBook was released in 2014, don’t expect it to run any OS released prior of that time, because older Apple OS versions simply do not include hardware drivers for your Mac.
But as it often happens, workarounds are possible. There is still a chance to download the installation file if you have an access to a Mac (or virtual machine) running that operating system. For example, to get an installer for Lion, you may ask a friend who has Lion-operated Mac or, once again, set up a virtual machine running Lion. Then you will need to prepare an external drive to download the installation file using OS X Utilities.

After you’ve completed the download, the installer should launch automatically, but you can click Cancel and copy the file you need. Below is the detailed instruction how to do it.
STEP 3. Install older OS X onto an external drive
The following method allows you to download Mac OS X Lion, Mountain Lion, and Mavericks.
Start your Mac holding down Command + R.
Prepare a clean external drive (at least 10 GB of storage).
Within OS X Utilities, choose Reinstall OS X.
Select external drive as a source.
Enter your Apple ID.
Now the OS should start downloading automatically onto the external drive. After the download is complete, your Mac will prompt you to do a restart, but at this point, you should completely shut it down. Now that the installation file is “captured” onto your external drive, you can reinstall the OS, this time running the file on your Mac.
Boot your Mac from your standard drive.
Connect the external drive.
Go to external drive > OS X Install Data.
Locate InstallESD.dmg disk image file — this is the file you need to reinstall Lion OS X. The same steps are valid for Mountain Lion and Mavericks.
How to downgrade a Mac running later macOS versions

If your Mac runs macOS Sierra 10.12 or macOS High Sierra 10.13, it is possible to revert it to the previous system if you are not satisfied with the experience. You can do it either with Time Machine or by creating a bootable USB or external drive. Instruction to downgrade from macOS Sierra
Instruction to downgrade from macOS High Sierra
Instruction to downgrade from macOS Mojave
Instruction to downgrade from macOS Catalina
Before you do it, the best advice is to back your Mac up so your most important files stay intact. In addition to that, it makes sense to clean up your Mac from old system junk files and application leftovers. The easiest way to do it is to run CleanMyMac X on your machine (download it for free here).
Visit your local Apple Store to download older OS X version
If none of the options to get older OS X worked, pay a visit to nearest local Apple Store. They should have image installations going back to OS Leopard and earlier. You can also ask their assistance to create a bootable USB drive with the installation file. So here you are. We hope this article has helped you to download an old version of Mac OS X. Below are a few more links you may find interesting.
These might also interest you:
OS X Server 5.1.7
Designed for OS X and iOS devices, OS X Server makes it easy to share files, schedule meetings, synchronize contacts, develop software, host your own website, publish wikis, configure Mac, iPhone, and iPad devices, remotely access your network, and more. OS X Server is an application you can add to OS X right from the Mac App Store. Anyone can quickly and easily turn a Mac into a server that’s perfect for home offices, businesses, schools, developers, and hobbyists alike.
Here’s what you’ll get with OS X Server:
File Sharing
File sharing for Mac, PC, iPhone and iPad
Standards-based SMB, AFP, and WebDAV file services
Flexible file permissions
Spotlight searching
Profile Manager
Mobile device management for Mac and iOS devices
Simplified management and deployment of iOS and OS X.
Distribution of institution licensed apps and books purchased from the Volume Purchase Program to users or devices
Install Software Updates on devices running iOS 9 and OS X El Capitan
Device Enrollment Program integration
Web-based administration console
Self-service user portal for clearing passcodes, remote lock, and remote wipe
Caching Server
Speed up the download of software distributed by Apple
Locally cache apps, books, iTunes U, software updates, and OS X Recovery images
Accelerate the download of iCloud data, including documents in iCloud Drive and photos.
Fault-tolerant design with multiserver cache replication and load balancing
No client configuration required
Xcode Server

Use Xcode to create continuous integration bots that build, analyze, and test on any Mac running OS X Server
Configure bots to integrate at a specific time, or continually as code is committed to the repository
Automate testing of OS X and iOS apps, executing on multiple connected iOS devices
Host your own Git repositories on OS X Server or connect to remote Git or Subversion hosts
Remotely access detailed integration summaries and nightly builds using the Web interface
Time Machine
Provide a backup destination for Mac computers on your network
Monitor which computers have backed up, when they last backed up, and size of backup
Set limits on the amount of Time Machine storage a user can use
Calendar Server
Share calendars, schedule meetings and events, and book conference rooms
Standards-based CalDAV server for access from Mac, iPad, iPhone, and PC
View availability with free/busy lookups
Email invitations and push notifications
Contacts Server
Mac Os X Lion Server Download
Synchronize contacts with Mac, iPad, and iPhone
Allow multiple users to access and update contacts
Standards-based CardDAV server
Wiki Server
Point-and-click page edit to change formatting and insert images, movies, and attachments
Access controls
Tags and comments
Revision history
Document sharing
Quick Look previews
Apple Mac Os X Download
Mail Server
Standards-based SMTP, IMAP, and POP server
Push notifications
SSL encryption
Adaptive junk mail filtering
Virus detection and quarantine
Virtual Private Network
Remote access for your network services
Encrypted VPN connections for Mac, iPad, iPhone, and PC
Xsan 4
Block-level SAN file sharing with concurrent read/write access
Xsan volume hosting and configuration
Volume management, storage pooling, stripping, and volume mapping
Real-time monitoring, graphs, and event notifications
Metadata controller failover and file system journaling
Server App
Local and remote management
Users and group settings
View real-time graphs of server usage
Receive alerts on network changes, certificate expiration, storage usage, and more
Version 5.1.7:
Fixed an issue affecting Server installations configured with a third-party SSL certificate that prevented MDM enrollment using DEP
SCREENSHOTS
Download Mac Os X Free
Title: OS X Server 5.1.7
Developer: Apple Inc.
Compatibility: OS X 10.11.4 or later
Language: English, Dutch, French, German, Italian, Japanese, Korean, Simplified Chinese, Spanish, Traditional Chinese
Includes: Pre-K'ed
Size: 158.36 MB
View in Mac App Store
Mac Os X Installer Download
NitroFlare:
1 note
·
View note
Text
Change windows folder color

CHANGE WINDOWS FOLDER COLOR HOW TO
CHANGE WINDOWS FOLDER COLOR INSTALL
CHANGE WINDOWS FOLDER COLOR ARCHIVE
Next, in Preview app, go to File > New from Clipboard > Markup tool icon. How to use Bing images within Office and Edge on Windows 10 PC. What to Know Use Preview App: First, copy folder.
CHANGE WINDOWS FOLDER COLOR ARCHIVE
On the left hand side you have a list of Folders: Inbox - change from black to blue Drafts Sent Items - change from black to red Deleted Items - change from black to green Archive Hope this is a little bit clearer. How to properly remove the Windows.old folder on Windows 10 I want to change the color of the folder names font from my Inbox from black to whichever color I choose. Right-click a folder in the left-hand navigation panel 1 (you can also right. How to create a System Restore Point in Windows 10 with a simple double-click Change a folders color Navigate to the space containing the relevant folder. How to make a full backup of a Windows 10 or Windows 8.1 PC Is your Windows 10 PC slowing you down, and the SFC utility is unable to fix the problem? Then use DISM to repair the Windows image to enable SFC to do its job. Outlook hangs on loading profile? Solutions Outlook 2013 max file limit: “The file you’re attaching is bigger than the server allows.” Tutorial: Outlook signature image with hyperlinkįix for Outlook: “Contacting the server for information” How to always pop-out an email window in Outlook 2013 Being able to change Windows folder color can help you separate all the items across the entire File Explorer it’s a game changer If same old yellow folders already bored you, Folder Colorizer is a lifesaver It’s simply the easiest, most intuitive way to change folder color on Windows 11 or 10. How Do I Enable Skype for Business/Lync Logging? Getting Started With Lync Mobile 2010 For Windows Phone Getting Started With Lync Mobile 2010 For iOS How Do I Clear Skype for Business/Lync Cache? While it does let you change the folder icon by right-clicking on the folder, selecting Properties and then switching to the Customize tab, you can’t change the default folder color to a custom color. Troubleshooting Skype for Business/Lync Secure Chat And Conferencing As you know, Windows 8, just like previous version of Windows, doesn’t allow users to change the default folder color. Getting Started With Lync 2010/2013 For Windows Getting Started With Skype for Business for Windows How to Downgrade to an Older Version of iOS on an iPhone or iPad How Can I Secure My Microsoft Office Files? MS Office : View my options and settings in the Trust Center Introducing Send Email in Access 2013 web appsġ6 Terminal commands every user should know How to back up notes in OneNote 2016 for Windows You can change the Icon, which has a similar effect. This folder is used by apps like Paint 3D and Mixed Reality Viewer. No, you cannot change the color of the folders in Windows 10.
CHANGE WINDOWS FOLDER COLOR HOW TO
How to set up an Internet email account in Outlook 2013 or 2016 How to Change or Restore 3D Objects Folder Icon in Windows 10 The 3D Objects folder was added to This PC in the Windows 10 Fall Creators Update.
CHANGE WINDOWS FOLDER COLOR INSTALL
How To Make UEFI Bootable USB Flash Drive to Install Windows 8 How to make a self extracting archive that runs your setup.exe with 7zip -sfx switch Choose the color for folder and make your computer more Comfortable and easy to use.
0 notes
Text
Mac Os Catalina Installer Download

Mac Os Catalina Installer Direct Download
Mac Os Catalina 10.15.4 Installer Download
Download Mac Os Catalina Installer Dmg
Mac Os Catalina Installer Download Usb
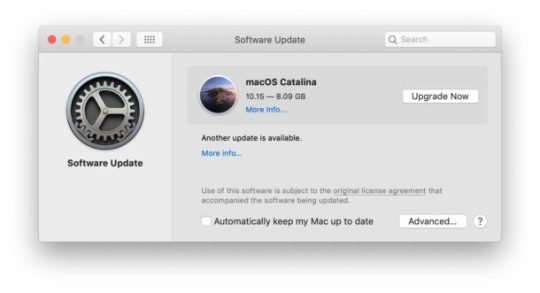
Mac Os Catalina Installer Download
The users can still find Mac OS X Yosemite Download here and its available for free download. After the completion of the download, the OZX Yosemite Installer will appear on “/Applications”. If the user wants to get nstallESD.DMG’, then they can follow the below steps. If you acquire the installer from another source, just downloading the file will not install the OS X right away on your Mac, you’ll need to find the file in your Downloads or Applications folder, then open and run the installer from the downloaded file. I can’t download an old version of Mac OS X. A downgrade is different than an upgrade.
Get an ultimate backup app
Data loss? Impossible with Get Backup Pro on Mac.
Running the latest software is not always the best decision. There are plenty of reasons you might want to downgrade or run an older version of macOS on your computer.
You may find that after the latest update your computer runs slower, your apps don’t function, or that the programs you need to run are not yet compatible with the upgrade. Maybe as a developer, you want to create a test environment to ensure your software runs properly in all available versions of OS X - check out the infographic below. Or you may simply like the look of the old version better (no judgement) and not want to upgrade until absolutely necessary.
Keep your apps while downgrading
Get Setapp, a collection of Mac apps that strengthen your macOS. Whenever you decide to downgrade, your apps will travel with you.
How to Install Old OS X on Your Mac
Although you might think that going back to the old macOS is not possible by looking at the App Store Updates tab, it’s actually quite easy to do. In this article, we’ll take you through everything you need to download and install an old OS X on your Mac.
Prepare your Mac first
Make sure you are ready to downgrade your operating system by checking in with what version of OS X you already have and ensuring you have enough hard drive room to download the older version. Clicking the apple in the top left corner of your desktop and selecting About This Mac will allow you to see what OS X version you are currently running. Tabbing over to Storage will let you know how much disk space you have available. You’ll need around around eight gigabytes free depending on which macOS you downgrade to.
Even if you do have enough space, it’s a good idea to clean your computer before installing the desired operating system. You can, of course, do so manually by deleting unused files and uninstalling old software to free up disk space. Depending on how tidy you are, this might take quite a bit of time.
To make things easy, use a specialized app like CleanMyMac, which will quickly free up space by detecting unused apps and large files, and offering to completely delete them, with all their hidden corresponding files, in one quick click.
Optimizing your Mac with CleanMyMac is effortless:
Launch CleanMyMac
Select the Smart Scan tab and click Scan
Review Details to see the list of suggested optimizations
Click Clean
To uninstall certain apps, find the Uninstaller tab and select the apps you haven’t been using for a while.
Download CMM X to prepare for Big Sur
Mac Os Catalina Installer Direct Download
The only solution that will free up disk space, remove duplicates, and solve tons of problems to prepare your Mac for a new macOS
The final preparation step is to make sure you back up all your important files to cloud storage or an external drive. A proper backup app like Get Backup Pro can save you a lot of headache here.
To create a new backup with Get Backup Pro:
Connect your external hard drive
Click the plus icon in the bottom left corner
Type in the name for your backup
Choose your external drive as a destination
Adjust all the settings according to your preference and click OK
Tap the play button once you ready to perform the backup

Grab an old macOS with Setapp
Downgrading to previous operating systems on Mac gets easier. To put it shortly, Setapp has your back here.
Download the OS X you want
Once you have space on your computer, figure out what version of OS X you would like to install. You can see all previous versions of OS X your Mac has installed by opening up the App Store and clicking the icon in Applications. Tab to the Purchase page of the menu and scroll down to find the line for previous operating systems. Clicking the install button of the macOS you want will begin downloading the file.
What if I can’t find the version I want in the app store?
If your goal is to download a version of macOS that you have not already used, or, that was not available as an update from the App Store after you bought your Mac, you may need to purchase it. The earliest versions, OS X Lion and OS X Mountain Lion are available on the Apple Store’s website and arrive to you via email for download. OS X Snow Leopard ships as a boxed version and requires a disk drive to install.
It could be helpful to know where you sit on the timeline of macOS X updates. Below is a chronological list of all the updates beginning with the most recent update, High Sierra, released in 2017:
OS X High Sierra 10.13
OS X Sierra 10.12
OS X ElCapitan 10.11
OS X Yosemite 10.10
OS X Mavericks 10.9
OS X Mountain Lion 10.8
OS X Lion 10.7, released in 2011
Visiting the Apple Support’s Downloads page makes it easy to search for any version of macOS you might need, and most are available for free. Downloads for previous versions of OS X are linked below and include:
Alternative sources for downloading macOS
If you can’t find the version you want from Apple, ask a friend who is running the macOS you’re looking for to make a copy of the installer file for you. Downloading a .dmg file from a torrent site may seem a quick solution, but it means risking your security. Alternatively, you could hit up your nearest Apple Store. They will likely have image files of all the different versions of the software and help you install it right there as well.
Install the macOS
If you download the file from the App Store, the installer will start immediately. Follow the prompts and be prepared to restart your computer. If you acquire the installer from another source, just downloading the file will not install the OS X right away on your Mac, you’ll need to find the file in your Downloads or Applications folder, then open and run the installer from the downloaded file.
I can’t download an old version of Mac OS X
A downgrade is different than an upgrade. When you try to downgrade macOS, the installer may not launch right away depending on which versions of macOS you are moving between. If your installer does not launch, or you get an error message that reads: “This copy of the ‘Install OS X’ application is too old to be opened on this version of OS X,” you’ll need to use a bootable USB or external drive to work around this problem.
Get a bootable drive with OS X
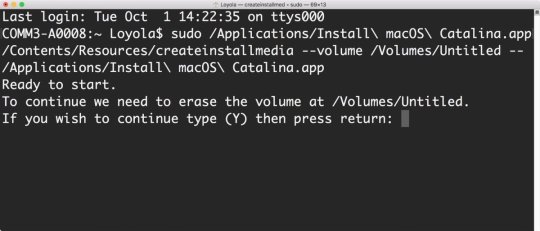
Creating a bootable USB or a bootable drive is not complicated. You’ll need an external drive with enough space to hold your desired OS X on it and a basic familiarity with Terminal, Apple’s command line interface.
If you’re uncomfortable using Terminal to execute basic commands, use an app like Disk Drill to help create a boot drive. Whether you use Terminal or Disk Drill, our guide on creating a bootable installer will walk you through all the necessary steps.
Remove the old OS X
Once your drive is prepared with your bootable version of OS X, erase the unwanted version. After you restart your computer, press and hold Command + R. When you enter the macOS Utilities screen, navigate to Disk Utility, click continue, and find your Startup Disk. Tab to the Erase page and name the file you want erased (e.g. macOS High Sierra). Then select Mac OS Extended (Journaled) from the dropdown menu. Hit Erase and quit out of Disk Utility. This will return you to the OS X Utilities selector.
Install the bootable version of OS X
If you used Disk Drill for creating your bootable drive, a window will prompt your actions for using the install disk you made. But if you created your own using Terminal, use OS X Utilities Selector and find Reinstall OS X. Find and select your install disk with your bootable version of your preferred macOS, and click continue through to the license agreement. Once you agree, you should be prompted by the installer. Once the installation is completed, your computer should restart. If it does not restart itself, make sure you restart it normally. The downgrade should be complete!
As you can see, downgrading your OS X is not as dreadful as you might think, especially if you use helper apps like CleanMyMac, Get Backup Pro, and Disk Drill — all of which are available for a free trial on Setapp. So downgrade away!
macOS evolution inforgaphic
Big Sur macOS 11
November 19, 2020
Epic design change: new Control Center, notifications, and more. With the transition to Apple’s M1 chips, you can now run iOS apps natively on Mac.
October 7, 2019
iTunes is replaced by dedicated apps for music, movies, and podcasts. It’s now possible to port iOS apps to macOS and expand your workspace with Sidecar.
Mojave macOS 10.14
September 24, 2018
Visual refinements introduced via Dark Mode and Dynamic Desktoptake central stage in Mojave. The new apps migrating from iOS include Stocks, News, Home, and Voice Memos..
September 25, 2017
Major improvements go unnoticed for a user, but the overall performance skyrockets, due to embracing Apple File System and a new video standard, HEVC.
Sierra macOS 10.12
September 20, 2016
With Sierra, OS X dies and macOS is born. The renamed system introduces even more iOS perks like Siriand unlocking Mac with Apple Watch.
September 30, 2015
El Capitan features Split Views– dual-window functionality for arranging and managing app windows. Plus, OS X 10.11 comes with improved Safari, Mail, and Spotlight.
Yosemite OS X 10.10
October 16, 2014
A completely new sleek design is what Yosemite is remembered for. Continuityand Handoffintegrated into the new OS strengthen bonds between iOS and OS X devices.
October 22, 2013
Maps, iBooks, and Tagsdebut in the first inanimate OS X – Mavericks. To enable secure password encryption and storage, iCloud Keychainin introduced.
Mountain Lion OS X 10.8
July 25, 2012
Mountain Lion adds new integrations and further iOS perks like Reminders, Notes, and Messages. It gets easier to track app updates via the Notification Center.
July 20, 2011
iCloudarrives. Apart from that, lots of iOS advancements find reflection in OS X Lion, covering Launchpad, multi-touchgestures, and more.
Snow Leopard OS X 10.6
August 28, 2009
While Leopard did a great job, Snow Leopard arrives to refine it even more. Mainly, it comes with apps rewritten in 64 bit and OpenCL. The 2009 OS X release is also known for Mac App Storelaunch.
October 26, 2007
Long-awaited and Mac-changing. Leopard gives a spectacular leap, introducing Time Machine, Boot Camp, QuickLook, and full support for 64-bit software.
Tiger OS X 10.4
April 29, 2005
A rich harvest for Mac, Tiger marks the launch of 200+ new features. Spotlightsearch and Dashboardare the top stars, with Apple TV, Automator, and VoiceOver joining the crowd.
October 24, 2003
Panther release introduces Exposé, a feature for seamless management of open applications. Safariofficially becomes the default web browser.
Jaguar OS X 10.2
August 23, 2002
A large grey Apple logoappears for the first time, replacing Happy Mac at startup. Optimized search functionality of Finder and the first release of Accessibility API – Universal Access. App arrivals: iChat and Address Book.
September 25, 2001
No big functionality updates, the focus is shifted to performanceinstead. From improved file management to CD and DVD burning, Puma just makes it work better.
Cheetah OS X 10.0
March 24, 2001
“When you saw it, you wanted to lick it,” said Steve Jobs about Aqua– the brand new UI born with the release of Cheetah. Preview, Mail, QuickTime, and TextEdit make debut at this point.
Setapp lives on Mac and iOS. Please come back from another device.
Meantime, prepare for all the awesome things you can do with Setapp.
Read on
Sign Up
Setapp uses cookies to personalize your experience on our website. By continuing to use this site, you agree to our cookie policy.
Quickstart
Install Xcode and the Xcode Command Line Tools
Agree to Xcode license in Terminal: sudo xcodebuild -license
Install MacPorts for your version of the Mac operating system:
Installing MacPorts
MacPorts version 2.6.4 is available in various formats for download and installation (note, if you are upgrading to a new major release of macOS, see the migration info page):
“pkg” installers for Big Sur, Catalina, Mojave, and High Sierra, for use with the macOS Installer. This is the simplest installation procedure that most users should follow after meeting the requirements listed below. Installers for legacy platforms Sierra, El Capitan, Yosemite, Mavericks, Mountain Lion, Lion, Snow Leopard, Leopard and Tiger are also available.
In source form as either a tar.bz2 package or a tar.gz one for manual compilation, if you intend to customize your installation in any way.
Git clone of the unpackaged sources, if you wish to follow MacPorts development.
The selfupdate target of the port(1) command, for users who already have MacPorts installed and wish to upgrade to a newer release.
Checksums for our packaged downloads are contained in the corresponding checksums file.
The public key to verify the detached GPG signatures can be found under the attachments section on jmr's wiki page. (Direct Link).
Please note that in order to install and run MacPorts on macOS, your system must have installations of the following components:
Apple's Xcode Developer Tools (version 12.2 or later for Big Sur, 11.3 or later for Catalina, 10.0 or later for Mojave, 9.0 or later for High Sierra, 8.0 or later for Sierra, 7.0 or later for El Capitan, 6.1 or later for Yosemite, 5.0.1 or later for Mavericks, 4.4 or later for Mountain Lion, 4.1 or later for Lion, 3.2 or later for Snow Leopard, or 3.1 or later for Leopard), found at the Apple Developer site, on your Mac operating system installation CDs/DVD, or in the Mac App Store. Using the latest available version that will run on your OS is highly recommended, except for Snow Leopard where the last free version, 3.2.6, is recommended.
Apple's Command Line Developer Tools can be installed on recent OS versions by running this command in the Terminal:
Older versions are found at the Apple Developer site, or they can be installed from within Xcode back to version 4. Users of Xcode 3 or earlier can install them by ensuring that the appropriate option(s) are selected at the time of Xcode's install ('UNIX Development', 'System Tools', 'Command Line Tools', or 'Command Line Support').
Xcode 4 and later users need to first accept the Xcode EULA by either launching Xcode or running:
(Optional) The X11 windowing environment for ports that depend on the functionality it provides to run. You have multiple choices for an X11 server:
Install the xorg-server port from MacPorts (recommended).
The XQuartz Project provides a complete X11 release for macOS including server and client libraries and applications. It has however not been updated since 2016.
Apple's X11.app is provided by the “X11 User” package on older OS versions. It is always installed on Lion, and is an optional installation on your system CDs/DVD with previous OS versions.
macOS Package (.pkg) Installer
The easiest way to install MacPorts on a Mac is by downloading the pkg or dmg for Big Sur, Catalina, Mojave, High Sierra, Sierra, El Capitan, Yosemite, Mavericks, Mountain Lion, Lion, Snow Leopard, Leopard or Tiger and running the system's Installer by double-clicking on the pkg contained therein, following the on-screen instructions until completion.
This procedure will place a fully-functional and default MacPorts installation on your host system, ready for usage. If needed your shell configuration files will be adapted by the installer to include the necessary settings to run MacPorts and the programs it installs, but you may need to open a new shell for these changes to take effect.
The MacPorts “selfupdate” command will also be run for you by the installer to ensure you have our latest available release and the latest revisions to the “Portfiles” that contain the instructions employed in the building and installation of ports. After installation is done, it is recommended that you run this step manually on a regular basis to to keep your MacPorts system always current:
At this point you should be ready to enjoy MacPorts!
Type “man port” at the command line prompt and/or browse over to our Guide to find out more information about using MacPorts. Help is also available.
Source Installation
If on the other hand you decide to install MacPorts from source, there are still a couple of things you will need to do after downloading the tarball before you can start installing ports, namely compiling and installing MacPorts itself:
“cd” into the directory where you downloaded the package and run “tar xjvf MacPorts-2.6.4.tar.bz2” or “tar xzvf MacPorts-2.6.4.tar.gz”, depending on whether you downloaded the bz2 tarball or the gz one, respectively.
Build and install the recently unpacked sources:
cd MacPorts-2.6.4
./configure && make && sudo make install
Optionally:
cd ../
rm -rf MacPorts-2.6.4*
These steps need to be perfomed from an administrator account, for which “sudo” will ask the password upon installation. This procedure will install a pristine MacPorts system and, if the optional steps are taken, remove the as of now unnecessary MacPorts-2.6.4 source directory and corresponding tarball.
To customize your installation you should read the output of “./configure --help | more” and pass the appropriate options for the settings you wish to tweak to the configuration script in the steps detailed above.
You will need to manually adapt your shell's environment to work with MacPorts and your chosen installation prefix (the value passed to configure's --prefix flag, defaulting to /opt/local):
Add $(prefix)/bin and $(prefix)/sbin to the start of your PATH environment variable so that MacPorts-installed programs take precedence over system-provided programs of the same name.
If a standard MANPATH environment variable already exists (that is, one that doesn't contain any empty components), add the $(prefix)/share/man path to it so that MacPorts-installed man pages are found by your shell.
For Tiger and earlier only, add an appropriate X11 DISPLAY environment variable to run X11-dependent programs, as Leopard takes care of this requirement on its own.
Lastly, you need to synchronize your installation with the MacPorts rsync server:
Upon completion MacPorts will be ready to install ports!
It is recommended to run the above command on a regular basis to keep your installation current. Type “man port” at the command line prompt and/or browse over to our Guide to find out more information about using MacPorts. Help is also available.
Git Sources
If you are developer or a user with a taste for the bleeding edge and wish for the latest changes and feature additions, you may acquire the MacPorts sources through git. See the Guide section on installing from git.
Mac Os Catalina 10.15.4 Installer Download
Purpose-specific branches are also available at the https://github.com/macports/macports-base/branches url.
Alternatively, if you'd simply like to view the git repository without checking it out, you can do so via the GitHub web interface.
Selfupdate
If you already have MacPorts installed and have no restrictions to use the rsync networking protocol (tcp port 873 by default), the easiest way to upgrade to our latest available release, 2.6.4, is by using the selfupdate target of the port(1) command. This will both update your ports tree (by performing a sync operation) and rebuild your current installation if it's outdated, preserving your customizations, if any.
Other Platforms

Running on platforms other than macOS is not the main focus of The MacPorts Project, so remaining cross-platform is not an actively-pursued development goal. Nevertheless, it is not an actively-discouraged goal either and as a result some experimental support does exist for other POSIX-compliant platforms such as *BSD and GNU/Linux.
The full list of requirements to run MacPorts on these other platforms is as follows (we assume you have the basics such as GCC and X11):
Tcl (8.4 or 8.5), with threads.
mtree for directory hierarchy.
rsync for syncing the ports.
cURL for downloading distfiles.
SQLite for the port registry.
GNUstep (Base), for Foundation (optional, can be disabled via configure args).
OpenSSL for signature verification, and optionally for checksums. libmd may be used instead for checksums.
Download Mac Os Catalina Installer Dmg
Normally you must install from source or from an git checkout to run MacPorts on any of these platforms.
Mac Os Catalina Installer Download Usb
Help
Mac Os Catalina Installer Download
Help on a wide variety of topics is also available in the project Guide and through our Trac portal should you run into any problems installing and/or using MacPorts. Of particular relevance are the installation & usage sections of the former and the FAQ section of the Wiki, where we keep track of questions frequently fielded on our mailing lists.
If any of these resources do not answer your questions or if you need any kind of extended support, there are many ways to contact us!
0 notes
Text
Download Latest Mac Version

So, you’ve decided to download an older version of Mac OS X. There are many reasons that could point you to this radical decision. To begin with, some of your apps may not be working properly (or simply crash) on newer operating systems. Also, you may have noticed your Mac’s performance went down right after the last update. Finally, if you want to run a parallel copy of Mac OS X on a virtual machine, you too will need a working installation file of an older Mac OS X. Further down we’ll explain where to get one and what problems you may face down the road.
Download Latest Mac Version
Mac Os Latest Version Iso
Download Mac Os Latest Version
Download Latest Mac Os Version
Without App Store: Download Mac OS version as Apple Developer. If you are signed with an Apple Developer account, you can get access to products that are no longer listed on the App Store. If you desperately need a lower OS X version build, consider creating a new Developer account among other options.
Stay within the reach with free Skype-to-Skype video/audio calls, videoconferencing, smart messaging, and screen sharing.
This latest version crashes (on the Mac) if I type too fast in Visual Studio on my Windows Desktop at work. I get the spinning beachball- have to exit to the Mac, force quit MRD and restart it, then reconnect. I'm finding myself doing this at least 2 or 3 times per hour!
Download Microsoft Teams now and get connected across devices on Windows, Mac, iOS, and Android. Collaborate better with the Microsoft Teams app.
A list of all Mac OS X versions
We’ll be repeatedly referring to these Apple OS versions below, so it’s good to know the basic macOS timeline.
Cheetah 10.0Puma 10.1Jaguar 10.2Panther 10.3Tiger 10.4Leopard 10.5Snow Leopard 10.6Lion 10.7Mountain Lion 10.8Mavericks 10.9Yosemite 10.10El Capitan 10.11Sierra 10.12High Sierra 10.13Mojave 10.14Catalina 10.15
STEP 1. Prepare your Mac for installation
Given your Mac isn’t new and is filled with data, you will probably need enough free space on your Mac. This includes not just space for the OS itself but also space for other applications and your user data. One more argument is that the free space on your disk translates into virtual memory so your apps have “fuel” to operate on. The chart below tells you how much free space is needed.
Highfive video conferencing download. Highfive makes your meetings awesome with insanely simple video conferencing designed for your meeting rooms, featuring video conferencing hardware and software built together.
Looks like your computer is running a operating system we no longer support, but you can still download and play your games using an older version of Origin. For Windows XP or Vista, click here to download. For Mac OSX 10.7 or 10.8, click here to download.
Note, that it is recommended that you install OS on a clean drive. Next, you will need enough disk space available, for example, to create Recovery Partition. Here are some ideas to free up space on your drive: Lightroom mac serial.
Uninstall large unused apps
Empty Trash Bin and Downloads
Locate the biggest files on your computer:
Go to Finder > All My Files > Arrange by size Then you can move your space hoggers onto an external drive or a cloud storage. If you aren’t comfortable with cleaning the Mac manually, there are some nice automatic “room cleaners”. Our favorite is CleanMyMac as it’s most simple to use of all. It deletes system junk, old broken apps, and the rest of hidden junk on your drive.
Download CleanMyMac for OS 10.4 - 10.8 (free version)
Download CleanMyMac for OS 10.9 (free version)
Download CleanMyMac for OS 10.10 - 10.14 (free version)
Download Latest Mac Version
STEP 2. Get a copy of Mac OS X download
Normally, it is assumed that updating OS is a one-way road. That’s why going back to a past Apple OS version is problematic. The main challenge is to download the OS installation file itself, because your Mac may already be running a newer version. If you succeed in downloading the OS installation, your next step is to create a bootable USB or DVD and then reinstall the OS on your computer.
Mac Os Latest Version Iso
How to download older Mac OS X versions via the App Store
If you once had purchased an old version of Mac OS X from the App Store, open it and go to the Purchased tab. There you’ll find all the installers you can download. However, it doesn’t always work that way. The purchased section lists only those operating systems that you had downloaded in the past. But here is the path to check it:
Click the App Store icon.
Click Purchases in the top menu.
Scroll down to find the preferred OS X version.
Click Download.
This method allows you to download Mavericks and Yosemite by logging with your Apple ID — only if you previously downloaded them from the Mac App Store.
Without App Store: Download Mac OS version as Apple Developer
If you are signed with an Apple Developer account, you can get access to products that are no longer listed on the App Store. If you desperately need a lower OS X version build, consider creating a new Developer account among other options. The membership cost is $99/year and provides a bunch of perks unavailable to ordinary users.
Nevertheless, keep in mind that if you visit developer.apple.com/downloads, you can only find 10.3-10.6 OS X operating systems there. Newer versions are not available because starting Mac OS X Snow Leopard 10.7, the App Store has become the only source of updating Apple OS versions.
Purchase an older version of Mac operating system
You can purchase a boxed or email version of past Mac OS X directly from Apple. Both will cost you around $20. For the reason of being rather antiquated, Snow Leopard and earlier Apple versions can only be installed from DVD.
Buy a boxed edition of Snow Leopard 10.6 Get an email copy of Lion 10.7 Get an email copy of Mountain Lion 10.8
The email edition comes with a special download code you can use for the Mac App Store. Note, that to install the Lion or Mountain Lion, your Mac needs to be running Snow Leopard so you can install the newer OS on top of it.
How to get macOS El Capitan download
If you are wondering if you can run El Capitan on an older Mac, rejoice as it’s possible too. But before your Mac can run El Capitan it has to be updated to OS X 10.6.8. So, here are main steps you should take:
1. Install Snow Leopard from install DVD. 2. Update to 10.6.8 using Software Update. 3. Download El Capitan here.
“I can’t download an old version of Mac OS X”
If you have a newer Mac, there is no physical option to install Mac OS versions older than your current Mac model. For instance, if your MacBook was released in 2014, don’t expect it to run any OS released prior of that time, because older Apple OS versions simply do not include hardware drivers for your Mac.
But as it often happens, workarounds are possible. There is still a chance to download the installation file if you have an access to a Mac (or virtual machine) running that operating system. For example, to get an installer for Lion, you may ask a friend who has Lion-operated Mac or, once again, set up a virtual machine running Lion. Then you will need to prepare an external drive to download the installation file using OS X Utilities.
After you’ve completed the download, the installer should launch automatically, but you can click Cancel and copy the file you need. Below is the detailed instruction how to do it.
STEP 3. Install older OS X onto an external drive
The following method allows you to download Mac OS X Lion, Mountain Lion, and Mavericks.
Start your Mac holding down Command + R.
Prepare a clean external drive (at least 10 GB of storage).
Within OS X Utilities, choose Reinstall OS X.
Select external drive as a source.
Enter your Apple ID.
Download Mac Os Latest Version
Now the OS should start downloading automatically onto the external drive. After the download is complete, your Mac will prompt you to do a restart, but at this point, you should completely shut it down. Now that the installation file is “captured” onto your external drive, you can reinstall the OS, this time running the file on your Mac.
Boot your Mac from your standard drive.
Connect the external drive.
Go to external drive > OS X Install Data.
Locate InstallESD.dmg disk image file — this is the file you need to reinstall Lion OS X. The same steps are valid for Mountain Lion and Mavericks.
How to downgrade a Mac running later macOS versions
If your Mac runs macOS Sierra 10.12 or macOS High Sierra 10.13, it is possible to revert it to the previous system if you are not satisfied with the experience. You can do it either with Time Machine or by creating a bootable USB or external drive. Instruction to downgrade from macOS Sierra
Instruction to downgrade from macOS High Sierra
Instruction to downgrade from macOS Mojave
Instruction to downgrade from macOS Catalina
Before you do it, the best advice is to back your Mac up so your most important files stay intact. In addition to that, it makes sense to clean up your Mac from old system junk files and application leftovers. The easiest way to do it is to run CleanMyMac X on your machine (download it for free here).
Visit your local Apple Store to download older OS X version
If none of the options to get older OS X worked, pay a visit to nearest local Apple Store. They should have image installations going back to OS Leopard and earlier. You can also ask their assistance to create a bootable USB drive with the installation file. So here you are. We hope this article has helped you to download an old version of Mac OS X. Below are a few more links you may find interesting.
These might also interest you:
High Sierra is an update of MacOS which focuses mostly on back-end developments and a higher level of user security. As such, this operating system lays a foundation for future upgrades.
Stay safe
In essence, High Sierra took what was good with Sierra and developed it into a more comprehensive software.
High Sierra emphasizes the already-existing benefits of MacOS previous system, Sierra. There are few bells and whistles, but the changes are noticeable and positive. The Apple file system is the most significant feature it brought. It enables the storage and encryption of a large number of files. Thus, it boosts performance and helps manage device memory issues.
Apple also introduced new formats for video and photos in this version. These formats compress data - that’s a benefit as files can get huge with ever-rising resolutions. They added support for virtual reality headsets as well.
Besides that, when it comes to Safari, Mac search engine, there are some notable improvements with the update. The users can now control annoying auto-play videos, prevent tracking, and more. There are also notification controls, and you will experience a boost in performance, too.
The most noticeable changes took place in Apple’s Photo App, though. It went through a total revamp both visually in its interface and terms of tools and functions available. Many other discreet changes happened all over the system.
Where can you run this program?

If you’re running Sierra on your Mac, you will be able to run this one as well.

Is there a better alternative?
Yes. Mojave, the newest version of MacOS, brought even more improved features to the table. However, if you can’t run it on your device, this is the second best.
Our take
Download Latest Mac Os Version
High Sierra is not the shiniest upgrade Apple brought, but it’s one that sets the stage for new upgrades to come. Even out of that context, it’s a great operating system.
Should you download it?
Yes, if your device can support it. The new options and better security settings are worth getting.
10.13
0 notes
Text
Can you still downgrade to iOS 13?

Can I downgrade iOS 14 to iOS 13?
Can I downgrade iOS 2020?
How do I revert back to iOS 14 from 15?
How do I downgrade to previous iOS?
How do I downgrade to ios13?
Can I uninstall iOS 14?
How do I uninstall the iOS 14 update?
How do I downgrade from iOS 14?
Can I undo an iPhone update?
Can you downgrade iPhone 12 Pro Max?
0 notes
Text
Macintosh Free Download

Macintosh Free Downloads
Adobe Acrobat For Macintosh Free Download
Jayjay Macintosh Free Download Of Vegas Pro
Macintosh Plus Download Free
OldVersion.com provides free. software downloads for old versions of programs, drivers and games. So why not downgrade to the version you love? Because newer is not always bett. Download Slack for free for mobile devices and desktop. Keep up with the conversation with our apps for iOS, Android, Mac, Windows and Linux.
So, you’ve decided to download an older version of Mac OS X. There are many reasons that could point you to this radical decision. To begin with, some of your apps may not be working properly (or simply crash) on newer operating systems. Also, you may have noticed your Mac’s performance went down right after the last update. Finally, if you want to run a parallel copy of Mac OS X on a virtual machine, you too will need a working installation file of an older Mac OS X. Further down we’ll explain where to get one and what problems you may face down the road.
A list of all Mac OS X versions
We’ll be repeatedly referring to these Apple OS versions below, so it’s good to know the basic macOS timeline.
Cheetah 10.0Puma 10.1Jaguar 10.2Panther 10.3Tiger 10.4Leopard 10.5Snow Leopard 10.6Lion 10.7Mountain Lion 10.8Mavericks 10.9Yosemite 10.10El Capitan 10.11Sierra 10.12High Sierra 10.13Mojave 10.14Catalina 10.15
STEP 1. Prepare your Mac for installation
Given your Mac isn’t new and is filled with data, you will probably need enough free space on your Mac. This includes not just space for the OS itself but also space for other applications and your user data. One more argument is that the free space on your disk translates into virtual memory so your apps have “fuel” to operate on. The chart below tells you how much free space is needed.
Note, that it is recommended that you install OS on a clean drive. Next, you will need enough disk space available, for example, to create Recovery Partition. Here are some ideas to free up space on your drive:
Uninstall large unused apps
Empty Trash Bin and Downloads
Locate the biggest files on your computer:
Go to Finder > All My Files > Arrange by size Then you can move your space hoggers onto an external drive or a cloud storage. If you aren’t comfortable with cleaning the Mac manually, there are some nice automatic “room cleaners”. Our favorite is CleanMyMac as it’s most simple to use of all. It deletes system junk, old broken apps, and the rest of hidden junk on your drive.
Download CleanMyMac for OS 10.4 - 10.8 (free version)

Download CleanMyMac for OS 10.9 (free version)
Download CleanMyMac for OS 10.10 - 10.14 (free version)
STEP 2. Get a copy of Mac OS X download
Normally, it is assumed that updating OS is a one-way road. That’s why going back to a past Apple OS version is problematic. The main challenge is to download the OS installation file itself, because your Mac may already be running a newer version. If you succeed in downloading the OS installation, your next step is to create a bootable USB or DVD and then reinstall the OS on your computer.
How to download older Mac OS X versions via the App Store
If you once had purchased an old version of Mac OS X from the App Store, open it and go to the Purchased tab. There you’ll find all the installers you can download. However, it doesn’t always work that way. The purchased section lists only those operating systems that you had downloaded in the past. But here is the path to check it:
Click the App Store icon.
Click Purchases in the top menu.
Scroll down to find the preferred OS X version.
Click Download.
This method allows you to download Mavericks and Yosemite by logging with your Apple ID — only if you previously downloaded them from the Mac App Store.
Without App Store: Download Mac OS version as Apple Developer
If you are signed with an Apple Developer account, you can get access to products that are no longer listed on the App Store. If you desperately need a lower OS X version build, consider creating a new Developer account among other options. The membership cost is $99/year and provides a bunch of perks unavailable to ordinary users.
Nevertheless, keep in mind that if you visit developer.apple.com/downloads, you can only find 10.3-10.6 OS X operating systems there. Newer versions are not available because starting Mac OS X Snow Leopard 10.7, the App Store has become the only source of updating Apple OS versions.
Purchase an older version of Mac operating system
You can purchase a boxed or email version of past Mac OS X directly from Apple. Both will cost you around $20. For the reason of being rather antiquated, Snow Leopard and earlier Apple versions can only be installed from DVD.
Buy a boxed edition of Snow Leopard 10.6 Get an email copy of Lion 10.7 Get an email copy of Mountain Lion 10.8

The email edition comes with a special download code you can use for the Mac App Store. Note, that to install the Lion or Mountain Lion, your Mac needs to be running Snow Leopard so you can install the newer OS on top of it.
How to get macOS El Capitan download
If you are wondering if you can run El Capitan on an older Mac, rejoice as it’s possible too. But before your Mac can run El Capitan it has to be updated to OS X 10.6.8. So, here are main steps you should take:
1. Install Snow Leopard from install DVD. 2. Update to 10.6.8 using Software Update. 3. Download El Capitan here.
“I can’t download an old version of Mac OS X”

If you have a newer Mac, there is no physical option to install Mac OS versions older than your current Mac model. For instance, if your MacBook was released in 2014, don’t expect it to run any OS released prior of that time, because older Apple OS versions simply do not include hardware drivers for your Mac.
But as it often happens, workarounds are possible. There is still a chance to download the installation file if you have an access to a Mac (or virtual machine) running that operating system. For example, to get an installer for Lion, you may ask a friend who has Lion-operated Mac or, once again, set up a virtual machine running Lion. Then you will need to prepare an external drive to download the installation file using OS X Utilities.
After you’ve completed the download, the installer should launch automatically, but you can click Cancel and copy the file you need. Below is the detailed instruction how to do it.
STEP 3. Install older OS X onto an external drive
The following method allows you to download Mac OS X Lion, Mountain Lion, and Mavericks.
Macintosh Free Downloads
Start your Mac holding down Command + R.
Prepare a clean external drive (at least 10 GB of storage).
Within OS X Utilities, choose Reinstall OS X.
Select external drive as a source.
Enter your Apple ID.
Adobe Acrobat For Macintosh Free Download
Now the OS should start downloading automatically onto the external drive. After the download is complete, your Mac will prompt you to do a restart, but at this point, you should completely shut it down. Now that the installation file is “captured” onto your external drive, you can reinstall the OS, this time running the file on your Mac.
Boot your Mac from your standard drive.
Connect the external drive.
Go to external drive > OS X Install Data.

Locate InstallESD.dmg disk image file — this is the file you need to reinstall Lion OS X. The same steps are valid for Mountain Lion and Mavericks.
How to downgrade a Mac running later macOS versions
If your Mac runs macOS Sierra 10.12 or macOS High Sierra 10.13, it is possible to revert it to the previous system if you are not satisfied with the experience. You can do it either with Time Machine or by creating a bootable USB or external drive. Instruction to downgrade from macOS Sierra
Instruction to downgrade from macOS High Sierra
Instruction to downgrade from macOS Mojave
Jayjay Macintosh Free Download Of Vegas Pro
Instruction to downgrade from macOS Catalina
Before you do it, the best advice is to back your Mac up so your most important files stay intact. In addition to that, it makes sense to clean up your Mac from old system junk files and application leftovers. The easiest way to do it is to run CleanMyMac X on your machine (download it for free here).
Visit your local Apple Store to download older OS X version
If none of the options to get older OS X worked, pay a visit to nearest local Apple Store. They should have image installations going back to OS Leopard and earlier. You can also ask their assistance to create a bootable USB drive with the installation file. So here you are. We hope this article has helped you to download an old version of Mac OS X. Below are a few more links you may find interesting.
Macintosh Plus Download Free
These might also interest you:
0 notes
Photo

Apple should have been sued for slow-downs before "batterygate"
Before "battery gate" Apple should already have been sued by consumers for knowingly letting users install updated OSs that older iPhones and iPads can barely run without giving a warning about the unavoidable slowdown that will inevitably occur after the update. What's even worse is how Apple is not letting users downgrade to previous iOS versions with ease, which is something they should do that as a bare minimum.
The whole iOS ecosystem is much less appealing and much more expensive longterm if you account for the actual number of updates an iPhone or iPad can truly handle gracefully without experiencing significant slowdowns and glitches.
Also, I genuinely can't see why the addition of a new emoji or similar, arbitrary additions or corrections to iOS can't be included in a "lite" version of an update, something specifically designed for the specifications of the device in question, instead of having to download and install a full system update with tons of features that older devices simply can't handle.
I used to deny the idea of Apple implementing deliberate, planned obsolescence. I used to think that Apple "gave" so much to its users with providing updates for older devices. But after iOS 11 and "batterygate", it's clear to me how they've come up with ways to cripple older devices in ways that aren't obvious to the average consumer.
Apple is not premium anymore.
1 note
·
View note
Note
Eyyy, have some uncommon questions and thanks for yours! How about we get Lut's comments on 7, 15, 27, 40 annnd B?
Thank you for the ask! What does Lut talk like?A lot. Lut is fond of words and of his own voice -- why use one sentence when five will suffice? Honestly I love writing Lut’s speech so much, it’s overly flowery, filled with terms of endearment. He gets distracted easily with a tendency to fall down multi-clause tangents. It would never occur to him to think before speaking, so often his speech is a stream of consciousness. In terms of his voice, he speaks fast. A while ago I recorded myself reading the first few chapters (to try to persuade a reading-shy-podcast-happy friend to read them hahaa) and I ended up voicing Lut like Hugh-Laurie-in-Blackadder-excitable-puppy. I don’t think that’s what he would actually sound like though. How sensitive are they about their flaws?Very. Lut is very aware of his flaws, and as a result is prone to lash out if anyone alludes to them. Which they do. He’s uncomfortable with other people even knowing about things he’s self-conscious about, like his lack of career and the fact this is entirely his own fault. -What triggers nostalgia?Seeing some of Viola’s early attempts at pottery, lopsided and wonky, something that snapped during firing, or if she makes something badly, or makes an error. She didn’t start learning until they were close friends, back when their friendship/relationship was lighter and easier, and she didn’t have that dark pall following her everywhere. There would be some nostalgia in the summer breeze for lazy days when he was younger, on days hot enough that he would get out of the house, but he usually couldn’t work for Reasons. -What causes him to feel dread?Familial occasions and obligations, that final stretch of the journey home when he anticipates going back to live with his parents after travelling. They’re not terrible people, but they’re not good people either (okay, maybe they’re a bit terrible). -B) What inspired you to create them?I might have to answer this in two parts. Most of my main cast were created in two stages, once when I was 14-15 and again when I decided to return to the story around 24. I made A LOT of changes. First version Luteni: I think I wanted someone cute and fluffy who would then go on to betray our heroes, he was someone super friendly and seemingly oblivious, while socially astute. Early Luteni had rabbit ears. Yes I have the old art stored, no, you can’t see it. Luteni comes from my Final Fantasy… (I want to say 2?) white mage. I loved the idea of the white mage being moderately evil. In the old version he had lots of siblings all named after instruments, and I think his brother was evil? It was a mess, hahaha. His creation was effectively to be the betraying character.Second version Luteni: existed because his previous incarnation existed. So he was what I built onto (some characters did get deleted, others were downgraded to minor character). Actually his personality is not too different in that he’s both very friendly, eager to help though the reasons for this are often selfish, he’s both oblivious and astute. I scrapped the betrayal idea when I scrapped the idea of having a bad guy “organisation” and went with a more grey morality kind of antagonist. Lut doesn’t betray anyone anymore, but he makes some decisions with selfish intentions. I don’t know, I wanted it to be a bit more nuanced, and hopefully that works. Inspiration this time came more from folklore, Tolkien, idea about convergent evolution of a marmoset-human, and actually for the design I took inspiration from an ios f2p card game called… uhh… I can’t remember but something super generic… Chain Chronicle! Anyway they have adorable fire sprites which are like little fox people. So the forestfolk were somewhere between those, hobbits, and marmosets. On a tangent, the first version Luteni had glasses. Second version exists in a world that doesn’t have glasses, but he’s still a bit short-sighted. I don't this is relevant in the story, but it is mentioned briefly. He was always Diriel's annoying but necessary friend. Their friendship was the inspiration ✨✨✨ (I wanted a cheesy end to this sorry-not-sorry)
6 notes
·
View notes
Text
jaellisme replied to your post: I love your art so much! What do you use to draw?
I mean, maybe you won’t be able to download/update some apps but in my opinion, better the outdated device that works than the updated one that doesn’t. If I had no problem using it in the past, I have no problem using it in the future, updates or otherwise. Of course, Android apps tend to have support for older softwares so I lucked out in that department, but I mean it when I said I can live without ever updating anything if that’s what it takes
Sorry about how long the previous reply got--especially if you were reading on mobile since the keep reading just doesn't exist for my tumblr (⊃﹏⊂) I'm glad I'm not the only one who takes a while to draw digitally, too! I get frustrated with how much time it takes to do one thing right. I'd be done with the lineart, but then the shading for skin tone would look wrong so what could have been done in 2 hours is finished 2 weeks later. Thanks for your advice, but unfortunately Apple doesn't let anyone downgrade the Software Update iOS 10.3.2 to iOS 10.3.1 anymore so I have to wait until the iOS 10.3.3 becomes available for my iPad Pro. I've restarted my iPad Pro several times, but it just works on and off. It could be playing a video for a few minutes before it suddenly skips to another video without me even being near it. I won’t update any of my Apple electronics ever again after I get the iOS 10.3.3. I'm furious because Nintendo has never done this to me even when I don't treat their electronics right. My 3DS was dropped down a flight of wooden stairs and I've accidentally kicked my Wii hard enough for it to get scuff marks. Both still work fine. I know they're different electronic types compared to the iPad Pro, but so much of my money feels has been wasted. I didn’t just lose my iPad Pro, but I also lost my Apple Pencil since you can’t use it except with an iPad Pro (and I can’t stop thinking about how the $900+ I spent could have been paying my rent instead). It doesn't help, either, that the amount of stress I've felt because of this loss is a waste of my time, too.
1 note
·
View note
Text
Macos Big Sur Virtualbox

In this article, I’m going to show you how to fix macOS Big Sur Screen Resolution on VirtualBox. If you’ve installed macOS Big Sur on Virtualbox so you might have observed, the screen is really small. You can’t scale it to any other resolutions. Because it’s not fixed by default when you install macOS Big Sur or any other versions of macOS on VirtualBox. In this post, I’ll show step by step to fix your macOS screen resolution on Virtualbox. However, this methods are not only for a Mac Operating system but also, for Windows OS as well.
Macos Big Sur Virtualbox Installation Failed
Macos Big Sur Virtualbox Kernel Driver Not Installed
Macos Big Sur Virtualbox
Macos Big Sur Virtualbox Settings
Macos Big Sur Virtualbox Error
Macos Big Sur Virtualbox Image
Macos Big Sur Virtualbox Iso
Fix macOS Big Sur Screen Resolution on VirtualBox
In this post, I’ll explain different ways of fixing macOS Screen resolution on Virtualbox software. One of these methods should work for you as well. If all the methods didn’t work, let us know via the comment section below. This guide is categorized from the most important method to less important. The first method is one of the best methods to fix macOS Big Sur screen Resolution on Virtualbox.
Related: Fix macOS Big Sur Screen Resolution on VMware on Windows
Method #1: Fix macOS Catalina Screen Resolution
Let’s get the ball rolling on how to fix macOS Big Sur screen resolution on VirtualBox on Windows operating system. All these methods are tested by our website visitors so it should work for most of you guys. One of these methods should work absolutely fine. For us, Method 1 has worked all the times and we recommend it to all. The resolution which is mentioned in the notepad file is tested by the wikigain team. If any other resolution also works, let us know. We will add them to the list.
Alternative to providing macOS Big Sur ISO file, we’ll try to cover every aspect of macOS Big Sur. From downloading macOS Big Sur ISO to installing macOS Big Sur on VMware and VirtualBox. In this post, I will simply provide a macOS Big Sur DMG file so get it and enjoy it. There are many other software issues like software unexpectedly quit, and apps like VirtualBox, AdGuard, Chrome, and Steam won't response in macOS Big Sur. What we can advise is to downgrade to a previous system like macOS Catalina and Mojave, and do not upgrade to macOS Big Sur until it is released to the public in a stable condition. The first method is one of the best methods to fix macOS Big Sur screen Resolution on Virtualbox. Related: Fix macOS Big Sur Screen Resolution on VMware on Windows. Method #1: Fix macOS Catalina Screen Resolution. Let’s get the ball rolling on how to fix macOS Big Sur screen resolution on VirtualBox on Windows operating system.
Step #1. Completely Shutdown your macOS Big Sur virtual machine and open up macOS Big Sur Screen Resolution VirtualBox code. Here you need to replace “VM Name” with your virtual machine name. Leave the code opened but Quit VirtualBox completely. It should not be running in the background.
Step #2. Open up the command prompt or Windows Powershell. Press the Windows key in Windows 10. Typ cmd and Run it as administrator.
Run CMD as Admin
Step #3. Now, copy and paste the code to the command prompt (CMD) and make sure to Replace HxV with your desired resolution which is listed in the notepad file. For example, 1920×1080 is one of the resolutions. have a look at the screenshot below to get an idea of how it’s done.
Run the Resolution Code
Step #4. Leave the CMD or PowerShell open, start your macOS Big Sur VM.
#5. Click the Apple icon on the top left corner of the screen then selects About this Mac. From the Display tab, you should see your new resolution. In my case, it’s 1920×1080.
Changed Screen Resolution
Method #2: Fix macOS Big Sur Screen Resolution
This method also has worked for some of our visitors and they mentioned to us and we added in this guide. If you also have another solution, please let us know and we should add it to our list.
Step #1. Shutdown your macOS virtual machine and from the VirtualBox observe your macOS VM Name. Open Screen Resolution VirtualBox code and replace it with your virtual machine name. Make sure to quit VirtualBox. Don’t forget to execute the first command. Change the H and V at the end of each command in method #2 with your desired resolution. H stand for Horizontal and V stands for Vertical.
Macos Big Sur Virtualbox Installation Failed
Change macOS Big Sur Screen Resolution Method 2Once you executed the code by command prompt or PowerShell. Start your macOS Big Sur VM and you should see the new resolution from Display Tab.
4K Resolutions
Other Methods to fix macOS Screen Resolution on VirtualBox
The following tips and methods are also worked for some people. We will list here just in case all the other methods didn’t work. The following methods might work. In all methods, your VM should be shut down and Virtualbox should be Closed. VBox should not be running while executing the code by command prompt or PowerShell. When you run the code, make sure to replace “N” with your desired resolution.
For instance: I would like to set 1024×768, I’ll use number 3 for this resolution.
Macos Big Sur Virtualbox Kernel Driver Not Installed
Example:
Where N can be one of 0,1,2,3,4,5 referring to the 640×480, 800×600, 1024×768, 1280×1024, 1440×900, 1900×1200.
While the VM is running, you can also tell the guest OS to change the resolution by using
The 32 at the end denotes, display color depth.
The following primary display resolutions are supported by macOS on VirtualBox: 5120×2880 2880×1800 2560×1600 2560×1440 1920×1200 1600×1200 1680×1050 1440×900 1280×800 1024×768 640×48.
What we recommend is method 1 which has worked all the times we’ve tested. So if any of this method didn’t work. Disable 3D Acceleration from Virtualbox Settings> Display Menu>Screen Tab.
Conclusion
To sum up this guide, we’ve shown three methods to fix macOS Big Sur Screen Resolution on VirtualBox on Windows PC. Every method is a command line command that needs to be executed to fix the resolution issue. If you’ve any other solution to fix the issue, please feel free to share via comment section down below this post.

Macos Big Sur Virtualbox
This post will provide you with Download macOS Big Sur VMware & VirtualBox Image. Apple kicked off the new working system for the users by the name of macOS 11 Big Sur. At the Worldwide developer conference, you have the best operating system with many extraordinary features and updates. They have made some new and unique modifications to macOS Big Sur. This time WWDC event was fairly different compared to previous events. According to Apple, the Final version of macOS Big Sur will be out in September or October 2020. On the other hand, there are a lot of changes and updates on Safety and performance. Well, Apple always tries its best to be able to provide a much better operating system.
Download macOS Big Sur VMware & VirtualBox Image– Latest Version.
Macos Big Sur Virtualbox Settings
Installing macOS Big Sur on supported is not a challenging undertaking. Due to downloading from AppStore, you can install macOS Big Sur on Mac with no limitation.
Once you get installed, you may enjoy the features of macOS Big Sur such as New Notification Center, Faster Safari, Big UI Refresh, Control Center, New Dock, Particular icons, and many more. The upgrades were especially focused on the brand new design and some much better improvements. Apart from that, Apple also published iOS 14, iPadOS 14, watchOS 7, tvOS 14, and macOS Big Sur. And a few major upgrades to Apple AirPods.
If you do not have Mac or MacBook to attempt macOS Big Sur, then do not worry. There are many ways in which you may set up macOS Big Sur. I believe virtualization software is the best to go with since you can use the same as your actual operating system. Nowadays, the most popular virtualization software is VMware and VirtualBox that provides the ideal user interface. You can use the virtual machine to set up macOS Big Sur, Linux, Windows, Ubuntu, and many more operating systems. Personally, I use VMware & VirtualBox when any operating system becomes released. When you install macOS Big Sur on virtual machines, you can do anything you would like to do.
Creating apps or catch up with each and everything on macOS Big Sur afterward VMware and VirtualBox is going to be the best alternative for you. For this, you will likely want macOS Big Sur VMware & VirtualBox Image because it is one of the main documents while installing. We’ve made or created VMware, and VirtualBox images, particularly for the digital machines, and it doesn’t work someplace else. If you’d like an image for Hackintosh, then you can directly download it from App Store.
To install macOS Big Sur on virtual machines, you have to Download macOS Big Sur VMware & VirtualBox image. Because VMware & VirtualBox accept VMDK expansion, which stands for Virtual Machine Disc. A single VMDK image will do the job for both VMware & VirtualBox. But, creating the macOS Big Sur image for virtual machines is difficult for the newbie. We have established VMware and VirtualBox image and successfully uploaded on Google Drive and MediaFire to reduce virus and malware. Head towards the under sections.
Pictures: The photographs are just amazing in macOS Big Sur. You can access all your albums and press types from the sidebar. It has a great interface that’s a huge update for Apple users. Safari: Safari is a superb internet browser on macOS. This time Apple must boost the speed of Safari than before. It works 50% quicker and correctly than before. Menu Bar: Menu pub is simply wonderful for controlling both the Mac and customizing all items like Wi-Fi, Sound, Brightness, and many more. According to Apple, all of your Mac controllers will probably be from the pub, and it is now simple to make adjustments. Control Center: Control center on macOS Big Sur is a fascinating feature. You may get it from the menu bar. It features new widgets and notification apps, and many more. Messages: On the messages program, you can pin your favorite conversation to the top of your list. The user can also search the old messages, photographs, links, and a lot more. Maps: The map program is even better today than before. Next, you won’t miss your favorite place as it gives full functionalities to discover. If you want to visit any location, then it’s possible to create your own guide. This attribute is released on iOS 14 will soon be accessible on macOS Big Sur later.
Download macOS Big Sur VMware & VirtualBox Image – Latest Version
You can create your own VMware & VirtualBox image. For our manual, we will give you a direct connection to download it. Nothing to worry about the images as they’re wholly fresh and prepared to use it to install macOS Big Sur on VMware & VirtualBox.
DISCLAIMER: The macOS Big Sur ISO image is created only for testing & educational purposes. We are not responsible if anyone is misusing the macOS Big Sur ISO image. How to Speed Up macOS Big Sur? 7 Easy Methods
Important Note: The download links are macOS Big Sur ISO File. The ISO will operate flawlessly to set up macOS Big Sur on VMware & VirtualBox. Later on, we will create an especially image for you and update the links for you.
macOS BigSur ISO 11.1 by techrechard (Mega.NZ) Updated 4 Jan 2020.
macOS BigSur ISO 11.1 by techrechard (Media Fire) Updated 4 Jan 2020.
The ISO file is around 16GB, so you will need a good internet connection to download the macOS Big Sur ISO file. So, here is a tool that you can use to speed up the download process. Internet Download Manager tool that will help you enhance your downloading speed. You can download the full version from below.
IDM 6.27 Build 2 Registered (32bit + 64bit Patch) (Techrechard.com) – This file is password-protected, and the password is www.techrechard.com. You can extract this file using WinRAR download free and support: WinRAR (win-rar.com).
Macos Big Sur Virtualbox Error
macOS Big Sur Image (Alternate): macOS Big Sur is one of the most powerful operating systems out there. We’ve brought you the macOS Big Sur ISO file’s latest version. For a better experience, we have uploaded the document on MediaFire.
If you get a Quota exceeded error, you can use the Mediafire links provided. If you want to use Mega.NZ links only, check this- How to Download MEGA files without Limits: 16 Easy Steps in 2021 How to Speed Up macOS Big Sur? 7 Easy Methods
You can also get: macOS Big Sur VMDK File (Virtual Machine Disk). Download macOS Big Sur DMG for a clean setup.
Macos Big Sur Virtualbox Image
When you download macOS Big Sur Image, then you will be prepared for the setup. We’ve got guides on it, have a look at the down under link, and follow the complete procedure.
How to Install macOS Big Sur on VMware on Windows PC How to Install macOS Big Sur on VirtualBox on Windows PC How to Speed Up macOS Big Sur? 7 Easy Methods How to install Windows 10 on macOS 11 Big Sur: Step-by-step Guide
Macos Big Sur Virtualbox Iso
Download macOS Big Sur VMware & VirtualBox Image: Bottom Line
I hope you’ve downloaded macOS Big Sur VMware & VirtualBox Image — Latest Version. Do not be afraid to leave comments in the comment section down below for any problem or question.
0 notes
Text
How Do I Icloud Unlock For Free
icunlocker is the unparalleled genuine iCloud open server that chips away at all iOS gadgets. Our iCloud open strategy utilizes a mirror actuation server that initiates your iPhone/iPad/iPod when associated with iTunes. It’s 100% free and chips away at Mac, Linux and Windows.This application is fascinating in that, rather than expelling the iCloud account from a telephone, it will straightforwardly interface how to unlock icloud account with Apple’s servers to actuate your telephone so you can utilize it.2019 Bypass iCloud Activation Tool is one of the best tools regarding this work. It connects to the Apple server for iOS 12.2/ 12.2.1/ 12.2.2 iCloud activation, and it is gradually gaining popularity due to its efficient work.
These two programs can be used from your home office using your personal laptop or computer and do not require payment to iPhone XS, XS Max, XR, X, 8 Plus, 7 Plus and 6S repair centers or other payments to online operators. All you have to do is go to the Unlock iCloud team page and downgrade the software. Our team has checked if this software recognizes Apple devices, which models are compatible and what are the pros and cons. In the next section, we’ll show you the results of the free and Pro analysis. DoulCi iCloud iOS 12.2/ 12.2.1/ 12.2.2 unlock ( bypass iCloud lock remover ) for iOS 12.2 had called the rake has already been used thousands of times on the iPhone locked and around the world. Apple iOS is they think being the case, the server or stolen equipment company tricking Apple’s steal-anonymous hacker who cracked a strong step, a pair of work. Apple removed the activation lock check toolfrom their website on January 29th 2017 without any warning. Rumour has it that Chinese hackers had been using the tool to find unlocked devices serial numbers and used them to reset iPhone serial numbers remove locks on an industrial scale. This means you can’t check the status of your Apple device online for now. It is unknown if the tool will ever return. If it is locked due to theft you may still be able to bypass the activation lock as described later in this article and get some functionality. But you won’t be able to unlock the iPhone completely. In future it is best to request this number from the seller before you buy it to make sure the item has not been stolen or locked by the previous owner. You simply ask Apple to check the device on your behalf and can then buy it safe in the knowledge it hasn’t been stolen and locked permanently.
If the original owner of your iPhone turned on a feature called ‘Find My iPhone‘ then it will automatically link their iCloud account to the iPhone. The idea is to help them find their device if it is lost or stolen. If the worst comes to the worst and they can’t get their iPhone back then they can use ‘Find My iPhone’ to erase the contents of the phone and lock it permanently. Obviously the idea behind this is to deter theft which is a great. However, if you buy a used iPhone, iPad or even Apple Watch and the previous owner forgot to remove it from their ‘Find My iPhone’ account then it is locked to the old owners iCloud account. This means you can’t use it. So the security on iCloud may disable the iPhone you bought in good faith and make it unusable. If the original owner of your iPhone turned on a feature called ‘Find My iPhone‘ then it will automatically link their iCloud account to the iPhone. The idea is to help them find their device if it is lost or stolen. If the worst comes to the worst and they can’t get their iPhone back then they can use ‘Find My iPhone’ to erase the contents of the phone and lock it permanently.
Obviously the idea behind this is to deter theft which is a great idea. However, if you buy a used iPhone, iPad or even Apple Watch and the previous owner forgot to remove it from their ‘Find My iPhone’ account then it is locked to the old owners iCloud account. This means you can’t use it. So the security on iCloud may disable the iPhone you bought in good faith. However there is a solution – using either an iCloud bypass or unlock. The difference between the 2 methods are described in this article.The only way to unlock your iCloud account is to have an industry insider reset your iCloud lock status in their computer systems. Unless you know someone on the inside, you will need to pay a third-party provider to do this. After hundreds of hours of research, scouring through a dozen high-authority review sites, and icloud unlock free testing 3 providers, I can confidently say that the best third-party iCloud unlock provider is Apple iPhone Unlock. Apple iPhone Unlock is the only iCloud unlock service I recommend because they’re the only company who actually unlocked all four iCloud accounts we paid for! Whilst that would be enough to put them in the #1 spot, when you add in the fact that they’re also the cheapest AND the fastest of all providers, then they’re definitely my #1 choice.
0 notes
Text
iOS 12: new features and the iOS 12.1 release date
iOS 12 features are already popular among iPhone and iPad users, according to new data that shows high usage of Apple's fresh take on its mobile operating system.
But the changes don't stop there. Apple is already testing iOS 12.1 beta. We outlined all of the major iOS 12 features below, include Grouped Notifications, Memojis, Screen Time, and better performance for older iPhones. But later this month, the iOS 12.1 release date will add new emoji and Group FaceTime and more than 70 new emoji among other perks, maybe when the iPhone XR launches on October 26.
Apple has made its mobile operating system competitive in the wake of Google's Android Pie update and next week's Google Pixel 3 launch.
Here's everything you need to know about iOS 12, whether you're upgrading an older iPhone (that will be faster), or getting it out of the box with iPhone XS Max.
Read more: 5 Ways to Import Music to iPhone XS
Here's what is in the iOS 12.1 update
70+ new emoji – good news for redheads, curly-haired and bald folks
Group FaceTime for up to 32 users is part of the iOS 12.1 beta
Adjust photo background blur (bokeh) in real time (not just afterward)
eSIM support menus are live in the beta – but carrier support is needed
References 'iPadfall2018' – a big iPad Pro 2018 hint
The iOS 12.1 release date is expected to be in October, and it could very well launch at the same time as the iPhone XR on October 23. Until, then iOS 12.1 beta is out for both developers and the general public, and we recommend downloading it.
There are five important iOS 12.1 changes:
70+ new emoji On October 2, Apple announced that more than 70 new emoji were launching with the iOS 12.1 developer beta 2. Get ready for red, gray and curly hair options, as well as bald people, according to Apple's official press release. Softballs, skateboards, and frisbees are here for alternative sports, while new animal and food emojis include kangaroos, lobsters (sometimes a food, always an animal) bagels, and cupcakes.
Group FaceTime First, Group FaceTime for up to 32 users is here. To test it out, however, you're going to have to pair up with people who have iOS 12.1 beta, so its use cases are limited right now.
Portrait Mode bokeh effects Second, Apple has improved the bokeh (background blur) feature in portrait mode on the iPhone XS and iPhone XS Max. Before you could only adjust the blur after a picture was taken. Now, with iOS 12.1, you can also adjust the blur in real time, as you're snapping a photo. This helps you better frame your portrait photos.
eSIM support – kind of Third, eSIM iPhone support is live with the proper setup menus. But there's a catch for setting up the simulated dual-SIM – you'll have to wait for your carrier to start supporting the feature, which may happen on the official iOS 12.1 release date.
iOS 12.1 fixes bugs Fourth, the iOS 12.1 release notes indicate that you're in for some bug fixes. That's very good news if you're experiencing problems. Apple's updates usually remedy the issue, however, you may have to wait until iOS 12.2 in order to fix the iPhone XS and XS Max charging issues.
iPadfall2018 reference Fifth, although not a feature, the iOS 12.1 code references 'iPad2018fall' and that's interesting to us. We're likely to see the iPad Pro 2018 launch in October. New iPad Pro rumors point to a bezel-reduced iPad, one with a TrueDepth camera for Face ID and Memoji. There are plenty of hints in iOS 12.1 that Animoji and Memoji are going to be supersized on Apple's tablet soon.
Read more: How to Transfer Data from iPad/iPad Pro/iPad Mini to iPhone XS Max
The top iOS 12 featuresImage 1 of 4
1. iOS 12 makes your old iPhone and iPad faster
Older iPhones are 40% to 70% faster at certain tasks
Apple's looking to put the problematic iOS 11 behind it
iOS 12 focuses on reliability and performance with this update, and it supports all of the same iPhones and iPads that iOS 11 worked with.
Apple highlights the iPhone 6 Plus, specifically, saying iOS 12 makes this phone 40% faster at launching apps, 70% faster at launching the camera app, and 50% faster at displaying the keyboard. Keyboard typing and other routine features on older iPhones can slow down with every new iOS update, and Apple is looking to change these pain points with iOS 12.
This makes your existing iPhone and iPad more reliable, and your older devices can be used by family members, or will be more sellable – they don't have to sit in a drawer because they're too slow.
Read more: How to Backup iPhone/iPad before upgrading to iOS 12
2. Grouped notifications
Grouped notification on iOS 12 clean up individual notifications mess
Smartly grouped by app, topic, thread
You can clear a whole group of notifications with a single swipe
Grouped notifications are a part of iOS 12. This is a small, but very important tweak (maybe the most important in the iOS 12 update) because it changes the lock screen alerts you see each and every day.
It binds together notifications by message threads and topics, making it easier to see everything at a glance. Right now, individual notifications in the morning are a big pain to check as they pile up.
Read more:
How to Recover Deleted iPhone/iPad Data on iOS 12
3. Memoji and changes to Animoji
Personalized 'Memoji' to look like you or 'the real you'
Four new Animoji masks: Ghost, Koala, Tiger and T-Rex
Animoji and Memoji clips last 30 seconds (up to 10 seconds)
Tongue and wink detection for iOS 12 masks
Memoji is a customizable mask that can look like you – or the real you, according to Apple. It still resides in Messages. You can select hairstyles, eye color and accessories like earrings and sunglasses.
Like Animoji, this is a feature for newer iPhones in the X lineup as it requires Apple's TrueDepth front-facing camera.
Animoji is expanded, not just with new masks, but with tongue detection and wink detection. Ghost, Koala, Tiger, and T-Rex will be joining the cast of Animoji masks.
4. Automatically enter those pesky security codes
Two-factor authentication is great, except the annoying task of entering six-digital security codes sent to you via text feels like a chore. iOS 12 fixes this issue.
As soon as a security code is sent to your device as a text, it'll automatically pop up within the suggested words in the keyboard interface. All you have to do is tap it. It makes life just a little easier when you're locked out of Dropbox.
5. iOS 12 allows for more than one Face ID face
Face ID on iOS 12 supports more than one face within the Setting menu labeled 'Face ID & Passcode.' Look for the 'Set up an Alternative Appearance' sub-menu to add a second look.
This is helpful for two reasons: You can either allow a partner to have access to your iPhone or iPad with Face ID, or you can add your alter ego to make sure Face ID unlocks your phone no matter what you look like today, tomorrow or the next day.
6. Siri Shortcuts can find your lost keys, more
Siri Shortcuts allows you to assign phrases to tasks
'I lost my keys' can ring your Tile tracker to find keys
'Heading home' sends ETA notification to roommate, sets thermostat and fan, and brings up the fastest route via Apple Maps
Gallery and library full of pre-configured Siri Shortcuts
Siri is smarter. If you set up Siri Shortcuts, a brand new app, It‘ll know that “I lost my keys” means to ring your Tile tracker.
Sure, Tile is a handy gadget, but getting to the slow app is a pain when you've lost your keys. An integrated Siri is a game-changer for both Tile and our peace of mind.
Siri Shortcuts go far beyond this example. Apple allows for all sorts of formulas. The app can suggests coffee orders from the place you always order from, and nudge you to message contacts to tell them you're running late.
There's also Kayak-based flight information you can call up via voice. By pressing the add to Siri button, you can then say “Travel plans” and Siri will read back information such as your hotel address.
Apple's IFTTT-like Siri Shortcuts app launched alongside the final iOS 12 software. However, not all shortcuts will be found in the new app. Some companies, like the aforementioned Tile, will host shortcuts within their own app, so look out for that.
7. Group FaceTime (now launching later)
Group FaceTime for up to 32 people with dynamic UI
Can use Animoji and Memoji in FaceTime
Won't launch with the final software on day one
Group FaceTime is coming to iOS 12 with up to 32 participants, and you go directly from a group chat to a group FaceTime in the Messages app.
Update: Apple has delayed the launch of iOS 12 Group Notifications, according to release notes indicating that it'll come out this 'fall'. To us, that sounds like an iOS 12.1 launch – like Apple Pay, Apple Cash, AirPlay 2 and other features didn't make it live on day one in previous operating system updates.
People can drop in and drop out at any time. The interface is filled with tiles that can expand, and 'the roster' along the bottom for everyone else in the Group FaceTime chat. When people start to speak, their window gets bigger, even if they're in the bottom roster of participants. It works on iPhone, iPad and Mac, and you can even answer on the Apple Watch and HomePod with just audio.
Animoji is coming to FaceTime and Group FaceTime. You'll of course need to update to iOS 12 and an iPhone X, iPhone XS, iPhone XS Max or an iPhone XR to make that magic happen.
Read more: How to downgrade iOS 12 to iOS 11
8. Screen time – using your iPhone less
Reports give a weekly activity summary on how you use iOS 12
Breakdown: ranks app usage, highest phone pick up times (and what app draws you in first), and apps that send you the most notifications
Set self-imposed time limits via reminders and temporary app blocking
Limit kids time in apps by category or individual apps via Family Sharing
Screen time is Apple's way of limiting your iPhone usage – calculating how much time you're spending on apps, which apps you use the most, and which apps are sending you the most notifications. Screen time doesn't lie.
For those without self-control, Apple has created app limits. You can set your own limit, with a notification letting you know when time is almost up. A 'Time is up' message will display when you've reached your self-imposed-Siri-assisted limit.
Parents can create limits for kids with Allowances, time-of-day-based downtime controls, and category controls. Education and essential message apps can also be greenlit thanks to an always-allowed settings.
The best part? Setting limits for your kids uses Family Sharing, so you can manage it all remotely from your parental device – no need to get hold of your 12-year-old kid's phone to execute on these new iOS 12 controls.
9. Do Not Disturb goes visual in iOS 12
Do Not Disturb during bedtime to hide visual display of notifications
It offers a clean lock screen with only a reminder than DND mode is on
Apple has expanding its Do Not Disturb capabilities with a cleaner 'Do Not Disturb During Bedtime' mode. It'll silence not just the notification delivery sounds, but also the visual notifications clutter that can distract you when you're trying to sleep.
The lock screen remains clear until you unlock your iPhone in the morning. You can allow certain apps to break through, just like with DND mode right now. Apple refers to these as critical alerts, and they're opt-in.
We really like the solo DND notification hanging out on the lock screen. It's peaceful without distracting visual clutter at night and it reminds us that DND mode is on. All notched iPhones don't have the DND icon at the top, so it was always hard to tell before iOS 12.
10. Instant Tuning for axing notifications
Instant Tuning to send future notifications silently or turn them off
Siri can suggest which notifications to silence based on usage
Instant Tuning is an iOS 12 feature you'll love if you've ever gotten a notification from an app you always seem to dismiss (HQ trivia, breaking news alerts, etc), but don't have time to turn off future notifications in the many submenus of Settings. Apple is allowing you to control individual app notification profiles right from the lockscreen, without making you leave what you're doing.
Deliver Quietly is an option within Instant Tuning, and it'll allow you to choose to have notifications delivered silently Notification Center by default so you’re not interrupted by alerts on the lockscreen. It's a nice in between option.
Siri helps clean up your messy lock screen with notification delivery suggestions based on how you interact with notifications. Siri will understand which notifications it should deliver prominently and which ones to send to Notification Center. It's like iOS 12's version of 'clean up your desktop' system nudges.
11. New 'Measure' app and USDZ file format
New USDZ file type dedicated at augmented reality
Measure app replaces your old-fashioned measuring tape
'Measure' is getting its own AR app. It uses the iPhone's and iPad's sensors to measure objects in front of you, including suitcases, as shown in the first iOS 12 demo. All it takes it just tap-and-drag along the edges of the object on the screen.
It also automatically detects the approximate dimensions of a photo – we've used it to buy a photo frame when we couldn't find the old-fashioned tape measure. iOS 12 to the rescue.
For AR developers, Apple has created a new file type called 'USDZ.' The company worked on USDZ with Pixar, and Adobe is supporting it, too. The file format can be shared across FIles, Mail, Messages and Safari. This is an important step forward for developers working on AR apps.
Image 1 of 2
12. Apple News, Stocks, Voice Memos and CarPlay
Apple News: new Browse tab and sidebar navigation
Stocks: robust chart design and stock news integration
Voice memos: easier menus, iCloud support, on iPad (finally)
CarPlay: third-party app support, like Google News and Waze
Apps are indeed getting updates with iOS 12, starting with Apple News. There’s a new Browse tab and a sidebar for better navigation. Stocks is finally being rebuilt with a helpful news design, complete with charts and Apple news headline integrated into into stocks. The top stories will be business news curated by Apple News editors.
Voice Memos has come to iPad (as well as macOS), and it’ll get iCloud support, long overdue changes. Now you won't have to AirDrop conversations between devices in order to listen back. It'll also be easier to assign names to voice clips thanks to an overhauled Voice Memos redesign.
Apple Books is the new name for iBooks, allowing you to pick up reading where you left off and a new store interface to browse buy ebooks and audio books.
CarPlay now support third-party applications, with Waze and Google Maps appearing on-screen. Apple didn’t call out the Google-owned apps by name, but they were there on the screen. This was a major highlight of iOS 12.
13. Some NFC features work even with a dead battery
Apple delivers a clever trick with NFC, allowing you to use a metro pass or student ID in the Wallet app, even if your iPhone has a depleted battery.
Express Cards with power reserve ensures you're not stranded outside of a train station or a dorm room because there's still some low-level power in your phone. This is one of our biggest fears for users who routinely rly on NFC.
Apple solves this, and though there's not enough power to give you visual feedback, when you touch your dead iPhone to an NFC-equipped terminal and you'll get a haptic response. And like magic, it works.
Just don't expect this new feature to work with Apple Pay. That requires Face ID, so you're going to have to possess a powered-on smartphone for that to work.
14. Closing apps in multitasking mode is easier
For 12 and 13, iOS 12 fixes some irksome features we hated about iOS 11. They're the kind of problems only first-year iPhone X users will know about.
Closing open app windows in iOS 12 is easier. All you have to do is slide up on an open app to dismiss it from the multitasking menu. iOS 11 had us press down on the app until a bunch of red close icons appeared over top of each app, and then to tap those little red icons to dismiss the app. That was unpleasant.
15. Accidental screenshots are less common
Whenever we picked up our iPhone X, we'd always press the volume up and power button accidentally, which is the new 'take a screenshot' button combination on iPhone X. Apple has disabled this action whenever the phone screen is off. Our iOS 12 Photos app is no longer going to be filled with errant screenshots on the daily.
Image 1 of 3
16. ARKit 2 and multiplayer gaming
ARKit 2 allows for 'shared experiences' for AR multiplayer
Lego, Fender, Adobe and Pixar are all working on AR with Apple
iOS 12 cements Apple as a leader in augmented reality (AR) with the arrival of groundbreaking multiplayer capabilities it calls Shared Experiences in ARKit 2.
These multi-user virtual environments allow for multiplayer gaming and experiences through iPhones and iPads. iOS 12 creates a more collaborative (and competitive) way of experiencing AR.
Lego demoed a four-player game at WWDC in June, pledging that it was in when it came to Apple's “creative play possibilities.” Players were involved in building up an AR town. It was like The Sims was reimagined for the future.
ARKit 2 opens up AR to hundreds of millions of users, according to Apple, and that makes iOS 12 the broadest AR platform in the world. We got a taste of AR last year, but multi-user virtual environments bring more advanced tools and gameplay.
17. Camera app changes
Smart DHR is reserved for the A12 chip-equipped iPhone XS and iPhone XR phones, but iOS 12 also tweaks the default camera app on older devices with new tricks.
First, the Portrait Lighting mode (on newer iPhones with dual-lens cameras) looks more natural. The software will be able to define crisper edges by more effectively separating a person from a background scene. Apple is also allowing third-party apps to use the software to separate the foreground and background.
Second, it's the end of an era for our how to scan a QR code from your iPhone and iPad guide. The default camera in iOS 12 makes QR code reading automatic.
Third, while not part of the camera app, RAW photos can be imported and managed on an iPhone and iPad, with the bonus ability of editing RAW photos on an iPad Pro.
18. Photos app is now smarter with iOS 12
Betters search and a new 'For you' tab
Suggestions on who to share photo collections with
Share back suggestions nudge friends to send their photos
The Photos app expands its search capabilities in an effort to compete with Google Photos. It recognizes photos by event now and indexes them accordingly. Apple says it takes into account over four million events, citing the Aspen Ideas Festival as a very niche example.
This lets you search by event without any thankless manual tagging. Searching by event joins other smart suggestions, including filtering by people, places, and relative dates (searching via Siri works with all of these and is quite handy in our experience).
The iOS 12 Photos search capabilities have also been broadened to let you use multiple search terms at once. Seeking "dog, animal" should weed out all of your gourmet hotdog results (this is a real problem we just tested at TechRadar).
A new tab 'For you' is a part of the iOS 12 Photos app, and it's filled with personalized suggestions on how to improve and share your pictures. Sharing has gotten smarter, letting you share at full-resolution and suggesting who to share these photos with.
Share back suggestions is a neat feature that lets you send photos to a friend, and it uses machine learning to poke them to send photos they took to you. Bonus: iOS 12’s photo sharing features uses iMessage's end-to-end encryption.
Read more: Two Ways to Transfer Photos between iPhone XS and PC
19. iPad switches to iPhone-like gestures
It's confusing owning both an iPad and a new iPhone X right now because returning to the home screen and opening Control Center are executed by different gestures.
The iPad takes cues from the iPhone X with the iOS 12 update: swipe up from the bottom to return home and check Control Center by pulling down from the top right-hand corner.
This may be a prelude to the iPad Pro 2018 that's rumored to include Apple's TrueDepth camera for Face ID, Animoji, and Memoji.
20. Siri translates new languages, learns motorsport scores
Siri can now translate over 40 language pairs
Motorsports scores, schedules and stats knowledge
Food and celebrity facts knowledge expanded upon
Password search now part of Siri's duties in iOS 12
Try asking Siri to translate something into Spanish. It works, and with iOS 12 it'll be even more robust with over 40 language pairs to aid your international travels.
So far, Siri will translate English (US) into Brazilian Portuguese, French, German, Italian, Japanese, Mandarin Chinese, Russian and Spanish. We really hope Siri will be able to translate foreign words into English. That may have to wait for iOS 13.
Siri will also learn the language of motorsports, per se. Asking for Formula One and NASCAR information will have Siri recite live standings, schedule, roster and stat info.
Food knowledge and celebrity facts are also part the Siri update. Right now, asking "How healthy is fish" gives a smatter of search results and requires opening up Siri. In the future, a specific answers about food will come from the USDA database, citing calories, vitamins, and how healthy the food is overall.
Password hunting is now within Siri's grasp, letting you search any saved passwords, according to Apple. This applies to both apps and websites.
21. Pinpoints 911 calls in the US
You won't have to worry about reciting your exact location when calling 911 in the US thanks to iOS 12. It'll pinpoint your whereabouts during emergency calls.
Apple says it'll "automatically and securely" share your iPhone location with first responders, but only with them and only during such emergencies. It's an effort to reduce response time, yet maintain your privacy.
22. iOS 12 compatibility
Compatible with iPhone 5S, iPad mini 2 and iPad Air and newer
11 iPhones, 10 iPads, 1 iPod touch – the broadest iOS update yet
iOS 12 will run on all devices that have its 64-bit chipset. It'll work on the iPhone 5S and newer, while the iPad Air and iPad mini 2 are the oldest iPads that are compatible with iOS 12.
That's means this update is supporting 11 different iPhones, 10 different iPads, and the sole iPod touch 6th generation, still clinging to life. It’s the broadest support for a software update Apple has ever offered, and this is one of the biggest advantages Apple has over Android phones.
23. Weather app warns unhealthy air quality
Apple's official weather app contains new messaging that indicates air quality in cities. This is where Sunny, Cloudy, and Partly Cloudy messaging usually sits. iOS 12 puts it in a spot where you'll see it more regularly, as opposed to a separate air quality app.
The forecast New York City as of writing this, for example, tells us that the area has 'Unhealthy Air Quality for Sensitive Groups'. People with asthma therefore may want to stay indoors.
When did iOS 12 launch?
June 4 – Developer beta launched (to paid Apple Developers)
June 25 – iOS 12 public beta launched (it's free)
September 17 – the final iOS 12 software (still free)
iOS 12 released on Monday, September 17 following the iPhone XS launch event, where Apple announced the official launch date. You can now download it.
There were actually three phases to the iOS 12 launch: one for developers, one for public beta testers, and one final version launching in mid-September.
First, the developer beta launched at WWDC and got more frequent refreshes, but it was early software. You have to be a registered Apple developer, which costs $99 for the annual membership. It's for people who like to tinker with Xcode and make apps.
Second, iOS 12 public beta launched on June 25 and was completely free. It was less problematic than the developer beta. The downside? It was always one step behind what the developers have access to.
Third, the final software, meant for everyone, launched on September 17. There's no need to jump through hoops to enroll in a beta. iOS 12 is now here in its final form, right in time for the iPhone XS release date.
That's a wrap for new iOS 12 features.
The two biggest highlights were Grouped notifications and Group FaceTime with Memoji. Of course, Group FaceTime is not due to launch just yet, which means an inevitable iOS 12.1 and more updates for us to write about.
-----------------------Related Articles---------------------
How to Import Music to iPhone XS Max
7 Ways to Restore iTunes / iCloud Backup to iPhone XS/iPhone XS Max/iPhone XR
How to Make iPhone XS/XS Max Ringtones without iTunes
How to Free Make Ringtones on iPhone XS Max
3 Ways to Download and Import Streaming Music to iPhone XS/iPhone XS Max
Two Ways to Transfer Photos between iPhone XS and PC
6 Ways to Transfer Data from iPhone 5/6/7/8/X to iPhone XS
Two Ways to Transfer Samsung Data to iPhone XS
How to Transfer Data from Samsung to iPhone XS Max
4 Ways to Transfer WhatsApp messages to iPhone XS or iPhone XS Max
5 Quick Ways to Transfer Data from Android to iPhone XS/XS Max
0 notes
Text
Dealing with CORS (Cross-Origin Resource Sharing) in Ionic Applications
Almost everybody who is developing Ionic applications will at some point or another run into a fun little error that looks something like this:
No 'Access-Control-Allow-Origin' header is present on the requested resource. Origin 'http://localhost:8100' is therefore not allowed access.
The Access-Control-Allow-Origin error you see here is the result of the browser’s implementation of CORS (Cross-Origin Resource Sharing). This is an exceedingly common error, but it is also something that is also widely misunderstood.
This is an issue I’ve seen popping up on forums more and more frequently lately (likely due to people upgrading from UIWebView to WKWebView). I wanted to write this quick guide to explain what CORS is, and how you can work with it (or sometimes, against it).
Once you understand what is going on, these errors become much less intimidating and much easier to solve.
What is CORS?
CORS stands for Cross-Origin Resource Sharing and it is a security protocol implemented by browsers that allow a server to determine what domains/origins should be allowed access to its resources.
Since an Ionic application runs inside of a browser, CORS will apply to requests that are launched from within an Ionic application.
By default, the same-origin security policy is used, which means that the browser will only allow the loading of resources from the server if the request was launched from that same origin. That means that if my application is running on coolfishieswithhats.com and I am trying to make a request to a server on dogswithfancyshoes.com it will be blocked by CORS with an error that looks something like this:
No 'Access-Control-Allow-Origin' header is present on the requested resource. Origin 'https://coolfishieswithhats.com' is therefore not allowed access.
The browser will allow cross-origin requests like this to succeed, but only if the server the request is being made to explicitly allows requests from that origin (or from all origins) using an appropriate header.
If we are developing an Ionic application on a desktop, then the origin in the browser will be:
http://localhost:8100
Since our requests would be coming from the localhost origin, then any server we are trying to request resources from would need to allow that origin.
If we were using Ionic and their web view plugin to run the application on a device, then the origin would also be localhost because Ionic spins up a local web server to serve content on the device
If you are just using the standard Cordova web view then assets will be served from the file:// origin.
If you’re not too sure about what origin your application is running on it doesn’t really matter, because the Access-Control-Allow-Origin error will soon tell you if you’re wrong!
The Solution for CORS Issues
The best way to deal with CORS is to abide by the rules of the browser and implement CORS correctly. That means enabling CORS on the server you are making a request to.
The reason not enabling CORS is an issue is because the server you are making a request to is saying “No, I don’t give permission for external domains to access my resources” in the eyes of the browser. The solution then is to modify your server so that it instead says “Yes, external domains are free to use my resources” or “Yes, it is OK for coolfishieswithhats.com to access my resources”.
Exactly how you enable CORS depends on your server. In general, you need to add a header to the server response that looks like this:
Access-Control-Allow-Origin: *
NOTE: This will allow access to all origins, but you can also just allow specific origins if you want.
But, the way in which you add headers will depend on what server-side technologies you are using. If you are not sure how to add the header, I would recommend taking a look at enable-cors.org. This is a fantastic resource that contains just about everything you would ever need to know about CORS, and also has a lot of example implementations for various server-side technologies.
Ultimately, the best way to deal with CORS is to add the appropriate header to the response from the server. However, you don’t always necessarily have the ability to add this header, perhaps for the following reasons:
You are building a solution for an existing server that a client won’t give you permission to change
You are using a service that does not allow you to modify the CORS settings
You are attempting to pull in resources from somebody else’s server that does not have CORS enabled
As a first step to solving these, I think the “best” solutions are:
Convince the client to make this change
Use a different service that provides the ability to configure CORS correctly
Consider whether you are using this server in an intended manner, and if you are, perhaps suggest that they enable CORS
However, we live in the real world and often we do end up in situations where we can’t always use the “best” solution, which brings me to potential workarounds…
Working Around CORS Issues
As I mentioned, CORS is implemented by browsers, and fortunately for us, there are some ways we can work around that. Again, I’d like to stress that these options should only be used if necessary – the fewer workarounds you use to build your app, the better.
I will list these workarounds in my order of preference from best to worst.
1. Proxy requests through an additional server
Since CORS is implemented by browsers, it won’t stop you making a request from a server you control to the server that does not implement CORS (the communication happening here is server to server, no browser is involved). Therefore, you can proxy a request through your own server to avoid CORS issues. Your application makes a request to your server, your server makes a request for the desired resource, and then your server returns that resource to your application.
Of course, you would need to make sure that your own server responds with the appropriate CORS header!
2. Proxy requests through native code
Similarly to the last solution, since CORS is implemented by browsers we can also avoid it by launching the request from native code on the device. You can do this using the native HTTP plugin in place of your normal HTTP requests.
This proxies the HTTP requests through native code, which completely circumvents CORS just like proxying the request through a server does. There isn’t really much difference to this approach and the previous one.
3. Downgrade to UIWebView (not recommended)
The reason a lot of people suddenly face CORS issues is that they upgrade from UIWebView to WKWebView (perhaps not knowingly). UIWebView is an old web view that is used to display your Ionic applications on iOS. WKWebView is a new web view that performs a lot better than its predecessor. However, UIWebView does not enforce CORS, whereas WKWebView does.
This means that you could downgrade to UIWebView to circumvent any CORS issues completely because UIWebView doesn’t care about CORS. However, this is not a good solution because you are sacrificing the overall performance of your application to fix an issue that can be solved in a better way.
Not a solution for CORS issues…
As well as all of the potential solutions for CORS issues that I have listed, I also wanted to specifically mention something that is not a solution.
I quite often see people confused who have installed some kind of CORS extension for the browser, or set some specific security flag to disable CORS. During development, this will circumvent CORS issues, but then when they move to production they start facing CORS issues.
These extensions or settings only modify your own browser to ignore CORS, so when other people start using the application, or you use it on a device, those CORS issues will still be present.
The only time using something like this is viable is if the CORS issues are only present for local development and you are trying to work around that. For example, maybe you are launching a PWA which works fine with CORS in production (since it is hosted on your own domain) but during development, you need to make requests from localhost.
Summary
CORS is a major source of frustration for many developers. Although the errors can be somewhat confusing, and the concept seems to be a little intimidating, once you understand the basics it is a reasonably simple concept with a fixed set of possible solutions.
What to watch next...
VIDEO
via joshmorony – Learn Ionic & Build Mobile Apps with Web Tech https://ift.tt/2N8BMRC
0 notes