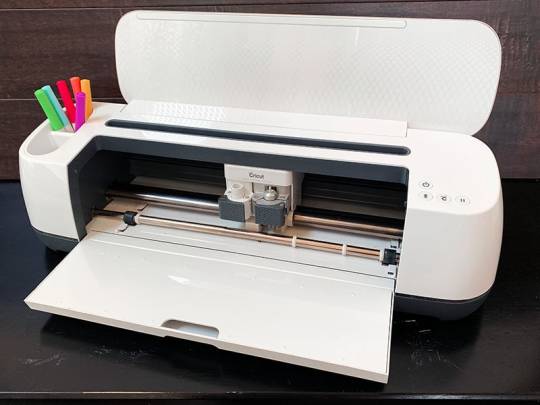
#How to Use Cricut Infusible Ink Pens
Text
How to Use a Pen on Cricut: A Beginner’s Guide
If you are a Cricut user, then you know that Cricut is a brand that offers crafting machines capable of making a variety of projects using different materials. But did you know that you can now create DIY projects using Cricut pens without cutting any design? Yes, it is possible! Cricut provides many pens and markers in different colors for beautiful crafts. To make projects involving pens, you must know how to use a pen on Cricut.
If you do not know what a Cricut pen is or how to use it, don’t worry. This blog will explain everything related to a pen. To learn all about these pens and how to use them, just read the blog!
What Is a Cricut Pen?
Before we find out how to use a pen on Cricut, we should know what a Cricut pen is. Cricut pens are specially designed to work with Cricut machines to write on various materials. Using this pen, you can make banners, greeting cards, bookmarks, labels, notes, and more.
With Cricut models like Maker, Venture, and Explore, you can use special-sized pens that you can fit into the machine’s pen holder. However, if you want to use a pen with Cricut Joy, you will need to buy a separate pen, which will not work with other Cricut machines. The Cricut Joy is a small machine, so any regular pen will not work with it. You will have to get a pen that is specially made for Cricut Joy.
Types of Cricut Pens
Cricut has a variety of pens, and you can use one of them depending on the project you are making. I am writing about all of them. Here, you will learn about these pens and which one is suitable for your project. It is important to know about pens before learning how to use a pen on Cricut.
Pens
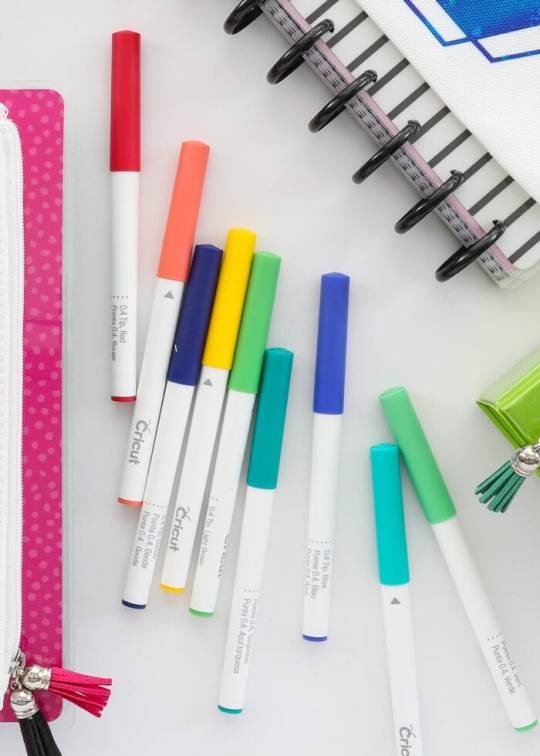
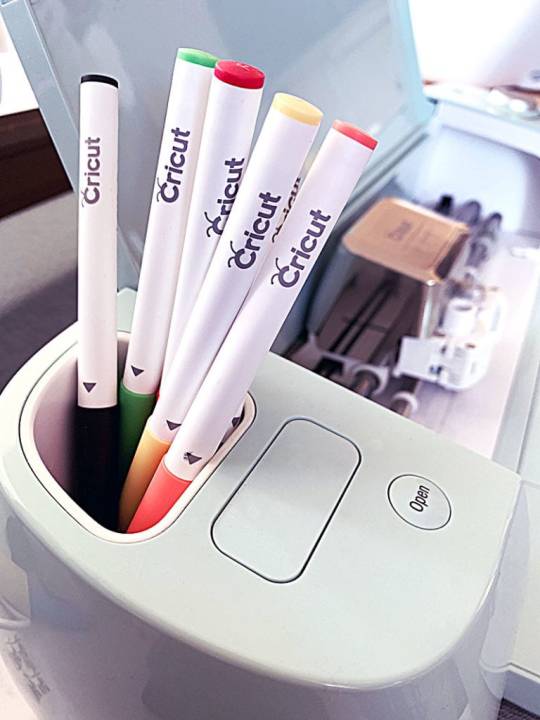
Most Cricut writing projects are made with Cricut pens. You can insert the pen into the machine clamp, which is good for writing. These pens come in a wide variety of thicknesses, colors, sheens, and weights. They have fun color combinations. These pens include fine-point pens, extra fine-point pens, and normal pens. Their thickness ranges from 0.3 to 0.8 mm.
Markers
When you need to write on projects that require thick writing, you can use markers instead of pens. Its thickness ranges from 0.6 mm to 1.0 mm.
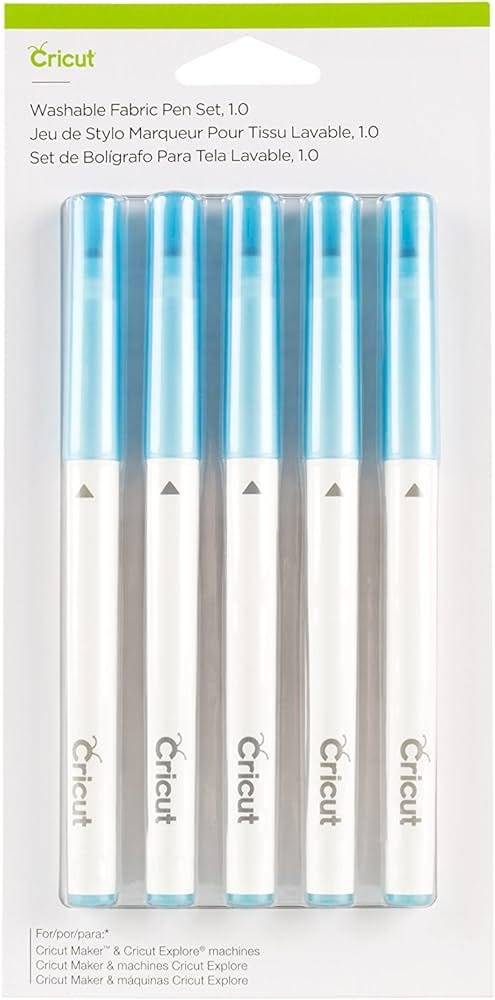
Fabric Pens
This pen is specially created to draw on clothes. You can fit the pen into clamp A just like any other pen and start drawing. You can use the Cricut Maker/Explore machines to draw.
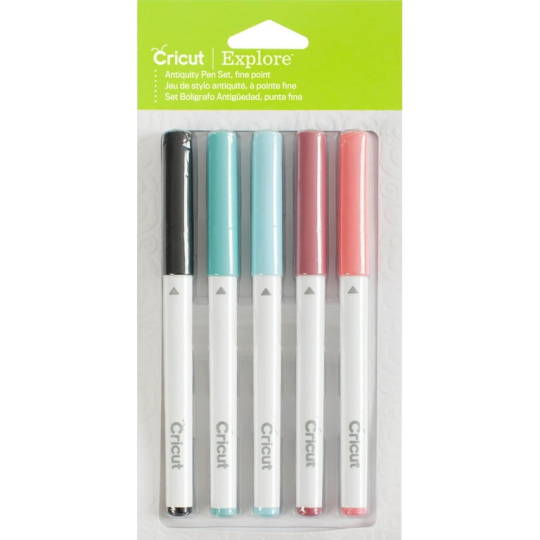
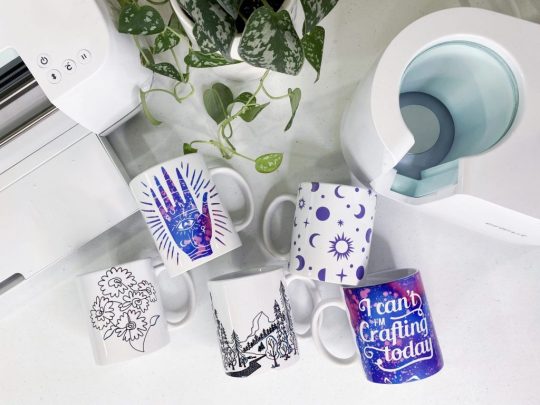
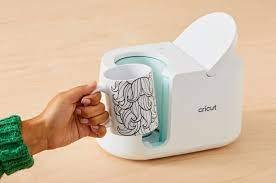
Infusible Ink Pens
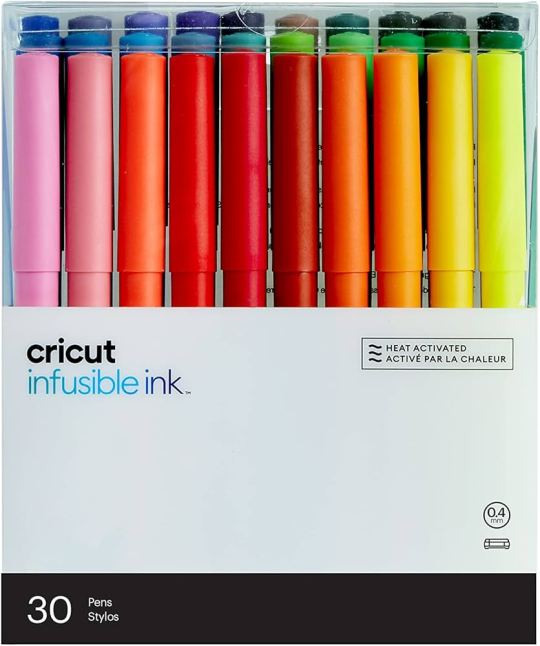
If you want to draw on your sublimation projects, you can use infusible ink pens. It will draw on the infusible ink sheet, and you can transfer it to a mug or coaster project using a heat press machine. Remember, do not use this ink with non-sublimation projects.
Free Hand Markers
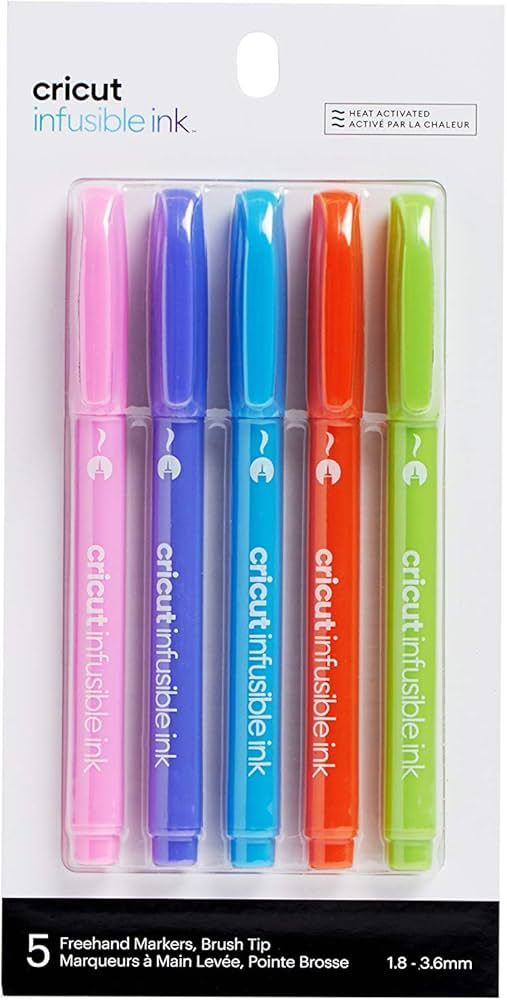
These are markers that do not fit in a Cricut machine. If you want to use it, color the design by hand.
How to Use a Pen on Cricut: 3 Easy Instructions
Now you know all you need to know before you go on to learn how to use a Criuct pen. Let’s learn how you can actually use a pen on your project.
Step 1: Insert a Pen into Your Cricut Machine
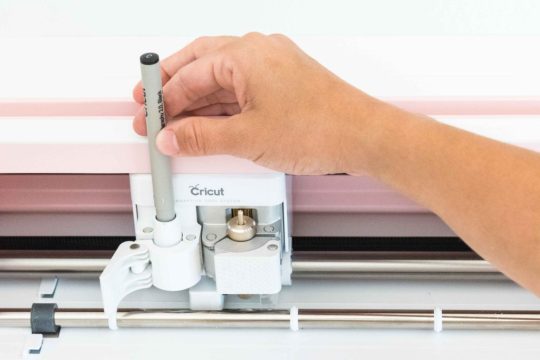
To install the pen, you have to turn the machine on and then open clamp A of your Cricut cutting machine, which is located on the left side. Once the clamp opens, you have to remove the pen cap and press it into the camp. When it reaches its limit, you will hear or feel a click. It means that the pen is well installed. Now, you close the camp.
Step 2: Choose a Design or Font
Before using a pen on your Cricut machine, you should first choose or create a design using the Design Space software. Cricut has thousands of ready-made designs, fonts, and images. You can select any one of them and draw on your machine. If you want, you can also create a design on your own. You also have an option to upload an image from the internet.
Step 3: Draw Your Design
After that, you can draw the design using your material. You must put the material inside the Cricut Maker, Explore, or Venture machine. Once the material is loaded, you can start drawing the design on it, and when it is done, you can unload the material. Your project is now ready.
Conclusion
In conclusion, you have to know that you have learned here how to use a pen on Cricut, and now you can easily create projects with the help of pens. Cricut has various pens, and you can use any that fit the needs of your project. To use a pen on your Cricut machine, you should choose a design that you will draw using your material. Once the design is ready, you can install the pen into the machine and draw the design on it.
Frequently Asked Questions
How Can I Install Cricut Pen?
To draw any image or font on a Cricut machine, you will need to install a pen. You can install it in a few steps. Here is how you can do it.
First, pick a pen suitable for your project.
Then, open the clamp A of your machine.
Next, insert the pen inside the clamp and close the camp
Now, the pen is installed. You can start crafting.
What Can I Make from a Cricut Pen?
A Cricut pen is a tool that can be used for multiple projects. You can create beautiful bookmarks, cards, invitations, coasters, t-shirts, and so much more. If it is someone’s birthday and you want to make banners, you can use a Cricut machine for it. Apart from these, you can make cute doodles, stickers, and labels using these pens. You can use these projects for your home decor, or you can also give them to someone you love.
Can I Write on Fabric with a Cricut Pen?
Yes definitely! Cricut has a fabric pen specifically designed for fabrics. You can use the pen with the Cricut machine and draw any design on the fabric. To use the fabric pen, you must first select a design on the Cricut Design Space app and then install the pen on your cutting machine. After that, load the fabric onto the machine and draw your design on it.
0 notes
Text
How to Setup Cricut Maker 3: Full Guide for Beginners
Are you a beginner looking to start with a Cricut machine? Are you wondering how to setup Cricut Maker 3? If yes, then you have reached the right place. As a longtime Cricut user, I have been using the Cricut Maker 3 machine really well. Here, I am going to provide all the necessary details and tutorials to guide you in setting up your own Cricut cutting machine.
The Cricut Maker 3 is a third-generation crafting machine and one of the latest models. It is known for its power and is capable of cutting over 300 different materials, such as paper, cardstock, leather, plastic, fabric, vinyl, iron-on vinyl, metal, and more. To begin setting up, you have first to unbox the machine and then follow the steps below.
Unboxing the Cricut Maker 3 Product
As a beginner, after buying the machine to learn how to setup Cricut Maker 3, the first thing you have to do is unbox it, check for the items, and make sure nothing is missing. Once checked, you can prepare it for the setup. When you buy the Cricut machine, these are the tools and supplies you will get in the box. You should keep them all in a good place so nothing gets lost and you can find them easily when you need them to use.
Note: When you buy the machine, you should know one thing: a few items will not be in the box. Cricut used to provide these materials in the previous ones. These tools are a mat, pen, rotary blade, and others. While using the Cricut Maker 3 machine, you will have to know what extra tools you will need, and you will have to buy those things separately.
How to Setup Cricut Maker 3 to Get Started Easily?
Once you have unboxed, you can proceed to see the setup you have to do. The process for the Cricut product is as follows. You will need to do it properly and in the right order. The machine setup will be done, and you will be able to work on it.
How to Connect Cricut Maker 3 to Your Computer?
In order to learn how to setup Cricut Maker 3, the next step is that you have to connect the Cricut machine to your computer, you can use wireless Bluetooth or a wired USB cable connection for pairing. The process for connecting your Cricut to your desktop via Bluetooth is here.
How to Download Cricut Design Space?
Moving forward in learning how to setup Cricut Maker 3, now you have to download the Cricut Design Space app on your computer. You may find it a little difficult if you are doing it, but trust me, it is very easy, and here is how you can do it.
Conclusion
In short, learning how to setup Cricut Maker 3 is an easy task, but you should have the proper guidelines for it. In this blog, I have given you all the details you need for your Cricut Maker 3 setup. The first thing you have to do is unbox the machine and prepare for the setup. Once the machine is prepared, you should connect it to your computer. The final step in the setup is to download the Cricut Design Space app. Once you have downloaded and logged in with an account, you can start working on projects.
FAQs
Can I Make Stickers With Cricut Maker 3?
Yes, you can! Cricut Maker 3 is a versatile tool that can cut all the materials you can on a Cricut machine. It is a powerful machine; you can even cut materials like metal and leather. To make stickers, you need to cut papers or cardstock on the Cricut machine. The Cricut Maker 3 can easily cut these materials, allowing you to make stickers.
Can I Use Ink With My Cricut Maker 3?
Yes, for sure! Infusible ink is a material that you can cut on the Cricut machine, and then you can use that design on a mug to make a unique design with the help of the Cricut Mug Press. Infusible ink can be cut on any Cricut machine. Even the older models cut the design to the infusible. If you want to use the ink with the Cricut Maker 3, you can do it without any problem.
What Software Is Good for Cricut Maker 3?
Cricut has two software applications, both compatible with all Cricut machines. The first is the Cricut Design Space app, which is free. You can download this app on your device, connect it to the Cricut Maker 3, and use it just like any other Cricut machine. The other app, Cricut Access, is also available for the Maker 3 machine. However, it is a premium app and requires a subscription.
Visit: cricut.com/setup
Source: https://cricricutdesigncut.wordpress.com/2024/07/20/how-to-setup-cricut-maker-3-full-guide-for-beginners/
#design space setup#cricut.com/setup explore air 2 setup#cricut.com/setup#cricut venture#cricut easy press#cricut design space#cricut new machine setup#cricut setup#www.cricut.com/seup#digital design#www.cricut.com/setup login#setup cricut design space setup#cricut design space setupp#cricut design space login#design space cricut#design.cricut.com#design.cricut.com/setup
0 notes
Text
How to Use Cricut Infusible Ink: A Comprehensive Guide
Eager to learn about infusible ink and create a project with it? Here, you’ll get it all in detail. I’ve been using Cricut machines for the last five years, and there is nothing left that I haven’t used to date. I also started as a beginner, but soon, I experimented with many Cricut accessories. Today, you’ll learn how to use Cricut infusible ink to make a personalized T-shirt. You’ll get a step-by-step guide to learning how to use infusible ink.
Before I move on to the final steps, I would like to share with you something that you need to know about Cricut infusible ink, like what it is, how it works, and how you can best utilize it to create your projects. Let’s get started!
What You Need to Know about Cricut Infusible Ink?
I know creating a new project seems exciting, but at the same time, the chances of silly mistakes increase, too. It’s always better to learn before you start. Infusible ink is a different type of ink used for creating professional-looking projects using a range of materials. You might have used iron-on vinyl or HTV, which are usually applied over the surface or your material and then peeled off, leaving the design.
However, there is a different case with infusible ink. This ink works on the sublimation principle and fuses with your material without leaving any residue. Thus, it gives you a typical printing look but with ink. To make an infusible ink project, you’ll need to use infusible ink sheets and infusible ink pens.
How to Use Cricut Infusible Ink to Make a Shirt?
You know what infusible ink is and how it works. It’s way better than the vinyl projects and leaves a permanent design on your material. Get ready to learn how to use infusible ink transfer sheets on shirts and create customized T-shirts.
Step 1: Select an Infusible Ink Material and Apparel
You have two options: Either you can cut your designs onto an infusible ink transfer sheet or draw the designs using your infusible ink pens and markers. In this guide, you’ll learn to cut and apply your infusible ink transfer materials to your final project. Note that I’m not teaching you how to use the infusible ink and markers here. So, if your main focus is on them, I’ll recommend you move on to another tutorial. Here, we go with the other steps to learn how to use Cricut infusible ink.
Step 2: Draw a Design in Cricut Design Space
This step includes making a desirable design using special software from Cricut. I’m mentioning a few steps here that you can go through to understand how you can use this software.
Step 3: Cut Your Infusible Ink Transfer Sheets
It’s time to use an infusible ink transfer sheet to cut it. To proceed, use these steps:
That’s how you’ll finish the cutting process. Let’s continue learning how to use Cricut infusible ink transfer sheets.
Step 4: Get Ready With Your Materials
In this step, you’ll have to use a Cricut EasyPress to transfer the design onto your shirt. Follow the steps below to learn how to apply the transfer sheet.
Step 5: Preheat Your Blank
The first step to transfer your project to your blank is to preheat it as per the instructions in the Cricut Heat Guide. This process will remove the wrinkles and moisture from the blank and won’t interfere with the design transfer.
After that, take off your heat press from the apparel and also remove the butcher paper. Allow your blank to cool. Don’t be in a rush, and let your blank space fully cool down.
Step 6: Transfer the Infusible Ink
In this step, you need to put your cut design on the apparel. Make sure that the shiny side is facing down. Then, follow the steps mentioned here.
Finally, your customized shirt is ready. One more thing I want to suggest to you is that you can also use a pair of tweezers to lift the transfer sheet from your apparel. It will safely remove the material.
Conclusion
Hopefully, you’ve learned how to use Cricut infusible ink to create a customized shirt. The whole process is easy, and even beginners can perform it very well. Moreover, there are some tips and tricks that are useful while creating your project with the Cricut machine. For instance, always remember to mirror your design. Plus, always preheat your blank before applying the heat properly. The most important part is not to forget to weed off your cut design before using it for the final project.
Visit: install cricut design space app
www.cricut.com setup login
cricut create connect to computer
cricut setup create account
Source: https://desincricut.wordpress.com/2024/04/30/how-to-use-cricut-infusible-ink-a-comprehensive-guide/
#install cricut design space#install cricut design space app#install cricut explore air 2#cricut install setup#cricut.com/setup#www.cricut.com setup login#cricut setup create account#cricut create connect to computer#cricut setup on computer#cricut setup#cricut setup maker#cricut setup log in#cricut.com setup mac
0 notes
Text
8 Best Cricut Pens to Enhance Your DIY Projects
To complete any project, all crafters must have the best Cricut pens. That crafting item will help you give a personal touch as it will highlight every aspect of the project. Being an experienced crafter, this crafting tool plays the same role as others, creating projects that look more attractive and eye-catching.
To brush up on the creator's skills, the company keeps launching new pens with several features that make them unique. They have these crafting supplies for every task, whether writing or drawing. Apart from that, their Cricut pens are compatible with all craft plotters and work on all kinds of fabrics.
Want to learn more about this crafting time? Then you should probably check this guide, as it will help you see new models.
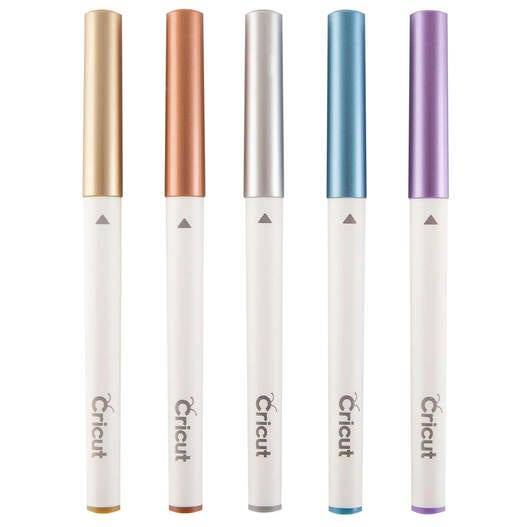
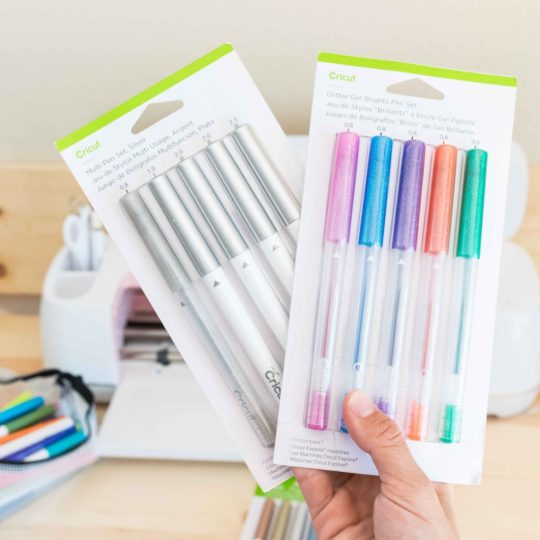
1. Pen Set, Metallic (5 ct.)
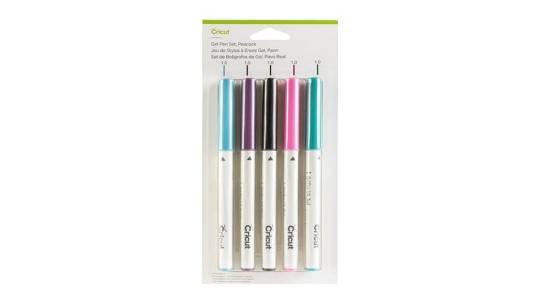
2. Gel Pen Set, Peacock (5 ct.)
3. Opaque Gel Pens 1.0 mm
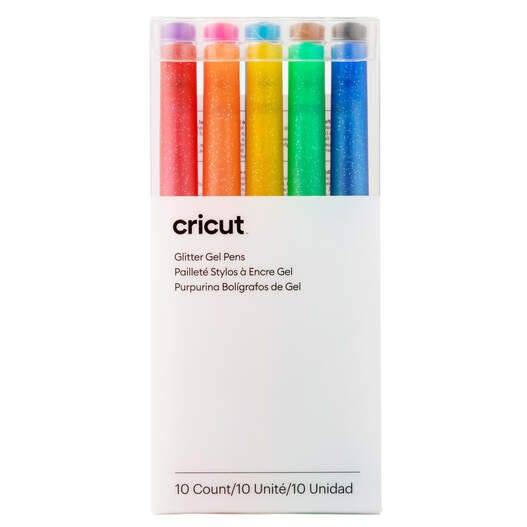
4. Glitter Gel Pen 0.8 mm, Rainbow (10 ct.)
5. Washable Fabric Pen Set
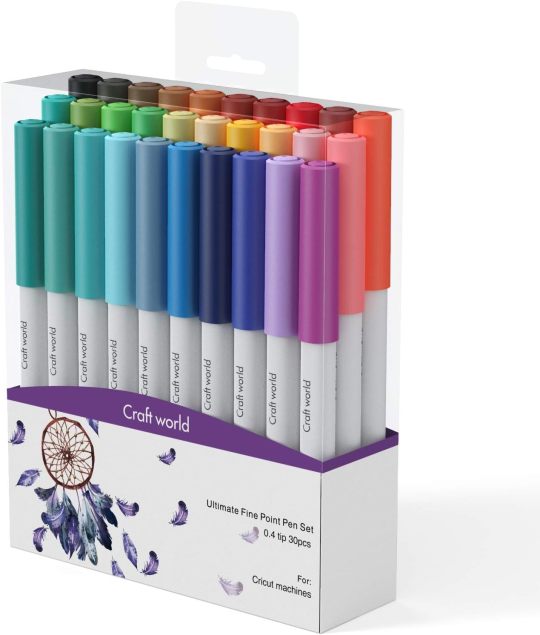
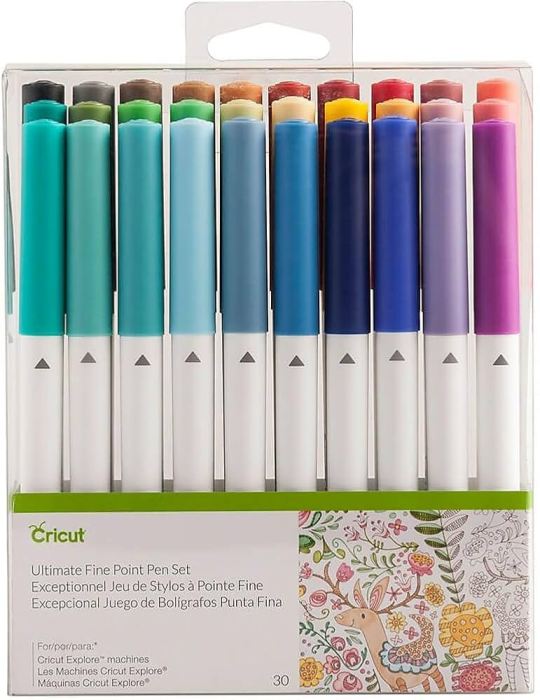
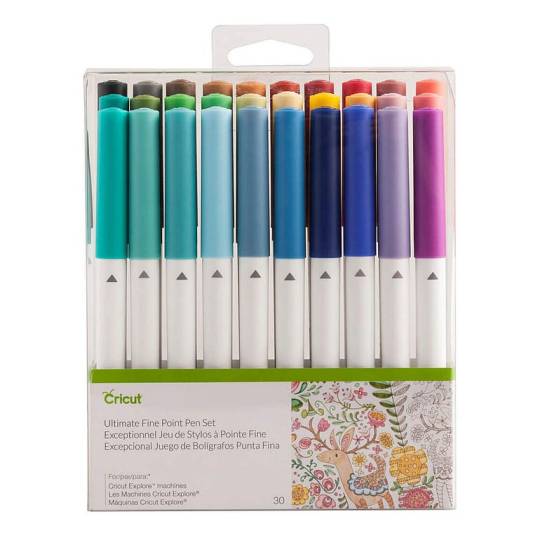
6. Ultimate Fine Point Pen Set (30 ct.)
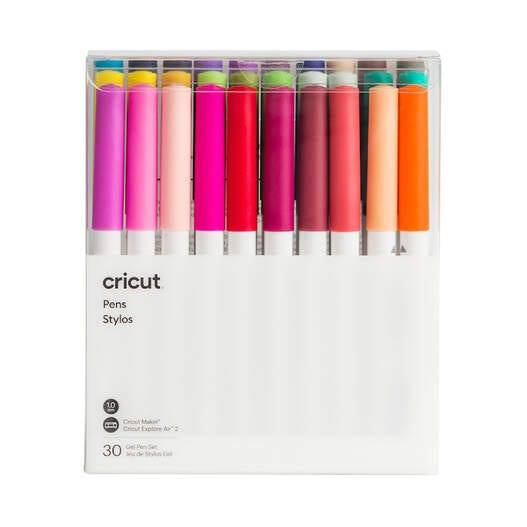
7. Ultimate Gel Pen Set (30 ct)
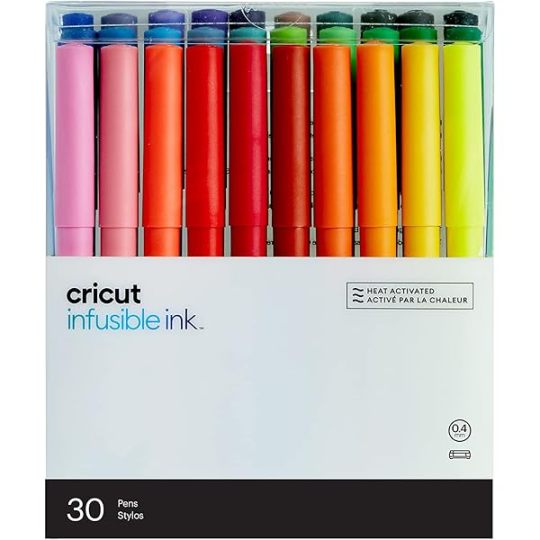
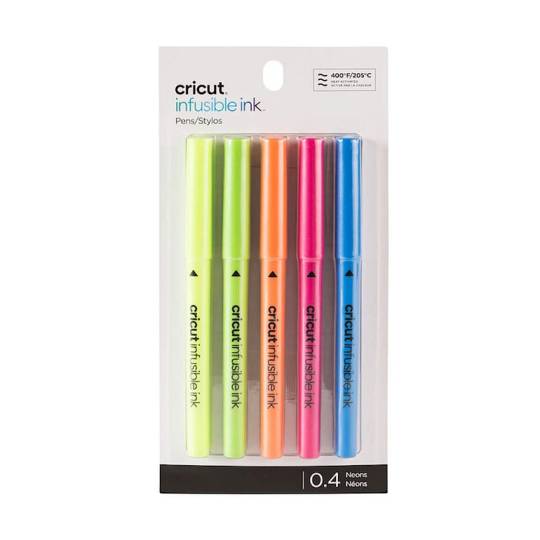
8. Infusible Ink Pens (0.4), Neons (5 ct.)
It was fun to learn something new about one of the crafting supplies as it will help you make the DIY craft more fun and easy. However, you will decide which model to use while making any craft. Moreover, you should also choose the correct one among the best Cricut pens list.
Frequently Asked Questions
Question: How Do I Insert a Pen Inside My Cricut Machine Clamp?
Answer: Go through the process and learn about inserting a pen inside the Cricut clamp:
1. Unlock the clamp by pushing it upwards and then remove the pen cap.
2. After that, slowly insert the pen and ensure it is placed correctly inside the clamp.
3. Lock the clamp and start your cutting machine for designing and writing purposes.
Question: How Should I Store My Cricut Pens?
Answer: Follow these tricks to store the pens and to increase the Cricut pen’s life: 1. Cover the pen with its cap and keep it upside down after using it.
2. After that, store it inside the organizer in the correct position without forcing it.
3. Don't mix the pen with sharp items; otherwise, it will damage the outer side.
Question: How do you use Cricut Pens on Pillow Cover Blanks?
Answer: Follow the steps and make the design with the best Cricut pens on pillow cover blanks:
First, draw your design on Cricut Design Space and cut it with the cutting machine.
2. Second, prepare the blank by setting the temperature and timing and applying the design on the blank.
3. Third, cover the design with butcher paper, and when the heating is complete, enjoy your fully-designed pillow cover.
Source: Best Cricut pens
Visit here for more Information: cricut.com/setup
Cricut maker 3 vs explore 3
design space Cricut
#best Cricut pens#cricut.com/setup#cricut explore 3#download cricut design space#design space cricut#2024
0 notes
Text
How to Use Infusible Ink Pens With Cricut: A Complete Guide
Cricut infusible ink pens and markers are just awesome. I use them to create my iron-on projects like custom T-shirts for myself and my sweet little child. Well, you can make multiple things with these Cricut products. It’s very easy to use and gives a well-finished project in the end. Its color never fades and always provides shiny, vibrant, and colorful crafts. If you are also a crafter and want to learn how to use infusible ink pens with Cricut, then stay with me till the end of this blog to learn in depth.
I have done dozens of iron-on projects with my tiny Cricut Joy machine and infusible ink. The ink is so permanent that it won’t fade after washing. I am really excited to share my way of using infusible ink pens and creating lovely projects.
In this blog, you will get everything about Cricut’s infusible products, like how to use them, what type of projects you can make with them, and even some of my tips. So, let’s get started to learn everything.
What Are Infusible Ink Pens and Markers?
Basically, Cricut’s infusible ink pens and markers are simple pens with infusible ink intended to make various heat projects such as designing aT-shirt, tote bag, or any apparel where ink is necessary.
These products can be easily loaded into the clamp of your Cricut machine and draw your favorite designs. You can draw it with your hands, too.
How Do Cricut Infusible Ink Products Work?
Before learning how to use infusible ink pens with Cricut, you should know how it works. Infusible ink works on the principle of sublimation. It sounds a bit complex, but it’s so simple. When you use the infusible ink or marker on a paper, it’s in a solid state, which is its original state.
But, the moment you apply heat to it, it gets transformed into gas. During this process, it infuses your material, and when you remove the heat, it cools down again. And then, after cooling, it will again become solid.
One thing to note here is that these products only work on specific materials, such as poly-based materials, polyester fabric, coasters, and mugs with a poly-coated ceramic coating.
So, if you want to make such projects, Cricut infusible ink pens and markers will be a must-have. Luckily, these amazing accessories are compatible with all types of Cricut machines, including Cricut Maker, Explore, and Cricut Joy.
How to Use Infusible Ink Pens With Cricut Machine?
Here comes the final part of the blog, which I was excited about. You already understand why we use it. And now, you are going to learn the exact procedure through the steps that I am sharing with you now. Before moving to the final steps, let’s see the materials you will need while making your project.
Step 1: Tools and Supplies Required
Here are some of the essential materials and tools you will need for your project.
When you are done with all the materials, it’s time to start the project. So, let’s start the step-by-step guide and learn how to use infusible ink pens with Cricut.
Step 2: Create Your Design
In the first step, you need to put a sheet of laser copy on your cutting mat and then put it into the Cricut machine.
Now, move to your Design Space and choose the size of your design to fit onto your blank. After that, adjust your Linetype to draw and select a Cricut infusible pen or marker. Don’t forget to mirror the design before the cutting procedure.
Step 3: Load Infusible Ink Pens
Now, select your material. In the case of an older Cricut machine, set the Smart Set Dial to Custom. Once done, put your infusible Cricut pen or marker into Clamp A and then hit the Go button to load different colors.
Step 4: Unload the Cricut Cutting Mat
When your design is ready, you can unload your mat and then take out the design from the mat.
When your design is ready, you are ready to apply heat to your apparel using the Cricut EasyPress mat. To get started, first place the sheet of cardstock inside your apparel blank to keep it protected from wrinkles and damage.
Moreover, use a fresh and clean lint roller to remove the lint from the surface of your apparel blank. It will also remove the fiber particles to create a perfect apparel for heat transfer.
Step 5: Preheat Your T-shirt
Then, cover your apparel with the butcher paper. In the next step, you need to preheat your apparel to remove unwanted moisture from it. Also, you need to check the Cricut Heat Guide from time to time to follow the instructions correctly. Apply the heat with a light pressure.
After that, take off the butcher paper and let the apparel cool down. Now, put the design pieces on your apparel facing down. Then, apply the tape on each corner of your design with a Heat Resistant Tape, which will keep your design free from moving.
Step 6: Apply Heat to the Design
Next, put the butcher paper on top of your design. Afterward, select the correct temperature and time settings for your project from the Cricut Heat Guide. Once set, apply heat with the optimum pressure, and when you hear a beep sound, lift away the press and slowly remove the butcher paper.
In the end, let your project cool completely and enjoy it. Finally, you learned how to use infusible ink pens with Cricut, and hopefully, you will try it on your own.
Conclusion
The process was extremely easy, wasn’t it? All you need to do is to gather some accessories and get started with the project. I used an example of a T-shirt, but you can make use of any apparel like a tote bag or anything where ink pens can be used. You can make beautiful creations with your Cricut infusible ink pens and an EasyPress machine. So, get ready to create something and use the Design Space software to make things beautiful and unique.
Visit: cricut.com/setup
design.cricut.com/setup
install cricut design space app
cricut.com setup mac
www.cricut.com/setup login
Source: https://cricuthelp.wordpress.com/2024/02/21/how-to-use-infusible-ink-pens-with-cricut-a-complete-guide/
#cricut.com/setup#www.cricut.com/setup login#www.cricut.com/setup#cricut design space download#cricut project ideas#cricut explore air 2#cricut software app#cricut new machine setup#install cricut design space app#install cricut explore air 2#cricut new product setup#setting up your cricut maker#cricut create connect to computer
0 notes
Text
A Complete Guide on Cricut Pens for Beginners 2024

Are you looking for an accessory that can make your DIY craft come to life? If yes! Then Cricut pens are the ultimate answer. When I first bought my Cricut machine setup, I needed to learn more about its writing function. But as time passes by, I always find an excuse to use them to design new things. Yesterday, my parents celebrated their 25th wedding anniversary, and being a craft lover, I was responsible for creating all the decorations from the entrance to the main hall.
Ever since the party came to an end, everyone has been asking about how I made such fabulous projects on my own. Undoubtedly, all credit goes to my Cricut machine and pen. They helped me create projects such as banners, cards, doodles, and many more. In this blog, I explain everything about these Cricut supplies and projects.
What Are the Different Types of Cricut Pens?
Ever since its formation, the company has developed a variety of Cricut supplies that are beneficial for them while drawing or writing on the material. With an aim to expand the lifeline of this item, store this product with a cap in a downward position. One of the good news that I am going to share with you is that Cricut Maker, Explore, and Joy are compatible with all kinds of Cricut pens. These craft machine items are available in various models, allowing you to be more creative:
1. Opaque Gel Pens 1.0 mm
Beginning with opaque gel pens, they pop clearly on the darkest and light materials. With the help of this cutting machine product, it will be easy to include an embellishment on any card, paper craft, or decor. Also, these Cricut supplies are water-proof, non-toxic, acid-free, and permanent after getting dried up. Inside the pack, you will find five different colors, i.e. Pink, White, Orange, Blue & Yellow. Plus, these craft machine supplies are compatible with Cricut Maker & Explore machines.
2. Glitter Gel Pens 0.8 mm
Further referring to this specific Cricut supply, don’t leave the chance to add a special touch to your project with these glitter gel pens. Its eye-catching sparkle and silky gel will surely enhance each part of your project, making it look more attractive and praiseworthy. Also, these craft plotter items are water-based, acid-free, and non-toxic. The pack contains Blue, Red, Orange, Yellow, Green, Purple, Light Blue, Brown, and Black.
3. Pen Set, Metallic (5 ct.)
Equally important, this Cricut supply also includes a Metallic pen set with the Cricut pens in five different colors. These craft machine items are acid-free, non-toxic, and get permanent after getting dried up. Also, they are used for making invitations, banners, cards, gift tags and many more. Other than that, the set includes Gold, Silver, Copper, Blue, and Violet. Plus, this set is compatible with Cricut Maker, Explore & Venture cutting machines.
4. Infusible Ink Pens 0.4, Ultimate (30ct)
Last but not least, watch your design getting into vibrant, permanent, and pro-quality transfers on any Infusible Ink blank. Get a chance to draw and write on the material while making any project. This craft machine pen set is available in a variety of colors that give bright, beautiful, and seamless smooth transfers without any wrinkles. Finally, these items are acid-free, water-based, and aren’t safe for the skin.
Since you’ve learned about the types of cutting machine supplies, let’s begin by making you come across the process by which you can utilize this smart cutting machine accessory.
How to Use Cricut Pens for Making a Custom Project?
If you are a proud owner of a Cricut machine along with other tools and supplies, then this part is going to be beneficial for you. Here, you will get a chance to learn how to create a customized project with these supplies.
Step 1: Draw a Design on the Cricut App
Start the process by going to Cricut Design Space canvas and tick the Upload option. Next, tick the Upload Image and upload an image from your system gallery. After choosing an image, tick the Open and then Upload option. Following this, select your image from the Recently Uploads section.
After choosing the image, tick the Add to Canvas and change Operation from Basic Cut to Pen. Following this, select Ungroup, and you will be able to do your work separately on each layer. Now, click on the top layer and choose the color and pen or marker you want to use during the process. After adding all the colors to the design, select the whole design and tick the Attach option given at the bottom of the Layers panel.
Afterward, unlock your design dimensions and change the height and width appearing at the top of the screen. Also, tick the Make It option and change the material size from the drop-box.
Step 2: Apply the Material on Your Cricut Mat
With the completion of creating design on the Cricut app, open your card and hold it face upward with the crease running vertically and the front panel at the right. Following this, place the material on your cutting mat and go back to the mat preview mat. Now, move your design into the center and hit the Continue option.
Equally important, choose your Cricut material and then load compatible tools from the Cricut pens list. In addition, unlock your machine clamp and start your cutting machine by pressing the blinking Arrow button.
Step 3: Remove the Mat and Share Your Design
In the last step of making a customized card with this Cricut supply, roll out the card from the mat using the spatula tool. Apart from that, flip over the cutting mat and remove the card mat with your hands. Conclude the process of designing a DIY card by folding the existing crease with your fingers or with your Cricut scoring stylus. Finally, your first personalized greeting card is all done.
By paying special towards this smart cutting machine supply, you can now make plenty of customized projects with your Cricut machine. Besides, you can also sell or start your business by designing and selling various crafts made out of your craft machine.
Frequently Asked Questions
How to Load Pen Into Cricut Machine?
Go through the process and load your pen into your craft machine:
First, unbox your Cricut machine and unlock Clamp A of your machine.
Next, remove your pen cap and slide it downward into the clamp.
When you hear a slight click, it will indicate that your Cricut item has been loaded into the machine.
Can I Use Non-Cricut Pens While Making Any DIY Projects?
Yes, you can use non-Cricut pens while creating any project without any type of issues. To do that, you need to open the Cricut app and select a similar pen or marker. On the other hand, you need to ensure that the cricut item you are using is compatible with your craft machine or not. Also, don’t force the pen to insert the pen into the clamp before starting the drawing process.
Can I Draw Directly on My Projects With Cricut Infusible Ink & Pens?
Nope, it’s impossible to draw the design directly on the compatible materials. For the perfect design, all the users must transfer the design made via an Infusible Ink pen with a heat transfer process. These Cricut pens are heat-resistant and can handle the pressure upto 400*F and get permanent on the compatible blank once they are dried up.
For more information visit: Cricut.com/setup autopress
cricut.com/register
set up cricut easypress 3
cricut heat press guide
Source: Cricut Pens
1 note
·
View note
Text
How to Make Coasters With Cricut? [Step-by-Step Guide]
Making coasters with Cricut machines is easy and fun. Anyone with a bit of crafting knowledge or passion can create premium-quality coasters. However, the process seems complex for some crafters, especially if they are beginners. If you also want to know how to make coasters with Cricut, then don’t worry cause I have got your back. I will help you complete your first coaster project by sharing my years of crafting skills. Thus, stay tuned to this blog till the end and get every vital info you need to know to create coasters.
What Do You Need to Make a Coaster With Cricut?
Let’s take a look at what you need before you learn how to make coasters with Cricut.
Any Cricut cutting machine
Cricut Design Space on your computer/smartphone
StandardGrip machine mat
Lint brush
Cricut Heat Guide
Cricut EasyPress or Cricut EasyPress 2
Cricut EasyPress Mat
Heat Resistant Tape
Cricut Ceramic Coaster Blank
White Cardstock, and others.
How to Make Coasters With Cricut?
There are numerous methods to create the coasters with Cricut machines and tools. In the guide below, I am sharing where you can create the coasters with Cricut’s infusible ink transfer sheet. You can use the help of the guide below to create your own design or the same practice first.
Step 1: Create a Design for the Coaster
The process of making coasters with Cricut starts with creating a design first.
For that, open the Cricut software and then access a fresh canvas.
After that, add the preferred image from the app image library or upload your image.
Step 2: Edit Your Image in Design Space
For this project, I am going to first select the text “Crafting is my happy place” and click on the Weld option. (For your project, you have to select the text/image you have selected)
Next, I am going to resize the text in the pink space and then click on the Slice option after selecting both images. (The Slice option is located next to Weld)
After slicing the design, you will see a couple of extra layers known as “Slice Results.”
Now, you need to keep the design that appears like the below image.

After that, you have to resize the design so it perfectly fits the coaster.
Step 3: Prepare Your Design for the Cutting Process
Once the design resizing is complete, click on the Make It option to get the mat preview and then select Continue.
If you are working with the Infusible Ink, either pens or transfer sheets, you have to “Mirror” the image.
After that, you have to click on “Browse All Materials” and select the option of “Infusible Ink Transfer Sheets.“

Step 4: Cut the Design With a Cricut Machine
Before you start to work with the transfer sheet, you have to clear your hands.
Also, keep the sheet away from the moisture.
Now, take the infusible ink transfer sheet and then place it on the green mat.
I would suggest using the scraper to smooth the sheet on the mat.
After that, load the mat on the Cricut machine you are using for cutting the design.
When the cut is complete, unload the mat and remove excessive parts from the design. (You can use the Cricut weeding tool if you want.)

Step 5: Apply Your Design on a Coaster
Take the Cricut EasyPress design at 400°F and set the timer for the 60s.
Clear off the dust from the coaster using the microfiber cloth.

Keep the coaster on a mat, then save the design material and use butcher paper.
After that, apply the heat on a coaster with the help of your EasyPress machine.
Now, your coaster design project will be complete.

Frequently Asked Questions
Q.1 What Are the Essential Supplies to Make a Cricut Coaster?
Here are the tools you must have to create the coaster with the Cricut machine. You must gather all the tools before you start the project.
● Cricut cutting machine
● Printer
● Cricut Design Space on your device
● StandardGrip mat
● Cricut Heat App
● Cricut EasyPress or Cricut EasyPress 2
● Cricut EasyPress mat
● Cricut Ceramic Coaster Blank, others.
Q.2 How to Make Coasters With Cricut?
The steps to make the coasters with Cricut machines are as follows.
Open the Cricut app and create a design you want to make a coaster.
After that, edit the design and send it for the cut.
Cut the design by loading the material on the Cricut machine and pressing the Go button.
When the design cut is complete, unload the material from the machine.
And then weed out the extra part from the design.
Lastly, attach the design on the coaster using the EasyPress machine.
Q.3 Which is the Best Cricut Machine for Making Coasters?
For me, all the Cricut machines come with their own features and specialties. However, for making the coasters, my Cricut machines are Cricut Maker 3 or Explore. These machines provide a robust and flawless cutting experience. Also, while using the Explore or Maker machine, I get premium quality results in making coasters.
Source :- https://designaccessoriesmart.com/how-to-make-coasters-with-cricut-step-by-step-guide
0 notes
Text
How to Use a Cricut Mug Press? [A Comprehensive Guide]
Are you curious to learn how to use a Cricut Mug Press? Well, this guide explores everything you need to know about the use of this machine. With this ultimate guide, you will be ready to use the Cricut Mug Press easily without anyone’s help. However, the Cricut Mug Press is a perfect choice for people who want to create a customized mug with pro quality.
This fantastic tool is compatible with markers, pens, and Infusible Ink transfer sheets. You also need a Cricut Design Space to create a design that can be further cut on the Cricut cutting machine. Moreover, you will need different materials, such as HTV and Infusible ink, to get desirable designs on mugs. After that, we will learn the process of using the Mug Press with step-by-step instructions. Let’s dive into it.
Step 1: Supplies You Need to Use Cricut Mug Press
Before learning how to use a Cricut Mug Press, you first need to know the requirements of supplies. These supplies are essential for using the Cricut Mug Press.
A desktop or laptop for setting up your Mug Press.
You can use any Cricut machine (Maker series, Explore series, and Joy).
Cricut Blank Ceramic Mug
Lint Roller
Butcher Paper
EasyPress mat or heat-resistant surface.
Infusible Ink Transfer Sheets and Infusible Ink Markers/Pens.
Oven Glove
Heat Resistant Tape
Laser copy paper
Step 2: Set Up Your Cricut Mug Press
In order to learn how to use a Cricut Mug Press, you must know about the Cricut Mug Press setup.
Follow the steps carefully to set up the Cricut Mug Press:
Insert the power cable into the back of your Cricut Mug Press, followed by a USB cable. Insert one end into your machine and another end into the computer.
Open the Cricut Design Space on your computer or laptop.
Then, select New Product Setup from the right-side menu.
Afterward, select Heat Press, followed by Mug Press.
You can follow the displayed instructions on the screen to download any updates you need.
While following the instructions, you will need to continue the Activate button to activate your Mug Press.
After this, the update will be completed.
Then, you can unplug the USB cable.
Now, your Mug Press is ready to use. Let’s learn how to use a Cricut Mug Press.
Step 3: Use the Cricut Mug Press
The Mug Press is relatively easy to use. After setting up, you can easily create a pro-customized mug. You can choose the design from Cricut Design Space. Always ensure that you choose the design with the exact size that fits your mug.
Once you have selected the designs, start cutting them using your cutting machine. Make sure your design is mirrored before the cut. You can follow the design given below.
After cutting the material, weed the unwanted materials.
Ensure your mug is clean and there is no dust present on it.
Then, place the design around the mug.
Afterward, you have to place the Cricut Mug Press on an easy press mat or any other heat-resistant surface you have.
Press the power button in your Mug Press, and the button will light the green color.
After that, you will hear the beep sound, meaning it is ready to use. However, you don’t need to set any temperature as it is already smart enough to set the temperature automatically.
Then, put the mug into the press.
It will take 6 minutes to sublimate the design onto the mug.
Finally, it will beep when it is done.
Turn off the device and take out the mug using gloves.
Final Words
In short, you should understand that a Mug Press alone can’t help you customize your mug. For this, you need various types of supplies that we have already mentioned in this post. Once you have all these items, you can proceed with the setup process. For this setup, you need a laptop or computer with a Cricut Design Space. When you are done with your setup, your Mug Press will be ready to use. Finally, you can design your mug like a pro!
FAQs
Question 1: How much time does a Cricut Mug Press take to heat up?
Answer: The only time your Mug Press will take to heat up is 5 minutes. After placing your mug into the press, it will take approx 6 minutes to finish it. However, the Mug Press produces a beep sound when it has finished its task. When you finally take out the mug from the press, it takes 15 to 30 minutes to cool down. Therefore, you must be cautious while taking it outside.
Question 2: Do I need a computer to use the Cricut Mug Press?
Answer: Well, you don’t have to rely entirely on a computer to use the Mug Press. Still, a computer is needed when you want to set up or activate your Cricut Mug Press. Also, you can update your firmware using your computer or laptop. All this is done when you connect your computer to your Mug Press via a USB cable.
Question 3: Is a regular mug compatible with the Cricut Mug Press?
Answer: There is no issue using your regular mug until it is made up of ceramic. Other than this, no materials should be used, such as stainless steel, plastic, etc.). Plus, the mug must be coated with sublimation material, which is suitable for your printer’s sublimation ink and Infusible ink. In short, the regular you buy from a local store is not going to work with the Cricut Mug Press.
Visit - Cricut.com/setup
Cricut Design Space Login
Cricut maker setup
Cricut Mug Press
Cricut Maker Machine
#Cricut Maker Machine#Set Up Cricut Machine#Cricut Mug Press#How to Use a Cricut Mug Press?#How to Use a Cricut#How to Set Up Cricut Maker Machine
0 notes
Text
How Does Cricut Mug Press Work? [Beginner's Guide]
Want to design a coffee mug with the help of Cricut Mug Press but don't know - how does Cricut Mug Press work? Don't worry; we will cover everything in this blog. With the setup guide and easy tutorial, you will quickly learn how to use Cricut Mug Press at home. In addition to the Cricut Mug Press, the tool is an electronic press machine that uses heat to transfer infusible or other types of material onto the mug. Plus, it delivers top-notch, professional-looking designs on mugs. So, make sure you purchase the original item from Cricut's official website. By the end of this blog post, you will be able to create your own custom projects with the Cricut Mug Press machine.
What is Cricut Mug Press?
The Cricut Mug Press allows you to create your own personalized mugs with a process called sublimation. This is perfect for people who want to customize a beautiful gift for their loved ones. In addition, you don’t need to spend a huge amount on buying a sublimation printer setup.
The press works perfectly fine with Infusible Ink transfer sheets, markers and pens, making it easy for you to incorporate the designs into the coated sublimation blank mugs. The print offers a professional quality that never peels off or cracks.
How Does Cricut Mug Press Work?
The Cricut Mug Press doesn’t work alone; however, you need various items to make a professional-looking coffee mug. The items you need are a Cricut machine, a Design Space app on your computer, Infusible ink materials and, of course, a Mug Press. With this press, you can easily customize your coffee mug with just one touch. To use this Mug Press, you need to create a design using Cricut Design Studio. Then, with the help of a Cricut cutting device, you have to cut the mirror image. Once you have created the designs using the Cricut Infusible ink materials, fix it to your mug carefully by placing the transfer sheet around the mug.
With this engineered plate design, you can apply the heat on the mug with an optimal amount of pressure and heat. There is only one button given in the press to start the transfer of the design to the mug, making it simple to use. In addition, the LED light will show the progress of your press, and a beep sound will notify the end of the process. The only thing you will need to do is insert and press. That’s it.
Important Note:Always use a Cricut Mug Press in a well-ventilated space area for better results.
How to Activate Cricut Mug Press?
Now, we will learn to activate the new Cricut Mug Press. Anyone who has just bought their new Mug Press must follow the steps given below. However, before activation of the Mug Press, ensure you have a Cricut Mug Press, USB cable, and a compatible Windows or Mac computer.
Once you have all these items, you must also install the Cricut Design Space on your computer.
Follow the steps in the section below to setup the Cricut Mug Press:
Visit cricut.com/setup on a Windows or Mac computer to download Cricut Design Space.
Launch the app and sign in to the Cricut account using your ID and password.
On the next screen, you will see a Cricut Setup page.
Here, click on the Heat Press and then select the Cricut Mug Press option.
Check the firmware and finish the activation by following the on-screen prompts.
Once the Mug Press is activated, you need to hit the Get Started tab.
Conclusion
Through the blog post, you might have got an idea about the process of Cricut Mug Press. For example, how does Cricut Mug Press work and how to activate the same using the software called Design Space? After completion of the activation process, you can start using the machine. However, you need various things, including a computer or mobile device, Cricut Design Space, a Cricut cutting machine, vinyl materials and a blank Cricut mug. Read the blog carefully to understand the working capabilities of Cricut Mug Press and design your coffee mug like a pro.
FAQs
Question 1: How to use Cricut Mug Press with sublimation?
Answer: To learn how to use Mug Press with sublimation, follow the following methods:
Turn on the Mug Press.
Start printing the design you want to use on the mug.
Meanwhile, ensure the surface of the coffee mug is neat and clean.
Wrap the printed transfer around the mug.
Place the mug into the machine. Then, hit the button.
After that, the machine will automatically adjust the temperature and pressure.
The beep sound will let you know that the mug is ready.
Take the mug outside carefully, as it might be a little hot.
Question 2: Do I need a computer to use a Cricut Mug Press?
Answer: You don’t need to use the computer all the time to work on Mug Press. However, if you want to make designs, then you can easily cut the design using the Cricut machine. Besides, you need a computer to activate your machine and update its firmware. That’s the use of a computer with a Mug Press.
Question 3: How Does Cricut Mug Press Work with Design Space?
Answer: You need Design Space only when you want to activate the Mug Press. This is also used to update the firmware of your press. Besides, you can use the Cricut app to design intricate designs and add eye-catching fonts to your coffee mug. Overall, Cricut Mug Press doesn’t use the Design Space as its companion but only for setup.
1 note
·
View note
Text
7 Best Cricut Joy Pens for Making Next-Level DIY Projects

Additionally, the Cricut app will alert the users when the pen needs to be inserted for the project. If you are wondering which one you should buy, then find out by reading this blog. However, you might see any one of the items assisting you in designing the project as per your preference.
1. Cricut Joy Fine Point Pens, 0.4 mm (3 CT)

2. Joy Permanent Markers, 1.0 mm, Black (3 CT)

3. Joy Water Colour & Marker Set (9 CT)

4. Cricut Joy Gel Pens, 1.0 mm (3 CT)

5. Glitter Gen Pens 0.8 mm, Rainbow (10 CT)

6. Cricut Joy Infusible Ink Markers, 1.0

7. Opaque Gel Pens 1.0 mm

Frequently Asked Questions
Question: How to Install Cricut Joy Pens on Cutting Machine?
Answer: Installing Cricut pens into this smart cutting machine is easy. You just have to go through the steps shared below:
First, you’ve to open the clamp by pressing it upwards.
Second, remove the blade housing and keep it aside in a safe place.
Third, carefully remove the craft plotter pen or marker cap.
Next, take the pen or marker and put it inside the clamp.
After that, permit it to drop into its respective place; no press will be needed.
Lastly, close the separate clamp, and the craft plotter is ready.
Question: Can Cricut Joy Write with a Pen?
Answer: Yes, it’s definitely true that Cricut Joy Fine Point Pens are perfect for writing and drawing while using the craft plotter. With the help of this item, crafters are eligible to create incredible designs with the Design Space app. Other than that, they also convert their imaginary idea into reality with different complementary colors. The pens will write messages and other activities with just one click.
Question: Do Regular Cricut Pens Work with Joy Machine?
Answer: The answer to the question asked is definitely Yes! But with the help of the adapter. The crafter must purchase a Pen adapter to complete this task. However, they should use the Cricut pens and the Infusible Ink markers while accessing this cutting machine. Moreover, before commencing the drawing, ensure that all the pens are working properly by writing them on paper.
0 notes
Text
How to Use Pens on Cricut: A Complete Guide for Beginners
If you are a Cricut user, then you are likely familiar with its capabilities and versatility. It is well-known that Cricut is a leading brand of crafting machines, but did you know you can also write and draw with them? Yes, Cricut machines can create beautiful designs! Here, I will explain how to use pens on Cricut.
Using a Cricut pen is straightforward, but knowing the process is essential. You just need to understand which pen is suitable for your DIY project and how to use it on your Cricut machine. So, let’s get started with the different types of Cricut pens and markers they provide!
Different Types of Cricut Pens
Before we delve into the process of learning how to use pens on Cricut, it is crucial to understand the variety available and which pen suits your crafting project best. Here are the types of pens compatible with a Cricut machine:
Fine Point Pens: These have a 0.4mm tip and come in multiple colors.
Extra Fine Point Pens: It is an even sharper pen with a 0.3mm tip.
Pens/Markers: They have a 1.0mm thickness and can be used interchangeably.
Gel Pens: No tip, with a 0.8mm roller ball, suitable for glossy or textured materials.
Glitter Gel Pens: They are similar to Gel Pens but with glittering ink.
Calligraphy Pens: These are marked with a “C” and angled at 45 degrees for calligraphy.
Fabric Markers: They are made specifically for writing on fabric.
Infusible Ink Pens: For sublimation ink onto poly-coated surfaces, with a 0.4mm tip.
Infusible Ink Marker: A thicker version of the infusible ink pen with a 1.0mm tip.
Now that you know about all of the Cricut pens available in the market, you can select the right pen for your writing and printing needs.
How to Load a Pen on a Cricut Machine?
Before you start working on how to use pens on Cricut, it is important to know how to load the pen onto your machine. Cricut pens work only with newer models like Maker 3, Explore 3, or Joy. Older Cricut machines are not made to fit in pens, and trying to use them on such models, like Maker or Explore Air 2, may damage your materials.

When you open the machine, you will see two clamps: Clamp A and Clamp B. Clamp B is always created for the pen. Just open Clamp A, gently insert the pen until it clicks into place, and then close the clamp properly. After that, you are ready to continue your crafts using the Cricut pen.
How to Use Pens on Cricut in 3 Easy Steps?
Once you have loaded the pen into your machine, it will be ready to start. To begin your DIY projects, perform the steps in the section below:
Step 1: Create a Design on the Cricut App

These are the things you have to do to make a design:
In the beginning, open the Cricut Design Space app on your device and pick a canvas size for your design.
Then, choose the Writing option. Here, you can select your desired font.
Optionally, you can add images for a unique look to your design.
Type in your text using the chosen font, and it will automatically appear in the design.
After that, select the color you want for the font.
Finally, your design is now ready for writing.
Step 2: Choose the Material
Now, you should load the material on your Cricut machine.
Choose the material onto which you want to print your design.
Then, put the material onto the mat and insert it into your machine for printing.
Your material is ready for printing now.
Step 3: Cut the Material on Your Cricut Machine
Once you load the material into your machine, you can start the cutting process.
To start printing, press the Load button on the machine, which will start printing your design on the material.
Once the printing is done, unload the material, and your design is ready on your material.
Now, you can continue to cut it into your shape and place it wherever needed.
Conclusion
Now you know how simple and easy it is to learn the procedure of how to use pens on Cricut. This post covers all the essential things for using a Cricut pen. After reading this blog, you can select a pen based on your needs, load it into your Cricut machine, create a design, choose the material, and write or draw your design using the pen.
FAQs
What Is a Cricut Pen Used For?
A Cricut pen can be used for multiple purposes. Here are some of the things you can create with them:
Coloring pages
Sweet gift notes
Greeting cards
Kitchen pantry labels
Labels for your study-related items
Adding doodles
Birthday banners
Apart from these, you can create many more things.
How Can I Write on My Cricut Instead of Cutting?
If you prefer writing with a Cricut machine instead of cutting, it is possible. However, not all Cricut machines support the writing feature. Only the latest Cricut models like Maker 3, Explore 3, and Joy can write with a Cricut pen. In order to write in your machine, open clamp A, then insert the pen and close the clamp. After that, choose a design, load the material, and start writing.
Can I Write on a Fabric with a Cricut Pen?
Yes, you can write on any of the fabrics with a Cricut machine. But for that, you have to make sure you use the right tool—a special Cricut fabric marker. With this marker, you can create beautiful quotes and designs on t-shirts, tote bags, pillowcases, and various other fabrics.
0 notes
Text
How To Use Cricut Infusible Ink [Explained]
Infusible ink is a special product from the Cricut company which is used for making bright, colorful designs with smooth finishing of different types of base materials. Not like the HTV or iron on vinyl, the Infusible ink is applied/ pressed on the top of the base material using the heat-activated adhesive, and this makes the Infusible ink fuse with the base materials. The Infusible ink becomes one with the blank, which means your design will not crack, wrinkle, peel or flake any time soon. It is much similar to sublimation printing but simpler. In this blog, we will discuss the step-by-step process of how to use Cricut Infusible ink. So let us start with the blog by discussing things you need to have before you start using an Infusible Ink. Visit at- Cricut.com/setup
Materials/ Machines You Need To Start Using Infusible Ink
For creating any craft with the Infusible Ink, you may require any of the following materials/ machines:
Cricut Maker/ Explore/ Joy Machine – All the Cricut machines have the capability to cut Infusible Ink sheets. The only thing you have to keep in mind before using the Cricut joy machine is that it has got a smaller cut size, so Joy cannot be used for large designs.
Cricut Infusible Ink Transfer sheets – The infusible sheets come in a standard size of 12 by 12, which are widely available in different colors and patterns.
Butcher Paper – You get 2 sheets of Butcher paper in a pack of infusible Ink transfer sheets.
Compatible Blank times (Shirts or Mugs) – Cricut brand Blanks are specially designed materials to be used with the Infusible Ink. There are third-party sublimation banks also available so that you can use them too.
Cricut EasyPress machine or heat press – You need a source of heat to transfer Infusible ink into your project. You can also use the regular iron, but it is not recommended to use it since they do not get hot enough, and also, they aren’t hot enough for heat pressing the whole design. So, an EasyPress machine is definitely worth using and is a value-for-money product.
Mug Press – Mug Press helps you in using Infusible Ink with special mug blanks.
Cricut EasyPress Mat – A flat smooth pressing mat is highly recommended for your infusible Ink projects. The EasyPress mat helps you complete the contact between the transfer sheet and the project surface to achieve better final results.
Standard Gripping Mat – It is the green mat under which materials are inserted, and then it is inserted inside the Cricut machine for the cutting process.
White cardstock – White cardstock is used inside your cardstock under your project, which is used for the protection and equal heat distribution of any accidental ink transfer.
Paper trimmer
Lint roller
Visit at- www.cricut.com/setup
Things To Keep In Mind Before Working With Infusible Ink
Following are some of the things you should keep in mind before working with Infusible Ink:
Never forget to mirror your craft/ design.
Make sure you place your Infusible ink material’s color side facing up and shiny side down.
When you remove the Infusible transfer sheet for transferring from the cutting mat, it is recommended to slightly roll and bend the material to crack the cut lines. This technique makes your removal of the transfer sheet process a lot easier.
Make sure you give time to lint roll and preheat your blank. These two steps will make your heat-transferring process a lot easier.
You should take time for your design to cool down after the heat-transferring process to avoid any burns on your skin.
Visit at- cricut setup
Infusible Ink Materials
The Infusible ink comes in two forms which are marketer/ pens and transfer sheets:
Infusible Ink Transfer is available in different patterns and colors. You can even easily cut designs from the infusible ink sheets with the help of your Cricut machine, just like you would do with sheets of vinyl.
Draw with the Infusible Markers and Pens to make your own transfer designs. You can even use your hands or your Cricut machine.
How To Use Cricut Infusible Ink [Steps]
Follow the step-by-step process for using the Cricut Infusible Ink:
The first step is to choose your Infusible Ink materials and a suitable bank.
After that, make your craft/ design in the Cricut Design Space software.
After the creation of your decision, cut the Infusible ink transfer sheet by using the Cricut machine.
Keep all of your materials ready and install them in the Cricut machine. After that, finally, give the Print command by pressing the button on the Cricut machine.
Now apply the Infusible ink on your design and apply the heat transfer to stick the design on the blank.
Final Words
We hope you found our blog helpful. In this blog, we discussed the step-by-step process of how to use Cricut Infusible ink. We also discussed each and every material you may need in using the Infusible ink. We tried to explain everything about Cricut Infusible Ink; if you have any doubts, then please refer to our Frequently Asked Questions.
Visit at- cricut.com setup windows
Frequently Asked Questions
What Is Cricut Infusible Ink Used For?
Cricut Infusible Ink is a group of homemade products which are used in making professional, customized heat transfers and for other purposes for in-home usage.
Is Cricut Infusible Ink And Sublimation Both Similar?
Infusible ink is a type of sublimation that the Cricut brand develops. Sublimation too is a similar type of process to the Cricut Infusible Ink. Both the Infusible Ink and Sublimation are easily available and can be cut with the Cricut machine.
What Differentiates Infusible Ink From Cricut Iron On?
The Infusible ink is the fused ink into the base material so that it doesn’t stick or lose print quality. The Cricut Iron On is the sticky material that is used for heat adherence on the top of the base material.
What Types Of Materials Can Be Used With An Infusible Ink?
The Infusible is amongst the best fabric materials, which has polyester material so that you can easily transfer your design from the sheet to the material without losing any residual or compromising on quality. The Infusible Ink works best in light-colored or white bases. Visit at- Cricut explore air 2 setup
Is A Printer Required For An Infusible Ink?
The Infusible ink is used as a sublimation method without needing anything other than the Cricut machine and Infusible ink to work on your crafts. So, you don’t need a printer to perform any task.
Source Url- How To Use Cricut Infusible Ink
#How To Use Cricut Infusible Ink#www.Cricut.com/setup#cricut.com setup windows#cricut.com setup mac#cricut setup
1 note
·
View note
Text
Top 5 DIY Cricut Garden Projects for a Lively Outdoor Space
Cricut cutting machines are used to make all sorts of DIY projects. It includes projects for personal use like water bottles, mugs, and t-shirts. Also, you can make projects for home purposes, such as wall decals, labels, and stickers. Further, projects are also used to sell and improve the crafting business. A user can make any craft of their wish with a single Cricut machine. However, this blog focuses on easy Cricut garden projects. These projects will surely make your garden look more lively for you to sit and enjoy the silence.
1. Designing Pot
Usually, Plan pots look plain and simple, or in other words, boring. Since you have a Cricut machine, why not use it to add style and personality to your garden? If you love bold prints or subtle designs, use permanent vinyl to customize the look of your pot. It is because permanent vinyl is best for outdoor use as it is UV- and water-resistant. Further, it can stay the same for up to three years.
You only need to design whatever you want on Cricut Design Space and print the same on vinyl using a Cricut machine. After that, attach the design to the surface of the pot. Now, you have left with a beautiful pot that increases your garden’s aesthetic.
2. Gardeners Paradise
A garden box is a place where a gardener stores tools. However, you can also make it more interesting to look at with your Cricut machine. Here too, use permanent vinyl for its durability and water-resistant ability.
Further, you can even design a garden box and give it to someone fond of gardening. So, you can personalize anything with a Cricut machine and the right project.
3. Garden Gloves
If you have never thought of it, this one among all the Cricut garden projects can be interesting. That is to personalize garden gloves. Please add your initials or name for this project. Further, you can add a leaf or small plant design on the glove.
To make a personalized garden glove, you need an Easy press Cricut machine. You need to press the vinyl onto the globe’s surface. You can also use Infusible Ink, which directly fuses to the glove’s fabric. Both the materials are good to use, and you can choose depending on your likes.
4. Garden Entry Sign Board
Making a custom vinyl signboard is an easy way to decorate your garden. The Cricut machines are known to make crafting projects quicker and easier. These boards will be an addition to your beautiful garden.
Further, Permanent vinyl is a perfect material to use for this project. It is an attractive material that makes the garden board a more inviting place. You can attach the vinyl onto cardboard, chipboard, or wooden board.
5. Labeling the Herbs or Plants
Do you want others to know which herbs or plants you have planted in your garden? Also, if you are a person who can forget names easily, then this project will be best for you.
With a Cricut machine, you can design the names of plants and herbs in attractive fonts. Next, cut the names on vinyl. You can even use Cricut pens and markers and write the names on the material.
Conclusion
Cricut machines are designed to help you craft anything you wish for. Along with its Design Space from where you can design, upload, or download the project. This blog focusing on Cricut Garden Projects will help you improve your garden’s look. We have covered five essential ideas: making gloves, a signboard, and designs and labels for pots and plants. However, you can do any other project to make the garden look more beautiful.
FAQs
What is a Cricut Machine?
Cricut is a company that makes smart cutting machines. There are many models of Cricut machines, such as Maker, Maker 3, Explore 3, Air 2, and Joy. All these machines are different from each other, but they can cut many different materials so that you can make many types of Cricut garden projects. You can custom-make cards, t-shirts, and other everyday items.
How to make labels with Cricut Joy?
To make labels with your Cricut Joy machine, design your labels on Design Space by selecting either text or images. Next, create as many labels as you need for your project and select the Make it an option. Now, load the material into the machine, and it will cut the designed labels. Finally, apply Transfer Tape and attach the labels to your product.
What is Cricut Everyday Iron-On?
The Everyday Iron-On by Cricut is a heat-transfer material that can outlast 50 or more washes. It can work with the widest base materials, even wood. You can make projects such as customized t-shirts, tote bags, home decors, wall decals, and more. You can even use one color layer or up to four colors to create unique designs.
Source URL: Cricut garden projects
For more information:
Cricut cutting machines
Cricut Design Space.
Cricut Joy machine,
0 notes
Text
Cricut Infusible Ink: What Is It and How to Use It?

Have you ever used the Cricut Infusible Ink? If not, then this guide is for you! This post is mainly dedicated to beginner crafters who know little about infusible ink (or transfer sheets). In other words, the Infusible Ink comes in two varieties: markers/pens and transfer sheets. However, you can’t use infusible ink markers/pens directly onto the materials (paper or fabrics), but you will need a heat press to infuse the ink into the materials.
This detailed guide will teach you about Infusible Ink, Infusible Ink transfer sheets, and how to use them to make beautiful craft projects.
What is Cricut Infusible Ink?
Infusible ink is also a Cricut product, allowing us to get professional-quality heat transfer projects. In simple terms, the ink infuses any of your projects instead of sticking in the form of a layer. When it dries, it becomes a permanent part of your projects. As a result, the ink doesn’t peel, crack, or wrinkle like vinyl.
On the other hand, Cricut Infusible Ink transfer sheets are a collection of pre-printed materials. The transfer sheets contain Infusible Ink that is made to work with a cutting machine. You just need to load these sheets into your Cricut machine just like other materials (loading them onto a cutting mat). Further, you can cut your design with a Cricut digital cutter. Finally, you will press these sheets with a heat press to infuse the design onto your projects.
What Supplies Do You Need to Use Cricut Infusible Ink?
Given below is the list of supplies and tools you will need for using Infusible Ink.
Infusible Ink transfer sheets
Butcher paper
Cardstock
Cricut Explore or Maker cutting machine
A heat press machine such as AutoPress or EasyPress
A Poly-coated base Material like Cricut’s blank
Heat Resistant Tape
Other supplies, like tweezers or a link roller
How to Use the Cricut Infusible Ink Transfers?
Here is the step-by-step guide to cutting and applying infusible ink transfers on a project. Hope you are excited to learn this. Let’s get started!
Step 1: Select Infusible Ink Materials and a Compatible Blank
As per your inconvenience, you can either cut designs from Infusible Ink sheets or sketch your own designs with Cricut Infusible Ink (pens or markers).
Step 2: Start Making Your Design in the Cricut App
Launch the Cricut Design Space and start working on a new project.
For this, you can choose the design from Cricut Access Library.
You need to upload an SVG cut file. Otherwise, you can make your own design on this app.
When you finish your design, click Make it to send it to the mat.
Further on the prepare screen, you need to click the button to mirror your design.
Then, choose Cricut Infusible Ink from the given list of materials settings. Also, load the fine-point blade into your machine.
Step 3: Cut Your Transfer Sheet
Now, you can load the transfer sheets on top of the cutting mat (StandardGrip). Place your sheet onto this mat. Ensure the shiny side is down, and the colorful inked surface should be facing upward. Plus, the transfer sheet must be adhered to the mat.
After that, hit Load to insert the mat into the Cricut machine. Next, press GO and start.
Unload the mat after cutting. Keep the mat on a clean surface by flipping it.
Then, separate the cutting mat and Cricut Infusible Ink sheet by peeling the mat.
Next, you need to weed the design.
After the weeding, you will have your design.
Note: Weeding Infusible Ink is not as easy as weeding vinyl. As per Cricut’s recommendation, you should weed your transfer sheets by using your fingers. Don’t use sharp objects to weed, as it may result in unwanted ink transfer.
Step 4: Get Ready With Your Materials
This time, you need to set up your working area before you apply for the transfer sheet.
First of all, place your blank project onto the mat. Keep a piece of white cardstock inside it (blank project). The cardstock will shield your mat and project from ink seepage from one side to another.
Then, you must use a lint roller to clean the unwanted particles from the surface of the blank.
Next, use a larger butcher paper to cover the blank project. Butcher paper must be larger than the heat press plate.
Then, follow the Cricut Heat Guide to preheat your blank. Preheating your blank will remove the moisture and wrinkles from your project. It is an essential step for desirable results. However, the heat guide will recommend suitable temperatures and times for your project.
Lastly, you can remove the butcher paper and the heat press. Further, let it cool completely.
Step 5. Use Infusible Ink
Plot the cut and weeded design on the blank. Make sure the colorful side of your design should be facing down.
Again, take a butcher paper and place it on the top of your cut design. Ensure that the paper covers your design entirely.
Then, you need to locate the preheated heat press and follow the instructions given in the Cricut Heat Guide.
Remove your press and let the project cool down.
Finally, remove the butcher paper and transfer the sheet. Also, you can use tweezers to remove it.
And here you go, you have finally finished your project using the Cricut Infusible Ink.
Final Words
We hope you understand the difference between the Cricut Infusible Ink and Transfer sheets. We use Infusible Ink in both products, but they come in different forms. For example, they are available in the form of Infusible Ink pens/markers and transfer sheets. These pens and markers can be used directly by hand, but transfer sheets need to be put inside the Cricut cutting machine to cut the design onto it. Further, you can weed the design and then put it on to your desirable blank. Finally, with the help of your heat press (Autopress and EasyPress), your design will be ready to go!
FAQs
Can I use Cricut Infusible Ink on 100% pure cotton?
No, Infusible Ink doesn’t transfer to 100% cotton. It mainly requires polymer or polyester-based materials that are designed to absorb ink permanently. However, when you see the list of compatible Infusible Ink blanks, you will find several fibers and materials. So, always check the compatibility badge on the packaging.
Can beginner crafters use Cricut Infusible Ink?
Yes, you can. You really don’t need any prior design experience to use Infusible Ink. Every product from Cricut is designed to suit all crafts, no matter if you are an experienced or beginner. However, you can check some blog articles on the internet and read how-to tutorials to avoid any mistakes.
Is a Cricut Infusible Ink better than iron-on (HTV)?
Iron-on (HTV) is still the most widely used Cricut product by all crafters. Both are great for different reasons. However, you can use both together to get extraordinary results on your projects. Moreover, iron-on works great when you want certain effects and finishes like glitter, metallic, and holographic.
For more information visit: Cricut.com/setup mac
Cricut New Machine Setup
cricut.com/setup app
design.cricut.com/setup
Source: Cricut Infusible Ink
#Cricut Infusible Ink#Cricut.com setup mac#Cricut New Machine Setup#Cricut Design Space#Cricut.com setup#cricut.com/setup app#Cricut maker setup
0 notes
Text
Cricut Mug Press: Ultimate Guide to Infusible Ink Mugs
If you have recently purchased a Cricut Mug Press and need to learn how to use it, read through the guide to learn everything. Cricut Mug Press is a great choice for crafters to create pro-quality, customized mugs for any occasion. This new product of Cricut functions with the Infusible Ink transfer sheets, markers, and pens so users can create the best gift for friends, family, neighbors, and others.

Introducing Cricut Mug Press
The Patent-pending heat plate design of the Cricut Mug Press adds the optimal amount of pressure and heat with simple, single-touch settings. One button begins the transfer process, LEDs monitor the progress of the press, and the beep lets users know when it completes.
Unlike the HTV or iron-on process, where you attach the artwork at the top of the base material using the sticky, an Infusible Ink transfer automatically becomes the best one with the mug. The results are beautiful, bright, seamless transfers that never peel, flake, crack, or wrinkle. Also, dishwasher friendly.
Cricut has designed Cricut Mug Press to be safe and beautiful. The insulated case protects the user’s work surface. You will also like the auto-off functions for peace of mind.
Personalize with the name, special dates, a one-of-a-kind design, and much more to create the best gift for loved ones.
Also Read: How to Use Editable Images in Cricut Design Space
How Does Cricut Mug Press Function
There are two important ways to utilize the Mug Press and the Cricut crafting machine to design a mug: There is a drawn tab, where the Infusible Ink pen draws a design onto paper, which the machine presses onto your mug. And there is a cut tab, where the Cricut device cuts the design onto Infusible Ink paper, which users remove, stick on a mug, and the heated press transfers the design onto the mug.
How to Use Cricut Mug Press
If you are using Cricut Mug Press for the first time, you must activate and register it to your profile. For this, you should plug in the USB cord you received with the machine to your PC; if your PC doesn’t have the usual USB port, use an adapter to plug it into it. Move to the official Cricut.com/register website. You can download or launch the Cricut Design Space software on your PC. Please tap on the Open button unless you should download it; that does that. This will open a page where you must set up the machine, and it will provide the option of a heat press or cutting machine. Tap on the Heat press option, pick the mug press and read the prompts.
When ready to begin making the mugs, you should select a design. You have numerous choices here in Design Space. There are plenty of ready-made designs to use. You will also find some ready-to-customize in Design Space; you need to add your initials or anything you want to the basic design to complete it. Then there is an option to begin from scratch and make your design.
While selecting a design in the Cricut Design Space, remember the size of the design and your mug. There are large and small options in all of the premade designs so that the designs will fit either the 15 oz or 12 oz size. For instance, Small Tentacles Mug Design, Small Painted Stripes Mug Design, Large Night Time Forest Mug Design, and Large Pointed Dots Mug Design.
Cut the desired designs from the Infusible Ink transfer sheets. Ensure to mirror the designs, mainly if you pick designs with directional elements or words. Weed the designs.
Next, switch on the Cricut Mug Press so that it can heat up, it will show a red light when it switches on, and the light will become green when it’s ready to use. Now clean your mug with the alcohol wipe and go over it with the lint roller.
Wrap your desired design around your mug. Apply the heat-resistant tape if you require it. When your Mug Press is ready to use, place your mug into it and lift the lever of your mug press. Once your mug is in the correct position, press the lever down & let your mug press do its magic. There are small progress lights on the mug press to know the progress of your design.
When your mug is ready, the progress lights will become full, and the machine will beep. When this happens, lift the lever, remove your mug, and set it on the EasyPress mat and any other heat-resistant surface to cool down. Remove the transfer sheet to show the design.
Also Read: How to Use the Cricut Monogram Maker in Design Space
Instructions to Update the Cricut Mug Press Firmware
Firmware updates ensure the Cricut Mug Press has the greatest and latest feature enhancements. You require Cricut Mug Press, a USB cable, a compatible Mac or Windows PC with a USB Type-A port, and Cricut Design Space software to do this.
First, you should put your Cricut Mug Press device into Connect mode.
Plug in the power cord
Press the Power button until the Connect mode begins. In the connect mode, the power button will flash an orange light.
Plug in the USB cable.
Then, launch the Cricut Design Space software on a compatible Mac or Windows PC.
After this, you must log in with the Cricut ID and password.
Now, tap on the Design Space menu and select the New Machine Setup option.
Next, choose the Heat Press option and hit the Cricut Mug Press tab.
Read the prompts on your screen to connect the Cricut Mug Press.
The Design Space software will take a couple of minutes to locate your press, then begin the firmware update. You can check the progress bar to know the updated progress.
After completing the update, the power button will show an orange light. Then disconnect the USB cable from your press. It will turn off. Turn on to begin using the press.
Final Thoughts
The Cricut Mug Press is an easy-to-use mug-shaped version of other heat press products of Cricut, developed to correctly wrap a mug and heat Infusible Ink sheets & designs drawn by Infusible Ink markers. Cricut Mug Press is a brand new machine by Cricut and opens a fun world of design and art possibilities for professionals and hobbyists. While Cricut has become a brand in the design Space for providing the best crafting devices that can do any project, Mug Press allows users to do one thing: make mugs. Read the post above and learn everything about Cricut Mug Press.
Source:https://hariguide.com/cricut-mug-press/
0 notes
Last Seen Blogs

selettivo-futakotamagawa
Selettivo

sappyrainyday
Some things are best left unsaid.

solaroppositesclips
SolarOppClips

cone-with-eyes
it is what it says

livinn
Livinn Bengaluru