#How to Use Pens on Cricut
Explore tagged Tumblr posts
Visit Tumblr Blog
Explore Tumblr blogs with no restrictions, modern design and the best experience.
Last Seen Tumblr Blogs


Fun Fact
Tumblr posted its first advertisements in May 2012 and subsequently earned $13M in revenue.
Text
How to Use Pens on Cricut: A Complete Guide for Beginners
If you are a Cricut user, then you are likely familiar with its capabilities and versatility. It is well-known that Cricut is a leading brand of crafting machines, but did you know you can also write and draw with them? Yes, Cricut machines can create beautiful designs! Here, I will explain how to use pens on Cricut.
Using a Cricut pen is straightforward, but knowing the process is essential. You just need to understand which pen is suitable for your DIY project and how to use it on your Cricut machine. So, let’s get started with the different types of Cricut pens and markers they provide!
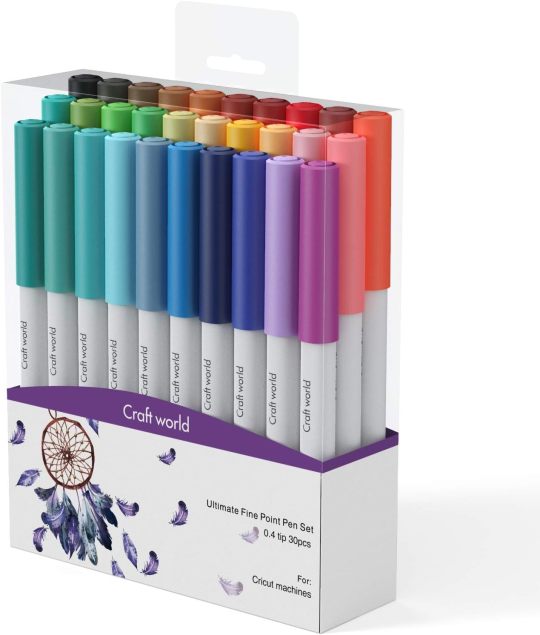
Different Types of Cricut Pens
Before we delve into the process of learning how to use pens on Cricut, it is crucial to understand the variety available and which pen suits your crafting project best. Here are the types of pens compatible with a Cricut machine:
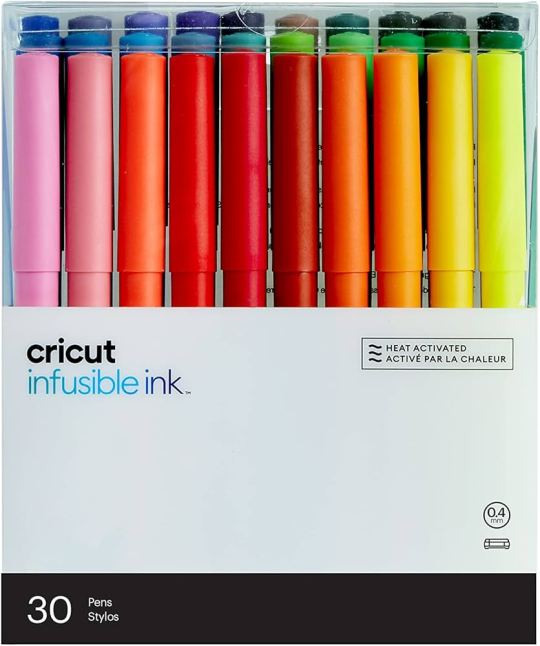
Fine Point Pens: These have a 0.4mm tip and come in multiple colors.
Extra Fine Point Pens: It is an even sharper pen with a 0.3mm tip.
Pens/Markers: They have a 1.0mm thickness and can be used interchangeably.
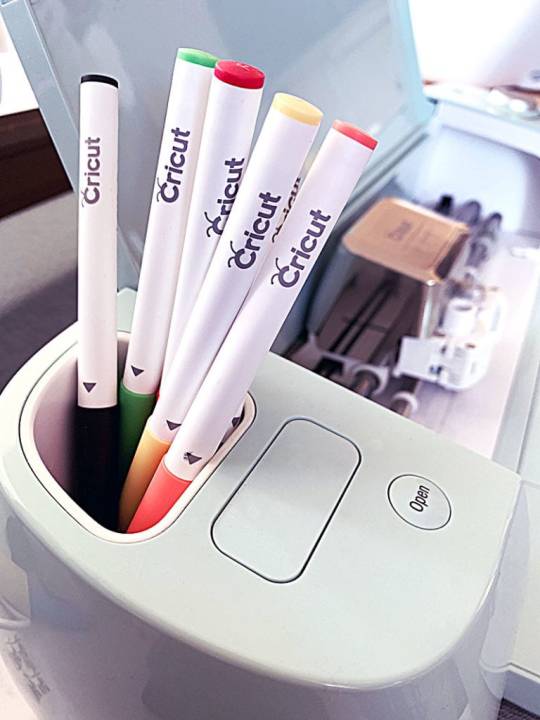
Gel Pens: No tip, with a 0.8mm roller ball, suitable for glossy or textured materials.
Glitter Gel Pens: They are similar to Gel Pens but with glittering ink.
Calligraphy Pens: These are marked with a “C” and angled at 45 degrees for calligraphy.
Fabric Markers: They are made specifically for writing on fabric.
Infusible Ink Pens: For sublimation ink onto poly-coated surfaces, with a 0.4mm tip.
Infusible Ink Marker: A thicker version of the infusible ink pen with a 1.0mm tip.
Now that you know about all of the Cricut pens available in the market, you can select the right pen for your writing and printing needs.
How to Load a Pen on a Cricut Machine?
Before you start working on how to use pens on Cricut, it is important to know how to load the pen onto your machine. Cricut pens work only with newer models like Maker 3, Explore 3, or Joy. Older Cricut machines are not made to fit in pens, and trying to use them on such models, like Maker or Explore Air 2, may damage your materials.

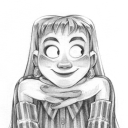
When you open the machine, you will see two clamps: Clamp A and Clamp B. Clamp B is always created for the pen. Just open Clamp A, gently insert the pen until it clicks into place, and then close the clamp properly. After that, you are ready to continue your crafts using the Cricut pen.
How to Use Pens on Cricut in 3 Easy Steps?
Once you have loaded the pen into your machine, it will be ready to start. To begin your DIY projects, perform the steps in the section below:
Step 1: Create a Design on the Cricut App

These are the things you have to do to make a design:
In the beginning, open the Cricut Design Space app on your device and pick a canvas size for your design.
Then, choose the Writing option. Here, you can select your desired font.
Optionally, you can add images for a unique look to your design.
Type in your text using the chosen font, and it will automatically appear in the design.
After that, select the color you want for the font.
Finally, your design is now ready for writing.
Step 2: Choose the Material
Now, you should load the material on your Cricut machine.
Choose the material onto which you want to print your design.
Then, put the material onto the mat and insert it into your machine for printing.
Your material is ready for printing now.
Step 3: Cut the Material on Your Cricut Machine
Once you load the material into your machine, you can start the cutting process.
To start printing, press the Load button on the machine, which will start printing your design on the material.
Once the printing is done, unload the material, and your design is ready on your material.
Now, you can continue to cut it into your shape and place it wherever needed.
Conclusion
Now you know how simple and easy it is to learn the procedure of how to use pens on Cricut. This post covers all the essential things for using a Cricut pen. After reading this blog, you can select a pen based on your needs, load it into your Cricut machine, create a design, choose the material, and write or draw your design using the pen.
FAQs
What Is a Cricut Pen Used For?
A Cricut pen can be used for multiple purposes. Here are some of the things you can create with them:
Coloring pages
Sweet gift notes
Greeting cards
Kitchen pantry labels
Labels for your study-related items
Adding doodles
Birthday banners
Apart from these, you can create many more things.
How Can I Write on My Cricut Instead of Cutting?
If you prefer writing with a Cricut machine instead of cutting, it is possible. However, not all Cricut machines support the writing feature. Only the latest Cricut models like Maker 3, Explore 3, and Joy can write with a Cricut pen. In order to write in your machine, open clamp A, then insert the pen and close the clamp. After that, choose a design, load the material, and start writing.
Can I Write on a Fabric with a Cricut Pen?
Yes, you can write on any of the fabrics with a Cricut machine. But for that, you have to make sure you use the right tool—a special Cricut fabric marker. With this marker, you can create beautiful quotes and designs on t-shirts, tote bags, pillowcases, and various other fabrics.
0 notes
Text
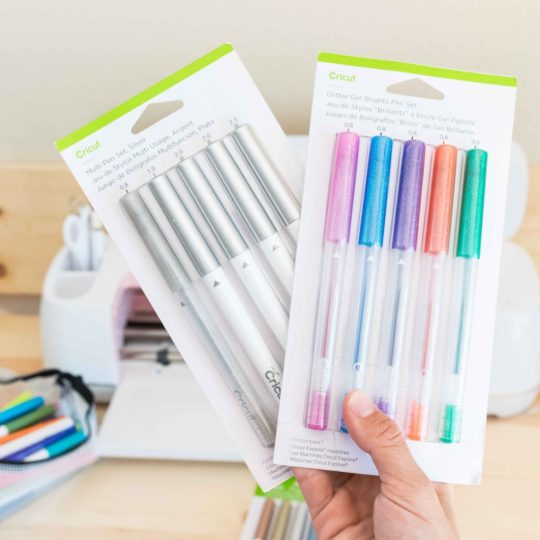
How to Use Cricut Pens? (Easy Steps!)
If you are a Cricut user, then surely you know that this brand makes some smart tools and machines. You know about its capabilities and how useful it is. But did you know that apart from cutting materials, you can use pens to simplify the crafting process significantly? But how to use Cricut pens? Cricut machines are not only used for cutting different shapes out of paper or vinyl. These machines use pens to create doodles, illustrations, and intricate designs. However, you need to know some basic steps you need to perform when you are designing your projects to make them better.
Using the pens is easy and straightforward, but the important thing is that you know the process. Read this blog to discover all about Cricut pens and what projects you can make with them.
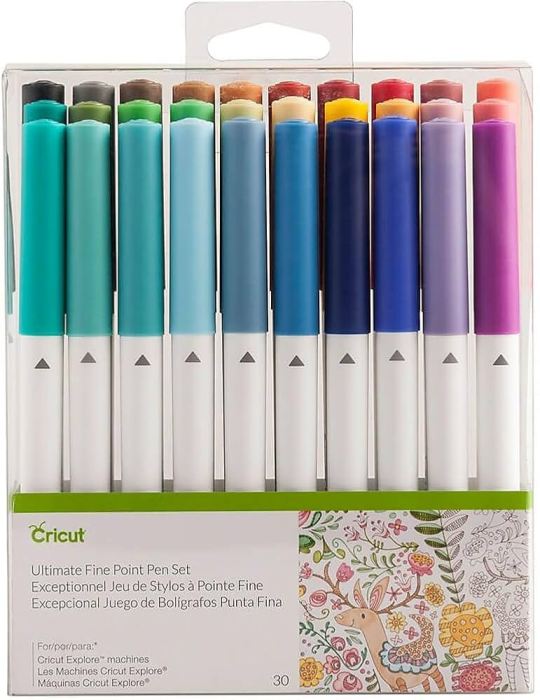
What Types of Cricut Pens Are Available?
All of the current Cricut machines can use a pen, whether Maker, Explore, or Joy. The Maker and Explore machines have interchangeable pens, and Joy has a lineup of small pens. Joy pens are incompatible with other machines due to their unique, smaller size. Before you proceed with how to use Cricut pens, here is the list of pens that you can use with the machine:
Fine Point Pens
This has an F stamped on it for fine, has a 0.4mm tip, and comes in multiple colors.
Extra Fine Point Pens
These are finer, and the pens are just 0.3mm thick.
1.0 Pens and Markers
They have a thickness of 1.0mm and can be called markers, too.
Gel Pens
Gel Pens have a roller ball instead of a tip and are 0.8 mm in size.
Glitter Gel Pens
It has a roller ball and is 0.8 mm in size.
Calligraphy Pens
These pens have a gray barrel and have C stamped to denote calligraphy.
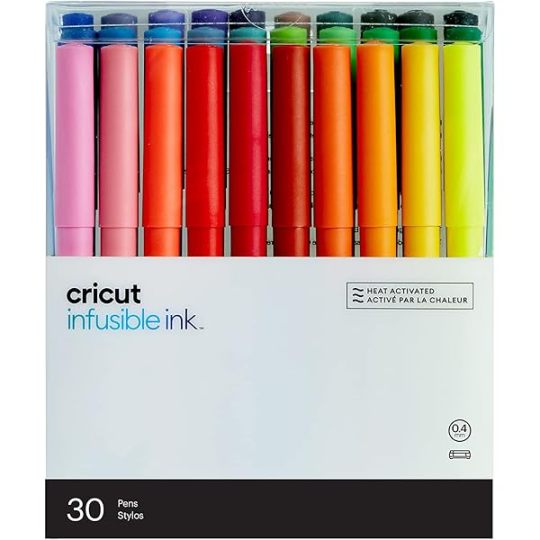
Infusible Ink Pens
It has a 1.0mm tip, and it is used for sublimation and infusing the ink on the surfaces.
How to Use Cricut Pens: Easy and Simple Steps
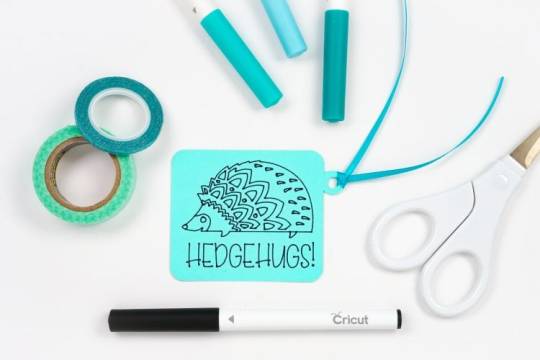
Placing or installing pens is easy, but if you are a beginner, then it will be a new thing for you. Always use the pens carefully, and pens should always be fitted to the clamp A of the cutting machine. Here, I am going to show you something different about using Cricut pens to create a simple gift tag. Now, let’s look at the below process to understand how to use it:
First, go to the Design Space and click on a new project to create a design.
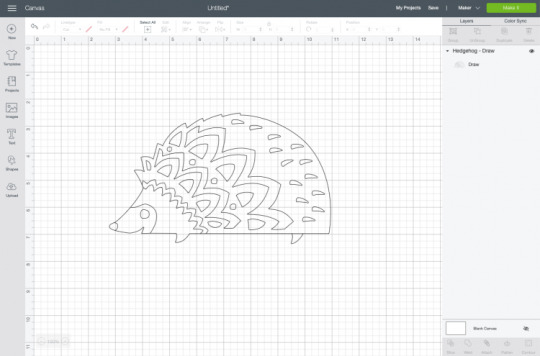
Then, create a design, or you can choose a text that you want to use with your pen. Cricut Design Space has its own vast library of images for your DIY projects.
Now, remember you have to draw, not cut the image. So, go to the Edit toolbar, and from there, select the Draw option in the Layers panel.
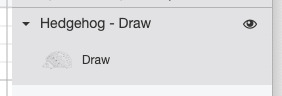
When you click the colored square box next to the line type dropdown, you can select the type of pen and choose the Fine Point pen.

After you have completed drawing your design, it is time to add text. In the Font menu, you can filter by Cricut Writing fonts. Choose the writing style font.
You can insert a shape into your Canvas. Then, using the Align tool, you can change its size and color and move it to the back of your Canvas.
Next, select your drawing and text layer and click Attach on the right-hand side of the Layers panel.
On the preview screen, your image will appear on the mat. Click Continue, and in the Make screen option, select the material you are using. Here, I am using cardstock. The Cricut Design Space app will prompt you to insert your pen, and you can use a fine-point blade.
In the last step, you have to insert your mat into the machine, and your machine will draw and cut the tag.
Conclusion
Now you know how simple it was to learn ‘how to use Cricut pens‘.? In this post, I have explained the types of pens and how you can craft your project with the pen. After reading this blog, you can choose a pen for your project, load it into the machine, and start crafting. Start crafting with your pen and unlock the full potential of the machine.
FAQs
How Do You Load the Pen Into Cricut Machine?
When you open the machine, you will see two clamps: Clamp A and Clamp B. To load the pen into your cutting machine, open Clamp A and insert the pen into it. Gently press the pen into the clamp until it fits properly, and you hear a click sound. Then, close the cover, and you are ready to use the machine.
What Are Cricut Pens?
Cricut makes different types of pens, which are great ways to add drawn or handwritten details to your projects. Cricut pens come in different sizes and can be easily loaded into the machine. This can be used for various creative projects, such as writing on gift tag cards or adding doodles.
What Is the Difference Between Cricut Pens and Markers?
A Cricut pen usually has a fine tip, which allows it to create a thinner line, compared to a marker, which has a thick tip and creates a thicker line. Pens are ideal for writing detailed text, signatures, or fine lines within a design, whereas markers are better for filling large areas with color.
Source: How to Use Cricut Pens
#how to use Cricut pens#cricut design space download#cricut design space app#cricut maker#cricut joy#cricut pens
4 notes
·
View notes
Note
Hello! I was wondering what company you use for your sticker sheets? I bough one from your Ko-Fi shop and really like the quality, and the pricing you were able to sell at is waaaaaay more reasonable compared to any of the companies I've seen and used myself. Is it a POD company, or a mass purchase of them to sell on your own?
Thank you for your time if you're able to respond!
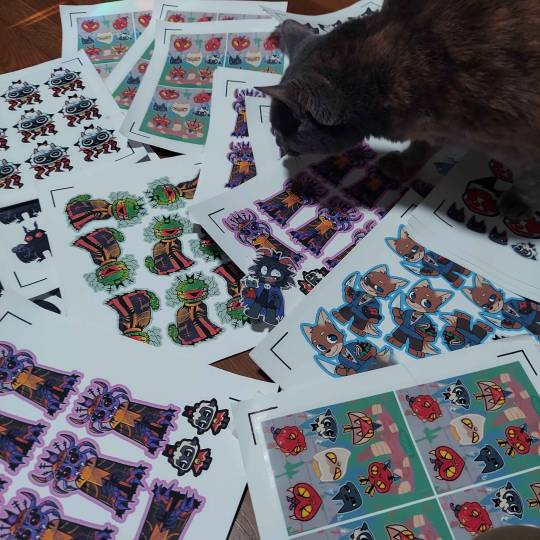
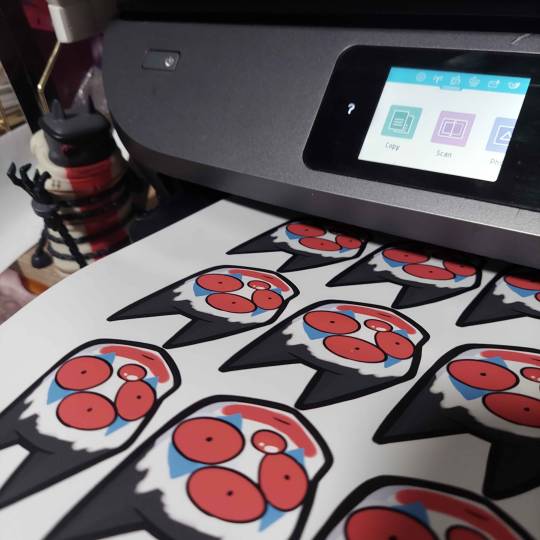
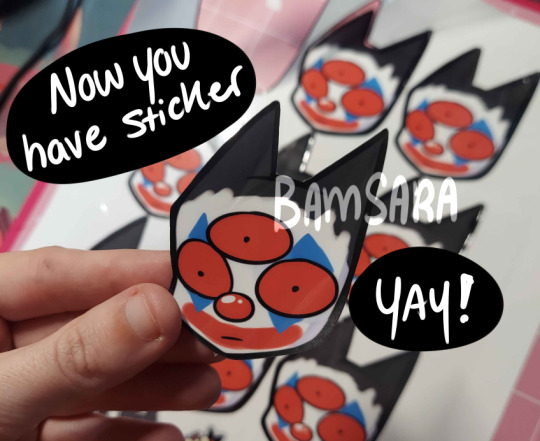
I'm really glad you like the quality, because I actually make them by hand at home! (Please forgive the lighting, my bedroom is my office lmao.)
I don't use a company (and Idk what a POD company is sorry!) but making them at home gives a lot more freedom of stock, just be wary it can be very time consuming depending on how many you need to make.
I've had other people ask before, so here's a rundown of how I make my stickers at home: At most you'll need:
Printer
Sticker paper (this is the type that I use)
Laminator and lamination paper (the lamination paper that I use.) You can also use adhesive non-heat lamination paper if you don't have a laminator, gives you the same result, just be careful of bubbles. You will get double your worth out of a pack because we are splitting the pouches to cover two sticker sheets.
Your choice of a sticker cutting machine or just using scissors.
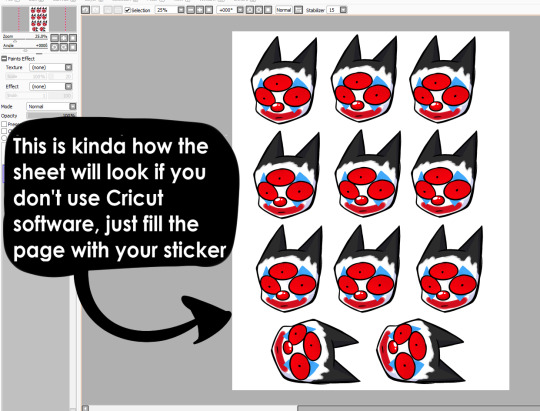
First, I use Cricut's software to print out the sticker sheet with the guidelines around the corners so the machine can read it. If you do NOT have a Cricut machine, open up your art program, make a canvas of 2550x3300 and fill it up with your sticker design with some cutting space between them. This the 8.5x11 size for the sticker page.
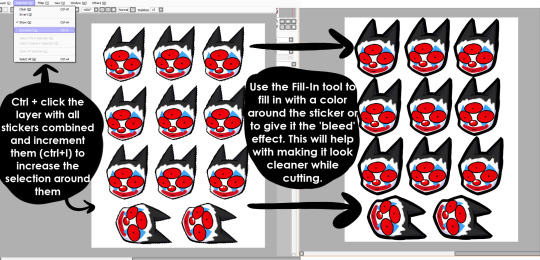
I usually have bleed selected so the cut comes out cleaner. Tip for non-Cricut users below: Increase the border around your sticker design to fake the 'bleed' effect for a cleaner cut.
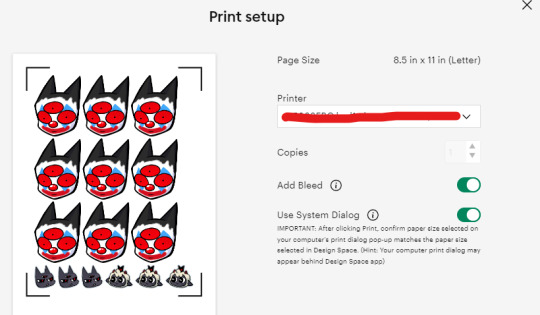
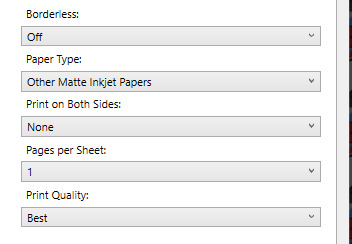
These are the print settings I use for my printer. I use the 'use system dialogue' to make sure I can adjust the settings otherwise it prints out low quality by default. Make sure if you're using the above paper that you have 'matte' selected, and 'best quality' selected, these aren't usually selected by default.
So you have your sticker sheet printed! Next is the lamination part. I use a hot laminator that was gifted to me, but there is no-heat types of lamination you can peel and stick on yourself if that's not an option.
(This is for protection and makes the colors pop, but if you prefer your stickers matte, you can skip to the cutting process.)
Important for Cricut users or those planning to get a Cricut: You're going to cut the lamination page to cover the stickers while also not covering the guidelines in the corners. First, take your lamination page and lay it over the sheet, take marker/pen and mark were the edges of your stickers are, and cut off the excess:
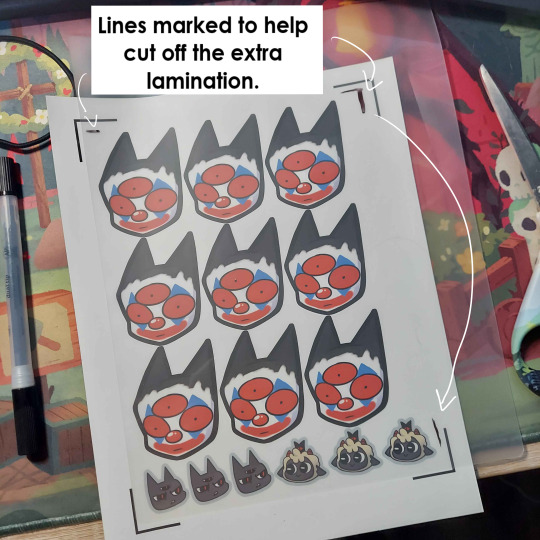
(I save the scrap to use for smaller stickers or bonuses later on)
After you've cut out your lamination rectangle, separate the two layers and lay one down on your sticker sheet over your stickers with matte side down, shiny side up. (Save the other sheet for another sticker page)
The gloss of the lamination will prevent the machine from reading the guidelines, so be careful not to lay it over them. It also helps to cut the corners afterwards to prevent accidentally interfering with the guidelines.

Now put that bad boy in the laminator! (Or self seal if you are using non-heat adhesive lamination)
Congrats! You now have a laminated page full of stickers.
For non-cricut/folks cutting them out by hand: this is the part where you start going ham on the page with scisscors. Have fun~
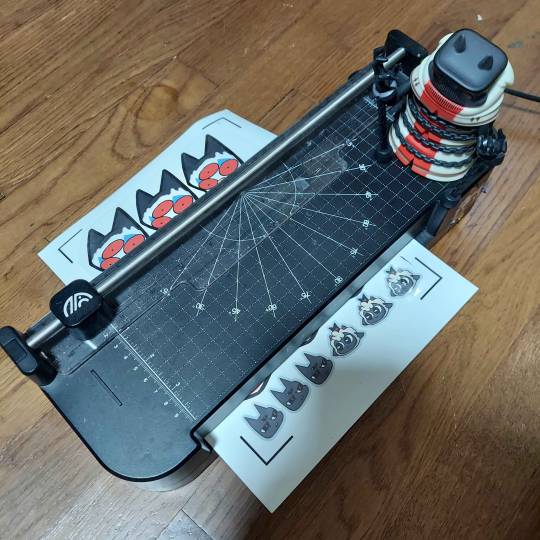
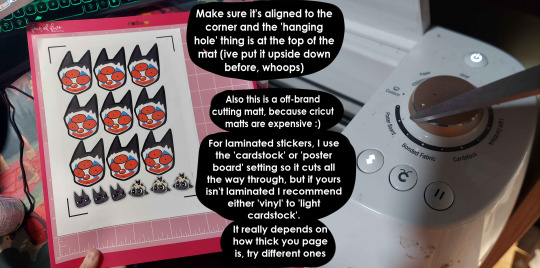
Cutting machine: I put the page on a cutting mat and keep it aligned in the corner, and feed it into the machine. For laminated pages I go between 'cardstock' and 'poster board' so that it cuts all the way through without any issues, but for non-laminated pages or thinner pages, I stick for 'vinyl' and 'light card stock'. Kinda test around.
Now I smash that go button:

You have a sticker now!
The pros of making stickers at home is that you save some cost, and you have more control of your stock and how soon you can make new designs. (I can't really afford to factory produce my stickers anyway)
However, this can be a very time consuming, tedious process especially if you have to make a lot of them. There is also a LOT chance for some errors (misprints, miscuts, lamination bubbles, ect) that will leave you with B-grade or otherwise not-so-perfect or damaged stickers. (Little note, if you have page mess up in printing and can't be fed into the cricut machine, you can still laminate it and cut it out by hand too.)
I have to do a lot of sticker cutting by hand, so if you don't have a cricut don't stress too much about it. I have an entire drawer filled to the top of miscuts/misprints. I keep them because I don't want to be wasteful, so maybe one day they'll find another home. Sucks for my hand though.
But yeah! This is how I make my stickers at home! Hope this is helpful to anyone curious
1K notes
·
View notes
Text
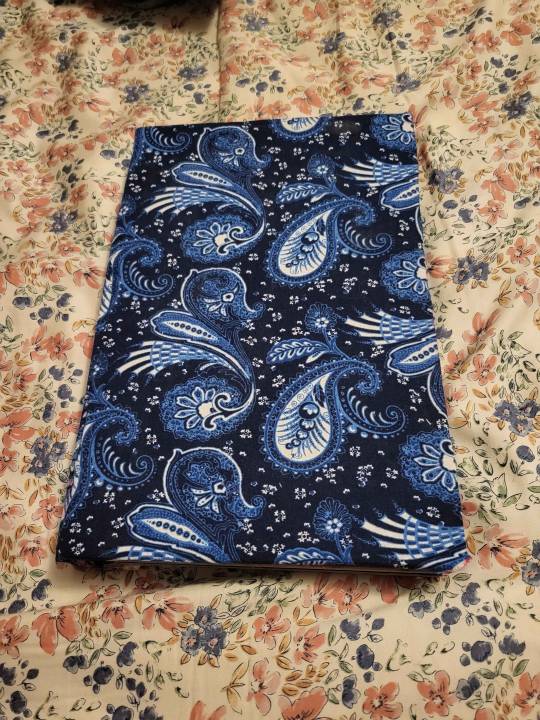
So, I have started a new hobby. I am not great at this yet but wanted to share. Be kind cause I am nervous. Lol
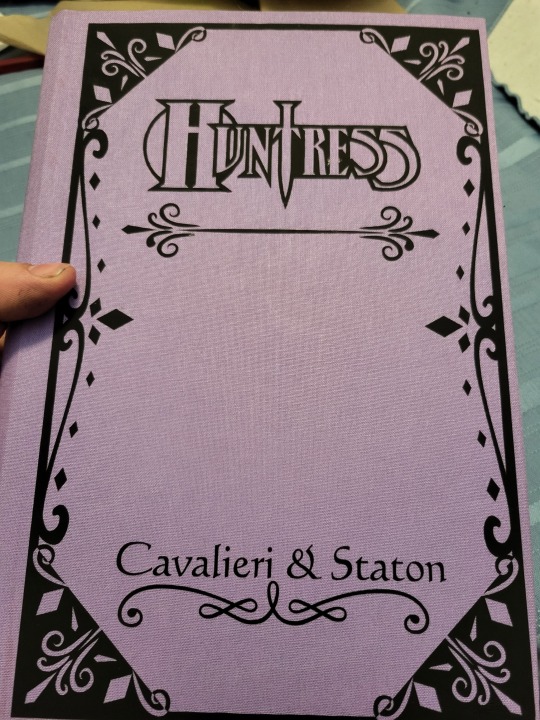
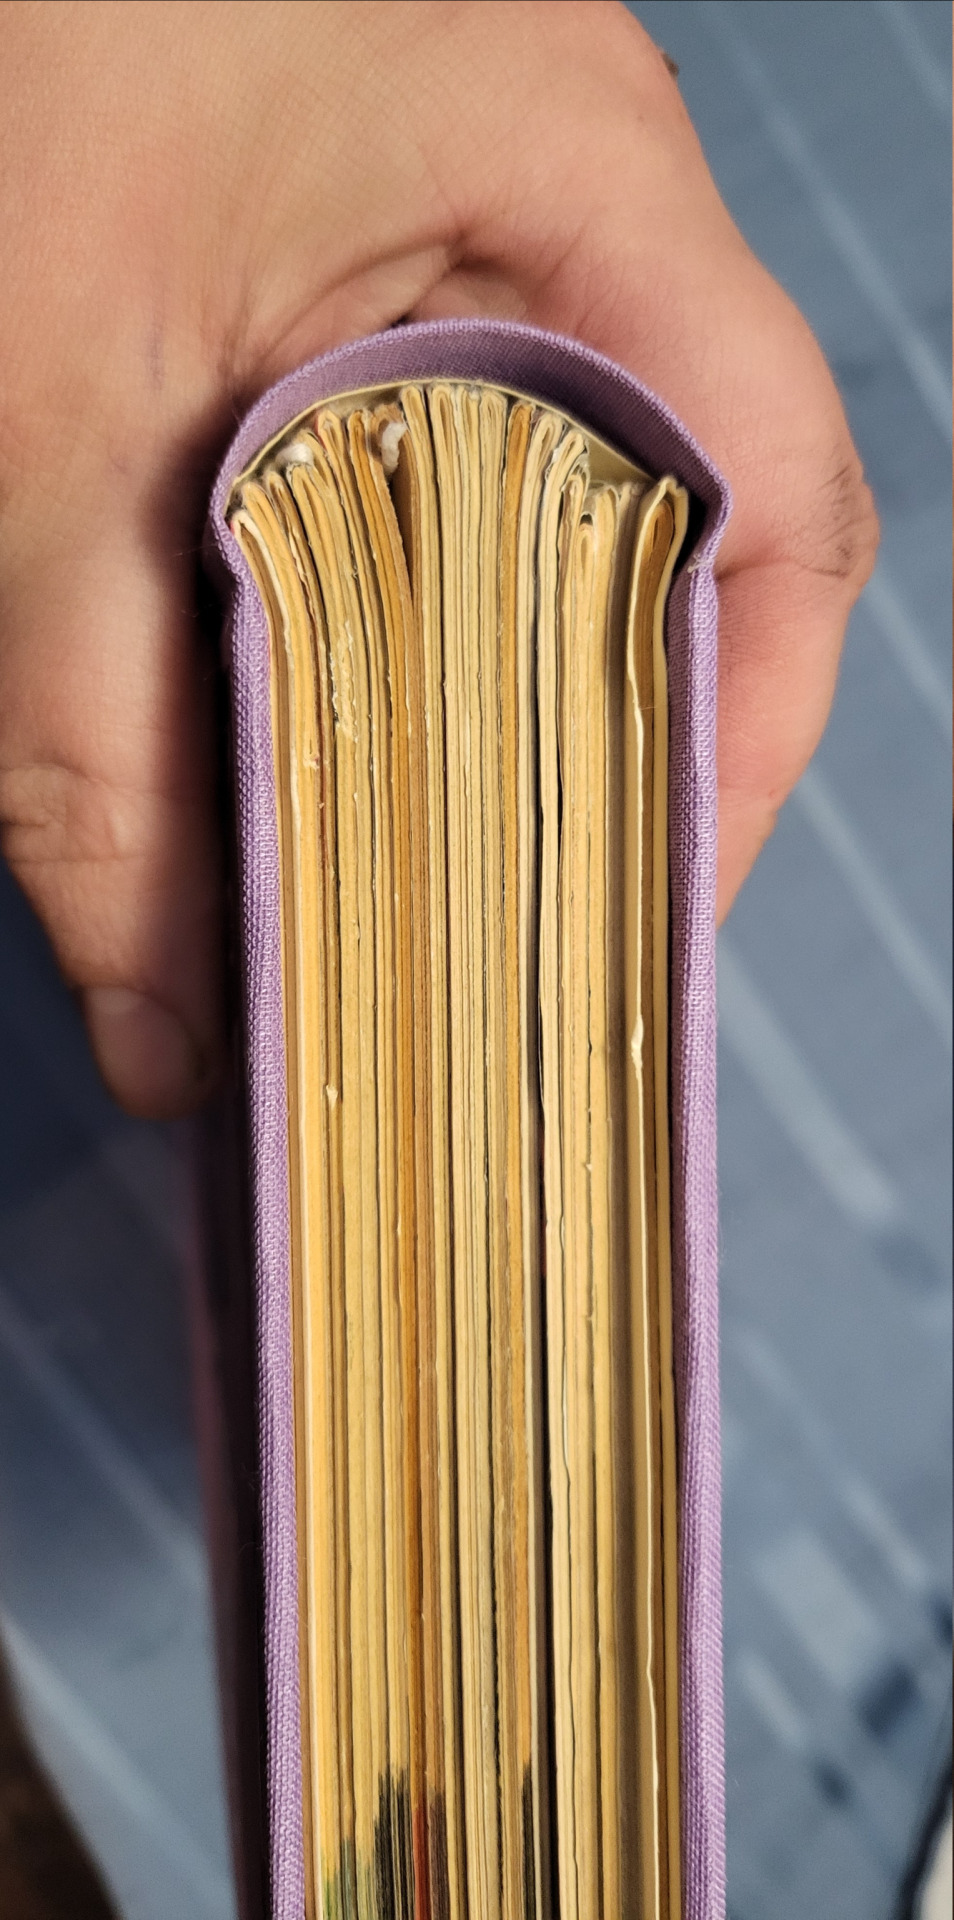
This is my bound copy of The Kakashi Mission by JBMcDragon. It was originally posted on Live Journal and Fanfiction.net. I formatted it in Garmond font with Chapter Headers in InkFree. The edges are colored with gold ink and the spine is lettered using a hot foil pen in green foil. I am really happy with this one. Sorry for the pic spam but I am on my mobile and don't know how to make the pics better?


Nuummite is not helping as usual. Gotta love her. I don't have a cricut to do those fancy covers but am looking forward to creating more books from my favorite fics! Any ideas?
79 notes
·
View notes
Text
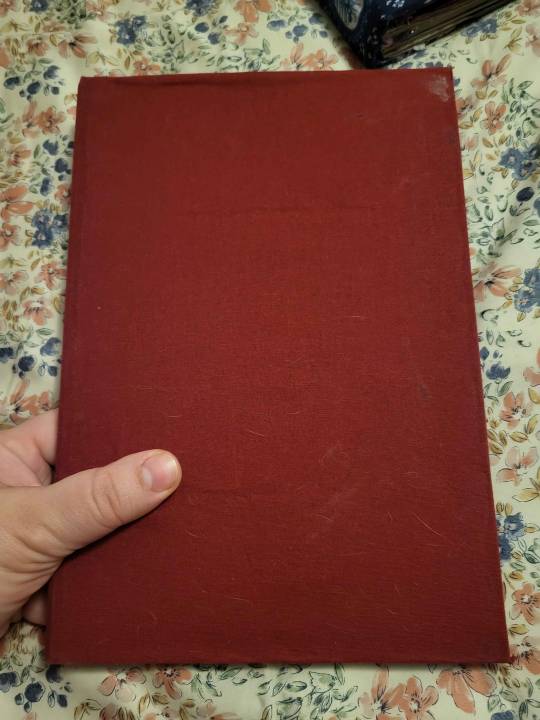
Massive comic bookbinding progress post.
Making a massive bookbinding post with my progress and what resources and steps I use. I do not claim to be an expert and recommend if you want to get into bookbinding yourself you look into any linked tutorials (or find some yourself), because they are made by people with much more experience.
So. When I just got into bookbinding, I was following an instructables tutorial for (link) most of the book. the sewing part, I was following this (link) tutorial. The cover tutorial (instructables) wasn't great for what I currently do, and I changed a lot looking back on it, but it had the bonus of suggesting cheap materials (Cardboard for covers, elmer's glue for spine, any spare fabric for bookcloth) that helped lower the barrier to entry and let me decide if I wanted to buy nicer stuff.
This is the first book I ever bound, using the instructables tutorial.
It's not the prettiest construction wise, but I can still hold it and read it which is at least successful for a first book (tho I did test on comics I didn't care as much about, in case I messed up).
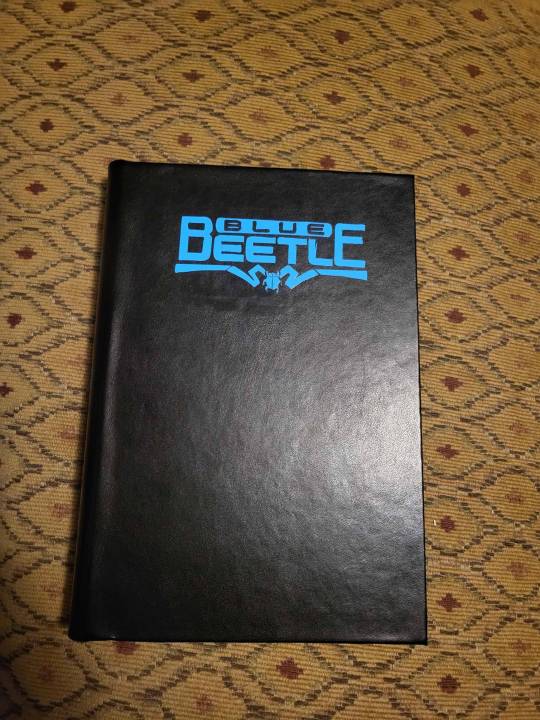
I did a couple more books like this, one being Blue Beetle: Graduation Day (in Spanish) and the other being Artemis: Requiem, and another being Knight Terrors.
Artemis Requiem I think was the last
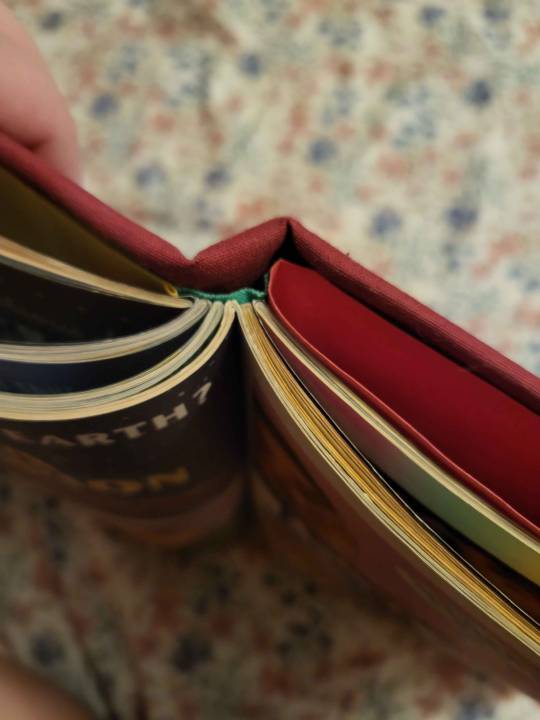
Next, I found and started using Dave the Designer's tutorial (link) and also got some materials actually targeted at bookbinding. I got bookbinding needles and thread (much thicker and stronger, it's easier to pull the threat through and it feels stronger) and davey board -- though since then I have tried chipboard which is muuuuuuuuuuuuch cheaper and works just as well unless you have a giant comic. Sometimes you have to lay weights on chipboard after gluing it to make sure it doesn't bend though, it likes bending when it is wet a lot.
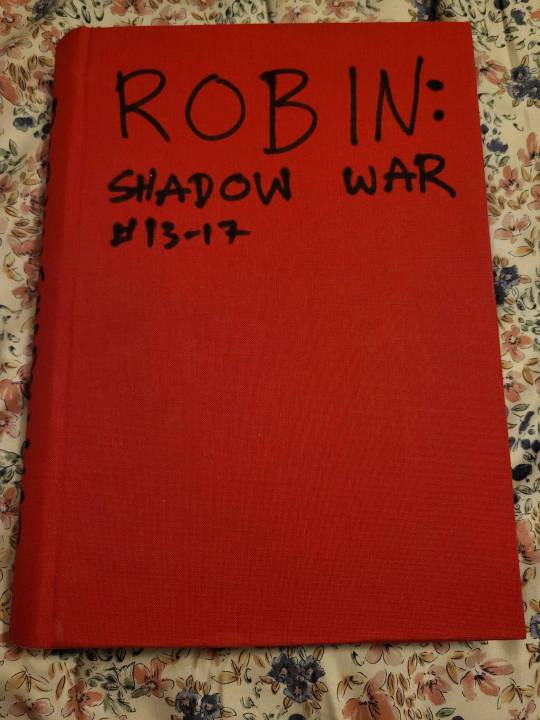
I did a ton of books in this period. I was mostly interested in making books that had good construction and were good for protecting the comics I sewed together and felt structurally sound. I did not care at all about what the covers looked like, and just wrote titles on them with sharpie. I used mostly linen cloth, buckram cloth, or occasionally spent money on book cloth
After this, my friend linked me this (link) youtube tutorial. It does not get into sewing, because the goal of that person's tutorial is not how to sew but how to rebind paperbacks as hardbacks with fancy covers. The main focus for what I watched is on covers. They use a cricut, I got the cheapest I could find (Joy xtra, not maker or any of the big kinds). It still is expensive (like 150 dollars), and in the linked playlist the youtuber includes how you can decorate without a cricut, though that does leave less freedom for what you can choose... UNLESS you are an artist already!
Shortly before I got the cricut, I did Eric Luke's WW Run
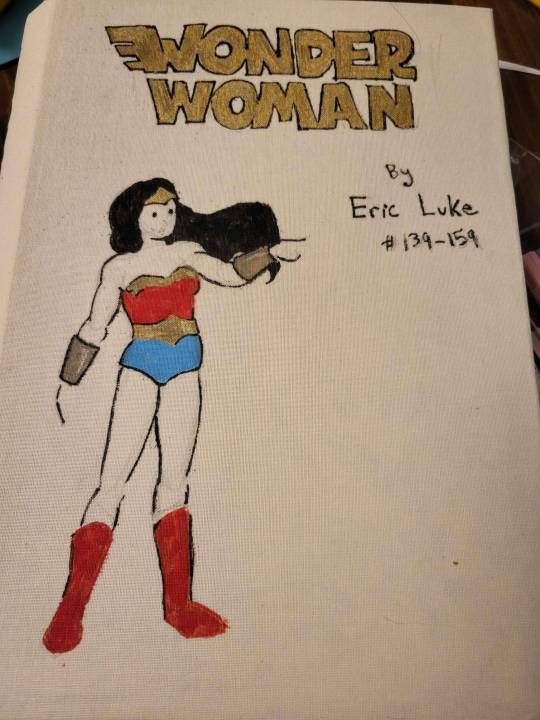
This was when I was getting frustrated I couldn't make the books look pretty on the outside, so I drew a sketch in pencil and colored in with paint pens i had bought for action figure modding (tho im sure any type of sharpies would work).
Anyway, after that I started using the Cricuts for covers. This is the first one:
i messed up on the heat transfer vinyl stuff, so I had to repaint some parts with yellow paint. I haven't had these issues since I started using the bookcloth materials recommended by the cricut youtuber I linked earlier, which are also generally cheaper per unit than where I was getting bookcloth earlier (but shipping is expensive)
Now I do almost all my bookcovers with cricut because once you have the machine it's reasonably priced, the vinyl is pretty cheap, and it's easier on my spoons than hand drawing everything and lets you customize a lot
Lately, I've been trying to make my sewing/construction technique better, and I've been watching videos from DAS bookbinding (link). I tried to do my most recent Huntress comic with the rounded + backed spine with shoulders, not sure that I succeeded, but that's definitely on me because in the tutorial where he explains how to do it without the official material he's like "You should try this with proper equipment first, this is just for binders who took a course and could do the shouldering in a bookbinding course and want to try it on their own without having to buy the proper equipment" and. I have never done a real bookbinding course or used the proper equipment.
Hope this was informative/fun if you made it through!
69 notes
·
View notes
Text
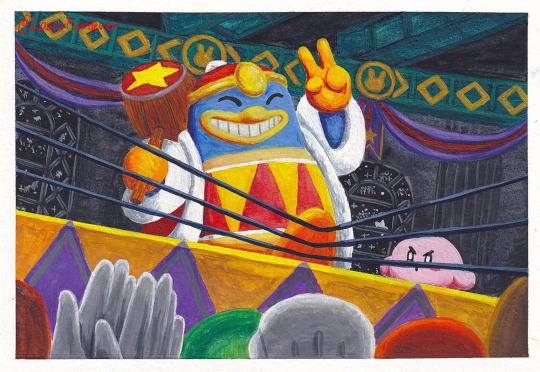
Here's everything from my part of the POPSTAR'S SUPER ULTRA SCRAPBOOK ZINE @popstarzine!!! Everyone worked really hard on their artworks so check it out :)
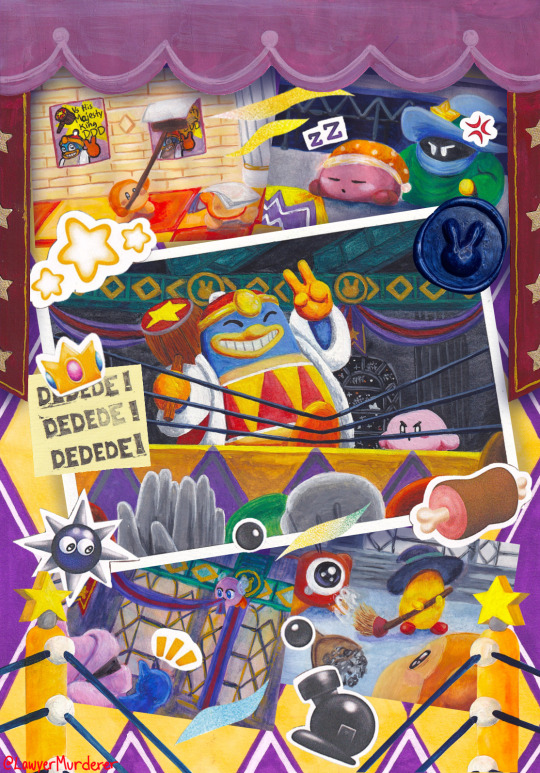
First we have the final artwork!
With and without the spotlight :D Everything, except the spotlight, was done using traditional mediums and scanned individually. I'm really glad I could be a part of this and it being my first zine.

Take a look at the process video
Keep reading for details :o
Concept sketches and final sketch before painting
The sketch has the list of enemy characters and a few different thumbnail sketches of Dedede. The gist of the artwork was to show the characters working together to set up the fighting ring for the fight that happens in game with the 4 small paintings. With the middle painting being Dedede in the decorated room. I re-sketched 2 of the small paintings I was having trouble visualizing and some background and foreground bits.


This sketch was the original sketch for my piece before I was told I needed Dedede in it. I plan on coloring this, but I'm busy so it will just have to be a sketch for now.

Background and foreground
The background pattern is the pattern from the sides of the fighting ring, but without Dedede's face and symbol. It was made with alcohol markers and the white lines are painting with acrylic pen.
For the foreground, the light purple drape is from where the crowd sits, and the side banners are from the main fighting ring. Both painted with gouache with the side banners having paper stars I cut out using my Cricut and drew the gold with a pen. The bottom part of the foreground is the ropes and poles of the ring.


Paintings
Top left - The area the Waddle Dees are in is the room before the fight Dedede
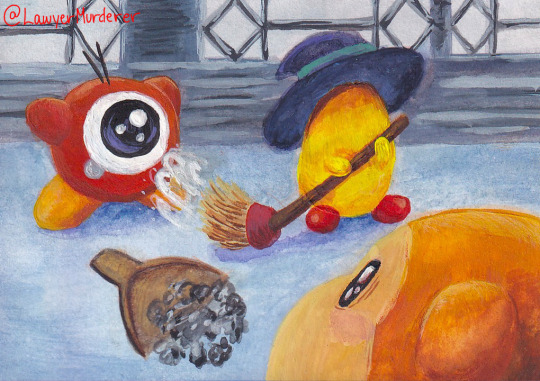
Top right - Noddy and Simirror are on the covering the sides of the stage, but Noddy fell asleep and is not being helpful.
Bottom left - They are on top of the stage but looking up at the support beams
Bottom right - Also on top of the stage, but it is angled facing downward
Middle - I thought it would be funny if Dedede used his strength to step down on the ropes. Also, do you notice that Mario and Peach are in the crowd?


Stickers, stamps, & paper
Stickers - I lied when I said everything was made using traditional mediums >:) the stickers were drawn digitally, printed and rescanned. Yes, they're actual stickers and I will stick them on to everything.
Sticky note & breezes - Words on the sticky note were carved out of rubber carving blocks and using ink to stamp it onto a sticky note. The breezes are from the start screen of string breeze and are finger painted on paper with ink
Wax stamp - wax seal was also carved from rubber carving blocks. Scanning the wax stamp was difficult because it wasn't flat, so I took a picture of it instead


Scanner & Editing software
For the scanner, I used a Canon Lide 400 scanner and for the price it's a pretty good, but this is my first scanner, so I'm not sure how other scanners fair.
I used Affinity Photo 2 on my iPad to put everything together. I originally used Procreate, but after seeing the quality I realized I needed a photo editing program. So I used the free trial from Affinity to make the final artwork. Original I wanted the final piece to have a white border but decided against it and instead added shadows to make it look like a spotlight. Also added some shadows to some areas.

Everything but it's not scanned


Ok, thanks for coming to my art talk :D see you next time!
#get the zine#king dedede#kirby#sir kibble#bronto burt#noddy#simirror#waddle dee#waddle doo#broom hatter#kirby series#kirby zine#art zine#watercolor#gouache#painting#illustration#artwork#affinity photo#my art#finished art
43 notes
·
View notes
Text
Flare Signal (by @queenangst/achievingelysium on AO3) Fic Binding Update #6
I LIVE AGAIN
For most people, one bind does not take this long. However I am a) a beginner and b) the physical embodiment of ADHD (so motivation is a lil hard to come by) (my poor friend has been waiting on her birthday gift for over a month now) (but it's fine)
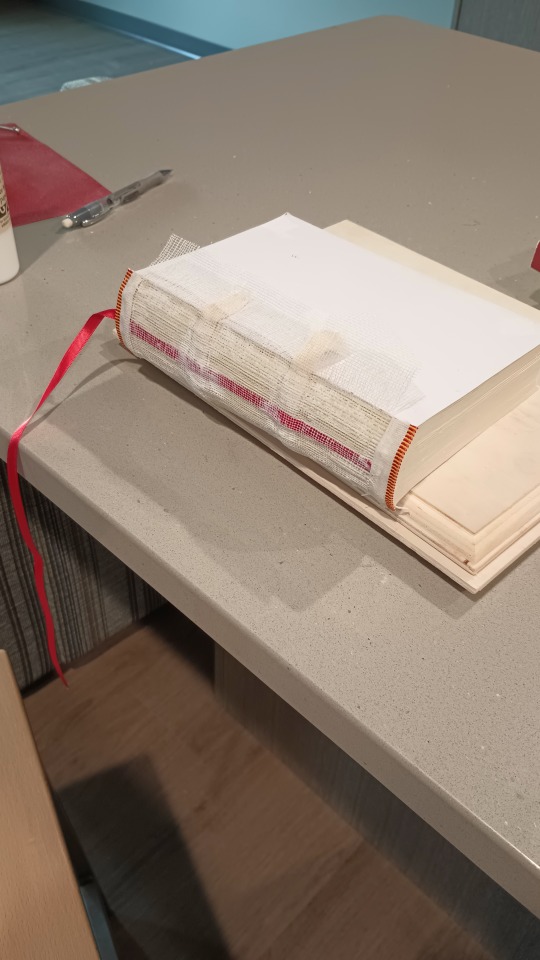
Edge trimming did take ages as I predicted last time but it's DONE and it looks pretty decent considering I did it by hand with a wood chisel and a homemade press. Also finished reinforcing the spine & added headbands and bookmark!
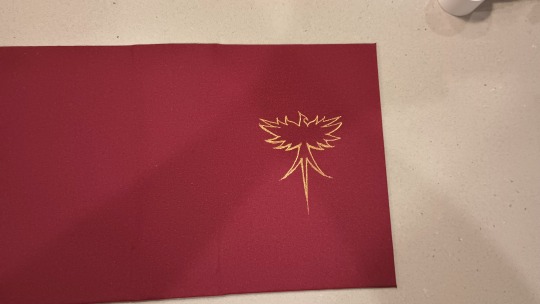
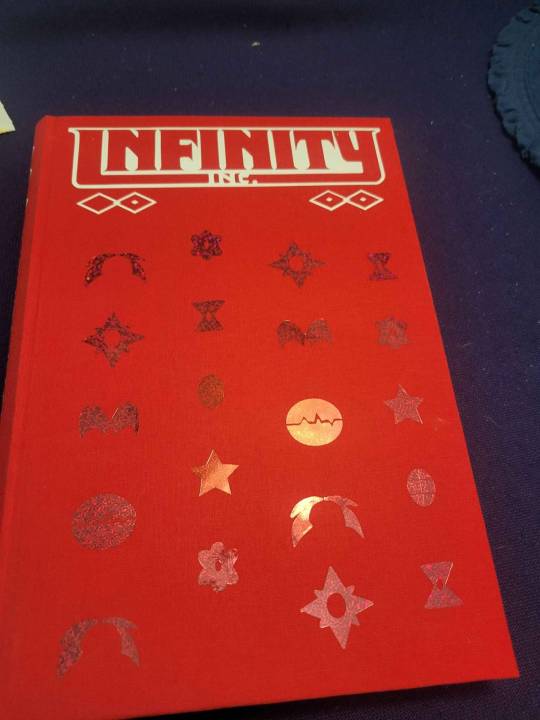
AND I made the case today! First time using the foil quill pen I bought months ago (thanks to the good folks in the @renegadeguild discord server for the recommendation!) I kept the cover design very simple and didn't do anything on the spine or back, mostly because I didn't quite know how the pen worked yet and this was my last bit of red bookcloth so I was Very Scared of Messing Up
The phoenix design definitely isn't as perfect as it would be if I used a cricut, but for hand-drawn I think it looks p good so I'm happy with it
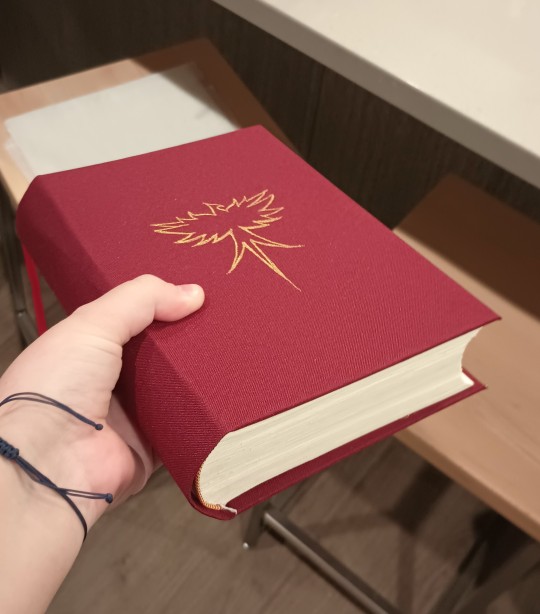
Making sure the case fits, not glued in yet (that's a job for tomorrow)
#sorry for rambling i'm just excited#i know it's not much compared to a lot of the binds you'll see on here but it's a lot for ME okay#and I just think it's neat#bookbinding#fan binding#fanbinding#fic binding#fanfic binding#flare signal#mha fanfic#bnha fanfic#mha#bnha#seriously if yall are experiencing withdrawal after the end of the manga and haven't read flare signal yet you should do so immediately
73 notes
·
View notes
Text
Book No. 27
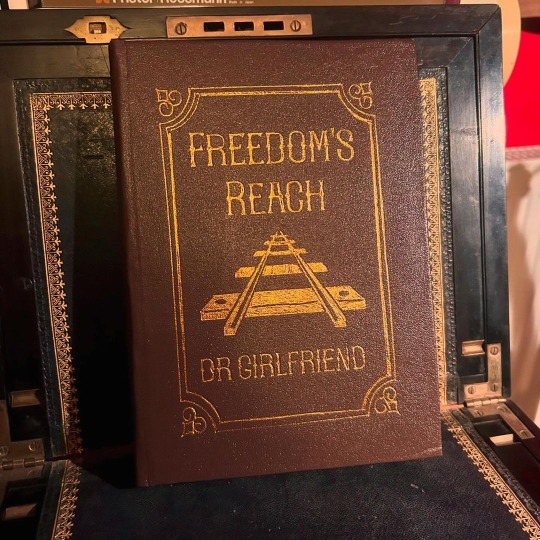
A charity bind for @dr-girlfriend, and coincidentally a fic I adore, which is a lovely bit of fortuitousness.
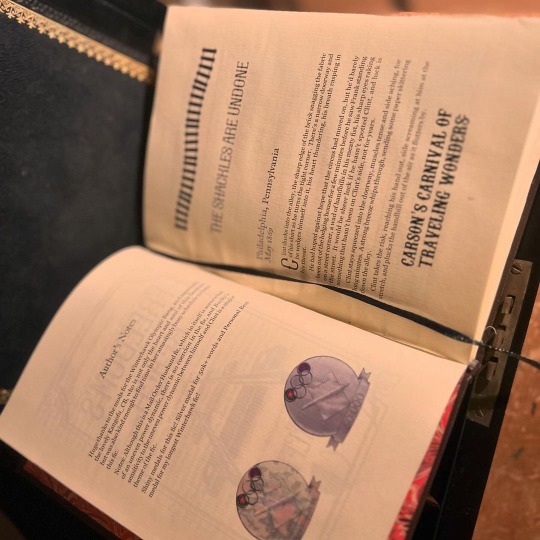
Finished on the 20th of October, according to my binding journal, but only reached the lovely Dr. G today! I was so delighted when she reached out and asked if I would consider binding a copy of this fic for her — it’s a longtime favourite of mine, and it was a fun work to typeset. I wanted to lean into the setting as far as I could without tipping over into outright cheesiness, and while I don’t know that I fully succeeded, it was fun to try.

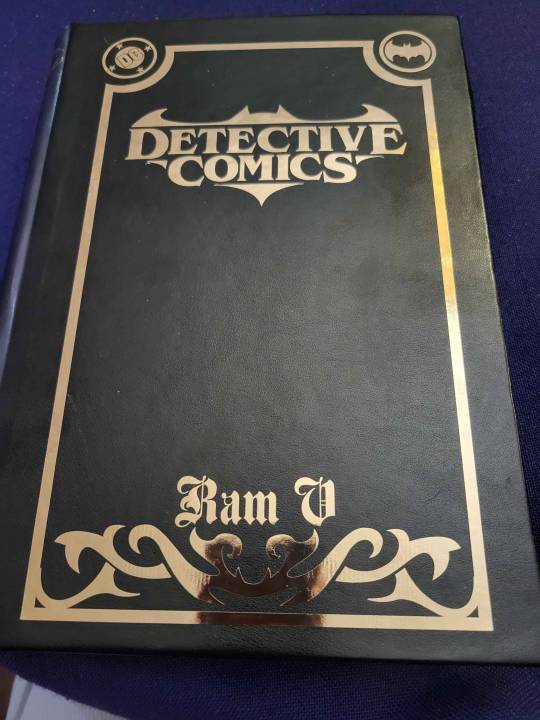
The foiling on this was a pain, mostly because I wasn’t very clever how I went about it - the sheets of heat-transfer foil I was using weren’t big enough to cover the whole design, and I when I tried to use the cricut, it didn’t take where I used tape to cover the join in strips of foil. Stencil vinyl, my beloved for foiling, also didn’t work as the design was too big to place on the foil without buckling.
I ended up cutting templates out of sticker card and using those on top of the foil, and used a heated pen tool into the crevices of the stencil. It’s still not 100% but it’s better than previous attempts.
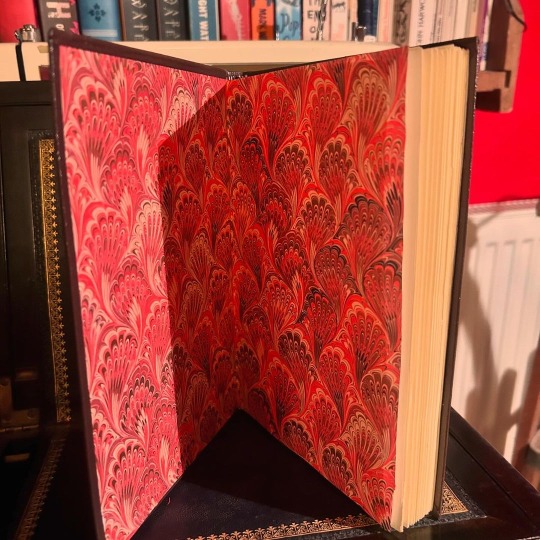
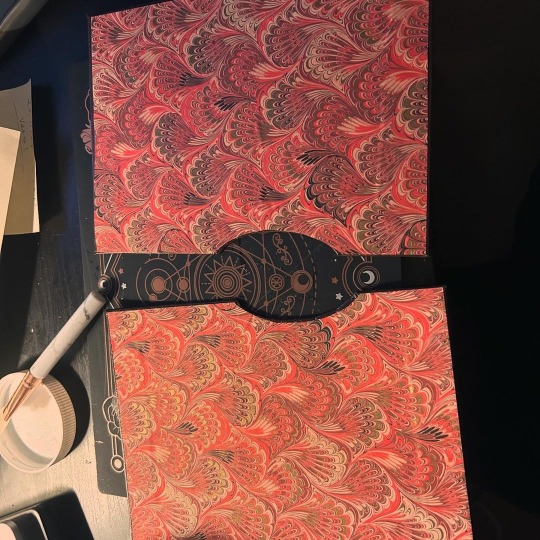
My favourite thing is probably the endpapers — the gold touches in them are really shimmery in person, if not in photos. I also used it to line the slipcase I made, which was a last-minute addition made when I was panicking that the cover was a little too floppy for this book. (The cover ended up firming up compin the press, and the case apparently got a little damaged in transport and is protecting nothing 😅, but I still think it’s a fun touch.)
28 notes
·
View notes
Text

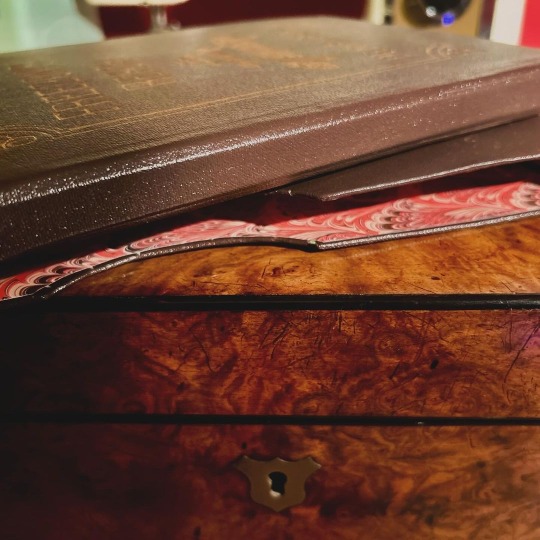
It is Monday, and Monday is for books. Look at these beautiful things! They took me five months to make. I tried so many new things in the process and I am extremely proud of them. This is a binding of @racketghost's amazing Good Omens fic Strange Moons (Hi. I hope it's ok I tagged you in this. Your fic has been one of my favorites since I found it in 2019.) The story is a series of short fics (and one long one) that really need no introduction from me. They're set throughout the 20th century, and they are beautiful and sensual and moody and you should definitely read them if you haven't already. This is the longest work I've bound so far, but I was fortunate that the word count on the shorter fics added up to almost exactly the length of the final, longest one, making them the perfect choice for a two-volume set. I tried very hard to get them to be an exact match, and they turned out even better than I pictured.
More pics under the cut! Two books means twice the pics, and all the stuff I tried here means it's a very long post, so be warned.
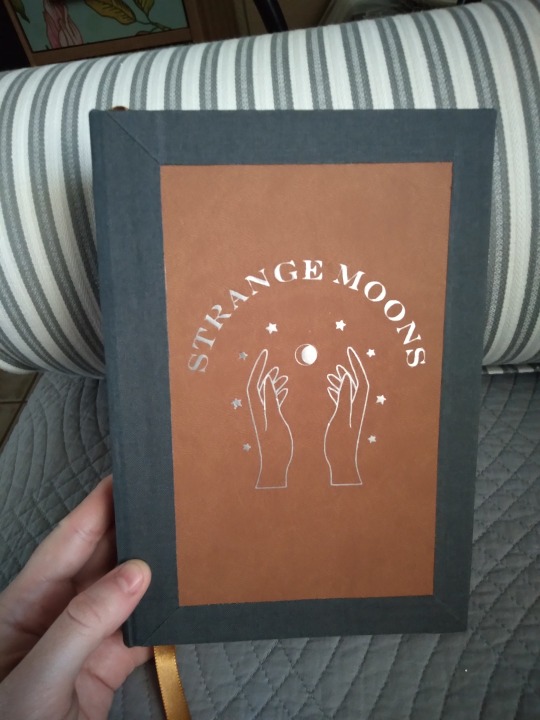
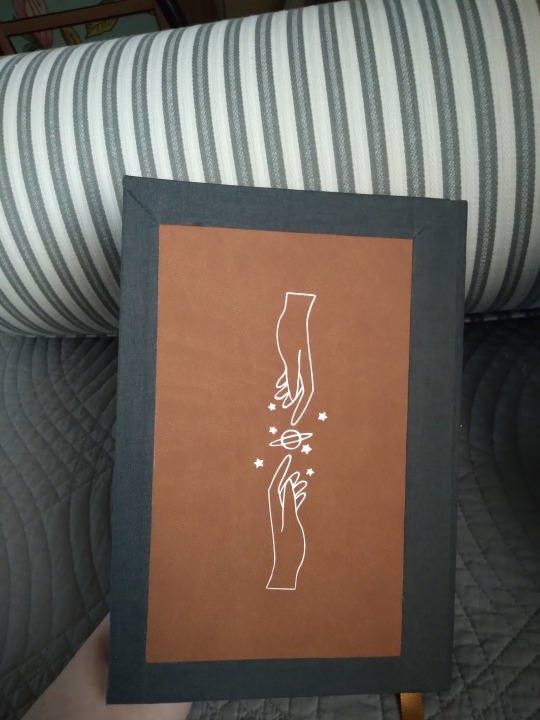
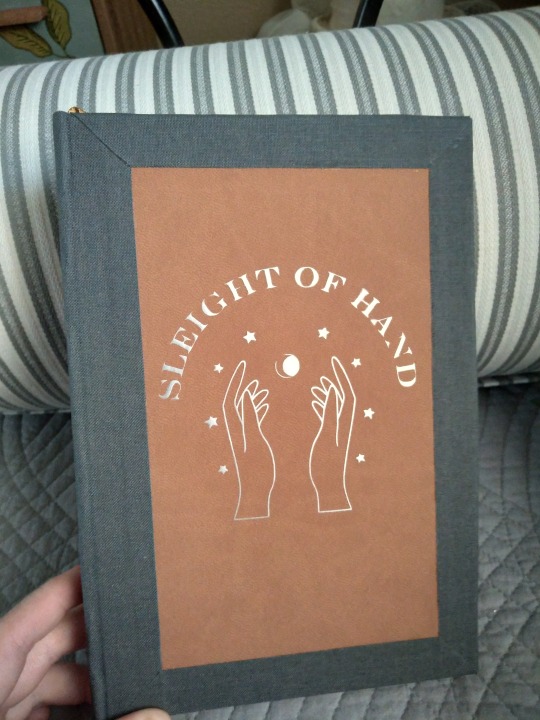
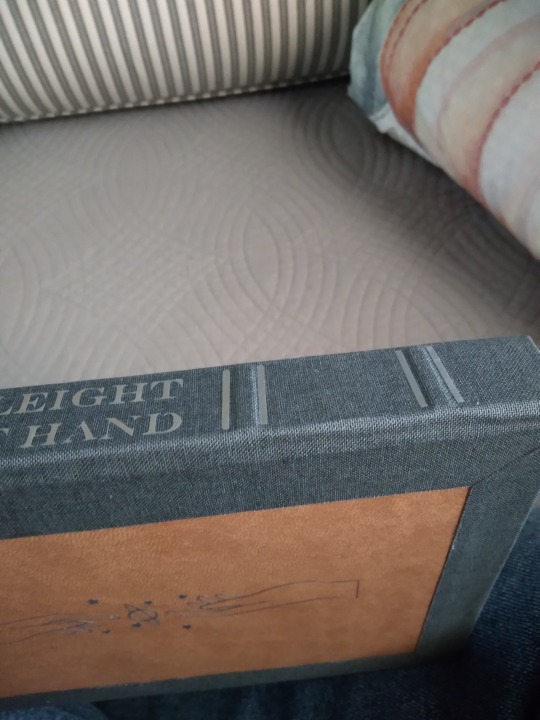
Individual images of the covers. The titles are done in silver htv over brown faux leather, edged in charcoal bookcloth. The graphics are the same on both, except for the title text, and they have the same image of the reaching hands on the back. All the art assets are from rawpixel, I just flipped and rotated some of them to make the back image.
The cover materials were an interesting challenge. I'd worked with both before and wanted to incorporate them both in the design, but after measuring and checking grain direction I found I didn't have enough of either of them to do a full book, or even a half bind. So they're actually made by affixing the faux leather to the book board, then layering strips of book cloth over the top. The corners are actually mitered at a 45-degree angle. Here's a close-up:
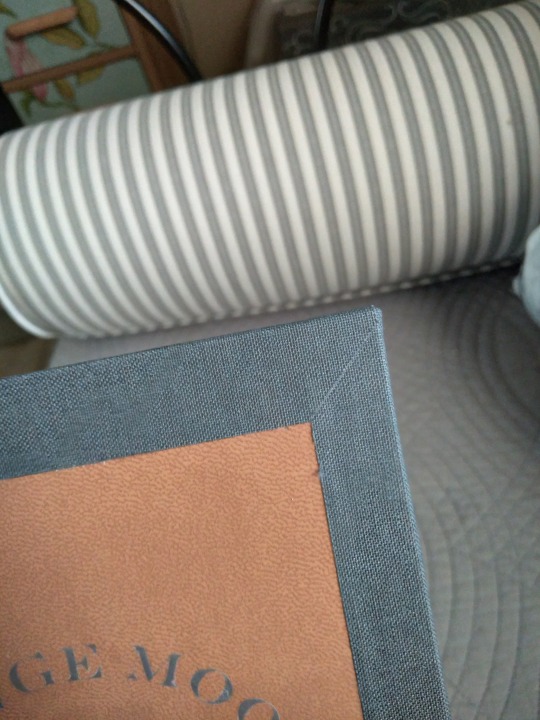
It's two long strips of cloth (spine and fore edge, not mitered) with two short strips (top and bottom, mitered) glued over the top. There was so much measuring, omg. I bought a new tool to make sure I got it right. Hilariously, I still didn't have enough leather and had to order another roll anyway. Also hilariously, I got the idea to do this after seeing an image of a leather-bound book made by a professional that appeared to have the same feature, i.e. multiple materials with an inset and mitered corners. Wow, I said, looking at a video thumbnail, I'm going to do that! So I did, even though I didn't watch the video. Much later, after I watched his tutorial, it was clear that the design was from leather dye and tooling, not the thing that I did at all. But I do like the effect, and now I know it's possible I think it'll be great for using up weird offcuts from making other covers.
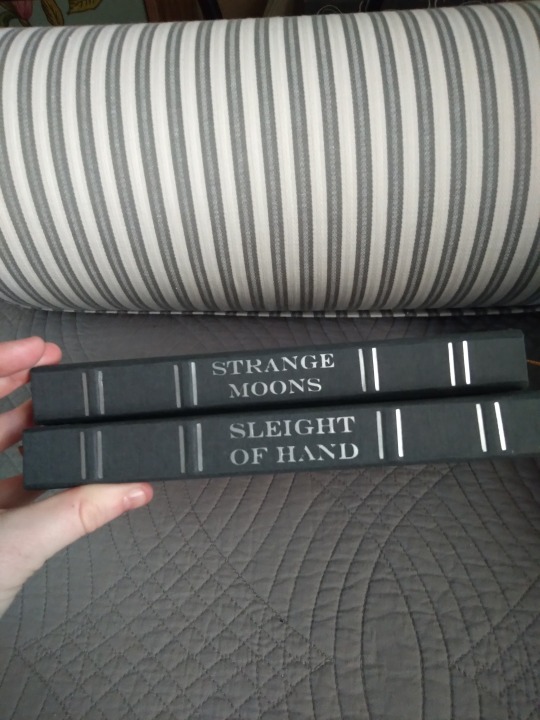
Look, spines! With TITLES on them! And LITTLE RIDGES! Both firsts for me. I'm a little obsessed with them. The cricut has opened up entirely new worlds, though I suspect the little silver lines might have been easier to do with a foil pen (which I don't have) than they were with a heat press. I did them by making the cricut cut out several "=" symbols that were the same width as the spine. The raised bands are false bands; I made them by layering little pieces of chipboard on the spine stiffener, then molding the book cloth around them when I covered them. I was worried it wouldn't work, since this is usually done with leather and book cloth is apparently way less stretchy, but it worked fine. Probably because it's a small straight design, no curves or fancy bits. I'd layer the chipboard thicker next time so they stand up higher (this is 2 layers, I'd do 3 in future) but I'm delighted by how this turned out. They look so professional.


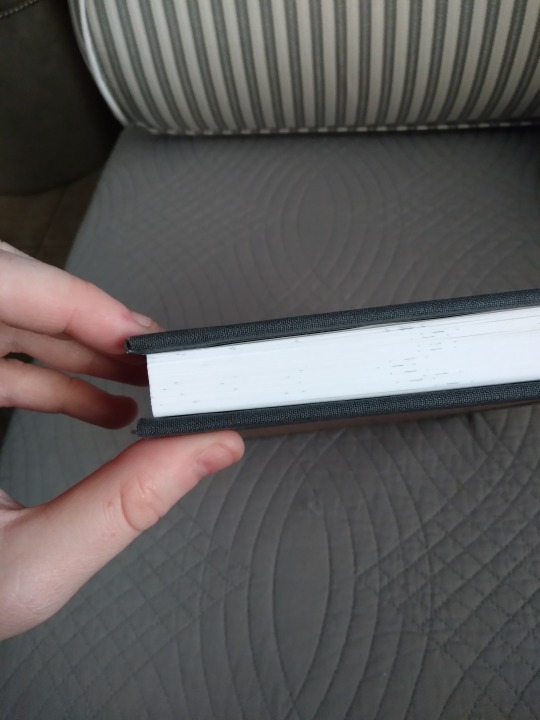
The endpapers on both books are a constellation print. I had a really hard time trying to find something to go with the typeset, and the only ones I liked were from an etsy seller who kept selling out of them. I got lucky eventually but it was one of many hassles that befell this project. I also made my own end bands using a tutorial from the Renegade Bindery discord. I had some issues and I didn't quite nail them but I think they're pretty good for a first time (ok, second time, the first one was on a practice text block, but my point stands). I had originally intended this to be a split boards binding, my first time trying that, but when I got the boards glued on I found that they were crooked. Really crooked. Completely misaligned. Much swearing followed this discovery. I ended up having to cut the boards free, cutting the mull and tapes in the process. The mull was easily replaced, but the parts of the tapes that are usually glued to the boards were a lost cause. I reused the boards, but flipped them so the edge with the cut tapes inside is at the fore edge so I could have a cleaner hinge. You can see in the last photo that the cover board is a little wider at the fore edge. On the plus side, there are no tapes to wrinkle my pretty endpapers and it combated the small bit of spine swell I had. On the downside, the hinge has less support and the only thing I learned was How Not To Make A Sewn Boards Binding.


I may have gone a little nuts with the images in this typeset. In my defense they look very pretty. In order, that's the title page, table of contents, section break image (same as the back cover, just tiny), chapter header and ender (each chapter has one on its first and last pages, they just look particularly cool when you can get a full page spread like this), and the image on the last page of the book (same as the cover image, almost). The cover image was also supposed to have little rays coming off its moon like this one does, but the lines proved too thin for the cricut and it ate them. I still like how it looks though. The prose in this story is really rich and I was in the mood for opulence when I did it. I have absolutely no regrets.

Here's a feature that's unique to this typeset. One of the chapters in the second volume has three alternating, interwoven timelines. I read them fine on Ao3 but had trouble following them when I formatted it for printing. Usually I'd use the section break image to denote when there's a scene skip but there are literally dozens in this chapter, like 40-60 breaks over the course of 10 or so pages, and it looked very busy with images in it. So I left them out, made the line skips single instead of double like they are elsewhere in the book, and I color-coded the text instead. One timeline is printed in black, one is dark gray, and one is dark blue. And it's a very surreal chapter, with the characters having some very confusing and conflicting emotions, so I feel like reading multicolored text when you're not expecting it (the rest of the book is all normal black and this bit is near the middle) sort of reflects that unbalanced feeling? I hope so anyway, because I love the way it looks so much.
I learned so many things in the course of making these. I'm absolutely doing all of them again. Part of the reason it took so long was that I wanted it to be perfect, or as near as I could get, and I had to take the time to solve all the puzzles it threw at me. But it stretched my creativity and ingenuity and I could not be more in love with the finished product.
#bookbinding#fanbinding#snek makes books#good omens#fic rec#this got super long#and considerably more journal-like than I planned#i guess when you work on something for five months it becomes part of you huh#there were more images too#i took so many photos of these
94 notes
·
View notes
Text


This is my first attempt at printing and binding a book and it worked out so well! (Prior to this I made two blank notebooks from a kit to learn how)
The text is The Marlows and the Traitor, by Antonia Forest - a book that's out of print and apparently impossible to buy second hand. I found a PDF of a scan of the book online, converted this to a txt file, copied and pasted it into Word and then retyped most of it to correct the mis-translated words and punctuation from the scan. I cleaned up the illustrations and added them back in, and then formatted it for printing. I used Bookbinder JS online to create the signatures.
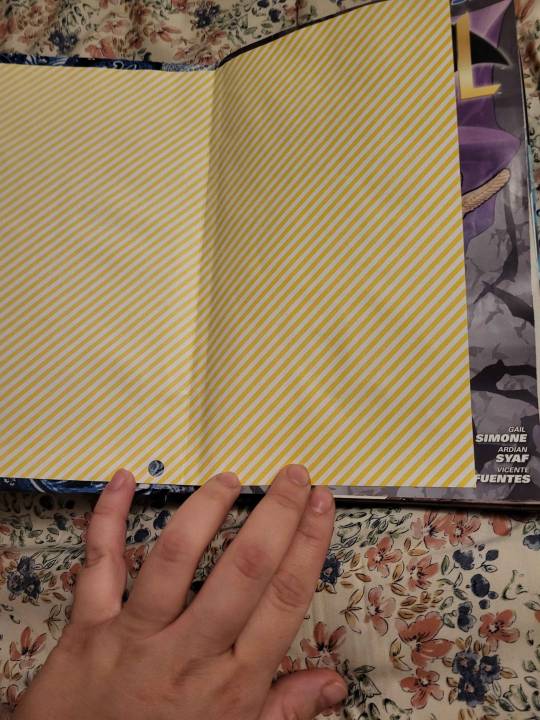
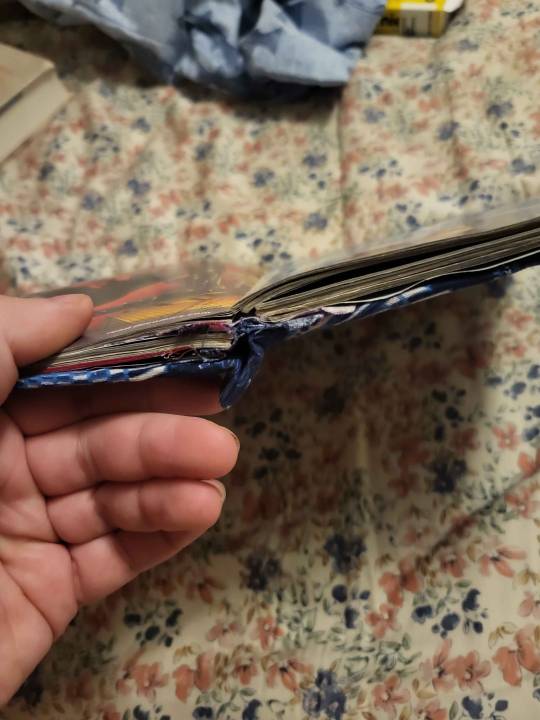
I made a mistake with the spine board and didn't realise it wasn't right until it was first glued together, so I had to rip off the endpaper to set it free, then trimmed the spine board down and glued it back together - I didn't know if this would make the hinges too big but it turned out fine. It does mean it has different endpapers at the start and end, because I didn't have a second sheet to replace the one I ripped up.
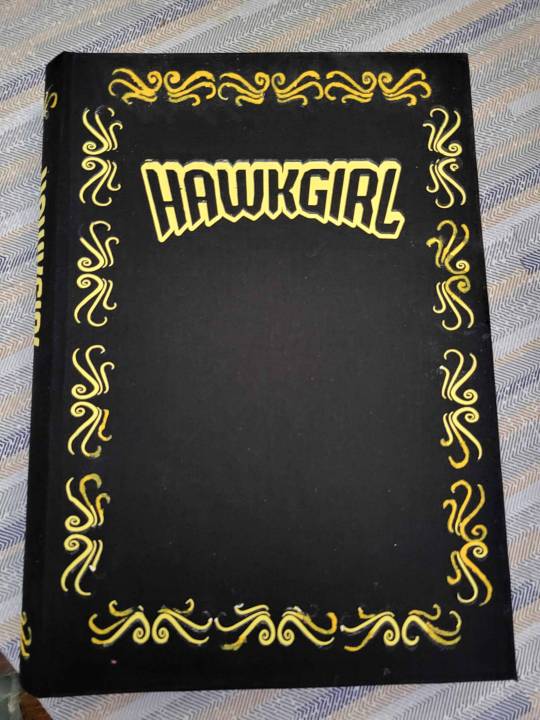
I'd like a Cricut or similar for a more professional looking cover, but that's on the wishlist for now. My handwriting is legible, so I bought a metallic paint pen that would write on bookcloth and just wrote the title on the spine and cover. (Next time i'll do this before I put the text block into it - I didn't have the pens until after it was all together.)
Anyway, I definitely have a list of things to improve but I'm pretty happy with the end result. And since it's been so long since I edited the text (this has been on the backburner for a long time) I was able to actually read this physical copy, and despite the imperfections it's a perfectly functional book which is what ultimately matters!
3 notes
·
View notes
Note
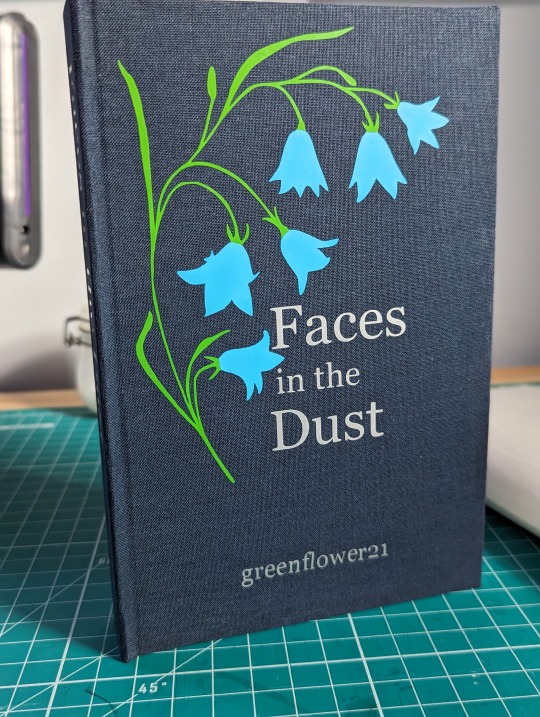
Hi, just wanted to say your binding of "Faces In The Dust" looks gorgeous!!! Could I ask, how did you make the title + decoration and apply it to the front cover? :O
Hello! The cover designs are cut from vinyl with a cricut machine. In this book's case I used permanent vinyl. Which is essentially very sticky vinyl. There is also HTV(heat transfer vinyl) which you cut out and then adhere to the material via heat (such as an iron). I tend to use cricut to design and then cut most of my covers. The cricut is a cutting (and other things) machine that has a digital design space I run on the computer to help me design covers.
I typically like to start by 'making the case' out of colored blocks in the space that are the size of my actual cover so I can know what things will look like when I put it all together. I also color my items to match as close as possible to the colors I plan to cut them from as well. I mostly do this because I have aphantasia so I need the literal imagery in order to see what the design will look like. These steps are by no means necessary and if you can visualize what you want then you can just add the images/text in however you like.
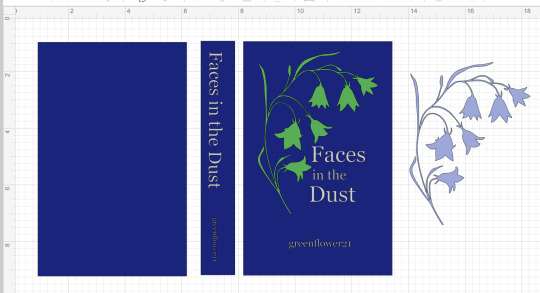
The vinyl is a plastic-y sheet or roll of vinyl in a given color. Because I wanted to have the flowers be one color(lavender) and the stem (green) another I needed to cut two sections and take the parts I wanted from each. I could have also edited the images so that each of the two only had the parts I wanted from it so it would only cut them. But it wasn't that much of a difference and if I just copy pasted a second one of the same image and changed the color then I would know they were the same size and everything would fit together.
Once the design is done I move to the cutting phase. The colors you pick determine which pieces are cut together.
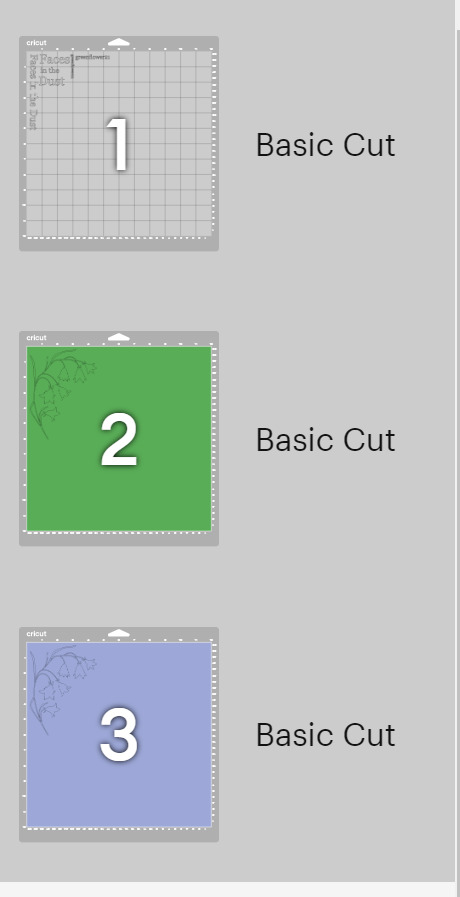
You load each sheet of vinyl in on a mat and it cuts the image out. When it is done you cut out around the section you just cut the image on and then use tweezers to remove the vinyl you aren't using around the image. This is called weeding. In the flowers & stem's case I also then used an exacto blade to cut off the flower heads from each of the cut outs so I could combine the two colors of vinyl to create my final version of the image.
Once it is all weeded you are ready to transfer it to the book case. You do this with transfer tape. It is a clear plastic sticky sheet that you place on your vinyl to 'pick it up' off of the backing it started out on.
Again in this instance to combine the colors I picked up the green vinyl on the tape and then lined up the purple flowers and pressed down to get them stuck to the tape as well. With it all now collected I placed the transfer tape on my book and pressed the vinyl into the case of the book. Smoothing it down with my bonefolder or anything else that helps make sure it is flat so it is really adhered and there are no air bubbles.
I do the same with all the titling and ta-da! A Book!
There are tons of ways you can title/design your book covers. I just got my hands on foil quills this past weekend so I hope to try making a cover with them in the not too distance future. Some folks I know use paint pens, or cut out stencils and use regular paint, or just free hand paint if you want to show off your skills of an artist. Hope this was helpful and not too rambling. Sorry I don't have pictures for all the steps, I can make a point to take pictures the next time I make a cover in cricut if that is something folks would want to have. Feel free to reach out if you have any more questions.
45 notes
·
View notes
Text
How to Use a Pen on Cricut: A Beginner’s Guide
If you are a Cricut user, then you know that Cricut is a brand that offers crafting machines capable of making a variety of projects using different materials. But did you know that you can now create DIY projects using Cricut pens without cutting any design? Yes, it is possible! Cricut provides many pens and markers in different colors for beautiful crafts. To make projects involving pens, you must know how to use a pen on Cricut.
If you do not know what a Cricut pen is or how to use it, don’t worry. This blog will explain everything related to a pen. To learn all about these pens and how to use them, just read the blog!
What Is a Cricut Pen?
Before we find out how to use a pen on Cricut, we should know what a Cricut pen is. Cricut pens are specially designed to work with Cricut machines to write on various materials. Using this pen, you can make banners, greeting cards, bookmarks, labels, notes, and more.
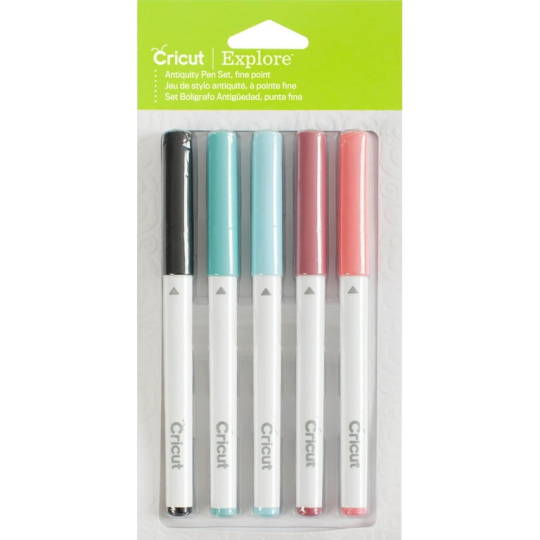
With Cricut models like Maker, Venture, and Explore, you can use special-sized pens that you can fit into the machine’s pen holder. However, if you want to use a pen with Cricut Joy, you will need to buy a separate pen, which will not work with other Cricut machines. The Cricut Joy is a small machine, so any regular pen will not work with it. You will have to get a pen that is specially made for Cricut Joy.
Types of Cricut Pens
Cricut has a variety of pens, and you can use one of them depending on the project you are making. I am writing about all of them. Here, you will learn about these pens and which one is suitable for your project. It is important to know about pens before learning how to use a pen on Cricut.
Pens
Most Cricut writing projects are made with Cricut pens. You can insert the pen into the machine clamp, which is good for writing. These pens come in a wide variety of thicknesses, colors, sheens, and weights. They have fun color combinations. These pens include fine-point pens, extra fine-point pens, and normal pens. Their thickness ranges from 0.3 to 0.8 mm.
Markers
When you need to write on projects that require thick writing, you can use markers instead of pens. Its thickness ranges from 0.6 mm to 1.0 mm.
Fabric Pens
This pen is specially created to draw on clothes. You can fit the pen into clamp A just like any other pen and start drawing. You can use the Cricut Maker/Explore machines to draw.
Infusible Ink Pens
If you want to draw on your sublimation projects, you can use infusible ink pens. It will draw on the infusible ink sheet, and you can transfer it to a mug or coaster project using a heat press machine. Remember, do not use this ink with non-sublimation projects.
Free Hand Markers
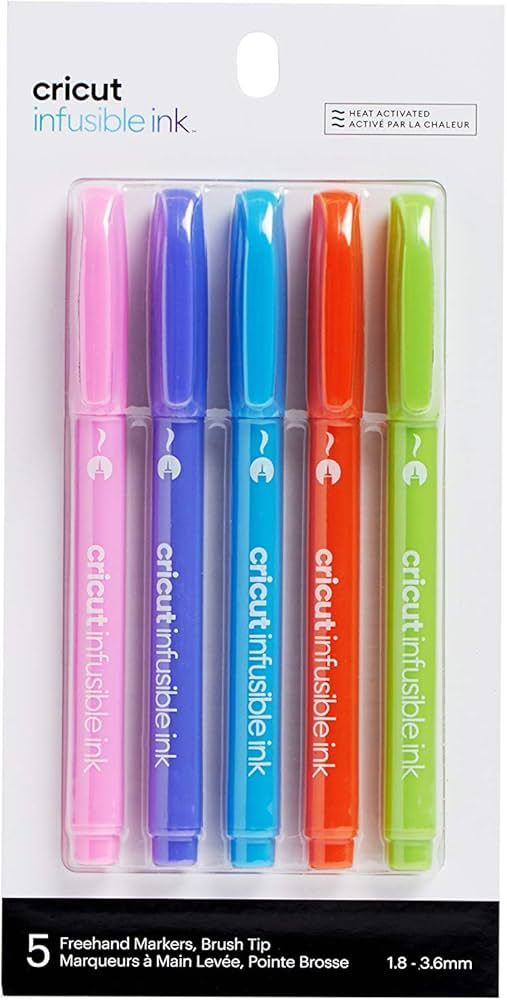
These are markers that do not fit in a Cricut machine. If you want to use it, color the design by hand.
How to Use a Pen on Cricut: 3 Easy Instructions
Now you know all you need to know before you go on to learn how to use a Criuct pen. Let’s learn how you can actually use a pen on your project.
Step 1: Insert a Pen into Your Cricut Machine
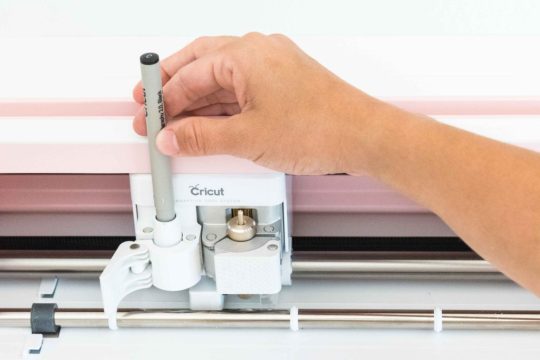
To install the pen, you have to turn the machine on and then open clamp A of your Cricut cutting machine, which is located on the left side. Once the clamp opens, you have to remove the pen cap and press it into the camp. When it reaches its limit, you will hear or feel a click. It means that the pen is well installed. Now, you close the camp.
Step 2: Choose a Design or Font
Before using a pen on your Cricut machine, you should first choose or create a design using the Design Space software. Cricut has thousands of ready-made designs, fonts, and images. You can select any one of them and draw on your machine. If you want, you can also create a design on your own. You also have an option to upload an image from the internet.
Step 3: Draw Your Design
After that, you can draw the design using your material. You must put the material inside the Cricut Maker, Explore, or Venture machine. Once the material is loaded, you can start drawing the design on it, and when it is done, you can unload the material. Your project is now ready.
Conclusion
In conclusion, you have to know that you have learned here how to use a pen on Cricut, and now you can easily create projects with the help of pens. Cricut has various pens, and you can use any that fit the needs of your project. To use a pen on your Cricut machine, you should choose a design that you will draw using your material. Once the design is ready, you can install the pen into the machine and draw the design on it.
Frequently Asked Questions
How Can I Install Cricut Pen?
To draw any image or font on a Cricut machine, you will need to install a pen. You can install it in a few steps. Here is how you can do it.
First, pick a pen suitable for your project.
Then, open the clamp A of your machine.
Next, insert the pen inside the clamp and close the camp
Now, the pen is installed. You can start crafting.
What Can I Make from a Cricut Pen?
A Cricut pen is a tool that can be used for multiple projects. You can create beautiful bookmarks, cards, invitations, coasters, t-shirts, and so much more. If it is someone’s birthday and you want to make banners, you can use a Cricut machine for it. Apart from these, you can make cute doodles, stickers, and labels using these pens. You can use these projects for your home decor, or you can also give them to someone you love.
Can I Write on Fabric with a Cricut Pen?
Yes definitely! Cricut has a fabric pen specifically designed for fabrics. You can use the pen with the Cricut machine and draw any design on the fabric. To use the fabric pen, you must first select a design on the Cricut Design Space app and then install the pen on your cutting machine. After that, load the fabric onto the machine and draw your design on it.
0 notes
Text
Freezer Paper Stencils

Do you ever need to paint a design onto your fabric, but don’t want to try and free hand the design? Freezer paper stncils may be the answer for you! They are an easy technique and they use items that you may already have around your home. Painting directly on to fabric can be scary, but I’ve had a lot of luck with stencils. I like them as a cheap alternative to buying something like a Cricut to cut designs from HTV. It also has a unique look! I made the designs below using freezer paper stencils.


Supplies Needed:
Freezer Paper
Pencil/Pen for Tracing
Xacto Knife/Scissors
Paint
And of course the fabric that you want to paint designs on!
Freezer paper is a kitchen supply that you might already have on hand! One side has regular paper texture, but the other side is slightly waxy! The idea is to trace the design onto the paper Sadie and then iron it on to the frantic. The wax will melt and stick to the fabric, but it is a loose adhesive and the stencil can easily be pealed off.


Step 1:
Draw or trace your design on to the freezer paper.

Step 2:
Carefully cut out the inside of the design. The cleaner your cuts on the stencil, the cleaner your end product will be. If you make a mistake you may want to start over as paint can bleed through any knicks or tears.

Step 3:
Iron the freezer paper waxy side down onto your fabric. Be sure that the paper doesn’t wrinkle when applying it. You may also want to turn off any steam settings that your iron has.

Step 4:
Once the stencil is in place, paint on the fabric! I like to go very slowly and gently so that no paint seeps through beneath the freezer paper.

Step 5:
Remove the freezer paper! You should be left with a beautifully crisp design.

Extra tips:
You may want to test this technique out on a scrap of the fabric to see how the paint behaves with the stencil and the fabric. Depending on your paint it will act differently and you will want to know how it works before putting it on your actual project!
This technique works best when you have more freezer paper. The greater the surface area of the paper, the better the adhesion. Small pieces of paper may peal away too easily.
Sometimes when you peal away the paper it may leave a white residue. To remove this take some scotch tape, or clear packing tape and dab the residue with the sticky side. This will pull off what was left behind.
If your stencil overlaps any seams or darts this may cause problems while painting on the fabric. Use extra care so that the paint doesn’t smear into the crevices
11 notes
·
View notes
Text
Tour time!
Welcome to my craft closet!

I used to have a whole room in my house dedicated to crafts but it had to be used for something else. Now I store all my stuff in this closet! Here’s what everything is:

The bottom left shelf holds all my cardstock paper. It’s sorted by color in these boxes! I’ve found this to be the easiest way to store them because it allows me to move them anywhere.
The bin to the right holds a bunch of duct tape.
Middle left is arts and crafts books like how to draw, coloring books, and a binder full of stickers.
Top left is paper! Copy paper, lined paper, construction paper; basically any random paper that isn’t cardstock.
The drawers on the right hold all kinds of things from glue to shape punchers to paper clips. I’d show you the inside but it’s truly super random

These top 2 (4) shelves are my favorite!
The left is all kinds of writing utensils (I have a ton more in my room) everything. From markers to pencils to pens to sharpies.
The bottom right is tools (like staplers, tape rolls) and some other random stuff. The top right is all kinds of fun craft supplies! (The kind you’d use as a kid) Things like pom-poms, sequins, feathers, and more.

These top shelves hold a lot of bigger items. I’ve got pads of cardstock, craft pints, and perler beads (my current hobby). Above that I have more sequins (color sorted) a sticker maker, funky scissors, my main stash of markers and colored pencils, more perler beads, and a button maker (that is sadly broken)
The top top shelf in the first picture has bins of all kinds of stuff like tissue paper, play-doh, ribbon, you name it.
Now onto my room! (The craft closet is in another room in my house)

This is my desk! It’s huge and I love it. If I’m not crafting in the other room I’m doing it in here! This is also where I play Minecraft and use my computer.
I’m not gonna go over the bulletin board in detail but I’ve been putting things on it since I was in middle school and it’s basically a giant collection of my life (think scrapbook junk journal but on my wall)
Here’s a few of the insides of my drawers:


The left one is for watercolor painting! I like to paint houses for people sometimes. The right holds some notebooks, my Bible, my church journal, and my church note taking stuff

I also have an art cart! I got this before transforming the closet as a way to hold my stuff so now it just holds a few things. (And yes, I am a beef loving Texan and proud)
The front holds tools like scissors and glue. I also have a few baskets on the side that hold paintbrushes and other tools.
Couldn’t get a good picture of the shelves but they hold my paper art tools (cricut machine, paper scraps, etc) alongside some extra pens and markers.

The top of my cart holds all my main writing utensils! I love it being right by my desk for easy access. If you ever want marker/pen recommendations, let me know! I’d love to go through them
And that’s that! If there’s anything you want me to talk more about if you have any questions lmk!
2 notes
·
View notes
Note
Hi!
Stumbled across your beautiful book rebind of six of crows, and i just picked up book binding again, and i wondered how you did the foiling? Did you hand cut out the design, or did you have a cricut type of device? 🌟
Hello! My method was quite basic in the end😅. The design was printed on regular printer paper, laid over the foil, and I traced the design by hand using a hot foil pen.
3 notes
·
View notes
Note
How do you make stickers?
Long answer: I use a cricut machine. I source photos online, edit them onto a plain white background (using Picsart or photoshop), organize the pictures onto one page on the cricut app, print on inkjet sticker paper, load printed sticker sheets onto cricut and the machine cuts them using the outline I made on the app. This is very tedious and definitely a labour of love so I have to be super idle to go this route or I make stickers in big batches so I don’t have to do it again for a while.
Simple answer: print sourced photos onto sticker paper (or regular paper) and use a precision knife or scissors to cut. Use glue if printing on regular paper.
Pictures are either from idol instagrams, Pinterest or Twitter. I use a cricut precision knife but I also have a pen like cutter I got from shein a long time ago and it was super cheap. I’d be happy to give more details on my exact supplies and yt videos I watched to learn but this is pretty much the gist of it 😊
4 notes
·
View notes