#cricut.com/register
Explore tagged Tumblr posts
Visit Tumblr Blog
Explore Tumblr blogs with no restrictions, modern design and the best experience.
Last Seen Tumblr Blogs


Fun Fact
In Q3 of 2020, 31% of US users access the Tumblr app daily.
Text
How to Make a Personalized Cricut Water Bottle: Top 3 Ideas

The Cricut water bottle is more than just an accessory for hydration, as it’s a great way to show off your creativity and personal style. If you are interested in learning how to make a water bottle with the Cricut machine, I have prepared this blog post just for you. In this blog, I will first share with you 3 unique water bottle projects that are very popular and expensive in the market, which I made myself with some supplies and a Cricut machine.
Next, I will show you step-by-step how you can make such bottles in only a short time. Once you learn it, you will be able to make many things like bottles, glasses, and cups. Now, I can’t wait to start this guide.
3 Most Popular Cricut Water Bottle Ideas
The following are the trending water bottle ideas that you should try to show your creative side. Bottles are very easy to style and don’t take much time. If you are a person who loves exploring new ideas, you are going to love these three ideas.
Berg Water Bottle
Whether you’re a working professional or in college, you can make this project with your Cricut. This is a water bottle from a very popular brand, Berg, which you can prepare yourself at your home. I made this because I had to give it to my clients at the crafting office. To make this, buy a plain water bottle, cut out several permanent vinyl berg designs with a Cricut, and attach.
Cricut Water Bottle With Vinyl
My daughter wants to serve the country as a professional nurse, and I keep giving her small gifts to keep her motivated. She loves to personalize things, so I gifted her a personalized water bottle. To make this, I need a Cricut machine and vinyl. You can also make this by simply cutting your design on vinyl.
Sports Water Bottle
If you are also a sports lover, like to go to the gym and also do workouts. It is your responsibility to keep yourself hydrated, and for this, you need a water bottle that will excite you. This Cricut allows you to personalize a plain water bottle according to you.
To make this first, go to the Design Space, create a stencil design, choose the correct material setting, and cut it out.
How to Make a Water Bottle With Your Cricut Machine?
After sharing my top Cricut bottle ideas with you, I’ll now walk you through the complete step-by-step process of how to make a custom Cricut water bottle.
Step 1: Collect All the Tools and Supplies
The first thing you have to do is gather all the essential materials you will require for your project.
A Step by step instruction
Cricut cutting machine
Permanent adhesive vinyl
Transfer tape
Cutting mat
Scraper tool
Blank water bottles
A computer with Design Space installed
Downloaded SVG file
Step 2: Upload Your SVG File on the Design Space
First, we connected our Cricut machine to our computer and opened the Design Space.
Now, click on the New Project on this software.
After this, press the Upload icon on the left-hand corner of your screen.
Then, browse and find the SVG file from your computer system.
Next, import the file, write a name and tag for it, and select Upload.
Here, I am making more than 3 Cricut water bottle designs, so I have selected multiple designs.
Now, measure your bottle and resize your design accordingly using the edit tool.
Step 3: Choose the Appropriate Material Settings
The design we will make on the bottle must be curved; for this, click on the design and use the curve tool. Once everything is prepared according to plan, click on the Make It option.
Now, you will be on a new page, mirror the design here, and click on Continue.
Subsequently, set the material as permanent vinyl and maintain the default pressure setting.
Step 4: Cut the Design
Now leave your computer as it is, take your permanent vinyl, and lay it on the Cricut mat with the shiny side down. And after that use the roller to fit it correctly.
Moreover, press the Load button on the machine and load the mat. Then go back to your computer and click on the Continue option. After this, the Go button of your machine will start flashing; click on it.
Step 5: Weed Out Your Design & Prepare a Bottle
Once the design is cut, click the unload button on the machine, unload the sheet, and remove the sheet from the mat. Now, use the weeding tool to remove negative parts from the design.
Finally, clean your bottle and dry it using your towel.
Step 6: Apply the Design to Your Bottle
Furthermore, cover the vinyl design with a small piece of transfer tape and peel away the backing paper.
Finally, apply the vinyl to the water bottle using a scraper tool. This will look straight on our curved water bottle. After this, use the scraper and run it on the bottle.
Final Words
Personalized bottles can be used as gifts for family and friends or for corporate, graduation programs, and other special events. And the bottle of your choice will not be available in the market, even if it is available, the price will be very high. And that’s the problem the Cricut water bottle solves. You can make it as per your requirement with Cricut; it can be either permanent or temporary.
For more information visit: cricut.com/setup cricut.com/register cricut easy press 3 setup how to set up cricut easypress 3
#Cricut water bottle#Cricut water bottle ideas#Cricut.com/setup#Cricut design space download#Cricut design space login#www.cricut.com/setup login#cricut easypress 3 app#cricut.com/register
3 notes
·
View notes
Text
How to Use Cricut Design Space for Free: A Complete User Guide
Creating designs and projects is fun, right? Who does not want to make handmade projects? Cricut Design Space is a free and easy-to-use application for making craft projects. But how to use Cricut Design Space for free? The app allows you to design and upload your projects to the app. Once your design is ready, you can cut it with the help of a Cricut cutting machine.
As a newbie, using the software program can be a bit overwhelming and confusing. But do not worry. This stepwise tutorial will explain how you can use it.
How to Download Cricut Design Space on Computer?
Before you learn how to use Cricut Design Space for free, you must download and install it first on your operating system. Here are the basic directions to follow:
Now that you have downloaded and installed the application on your desktop computer, it is time to learn how to use it. So, let’s get started!
How to Use Cricut Design Space App: Quick and Easy Steps
After downloading and installing the design software on your desktop computer, it is time to learn the complete process of how to use Cricut Design Space for free. In the section below, I have mentioned the simple steps so that anyone can easily follow along.
Step 1: Creating a Design
The first step is to create your design in the Design Space app. You can either make or upload an SVG file. On your home screen, click on New Project to open the blank canvas. On the left, you can find the menu and other tools, using which you can add different elements like text, images, shapes, templates, and so much more.
Step 2: Resize Your Image
When you are done creating your design or uploading your image, you can flip, rotate, and resize it according to your needs. Once satisfied with your design, you will need to click the Make It button to send it to cut with the crafting machine.
Step 3: Cutting the Design
Now, it is one of the most important steps after designing. You need to cut your design using the app. After that, click on the Attach tool so your design will be in the same position on the mat as on your canvas. A window will appear with the Preview section. So, check there to confirm it. You need to select the material you use to make the design. Then, load your material onto the mat and slide it into the machine to cut.
Step 4: Unload the Design From Your Machine
After the cut, unload your design and remove the extra part. You should not remove extra parts for some materials, like cardstock, because they come out easily. However, you must peel off your design from the mat using a weeding tool.
Step 5: Apply Your Design
Last but not least, it is time to finish your project. For some projects, you are done when you just peel off your design. But sometimes, there is an application process, and this varies from project to project. If you are working with vinyl, you need to use tape to remove the vinyl from the backing and place it on your project. When using iron-on materials, press this onto your project.
Wrapping up
This blog post explains how to use Cricut Design Space for free. It is a free software that can help you create custom project designs. It has a user-friendly interface and various features make it an excellent option for beginners and experienced crafters. Also, there are many projects you can design, even if you’re not an expert.
If you want to get creative and create unique projects, then download the Design Space app and start today.
FAQs
Why should you use Cricut Design Space?
The Design Space app is free to design, cut, and use custom projects with various features. You can start from scratch or use the library of images, fonts, and templates. You can upload your projects and then connect to your machine to cut out the designs.
Can you use Cricut Design Space offline?
You can use Design Space offline on Mac, Windows, and iOS devices. You can also edit projects offline if you have installed this software and saved the project in your operating system. You can choose to work offline anytime. Just disconnect from your Wi-Fi network or unplug the Ethernet cable from your device.
Do you need a subscription to use Cricut Design Space?
No, you do not need a subscription to use this application. It is available on computers and mobile devices and works with any Cricut cutting machine. But if you want advanced features like access to premium images, fonts, premade projects, and more, then you can take a paid subscription known as Cricut Access.
Visit: cricut.com/setup www.cicut.com/setup login
Source: https://cricricutdesigncut.wordpress.com/2024/12/09/how-to-use-cricut-design-space-for-free-a-complete-user-guide/
#cricut.com/setup#cricut.com/create#cricut.com design space#cricut.com/register#cricut.com sign in#design space setup#digital design#www.cricut.com/setup\cricut explore air 2 setup#www.cricut.com/setup login#www.cricut.com/setup#www.cricut.com setup#www.cricut.com setup login#cricut design space setup#setup cricut design space#cricut setup#design.cricut.com/setup
0 notes
Text
youtube
install cricut design space app
Hi! Lovely crafters. I have been waiting to write this blog for many days after designing a custom label for my daughter’s school assignment. It was fun making it. And most importantly, my daughter loved it. So, I thought, why not share my way of creating labels with a Cricut Explore machine? go to install cricut design space app.
#install cricut design space app#cricut.com/setup#cricut.com/create#cricut.com sign in#cricut.com/register#cricut.com design space#Youtube
0 notes
Text
install cricut design space app
Cricut is an incredible DIY machine that fits all environments effortlessly. With this machine, you can easily cut your materials, including hard as well as delicate materials. Explore the diverse range of Cricut machines that are versatile and do your work effortlessly in no time. With this machine, there is no limit to experimenting with things. You can try writing, drawing, scoring, embossing, debossing, and etching with it. Hence, if you want to try using this machine, set it up via install cricut design space app.
#install cricut design space app#www.cricut.com/setup login#www.cricut.com setup login#cricut setup#cricut.com/setup#cricut.com/create#cricut.com design space#cricut.com sign in#cricut.com/register
0 notes
Text

cricut.com/setup
Cricut is a prestigious brand that offers a variety of first-rate crafting devices. These devices offer pro-level results while making DIY crafters, even if you are a complete beginner. The brand provides heat presses and cutting machines along with essential supplies for crafters who make a plethora of projects, such as customized apparel, banners, cake toppers, decals, sticks, and more. Cricut machines need to connect to a computer or mobile phone. Users can connect the machine to their Mac computer and work on their projects right away. Visit the cricut.com/setup website to learn more about the process.
#cricut.com/setup#cricut.com/register#cricut.com/create#cricut.com sign in#cricut.com design space#cricut.com/setup mac#cricut.com/setup windows#cricut.com setup#cricut setup#www.cricut.com setup login#www#www.cricut.com/setup login#www.cricut.com/setup#install cricut design space app#install cricut explore air 2#cricut.com setup mac#cricut setup for pc#cricut setup maker#cricut setup explore air 2 setup#cricut setup on computer
0 notes
Text
cricut.com/setup
Cricut Design Space is an essential app to use for various Cricut machines. You can download the app just by clicking here. With the help of this software, Cricut users can create stunning designs for projects. The app can be used on both Windows and Mac devices. Plus, the Cricut Design Space is also available for Android and iOS smartphones. Keep reading the whole content to get extensive info about the app.
cricut.com/setup
www.cricut.com/setup login
cricut setup
#cricut.com/create#cricut.com sign in#cricut.com/setup#cricut.com design space#cricut.com/register#www.cricut.com setup login#www.cricut.com/setup login#www.cricut.com/setup
0 notes
Text
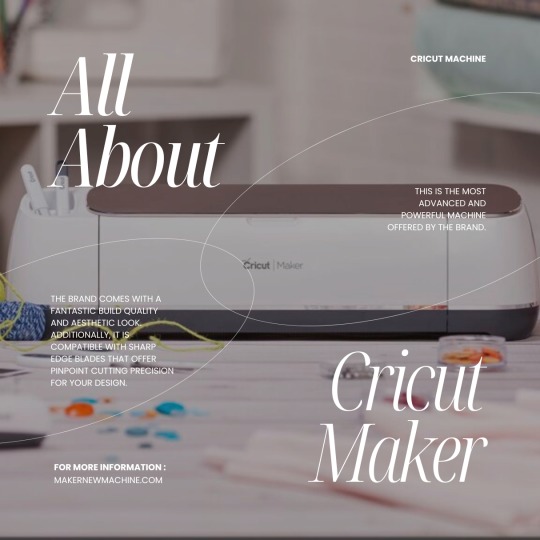
The Cricut Maker is a versatile cutting machine designed for a wide range of crafting and DIY projects. It features an adaptive tool system that accommodates various tools like rotary blades, knife blades, and pens, enabling precise cuts on over 300 materials, including fabric, leather, and wood. Integrated with Cricut’s Design Space software, it allows users to create or import designs via a user-friendly interface. Bluetooth connectivity supports wireless cutting. Ideal for crafting, home décor, sewing, and educational projects, the Cricut Maker offers unmatched precision and versatility, making it a favorite among crafters and DIY enthusiasts.
#design.cricut.com#design.cricut.com/setup#Cricut.com/setup#cricut.com/setup windows#cricut.com sign in#cricut venture#cricut.com/create#cricut.com design space#cricut.com/register
0 notes
Text
How to Connect Cricut Maker 3 to Bluetooth: Full Guide
Whether you want to connect Cricut Maker 3 to Bluetooth or a USB cable, this step is always recommended when you are up to the Cricut setup! However, this blog will especially focus on how to connect Cricut Maker 3 to computer and mobile devices.
Like many of you, I remember the day I started crafting with my first Cricut Explore Air 2, purchased with my savings. The excitement was real, but so was the confusion. I found myself unable to connect my device to the Cricut machine, a common issue for beginners. However, with the help of the internet, I was able to overcome this challenge and learn the steps to connect my Cricut machine.
Besides, the connection is exactly the same for all devices. Being an expert in crafting, I can teach you to connect your Cricut Maker 3 to your Windows, MacBook, Android, and iOS devices. So, let’s get started now!
Connect Cricut Maker 3 to Bluetooth on Windows 10
When it came to establishing a connection with Windows computers, I was very excited. It is still a cakewalk for me. I can do it within a minute, and so can you! Yes, you can also make this connection in a couple of minutes. Let me show you how.
Here are the superb, simple steps you need to follow to connect Cricut to a PC via Bluetooth:
Connect Cricut Maker 3 to Bluetooth on MacBook
Thanks to Cricut, we can use Cricut on our MacBook without any hassle. However, the first step would be the same for Mac as for Windows 10. To learn the steps to connect to Cricut, users need to do the following:
Connect Cricut Maker 3 to Bluetooth on Android
Android devices, including Samsung, Google Pixel, LG, Motorola, and One Plus, are compatible with Cricut machines. Hence, if you want to connect Cricut Maker 3 to your Android devices via Bluetooth, you need to go through the following steps:
Connect Cricut Maker 3 to Bluetooth on iPhone/iPad
Are you using an iPhone or iPad? You can also connect your Cricut to Bluetooth on these devices without hassle. To connect, you have to follow the steps below:
FAQs
Question 1: Why is my Cricut Maker 3 not connecting to my Android?
Answer: Whenever you encounter this issue on your Android, you will need to check for the following points:
Question 2: Can I connect Cricut Maker 3 to a PC via a USB cable?
Answer: Yes, you can! You can connect Cricut to your computer using a USB cable. To connect, you have to go along with the following steps:
Question 3: What do I need to connect my Cricut Maker 3 to PC?
Answer: In order to connect a Cricut machine to your Windows computer, you will need things as follows:
Visit: install cricut design space app cricut.com/setup
Source: https://cricutmakermachines.com/how-to-connect-cricut-maker-3-to-bluetooth-full-guide/
#cricut install setup#install cricut design space#install cricut design space app#install cricut explore air 2#cricut.com/setup login#cricut.com/setup windows#cricut.com/register#cricut.com/create#cricut.com/setup#cricut.com sign in#cricut.com design space#www.cricut.com setup login#cricut new machine setup#cricut design space#cricut explore 3#cricut explore air 2#cricut setup maker#cricut setup#cricut setup create account#cricut setup download#cricut setup on computer#cricut create connect to computer#setting up my cricut maker#setting up your cricut maker
0 notes
Text
How to Connect Cricut Bluetooth to Computer: Full Guide
Hey, Cricut folks, I’m going to show you the easiest way to connect Cricut Bluetooth. I know how hard it can be when we get a new Cricut machine. From setup up to performing a test cut, it seems like climbing a mountain. But wait, this is not as difficult as you think!
I recently finished setting up a friend’s machine, in which I briefly taught him how to connect Cricut to computer. Honestly speaking, I didn’t even touch a thing; I was just instructing him to do this and that. Following my instructions, he completed his setup in a matter of minutes. Do you also want me to instruct you on how to set up your Cricut machine? If so, join me on a board to connect your Cricut to your computer using Bluetooth. Let’s start!
Step 1: Unpacking the Cricut Product
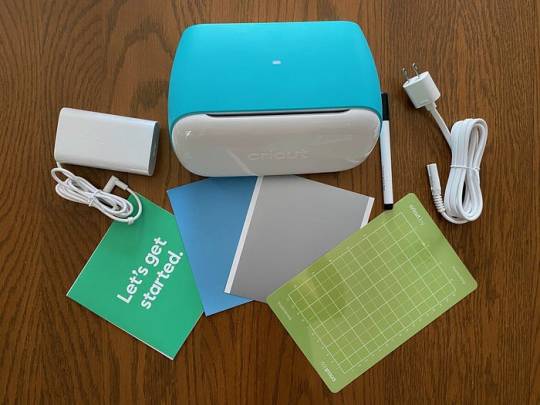
In the first step, you must open your new Cricut machine. Be careful while unboxing the box because many accessories are included. You have to ensure that nothing breaks while taking things out. As you can see below, I have unboxed my Cricut Maker 3 machine, and the items inside the box are as follows:
Similarly, when you unbox other Cricut models, such as Cricut Explore or Joy, you will get a few similar items. Now that we have done the unboxing let's proceed with the second step, which is to connect Cricut Bluetooth.
Step 2: Place Your Cricut Machine
Now, you have to find a place where you can locate your machine properly. Ensure the surface is completely flat so that it will be easier to work for you in the future. If you have a table, you can keep it. Otherwise, the floor is also a good idea if you have none.
Now you have chosen the right place, let’s move on to plug the machine. To do this, you have to find a nearby power socket and connect your machine to it.
Once connected, you have to turn on the machine by pressing its power button.
Step 3: Connect Cricut Bluetooth to Your Device
Finally, we are heading to learn how to connect Cricut to a computer via Bluetooth. But here, one question that might arise in your mind is what computer will we connect to? Is this a Mac or Windows or others?
Don’t worry! I have got your back for both the computers. I will show you how to individually connect your Cricut machine via Bluetooth on a Mac or Windows computer. Let’s start with Windows first:
For Windows
For Mac
FAQs
Question 1: Can I connect my Cricut to my laptop?
Answer: As mentioned on its official site, Cricut works with iOS, Windows, Mac, and Android. However, it is not compatible with Chromebook or Unix/Linux. Hence, if you use the operating system mentioned above, you can use any brand’s laptop, such as HP, Acer, Dell, Asus, Lenovo, MSI, and Apple.
Question 2: Is the Internet compulsory for using Cricut Design Space?
Answer: No, it is not necessary to connect the Cricut software to the internet all the time. The internet is only needed when you want to access a certain feature in the app. Otherwise, there is no need to connect it to the internet. The offline option is available for the Cricut app on all devices except Android devices.
Question 3: Can I connect my Cricut machine without Bluetooth?
Answer: Absolutely, yes! You can also connect your Cricut machine and computer via a USB cable. To do this, insert one cable end into the machine’s USB port and the other end into the computer’s USB port. Once connected, you are ready to use the machine for cutting, scoring, and other operations.
Final Words
In conclusion, I discussed how you can connect Cricut Bluetooth to Mac and Windows computers. I explained everything stepwise so that every beginner Cricut user can connect their Cricut wirelessly and hassle-free. The connection is important if you want to set up your Cricut. Hence, connect it and set it up to get started with your Cricut cutting machine. Start setting up your Cricut machine in one go with this simple guide.
Source: https://desincricut.wordpress.com/2024/04/23/how-to-connect-cricut-bluetooth-to-computer-full-guide/
#cricut setup#install cricut design space app#install cricut printer#install cricut explore air 2#www.cricut.com setup login#cricut.com/setup#cricut.com setup download#cricut.com setup#cricut.com setup windows#cricut.com setup mac#cricut.com/create#cricut.com sign in#cricut.com/register#cricut.com design space#cricut#cricut com setup#cricut new#cricut new product device#cricut new machine setup#cricut new product setup#cricut create#cricut create connect to computer
0 notes
Text

Designing with Ease: Cricut Design Space Hacks
Whether you’re making custom home decor apparel or party favors, this robust cutting machine will get you to cut, score, emboss, and write on over 300 materials without any trouble. Just get your machine set up by visiting Cricut Accessories. Visit the site download the Design Space app, and finally register using your Cricut ID. Expand your horizons to make crafts that stand out!
Visit here for more Information :- https://mycricutspace.com/
#cricut.com/setup#design.cricut.com/setup#cricut.com#cricut design space#cricut design space download#cricut design space login#design.cricut.com/setup explore air 2#cricut.com/setup app#cricut.com/create#cricut.com/register#cricut machine setup
0 notes
Text
How to Use a Cricut Joy: Quick and Easy Guide
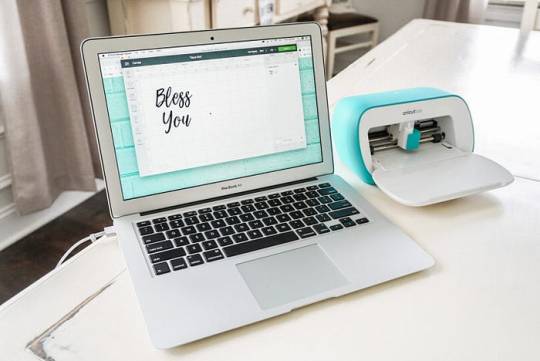
A few days ago, I went to my cousin’s house and saw a new Cricut Joy collecting dust in the corner. Being a crafter myself, I couldn’t resist asking her why. She replied that she was confused about how to use it. With a smile, I offered to help. From unboxing the machine to setting it up, I guided her through each step, even teaching her how to create her first project.
Then, I realized that some beginners may not have even opened the box and could use my assistance. That’s why I have prepared this guide for you all. Just like I helped my cousin, I will tell you how to use a Cricut Joy from scratch. However, it is necessary to follow this guide till the end because every piece of information is important for using your Cricut Joy.
Step 1: Unboxing the Cricut Joy
If you have already unboxed your Cricut Joy machine, you can continue to the second step below. If not, let’s take a look at what you’ll find inside the box:
Welcome card
Cricut Joy machine
Power adapter
Fine Point pen (0.4 mm)
StandardGrip mat
Sample of smart vinyl
Around 50 pre-made projects
Free Cricut Access for 30 days
Step 2: Setting up Your Cricut Joy Machine
Setting up a Cricut Joy is a crucial step in learning how to use a Cricut Joy machine effectively. Let’s start by setting up the machine first.
Prepare Your Cricut Cutting Machine
Place the Cricut Joy machine on a flat and clean surface near the electric outlet.
Assemble the machine’s power cord and insert one end into the machine and the other end into the electrical outlet.
After that, turn the power button on, and a light will illuminate the machine.
Connecting a Cricut Joy to Your Computer
The Cricut Joy does not have a USB cord, so you have to connect the cutting machine to a computer via Bluetooth.
Turn on the Cricut Joy machine 10–15 feet away from your desktop computer.
Next, locate the Bluetooth option, turn it on, and wait for the computer to detect your machine.
Now, select Cricut Joy from the list, and if asked for a PIN, enter 0000 and hit Connect.

Downloading and Installing Cricut Design Space
Downloading and installing Design Space on your desktop computer is necessary to complete the process of how to use a Cricut Joy machine.
Go to cricut.com/setup, agree to Cricut’sterms and conditions, and download the file.

After downloading Design Space, locate the file you see on the screen and install it.
Once the software is installed, launch it, create a Cricut ID and password, and sign in.
Note: If you want to access Cricut Joy from mobile (Android or iOS), download the Cricut app from the Play Store or App Store.
Adding Your Cricut Joy Machine in Design Space
Once you have installed and signed into the Cricut software, it’s time to set up the Cricut Joy. To do this, launch the Cricut software, click on the drop-down menu, and select New Machine Setup > Cricut Cutting Machine > Cricut Joy. Also, make sure the connection is established.
Step 3: Using a Cricut Joy to Make a Project
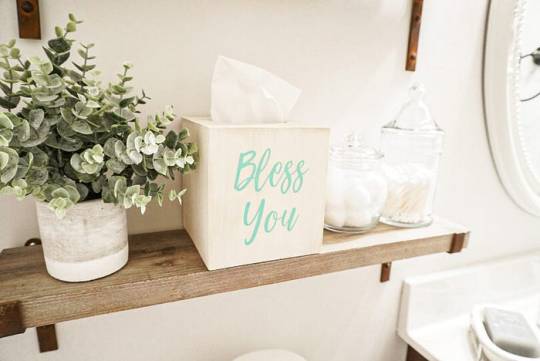
You will need to cut vinyl with Cricut Joy to personalize a wooden tissue holder. Here’s what you need for this project:
Cricut smart vinyl
Unfinished wooden tissue box
Cricut Joy machine
Computer or transfer tape
Design
Create a Design in Design Space
Open the Cricut Design app and select the New Project tab.
After that, use the Text function and a text and change its font.
Once you have the design ready to cut, click the Make It option to move on to the next page.
Then, select the mat page. There is no need to mirror this project. Click Continue.
From the All Browse Material option, search for vinyl and select it as a material.
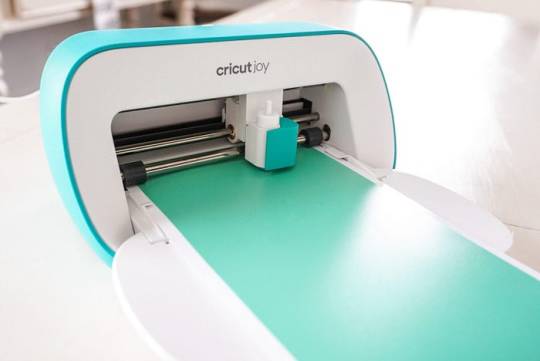
Now, load the green vinyl into Cricut Joy without using a mat.
Cut & Weed Out the Vinyl Design
Once everything is ready, go back to Design Space and hit Continue to begin cutting.
Once the machine completes cutting, it automatically stops. Now, unload the smart vinyl and weed out unwanted designs.

Next, cut the transfer tape to the size of the vinyl and apply it to the design.
Apply Your Design
Frequently Asked Questions
What can you make using a Cricut Joy?
Cricut Joy is a smart, compact, and portable machine that can be used to create different projects. Below, I have listed some of the Cricut Joy projects.
Vinyl mug
Greeting cards
DIY pillow
Leather earrings
Wall art
Tumblers
Cake toppers
Stickers
Labels
Banners
T-shirts
Jewelry
How does Cricut Joy work?
The Cricut machine works with the user-friendly Cricut Design Space or Cricut Joy app. Users need to install one of these and start a project. Also, the Cricut Joy connects to devices via Bluetooth. Once everything is set up, the user designs it and sends it to the machine. Finally, the Cricut Joy will cut or write according to the selected settings.
Do I need a computer to use a Cricut Joy?
That’s not necessarily true; you can also use your mobile device to use Cricut Joy. All you need is a device where you can download and install Cricut Design Space to command the Cricut machine. However, all of this can also be done from a mobile phone or tablet. So, it depends on the user’s preference and their comfort level.
Conclusion
The Cricut Joy is a beginner-friendly crafting tool that is compact yet versatile. Setting up the Cricut Joy and learning how to use it may not be too difficult for beginners. I have discussed everything in detail in the blog post above. If you followed the instructions exactly, you can now use your Cricut Joy without any hassle.
Read more: install cricut design space app
cricut.com/setup
cricut.com/setup mac
Cricut New Machine Setup
Source: how to use a Cricut Joy
#how to use a Cricut Joy#Cricut New Machine Setup#cricut software app#cricut design space download#cricut explore air 2#cricut.com/setup#cricut project ideas#design.cricut.com/setup#cricut.com/register#cricut.com#cricut.com/create
1 note
·
View note
Text
Is Cricut AutoPress Right for You in 2024?
You’ve heard of the Cricut AutoPress if you want to focus more on crafting and less on heat transfer. But if you’re concerned about whether this machine is right for you, this helpful guide is for you. I have tested various projects and researched this machine in detail. Then, I prepared this easy guide to help you decide whether you need to buy it.
Read my guide and learn about the features, performance, price, setup, specifications, security measures, and design of AutoPress, and I will share my personal experience. As soon as you’ve completed this guide, you’ll know if it suits your crafting style or not. So, let’s get started; follow this guide until the end; otherwise, you will only have half of the confusing information.
What Is Cricut AutoPress?
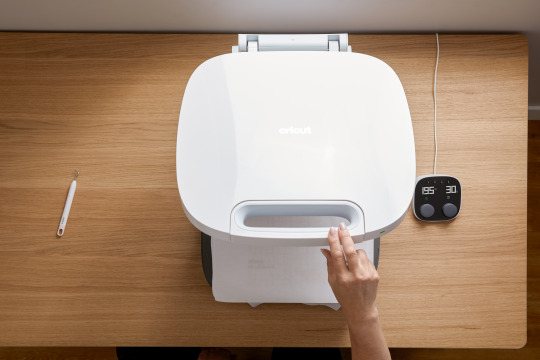
The first thing you need to do is know what an auto press is. If you already know about it, then you can skip it. “The AutoPress is a Cricut heat press machine that can automatically apply pressure and heat up to 2 inches thick simultaneously. Its ceramic-coated heat plate covers 15 inches by 12 inches and can heat up to 400 degrees.” It is used for adhering iron-on vinyl, infusible ink, or sublimation print to various flat blanks, such as T-shirts, tote bags, coasters, and more.
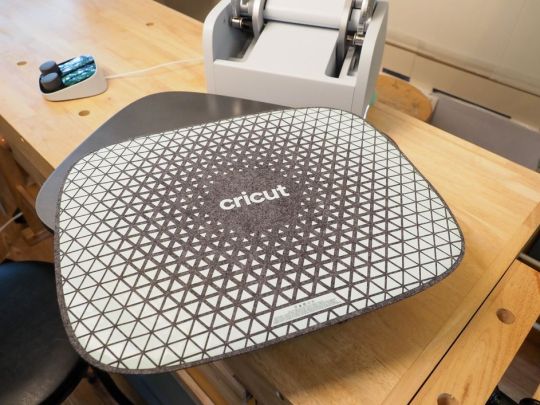
Cricut AutoPress Design & Build Quality
I know you’re curious about the design, build quality, and how it differs from the Cricut EasyPress and other heat presses. In fact, every Cricut heat press machine is different and is used according to the need. However, AutoPress shines when we want to do a large number of projects and large surface projects with consistency and ease.
Additionally, it uses a hinge system when moving the heat plate and applies pressure autonomously depending on the thickness of the material, making it the easiest heat press on the market.
Features & Performance of Cricut AutoPress
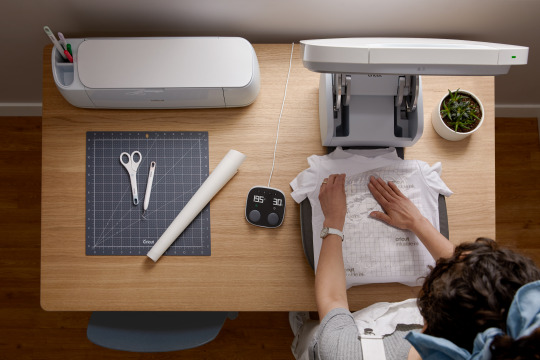
I’m a full-time crafter and have done different projects with this machine. I found the heat press to be the easiest to close because it applies pressure automatically. As far as the project outcome is concerned, you will get visually attractive results.
First, this machine offers a zero-effort system that allows us to close the iron with just two fingers.
Moreover, it has an Intelligent pressure system that adjusts the pressure simultaneously to heat according to materials.
Subsequently, an AutoPress has a ceramic-coated heat plate that ensures clean results and heats up to 205°C.
Next, we will get an Automation power-off function to ensure safety.
Last but not least, it offers a large opening angle and fan-assisted ventilation for larger projects.
Cricut Auto Heat Press Safety Measures
As we know, it is a heat press, so it is important to know the safety measures before investing in the Cricut AutoPress heat press machine.
Firstly, an LED indicator on the machine informs us what is going on.
Secondly, the press will turn off automatically after 13 minutes
Third, the AutoPress has an internal fan that keeps the handle cool.
Fourth, it is made with certified temperature plastics that resist heat.
Cricut AutoPress Setup
Trust me, as I mentioned below, setting up AutoPress after purchasing it is very easy.
First and foremost, remove the machine from the box and place it on the table.
After that, we will plug the power cord into the power outlet and turn it on.
Then, connect one end of the USB to the computer and the other end to AutoPress.
Moreover, download and install the Cricut Design Space from cricut.com/setup.
Finally, select the heat press> AutoPress and complete the on-screen prompts.
Finally, select the heat press> AutoPress and complete the on-screen prompts.
Cricut AutoPress Price: Should You Buy or Not
Frequently Asked Questions
HTVRONT auto heat press vs Cricut, which one is best?
So, both the Cricut and the HTVRONT are heat press machines, but the HTVRONT is lighter and can reach higher temperatures than the Cricut. However, the Cricut is perfect and better for those who like manual controls and customer support, like me. Additionally, we also produce stunning results on the Cricut Machine and can offer the Cricut Heat App and the Cricut Heat Site.
How to use Cricut AutoPress?
Below, I have mentioned a brief step on how to use Auto Press Cricut easily.
Initially, set the machine and cut the design on HTV or infusible ink sheet.
Then, position the base material on the heat mat, follow the Cricut Heat Guide, and adjust the time and temperature.
Moreover, apply the heat on the surface until the design is infused.
Finally, switch off AutoPress and leave the project to leave cool down.
What is the heat setting on the Cricut AutoPress?
A Cricut auto heat press machine can heat from 170° to 400°F (75° to 205°C), and it is mostly used to transfer heat on big projects. The following are the steps to get exact time and temperature information.
First, go to the cricut.com/heatguide and select this machine.
After that, we will select the heat transfer material & also choose your base material.
Finally, select the Apply option; detailed information will appear on the screen.
Final Thoughts
If you do many HTV, sublimation, and infusible ink projects with Cricut, you will face difficulties as it takes time and more energy. Cricut has introduced the Cricut AutoPress machine, a perfect machine made for home use. Above, I have told you everything about this machine that you will need to know. If your budget and project requirement match this machine, then you should invest in this machine.
Source Url :- Cricut heat press machine
Visit here for more Information:- Cricut AutoPress
cricut autopress machine
cricut autopress machine 2024
Cricut heat press machine
#Cricut AutoPress#CRICUT AUTOPRESS MACHINE#cricut design space#cricut design space login#cricut.com/setup#help.cricut.com#cricut.com/register#cricut machine setup
0 notes
Text
Why My Cricut Won’t Connect to My Laptop: Top 3 Fixes!
Why my Cricut won’t connect to my laptop—this is the same question that I often receive from users. Since the problem is very common, the solution is also quite easy to solve. It is really troublesome to encounter such an issue when we want to make beautiful crafts with our Cricut. But the machine is a machine, and many inevitable errors arise.
Even when my first 2-year-old machine, Cricut Explore Air 2, wasn’t connecting to my Mac, I tried many ways to fix the problem. After trying 2 methods, I succeeded with the last one. So, based on my prior experiences, I will describe 3 solutions in this blog. You can try any of them and see what works best for you. So, if you are ready to start, let’s get into it.
Why Won’t My Cricut Connect to My Laptop?
Okay, so I will explain why my Cricut won’t connect to my laptop. I noticed some possible reasons while connecting my device with Cricut. I have already discussed them below; go check them out.
Here are 3 common reasons that you must avoid while connecting to your Cricut:
1. Conflict Due to Firewall
Perhaps your firewall app has blocked your Cricut, preventing you from connecting it to your laptop. You can’t connect it until you fix the issue.
2. Disabled Bluetooth
Confirm whether your Bluetooth is disabled. If it is, you need to fix and enable it. You can also troubleshoot your Bluetooth before connecting your laptop to the Cricut.
3. Damage Driver
When I encountered my Cricut won’t connect to my laptop, the main reason for this issue was my corrupted USB driver. So, make sure you are not using an outdated driver.
How to Fix Cricut Won’t Connect to Laptop Issue?
By now, you are very familiar with why the Cricut won’t connect problems on a PC. But you might not know how to fix it. Chillax, as I have explained, has 3 fixes to combat this issue. Let’s try them out:
Fix 1: Install USB Drivers (Manually)
If your USB driver is outdated, you can install it manually. Here’s how to install it:
Fix 2: Confirm if Windows Firewall Isn’t Blocking Cricut
Sometimes, a Windows firewall may block your Cricut, making it impossible to connect your Cricut machine to your laptop. Here’s how I changed my firewall settings to fix my Cricut won’t connect to my laptop problem:
Fix 3: Turn on Bluetooth or Connect via a USB Cord
Make sure you have turned on your Bluetooth. Otherwise, you can also connect using a USB cord. Follow the steps given below to connect your Cricut to your laptop:
How to Connect Cricut Machine to Computer?
Conclusion
That’s all in this blog. I have explained all three fixes to troubleshoot why my Cricut won’t connect to my laptop. Make sure your computer has built-in Bluetooth and that your Cricut also comes with built-in Bluetooth. If you are using an older version of the Cricut machine, then you will need to insert a wireless Bluetooth adapter into your Cricut so that you can connect Cricut to your laptop using Bluetooth.
FAQs
Question 1: Why can’t I connect my Cricut to Bluetooth?
Answer: The following are probably why your Cricut is not connecting to Bluetooth. You can fix the issues by trying any of the methods described below:
Question 2: Is Cricut compatible with Mac?
Answer: Certainly, yes! The Cricut software is compatible with various devices, such as computers (Windows and Mac) and mobile devices (Android and iOS). However, it doesn’t support Chromebooks, Unix, or Linux. So, you need to check the system’s compatibility before downloading and installing the Cricut Design Space. Otherwise, the app might not run smoothly if you use it on an incompatible device.
Question 3: Why is the software not finding my Cricut machine?
Answer: In this case, you might need to unpair and re-pair your Cricut machine in your device’s Bluetooth settings. However, if you are using and connecting to your USB connection, you can use a USB cord and connect it to your Cricut and computer device. Once you unpair and re-pair, Cricut Design Space will recognize your machine easily.
Visit: cricut.com/setup www.cricut.com/setup login
Source: https://cricricutdesigncut.wordpress.com/2024/11/26/why-my-cricut-wont-connect-to-my-laptop-top-3-fixes/
#design space setup#digital design#cricut explore#cricutprojects#cricut#www.cricut.com/setup\cricut explore air 2 setup#www.cricut.com setup#cricut.com/setup#cricut setup#cricut.com/create#cricut.com sign in#cricut.com design space#cricut.com/register#cricut design space setup
0 notes
Text

cricut.com/setup
Do you want to create professional DIY stuff, decorate your home, or start an online business? It seems like a tough and time-consuming task, but it isn’t. You just need the right tool to get started. Cricut offers you the opportunity to work comfortably while creating a DIY craft. Since it is loaded with many surprising features, users always find it convenient to use it. To learn how to use this machine, you should download its software called Design Space via cricut.com/setup.
#cricut.com/setup#cricut.com setup mac#www.cricut.com setup login#cricut.com/setup login#cricut setup#cricut.com setup#cricut.com/create#cricut.com sign in#cricut.com/register#cricut.com design space#install cricut design space app#cricut design space setup#cricut create connect to computer
0 notes
Text
How to Connect Cricut to Computer: A Guide for Windows & Mac
How to Connect Cricut to Computer is important if you want to work on your DIY projects. Whether you are using a Mac or Windows, this connection allows your machine to interact with the Cricut Design Space app. If you are not sure how to connect your Cricut machine, don’t worry! I am going to guide you through all the necessary steps with the help of this blog.
There are two ways to connect your Cricut to your computer or laptop: USB and Bluetooth. You can use both methods, which are compatible with Windows and Mac computers. In this blog, I will focus on connecting via wireless Bluetooth connection.
Minimum System Requirements to Connect Cricut
Before connecting Cricut to computer, you have to know its system requirements. I am writing about the features your computer should have. These features are required in both Windows and Mac computers.
Connecting Cricut to Computer on Windows
A Windows computer is a great device for working with Cricut machines. To use Cricut on a Windows computer, you will need to connect it to the machine. After connecting the machine, you will have to download the Cricut Design Space software to run your machine. Here, you will see how you can connect them with the help of a Bluetooth connection.
Connecting Cricut to Computer on Mac
A Mac computer is equally good for connecting to Cricut and using the Cricut Design Space app. It can also be connected to the machine via Bluetooth and USB. Here, you will see the process for connecting them via Bluetooth.
Note: Apart from Bluetooth, a USB cable is also a good way to connect Cricut to your computer. To connect both devices via USB, you have to take a strained or overused cable. Now, you must connect the cable to an operating system from one side. On the other side, connect it to the machine. And then they will be paired.
Conclusion
In short, seeing the importance of connecting Cricut to computer, you have to learn how to do it. If you do not connect the computer to your Cricut machine, it cannot function on your computer. Cricut is compatible with Windows and Mac computers, so you can connect them both with your machine. But to work on your machine, you will need to install the Design Space app and log in with your Cricut ID.
FAQs
Why Is My Cricut Not Connecting to Computer via Bluetooth?
If you are having trouble connecting your Cricut to your computer, then you may have a few problems. If you just check those errors, your connection issue will be solved. The first thing you should check is whether you have turned on the Bluetooth on your computer or not. The second thing you should make sure of is that you keep the machine and your computer within the 10-15-foot range. If your problem is still there, you can reset Bluetooth.
Is It Possible to Use USB to Connect Cricut to Computer?
Yes, for sure! Cricut offers you both wireless and wired connections. You can use either of these according to your convenience. If you are more prone to moving your device while working on your projects, you can use a Bluetooth connection. It will give you the flexibility to move. But if you are going to use a more stable connection, like on a desktop, a USB cable is also a great option for connecting the computer and Cricut.
How Can I Connect Cricut to My Computer?
There are two ways to How to connect Cricut to your computer. One is using a USB cable. You can take a USB cable and connect it to the machine and your computer at both ends. The other method is using Bluetooth. To connect via Bluetooth, you have to turn on the machine and then go to Bluetooth Settings on your device. In Bluetooth, you have to search for the machine, and when you see it, you have to click on it. The machine will be connected successfully.
Visit: install cricut design space app
Source: https://designspace-cricut.com/how-to-connect-cricut-to-computer-a-guide-for-windows-mac/
#install cricut design space app#cricut.com/setup#cricut setup#cricut.com/register#cricut.com sign in#cricut.com/create#cricut.com design space#cricut design space app#cricut.com setup mac
0 notes
Text
8 Unique Cricut Gift Ideas: Perfect Projects for Any Occasion
Are you looking for some unique Cricut gift ideas? If so, you are in the right place! Here are the best projects you must try to gift someone on their special occasion. These gifts are handmade creations that I created using my smart Cricut machines. Since I have won all the Cricut cutting machines, I have used different types of tools at my convenience. However, you can use a machine you already have.
Being a professional Cricut crafter, I have to make many projects with my Cricut machine to show the theme to my online buddies like you. In this blog, I have covered all the gift ideas you must try once if you are a beginner and just getting started. Without any further ado, let’s get started now!
1. Spice Jars
Does anyone in your family love cooking? This is going to be one of the best Cricut gift ideas. These glass-made jars with labels and text can make it easier for them to find suitable ingredients. They can significantly help them by saving them time finding a particular spice as soon as possible. Now, personalize all the jars using your Cricut machine and Cricut Design Space, where you can choose a different font style to make them look more attractive.
2. Makeup Bag
There are different ways to create a personalized cosmetic bag, and they are the perfect Cricut gift ideas for anyone who is into beauty and wellness. However, I made this customized bag at my sister’s request. She wanted it for her use as she is a makeup artist and has to carry many makeup-related items. Also, you can use iron-on material with any blank you sewed for or bought from the market. Don’t forget to add the texts that remind them of you.
3. Doormat
Want to make something for your sweet home? Here is the doormat that I believe is one of the fantastic Cricut gift ideas you must try this year. Since I have made one for myself and one of my best friends, Julie, I made this using my Cricut Maker machine. I was looking for something like this, which I couldn’t find on the market, so I decided to make one myself using my Cricut machine.
4. Flower Mug
Do you want to add flower magic to your simple mug? You can use your Cricut machine to do it. It is easier than you think and looks beautiful. Not only this, but you can also add the name or initial to make the ultimate Cricut gift ideas. I used permanent vinyl to add these flowers to my mug. Doesn’t it look so beautiful? I found it excellent; give it a shot now!
5. Fox Pillow
Here is one of the standard pillows I gifted to my cousin’s sister. She loved it when she received it. I used my trusty Cricut Maker machine to make this effective way to bring personality and some adorable decorations you have never seen before. So, what are you waiting for? Give it a shot now!
6. Sleep Mask and Slippers
Thanks, Cricut—it helped me decide on the best Cricut gift ideas, which were not easy to find in a shop. With Cricut, we can create our design and add it to our daily used stuff like sleep masks and slippers. The text-based design is the easiest beginner can easily create on Cricut software. All they need to do is use the Cricut Design Space app and add the texts using the font style of their own choice.
7. Coffee Mug
I gifted this mug to my dad last week. It was neither his birthday nor any special occasion; I just wanted to make him feel special by expressing my gratitude. All credit goes to Cricut, and I used beautiful fonts from Cricut Design Space. Making it was really fun, as most of the Cricut software resources are free.
FAQs
Question 1: What birthday Cricut gift ideas can I try?
Answer: If you are looking for Cricut birthday gift ideas, then you should try the following ideas that I have made myself:
Question 2: What items do I need to make my Cricut projects?
Answer: The requirements of items may vary according to the type of project you are working on. However, I am mentioning some of the everyday items or supplies that you must have when you are creating a project using a Cricut:
Question 3: How to make a gift tag using Cricut?
Answer: To make your gift tags, you should follow the steps below:
Wrap Up
In this blog, I have added some Cricut gift ideas, which are easy to make if you put all your effort and ideas into them. However, the best part about the Cricut app is that it has an intuitive interface that lets you create unique designs in no time, and you find no difficulty using it. Explore the different types of projects that you want to make and make your loved one feel so special with these inexpensive gift ideas with Cricut.
Visit: cricut.com/setup install cricut design space app cricut.com setup mac www.cricut.com setup login
Source: https://cricutsetuplogin.wordpress.com/2024/07/22/8-unique-cricut-gift-ideas-perfect-projects-for-any-occasion/
#install cricut design space app#cricut setup#cricut.com setup#cricut.com sign in#cricut.com/create#cricut.com/setup#cricut.com design space#cricut.com/register#www.cricut.com setup login#cricut design space login#cricut design space app#cricut design space download#cricut design space setup#cricut design space software#install cricut design space#install cricut explore air 2#cricut new product setup#cricut new product device#cricut setup login#cricut setup log in
0 notes