#I followed a tutorial
Explore tagged Tumblr posts
Visit Tumblr Blog
Explore Tumblr blogs with no restrictions, modern design and the best experience.
Last Seen Tumblr Blogs


Fun Fact
Tumblr.com rank in the US is 25.
Text

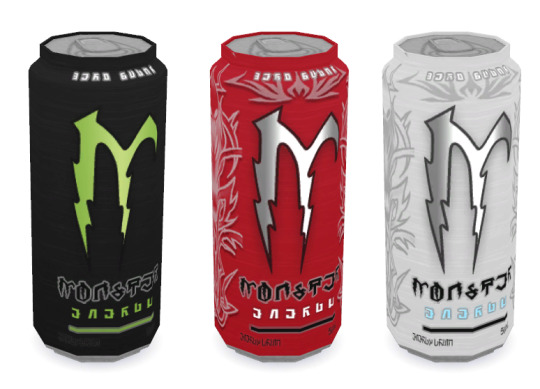
Last night I thought "What if Lawrie (from Brawl Stars) was in CMY2K???" just because I found 0046incognito's old tutorial on how to do a fake screencap art so I followed through.
The thing that matters is this was one of the first attempts at doing 2000s style (especially the lines!) and I had a BLAST doing this fabricated junk. Design was kinda hard, the original was mostly different but I had to bend the design rules for the sake of the "Halosoft's product made sometime in 1995, definitely bad and that was 4 years before Hibiki was even made" and the face was supposed to be those cream colored old desktop monitors.
Aside from this ugly ass design overall looks perfectly fine
Now I know how to make fakes CRT screencaps have a nice day everyone
16 notes
·
View notes
Text
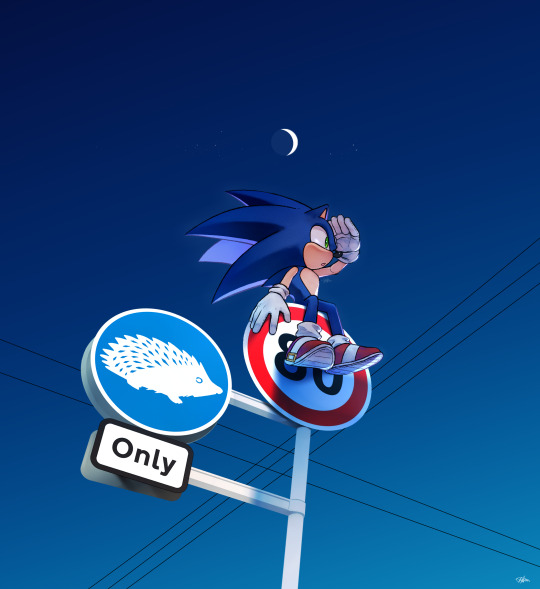
#sonic the hedgehog#girl i have no idea how to pose him i kms#i saw a fun tutorial on rendering signs and then half followed it half gave up LMAO#me when all i do is draw stick him on top of signs or lamposts im sorry for drawing nothing new
2K notes
·
View notes
Text
hey so i've been working on a lot of things (and also second guessing myself a lot because perfectionism) but here's some very random sneak peeks if y'all are interested!!


#and happy black history month!!#how are we already entering into the final week :((#also#i've been inspired to write some 'creating deco cc' tutorials#i saw someone ask where they could find some easy-to-follow ones on x and i thought why not???#i'm far from the best but i can do lil sumn sumn i suppose
1K notes
·
View notes
Text


PSA on drawing feathered dinosaur wings
If I made any mistakes in this post, please let me know and I will correct them
#Yes I know some people don’t like drawing accurate dinosaurs#if you are one of those people you are not obligated to follow this PSA#art#digital art#dinosaurs#birds#palaeoblr#birdblr#paleoart#bird art#art tutorial
1K notes
·
View notes
Text
programmed my oc into a game for the aesthetic
#i hope this gives off the vibe of an old game#2 days of modeling#1 day of following a coding tutorial#i felt so happy to draw the little gifs on the screen again#im so sick of 3d (i will do it again)#oc#oc animation#oc art
692 notes
·
View notes
Text
how to grub your karkat
or you can use this for any other plush or if you wanna make a whole new plush entirely or whatever

disclaimer im not a professional in any sense of the word and theres anything technical im doing wrong or you think you can do it better by all means dont hold back
Things you’ll need
sewing machine unless youre really dedicated but doing it by hand is gonna be an agonizing feat i promise. I just used a straight stitch for everything
Fabrics: for the main body i suggest a minky or something soft, for the inner lining something in the same color as the main body and ideally with some stretch, and anything black for the legs. Less than a yard of each will do
if youre using minky or anything furry get a lint roller. Trust me
stuffing, i used polyfil
threads that match your fabrics
good fabric scissors
sewing needle for hand sewing/fixes
karkat plush (optional)

Heres the pattern i came up with! They are numbered for your convenience and pieces with the same numbers are going to be part of the same row of segments. cut everything out on the black lines (Make sure when you’re printing to fit the image to the page size.) on the left we have the belly pieces, the right is the main body, and we have the foot in between
Im using a relatively thin minky fabric, im sure you can use whatever but something with some fluffiness kinda helps to mask any imperfections in the sewing. When drawing out your patterns keep in mind what direction your fibers settle in and try to keep it consistent
On the wrong side of the fabric measure out at least a half inch seam allowance around each piece of the pattern, i used a centimeter and that worked but had me sweatin a bit.

For the main body pieces fold your fabric in half before you cut so you can have 2 of each segment that are mirrored to each other, i also extended all of the #1 pieces an additional centimeter/half inch at the top so we can fold them over at the very end. I highly suggest numbering the insides of all the cut pieces, especially in a way where you will remember what direction they are each meant to sit

After you’ve numbered all your pieces, set them aside and start making your feet!
Each of the 6 legs is made of two pieces, but i because i only had a swatch of the black minky i made up for the rest with some random black scrap fabric from an old project. Try to keep your fabric consistent if you can lol
I didnt give these pieces any more seam allowance on the fabric but i recommend adding a centimeter or half inch to the base of it to extend the length and have some more wiggle room

like so
Instead of cutting out 12 individual pieces and struggling to stitch them all together i started with 6, then pinning each piece real tight with the right/furry side down onto my secondary fabric, and slowly stitching around the shape real close to the edges- DO NOT CLOSE THE FLAT SIDE as we are going to stuff the feet through here

Now cut the shape out of the fabric and repeat till you have 6 feet

Now flip those bad boys inside out, stuff up, and if you wanna you can match them to their best pairs

now grab a pair of feeties and your #1 pieces and line them up, in this picture my belly #1 piece is shorter bc i forgot to add the extra centimeter and i recut that once i realized. Line those sides up with the right/furry parts touching and with the feet in between, flip it around to make sure everything's sitting the way you want it

Note. i didnt realize until later but i sewed my feet in upside down. save yourself the time it takes to fix it and dont make the same mistake
Straight stitch these layers together and repeat with the next two segments our good friends #2 & #3

Repeat this for the #2 and #3 sections but NOT THE #4, that part doesnt need feet! just line those edges up right/furry sides together and sew


the secret to the squish of the suit is making this inner lining from another fabric and stuffing it! I used what i had leftover from a stretchy red fabric for a kanaya skirt. For this we need to make a new pattern for each section, making sure it follows the curve of the round edge but the piece itself is shorter, almost like youre removing the seam allowance you added. Mine is a centimeter shorter on the top and on the bottom and reaches to the middle

Make one of these for each numbered segment,you only need to make half the pattern and you can fold your fabric in half on a crease and you end up with one symmetrical piece (bars)

Now you need to pin these pieces right on top of the wrong side of your numbered furry sections and line up the straight edges like so (disclaimer for LOTS OF SCARY NEEDLES !!)

Admittedly i didnt estimate how long these pieces needed to be very accurately and overshot it a bit, if you start pinning it from the middle and continue outwards on either side thatll ensure its not too lose and you can cut off any excess after
The only exception is piece #1, if you recall we gave this #1 section extra seam allowance. This is so we can sew down that excess at the neck later and hide any of the inside that might show once its all put together. Do not connect the top edge to the inner lining! Since i added an extra centimeter earlier im gonna leave that hanging and pin + sew down the inner lining a centimeter lower than the top edge. LEAVE THE CURVED EDGES OPEN! DONT SEW THEM TOGETHER! those stay open to stuff

Straight stitch the lined up edges together

Now you have all these skinned pieces of little freak and we need to connect all these segments together making sure to sew UNDER the existing stitches so we dont see those on the outside when its all put together


Inside looks like a bit of a mess but thats fine bc its not the part that matters
Now stuff it! you might need a stick or pencil or something long and thin to get stuffing into the middle bits

Now thats its stuffed you can finally close those curved edges. Try not to sew over a thick mound of stuffing, push it in a little further to give yourself some space and you can fluff it back out after everythings closed. I cut off that excess lining fabric after sewing

Ough… they filleted my boy…
Finally, match up all the edges and lines and HAND SEW them right sides together. You will destroy your machine trying to work around that stuffing i promise. You also have an excuse to get up from your work desk and sew on a couch or smth. I used a standard backstitch for a tight finish and again, make sure you sew under any existing stitches so they arent visible on the outside!

Speaking of the outside, once you stitch everything together you can very gently flip this sucker inside out

This is @hatamonu’s cat Cocaina, aka Coco. Her perfectly square figure made it into my grub files somehow so shes essential to the tutorial

Check the fit and all thats left to do is roughly baste stitch down that excess neck fabric onto the stuffed lining and youre set! I gave the thread slight tugs as i went to tighten the opening a bit put dont tighten it too much

tadaaaaa

It fits pretty snug but starts to slip a bit with motion. Heres a bounce test

If you do shake your baby make sure to safety pin the plush to the suit so he doesnt prematurely shed his exosekeleton
Now spread that baby fever and show your baby to the world


pics from the ALA 2025 homestuck meetup and supplied by para.dox.cos
Tysm for coming along this ride with me especially if you followed the prototype journey on twitter, much thanks to my more sewing savvy friend for the solution to my grub dilemma and for helping me design and build my dolorosa cosplay <3 much love and hopefully many more homestuck cosplays and meetups to come in the future!
#homestuck#homestuck cosplay#karkat plush#karkat#karkat vantas#cosplay#tutorial#homestuck grub plush#plush pattern#long post#ALA 2025#anime los angeles#dolorosa#the dolorosa#apologies if this is hard to follow or utterly incomprehensible please note i am making shit up as i go and results may vary#feel free to ask any clarifying questions and ill do my best to answer#no i will not be selling these#technically i have more minky left than i know what to do with but the cost would have to justify the pain in the ass it all was to complet#and i dont think anyone will pay that price#send me suggestions of red characters to make plushes out of
426 notes
·
View notes
Text

…to the sea.
#I followed James Julier Art Tutorials’ video for the background#levi ackerman#erwin smith#aot#levi fanart#snk#attack on titan#shingeki no kyojin#aot fanart
825 notes
·
View notes
Text
oc doodle from today
#tried following a chinese shading tutorial#but when i translated it it was absolutely useless. so i just fucked around#ocs#my ocs#orphe’s art
150 notes
·
View notes
Text


(pls click the images. The quality is terrible. Also there may be some typos. lol) Anyways, @th3p0rtalmaker, this is for you! I hope you like it! :D
#Tfa prowl#transformers animated#tfa#maccadam#transformers#tf fanart#my art#art tutorials#I don't usually make tutorials so if it's hard to follow along I apologize.😅
150 notes
·
View notes
Note
I’m absolutely obsessed with your art! Your art is such an inspiration, and I like to analyze it to make my own work grow (don’t worry, I am not copying ur style. Perfection is impossible to cheat off of)
I’d like to know- How do you get that dot/noise-ish texture? In the tmnt art you made, one is Raphael’s arm had a bright cyan light from it, but then fades into little dots- I’d like to know how you do that.
Ofc you don’t gotta answer! If you see this in your inbox and don’t want to answer, that’s okay <3
hi! firstly thank u im flattered ;_; secondly its funny to get this ask because i actually made a tutorial for this months ago and i was like.....actually im a little anti-tutorial because i think online art communities pass them around and treat them as a "you've been doing art WRONG this is the RIGHT way" thing and not as like. individual technique sharing. idk. also nobody asked so im not gonna post this. but u asked so... here i am posting it LOL

basically its just the dissolve brush mode in photoshop with the softest default brush + some sneaky masking to get the right fall off/shadows that i want. u can technically use eraser instead of masking but idk i find its a pain to edit afterwards.
this has kind of been my default coloring method for the past... year plus now? basically i just do all the work in my inks/flats stage and all i do for "paint" boils down to like. 2-3 of these lighting layers (normally one key light and one bounce light. sometimes more key lights depending on how much i hate myself) i used to do shadows with this too but then i stopped because it was getting too complicated. sometimes if i want it to be glowy ill throw a frickin.... outer glow layer style on the light layer too.
you can also see me kind of work thru this method in a couple tiktoks (1) (2)
#ask#im gonna make this not rebloggable because i dont want people following me for tutorials LOL#process
277 notes
·
View notes
Text

This art shits easy
#I seriously recommend following this tutorial javert is so fun to draw#and you don’t have to feel bad about the low effort bc he deserves it#drawtism#les mis#les misérables#inspector javert#javert#les miserables#mine
121 notes
·
View notes
Text

This is part of a comic I'm doing, but I think it worked well enough to deserve a post all by itself~ :D:D:D (drawing Azula is very fun :D)
#Got avatar on the brain atm#:D:D:D#azula#avatar the last airbender#atla fanart#atla#wanted to try out some more 'realistic' stuff#like actually doing skin rendering and all that#I like how this turned out#so I guess it worked!#:D#(followed a tutorial instead of just winging it-)#Ye.#im gonna add text for the comic#which goes something like#'Oh look who finally decided to show up'#>:D#princess azula#>:D>:D>:D
154 notes
·
View notes
Text
a reminder to young/new artists;
YOU WILL GET THERE EVENTUALLY.
i promise you, you will get there eventually. you will have the art style you've always envied, the quality you thought you'd never reach, the skill you think you don't have. you will get there.
you just have to keep going.
#and i know that's not easy. i have been there. every artist has.#but no one gets where they are through lack of effort and practice#you dont have to follow fancy tutorials. you dont have to do fancy lessons. you dont have to do anything other than-#-doing what you love. doing what makes YOU happy. i promise you YOU WILL GET THERE.#take it from an artist that thought he never would. you will get where you want to be.#a talking bunny#feeling sentimental :') realized im the artist young me always dreamed of being and thats just. hoohkjghfgh#i never thought i'd get here. so. something for artists that may be like me#U WILL GET THERE!! IF I CAN SO CAN U!!!
208 notes
·
View notes
Text
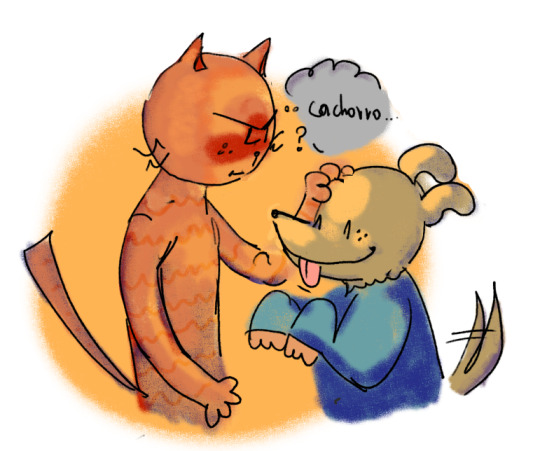


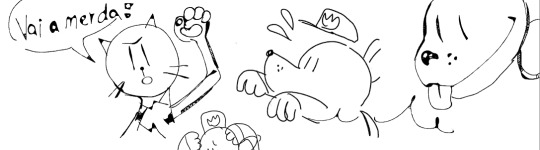
experimental dog man drawings i've made over the last week.... now talk abt an inconsistent art style.........
more doodles under the cut

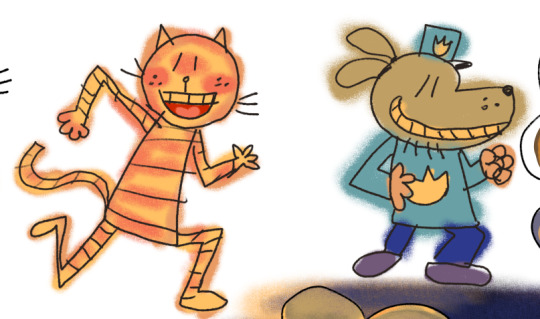


and my masterpiece:
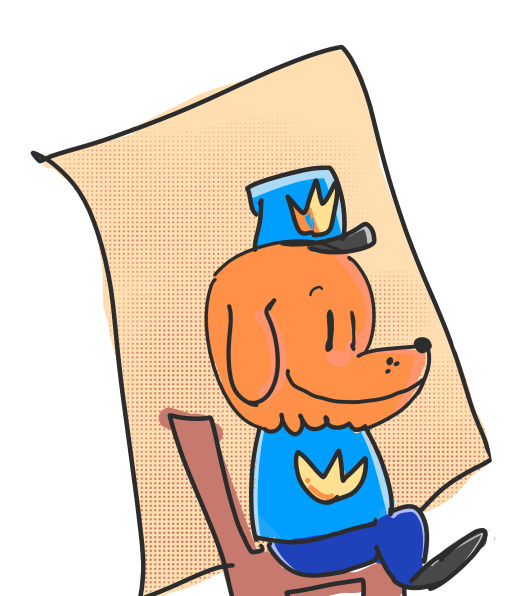
#dogman#petey the cat#lil petey#myn.arte#lotsss of scribbles nothing concrete rlly im just having fun#eyestrain#tw eyestrain#i was trying to follow the drawing tutorial on the book for a lot of these#i think im not very good at cartooning
136 notes
·
View notes
Text


#sleep token#vessel teef#daylight vessel#i will never be over daylight vessel ever....#i have to get ready to take my doggo out now but i am sore#i followed a dance tutorial yesterday and now i am just so damn sore#i want to upload a dance video for you XD i miss dancing a lot#going to take me some time to become good at it again XD
115 notes
·
View notes
Text
💧✨based off of this illustration by @passionpeachy!✨💧
video compression muted the colors, so here are a few stills under the cut


tiny bonus: happy pride!

#3d#blender#npr#video#passionpeachy#i actually finished and rendered this out at 2 am but i will schedule this for the morning 😴#thank you azul for letting me use your art!! it made me feel very smart figuring out how to replicate the black shading of the bubble#it's not perfect but it's my first model that wasn't made following a tutorial! so that is to be expected. very fun very charming :]
510 notes
·
View notes