#Npm install from github commit
Explore tagged Tumblr posts
Visit Tumblr Blog
Explore Tumblr blogs with no restrictions, modern design and the best experience.
Last Seen Tumblr Blogs


Fun Fact
In 2020, Tumblr had 29.4 million users in the US.
Text
How to Build Software Projects for Beginners

Building software projects is one of the best ways to learn programming and gain practical experience. Whether you want to enhance your resume or simply enjoy coding, starting your own project can be incredibly rewarding. Here’s a step-by-step guide to help you get started.
1. Choose Your Project Idea
Select a project that interests you and is appropriate for your skill level. Here are some ideas:
To-do list application
Personal blog or portfolio website
Weather app using a public API
Simple game (like Tic-Tac-Toe)
2. Define the Scope
Outline what features you want in your project. Start small and focus on the minimum viable product (MVP) — the simplest version of your idea that is still functional. You can always add more features later!
3. Choose the Right Tools and Technologies
Based on your project, choose the appropriate programming languages, frameworks, and tools:
Web Development: HTML, CSS, JavaScript, React, or Django
Mobile Development: Flutter, React Native, or native languages (Java/Kotlin for Android, Swift for iOS)
Game Development: Unity (C#), Godot (GDScript), or Pygame (Python)
4. Set Up Your Development Environment
Install the necessary software and tools:
Code editor (e.g., Visual Studio Code, Atom, or Sublime Text)
Version control (e.g., Git and GitHub for collaboration and backup)
Frameworks and libraries (install via package managers like npm, pip, or gems)
5. Break Down the Project into Tasks
Divide your project into smaller, manageable tasks. Create a to-do list or use project management tools like Trello or Asana to keep track of your progress.
6. Start Coding!
Begin with the core functionality of your project. Don’t worry about perfection at this stage. Focus on getting your code to work, and remember to:
Write clean, readable code
Test your code frequently
Commit your changes regularly using Git
7. Test and Debug
Once you have a working version, thoroughly test it. Look for bugs and fix any issues you encounter. Testing ensures your software functions correctly and provides a better user experience.
8. Seek Feedback
Share your project with friends, family, or online communities. Feedback can provide valuable insights and suggestions for improvement. Consider platforms like GitHub to showcase your work and get input from other developers.
9. Iterate and Improve
Based on feedback, make improvements and add new features. Software development is an iterative process, so don’t hesitate to refine your project continuously.
10. Document Your Work
Write documentation for your project. Include instructions on how to set it up, use it, and contribute. Good documentation helps others understand your project and can attract potential collaborators.
Conclusion
Building software projects is a fantastic way to learn and grow as a developer. Follow these steps, stay persistent, and enjoy the process. Remember, every project is a learning experience that will enhance your skills and confidence!
3 notes
·
View notes
Text
GitHub Repositories Hit by Password-Stealing Commits Disguised as Dependabot Contributions
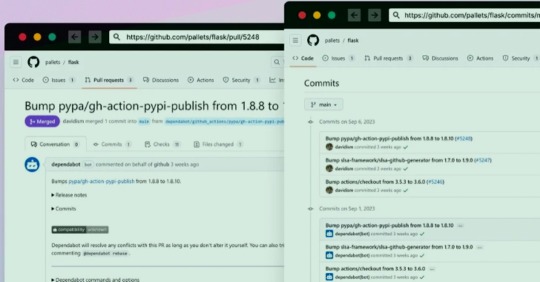
A new deceptive campaign has been observed hijacking GitHub accounts and committing malicious code disguised as Dependabot contributions with an aim to steal passwords from developers.
"The malicious code exfiltrates the GitHub project's defined secrets to a malicious C2 server and modify any existing javascript files in the attacked project with a web-form password-stealer malware code effecting any end-user submitting its password in a web form," Checkmarx said in a technical report
The malware is also designed to capture GitHub secrets and variables to a remote server by means of a GitHub Action.
The software supply chain security firm said it observed the atypical commits to hundreds of public and private GitHub repositories between July 8 and 11, 2023.
It has emerged that the victims had their GitHub personal access tokens stolen and used by the threat actors to make falsified code commits to users' repositories by posing as Dependabot.
Dependabot is designed to alert users of security vulnerabilities in a project's dependencies by automatically generating pull requests to keep them up-to-date.

"The attackers accessed the accounts using compromised PATs (Personal Access Token) -- most likely exfiltrated silently from the victim's development environment," the company said. Most compromised users are located in Indonesia.
However, the exact method by which this theft may have taken place is currently unclear, although it's suspected that it may have involved a rogue package inadvertently installed by the developers.
This is evidenced by a new data exfiltration campaign targeting both npm and PyPI that uses as many as 39 counterfeit packages to gather sensitive machine information and transmit the details to a remote server.
The development highlights the continued attempts on part of threat actors to poison open-source ecosystems and facilitate supply chain compromises.
3 notes
·
View notes
Text
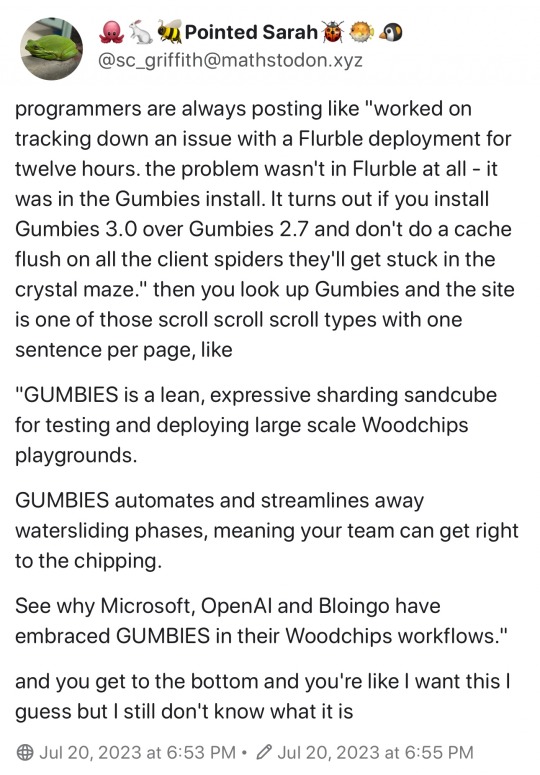
Ok, so from what I could gather:
"Gumbies" refers to two different projects with the same name that do the same thing. Let's call them Corporate gumbies and GitHub gumbies.
Corporate Gumbies does not propose a proper local library that you can add to your project (hence the lack of npm ref). Or to be clearer : you need to install a local spider client in your project, but it doesn't do anything on its own. Instead it allows you to send https request containing the glabglorg equation you want solved and their server run gumbies, then sends back the result. I don't know why this couldn't be handled on the device since this is absolutely not computationally heavy, but hey, they wouldn't be able to charge an expensive subscription otherwise.
Now, for github gumbies, the project aims to do the exact same thing as corporate Gumbies (and is in fact older) and it would even be able to solve your glarbglorgs locally. Sadly it got abandoned some 4 years ago. Then, powerwolf112 got tired of corporate Gumbies and resurrected the project. But then suddenly stopped commiting? On every single of their projects. Someone somewhere mentioned a car accident, but I couldn't confirm that so take it however you want.
Since corporate Gumbies has the monopole on the service and it is a technology that is both too niche and too annoying, nobody is making an alternative and they are en route for keeping that monopoly for many years. Which sucks because at no point are they encouraged to propose a better service.
Fuck us I guess.
24K notes
·
View notes
Text
Npm install from github commit

NPM INSTALL FROM GITHUB COMMIT INSTALL
NPM INSTALL FROM GITHUB COMMIT FULL
NPM INSTALL FROM GITHUB COMMIT DOWNLOAD
Note on Patches/Pull RequestsĬheck out our Contributing guide CopyrightĬopyright (c) 2015 Andrew Nesbitt.
NPM INSTALL FROM GITHUB COMMIT FULL
You can find a full list of those people here. We Michael Mifsud – Project Lead (Github / Twitter). This module is brought to you and maintained by the following people: If any tests fail it will build from source. Install runs only two Mocha tests to see if your machine can use the pre-built LibSass which will save some time during install. These parameters can be used as environment variable:Īs local or global. Following parameters are supported by node-sass: Variable name
NPM INSTALL FROM GITHUB COMMIT DOWNLOAD
Node-sass supports different configuration parameters to change settings related to the sass binary such as binary name, binary path or alternative download path. Node scripts/build -f Binary configuration parameters Node-sass includes pre-compiled binaries for popular platforms, to add a binary for your platform follow these steps: There is also an example connect app here: Rebuilding binaries scss files using node-sass: Metalsmith has created a metalsmith plugin based on node-sass: Meteor has created a meteor plugin based on node-sass: Mimosa has created a Mimosa module for sass which includes node-sass: Example App scss files using node-sass: Duo.js has created an extension that transpiles Sass to CSS using node-sass with duo.js Grunt has created a set of grunt tasks based on node-sass: Gulp has created a gulp sass plugin based on node-sass: Harp web server implicitly compiles. This functionality has been moved to node-sass-middleware in node-sass v1.0.0 DocPad wrote a DocPad plugin that compiles. scss files automatically for connect and express based http servers. Brunch pluginīrunch’s official sass plugin uses node-sass by default, and automatically falls back to ruby if use of Compass is detected: Connect/Express middleware The extension also integrates with Live Preview to show Sass changes in the browser without saving or compiling. When editing Sass files, the extension compiles changes on save. Brackets has created a Brackets extension based on node-sass. Listing of community uses of node-sass in build tools and frameworks. Having installation troubles? Check out our Troubleshooting guide.
NPM INSTALL FROM GITHUB COMMIT INSTALL
Follow the official NodeJS docs to install NodeJS so that #!/usr/bin/env node correctly resolves.Ĭompiling on Windows machines requires the node-gyp prerequisites.Īre you seeing the following error? Check out our Troubleshooting guide.** Some users have reported issues installing on Ubuntu due to node being registered to another package. scss files to css at incredible speed and automatically via a connect middleware.įollow on twitter for release updates: Install Node-sass is a library that provides binding for Node.js to LibSass, the C version of the popular stylesheet preprocessor, Sass. We will open a single issue for interested parties to subscribe to, and close additional issues.īelow is a quick guide for minimum and maximum support supported version of node-sass: NodeJS
New node release require minor internal changes along with support from CI providers (AppVeyor, GitHub Actions).
We will stop building binaries for unsupported releases, testing for breakages in dependency compatibility, but we will not block installations for those that want to support themselves.
Node versions that hit end of life, will be dropped from support at each node-sass release (major, minor).
Supported Node.js versions vary by release, please consult the releases page.
0 notes
Photo

How to Build and Deploy a Web App With Buddy
Moving code from development to production doesn't have to be as error-prone and time-consuming as it often is. By using Buddy, a continuous integration and delivery tool that doubles up as a powerful automation platform, you can automate significant portions of your development workflow, including all your builds, tests, and deployments.
Unlike many other CI/CD tools, Buddy has a pleasant and intuitive user interface with a gentle learning curve. It also offers a large number of well-tested actions that help you perform common tasks such as compiling sources and transferring files.
In this tutorial, I'll show you how you can use Buddy to build, test, and deploy a Node.js app.
Prerequisites
To be able to follow along, you must have the following installed on your development server:
Node.js 10.16.3 or higher
MongoDB 4.0.10 or higher
Git 2.7.4 or higher
1. Setting Up a Node.js App
Before you dive into Buddy, of course, you'll need a web app you can build and deploy. If you have one already, feel free to skip to the next step.
If you don't have a Node.js app you can experiment with, you can create one quickly using a starter template. Using the popular Hackathon starter template is a good idea because it has all the characteristics of a typical Node.js app.
Fork the template on GitHub and use git to download the fork to your development environment.
git clone https://github.com/hathi11/hackathon-starter.git
It's worth noting that Buddy is used with a Git repository. It supports repositories hosted on GitHub, BitBucket, and other such popular Git hosts. Buddy also has a built-in Git hosting solution or you can just as easily use Buddy with your own private Git servers.
Once the clone's complete, use npm to install all the dependencies of the web app.
cd hackathon-starter/ npm install
At this point, you can run the app locally and explore it using your browser.
node app.js
Here's what the web app looks like:
2. Creating a Buddy Project
If you don't have a Buddy account already, now is a good time to create one. Buddy offers two premium tiers and a free tier, all of which are cloud based. The free tier, which gives you 1 GB of RAM and 2 virtual CPUs, will suffice for now.
Once you're logged in to your Buddy account, press the Create new project button to get started.
When prompted to select a Git hosting provider, choose GitHub and give Buddy access to your GitHub repositories.
You should now be able to see all your GitHub repositories on Buddy. Click on the hackathon-starter repository to start creating automations for it.
Note that Buddy automatically recognizes our Node.js app as an Express application. It's because our starter template uses the Express web app framework.
3. Creating a Pipeline
On Buddy, a pipeline is what allows you to orchestrate and run all your tasks. Whenever you need to automate something with Buddy, you either create a new pipeline for it or add it to an existing pipeline.
Click on the Add a new pipeline button to start creating your first pipeline. In the form shown next, give a name to the pipeline and choose On push as the trigger mode. As you may have guessed, choosing this mode means that the pipeline is executed as soon as you push your commits to GitHub.
The next step is to add actions to your pipeline. To help you get started, Buddy intelligently generates a list of actions that are most relevant to your project.
For now, choose the Node.js action, which loads a Docker container that has Node.js installed on it. We'll be using this action to build our web app and run all its tests. So, on the next screen, go ahead and type in the following commands:
npm install npm test
4. Attaching a Service
Our web app uses MongoDB as its database. If it fails to establish a connection to a MongoDB server on startup, it will exit with an error. Therefore, our Docker container on Buddy must have access to a MongoDB server.
Buddy allows you to easily attach a wide variety of databases and other services to its Docker containers. To attach a MongoDB server, switch to the Services tab and select MongoDB. In the form shown next, you'll be able to specify details such as the hostname, port, and MongoDB version you prefer.
Make a note of the details you enter and press the Save this action button.
Next, you must configure the web app to use the URI of Buddy's MongoDB server. To do so, you can either change the value of the MONGODB_URI field in the .env.example file, or you can use an environment variable on Buddy. For now, let's go ahead with the latter option.
So switch to the Variables tab and press the Add a new variable button. In the dialog that pops up, set the Key field to MONGODB_URI and the Value field to a valid MongoDB connection string that's based on the hostname you chose earlier. Then press the Create variable button.
The official documentation has a lot more information about using environment variables in a Buddy pipeline.
5. Running the Pipeline
Our pipeline is already runnable, even though it has only one action. To run it, press the Run pipeline button.
You will now be taken to a screen where you can monitor the progress of the pipeline in real time. Furthermore, you can press any of the Logs buttons (there's one for each action in the pipeline) to take a closer look at the actual output of the commands that are being executed.
You can, of course, also run the pipeline by pushing a commit to your GitHub repository. I suggest you make a few changes to the web app, such as changing its header by modifying the views/partials/header.pug file, and then run the following commands:
git add . git commit -m "changed the header" git push origin master
When the last command has finished, you should be able to see a new execution of the pipeline start automatically.
6. Moving Files
When a build is successful and all the tests have passed, you'd usually want to move your code to production. Buddy has predefined actions that help you securely transfer files to several popular hosting solutions, such as the Google Cloud Platform, DigitalOcean, and Amazon Web Services. Furthermore, if you prefer using your own private server that runs SFTP or FTP, Buddy can directly use those protocols too.
In this tutorial, we'll be using a Google Compute Engine instance, which is nothing but a virtual machine hosted on Google's cloud, as our production server. So switch to the Actions tab of the pipeline and press the + button shown below the Build and test action to add a new action.
On the next screen, scroll down to the Google Cloud Platform section and select the Compute Engine option.
In the form that pops up, you must specify the IP address of your VM. Additionally, to allow Buddy to connect to the VM, you must provide a username and choose an authentication mode.
The easiest authentication mode in my opinion is Buddy's SSH key. When you choose this mode, Buddy will display an RSA public key that you can simply add to your VM's list of authorized keys.
To make sure that the credentials you entered are valid, you can now press the Test action button. If there are no errors, you should see a test log that looks like this:
Next, choose GitHub repository as the source of the files and use the Remote path field to specify the destination directory on the Google Cloud VM. The Browse button lets you browse through the filesystem of the VM and select the right directory.
Finally, press the Add this action button.
7. Using SSH
Once you've copied the code to your production server, you must again build and install all its dependencies there. You must also restart the web app for the code changes to take effect. To perform such varied tasks, you'll need a shell. The SSH action gives you one, so add it as the last action of your pipeline.
In the form that pops up, you must again specify your VM's IP address and login credentials. Then, you can type in the commands you want to run. Here's a quick way to install the dependencies and restart the Node.js server:
pkill -HUP node #stop node server cd my_project npm install #install dependencies export MONGODB_URI= nohup node app.js > /dev/null 2>&1 & #start node server
As shown in the Bash code above, you must reset the MONGODB_URI environment variable. This is to make sure that your production server connects to its own MongoDB instance, instead of Buddy's MongoDB service.
Press the Add this action button again to update the pipeline.
At this point, the pipeline has three actions that run sequentially. It should look like this:
Press the Run pipeline button to start it. If there are no errors, it should take Buddy only a minute or two to build, test, and deploy your Node.js web app to your Google Cloud VM.
Conclusion
Being able to instantly publish new features, bug fixes, and enhancements to your web apps gives you a definite edge over your competition. In this tutorial, you learned how to use Buddy's pipelines, predefined actions, and attachable services to automate and speed up common tasks such as building, testing, and deploying Node.js applications.
There's a lot more the Buddy platform can do. To learn more about it, do refer to its extensive documentation.
by Ashraff Hathibelagal via Envato Tuts+ Code https://ift.tt/33rH96G
1 note
·
View note
Text
Easy Automatic npm Publishes
One common question from people using npm to publish, especially on CI systems, is how best to automate the process, especially when dealing with multiple branches.
For a while now, I've been using a pattern that takes almost all of the human interaction out of it, since I tend to mess stuff up when I type it with my fingers. This works well for automatic publishes from CI or when publishing manually from a terminal.
I haven't manually typed npm publish in a while, which is a good thing.
First things first, have good tests
I am a huge fan of running tests with 100% test coverage. It isn't a perfect guard against every problem out there, but it does keep me from doing stupid things, like assuming that I know what my program does.
My go-to test library is tap, but you can do this with any testing library that supports code coverage. If it doesn't support code coverage out of the box, you can use nyc to run any Node.js process with coverage tracking.
To use it, run npm i tap -D, and then add this to your scripts section in package.json:
{ "scripts": { "test": "tap" }, "tap": { "check-coverage": true } }
The npm version Command
The npm version command will figure out what the next version should be, edit your package.json file, and even check it into git with a signed tag. The beauty of this is that it also prevents you from bumping the version when you have untracked changes in your git working directory, and provides some hook scripts that can do other things before or after the version bump.
In the scripts section of my package.json file, I add a preversion script that runs my tests:
{ "scripts": { "preversion": "npm test", "test": "tap" }, "tap": { "check-coverage": true } }
Now, before I can bump the version, npm will make sure that my tests pass. If the test fails (or if coverage isn't 100%), then it'll fail and the version command fails.
Publishing on Version Change
Bumping the version is fine, but then it's time to share it. Along with preversion, the postversion command does actions after the version is bumped. So, let's hook onto that to publish the package.
{ "scripts": { "postversion": "npm publish", "preversion": "npm test", "test": "tap" }, "tap": { "check-coverage": true } }
Keeping Git and npm in Sync
That's fine for pushing to npm, but then I have to remember to push the changes to git. (I have many times forgotten to do this, and gotten issues because the code on npm is not in GitHub, which is generally a bad sign.)
Thankfully, npm also gives us a way to hook a script around the publish event, so let's use that:
{ "scripts": { "postpublish": "git push origin --all; git push origin --tags", "postversion": "npm publish", "preversion": "npm test", "test": "tap" }, "tap": { "check-coverage": true } }
This runs two commands. The first pushes all branches, and the second pushes all the tags (including my newly published version tag).
Branches and Dist-Tags
Occasionally, I'll find myself working on some big feature for a new release that is not yet ready for prime time.
In the feature branch, I'll modify the scripts by adding a --tag argument to the npm publish command to put it on a dist-tag other than latest.
{ "scripts": { "postversion": "npm publish --tag=next", "postpublish": "git push origin --all; git push origin --tags", "preversion": "npm test", "test": "tap" }, "tap": { "check-coverage": true } }
Now, I can tell people to run npm install my-module@next to try out the new prerelease version.
On the other side, I might want to land a bugfix or backport a feature for a legacy version. To do that, I create a git branch with the old version, and update package.json to add a legacy tag instead.
{ "scripts": { "postversion": "npm publish --tag=legacy", "postpublish": "git push origin --all; git push origin --tags", "preversion": "npm test", "test": "tap" }, "tap": { "check-coverage": true } }
Bonus Points: Sign Your Versions
Git has support for PGP signing tagged commits. To tell npm to take advantage of this, set these two config values:
npm config set sign-git-commit true npm config set sign-git-tag true
If setting up PGP and hooking it up with Git is too much of a pain, you're not alone. I'm a nerd who's been computering for a very long time, and I can't handle it. Also, I'm always worried about my keys just sitting on my machine in text files, even if they are encrypted with a passphrase. And if they are encrypted with a passphrase, then I have to type it in all the time, and that's just too much work.
I'm a huge fan of Krypton. It stores your PGP and SSH private keys in your mobile device's secure storage vault, and then sends a push notification to allow it to do things with those keys. It's dead-simple to set up, and extremely easy to use, and gives you a hardware second factor for everything that matters.
Of course, and I don't exactly know if this is a bug or a feature, it does mean that whenever I run npm version, between the commit, the signature, the tag, and the two SSH connections, my phone does a lot of buzzing.
Running npm version to Test and Publish
From there, I use the npm version command to do all my publishing. For bug fixes, I run npm version patch. For new features, I run npm version minor. For breaking changes, I run npm version major.
If you use Conventional Commits or similar tools, you could even automate the detection of what kind of version bump it should be, though that's left as an exercise for the reader.
This approach of using npm scripts to automate the process works well with any system where you'll be publishing and committing. Set it up in your next project, and trust your human fingers a little bit less :)
PS: npm Configuration is Very Flexible
You'll note that I did --tag= in the publish commands above. You can also configure npm in many other ways. Any configuration value (including tag in the case of npm publish) can be set:
explicitly on the command line, like --tag=whatever
in the environment, like NPM_CONFIG_TAG=whatever
in a .npmrc file in the root of your project, like tag = whatever
in a .npmrc file in your home directory
in /usr/local/etc/npmrc (or /usr/etc/npmrc on some systems).
This works inheritance-style, so the higher up on that list a setting is, the higher the priority.
For CI/CD systems, this means that you can sometimes set environment variables to control the behavior of npm commands, without having to change the code or inject files into places. If it's easier to control it with a file (for example, checking a .npmrc file into git), then that's also fine.
11 notes
·
View notes
Text
Npm install from github tree

NPM INSTALL FROM GITHUB TREE INSTALL
NPM INSTALL FROM GITHUB TREE FREE
You can develop numerous projects with Node.js like single-page applications (SPA), social media applications, static sites, online payment systems, hardware projects, blogs, mobile apps, real-time chat apps, APIs, eCommerce apps, and many more. You don't need to assemble these building blocks from scratch and instead, you can focus on the core of your application.ĭue to other features like Node's efficient caching ability, multiple hosting providers, and cross-platform availability, it's no surprise that it's so popular among developers.
NPM INSTALL FROM GITHUB TREE FREE
If you want to add any feature or building blocks to your application, there's a high probability that an open-source, free library is already available to you. Node.js has one of the largest ecosystems of open source libraries available. Node applications use JavaScript-if you're a frontend developer and know JavaScript, you can reuse those skills and transition to a Full-Stack Developer.
NPM INSTALL FROM GITHUB TREE INSTALL
PS C:UsersshutezDocumentsSimple EmotionCodesedemo.tk> npm install git+ssh://:SimpleEmotion/node-call -analytics.git0.4. It's used in production by large companies like Netflix, LinkedIn, PayPal, Trello, Uber, eBay, NASA, etc. The other 3 repositories have the same format for the install command. It can also be used for building super-fast, highly scalable services. It's easy to get started with Node, and it's great for prototyping and agile development. You can build standalone applications with Node.js, but it's most often used to build back-end services. Node.js is a JavaScript runtime built on Chrome's V8 JavaScript engine. What Is Node.js and Why Is it So Popular? Luckily, it's compatible with nearly all operating systems-Windows included.įollow this step-by-step guide to install Node.js and start building your first applications on Windows.
If is provided, it will be used to clone exactly that commit. Authentication module written in TypeScript providing authentication utilities and JWT methods. I am getting following error on npm installġ8 verbose stack TypeError: Cannot read property 'match' of undefined 18 verbose stack at tarballToVersion (/home/rahul/.nvm/versions/node/v12.16.3/lib/node_modules/npm/lib/install/inflate-shrinkwrap.js:87:20) 18 verbose stack at inflatableChild (/home/rahul/.nvm/versions/node/v12.16.3/lib/node_modules/npm/lib/install/inflate-shrinkwrap.js:99:22) 18 verbose stack at /home/rahul/.nvm/versions/node/v12.16.3/lib/node_modules/npm/lib/install/inflate-shrinkwrap.js:55:12 18 verbose stack at tr圜atcher (/home/rahul/.nvm/versions/node/v12.16.3/lib/node_modules/npm/node_modules/bluebird/js/release/util.js:16:23) 18 verbose stack at Object.gotValue (/home/rahul/.nvm/versions/node/v12.16.3/lib/node_modules/npm/node_modules/bluebird/js/release/reduce.js:155:18) 18 verbose stack at Object.gotAccum (/home/rahul/.nvm/versions/node/v12.16.3/lib/node_modules/npm/node_modules/bluebird/js/release/reduce.js:144:25) 18 verbose stack at 圜atcher (/home/rahul/.nvm/versions/node/v12.16.3/lib/node_modules/npm/node_modules/bluebird/js/release/util.js:16:23) 18 verbose stack at Promise._settlePromiseFromHandler (/home/rahul/.nvm/versions/node/v12.16.3/lib/node_modules/npm/node_modules/bluebird/js/release/promise.js:517:31) 18 verbose stack at Promise._settlePromise (/home/rahul/.nvm/versions/node/v12.16.3/lib/node_modules/npm/node_modules/bluebird/js/release/promise.js:574:18) 18 verbose stack at Promise._settlePromise0 (/home/rahul/.nvm/versions/node/v12.16.3/lib/node_modules/npm/node_modules/bluebird/js/release/promise.js:619:10) 18 verbose stack at Promise._settlePromises (/home/rahul/.nvm/versions/node/v12.16.3/lib/node_modules/npm/node_modules/bluebird/js/release/promise.js:699:18) 18 verbose stack at _drainQueueStep (/home/rahul/.nvm/versions/node/v12.16.3/lib/node_modules/npm/node_modules/bluebird/js/release/async.js:138:12) 18 verbose stack at _drainQueue (/home/rahul/.nvm/versions/node/v12.16.3/lib/node_modules/npm/node_modules/bluebird/js/release/async.js:131:9) 18 verbose stack at Async._drainQueues (/home/rahul/.nvm/versions/node/v12.16.3/lib/node_modules/npm/node_modules/bluebird/js/release/async.js:147:5) 18 verbose stack at (/home/rahul/.nvm/versions/node/v12.16.3/lib/node_modules/npm/node_modules/bluebird/js/release/async.It may seem obvious, but installing Node.js is the first step to building cool Node.js applications. npm install /: npm install github:/: Install the package at by attempting to clone it using git.
0 notes
Text
There is a NodeJS repository on GitHub
About GitHub
GitHub is a web-based version-control and collaboration platform for software developers. Microsoft, the biggest single contributor to GitHub, initiated an acquisition of GitHub for $7.5 billion in June, 2018. GitHub, which is delivered through a software-as-a-service (SaaS) business model, was started in 2008 and was founded on Git, an open source code management system created by Linus Torvalds to make software builds faster.
About GitHub Nodejs
Mostly used in server-side programming, Nodejs is used in traditional websites for faster code deployment. All browsers have their own version of Nodejs and this is adapted due to its high performance. It is mostly used for applications and browsers that need continuous connection with the server to collect relevant data from the database. It is also used in real-time applications of distributive servers such as newsfeeds, chats, customer support, and so on.It is not a programming language or framework but an environment to write codes and test the same against various conditions. Eventloop model is followed here with a single thread. Nodejs uses JavaScript, CoffeeScript, C and C++ in the environment. Knowledge of JavaScript is sufficient to work with Nodejs along with some APIs.
How to use GitHub Nodejs
In the terminal run the command git add. Commit the changes into Git using git commit -m “first commit”.
Now the code must be pushed into Git repository by logging into GitHub account and clicking on new repository. Add URL into git and it will connect to the repository.
git remote add origin https://github.com/UserName/RepoName.git
Push the changes to the repository using git push origin master.
Clone the project using git clone https://github.com/UserName/RepoName.git.
Since npm is already installed, run npm start.
.gitignore file should not be modified in any case and all the processes should be documented.
Requirements
At whatever point new code is created, it should be appropriately positioned and organized into parts. There should be layers for these parts, for example, information rationale and business layers so it very well may be effectively separated from others. There should be normal utility bundles in the application. Application and server should be various constructions so designers can work effectively on it. The setup should be progressive and ought to oblige the climate. Inherent mistake items ought to be utilized for blunder dealing with and every one of the API mistakes ought to be reported appropriately. Mistake streams ought to be tried with a known test applications for better agreement. APM items can be utilized for blunder acknowledgment and personal time.
0 notes
Text
NPM install git repos like a pro!
NPM install git repos like a pro!
Hey guys! it been long, nevertheless I’m here and lets get started. As a Javascript / Node.js developer, we use lot of npm packages and there’s standard command npm i package-name to install any package, but, do you know that you can install npm package directly from a git repo, even install from a specific branch, commit or tag. To install any npm package from from github direclty we would use…
View On WordPress
0 notes
Photo

VuexをTypeScriptで利用するのに悩んだ https://ift.tt/2MOnODr
概要
Vue.jsをTypeScriptで開発する際にVuexを利用するのにしっくりくる実装方法を模索中で、いくつか方法を試してみました。
GitHubに利用したプロジェクトをUPしています。実際に試してみたい方どうぞ^^
https://github.com/kai-kou/vue-js-typescript-vuex
準備
ここではDockerを利用して環境構築していますが、ローカルで構築してもらってもOKです。
> mkdir 任意のディレクトリ > cd 任意のディレクトリ > vi Dockerfile > vi docker-compose.yml
Dockerfile
FROM node:10.8.0-stretch RUN npm install --global @vue/cli WORKDIR /projects
docker-compose.yml
version: '3' services: app: build: . ports: - "8080:8080" volumes: - ".:/projects" tty: true
> docker-compose up -d > docker-compose exec app bash
コンテナ内
> vue create app Vue CLI v3.0.1 ? Please pick a preset: Manually select features ? Check the features needed for your project: Babel, TS, Vuex, Linter, Unit ? Use class-style component syntax? Yes ? Use Babel alongside TypeScript for auto-detected polyfills? Yes ? Pick a linter / formatter config: TSLint ? Pick additional lint features: Lint on save ? Pick a unit testing solution: Mocha ? Where do you prefer placing config for Babel, PostCSS, ESLint, etc.? In dedicated config files ? Save this as a preset for future projects? No ? Pick the package manager to use when installing dependencies: (Use arrow keys) ❯ Use Yarn Use NPM
コンテナ内
> cd app > yarn serve
これで実装の準備が整いました。
Vue-Cli標準
vue create コマンドでプロジェクトを作成するとsrc直下にstore.tsが作成されているので、そこに実装をいれて利用するパターンです。
stateにcounter ってのを持っていて、それをインクリメントするアクションがあるだけです。
src/store.ts
import Vue from 'vue'; import Vuex from 'vuex'; Vue.use(Vuex); interface State { conuter: number; } export default new Vuex.Store({ state: { conuter: 0, } as State, getters: { getCounter: (state, getters) => () => { return state.conuter; }, }, mutations: { increment(state, payload) { state.conuter += 1; }, }, actions: { incrementAction(context) { context.commit('increment'); }, }, });
App.vueで使ってみます。 超適当ですが、画像にclickイベント定義して、HelloWorldコンポーネントでstateに定義しているcounter を表示してます。
src/App.vue
<template> <div id="app"> <img alt="Vue logo" src="./assets/logo.png" @click="increment"> <HelloWorld :msg="`Welcome to Your Vue.js + TypeScript App ${this.counter}`"/> </div> </template> <script lang="ts"> import { Component, Vue } from 'vue-property-decorator'; import HelloWorld from './components/HelloWorld.vue'; @Component({ components: { HelloWorld, }, }) export default class App extends Vue { private get counter(): number { return this.$store.getters.getCounter(); } private increment(): void { this.$store.dispatch('incrementAction'); } } </script> (略)
ブラウザで確認すると、画像をクリックするとcounterがインクリメントするのが、確認できます。

気になる点
実装はシンプルで良いのですが、規模が大きくなってくると、store.tsが肥大化してくるのが目に見えます。辛い。
this.$store を利用するので、メソッド名などを間違えていても実行時にしかエラーにならないので、せっかくTypeScript使っているのになーです。
src/App.vue
export default class App extends Vue { private get counter(): number { return this.$store.getters.getCounter2(); // 実行時にエラー } private increment(): void { this.$store.dispatch('incrementAction2'); // 実行時にエラー } }
vuex-type-helperを利用する
下記記事で紹介されていたvuex-type-helperを利用してみます。
Vue.js + Vuex + TypeScript を試行錯誤してみた https://logs.utahta.com/blog/2017/09/02/110000
ktsn/vuex-type-helper https://github.com/ktsn/vuex-type-helper
vuex-type-helperとvuex-classってのを追加します。
コンテナ内
> yarn add vuex-type-helper vuex-class
storeの実装を追加します。ここではモジュール化してみます。
> mkdir -pv store2/modules > touch store2/index.ts > touch store2/modules/app.ts
store2/index.ts
import Vue from 'vue'; import Vuex from 'vuex'; import { app } from '@/store2/modules/app'; Vue.use(Vuex); export default new Vuex.Store({ modules: { app, }, });
store2/modules/app.ts
import Vuex, { createNamespacedHelpers } from 'vuex'; import { DefineActions, DefineGetters, DefineMutations } from 'vuex-type-helper'; export interface State { counter: number; } export interface Getters { counter: number; } export interface Mutations { increment: {}; } export interface Actions { incrementAction: {}; } export const state: State = { counter: 0, }; export const getters: DefineGetters<Getters, State> = { counter: (state) => state.counter, }; export const mutations: DefineMutations<Mutations, State> = { increment(state, {}) { state.counter += 1; }, }; export const actions: DefineActions<Actions, State, Mutations, Getters> = { incrementAction({ commit }, payload) { commit('increment', payload); }, }; export const { mapState, mapGetters, mapMutations, mapActions, } = createNamespacedHelpers<State, Getters, Mutations, Actions>('app'); export const app = { namespaced: true, state, getters, mutations, actions, };
利用できるようにmain.tsとApp.vueを編���します。
src/main.ts
import Vue from 'vue'; import App from './App.vue'; -import store from './store'; +import store from './store2';
src/App.vue
import { Component, Vue } from 'vue-property-decorator'; import HelloWorld from './components/HelloWorld.vue'; import { Getter } from 'vuex-class'; import * as app from './store2/modules/app'; @Component({ components: { HelloWorld, }, methods: { ...app.mapActions(['incrementAction']), }, }) export default class App extends Vue { @Getter('app/counter') private counter!: number; private incrementAction!: (payload: {}) => void; private increment(): void { this.incrementAction({}); } } (略)
はい。
気になる点
こちらの利点としてはモジュール化しやすい点と、アクション名を間違えてたときにビルドエラー吐いてくれる点でしょうか。
メソッド名間違い
methods: { ...app.mapActions(['incrementAction2']), },
エラー出してくれる
Argument of type '"incrementAction2"[]' is not assignable to parameter of type '"incrementAction"[]'. Type '"incrementAction2"' is not assignable to type '"incrementAction"'.
getterで間違ってる場合は、ブラウザ側でエラーになります。惜しい。
プロパティ名間違い
@Getter('app/counter2') private counter!: number;
ブラウザでエラー

vuex-classを利用するとActionなんかも以下のような定義ができるけれど、getterと同様にメソッド名間違いがブラウザでしか検知できないので、微妙。
vuex-classでAction定義
@Action('app/incrementAction') private incrementAction!: (payload: {}) => void;
うーん。独自実装いれたらもっとブラウザエラーを回避できそうですが、どこまで実装しようか悩ましいところです。
Vue.js+TypeScriptで開発するときの参考記事まとめ https://qiita.com/kai_kou/items/19b494a41023d84bacc7
元記事こちら
「VuexをTypeScriptで利用するのに悩んだ」
September 20, 2018 at 04:00PM
1 note
·
View note
Link
The Evolution of the Jupyter Notebook
Project Jupyter exists to develop open-source software, open standards, and services for interactive and reproducible computing.
Since 2011, the Jupyter Notebook has been our flagship project for creating reproducible computational narratives. The Jupyter Notebook enables users to create and share documents that combine live code with narrative text, mathematical equations, visualizations, interactive controls, and other rich output. It also provides building blocks for interactive computing with data: a file browser, terminals, and a text editor.
The Jupyter Notebook has become ubiquitous with the rapid growth of data science and machine learning and the rising popularity of open-source software in industry and academia:
Today there are millions of users of the Jupyter Notebook in many domains, from data science and machine learning to music and education. Our international community comes from almost every country on earth.¹ The Jupyter Notebook now supports over 100 programming languages, most of which have been developed by the community. There are over 1.7 million public Jupyter notebooks hosted on GitHub. Authors are publishing Jupyter notebooks in conjunction with scientific research, academic journals, data journalism, educational courses, and books. At the same time, the community has faced challenges in using various software workflows with the notebook alone, such as running code from text files interactively. The classic Jupyter Notebook, built on web technologies from 2011, is also difficult to customize and extend.
JupyterLab: Ready for Users
JupyterLab is an interactive development environment for working with notebooks, code and data. Most importantly, JupyterLab has full support for Jupyter notebooks. Additionally, JupyterLab enables you to use text editors, terminals, data file viewers, and other custom components side by side with notebooks in a tabbed work area.
JupyterLab enables you to arrange your work area with notebooks, text files, terminals, and notebook outputs. JupyterLab provides a high level of integration between notebooks, documents, and activities:
Drag-and-drop to reorder notebook cells and copy them between notebooks.
Run code blocks interactively from text files (.py, .R, .md, .tex, etc.).
Link a code console to a notebook kernel to explore code interactively without cluttering up the notebook with temporary scratch work.
Edit popular file formats with live preview, such as Markdown, JSON, CSV, Vega, VegaLite, and more.
JupyterLab has been over three years in the making, with over 11,000 commits and 2,000 releases of npm and Python packages. Over 100 contributors from the broader community have helped build JupyterLab in addition to our core JupyterLab developers.
To get started, see the JupyterLab documentation for installation instructions and a walk-through, or try JupyterLab with Binder. You can also set up JupyterHub to use JupyterLab.
Customize Your JupyterLab Experience
JupyterLab is built on top of an extension system that enables you to customize and enhance JupyterLab by installing additional extensions. In fact, the builtin functionality of JupyterLab itself (notebooks, terminals, file browser, menu system, etc.) is provided by a set of core extensions.
JupyterLab extensions enable you to work with diverse data formats such as GeoJSON, JSON and CSV.²
Among other things, extensions can:
Provide new themes, file editors and viewers, or renderers for rich outputs in notebooks;
Add menu items, keyboard shortcuts, or advanced settings options;
Provide an API for other extensions to use.
Community-developed extensions on GitHub are tagged with the jupyterlab-extension topic, and currently include file viewers (GeoJSON, FASTA, etc.), Google Drive integration, GitHub browsing, and ipywidgets support.
Develop JupyterLab Extensions
While many JupyterLab users will install additional JupyterLab extensions, some of you will want to develop your own. The extension development API is evolving during the beta release series and will stabilize in JupyterLab 1.0. To start developing a JupyterLab extension, see the JupyterLab Extension Developer Guide and the TypeScript or JavaScript extension templates.
JupyterLab itself is co-developed on top of PhosphorJS, a new Javascript library for building extensible, high-performance, desktop-style web applications. We use modern JavaScript technologies such as TypeScript, React, Lerna, Yarn, and webpack. Unit tests, documentation, consistent coding standards, and user experience research help us maintain a high-quality application.
JupyterLab 1.0 and Beyond
We plan to release JupyterLab 1.0 later in 2018. The beta releases leading up to 1.0 will focus on stabilizing the extension development API, user interface improvements, and additional core features. All releases in the beta series will be stable enough for daily usage.
JupyterLab 1.0 will eventually replace the classic Jupyter Notebook. Throughout this transition, the same notebook document format will be supported by both the classic Notebook and JupyterLab.
9 notes
·
View notes
Text
Plot to steal cryptocurrency foiled by the npm security team
Yesterday, the npm, Inc. security team, in collaboration with Komodo, helped protect over $13 million USD in cryptocurrency assets as we found and responded to a malware threat targeting the users of a cryptocurrency wallet called Agama.
This attack focused on getting a malicious package into the build chain for Agama and stealing the wallet seeds and other login passphrases used within the application.
The details
The attack was carried out by using a pattern that is becoming more and more popular; publishing a “useful” package (electron-native-notify) to npm, waiting until it was in use by the target, and then updating it to include a malicious payload.
The GitHub user sawlysawly published this commit on Mar 8th which added electron-native-notify ^1.1.5 as a dependency to the EasyDEX-GUI application (which is used as part of the Agama wallet).
The next version of electron-native-notify was published 15 days later and was the first version to include a malicious payload. Following that Agama version v0.3.5 was released on Apr 13.
electron native notify publication timeline "1.0.0": "2019-03-06T23:54:33.625Z" "1.0.1": "2019-03-07T03:07:45.585Z" "1.0.2": "2019-03-07T03:10:00.491Z" "1.0.3": "2019-03-08T03:46:17.223Z" "1.1.0": "2019-03-08T04:04:55.489Z" "1.1.1": "2019-03-08T04:18:13.915Z" "1.1.2": "2019-03-08T04:29:26.857Z" "1.1.3": "2019-03-08T04:44:44.991Z" "1.1.4": "2019-03-08T04:47:23.483Z" "1.1.5": "2019-03-08T09:58:07.558Z" <- KomodoPlatform/EasyDEX-GUI installs package "1.1.6": "2019-03-23T09:28:57.679Z" <- Malicious payload introduced here "1.1.7": "2019-03-23T10:45:36.035Z" "1.2.0": "2019-04-16T02:09:56.904Z" <- Agama updated by sawlysawly to this version "1.2.1": "2019-05-11T11:44:21.933Z" "1.2.2": "2019-06-03T15:26:40.054Z"
After being notified by our internal security tooling of this threat we responded by notifying and coordinating with Komodo to protect their users as well as remove the malware from npm.
Here is a brief demonstration showing the Agama wallet sending my wallet seed to a remote server.
youtube
After launching the wallet application on the left, you see a request to `updatecheck.herokuapp...` on the right which downloads the second stage payload. Once we enter in our wallet seed you will see another request to that remote server successfully stealing our wallet seed.
What to do now
Komodo Platform has released the following statement https://komodoplatform.com/vulnerability-discovered-in-komodos-agama-wallet-this-is-what-you-need-to-do/ which provides some guidance as to what to do if you were a user of the Agama wallet.
Users of npm will be automatically notified via `npm audit` if they encounter this malicious dependency in their projects.
npm, Inc. continues to grow its 24/7 security team, to invest in security infrastructure, and to bring new levels of protection to its users.
2 notes
·
View notes
Text
Automating Hyperledger Fabric chaincode deployment on Amazon Managed Blockchain using AWS CodePipeline
Amazon Managed Blockchain is a fully managed service that makes it easy to create and manage blockchain networks using the open-source blockchain framework Hyperledger Fabric. In this post, we explore how to use AWS CodePipeline and related services to automate the deployment of chaincode. Chaincode is a program that typically handles business logic agreed to by members of the network and is sometimes called a smart contract. To install and instantiate chaincode on the blockchain network, you use the open-source Hyperledger Fabric CLI or SDK with the endpoints exposed on your Hyperledger Fabric resources. Chaincode runs in an isolated Docker container and can interact with the ledger by submitting transactions to the fabric network. Unlike other blockchain platforms, chaincode isn’t written in a domain specific language (DSL). It’s written in Go, NodeJS, or Java (or languages running on those respective platforms, such as Typescript or Scala). This enables you to use standard test and build tools with chaincode as part of a CI/CD process. By doing so, we can make chaincode deployments automated and consistent. In this post, we examine how to use tools such as CodePipeline, AWS CodeBuild, and AWS Lambda to perform automated testing and deployment of chaincode to Managed Blockchain. Solution overview The following architecture diagram describes our solution. A developer first commits their chaincode program to AWS CodeCommit. This commit triggers a pipeline in CodePipeline. Within the pipeline, CodeBuild is sent the chaincode that was committed to CodeCommit and performs a series of tests. If the tests pass, it zips up the code and stores it as a build artifact. CodePipeline invokes a Lambda function that retrieves the build artifact, extracts it, and deploys it to Managed Blockchain. AWS Secrets Manager stores the credentials required to authenticate with Hyperledger Fabric and tracks the current version number of the chaincode. The solution is hosted in the following GitHub repo. Although our Lambda function is written in NodeJS, the Fabric libraries that it uses include native code. All native code libraries must be compiled in an Amazon Linux environment. The easiest way to do this is to use an AWS Cloud9 instance or an Amazon Elastic Compute Cloud (Amazon EC2) instance running Amazon Linux. In this environment, clone the code for this post: git clone https://github.com/aws-samples/amazon-managed-blockchain-cicd-sample The solution is provided as an AWS Cloud Development Kit (AWS CDK) application. The cdk folder contains the app. This app creates the architecture described earlier. It also creates AWS Identity and Access Management (IAM) resources for this architecture. For more information about the AWS CDK, see Getting started with the AWS CDK. Prerequisites This walkthrough assumes you have already set up the following: A Hyperledger Fabric network on Managed Blockchain. For instructions on creating a Fabric network, see Create the Network and First Member and Part 1 of Build and deploy an application for Hyperledger Fabric on Amazon Managed Blockchain. A VPC with at least two private subnets and the Managed Blockchain VPC endpoints. For instructions, see Create an Interface VPC Endpoint to Connect to Managed Blockchain Network Resources. A Fabric client node from which to interact with your Fabric network and an AWS Cloud9 instance or Amazon Linux EC2 instance. For instructions, see Create an Amazon EC2 Instance and Set Up the Hyperledger Fabric Client. When you have the prerequisites installed, you can proceed to the next step. Examining the Lambda function The Lambda function reads the location of the chaincode build artifact from the event passed from CodePipeline, obtains Fabric credentials from Secrets Manager, and installs the chaincode to Fabric. It is written in NodeJS and is in the lambda directory. Downloading dependencies Prior to deploying our solution, we have to download the dependencies for our Lambda function. Change to the lambda directory within the solution and then enter the following code: npm install Uploading certificates The Lambda function needs an admin identity in order to install chaincode to the Fabric network. To provide this, we upload Fabric credentials to Secrets Manager using the AWS Command Line Interface (AWS CLI). The Lambda function accesses the secrets and uses them to authenticate with Fabric and deploy chaincode. To upload the credentials to Secrets Manager, run the following commands on your Fabric client node. Provide the name of your Fabric member as $MEMBERNAME, and substitute the path for the correct location of your admin-msp: aws secretsmanager create-secret --name "dev/fabricOrgs/$MEMBERNAME/admin/pk" - secret-string "`cat /home/ec2-user/admin-msp/keystore/*`" --region us-east-1 aws secretsmanager create-secret --name "dev/fabricOrgs/$MEMBERNAME/admin/signcert" --secret-string "`cat /home/ec2-user/admin-msp/signcerts/*`" --region us-east-1 Providing a connection profile A connection profile is a YAML file that provides the URL endpoints for the peer, ordering service, CA, and other details required for your Lambda function to connect to your Fabric network. The gen-connection-profile.sh script can generate a connection profile from shell variables. Alternatively, you can manually generate a connection profile. For instructions, see fabric-client: How to use a common connection profile. You can obtain the information necessary to populate the connection profile from the Managed Blockchain console. Name your connection profile connection-profile.yaml and place it in the lambda directory. Downloading Managed Blockchain certs We need to obtain the latest version of the Managed Blockchain PEM file and place it in the certs directory within the Lambda function source. To do so, run the following command in the lambda folder. Replace MyRegion with the AWS Region you’re using—for example, us-east-1: aws s3 cp s3:// MyRegion.managedblockchain/etc/managedblockchain-tls-chain.pem ~/certs Deploying the AWS CDK app You need to change several variables in the cdk.ts file prior to deploying the app: CA endpoint Peer endpoint Order endpoint MSP ID Member name VPC ID You can find the details pertinent to Managed Blockchain from the client node or from your blockchain network details on the Managed Blockchain console. The VPC ID is the ID for the VPC (for example, vpc-12345) that you created earlier. Modify the variables to reflect your environment. When the variables are up to date, in the cdk folder, run the following: cdk deploy You receive the following prompt: Do you wish to deploy these changes (y/n)? Accept the changes and the solution is deployed via AWS CloudFormation. After the solution is deployed, navigate to the CodePipeline console and you can see that a new pipeline has been created. This pipeline has three stages: source, build, and deploy, and correlates to the architecture diagram from earlier. We return to the first stage soon to start the pipeline, but first let’s examine the build and deploy stages. Testing chaincode with CodeBuild The chaincode for this solution resides in the chaincode folder. It’s a very simple golang program named forex, which you can use to get and set foreign exchange rates, such as (“USD:CAD”, 0.75). We test this chaincode and then deploy it to Fabric. CodeBuild uses a YAML buildspec file to run a build for this chaincode. The buildspec file for our solution is in the chaincode folder, which is included inline in the following code: version: 0.2 env: variables: PACKAGE: "forex" phases: install: runtime-versions: golang: 1.13 commands: # Download the appropriate version of the Fabric Shim - wget https://github.com/hyperledger/fabric/archive/v1.4.2.tar.gz - tar xvzf v1.4.2.tar.gz - mkdir -p /go/src/github.com/hyperledger - mv fabric-1.4.2 /go/src/github.com/hyperledger/fabric - rm v1.4.2.tar.gz # Install golint - go get -u github.com/golang/lint/golint build: commands: - mkdir -p /go/src/${PACKAGE} - ls /go/src/forex - ls ${CODEBUILD_SRC_DIR} - cp -r ${CODEBUILD_SRC_DIR}/* /go/src/${PACKAGE}/ - cd /go/src/${PACKAGE} - go get -t . # Lint our Chaincode - golint -set_exit_status # Check the Go code for common problems with 'go vet' - go vet . # Run unit tests using Mockshim to test our chaicode - go test . - zip -r /go/src/${PACKAGE}/forex.zip "/go/src/${PACKAGE}" artifacts: files: - /go/src/${PACKAGE}/forex.zip This differs from a traditional golang build in a significant way: the end artifact isn’t a binary. Rather, it’s a .zip file of our chaincode. The reason for this is that the chaincode is compiled as part of the installation process. Instead, this buildspec file runs tests against the chaincode and produces a .zip file that you can use to install the chaincode on your Fabric network. The buildspec defines the following steps: GoLint – Detects style mistakes GoVet – Detects common go problems such as inappropriate calls to printf or improper pointer passing Go test – Runs our test suite based around shimtest The first two steps are agnostic to the chaincode; they simply treat the code as standard go code. Our test suite, however, uses shimtest to perform unit tests against our chaincode. shimtest provides a mock version of the shim.ChainCodeStubInterface and can simulate much of the interactions between our chaincode and Hyperledger Fabric. We can use shimtest to ensure that our chaincode implements the correct business logic and that the appropriate state changes are written to the ledger. This allows us to validate the correctness of our chaincode without having to deploy the chaincode to Fabric. This approach is fully compatible with traditional unit testing, and allows you to use standard tools to run individual tests. Because our chaincode is written in golang, we can make use of the golang testing and assert packages to orchestrate our tests using shimtest. This allows us to test the chaincode with the following code: go test Instead of running the test manually, we use CodeBuild. Before we proceed, let’s examine the simple test that we run on our chaincode. In the chaincode folder, the forex_test.go file contains a simple function for testing our chaincode using MockStub. The following line creates a mock instantiation of our chaincode, which allows us to perform mock invocations: stub := shim.NewMockStub("forex", new(ForexChaincode)) The following lines run the invocation and use the assert library to confirm that the result is accurate: response = stub.MockInvoke(uuid, args) assert.EqualValues(t, shim.OK, response.GetStatus(), "failed to execute invocation") Committing chaincode and starting the pipeline To use the pipeline, we have to commit the contents of the chaincode directory to the CodeCommit repository. You can find the name and URL of the CodeCommit repo from the AWS CDK stack outputs or the CodeCommit console. You can commit to the repo with either a Git client or the AWS CLI. For instructions, see Create a commit in AWS CodeCommit. Committing to the CodeCommit repo triggers the pipeline. The chaincode should successfully pass testing, after which the Lambda function installs the chaincode to Managed Blockchain. The CodePipeline console should show a result similar to the following screenshot. If you inspect the logs for CodeBuild, you should see a successful run where the chaincode passed linting, go vet, and testing. Likewise, the Lambda logs should show that it has successfully installed the chaincode to the Fabric network. You can confirm that the installation completed successfully by listing the installed chaincodes from a Fabric client node: peer chaincode list --installed You should see something resembling the following code: Name: forex, Version: 1, Path: forex, Id … Subsequently, you can instantiate the chaincode by running the following command on your fabric client: docker exec -e "CORE_PEER_TLS_ENABLED=true" -e "CORE_PEER_TLS_ROOTCERT_FILE=/opt/home/managedblockchain-tls-chain.pem" -e "CORE_PEER_LOCALMSPID=$MSP" -e "CORE_PEER_MSPCONFIGPATH=$MSP_PATH" -e "CORE_PEER_ADDRESS=$PEER" cli peer chaincode install -n $FOREXCHAINCODENAME -v v0 -p forex/cmd Clean Up When you have completed the solution, you can delete the AWS CDK stack with the following code: cdk destroy If you created a new VPC, AWS Cloud9 instance, or other resources, you can also delete those. Summary In this post, we explored how to use CodePipline and Managed Blockchain to automated the testing and deployment of chaincode to a Hyperledger Fabric network. You could extend this solution further through additional Lambda functions to instantiate chaincode, create channels, perform integration testing, and other activities as part of the pipeline. About the Author Dr. Jonathan Shapiro-Ward is a Principal Solutions Architect at AWS based in Toronto. Jonathan has been with AWS for 3.5 years and in that time has worked helping customers solve problems including petabyte scale analytics and the adoption of ML, serverless, and blockchain. He has spoken at events across the world where he focused on areas of emerging technology. Jonathan has previously worked in a number of industries including gaming and fintech and has a background in academic research. He holds a PhD in distributed systems from the University of St Andrews. https://aws.amazon.com/blogs/database/automating-hyperledger-fabric-chaincode-deployment-on-amazon-managed-blockchain-using-aws-codepipeline/
0 notes
Text
How to Use Github Actions to Deploy a Next.js Website to AWS S3
The beauty of Next.js and static web apps is that they let you run the project pretty much anywhere using object storage, like on AWS S3. But it can be a pain to manually update those files each time.
How can we use GitHub Actions to automate and continuously deploy our app to S3?
youtube
What are GitHub Actions?
GitHub Actions is a free service from GitHub that allows us to automate code tasks.
I previously wrote about how we can use them to automate tasks like running tests on our code and sending notifications to Slack.
They provide a flexible way to automatically run code based on our existing workflows. This provides a lot of possibilities like even deploying our website!
What is AWS S3?
S3 (Simple Storage Service) is an object storage service from AWS. It allows you to store files in the cloud easily making them available around the world.
It also allows you to use these files as a website. Because we can upload an HTML file as an object, we can also configure S3 to access that file as an HTTP request. This means that we can host an entire website right in S3.
What is Continuous Deployment?
Continuous Deployment, often referred to by its acronym CD, is the practice of maintaining code in a releasable state and deploying that code automatically or in short cycles.
Particularly in our use case, we’re going to configure our project so that any time a new update is pushed or merged to the primary Git branch, our website will deploy.
What are we going to build?
We’re first going to bootstrap a simple Next.js app using the default Next.js starting template and configure it to compile to static files.
If you don’t want to create a Next.js project, you can follow along with even a simple HTML file and not run any of the build commands. But Next.js is a modern way to build dynamic web apps, so we’ll start there.
With our website files ready to go, we’ll create and configure an S3 bucket in AWS where we’ll host our website.
Finally, we’ll create a new GitHub Action workflow that will automatically update the website files in S3 any time a new change occurs on our primary branch (main).
Step 0: Setting up a new Next.js project on GitHub
We’re going to get started with the default template with Next.js.
After navigating to the directory you want to create your project in, run:
yarn create next-app my-static-website # or npx create-next-app my-static-website
Note: Feel free to replace my-static-website with the name of your choice. We’ll use that for the rest of this tutorial.
If you navigate to that directory and run the development command, you should be able to successfully start up your development server.
cd my-static-website yarn dev # or npm run dev

New Next.js App
Next, let’s configure our project to statically compile.
Inside the package.json file, update the build script to:
"build": "next build && next export",
What this will do is tell Next to take the website and export it to static files, which we’ll use to host the site.
We can test this out by running the command:
yarn build # or npm run build
And once finished, we can look inside of the out directory and see all of the files of our new website.

Static output from Next.js
Finally, we want to host this on GitHub.
Inside of your GitHub account, create a new repository. This will then provide instructions on how you can add an existing project to that repo.
And once you push our your project to GitHub, we should be ready to set up our new website project!

New repo in GitHub
Follow along with the commits:
Step 1: Manually creating and deploying a Next.js project to a new S3 Bucket
To get started with our new S3 Bucket, first log in to your AWS account and navigate to the S3 service.

No buckets in S3
We’ll want to create a new bucket, using the name of our choice, which will be used for the S3 endpoint where our website is hosted. We’ll also want to configure our S3 bucket to be able to host a website.
Note: this tutorial will not walk you through how to host a website on S3, but you can check out my other tutorial that will walk you through hosting a website on S3 step-by-step.

Static website hosting in AWS S3
Once we have our S3 bucket configure as a website, we can go back to our Next.js project folder, run our build command, and then upload all of our files from the out directory into our new S3 bucket.

S3 Bucket with Static App
And once those files are uploaded and we’ve configured our S3 bucket for website hosting, we should now be able to see our project live on the web!

AWS S3 hosted Next.js app
Step 2: Creating a new GitHub Action workflow to automatically build a Next.js project
To get started, we’re going to need to create a new workflow.
If you’re familiar with GitHub Actions, you could create one manually, but we’ll quickly walk through how to do this in the UI.
Navigate to the Actions tab of your GitHub repository and click on "set up a workflow yourself."

New GitHub Action Workflow
GitHub provides a starting template that we can use for our workflow, though we’ll want to make some changes.
Let’s do the following:
Optional: rename the file to deploy.yml
Optional: rename the workflow to CD (as it’s a bit different from CI)
Optional: remove all of the comments to make it a bit easier to read
Remove the pull_request definition in the on property
Remove all steps except for uses: actions/checkout@v2
So at this point we should be left with:
name: CD on: push: branches: [ main ] jobs: build: runs-on: ubuntu-latest steps: - uses: actions/checkout@v2
This code alone will trigger a process that spins up a new instance of Ubuntu and simply checks out the code from GitHub any time there’s a new change pushed to the main branch.
Next, once we have our code checked out, we want to build it. This will allow us to take that output and sync it to S3.
This step will differ slightly depending on if you are using yarn or npm for your project.
If you’re using yarn, under the steps definition, add the following:
- uses: actions/setup-node@v1 with: node-version: 12 - run: npm install -g yarn - run: yarn install --frozen-lockfile - run: yarn build
If you’re using npm, add the following:
- uses: actions/setup-node@v1 with: node-version: 12 - run: npm ci - run: npm run build
Between both of these sets of steps, what we’re doing is:
Setting up node: this is so that we can use npm and node to install and run our scripts
Install Yarn (Yarn Only): if we’re using yarn, we install it as a global dependency so that we can use it
Install Dependencies: we install our dependencies and we use a specific command that makes sure we use the lock file available to avoid any unexpected package upgrades
Build: finally, we run our build command which will compile our Next.js project into the out directory!
And now we can commit that file right to our main branch which will kick off a new run of our workflow that we can see in our Actions tab.

New workflow in GitHub Actions
To see that it works, we can navigate into that run, select our workflow, and see that all of our steps ran including building our project!

Successful build logs for a GitHub Action workflow
Follow along with the commit!
Step 3: Configuring a GitHub Action to deploy a static website to S3
Now that we’re building our project automatically, we want to automatically update our website in S3.
To do that, we’re going to use the GitHub Action aws-actions/configure-aws-credentials and the AWS CLI.
The GitHub Action that we’re using will take in our AWS credentials and configuration and make it available to use throughout the lifecycle of the workflow.
As of now, the Ubuntu instance that GitHub Actions provides allows us to use the AWS CLI as it comes included. So we’ll be able to use the CLI commands right in our workflow.
Alternatively, we could use the S3 Sync action. But by using the AWS CLI, we gain more flexibility to customize our setup, we can use it for additional CLI commands, and it’s also generally nice to get familiar with the AWS CLI.
So to get started, let’s add the following snippet as additional steps in our workflow:
- uses: aws-actions/configure-aws-credentials@v1 with: aws-access-key-id: $ aws-secret-access-key: $ aws-region: us-east-1
What the above will do is use the AWS credentials configuration action to set up our AWS Access Key, Secret Key, and region based on our settings.
The AWS Region can be customized to whatever region you typically use with your AWS account. I’m in the northeast United States, So I’ll keep us-east-1.
The Access Key and Secret Key are credentials that you’ll need to generate with your AWS account. The way our code is set up is that we’ll store those values inside of GitHub Secrets, which will prevent those keys from being leaked. When the action runs, Github changes those values to stars (***) so people can't access those keys.
So to set up those secrets, we first want to generate Access Keys in AWS.
Navigate to the AWS console. Under the user menu, select My Security Credentials, and then select Create access key.

Creating an Access Key in AWS
This will provide you with two values: the Access key ID and the Secret access key. Save these values, as you won’t be able to access the Secret key ID again.

Finding Secret and Access Key in AWS
Note: remember to NOT include the Access Key and Secret Key inside of your code. This could lead to someone compromising your AWS credentials.
Next, inside of the GitHub repo, navigate to Settings, Secrets, then select New secret.
Here we’ll want to add our AWS keys using the following secrets:
AWS_ACCESS_KEY_ID: your AWS Access key ID
AWS_SECRET_ACCESS_KEY: your AWS Secret key
And once saved you should have your two new secrets.

Creating Secrets in GitHub
Now that we have our credentials configured, we should be ready to run the command to sync our project to S3.
Inside of the GitHub Action, add the following step:
- run: aws s3 sync ./out s3://[bucket-name]
Note: be sure to replace [bucket-name] with the name of your S3 Bucket.
This command will trigger a sync with our specified S3 bucket, using the contents of the out directory, which is where our project builds to.
And now, if we commit our changes, we can see that our action is automatically triggered once committed to the main branch, where we build our project and sync it to S3!
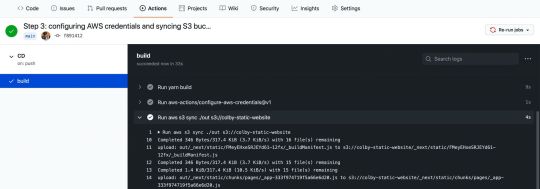
Successful AWS S3 sync in GitHub Action workflow
Note: Make sure that before setting up this action you’ve configured the S3 bucket to host a website (including unblocking permissions on S3 bucket) – otherwise this action may fail.
At this point, our project probably looks the same, as we didn’t make any changes to the code.
Next.js app on AWS S3
But if you make a code change, such as changing the title of the homepage inside of pages/index.js and commit that change:
<h1 className={styles.title}> Colby's <a href="https://nextjs.org">Next.js!</a> Site </h1>
We can see that our change triggers the workflow to kick off:

New GitHub Action workflow from code change
And once our workflow finishes, we can see that our content is now automatically updated on our website:

AWS S3 hosted app with updated code changes
Follow along with the commits:
What else can we do?
Setting up CloudFront
The goal of this post wasn’t to go through the entire process of configuring a website for AWS, but if you’re serving a website on S3, you might want to also include CloudFront in front of it.
You can check out my other guide here which walks you through setting up CloudFront as well as a step-by-step guide through creating the site in S3.
Invaliding CloudFront cache
If your S3 website is behind CloudFront, chances are, you’ll want to make sure CloudFront isn’t caching the new changes.
With the AWS CLI, we can also trigger a cache invalidation with CloudFront to make sure it’s grabbing the latest changes.
Check out the docs here to learn more.
Pull request deployments
If you’re constantly working on website changes in a pull request, sometimes it can be easier to see the changes live.
You can set up a new workflow that only runs on pull requests, where the workflow can dynamically create a new bucket based on the branch or environment and add a comment to the pull request with that URL.
You might be able to find a GitHub Action that exists to manage the comments on the pull request for you or you can check out the GitHub Actions docs.
0 notes
Text
SonarQube Enterprise Edition Support
Tiffany Kyi, Software Engineer, Verizon Media
We have recently added SonarQube Enterprise Edition support to Screwdriver, which unlocks powerful Pull Request Workflows and improves build analysis performance. Cluster admins can follow instructions in the Cluster Admin Configuration section below to use SonarQube Enterprise.
In order to make use of these new Pull Request features and to better utilize our SonarQube license, we will be making the following changes:
Sonar Project Key for your build will change from “job:<jobId>” to “pipeline:<pipelineId>”.
If your project still needs multiple analysis at job level we will provide you with a job level annotation to get a Sonar Project Key scoped to a Job.
These changes will enable Screwdriver to provide a Pull Request Analysis feature for all builds.
Note: This will create a new Sonarqube project for your pipeline, however your existing analysis data will not be migrated over to the new Sonarqube project.
User configuration
If you are relying on the Screwdriver SonarQube integration to publish and view test coverage results in the Screwdriver build detail page, then no change is required.
If you have a custom integration where you are manually constructing SonarQube scanner parameters, then you need to rely on $SD_SONAR_PROJECT_KEY & $SD_SONAR_PROJECT_NAME for scanner parameters, which will be available in builds based on your project configuration. We have also added $SD_SONAR_ENTERPRISE to indicate whether the cluster is using Enterprise (true) or open source edition of SonarQube(false).
If you absolutely need to have a separate SonarQube analysis for each job, you need to add this annotation screwdriver.cd/coverageScope: job to your job configuration in your “screwdriver.yaml” file:
jobs: main: annotations: screwdriver.cd/coverageScope: job requires: [~pr, ~commit] image: node:12 steps: - install: npm install - test: npm test
Cluster Admin configuration
In order to enable SonarQube Enterprise edition with Screwdriver, do the following steps:
Get a SonarQube Enterprise license.
Update the SonarQube Enterprise license in the SonarQube UI (https://SONAR_URL/admin/extension/license/app).
Then, set COVERAGE_SONAR_ENTERPRISE: true in your config file.
Pull Request Decoration
To set up Pull Request Decoration in your Github PRs, follow these steps in the link below:
https://docs.sonarqube.org/latest/analysis/pr-decoration/
Note: Users will need to manually install the newly created Github app in their organizations and repos, and these will need to be manually configured in SonarQube projects.
You should see something like this:
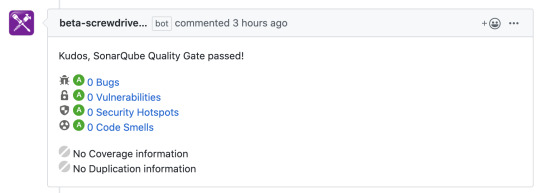
Compatibility List
In order to have these improvements, you will need these minimum versions:
API - v0.5.972
Queue-Service - v1.0.22
UI - v1.0.539
Launcher - v6.0.87
Build Cluster Worker - v1.18.8
Contributors
Thanks to the following contributors for making this feature possible:
Jithin
Lakshminarasimhan
Tiffany
Questions and Suggestions
We’d love to hear from you. If you have any questions, please feel free to reach out here. You can also visit us on Github and Slack.
0 notes
Text
Agilenano - News: How To Set Up An Express API Backend Project With PostgreSQL Chidi Orji 2020-04-08T11:00:00+00:002020-04-08T13:35:17+00:00
We will take a Test-Driven Development (TDD) approach and the set up Continuous Integration (CI) job to automatically run our tests on Travis CI and AppVeyor, complete with code quality and coverage reporting. We will learn about controllers, models (with PostgreSQL), error handling, and asynchronous Express middleware. Finally, we’ll complete the CI/CD pipeline by configuring automatic deploy on Heroku. It sounds like a lot, but this tutorial is aimed at beginners who are ready to try their hands on a backend project with some level of complexity, and who may still be confused as to how all the pieces fit together in a real project. It is robust without being overwhelming and is broken down into sections that you can complete in a reasonable length of time. Getting Started The first step is to create a new directory for the project and start a new node project. Node is required to continue with this tutorial. If you don’t have it installed, head over to the official website, download, and install it before continuing. I will be using yarn as my package manager for this project. There are installation instructions for your specific operating system here. Feel free to use npm if you like. Open your terminal, create a new directory, and start a Node.js project. # create a new directory mkdir express-api-template # change to the newly-created directory cd express-api-template # initialize a new Node.js project npm init Answer the questions that follow to generate a package.json file. This file holds information about your project. Example of such information includes what dependencies it uses, the command to start the project, and so on. You may now open the project folder in your editor of choice. I use visual studio code. It’s a free IDE with tons of plugins to make your life easier, and it’s available for all major platforms. You can download it from the official website. Create the following files in the project folder: README.md .editorconfig Here’s a description of what .editorconfig does from the EditorConfig website. (You probably don’t need it if you’re working solo, but it does no harm, so I’ll leave it here.) “EditorConfig helps maintain consistent coding styles for multiple developers working on the same project across various editors and IDEs.” Open .editorconfig and paste the following code: root = true [*] indent_style = space indent_size = 2 charset = utf-8 trim_trailing_whitespace = false insert_final_newline = true The [*] means that we want to apply the rules that come under it to every file in the project. We want an indent size of two spaces and UTF-8 character set. We also want to trim trailing white space and insert a final empty line in our file. Open README.md and add the project name as a first-level element. # Express API template Let’s add version control right away. # initialize the project folder as a git repository git init Create a .gitignore file and enter the following lines: node_modules/ yarn-error.log .env .nyc_output coverage build/ These are all the files and folders we don’t want to track. We don’t have them in our project yet, but we’ll see them as we proceed. At this point, you should have the following folder structure. EXPRESS-API-TEMPLATE ├── .editorconfig ├── .gitignore ├── package.json └── README.md I consider this to be a good point to commit my changes and push them to GitHub. Starting A New Express Project Express is a Node.js framework for building web applications. According to the official website, it is a Fast, unopinionated, minimalist web framework for Node.js. There are other great web application frameworks for Node.js, but Express is very popular, with over 47k GitHub stars at the time of this writing. In this article, we will not be having a lot of discussions about all the parts that make up Express. For that discussion, I recommend you check out Jamie’s series. The first part is here, and the second part is here. Install Express and start a new Express project. It’s possible to manually set up an Express server from scratch but to make our life easier we’ll use the express-generator to set up the app skeleton. # install the express generator globally yarn global add express-generator # install express yarn add express # generate the express project in the current folder express -f The -f flag forces Express to create the project in the current directory. We’ll now perform some house-cleaning operations. Delete the file index/users.js. Delete the folders public/ and views/. Rename the file bin/www to bin/www.js. Uninstall jade with the command yarn remove jade. Create a new folder named src/ and move the following inside it: 1. app.js file 2. bin/ folder 3. routes/ folder inside. Open up package.json and update the start script to look like below. "start": "node ./src/bin/www" At this point, your project folder structure looks like below. You can see how VS Code highlights the file changes that have taken place. EXPRESS-API-TEMPLATE ├── node_modules ├── src | ├── bin │ │ ├── www.js │ ├── routes │ | ├── index.js │ └── app.js ├── .editorconfig ├── .gitignore ├── package.json ├── README.md └── yarn.lock Open src/app.js and replace the content with the below code. var logger = require('morgan'); var express = require('express'); var cookieParser = require('cookie-parser'); var indexRouter = require('./routes/index'); var app = express(); app.use(logger('dev')); app.use(express.json()); app.use(express.urlencoded({ extended: true })); app.use(cookieParser()); app.use('/v1', indexRouter); module.exports = app; After requiring some libraries, we instruct Express to handle every request coming to /v1 with indexRouter. Replace the content of routes/index.js with the below code: var express = require('express'); var router = express.Router(); router.get('/', function(req, res, next) { return res.status(200).json({ message: 'Welcome to Express API template' }); }); module.exports = router; We grab Express, create a router from it and serve the / route, which returns a status code of 200 and a JSON message. Start the app with the below command: # start the app yarn start If you’ve set up everything correctly you should only see $ node ./src/bin/www in your terminal. Visit http://localhost:3000/v1 in your browser. You should see the following message: { "message": "Welcome to Express API template" } This is a good point to commit our changes. The corresponding branch in my repo is 01-install-express. Converting Our Code To ES6 The code generated by express-generator is in ES5, but in this article, we will be writing all our code in ES6 syntax. So, let’s convert our existing code to ES6. Replace the content of routes/index.js with the below code: import express from 'express'; const indexRouter = express.Router(); indexRouter.get('/', (req, res) => res.status(200).json({ message: 'Welcome to Express API template' }) ); export default indexRouter; It is the same code as we saw above, but with the import statement and an arrow function in the / route handler. Replace the content of src/app.js with the below code: import logger from 'morgan'; import express from 'express'; import cookieParser from 'cookie-parser'; import indexRouter from './routes/index'; const app = express(); app.use(logger('dev')); app.use(express.json()); app.use(express.urlencoded({ extended: true })); app.use(cookieParser()); app.use('/v1', indexRouter); export default app; Let’s now take a look at the content of src/bin/www.js. We will build it incrementally. Delete the content of src/bin/www.js and paste in the below code block. #!/usr/bin/env node /** * Module dependencies. */ import debug from 'debug'; import http from 'http'; import app from '../app'; /** * Normalize a port into a number, string, or false. */ const normalizePort = val => { const port = parseInt(val, 10); if (Number.isNaN(port)) { // named pipe return val; } if (port >= 0) { // port number return port; } return false; }; /** * Get port from environment and store in Express. */ const port = normalizePort(process.env.PORT || '3000'); app.set('port', port); /** * Create HTTP server. */ const server = http.createServer(app); // next code block goes here This code checks if a custom port is specified in the environment variables. If none is set the default port value of 3000 is set on the app instance, after being normalized to either a string or a number by normalizePort. The server is then created from the http module, with app as the callback function. The #!/usr/bin/env node line is optional since we would specify node when we want to execute this file. But make sure it is on line 1 of src/bin/www.js file or remove it completely. Let’s take a look at the error handling function. Copy and paste this code block after the line where the server is created. /** * Event listener for HTTP server "error" event. */ const onError = error => { if (error.syscall !== 'listen') { throw error; } const bind = typeof port === 'string' ? `Pipe ${port}` : `Port ${port}`; // handle specific listen errors with friendly messages switch (error.code) { case 'EACCES': alert(`${bind} requires elevated privileges`); process.exit(1); break; case 'EADDRINUSE': alert(`${bind} is already in use`); process.exit(1); break; default: throw error; } }; /** * Event listener for HTTP server "listening" event. */ const onListening = () => { const addr = server.address(); const bind = typeof addr === 'string' ? `pipe ${addr}` : `port ${addr.port}`; debug(`Listening on ${bind}`); }; /** * Listen on provided port, on all network interfaces. */ server.listen(port); server.on('error', onError); server.on('listening', onListening); The onError function listens for errors in the http server and displays appropriate error messages. The onListening function simply outputs the port the server is listening on to the console. Finally, the server listens for incoming requests at the specified address and port. At this point, all our existing code is in ES6 syntax. Stop your server (use Ctrl + C) and run yarn start. You’ll get an error SyntaxError: Invalid or unexpected token. This happens because Node (at the time of writing) doesn’t support some of the syntax we’ve used in our code. We’ll now fix that in the following section. Configuring Development Dependencies: babel, nodemon, eslint, And prettier It’s time to set up most of the scripts we’re going to need at this phase of the project. Install the required libraries with the below commands. You can just copy everything and paste it in your terminal. The comment lines will be skipped. # install babel scripts yarn add @babel/cli @babel/core @babel/plugin-transform-runtime @babel/preset-env @babel/register @babel/runtime @babel/node --dev This installs all the listed babel scripts as development dependencies. Check your package.json file and you should see a devDependencies section. All the installed scripts will be listed there. The babel scripts we’re using are explained below: @babel/cli A required install for using babel. It allows the use of Babel from the terminal and is available as ./node_modules/.bin/babel. @babel/core Core Babel functionality. This is a required installation. @babel/node This works exactly like the Node.js CLI, with the added benefit of compiling with babel presets and plugins. This is required for use with nodemon. @babel/plugin-transform-runtime This helps to avoid duplication in the compiled output. @babel/preset-env A collection of plugins that are responsible for carrying out code transformations. @babel/register This compiles files on the fly and is specified as a requirement during tests. @babel/runtime This works in conjunction with @babel/plugin-transform-runtime. Create a file named .babelrc at the root of your project and add the following code: { "presets": ["@babel/preset-env"], "plugins": ["@babel/transform-runtime"] } Let’s install nodemon # install nodemon yarn add nodemon --dev nodemon is a library that monitors our project source code and automatically restarts our server whenever it observes any changes. Create a file named nodemon.json at the root of your project and add the code below: { "watch": [ "package.json", "nodemon.json", ".eslintrc.json", ".babelrc", ".prettierrc", "src/" ], "verbose": true, "ignore": ["*.test.js", "*.spec.js"] } The watch key tells nodemon which files and folders to watch for changes. So, whenever any of these files changes, nodemon restarts the server. The ignore key tells it the files not to watch for changes. Now update the scripts section of your package.json file to look like the following: # build the content of the src folder "prestart": "babel ./src --out-dir build" # start server from the build folder "start": "node ./build/bin/www" # start server in development mode "startdev": "nodemon --exec babel-node ./src/bin/www" prestart scripts builds the content of the src/ folder and puts it in the build/ folder. When you issue the yarn start command, this script runs first before the start script. start script now serves the content of the build/ folder instead of the src/ folder we were serving previously. This is the script you’ll use when serving the file in production. In fact, services like Heroku automatically run this script when you deploy. yarn startdev is used to start the server during development. From now on we will be using this script as we develop the app. Notice that we’re now using babel-node to run the app instead of regular node. The --exec flag forces babel-node to serve the src/ folder. For the start script, we use node since the files in the build/ folder have been compiled to ES5. Run yarn startdev and visit http://localhost:3000/v1. Your server should be up and running again. The final step in this section is to configure ESLint and prettier. ESLint helps with enforcing syntax rules while prettier helps for formatting our code properly for readability. Add both of them with the command below. You should run this on a separate terminal while observing the terminal where our server is running. You should see the server restarting. This is because we’re monitoring package.json file for changes. # install elsint and prettier yarn add eslint eslint-config-airbnb-base eslint-plugin-import prettier --dev Now create the .eslintrc.json file in the project root and add the below code: { "env": { "browser": true, "es6": true, "node": true, "mocha": true }, "extends": ["airbnb-base"], "globals": { "Atomics": "readonly", "SharedArrayBuffer": "readonly" }, "parserOptions": { "ecmaVersion": 2018, "sourceType": "module" }, "rules": { "indent": ["warn", 2], "linebreak-style": ["error", "unix"], "quotes": ["error", "single"], "semi": ["error", "always"], "no-console": 1, "comma-dangle": [0], "arrow-parens": [0], "object-curly-spacing": ["warn", "always"], "array-bracket-spacing": ["warn", "always"], "import/prefer-default-export": [0] } } This file mostly defines some rules against which eslint will check our code. You can see that we’re extending the style rules used by Airbnb. In the "rules" section, we define whether eslint should show a warning or an error when it encounters certain violations. For instance, it shows a warning message on our terminal for any indentation that does not use 2 spaces. A value of [0] turns off a rule, which means that we won’t get a warning or an error if we violate that rule. Create a file named .prettierrc and add the code below: { "trailingComma": "es5", "tabWidth": 2, "semi": true, "singleQuote": true } We’re setting a tab width of 2 and enforcing the use of single quotes throughout our application. Do check the prettier guide for more styling options. Now add the following scripts to your package.json: # add these one after the other "lint": "./node_modules/.bin/eslint ./src" "pretty": "prettier --write '**/*.{js,json}' '!node_modules/**'" "postpretty": "yarn lint --fix" Run yarn lint. You should see a number of errors and warnings in the console. The pretty command prettifies our code. The postpretty command is run immediately after. It runs the lint command with the --fix flag appended. This flag tells ESLint to automatically fix common linting issues. In this way, I mostly run the yarn pretty command without bothering about the lint command. Run yarn pretty. You should see that we have only two warnings about the presence of alert in the bin/www.js file. Here’s what our project structure looks like at this point. EXPRESS-API-TEMPLATE ├── build ├── node_modules ├── src | ├── bin │ │ ├── www.js │ ├── routes │ | ├── index.js │ └── app.js ├── .babelrc ├── .editorconfig ├── .eslintrc.json ├── .gitignore ├── .prettierrc ├── nodemon.json ├── package.json ├── README.md └── yarn.lock You may find that you have an additional file, yarn-error.log in your project root. Add it to .gitignore file. Commit your changes. The corresponding branch at this point in my repo is 02-dev-dependencies. Settings And Environment Variables In Our .env File In nearly every project, you’ll need somewhere to store settings that will be used throughout your app e.g. an AWS secret key. We store such settings as environment variables. This keeps them away from prying eyes, and we can use them within our application as needed. I like having a settings.js file with which I read all my environment variables. Then, I can refer to the settings file from anywhere within my app. You’re at liberty to name this file whatever you want, but there’s some kind of consensus about naming such files settings.js or config.js. For our environment variables, we’ll keep them in a .env file and read them into our settings file from there. Create the .env file at the root of your project and enter the below line: TEST_ENV_VARIABLE="Environment variable is coming across" To be able to read environment variables into our project, there’s a nice library, dotenv that reads our .env file and gives us access to the environment variables defined inside. Let’s install it. # install dotenv yarn add dotenv Add the .env file to the list of files being watched by nodemon. Now, create the settings.js file inside the src/ folder and add the below code: import dotenv from 'dotenv'; dotenv.config(); export const testEnvironmentVariable = process.env.TEST_ENV_VARIABLE; We import the dotenv package and call its config method. We then export the testEnvironmentVariable which we set in our .env file. Open src/routes/index.js and replace the code with the one below. import express from 'express'; import { testEnvironmentVariable } from '../settings'; const indexRouter = express.Router(); indexRouter.get('/', (req, res) => res.status(200).json({ message: testEnvironmentVariable })); export default indexRouter; The only change we’ve made here is that we import testEnvironmentVariable from our settings file and use is as the return message for a request from the / route. Visit http://localhost:3000/v1 and you should see the message, as shown below. { "message": "Environment variable is coming across." } And that’s it. From now on we can add as many environment variables as we want and we can export them from our settings.js file. This is a good point to commit your code. Remember to prettify and lint your code. The corresponding branch on my repo is 03-env-variables. Writing Our First Test It’s time to incorporate testing into our app. One of the things that give the developer confidence in their code is tests. I’m sure you’ve seen countless articles on the web preaching Test-Driven Development (TDD). It cannot be emphasized enough that your code needs some measure of testing. TDD is very easy to follow when you’re working with Express.js. In our tests, we will make calls to our API endpoints and check to see if what is returned is what we expect. Install the required dependencies: # install dependencies yarn add mocha chai nyc sinon-chai supertest coveralls --dev Each of these libraries has its own role to play in our tests. mocha test runner chai used to make assertions nyc collect test coverage report sinon-chai extends chai’s assertions supertest used to make HTTP calls to our API endpoints coveralls for uploading test coverage to coveralls.io Create a new test/ folder at the root of your project. Create two files inside this folder: test/setup.js test/index.test.js Mocha will find the test/ folder automatically. Open up test/setup.js and paste the below code. This is just a helper file that helps us organize all the imports we need in our test files. import supertest from 'supertest'; import chai from 'chai'; import sinonChai from 'sinon-chai'; import app from '../src/app'; chai.use(sinonChai); export const { expect } = chai; export const server = supertest.agent(app); export const BASE_URL = '/v1'; This is like a settings file, but for our tests. This way we don’t have to initialize everything inside each of our test files. So we import the necessary packages and export what we initialized — which we can then import in the files that need them. Open up index.test.js and paste the following test code. import { expect, server, BASE_URL } from './setup'; describe('Index page test', () => { it('gets base url', done => { server .get(`${BASE_URL}/`) .expect(200) .end((err, res) => { expect(res.status).to.equal(200); expect(res.body.message).to.equal( 'Environment variable is coming across.' ); done(); }); }); }); Here we make a request to get the base endpoint, which is / and assert that the res.body object has a message key with a value of Environment variable is coming across. If you’re not familiar with the describe, it pattern, I encourage you to take a quick look at Mocha’s “Getting Started” doc. Add the test command to the scripts section of package.json. "test": "nyc --reporter=html --reporter=text --reporter=lcov mocha -r @babel/register" This script executes our test with nyc and generates three kinds of coverage report: an HTML report, outputted to the coverage/ folder; a text report outputted to the terminal and an lcov report outputted to the .nyc_output/ folder. Now run yarn test. You should see a text report in your terminal just like the one in the below photo. Test coverage report (Large preview) Notice that two additional folders are generated: .nyc_output/ coverage/ Look inside .gitignore and you’ll see that we’re already ignoring both. I encourage you to open up coverage/index.html in a browser and view the test report for each file. This is a good point to commit your changes. The corresponding branch in my repo is 04-first-test. Continuous Integration(CD) And Badges: Travis, Coveralls, Code Climate, AppVeyor It’s now time to configure continuous integration and deployment (CI/CD) tools. We will configure common services such as travis-ci, coveralls, AppVeyor, and codeclimate and add badges to our README file. Let’s get started. Travis CI Travis CI is a tool that runs our tests automatically each time we push a commit to GitHub (and recently, Bitbucket) and each time we create a pull request. This is mostly useful when making pull requests by showing us if the our new code has broken any of our tests. Visit travis-ci.com or travis-ci.org and create an account if you don’t have one. You have to sign up with your GitHub account. Hover over the dropdown arrow next to your profile picture and click on settings. Under Repositories tab click Manage repositories on Github to be redirected to Github. On the GitHub page, scroll down to Repository access and click the checkbox next to Only select repositories. Click the Select repositories dropdown and find the express-api-template repo. Click it to add it to the list of repositories you want to add to travis-ci. Click Approve and install and wait to be redirected back to travis-ci. At the top of the repo page, close to the repo name, click on the build unknown icon. From the Status Image modal, select markdown from the format dropdown. Copy the resulting code and paste it in your README.md file. On the project page, click on More options > Settings. Under Environment Variables section, add the TEST_ENV_VARIABLE env variable. When entering its value, be sure to have it within double quotes like this "Environment variable is coming across." Create .travis.yml file at the root of your project and paste in the below code (We’ll set the value of CC_TEST_REPORTER_ID in the Code Climate section). language: node_js env: global: - CC_TEST_REPORTER_ID=get-this-from-code-climate-repo-page matrix: include: - node_js: '12' cache: directories: [node_modules] install: yarn after_success: yarn coverage before_script: - curl -L https://codeclimate.com/downloads/test-reporter/test-reporter-latest-linux-amd64 > ./cc-test-reporter - chmod +x ./cc-test-reporter - ./cc-test-reporter before-build script: - yarn test after_script: - ./cc-test-reporter after-build --exit-code $TRAVIS_TEST_RESUL First, we tell Travis to run our test with Node.js, then set the CC_TEST_REPORTER_ID global environment variable (we’ll get to this in the Code Climate section). In the matrix section, we tell Travis to run our tests with Node.js v12. We also want to cache the node_modules/ directory so it doesn’t have to be regenerated every time. We install our dependencies using the yarn command which is a shorthand for yarn install. The before_script and after_script commands are used to upload coverage results to codeclimate. We’ll configure codeclimate shortly. After yarn test runs successfully, we want to also run yarn coverage which will upload our coverage report to coveralls.io. Coveralls Coveralls uploads test coverage data for easy visualization. We can view the test coverage on our local machine from the coverage folder, but Coveralls makes it available outside our local machine. Visit coveralls.io and either sign in or sign up with your Github account. Hover over the left-hand side of the screen to reveal the navigation menu. Click on ADD REPOS. Search for the express-api-template repo and turn on coverage using the toggle button on the left-hand side. If you can’t find it, click on SYNC REPOS on the upper right-hand corner and try again. Note that your repo has to be public, unless you have a PRO account. Click details to go to the repo details page. Create the .coveralls.yml file at the root of your project and enter the below code. To get the repo_token, click on the repo details. You will find it easily on that page. You could just do a browser search for repo_token. repo_token: get-this-from-repo-settings-on-coveralls.io This token maps your coverage data to a repo on Coveralls. Now, add the coverage command to the scripts section of your package.json file: "coverage": "nyc report --reporter=text-lcov | coveralls" This command uploads the coverage report in the .nyc_output folder to coveralls.io. Turn on your Internet connection and run: yarn coverage This should upload the existing coverage report to coveralls. Refresh the repo page on coveralls to see the full report. On the details page, scroll down to find the BADGE YOUR REPO section. Click on the EMBED dropdown and copy the markdown code and paste it into your README file. Code Climate Code Climate is a tool that helps us measure code quality. It shows us maintenance metrics by checking our code against some defined patterns. It detects things such as unnecessary repetition and deeply nested for loops. It also collects test coverage data just like coveralls.io. Visit codeclimate.com and click on ‘Sign up with GitHub’. Log in if you already have an account. Once in your dashboard, click on Add a repository. Find the express-api-template repo from the list and click on Add Repo. Wait for the build to complete and redirect to the repo dashboard. Under Codebase Summary, click on Test Coverage. Under the Test coverage menu, copy the TEST REPORTER ID and paste it in your .travis.yml as the value of CC_TEST_REPORTER_ID. Still on the same page, on the left-hand navigation, under EXTRAS, click on Badges. Copy the maintainability and test coverage badges in markdown format and paste them into your README.md file. It’s important to note that there are two ways of configuring maintainability checks. There are the default settings that are applied to every repo, but if you like, you could provide a .codeclimate.yml file at the root of your project. I’ll be using the default settings, which you can find under the Maintainability tab of the repo settings page. I encourage you to take a look at least. If you still want to configure your own settings, this guide will give you all the information you need. AppVeyor AppVeyor and Travis CI are both automated test runners. The main difference is that travis-ci runs tests in a Linux environment while AppVeyor runs tests in a Windows environment. This section is included to show how to get started with AppVeyor. Visit AppVeyor and log in or sign up. On the next page, click on NEW PROJECT. From the repo list, find the express-api-template repo. Hover over it and click ADD. Click on the Settings tab. Click on Environment on the left navigation. Add TEST_ENV_VARIABLE and its value. Click ‘Save’ at the bottom of the page. Create the appveyor.yml file at the root of your project and paste in the below code. environment: matrix: - nodejs_version: "12" install: - yarn test_script: - yarn test build: off This code instructs AppVeyor to run our tests using Node.js v12. We then install our project dependencies with the yarn command. test_script specifies the command to run our test. The last line tells AppVeyor not to create a build folder. Click on the Settings tab. On the left-hand navigation, click on badges. Copy the markdown code and paste it in your README.md file. Commit your code and push to GitHub. If you have done everything as instructed all tests should pass and you should see your shiny new badges as shown below. Check again that you have set the environment variables on Travis and AppVeyor. Repo CI/CD badges. (Large preview) Now is a good time to commit our changes. The corresponding branch in my repo is 05-ci. Adding A Controller Currently, we’re handling the GET request to the root URL, /v1, inside the src/routes/index.js. This works as expected and there is nothing wrong with it. However, as your application grows, you want to keep things tidy. You want concerns to be separated — you want a clear separation between the code that handles the request and the code that generates the response that will be sent back to the client. To achieve this, we write controllers. Controllers are simply functions that handle requests coming through a particular URL. To get started, create a controllers/ folder inside the src/ folder. Inside controllers create two files: index.js and home.js. We would export our functions from within index.js. You could name home.js anything you want, but typically you want to name controllers after what they control. For example, you might have a file usersController.js to hold every function related to users in your app. Open src/controllers/home.js and enter the code below: import { testEnvironmentVariable } from '../settings'; export const indexPage = (req, res) => res.status(200).json({ message: testEnvironmentVariable }); You will notice that we only moved the function that handles the request for the / route. Open src/controllers/index.js and enter the below code. // export everything from home.js export * from './home'; We export everything from the home.js file. This allows us shorten our import statements to import { indexPage } from '../controllers'; Open src/routes/index.js and replace the code there with the one below: import express from 'express'; import { indexPage } from '../controllers'; const indexRouter = express.Router(); indexRouter.get('/', indexPage); export default indexRouter; The only change here is that we’ve provided a function to handle the request to the / route. You just successfully wrote your first controller. From here it’s a matter of adding more files and functions as needed. Go ahead and play with the app by adding a few more routes and controllers. You could add a route and a controller for the about page. Remember to update your test, though. Run yarn test to confirm that we’ve not broken anything. Does your test pass? That’s cool. This is a good point to commit our changes. The corresponding branch in my repo is 06-controllers. Connecting The PostgreSQL Database And Writing A Model Our controller currently returns hard-coded text messages. In a real-world app, we often need to store and retrieve information from a database. In this section, we will connect our app to a PostgreSQL database. We’re going to implement the storage and retrieval of simple text messages using a database. We have two options for setting a database: we could provision one from a cloud server, or we could set up our own locally. I would recommend you provision a database from a cloud server. ElephantSQL has a free plan that gives 20MB of free storage which is sufficient for this tutorial. Visit the site and click on Get a managed database today. Create an account (if you don’t have one) and follow the instructions to create a free plan. Take note of the URL on the database details page. We’ll be needing it soon. ElephantSQL turtle plan details page (Large preview) If you would rather set up a database locally, you should visit the PostgreSQL and PgAdmin sites for further instructions. Once we have a database set up, we need to find a way to allow our Express app to communicate with our database. Node.js by default doesn’t support reading and writing to PostgreSQL database, so we’ll be using an excellent library, appropriately named, node-postgres. node-postgres executes SQL queries in node and returns the result as an object, from which we can grab items from the rows key. Let’s connect node-postgres to our application. # install node-postgres yarn add pg Open settings.js and add the line below: export const connectionString = process.env.CONNECTION_STRING; Open your .env file and add the CONNECTION_STRING variable. This is the connection string we’ll be using to establish a connection to our database. The general form of the connection string is shown below. CONNECTION_STRING="postgresql://dbuser:dbpassword@localhost:5432/dbname" If you’re using elephantSQL you should copy the URL from the database details page. Inside your /src folder, create a new folder called models/. Inside this folder, create two files: pool.js model.js Open pools.js and paste the following code: import { Pool } from 'pg'; import dotenv from 'dotenv'; import { connectionString } from '../settings'; dotenv.config(); export const pool = new Pool({ connectionString }); First, we import the Pool and dotenv from the pg and dotenv packages, and then import the settings we created for our postgres database before initializing dotenv. We establish a connection to our database with the Pool object. In node-postgres, every query is executed by a client. A Pool is a collection of clients for communicating with the database. To create the connection, the pool constructor takes a config object. You can read more about all the possible configurations here. It also accepts a single connection string, which I will use here. Open model.js and paste the following code: import { pool } from './pool'; class Model { constructor(table) { this.pool = pool; this.table = table; this.pool.on('error', (err, client) => `Error, ${err}, on idle client${client}`); } async select(columns, clause) { let query = `SELECT ${columns} FROM ${this.table}`; if (clause) query += clause; return this.pool.query(query); } } export default Model; We create a model class whose constructor accepts the database table we wish to operate on. We’ll be using a single pool for all our models. We then create a select method which we will use to retrieve items from our database. This method accepts the columns we want to retrieve and a clause, such as a WHERE clause. It returns the result of the query, which is a Promise. Remember we said earlier that every query is executed by a client, but here we execute the query with pool. This is because, when we use pool.query, node-postgres executes the query using the first available idle client. The query you write is entirely up to you, provided it is a valid SQL statement that can be executed by a Postgres engine. The next step is to actually create an API endpoint to utilize our newly connected database. Before we do that, I’d like us to create some utility functions. The goal is for us to have a way to perform common database operations from the command line. Create a folder, utils/ inside the src/ folder. Create three files inside this folder: queries.js queryFunctions.js runQuery.js We’re going to create functions to create a table in our database, insert seed data in the table, and to delete the table. Open up queries.js and paste the following code: export const createMessageTable = ` DROP TABLE IF EXISTS messages; CREATE TABLE IF NOT EXISTS messages ( id SERIAL PRIMARY KEY, name VARCHAR DEFAULT '', message VARCHAR NOT NULL ) `; export const insertMessages = ` INSERT INTO messages(name, message) VALUES ('chidimo', 'first message'), ('orji', 'second message') `; export const dropMessagesTable = 'DROP TABLE messages'; In this file, we define three SQL query strings. The first query deletes and recreates the messages table. The second query inserts two rows into the messages table. Feel free to add more items here. The last query drops/deletes the messages table. Open queryFunctions.js and paste the following code: import { pool } from '../models/pool'; import { insertMessages, dropMessagesTable, createMessageTable, } from './queries'; export const executeQueryArray = async arr => new Promise(resolve => { const stop = arr.length; arr.forEach(async (q, index) => { await pool.query(q); if (index + 1 === stop) resolve(); }); }); export const dropTables = () => executeQueryArray([ dropMessagesTable ]); export const createTables = () => executeQueryArray([ createMessageTable ]); export const insertIntoTables = () => executeQueryArray([ insertMessages ]); Here, we create functions to execute the queries we defined earlier. Note that the executeQueryArray function executes an array of queries and waits for each one to complete inside the loop. (Don’t do such a thing in production code though). Then, we only resolve the promise once we have executed the last query in the list. The reason for using an array is that the number of such queries will grow as the number of tables in our database grows. Open runQuery.js and paste the following code: import { createTables, insertIntoTables } from './queryFunctions'; (async () => { await createTables(); await insertIntoTables(); })(); This is where we execute the functions to create the table and insert the messages in the table. Let’s add a command in the scripts section of our package.json to execute this file. "runQuery": "babel-node ./src/utils/runQuery" Now run: yarn runQuery If you inspect your database, you will see that the messages table has been created and that the messages were inserted into the table. If you’re using ElephantSQL, on the database details page, click on BROWSER from the left navigation menu. Select the messages table and click Execute. You should see the messages from the queries.js file. Let’s create a controller and route to display the messages from our database. Create a new controller file src/controllers/messages.js and paste the following code: import Model from '../models/model'; const messagesModel = new Model('messages'); export const messagesPage = async (req, res) => { try { const data = await messagesModel.select('name, message'); res.status(200).json({ messages: data.rows }); } catch (err) { res.status(200).json({ messages: err.stack }); } }; We import our Model class and create a new instance of that model. This represents the messages table in our database. We then use the select method of the model to query our database. The data (name and message) we get is sent as JSON in the response. We define the messagesPage controller as an async function. Since node-postgres queries return a promise, we await the result of that query. If we encounter an error during the query we catch it and display the stack to the user. You should decide how choose to handle the error. Add the get messages endpoint to src/routes/index.js and update the import line. # update the import line import { indexPage, messagesPage } from '../controllers'; # add the get messages endpoint indexRouter.get('/messages', messagesPage) Visit http://localhost:3000/v1/messages and you should see the messages displayed as shown below. Messages from database. (Large preview) Now, let’s update our test file. When doing TDD, you usually write your tests before implementing the code that makes the test pass. I’m taking the opposite approach here because we’re still working on setting up the database. Create a new file, hooks.js in the test/ folder and enter the below code: import { dropTables, createTables, insertIntoTables, } from '../src/utils/queryFunctions'; before(async () => { await createTables(); await insertIntoTables(); }); after(async () => { await dropTables(); }); When our test starts, Mocha finds this file and executes it before running any test file. It executes the before hook to create the database and insert some items into it. The test files then run after that. Once the test is finished, Mocha runs the after hook in which we drop the database. This ensures that each time we run our tests, we do so with clean and new records in our database. Create a new test file test/messages.test.js and add the below code: import { expect, server, BASE_URL } from './setup'; describe('Messages', () => { it('get messages page', done => { server .get(`${BASE_URL}/messages`) .expect(200) .end((err, res) => { expect(res.status).to.equal(200); expect(res.body.messages).to.be.instanceOf(Array); res.body.messages.forEach(m => { expect(m).to.have.property('name'); expect(m).to.have.property('message'); }); done(); }); }); }); We assert that the result of the

Agilenano - News from Agilenano from shopsnetwork (4 sites) https://agilenano.com/blogs/news/how-to-set-up-an-express-api-backend-project-with-postgresql-chidi-orji-2020-04-08t11-00-00-00-002020-04-08t13-35-17-00-00
0 notes