#PasswordAuthentication
Explore tagged Tumblr posts
Visit Tumblr Blog
Explore Tumblr blogs with no restrictions, modern design and the best experience.
Last Seen Tumblr Blogs


Fun Fact
Tumblr.com is the 103rd most visited website in the world.
Text
PuTTYgen and Key-Based Authentication: A Secure Approach to Remote Server Access
In the realm of secure remote server access, key-based authentication has emerged as a superior alternative to traditional password-based methods.
PuTTYgen, a crucial component of the PuTTY suite, plays a vital role in generating and managing SSH key pairs, enabling users to leverage the power of key-based authentication.
In this article, we explore the benefits of key-based authentication, walk through the process of using PuTTYgen to generate SSH keys, and demonstrate how this approach enhances security and efficiency in remote server access.

Understanding Key-Based Authentication
Key-based authentication, facilitated by PuTTYgen, offers a secure method of verifying users without passwords. It uses cryptographic pairs of public and private keys, generated by PuTTYgen, to authenticate access to remote systems.
The public key is stored on the server, while the private key remains on the user's local machine. This approach enhances security, eliminates password complexities, and allows for seamless automation and scripting.
Embracing key-based authentication with PuTTYgen ensures a safer and more efficient method for accessing remote servers.
Exploring PuTTYgen and Its Features
PuTTYgen is a user-friendly tool within the PuTTY suite that enables users to generate and manage SSH key pairs for secure authentication. It offers a graphical interface that simplifies the process of generating cryptographic keys.
Users can choose from different key types, and lengths, and add passphrase protection for enhanced security.
PuTTYgen's key generation capabilities empower users to create both public and private keys, ensuring a secure foundation for remote server access.
Generating SSH Key Pairs with PuTTYgen
Generating SSH key pairs with PuTTYgen is a straightforward process. First, open PuTTYgen and select the desired key type and length.
Click "Generate," and the tool will create the public and private keys. Save both keys securely, and optionally, add a passphrase for additional protection.
The public key is copied to the remote server, while the private key remains on the local machine. This key pair enables secure and passwordless authentication when accessing remote systems.
Importance of Securely Storing Private Keys
Securely storing private keys is crucial for preventing unauthorized access to remote systems. PuTTYgen offers password protection and encryption options to safeguard sensitive key material.
Password protection adds an extra layer of security, while encryption ensures the key file remains confidential and unreadable to unauthorized individuals.
By utilizing these features, PuTTYgen users can minimize the risk of unauthorized access and protect their private keys from potential data breaches.
Configuring Key-Based Authentication on Servers
Configuring key-based authentication on remote servers involves the following steps:
Generate SSH Key Pair: Use PuTTYgen to generate an SSH key pair (public and private keys) on your local machine.
Copy Public Key to Server: Copy the contents of the public key (usually found in a file named "id_rsa.pub") to the server's ~/.ssh/authorized_keys file. If the file doesn't exist, create it.
Set Appropriate Permissions: Ensure the correct permissions are set for the ~/.ssh directory (700) and the authorized_keys file (600) on the server. This restricts access to the authorized keys.
Configure SSH Settings: Edit the SSH server configuration file (/etc/ssh/sshd_config) on the server. Set the "PasswordAuthentication" option to "no" to disable password-based logins.
Restart SSH Service: Restart the SSH service on the server to apply the changes.
With key-based authentication configured, you can now access the server securely and passwordlessly.
When you attempt to log in, the server will challenge your local machine to provide the private key's signature, verifying your identity.
If the signature matches the public key on the server, you will be granted access without the need for a password. This method enhances security and streamlines the login process for remote server access.
Key Revocation and Renewal
Key revocation and renewal are crucial security measures to maintain the integrity of SSH communication. If a private key is compromised or if there are personnel changes, it's essential to revoke and renew SSH keys promptly. PuTTYgen simplifies this process:
Key Revocation: If a private key is compromised or no longer needed, it can be revoked. Remove the corresponding public key from the server's ~/.ssh/authorized_keys file. Revoking the key ensures that even if the private key falls into the wrong hands, it cannot be used for unauthorized access.
Key Renewal: To renew an SSH key, generate a new key pair with PuTTYgen on the local machine. Follow the same process as initial key generation. Once the new key pair is created, copy the public key to the server's ~/.ssh/authorized_keys file. Users can then securely access the server using the new key, ensuring continuous secure communication.
By revoking compromised keys and renewing with new key pairs generated by PuTTYgen, users can maintain a strong security posture and safeguard against potential unauthorized access or data breaches. Regularly updating SSH keys is a best practice to reinforce the security of remote server access.
Conclusion:
PuTTYgen streamlines SSH key generation and management, providing users with a secure and effective way to authenticate remote server access.
Embracing key-based authentication enhances security, reduces password vulnerabilities, and fosters smoother connections.
With PuTTYgen's intuitive interface and powerful features, users can bolster their cybersecurity posture, ensuring peace of mind when accessing remote servers.
0 notes
Text
Configurar las opciones de seguridad en ssh
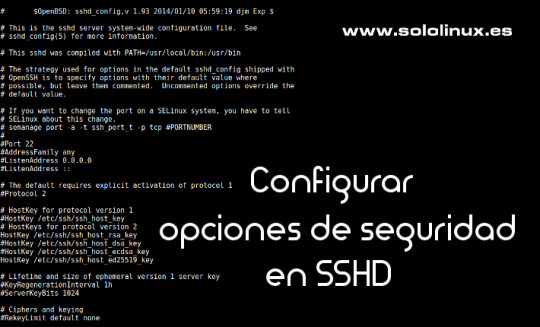
Configurar las opciones de seguridad en ssh. SSH (Secure SHell), permite que el usuario de una maquina en red se conecte y haga uso de la shell de una maquina remota a través de una conexión segura. Consta de dos componentes básicos, el cliente SSH que nos permite conectar con un servidor remoto y el demonio del servidor SSH (más conocido como sshd) que está configurado para aceptar conexiones SSH desde sistemas remotos. Los archivos de configuración de cliente y servidor son diferentes, los podemos localizar en: Conf. del cliente: /etc/ssh/ssh_config Conf. del servidor: /etc/ssh/sshd_config En este articulo veremos las opciones más importantes del archivo de configuración del servidor (algunas indispensables), que deberías plantearte si modificar o no. Las vemos.
Configurar las opciones de seguridad en ssh
Port 22 El puerto predeterminado en SSH es el 22, generalmente está bien pero por seguridad puedes cambiarlo por otro que este disponible si recibes demasiados intentos de conexión no autorizados. Cambiar puerto SSH.

Puerto ssh 22 PermitRootLogin En esta opción tienes dos opciones yes y no. Si se establece en yes se permitirá iniciar SSH directamente como root. Si pones no, solo podrán acceder los usuarios con permiso, pero el root no. Maneja está opción con extremo cuidado, no vaya a ser que te bloquees a ti mismo.

Permit Root Login AllowUsers Con esta opción se puede configurar que solo algunos usuarios del sistema se conecten mediante SSH. Para múltiples usuarios, insertamos espacios entre los diferentes nombres. Por ejemplo: AllowUsers sergio mario david Dependiendo de como se instalo/configuro el servidor sshd (por ejemplo automáticamente desde algún panel de control), es posible que no tengas esta opción dado que la controla el propio panel. LoginGraceTime Aquí podemos modificar el tiempo que SSH espera a que el usuario se autentifique antes de cortar la conexión. De manera predeterminada está establecido en 120 segundos o 2 minutos, pero si recibes muchos ataques de fuerza bruta es recomendable reducir ese tiempo. PasswordAuthentication Al modificar esta opción podemos permitir o no la autentificación por contraseña, ten cuidado solo deberías deshabilitar la opción si tienes habilitada la autenticación por clave pública.
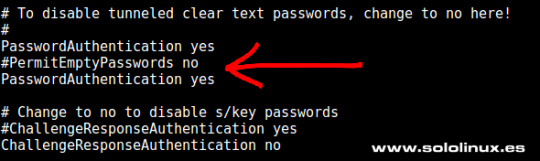
Password Authentication PubkeyAuthentication Una buena alternativa, o simplemente un añadido a la opción anterior (PasswordAuthentication), es activar esta opción y aumentar la seguridad de manera significativa. Para que funcione es necesario indicar dónde están las claves autorizadas, por ejemplo: AuthorizedKeysFile ~/.ssh/authorized_keys TCPKeepAlive Al habilitar esta opción se verifica el estado de la conexión enviando mensajes de alerta al cliente. Si existen interrupciones en la red, se cerrará la conexión en vez de seguir utilizando sus recursos de manera inutil.
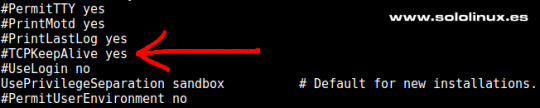
TCP KeepAlive Puedes revisar el resto de opciones, estás son las que considero más importantes. Ten mucho cuidado al manejar este archivo puede jugarte una mala pasada si su configuración no es correcta. Después de modificar el archivo no te olvides de reiniciar el servicio. systemctl restart sshd.service Espero que este articulo sea de utilidad, puedes colaborar con nosotros con una donación (paypal), o con el simple gesto de compartir los manuales en tu sitio web, blog, foro o redes sociales. Read the full article
#/etc/ssh/ssh_config#/etc/ssh/sshd_config#AllowUsers#clienteSSH#configurar#demoniodelservidorSSH#LoginGraceTime#PasswordAuthentication#PermitRootLogin#Port#PubkeyAuthentication#SecureShell#seguridad#seguridadenssh#servidorSSH#ssh#sshd#TCPKeepAlive
0 notes
Text
Cara Masuk Sebagai User Root pada VPS Ubuntu & Debian

masuk akses root , ada beberapa penyedia layanan Virtual server private (VPS) yang masih tidak menginzikan masuk sebagai root karena sebagai pengamana vps kamu seperti Penyedia Google clud Platfrom , Biznet , Idcloudhost , Aws , Azure dll jika kamu tidak mendapatkan akses root maka kamu tidak bisa menjalanakan, auto script installer vps dan installer panel pada vps , karena terdapat keterbatasan izin pada akses untuk mengayasi kamu perlu membuka atau masuk Sebagai User Root pada VPS Ubuntu & Debian Baca juga : Cara Memberikan hak akses Sudo di VPS CentOS Apa itu Akses Root pada VPS Akses root adalah akses dimana kita mendapatkan control secara penuh dalam mengatur dan menginstall semua konfigurasi di vps , dalam hal ini sama seperti kita login sebagai adminstator pada OS windows jika kita masih login dengan akses user biasa dan bukan root masih memiliki banyak keterbatasan dalam akses serta setting os kamu Sebenarnya ini tidak menjadi masalah yang besar. Dengan menggunakan username yang diberikan default provider, kita bisa menjalankan perintah yang membutuhkan root dengan perintah sudo, atau bisa juga dengan perintah sudo su atau sudo -i.
Cara Mengaktifkan Root Login di VPS Debian dan Ubuntu
pertama tama kita harus login ke vps kamu , dengan menggunakan informasi login dari Penyedia layanan ISP , biasanya akan masuk di email kamu - Pertama Login VPS - kemudian masukan kode perintah di bawah ini sudo su cd setelah itu konfigurasi SSH Sebagai berikut ini : nano /etc/ssh/sshd_config - kemudian ubah seperti di bawah ini PermitRootLogin prohibit-password menjadi PermitRootLogin yes PasswordAuthentication no, ubah menjadi PasswordAuthentication yes jika kamu masih belum jelas bisa melihat gambar di bawah ini

- Simpan file dengan cara tekan Ctrl x lalu y lalu Enter - kemudian ganti password akses root dengan memasukan kode di bawah ini passwd - masukan kode di bawah ini untuk restart service ssh service ssh restart service sshd restart - selesai Catatan tambahan kode perintah Akses Root - Untuk mengetahui posisi login kamu bisa menjalankan perintah ini whoami - Cek service ssh service ssh status Cara Nonaktifkan Akses Root Login dengan akses root kita bisa mengakses semua konfigurasi penting di sistem operasi , untuk keamanan sebaiknya perlu di nonaktifkan Untuk melakukan ini, ikuti langkah-langkah ini: - Masuk ke server sebagai root menggunakan SSH. - setelah itu konfigurasi SSH Sebagai berikut ini : nano /etc/ssh/sshd_config - Temukan baris PermitRootLogin yes kemudian Ubah baris sebagai PermitRootLogin no - Simpan perubahan ke file /etc/sshsshd_config, dan kemudian keluar dari editor teks. - Restart layanan SSH menggunakan perintah yang sesuai untuk distribusi Linux Anda: service ssh restart coba login ke vps kamu dengan akses root kambali pasti tidak bisa jika kamu masih mengalami banyak masalah atau kesulitan bisa berkomntar di bawah ini atau diskusi di group telegram kami Read the full article
0 notes
Text
Limit standard accounts ubuntu

LIMIT STANDARD ACCOUNTS UBUNTU HOW TO
LIMIT STANDARD ACCOUNTS UBUNTU FULL
LIMIT STANDARD ACCOUNTS UBUNTU PASSWORD
LIMIT STANDARD ACCOUNTS UBUNTU DOWNLOAD
To display soft limits, use option -S: ulimit -S It is also possible to see either of these respective limits with a flag. This view displays a description, the assigned flag (that can be used for changing the limits), and the configuration. Your default values may be different than mine, of course. Let me show you the limits set up for me by default: :~$ ulimit -a If you omit the user_name, it shows limits for you. The -a flag will display all options and their configuration for your specific user name. You can display all kind of limits for a specified user in this manner: ulimit -a user_name Here’s the syntax for ulimit command: ulimit Display all limits for any user The user would be authorized to increase their limit from 25 up to 50. Then, you could establish a hard limit that could not be exceeded by that user (50). This would be your soft limit (let’s say 25). So from the admin perspective, you may prefer your user to hover around a certain value. This is where soft and hard limits come into play. You may be wondering why even set a limit if a user can adjust it. Soft vs Hard LimitsĪs a user, you can actually adjust your ulimit settings. Ulimit allows us to edit that configuration quickly. Your exact location may vary but it is typically something like /etc/security/nf. Ulimit is linked to a security configuration file. In addition to ensuring smooth processing of tasks, it prevents unwanted processes from being able to devour system resources like RAM, and CPU power. This type of control can be enforced at the global, group, and user levels. It is essential for any system to regulate these types of controls. Ulimit is a built-in shell command designed to display, allocate, and limit resources.
LIMIT STANDARD ACCOUNTS UBUNTU HOW TO
You’ll how to use it to control system resource allocations.
LIMIT STANDARD ACCOUNTS UBUNTU DOWNLOAD
You can create multiple users with different directories to securely upload and download files on your server.In this beginner tutorial, you’ll learn about the ulimit command in Linux. In this guide, you successfully set up SFTP on a Ubuntu 20.04 server, then tested connectivity through a terminal session and FileZilla. sftp> cd uploadsĬonfirm creation of the new directory: sftp> lsįileZilla and Cyberduck are the most popular SFTP clients available for Windows, Mac, and Linux desktop to test connectivity using a desktop client. Your output should be similar to the one below: password:Īlso, try creating a new directory within the subdirectory to test user permissions. $ sftp $ sftp (If running within the same server SSH session) Open a new terminal window and log in with sftp using a valid user account and password. Restart the SSH server for changes to take effect. Subsystem sftp /usr/lib/openssh/sftp-server The line below should be uncommented in /etc/ssh/sshd_config: # override default of no subsystems
ForceCommand internal-sftp: Enable SFTP only with no shell access.Īlso, confirm if SFTP is enabled (it is by default).
X11Forwarding no: Don't permit Graphical displays.
AllowTcpForwarding no: Disable TCP forwarding.
LIMIT STANDARD ACCOUNTS UBUNTU PASSWORD
PasswordAuthentication yes: Enable password authentication.ChrootDirectory %h: Restrict access to directories within the user's home directory.Match Group sftpcorner: Match the user group sftpcorner.Match Group sftpcornerīelow are the functions for each of the above configuration lines: Replace sftpcorner with your actual sftp group. $ sudo vim /etc/ssh/sshd_configĪdd the following lines to the end of the file. Using an editor of your choice, open the file /etc/ssh/sshd_config. With the sftp group and user accounts created, enable SFTP in the main SSH configuration file. Then, allow read and write permissions to all files within the home directory. $ sudo chown -R exampleuser:exampleuser /home/exampleuser/uploads Grant the user ownership rights to the subdirectories. Now, create new subdirectories within the user home directory. Restrict the user from accessing files outside the home directory.
LIMIT STANDARD ACCOUNTS UBUNTU FULL
$ sudo adduser exampleuserĮnter the user’s full name, password to continue. Replace exampleuser with your desired user name. $ sudo addgroup sftpcornerĬreate a new user account. Replace sftpcorner with your desired group name. PrerequisitesĬreate a new SFTP Users Group. In this guide, you will set up SFTP User accounts on Ubuntu 20.04, and allow the user to strictly access files within the home directory. It is an improved version of the traditional file transfer protocol (FTP), which adds a layer of security during the file transfer and connection establishment processes. Secure file transfer protocol (SFTP) is a secure way of transferring files between a local and remote computer using an encrypted SSH session.
0 notes
Text
Setting up cmake linux

#Setting up cmake linux how to
#Setting up cmake linux install
#Setting up cmake linux update
Some other relevant security options you may want to consider are PermitRootLogin, PasswordAuthentication, and PermitEmptyPasswords. You can configure ssh to use other ciphers, host key algorithms, and so on. The ecdh-* key exchange algorithms are FIPS compliant, but Visual Studio doesn't support them. The aes*-ctr algorithms are also FIPS compliant, but the implementation in Visual Studio isn't approved. Ssh-rsa is the only FIPS compliant host key algorithm VS supports. KexAlgorithms diffie-hellman-group-exchange-sha256,diffie-hellman-group-exchange-sha1,diffie-hellman-group14-sha1 Edit (or add, if they don't exist) the following lines: Ciphers aes256-cbc,aes192-cbc,aes128-cbc,3des-cbc If you'd like the ssh server to start automatically when the system boots, enable it using systemctl: sudo systemctl enable ssh
#Setting up cmake linux install
On the Linux system, install and start the OpenSSH server: sudo apt install openssh-server To set up the SSH server on the remote system However, the instructions should be the same for any distro using a moderately recent version of OpenSSH. The examples in this article use Ubuntu 18.04 LTS with OpenSSH server version 7.6. For FIPS-140-2 compliance, Visual Studio only supports RSA keys. Some preparation is required to use a FIPS-compliant, cryptographically secure ssh connection between Visual Studio and your remote Linux system. This article is the FIPS-compliant version of the connection instructions in Connect to your remote Linux computer. This guide is applicable when you build CMake or MSBuild Linux projects in Visual Studio.
#Setting up cmake linux how to
Here's how to set up a secure, FIPS-compliant connection between Visual Studio and your remote Linux system. In Visual Studio 2019 version 16.5 and later, you can use a secure, FIPS-compliant cryptographic connection to your Linux system for remote development. Windows has validated support for FIPS-compliant cryptographic modules. Implementations of the standard are validated by NIST. government standard for cryptographic modules.
#Setting up cmake linux update
If you are starting the runner again or to update the runner, always pull the runner manually before using the following command to ensure you are always running the most up-to-date runner.Federal Information Processing Standard (FIPS) Publication 140-2 is a U.S. If this is the first time running the runner, it will pull the image. Use the pre-configured Docker command provided in Run step on the Runner installation dialog to run the runner. Use the crontab -e command to open your user account’s crontab file.Īppend the following entry 0 0 * * 0 docker system prune -afįor more details, refer to the crontab documentation.įor Workspace runners, visit Workspace settings > Workspace runners.įor Repository runners, visit Repository settings > Runners.įrom the Runner installation dialog, under System and architecture, select Linux Docker (x86_64). The schedule depends on the size of images you use, disk space available, and how often you run builds on a runner.įor example, do the following to clean up images once a week on Sunday at midnight: You can create a cron job using the command docker system prune -af to remove all unused images. We recommend setting up a process to automatically remove docker images to avoid running out of disk space. If there is an output other than 1, repeat Step 2 and ensure that /etc/nf is configured correctly.
0 notes
Text
Ubuntu 16.04 vnc server xstartup gnome panel missing

UBUNTU 16.04 VNC SERVER XSTARTUP GNOME PANEL MISSING INSTALL
UBUNTU 16.04 VNC SERVER XSTARTUP GNOME PANEL MISSING UPDATE
UBUNTU 16.04 VNC SERVER XSTARTUP GNOME PANEL MISSING PASSWORD
UBUNTU 16.04 VNC SERVER XSTARTUP GNOME PANEL MISSING PLUS
UBUNTU 16.04 VNC SERVER XSTARTUP GNOME PANEL MISSING DOWNLOAD
enable firewall traffic on the vnc port (in the AWS console).
In that mindset, launching each component yourself makes it clearer what is doing what. It also matters whether you want things to run on the GPU, or the CPU. The responses here are good for getting one solution up and running, but I recommend understanding the basics of the different layers which result in a functioning GUI / OpenGL environment / remote desktop in Unix. I ran into the same problem, and ended up writing a how-to guide for myself ( ) If you want to return to a session later, specify this number in the port field of the xrdp login dialog box. Pay close attention to these status messages and make note of the VNC port number displayed. When you start a session, the port number is -1.ġ9) When the system connects, several status messages are displayed on the Connection Log screen.
UBUNTU 16.04 VNC SERVER XSTARTUP GNOME PANEL MISSING PASSWORD
sudo service xrdp restartġ7) On Windows, open the Remote Desktop Connection client, paste the fully qualified name of your Amazon EC2 instance for the Computer, and then click Connect.ġ8) When prompted to Login to xrdp, ensure that the sesman-Xvnc module is selected, and enter the username ubuntu with the new password that you created in step 8.
UBUNTU 16.04 VNC SERVER XSTARTUP GNOME PANEL MISSING INSTALL
First Install the xrdp with sudo apt-get install xrdp then edit the above mentioned file)ġ5) Look for the section and change the following text (then save and exit ). sudo cp /home/ubuntu/.xsession /etc/skelġ4) Open the xrdp.ini file to allow changing of the host port you will connect to. xsession to the /etc/skel folder so that xfce4 is set as the default window manager for any new user accounts that are created. echo xfce4-session > ~/.xsessionġ3) Copy. Sudo -E apt-get install -y ubuntu-desktopġ1) Install xrdp sudo apt-get install xfce4ġ2) Make xfce4 the default window manager for RDP connections. su ubuntuġ0) Install Ubuntu desktop functionality on your Linux instance, the last command can take up to 15 minutes to complete. sudo –iĩ) Switch back to the ubuntu user account and cd to the ubuntu home directory. Press the Enter key after typing the command passwd ubuntu, and you will be prompted to enter the new password twice. sudo /etc/init.d/ssh restartĨ) Temporarily gain root privileges and change the password for the ubuntu user to a complex password to enhance security. sudo vim /etc/ssh/sshd_configĦ) Change PasswordAuthentication to yes from no, then save and exit.ħ) Restart the SSH daemon to make this change take effect.
UBUNTU 16.04 VNC SERVER XSTARTUP GNOME PANEL MISSING UPDATE
Refer this guide to create permanent sessions as serviceĤ) Execute: sudo apt-get update sudo apt-get upgradeĥ) Because you will be connecting from Windows Remote Desktop, edit the sshd_config file on your Linux instance to allow password authentication. Now you can access GUI using IP/Domain and port 1įor AWS, you have to allow port 5901 on firewall Log file is /home/lonely/.vnc/ubuntu:1.log Starting applications specified in /home/lonely/.vnc/xstartup New 'ubuntu:1 (lonely)' desktop is ubuntu:1Ĭreating default startup script /home/lonely/.vnc/xstartup Xauth: file /home/lonely/.Xauthority does not exist You will require a password to access your desktops. "gnome-session & ".ģ) Create VNC password and vnc session for the user using "vncserver" command. $ sudo apt install gnome-panel gnome-settings-daemon metacity nautilus gnome-terminal vnc4serverĢ) Edit /usr/bin/vncserver file and modify as belowįind this line "# exec /etc/X11/xinit/xinitrc ".Īnd add these lines below. So run the vnc server also on same user instead of "awsgui" user.ġ) Install packages $ sudo apt update sudo apt install -no-install-recommends ubuntu-desktop Mostly because of ".vnc/xstartup" file on different user. Sudo iptables -A INPUT -p tcp -dport 5901 -j ACCEPT Mac VNC client can be downloaded from here:
UBUNTU 16.04 VNC SERVER XSTARTUP GNOME PANEL MISSING PLUS
In the vnc client, give public DNS plus ":1" (e.g.
UBUNTU 16.04 VNC SERVER XSTARTUP GNOME PANEL MISSING DOWNLOAD
You can download xtightvncviewer to view desktop(for Ubutnu) from here When you're done, hit Ctrl + C on the keyboard, type :wq and hit Enter. "Uncomment the following two lines for normal desktop." And on the second line add "sh" so the line reads exec sh /etc/X11/xinit/xinitrc. Then hit the Insert key, scroll around the text file with the keyboard arrows, and delete the pound (#) sign from the beginning of the two lines under the line that says Then run following commands and enter the login password for vnc connection: su - awsgui Run following commands to install ui and vnc server: sudo apt-get update Setting up ui based ubuntu machine on AWS. Sudo vim /etc/ssh/sshd_config # edit line "PasswordAuthentication" to yes Following are the steps to setup the GUI Create new user with password login sudo useradd -m awsgui
0 notes
Text
2021年05月09日(日)のVPSいじり
SSHで認証を求められる件は解決した。
ホームディレクトリ/home/VPSUSERの所有者または権限が原因で~/.ssh/authorized_keysが無視されています。 以下のコマンドを実行して、所有者と権限を修正してください。 とのこと。Ubuntuの作業用ユーザー作る時に、ホームディレクトリを作ってくれないのは正常な動作なのかは分からず。
chown VPSUSER /home/VPSUSER chmod go-w /home/VPSUSER
上記で解決した。
これから、sshでパスワードでログインできないようにする。ついでにポート番号も22から、変える。
Last login: Sun May 9 17:24:48 2021 from 126.2.163.40
$ sudo -s
[sudo] VPSUSER のパスワード:
\# cp /etc/ssh/sshd\_config /etc/ssh/sshd\_config.org ///orgはオリジナルという意味。念のためバックアップをとる。
\# vim /etc/ssh/sshd\_config
sshd_configを3ヶ所いじる。
\# $OpenBSD: sshd\_config,v 1.103 2018/04/09 20:41:22 tj Exp $
\# This is the sshd server system-wide configuration file. See
\# sshd\_config(5) for more information.
(中略)
#Port 12345 //ここの数字を22か���好きな数字(1024~65536)に変えてコメント(#)をはずす。
#AddressFamily any
#ListenAddress 0.0.0.0
#ListenAddress ::
(中略)
\# Authentication:
#LoginGraceTime 2m
PermitRootLogin no ///ここをnoにする!!!!!
#StrictModes yes
#MaxAuthTries 6
#MaxSessions 10
#PubkeyAuthentication yes
(中略)
\# To disable tunneled clear text passwords, change to no here!
PasswordAuthentication no //noにする!!!!
#PermitEmptyPasswords no
設定の変更を反映させる。
\# service sshd restart
これでポート22では弾かれるようになったぞ。
wantwant@wantwantnoAir ~ % ssh -p 12345 [email protected]
Welcome to Ubuntu 20.04.2 LTS (GNU/Linux 5.4.0-72-generic x86\_64)
wantwant@wantwantnoAir ~ % ssh [email protected]
ssh: connect to host IP.ADD.RE.SS port 22: Connection refused
0 notes
Text
Using Tailscale on Windows to network more easily with WSL2 and Visual Studio Code
Tailscale is a zero config mesh "VPN" that runs atop other networks and effectively "flattens" networks and allows users/services to more easily (and securely) communicate with each other.
For example, I've written extensively on how to SSH into WSL2 on Windows 10 from another machine and you'll note that there is not only a ton of steps but there's more than one way to do it!
I have talked about this for SSH, but if you're an active developer and want to share the services and sites you're working on with your coworkers and collaborators, there's a non-trivial amount of setup, management, and maintenance to deal with.
Phrased differently, "wouldn't it be easier if we were all just on the same network and subnet?"
WSL1 shares its networking stack with Windows 10, so the "machine" is the same. Whatever YourMachineName is, running a service on 5000 is the same if it's a Windows service or an app running in Linux under WSL1. However, in WSL2, your Linux environment is "behind" your Windows host. While WSL2 makes it easy to hit http://localhost:5000 by transparent port-forwarding, your WSL2 Linux machine isn't really a peer on the same network as your other devices.
Using a zero-configuration networking system like Tailscale (and similar services) levels the playing field - and the network. Due to some characteristics of WSL2 there are a few gotchas. Here's how I got it working for me.
Tailscale on WSL2
Get WSL
Install WSL2 - follow the instructions here
Install a Linux distro - I used Ubuntu 20.04
go through the process, make a user, etc.
Install the Windows Terminal - It's just so much better, and really makes your command line experience better
Get Tailscale
Install Tailscale - I used the Ubuntu 20.04 instructions
Modify WSL2
I can't get Tailscale today to startup on WSL2 with ipv6 install, so I disable it.
sudo sysctl -w net.ipv6.conf.all.disable_ipv6=1 sudo sysctl -w net.ipv6.conf.default.disable_ipv6=1
Run Tailscale
Here you startup the daemon. There's no systemd (yet) on WSL2, but if you're on a version over Windows 10 build 21286, there are ways run commands on startup in the Windows Subsystem for Linux. Personally, I just do this in a bash script.
sudo tailscaled
WSL doesn't have a way to do an interactive login process, so you wan tot create a pre-authentication key to authenticate a single machine. Then use that key, as I do here, to bring up Tailscale within WSL:
tailscale up --authkey=tskey-9e85d94f237c54253cf0
I like to keep this open in another Terminal Tab or Window Pane so I can watch the logs. It's interesting and verbose!
Within the Tailscale machines admin panel, you can see all the machines living on your new Tailscale network. Note that I have scottha-proto listed as Windows, and scottha-proto-1 listed as Linux. The first is my Host machine and the second (the -1) is my Linux WSL2 instance! They are now on a flat network!
I was also able to invite a user from outside my network with the new (coming soon) Tailscale node sharing feature. My friend Glenn is NOT in my organization, but just like I use OneDrive or DropBox to create a link to access ONE entity but not the WHOLE system, I can do the same here.
Now I can have Glenn hit a service running in WSL2 from his house.
Make a Service and Bind it to the Tailscale Network
I've installed .NET 5 in my WSL2 Ubuntu system, made a folder, and run dotnet new web to make a Hello World microservice.
When I run the service - .NET or Node, or whatever - it essential that the service listen on the Tailscale network. Your Linux system in WSL2 is 'multi-homed' and is connected to multiple networks. By default my developer systems listen only on localhost.
For .NET there's several ways to listen on all networks (including Tailscale) but I used this one:
dotnet run --urls http://*:5100;https://*:5101
So here I've got myself connecting to the Tailscale IP that's associated with my WSL2 instance and hitting my Linux service running within:
How far can we take this? Well, since I'm on the Tailscale network and Glenn has connected to it, the whole network is flat, so hitting my service is trivial! Here I am on Teams with my desktop on the bottom and Glenn's desktop on the top.
Cool. How far can we go?
Add Visual Studio Code and the Remote Development SSH Extension
Ok, so flat secure network, no limits! Can I make my WSL2 instance be treated as a remote development system for Glenn? Sure, why not?
To be clear - this is just me talking and experimenting, but there's something here. This can also be cross platform, Mac to Windows to WSL2, etc. You can also certainly use this section to create a VM in any cloud host or hoster, install Tailscale, stop worrying about port forwarding, and use it as a development box. Yes, you can just use WSL local, but this is fun and can be exploited in other cool ways.
On my WSL2 machine, I'll start up the ssh service. I could share public keys and do proper key-based login, but for this I'll do it by username.
I'll edit /etc/ssh/sshd_config and set the port, ListenAddress, and PasswordAuthentication to Yes. Here's an example:
Port 22 #AddressFamily any ListenAddress 0.0.0.0 ListenAddress :: PasswordAuthentication yes
I made glenn a local super user just in my WSL2 instance:
sudo adduser glenn usermoid -aG sudo glenn
Glenn then installs the VS Code Remote Development pack and connects using Remote via SSH to my Tailscale IP. Here you can see VS Code from Glenn's machine is actually installing the VS Code Server and remote developers, and Glenn and code with VS Code architecturally split in half with the client on his Windows machine and the server on my WSL2 instance.
Note in the lower left corner, you can see his VS Code is connected to my WSL2 Linux instance's Tailscale IP!
What do you think?
You may compare Tailscale to things like NGrok which offers a developer-oriented localhost tunneller, but there are some important differences. Do your research! I have no relationship with this company other than I'm a fan.
Sponsor: This week's sponsor is...me! This blog and my podcast has been a labor of love for 19 years. Your sponsorship pays my hosting bills for both AND allows me to buy gadgets to review AND the occasional taco. Join me!
© 2020 Scott Hanselman. All rights reserved.


Using Tailscale on Windows to network more easily with WSL2 and Visual Studio Code published first on http://7elementswd.tumblr.com/
0 notes
Text
Using Tailscale on Windows to network more easily with WSL2 and Visual Studio Code
Tailscale is a zero config mesh "VPN" that runs atop other networks and effectively "flattens" networks and allows users/services to more easily (and securely) communicate with each other.
For example, I've written extensively on how to SSH into WSL2 on Windows 10 from another machine and you'll note that there is not only a ton of steps but there's more than one way to do it!
I have talked about this for SSH, but if you're an active developer and want to share the services and sites you're working on with your coworkers and collaborators, there's a non-trivial amount of setup, management, and maintenance to deal with.
Phrased differently, "wouldn't it be easier if we were all just on the same network and subnet?"
WSL1 shares its networking stack with Windows 10, so the "machine" is the same. Whatever YourMachineName is, running a service on 5000 is the same if it's a Windows service or an app running in Linux under WSL1. However, in WSL2, your Linux environment is "behind" your Windows host. While WSL2 makes it easy to hit http://localhost:5000 by transparent port-forwarding, your WSL2 Linux machine isn't really a peer on the same network as your other devices.
Using a zero-configuration networking system like Tailscale (and similar services) levels the playing field - and the network. Due to some characteristics of WSL2 there are a few gotchas. Here's how I got it working for me.
Tailscale on WSL2
Get WSL
Install WSL2 - follow the instructions here
Install a Linux distro - I used Ubuntu 20.04
go through the process, make a user, etc.
Install the Windows Terminal - It's just so much better, and really makes your command line experience better
Get Tailscale
Install Tailscale - I used the Ubuntu 20.04 instructions
Modify WSL2
I can't get Tailscale today to startup on WSL2 with ipv6 install, so I disable it.
sudo sysctl -w net.ipv6.conf.all.disable_ipv6=1 sudo sysctl -w net.ipv6.conf.default.disable_ipv6=1
Run Tailscale
Here you startup the daemon. There's no systemd (yet) on WSL2, but if you're on a version over Windows 10 build 21286, there are ways run commands on startup in the Windows Subsystem for Linux. Personally, I just do this in a bash script.
sudo tailscaled
WSL doesn't have a way to do an interactive login process, so you wan tot create a pre-authentication key to authenticate a single machine. Then use that key, as I do here, to bring up Tailscale within WSL:
tailscale up --authkey=tskey-9e85d94f237c54253cf0
I like to keep this open in another Terminal Tab or Window Pane so I can watch the logs. It's interesting and verbose!
Within the Tailscale machines admin panel, you can see all the machines living on your new Tailscale network. Note that I have scottha-proto listed as Windows, and scottha-proto-1 listed as Linux. The first is my Host machine and the second (the -1) is my Linux WSL2 instance! They are now on a flat network!
I was also able to invite a user from outside my network with the new (coming soon) Tailscale node sharing feature. My friend Glenn is NOT in my organization, but just like I use OneDrive or DropBox to create a link to access ONE entity but not the WHOLE system, I can do the same here.
Now I can have Glenn hit a service running in WSL2 from his house.
Make a Service and Bind it to the Tailscale Network
I've installed .NET 5 in my WSL2 Ubuntu system, made a folder, and run dotnet new web to make a Hello World microservice.
When I run the service - .NET or Node, or whatever - it essential that the service listen on the Tailscale network. Your Linux system in WSL2 is 'multi-homed' and is connected to multiple networks. By default my developer systems listen only on localhost.
For .NET there's several ways to listen on all networks (including Tailscale) but I used this one:
dotnet run --urls http://*:5100;https://*:5101
So here I've got myself connecting to the Tailscale IP that's associated with my WSL2 instance and hitting my Linux service running within:
How far can we take this? Well, since I'm on the Tailscale network and Glenn has connected to it, the whole network is flat, so hitting my service is trivial! Here I am on Teams with my desktop on the bottom and Glenn's desktop on the top.
Cool. How far can we go?
Add Visual Studio Code and the Remote Development SSH Extension
Ok, so flat secure network, no limits! Can I make my WSL2 instance be treated as a remote development system for Glenn? Sure, why not?
To be clear - this is just me talking and experimenting, but there's something here. This can also be cross platform, Mac to Windows to WSL2, etc. You can also certainly use this section to create a VM in any cloud host or hoster, install Tailscale, stop worrying about port forwarding, and use it as a development box. Yes, you can just use WSL local, but this is fun and can be exploited in other cool ways.
On my WSL2 machine, I'll start up the ssh service. I could share public keys and do proper key-based login, but for this I'll do it by username.
I'll edit /etc/ssh/sshd_config and set the port, ListenAddress, and PasswordAuthentication to Yes. Here's an example:
Port 22 #AddressFamily any ListenAddress 0.0.0.0 ListenAddress :: PasswordAuthentication yes
I made glenn a local super user just in my WSL2 instance:
sudo adduser glenn usermoid -aG sudo glenn
Glenn then installs the VS Code Remote Development pack and connects using Remote via SSH to my Tailscale IP. Here you can see VS Code from Glenn's machine is actually installing the VS Code Server and remote developers, and Glenn and code with VS Code architecturally split in half with the client on his Windows machine and the server on my WSL2 instance.
Note in the lower left corner, you can see his VS Code is connected to my WSL2 Linux instance's Tailscale IP!
What do you think?
You may compare Tailscale to things like NGrok which offers a developer-oriented localhost tunneller, but there are some important differences. Do your research! I have no relationship with this company other than I'm a fan.
Sponsor: This week's sponsor is...me! This blog and my podcast has been a labor of love for 19 years. Your sponsorship pays my hosting bills for both AND allows me to buy gadgets to review AND the occasional taco. Join me!
© 2020 Scott Hanselman. All rights reserved.


Using Tailscale on Windows to network more easily with WSL2 and Visual Studio Code published first on https://deskbysnafu.tumblr.com/
0 notes
Photo

World Economic Forum (WEF) Report Emphasizes Passwordless Authentication Amidst COVID-19 #authentication #authenticator #biometricauthentication #biometricauthenticationsystem #breachedpasswords #commonpasswords #cyberattack #cybersecurity #databreach #dataleak #hackingpasswords #password #passwordauthentication #passwordbypass #passwordhackers #passwordleak #passwordreset #passwordvulnerability #passwordlessauthentication #securepassword #staticpasswordflaw #twofactorauthentication #userauthentication #weakpassword #webauthentication #worldeconomicforum #hacking #hacker #cybersecurity #hack #ethicalhacking #hacknews
0 notes
Text
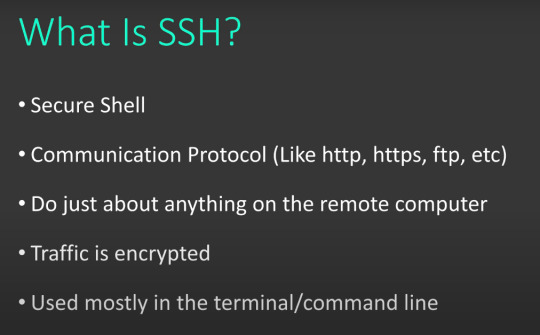
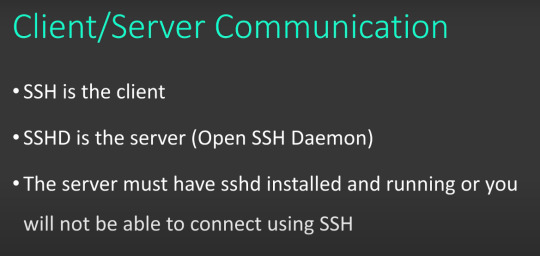
ssh Secure Shell 기본 설명
기본 개념 : https://youtu.be/qWKK_PNHnnA
아래그림음 ssh의 작동원리를 쉽게 설명한 그림들이다.
각자가 각자의 자물쇠를 이용한다. 그래서 이동중에는 하나이건 둘이건 자물쇠가 잠긴 상태의 가방이 이동하기 때문에 외부인이 그 내용을 가로채서 열어볼수 없다.


아래는 macos에서 ssh server를 작동하는 방법을 설명

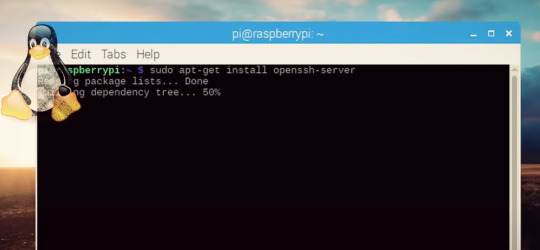
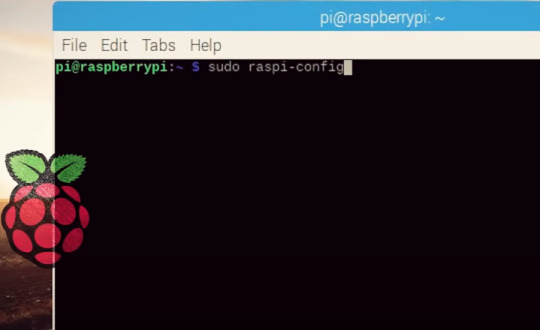
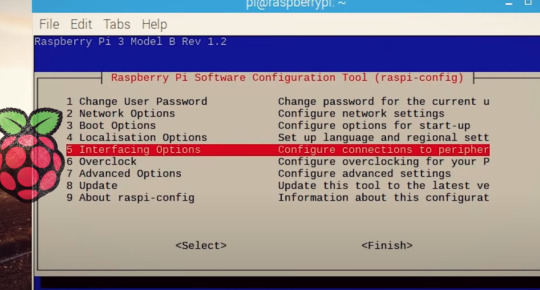
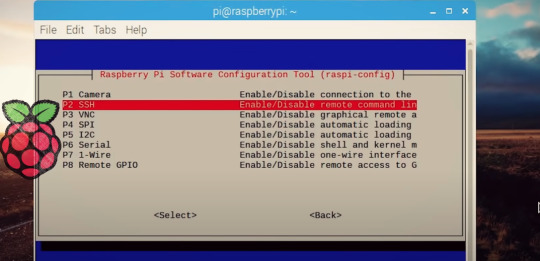
아래는 raspberry pi 에서 ssh server를 작동하는 방법을 설명
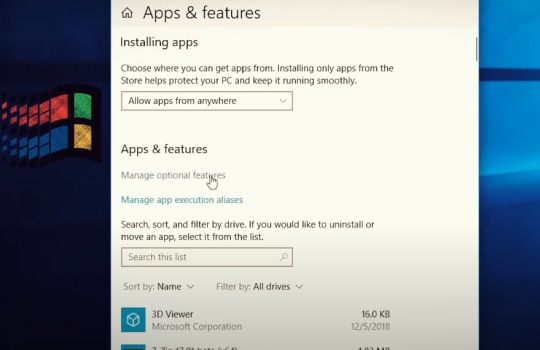
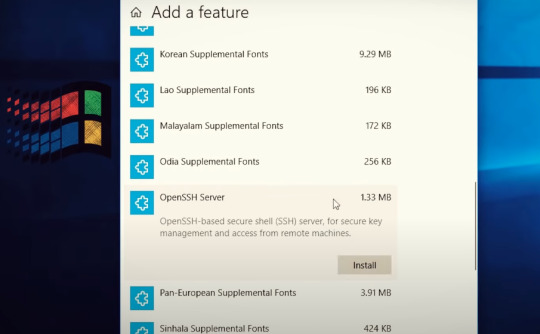
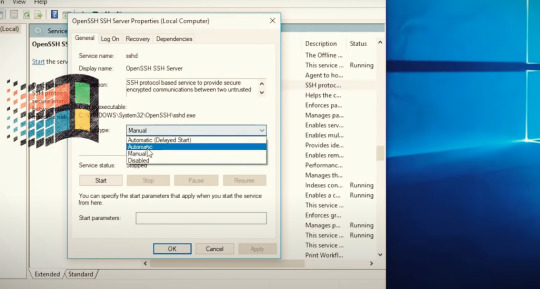
아래는 windows에서 ssh server를 작동하는 방법을 설명


아래는 android에서 ssh server를 돌리는 방법을 설명 simplesshd라는 app을 이용한다 (ios는 없다.)

아래는 windows에서 ssh client를 작동하는 방법을 설명


아래는 android, ios 에서 ssh client를 작동하는 방법을 설명

기본 사용 설명 : https://youtu.be/hQWRp-FdTpc
이 기본설명은 digital ocean 에 있는 서버를 연결하는 것을 예시로 보여주고 있다.
digital ocean의 경우 root password reset과정을 통해 새로운 비밀번호를 받고 그것을 이용해서 digital ocean이 제공하는 console을 통해 접속할때 본인의 새로운 비밀번호를 설정했다. 이렇게 digital ocean console을 통해 서버에 들어간다음
/etc/ssh/sshd_config next lines: 1) PasswordAuthentication yes 2) PermitRootLogin yes 3) PubkeyAuthentication yes 4) AuthorizedKeysFile .ssh/authorized_keys
위와 같이 sshd 서버 설정을 수정한다.그래야 접속가능하다. 그리고 아래 과정 수행
ssh root@아이.피.어드.레스
를 통해 password prompt를 얻고 패스워드를 넣어 접속가능하게 된다.
ssh-keygen을 통해 새로운 키를 생성한다.
cat ~/.ssh/키이름.pub 을 통해 pub키를 확인하고 이를 복사해서 web site 에 profile - security 항목에서 직접 넣을수도 있고 터미널에 아래 명령어를 이용
cat ~/.ssh/키이름.pub | ssh demo@아이피.어드.레.스 "mkdir -p ~/.ssh && chmod 700 ~/.ssh && cat >> ~/.ssh/authorized_keys"
넣을수도 있다.
넣고 난 다음에 key를 이용해서 ssh 접속하는 경우
ssh -i ~/.ssh/프라이빗키화일이름 root@아이피.어드.레.스
를 통해 해야 한다.
digital ocean에서 ssh 사용법
ref) https://www.digitalocean.com/community/tutorials/how-to-set-up-ssh-keys--2
여러키를 load한 경우 특정 키로 접속하는 방법
ref) https://www.digitalocean.com/community/questions/permission-denied-publickey-for-root-login
if you have multiple SSH keys loaded into your agent.
Lets say your key file is idrsa and idrsa.pub respectivly
ssh -i ~/.ssh/id_rsa [email protected]
sshd (ssh 서버 설정 수정하고 다시 서버 돌리기)
ref) https://www.digitalocean.com/community/questions/ssh-permission-denied-publickey
I entered on droplet through Control Access via browser. And then changed on server file /etc/ssh/sshd_config next lines: 1) PasswordAuthentication yes 2) PermitRootLogin yes 3) PubkeyAuthentication yes 4) AuthorizedKeysFile .ssh/authorized_keys
And then restarted sshd by : systemctl restart sshd
등록된 key를 보는 방법, 지우는 방법
Run ssh-add -l to list the agent's keys, ssh-add -D to clean out all keys.
ref) https://superuser.com/a/271673


.
.
.
filezilla 를 이용한 sftp
ref) https://youtu.be/6njnV8n0uig
0 notes
Text
设置WSL可远程SSH连接,修改WSL Ubuntu 系统的 root 密码
开启ssh远程连接步骤
1.关闭windows自带的ssh服务,这个会和wsl的ssh服务冲突
2.wsl安装ssh服务 ,如果ssh无法启动可以先卸载再安装
sudo apt-get remove openssh-server sudo apt-get install openssh-server
3. 编辑sshd_config文件,修改几处配置才能正常使用用户名/密码的方式连接
sudo vi /etc/ssh/sshd_config
修改:
Port 2222 #设置ssh的端���号, 由于22在windows中有别的用处, 尽量不修改系统的端口号 PermitRootLogin yes # 可以root远程登录 PasswordAuthentication yes # 密码验证登录
重启服务:
sudo service ssh --full-restart
ok,可以本地使用ssh客户端连接wsl了,但是想要在其他的计算机上访问, 就需要系统开放端口了.
需要到防火墙设置开放2222端口
防火墙->高级设置->入站规则->新建规则
端口->下一步
选择tcp 特定本地端口 2222
允许连接, 默认都选上, 下一步填个名字 完成
这个时候就可以通过网络进行ssh远程登录了.
接下来说一下wsl Ubuntu修改root密码
wsl Ubuntu 的默认 root 密码是随机的,即每次开机都有一个新的 root 密码。 我们可以在终端输入命令
sudo passwd
然后输入当前用户的密码,终端会提示我们输入新的密码并确认,此时的密码就是 root 新密码。 修改成功后,输入命令
su root
再输入新的密码就 ok 了。
0 notes
Text
How to (attempt to) secure your Raspberry Pi against IoT hacker attacks
*Gee, that doesn’t look difficult, painful, or time-consuming.
https://makezine.com/2017/09/07/secure-your-raspberry-pi-against-attackers/
Why would anyone hack a Raspberry Pi?
Its computing power can be abused for operations like mining cryptocurrency.
It can be used as a bounce point to attack other hosts, in order to cover the attacker’s tracks.
It’s an entry point to the rest of an internal network. An attacker can easily reach the file servers and try to install ransomware, obtain documents for blackmail, or manipulate the firewall and router settings to ensure persistent access in the future for later nefarious actions, either by attacking the web console of the router or performing uPNP manipulation to open up more ports to the Internet for attack.
Passwords
Change the default passwords — If you are installing a recent version of NOOBS or Raspbian, be sure to change the default password of the “pi” user to something that is long and hard to guess. A passphase like “iamasuckerfor5dollarmojitos” is much better than P@assword1! Even if you plan on disabling the account, this first step is basic protection in case you forget.
User Accounts
Your next step should be to disable the default Pi account in Raspbian. Before doing this, create a new account on the system. You can use the useradd command to do this, with some extra flags to specify that a new home directory be created for the user. Log in as the Pi user and issue the command:
$ sudo /usr/sbin/useradd --groups sudo -m makezine
Use your own username instead of “makezine.” This will create a new account, create a directory for the account (such as /home/makezine), and add the new account to the sudo group so the user can use the sudo command. Once the new user account is created we need to set a password for the account. You can do this using the command:
$ sudo passwd makezine
Next, reset the root password. Choose something long and hard to guess.
$ sudo passwd root
Finally, you’ll want to disable the Pi account:
$ sudo passwd --lock pi
Now you can log out of the Pi account and log in with your new account and password.
Securing SSH
By default, Raspbian installs a remote access shell (SSH) that can be accessed from anywhere. You can disable this by setting up SSH so that only machines with an authorized SSH key can log in. Back up your private keys in at least two locations you trust.
To set them up, edit the SSH configuration file using vi, or another text editor, with the command:
$ sudo vi /etc/ssh/sshd_config
Make sure the following lines are set and uncommented — meaning that the lines are in the file and they aren’t preceded with a hash tag symbol, which marks a line as a comment and ignores it for configuration purposes:
# Authentication: LoginGraceTime 120 PermitRootLogin no StrictModes yes RSAAuthentication yes PubkeyAuthentication yes AuthorizedKeysFile %h/.ssh/authorized_keys # To enable empty passwords, change to yes (NOT RECOMMENDED) PermitEmptyPasswords no # Change to yes to enable challenge-response passwords (beware issues with # some PAM modules and threads) ChallengeResponseAuthentication no # Change to no to disable tunnelled clear text passwords PasswordAuthentication no UsePAM no
The last line is very important since it will disable Pluggable Authentication Modules (PAM), or native Linux authentication, and only allow users to log in with a key. Next, generate an SSH key. You can do this with PuTTY on Windows or with the ssh-keygen command on Linux. Create a .ssh directory in your user’s home directory and an authorized_keys file with the following commands. Be sure to set the permissions properly (otherwise the key based authentication will fail):
$ mkdir ~/.ssh $ chmod 0700 ~/.ssh $ touch ~/.ssh/authorized_keys $ chmod 0600 ~/.ssh/authorized_keys
Next use your text editor to edit the authorized_keys file and paste in the public key you generated so you can log in. Be sure to restart SSH to ensure the changes take effect using the command:
$ sudo systemctl restart ssh
Firewall
Once you’ve locked down SSH, you’ll want to ensure that the iptables firewall is running on your Pi. For good measure, you can configure the firewall so that it logs a message whenever a firewall rule is activated and a connection is blocked. First make sure that iptables is installed using the command:
$ sudo apt-get install iptables iptables-persistent
Note that using the iptables firewall will require new kernel modules to be loaded. The easiest way to load them is to reboot your Pi. Once iptables is installed, go ahead and check the current iptables rules with the command:
$ sudo /sbin/iptables -L
This will list the rules, which are probably empty. You can save these rules off to a text file and edit it using the command:
$ sudo /sbin/iptables-save > /etc/iptables/rules.v4
This is the file that iptables-persistent uses when your system boots or reboots to make sure that the firewall is still running. Save, then edit the file so that it looks somewhat like the following (altering whatever rules you need):
$ sudo cat /etc/iptables/rules.v4 :INPUT ACCEPT [0:0] :FORWARD ACCEPT [0:0] :OUTPUT ACCEPT [0:0] # Allows all loopback (lo0) traffic and drop all traffic to 127/8 that doesn't use lo0 -A INPUT -i lo -j ACCEPT -A INPUT ! -i lo -d 127.0.0.0/8 -j REJECT # Accepts all established inbound connections -A INPUT -m state --state ESTABLISHED,RELATED -j ACCEPT # Allows all outbound traffic # You could modify this to only allow certain traffic -A OUTPUT -j ACCEPT # Allows SSH connections # The --dport number is the same as in /etc/ssh/sshd_config -A INPUT -p tcp -m state --state NEW --dport 22 -j ACCEPT # log iptables denied calls (access via 'dmesg' command) -A INPUT -m limit --limit 5/min -j LOG --log-prefix "iptables denied: " --log-level 7 # Reject all other inbound - default deny unless explicitly allowed policy: -A INPUT -j REJECT -A FORWARD -j REJECT COMMIT
Next, ensure your iptables are working properly. This can be tricky (((etc etc etc etc)))
3 notes
·
View notes
Text
Proteger un servidor casero Ubuntu

Proteger un servidor casero Ubuntu y derivados. Ya sea como servidor multimedia, servidor de archivos o incluso como backup local, es algo común que tengamos nuestro propio server casero. Ahora bien, mantenerlo con un minimo de seguridad es otra historia. La seguridad puede llegar a ser tan compleja como importante. La seguridad basica de un servidor comienza en su propia instalación, piénsalo bien... por que instalas una aplicación o herramienta que no usaras nunca?, no la instales, es así de fácil. Si no eres novato en linux, no deberías de realizar instalaciones predeterminados, utiliza el modo experto (o similar) que te ofrece un mayor control sobre la misma. Un control minucioso de las opciones que se van a instalar, puede ahorrarnos un valioso tiempo en deshabilitar posteriormente servicios innecesarios por motivos de seguridad. Una vez vistas las nociones básicas a la hora de instalar, entramos un poco más en profundidad en el tema.

Servidor casero Ubuntu
Proteger un servidor casero con Ubuntu
Lo primero que tenemos que hacer es asegurarnos que nuestro usuario tendrá acceso mediante ssh (es necesario para poder conectarnos después al servidor remotamente). sudo -lU tu-usuario Un ejemplo de respuesta correcta es: User sergio may run the following commands on SoloLinux: (ALL) ALL Si no fuera como el ejemplo anterior, debemos acceder al archivo "sudoers" y agregar nuestro usuario con sus permisos correspondientes. nano /etc/sudoers Copia y pega (con tu usuario). mi-usuario ALL=(ALL) ALL Guarda el archivo y cierra el editor nano. Configurar SSH Como norma general, el server ssh ya viene instalado. Por si acaso ejecutamos el comando siguiente. sudo apt install openssh-server La autentificación basada en claves es mucho más segura que con contraseña, por tanto configuraremos SSH para que utilice claves. OJO!!!, este proceso lo debemos hacer en el cliente con el que después nos conectaremos al servidor (nunca en el propio server). Primero nos aseguramos que no tenemos ninguna clave ya generada en nuestro sistema. ls ~/.ssh/ Si en los archivos listados aparece "id_rsa" o "id_rsa.pub" es porque ya tienes una clave, salta el paso que indicamos a continuación. Generamos una clave con nuestros datos reales. ssh-keygen -t rsa -b 4096 -C "[email protected]" Bien... ya la tenemos, en este paso copiaremos nuestra clave de acceso al server, debes tener en cuenta que en un servidor casero (doméstico) es probable que utilicemos la ip para acceder en vez de un nombre. Si no conoces el nombre del servidor, usa la dirección IP en vez del nombre, realmente da lo mismo. Ejecutamos lo siguiente: ssh-copy-id miusuario@IP-o-nombre Nos falta editar la configuración SSH. Iniciamos la sesión desde el PC-cliente en el que tenemos las claves y editamos la configuración del servidor. sudo nano /etc/ssh/sshd_config Debes copiar y pegar en el archivo las lineas siguientes, pero ojo... si ya existe alguna no la dupliques. ChallengeResponseAuthentication no PasswordAuthentication no UsePAM no PermitRootLogin no Para finalizar reiniciamos el servidor SSH. sudo systemctl restart ssh Configurar el firewall En un servidor casero es más que suficiente utilizar el "firewall UFW", en un articulo anterior ya creamos un tutorial bastante completo, aun así volvemos a explicar los pasos imprescindibles para configurar UFW en tu server Ubuntu. Dependiendo de la versión de Ubuntu tal vez no lo tengas instalado, procedemos a ello. sudo apt install ufw Lo habilitamos. sudo ufw enable Al activarlo y de manera predeterminada se bloquearán todos los puertos. Como mínimo debemos habilitar el acceso a la red y a ssh, ejecuta los siguientes comandos para abrir los puertos 80, 443 y 22: sudo ufw allow 80 sudo ufw allow 443 sudo ufw allow 22 Habilitar actualizaciones automáticas Si no quieres estar pendiente de actualizar cada X días, tal vez te convenga automatizar las actualizaciones de seguridad, la tarea es sencilla tan solo debes ejecutar lo siguiente. sudo dpkg-reconfigure -plow unattended-upgrades Aparecerá en pantalla una ventana similar a la siguiente, pulsa "YES" o "SI".

Configurar auto update en Ubuntu Este articulo esta pensado para servidores domésticos, si es empresarial o manejas datos sensibles busca en sololinux.es otros post más especializados. En Sololinux.es seguimos creciendo gracias a nuestros lectores, puedes colaborar con el simple gesto de compartir nuestros artículos en tu sitio web, blog, foro o redes sociales. Read the full article
#/etc/sudoers#configuraciónSSH#ConfigurarSSH#configurarUFW#editornano#firewall#id_rsa#id_rsa.pub#protegerservidor#servidor#servidorcasero#servidormultimedia#servidorSSH#ssh#sudo#sudoers#ubuntu#ufw
0 notes
Text
mastodon インストール後〜アップデートまで
mastodonのインストールが終わったら、とにもかくにもsshの設定。
ローカルで $ cd ~ $ mkdir .ssh $ cd ~/.ssh $ ssh-keygen -f rsa -t rsa
サーバ上のマストドン(hogegoge)ユーザで $cd /home/hogehoge $ mkdir .ssh $ chmod 700 .ssh
ローカルで $ scp ~/.ssh/rsa.pub hogehoge@「ipアドレス」:~/
hogehogeユーザで $ cat rsa.pub > .ssh/authorized_keys $ chmod 600 .ssh/authorized_keys $ rm -f rsa.pub
$ sudo vi /etc/ssh/sshd_configを編集 PermitRootLogin no PasswordAuthentication no
View On WordPress
0 notes
Text
How to Configure a Secure SSH-Based
Introduction
SSH is a remote connection method, whether or not it is a VPS. It is versatile and multi-platform, allows you to almost monitor your computer, as you were, and it has many useful features.
Yet protection is an important focus in the modern world of IT, so I will share some details about how to ensure access to your ssh. You’ll build a couple of keys: public and private. Privacy is your secure key for protecting, safeguarding and sharing with no one. It’s used as a special user to mark you. Public is a key to be delivered to remote servers or services.
Accessions
You’ll need:
1) CentOS 7.4 VPS server
2) Basic knowledge how to edit files in Linux systems
3) Linux or Windows host machine, from which you access the VPS server.
Generating A SSH Key Pair on Your Host Machines
If your system, from which you access VPS, is Linux ( Fedora 25 system was used, as a typical home/workplace Linux system):
1) run ssh-keygen and follow on-screen instructions
“ssh-keygen”
SSH command “ssh-keygen”
You can enter a specific location of storage (you can leave this as it is). You will also be asked for a password to secure the key by ssh-keygen. Although passwordless, as it is sometimes useful for different setups (automatic systems without user input), the password should be protected from your key and your key will only not allow an attacker to access the VPS-server even if your key pair is compromised.
Remember password. When you forget it, you can’t restore your key control.
Must Remember Password
2) Backup your keys on a secure, safe storage
3) run cat /home/vpsuser/.ssh/id_rsa.pub ( replace path with the one, you have actually used ) and copy the key.
4) You need to put a copied key as a new string into
`/root/.ssh/authorized_keys`
on your VPS server. It should look like this
SSH-command copy key as a new string on VPS server
Notice that each key starts as a separate string.
5) To connect from linux machine to your VPS server through ssh, you just need to run
“ssh -i /home/vpsuser/.ssh/id_rsa.pub root@”
Connect from linux machine to VPS server through SSH
If your system, from which you access VPS, is Windows ( Windows 10 was used, as a typical home/workplace Windows system): 1) Run puttygen tool, that comes out of the box with a putty installation.
PuTTY Key Generator tool
Press “generate” and it will ask you to move mouse on the empty area to generate random data, and will provide you an ssh key pair.
SSH key pair
2.1) Enter password to “Key passphraze” and confirmation fields. Remember the password.
2.2) Copy the contents of the “public key for pasting into Openssh authorized_keys file:”
2.3) Save public and private key to a secure, safe storage
3) Copy’s the contents of the “public key for pasting into Openssh authorized_keys file:” windows in puttygen
4) Go back to your VPS server. We need to add the public part of the key pair, we have just created to the list of authorized keys. Put a copied key as a new string into
/root/.ssh/authorized_keys
On your VPS server. It should look like this
add the public part of the key pair on VPS server
Notice that each key starts as a separate string.
5) Test connection to your VPS server
5.1) Open putty and go to Connection – SSH – Auth in the left panel.
5.2) Open you private key file by pressing Browse near the Private key for authentication field.
Open Private Key File for authentication field
5.3) Go back to Session in the left panel of putty, enter your server hostname or ip with a login name ( optional, as putty will prompt for it anyway ) and press Open.
Enter your server Hostname or IP
5.4) Putty will prompt for key password at it’s screen, and if entered correctly, forward you to your VPS server console
PuTTY-prompt for key password
Securing Your SSH Server
Using Linux and Windows, you can now easily connect to your VPS server. You should currently disable access to your machine with a password, so any attempts to bruteforce are useless. Without an authorized ssh key your system will just not accept an incoming ssh connection. Open on your VPS server
“/etc/sshd/sshd_config”
and change “PasswordAuthentication yes” string to “PasswordAuthentication no” restart sshd daemon
“systemctl restart sshd”
and check that it has no problems
“systemstl status sshd”
Securing Your SSH Server
Conclusion
Securing your link to your ssh-key pair and preventing a password login are a fundamental measure of security. It protects your server against a lot of attacks based on alphabetical password and bruteforce searches. In conclusion, secure at least basic steps for your VPS server to allow you to sleep better.
Credit by vpsserver.
https://www.casbay.com/blog/tips-sharing/how-to-configure-a-secure-ssh-based/
0 notes