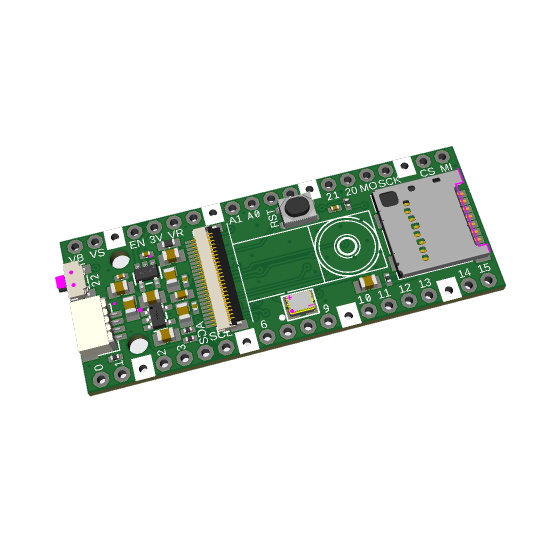
#Raspberry Pi Camera Module
Explore tagged Tumblr posts
Visit Tumblr Blog
Explore Tumblr blogs with no restrictions, modern design and the best experience.
Last Seen Tumblr Blogs


Fun Fact
The average Tumblr user visits about 67 pages every month.
Text
Transforming Vision Technology with Hellbender
In today's technology-driven world, vision systems are pivotal across numerous industries. Hellbender, a pioneer in innovative technology solutions, is leading the charge in this field. This article delves into the remarkable advancements and applications of vision technology, spotlighting key components such as the Raspberry Pi Camera, Edge Computing Camera, Raspberry Pi Camera Module, Raspberry Pi Thermal Camera, Nvidia Jetson Computer Vision, and Vision Systems for Manufacturing.

Unleashing Potential with the Raspberry Pi Camera
The Raspberry Pi Camera is a powerful tool widely used by hobbyists and professionals alike. Its affordability and user-friendliness have made it a favorite for DIY projects and educational purposes. Yet, its applications extend far beyond these basic uses.
The Raspberry Pi Camera is incredibly adaptable, finding uses in security systems, time-lapse photography, and wildlife monitoring. Its capability to capture high-definition images and videos makes it an essential component for numerous innovative projects.
Revolutionizing Real-Time Data with Edge Computing Camera
As real-time data processing becomes more crucial, the Edge Computing Camera stands out as a game-changer. Unlike traditional cameras that rely on centralized data processing, edge computing cameras process data at the source, significantly reducing latency and bandwidth usage. This is vital for applications needing immediate response times, such as autonomous vehicles and industrial automation.
Hellbender's edge computing cameras offer exceptional performance and reliability. These cameras are equipped to handle complex algorithms and data processing tasks, enabling advanced functionalities like object detection, facial recognition, and anomaly detection. By processing data locally, these cameras enhance the efficiency and effectiveness of vision systems across various industries.
Enhancing Projects with the Raspberry Pi Camera Module
The Raspberry Pi Camera Module enhances the Raspberry Pi ecosystem with its compact and powerful design. This module integrates seamlessly with Raspberry Pi boards, making it easy to add vision capabilities to projects. Whether for prototyping, research, or production, the Raspberry Pi Camera Module provides flexibility and performance.
With different models available, including the standard camera module and the high-quality camera, users can select the best option for their specific needs. The high-quality camera offers improved resolution and low-light performance, making it suitable for professional applications. This versatility makes the Raspberry Pi Camera Module a crucial tool for developers and engineers.
Harnessing Thermal Imaging with the Raspberry Pi Thermal Camera
Thermal imaging is becoming increasingly vital in various sectors, from industrial maintenance to healthcare. The Raspberry Pi Thermal Camera combines the Raspberry Pi platform with thermal imaging capabilities, providing an affordable solution for thermal analysis.
This camera is used for monitoring electrical systems for overheating, detecting heat leaks in buildings, and performing non-invasive medical diagnostics. The ability to visualize temperature differences in real-time offers new opportunities for preventive maintenance and safety measures. Hellbender’s thermal camera solutions ensure accurate and reliable thermal imaging, empowering users to make informed decisions.
Advancing AI with Nvidia Jetson Computer Vision
The Nvidia Jetson platform has revolutionized AI-powered vision systems. The Nvidia Jetson Computer Vision capabilities are transforming industries by enabling sophisticated machine learning and computer vision applications. Hellbender leverages this powerful platform to develop cutting-edge solutions that expand the possibilities of vision technology.
Jetson-powered vision systems are employed in autonomous machines, robotics, and smart cities. These systems can process vast amounts of data in real-time, making them ideal for applications requiring high accuracy and speed. By integrating Nvidia Jetson technology, Hellbender creates vision systems that are both powerful and efficient, driving innovation across multiple sectors.
Optimizing Production with Vision Systems for Manufacturing
In the manufacturing industry, vision systems are essential for ensuring quality and efficiency. Hellbender's Vision Systems for Manufacturing are designed to meet the high demands of modern production environments. These systems use advanced imaging and processing techniques to inspect products, monitor processes, and optimize operations.
One major advantage of vision systems in manufacturing is their ability to detect defects and inconsistencies that may be invisible to the human eye. This capability helps maintain high-quality standards and reduces waste. Additionally, vision systems can automate repetitive tasks, allowing human resources to focus on more complex and strategic activities.
Conclusion
Hellbender’s dedication to advancing vision technology is clear in their diverse range of solutions. From the versatile Raspberry Pi Camera and the innovative Edge Computing Camera to the powerful Nvidia Jetson Computer Vision and robust Vision Systems for Manufacturing, Hellbender continues to lead in technological innovation. By providing reliable, efficient, and cutting-edge solutions, Hellbender is helping industries harness the power of vision technology to achieve greater efficiency, accuracy, and productivity. As technology continues to evolve, the integration of these advanced systems will open up new possibilities and drive further advancements across various fields.
#Vision Systems For Manufacturing#Nvidia Jetson Computer Vision#Raspberry Pi Thermal Camera#Raspberry Pi Camera Module#Edge Computing Camera#Raspberry Pi Camera
0 notes
Text
The high-quality, high-end, auto-focus, 8 mega pixel camera module with Omnivision OV8865 image sensor, it is widely used for many applications, such as smartphones, tablets, PC multimedia, embedded, robotics, drones, medical equipment, artificial intelligence, etc. The key features of this camera include MIPI interface, 8MP resolution with Omnivision OV8865 image sensor, high-quality image with high performance and low power consumption.
0 notes
Text
[Video Description: hands typing on a rainbow-lit clicky clacky keyboard, resting on the bottom half of an open black faux-leather clutch, the top half of which has a 4 inch-ish white e-paper screen and a Raspberry Pi module plugged into it. The keys clack and flash as they're typed, and the camera zooms in on the screen where it says "hello happy pi day!!! :D", as an excited and silly-deep voice offscreen says "It works!" End V.D]
I finally have q new-fangled typing machine! A ZeroWriter RasPi compiled together in a freebie handbag that one could say...came thru in a clutch...?
#😎#zerowriter#e-paper#e-ink#eink#writerdeck#raspberry pi#fun fun fun#writing#pi day#i need a new battery pack mine goes the wrong way so this is just plugged into a usb c outlet#and a much smaller keyboard#but it works!!#flashing warning
63 notes
·
View notes
Text
A Compact Pi Compute Module Backpack 🍓🥧📸🎒
We used to stock a PiCam Module
that would plug into a Pi CM4 or CM5 - recently we went to restock it, but the vendor hasn't replied to our emails for many months. So, it could be a good time for us to design something that works similarly but with more capabilities. So we tasked Timon
with designing something for us - we just said, "Make the best thing ya can," and he delivered! Check this board out that plugs onto the compute module and provides many great accessories: USB connection for bootloading/USB gadget, USB 3.0 host type A for CM5, micro HDMI, micro SD card for data storage on 'Lite modules, camera connection, and mount, two DSI connectors, fan connect, Stemma QT / Qwiic connection, and RTC battery. There's one shutdown button for CM5 and two GPIO buttons plus one LED. Timon's gonna try to add an EYESPI connector for our next rendering so we can get some I2C/SPI/PWM outputs easily. What do you think? We wanted to keep it compact and not too pricey (aiming for <$30 cost. We'll see if we can get it there) but were able to craft fairly complex projects in a small space.
#raspberrypi#computeModule#electronics#maker#hardware#embedded#engineering#diy#tech#innovation#pcbdesign#usb3#microsd#hdmi#camera#stemmaqt#qwiic#gpio#fan#rtc#devboard#prototyping#opensource#electronicsdesign#robotics#automation#coding#hobbyelectronics#hackerspace#geekstuff
17 notes
·
View notes
Text
Top 10 Projects for BE Electrical Engineering Students
Embarking on a Bachelor of Engineering (BE) in Electrical Engineering opens up a world of innovation and creativity. One of the best ways to apply theoretical knowledge is through practical projects that not only enhance your skills but also boost your resume. Here are the top 10 projects for BE Electrical Engineering students, designed to challenge you and showcase your talents.
1. Smart Home Automation System
Overview: Develop a system that allows users to control home appliances remotely using a smartphone app or voice commands.
Key Components:
Microcontroller (Arduino or Raspberry Pi)
Wi-Fi or Bluetooth module
Sensors (temperature, motion, light)
Learning Outcome: Understand IoT concepts and the integration of hardware and software.
2. Solar Power Generation System
Overview: Create a solar panel system that converts sunlight into electricity, suitable for powering small devices or homes.
Key Components:
Solar panels
Charge controller
Inverter
Battery storage
Learning Outcome: Gain insights into renewable energy sources and energy conversion.
3. Automated Irrigation System
Overview: Design a system that automates the watering of plants based on soil moisture levels.
Key Components:
Soil moisture sensor
Water pump
Microcontroller
Relay module
Learning Outcome: Learn about sensor integration and automation in agriculture.
4. Electric Vehicle Charging Station
Overview: Build a prototype for an electric vehicle (EV) charging station that monitors and controls charging processes.
Key Components:
Power electronics (rectifier, inverter)
Microcontroller
LCD display
Safety features (fuses, circuit breakers)
Learning Outcome: Explore the fundamentals of electric vehicles and charging technologies.
5. Gesture-Controlled Robot
Overview: Develop a robot that can be controlled using hand gestures via sensors or cameras.
Key Components:
Microcontroller (Arduino)
Motors and wheels
Ultrasonic or infrared sensors
Gesture recognition module
Learning Outcome: Understand robotics, programming, and sensor technologies.
6. Power Factor Correction System
Overview: Create a system that improves the power factor in electrical circuits to enhance efficiency.
Key Components:
Capacitors
Microcontroller
Current and voltage sensors
Relay for switching
Learning Outcome: Learn about power quality and its importance in electrical systems.
7. Wireless Power Transmission
Overview: Experiment with transmitting power wirelessly over short distances.
Key Components:
Resonant inductive coupling setup
Power source
Load (LED, small motor)
Learning Outcome: Explore concepts of electromagnetic fields and energy transfer.
8. Voice-Controlled Home Assistant
Overview: Build a home assistant that can respond to voice commands to control devices or provide information.
Key Components:
Microcontroller (Raspberry Pi preferred)
Voice recognition module
Wi-Fi module
Connected devices (lights, speakers)
Learning Outcome: Gain experience in natural language processing and AI integration.
9. Traffic Light Control System Using Microcontroller
Overview: Design a smart traffic light system that optimizes traffic flow based on real-time data.
Key Components:
Microcontroller (Arduino)
LED lights
Sensors (for vehicle detection)
Timer module
Learning Outcome: Understand traffic management systems and embedded programming.
10. Data Acquisition System
Overview: Develop a system that collects and analyzes data from various sensors (temperature, humidity, etc.).
Key Components:
Microcontroller (Arduino or Raspberry Pi)
Multiple sensors
Data logging software
Display (LCD or web interface)
Learning Outcome: Learn about data collection, processing, and analysis.
Conclusion
Engaging in these projects not only enhances your practical skills but also reinforces your theoretical knowledge. Whether you aim to develop sustainable technologies, innovate in robotics, or contribute to smart cities, these projects can serve as stepping stones in your journey as an electrical engineer. Choose a project that aligns with your interests, and don’t hesitate to seek guidance from your professors and peers. Happy engineering!
5 notes
·
View notes
Text
ough no raspberry pis in my area on craigslist.....this doesn't entirely surprise me but I'd like to get that + a camera module within a couple of weeks so that I can do something with Hough transform and that
3 notes
·
View notes
Text
Exploring the Possibilities with Raspberry Pi: A Guide to Buying and Utilizing Raspberry Pi 4 and Its Camera Kit
Introduction:
In the world of single-board computers, Raspberry Pi stands out as a powerful and versatile option. The Raspberry Pi Foundation has continuously pushed the boundaries of what can be achieved with these compact devices. In this blog post, we will explore the benefits of Raspberry Pi 4 kit, Raspberry pi buy, and delve into the exciting projects you can undertake using this remarkable technology.
Why Choose Raspberry Pi 4 Camera? Raspberry pi 4 camera is the latest iteration of the Raspberry Pi series, offering improved performance and enhanced features. It comes equipped with a Broadcom BCM2711 quad-core Cortex-A72 processor, clocked at 1.5GHz, which ensures smooth multitasking and faster execution of complex tasks. The availability of up to 8GB of RAM allows for efficient handling of data-intensive applications. With its support for dual-band Wi-Fi and Bluetooth 5.0, Raspberry Pi 4 provides seamless connectivity options for your projects.
Exploring the Camera Capabilities: One of the most exciting features of Raspberry Pi 4 is its compatibility with a dedicated camera module. The Raspberry Pi Camera Module v2 is a high-quality camera that can be easily connected to the board via the camera interface. The camera module offers an 8-megapixel sensor and supports video resolutions up to 1080p, enabling you to capture stunning photos and videos. Its compact size and versatility make it perfect for various applications, including surveillance systems, time-lapse photography, and even computer vision projects.
Where to Buy Raspberry Pi 4 Online: When it comes to purchasing Raspberry Pi 4 and its accessories online, there are several reputable platforms to consider. Some popular options include:
Online Retailers (e.g., Amazon, Robomart, SparkFun) Established Raspberry pi buy online platforms like Amazon, Robomart, and SparkFun also stock Raspberry Pi 4 boards, camera modules, and kits. These retailers often provide customer reviews and ratings, giving you insights into the products before making a purchase.
Specialized Electronics Retailers Various specialized electronics retailers cater specifically to the Raspberry Pi community. These retailers often have a wide range of Raspberry Pi products, including kits that include the camera module.
Exciting Raspberry Pi 4 Projects: Once you have your Raspberry Pi 4 and camera kit, the possibilities for projects are virtually endless. Here are a few ideas to get you started:
Home Surveillance System: Set up a motion-activated camera system to monitor your home remotely and receive alerts on your smartphone.
Wildlife Monitoring: Create a wildlife camera trap that captures photos or videos of animals in their natural habitats.
Time-Lapse Photography: Capture the beauty of nature or the progress of a construction project by creating stunning time-lapse videos.
Facial Recognition: Develop a facial recognition system using the camera module and explore applications in security or access control.
Virtual Assistant: Transform your Raspberry Pi 4 into a voice-controlled assistant by integrating a microphone and speaker.
Conclusion: Raspberry Pi 4, along with its camera module, opens up a world of possibilities for hobbyists, educators, and professionals alike. Whether you're interested in building a smart home system or exploring computer vision applications, Raspberry Pi 4 provides the necessary power and flexibility. With numerous online platforms available to purchase Raspberry Pi 4 and its accessories,
4 notes
·
View notes
Text
youtube
8MP IMX219 MIPI Camera Module
The IMX219 MIPI camera module is an 8MP CMOS sensor that supports the MIPI CSI-2 interface and is commonly used in Raspberry Pi and Jetson Nano. It uses a rolling shutter, has a focal length of 2.85mm, an aperture of 2.0, a field of view of 78°, supports 720p@60fps, 1080p@30fps, and is suitable for robotics and computer vision. GUANGZHOU SINCERE INFORMATION TECHNOLOGY LTD. Attn.: Ms. Annie Skype/E-mail: [email protected] M.B/Whatsapp:+8617665309551 Sincere Eco-Industrial Park, GuanNanYong Industrial Zone, GZ
0 notes
Text
The high-quality, high-end, auto-focus, 8 mega pixel camera module with Omnivision OV8865 image sensor, it is widely used for many applications, such as smartphones, tablets, PC multimedia, embedded, robotics, drones, medical equipment, artificial intelligence, etc.
0 notes
Text
Why India’s Drone Industry Needs Periplex: The Hardware Tool Drones Didn’t Know They Needed
As drones fly deeper into critical roles — from agricultural intelligence to autonomous mapping, from disaster response to military ops — the hardware stack that powers them is undergoing a silent revolution.
At the center of that transformation is Periplex — a breakthrough tool from Vicharak’s Vaaman platform that redefines how drone builders can interface with the real world.

What is Periplex?
Periplex is a hardware-generation engine. It converts JSON descriptions like this:{ "uart": [ { "id": 0, "TX": "GPIOT_RXP28", "RX": "GPIOT_RXN28" } ], "i2c": [ { "id": 3, "SCL": "GPIOT_RXP27", "SDA": "GPIOT_RXP24" }, { "id": 4, "SCL": "GPIOL_63", "SDA": "GPIOT_RXN24" } ], "gpio": [], "pwm": [], "ws": [], "spi": [], "onewire": [], "can": [], "i2s": [] }
…into live hardware interfaces, directly embedded into Vaaman’s FPGA fabric. It auto-generates the FPGA logic, maps it to kernel-level drivers, and exposes them to Linux.
Think of it as the “React.js of peripherals” — make a change, and the hardware updates.
Real Drone Applications That Truly Need Periplex
Let’s break this down with actual field-grade drone use cases where traditional microcontrollers choke, and Periplex thrives.
1. Multi-Peripheral High-Speed Data Collection for Precision Agriculture
Scenario: A drone is scanning fields for crop health with:
2 multispectral cameras (I2C/SPI)
GPS + RTK module (2x UART)
Wind sensor (I2C)
Sprayer flow monitor (PWM feedback loop)
ESCs for 8 motors (PWM)
1 CAN-based fertilizer module
The Periplex Edge: Microcontrollers would require multiple chips or muxing tricks, causing delays and bottlenecks. With Periplex:
You just declare all interfaces in a JSON file.
It builds the required logic and exposes /dev/pwm0, /dev/can0, etc.
Zero code, zero hassle, zero hardware redesign.
2. Swarm Communication and Custom Protocol Stacks
Scenario: Swarm drones communicate over:
RF LoRa (custom SPI/UART)
UWB mesh (proprietary protocol)
Redundant backup over CAN
Periplex lets you:
Create hybrid protocol stacks
Embed real-time hardware timers, parity logic, and custom UART framing — none of which are feasible in most MCUs
Replacing Microcontrollers, Not Just Augmenting Them
| Feature | Microcontroller | Periplex on Vaaman | |---------------------------|----------------------------|------------------------------------| | Number of peripherals | Limited (4–6) | Virtually unlimited (30+ possible) | | Reconfiguration time | Flash + reboot | Real-time, dynamic reload | | Timing precision | Software-timer limited | FPGA-grade nanosecond-level timing | | AI compatibility | Not feasible | Integrated (Gati Engine) | | Sensor fusion performance | Bottlenecked | Parallel FPGA pipelines |
Developers Love JSON, Not Register Maps
No more:
Scouring 400-page datasheets
Bitmasking registers for I2C configs
Writing interrupt handlers from scratch
Just declare what you need. Let Periplex do the work. Peripherals become software-defined, but hardware-implemented.
Built in India, for India’s Drone Revolution
Vaaman + Periplex isn’t just about tech. It’s about self-reliance.
India’s defence, agriculture, and logistics sectors need secure, reconfigurable, audit-friendly hardware — not black-box SoCs from questionable supply chains.
Periplex is the hardware engine for Atmanirbhar Bharat in drones.
TL;DR
Periplex lets drones adapt hardware to the mission — instantly.
It replaces tangled microcontroller logic with clean, structured JSON.
It unlocks use cases microcontrollers can’t touch: AI at the edge, dynamic reconfiguration, secure protocol stacks, and more.
And it’s built into Vaaman, India’s first reconfigurable edge computer.
Ready to Get Started?
Explore Vaaman on Crowd Supply Reach out for Periplex SDK access: [email protected]
Raspberry Pi
Drones
Drones Technology
Jetson Orin Nano
Technology
0 notes
Text
snap snap, here's a camera module picowbell
we've been doing a ton of projects with OV5640-and-friends camera modules. these devices have 8-pin data ports plus pixel clock, hsync and vsync. the data can be raw 565 color, or JPEG data at 1080p! either way, you need a device with lots of RAM and the ability to quickly grab the buffer off the module. the RP2040 will do a fine job, but if you want to work with these modules they require a LOT of wiring. (https://learn.adafruit.com/capturing-camera-images-with-circuitpython/raspberry-pi-pico-wiring)
to make it easier, here's a design for a 'cowbell that will work with the Pico or PicoW to add a camera module, Stemma QT I2C port, MicroSD slot for storing images, and a right angle 'shutter' button. there's not enough room for a display on this slim board but we left pins 20 and 21 available for a TFT CS and DC pin for expansion capabilities.
#raspberry pi#raspberrypiprojects#camera#ov5640#rp2040#adafruit#electronics#opensource#manufacturing#opensourcehardware
4 notes
·
View notes
Text
Elmalo, let's commit to that direction. We'll start with a robust Sensor Fusion Layer Prototype that forms the nervous system of Iron Spine, enabling tangible, live data connectivity from the field into the AI's processing core. Below is a detailed technical blueprint that outlines the approach, components, and future integrability with your Empathic AI Core.
1. Hardware Selection
Edge Devices:
Primary Platform: NVIDIA Jetson AGX Xavier or Nano for on-site processing. Their GPU acceleration is perfect for real-time preprocessing and running early fusion algorithms.
Supplementary Controllers: Raspberry Pi Compute Modules or Arduino-based microcontrollers to gather data from specific sensors when cost or miniaturization is critical.
Sensor Modalities:
Environmental Sensors: Radiation detectors, pressure sensors, temperature/humidity sensors—critical for extreme environments (space, deep sea, underground).
Motion & Optical Sensors: Insect-inspired motion sensors, high-resolution cameras, and inertial measurement units (IMUs) to capture detailed movement and orientation.
Acoustic & RF Sensors: Microphones, sonar, and RF sensors for detecting vibrational, audio, or electromagnetic signals.
2. Software Stack and Data Flow Pipeline
Data Ingestion:
Frameworks: Utilize Apache Kafka or Apache NiFi to build a robust, scalable data pipeline that can handle streaming sensor data in real time.
Protocol: MQTT or LoRaWAN can serve as the communication backbone in environments where connectivity is intermittent or bandwidth-constrained.
Data Preprocessing & Filtering:
Edge Analytics: Develop tailored algorithms that run on your edge devices—leveraging NVIDIA’s TensorRT for accelerated inference—to filter raw inputs and perform preliminary sensor fusion.
Fusion Algorithms: Employ Kalman or Particle Filters to synthesize multiple sensor streams into actionable readings.
Data Abstraction Layer:
API Endpoints: Create modular interfaces that transform fused sensor data into abstracted, standardized feeds for higher-level consumption by the AI core later.
Middleware: Consider microservices that handle data routing, error correction, and redundancy mechanisms to ensure data integrity under harsh conditions.
3. Infrastructure Deployment Map
4. Future Hooks for Empathic AI Core Integration
API-Driven Design: The sensor fusion module will produce standardized, real-time data feeds. These endpoints will act as the bridge to plug in your Empathic AI Core whenever you’re ready to evolve the “soul” of Iron Spine.
Modular Data Abstraction: Build abstraction layers that allow easy mapping of raw sensor data into higher-level representations—ideal for feeding into predictive, decision-making models later.
Feedback Mechanisms: Implement logging and event-based triggers from the sensor fusion system to continuously improve both hardware and AI components based on real-world performance and environmental nuance.
5. Roadmap and Next Steps
Design & Prototype:
Define the hardware specifications for edge devices and sensor modules.
Develop a small-scale sensor hub integrating a few key sensor types (e.g., motion + environmental).
Data Pipeline Setup:
Set up your data ingestion framework (e.g., Apache Kafka cluster).
Prototype and evaluate basic preprocessing and fusion algorithms on your chosen edge device.
Field Testing:
Deploy the prototype in a controlled environment similar to your target extremes (e.g., a pressure chamber, simulated low-gravity environment).
Refine data accuracy and real-time performance based on initial feedback.
Integration Preparation:
Build standardized API interfaces for future connection with the Empathic AI Core.
Document system architecture to ensure a smooth handoff between the hardware-first and AI-core teams.
Elmalo, this blueprint establishes a tangible, modular system that grounds Iron Spine in reality. It not only demonstrates your vision but also builds the foundational “nervous system” that your emergent, empathic AI will later use to perceive and interact with its environment.
Does this detailed roadmap align with your vision? Would you like to dive further into any individual section—perhaps starting with hardware specifications, software configuration, or the integration strategy for the future AI core?
0 notes
Text
Top Skills You’ll Learn in a Robotics and Artificial Intelligence Course
In a world that’s rapidly embracing automation, machine intelligence, and smart systems, careers in robotics and artificial intelligence (AI) are more promising than ever. From healthcare robots to self-driving cars and intelligent customer support systems, AI and robotics are becoming integral to modern life.
If you're considering robotics and artificial intelligence courses, you're not just choosing a degree — you're preparing to be part of a technological revolution. But what exactly will you learn in such a program? Let’s explore the most important skills these courses help you develop, and how they prepare you for the future of innovation.
Programming Fundamentals for AI and Robotics
Whether a robot arm on a manufacturing floor or a chatbot handling customer queries, everything begins with programming. Students learn core languages such as:
Python: Widely used in AI and machine learning applications.
C/C++: Essential for embedded systems and robotic control.
Java: Useful in software development and some machine learning frameworks.
Understanding data structures, control flow, and algorithms is foundational for writing efficient code for intelligent systems.
Machine Learning and Deep Learning Techniques
At the heart of AI lies machine learning — the ability for machines to learn from data. Students gain practical knowledge of:
Supervised and unsupervised learning
Neural networks and deep learning frameworks like TensorFlow and PyTorch
Natural Language Processing (NLP) for text and voice-based AI systems
These skills are critical for creating models that can analyze data, make predictions, and improve over time.
Robotics System Design and Control
In robotics, it’s all about building machines that sense, think, and act. You'll learn how to:
Design mechanical structures and integrate them with electronics
Work with sensors (like LIDAR, cameras, gyros) and actuators
Apply control systems theory to ensure precise movements and decisions
These concepts are essential in developing autonomous systems, from robotic arms to drones.
Embedded Systems and IoT Integration
Modern robots and smart devices often rely on embedded systems — mini-computers that perform dedicated functions. You'll learn to:
Program microcontrollers (like Arduino or Raspberry Pi)
Work with real-time operating systems
Connect devices using IoT protocols (like MQTT)
This hands-on knowledge is critical for building responsive and connected devices.
Computer Vision and Image Processing
Robots and AI systems need eyes — and that’s where computer vision comes in. This skill allows machines to:
Interpret visual data from cameras or sensors
Recognize objects, track movements, and detect patterns
Use tools like OpenCV to process and analyze images
Applications range from facial recognition to robotic navigation.
AI Ethics and Responsible Innovation
With great power comes great responsibility. As AI systems become more influential, engineers must understand:
Ethical implications of automation and decision-making
Bias in AI models
Data privacy and security concerns
Courses now include modules that prepare students to design responsible and inclusive technologies.
Soft Skills for Cross-Disciplinary Collaboration
It’s not all about tech. Robotics and AI projects often involve teamwork across domains. You’ll develop:
Communication and presentation skills
Project management techniques
Creative thinking and problem-solving abilities
These soft skills ensure that your innovative ideas are clearly conveyed and efficiently executed in real-world scenarios.
Real-World Projects and Internships
A good robotics and AI course doesn't end with classroom theory. Students gain experience through:
Capstone projects where they design, build, and deploy AI or robotic systems
Industry internships that provide exposure to real-world applications
Hackathons and competitions that encourage innovation under pressure
This kind of hands-on experience is crucial in standing out during placements and job interviews.
Choosing the Right Institution Matters
The quality of your learning experience depends heavily on where you study. The best robotics and artificial intelligence courses provide a mix of strong academic foundation, practical labs, and industry exposure.
At NITTE University, particularly through its NMAM Institute of Technology (NMAMIT), students receive a future-focused education that combines cutting-edge theory with real-world skills. With dedicated labs, advanced AI and robotics curriculum, and partnerships with industry leaders, NMAMIT prepares students not just for today’s tech world—but for the challenges of tomorrow.
1 note
·
View note
Text
DIY Smart Lock with Facial Recognition
Introduction
Welcome to our DIY project guide on building a Smart Lock with Facial Recognition! In this age of technological advancements, ensuring the security of our homes is more important than ever. This innovative project combines IoT and computer vision to create a smart lock that grants access based on facial recognition, providing enhanced security for your home. Let’s dive into how to build this project step by step!
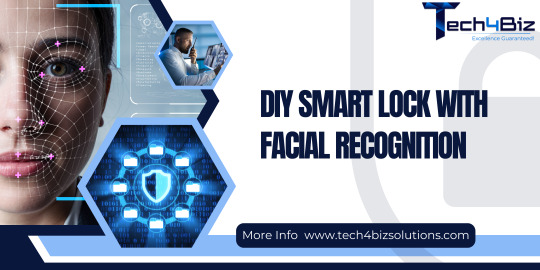
Why Build a Smart Lock?
Traditional locks can be cumbersome and easily compromised. A smart lock with facial recognition offers a high level of security by allowing only authorized users to enter. Plus, with remote access capabilities, you can monitor and control your door lock from anywhere, giving you peace of mind.
Benefits of a Smart Lock:
Enhanced Security: Only authorized faces can unlock the door.
Convenience: No need for physical keys or codes.
Remote Monitoring: Control access from your smartphone.
Real-Time Notifications: Get alerts when someone tries to access your door.
Key Components and Technologies
To build your smart lock, you will need the following components:
Raspberry Pi: The brain of your smart lock. A Raspberry Pi 3 or 4 is ideal.
Camera Module: For capturing facial images.
Servo Motor or Solenoid: To act as the locking mechanism.
OpenCV: A powerful computer vision library for facial recognition.
Cloudtopiaa Cloud Services: For remote access, data storage, and notifications.
Breadboard and Jumper Wires: For easy connections.
Additional Tools:
Power supply for the Raspberry Pi
A small project enclosure to house the components
Optional: a push button for manual locking/unlocking
Step-by-Step Guide
Step 1: Set Up Your Raspberry Pi
Install the Operating System: Download and install Raspberry Pi OS on your Raspberry Pi. You can use the Raspberry Pi Imager for an easy setup.
Connect the Camera Module: Attach the camera module to the Raspberry Pi. Ensure it’s enabled by running the following command in the terminal:
sudo raspi-config
2. Navigate to Interfacing Options and enable the camera.
Step 2: Install Required Libraries
Open the terminal on your Raspberry Pi and install the necessary librariessudo apt-get update sudo apt-get install python3-opencv
Step 3: Program Facial Recognition
Create a Python script to implement facial recognition using OpenCV. Here’s a basic example to get you started:import cv2
# Load the Haar Cascade for face detection face_cascade = cv2.CascadeClassifier(cv2.data.haarcascades + 'haarcascade_frontalface_default.xml')
# Initialize the camera camera = cv2.VideoCapture(0)
while True: # Capture frame-by-frame ret, frame = camera.read() gray = cv2.cvtColor(frame, cv2.COLOR_BGR2GRAY)
# Detect faces faces = face_cascade.detectMultiScale(gray, scaleFactor=1.1, minNeighbors=5) # Draw rectangles around detected faces for (x, y, w, h) in faces: cv2.rectangle(frame, (x, y), (x + w, y + h), (255, 0, 0), 2)
# Display the resulting frame cv2.imshow('Face Detection', frame)
if cv2.waitKey(1) & 0xFF == ord('q'): break
# Release the camera and close windows camera.release() cv2.destroyAllWindows()
Step 4: Control the Locking Mechanism
Integrate a servo motor or solenoid to act as your locking mechanism. Connect it to a GPIO pin on the Raspberry Pi and update your script to unlock the door when a recognized face is detected.import RPi.GPIO as GPIO
# Set up GPIO for servo motor LOCK_PIN = 17 # Choose an available GPIO pin GPIO.setmode(GPIO.BCM) GPIO.setup(LOCK_PIN, GPIO.OUT)
def unlock_door(): GPIO.output(LOCK_PIN, GPIO.HIGH) # Unlock time.sleep(5) # Keep unlocked for 5 seconds GPIO.output(LOCK_PIN, GPIO.LOW) # Lock again
Step 5: Implement Facial Recognition Logic
You’ll need to create a mechanism to recognize faces. Start by capturing and storing images of authorized users. Modify your script to compare live images with stored images.
Step 6: Cloud Integration with Cloudtopiaa
To enable remote access and notifications for your smart lock, we’ll set up Cloudtopiaa. Follow these steps:
Sign Up for Cloudtopiaa: Create an account on Cloudtopiaa and log in.
Create a New Project: In the Cloudtopiaa dashboard, create a new project for your smart lock application.
Set Up Database: Create a database to store authorized user data (e.g., facial images or user IDs) and logs of access attempts.
Develop API Endpoints:
Create an endpoint to send facial recognition data to the cloud for analysis.
Set up another endpoint to receive access notifications and alerts.
Implement HTTP Requests: In your Python script, use the requests library to communicate with Cloudtopiaa. Here’s an example of how to send data:
import requests
def send_to_cloud(face_data): url = "https://api.cloudtopiaa.com/your-endpoint" # Replace with your actual endpoint response = requests.post(url, json=face_data) return response.status_code
5. Remote Access Setup: Use Cloudtopiaa’s features to allow remote monitoring and control of your smart lock. You can implement webhooks or notifications to alert you whenever someone attempts to unlock the door.
Step 7: Final Assembly
Assemble all components in a project enclosure.
Mount the camera at eye level on your door.
Ensure the servo motor or solenoid is securely attached to the locking mechanism.
Conclusion-
Congratulations! You have successfully built a DIY Smart Lock with Facial Recognition. This project not only enhances your home security but also demonstrates your skills in computer vision, IoT security, and hardware-software integration.
Additional Resources
OpenCV Documentation
Raspberry Pi Documentation
Cloudtopiaa Documentation — For more details on using their cloud services.
#tech4bizsolutins #DIYSmartLock #FacialRecognition #HomeSecurity #SmartHome #TechDIY #InnovativeSecurity #FacialRecognitionLock #HomeAutomation #SmartTech #SecureHome #cloudtopiaa
0 notes
Video
youtube
12MP IMX577 USB Cameras Module
The Sony IMX577 is a 12.3 megapixel high-resolution (12MP) stacked CMOS USB image sensor camera module using Sony technology, which is known for its excellent image quality and performance. It can capture images at high speed using column-parallel A/D conversion circuits. The back-illuminated (BSI) pixel structure enables high sensitivity and low noise. The diagonal size is 7.857 mm (1/2.3 type), the output interface is UVC-compliant USB 3.0, plug-and-play, supports Linux, Android, Mac, Windows, Raspberry Pi, etc., the frame rate is up to 18 fps at full resolution, and has special features such as high dynamic range (HDR), Exmor RS sensor technology (for low-light performance) and rolling shutter mode. There are autofocus or fixed focus options. This module is widely used in outdoor photography, baby monitoring systems, advanced smart toys, medical equipment, industrial inspection, machine vision, Internet of Things, etc.
0 notes