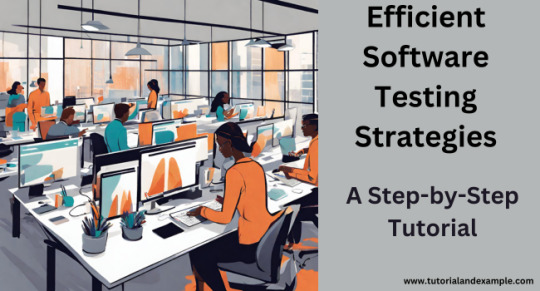
#Software Testing Tutorial
Explore tagged Tumblr posts
Visit Tumblr Blog
Explore Tumblr blogs with no restrictions, modern design and the best experience.
Last Seen Tumblr Blogs


Fun Fact
Tumblr has been banned in Indonesia for providing people with access to pornographic content.
Text
The Ultimate Software Testing Tutorial for Beginners: Step-by-Step Guide to Start Testing Today

Software testing is an essential step in ensuring that any application or system works flawlessly before it reaches users. If you’re new to the field, this beginner-friendly guide will help you understand the basics of software testing and how to get started.
What is Software Testing? Software testing involves verifying that a software application performs as expected and is free from bugs or errors. It ensures quality, improves performance, and enhances user satisfaction.
Types of Software Testing
Manual Testing: Testers manually check the functionality of the application. It doesn’t require coding skills but needs attention to detail.
Automation Testing: Test cases are executed using automation tools like Selenium or JUnit, making the process faster and more accurate.
Why is Software Testing Important?
Detect Errors Early: Identify and fix issues before deployment.
Save Costs: Fixing bugs after release can be expensive.
Ensure Quality: Deliver reliable and high-performing software.
Steps to Get Started
Learn basic software testing concepts and terminologies.
Understand different testing methods like functional, regression, and usability testing.
Practice with real-world scenarios to improve your skills.
Getting started with software testing doesn’t require prior experience in programming. With consistent learning and practice, anyone can build a strong foundation in this field.
For a more detailed guide, visit Software Testing Tutorial.
0 notes
Text

This tutorial is perfect for beginners who want to learn software testing. It covers basic concepts, types of testing, and practical examples, helping you understand how to test software effectively. Step-by-step guidance makes learning easy and fun.
0 notes
Text
AI Automated Testing Course with Venkatesh (Rahul Shetty) Join our AI Automated Testing Course with Venkatesh (Rahul Shetty) and learn how to test software using smart AI tools. This easy-to-follow course helps you save time, find bugs faster, and grow your skills for future tech jobs. To know more about us visit https://rahulshettyacademy.com/
#ai generator tester#ai software testing#ai automated testing#ai in testing software#playwright automation javascript#playwright javascript tutorial#playwright python tutorial#scrapy playwright tutorial#api testing using postman#online postman api testing#postman automation api testing#postman automated testing#postman performance testing#postman tutorial for api testing#free api for postman testing#api testing postman tutorial#postman tutorial for beginners#postman api performance testing#automate api testing in postman#java automation testing#automation testing selenium with java#automation testing java selenium#java selenium automation testing#python selenium automation#selenium with python automation testing#selenium testing with python#automation with selenium python#selenium automation with python#python and selenium tutorial#cypress automation training
0 notes
Text
Online Marathi Typing Lessons: Your Path to Proficiency
Introduction Starting Sentence: "Online Marathi typing lessons offer a flexible and efficient way to master the Marathi language in the digital age."
The Benefits of Learning Marathi Typing Online Starting Sentence: "Exploring the advantages of online learning can help you understand why this method is so effective for mastering Marathi typing."
Flexibility and Convenience Starting Sentence: "Online lessons provide the flexibility to learn at your own pace and convenience, fitting into any schedule."
Access to a Wide Range of Resources Starting Sentence: "The internet offers a plethora of resources, from interactive lessons to practice exercises and typing games."
Getting Started with Online Marathi Typing Lessons Starting Sentence: "Starting your journey with online Marathi typing lessons requires the right setup and mindset."
Choosing the Right Platform Starting Sentence: "Selecting a reliable and comprehensive online typing platform is the first step to effective learning."
Setting Up Your Learning Environment Starting Sentence: "Create a distraction-free environment to focus on your lessons and practice sessions."
Basic Lessons in Marathi Typing Starting Sentence: "Begin your online Marathi typing journey with fundamental lessons that build a strong foundation."
Introduction to the Marathi Alphabet Starting Sentence: "Learn the basics of the Marathi alphabet and practice typing each character to build familiarity."
Typing Simple Words and Sentences Starting Sentence: "Start typing simple words and sentences to develop your confidence and initial speed."
Intermediate Marathi Typing Lessons Starting Sentence: "Once you’ve mastered the basics, move on to intermediate lessons to enhance your typing skills."
Typing Complex Words and Phrases Starting Sentence: "Practice typing more complex words and phrases to improve your accuracy and fluency."
Using Online Typing Tools and Resources Starting Sentence: "Utilize online tools and resources that offer practice exercises, typing tests, and interactive lessons."
Advanced Marathi Typing Techniques Starting Sentence: "Advance your skills with techniques designed to increase your typing speed and precision."
Touch Typing Practice Starting Sentence: "Develop touch typing skills to type efficiently without looking at the keyboard."
Utilizing Typing Shortcuts and Advanced Tools Starting Sentence: "Learn and use typing shortcuts and advanced tools to streamline your typing process."
Incorporating Daily Practice Starting Sentence: "Consistent practice is key to mastering Marathi typing and retaining your skills."
Daily Typing Exercises Starting Sentence: "Incorporate daily typing exercises into your routine to continuously improve your skills."
Participating in Online Typing Challenges Starting Sentence: "Engage in online typing challenges and competitions to test your skills and track your progress."
Overcoming Common Challenges in Marathi Typing Starting Sentence: "Recognizing and addressing common challenges can help you overcome obstacles in your learning journey."
Dealing with Typing Errors Starting Sentence: "Learn strategies to minimize and correct typing errors as you practice."
Maintaining Motivation and Consistency Starting Sentence: "Find ways to stay motivated and consistent in your practice to achieve steady progress."
Applying Your Marathi Typing Skills Starting Sentence: "Apply your Marathi typing skills in real-world scenarios to fully realize their benefits."
Professional Applications Starting Sentence: "Use your typing skills for professional tasks such as writing reports, emails, and data entry."
Personal and Creative Projects Starting Sentence: "Incorporate your skills into personal projects like blogging, social media, and creative writing."
Conclusion Starting Sentence: "By following online Marathi typing lessons and practicing consistently, you can achieve proficiency and open up new opportunities for communication and expression."
#Marathi typing lessons#Learn Marathi typing#Marathi typing course#Marathi typing tutorial#Online Marathi typing lessons#Marathi typing practice#Marathi typing classes#Marathi typing speed test#Marathi typing exercises#Marathi typing software#Free Marathi typing lessons
0 notes
Text
#software development engineer in test#sdet#sdet training#software development engineer#software development#testing#testing tutorial#tutorial academy
0 notes
Text
Ok. I am going to let you in on a secret about how to make programming projects.
You know how people write really good code? Easy to read, easy to work with, easy to understand and very efficient?
By refactoring.
The idea that you write glorious nice code straight is an insane myth that comes from thinking tutorials is how people actually code.
That is because programming is just writing. Nothing more. Same as all other writing.
The hobbit is ~95000 words.
Do you think Tolkien created the Hobbit by writing 95 thousand words?
Of course not! He wrote many many times that. Storylines that ended up scrapped or integrated in other ways, sections that got rewritten, dialog written again and again as the rest of the story happened. Background details filled in after the story had settled down
Writing. Is. Rewriting.
Coding. Is. Refactoring.
Step 1 in programming is proof of concept. Start with the most dangerous part of your project ( danger = how little experience you have with it * how critical it is for your project to work )
Get it to do... anything.
Make proof of concept code for all the most dangerous parts of the project. Ideally there is only 1 of these. If there is more than 3 then your project is too big. ( yes, this means your projects needs to be TINY )
Then write and refactor code to get a minimum viable pruduct. It should do JUUUUUST the most important critical things.
Now you have a proper codebase. Now everytime you need to expand or fix things, also refactor the code you touch in order to do this. Make it a little bit nicer and better. Write unit tests for it. The works.
After a while, the code that works perfectly and never needs to be touched is hard to read. Which does not matter because you will never read it
And the code that you need to change often is the nicest code in the codebase.
TRYING TO GUESS AHEAD OF TIME WHAT PARTS OF THE CODE WILL BE CHANGED OFTEN IS A FOOLS ERRAND.
( also, use git. Dear god use git and commit no more than 10 lines at once and write telling descriptions for each. GIT shows WHAT you did. YOU write WHY you did it )
Is this how to make your hobby project?
Yes. And also how all good software everywhere is made.
#codeblr#software#developer#software development#software developer#programmer#programming#coding#softeware
294 notes
·
View notes
Text

Fully Underwater Lot Tutorial
@creida-sims @kitkat99
UPDATE January 2025
There is now a much, much easier way to do this. This version of SimPE now includes a tool to change terrain geometry. To edit the terrain in SimPE, go to Tools/Neighborhood/Neighborhood Browser and load your neighborhood. In the Resource Tree, select Neighborhood Terrain Geometry (NHTG) and select the only resource in the Resource List. In Plugin View, click Terrain Editor. It's very intuitive, but basically, you can edit the terrain under a lot to make it be underwater. You can also delete the road with the Road Editor.
I'll keep the old tutorial for archival purposes, but unless you can't or don't want to install this version of SimPE, it is pretty much obsolete.


Some warnings and disclaimers
1. This is not a beginner tutorial. I have tried to explain with as much detail as I can, but still, if you just started playing The Sims 2 I recommend trying out other building tutorials first.
2. I have tested it but there's always a possibility that some new problems will come up. Follow at your own risk. Backup your neighborhoods before trying this. Test it first in a new empty neighborhood.
3. These lots are roadless, so they require specific gameplay conditions to avoid breaking immersion (pun intended).
4. They will behave like normal lots in the sense that sims can walk around and do anything as if they were on land. There's one big problem to consider: when sims go fully underwater, their hair and some parts of their clothing might disappear visually.
So this is more useful for structures that sit above the water, shallow water that doesn't reach a sim's head or, with some modifications, small islands surrounded by water. So unless you want bald mermaids, I don't recommend this for sims that live underwater.
5. If you use Voeille's hood water mod, reflections will look glitchy in lot view, because this is technically not a beach lot. The only solution I found is enabling "Lot view ocean reflections" in RPC Launcher. Otherwise you'll have to deal with glitchy reflections.
6. Before following this tutorial, make sure you know the basics of creating, editing, importing and exporting SimCity 4 terrains. Written tutorial by SimEchoes here, video tutorial by loonaplum here.
Software and mods used
The Sims 2 FreeTime expansion pack (required for the modifyNeighborhoodTerrain cheat)
SimCity 4 (required) Hood Replace by Mootilda (required)
Lot Adjuster by Mootilda (required)
Portal revealer by Inge Jones (required)
Voeille's pond and sea water overhaul and RPC Launcher (optional, see disclaimers)
The Sims 2 Apartment Life and Bon Voyage expansion packs (optional, for "walk to lot/work/school" options)
Cheat codes used
moveObjects on/off
modifyNeighborhoodTerrain on/off
1. Creating/editing a terrain in SimCity 4
1.1. You can edit an already existing terrain or create your own from scratch. In both cases, you need to keep two things in mind: If you want the usable area of the lot to be underwater, such as making houses for mermaids or a coral reef, make sure the water is shallow. No more than a few short clicks with the terraforming tools in SimCity 4. This is because The Sims 2 live mode camera won't go underwater, so making the water too deep might make it uncomfortable to build or play the lot.
If you goal is to build a structure mostly above water, like a ship or an oil rig, you can get away with making the water a bit deeper, but not too much. I've noticed that sometimes the lot terrain tools stop working correctly if there a hill that's too steep.
1.2. Once you've created the terrain, you will need to add a small island on the area where your lot will be. I know it seems contradictory, but trust me, it will make sense. Create and name your city. Use the terraforming tools in city mode to make a tiny island of about 6x2 squares.

1.3. On the island, use the road tool to place a straight road that takes up 4 squares. Then, using the street tool (the last option), place two short streets at each end of the road.
Streets will disappear in TS2, only roads translate to roads in ts2, so why do we place them? Well, placing a street at the end of a road will get rid of the rounded end bit in TS2, which can't be used to place lots. This will be important for the placement of the lot and to make sure the edges of the lot are underwater. If this doesn't make sense yet, don't worry, it might make sense later.
1.4. Save the terrain. Don't exit SimCity 4. Copy your new/edited sc4 terrain from your SimCity 4 folder to your SC4Terrains folder in your Sims 2 documents directory. It is usually
"C:\Users\YOURUSERNAME\Documents\EA Games\The Sims 2 Ultimate Collection\SC4Terrains"

1.5. Back in SimCity 4, we're going to make a second version of this terrain. Remove the roads and streets you made before, with the bulldozer tool. With the level terrain tool in Mayor mode, carefully remove the island, so it's on the same level as the bottom of the ocean/lake. Don't change anything else. Save, exit and copy this second terrain to your Sims 2 SC4Terrains folder. Make sure you rename the file to something different from the first one, like adding "no roads" to the filename. You should have two terrains by the end of this step. One with the small island and one without it.
2. Editing the terrain in The Sims 2
2.1. Open The Sims 2 and create a new neighborhood using your new terrain. Something to keep in mind: if you want the terrain to be a subhood of another neighborhood, make it a subhood from the start. You will not be able to move the lot once it's finished, since it will be roadless. I don't recommend decorating the neighborhood for now. Leave it empty until the end of this tutorial.

2.2. Place the smallest empty lot (3x1) on the island.
2.3. In neighborhood view, open the cheat console by pressing Control + Shift + C, and type
modifyNeighborhoodTerrain on
To quote The Sims Wiki:
"This allows you to alter the neighborhood terrain by raising or lowering it. To use this cheat, be in the neighborhood view, then enter the cheat "modifyNeighborhoodTerrain on" (without the quotation marks), and click over the area you would like to change. To select a larger area, click and drag the cursor to highlight the desired area. Press [ or ] to raise or lower the terrain by one click, press \ to level the terrain, and press P to flatten terrain. When you're finished, type “modifyNeighborhoodTerrain off” in the cheat box (again, without the quotations)."
If you use an English keyboard, these instructions will probably be enough for you. If you don't, I recommend first testing the cheat, because the keys for using this cheat are different in other languages. For example, in my spanish keyboard, the question marks are used to raise and lower the terrain and the º/ª key flattens it.
Another aside: When you select an area using this cheat, a green overlay is supposed to show up. Some lighting mods make this green overlay invisible, like the one I use. If that's your case, you kind of have to eyeball it. Remember that one neighborhood grid square in TS2 is equivalent to 10 lot tiles, or the width of a road. I recommend getting a mod that allows you to tilt the neighborhood camera on the Y axis, which will allow you to have a bird eye's view of the terrain.

2.4. Flatten the terrain around the lot so it's at water level. This cheat won't allow you to edit the terrain inside the lot, so you have to edit the terrain around the lot. Make sure there is plenty of flat underwater space around the island. You should end up with something like the picture above. The water will have some holes, but don't worry, those get filled with water the next time you load the neighborhood.
2.5. Enter the lot and place any object on it. Save the lot and exit the game. This is so LotAdjuster recognizes the lot in the next step.
3. Expanding the lot with Lot Adjuster
3.1. Open Lot Adjuster and select your neighborhood and lot.

3.2. Click "Advanced…". Check "Over the road (only enlarge front yard)". Use the arrows to add 20 tiles to the front yard. Click "Finish" and "Restart".

3.3. Select the same lot again. This time, check "Add and remove roads". Uncheck the road checkbox for the front yard. Add 20 Tiles to the back yard, 20 tiles to the left side and 10 tiles to the right side. Check "Place portals manually". You should end up with a 60x60 lot, which is the biggest size. You might want a smaller lot, but unless you know what you are doing, I recommend starting with this size. You can shrink it later. The goal of making the lot this big is making sure the edges of the lot are underwater. Click "Finish" and exit.
4. Moving portals and flattening the lot

4.1. Make sure you have the portal revealer by Inge installed in your Downloads folder before the next step. Open your game and load your neighborhood. The lot should look something like the picture above.

4.2. Load the lot. Delete the object you placed before. Place the portal revealer on the lot near the mailbox/phone booth and trashcan. It looks like a yellow flamingo and you can find it in Build Mode/Doors and Windows/Multi-Story Windows catalogue. You will notice that when you select the object from the catalogue, some yellow cubes appear on the lot, and when you place the object, the cubes disappear. After placing the portal revealer, pick it up and place it again. This will make the yellow boxes visible again.
So what are those yellow boxes? They are portals. They determine where sims and cars arrive and leave the lot. The ones on both ends of the sidewalk are called pedestrian portals, and in the street, one lane has portals for service vehicles (maids, gardeners, etc.) and the opposite is for owned cars and carpools. You can see the portal's names if you pick them up. Make sure not to delete any of them.
Now, since this is going to be a roadless lot, ideally there won't be vehicles in it. This means that the lot would ideally be accessed through walking only. In community lots, this would not be an issue if you have the Bon Voyage expansion pack, which allows sims to walk to lots.
In residential lots, you might run into some problems. Service NPCs always arrive on vehicles, and unless your sim owns a vehicle, the carpool and school bus will always come to pick sims up for work/school. It might break your immersion to have a vehicle show up underwater or on a ship. There are many options to avoid this: having sims work on an owned business instead of a regular job, not having kids on the lot, making the kids homeschooled, avoiding calling service NPCs… it depends on how you want to play the lot. For example, my icebreaker is a residential lot, only adults live there, some sims live in it temporarily and none of them have a regular job.

All of this is relevant because we're going to move the portals. Where you move the portals depends on you. Think about how you're going to use the lot. In my icebreaker, I placed the car portals (which won't be used) underwater, on a corner of the lot. I placed the pedestrian portals on the ship, to pretend that the walkbys are part of the crew or passengers. But for now, just move the portals, mailbox/phone booth and trashcan to a corner of the lot. To be able to pick up the mailbox/phone booth and trashcan, use the cheat moveObjects on. Delete the street and sidewalk tiles using the floor tool (Control + click and hold left mouse button + drag).


4.3. Flatten the island with the level terrain tool. Save the lot. Almost done! Don't mind the hole in the water, this will be fixed. You will notice that in neighborhood view, the island is still there. This is because the neighborhood terrain under the lot hasn't updated. I don't know why this happens, but it does. Normally, moving the lot would fix it, but we can't move this lot using the game's tools. Instead, we are going to fix the terrain with Hood Replace. Don't exit the game yet.
5. Updating the terrain with Hood Replace
5.1. Create a new neighborhood using the new roadless terrain. Make sure it has the same type of terrain (lush, desert, etc.) as the first one. Again, name it "NO ROADS" or something similar. Exit the game.

5.2. Open HoodReplace. On the left column you will select your "NO ROADS" neighborhood. In the right column, select the neighborhood that has the underwater lot. Check these settings: Replace terrain, replace road, and versioned backups. Leave everything else unchecked. Click Copy.

5.3. Open The Sims 2 and load the neighborhood to check if the changes worked. That concludes the tutorial. At this point you can shrink the lot if you don't want it to be so big. Remember to move the portals to their final placement when you're done building the lot. Also keep in mind pedestrians (walkbys) always walk by the mailbox, so keep the mailbox accessible for sims.
If you're going to have multiple underwater lots, I recommend making them first, and decorating the neighborhood after. Doing this in an already existing neighborhood might be more difficult, mainly because, if you made any changes to the terrain using the modifyNeighborhoodTerrain cheat in the past, they might get reset when using Hood Replace.
151 notes
·
View notes
Text
Here’s an short unsuccessful test I did today; attempting to create an animation in a program I quite literally have ZERO experience with using ahaha :’)
Storytime/long ramble (unimportant):
I wanted to be like the “cool kids” and shift out of my comfort zone—no more relying solely on FlipaClip! Gotta branch out to a more effective program (ideally one that has an interface resembling animation software used directly in industry work)! I’ve seen people make good use of AlightMotion and figured it’s worth a shot!….that goal quickly fell apart <<
There’s definitely a wide variety of tools and especially emphasis on built-in editing features. I was intimidated by the sheer amount of mechanics going on at first, but gradually you get used to navigating stuff (even if some stuff I’m still trying to figure out the purpose of lmao). The only issue is that (to me at least) AlightMotion seems to handle tweening better then frame-by-frame animation. Which immediately lands me in a predicament of sorts since uh…can’t say I’m good at tweening. That would require me to actually finish coloring characters/have the ability to polish things using clean linework :P
Tweening (from my perspective) is about making something visually appealing by rigging separated assets of characters (like you would for puppets) rather then the whole. Or alternatively, some people tween by slightly moving the same drawn lines around on a singular drawing…so TLDR the exact opposite of frame-by-frame. I’m not an illustrator, I’m a storyteller. I can only manage rough line work with uncolored motions. Usually the smooth flow of frame-by saves me, else it would all look rather unfinished. I know where my strengths and my weaknesses lie; I’ve given AlightMotion a shot, but unfortunately it’s not gonna be solving the FlipaClip replacement problem 🥲
Was still beneficial challenging myself to play around with an unfamiliar environment! It’s a step in the right direction to encourage myself to try different things/figure out what works or doesn’t. If my patience didn’t wear thin, I’m sure I could’ve attempted authentic tweening instead of trying to push the program to work with frame-by-frame (it kept crashing, lagging, and pixelating while I tried to force it to comply with my methods. Think it’s safe to assume it doesn’t like me fighting against tweening lol). Who knows! Might return to AlightMotion in the future or might not. Depends on how adventurous or up for a challenge I’m feeling :3


Also goes without saying that online video tutorials would have probably helped—I’m just stubborn & prefer taking hands on approach sometimes. Learning any new program is gonna be overwhelming and scary at first, it is normal! I don’t think anything bad about AlightMotion. Just not for me at the moment. Was fun to play with while it lasted
#hplonesome art#mr puzzles and leggy animation#mr. puzzles and leggy#leggy and mr. puzzles#smg4 leggy#smg4 mr. puzzles#mr puzzles smg4#smg4 mr puzzles#leggy smg4#update#(not feeling up for other tags since I kinda deviated too much in my rambling :P)
68 notes
·
View notes
Text


Neural Filters Tutorial for Gifmakers by @antoniosvivaldi
Hi everyone! In light of my blog’s 10th birthday, I’m delighted to reveal my highly anticipated gifmaking tutorial using Neural Filters - a very powerful collection of filters that really broadened my scope in gifmaking over the past 12 months.
Before I get into this tutorial, I want to thank @laurabenanti, @maines , @cobbbvanth, and @cal-kestis for their unconditional support over the course of my journey of investigating the Neural Filters & their valuable inputs on the rendering performance!
In this tutorial, I will outline what the Photoshop Neural Filters do and how I use them in my workflow - multiple examples will be provided for better clarity. Finally, I will talk about some known performance issues with the filters & some feasible workarounds.
Tutorial Structure:
Meet the Neural Filters: What they are and what they do
Why I use Neural Filters? How I use Neural Filters in my giffing workflow
Getting started: The giffing workflow in a nutshell and installing the Neural Filters
Applying Neural Filters onto your gif: Making use of the Neural Filters settings; with multiple examples
Testing your system: recommended if you’re using Neural Filters for the first time
Rendering performance: Common Neural Filters performance issues & workarounds
For quick reference, here are the examples that I will show in this tutorial:
Example 1: Image Enhancement | improving the image quality of gifs prepared from highly compressed video files
Example 2: Facial Enhancement | enhancing an individual's facial features
Example 3: Colour Manipulation | colourising B&W gifs for a colourful gifset
Example 4: Artistic effects | transforming landscapes & adding artistic effects onto your gifs
Example 5: Putting it all together | my usual giffing workflow using Neural Filters
What you need & need to know:
Software: Photoshop 2021 or later (recommended: 2023 or later)*
Hardware: 8GB of RAM; having a supported GPU is highly recommended*
Difficulty: Advanced (requires a lot of patience); knowledge in gifmaking and using video timeline assumed
Key concepts: Smart Layer / Smart Filters
Benchmarking your system: Neural Filters test files**
Supplementary materials: Tutorial Resources / Detailed findings on rendering gifs with Neural Filters + known issues***
*I primarily gif on an M2 Max MacBook Pro that's running Photoshop 2024, but I also have experiences gifmaking on few other Mac models from 2012 ~ 2023.
**Using Neural Filters can be resource intensive, so it’s helpful to run the test files yourself. I’ll outline some known performance issues with Neural Filters and workarounds later in the tutorial.
***This supplementary page contains additional Neural Filters benchmark tests and instructions, as well as more information on the rendering performance (for Apple Silicon-based devices) when subject to heavy Neural Filters gifmaking workflows
Tutorial under the cut. Like / Reblog this post if you find this tutorial helpful. Linking this post as an inspo link will also be greatly appreciated!
1. Meet the Neural Filters!
Neural Filters are powered by Adobe's machine learning engine known as Adobe Sensei. It is a non-destructive method to help streamline workflows that would've been difficult and/or tedious to do manually.
Here are the Neural Filters available in Photoshop 2024:


Skin Smoothing: Removes blemishes on the skin
Smart Portrait: This a cloud-based filter that allows you to change the mood, facial age, hair, etc using the sliders+
Makeup Transfer: Applies the makeup (from a reference image) to the eyes & mouth area of your image
Landscape Mixer: Transforms the landscape of your image (e.g. seasons & time of the day, etc), based on the landscape features of a reference image
Style Transfer: Applies artistic styles e.g. texturings (from a reference image) onto your image
Harmonisation: Applies the colour balance of your image based on the lighting of the background image+
Colour Transfer: Applies the colour scheme (of a reference image) onto your image
Colourise: Adds colours onto a B&W image
Super Zoom: Zoom / crop an image without losing resolution+
Depth Blur: Blurs the background of the image
JPEG Artefacts Removal: Removes artefacts caused by JPEG compression
Photo Restoration: Enhances image quality & facial details
+These three filters aren't used in my giffing workflow. The cloud-based nature of Smart Portrait leads to disjointed looking frames. For Harmonisation, applying this on a gif causes Neural Filter timeout error. Finally, Super Zoom does not currently support output as a Smart Filter
If you're running Photoshop 2021 or earlier version of Photoshop 2022, you will see a smaller selection of Neural Filters:


Things to be aware of:
You can apply up to six Neural Filters at the same time
Filters where you can use your own reference images: Makeup Transfer (portraits only), Landscape Mixer, Style Transfer (not available in Photoshop 2021), and Colour Transfer
Later iterations of Photoshop 2023 & newer: The first three default presets for Landscape Mixer and Colour Transfer are currently broken.
2. Why I use Neural Filters?
Here are my four main Neural Filters use cases in my gifmaking process. In each use case I'll list out the filters that I use:

Enhancing Image Quality:
Common wisdom is to find the highest quality video to gif from for a media release & avoid YouTube whenever possible. However for smaller / niche media (e.g. new & upcoming musical artists), prepping gifs from highly compressed YouTube videos is inevitable.
So how do I get around with this? I have found Neural Filters pretty handy when it comes to both correcting issues from video compression & enhancing details in gifs prepared from these highly compressed video files.
Filters used: JPEG Artefacts Removal / Photo Restoration
Facial Enhancement:
When I prepare gifs from highly compressed videos, something I like to do is to enhance the facial features. This is again useful when I make gifsets from compressed videos & want to fill up my final panel with a close-up shot.
Filters used: Skin Smoothing / Makeup Transfer / Photo Restoration (Facial Enhancement slider)
Colour Manipulation:
Neural Filters is a powerful way to do advanced colour manipulation - whether I want to quickly transform the colour scheme of a gif or transform a B&W clip into something colourful.
Filters used: Colourise / Colour Transfer
Artistic Effects:
This is one of my favourite things to do with Neural Filters! I enjoy using the filters to create artistic effects by feeding textures that I've downloaded as reference images. I also enjoy using these filters to transform the overall the atmosphere of my composite gifs. The gifsets where I've leveraged Neural Filters for artistic effects could be found under this tag on usergif.
Filters used: Landscape Mixer / Style Transfer / Depth Blur
How I use Neural Filters over different stages of my gifmaking workflow:
I want to outline how I use different Neural Filters throughout my gifmaking process. This can be roughly divided into two stages:
Stage I: Enhancement and/or Colourising | Takes place early in my gifmaking process. I process a large amount of component gifs by applying Neural Filters for enhancement purposes and adding some base colourings.++
Stage II: Artistic Effects & more Colour Manipulation | Takes place when I'm assembling my component gifs in the big PSD / PSB composition file that will be my final gif panel.
I will walk through this in more detail later in the tutorial.
++I personally like to keep the size of the component gifs in their original resolution (a mixture of 1080p & 4K), to get best possible results from the Neural Filters and have more flexibility later on in my workflow. I resize & sharpen these gifs after they're placed into my final PSD composition files in Tumblr dimensions.
3. Getting started
The essence is to output Neural Filters as a Smart Filter on the smart object when working with the Video Timeline interface. Your workflow will contain the following steps:
Prepare your gif
In the frame animation interface, set the frame delay to 0.03s and convert your gif to the Video Timeline
In the Video Timeline interface, go to Filter > Neural Filters and output to a Smart Filter
Flatten or render your gif (either approach is fine). To flatten your gif, play the "flatten" action from the gif prep action pack. To render your gif as a .mov file, go to File > Export > Render Video & use the following settings.

Setting up:
o.) To get started, prepare your gifs the usual way - whether you screencap or clip videos. You should see your prepared gif in the frame animation interface as follows:

Note: As mentioned earlier, I keep the gifs in their original resolution right now because working with a larger dimension document allows more flexibility later on in my workflow. I have also found that I get higher quality results working with more pixels. I eventually do my final sharpening & resizing when I fit all of my component gifs to a main PSD composition file (that's of Tumblr dimension).
i.) To use Smart Filters, convert your gif to a Smart Video Layer.
As an aside, I like to work with everything in 0.03s until I finish everything (then correct the frame delay to 0.05s when I upload my panels onto Tumblr).
For convenience, I use my own action pack to first set the frame delay to 0.03s (highlighted in yellow) and then convert to timeline (highlighted in red) to access the Video Timeline interface. To play an action, press the play button highlighted in green.

Once you've converted this gif to a Smart Video Layer, you'll see the Video Timeline interface as follows:

ii.) Select your gif (now as a Smart Layer) and go to Filter > Neural Filters

Installing Neural Filters:
Install the individual Neural Filters that you want to use. If the filter isn't installed, it will show a cloud symbol (highlighted in yellow). If the filter is already installed, it will show a toggle button (highlighted in green)

When you toggle this button, the Neural Filters preview window will look like this (where the toggle button next to the filter that you use turns blue)

4. Using Neural Filters
Once you have installed the Neural Filters that you want to use in your gif, you can toggle on a filter and play around with the sliders until you're satisfied. Here I'll walkthrough multiple concrete examples of how I use Neural Filters in my giffing process.
Example 1: Image enhancement | sample gifset
This is my typical Stage I Neural Filters gifmaking workflow. When giffing older or more niche media releases, my main concern is the video compression that leads to a lot of artefacts in the screencapped / video clipped gifs.
To fix the artefacts from compression, I go to Filter > Neural Filters, and toggle JPEG Artefacts Removal filter. Then I choose the strength of the filter (boxed in green), output this as a Smart Filter (boxed in yellow), and press OK (boxed in red).
Note: The filter has to be fully processed before you could press the OK button!

After applying the Neural Filters, you'll see "Neural Filters" under the Smart Filters property of the smart layer

Flatten / render your gif
Example 2: Facial enhancement | sample gifset
This is my routine use case during my Stage I Neural Filters gifmaking workflow. For musical artists (e.g. Maisie Peters), YouTube is often the only place where I'm able to find some videos to prepare gifs from. However even the highest resolution video available on YouTube is highly compressed.
Go to Filter > Neural Filters and toggle on Photo Restoration. If Photoshop recognises faces in the image, there will be a "Facial Enhancement" slider under the filter settings.

Play around with the Photo Enhancement & Facial Enhancement sliders. You can also expand the "Adjustment" menu make additional adjustments e.g. remove noises and reducing different types of artefacts.

Once you're happy with the results, press OK and then flatten / render your gif.
Example 3: Colour Manipulation | sample gifset
Want to make a colourful gifset but the source video is in B&W? This is where Colourise from Neural Filters comes in handy! This same colourising approach is also very helpful for colouring poor-lit scenes as detailed in this tutorial.
Here's a B&W gif that we want to colourise:

Highly recommended: add some adjustment layers onto the B&W gif to improve the contrast & depth. This will give you higher quality results when you colourise your gif.
Go to Filter > Neural Filters and toggle on Colourise.

Make sure "Auto colour image" is enabled.
Play around with further adjustments e.g. colour balance, until you're satisfied then press OK.
Important: When you colourise a gif, you need to double check that the resulting skin tone is accurate to real life. I personally go to Google Images and search up photoshoots of the individual / character that I'm giffing for quick reference.
Add additional adjustment layers until you're happy with the colouring of the skin tone.

Once you're happy with the additional adjustments, flatten / render your gif. And voila!

Note: For Colour Manipulation, I use Colourise in my Stage I workflow and Colour Transfer in my Stage II workflow to do other types of colour manipulations (e.g. transforming the colour scheme of the component gifs)
Example 4: Artistic Effects | sample gifset
This is where I use Neural Filters for the bulk of my Stage II workflow: the most enjoyable stage in my editing process!
Normally I would be working with my big composition files with multiple component gifs inside it. To begin the fun, drag a component gif (in PSD file) to the main PSD composition file.
Resize this gif in the composition file until you're happy with the placement

Duplicate this gif. Sharpen the bottom layer (highlighted in yellow), and then select the top layer (highlighted in green) & go to Filter > Neural Filters

I like to use Style Transfer and Landscape Mixer to create artistic effects from Neural Filters. In this particular example, I've chosen Landscape Mixer
Select a preset or feed a custom image to the filter (here I chose a texture that I've on my computer)

Play around with the different sliders e.g. time of the day / seasons
Important: uncheck "Harmonise Subject" & "Preserve Subject" - these two settings are known to cause performance issues when you render a multiframe smart object (e.g. for a gif)

Once you're happy with the artistic effect, press OK
To ensure you preserve the actual subject you want to gif (bc Preserve Subject is unchecked), add a layer mask onto the top layer (with Neural Filters) and mask out the facial region. You might need to play around with the Layer Mask Position keyframes or Rotoscope your subject in the process.
After you're happy with the masking, flatten / render this composition file and voila!

Example 5: Putting it all together | sample gifset
Let's recap on the Neural Filters gifmaking workflow and where Stage I and Stage II fit in my gifmaking process:
i. Preparing & enhancing the component gifs
Prepare all component gifs and convert them to smart layers
Stage I: Add base colourings & apply Photo Restoration / JPEG Artefacts Removal to enhance the gif's image quality
Flatten all of these component gifs and convert them back to Smart Video Layers (this process can take a lot of time)
Some of these enhanced gifs will be Rotoscoped so this is done before adding the gifs to the big PSD composition file
ii. Setting up the big PSD composition file
Make a separate PSD composition file (Ctrl / Cmmd + N) that's of Tumblr dimension (e.g. 540px in width)
Drag all of the component gifs used into this PSD composition file
Enable Video Timeline and trim the work area
In the composition file, resize / move the component gifs until you're happy with the placement & sharpen these gifs if you haven't already done so
Duplicate the layers that you want to use Neural Filters on
iii. Working with Neural Filters in the PSD composition file
Stage II: Neural Filters to create artistic effects / more colour manipulations!
Mask the smart layers with Neural Filters to both preserve the subject and avoid colouring issues from the filters
Flatten / render the PSD composition file: the more component gifs in your composition file, the longer the exporting will take. (I prefer to render the composition file into a .mov clip to prevent overriding a file that I've spent effort putting together.)
Note: In some of my layout gifsets (where I've heavily used Neural Filters in Stage II), the rendering time for the panel took more than 20 minutes. This is one of the rare instances where I was maxing out my computer's memory.
Useful things to take note of:
Important: If you're using Neural Filters for Colour Manipulation or Artistic Effects, you need to take a lot of care ensuring that the skin tone of nonwhite characters / individuals is accurately coloured
Use the Facial Enhancement slider from Photo Restoration in moderation, if you max out the slider value you risk oversharpening your gif later on in your gifmaking workflow
You will get higher quality results from Neural Filters by working with larger image dimensions: This gives Neural Filters more pixels to work with. You also get better quality results by feeding higher resolution reference images to the Neural Filters.
Makeup Transfer is more stable when the person / character has minimal motion in your gif
You might get unexpected results from Landscape Mixer if you feed a reference image that don't feature a distinctive landscape. This is not always a bad thing: for instance, I have used this texture as a reference image for Landscape Mixer, to create the shimmery effects as seen in this gifset
5. Testing your system
If this is the first time you're applying Neural Filters directly onto a gif, it will be helpful to test out your system yourself. This will help:
Gauge the expected rendering time that you'll need to wait for your gif to export, given specific Neural Filters that you've used
Identify potential performance issues when you render the gif: this is important and will determine whether you will need to fully playback your gif before flattening / rendering the file.
Understand how your system's resources are being utilised: Inputs from Windows PC users & Mac users alike are welcome!
About the Neural Filters test files:
Contains six distinct files, each using different Neural Filters
Two sizes of test files: one copy in full HD (1080p) and another copy downsized to 540px
One folder containing the flattened / rendered test files
How to use the Neural Filters test files:
What you need:
Photoshop 2022 or newer (recommended: 2023 or later)
Install the following Neural Filters: Landscape Mixer / Style Transfer / Colour Transfer / Colourise / Photo Restoration / Depth Blur
Recommended for some Apple Silicon-based MacBook Pro models: Enable High Power Mode
How to use the test files:
For optimal performance, close all background apps
Open a test file
Flatten the test file into frames (load this action pack & play the “flatten” action)
Take note of the time it takes until you’re directed to the frame animation interface
Compare the rendered frames to the expected results in this folder: check that all of the frames look the same. If they don't, you will need to fully playback the test file in full before flattening the file.†
Re-run the test file without the Neural Filters and take note of how long it takes before you're directed to the frame animation interface
Recommended: Take note of how your system is utilised during the rendering process (more info here for MacOS users)
†This is a performance issue known as flickering that I will discuss in the next section. If you come across this, you'll have to playback a gif where you've used Neural Filters (on the video timeline) in full, prior to flattening / rendering it.
Factors that could affect the rendering performance / time (more info):
The number of frames, dimension, and colour bit depth of your gif
If you use Neural Filters with facial recognition features, the rendering time will be affected by the number of characters / individuals in your gif
Most resource intensive filters (powered by largest machine learning models): Landscape Mixer / Photo Restoration (with Facial Enhancement) / and JPEG Artefacts Removal
Least resource intensive filters (smallest machine learning models): Colour Transfer / Colourise
The number of Neural Filters that you apply at once / The number of component gifs with Neural Filters in your PSD file
Your system: system memory, the GPU, and the architecture of the system's CPU+++
+++ Rendering a gif with Neural Filters demands a lot of system memory & GPU horsepower. Rendering will be faster & more reliable on newer computers, as these systems have CPU & GPU with more modern instruction sets that are geared towards machine learning-based tasks.
Additionally, the unified memory architecture of Apple Silicon M-series chips are found to be quite efficient at processing Neural Filters.
6. Performance issues & workarounds
Common Performance issues:
I will discuss several common issues related to rendering or exporting a multi-frame smart object (e.g. your composite gif) that uses Neural Filters below. This is commonly caused by insufficient system memory and/or the GPU.
Flickering frames: in the flattened / rendered file, Neural Filters aren't applied to some of the frames+-+
Scrambled frames: the frames in the flattened / rendered file isn't in order
Neural Filters exceeded the timeout limit error: this is normally a software related issue
Long export / rendering time: long rendering time is expected in heavy workflows
Laggy Photoshop / system interface: having to wait quite a long time to preview the next frame on the timeline
Issues with Landscape Mixer: Using the filter gives ill-defined defined results (Common in older systems)--
Workarounds:
Workarounds that could reduce unreliable rendering performance & long rendering time:
Close other apps running in the background
Work with smaller colour bit depth (i.e. 8-bit rather than 16-bit)
Downsize your gif before converting to the video timeline-+-
Try to keep the number of frames as low as possible
Avoid stacking multiple Neural Filters at once. Try applying & rendering the filters that you want one by one
Specific workarounds for specific issues:
How to resolve flickering frames: If you come across flickering, you will need to playback your gif on the video timeline in full to find the frames where the filter isn't applied. You will need to select all of the frames to allow Photoshop to reprocess these, before you render your gif.+-+
What to do if you come across Neural Filters timeout error? This is caused by several incompatible Neural Filters e.g. Harmonisation (both the filter itself and as a setting in Landscape Mixer), Scratch Reduction in Photo Restoration, and trying to stack multiple Neural Filters with facial recognition features.
If the timeout error is caused by stacking multiple filters, a feasible workaround is to apply the Neural Filters that you want to use one by one over multiple rendering sessions, rather all of them in one go.
+-+This is a very common issue for Apple Silicon-based Macs. Flickering happens when a gif with Neural Filters is rendered without being previously played back in the timeline.
This issue is likely related to the memory bandwidth & the GPU cores of the chips, because not all Apple Silicon-based Macs exhibit this behaviour (i.e. devices equipped with Max / Ultra M-series chips are mostly unaffected).
-- As mentioned in the supplementary page, Landscape Mixer requires a lot of GPU horsepower to be fully rendered. For older systems (pre-2017 builds), there are no workarounds other than to avoid using this filter.
-+- For smaller dimensions, the size of the machine learning models powering the filters play an outsized role in the rendering time (i.e. marginal reduction in rendering time when downsizing 1080p file to Tumblr dimensions). If you use filters powered by larger models e.g. Landscape Mixer and Photo Restoration, you will need to be very patient when exporting your gif.
7. More useful resources on using Neural Filters
Creating animations with Neural Filters effects | Max Novak
Using Neural Filters to colour correct by @edteachs
I hope this is helpful! If you have any questions or need any help related to the tutorial, feel free to send me an ask 💖
#photoshop tutorial#gif tutorial#dearindies#usernik#useryoshi#usershreyu#userisaiah#userroza#userrobin#userraffa#usercats#userriel#useralien#userjoeys#usertj#alielook#swearphil#*#my resources#my tutorials
534 notes
·
View notes
Text

THE SIMS 3 TUTORIAL
HOW TO CREATE DEFAULT REPLACEMENT MOD USING CUSTOM MESH & TEXTURE FOR SIMPLE OBJECT
⚠️ Tumblr has 30 pictures limit, so I cannot include too many pictures. If you want to zoom in the pictures, click the pictures to enlarge, or save the pictures into your PC, zoom the pictures on picture viewer or zoom in the pictures on your mobile phone. ⚠️
----------------------------------------------------
I create this tutorial to make easier to follow because there are older tutorials available before but scattered on internet and usually only say "Export to replace s3asc" without explaining how to export the edited object properly.
My method is using TSR Workshop instead of exporting the object using Sims 3 Object Export/Import plug in because exporting to replace the s3asc using that plug in always giving error notification "ERR: Model has 1 groups; original had 0" and cannot be exported.
For beginners who are very new using s3pe and haven't created default replacement mod before, better start from simple object first.
Simple objects I mean in-game object that has single MODL and single texture with no morphs, no GeoStates, no presets, no CAS colour channels, and easily cloned from OBJD on catalogue. Usually as utensils that Sims holding in their hand, not buy/build objects. For example: Pencil, pan, fork, spoon.
----------------------------------------------------
Tools to prepare:
s3oc
s3pe
Milkshape 3D for bone assignment (Version I use 1.8.5 beta, discontinued by its developer, therefore feel free to download the full version with its license key provided).
Sims 3 Object Export/Import 1.01 by Wesley Howe (Milkshape plug-in. Download msS3ObjPluginsV101.rar )
TSR Workshop (Older version for TS3 only version 2.0.88)
TSR Workshop plug-ins for export.import TSRW Object.
3D Program (Blender/Maya/3dsMax)
Editing images software (Photoshop, make sure you have to install .dds plugin by Nvidia. For free software alternative, you can use GIMP with its .dds plugin)
This tutorial will not teach you how to:
Meshing object ❌
Create alpha texture ❌
Change thumbnails in-game ❌
Install programs and plug-ins ❌
This is how I created Chinese chopsticks replacement mod using custom mesh and texture.
In summary, this tutorial has 10 steps:
Step 1. Clone the Object using s3oc
Step 2. Open S3PE to Copy the Original Resource Code and Export the Files
Step 3. Export the Original Mesh as Base Mesh to .obj format
Step 4. Create Your Custom Mesh
Step 5. Bone Assignment & Create Group
Step 6. Create custom Texture
Step 7. Import the .wso of Edited Mesh on TSR Workshop & Export the package
Step 8. Export MODL file from Package saved from TSR Workshop
Step 9. Finalizing in s3pe & Replacing the Original file with Edited File & Correcting the Code As Same As Default Code
Step 10. Test the CC in your game.
-----------------------------------
✳️ Step 1. Clone the Object using s3oc
Before cloning the object, check the Game Folder for in-game object file location. Settings > Game Folders...
Take a look if the Base Game or Expansion Pack for object file you want to clone is in the right folder. For example, my The Sims 3 game are all bought from Steam, so the location is D:\SteamLibrary\steamapps\common\The Sims 3
If you want to clone object from Expansion Pack, make sure input the folder location. For example, the location for World Adventures EP is D:\SteamLibrary\steamapps\common\The Sims 3\EP1

If you are done, close the pop-up box. You can continue click Cloning then choose Normal Object...
Wait until you get the whole catalogue. Click Search...

For example, I clone object from World Adventures Expansion Pack. You can clone object from Base Game or other Expansion Packs as long it is considered as "utensil" that Sim holding on hand. For example: "Pencil" or "Pan"
Search for text: chopsticks
or if you want to clone object from Base Game, search: utensil
Tick check marks for Resource Name, Object Name, Object Desc then click "Search button"
Search result gives you results with name "chopsticks". Here is the object we are looking for: UtensilChopsticks
We need the OBJD file to clone. OBJD = Object Data.

Click "Clone or Fix" at the right bottom. Then you see the next page to determine if you want to clone with renumber or not. If you want to make default replacement, then do not check the Renumber box. Keep it blank.
Tick check box means the s3oc will generate new resource code for new item. Not tick the check means the s3oc will overwrite the same resource code, it is to replace object you cloned in-game.
I am personally a detailed person, so I usually tick as many as I want: tick "Deep clone" "Missing String Tables" and "Include Thumbnail" to include more details. Then click "Start" to proceed.

It will give you file name [CreatorName]_ObjectName_Number
Then save your package file in "DBPF Package" format in your project folder. Always make folder for any file to make everything organized.
✳️ Step 2. Open S3PE to Copy the Original Resource Code and Export the Files
Open S3pe, locate your package file you cloned from s3oc. Find the MODL of Utensil Chopsticks, Right-Click, "Details..."

On Resource Details, click "Copy TGI" to copy the Resource Code. Type, Group, and Instance will automatically be copied on clipboard. Then open Notepad, Right-Click to "Paste".
Click GRID on bottom of the s3pe (I mark it red on picture), it will give you pop-up box with Data Grid. Click "Resources", it will be highlight blue and there's 3 dots button appeared on the right side. Click the 3 dots button. It will give you TGI Block List Editor.
Inside MODL's TGI Block List Editor only has IMG. You may wondering why, but that's how the game coded. Type, Group, Instance of _IMG inside TGI Block List Editor should be the same as _IMG on the package.
Copy the TGI, Group, Instance to your Notepad.

After you copied code of MODL, do the same for the texture image (_IMG), but only copy the code from Resource Details. You cannot edit TGI Block List Editor for _IMG as the Grid button for _IMG is greyed out.
The main task is the code of your edited mesh and texture should be the same as the code you copied now from original package you cloned with s3oc.
Keep the code on notepad. You will need this code later.
Export the MODL file. Right-Click, "Export to s3asc". The file appears in long string such with name for example: S3_01661233_08000001_B619DB2238C3430B%%+MODL_filebase
Do not rename the file. Save.

Export the texture file. Right-Click "Export > To File..." The file will be saved in .dds format. Do not rename the file. Save.

✳️ Step 3. Export the Original Mesh as Base Mesh to .obj format
Open Milkshape. Import the s3asc file you saved before.
More steps click spoiler tag "Read More / Keep Reading" below
File > Import > Sims 3 Object Import v 1.01 by Wesley Howe

Locate the s3asc file, then the original chopsticks mesh appears.
Click the "Joints" tab. It has 4 codes. Check box "Draw vertices with bone colors" It will show Bone Assignment colors on the original mesh. Yellow on top chopstick and light blue on bottom chopstick. The colours are to make the object has rig and movement following the Sim's interaction.

Take a look at the 4 codes on Joints Tab. You can play around to see which colour of the code will appear, after that copy paste the code to Notepad to make it easier to comprehend.
Click Select from Tools menu, Select Options: Face. On "Right/Left/Top/Bottom 2D View", Left-click make selection of one part of chopsticks. While the part of object being selected (Red), click Joints then Choose "Assign".
0x96239247 --> Yellow 0xFEAE6981 --> Purple 0xCD68F001 --> Light Blue 0xD0DECA8E --> Red
Your edited mesh must have the exact same Bone Assignment colour later. Check again if the code and colour are correct.

You can save object mesh as .obj to other 3D software such as Blender or any other 3D software.
✳️ Step 4. Create Your Custom Mesh
Use the original .obj as base model. While you can create longer mesh or any edited version as you wish.
Make sure the scale and position of the edited mesh is same as base original mesh, because the edited mesh will be used on Sim's hand.

If you are done editing the mesh, export the UVmap.
You can export the uvmap in higher resolution, as long as it is Power of 2. 64x64, 128x128, 256x256, 512x512, 1024x1024, 2048x2048, 4096x4096. I export in 1024x1024 pixels to make the size of texture larger and have more details.
Then export the mesh object in .obj format.
✳️ Step 5. Bone Assignment & Create Group
Open Milkshape. Import the original mesh.
Check the Groups Tab. Original mesh has 1 group, "group 00". Group 00 means it is the main mesh. There is no shadow beneath the object.

Import the edited mesh as .obj file.

My edited mesh has one single name "default" name on the Group Tab. While edited mesh may have a lot of file name scattered on Group Tab. Regroup the file name to simplify your edited mesh into one single name. Select > Regroup.
The main task is replacing the EA's original mesh with your edited mesh.
Before you delete anything, you must do Bone Assignment first to the edited mesh you created.
Your edited mesh does not have Bone Assignment, so it appears white.
Remember the 4 codes you copied earlier in Notepad.

Copy Bone Assignment from original mesh to your edited mesh.
This case, your want to Bone Assign Yellow colour.
Select > Face to select one part of chopsticks of your edited mesh. On Joints Tab, double click the appropriate code 0x96239247 in blue highlight then the code box on the right side of "Rename" will appear 0x96239247. Make sure the code is correct. Then you can click "Assign".

Your edited mesh will appear in Yellow colour. Then do the same for another part of chopsticks.
Select another part of chopsticks of your edited mesh. On Joints Tab, double click the appropriate code 0xCD68F001 in blue highlight then the code box on the right side of "Rename" will appear 0xCD68F001. Click "Assign".

Your edited mesh will appear in Light Blue colour.
Then what's the other code for? With colour purple and red?
Leave them. Let the codes have the same exact codes as appear in original mesh and let the colours only assigned Yellow and Light Blue. The colours are to determine rig for interaction in-game, which only use Yellow as upper part of chopstick and Light Blue as bottom part of chopstick.
You can safely delete the original mesh with name group00 until it remains your only your edited mesh.

Rename your edited mesh to group00. Type group00 on the box then click "Rename" on the left side.

Export to TSRW Object in .wso format. .wso is format with bone assignment on object attached.

Save your .wso in your project folder.
✳️ Step 6. Create custom Texture
Import original texture you exported from s3pe to your editing image software.
Look at the original texture made by EA. 32x64 pixels. It is very low resolution, blurry and stretched, because the texture should be compressed as low as possible by game designer. As player you want it has higher detail to look realistic as possible and your PC of course can handle high resolution content, sure you can make the resolution much higher than EA's.

Import the UVMap you saved from 3D software. For example, UVmap I imported has 1024x1024 resolution. Add your custom texture. Then save it to .dds format in the same name as original texture. Save in separate folder, name it "Edited Texture" to keep it separated from original texture.
✳️ Step 7. Import the .wso of Edited Mesh on TSR Workshop & Export the package
Open your TSR Workshop.
Create New Project > New Import >Next...

Then Browse original mesh by EA in package format in your project folder.
On Open file box, you cannot see .package file because the filter is .wrk (TSR Workshop Project). Choose the .package dropdown.

Then you can see .package file.
Open the .package. After the file is located, then Next. On Project Details I usually skip without giving name of Project Name and Title. Next.
You must have seen green land with white blank sky.
Where's the mesh? It is actually there... just being zoomed in too close. You need to zoom out by scrolling down mouse.
You can see the original chopsticks mesh by EA. You can save the project file in .wrk format. After you save the file, import the .wso of your edited mesh. Mesh tab > High Level detail. Click green arrow folder icon to import. Then your edited mesh will appear replacing the original EA mesh.

As you see, the texture is messed up because the texture is still using original EA's texture. But then you check Textures tab and it has blank dropdown...
I cannot change the texture on this TSR Workshop!
Don't worry, we can replace the texture on s3pe later.
No need to change anything other than importing mesh. Click Edit > Project Contents to save as package.
You will see pop up box with number or files DDS, FTPT, LITE, MODL, OBJD, OBJK, etc. Export > To. package. Give name such as "EditedChopsticks_TSRW"

✳️ Step 8. Export MODL file from Package saved from TSR Workshop
Open S3PE, File > Open package "EditedChopticks_TSRW" that you saved from TSR Workshop.
Export MODL. Right-Click, export. It gives you file name with [StringOfNumber] .model .
Save it on project folder. Keep it organized and separated from original MODL. Name the folder "Edited MODL". Do not rename the file.
✳️ Step 9. Finalizing in s3pe & Replacing the Original file with Edited File & Correcting the Code As Same As Default Code
Open s3pe, File > Open original package that you cloned from s3oc. [CreatorName]_ObjectName_Number
Find the MODL. Right-Click > Replace...
Locate to your edited MODL with filename .model .
Then click Open.
The original MODL of the package should be replaced with your edited mesh.
Do the same for the texture.
Locate to your edited texture with filename .dds
Then click Open.
The original texture of the package should be replaced with your edited texture.
Take a look at MODL's Type, Group, Instance. It has the same code as original MODL in the original package cloned with s3oc (because it has been replaced)
Don't forget to see the code inside TGI Block List Editor.
Repeat step 2 how to check the code. Right-Click on MODL/IMG > Details... and click GRID > Resources > TGI Block List Editor.
The Type, Group, Instance of the _IMG are different compared from IMG from original package clone, which means that is the evidence of edited mesh replaced the original.
Rename the Instance with default/original Instance you copied on notepad from Step 2. Type, Group, Instance should be the same as default/original Type, Group, Instance.

Open notepad with resource code you copied from Step 2. Make sure the Type, Group, and Instance are all the same.
If the codes are the same, then your edited mesh and texture will overwrite the default mesh and texture with the same code in the game. Save, Commit, Save the package.
Check again if the texture is replaced properly. Right-Click on _IMG > ViewDDS.
ALTERNATIVES!
Yes, you can delete unwanted files in your edited package, to keep the package clean. Simply Right-Click>Deleted.
The only files needed in package are: MODL, _IMG, _KEY
They are the only files with your edited mesh/texture including codes to overwrite the default codes.
You can Start new fresh blank s3pe. Right-Click>Import from file...
Locate your edited MODL and _IMG (texture) file.
On Resource Details box, tick mark "Use resource name" > OK.
Make sure all the Type, Group, and Instance of MODL and _IMG including in the TGI Block List Editor are all the same as the code in original package.

Save the package.
✳️ Step 10. Test the CC in your game.
Put the package to your CC folder in your The Sims 3 document folder to see if the CC is working or not.
If the CC is working as your intended, with your custom mesh and texture, then test the animation. Are the chopsticks animation working as the same as original EA's? If the animation are working well too, then congratulations!

Your default replacement are working. Give applause to yourself. 👏
-------------------------------------
QUESTIONS!
Q:
Can I use this tutorial for making default replacement for buy/build object?
A: This tutorial covers basic method of using TSR Workshop and replacing the default codes (Type, Group, Instance), so you will understand the basic principle of doing default replacement mod.
Keep in mind that different object has different case. Buy / build object has MLOD (not just MODL) more than one, texture images more than one, has presets, and CAStable colour channels.
The TGI Block List Editor for buy/build object has a lot of codes, so have to spend a lot of time to do trial-and-error to make the default replacement working properly, because a lot of times the texture doesn't work (still using default EA's texture), or when the object appears right with your edited mesh and texture, after you choose the presets, the object reverts back to your edited mesh with default EA's texture.
Q:
Help! The texture is black! / still using same EA's texture when tested in the game!
A: The texture codes must be not the same. Check the Type, Group, Instance of _IMG. Do the codes are the same like codes in original package? Check the TGI Block List Editor for MODL, is the _IMG inside has the same Type, Group, Instance as in original package.
Q:
Help! The object disappears when tested in the game!
A: You must be replacing OBJD in your package. Do not replace OBJD. Just MODL and texture only.
#tutorial#the sims 3#the sims 3 tutorial#thebleedingwoodland#the sims 3 default replacement mod#modding#s3pe#s30c#TSR Workshop
118 notes
·
View notes
Text
Testing Excellence: Proven Methods for Robust Software Applications
In today's dynamic tech landscape, delivering flawless software is paramount. That's where our Software Testing Tutorial steps in as your guiding light. From novice to adept, this tutorial caters to all proficiency levels.
Dive into the fundamentals, exploring essential concepts that underpin successful testing strategies. Learn about various methodologies, equipping you with a versatile toolkit for diverse projects. From manual to automated testing, we cover it all, empowering you to choose the right approach for each scenario.
Our tutorial offers more than theoretical knowledge. It's hands-on and practical, with examples and exercises to reinforce learning. Delve into real-world case studies, gaining invaluable insights from industry experts.
One of the key highlights is its adaptability. Whether you're in agile development or traditional waterfall projects, our tutorial provides tailored techniques to suit your environment.
Stay updated with the latest trends and technologies in software testing. Continuous integration, DevOps, and exploratory testing are just a few topics we explore to keep you at the cutting edge.
Elevate your software testing game with our comprehensive tutorial at Tutorial and Example. Quality assurance is not just a task; it's an art. Master it with us.
0 notes
Text

Discover a comprehensive Software Testing Tutorial offering insights into essential concepts, methodologies, and effective practices. Elevate your skills in ensuring high-quality and reliable software applications.
0 notes
Note
Can I please ask for digital art tips? I’ve been wanted to get into it for a while! Specifically drawing people 😅 any tips? Using a drawing tablet+pencil
Yessss!!!!
First off: ADVENTURE YOUR SOFTWARE!!
Really tho, you don’t have to watch tutorials if that makes you want to kill puppies, test it out.
truly just sit down and try every brush, mess with features, figure out buttons, make something ugly. Best and most fun way to start! Also you can ask what other people use (like brushes or programs) sometimes there’s a tool that everyone universally just goes “THAT ONE” (cough! The 6B pencil on procreate for sketching COUGH)
NOW FOR PEOPLE WAHOO!!!
Look at artists you like, take inspiration from from them! Test out their styles to find what you like about it, to carry on into yours. Also a lot of artists LOVE to elaborate on their process and don’t mind being asked.
One of which being me, if yall want a legit tutorial start to finish I’d break that down for yall. Legit.
Also practice! Whether it’s traditional or digital, it takes skill and time!
Most importantly: don’t stop. Please harass me by tagging so I can hype you up. Dont be shy on sending asks or asking tips!
GO MAKE SOMETHING SPECIAL!!!!
25 notes
·
View notes
Text
The Role of AI in Modern Software Testing Practices
AI is reshaping the way software testing is done. With AI automated testing, businesses can achieve higher efficiency, better accuracy, and faster software releases. Whether it’s AI software testing, AI generator testers, or AI-driven automation, the future of software testing is AI-powered.
#ai generator tester#ai software testing#ai automated testing#ai in testing software#playwright automation javascript#playwright javascript tutorial#playwright python tutorial#scrapy playwright tutorial#api testing using postman#online postman api testing#postman automation api testing#postman automated testing#postman performance testing#postman tutorial for api testing#free api for postman testing#api testing postman tutorial#postman tutorial for beginners#postman api performance testing#automate api testing in postman#java automation testing#automation testing selenium with java#automation testing java selenium#java selenium automation testing#python selenium automation#selenium with python automation testing#selenium testing with python#automation with selenium python#selenium automation with python#python and selenium tutorial#cypress automation training
0 notes