#advanced typing tutorial
Explore tagged Tumblr posts
Visit Tumblr Blog
Explore Tumblr blogs with no restrictions, modern design and the best experience.
Last Seen Tumblr Blogs


Fun Fact
Average visit duration of Tumblr.com is 10 mins and 25 secs.
Text
#advanced typing techniques#advanced keyboard typing#advanced typing test#advanced typing course#advanced typing tutorial#advanced english typing skills#advanced typing speed#advanced typing training#advanced typing software#advanced touch typing#advanced typing lessons
0 notes
Text
Every TypeScript example and tutorial I've come across so far mainly focuses on language features, static typing, and working with Visual Studio. However, I couldn't find much guidance on how to use TypeScript effectively with JavaScript and the DOM.
I remember having the same question a while back, just like Johnny on Stack Overflow. "Can we use TypeScript to manipulate the DOM?" This question motivated me to dive deeper and figure it out, and I'm here to share what I've learned.
Configuration: Using TypeScript for DOM manipulation is straightforward, but it does require some configuration. You'll need to include the specific types for DOM access, which aren't available by default in TypeScript. To do this, you must explicitly configure the TypeScript compiler to include the "dom" library in the compilerOptions section of your tsconfig.json file. It's worth noting that the decision not to include these types by default might suggest that TypeScript's creators initially intended it more for server-side development with Node.js than for front-end work.
/** tsconfig.json - Configuration file in the project folder for the TypeScript compiler */ { "compilerOptions": { "lib": [ "es2015", "dom" ], "strict": true, "target": "es2015" } }
Hello World: In this article, I'll create a simple "Hello, world!" program to demonstrate how to use the DOM in TypeScript. Since this is my first post about TypeScript, I'll cover the basics of working with DOM types and address a common challenge that beginners might encounter. Please note that I won't be discussing DOM events in this post; that's a topic for a future article.
Let's start with the basics by changing the inner text value of an existing HTML element. I began by creating an HTML file with a standard HTML5 boilerplate, including an <h1> element with the id "greeter" in the body.
<!DOCTYPE html> <html lang="en"> <head> <!-- ... --> </head> <body> <h1 id="greeter">Hello</h1> </body> </html>
Next, I opened a new TypeScript file and added the following code:
let greeter: HTMLHeadingElement = document.getElementById("greeter") as HTMLHeadingElement; greeter.innerText = "Hello world!";
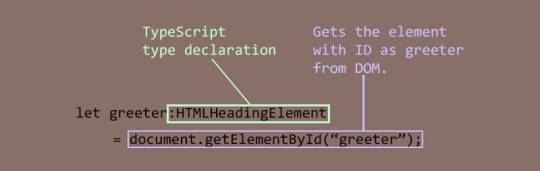
In this code, I created a variable called greeter and assigned the type HTMLHeadingElement to it. The HTMLHeadingElement type is defined in the "dom" library we added to the configuration. It tells the TypeScript compiler that greeter expects an HTML heading element and nothing else. Then, I assigned the greeter to the value returned by the getElementById function, which selects an element by its ID. Finally, I set the inner text of the greeter element to "Hello world."
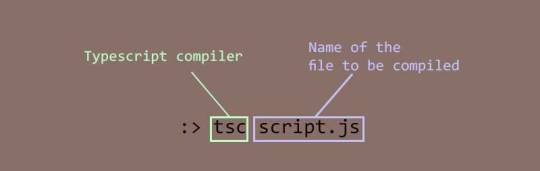
When I compiled the code with the following command:
tsc script.ts
It produced the following error:
Type 'HTMLElement | null' is not assignable to type 'HTMLHeadingElement'. Type 'null' is not assignable to type 'HTMLHeadingElement'.
It's a bit frustrating, but TypeScript is doing its job. This error means that I tried to assign a greeter, which is of type HTMLHeadingElement, with an object of type HTMLElement that the getElementById method returned. The HTMLElement | null in the error message indicates that the method's return value can be either of type HTMLElement or null.
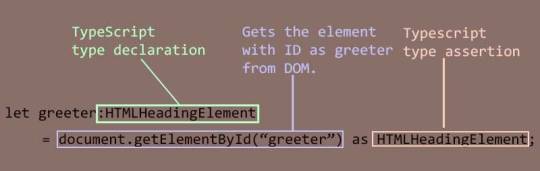
To address this, I used TypeScript's type assertion feature to tell the compiler that the element returned by getElementById is indeed a heading element, and it doesn't need to worry about it. Here's the updated code:
let greeter: HTMLHeadingElement = document.getElementById("greeter") as HTMLHeadingElement; greeter.innerText = "Hello world!";
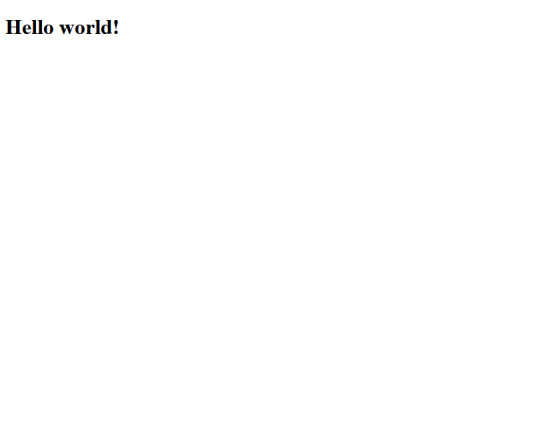
With this change, the compilation was successful. I included the script.js file generated by the compiler in the HTML document and opened it in a browser.
Decoration Time: Now that I've confirmed that everything works as intended, it's time to make the page more visually appealing. I wanted a font style that was informal, so I chose the "Rock Salt" font from Google Fonts. I imported it into my stylesheet, along with "Dancing Script" as a secondary font, using CSS imports. I then added a few more elements to the HTML document, centered all the text using CSS flexbox, added a background from UI gradients, and adjusted the positions of some elements for proper arrangement. The page now looked beautiful.
Animation: To add a finishing touch, I wanted to include a background animation of orbs rising to the top like bubbles. To create the orbs, I decided to use <div> elements. Since I wanted several orbs with different sizes, I split the task into two steps to simplify the work.
First, I created a common style for all the orbs and defined a custom animation for the orbs in CSS. Then, I created the orbs dynamically using TypeScript. I created a set number of <div> elements, assigned them the pre-defined style, and randomized their sizes, positions, and animation delays to make them appear more natural.
Here's an excerpt of the code for creating the bubbles:
function createBubbles() { for (let i = 0; i < bubbleCount; i++) { let div: HTMLDivElement = document.createElement("div") as HTMLDivElement; let divSize = getSize(); div.style.left = getLeftPosition() + "px"; div.style.width = divSize + "px"; div.style.height = divSize + "px"; div.style.animationDelay = i * randomFloat(0, 30) + "s"; div.style.filter = "blur(" + randomFloat(2, 5) + "px)"; div.classList.add("bubble"); bubbleBuffer.push(div); } console.log("Bubbles created"); }
After creating the orbs, I added them to the DOM and started the animation:
function releaseBubbles() { createBubbles(); for (let i = 0; i < bubbleCount; i++) { containerDiv.appendChild(bubbleBuffer[i]); } console.log("Bubbles released"); }
And with that, the animation of orbs rising like bubbles was set in motion.
Here's the final output:
youtube
You can find the complete code in this repository.
Conclusion: While writing this article and creating the example, I realized the involvement of advanced concepts like type assertion and union types. I now understand why the authors of those tutorials didn't include them; introducing them could confuse beginners. It's best to learn TypeScript thoroughly before venturing into DOM manipulation.
In my example, I skipped null checking when fixing the type mismatch error, as it seemed unnecessary for the demonstration. However, in real projects, it's important to check for null values to avoid runtime errors. I also didn't
#While writing this article and creating the example#I realized the involvement of advanced concepts like type assertion and union types. I now understand why the authors of those tutorials di#beginner#typescript#dom manipulation#Youtube
0 notes
Text
PRIORITIES & PRETTY THINGS - A.H

your beauty routine is sacred, but so is aaron's favorite way to decompress. looks like tonight you'll have to manage both

pairings: aaron hotchner x bimbo!reader warnings: 18+ MDNI, smutty smut, kinda free use policy, hotch using u for stress relief, p in v, twinkie (boycotting the name creampie), alexa play CPR by cupcake, AFAB, fem!reader, praise, dirty talk, aftercare, maybe a little breeding kink? talk about kids for like a singular line at the end, also mention of their first kiss which can be read here but not necessary to understand wc: 2.9k
Your love affair with beauty did not have the glamorous, instantaneous sparkle like most people choose to assume. In truth, it began behind a bedroom door barricaded tight against preteen anxieties, something that was constructed by braces flashing in garish shades of bubblegum pink and galaxy purple and bangs unevenly chopped by an overly eager parent.
Yet, somehow, fumbling with frosty blue eyeshadow and watermelon-scented gloss taught you self-expression, how to build confidence from the ground up.
Puberty decided to throw you a bone eventually (thank god), but by then makeup had embedded itself as more than something done for vanity. You would consider it a soul-mate level connection nurtured through midnight eyeliner tutorials, endless afternoons reading magazine spreads, and racking up Sephora points that probably rivaled some small countries economies.
Aaron loves giving you endless grief about your overflowing vanity drawers. Overflowing being his word choice, by the way, not yours. He loves grumbling about the avalanche of cosmetic boxes spilling from your shared closet, loves sighing (dramatically) each time another package lands on your doorstep.
Your face looks perfect without this, he insists regularly, always cupping your cheeks so you’re forced to meet those sincere eyes of his.
But he overplays his hand — all gooey-soft affection pulsing through his pupils, twitch tugging his mouth upward.
He would never actually begrudge something that makes you so shamelessly happy, even if your spending habits are probably sending him toward an emotional breakdown. Therapy’s overdue anyway, in your opinion.
But nothing, absolutely nothing, brings out Aaron’s inner drama king quite like watching you spend approximately a million years applying the very products he loves to call a sparkly money pit.
You’re wrist-deep in said sparkly money pit when Aaron materializes behind you. Not that it fazes you. Your boyfriend-detecting instincts are now advanced to border on psychic talent (and way hotter than being able to predict lottery numbers).
“Hi, handsome,” you greet, flicking your eyes up briefly to gift him your best flirty, mirror-reflected smile.
You hope he’s sufficiently distracted by your lips to overlook the fact that you’re still nowhere near ready. And true to form, Aaron’s eyes drop obediently.
His fixation on your mouth is practically Pavlovian by now, something you first discovered when he walked headlong into a door frame mid-argument simply because you had pulled your lower lip through your teeth to avoid saying something that might’ve gotten you bent over his knee.
Needless to say, the fight was quickly forgotten, replaced by a much more enjoyable, hands-on type of interaction.
“Honey.”
You recognize that tone instantly, hearing it countless times before. It’s his signature prelude, a gentle warning shot before he points out the obvious — that Spencer and his girlfriend are undoubtedly sitting at your reserved table right now, politely studying menus, patiently pretending to understand your stylish definition of on time.
And then, right on cue, will come the entirely fair (but completely predictable) mention of your solemn promise to be ready to go the nanosecond his work call ended.
“Nearly ready, cross my heart. Just two more seconds. Okay, maybe three. But four tops. Five, like, absolutely worst-case scenario.”
Aaron’s fingertips skate possessively along your waist, slipping beneath your robe to reclaim their preferred real estate.
“I’m not particularly worried about being on time right now,” he murmurs into the shallow dip at your neck, nose nudging the sensitive spot just below your ear.
Your mascara wand skips slightly, completely giving you away. Not that Aaron’s much better at hiding it, his poker face vanishes at moments like this, evident both in the rigid slope of his shoulders and (oh, hello there!) in the very prominent, enthusiastic proof making itself known against your ass.
“Yeah,” you giggle, bumping your hips back against him for emphasis. ���I can feel how not worried you are.”
You struggle to fathom how he managed stress before you. Occasionally, you entertain yourself by picturing it — Aaron Hotchner being told to inhale deeply through a mindfulness app? Or earnestly attempting downward dog stretches in your living room? (You’d pay good money to see that.) Or perhaps he’d stress bake, an apron hugging his waist, forehead creased in the cutest serious-face as he glares suspiciously at measuring cups.
Each scenario gets progressively more funny and less believable.
Once, in those deceptively ‘innocent’ days before your relationship became official, you suggested Aaron adopt a new workout regime to help loosen that chronic, tightly wound demeanor of his. Admittedly, you were implying something a lot less treadmill-focused and considerably more… horizontal.
He diplomatically chose to ignore your entirely transparent proposition. Outwardly, anyway.
What neither of you anticipated, however, was just how accurate your advice would prove. Because nothing drains Aaron’s tension faster than having you trapped beneath him, diligently working out every ounce of strain against your eagerly receptive body.
Which is precisely why, employing your best bedroom voice, you once generously offered Aaron permanent, round-the-clock access to you anytime the mood might arise. No rules, no red tape. Just full, unrestricted access to you.
In hindsight, you should have anticipated the lengthy, serious discussion that ensued after.
Your easy-going, no rules proposition quickly evolved into an impressively comprehensive negotiation, complete with detailed guidelines and exhaustive clarifications.
His eyebrows had knitted together with that intensity of his, repeatedly insisting that you were always in complete control, and then thoroughly checking — then double-checking, then triple-checking — that your consent was crystal clear, until your cheeks burned hot from the combination of embarrassment and sheer excitement.
Emphasis on excitement.
Knowing him though, you weren’t necessarily too hopeful that he would actually take you up on your offer.
But when he did, it happened so fast, your brain hardly registered the transition from scrubbing dishes to being perched on the countertop, skirt punches around your waist and legs spread.
He’d walked in fresh from a meeting with Strauss, appearing completely unruffled except for the thunderclouds brewing darkly behind his eyes.
Without even a hint of warning, he had hoisted you up onto the island, plunging into you with such sudden decisiveness that all you managed was a surprised little squeak, fingers digging into his shoulders as he split you open in demanding strokes.
Afterward, he casually tucked himself away, tidying his clothes as if straightening his tie after an entirely routine briefing.
He leaned back against the countertop — yes, the one that had been slicked with both your juices — and resumed your unfinished dishes, nonchalantly asking, “Did you do anything interesting today?” like nothing had happened.
Your cheeks run hot at the memory.
“You do realize Spencer will totally freak if we’re late, right?”
“Then you’d better keep working on that makeup,” he murmurs, sliding his hands lower, “and I’ll handle my own priorities.”
Aaron never bothers fully stripping down when taking advantage of this arrangement. And you know that some part of you should be frustrated at that. It should promote at least some token complaint about fairness or reciprocity or whatever.
But instead, the sight of him, belt hitting to floor with a decisive thunk, pants unfastened just enough to take what he wants, well, it melts any kind of objection from your head, leaving only knees feeling more akin to jelly.
You barely suppress a shuddering breath as his cock springs free, hot and demanding against your thigh, marking your skin with a tacky trail of precum.
You attempt to steady your hand, refocusing on your left eye, guiding the wand in patient strokes from base to tip, each swipe sculpting them into perfectly fanned-out strands.
Aaron, however, is far less concerned with patience or perfection. His fingers hook into your robe, tugging it upward to reveal your hips and ass in one movement.
Goosebumps burst along your freshly moisturized skin at the exposure, and even so, you swear the air feels about ten degrees warmer. His right palm flattens between your shoulder blades, tipping you forward, presenting your body like an inviting dessert for ravenous eyes.
He positions himself between your folds, the thick tip of his cock flirting at your entrance before gliding over your puffy clit in sluggish, repeated motions. Your lips fall open on a soft, breathy gasp, eyes blinking dazedly around the blackened spoolie.
A very distant (and honestly not very reliable) part of your brain registers mild surprise at how soaked you’ve gotten. Which is stupid because you should really should expect it by now.
Being with Aaron has transformed you into a creature constantly on the edge, trembling in anticipation, your senses warped in a constant, intoxicating fog of lust.
Living together had only exacerbated that lust a thousandfold. You were constantly surrounded by his addictive pheromones, wrapped nightly in sheets saturated with his heat, body trained to climb him on any remotely available surface — the couch, the corner of his desk, the shower, the bed (obviously), and even once, tipsily, sprawled across the living room floor after a bottle of wine dissolved all remaining inhibitions.
“Easy, sweetheart,” Aaron whispers, dragging his head at your now sopping opening. “Wouldn’t want to mess up your pretty face before dinner.”
“Awh, baby, you know I look even better when I’m —” The retort snaps into a choked-off whine as he pushes into your cunt with one fluid thrust.
Your wrist spasms without permission, sending the mascara wand skidding haphazardly across your eyelid and streaking your cheek in sloppy black lines. Your pelvis crashes clumsily into the countertop’s hard edge, a sharp little reminder that maybe multitasking is apparently not your strong suit.
Aaron’s fingers card through your hair, sweeping it aside to bare your neck and shoulders. His other hand slowly peels your robe downward, exposing inch after inch of bare skin to his warm mouth.
Tender kisses rain softly down your spine as he draws his hips back, leaving you momentarily empty, only to surge forward again, ripping a sweetly startled whimper from your lips.
The spoolie clatters into the sink, splattering the porcelain in the process.
“Guess it’s a good thing I don’t mind explaining to Spencer exactly why we’re late.”
He wouldn’t dare, of course he wouldn’t, but your body still preens at the implication, cunt tightening greedily around him as though daring him to prove you wrong.
Because, lately, Aaron has grown noticeably more brazen, perhaps due to the ease and intimacy building in your relationship, or maybe he’s finally giving into your bad (amazing, really) influence.
You’ve noticed it in tiny habits, like when he purposely rolls his sleeves up, putting those mouthwatering forearms on display after overhearing you confess just how much they distract you. Or how he picks ties that perfectly match his suits in ways you’ve gushed about, enjoying the obvious ways your eyes get stuck lingering in team meetings.
He’s even developed a charming habit of pointedly mentioning how wonderfully rested he feels each morning, making clear eye contact when Rossi wonders aloud why he looks so content.
He drives into you again, deeper, sending your nails clawing over the marble, arching yourself forward chasing every ounce of friction you can get.
But Aaron’s hand snakes around your waist, palm splayed across your stomach, guiding you upright until you’re pressed flush against him, the new angle forcing pleasure to surge hot and fast through every nerve ending.
His voice rumbles in your ear, “Keep working on your makeup, sweetheart. Or I’ll have to stop, and neither of us wants that.”
“Aaron,” you whine, drawing out his name in the most petulant, bratty tone you can muster, “I can’t.”
Instantly, he stills, cock fully seated inside you. You try to buck backward, trying to force your hips back against him, but his fingers clamp down around your waist, gripping with the kind of force that leaves marks you’ll admire later (like really cute, private trophies).
His free hand slips lower, fingertips pinching your clit.
You cry out, writhing against him. “Okay, okay, I’ll behave, just, please.”
Your hand fumbles along the vanity, nails knocking loudly into bottles and compacts until, finally, you find your lipliner.
Aaron rewards your compliance by ramming back into you, obliterating any remaining hand-eye coordination. Your fingers wobble uncontrollably, resulting in an uneven, messy trail of color from your cupid’s bow to who-knows-where.
“That’s more like it. Look at you,” Aaron taunts, “Mouth open, looking so damn pretty.” His thumb lethargically grazes your overly-sensitive nub, causing your lips to part further, deepening your pout. He chuckles softly, clearly amused and more than a little cocky as he studies your reflection, eyes darkening. “Yeah, exactly like that, sweet girl.”
Aaron accelerates his motions, hips snapping roughly, hard enough to send you bouncing onto your tiptoes. Honestly, if his dick was any bigger, you’d need heels just to reach the floor.
Your robe begins to fall away from your shoulder, silky fabric separating to expose the swell of your breast, instantly capturing Aaron’s full gaze, pupils blown wide.
His hand deserts your waist, reaching up to cup your tit, thumb rolling over your nip, coaxing it into a tight little peak. You moan helplessly, eyes mascara-blurred as you attempt to keep your lip color within the lines of increasingly messy lips.
“Having trouble concentrating?” Aaron asks mildly, sounding completely unaffected for someone who’s currently buried eight inches deep inside you.
“I’m — I’m trying.”
He responds by squeezing your nipple a little harder. “So I noticed.”
You squirm wildly beneath him, his chest pressed down against your back, each thrust hitting a spot that makes your brain fizz into pink bubbles.
Your thoughts spin in a dizzy disaster — Oh my god, Aaron, I can’t, wait, no, I definitely can, please keep going, love you, love you, love you, until half-formed thoughts turn into breathless declarations from your lips about how perfect he is, how you’d marry him tomorrow (white dress, cake and vows) if he’d just keep doing exactly this.
His control frays simultaneously, composed grunts fading into needy, unfiltered whispers against your flushed skin.
His words tumble out just as desperate as your own ramblings — how beautiful you are, how he’d buy you anything, give you anything — a ring, maybe even a baby, anything that would bind you to him forever.
The words send you careening into ecstasy, orgasm igniting within you in bright, syrupy bursts more saccharin than you thought possible. Those perfect promises twist around your core like velvet ropes, pulling tighter with every dreamy picture they paint (domestic bliss, pretty nurseries, endless forevers) until you’re seeing stars and giggling between gasping moans.
Your spine bows as you pulse around him, waves of pleasure radiating outward, turning you both into a trembling mess of sweaty, feverish harmony.
You feel Aaron spill inside you, and for one fleeting, impulsive second, you catch yourself wishing your birth control would magically fail, just this once.
He slowly eases out of you, legs immediately trembling in complaint, his cum trickling down your inner thighs. You slump against the counter, breath uneven, as Aaron grabs a washcloth to dampen it.
The mirror does not go easy on you. Mascara in streaks across your eyelids and cheeks, lipstick color smeared, well, everywhere. You shoot him a half-hearted glare. He has the audacity to return a proud smirk.
“What?” he shrugs, biting back a laugh. “I think it’s a good look on you.”
You wiggle impatiently, trying to escape Aaron’s hold, your overstimulated body shivering and twitching at every careful wipe of the cloth.
You glance at the clock. “Spencer is so going to hate us forever.”
“The reservations got pushed back.” He tightens his grip, one strong arm cinching around your waist. “Spencer texted, they’re running late, something about forgetting stuff at home.”
You spin quickly in his arms. “That is literally the first thing you should’ve told me!”
“And miss watching you get flustered? Not a chance.”
You stick your tongue out defiantly, because that’s obviously the mature, adult way to handle your boyfriend teasing you.
The reward, though, is immediate — a soft, genuine laugh bubbles from Aaron, warming every little corner of your heart and fluttering down to your toes.
He reaches past you, plucking a packet of makeup wipes from the counter, and his touch, as he gently presses it to your cheekbone, is stupidly gentle, dabbing at your face in a lazy, affectionate path.
You melt right into his palm, almost feline in your contentment, purring with how sweet it feels to be touched like this.
“You know what I’m thinking about?” Peering up at him through your lashes, you flash a smile, “Our first kiss.”
“Funny, so was I.” Aaron’s whole face shifts, eyes crinkling at the corners, the tenderest smile spreading openly across his mouth. “You know, after you fell asleep that night, I sat awake for way too long, worrying you might wake up in the morning regretting it,” he admits softly. “I had a whole speech planned, this overly formal, completely unnecessary lecture about workplace ethics and chain of command. You would’ve rolled your eyes so hard.”
You giggle, sliding your arms snugly around his middle, tipping your head back to look up at him.
“You and your speeches,” you tease. “Lucky for you, I was already planning how to seduce you the second I woke up.”
His mouth finds the corner of yours.
“Well, you’ve always had much better instincts than me.”
You tap his chest lightly. “So, um, did you happen to mention something about giving me a baby earlier or was that just my post-orgasmic delirium talking?”
Aaron laughs. “I might have gotten carried away.”
“No baby, then? Just empty promises?”
“Who said anything about empty?” He smirks, fingertips dancing along your spine. “I just thought it’d be polite to give you my last name before we start creating miniature versions of ourselves.”
“Careful, talk like that will earn you all kinds of privileges.” You reach up, pinching his cheek.
“Good.” He grabs your wrist, kissing the inside of it. “And just so we’re clear, I plan to extensively take advantage for the next, oh, forty or fifty years.”

💌 masterlist taglist has been disbanded! if you want to get updates about my writings follow and turn notifications on for my account strictly for reblogging my works! @mariasreblogs
#🌺 maria writes#aaron hotchner x reader#aaron hotchner#criminal minds#aaron hotchner x fem reader#aaron hotchner smut#aaron hotchner x bimbo reader#aaron hotchner x bimbo!reader#aaron hotchner x fem!reader#aaron hotchner x you#aaron hotchner oneshot#aaron hotchner x bimbo assistant reader#aaron hotchner x bimbo!assistant!reader#aaron hotchner one shot#criminal minds smut#hotchner#hotch
904 notes
·
View notes
Text

i told my friend i would find him some beginner’s giffing tutorials, but all the one’s i could find were either years out of date, used a method that made me go “huh”, or incorporated ready-made actions. all perfectly fine, but if i’m sending someone a tutorial i’d rather it be one for a method i understand enough to help with.
so, here is a beginner’s guide to giffing, as told by cleo, a neurotic, detailed, and organization happy individual. there will be many pictures.
this tutorial will strictly cover the gif making portion of the process, from getting your screencaps to importing in photoshop, resizing/cropping, and sharpening. i was going to briefly go over colouring, but tumblr only allows 30 images and i ran out of space, so i'll have to do a separate colouring tutorial (which also means i can go into more detail, yay).
downloading the videos, whether direct downloads or t*rrents, is also another tutorial. but make sure you’re using at least 1080p, and the bigger the file the better. a single episode of a ~45 minute show should ideally be 2gb at minimum. a full length movie should ideally be at least 5gb. imo 2160p/4k files are not really necessary; the quality increase is negligible, and it takes a lot longer to screencap them. if you do use 2160p/4k files, try and make sure it is not HDR, as those videos are often washed out and require a different screencapping program to fix.
Programs
I am using a cracked version photoshop 2022, but whichever version you use should be pretty much the same
Actions. not a program but a function inside photoshop, where you essentially record a series of steps, and then you can simple play that action when needed and those steps will repeat, which saves considerable time when giffing. I will note which parts of the tutorial are best saved as actions, and explain how to create actions at the end.
For screencapping i use kmplayer it’s free and very simple to use
not at all a necessary program, but i use freecommander instead of the regular windows file explorer as i find the dual panels very helpful when moving the frames around
Screencapping
there are many programs you can use to get the screencaps from a video, a lot are basically the same, some are better suited for particular video file types. kmplayer is a very simple program to use, but afaik the capture function only works on mkv. files (the only other file type i’ve tried is mp4, which plays but does not capture)
once you open your video file in kmplayer, we’re going to open the advanced capture window, found under capture→advanced capture, or alt+v
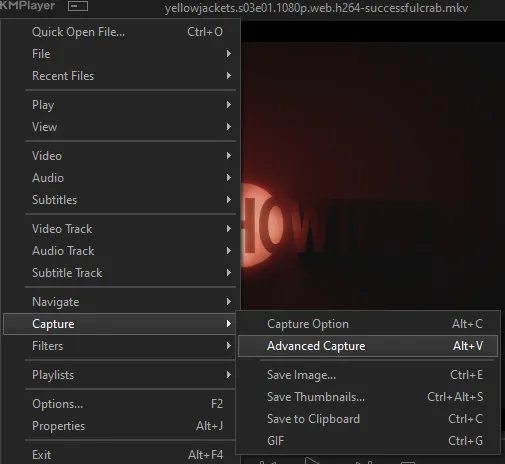
the window should look like this
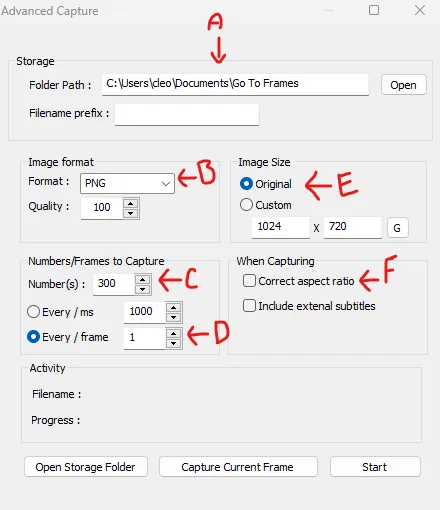
A-this is where all your screencaps will save to. i recommend making a specific folder for all your screencaps
B-make sure this is set to png for best quality
C-this is the number of screencaps you want to take, guesstimate how many you will need, keeping in mind that most videos are approx. 25 frames per second, and you should always cap a bit more than you think just in case
D-make sure “every/frame” is selected and set to 1
E-make sure “original” is selected, resizing will be done in photoshop
F-make sure “correct aspect ratio” is unselected
go to the part of the video you want to gif, and pause it just slightly before that part starts, then select ‘start’. the screencaps will start to save to the file, no need to play the video, and will automatically stop once it has capped the number of frames you have chosen
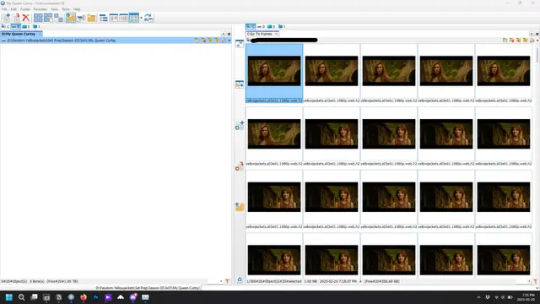
and here is how they look inside freecommander. i have already made a folder for this gifset, which is on the left. now you’re going to make a folder for each individual gif. i’ve decided this one will have four gifs, so create four folders (i just label them gif 01, gif 02, etc) and then move the frames for each gif into their respective folder
while you can always delete frames once the gif is made if it’s too big, i prefer to make sure i have the correct number of frames before i start. the gif limit on tumblr is 10mb, so it’s good to look at the scene/shots you’re giffing and decide approx. what dimensions your gif will be. full size gifs have a width of 540px and your choice of height. if you go for a square gif (540x540) you can usually fit 40-50 frames. if you’re planning for a smaller height (such as 540x400) you can usually fit more around 50-60 frames.
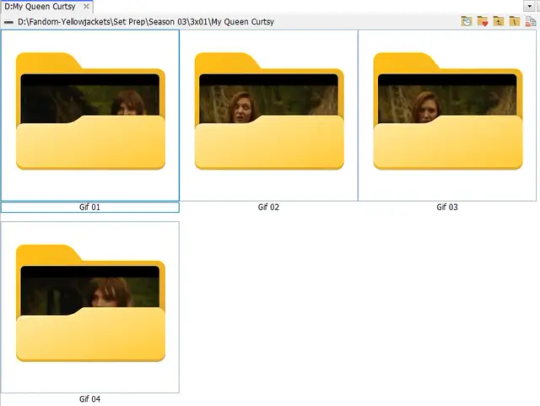
and here are the caps inside the folders. another reason i like freecommander is it’s ability to “multi-rename” files. the default file explorer can do so as well, but you have to do each folder individually and you can’t customize the new names as much. either way, i prefer to rename the files to each gif just to scratch my organization itch.
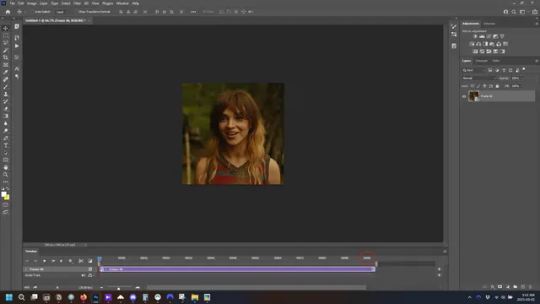
Introduction to Photoshop
NOTE: i have changed many of my keyboard shortcuts in photoshop to ones i prefer, so any you see listed in the menus of these screenshots are likely not the original shortcuts. you can see and change them yourself under edit→keyboard shortcuts

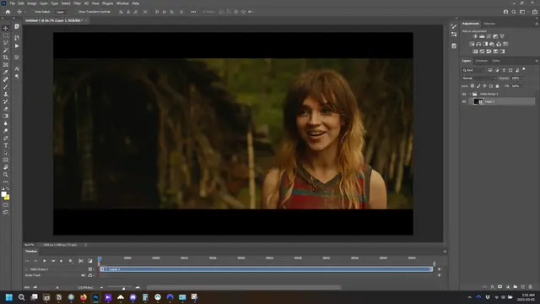
quick run-down of the photoshop interface. i have adjusted placement of some things from the default so this isn’t exactly how your photoshop will look when you open it, but everything is labelled, either on top or by hovering over the element. once you’re more familiar and have your process down i would recommend adjusting the workspace to suit your process.
A-your main tools and colour selector. almost all the tools have either several tools in one, or have alternate options which can be accessed by right-clicking the tool. you can also hover over each tool to get a pop-up with a quick explanation of the tool
B-additional “windows” such as history, properties, actions etc. can be opened from the window menu at the top and moved around with click-and-drag. history and properties should already be there by default, but probably on the right hand side instead. each window opens and closes with a click
C-the timeline window where the gif is made. the white square is a single frame of a gif, and on the row below is the play controls. this will not be there by default and will need to be opened from the window menu
D-adjustment layers for colouring
E-layers box. this is where the screencaps will show, along with adjustment layers, text layers, etc.
Opening Screencaps in Photoshop
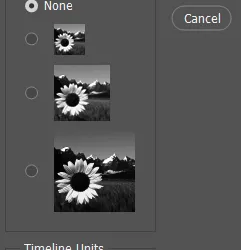
go to file → open navigate to the folder for your first gif, select the first screencap, and check the image sequencing, and click open

a window will open labelled frame rate. set it to 23.976 and select ok
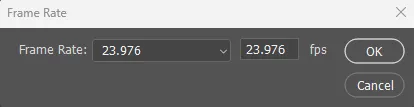
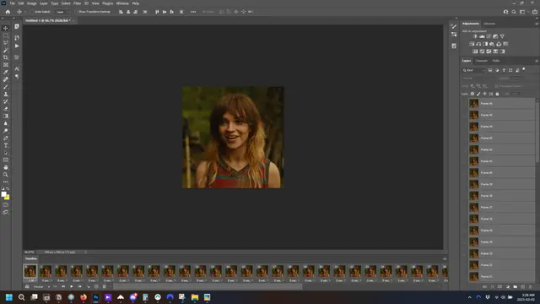
the screencaps will open in the timeline view, seen as the blue panel line at the bottom, and the screencaps are combined into video layer in the layer panel on the right.
Creating Frames
technically, you could go right into your cropping/resizing and sharpening from here, however if you do that directly then you have to keep the screencaps in the folders you have, otherwise if you save and re-open the gif it won’t move.
this next part should be made into an action.
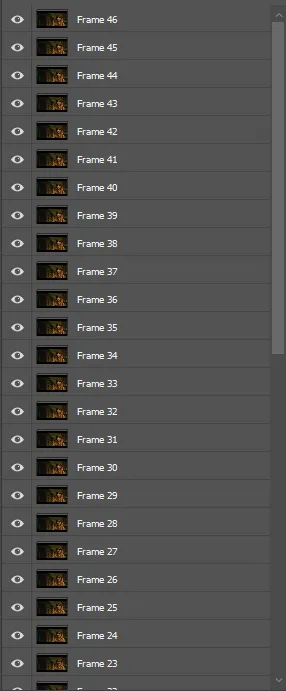
at the top right of the timeline window, click four vertical lines to open the menu and select convert frames → flatten frames into clips. depending on how long the gif is, this can take a minute.

the layers panel should now look like this, each frame of the gif is now its own layer.
the very bottom layer will be the video group. this can be deleted as we’ve made the frames from it
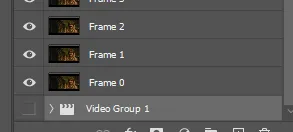
in same timeline menu as before, right under “flatten frames into clips”, select “convert to frame animation” and the screen should now look like this. this will be the end of this action.
Cropping and Resizing
with widescreen footage, sometimes it’s just shorter than 1080p, but most of the time it will have the black bars on the top and bottom, and frustratingly, they’re not always the same size. it’s good to save the most common sizes as actions.
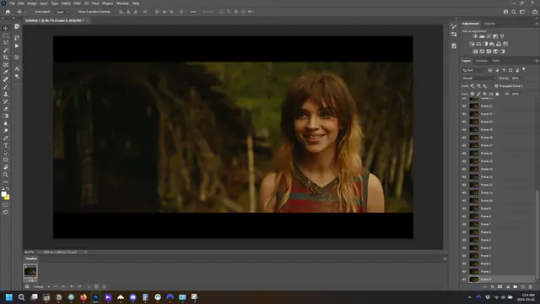
to find the size of the actual screen you turn on the rulers under view→rulers and check the height. then open your canvas size dialogue box under image→canvas size and change the height, making sure pixels are selected in the dropdown. yellowjackets is what i call “xtra wide” which is 800px. “normal” widescreen is 960px.
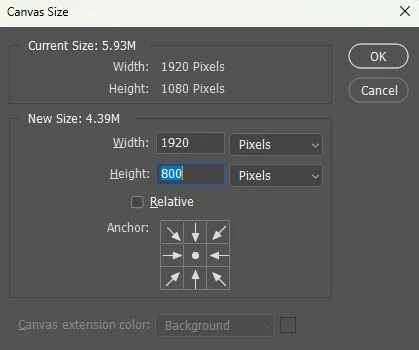
next we’re going to resize the caps. i also make actions for this, one for each potential gif size. open the image size dialogue box under image→image size and change the height of the image to your desired height plus 4 pixels. these extra pixels are to prevent a line at the top and/or bottom of your completed gif. now re-open the canvas size box, change the width to 540px, and the height to the desired, removing those 4 extra pixels. i have set this one to 540x540. this is where you would end the resizing action.
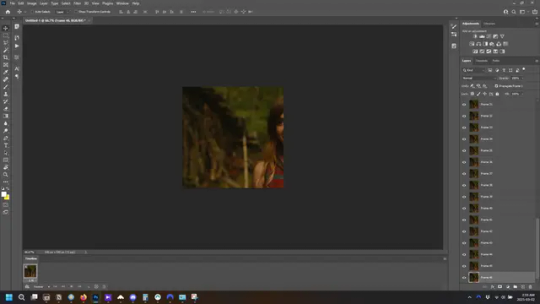
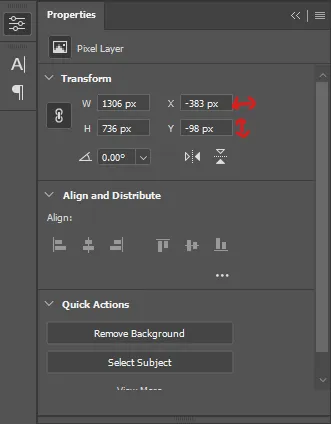
and as you can see she is off-screen. select the top layer, hold down shift and select the bottom layer to select them all, and with the move tool (the very top one) activated, click and drag to move it left to right as needed to centre the figure/s. as you move it a box will appear telling you how far you are moving it in any direction. make sure you are only moving it left or right, not up or down. to be certain of that, open the properties tab.
the y axis is your up/down, x is left/right. for this gif the y needs to stay at -98. you can also manually change the x axis number instead of dragging the image. also helpful for making sure multiple gifs of the same shot are all positioned the same.
the layer are currently ordered with the 1st at the top and the last at the bottom. with all layers still selected, go to layers→arrange→reverse. the last layer will be on top now. if there is movement in your gif, check if you need to alter the position again to make sure the movement properly centred. but once you are satisfied with the position, the layers should be in “reverse” position, of last layer on top. this is to ensure that the gif plays forwards.
Converting Gif
this should also be made into an action, going through sharpening process
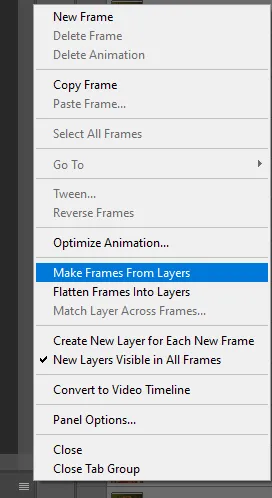
in the timeline menu, select “make frames from layers”
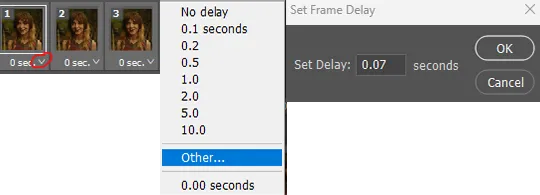
the frames are now populated in animation window. in timeline, click select all frames. go to any of the frames on the bottom and click the little arrow beneath it, select other, and enter 0.07 seconds. this is not a necessary step, as we will have to adjust the frame rate at the end, most likely to 0.05, but if we don’t change the frame rate here, then when we play the gif while working on it to check how it looks, it will play very fast.
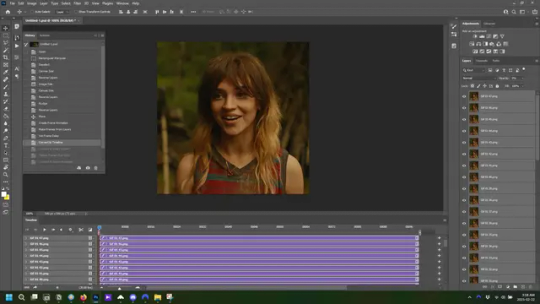
in the same menu at the right of the timeline box, select “convert to video timeline”
then, making sure all layers in the panel on the right are selected, go to filter→convert for smart filters. this turns all the layers into a single smart object.
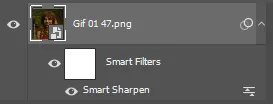
but if you look where i’ve circled, it says the gif is 99 frames long*, when in fact there are only 47. if you are making regular “scene” gifs, basic colouring and maybe a caption, this is fine and does not need to be fixed, it will play at the same speed. if you want to change it to display (approx.**) the correct number of frames, go to the timeline menu on the right, select “set timeline frame rate” and change it from 30 to 15
*if it does not list a frame number by 4 digits but instead says 5f, 10f, 15f, etc. go to the timeline menu on the right, select panel options, and change timeline units to “frame number”
**the reason why this is only approximate is because the actual frame rate is not a a whole number, so when changing the frame rate it isn’t a 1:1, and 47 frames becomes 50 frames. the extra frames are removed at the very end, but if you are not doing any edits that require working frame by frame, there’s no need to change the frame rate here at all
Sharpening
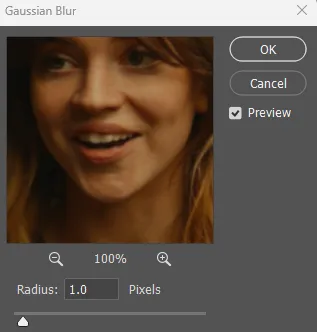
this is, as it sounds, making the gif look sharper. to start go to filter→sharpen→smart sharpen and this window opens. play around with the dials to see what each ones does. the below settings are good for most high quality footage.
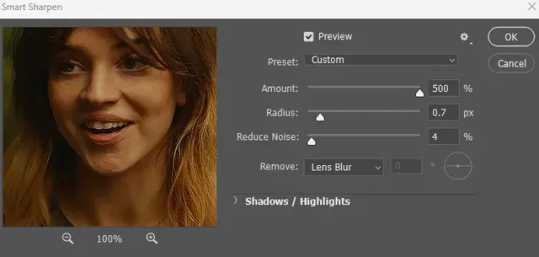
Amount-basically, how sharp do you want it
Radius-hard to explain, but this essentially sets how deep the lines of the sharpness are
Reduce Noise-smooths the pixels
once you click okay your single layer should look like this.
you’re going to then right click the layer and select duplicate layer. with the top layer selected, go to filters→blur→gaussian blur and set the radius to 1.0 pixels.
then change the opacity of the top layer to 10%. this is to essentially soften the sharpening a bit, as if it’s too sharp it can make the colouring wonky. this opacity level can also be changed depending on need.
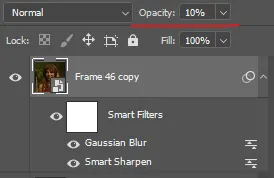
finally, select both layers, right click, and click “group from layers”. your gif is now fully made and sharpened.
Colouring
yeah. ran out of image space. but this is where you would do your colouring and add a caption or any other text.
Converting & Exporting
when all your colouring is done, you’re ready to start saving your gif. you can do it directly from your current file, but that means essentially losing your colouring, as all those layers will be merged together. i am someone who likes to save my psd’s (photoshop files), at least until i’ve posted the gifs, in case i need to fix something in the colouring. if you’d like to keep yours as well, open the history tab and select the first icon at the bottom “create new document from current state”. this will open a copy of the file in a new tab. save the original file and you can close it, continuing all work on the copy file.

select your all your layers, convert them into a smart object from filter->convert for smart filters, then follow the same steps from Creating Frames above. once you're back in frame animation, select Create Frames From Layers, and once again set the frame animation speed.
most people set the speed to 0.05. i personally set it to 0.05 or 0.06 depending on the length of the gif. check how it looks at 0.05, if it seems too fast, try 0.06.
now to save. go to file->export->save for web (legacy). the number is the lower left corner is your gif size, it needs to be under 10mb or else you'll have to delete some frames.

the right panel is your save options. the preset dropdown has some built-in settings, but you won't use them because (at least on my version) the presets only go up to 128 colours, instead of the full 256. the 3 i've highlighted in green are the only one's you'll adjust as needed. the settings below i use for i'd say 90% of my gifs. i'll sometimes change the adaptive dropdown to one of the other options, ocaissionaly the diffusion, and rarely the no transparency dither, but play around with them and see how they change the look of the gif.

when you're satisfied with the look of your gif, click save at the bottom right of the window.
voilà! you now have a gif.
Actions
this is your actions panel. the triangle on the left side is the button to open it. remember, if it's not already there, go to windows->actions to open it.
the buttons on the bottom, left to right, are stop recording, record action, play action, new folder, new action, and delete.

as you can see, i have different folders for my resizing, sharpening, captions, saving, and my 1 step (temporary) actions. to run an action is very simple; click the action, and click play.
to create an action, click the new action button, a box will pop up, give the action a name, and click record. the record button at the bottom of the action window will turn red. now perform all the steps you want it to record, and click stop recording. keep in mind it will record every single thing you do, including in other open files, so if the action you plan to record will have a lot of steps, it might help to write them down first.
to modify an action, select the step in the action above where you'd like the new step to be, hit record, perform the step, stop recording. select the step you'd like to delete, and click the delete button.
steps within the actions can be clicked and dragged, both within that action and moved to other actions. actions can also be moved between folders.
267 notes
·
View notes
Note
You absolutely do not need to write about this but I need to share this mental image with you: Azul learning about the Cursed Cafe, getting annoyed because 'how dare there be a new cafe that he did not hear about months in advance'.
Goes in to investigate only to stumble head first into the majority of the school's heroes (read: almost all of the villains) and trying not to lose it because IS THAT THE SEA WITCH OF LEGEND? AND SHES DRESSED SO NICELY?
I just love the idea of him coming in to try and undermine the cafe, only to come back trying to pull it together because OH GOD ITS HER. WHile the tweels just ???? About why hes suddenly losing it.


dhahebwvgswu Azul is definitely the type to put on a disguise to “scope out the competition” if a new café opens up 😭 He finds a table and hunches behind a menu to observe just what makes this place so special?? And then in walks in someone that resembles the Sea Witch?? Azul’s so shocked he almost drops his menu!! He tries to get a leash on his emotions and come up with a reasonable explanation for this—is it one of those “cosplayer” people Idia-san has mentioned at club meetings? A historical reenactment?? Simply an uncanny acceptance? Would it be too rude to start up a conversation? He had a pen on him, plus these napkins… c-can he get an autograph?!
The twins, who came to the café with Azul for the so-called “reconnoissance mission”, are greatly enjoying his reaction. They probably tag team to gaslight him, saying it’s sooo weird and mannerless for Azul to stare at a stranger and such. (Jade and Floyd are actually secretly curious too!) Maybe they also find some time to feed fish flakes to the moray eels at the counter’s fish bowl.
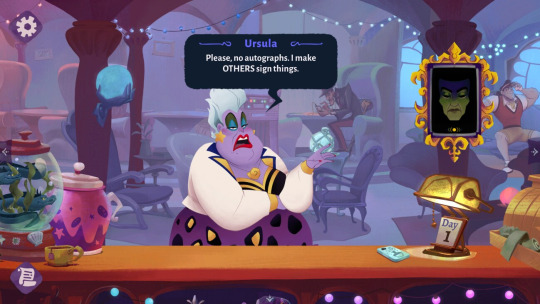
bfksbwkkw The way the Disney Villains Cursed Café depicts Ursula is honestly so precious 😭 She’s obviously still evil and wants to use dishonest means to get her way, but I really appreciate how she’s relatively sweet to the player compared to some of the other villains we serve. Ursula is the one that walks us through the tutorial and she frequently refers to the Potionista as “angelfish” or “dearie”. She gives me sweet (and maybe a little unhinged) cat auntie vibes… I bet Ursula would be sweet to the Octatrio too ^^
#disney twst#twisted wonderland#twst#disney twisted wonderland#Azul Ashengrotto#Jade Leech#Floyd Leech#Octavinelle#Tweels#Ursula#Flotsam#Jetsam#notes from the writing raven#disney villains cursed cafe#disney villains cursed café
174 notes
·
View notes
Text
How to run The Sims 3 with DXVK & Reshade (Direct3D 9.0c)

Today I am going to show you guys how to install Reshade and use Direct3D 9.0c (D3D9) instead of Vulkan as rendering API.
This tutorial is based on @nornities and @desiree-uk's awesome guide on "How to use DXVK with The Sims 3", with the goal of increasing compatibility between DXVK and Reshade. For users not interested in using Reshade, you may skip this tutorial.
If you followed nornities and desiree-uk's guide, it is strongly recommended that you start from scratch, meaning you should uninstall DXVK AND Reshade completely. Believe me when I say this: it will save you a lot of time, frustration, and make your life so much easier.
For the purpose of this tutorial, I am on patch 1.69.47 and running EA App on Windows 10, but it should work for version 1.67.2 on Steam and discs, too. This tutorial does not cover GShade.
Before we start
Backup your files, even the entire folder (Program Files\EA Games\The Sims 3\Game\Bin) if you want to be extra safe; you will thank yourself later. If you do not wish to backup the entire folder, at least backup the following:
reshade-presets
reshade-shaders
Reshade.ini
Options.ini (Documents\Electronic Arts\The Sims 3)
Keep them somewhere secure, for your peace of mind (and sanity).

Done? Great stuff, let us begin!
Step 1:
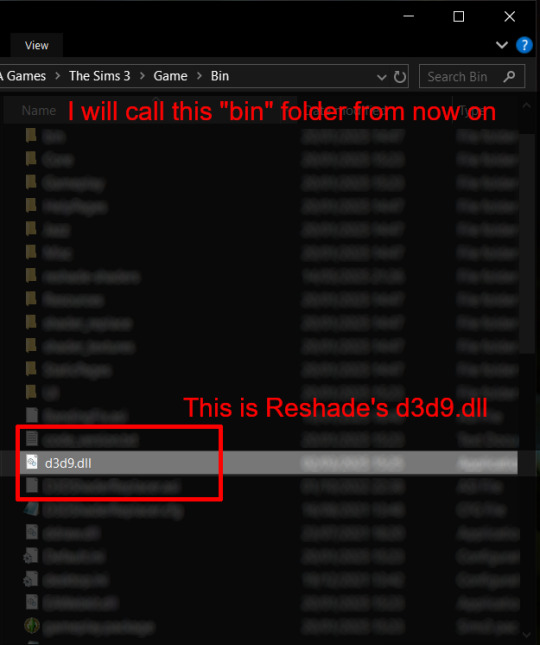
If you installed DXVK following nornite and desiree-uk's guide, go to the bin folder and delete the following files to fully uninstall DXVK, we are starting from scratch:
d3d9.dll
TS3.dxvk-cache
dxvk.conf
TS3_d3d9.log (or TS3W_d3d9.log)
Step 2:
If you already have Reshade on your PC, uninstall it using this: https://reshade.me/downloads/ReShade_Setup_X.X.X.exe (replace X.X.X with version number)
Step 3:
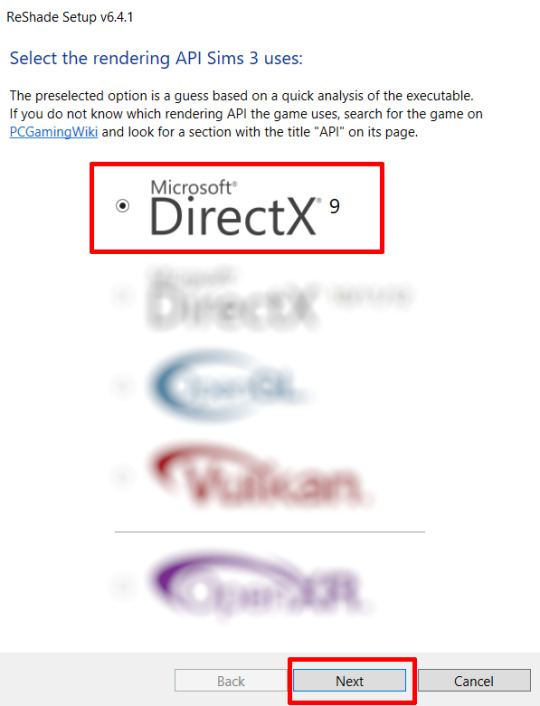
Perform a clean install of Reshade (I am using the latest version - 6.4.1 at the time of writing). Please note that you need a version no older than 4.5.0 or this method will not work. Choose DirectX9, click next.
Once the installation is complete, you should see a "d3d9.dll" file inside The Sims 3's bin folder (Program Files\EA Games\The Sims 3\Game\Bin):
It may all seem familiar thus far. Indeed, this is how we installed Reshade in the past before using DXVK, but here comes the tricky part:
Step 4:
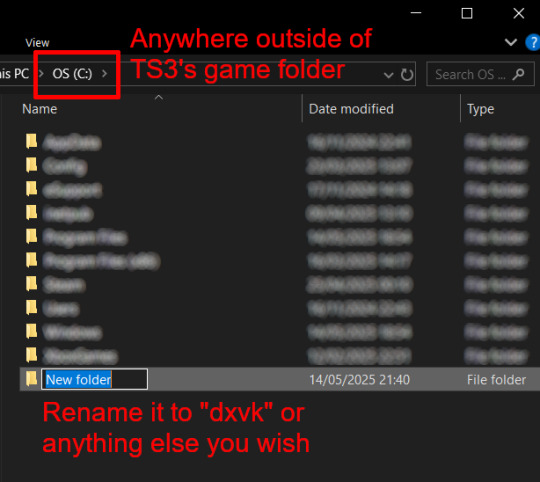
Create a new folder outside of The Sims 3's game folder (I created it on my C drive), name it "dxvk" or whatever else you like. Remember where you saved this folder, we will return to it later.
Step 5:
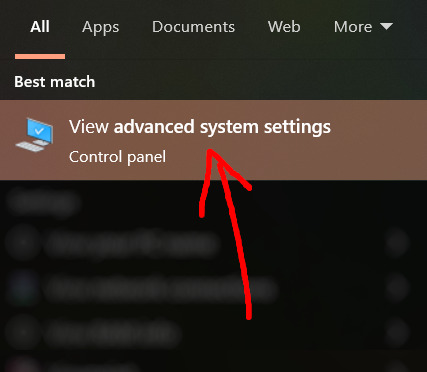
Now we need Reshade to load the next dll in order to chain Reshade with DXVK. Click on the search bar, and type in "View advanced system settings".
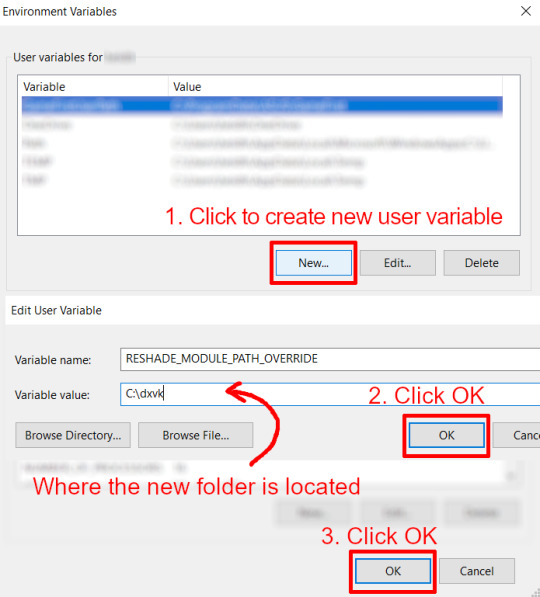
Click on "Environment Variables..."

Under "User variables", click "New..."
In the new pop-up window, find "Variable name:" and type in:
RESHADE_MODULE_PATH_OVERRIDE
for "Variable value:", paste in the directory that leads to the folder we created earlier. Once you are done, hit OK, and then hit OK again to save the changes made.
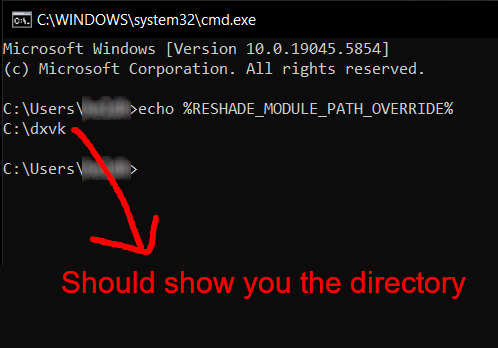
You can use Command Prompt to check if this new environment variable has been registered by entering:
echo %RESHADE_MODULE_PATH_OVERRIDE%
It should return you the folder's location. If not, make sure you have typed in the variable name correctly and confirm the folder's location.
Step 6:
Download DXVK (version 2.3.1) from here: https://github.com/doitsujin/DXVK/releases/tag/v2.3.1 and unzip "dxvk-2.3.1.tar.gz" (I use 7-Zip, but winRAR works, too). Remember to choose x32, and move only "d3d9.dll" to the folder we made earlier.
Now we have two "d3d9.dll" files, one from Reshade (lives in the bin folder), and the other from DXVK (in this new folder, outside of The Sims 3 game folder).

Step 7:
Download "dxvk.conf" here: https://github.com/doitsujin/dxvk/blob/master/dxvk.conf delete everything inside, and enter the following:
d3d9.textureMemory = 1 d3d9.presentInterval = 1 d3d9.maxFrameRate = 60 dxvk.hud = devinfo
Ctrl + S to save the document.
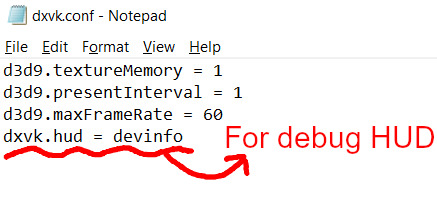
The first 3 lines are taken from @nornities and @desiree-uk's guide.
The last line is only for debugging purposes. Due to the inconvenient location occupied by the HUD (top left corner of your screen), it should be removed once the installation is successful.
Step 8:
Drag "dxvk.conf" into the bin folder, where Reshade's "d3d9.dll", "TS3.exe", and "TS3W.exe" all live.

Step 9:
Now fire up the game and check if both are showing up:

Lastly, check for “TS3.dxvk-cache” in the bin folder:
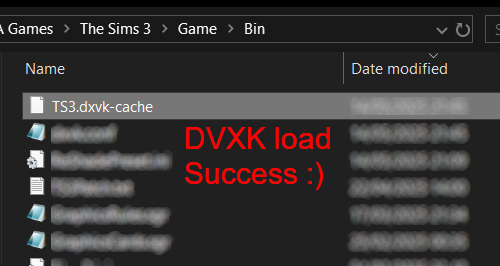
If it is there, congratulations! You have successfully installed DXVK and Reshade utilising D3D9 as API! You can now go to "dxvk.conf" and remove its last line "dxvk.hud = devinfo" and have fun! :)
Hope this tutorial isn't too confusing, the last thing I want is to over-complicate things. If you still need some help, comment down below or send me a DM/ask, I'll try and troubleshoot with you to the best of my ability.
Credits:
@nornities and @desiree-uk for their fantastic guide.
@criisolate for promulgating the usage of DXVK in TS3 community.
reddit user folieadeuxmeharder for helping me troubleshoot and informing me of this workaround.
doitsujin for creating DXVK.
crosire for creating Reshade.
147 notes
·
View notes
Text
Heavy Dirty Soul
Chapter One
Homewell x fem!reader
18+

When you first get a job as Madelyn Stillwell’s personal assistant, you merely see it as a stepping stone for corporate advancement. But when your feelings for her begin to toe the line between admiration and desire, you allow her to mold you into whatever she wants regardless of professional boundaries. This evolution places you square in the middle of the very strange dynamic between her and Homelander. It doesn’t take long before you willingly become entangled in a web of lust and manipulation.
Competence, that’s what starts all this. You’re a perfectionist, constantly at war with your best, and desperate to prove what you're capable of. When you are hired as Madelyn Stillwell’s personal assistant, you practically shake with your need to show off. If you can impress her then you’ll be set. If you can impress her then maybe she’ll pull you up the ladder along with her. You’re ambitious and hungry. You can practically taste your future when she calls you into her office for the first time.
She’s not an easy boss but she’s fair. She walks the halls and people scatter. You imitate her gait as you follow behind her, typing away on your phone and completing tasks that she hasn’t even asked you about yet. But you know she will, you know her. You crave that look of respect she gives you every time you reveal that you’re already ahead of her. It makes you feel fuzzy, like your veins are filled with champagne. Her approval is good for your career but your craving for it has become far deeper than a bit of professional interest. When you’re tailing her, your gaze perhaps watches her a little too closely. At first you thought it was because you wanted to be her, but you’re not so sure that’s it anymore.
The first time she asks you to watch Teddy while she meets with Edgar, you flush crimson. She doesn’t comment as she hands him over to you, but there is a certain quirk in her smile that indicates that she notices. Your shoulders square with pride as you bounce a giggly Teddy on your hip. He instantly takes a shine to you and this fact hasn't escaped her either. You can tell because her look of respect has turned calculating in a way that makes your knees a little wobbly. You’ve never considered yourself good with children so despite his inability to understand, you thank Teddy for doing you a solid and behaving for you.
Teddy is only the beginning. Stillwell begins asking you more personal favors, ones that push the boundaries of what is strictly professional. Her gaze remains pleasant but hawk-like, as though she’s testing how far you’ll really go. When she begins requesting you wear button-ups to work, you instantly fill your closet with them. When she asks you to wear your hair a certain way, you make a playlist of hair tutorials that night. You aren’t stupid, you know she is pushing inappropriate boundaries. You also know that following her orders without question is no longer a matter of pure ambition. You crave the way she looks at you with quiet satisfaction. And when she starts insisting you wear your shirts unbuttoned, you are more than willing to show off, despite the passing looks you get for revealing more of your chest than is appropriate for a corporate job. But everyone knows better than to say anything, especially with Stillwell’s umbrella of protection.
You are hungry for her attention. You thrive in her office, by her desk, waiting to fulfill whatever task she asks of you.
So when you start to notice your meetings with her end up involving Homelander more often than not, you can’t help your disappointment. It’s clearly a disappointment he seems to share. He always stares at you when she calls you in, disgruntled at having his time with her interrupted despite plastering on his best winning smile. You’ve never seen it reach his eyes. His stares drift down and linger impolitely on the days you wear your shirts buttoned low. You exchange small talk with him and he pretends to be pleasant under her watchful gaze. It doesn’t escape you that he looks at her the same way you know you do.
You’re not jealous of him or the way she is with him. On the contrary, as much as you would prefer her undivided attention, there is something magnetic about how effortlessly she moves him around like a piece on a chess board. You’ve heard whispers about their interesting dynamic but no one dared to say anything concrete. Now you have a front row seat. It’s subtle enough that it could easily be waved away as an overactive imagination. But not to you, your keen focus is what makes you so good at your job. Nothing escapes you. Especially not the subtle way she brushes his thigh as he huffs, pinky grazing the obscene jut of his cup. Her eyes meet yours as he melts and she gives you the silent command to watch, as though she is asking you to sit in on a meeting with her…as though she’s trying to teach you something.
———————
You’ve heard things that would have the country in a horrified uproar if they knew. The Supes aren’t heavenly bodies in human form. They’re created. You’ve seen it. The bright blue of the compound V practically glows. You find it beautiful. It looks like victory. You never once dream of whistleblowing. You don’t want to lose this strange intimacy that comes from sharing a terrible truth with someone else. She’s tugging you up the ladder with her and you eagerly climb. You leave your soul at the bottom. It’s dead weight anyway.
You touch yourself the night you learn the truth and fail to notice that a couple of stars in the sky glow an ominous red.
————————-
This is new, leaving you alone with him. You’re happily cuddling with Teddy, him giggling on your shoulder while you rub his back. She’s pleased with you today and your stomach flips twice over when she rests a gentle hand on your arm while she runs through the day with you. She has back to back meetings today so you’re on Teddy duty. You are more than willing to play with the baby. It turns out you do like children after all.
But Homelander has business with Madelyn. He’s flustered and when he comes into the office only to find you on your own, his displeasure is palpable. Teddy is gurgling and a muscle twitches in his cheek as he stares at the two of you with disdain.
Only…something interesting happens. His eyes rake over your body. Your shirt is buttoned low as usual and with Madelyn’s guidance, your tight pencil skirts have only gotten shorter. You remember the day you realized that she’s been dressing you up as some pornographic version of her. Homelander seems to finally be coming to the same conclusion. You’re not her twin by any means but that doesn’t seem to deter Homelander’s roving eyes. Your arms around Teddy seem to have sealed the deal as he watches you care for him so easily. He licks his lips and your eyes follow the movement.
“Where’s Madelyn? I have something urgent to discuss with her.” His hands rest on his hips and you can’t help but truly look at him for the first time. You’ve always been too distracted by Stillwell’s overwhelming presence. Acknowledging his attractiveness has always been a matter of cognitive recognition. But something about him has your body catching up to what your mind has always known.
“She has an emergency meeting with Mr. Edgar. I can help you with whatever you need.” You reply sweetly. Teddy reaches up for your attention and his little hand tugs at your shirt. A flash of your lace bra appears.
Homelander’s mouth opens wordlessly, eyes drawn to your exposed chest. You see a flash of tongue press against his teeth. He clears his throat as another insistent tug reveals more of your fancy lingerie, another purchase requested from Stillwell.
“I…I have some notes about these stupid talking points. I would not say this bland corporate shit. It’s ridiculous.” He fumes, lips pursed. He doesn’t look unlike Teddy at this moment when the baby starts to get petulant and hungry. He effortlessly sweeps his cape out of the way as he flops onto the couch with a huff. With the change of angle, he lets his eyes follow the line of your stockinged leg. His gaze seems to intensify as it reaches the hem of your skirt and travels upward. He hums low in his throat, a filthy heady noise. You swallow thickly, pretty damn sure he's using his abilities for reasons that are incredibly inappropriate in a workplace environment.
You walk over to place a babbling Teddy in his high chair before walking over to join Homelander on the couch. He scoots a touch closer and his thigh is blazingly hot against yours. You push down the nerves bubbling in your stomach at the intense way he looks at you. It’s different from the borderline reverent way he looks at Stillwell.
“Why don’t you tell me about it? That way you can gather your thoughts before she comes back.” You reply. He doesn’t answer at first so you gather your courage and reach out to lightly rest your hand on his thigh. He tenses for a moment but he doesn’t stop you and eventually his leg relaxes under your touch. He leans toward you conspiratorially.
“If you ask me, I think we’re going in the completely wrong direction when it comes to getting this bill passed. I mean, spitting out these bland speeches doesn’t do anything to really show what supes are capable of.” He casually rests his arm on the couch behind you. He smells good, clean but with the tiniest hint of cologne, something with vetiver you think. Your lids feel heavy as he leans closer until his forehead is almost touching yours. You try to ignore the painful thump of your heart in your chest, as though pretending it isn’t happening will block him from hearing it.
Your mouth is dry when you open your mouth to reply to him. You try your best to think of what Stillwell would say but your mind is blank. Luckily, you don’t have to think much harder because the door opens to reveal her. She seems completely unphased by the borderline inappropriate distance between Homelander and yourself. She even seems pleased by it, her eyes meeting yours with that look of approval you crave so much. Homelander instantly moves away and the loss of his heat is a shock to your system. He stands and launches into a laundry list of complaints but he seems easier to mollify today as his eyes continue to flick over to you. You return to pick up a whining Teddy, bouncing him on your hip as you watch them. Your heart is still pounding and you become aware of a dull throb between your thighs.
You wake up to a small bonus and a text from Stillwell.
Thank you for handling him.
It doesn’t take a genius to figure out what she means.
——————————
It’s the Believe Expo and Homelander is being a snot. It’s been a learning curve trying to manage him but you’re starting to get the hang of it. Now it’s your fingers teasing him just enough. Stillwell is still the one he really wants but he’s come to settle for you in a pinch. You don’t allow it to go too far but you’ve been known to allow a subtle grope of your chest or a hand brushing your backside. You don’t hold quite the same status of Stillwell yet so there are some things you must allow to keep his attention on you. You’re a little ashamed to admit to yourself that you don’t really mind.
Today however, he isn’t so easy to tame. He fumes in his tent as you gently explain that Stillwell is taking Teddy to the pediatrician. Usually allowing him to vent to you and distracting him with your body is enough to soothe his annoyance. But even your best efforts aren’t working. Your ire is up in a way he hasn’t been able to inspire in you before. Stillwell impressed upon you strongly the importance of this event. If he fucks up then you fuck up, and you feel ill at the thought of letting her down in this way. You dig your nails into your palm to calm yourself down.
“The pediatrician? Really? She should be here! Does she really expect me to be content with you?” He looks down at you with bold faced disdain. “She can’t use her slutty little puppet to get out of all her responsibilities!”
You slap him.
He stares.
A horrified silence sweeps through the tent like a dark cloud as you breath heavily and meet his glare right back. Your heart is pounding. You know you’ve fucked up. You know it.
He wasn’t wrong about your role in regards to Stillwell. You know what you are and the real reason she keeps you around. All the competence in the world doesn’t make up for the fact that you have nice tits and a willingness to debase yourself for corporate advancement and just a sliver of her attention. So far you’ve been more than ok with that. You don’t care why you’re useful as long as you are. But hearing it from him made you feel so cheap. Your hand moved before you could make yourself stop and think things through.
He smiles coldly but you don’t miss the way his hips twitch the way they always do when his hard cock becomes uncomfortable in his cup. You’ve watched Stillwell work him enough to know.
He liked that you fought back.
He walks closer with purpose and each footfall echoes in the quiet. You can see Ashley clutching her tablet with a death grip, knuckles white with the strain. A look of sheer primal horror is frozen on her features. But she’s more than willing to let you face the consequences of your own actions.
He’s close enough now that your noses are almost touching. His hand reaches around to rest heavy on the small of your back. Your skin prickles under the heat of his palm. Wordlessly, he maneuvers you to the exit and you let him guide you without resistance. You’re the only one who knows his dirty little secret and you pray it’s enough to give you leverage as long as you keep your cool and play your cards right. Perhaps this is your first real test.
“Ashley,” He purrs dangerously. “I’m going to miss the upcoming panel. I need to teach some manners. But believe me, I am fully prepared to make my big speech”
Your stomach drops.
You don’t care what he does to you. But if you disappoint her…you’re not sure you’ll be able to handle it.
Normally Ashley would try to stutter out some protest about his last minute cancellation but she prioritizes self-preservation at this moment. Instead, she shoots you a poisonous glare, because in her mind this is your fault. You know she doesn’t give a shit if you are being punished. After all, you’re just the office whore. The way she sees it, if you sleep your way to the top, you don’t get to throw a tantrum when someone actually calls it out. Especially when it’s someone as powerful and terrifying as Homelander.
You didn’t sleep your way to the top. But you look like you did and apparently that’s all it takes.
He leads you through the expo, waving and smiling and “politely” turning down requests for selfies. Eventually he makes it through the worst of the crowd, past the stench of the porta-potties and the humming generators providing power to the whole ordeal. He leads you behind the stages and the massive trucks ready to be stuffed with equipment again once the event is over. You reach a place on the edge of where the parking lot begins, a singular lone tent being used to store some instruments for an upcoming Christian rock performance. It’s isolated but not private. You expect that’s the point.
He doesn’t speak to you once and you’re not sure if it’s a relief or merely a signal of your upcoming doom. He never removes his hand from you and his gloved fingers dig into the soft flesh of your hip hard enough to bruise. He lifts the tent flap and all but shoves you in. He crowds you up against a speaker, looming over you with his gaze cold and snakelike. It’s far more terrifying than any overt display of rage could ever be.
“Y’know I could have you blacklisted not only from Vought but the entire corporate world for that. You could spread your legs for everyone in upper management and it wouldn’t make a bit of difference.” He leans forwards and whispers poisonously. He reaches out to trace the edge of your shirt, gently pulling the flimsy fabric back just enough to reveal the lace of your bra. You grab his wrist. He pauses, not because he has any intention of stopping. He’s just curious to see what you plan to do.
“I got this far because I am good at my job.” You hiss at him and he snorts.
“You got this far because your ass looks good in a tight skirt and Madelyn knows it. You think I don’t know what she’s doing… I’m not an idiot.” He growls and your stomach turns over.
“Maybe if she didn’t have to fuss at you to behave, she wouldn’t need to distract you so she can do her real job” You growl and you swear his eyes flash red for a split second. “If you want her attention so badly then why not be a good boy and let her do what she needs to do so she actually has the time.”
He reels back when you call him a good boy. His hips don’t twitch, they jerk. A light bulb flashes in your brain. You ignore the way his expression twists with fury as you reach out and caress his thigh, brushing the cup the way you know he likes. Your expression is cool despite the frustration and fear you feel. Rage simmers in his expression but it fights with the sudden rush of arousal from your words and actions. You know his secret. It’s time to exploit it if you want to make it out of this. Maybe you are nothing but a pretty object. But you’re a pretty object with teeth.
You sensually unbutton your blouse, exposing your fancy lingerie fully. The cups are sheer lace and leave nothing to the imagination. His lips curl with disdain but his gaze doesn’t move from your tits and there is a rapt hunger in his expression.
“There’s no need for you to fight with me. I’m here to help you both. Why don’t you get all of your big feelings out with me? I know you must be aching. We don’t have to be enemies, you and I.” You purr and once more you watch his tongue flick behind his teeth.
“You’re proving my point. You’re nothing but a slut.” He huffs, but his hand reaches out to cup your breast with an unexpected tenderness. You rest your hand on top of his, encouraging him to squeeze harder.
“You keep using that word to hurt my feelings. But you’re a little slutty too, aren’t you? My good boy.” You purr and he grips a little tighter as a faint blush crosses his cheeks. His thumb rubs over where the color of your nipple peeks through the white lace and you give a sweet moan as your nipple hardens. He exhales sharply.
“I don’t need anyone’s attention.” He complains but you both know it’s a lie. He pinches your nipples and you squeal and shift against him, letting your thigh slot between his legs to nudge up against where his hard cock must be aching in his cup. He bucks into it and the flush on his cheeks deepens as his brows knit together.
“It’s alright if you do. It’s alright if you need to soothe your nerves before your big performance. Just behave and let me help you. I’m good at what I do. It’s not because I’m a slut. It’s because you know as well as I do, you sometimes need to get a little dirty in this business if you want to get anywhere.” You nudge him again and he gives a sweet little whine. “Sometimes…you have to leave your soul at the door and give the damn speech”
He snarls and lurches forward to clash his mouth against yours. The force of it splits your lip and Homelander gathers it on his tongue and messily kisses it back into your mouth. Your blood is warm on your tongue and the sharp tang of iron masks the taste of him. The hand that isn’t massaging your breast plunges between your legs and cups you roughly. He grinds his palm against your aching clit until you whine and buck in his arms.
“Slut” He hisses against your lips as his hand tugs your bra down roughly to pinch the swell of your breast punishingly. The pain feels good even as the skin purples beneath his fingers. He can feel the way your panties become plastered against your wet cunt at his rough play. You smell like sin. You smell like you’re winning.
“Whore.” You hiss right back as your hand rubs against his cup. He whimpers and bucks into your hand rudely, demanding more and more and more. His cock is sensitive and the precum provides a delicious slip as he grinds against your palm. His eyes roll back as the pleasure blazes all the way up his spine until his brain goes hazy.
He closes his eyes. You know he’s imagining you’re her. That he’s “punishing” her for leaving him alone. That’s fine with you. Whatever gets him to do his job so you don’t have to tell her you failed. He whimpers sweetly and he nuzzles against you to bite and suck at your neck. You think he whispers her name against your skin but then his fingers slip under your silky panties to shove two thick gloved fingers into where you’re wet and open.
You gasp at the stretch but he cuts it off with another messy kiss.
He curls his fingers to pummel that spot inside you that feels like heaven and you croon and clench around him. His thumb circles your clit desperately, the sheer slickness dripping from you making it hard for him to establish a rhythm as his caresses can’t help but slip off their mark. It’s a cruel tease that he doesn’t intend and he growls lowly in frustration as he concentrates on rubbing you off.
“Good boy” you moan and you make sure to match her cadence of speaking.
He moans like a slut as he spills in his cup.
Good boy
Good boy
Good boy
You come hard around his fingers as your legs shiver and collapse. He simply presses you harder against the speaker with his body as he milks as much as he can from you. The lewd profane squelching of your juices filling the tent as your cunt flutters and melts around leather. He’s mean but not cruel as he continues to tease that spot even as your body twitches with overstimulation that is quickly edging into pain. When you rest your palms against his chest to weakly push him away, he removes his fingers with a flourish, droplets of your come darkening the dirt beneath your feet.
You’re both panting as you stare at each other. You both reek of sex and desperation. You both look debauched and used. You see each other and you understand.
“Feel better with that out of your system?” You ask breathlessly but the tone of your voice is as in control as ever. You did what you needed to do. You turned the situation in your favor exactly as you planned. You pull your bra back into place and button your shirt back up with a brisk professionalism despite your shaky hands.
He narrows his eyes as he analyzes you. He’s panting and the slimy mess he’s made of his cup is cooling and quickly becoming uncomfortable. You can see the wheels turning as he figures out where to go from here and whether or not this has changed or further solidified his opinion of you. He seems to make a decision although his expression gives nothing away.
He takes the two gloved fingers he had shoved up inside you and sticks them in his mouth. He keeps steady eye contact as he sucks before opening his mouth so you can see the way his tongue cleans your arousal from every inch of his fingers. He pulls them out with an obscene slurp and there is a faint shimmer of your slick on the corners of his mouth. He doesn’t lick it away.
“Peachy” He replies with a sleazy grin, before leaving the tent with a final flourish of his cape.
You lean against the speaker as you take a moment to wipe the sweat from your brow and to adjust your uncomfortably wet underwear back into place. Duty calls and so does the speech that has had you both so worked up. You are confident that things will work out just fine and as you make your way to the main stage you feel a deep sense of satisfaction that you’ll make Madelyn proud after all. He’ll behave just fine…surely.
You are wrong.
#homelander#homelander x reader#x reader#Homewell#Homewell x reader#Madelyn Stillwell#Madelyn Stillwell x reader#reader is a corporate baddie#reader wants Madelyn's cookie so bad#so does Homelander#this was originally going to be a oneshot but it got out of hand#sl*t shaming occurs#spicy work adjacent#homelander and reader are not so different
98 notes
·
View notes
Note
Hello.
What are your most used references and choices (in medium etc) for studying? Also do you study regularly or is it in a "this time i want to focus on X" fashion?
I'm confident in my skills but it has been long since i actually grinded for them. I'm both in need of a guide and curious about what you do.
Thanks in advance.
Hi! Thank you for this inquiry cause hooo am I eager to yap about practice.
So, as for references and info, my most used resources are:
- Sketchfab, has anything from meticulous anatomical models to most random 3d scans.
- Line of Action, timed sketching as a warmup. - Google maps! Environment warmup.
- Pinterest is heaven, but you have to curate the quality yourself. It can be turned into the most valuable visual library or a landfill of AI slop and disposable tutorials.
As for the medium, I try to balance traditional/digital sessions. Most knowledge transfers between them well, but certain skills need extra time (colors work differently, pen sketching requires more focus and planning, etc). Even though digital art is my domain, I need to have a good chunk of traditional practice. It’s less forgiving, sure, but much more engaging. The feel, the smell, the sound. Besides, I rarely share traditional stuff, so there’s less pressure to make it “good”.
I used to study consistently years ago, but mental health + skill plateau took their toll. The further you go, the more subjects add up, the less obvious your progress is. As a beginner, I had a simple routine - a bunch of gesture studies, then color palettes, then some environments, rinse and repeat. Did challenges like 365 sketching days, Figuary, Huevember etc. But as I learned to see more, it became overwhelming. Like, okay, today’s an anatomy session. Do I focus on quick gestures? Or maybe delve into 1 h. lecture about back muscles? Different body types maybe?..
Combined with the amount of stuff I need to draw beside that, I can’t keep up with a consistent routine. This is where the “focus on X" approach saves me. I take notice of the subject that causes the most trouble at a given moment and pick up an exercise for it. BUT remember I’m too burned out to come up with a practice plan every time. To navigate art theory better, I boiled it down to an octagon of fundamentals, with more subjects branching off them (pic attached). Feeling stiff about composition? Go to a respective section, do a couple exercises, feel better.
A grindy version of it would be to go through the whole octagon lol. Wish I had a whole year dedicated to studies only, I’d test and perfect this system.


75 notes
·
View notes
Note
Hi there! I was wondering if you would mind explaining how you do this, please? I'd love to try it! "Adoption: Adopted children have combined genetics of two townies who are chosen at random to act as the ‘biological parents’" Thank you in advance!

Hello lovely! No problem, sorry for the delay but here's a tutorial :) ⬇️
For anyone curious, anon is referring to my 'gameplay rules' page for this ask!
Important Note: Since I installed LazyDuchess's Random Sim Fixes this method isn't really an essential for me anymore, as pudding face is no longer an issue (which was my main reason for doing this in the first place) - however, making a note of an adopted sim's bio parents can still be quite a fun way to enhance your gameplay, as you can create storylines where they meet their bio parents later in life etc. So I do still prefer it over adopted sims just spawning in w. no previous family relations lol
To get started, you’re going to need Nraas Master Controller to follow this (here’s a tutorial for how to install mods if you’re new to TS3)
Adopt the new addition to the family as you normally would - this sim can be any age or gender

Once the adopted child arrives on your lot, click on them, bring up the NRAAS menu, then follow this string:
Nraas -> MasterController -> Advanced -> Play with Genetics
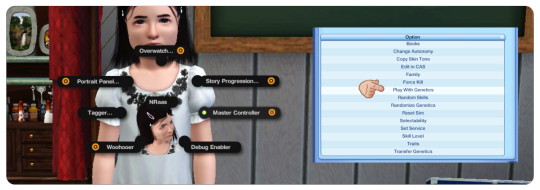
This is now going to bring up a big menu where you're selecting the parents for the sim - you can select from any sim in town by choosing '(Test Full Family)', however I like to use townies because they usually have no other relations - if you're selecting from the whole town I still recommend filtering by age using the 'Type of Sim (and)' menu detailed below:

You can choose one of the other options, or to only bring up a list of townies, choose:
Type of sim (and) -> 'Homeless Non Service'
This is going to bring up a huge list of townies, I literally just close my eyes and scroll my mouse around a bit to pick one 'randomly' but you could also use a random number generator or something similar if you wanted to!
You're then going to be brought to a little screen where it shows the two chosen parents & your adopted sim - just like if you were creating a child of two parents in CAS
Randomize the genetics however many times you wish to get the outcome you want
It's worth noting that altering the 'age' of the sim on this menu has no affect on them in-game, so if you want you can randomize the genetics w. the sim as a young adult to see what they're going to look like when they get older
When you're happy, press the 'tick' button to accept the changes
It might take a second in-game to load up the changes, but your adopted sim should now have the genetics of the two townies you'd chosen!

The only thing it won't change is the hair colour - so make sure you make a note of what the hair colour you want for them is and change it in CAS
I'd recommend making a note of the parents somewhere, so if you do want to incorporate them into your story at a later date you can do so
I hope this was helpful, if you have any other questions feel free to send me another ask / comment and I'll try and help! :)
129 notes
·
View notes
Text
𓈒༷♪˚.✧ How to make a mockup like this for smaus, ocs, etc. (step-by-step tutorial ☆ no Photoshop, easy, free) (requested by @lovebittenbyevans) ✿
guys this took me two hours to make and you could probably get this done in like, 30 minutes :) I hope this is coherent <3 Please look back this image for comparisons, if my explanation is not well explained, etc.
first of all, if you dont already have one, make a free canva acount. once you're signed in, hit the purple "create design" button on the sidebar. A pop-up will appear with different design template options. For this design, we want the dimentions to be 1080 x 1080, so you can either make a custom size or choose the instagram post (square) template by either searching or scrolling through the list.

2. Now you have a blank page. Zoom in with the slider at the bottom of the page if you need to (Mine is currently zoomed in 41%). Click on the page and change the color to an off black (hex code #111111).
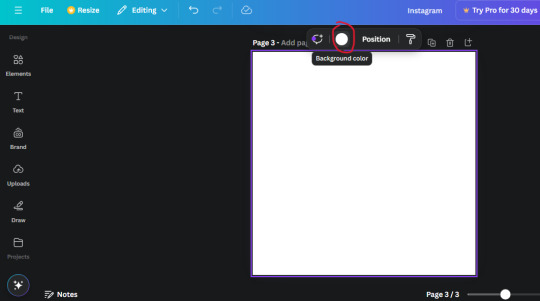
3. Now that the color is changed, click the "elements" tab and search "line". Click the shape and it will add it to the page automatically. These line are particularly hard to navigate and hard to get it at the right angle and length so this part might take a little longer than the rest.
4. stretch it from top to button and turn in a 90 angle so its straight on the left side of the page. Change the color of this as well to a grey tone (hex code #2F2F2F).
5. Now we'll add the Instagram logo. Click the "text" tab then click the purple "add text box" button. Write "Instagram" in the box and change the font to "apricots". This is the closest font I could find that resembled the logo font but if you find a better one, feel free to use that instead. Make the font size 19.3 (you can do this manually or do it in the text options). Change the color to grey color (hex code #707070). Add it to the upper left corner of the page like this:
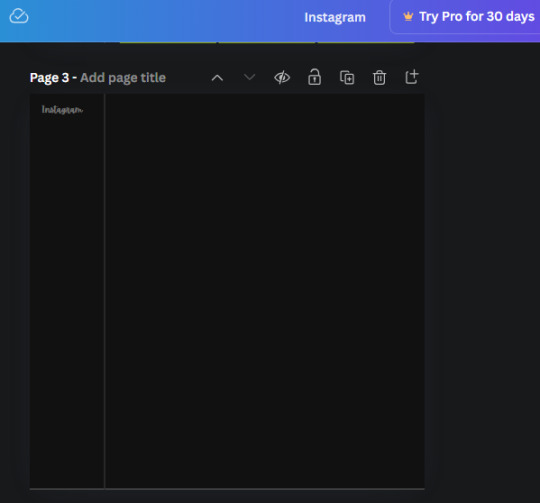
6. now we're adding icons and a menu inside the border we just made. Click the "elements" tab again and search for "instagram home icon" and add the element by sketchify to the page. Click the home icon, an options icon with pop-up above the page. Look for the "Position" button and click it. Scroll to find the advanced options and you can manually type in the width and height at 26.6 and 28.7.
Move it inside the border, under the logo (photo below). Change the color again (the hex code is #707070).
7. Open the text tab and add a text box. Change the font to Canva Sans and write "Home" in the box. Change the font size to 18.1 and align with with the house icon. It will look something like this,
8. Go into the elements tab again and search "instagram search icon". Scroll until you find the one by sketchify and add it to the page.
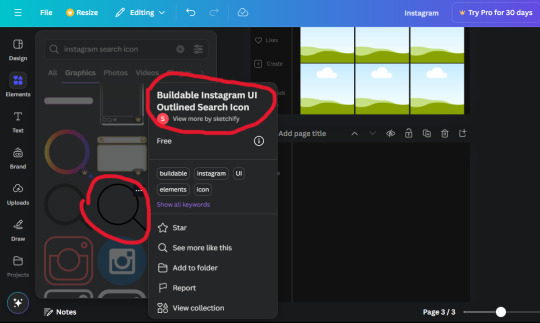
9. Shrink it so the W and H is at 36.6 and 31.3. Move it below the home icon until a purple "67" pop ups and aligns under it. Change it to the same color as the Home text and icon (#707070). Go ahead and Duplicate the the "Home" text box and clicking it and a pop-up will show up then edit the text so it says "Search" and align with the searcch icon we just added.
10. You know the drill. We are continuing to search up more icons in the "elements" tab. Search "instagram compass icon" and choose the one by sketchify (are u seeing the pattern?). Add it to the page and change the width and heigth to 33.1. align it under the search icon just like how we did before and change it to the say colors as the other icons.
11. Do the same as before and write "Explore" in a text box and align it with the icon. We're doing the same thing for all of these.
We'll be using the same search prompt for all of these icons so just change the type of icon you're looking for like we've done before hand. Next look for the Instagram reel icon and add the outlined one by sketchify and change the W and H to 31.2 x 30.9. Change the color to the ones we've used before, align it underneath the icons above and add your text ("Reels").
12. The next icon is an outlined, "sent" one. W and H is 31.1 x 27. The text will say "Send". Then an heart outline by sketchify; W and H is 34.2 x 29.1 and the text is "Likes". Next is the "create" outline icon by sketchify, W and H is 36.8.
(p.s if you are struggling to align the icons and text correctly, shoot me a message and I'll send you the X and Y positions ;D)
If you followed it through, it should look like this,
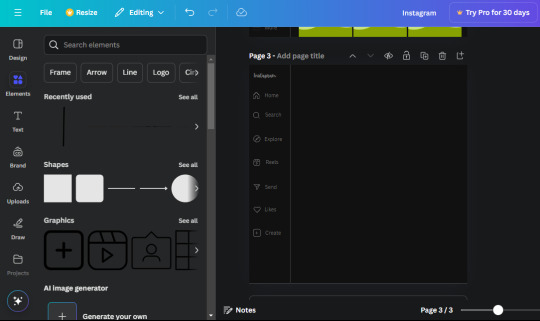
13. Now onto step 13, we'll be adding the Threads logo. You don't have to add this but to make it look more like the actual website, I will be adding it. Open the "text" tab and add a text box. Write an "@" symbol in the box and change the font to Nanum Sqaure and the size to 24.9. Add in the bottom corner below all the icons we just added to our page. We need another text box now (Color is still #707070), write "Threads" and align it to the "@" symbol.
14. We're adding another icon now. Search "Instagram menu icon" and find a wireframe menu icon by sketchify. the W and H are 42.5 x 24.6. Add a text box that says "More". It will look like this:
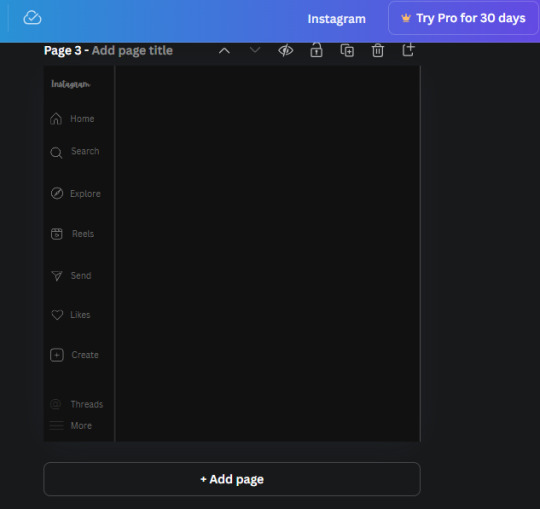
We are a quarter way done now :D
15. Search in the elements tab "circle frame" and look for the one with a little border around it.

At first, the circle will be green and inside the circle will be white. Change the white to color of the background of the page (hex code #111111) then change the green to a grey color (#8D8986).
16. Add a new text box, change the font to Canva Sans and the size to 22.8 and the color is white. I just wrote "user.name" in the box. the W and H will be 153.3 x 35.7.
Enter the "elements" tab and search for a blue checkmark and find the icon by Victor Aguiar. The W and H is 28.1 by 28.
17. Search in the search box for a rectangular shape and add it to the page. Place it next to your username and checkmark icon and make the W and H to 149.6 x 38. Add another and place it next to the other rectangle shape. the W x H is 111.4 x 36.7.
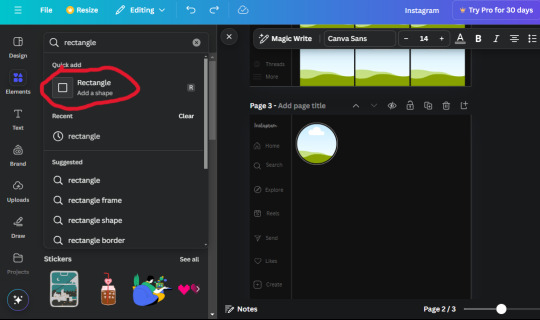
Change the color of both boxes to #2F2F2F. Add a text box and write "following" then change the W and H to 82.6 x 21.8 and fit it inside the first box. Add a second text box and write "message" in it then change the W and H to 77.8 x 21.8. Change both text colors to #7A7A7A

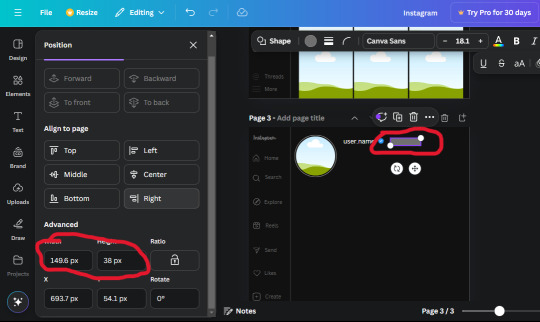
18. Add another text box. Write "<" and turn it upside down and place it beside the "following" text inside the rectangle. Adjust the size as you need to. I also like the round the corners to around 8 so its not so pointy and square.
19. Add 3 new text boxes. Write the amount of posts, the amount of accounts you're following and the amount of followers your have. Write "20 posts", "30 following" "40 followers". Bold the numbers and change the text W and H to 116.4 x 32.7. These are just place holders that I use.
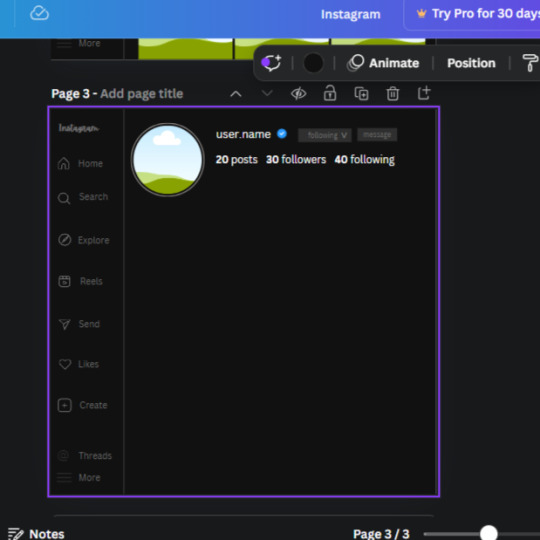
20. Open the "elements" tab again and search "frame". Choose the first one.
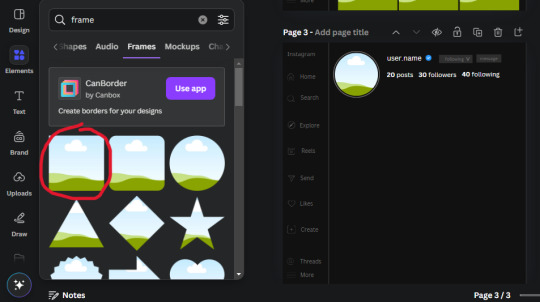
We want the height and width to be 268 x 252.4. Place it at the bottom of the page but we want some space between the frame and the page.
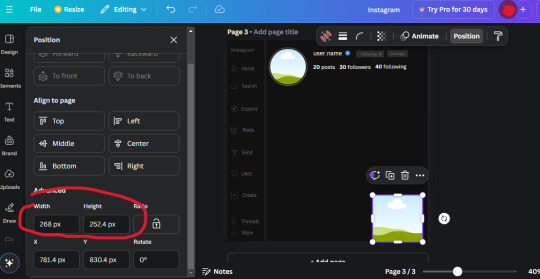
Now we'll duplicate the frame we just placed (the icon between the comment and trash can on the pop up above the frame). Place it next to the previous frame but we want to leave a bit of space between them like this:
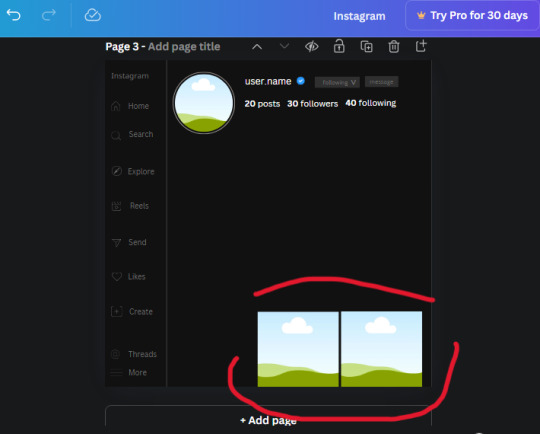
If its a little wonky, don't worry. You can always adjust it so it looks right.
Duplicate the frame again and place it next the second frame you just placed, same distance between. Make sure they're even. Now we have a row.
Select all three frames and duplicate them. Move them above our original frames but leave a little space between them.
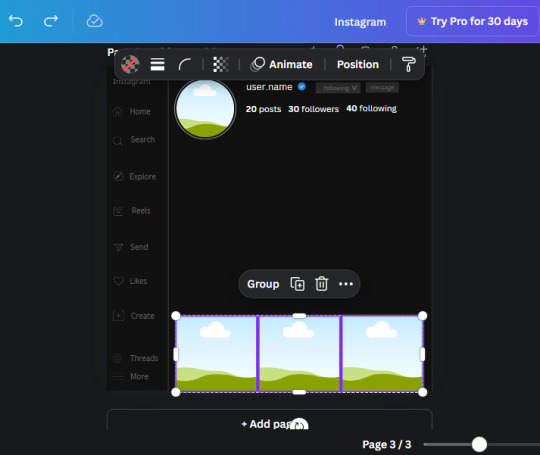

Again, if they're uneven, adjust them as you need to.
21. Select the line again from the elements tab. Stretch starting from the top frame to the last frame and make the color grey (#2F2F2F).
Because the line is stupid hard to navigate, use something like a text box to mark where you want it to end like this:


Delete the text box and the line with be where we want it.
22. On to the highlight reels. Seach for "add button" and find the one by Barudak Lier.
Change the heigh and width to 81.1 and move it above the border.
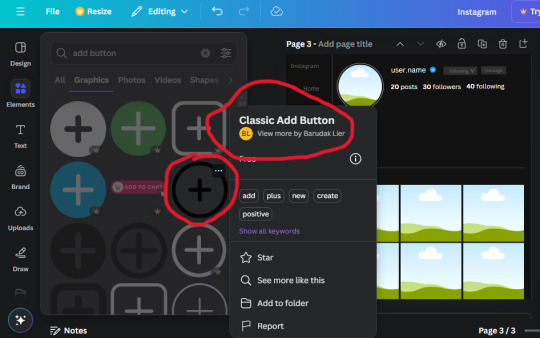
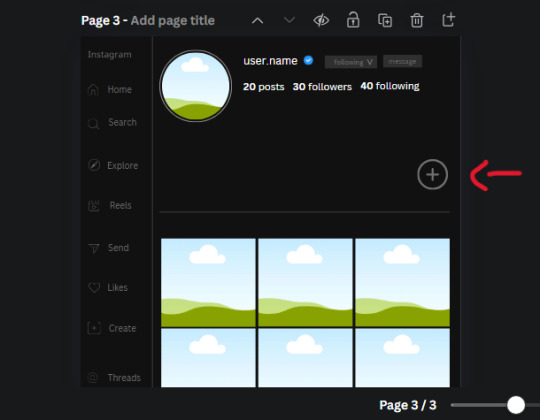
Search for circle frames now and add this one to the page (The same one we used for the pfp), change the width and height to 85.4 and move it next to the add button. Since this is a generic, blank template, I add about 4 of these highlight frames but you can do however many you want. You can change the border color to a gradient or leave it grey.
Add a text box now. The font will be Canva Sans, the size will be 18.1 and the color will be white. Change the text to "Add" and place it under our add button. Make more of these text boxes to place under the circle frames. Depending on which frame its under, write "Highlight 1", "Highlight 2", etc. etc. or you can give them different names and such.
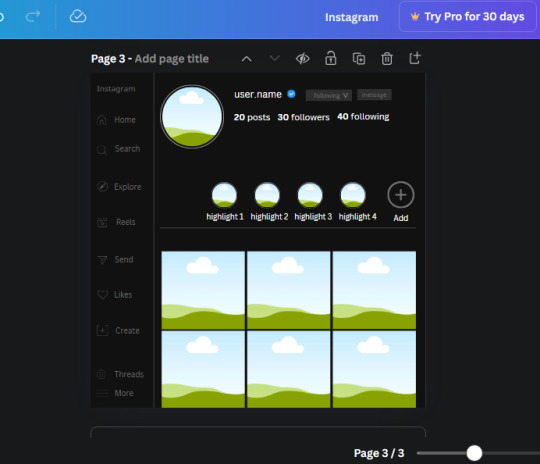
23. Add another text box, write "name" and bold it, change the size to 19.1 and the W and H to 69.2 x 28.8. The font will be Canva Sans and the color will be white. It will go under the amount of posts, followings and followers.
Add another box. The font is Canva Sans, font size to 20.1, the W and H is 40.8 x 31.3 and the color is white as well. This is our "bio". Place it under "name".

Yay!🎉🎉🎉 You're halfway done!
24. Search for a shape in the elements. Look for the rectangle again and add it. Change the width and height to 460 x 760.4 and the color to an off black/grey color (#191919), placing it like this:
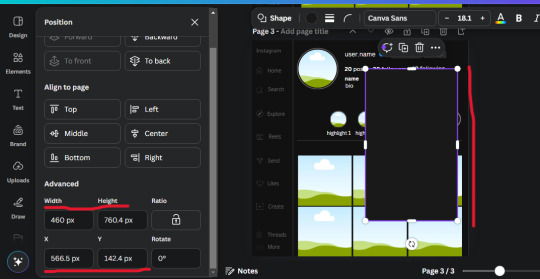
Get the same kind of square frame we used before to make the profile grid and make it the same size as the rectangle we just added. Place right up against the rectangle like it's its other half. Add another line like before and span across the upper half of the black rectangle as a border then add a circle frame inside the border.
Add a text box, "user.name" and align it with the frame. The text is white and the W and H is 111.5 x 25.9
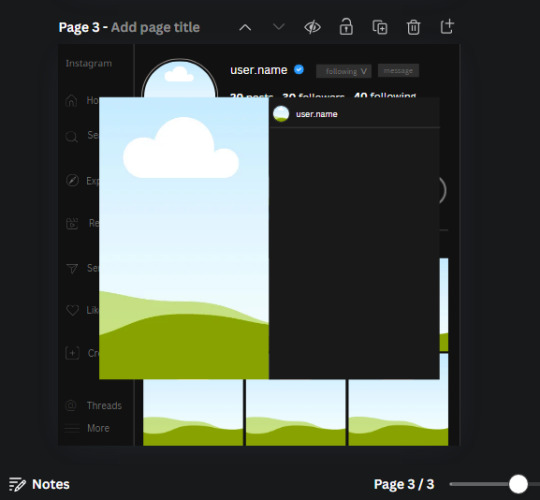
25. Add more circle frame along the inside of the rectangle to resemble the comment section. Make sure the W and H of the frames are 46.1.
Add more text boxes that align with the frames you just made and write "username" again and bold them. Add even more text boxes that align with the usernames and write "comment". These are place holders for when you decide to use this template.
Add another rectangle on the lower part of the rectangle and make the color black. and search for "instagram heart icon", "instagram comment icon" and "instagram send icon". Make sure the lines are thick. Find the heart icon by sketchify, and the the comment and send icon are by Mirazz Creations. Make the lines white and make sure the W and H are the following:
Heart icon: 38.7 x 32.9
Comment icon: 35.2 x 35. 8
Send icon: 35 x 32
Next, look for "instagram bookmark icon" and find the one by Adricreative. Change the color to white and the W and H to 29.7 x 40.2. Move it to the other end of the rectangle.
26. Now add three circles frames and change the W and H to 37.2. Move them below the heart icon and have them overlap each other some. Then, add a text box and write "liked by username and 1000 others". Change the font size to 13.6 and change the font to Canva sans. the color will be white. Align this with the three overlapped frames.
27. Look in the elements tab for an emoji icon and choose the one by Soni Soukell from Noun Project. The W and H will be 32.8 and the color is white.

Now add a another text box and write "Write a comment". The color will be white, the font size will be 14.2 and align with the emoji icon you just placed.
Search for "next arrow button" by Pixeden and make the W and H 42.8 then add it to both sides of the post.
And you're all done with your template! All that is left to do is fill it but before doing that, duplicate the page so you always have an extra blank mockup if you want to use it again.
To fill the frames, upload an image (or use a Canva stock photo), drag and hover it over the frame and it will fill the frame.
Hope this was helpful and you you successfully made one :D <3
#requests#text#smau#template#mockup#moodboard#instagram#instagram moodboard#instagram mockup#graphic design#canva#psd#free tutorial#tutorial#instagram au#social media au#free psd#photoshop#resources#fanfiction resources#graphic design resources#graphic design tutorial#psd tutorial#photoshop tutorial#au#au ideas#mockups#digital design#digital design tutorial
169 notes
·
View notes
Text
✎ᝰ ❛ THIS SWEETNESS IS JUST MADE FOR YOU ❜ — yuuta okkotsu. toge inumaki. megumi fushiguro. yuuji itadori.

౨ৎ⋆˚。⋆ content. The many woe's of being inlove is valentines day, so what kind of sweet treat do they make for you?
₊˚⊹ ᰔ warnings. gender neutral reader. you/your and they/them pronouns is used. (name) will be used. petnames is used (my love - yuuta , darling - megumi , my sunflower - yuuji). tooth rottening fluff.
note. kind off early for valentines day but I wanted to write it anyways! happy early valentines day people <33

— THE PREPARED TYPE. 乙骨憂太 | okkotsu yuuta
[ "happy valentines day (name), here you go, usually girls give out the chocolates but I wanted to do the giving! I didn't want to buy just chocolates so I made chocolate chip cookies! I hope you love them my love.. y- you don't mind if I call you my love right?" ]
A gentleman to the boot. A week before valentines he has already been planning on what to get for you. He wanted to give you something meaningful that you'll love. Thus the idea of baking cookies came in.
A chocolate chip cookie to be exact. Although he doesn't know baking that much, he asked for his friends' help, pandas, toge, maki. Although when he asks for their help all he gets is “I don't know how to bake,” or “bonito flakes” in toge's language.
Thus he opted to get baking lessons which was worth it because he learned how to bake cakes, and different types of desserts that he can surprise you for any occasion.
While in the baking lessons he was a little slow but the teacher didn't mind at all. He had to apologize a lot due to the small clumsy mistakes he does but nonetheless he was able to learn through his mistakes.
He gifts you the chocolate chip cookie with a white paper bag and light pink ribbons and laces. He tried his best to make the packaging look adorable which ended up to be cute and great!
He also bought you some pink tulips. The day of the valentines day he was worried you wont like the cookies he baked or worse your allergic to something in the cookie. So he had to ask in advance if your allergic to anything before he gave it to you.
When he gave the cutely packaged cookies and the tulips he gave you an awkward smile. As you feel your body feel hot as he blushed a little seeing you take the cutely packaged gift and the pink tulips.
“Oh uh… umm since you said you dont have any allergies h- here! happy valentines,” he gives it to you as he awkwardly chuckles feeling pink dust forming in his cheek. Slowly you take the cutely packaged sweet treat, “I hope you love it how much I loved making it for you.”
“thank you yuuta,” you smiled, giving him a small peck in the kiss, making his eyes widen. His whole face covered with his blush, “your welcome my love,” he gave you a kiss back. Yuuta feels as if his mouth has been overfilled with the sweetness of the chocolates as he looks at you. He truly is a lovesick fool isn't he?
— THE AWKWARD TYPE. 狗巻棘 | inumaki toge
[ “uhh… k- kelp… tuna tuna,” ]
He's a hopeless romantic. Although quite awkward as I'd like to think when he's in love, he'll love hard to the point he feels nervous and shy around them. He had to take three shopping trips in three whole days because he feels as if the things he bought are not too worthy for you.
Unlike yuuta he just followed a youtube tutorial and winged it the day before valentine. It was a lot of trial and error. Yes he woke up panda just to force panda to try the first failure of his creation.
Panda thought he was poisoning him after eating all of his onigiri. Yes the cursed corpse puked it out after. Toge has to be up all night to make those chocolate soufflés for you. The ending was a messy kitchen, a panda who looks like he's about to enter heaven and see Jesus, and a perfectly done chocolate soufflés.
He wrapped it in a minimalistic way, a red wrapper and a pink ribbon on the chocolate soufflés and made a small cute note on it drawing a chibi of yourself and him holding hands.
He hopes the chocolate soufflés were to your liking and the love letter reaches through your heart. He'll hide under his collar once you get the gifts he has given you. He wants to run away, kiss you, or give you a kiss then run away after!
In short he doesn't know what to do and just short circuits but tries his best to stay where he is as you took his declaration of love.
As you take the valentines gift you smile at him seeing the love letter attached to the wrapped treats. He blushed a little trying to hide his face with his collar as you read the letter he wrote.
Dear (name),
I love you, I know I can say it aloud like anybody can. I do hope my actions can speak through the words I badly wanna say. I love you dearly.
You smile at him, bringing him to a hug. The cursed speech user's eyes widen at this as he awkwardly hugs you back putting his head on your shoulder feeling his whole face hot and embarrassed. “I love you too toge!” He nodded his head as he hugged you tightly making you giggle hugging him back tightly.
Words may not be said but actions are much louder to toge's love for you.
— THE COOL HEADED TYPE. 伏黒恵 | fushiguro megumi
[ “I hope this isn't much, I hope you aren't disappointed, I'm not much of a flower type of guy but I hope this love letter will suffice, happy valentines day d-.. ahem! darling..” ]
He knows how to bake and is a perfect boyfriend at this point. Although he's quite stoic and a private person you loved him nonetheless. As for valentines day presents he already planned them in advance.
He personally doesn't like giving flowers but prefers to give you a love letter or love notes. He made some chocolate truffles for you but when gojo saw him baking he immediately annoyed megumi to let him join baking which he denied multiple times.
Gojo ended up eating some of the truffles as megumi forced him out of the kitchen. The way he decorated the packaging was a simplistic style. A cute pink wrapper with red ribbons decorating it. As he gave it to you, same with the cutely decorated letter scented with his favorite perfume.
Particularly he wasn't embarrassed more on the nervous side, afterall he value what your likes and dislikes and wants the best for you.
“Tell me if you don't like it, I'm gonna remake the one you like, okay?” he says making you chuckle as you take the gifts he gave for you, “silly megumi, I'd eat it even if I'm allergic to it if it came from you,”
The raven haired male chuckles, “stop being an idiot I would never let you eat something you're allergic too,” you grin as he gives you a small peck in the cheek as you hugged him close.
— THE SUNSHINE TYPE. 虎杖悠仁 | itadori yuuji
[ “I got you tons of things, if I'm being truthful I almost forgot about it so I kinda panicked and bought lots of things! I hope you like what I get for you, my sunflower!” ]
He almost forgot about it until nobara asked what he'll get for you. His eyes widened as he looked at nobara in panic as the brunette girl looked at him in defeat. He forced the girl to help him as nobara fighted for her life to not be in yuuji's shit.
Ended up helping him in the end as they looked around a patissier shop where he ended up buying brownies for you. He also requested for the workers to wrap it in a super duper cute way! pink wrapper, red ribbons, with white frills, and cute heart designs on it.
He also bought you a cute hello kitty plushie, a bouquet rose and a letter. Yuuji Itadori is going all out for this because he felt guilty and almost forgot about it. He will say it to you too once he gives his presents to you. Apologizing, looking like a kicked puppy.
You chuckled as you let it go, making the boy grin and pepper you with kisses.
“I’m still sorry I almost forgot about it…” yuuji whined hugging you close nuzzling his head onto your shoulder making you chuckle, “it's fine, I still love you yuuji, I don't mind if you forgot about it,” the pink haired male pouts. “That's not good, if I forget any event I'm gonna be angry at myself for that because I want to shower you with all my love.”
“You already do those yuuji, everyday you shower me with your love,”
“that's true I still want you to know I love you with every anniversary, valentines day, birthday, christmas—”
“yeah, yeah, I got it yuuji,”
He chuckles, hugging you closer, loving the warmth you two make.
“Good!”
#˃ᴗ˂ . . . signed by; ren#jjk x reader#jujutsu kaisen x gender neutral reader#jjk x gender neutral reader#jjk x reader fluff#jjk fluff#jjk imagines#jujutsu kaisen x reader fluff#jujutsu kaisen x reader#yuuta x reader#yuuta okkotsu x reader#yuta x reader#okkotsu yuta x reader#toge inumaki x reader#toge x reader#inumaki x reader#megumi fushiguro x reader#megumi x reader#yuuji itadori x reader#yuuji x reader
561 notes
·
View notes
Text
Mastering Advanced Touch Typing Skills
Introduction
Advanced touch typing skills can significantly improve your typing speed and accuracy, making you more efficient in both professional and personal tasks. Whether you're looking to boost your productivity at work, excel in academic settings, or enhance your personal communication, mastering touch typing can provide you with a substantial advantage.
1. The Basics of Touch Typing
Before diving into advanced techniques, it's essential to have a solid understanding of the basics of touch typing.
Home Row FundamentalsThe home row is the foundation of touch typing, where your fingers rest and return to after striking other keys. The keys ASDF and JKL; are your home base, and from here, your fingers reach out to the other keys.
Proper Finger PlacementCorrect finger placement on the home row is crucial for efficient typing and minimizing finger movement. Each finger is responsible for specific keys, which reduces the distance your fingers need to travel and helps maintain a steady rhythm.
2. Improving Typing Speed
Enhancing your typing speed requires a combination of practice and advanced strategies.
Speed Drills and ExercisesEngaging in speed drills can help you gradually increase your typing speed. Websites like TypingClub, Keybr, and Typing.com offer structured lessons and games designed to push your speed boundaries while maintaining accuracy.
Consistent Practice and PatienceRegular practice is key to building muscle memory and improving your typing speed over time. Dedicate a few minutes each day to focused typing practice. Remember, patience is essential; speed improvements will come with time and consistent effort.
3. Enhancing Typing Accuracy
Accuracy is just as important as speed when it comes to advanced touch typing.
Focused Typing ExercisesPractice focused typing exercises that emphasize accuracy over speed. Websites like Ratatype and Typing.com offer accuracy-first drills that help you concentrate on hitting the correct keys rather than typing quickly.
Identifying and Correcting ErrorsLearn to quickly identify and correct common typing errors to maintain high accuracy. Pay attention to your mistakes and practice typing the troublesome key combinations until they become second nature.
4. Advanced Typing Techniques
Incorporating advanced typing techniques can take your skills to the next level.
Touch Typing for Special CharactersMastering the typing of special characters and symbols can enhance your overall proficiency. Practice typing symbols like @, #, $, and %, as well as other punctuation marks, to become more versatile in your typing tasks.
Typing Without Looking at the KeyboardPractice typing without looking at the keyboard to improve your touch typing skills. This technique forces you to rely on muscle memory and can significantly boost both your speed and accuracy. Cover your hands or the keyboard to avoid looking at the keys and practice regularly.
5. Utilizing Typing Software and Tools
Leverage specialized software and tools to support your advanced touch typing practice.
Typing Training ProgramsExplore typing training programs designed to improve speed and accuracy through structured lessons. Programs like TypingMaster and Typing.com provide detailed feedback and analytics to help you track your progress and identify areas for improvement.
Typing Games and CompetitionsParticipate in typing games and competitions to make practice engaging and competitive. Platforms like Nitro Type and 10FastFingers offer fun and challenging environments where you can test your skills against others and stay motivated.
6. Applying Advanced Touch Typing Skills
Applying your advanced touch typing skills in real-world scenarios can enhance your productivity and efficiency.
Professional ApplicationsIn the workplace, advanced touch typing can streamline tasks like email correspondence and report writing. Faster and more accurate typing means you can handle a higher volume of work with fewer errors, making you a more effective and efficient employee.
Personal Use CasesIn your personal life, advanced typing skills can make everyday tasks like messaging and blogging more efficient. Whether you're writing a personal blog, communicating with friends and family, or managing personal projects, strong typing skills can make these activities smoother and more enjoyable.
Conclusion
By integrating these advanced techniques and tools into your practice, you can master touch typing and achieve greater speed, accuracy, and overall typing efficiency. Consistent practice, coupled with the right resources and techniques, will help you elevate your touch typing skills to a professional level. Whether for work, school, or personal use, mastering touch typing can significantly enhance your digital communication and productivity.
#advanced english typing course online#advanced typing skills online#advanced typing practice online#advanced typing exercises online#advanced typing tutorials#advanced english touch typing#advanced english typing software#advanced english typing training#advanced english typing speed
0 notes
Text

Someone asked me how I created the fade transition in this gifset which I’ll try to explain in the most comprehensive way that I can. If you've never done something like this before, I suggest reading through the full tutorial before attempting it so you know what you'll need to plan for.
To follow, you should have:
basic knowledge of how to make gifs in photoshop
some familiarity with the concept of how keyframes work
patience
Difficulty level: Moderate/advanced
Prep + overview
First and foremost, make the two gifs you'll be using. Both will need to have about the same amount of frames.
For ref the gif in my example is 540x540.
I recommend around 60-70 frames max total for a big gif, which can be pushing it if both are in color, then I would aim for 50-60. My gif has a total of 74 frames which I finessed using lossy and this will be explained in Part 4.
⚠️ IMPORTANT: when overlaying two or more gifs and when using key frames, you MUST set your frame delay to 0.03 fps for each gif, which can be changed to 0.05 fps or anything else that you want after converting the combined canvas back into frames. But both gifs have to be set to 0.03 before you convert them to timeline to avoid duplicated frames that don't match up, resulting in an unpleasantly choppy finish.
Part 1: Getting Started
Drag one of your gifs onto the other so they're both on the same canvas.
The gif that your canvas is fading FROM (Gif 1) should be on top of the gif it is fading INTO (Gif 2).

And here's a visual of the order in which your layers should appear by the end of this tutorial, so you know what you're working toward achieving:

Part 2: Creating the grid
Go to: View > Guides > New guide layout
I chose 5 columns and 5 rows to get the result of 25 squares.

The more rows and columns you choose, the more work you'll have to do, and the faster your squares will have to fade out so keep that in mind. I wouldn't recommend any more than 25 squares for this type of transition.

To save time, duplicate the line you've created 3 more times, or as many times as needed (key shortcut: CMD +J) and move each one to align with the guides both horizontally and vertically. You won't need to recreate the lines on the edges of the canvas, only the ones that will show.
After you complete this step, you will no longer need the guides so you can go back in and clear them.

Follow the same duplicating process for the squares with the rectangle tool using the lines you've created.
Align the squares inside the grid lines. The squares should not overlap the lines but fit precisely inside them.
This might take a few tries for each because although to the eye, the squares look all exactly the same size, you'll notice that if you try to use the same duplicated square for every single one without alterations, many of them will be a few pixels off and you'll have to transform the paths to fit.
To do this go to edit > transform path and hold down the command key with the control key as you move one edge to fill the space.
Once you're done, put all the squares in their separate group, which needs to be sandwiched between Gif 1 and Gif 2.

Right click Gif 1 and choose "create clipping mask" from the drop down to mask it to the squares group. This step is super important.
After this point, I also took the opacity of the line groups down to about 40% so the lines wouldn't be so bold. Doing this revealed some squares that needed fixing so even if you aren't going dim the lines, I recommend clicking off the visibility of the lines for a moment to make sure everything is covered properly.

Part 3A: Prep For Key framing
I wanted my squares to fade out in a random-like fashion and if you want the same effect, you will have to decide which squares you want to fade out first, or reversely, which parts of Gif 2 you want to be revealed first.
In order to see what's going on underneath, I made Gif 1 invisible and turned down the opacity of the squares group.

If you want text underneath to be revealed when the squares fade away, I would add that now, and place the text group above Gif 2, but under the squares group.

Make a mental note that where your text is placed and the order in which it will be revealed is also something you will have to plan for.
With the move tool, click on the first square you want to fade out. Every time you click on a square, it will reveal itself in your layers.
I chose A3 to be the first square to fade and I'm gonna move this one to the very top of all the other square layers.
So if I click on D2 next, that layer would need to be moved under the A3 layer and so on. You'll go back and forth between doing this and adding key frames to each one. As you go along, it's crucial that you put them in order from top to bottom and highly suggested that you rename the layers (numerically for example) which will make it easier to see where you've left off as your dragging the layers into place.

Part 3B: Adding the Keyframes
This is where we enter the gates of hell things become tedious.
Open up the squares group in the timeline panel so you can see all the clips.
Here is my example of the general pattern that's followed and its corresponding layers of what you want to achieve when you're finished:

So let’s try it!
Expand the control time magnification all the way to the right so you can see every frame per second.

As shown in Part 3A, select your first chosen square.
Where you place the time-indicator on the panel will indicate the placement of the keyframe. Click on the clock next to opacity to place your first keyframe.

Move the time-indicator over 3 frames and place the next key frame.

Things to consider before moving forward:
Where you place your very first keyframe will be detrimental. If you're using a lot of squares like I did, you may have to start the transition sooner than preferred.
If you're doing 25 squares, the key frames will have to be more condensed which means more overlapping because more frames are required to finish the transition, verses if you're only using a 9-squared grid. See Part 4 for more detailed examples of this.
The opacity will remain at 100% for every initial key frame, and the second one will be at 0%.

Instead of creating two keyframes like this and changing the opacities for every single clip, you can copy the keyframes and paste them onto the other clips by click-dragging your mouse over both of them and they'll both turn yellow. Then right click one of the keyframes and hit copy.
Now drop down to your next clip, move your time-indicator if necessary to the spot where the first keyframe will start and click the clock to create one. Then right click it and hit "paste".


Tip: When you have both keyframes selected, you can also move them side to side by click-dragging one of them while both are highlighted.
Your full repetitive process in steps will go as follows:
click on square of choice on the canvas
drag that square layer to the top under the last renamed
in timeline panel: drop down to next clip, move time-indicator tick to your chosen spot for the next keyframe
create new keyframe
right click new keyframe & paste copied keyframes
repeat until you've done this with every square in the group
Now you can change the opacity of your squares layer group back to 100% and turn on the visibility of Gif 1. Then hit play to see the magic happen.
PART 4: Finished examples
Example 1

the transition starts too soon Cause: initial keyframe was placed at frame 0
the squares fade away too quickly Cause: overlapping keyframes, seen below. (this may be the ideal way to go with more squares, but for only 9, it's too fast)

Example 2

more frame time for first gif
transition wraps up at a good point Cause: in this instance, the first keyframe was placed 9 frames in, and the keyframes are not overlapping. The sequential pair starts where the last pair ended, creating a slower fade of each square.


Part 5: Final Tips and Saving
You can dl my save action here which will convert everything back into frames, change the frame rate to 0.05 and open the export window so you can see the size of the gif immediately.
If it's over 10gb, one way to finesse this is by use of lossy. By definition, lossy “compresses by removing background data” and therefore quality can be lost when pushed too far. But for most gifs, I have not noticed a deterioration in quality at all when saving with lossy until you start getting into 15-20 or higher, then it will start eating away at your gif so keep it minimal.

If you've done this and your gif is losing a noticeable amount of quality and you still haven’t gotten it below 10mb, you will have no choice but to start deleting frames.
When it comes to transitions like this one, sometimes you can't spare a single frame and if this is the case, you will have to return to the timeline state in your history and condense the key frames to fade out quicker so you can shorten the gif. You should always save a history point before converting so you have a bookmark to go back to in case this happens.
That's pretty much it, free to shoot me an ask on here or on @jugheadjones with any questions.
#gif tutorial#photoshop tutorial#transition tutorial#grid tutorial#usergif#ps help#tutorials#tutorials*#resources*#requested
454 notes
·
View notes
Text
Hey everyone, in light of recent events, I want to share how you can block Anonymous authors on Archive of our Own. Credit to u/TGotaReddit on, well, Reddit lol
1: Filter out works by anonymous authors (to do this in the Search, within Results box, or Any Field box for advanced search, enter without quotes "-creators: Anonymous")
2: Mute/hide works by anonymous authors via a site skin. tutorial
3: Mute/hide works with too many fandom tags tutorial (scroll to the bottom for the code to skip seeing how they figured it out)
4: Use an extension that can mute/hide works with too many fandom tags. u/Solivagant0 uses this one, but I haven't used it myself so I can't speak about it with any type of confidence.
Take care of yourself <3
#why people can't just be a little bit normal i'll never know#nothing against anon authors who ARE normal and truly just want to share but are scared of judgement#911 lone star#tarlos#blah blah blah#ao3
90 notes
·
View notes
Note
Please, please explain how to install and use linux like I'm 5 years old. I'm so sick of windows adding AI and other bullshit to my already struggling elderly laptop but I'm really not good with computers at all so I have no idea where to start with Linux.
Okay, so, I'm going to break this down into steps I would give the average tumblr user first, and then if any of them are confusing or use words you don't understand, ask me and I'll explain that step in greater detail.
Step 0) BACK. UP. YOUR. SHIT.
NEVER EVER EVER CHANGE YOUR OPERATING SYSTEM WITHOUT A COMPLETE BACKUP OF ALL YOUR FILES.
Step 1) Learn your machine. You need to know:
How much RAM you have
If your processor is 32 or 64 bit
How big your hard drive is
On windows, you can find out all of this by going to the start menu, typing "about" and opening the first result on your system instead of the internet.
For additional instructions, visit this page.
Step 2) Pick your Linux.
There's like 10,000 kinds of Linux, each tailored to particular functions that the end-user (that is you!) might want to have. The sheer amount is very daunting, so first I'm going to give my suggestions, then I'll explain how to pick for yourself.
For Mac users, I suggest Kubuntu. For windows users, I suggest Mint Cinnamon. If your laptop is really REALLY old, I recommend Sparky Stable, which is the lightest weight Linux I would ever suggest for a new user. In every case, download the version suited to your processor (32 bit can be labelled "x86" or "32 bit"; 64 bit is always labelled "64 bit").
If you want to try a different type of linux, you'll need to make sure your laptop meets the "minimum specs" or "system requirements." These numbers tell you how much RAM, processor and hard drive space the linux will use. (That's why you needed those numbers at the beginning.)
Step 3) Collect your supplies. You're going to need:
An ISO burning program compatible with your current system, like Balena Etcher.
A copy of the ISO file for the Linux you want to use.
Your laptop.
An 8gb or larger USB flash drive.
Step 3) Make a bootable USB drive
Install Balena Etcher, hitting "okay" and "next" when prompted. Last I checked, Etcher doesn't have adware attached, so you can just hit next every time.
Plug your USB drive into the laptop.
Open Etcher.
Click "flash from file" and open the ISO file with your Linux on it.
Click "Select target" and open the USB drive location. Hit the "flash" button. This will start writing all the linux installer data to your flash drive. Depending on the speed of your machine, this could take as long as 10 minutes, but shouldn't be much longer.
Step 4) Boot to the USB drive
This is, in my opinion, the trickiest step for a lot of people who don't do "computer stuff." Fortunately, in a rare act of good will, Windows 10 made this process a lot easier.
All you'll need to do is go to settings, then recovery, then advanced startup and pick the button labelled "use a device."
This tutorial has images showing where each of those is located. It's considered an "advanced setting" so you may get a spooky popup warning you that you could "harm your system by making changes" but we're not doing anything potentially harmful so you can ignore that if you get it.
Step 5) Try out linux on the flash drive first.
Linux installs using a cool little test version of itself that you can play around in. You won't be able to make changes or save settings, but you can explore a bit and see if the interface is to your liking. If it's hideous or hard to navigate, simply pick a new linux version to download, and repeat the "make a bootable USB" step for it.
Step 6) Actually install that sucker
This step varies from version to version, but the first part should be the same across the board: on the desktop, there should be a shortcut that says something like "install now." Double click it.
Follow the instructions your specific linux version gives you. When in doubt, pick the default, with one exception:
If it asks you to encrypt your drive say no. That's a more advanced feature that can really fuck your shit up down the road if you don't know how to handle it.
At some point you're going to get a scary looking warning that says 1 of 2 things. Either:
Install Linux alongside Windows, or
Format harddrive to delete all data
That first option will let you do what is called "dual booting." From then on, your computer will ask every time you turn it on whether you want Windows or Linux.
The second option will nuke Windows from orbit, leaving only linux behind.
The install process is slower the larger your chosen version is, but I've never seen it take more than half an hour. During that time, most linux versions will have a little slideshow of the features and layout of common settings that you can read or ignore as you prefer.
Step 7) Boot to your sexy new Linux device.
If you're dual booting, use the arrow keys and enter key to select your linux version from the new boot menu, called GRUB.
If you've only got linux, turn the computer on as normal and linux will boot up immediately.
Bonus Step: Copy Pasting some code
In your new start menu, look for an application called "terminal" or "terminal emulator." Open that up, and you will be presented with an intense looking (but actually very harmless) text command area.
Now, open up your web browser (firefox comes pre-installed on most!), and search the phrase "what to do after installing [linux version you picked]"
You're looking for a website called "It's FOSS." Here's a link to their page on Mint. This site has lots and lots of snippets of little text commands you can experiment with to learn how that functionality works!
Or, if you don't want to fuck with the terminal at all (fair enough!) then instead of "terminal" look for something called "software manager."
This is sort of like an app store for linux; you can install all kinds of programs directly from there without needing to go to the website of the program itself!
297 notes
·
View notes
Note
Hi sunny :D I’m a tad nervous to ask questions but you’re one of my favorite artists soo… 😞😞
I was just wondering if you have any tips regarding making a comic :,3
thank you‼️🫶
heey thank you so much! 🙈 I'm sure I've responded to this multiple times before but I can't even find the asks on my own blog so here we go again dksjd
this is for a shorter type comic, for comics that are a lot longer like many hundreds pages it's more complicated!
1 - write down the plot with main things you want to have happen and divide it into scenes revolving around these things, expanding on what should happen in each scene with dialogue, notes etc. This helps making sure each scene connects well to the next and also gives you a general idea of how long the comic is gonna be
2 - sketch out pages as rough draft (thumbnailing) so you will know how the action will be distributed across the page, I usually sketch all the pages in one scene at the same time so you can know in advance where a scene is gonna end it's not gonna be 2 panels into a new page if u don't want it to
3 - when figuring out how a scene plays out you can sorta imagine it like a movie in your head and you choose angles you like or that make the scene flow nicely! (as for panel shapes and other technical things I suggest looking at tutorials or looking through comics or manga you like to see how they do them)
4 - this is just if you want to carry out a comic from start to finish! never underestimate how long it takes to make comic pages, so if you want a finished comic I suggest trying out doing something shorter of a few pages to see how you feel about that first, find a way to draw and color them that's comfortable for you! I think around 50-60 pages is manageable, if it goes in the hundreds it's gonna be a long haul (I kinda never want to go there again lmao) so imo avoid spending too much time on full coloring/details/backgrounds in every panel, it can look good but ur gonna get burned out SO fast (a lot of comics get dropped for that reason) most long running comics have simpler styles and assistants to help with coloring, adding text etc
hope this helps!
262 notes
·
View notes