#Video Editing Tools: Users can cut
Text
#Wondershare Filmora is a popular video editing software known for its user-friendly interface and a comprehensive set of features#making it accessible to both beginners and more experienced video editors. Developed by Wondershare#this software provides a platform for creating professional-looking videos with ease.#Key features of Wondershare Filmora include:#Intuitive Interface: Filmora boasts a straightforward and intuitive interface that allows users to easily navigate and edit their videos wi#Video Editing Tools: Users can cut#trim#merge#and arrange video clips with a variety of editing tools. Filmora supports a range of video formats#making it versatile for different projects.#Effects and Transitions: The software comes with a rich library of filters#overlays#animations#and transitions that users can apply to enhance the visual appeal of their videos.#Text and Titles: Filmora enables users to add text#titles#and captions to their videos#providing creative options for storytelling or adding information.#Audio Editing: Users can edit and enhance audio tracks within their videos#including adjusting volume#adding music#and incorporating sound effects.#Color Grading: Filmora allows for color correction and grading#giving users the ability to enhance the visual aesthetics of their videos.#Built-in Music and Sound Effects: The software often includes a library of royalty-free music and sound effects that users can easily incor#Export Options: Filmora supports a variety of export formats#making it convenient for users to save and share their edited videos on different platforms.#While the specific features and capabilities of Filmora may evolve over time with updates#this introduction reflects the software's general attributes as of my last knowledge update in January 2022. For the most current informati#it's recommended to check the official Wondershare website or documentation as of your current date in 2023.
0 notes
Text
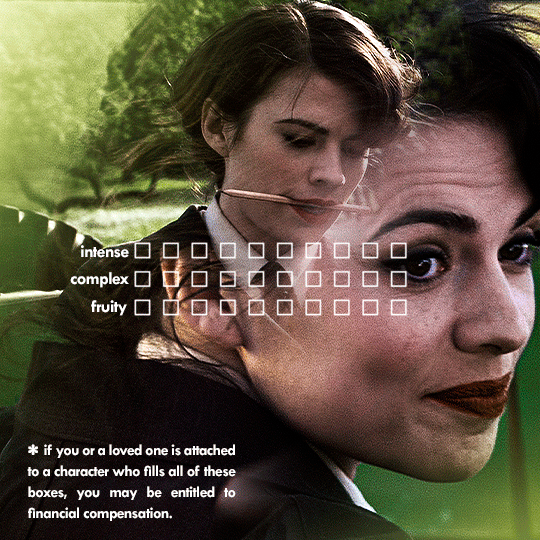
i was requested by anon to make a tutorial for this gifset and here it is!
DIFFICULTY intermediate/difficult. basic giffing knowledge is definitely required.
while my gifset has a fair amount of animation, the only handmade animations can be found in the second and fifth gif. the rest are assets (the checkmarks, the sharpie circles) (either gifs or videos) i found on the internet and pasted over my gif.
THE BASICS OF TIMELINE GIFFING
if you gif with frames, you will need to use a timeline for the animation to work (keyframes). i’m a timeline giffer anyway so this was another Tuesday for me. if you never used that method of giffing, however, it can be confusing, especially if you never used a video editing software before (the timeline works like video editing).
so, here’s a breakdown of what is the timeline:
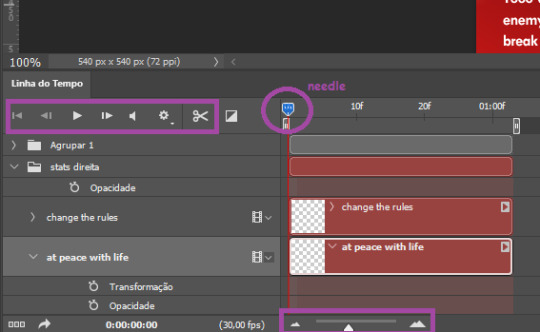
the player icons work like any video/music player in existence. ignore the volume icon.
the gear icon indicates the quality of the reproduction while editing it, not the quality of the end product. think like it’s Youtube reproduction settings on a video in order to save your 4G data, but with RAM power instead. this is very useful if your computer isn’t very powerful to begin with and gifs with VFX are very heavy to handle.
i always click the loop option inside the gear panel because i like to see how the gif will be viewed by the public, i find watching to play only once isn’t very productive. you can stop and restart the reproduction by pressing the space bar on your keyboard.
every layer of your PSD file will have its own bar. the length of the bar means the duration of the gif, so a longer bar means a longer gif and a shorter one, a shorter gif. for everything that isn’t your gif/screencap-based (ie, coloring, typography, lightning, shapes, etc) can be dragged by the extremities as much as you want, making the asset last as long as you want. the only layer that is limited by its maximum duration is naturally your gif, but you can also drag it to make it shorter.
you can also drag a whole layer bar by clicking it and dragging it, making the start and finishing point different from the rest. be careful while doing that otherwise you will end up with blank frames, messing up the looping of your gif completely.
there’s a needle you can drag across the timeline and it works just like on a vinyl disc, the moment the needle drops, it’s the moment/frame Photoshop will show you.
you can also trim your stuff by cutting and deleting snippets of the bar. for that, you will drag your needle to the desired moment, use the scissor tool and then press delete to erase the unwanted bit.
it’s important to point out that the timeline only allows 0.03x or 0.07px speed, no matter what the speed the gif was before converting to that method. if the original speed is closer to 0.03x, then PS will define the new speed as 0.03x. if it’s closer to 0.07x, then it’s 0.07x. i always change the speed to 0.03x before converting to timeline for the sake of not screwing stuff up, which means i see my gif looping while editing in a faster way than Tumblr users will see when the gifset is posted. this takes a while to adjust to if you’re new to timeline giffing, but eventually you don’t think it’s jarring anymore.
that also means you will need to correct the speed after your gif is completely finished. to do that, i use this action.
you can zoom in and zoom out using the little mountain sliding bar. this will be useful later in the tutorial.
if you zoom to the max, you will see all the numbers above your layer bar. these are time marks. the thing is, they seem a bit weird at first. the bigger numbers indicate SECONDS (01:00f, 02:00f, 03:00f, etc), while the smaller and repetitive numbers indicate frames (5f, 10f, 15f, 25f). that means that the smallest drag of your needle possible (from point A to point B) refers to an interval of 1 frame. you will need to take this into consideration while animating stuff.
you can color code your layers, if you think that makes it easier for you to see what you are doing. this is something i do, not only in Photoshop but every Adobe product with a timeline. to change the color of a layer bar (the default is purple), you can right-click on your layer in the layer panel and click the color you want. the colors are the very last thing in the list when you right-click it.
another organization tip is the use of folders. if you create a folder in the layers panel, a folder is created inside the timeline and any layer inside of that folder will disappear from the panel until you click the little arrow next to the name of the folder in the timeline panel. you can color code your folder as well, making every layer inside of it the same color or even different colors.
THE BASICS OF KEYFRAMES
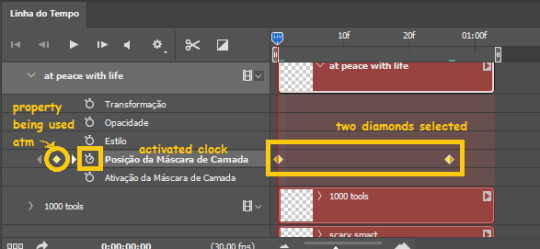
every change related to any property selected (transformation, opacity, style, text warp, position of the layer mask, activation of the layer mask) will be computed in the exact moment in the gif you change it. if that doesn’t happen, you can force Photoshop to do it by clicking the small diamond next to the property name.
let’s say you want an animation to start 0.5 seconds after the gif starts, so you will drag your “needle” to 0.5 seconds and then make the change (making a text bigger, moving a shape, etc).
Photoshop will automatically bridge the gap between the state of the gif at 0 seconds and 0.5 seconds, thus animating your gif.
to start animating, you will need to click the little clock next to the property you want to animate. make sure you click the clock while your needle is at the exact beginning of the gif.
every change (keyframe) will be marked with a small diamond under the layer bar, at the exact moment you changed it. that means if you make jarring changes in a short amount of time/frames, the animation will be quick and abrupt. if the interval is very long, the animation will be slow and smooth.
the selected(s) keyframe(s) will have their diamond painted yellow, while the unselected ones will be grayed out.
you can right-click the diamonds to delete or copy them. if you have many diamonds and want to delete them all, you can click and drag to form a square and select all of them just like when you do to select many files at once on a PC folder. there’s also the option “select all” under the right-click panel.
you can also drag them and change their timing that way. if you have more than one diamond selected, if you drag them, their interval will remain the same, but the starting and finishing point of those two diamonds will change.
THE SQUARES BAR
the easiest of the two animations. this one doesn’t require keyframe animation, but i put this in the last bit of the tutorial for the sake of its flow.
first, i added the empty squares. they last as long as the gif lasts. after 6 frames, i added the first colored square and made that square last until the end of the gif. i repeated this in a staggered manner (+2 frames delay each colored square) so the colored squares appear at equal intervals.
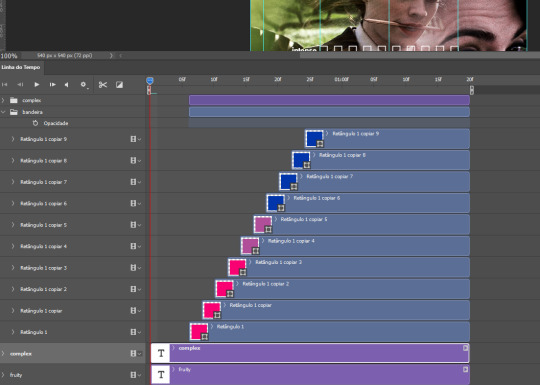
THE STATS BAR
the most difficult of the two, but don’t worry, you got this.
first, you will need to structure your stats, ie, add the text, the dividing line and the pointed lines. that is, if you want to follow the exact design i used in my gif, but you don’t have to if you don’t want to.
next, you will create rectangles that fill the entire stat bars. you will add a layer mask to each one of them and with a layer mask selected, select a rectangle about the size of your original rectangle, then paint it black. you will notice the original rectangle will disappear. if you delete the layer mask, the original rectangle will appear again. that is because you didn’t delete the original rectangle, you just hid it by using a layer mask.
there’s a chain icon between the layer and the layer mask in the layers panel, click it to unlink them.
click the clock next to “layer mask position” with your needle at 0 seconds/frames. drag your needle to the moment you want the stats to end and use the arrow keys to move the layer mask. you will notice the original rectangle will slowly be revealed by you moving the layer mask. you will also notice that a small diamond will appear in the “layer mask position” line in the timeline. you created a keyframe!
if you press play, you will see the animation from the bar going from null to full!
FURTHER READING/VIEWING
this tutorial uses layer mask animation to reveal text too!
a video tutorial for better visualization!
another keyframe tutorial, this time focusing on coloring!
if you still have any questions, feel free to contact me!
and if you (or anyone) else want, i can go in depth in animating each property, i just did a quick overview + explained the stats animation.
#*#*tutorials#completeresources#usergif#useralien#uservivaldi#usereme#userbess#userelio#usershreyu#userisaiah#useraljoscha#usersanshou#usermona#tuserju#userjaelyn#userabs#tusermalina#userbuckleys#tusermimi#tuserlucie#tusermira
208 notes
·
View notes
Note
Hi! Happy 4k celebration 🥰 Can you share how you make your gifs or make a gif tutorial?
hi !! tysm <3 i'm more than happy to give you a little tutorial on how i make my gifs ! of course, my process is not the same to other gifmakers and may not always work for everyone but i hope it helps !
for this tutorial, i'm using the most recent edition of photoshop (2023) on my mac. full explanation under the cut.
full disclaimer: most of what i've learnt about photoshop and the giffing process is through pure trial and error. this won't work for everyone and others may think it's a little weird, but this is just how i make my gifs !!
1.find your scenes.
finding your scenes is sometimes very time consuming but you want to get it right the first time !! for this tutorial, i'm using a music video in mp4 format.
2. loading your scenes.
to load your scenes, you want to go: 'file' > 'import' > 'video frames to layers'. i know that this step varies on the user because some people like to go to timeline first, but i'd advise starting in frames first !
after that, a screen like i've depicted below will pop up. i've also annotated everything for you as well.
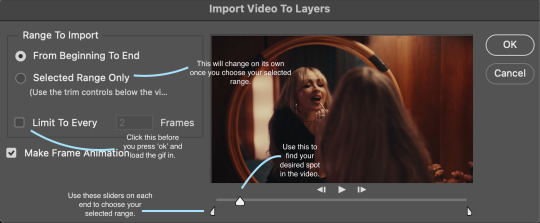
so, select your desired range, press 'ok' and then it will all load into ps !
3. setting up your gif.
i'm grouping this all into one step, but it's broken down into a few things.
the first part of this is: cropping. the recommended dimensions i follow are on this guideline here, but for the sake of this tutorial i'm just going to crop my gif 540x540 (as a w x h setting). the crop tool is on the left hand tool bar.
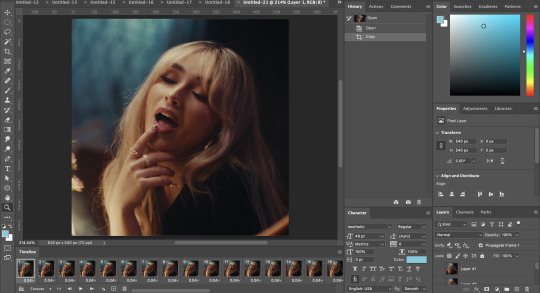
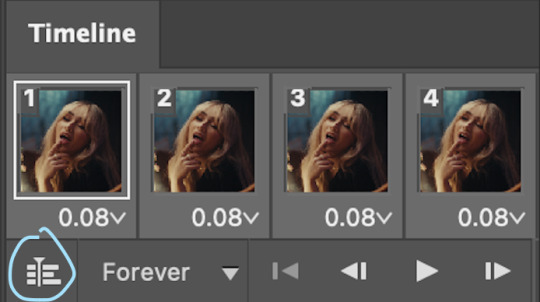
now, my gif looks like this. from here, i'm going to click on the timeline (the space along the bottom that has every frame). from there, click on the three lines to get this menu (i've circled where to go + what you'll click):

from there, go 'select all frames' and then click on any of the frames NUMBERS (where it says 0.04 with an arrow besides it, or whatever yours says) then change the frame rate. with most youtube videos i will use 0.08 as my desired frame rate, but when i'm gifing a show or something, it loads in as 0.02, so i change it to 0.05. 0.05-6 on any normal screen cap should be fine, but obviously you can change it depending on if it looks right or not.
from there, you've basically done the first half of the basics. now, you'll want to click on this button:
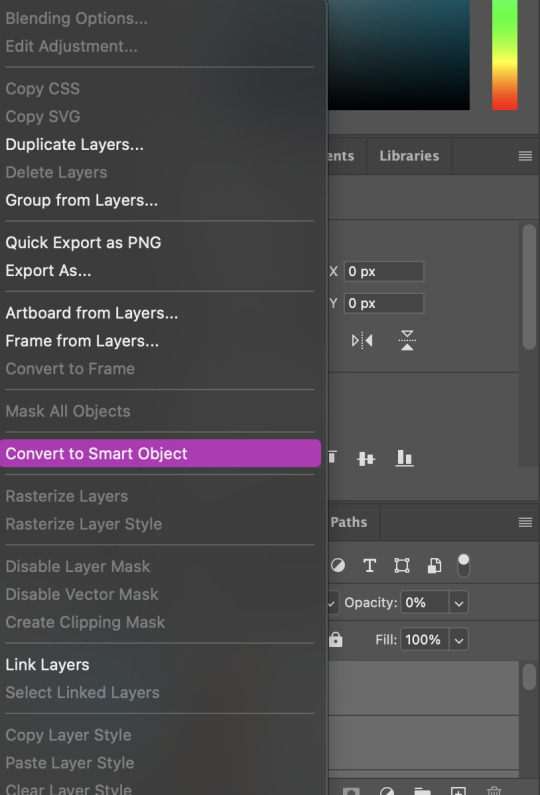
and now you'll be taken to the video timeline ! from here, select command + option + a (this is for mac, i think it would be control if you're on another device) then, right click on your layers and go 'convert to smart object'.
from here, i'll sharpen my gif before i colour. for this step i have two alternative sharpening settings first one by anyataylorjoy (rb to download !) and the other by maygrant (please ask !). the first one is tuser maygrant's and the second one is tuser anyataylorjoy's. i typically use morgan's for all my basic gifs but anyataylorjoy's for creative sets. every user has a different preference but just find what's good for you !

4. colouring your gif.
definitely the most tedious, this can be a little bit of a hassle depending on the scene. if the colouring isn't riddled with heavy yellows or cyans, colouring is usually a breeze but if it is, it can be hard.
CURVES

the circle with the arrow dropdown and that's half grey-white is the circle you want to click on to find curves. it'll open a menu and curves will be at the top.
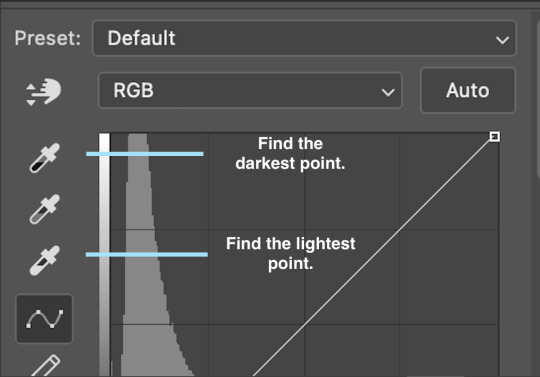
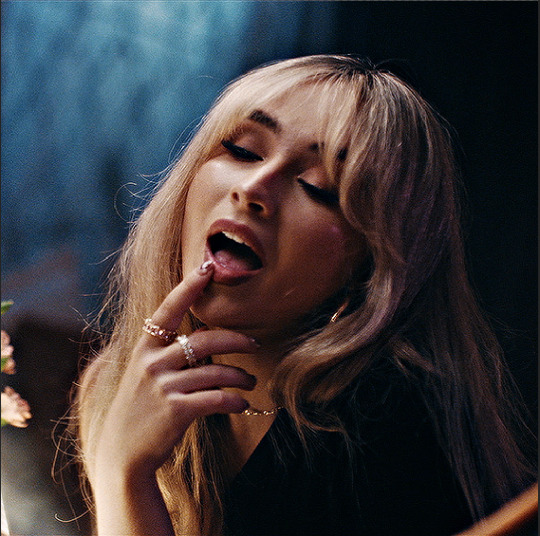
you'll see a little menu like above appear. now, select the dropper i've indicated as being the "light point" and then, using the zoom tool, we're going to zoom in and find the brightest point on the gif. this is typically where the light source is.
in this section here, i can see a couple of bright points. using the dropper, i'll click on the closest to white (note: i find that white rarely changes the colouring of the gif, so if there's like, a really really light yellow, for example, click on that) and then i'll do a similar process with the "dark point" dropper, finding the darkest spot, which is usually in shadows or in the corners. unlike with the light dropper, you want the closest to black, whether that's a dark dark brown or dark dark blue.
now, we can see how the colouring has changed:

optional: you can change the white line on the curves menu, which can make it lighter, or darker in different points of the gif.
LEVELS
levels is an optional step, but i recommend it on very light gifs, or if you want to add a little more depth. probably don't do it on an already very dark gif.
the levels menu looks like this:
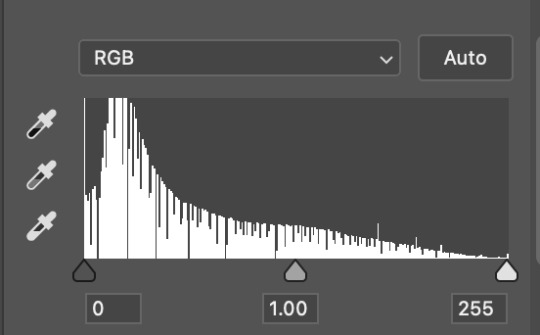
the far left slider adds shadows and the far right slider makes it lighter. on this particular gif, i only need a little bit of depth to her face and i only need to contrast that a little bit. by just dragging the slider a little bit:
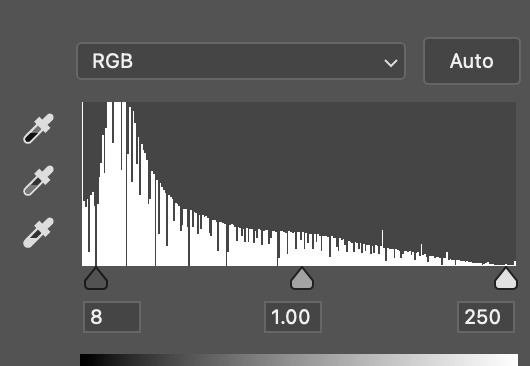
this is the result:
with levels, it can very quickly alter skin tone/make your gif look bad !! with levels, i don't think you need to go above 1-12 in adding depth.
OPTIONAL: BRIGHTNESS/CONTRAST
brightness/contrast is optional !! only add it if it's necessary :)
COLOUR BALANCE
a colour balance layer is great for fixing the tones for the gif !!

this one's pretty self explanatory. if you want it to be more yellow, slide it towards yellow. if you want it to be more red, slide it more towards red, etc etc. i've attached some gifs showing how i change tone:
but just play with it until it looks right. be very careful with skin tone !! colour balance can very easily whitewash/colour wash and that is not something encouraged, in the slightest.
SELECTIVE COLOUR
a selective colour layer is basically a "final touch" to colouring. where colour balance just kind of does an overall change of the gif, selective colour allows you to alter your specific tones, ie. reds, magentas, blues, etc. for me, i'll do the bulk of getting my desired colouring with colour balance, but if it overcorrects reds, for example, i'll add some cyan to red tones in selective colour, to diffuse that.
currently, in my gif, it's very red/yellow heavy. to balance that out, i want to add cyans. so, on the drop down list of the selective colour menu, i'll select 'red' and then i'll ADD cyans (so move the slider to the right, not the left to decrease) and then repeat that on other tones that i want to correct, with different colours.
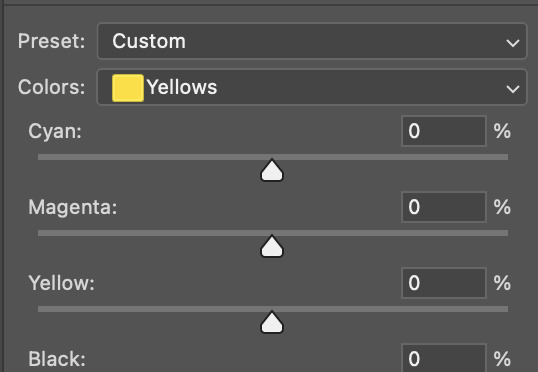
with each of the sliders, just add or decrease how much of that colour is in that tone. once again, be mindful of skin tone and whether it is appropriate or not.
with selective colour, if there are any standout colours (eg. in my gif, there's a big patch of cyan) that don't interrupt their face (eg. reds and yellows are always in faces) and change the way the subjects look, you can change those colours to make it more vibrant. so, in this gif, i'll enhance the cyans and blues and magentas to make the colours pop more.
5. saving your gif
once your happy with the colouring of your gif and done what you need to do with it, save it as a smart object with all your colouring layers, then go to 'file' > 'export' > 'save for web (legacy)...' . play back your gif, and it should be all good !! congrats on making your gifs !
i've included a playback of each layer, which is staggered to show each layer come into effect.
in order: nothing -> curves -> levels-> brightness/contrast -> colour balance -> selective colour.
hope this helped !!
#*tutorial#gif tutorial#ps help#ps tutorial#userriel#userautie#userraffa#usernorah#userrsun#usercats#thingschanged#**l.myeditss
98 notes
·
View notes
Text
PSA: Free Software
Reading this may really save your time, privacy, and money!
Reblog or share to spread awareness!
Folks often use software that’s expensive and sometimes even inferior because they don’t know there are alternatives. So to those unfamiliar: basically, free and open-source (FOSS) or "libre" software is free to use and anyone can access the original code to make their own version or work on fixing problems.
That does not mean anyone can randomly add a virus and give it to everyone—any respectable libre project has checks in place to make sure changes to the official version are good! Libre software is typically developed by communities who really care about the quality of the software as a goal in itself.
There are libre alternatives to many well-known programs that do everything an average user needs (find out more under the cut!) for free with no DRM, license keys, or subscriptions.
Using libre software when possible is an easy way to fight against and free yourself from corporate greed while actually being more convenient in many cases! If you need an app to do something, perhaps try searching online for things like:
foss [whatever it is]
libre [whatever it is]
open source [whatever it is]
Feel free to recommend more libre software in the tags, replies, comments, or whatever you freaks like to do!
Some Libre Software I Personally Enjoy…
LibreOffice
LibreOffice is an office suite, much like Microsoft Office. It includes equivalents for apps like Word, Excel, and Powerpoint, which can view and edit files created for those apps.
I can't say I've used it much myself yet. I do not personally like using office software except when I have to for school.
OpenShot
OpenShot Video Editor is, as the name suggests, a video editing program. It has industry-standard features like splicing, layering, transitions, and greenscreen.
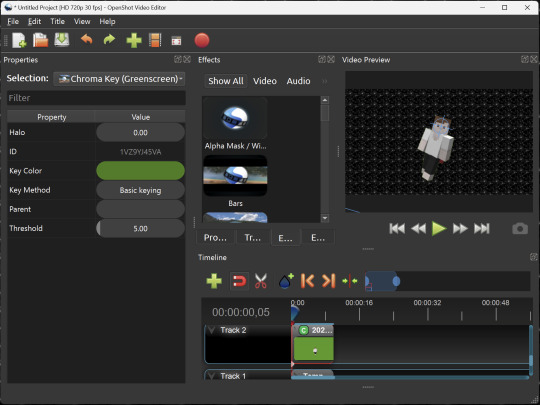
I've only made one video with it so far, but I'm already very happy with it. I had already paid for a video editor (Cyberlink PowerDirector Pro), but I needed to reinstall it and I didn't remember how. Out of desperation, I searched up "FOSS video editor" and I'm so glad I did. There's no launcher, there's no promotion of other apps and asset packs—it's just a video editor with a normal installer.
GIMP
GNU Image Manipulation Program is an image editor, much like Photoshop. Originally created for Linux but also available for Windows and MacOS, it provides plenty of functionality for editing images. It is a bit unintuitive to learn at first, though.
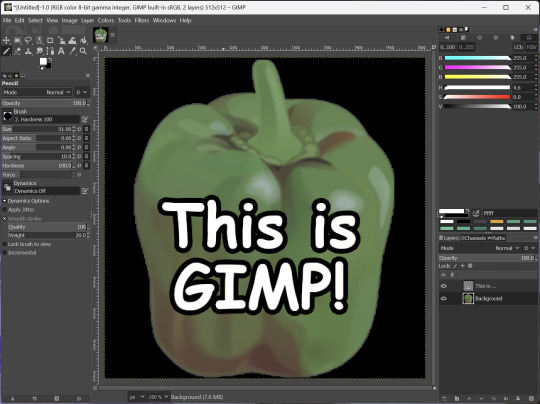
I've used it to create and modify images for years, including logos, really bad traceover art, and Minecraft textures. It doesn't have certain advanced tech like AI paint-in, but it has served my purposes well and it might just work for yours!
(Be sure to go to Windows > Dockable Dialogs > Colors. I have no idea why that's not enabled by default.)
Audacity
Audacity is an audio editing program. It can record, load, splice, and layer audio files and apply effects to them.
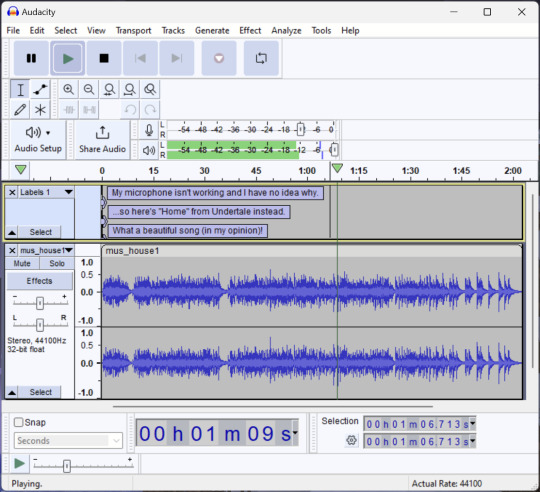
Audacity is another program I've used for a long time. It is not designed to compose music, but it is great for podcasts, simple edits, and loading legacy MS Paint to hear cool noises.
7-Zip
7-Zip is a file manager and archive tool. It supports many archive types including ZIP, RAR, TAR, and its own format, 7Z. It can view and modify the contents of archives, encrypt and decrypt archives, and all that good stuff.
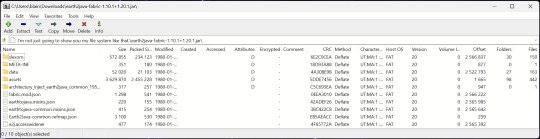
Personally, I use 7-Zip to look inside JAR files for Minecraft reasons. I must admit that its UI is ugly.
Firefox
Firefox is an internet browser, much like Google Chrome, Microsoft Edge, or Safari. While browsers are free, many of them include tracking or other anti-consumer practices. For example, Google plans to release an update to Chromium (the base that most browsers are built from these days) that makes ad blockers less effective by removing the APIs they currently rely on.
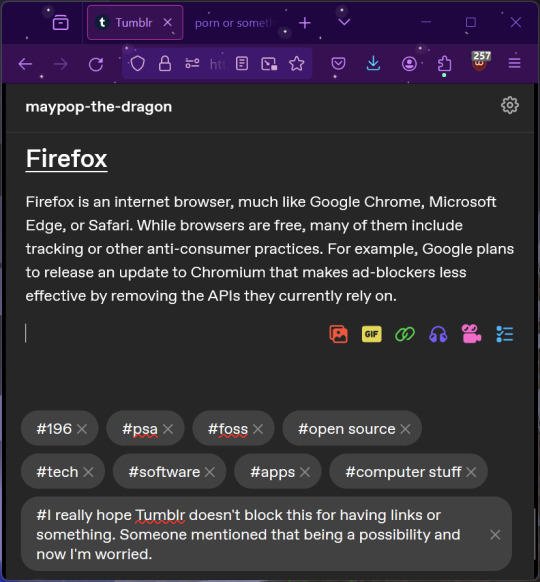
Aside from fighting monopolies, benefits include: support for animated themes (the one in the picture is Purple Night Theme), good ad blockers forever, an (albeit hidden) compact UI option (available on about:config), and a cute fox icon.
uBlock Origin
As far as I know, uBlock Origin is one of the best ad blockers there is.
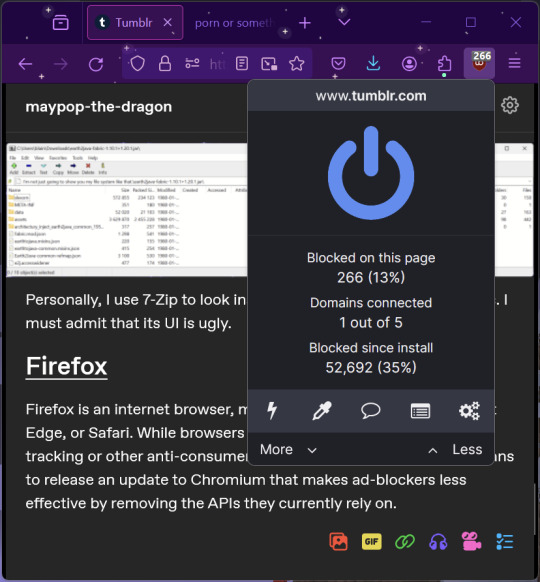
I was on a sketchy website with my brother, and he was using Opera GX's ad blocker. Much of the time when he clicked on anything, it would take us to a random sponsored page. I suggested that he try uBlock Origin, and with uBlock Origin, that didn't happen anymore.
Linux
Linux is a kernel, but the term is often used to refer to operating systems (much like Windows or MacOS) built on it. There are many different Linux-based operating systems (or "distros") to choose from, but apps made for Linux usually work on most popular distros. You can also use many normally Windows-only apps on Linux through compatibility layers like WINE.
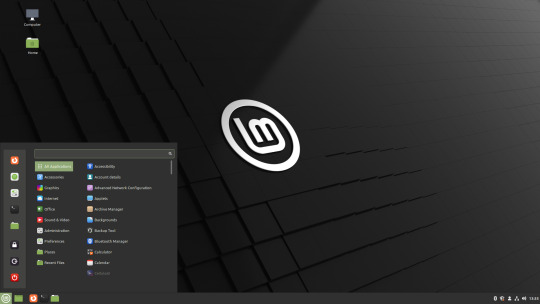

I don't have all four of these, so the images are from Wikipedia. I tried to show a variety of Linux distros made for different kinds of users.
If you want to replace your operating system, I recommend being very careful because you can end up breaking things. Many computer manufacturers don't care about supporting Linux, meaning that things may not work (Nvidia graphic cards notoriously have issues on Linux, for example).
Personally, I tried installing Pop!_OS on a laptop, and the sound output mysteriously doesn't work. I may try switching to Arch Linux, since it is extremely customizable and I might be able to experiment until I find a configuration where the audio works.
Many Linux distros offer "Live USB" functionality, which works as both a demo and an installer. You should thoroughly test your distro on a Live USB session before you actually install it to be absolutely sure that everything works. Even if it seems fine, you should probably look into dual-booting with your existing operating system, just in case you need it for some reason.
Happy computering!
#196#psa#foss#open source#tech#software#apps#computer stuff#I really hope Tumblr doesn't block this for having links or something. Someone mentioned that being a possibility and now I'm worried.#please reblog#2024-01-26
35 notes
·
View notes
Note
Hey I love ur amvs!! I was wondering if you had advice for someone that's interested in making their own? I'm not sure what the best programs are for editing or getting clips. Ty! :)
this is so flattering thank you so much!!!!! I LOVE making amvs…… favourite thing in the world to do so this is gonna be probably longer than you wanted…..
I’ve bounced around just about everything in the last couple years so I can give you a few different ideas!!
For clip sourcing:
initially, I used episodes that I had downloaded as supernatural was airing so the quality was iffy and there were logos on a lot of them… THEN I went the screen recording route (for when I was on my phone, I’ve never tried this on desktop but I know this works well for others!!) but I found that the quality still bugged me AND I ended up with nearly 2000 supernatural clips on my phone…… which was a nightmare to sort through… NOW I use this which is very fabulous and easy to use… you can select which eps to download if you don’t need all of them!! (and no vpn needed)
For editing:
I’ve used a lot of different programmes til I found one that worked well for me so definitely shop around…. youtube tutorials are your friend…. when I started, I was using sony vegas pro…. which worked fine even though my laptop was the first one ever made… but I didn’t want to pay for it and it got blocked on my laptop forever and windows would notttt let me get it back…….. SO, as I mentioned, for a while I was editing on my phone which I would personally nottt recommend for full length amvs… smaller edits would be completely fine!! I used splice which was very basic but it got the job done!! actually. looking through my videos- everything from mr perfectly fine to dean movies was made on my phone which is about 30 videos- so this works!! it’s just much more difficult and harder to polish up…. I personally make amvs much quicker and cleaner on my laptop.. and noticed a big big difference in my own quality since I switched….. NOW I use capcut since it’s free and my laptop can run it without any issues. I’m genuinely very impressed with it as a free software- lots of really good tools and effects, I find it so easy to alter colours and subtitle as well!! which I struggled with on other platforms!! very user friendly too!!! would be very beginner friendly!!
fun stuff :)
PLANNING is my absolute favourite part of making an amv…… normally I hear a song and can very easily picture shot by shot how I would amv it - once I’ve got the song and general theme I’m going for- I normally print out the lyrics and annotate them - jotting down timings, voiceovers, season, arcs and clips.. I can sometimes skip this if it’s just a simple video but if it’s anything complicated I HAVE to write it down. I also find it’s easier to make a video have a ‘point’ if I do this??? idk.. I think it helps but idk if this is something everybody does :)
there’s the spn transcript searcher which is very useful as well if there’s a line you’re looking for but can’t remember where it’s from!!
and of course homeofthenutty which is great for thumbnail stuff!!
editing things:
honestly… I don’t think there’s a wrong way to do this if you’ve got a really fabulous idea….. timings are the trickiest thing to get the hang of- I do dashes on my printed plan to kind of show where I need cuts and if it’s fast cuts I write down how long each clip should be so it looks cleaner. I find that my videos don’t really look finished until they’re subtitled either- so that always helps!! everybody kind of does that differently so definitely play around until you find a style you like!!
I wouldn’t worry too much about colouring when you’re just starting out- sometimes I find that filters can be distracting but I know others who swear by them so that’s just personal preference!! I really just tweak certain clips to make them less saturated or green-looking….
for posting:
I really recommend posting simultaneously on tumblr and youtube!! I have videos with basically no notes on tumblr but did really well on yt and vice versa!! the yt algorithm can be funny- I find that as long as it has a custom thumbnail and a few comments it does alright!! on tumblr- I always link the yt video since the tumblr player doesn’t always work for everybody…. also don’t be afraid to use taglists!!! I’m sure your mutuals would love to be tagged and please definitely tag me in anything you make!!! genuinely owe so much to my mutuals for their support 🫶🫶 and also don’t be afraid to self-reblog!! chronological dashboard means people WILL miss things if they aren’t online!!!
but genuinely the most important thing is to have fun…… I seriously love amvs…. I think they’re the best thing in the world and spend probably at least half an hour minimum a day watching amvs…….. and we need more of them!!!!! so thank you!!! and please please tag me when you make one!!! and feel free to dm me if you need anything at all!!! like all technical aspects aside… an amv made with so much love and to a fabulous song is a gift to the world…… 🫶🫶
#I’m so sorry if this is more than you wanted….. but I’m a teacher… it’s my nature…..#and the world needs every amver it can get…..#🫶🫶🫶 TY FOR THIS#amv ask#<- so I remember
12 notes
·
View notes
Text
hi! i’m user ames tattooine, and i’m gonna go over how to cut footage out of a scene. i’ll talk about rotoscoping—what it is, its history, and how to mask with the rotobrush successfully. i will also briefly go over how to use the pen tool to mask in after effects.
though this is pretty comprehensive and info-heavy already, there are still things i don't go over! but it should be a guide fit for beginner-intermediate after effects users.
YOU WILL NEED:
adobe after effects (minimum version cs5 / anything released after 2010)
basic knowledge of the interface and workflow, including but not limited to: compositions/precompositions, keyframes, and how to use brush tools
time. a lot of it
patience. more of it
also, before you click "read more," please note that this is about 3000 words long. definitely recommend viewing it in your browser. with housekeeping out of the way, let's go!
WHAT IS ROTOSCOPING?
very simply put, rotoscoping is a tracing technique. physically, it’s a little like using a selection tool on video. conceptually, things are slightly different, and that’s due to how it was meant to be used—but like many artistic tools, rotoscoping was transformed by contemporary artists / editors / animators / etc to become the versatile thing it is today. for mainstream giffing and video editing purposes, it is most often used as a way to mask footage out. see:
UNDERSTANDING ROTOSCOPING
the main thing you need to understand is that rotoscoping was meant for animation. not masking, not giffing—hand-drawn animation. in its early days, animation was clunky and generally unnatural-looking; not due to stylistic decisions about motion, but because artists were mostly guessing at how a movement would be divided into frames between point A and point B of any given movement. then, in 1915, two brothers named max and dave fleischer stuck a projector to a table, attached it to a car light, and beamed that light onto a block with tracing paper attached. they’d then take the image produced onto the tracing paper, trace out the figure (in the first case, dave dancing on top of a roof in front of a white sheet), and repeat this frame by frame to eventually trace an entire scene. the animated character would be drawn over / match the traced figures, and bam, animators suddenly had a HUGE shortcut to imitating real life movement in drawn scenes. (or, more accurately, only max and dave did, at least until the patent expired lol)
WHAT DOES THIS MEAN FOR ME??
well, maybe not much if you don’t care to nerd out like i do, but it should absolutely inform the choices you make re: scene selection. dave and max used a white sheet for contrast and added a car light to their apparatus to enhance that contrast when they were tracing. if you try to rotoscope a scene that doesn’t have much contrast to it, you may not come out the other end with much success.
but remember: the tool wasn’t created so that you could cut your blorbo out of a scene, it was so that artists could trace movement for funky and weird animated characters in the 1920s. over time, and as tech advanced, people realized that if they completed half the rotoscoping process, they would have an isolated scene from the original footage. aka, they could mask out background footage. sprinkle in a little web 2.0, accessibility and increasingly easy use of tools from the mid-90s onwards (and the implementation of the rotobrush tool specifically after 2010), and we have a fascinating study of how tools can be transformed from their original use to do things that are different but equally valid. and yeah—2010. it’s mind-boggling to think about the leaps and bounds we’ve made with editing tech in the last 10-15 years alone. i digress.
ROTOSCOPE =/= ROTOBRUSH
so here’s where you might be like, jesse what the fuck are you talking about dot jpg. i’ll try to be concise: rotoscoping is the method. rotobrush is ONE of the tools you can use to rotoscope. i have a little issue about terminology that i won’t get into, but what people want to do in gifsets and video edits with the rotobrush is MASK. they are using the rotobrush to mask away footage, the same as if they used tape to cover up sections of a canvas. it’s easier, however, to think of it in the inverse—taking specific footage out, rather than snipping background away. imagine i have gingerbread dough, and i want to cut it into stars or various shapes. one thing i could do is take a knife and a stencil and physically cut out my shapes; another thing i could do is use a cookie cutter. the rotobrush tool is like a cookie cutter if it was driven by machine learning, involved way too much math and programming for personal comfort, and also was incredibly inelegant. the former method can be done using the pen tool, which is more time consuming, perhaps, but it lends itself to accuracy because it’s all done by you, the artist. i will be going over both methods.
THE ROTOBRUSH METHOD
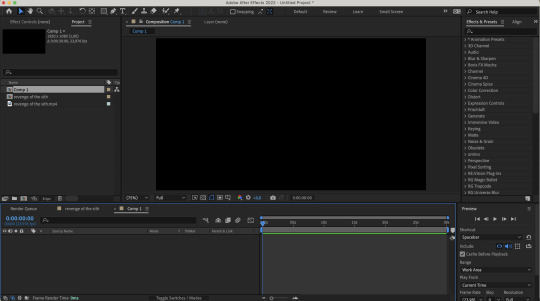
fucking finally! we’re in after effects! first thing of note: my interface looks like this. yours, unless you also went through a sony vegas envy phase in 2015 and then modified your existing cs6 interface to be as inconvenient as possible, does not. don’t worry about it—the tools you need are located in the same place, and if ever i use a panel you can’t find, just click “window” at the top (both in mac and windows) and click what you need there.
step 1: select your footage, and be selective. and boy, do i mean be selective, or else you are in for a world of irritation. you want a scene that has naturally high contrast between your subject and your background. you want a scene that doesn’t have erratic movement, or if it does, you need to have the frame rate to support that movement. similarly, your background shouldn’t have too much movement either.
(what is erratic movement? well, let’s say your footage is 24 fps, and a character moves their arm between frame 0 and frame 12, or half a second. if the arm is moving incrementally throughout all 12 frames, or every 2 frames, that’s workable! but if you have a still image for frames 0-3 where the character’s arm is in one position, then another still image for frames 4-6 where the character’s arm is in a vastly different position—that’s erratic movement. after effects will not process that easily.)
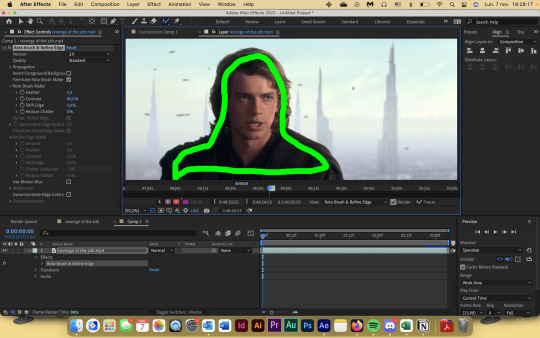
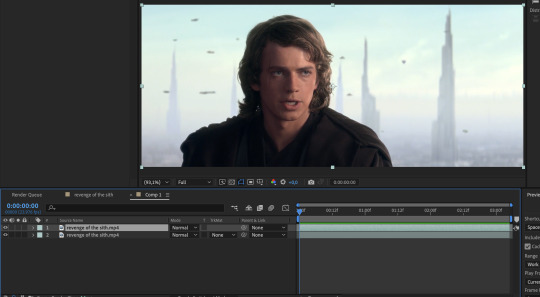
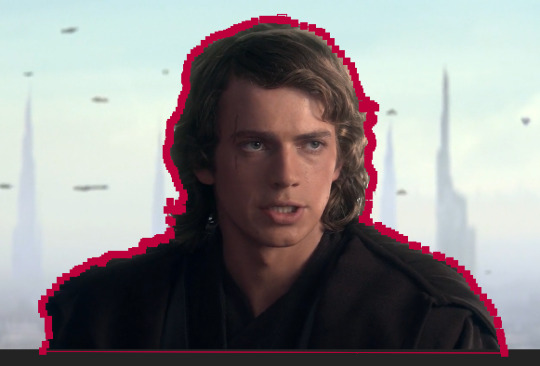
if you’re masking out footage of a human (or humans), then for your own sanity, choose a scene that doesn’t have a lot of flyaway hair. finally, you probably don’t want a scene that’s too long! for this tutorial, i’ve got this shot of my baby boy.
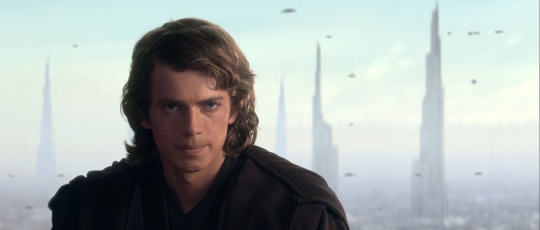
notice how he’s dressed in dark clothing against a very light background? how his hair is mostly flat to his head, and how there’s nothing really that could have erratic movement? the background is a little busy, but it doesn’t seem like anything that’ll mess up the rotobrush’s calculations. as a bonus, the subject is relatively large and details around the edges aren’t too detailed! this is the kind of footage that’ll give you an easier time.
note: when i say “calculations” btw, i really do mean calculations. the algorithm takes the brush tool set to “constant” and predicts “edges” based on things like contrast between pixels, relative position of where the brush was used, etc. this is why it can be really convenient, but also why it can be prone to error. as i said: inelegant.
step 2: isolate the scene in a separate comp, whether that be through creating a separate composition manually or just precomping your existing one. the key thing is to have workable start and end points that automatically pop up when you enter the layer so that you don’t have to wait hours for each unused frame to load. this is what i’ve got now:
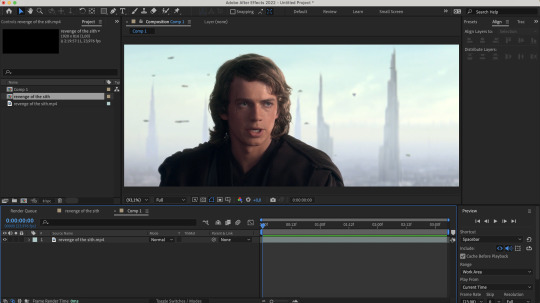
step 3: enter the layer by double clicking it in your timeline. you should see a separate panel pop up at the top here…
and what looks like the entirety of your footage here.

fret not! this is simply how layers work in after effects: they’re non-destructive, so you can add modify it to your heart’s content, and the original footage will not change. kind of like smart objects in photoshop, if you want a comparison. that is to say, yeah, in this layer, you DO have the entirety of your footage; in your composition, however, you’ve cut away all but 3 seconds of it. the point of step 2 will be apparent in one second when you do step 5.
step 4: equip the rotobrush tool. that’s the blue icon here on your tool bar (turns blue when you equip it).
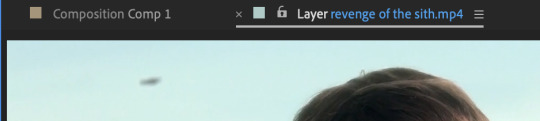
step 5: go to the beginning of your composition and vaguely trace the outline of your subject INSIDE the footage you want by clicking and dragging (like any other brush tool), like so:
the line doesn't have to connect, mine just does. you’ll notice that the "rotobrush and refine edge" effect is automatically applied, and if you zoom in on the timeline from step 3, you’ll also see that the start and end points of your workspace have been automatically set to fit your composition.
after you release your click-and-drag, you should see a pink outline appear around the selection.

you can change how you view your selection by hitting the buttons down here to toggle different alpha view settings. and if you didn’t know this already, alpha means transparency. i personally like switching between the pink outline and the alpha overlay setting—the former makes it easier to see the smoothness of my selection, and the latter makes it easier to see if i’m missing footage / provides a starker contrast.
step 6: refine the initial selection. if you have experience with tracking, you can think of this as a “master frame” where you’re defining the parameters that will go on to be approximated for the rest of the footage. reminder that you are manipulating an algorithm when you use this tool, so you want to feed it data! this means clicking and dragging to collect any missing footage, or holding option / alt while you click and drag to remove footage. if you see jagged lines (like around his hair here), you can make it smoother by tracing inside the subject around the area and removing footage from the outside around the area—basically, telling the algorithm that This Is Where The Edge Is And I’m Moving Around It.
step 7: click play and let footage propagate. once it’s done, it should preview and look something like this:
if you’ve done everything right so far, then your outline shouldn’t be jumping wildly around or anything—for the most part, it should stick to a good 80-90% of the footage you want! the more solid foundation you have that doesn’t need (much) fixing, the smoother the mask is going to be.
step 8: refine the “problem” frames. you can click through frame by frame and see where things go off the rails. for me, it’s anakin’s right (so my left) shoulder. basically repeat what you did in step 6 and add / take away footage as necessary to refine the edge. VERY IMPORTANT TO NOTE WHEN REFINING: the algorithm calculates edges FORWARDS. that is to say, if you make a change 2 seconds in, that change is only going to make modifications from that 2 second point onwards. it will not make a change backwards, meaning that if a problem starts to show up, you need to fix it from the root onwards and teach the algorithm that This Is Where The Edge Is. if you don’t do this, then you will end up going backwards frame by frame fixing the same mistake over and over again, and it will look wonky because you will redraw in different places. i have had students do this and spend hours in misery. be patient: work from the start and fix as you move forward frame by frame! don’t jump forwards and backwards if you can help it.
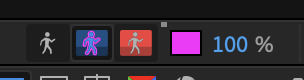
step 9: fiddle with the effect settings. now that you’ve basically gotten your mask as neat as possible, you can play with the actual effect itself. just quickly, i’ll explain what i think to be the most important things (and the other settings, you can experiment with on your own):
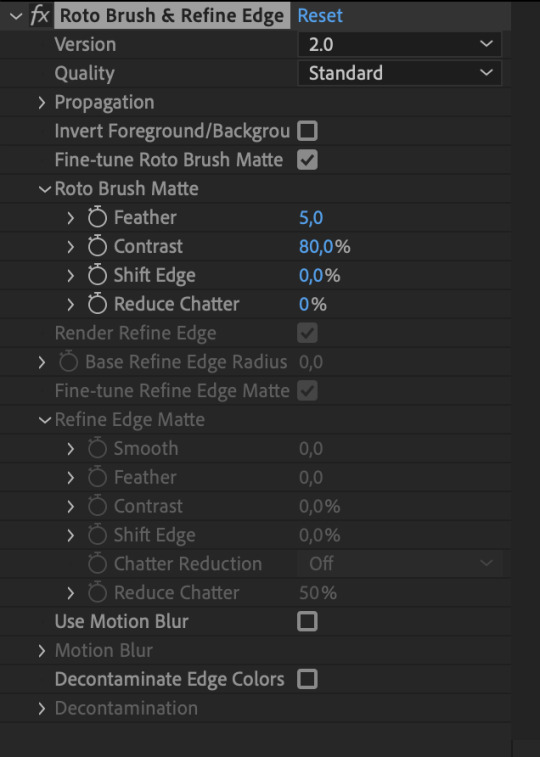
version: 2.0 is their latest and ostensibly “most improved” version from the 2020 update, though if you don’t have the hardware that can take it, you’ll end up propagating frames for Hours. version 1.0 is perfectly adequate, and at times even more efficient than 2.0. up to you!
invert foreground / background: select the footage around your subject rather than the subject itself. can be very useful!
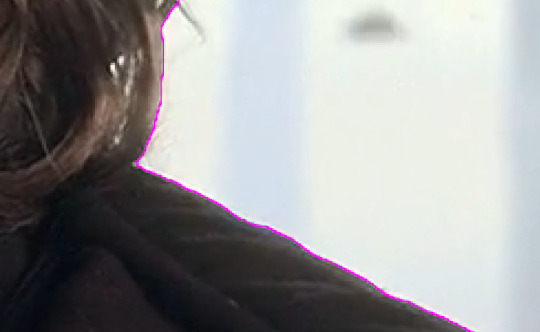
reduce chatter: chatter is the shakiness of your outline from frame to frame. when things get ugly—say, when you use the refine edge tool—is when your outline is jerking around every frame, seemingly unable to find an edge, like so (to the extreme—yours will likely be smaller twitches):
(also, this is me warning you right now. if you use the refine edge tool, you will triple your workload trying to actually refine it, and it will still look weird. if you insist on using it, be sure to work with a tiny brush size and stick as close as you can to the edge of your selection. this thing sucks and does not behave like it does in photoshop. LMAO.)
for the luke gifs, i had my feather at 10, my contrast at 90, my shift edge anywhere between 10 and 40%, and reduce chatter set to 100. these will vary greatly depending on the look you’re going for and also how neat your existing selection is. (at vague claims like this, i often hold a blinking neon sign at my students that says "REMEMBER MARSHALL MCLUHAN? THE MEDIUM IS THE MESSAGE? FORM AND CONTENT ARE INEXTRICABLY LINKED? CONSIDER THAT AND BE PURPOSEFUL IN YOUR DESIGN CHOICES PLEASE")
overall, the effects controls you see are very much like the select and mask feature in photoshop! you can play around with it and see what the other settings do, but those under roto brush matte are the main ones imo. and that’s all there is to it! you can render out your composition, or you can nest it in another composition if you’re working all in after effects, or whatever. for those who are slightly more advanced in ae: i wouldn't recommend using twixtor after masking to slow down the footage (if anything, risk the compression and add twixtor before, then render and import back and mask), but you can definitely adjust the time keyframes without impacting the quality of your selection. or you can sit and admire your genius and the power of c++.
THE PEN TOOL METHOD
this method is less a pain in the ass and more just.. very tedious. also jsyk, it works better with animated content (cartoons, anime, etc) and less so with live action just because of like, hair. i totally recommend being in a discord call with friends while you do this method because it is an absolute vibe and distracts you from how mind-numbing and boring editing actually can be lol
step 1: select your footage, and be selective. maybe not as particular as you had to be for the rotobrush method, but it should still have mostly the same elements. erratic movement isn’t so much an issue. i’m using the same scene as above for convenience.
step 2: isolate the scene in a separate comp, whether that be through creating a separate composition manually or just precomping your existing one. this is mostly for workflow reasons, but some people hate working with a lot of compositions, so it’s up to you if you want to work in the original composition with your whole footage.
step 3: duplicate the layer. you should have something like this now:
step 4: equip the pen tool, highlighted in blue here (turns blue when you equip it)!

step 5: on the top layer, create a mask around the very edges of your subject, starting from the beginning of your selected footage. you should end up with something that looks like this. i wouldn’t bother with curving your lines, just because it can be harder to move around (especially when you’re making video edits and masking out action sequences and whatnot). if you toggle the visibility off and on your bottom layer, you’ll see that you’ve masked out the rest of the footage, and everything else is transparent. woo!

NOTE: if you haven’t already, go to your preferences and make sure that this is toggled off. you want to be able to add and delete vertices at will without changing the mask path in previous frames!

step 6: hit “M” on your keyboard, or use the dropdowns on the uppermost layer to reveal the mask 1 dope sheet.
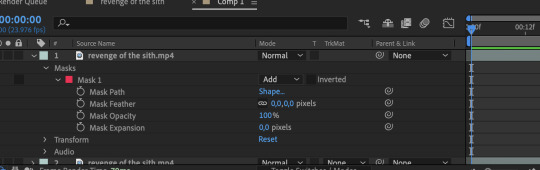
step 7: create a mask path keyframe at the first frame by clicking on the stop watch. your station should look something like this:

step 8: go forward frame by frame until the image changes. this may be by one frame, two, or sometimes three.
step 9: deselect your layer, then select it again. the mask outline should change from square vertices to circular ones.

step 10: click and drag to move the vertices so that they align with the edge of your subject again. feel free to zoom in and out as necessary! you’ll notice that keyframes are created automatically when you make changes, so don’t worry about manually inputting them.
repeat steps 8 to 10 until you’ve finished :) this is why it’s time consuming and annoying :))
bonus options: you can shift the edge of your mask by fiddling with mask expansion. mask feather will feather around your mask, and mask opacity will change the transparency of the footage outlined inside the mask. less sophisticated than the roto brush matte settings, but they work great!
annnd 3000+ words later… that’s it! that’s how you cut footage from a scene using after effects. i hope this was informative! if you have any questions, feel free to send an ask to usergif.
xo ames, signing off 🖤
142 notes
·
View notes
Text
Download Link
Pass: drop357
Adobe After Effects Crack is a widely-used video editing program. It is used to create many commercials, movies, clips, and other media. You can merge, cut, crop, overlap, and crop your videos to create unique visual content. It’s simple to use and allows users to create stunning clips and video content from one platform.
However, Adobe After Effects Registration Key has powerful features that simplify video post-processing and give users more creative freedom.
Auto-Keyframe and RotoBrush allow users to make quick changes to their video assets. RotoBrush allows you to quickly select objects or remove backgrounds without using green screens. RotoBrush is similar to Photoshop’s Magic Wand tool, which automatically selects objects from frames. This can also, of course, save the editor a lot.
#Video editor#Adobe After Effects Crack#Visual effects#Crack#Motion graphics#Keyframes#Motion tracking#Video effects#Graphic design#Install software#Video editing#Adobe 2024#software#Adobe After Effects#Motion graphics design#Adobe#Install#Video integration#Video montage#Adobe Creative Suite
4 notes
·
View notes
Text
-Full Procreate Dreams review-
firstly, i am by no means an animator, i’ve done a few short animations but nothing big or frequent, so if you don’t think i have the authority to judge an animation based app, then that’s totally fine
(also i’m sorry it’s super long, i added a TLDR as compensation)
outline:
🔺Overview of Procreate Dreams
i will judge it on:
🔺Bare minimum (does it do the bare minimum as an animation app)
🔺Features (are the features it has good, are there enough, does it need any more, etc.)
🔺User-friendliness (can it be easily understood without using tutorials)
🔺Functionality (do the features function, in its current state are there any frequent glitches or errors)
🔺Money worth (is it worth the $20 USD spent on it)
🔺Final conclusion
🔺TLDR
review under cut:
-Overview of Procreate Dreams-
The UI is similar to Procreate but not exactly the same

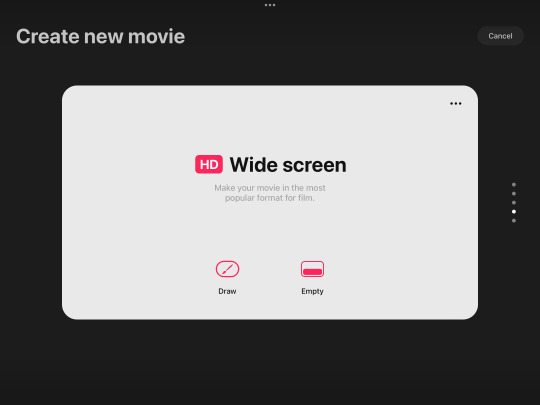
once you click + to make a canvas you get this screen showing various presets of canvas sizes (if you press the … you can choose frame rate, a note to add is that you can’t choose the exact number, only from presets, and the lowest is 12 fps)
this is the main workspace UI with the animation timeline down at bottom and drawing on top
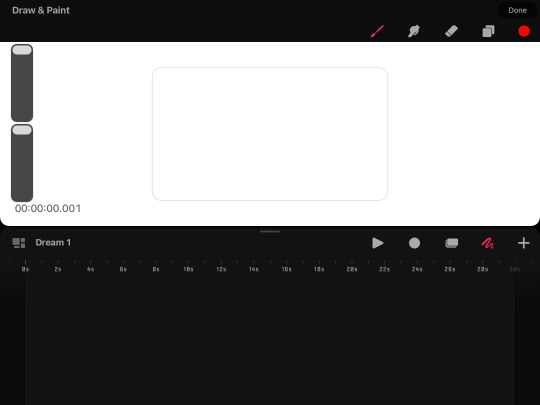
the drawing part works roughly the same as procreate (if you haven’t used procreate, well uh L i don’t have time to do an overview of that too) but some notable absences are no brush editing, no transform tool, no select tool, no flip canvas tool, and no liquify tool
the app is based primarily in gesture controls, so much so that there isn’t even an undo or redo button, to undo you have to click with 2 fingers and redo is click with 3 fingers
it also has 2 main forms of animation, one in which it favors
frame by frame, or as procreate dreams calls it “flipbook” and animation mainly by editing parts of existing art (such as tweening, blurring, warping, etc.)
this is what the flipbook looks like, you cannot x out of the flipbook without it going back to the split timeline/drawing screen (previous screenshot) you can move the flipbook around the screen but cannot enlarge or shrink it

in the alternative animation style you can set key frames and click and hold to open easing options, the default is ease in & out
along with key frames for move and scale, there’s also distort, warp, opacity, gaussian blur, noise, sharpen, and HSB (adjustment of hue, value, and saturation)

general notes:
procreate dreams has a “perform” button, which basically means that if you click it and press play, you can move a part of a drawing (or multiple parts if you select multiple or put them in a group on the timeline) and it will record how you move it and automatically add the keyframes which you can adjust afterward
you can adjust the canvas size by typing the exact pixel size, but unlike procreate it does not allow for as large of a size (it couldn’t reach 2000x2000)
-Bare minimum-
can you actually use it to animate??
i would say absolute bare minimum for frame by frame is have onion skins, able to choose fps, have it flip through the frames so it’s you know like an actual animation, have functioning, and preferably have layers
and bare minimum for the other style is have basic scaling options, have functioning export, and tweening with optional easing
procreate dreams passes bare minimum ✅ (wow what an accomplishment /s)
-Features-
it has the basic features such as onion skins, keyframes, etc.
it does allow for import of video, audio, photo, and text
the “perform” feature (explained in overview) is unique to procreate dreams from what i know
oddly enough the foreground and background feature that was in procreate animation was not added to procreate dreams
clipping mask, layer mask, and blending modes are there
BUT there is an extreme lacking of certain vital features
in frame by frame animation you can use many layers, but cannot re order them, and re ordering the actual frames is possible but rather difficult and i’m not actually sure how to do it intentionally and deleting frames is also a nuisance in the same way
you can also not re arrange the gallery images, i’m guessing this is because unlike procreate which stores art in the app, procreate dreams stores it in the files
there is no select tool and transform can only be done in the timeline which is just inconvenient, but to do any rotation you have to manually type a number of degrees it should rotate, you CANNOT rotate it normally
there is no physical undo/redo button, only the gesture for it, there is no brush editing, there is no physical import button for brushes (you can still import brushes but it is less convenient)
original procreate had a feature to hold down the pen after drawing a shape, and it would automatically make the shape but perfect and you could adjust points of it, procreate dreams does not have this
(there are of course more features but these are the major things i thought should be mentioned)
in features, procreate dreams is lacking, it has many good features but really important ones are missing ❌
-User-Friendliness-
i am a bit biased in this category because the UI and way it functions is many times very similar to procreate which i have been using for 4 years so take what i say here with a grain of salt
most everything in the app i figured out on my own without tutorials, and i did it rather quickly
i find it to be very easy to understand even for someone who has never seen the app ✅
-Functionality-
most of the features do function, but there are a few issues i should mention
occasionally on the gallery screen it just froze, but closing and opening the app again fixed it, and that didnt happen much
the brushes also look a bit more pixelated and not as smooth as procreate’s(??)
the import video and audio feature issues however, did happen much
i don’t know if this would be an issue for a newer ipad but any time i tried importing a video (even as short as 2 seconds) it said “this video exceeds your device’s capabilities” or if i tried importing too long a video it just crashed
purely audio files are a similar issue, except it COULD import a 2 second audio, but crashed at a 30 second one
in its current state, functionality is mostly passing, but audio is oftentimes such an important part of animation that i cannot truthfully give this a pass, but i won’t give it a fail either ❓
-Money worth-
in terms of money,
No.
$20 is an outrageous amount for an app that fails to import longer than a 2 second audio, having no select tool, an annoying transform tool, and many other missing features that even FLIPACLIP can do without even paying ❌
-Final conclusion-
i have full faith in the procreate team, i truly believe they can make this an absolutely amazing app, but right now, i would highly advise against buying it
i was really excited for it because i’ve been a loyal procreate fan for 4 years and go on about how amazing procreate is, but this is just disappointing
i will update you all on if it receives any major updates that fixes or adds features, until then, my conclusion is that procreate dreams is not currently worth your money ❌
-TLDR-
Procreate Dreams is missing a lot of really important features like a select tool, rotation, and the transform tool which it has but is inconvenient to use, and the audio import barely even works
i have full hope that the procreate dreams devs can and will fix it and make it a great app, but as it is now, you’d have better luck using flipaclip for free
it is actually painful for me to say that you shouldn’t get procreate dreams cause i love procreate so much, but i know that this is just BAD
go buy procreate instead, i have literally no complaints about that one it’s the best and i love it
also i’ve got art going up tomorrow!! so you get that at least
-updates-
-clipping mask added
-custom frame rates added
-drag and drop layer organization added
10 notes
·
View notes
Text
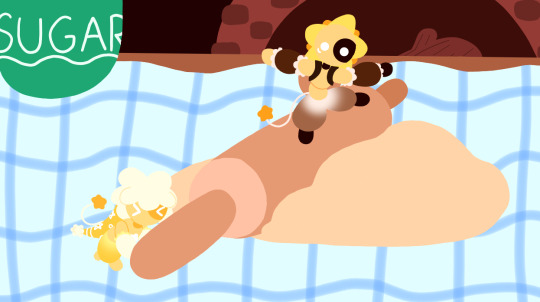
Okay after a lot of stress of doing this, I made this drawing!!!
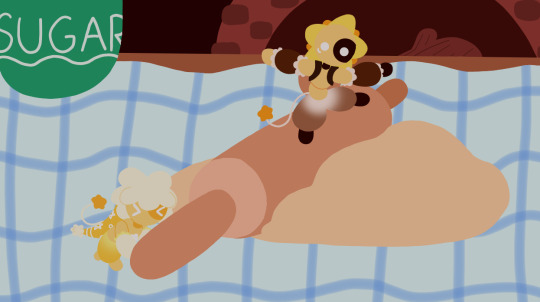
and here's a version w/out the darkness:
And there was supposed to be a version that was just the bg, but...
that leads into why I got stressed
I'll explain, but I'll put it below a cut so people aren't forced to see me ranting
So rant below:
The combination of Kleki + my often-glitches chromebook is a free helltrip.
So, as I've explained probably in June, my tablet is not working, forcing me to use my Chromebook to interact, and Kleki, this random drawing site, to draw
And Kleki is already not preferred by me, since:
It has a limit of 16 layers (sure, it used to only have 8, which was worse, but I'd still prefer more layers)
It doesn't really have a blur tool (sure, it has a blurring edit labelled Tilt Shift, but it doesn't work really like a blur tool would)
You can't select a specific part of a layer (example: Say for the drawing above, I put two heads: One is SunBun's, one is Moonpie's. However, Moonpie's isnt where I want it to be! It would be simple to just... select Moonpie's head, right? Nope!! You can't select one of them, you select the whole layer!! I've at least found a cheat of duplicating the layer, removing Sun's head on one & Moon's on the other, and then moving the layer that only has Moon's head. However, ya cant do that when you already have 16 layers, can ya??)
You can't select & recolor a part of a layer. (this is something I honestly use a lot if I'm drawing Sun and/or Moon lineless. I select the head, and then draw the cresent, with no worry of having to erase the outer lines. However, this one doesn't do that, and that upsets me slightly, but it's not too big of an issue.
No folders for layers (I don't usually use folders w/ layers so this doesn't bother me, but I found out from someone who I won't name that folders can be helpful when drawing, and this site didn't have that, so yeah for any folder users or anyone who needs a lot of layers then good luck using Kleki)
Trying to undo something and hitting the Share button by accident (this annoys me so much. I make a mistake, try to undo it, and have to deal with seeing "Kleki.Com says sharing not supported" over and over again like I KNOW!!! SHUT UPP!!!!)
And probably many more issues that I just can't think of rn
Of course this is just how I feel about it, and most of my issues towards it are based off of how I used IbisPaintX (what I would draw with on my tablet), but Kleki just makes me wish my tablet gets fixed quicker...
Cus honestly drawing would be easier for me on IbisPaintX than on Kleki...
But that's not it...
Since at the start I said the combination of Kleki & my often-glitches chromebook, right?
I've explained Kleki, what about my Chromebook?
well...
the screen will randomly go black.
when you least expect it.
Like some examples:
Writing something? A story, or an assignment, or something like that? Boom, black screen.
Watching a video? Boom, black screen.
Looking/scrolling through something? Boom, black screen. (or sometimes it just freezes, but that's only happened if I'm scrolling mainly...)
Drawing? Boom, black screen!!
But for that last one, that's not just it!!
so to finish that little equation?
Kleki plus my often-glitches Chromebook equals....
Your drawing is now lost to the void!!! Yippee!!! (<- /s)
But yeah I was drawing (and I've learned almost every step you gotta save it), and while I was working on the oven & wall of the bg, it glitched & I lost it
And I had it stepped out like this:
Sunbun & Moonpie
Roller
Dough
Sugar jar BG
Table BG
Oven BG
Wall BG
I reached the oven, but started working on the wall at the same time, and it did the thing!!! And since I saved after the Table, that meant 1-5 were all now 1 layer, and I couldn't have a separate bg image anymore, since the sugar jar & the table was meant to be a part of the BG!! Yippee!!!
So yeah, though I'm glad it didn't glitch while I was drawing Sunbun & Moonpie (since I would've just given up then), I'm still pissed.
But that's enough ranting, cus I don't like ranting.
...at least, I don't like me ranting.
#my art#please don't steal my art#Pastry! AU#Pastry! Sun#Pastry! Moon#Sunbun#Moonpie#Sun & Moon AUs#rant#hopefully it doesn't remove the cut (cus it did that once on a post but I forget which one...)
11 notes
·
View notes
Note
Hi, this is very random but I LOVE your edits!! SO SO much!! And I wanted to ask (if you feel like elaborating but no pressure!) about your editing process (I am a complete newbie). I am in awe of the connections you draw in your edits - do you first choose a song and then try to match the content to it or the other way around? And if you don't mind me asking which program do you use? And how do you get clean audio without the background music? ((I would greatly appreciate your advice if it wouldn't be too much of a burden, wishing you the loveliest of days<3))
hi there!! first off this is so sweet, and I really appreciate hearing that you like my edits!it's always so exciting to get that kind of feedback, esp since video edits arent smth ive done a Lot of or my primary form of fanwork, i guess
For some elaboration - I assume you mean the black sails edits (?), so I'm going to be answering for those. On the whole, I don't have a super well-defined process, so it definitely varies edit to edit, but in general, I tend to work off themes or ideas rather than audio! Especially since I'm not usually working with lyrics, in which case it would be a totally different story.
A lot of my black sails edits specifically are about highlighting a specific theme and how its paralleled over the show, so finding parallels usually is just me trying to remember different scenes which demonstrate the same concept, kind of. I have a file of the whole shows subtitles pasted into one place, so I do a lot of Ctrl+f with keywords (the 'you and i' video was built off literally just that) - and then try to arrange it in a way that makes sense for the BS narrative as well as the point im trying to make in the video. i also really love finding completely different conversations that feel like call and response, and setting them up against each other. Parallels! Contrasts! Etc
I try to work with an audio already in mind, though, generally, just because the flow is kind of determined by that. I didn't for the partners video, and I think it's a bit weaker for it, though i did adjust the music to suit it later. Picking a song if I have a theme in mind is really just going thru my soundtracks playlist, which is like 30% of all music I listen to, and picking smth with a vibe that fits + a pace and length that I think the video will match. (Sometimes I will also just cut the song down a bit)
The program I use is kdenlive, which is an free and open source video editing tool! It's not got quite as many features as smth like davinci resolve, but I find it works for my purposes, which are really just cropping, pasting, and a tiny bit of sharpen/recolour. that said kdenlive has a bunch of other features and options that I simply don't use and also don't know how because I haven't experimented, so its not like snip and move clips around is All you can do with it.
re: the background audios... this one is actually a process lol. i have high qual versions of all the BS eps with 6 channel audio, and ive made versions of each episode where ive isolated the central channel which usually has dialogue. however this channel also will have some slight background music or ambient sounds, so it's not really just the dialogue - but it works for the purposes of the video, where lower sounds like that may get hidden by music anyway. ymmv, it depends scene to scene, but I don't need it to be perfectly clean so it works for me. Ive isolated these channels through ffmpeg, which is a command prompt based editing thing, and isn't difficult to learn but isn't exactly the most user-friendly thing, i guess? However I understand ( @dykementality confirm?) that davinci resolve lets you just isolate audio channels of any clip you're editing, so like, that's an option. i Can give more detailed instructions on ffmpeg, or at least on the code that I use to make files w isolated audio, though honestly I've forgotten how to install ffmpeg (though it can't have been too difficult or I wouldn't have bothered)
I hope that helped you a little, pal! If you have any further clarification I'd be happy to help w/ what I know! And I hope you have a wonderful day also!
2 notes
·
View notes
Text
The Complete Beginner's Guide to Visionize AI
Visionize AI - Introduction
Welcome to my Visionize AI Review post. Where innovation meets intelligence, at Visionize AI, we are dedicated to pushing the boundaries of what's possible with artificial intelligence technology. Our mission is to empower businesses and organizations of all sizes to harness the transformative power of AI to drive growth, efficiency, and success.
With a team of experts at the forefront of AI research and development, Visionize AI is committed to delivering cutting-edge solutions that address our client's unique challenges and opportunities. Whether you're looking to streamline operations, optimize processes, or unlock new insights from your data, Visionize AI provides the expertise and technology needed to achieve your goals.
From machine learning algorithms to natural language processing systems, our comprehensive suite of AI solutions is designed to meet the diverse needs of modern businesses. Join us on a journey of innovation and discovery with Visionize AI.
Visionize AI – Overview
Creator: Bizomart
Product: Visionize AI
The official page: >>> Click here to access.
Niche: Software
Bonus: Yes, Huge Bonus
Guarantee: 30-day money-back guarantee!
What is Visionize AI?
Visionize AI is a pioneering technology company focused on harnessing the power of artificial intelligence to drive innovation and transformation. At Visionize AI, we develop cutting-edge AI solutions tailored to the specific needs of businesses across various industries. Our expertise lies in creating intelligent systems that automate processes, analyze data, and generate valuable insights to help organizations make informed decisions and achieve their goals.
Through advanced machine learning algorithms, natural language processing techniques, and computer vision capabilities, Visionize AI enables businesses to unlock new opportunities, streamline operations, and stay ahead of the competition in today's rapidly evolving digital landscape. Whether it's optimizing workflows, enhancing customer experiences, or predicting market trends, Visionize AI is dedicated to delivering high-impact AI solutions that drive tangible results and propel businesses toward success in the age of artificial intelligence.
How Does Visionize AI Work?
Leveraging Visionize AI is a seamless endeavor, characterized by a user-friendly interface where individuals can simply log in, input keywords or utilize voice commands, and witness the rapid generation of desired visual content. This intuitive workflow ensures swift and efficient production of captivating visuals, requiring minimal effort on the part of the user.
Get Instant Access
Benefits Of Using Visionize AI
Streamlines the process of visual content creation for users of all skill levels
Facilitates the rapid generation of high-quality visuals across a multitude of formats
Provides a seamless avenue for monetizing generated visuals through a dedicated marketplace
Diminishes the reliance on costly design tools and professional services
Empower individuals and businesses to embrace the AI-driven future of visual content creation.
Visionize AI Review - Key Features
AI-powered Graphics and Image Generation
Video Generation without the need for recording or editing
Access to a Marketplace boasting 10,000,000 active buyers
Inpainting, Colorization, and Denoising capabilities for images
Recognition, Synthesis, and Noise Removal functionalities
Mobile Compatibility, facilitating on-the-go visual creation
Comprehensive Training Videos and Round-the-Clock Support
Visionize AI Review- Pros and Cons
Pros:
The comprehensive suite of visual content creation features
One-time fee structure with no monthly costs, offering excellent value
Free commercial license, enabling users to sell their creations
Mobile compatibility for convenient access across various devices
Streamlined workflow catering to both novices and seasoned professionals
Cons:
Limited availability of licenses due to server capacity constraints
Potential future increase in price to a monthly subscription model
But That's Not All
In addition, we have several bonuses for those who want to take action today and start profiting from this opportunity.

1. Bonus: Exclusive Special Training (Valued at $997)
Enhance your skills with our exclusive Special Training program, meticulously crafted to complement VisionizeAi. Uncover advanced techniques, deepen your knowledge, and unlock the full potential of state-of-the-art artificial intelligence. Empower your creative vision today.
2. Bonus: 200+ Mascot Cartoon Characters (Valued at $247)
Introducing 200 vibrant mascot cartoon characters by VisionizeAi, each embodying a unique aspect of innovation and creativity. From tech-savvy bots to imaginative thinkers, these characters inject charm and personality into the realm of artificial intelligence.
3. Bonus: Infographic Blackbook (Valued at $367)
Unlock the secrets of crafting visually compelling infographics with the Infographic Blackbook, perfectly complemented by VisionizeAi's cutting-edge automated design tools. Together, they empower users to effortlessly create engaging visual narratives with precision and flair.
4. Bonus: Video Marketing Graphics Pack (Valued at $327)
Enhance your video marketing endeavors with our Graphics Pack, meticulously curated to complement VisionizeAi. Featuring stunning visual elements, dynamic animations, and customizable templates, effortlessly elevate your videos and captivate your audience like never before.
Get Instant Access
Why Recommended?
Recommended for its cutting-edge AI solutions, Visionize AI stands out for its commitment to innovation and excellence. With a track record of delivering tangible results, Visionize AI empowers businesses to thrive in today's competitive landscape.
Its advanced machine learning algorithms and natural language processing capabilities enable organizations to streamline operations, optimize processes, and uncover valuable insights from data. Backed by a team of AI experts, Visionize AI offers tailored solutions that drive measurable impact and propel businesses toward success.
Choose Visionize AI for unparalleled expertise and transformative AI solutions that drive growth and innovation.
Money Back Guarantee - Risk-Free
Look, VisionizeAi is not one of those “trash” or untested apps. We know what it’s capable of…However, in the unlikely event that you fail to use VisionizeAi for ANY REASON. We insist that you send us an email…It is simple if you don’t make money. We don’t want your money…We make more than enough with VisionizeAi. And no need to keep your money if you’re not gonna use it.
Not just that…We will send you a bundle of premium software as a gift for wasting your time. Worst case scenario, you get VisionizeAi and don’t make any money you will still get an extra bundle of premium software for trying it out.
Final opinion:
In conclusion, Visionize AI emerges as a leader in the realm of artificial intelligence, offering unparalleled expertise and transformative solutions. With a commitment to innovation and excellence, Visionize AI empowers businesses to thrive in today's dynamic environment.
Through advanced machine learning algorithms and natural language processing capabilities, Visionize AI enables organizations to streamline operations, optimize processes, and unlock valuable insights from data. Backed by a dedicated team of AI experts, Visionize AI delivers tangible results and drives measurable impact.
Overall, Visionize AI stands as a trusted partner for businesses seeking to harness the full potential of AI to achieve their goals and propel growth.
Get Instant Access
FAQ
What is Visionize Ai?
Vision AI is a peculiar sports-changing model crafted by complex algorithms and AI technology. It aims to just do that (don’t use double words). Specifically, its objective is to take the world’s imagery design to another next level. It does this by the way of using simple automatic techniques and additional design alternatives.
How does Visionize Ai differ from other design tools like Canva?
Visionize AI became quickly famous as a tool that can simplify the design usually performed by the industry’s front runner. Therefore, it is referred to as a Canva killer. It utilizes modern AI-driven models that offer personalized design suggestions, templates, and layouts. Also, it supplies libraries of inspiration and designs.
How does Visionize AI work?
The Visionize AI understands data in large volumes and skips the job of humans for many design work. It will offer advice and recommendations specific to each project, as well as different templates and layouts that have a personalized touch. Plugging the AI into the development process dramatically speeds up the workflow of design and gives a considerable library of inspirations and design objects.
Who can benefit from using Visionize AI?
Our solution focuses on meeting two major groups’ needs, those who are professional at the same time and beginners. Its easy-to-use interface can be mastered by all levels of users and can even be managed by drag and drop. Professionals with design skills are going to be flattered by the ability to use AI’s advanced automation abilities to save time and the creative work left off by the newcomers would only be their costly templates and design inspirations.
What sets Visionize Ai apart from other AI models?
It is indeed true that Visionise Ai is the “Daddy of all AI Models”. Advancements in Modern Artificial Intelligence (AI) technology will ensure Visionise is ahead of other design solution providers. Those powerful si eleenes have API that allows user customization, they fo seek to remain cutting edge in the designer sector simply because they are now superior among their peers.
What are the advantages of using Visionize AI?
The Visionize Ai technological solutions offer several benefits over the improvisations. First, its automation characteristics save time for designers leaving them to rationally work on their more strategic endeavors. Then, you use this AI base with its suggestions and templates to enable you to add more creative ideas and this inspires you. Finally, Visionize Ai’s (this company’s) top technology makes the most recent design trends and the most advanced features available as well as up-to-date.
How can Visionize Ai unlock my design potential?
Whether a seasoned expert in graphic design or a toddler, this tool frees your creativity and enables you to innovate. In line with its user-friendly interface, the strong AI components empower experiments, experiments, and artistic visualization using advanced models making the audience involved and intrigued.
Is Visionize Ai suitable for all types of graphic design projects?
Visionize Ai does all of the graphic design projects that are mentioned here. Its collection of templates as well as design elements gives many options to users who can modify them to suit their design needs, as they are versatile and can work for a range of designs.
#VisionizeAi#VisionizeAireview#VisionizeAiapps#VisionizeAisoftware#VisionizeAisoftwarererviews#VisionizeAidemos#VisionizeAiscam#VisionizeAife
2 notes
·
View notes
Text
Unlocking Creativity with ReelExpress AI: Redefining Video Content Creation
In an era where video content reigns supreme, the demand for captivating and engaging videos has never been higher. Whether you're a marketer, content creator, educator, or business owner, the ability to produce high-quality videos is essential for standing out in a crowded digital landscape. However, creating compelling videos often comes with its challenges – from time constraints and limited resources to technical expertise requirements. That's where ReelExpress AI steps in, empowering users to unlock their creativity and produce professional-grade videos effortlessly.
Introducing ReelExpress AI:
ReelExpress AI is more than just a video editing platform – it's a game-changer for anyone looking to streamline their video content creation process. Powered by cutting-edge artificial intelligence technologies, ReelExpress AI offers a comprehensive suite of tools and features designed to simplify the video creation journey.
Effortless Editing with AI:
Gone are the days of painstakingly editing videos frame by frame. With ReelExpress AI, editing becomes a breeze thanks to its intelligent automation capabilities. The platform leverages advanced AI algorithms to analyze and enhance your footage, automatically adjusting parameters such as color grading, transitions, and audio levels to ensure a polished final product.
Smart Scene Selection:
Finding the perfect shot can be a time-consuming task, but ReelExpress AI makes it easier than ever with its smart scene selection feature. By analyzing factors such as composition, lighting, and emotion, the platform identifies the most compelling moments in your footage, allowing you to focus on storytelling rather than tedious editing.
Customization Made Simple:
Whether you're creating a promotional video, a tutorial, or a social media post, ReelExpress AI offers a diverse selection of customizable templates to suit your needs. From stylish graphics and text overlays to dynamic transitions and effects, the platform provides endless possibilities for personalization, ensuring that your videos stand out from the crowd.
Voiceover and Text-to-Speech:
Adding narration to your videos has never been easier thanks to ReelExpress AI's built-in voiceover and text-to-speech capabilities. Whether you prefer to record your own voice or utilize AI-generated speech, the platform offers flexibility and convenience to bring your story to life.
Unlock Your Creativity Today:

With ReelExpress AI, the barriers to video content creation are a thing of the past. Whether you're a seasoned professional or a novice enthusiast, the platform empowers you to unleash your creativity and produce stunning videos with ease. Say goodbye to tedious editing and hello to a new era of effortless video creation – try ReelExpress AI today and experience the difference for yourself.
2 notes
·
View notes
Text
AI Video Editing Technology: Making Your Visual Storytelling Dreams a Reality
In the fast-evolving landscape of video production and content creation, the role of AI (Artificial Intelligence) has emerged as a game-changer. Specifically, AI-driven video editing technology is revolutionizing the way we tell stories, create captivating visuals, and streamline the editing process. This blog post explores how AI video editing is making visual storytelling dreams a reality.
The Evolution of Video Editing
Traditional video editing has long been a meticulous and time-consuming task. Editing software, while powerful, often requires extensive manual input, making the post-production process labor-intensive and, at times, creatively limiting. With the advent of AI, this narrative is rapidly changing.
AI video editing technology leverages algorithms and machine learning to analyze and manipulate video content. It can detect patterns, optimize transitions, enhance visual elements, and even suggest creative edits based on recognized best practices. This shift in video editing allows for faster, more efficient, and often more innovative post-production.
The Benefits of AI Video Editing
Speed and Efficiency: AI video editing significantly reduces the time required for post-production. Repetitive and time-consuming tasks, such as sorting and cataloging footage, can now be automated. This frees up creators to focus on more creative and strategic aspects of their projects.
Consistency: AI ensures that your video maintains a consistent look and feel throughout. This is particularly beneficial for brands that require a uniform visual identity across all their content.
Suggested Edits: AI can analyze the content and suggest edits that improve the overall quality of the video. This includes suggesting optimal cut points, transitions, and even color corrections.
Visual Enhancements: AI can enhance visual elements within a video. This includes improving image stabilization, reducing noise, and even upscaling resolution.
Accessibility: AI-driven video editing tools are becoming increasingly accessible to both professional videographers and amateur content creators. Many are designed with user-friendly interfaces, making them easy to integrate into existing workflows.
Applications of AI Video Editing
AI video editing has a wide range of applications across various industries:
Content Creation: Content creators can produce high-quality videos more efficiently, ensuring a consistent look and feel across their content.
Marketing: Marketers can create compelling video campaigns with ease, optimizing content for various platforms and audiences.
Education: Educators can enhance their e-learning materials with professionally edited video content, increasing engagement and retention.
Filmmaking: Filmmakers can streamline post-production processes and experiment with creative edits to bring their vision to life.
Corporate Communications: Businesses can produce professional videos for internal and external communications, training, and presentations.
The Future of Visual Storytelling
AI video editing is not just a tool for speeding up the post-production process; it's a catalyst for creativity and innovation in visual storytelling. As the technology continues to advance, we can expect even more sophisticated AI-driven editing tools that offer enhanced creative capabilities.
The democratization of video editing through AI empowers creators, businesses, and educators to bring their visual storytelling dreams to life. Whether you're a professional videographer, a marketer, an educator, or simply an enthusiast, AI video editing technology is making your visual storytelling dreams a reality, redefining the way we create and share stories through video. Embrace this technological revolution, and elevate your video production to new heights with the power of AI.
3 notes
·
View notes
Text
Visual Treasure AI Review
In the fast-paced digital era, visuals are the currency of engagement. Marketers, bloggers, and business owners are constantly in search of high-quality images, videos, and visual content to enhance their online presence. Visual Treasure AI, an innovative AI-powered image generator, steps into the spotlight promising to revolutionize the way we search, customize, and utilize visual resources. In this comprehensive review, we will delve into the features, benefits, and user experiences of Visual Treasure AI to help you make an informed decision.
Table of Contents
Why Visuals Matter in the Digital Age
Overview
Key Information
How Visual Treasure AI Works
Visual Treasure AI Review – Unlimited Access to Stock Resources
Cost-Effective Solution
User-Friendly Interface
Customization and Editing Tools
Commercial and Agency License
Pros and Cons
Price & Upsells
Visual Treasure AI Review – User Testimonials
Visual Treasure AI Review – Conclusion
Visual Treasure AI Review – Frequently Asked Questions (FAQ)
Why Visuals Matter in the Digital Age
>> Get Visual Treasure AI + My $49,000 Bonus To Boost Up Your Earnings MORE and you won’t find these bonuses anywhere <<
Visual Treasure AI: Unleashing the Power of AI for Visual Creativity
Overview
Visual Treasure AI, developed by Clicks Botz, is an advanced cloud-based platform that promises unlimited access to a vast collection of stock images, videos, gifs, animations, memes, and audio tracks. Leveraging cutting-edge SDXL and Dall-E technology, this AI image generator offers a seamless 1-click searchable experience, simplifying the process of finding and customizing visual resources.
Key Information
Vendor: Clicks Botz
Product: Visual Treasure AI
Launch Date: 2024-Jan-21
Front-End Price: $17
Coupon Code: VisualTreasureAI5
Bonuses: HUGE BONUSES
Refund: YES, 30 Days Money-Back Guarantee
Product Type: Graphic Design
Support: Effective Response
Recommended: Highly Recommended
Skill Level Needed: All Levels
>> Get Visual Treasure AI + My $49,000 Bonus To Boost Up Your Earnings MORE and you won’t find these bonuses anywhere <<
Exploring Visual Treasure AI’s Features and Benefits
How Visual Treasure AI Works
Step 1 – Enter a keyword and Search from Over 25 Million Resources
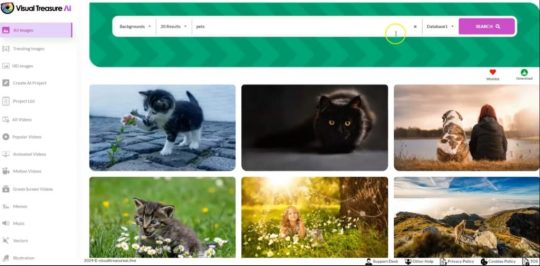
Imagine you have a specific theme or topic in mind for your project. It could be anything from ‘nature’ to ‘technology’ or ‘business.’ In the first step, you just type in that keyword, and Visual Treasure AI will do the magic for you. It will search through its massive library of over 25 million resources, including images, videos, gifs, and more, to find the perfect match for your needs.
Step 2 – Just Tap on it to Modify as per your needs with their Cloud Based Video, Image and Music Editor
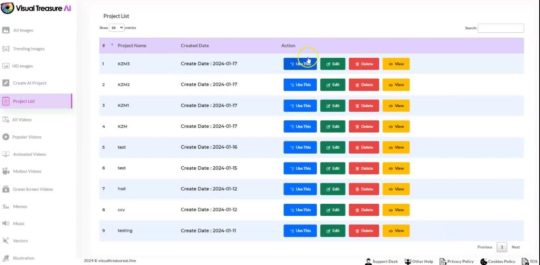
Once you’ve found the resource that fits your vision, it’s as easy as a tap or click. Visual Treasure AI brings you an in-built, user-friendly editor that lives in the cloud. No need for fancy software installations – everything is right there. You can modify your chosen image, video, or music to suit your style. Add filters, text, or any effects you like with a simple click. It’s like having your own creative studio right at your fingertips.
Step 3 – Use it ANYWHERE and in ANYWAY as you wish!
https://sharadreview.com/wp-content/uploads/2024/01/s3-1024x503.jpg
You can use your modified creation anywhere you want – whether it’s for personal projects, your business, or even for your clients. There are no restrictions on how you use it. Once you’ve made it yours, it’s yours to use in any way that fits your needs.
Visual Treasure AI Review – Unlimited Access to Stock Resources
Visual Treasure AI boasts a colossal collection of over 80 billion stock images, videos, gifs, animations, memes, and audio tracks. The promise of unlimited access empowers users to enhance their marketing campaigns, social media posts, websites, and videos with a diverse array of captivating visuals.
Cost-Effective Solution

User-Friendly Interface
Navigating the platform is a breeze with Visual Treasure AI’s user-friendly interface. Whether you’re a design novice or an experienced user, the intuitive design allows for quick keyword searches or exploration of various categories to find relevant content. The streamlined interface ensures a seamless experience, making it easy to find, customize, and download resources with just a few clicks.
Customization and Editing Tools
A highlight of Visual Treasure AI is its built-in image, video, and music editor. This powerful tool empowers users to customize and edit resources according to their specific marketing needs. From cropping and resizing to adding text overlays and applying filters, the platform eliminates the need for external editing software, saving time for time-conscious marketers.
>> Get Visual Treasure AI + My $49,000 Bonus To Boost Up Your Earnings MORE and you won’t find these bonuses anywhere <<
Commercial and Agency License
Visual Treasure AI provides users with a free commercial and agency license, allowing them to use the generated visuals for client projects as well. This feature eliminates legal concerns related to copyrighted images, opening new opportunities for monetization and expanding creative possibilities for individuals and agencies alike.
Pros and Cons
Pros
Unlimited access to a massive collection of visual resources.
Cost-effective solution with a one-time payment.
User-friendly interface with powerful editing tools.
Free commercial and agency license for unrestricted use.
Continuous improvement through AI algorithms.
Cons
– ❌ No problems at all.
Price & Upsells
Click Here & Join Now Visual Treasure AI Discount Price
Visual Treasure AI Review – User Testimonials
Positive testimonials from users underline the platform’s impact on marketing campaigns, cost-effectiveness, user-friendly interface, and the quality of visuals.

Visual Treasure AI Review – Conclusion
Unlocking the power of Visual Treasure AI has the potential to transform your visual content creation process. With its unlimited access to a vast collection of visuals, cost-effective pricing, user-friendly interface. and powerful editing tools, Visual Treasure AI stands as a valuable tool for marketers, bloggers, and business owners alike. The capabilities of AI, this platform empowers users to create captivating visuals. Save time and money, and elevate their brand identity.
>> Get Visual Treasure AI + My $49,000 Bonus To Boost Up Your Earnings MORE and you won’t find these bonuses anywhere <<
Visual Treasure AI Review – Frequently Asked Questions (FAQ)
1. How many visuals can I download with Visual Treasure AI?
– With Visual Treasure AI, unlimited access, meaning you can download as many visuals as you need without any restrictions.
2. Are the visuals provided by Visual Treasure AI royalty-free?
– Yes, all visuals available on Visual Treasure AI are royalty-free, allowing for personal and commercial use without additional fees.
3. Can I customize the visuals within the platform?
– Absolutely! Visual Treasure AI provides powerful editing tools for customization, ensuring visuals align with your brand identity and marketing objectives.
4. Can I use the visuals for client projects?
Yes, Visual Treasure AI provides a free commercial and agency license. allowing you to utilize visuals for client projects as well.
5. Is Visual Treasure AI suitable for non-designers?
– Yes, Visual Treasure AI is designed to be user-friendly, accessible even for non-designers. The intuitive interface and easy customization options make it suitable for all levels of users.
Thank you for taking the time to read my rest of the article, Visual Treasure AI Review
Affiliate Disclaimer :
Some of the links in this article may be affiliate links, which means I receive a small commission at NO ADDITIONAL cost to you if you decide to purchase something. While we receive affiliate compensation for reviews / promotions on this article, we always offer honest opinions, users experiences and real views related to the product or service itself. Our goal is to help readers make the best purchasing decisions, however, the testimonies and opinions expressed are ours only. As always you should do your own thoughts to verify any claims, results and stats before making any kind of purchase. Clicking links or purchasing products recommended in this article may generate income for this product from affiliate commissions and you should assume we are compensated for any purchases you make. We review products and services you might find interesting. If you purchase them, we might get a share of the commission from the sale from our partners. This does not drive our decision as to whether or not a product is featured or recommended.
#Visual Treasure AI Review#VisualTreasureAI#DigitalCreativity#AIImageGenerator#StockMedia#CreativeDesign#ContentCreation#VisualMarketing#InnovationHub#TechSolutions#MarketingMagic#BrandElevation#DesignInspiration#UnlimitedCreativity#DigitalTransformation#VisualContentTools#MarketingRevolution#TechInnovations#CreativeFreedom#AIforDesign#DigitalImpact
3 notes
·
View notes
Text
Explore HE Tuber - Your Ultimate Video Platform
Welcome to HE Tuber, the ultimate video platform for content creators. HE Tuber is a powerful video platform that provides cutting-edge SEO tactics and effective monetization strategies for YouTube growth. That platform is designed to help content creators to achieve success on the world's biggest video-sharing website, YouTube.
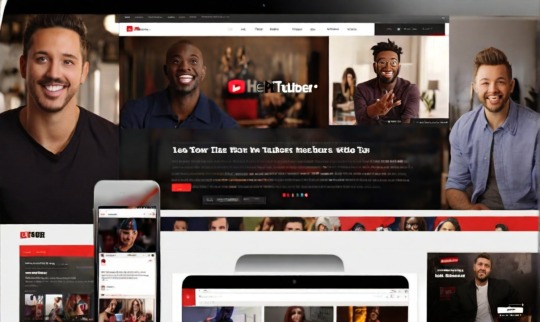
HE Tuber: A Comprehensive Guide for Content Creators
HE Tuber provides content creators with a comprehensive guide for building their YouTube channels. With HE Tuber, content creators have access to proven YouTube tips and techniques that can help them grow their audience and create engaging content. One of the essential features that HE Tuber offers is video editing tools that enable creators to enhance their videos' quality and maximize engagement with their viewers.
Apart from video editing, HE Tuber also provides other essential features, such as analytics tools that let content creators monitor their channel's performance and measure their success. With these insights, content creators can make informed decisions regarding the types of video content to publish and their promotional strategies.
HE Tuber sets content creators up for YouTube success by providing them with everything they need to create professional-quality videos. Additionally, with HE Tuber's comprehensive guide for content creators, creators can learn essential tips and tricks for maximizing YouTube's benefits and building a thriving channel audience.
Mastering YouTube Channel Growth with HE Tuber
HE Tuber offers an array of tools and features that can help content creators master YouTube channel growth. One of the most important techniques is creating viral videos that resonate with your audience and encourage engagement. HE Tuber provides resources to assist in creating unique, shareable content to increase views and retain subscribers.
Optimizing video content is also essential for channel growth. HE Tuber offers insights and data to refine your video content and improve your ranking on the search engine results page. By leveraging these features, content creators can gain greater visibility and attract new subscribers to their channels.
HE Tuber's features also extend to maximizing reach through video sharing across multiple platforms. With integrated access to social media sharing, content creators can increase engagement, retain subscribers, and expand their reach beyond YouTube.
The power of viral video techniques, video optimization, and the capability to share audio and video content across multiple platforms make HE Tuber a powerful platform for mastering YouTube channel growth.
Effective YouTube SEO with HE Tuber
With over two billion active users worldwide, YouTube is one of the most powerful platforms available for content creators. However, with such a massive user base, YouTube SEO is crucial to help your content stand out and reach your target audience.
HETuber offers a range of tools and features to aid content creators in implementing effective SEO tactics for their videos. With HE Tuber, you can easily analyze keyword density, optimize captions, descriptions, and tags to rank higher on YouTube's search results.
Furthermore, HE Tuber stays up-to-date with the latest YouTube algorithm updates, ensuring that content creators are always using the most effective tactics to improve their search rankings. By leveraging the SEO tactics provided by HETuber, content creators can drive organic traffic and increase the visibility of their content on the platform.
Overall, the combination of HETuber and effective SEO tactics is critical to achieving YouTube success. With the right tools, content creators can enhance their content's searchability and leverage YouTube's massive user base to drive engagement, followers, and monetization opportunities.
Monetization Strategies Unleashed with HE Tuber
As a content creator, you can unlock various monetization strategies with HE Tuber. Monetizing your video content is vital to earn revenue, and HETuber offers several ways for you to do this.
Advertising Revenue
HE Tuber's advertising revenue program allows creators to earn revenue from ads displayed before, during, or after their videos. To qualify, YouTubers must meet specific criteria, including a minimum of 1,000 subscribers and 4,000 watch hours over the past 12 months.
Channel Memberships
With HE Tuber, you can offer channel memberships to your subscribers. This feature allows viewers to purchase exclusive content and perks, such as badges and emojis, to support you at a monthly fee.
Merchandising
HE Tuber's merch shelf feature makes it easy for content creators to sell their merchandise on their channel. You can showcase up to twelve products directly below your video, and viewers can purchase them seamlessly using the platform.
Content Sponsorship
With HE Tuber, you can collaborate with brands to produce sponsored content while earning revenue. Brands can sponsor content creators to reach a wider audience and introduce new products or services.
Monetizing your video content on HETuber is a straightforward process that opens doors to earning revenue. With HE Tuber's various monetization strategies, content creators can generate income and turn their passion into a profitable endeavor.
Leveraging YouTube Analytics for Success with HE Tuber
HE Tuber provides content creators with access to advanced YouTube analytics tools that can be leveraged to achieve high levels of success on the platform. By utilizing HETuber's analytics, content creators can gain a full understanding of their video content's performance. Insights into view counts, watch time, and other metrics can be used to optimize and inform content creation, making it more effective in supporting YouTube channel growth.
HE Tuber's analytics tools provide essential data on the demographics of the audience, allowing users to come up with content that better aligns with their audience's preferences. Advanced features such as real-time tracking of content can be used by creators to capitalize on high-performing content and pivot as necessary, steadily increasing their reach and followers.
By monitoring performance on HE Tuber's analytics dashboard, content creators can identify trends and make robust, data-driven decisions on YouTube engagement, unlocking unprecedented content creation capabilities. HE Tuber's analytics platform goes beyond merely providing data, as it also offers insights that assist creators in understanding and improving their strategies for content creation and audience acquisition. Thus the platform is a must-have for any creator serious about their YouTube channel growth.
HE Tuber's Cutting-Edge Video Editing Features
HE Tuber offers a range of cutting-edge video editing features to empower content creators to create professional-looking video content. These tools enhance the editing process and help to produce high-quality video content that stands out from the rest.
HE Tuber's editing tools are intuitive and user-friendly, making it easy for even novice content creators to edit their videos with ease. The software allows for precise cuts, transitions, and effects, enabling users to polish their videos to perfection.
One of the standout features of HE Tuber's editing tools is its ability to handle high-resolution footage. This feature ensures that content creators can edit videos of any quality without compromising the visual appeal of their content.
The software also offers a range of color grading, audio editing, and animation tools that enable content creators to bring their ideas to life. The video editing tools on HETuber make it easy to create engaging and visually compelling content that captivates audiences.
The Power of Sharing on HE Tuber
HE Tuber is more than just a video content platform; it's also a powerful sharing platform that enables content creators to increase their visibility, engagement, and reach with their audience.
When you share your video content on HETuber, you open up new opportunities to connect with your followers and fans. Not only can they easily find and view your videos, but they can also interact with your content in a variety of ways, such as leaving comments and sharing your videos on other platforms.
Through HETuber, you can share your video content on a variety of channels, such as social media, forums, and blogs. This sharing capability is a game-changer for content creators looking to build their audience and grow their brand.
Moreover, sharing on HETuber is easy and intuitive. With just a few clicks, you can upload your video content and share it across different platforms. HE Tuber's sharing platform is optimized for maximum engagement, making it an essential tool for any content creator looking to reach a wider audience.
Key Takeaways
HE Tuber is a valuable sharing platform for content creators;
Sharing on HE Tuber increases visibility, engagement, and reach with the audience;
HE Tuber enables sharing of video content across different channels;
HE Tuber's sharing capabilities are easy to use and optimized for maximum engagement.
HE Tuber's Mobile App for On-the-Go Video Creation
HE Tuber's mobile app is a game-changer for content creators who want to create and upload videos directly from their camera phones. With this feature, you can create videos on-the-go, without worrying about carrying bulky equipment.
The app offers a range of video editing tools that can help you create professional-looking content even when you're not at your desktop. Filters, effects, transitions, and titles— all of the features are available on the app. So, you can play around with your creativity even when you're on the move.
Moreover, the mobile app is easy to use and can handle videos shot with both, your camera phone or video phone. So, next time you're traveling, attending a conference, or just having a lazy day, you can create and upload videos in minutes using the HE Tuber mobile app.
Unlimited Uploads and Free Features on HE Tuber
HE Tuber is more than just a video platform - it's an entire suite of powerful tools and resources that content creators can access for free. One of the most significant advantages of using HE Tuber is its unlimited upload feature, which means you can upload as many videos as you want without restrictions or hidden fees.
HE Tuber's free features are also unmatched by any other video platform. From video editing tools to analytics, HE Tuber provides a comprehensive and user-friendly platform that helps content creators to create, optimize and monetize their video content.
With HETuber, you have access to valuable resources to help you grow your YouTube channel, boost engagement, and earn revenue. And best of all, it won't cost you a penny!
The Future of Video Content with HE Tuber
HE Tuber is not just a video platform, but a pioneer in the future of video content. HE Tuber understands the importance of creating innovative features and advancements to enhance the experience for both content creators and viewers.
HE Tuber's cutting-edge tools and resources aid content creators in producing engaging and high-quality video content. The platform offers features like video editing, viral video techniques, and effective SEO tactics. All these aspects of HETuber have played a significant role in the success of content creators.
The future of video content is bright with HE Tuber, as the platform keeps evolving and adapting to meet the needs of the industry as well as its users. HETuber continues to empower content creators every day and is on track to remain a leading force in the world of video platforms.
Conclusion
HE Tuber is the ultimate video platform for content creators looking to achieve YouTube growth and effective monetization strategies. With cutting-edge SEO tactics, mastering YouTube channel growth, and video editing features, HETuber offers valuable tools and resources for content creators to leverage. Its comprehensive guide, viral video techniques, video analytics, and unlimited free uploads assists in helping creators achieve success on the platform.
Furthermore, HETuber enables monetization strategies and provides insights into the importance of YouTube SEO to rank higher in search results. Sharing video content on HE Tuber enhances reach, engagement, and visibility with their audience. The HETuber mobile app allows content creators to create and upload videos directly from their camera phones, and its innovative features offer significant benefits to the future of video content.
Overall, HETuber is a game-changer that has revolutionized the video-sharing industry. Its unlimited uploads, free features, and cutting-edge tools provide content creators with a platform to showcase their talents and reach their full potential. Sign up today and experience the benefits for yourself.
FAQ
What is HE Tuber?
HE Tuber is the ultimate video platform for content creators, providing cutting-edge SEO tactics, YouTube growth strategies, and effective monetization strategies.
How can HE Tuber help content creators?
HE Tuber serves as a comprehensive guide for content creators, offering YouTube tips, video editing techniques, and tools to master YouTube channel growth.
What are viral video techniques?
Viral video techniques are strategies used to create videos that have the potential to go viral, increasing reach and engagement.
How does HETuber optimize video content?
HETuber provides insights on YouTube SEO and utilizes the latest YouTube algorithm updates to help content creators rank higher in search results.
What monetization strategies can be used with HETuber?
HETuber offers various monetization strategies, allowing content creators to generate revenue from their video content.
How does YouTube analytics impact success?
YouTube analytics provided by HE Tuber help content creators understand their audience, analyze video performance, and drive YouTube channel growth.
What are the video editing features offered by HE Tuber?
HE Tuber offers cutting-edge video editing features that empower content creators to create professional-looking video content.
How can sharing on HE Tuber boost visibility?
By leveraging HE Tuber as a sharing platform, content creators can increase visibility, engagement, and reach with their audience.
Is there a mobile app for HETuber?
Yes, HE Tuber's mobile app allows content creators to create and upload videos directly from their camera phones, enabling on-the-go video creation.
Are there any costs associated with HETuber?
HETuber offers unlimited uploads and free features, providing valuable tools and resources to content creators at no cost.
How is HETuber shaping the future of video content?
HETuber is introducing innovative features and advancements that have a significant impact on the success of content creators and the future of video content.
3 notes
·
View notes
Text
How to Make Gifs on Your Phone (by an iPhone user)
For @thatsocfangirl and anyone else who might be interested <3 I am also still very new to gif making and video editing so any incorrect terminology is completely accidental
Step One: Get Your Tools Together
So you’ll want Firefox for your browser and a video editing app of your choice (I am currently using CapCut cause the last one I used went to paid only), also, you’ll need to locate a streaming service you can screen record from (with Firefox you should be able to use any, however, Netflix and Amazon Prime don’t allow you to stream through a browser on your phone yet).
Step Two: Capture the Scene(s) You Want
So you’ll need a decent chunk of storage on your phone if you want to make more artsy sets that incorporate multiple scenes. However, you won’t need too much space for doing one or two scenes at a time.
Step Three: Edit in Your Photos App
You’ll want to adjust some basic features directly to the original video (and cut out anything but the scenes you want so your working with a smaller file). The areas I tend to target are Exposure (usually hitting at least 80% cause the gif will always be dimmer than the video), Shadows (depending on the scene anywhere from 10-30% generally, the key is lightening without losing too much depth- but don’t worry depth and color will be added back in), Contrast (usually around 0-10%, adds back in some depth), Black Point (from 0-20%, adds back color and depth), adjust Warmth and Tint to return undertones to the same as the original unbrightened video (this will differ greatly from scene to scene), Sharpness and Definition (from 10-15%, makes the video clearer)
This step is where you’ll want to make the video really bright and colorful, while trying to maintain the same level of color balance as the original.

gif made with unedited video and video edited only in photos app
Step Four: Edit in Your App
Here you’ll do any additional adjusting to the above features, which will be lessened cause you’re now working from a new video as far as the app is concerned, giving you more maneuverability with coloring. But the primary thing you’ll be doing in this stage is sharpening, which you toggle to 100% and then download at the highest resolution (preferably 1080 or higher). And reupload the new video, and repeat till you get the clarity you want (I usually do it three or so times before I’m exhausted).
Then you can add in any affects, overlays or text you want to your newly sharpened and colored video!

gif made with video edited in app and sharpening x3 times overlayed with video edited only in photos app
Step Five: Convert to Gif
This step is pretty easy, if time consuming (though not longer than ten minutes a gif- with bad signal). Ezgif.com’s video to gif converter, where you’ll toggle your start and end times, use the drop down boxes to select 540 px (for tumblr), 33 frames per second, select the box to optimize for static background and then click the convert to gif box.
After a short loading session your gif will appear at the bottom of the page, with a MiB size (which to upload has to be below 10MiB). To get it to a smaller size you can adjust the frames per second which will make it less smooth or click the optimize button (I suggest starting at 5 and going up in increments of 5), and also you can adjust the speed of the gif from the options here (the shorter the gif the slower it will have to be to match the actual video speed)
To download always click the save button to load a new page or else the gif could be glitchy! And your all set!
6 notes
·
View notes
Last Seen Blogs

fanseeonline
Fansee Australia

nmcindia
NITIN MITTAL & CO.

mickeysclubhouse
hot diggity dog

aialchemy
AI Alchemy

car-tok-blog
Cartok