#auto hdr
Text
My camera's not perfect for capturing the difference of enabling Auto HDR (enabling it doubles the overall brightness), but messing with it in Mario Kart 8 has to be one of the Surface Pro's best new features.
#videos#video games#Mario Kart#Wii U#Cemu#emulation#Surface Pro 11#Windows on ARM#Auto HDR#GameXData
1 note
·
View note
Text
we hung out with rob last night!! here’s him talking to @k8mckinnonstan about macdennis
#iasip#macdennis#i haven’t fully processed this check back in with me in 3-5 business days#also sorry about the auto brightness hdr thing something went wrong when i was messing around with my camera settings last night
437 notes
·
View notes
Text
Ube's Gpose Edit Process
Disclaimer: I have no idea what I'm doing, this is just-- *gestures vaguely*
For @oneiroy!
Okay so, I'll be using the Candle Autumn - Gameplay preset. It's my usual preset, but I do toggle some effects for gposing. We'll get into it later. All my gpose settings are at default except for 'Depth of Field' and 'Character Lighting'.
(Please ignore my sliders for Lighting 1, I'm not going to be playing with lighting here. It's a pretty neutral shot without any strong light source, so I dont feel like I need it. )


before vs. after of 'character lighting' being turned from 53 to 0
'Character Lighting' gives the effect of even lighting no matter where they are. I usually turn it down to 0. In this situation, it's because she's standing under the dock roof thing with even natural lighting. When I work with light, turning it to 0 helps me understand exactly how light is hitting the subject and where my shadows are.

Now I'll mosey on over to Reshade. I've turned off the 'DoF' here as well. I prefer to do my blurring in post :D

I'll enable 'MxaoFFXIV' and mess with the settings until I have shadows appropriate for the lighting situation. Again, there's no strong light source here, so I want soft shadows that hint at objects being close together.

Next I enable 'HDR'. Just in case we don't know-- HDR stands for 'high dynamic range'. Essentially it makes our shadows darker without turning them black and our highlights brighter without making them white. 'HDR' picks up more details and is great for making those HQ screenies.
Now I mosey on over to my Windows photo editor.

I like to start by blurring the background. The auto-detect isn't always great so I'll go in and make sure the mask (the blue stripes) doesn't overlap Ajisai too much. If I don't, there'll be a strange glow radiating from the blurred spots. I also want to add the mask to any pieces of the background auto-detect missed.
Here's some problem spots:


Hopefully you can see here that the background isn't completely blurred in image 1 & 2. In image 3, the problem is the feather is almost completely blurred when I don't want it to be.


Now I edit! I usually don't push the values too hard. Except for vignette, which I turn up to max because I like it. It's probably just a phase, mom.
Done! I'll put some process pictures below to show how we were looking:
1. Pre-Reshade + Character Light 53
2. Reshade + Character Light 0
3. The Final days Image


Hopefully this was helpful and I apologize if I explained something you already knew ^-^;;. Thanks for the opportunity to break down my process, this helped me understand what in the Fury's name I'm doing.
If anyone has any questions about why I did what I did, feel free to ask. I'll do my best to answer!
Bonne chance and happy gposing o/
#if it wasn't helpful i hope it was at least interesting#also i have no idea if this shot is as good as the one you were originally talking about#i don't know what to tag this as#gposejar#gpose process
33 notes
·
View notes
Text


Hi pals!
I’ll still be travelling when you’re seeing this and haven’t watched the finale, so I don’t have any new content to share, but last week (maybe longer? I don’t know— rainforest brain lol) I posted a poll asking if anyone was interested in seeing a snippet of my editing process, so here it is feat. possibly one of my favourite Wrecker moments.
I use a myriad of different software depending on: my mood, what computer/tablet I’m using, what the image looks like, and how much energy I’m willing to put into it lol In this video, I’m using Lightroom on my iPad.
The three main factors I look mostly closely at when I’m editing shots are 1. lighting, 2. noise, and 3. resolution (read: clarity).
This image required pretty minimal work so it’s probably not the best example, but ah well. The process in the above video is as follows, and please note the video had been sped up to 2x for file size reasons lol
The first thing I’ll do is see what the auto edit function defaults to. Often times it overexposes the image, resulting in significant colour noise, but it gives me a decent idea of what I should expect in terms of colour corrections and exposure mapping. The auto edit function wasn’t terrible in this case, but did produce some colour noise, mainly on Wrecker’s chest plate, his sleeves, and the officers hat. Once I’m done the initial scope out, I’ll exposure the image as high as possible to crop it— usually with the subject being as centered as possible.
This software lets the user tweak the bones of the image individually in three ways, all of them very quickly demonstrated here. The first is the curve method which I despise and NEVER use— because it alters multiple aspects at once, I don’t feel like I have the same degree of control as the other methods. Next is HDR setting (the default upon import) using the sliders on the right. This is effective for images that are already pretty well lit, and does give me a little more control, but most of the time because the screenshots are so dark, I’m editing in SDR mode.
Once I’m satisfied with the exposure/lighting, I’ll move on to correcting colour distortion and saturating the image. This software also provides three methods for colour alternation and I’ll typically use all three in conjunction with each other. Colour mixing is extremely crucial when it comes to reducing odour noise and distortion. Because this software lets me isolate certain colours to adjust their hue, saturation, and luminance, I can typically reduce most of or all of the colour noise. However, it does have its limitations. In this particular post, desaturating the colour noise in Crosshair’s rifle coincided with blanching his skin tone, because this software does not let me isolate certain areas of an image. It was also important to me to emphasize the warm tones from the sunset in the background for the overall mood of the shot, so I opted to remove what colour noise I could and leave the rest. (You can’t win em all… especially when the starting image is near-black lol)
Correcting the colour distortion in this image was not particularly difficult, desaturating all purple tones removed the noise from his chest plate, and shifting green tones to something near a yellow instead removed the noise from his sleeve. I didn’t notice the colour noise on the officers hat until a little later, but that was pretty easily corrected too.
Once I’ve fixed the colour noise, I’ll shift to toning the overall image. Wrecker particularly looks good in cool tones, but It’s nice to contrast a cool tone background with the warmth of his skin.
Once the toning is done, I’ll move on the image clarity. I don’t have the means to alter the actual resolution of the image, but I’m particularly picky with balancing texture and clarity. Wrecker always looks the best with texture and clarity increased, because it brings out the scarring on his face and further humanizes him, but overdoing the texture can also emphasize pixelation. Once that’s done, I’ll reduce the overall noise only slightly (doing too much makes them look airbrushed and unnatural), and whatever is left of the colour noise (too much of this setting makes them look like ghouls LOL)
This software also offers a series of preset alterations/filters briefly shown in this video… but I’m not the biggest fan of any of them. I’m a bit of a control freak and would rather tweak each aspect individually to the degree that I like, instead blanketing the image with present modifications and then undoing certain aspects.
Before exporting the image I’ll do another once over and make sure I’m happy! In this case, I opted to go back in and add some darker tones back into the image. I don’t do this often, particularly when they start so damn dark, but I wanted to keep the focus centrally on Wrecker’s radiance lol
That’s about it. If I’m working on multiple edits in a set, this software lets me just copy and paste the settings, so the following images only require extremely light tweaks and take almost no time. And that, I’ll export, autograph, and upload!
Thank you for attending this unprofessional Ted Talk.
#starqueensrambles#things no one asked for but are getting anyways#Jedi queue-doo#starqueensedits#ungatekeeped lol#thats not a word#well… it is now
14 notes
·
View notes
Text
Big fan of the Pixel camera app's auto HDR function you can't turn off that makes everything look like shit
8 notes
·
View notes
Text
Elevate Your Viewing Experience with the Sony Bravia 4K Ultra HD Smart LED Google TV X90K (55 inch)
Experience the pinnacle of home entertainment with the Sony Bravia 4K Ultra HD Smart LED Google TV X90K. This 55-inch marvel combines cutting-edge technology, stunning visuals, and intelligent features to deliver an unparalleled viewing experience, making it the perfect addition to any modern home.
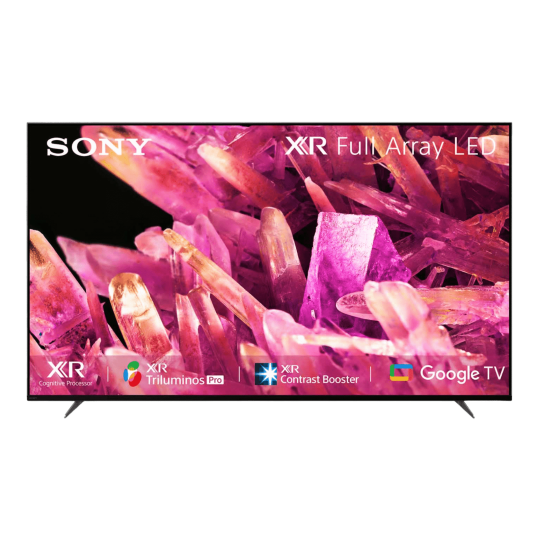
Breathtaking 4K HDR Visuals
The Sony Bravia X90K boasts a 4K Ultra HD resolution that brings every scene to life with incredible detail and clarity. With High Dynamic Range (HDR) technology, you'll experience a wider range of colors and brightness levels, making your favorite movies, shows, and games more realistic and immersive than ever before. The TRILUMINOS™ display further enhances the color accuracy, ensuring vibrant and true-to-life visuals.
Advanced Cognitive Processor XR™
At the heart of the X90K is the revolutionary Cognitive Processor XR™, designed to replicate the way humans see and hear. This advanced processor understands how humans focus on specific elements in a picture, cross-analyzing and optimizing hundreds of thousands of elements in a blink of an eye. The result is an incredibly lifelike and immersive viewing experience, with perfect contrast, natural colors, and exceptional clarity.
Google TV™ Integration
Enjoy the best of smart TV features with Google TV™ integration. Seamlessly access a vast array of content, including streaming services, apps, and live TV, all in one place. With personalized recommendations, voice search, and easy access to your favorite apps, finding something to watch has never been easier. Plus, the built-in Google Assistant allows you to control your TV and smart home devices with just your voice.
Smooth and Responsive Gaming
The X90K is a gamer's dream, featuring HDMI 2.1 compatibility, which supports 4K at 120Hz, Variable Refresh Rate (VRR), and Auto Low Latency Mode (ALLM). These features ensure smooth, lag-free gaming with exceptional responsiveness, making it perfect for next-gen console gaming. The Game Mode enhances picture quality while minimizing input lag, giving you the competitive edge you need.
Immersive Audio Experience
Complementing the stunning visuals, the Sony Bravia X90K delivers an immersive audio experience with Dolby Atmos® and Acoustic Multi-Audio™ technology. The strategically placed speakers create a rich, multidimensional soundscape, making you feel like you're right in the middle of the action. Clear, powerful sound ensures you hear every detail, whether you're watching a blockbuster movie or playing your favorite game.
Sleek and Stylish Design
The X90K's sleek and minimalist design blends seamlessly with any home decor. The slim bezels and premium finish add a touch of elegance, while the versatile stand can be adjusted to fit various spaces. Whether mounted on the wall or placed on a stand, the X90K is sure to be the centerpiece of your living room.
Key Features:
4K Ultra HD Resolution: Stunning detail and clarity for an immersive viewing experience.
HDR Technology: Enhanced color and brightness for realistic visuals.
Cognitive Processor XR™: Advanced processing for lifelike picture quality.
Google TV™ Integration: Seamless access to a vast array of content and apps.
HDMI 2.1 Compatibility: Supports 4K at 120Hz, VRR, and ALLM for smooth gaming.
Dolby Atmos®: Immersive audio with multidimensional sound.
Sleek Design: Slim bezels and premium finish for a stylish look.
Conclusion
The Sony Bravia 4K Ultra HD Smart LED Google TV X90K (55 inch) is the ultimate choice for anyone seeking the best in home entertainment. With its stunning visuals, advanced features, and sleek design, it offers an unparalleled viewing experience that will transform your living room into a cinematic paradise. Upgrade your entertainment setup with the X90K and enjoy the future of television today.
2 notes
·
View notes
Text
MSI MAG 271QPX E2 Boasts Gen 3 QD-OLED Panel
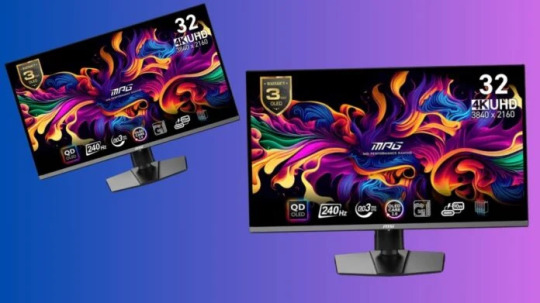
A new iteration of MSI’s gaming monitor, the MAG 271QPX QD-OLED E2, has been quietly unveiled. Remarkably, one of the first gaming monitors with a brand-new, never-before-released Gen 3 QD-OLED panel is the MAG 271QPX QD-OLED E2.
MSI released the MAG 271QPX QD-OLED ($749.99 on Amazon) months ago.MSI monitors use Gen 3 QD-OLED panel with 360 Hz refresh rates and 1440p resolution. Samsung may have secretly debuted a Gen 3 QD-OLED panel with a reduced refresh rate.
MSI has added the MAG 271QPX QD-OLED E2 to its US website, although prices are unknown. To the best of their knowledge, the panel is shared by the Gigabyte AORUS FO27Q2 and MAG 271QPX QD-OLED E2.
Thus, the MAG 271QPX QD-OLED E2 outputs at 1440p with a full panel brightness of 250 nits and a 0.03 ms GtG reaction time. The display also achieves VESA ClearMR 13000 and DisplayHDR True Black 400 standards, peaking with 1,000 nits when watching HDR material (APL 3%) overall.
The MAG 271QPX QD-OLED E2 differs from the MAG 271QPX QD-OLED in that it provides a refresh rate of 240 Hz. Nevertheless, MSI offers a three-year warranty against OLED burn-in in addition to its unique fan-less cooling system and OLED Care 2.0 technology.
MAG 271QPX QD-OLED
Strong connectivity possibilities are also offered by two HDMI 2.1 connectors, each of which can handle 48 Gbps of bandwidth. In order to work with PlayStation 5 and Xbox Series S|X consoles, the MAG 271QPX QD-OLED E2 supports Auto Low Latency Mode (ALLM) and Variable Refresh Rate (VRR) technology. For further connecting possibilities, please refer to the figure below.
Although the exact release date for any TV or monitor utilizing the Gen 3 QD-OLED panel is unknown, the following is known:
Announcement: In early 2024, Samsung Display made the Gen 3 QD-OLED panel official.
Product Availability: These Gen 3 panels were already used in a number of ASUS, MSI, and Dell monitor models that were released in 2024.
As of May 2024, there are a few new Gen 3 QD-OLED displays on the market. Here are two instances:
MSI 271QPX QD-OLED E2.This 27-inch 1440p display with a 360Hz refresh rate is ideal for competitive gamers.
ROG Swift OLED ASUS PG32UCDM4K-resolution 32-inch monitor with 240 Hz refresh rate.
A large, smooth-refreshing display with good quality is ideal for gaming.
Both displays provide deep blacks, rich colours, and fast response speeds.
For tear-free gaming, they support G-Sync and FreeSync.
Consider these extras when buying a Gen 3 QD-OLED display:
Cost: Gen 3 QD-OLED displays are still somewhat pricey and new. These are premium displays, so be prepared to pay more.
Dimensions and Resolution: Gen 3 QD-OLED panels are currently available in 27-inch 1440p and 32-inch 4K sizes.
Select a refresh rate based on what you require. For competitive gamers, a 360Hz refresh rate monitor may be ideal. Professional creatives and casual gamers can handle 240Hz refresh rates.
That’s right! You have cutting-edge display technology. New gaming monitor MSI MAG 271QPX QD-OLED E2 has a Gen 3 QD-OLED screen.
Gen 3 QD-OLED Panel has these notable features:
Gen 3 QD-OLED Panel has vivid colours, deep blacks, and 0.03ms GtG for fast-paced gameplay.
1440p (2560 x 1440): Most gamers like this resolution’s performance and clarity.
High 360Hz refresh rate guarantees smooth graphics in tough games.
VESA DisplayHDR True Black 400 boosts contrast and highlights on the monitor.
Ergonomic stands tilt, swivel, raise, and pivot for viewing comfort.
It has two HDMI 2.1 ports, one DisplayPort 1.4 port, a 15W PD USB 3.2 Type-C port, and a 3.5mm headphone jack.
This premium gaming monitor, the MSI MAG 271QPX QD-OLED E2, gives competitive players great features and performance.
Gen 3 QD-OLED screens are expensive
Seeing static images for long durations can cause burn-in, as with other OLED screens.
For dedicated gamers wanting best performance and visual quality, the MSI MAG 271QPX QD-OLED E2 is ideal.
Gen 3 QD-OLED panel gives the MSI MAG 271QPX QD-OLED E2 outstanding specs
Show:
Dimensions: (flat panel) 27 inches
Resolution: WQHD, 2560 x 1440
Type of Panel: QD-OLED Next-Gen (Gen 3)
16:9 aspect ratio
Achievement:
360 Hz refresh rate – The exceptionally smooth images produced by this ultra-fast refresh rate make it perfect for competitive gaming.
Response Time: 0.03 ms (GtG) – This blazingly quick response time reduces ghosting and blurring, making it ideal for action-packed, quick-paced games.
Image Quality:
High contrast, rich blacks, and vivid colours are guaranteed by the VESA DisplayHDR True Black 400 certification, providing an amazing HDR experience.
Excellent colour accuracy is claimed by MSI (precise numbers are not yet available).
Interface:
48Gbps HDMI 2.1 ports – Supports high frame rates (up to 120Hz) for PS5 and Xbox Series X consoles.
DisplayPort USB Type-C (functionality specifics not available yet)
Extras:
For customisation, use the MSI Arsenal Gaming OSD (On-Screen Display).
Compatible with VESA mounts
Technology that doesn’t flicker to lessen eye strain
OLED Care 2.0: A solution developed by MSI to lessen the possibility of OLED burn-in
Read more on govindhtech.com
#MSI#OLEDScreen#OLED#OLEDdisplay#Gen3#mag271qpx#gamingmonitor#gaming#Monitor#oledpanel#OLEDtechnology#news#technews#technology#technologynews#technologytrends#govindhtech
2 notes
·
View notes
Text
I am practicing my coloring using @sersi's coloring tutorial and Auto Options in Curves from Pix Imperfect's tutorial.
I started with this. It is from a video file in HDR, and it makes colors look washed out:

First, I don't want to work on HDR video files again 'cause it's so washed out.
Also, I had to 'de-squeeze' the image because it was a 2165px, and Photoshop squeezes the proportions and rations. I had to multiply with 1.33 to get the gif to look right. When I cropped it, I had to make it: 540px x 275px.
After many turns in adjustments, curves, and gradient maps, I finally got to this. The most significant change was when I messed with the Channel mixer adjustment and slid the saturation levels of red just a bit to get rid of the Reddish coloring in the background.
I finally get this:

I'm still not happy with it. I feel I could do better with Sabine's skin, but as a first (and many hours) attempt to fix the coloring, I think it's an improvement.
Anyway, part 1 of my adventures in Star Wars coloring!
7 notes
·
View notes
Text


It's literally like two different games. And this is with Windows trying to add its Auto HDR!
7 notes
·
View notes
Text

Finally finished my replay of FFXIII and moved on to FFXIII-2 and damn does Lightning look fantastic in it thanks to Auto HDR. If there is one thing Xbox does better than anyone else it’s the backwards compatibility feature that actually makes older games look better.
3 notes
·
View notes
Text


2023
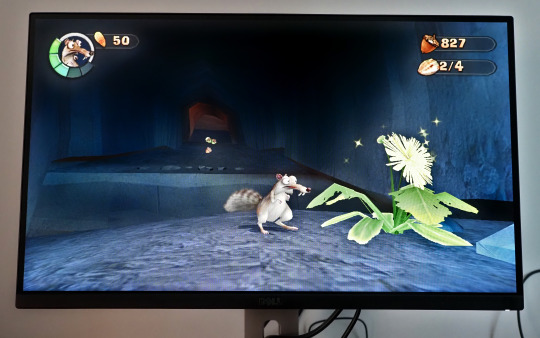
Ice Age 2 The Meltdown game.
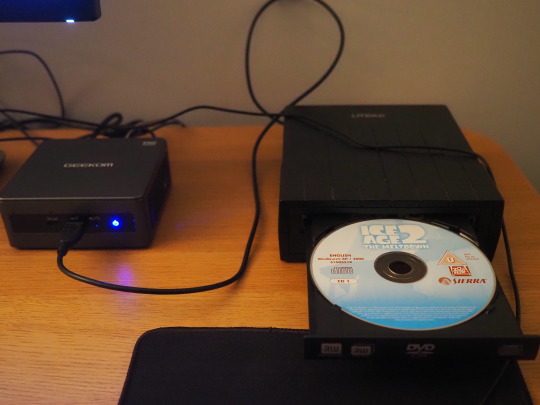
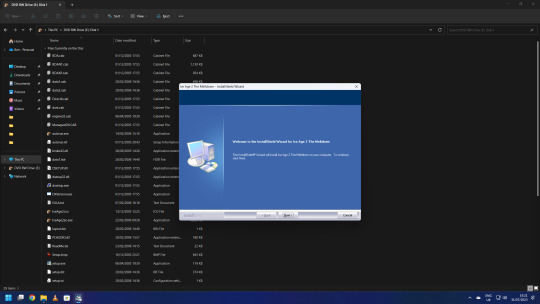
On the 31st July 2023, I installed Ice Age 2: The Meltdown onto my system to test-run it on Microsoft's Windows 11.
I connected a portable Liteon DVD-ROM optical drive to my Mini-PC to install it using the 2 CD discs.
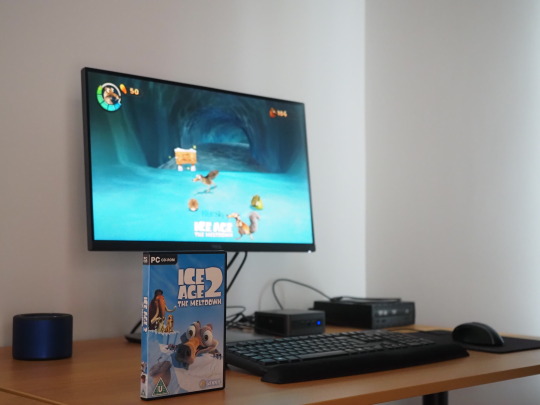
Here is a picture of me with the game box!
Ice Age 2: The Meltdown, based on Blue Sky Studios 2006 film of the same name, was developed by Eurocom and published by Vivendi Universal Games (Sierra Entertainment).
The game works on the latest versions of Windows and also works on Linux using Wine (PlayOnLinux).
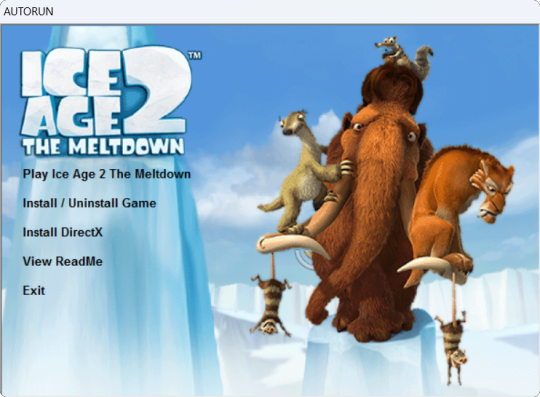
I put Disc 1 in first and opened the auto-run from the disc. I clicked the 'Install Ice Age 2: The Meltdown' option from the list. The game uses InstallShield software to install itself onto Windows. I switched the discs around towards the end of the install. Once it had finished installing onto the system, I chose to launch the game.
After going through the intros, I pressed the enter key to go to the main menu. Firstly before starting the game, I configured my favourite keyboard layout. Afterwards I then started a new game and selected a save game slot (Slot A).
As I was playing Ice Age 2, I got to the Forest 2 stage, shortly after going through this stage, Windows 11 asked if I wanted to run the game in 'Compatibility Mode', I chose to run the game with this. It offered this as it knew the game application running was intended for an older version of Windows. However compatibility mode didn't work and the game crashed to the desktop.
The app process name for the game is 'IceAge2pc.exe' (32-bit) when running. The CD (Disc 1) is required to play the game.
I re-launched the game and had to re-configure everything and start from the beginning again, however the game seemed to work much better without running it in the legacy mode Windows offered.
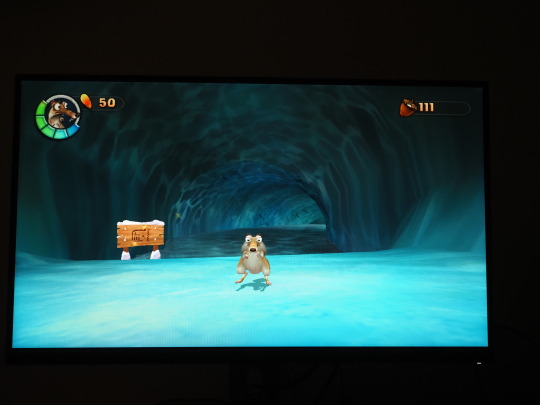
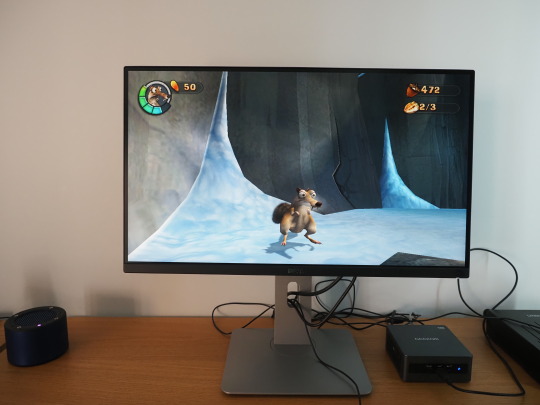
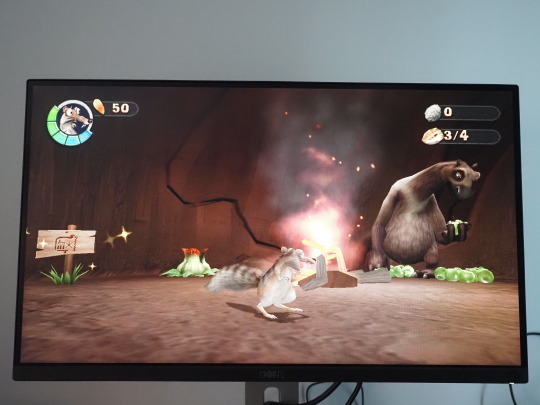
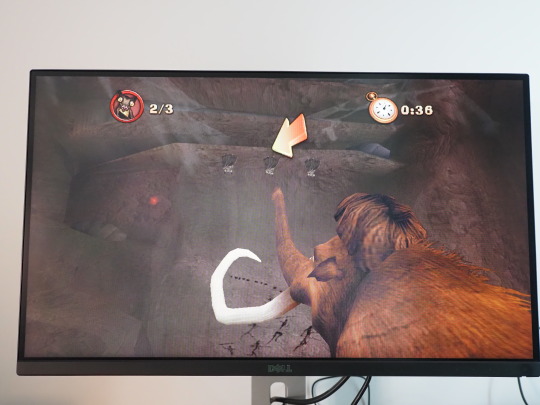
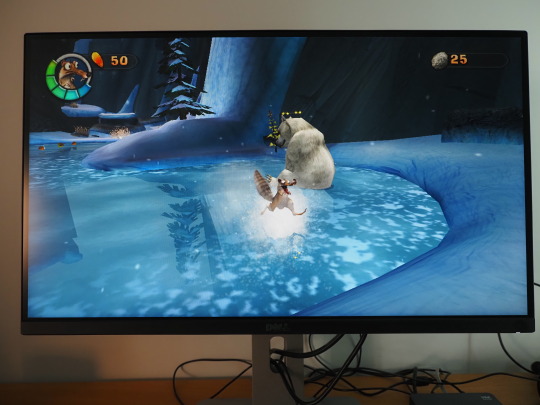
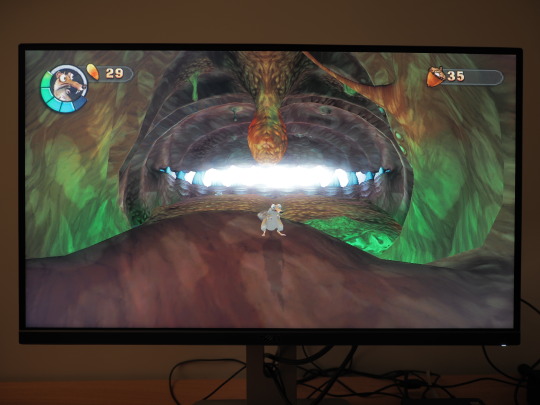
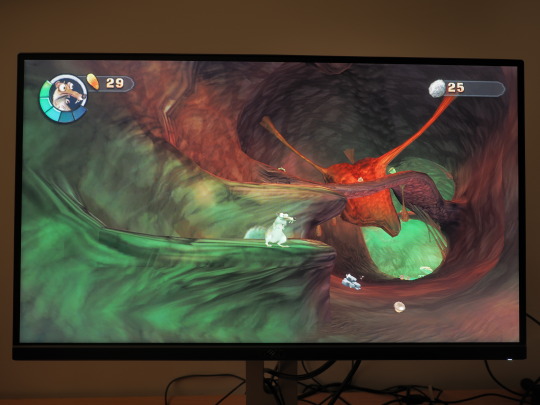
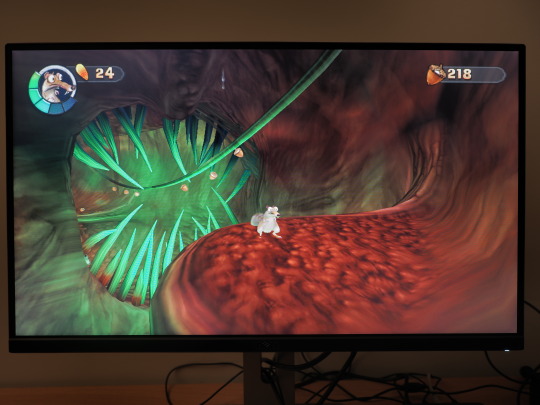
I tried again and successfully played the game up to the end of the Maelstrom level, completing this stage which in my opinion is the best level in the game! Here are the in-game pictures I took with the camera of some of the stages. I had to use HDR camera effect for some of the pictures. The levels shown in the pictures are the Waterpark, Forest, Ice River and Maelstrom.
I had to use my camera for the pictures as the game doesn't allow for print-screening due to Windows copy protection. When running Ice Age 2 in windowed mode, if you click out of the game it will darken the game screen and pause everything until you click on it again.
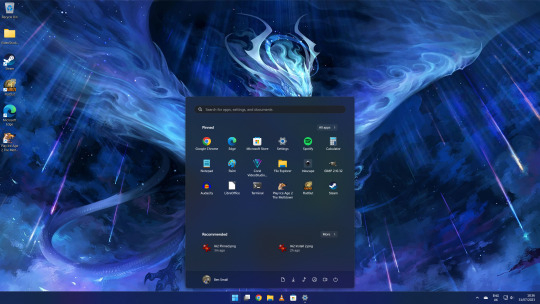
The game defaults to a screen resolution of 640x480, so I changed it to the maximum resolution of 1024x768. Interestingly the game didn't scale to full screen as when I tried it previously on another PC running Windows 10, but stretched to fit the screen instead. This was because of the 'Gaming Mode' function which is enabled in Windows 10. This mode is disabled by default in Windows 11 and the game worked perfectly without it. However, the game always runs in the 4.3 aspect ratio, but uses a fisheye lens effect which defaults to the 16.9 aspect ratio, so changing that fixed the gaming experience on this monitor. You can read more about display settings for the game in my write-up.
Audio played through my Mini-Rig Bluetooth speaker, which sounded great! The game uses a stereo sound set-up, which can act as surround through headphones.
Back in 2020, Dad gave me a copy of the Ice Age 2: The Meltdown video game which he found on eBay. I did a detailed review of the game and an unboxing review.
See my reviews in the links below:
There are a number of cheat codes you can enter in the pause menu, these include unlocking all the bonus content and the ability to unlock the 'Level Select' menu, plus more.
See all the cheat codes for the game here:
https://gamefaqs.gamespot.com/pc/931239-ice-age-2-the-meltdown/cheats
Playlist featuring all the levels:
https://www.youtube.com/playlist?list=PLyj4UFt4ma4_XQ0RZ3FjpFZAa7jvjhPc9
A link to the complete in-game music composed by Jim Croft:
https://www.youtube.com/playlist?list=PLO4jlmGoc6uDm0QVLyMqURTP2ciHWjCF_
Overall despite being 17 years old, running the game on Windows 11 worked a treat! It was great fun playing Ice Age 2: The Meltdown again as it is fun, humorous and challenging. Its music is memorable, vibrant and colourful just like its movie soundtrack!
However, I think that both Ice Age 2: The Meltdown (2006) and its Activision sequel Ice Age 3: Dawn of the Dinosaurs (2009) should be made available as a digital download through game distribution services such as Valves Steam alongside Ice Age: Scrat's Nutty Adventure (2019) to keep them running into the future without the need for a disc.
For a full list of all the Ice Age video-games see:
https://iceage.fandom.com/wiki/List_of_Ice_Age_video_games
See my video below. See videos underneath for the in-game bosses and also bosses in Scrat's Nutty Adventure on YouTube.
Scroll down to see my write-up on Cretaceous and Maelstrom!
5 notes
·
View notes
Note
Since I mentioned The House in the Ocean I couldn’t help but ask, what are your thoughts on analog horror in general? Assuming you are familiar with it? To me it’s a mixed bag, I love Alex/Manticore’s stuff (House in the Ocean, Trinity Desk Project, Cornerfolk, etc), but the rest of it is either terribly derivative shit or just okay. As I said you’ll LOVE The House in the Ocean, it gave me major Faction Paradox vibes. Very few things do that.
I like analog horror. It started with storytellers trying to immerse their audiences by using technologies they were familiar with. But as time has passed, fewer and fewer young people are able to relate to the VCR/camcorder era – as someone born at the tail end of the 90s, I myself remember it only faintly! – and "VCR static" has evolved into an aesthetic for its own sake rather than a means to an end. What's the equivalent of analog horror for today's audiences? Can there be a modern equivalent? What does horror look like when everything is captured in iPhone Auto HDR?
I had a really profound and enjoyable experience last week at "Convergence Station", the Meow Wolf exhibit/installation/experience in Denver. Trip report enclosed below the cut – I wanted to illustrate with a single image, but there's no one that does it justice, so this is going to be a longer than usual AMA answer.

On a purely superficial level, Convergence Station is a big building with hundreds of interactive art installations. There's a distressing trend of "museums" designed solely for the Instagram audience – the Museum of Ice Cream™, The FRIENDS™ Experience, the Van Gogh Exhibition: The Immersive Experience™. When friends would visit me in New York, I was dragged along to a number of these, and I found them frankly draining. It would be perfectly possible to engage with Convergence Station along these lines: it contains hundreds of photoshoot opportunities, whole rooms designed and decorated by local artists.
But everything else about Convergence Station subverts and transcends that boring format. Firstly, these exhibits are arranged in a way that encourages exploration – literal, physical exploration. One room looks like a laundromat; pull some handles and the dryers will start spinning, not with laundry but with miniature worlds. Tug on the handle of the coin machine on the opposite wall and you'll open the secret door to the shrine of the Laundry Cult.

And then there's the story. The exhibits are split across three distinct alien worlds with their own aesthetics, history, and social factions, which you can discover through the books, phone lines, and computer terminals scattered throughout many rooms. Dig deep enough, and you learn that all three worlds of the "Convergence" – four, if you count Denver – are tied together by a single overarching plotline, with you at the center.
The result is a nearly total level of immersion. Many of the building's silly interactive elements unlock new functions with deeper importance as you progress through the plotline. Mrs Bumber and I didn't complete the story, but I saved our Quantum Department of Transportation "QPASS" card so we can continue on our next visit(s) to Colorado.

I've experienced some of the "imagineering" industry through my wife, and what Meow Wolf is doing is truly innovative. This was far and away the best actualization I've seen yet of what Galaxy's Edge was supposed to be like (in contrast with what Galaxy's Edge actually is). Hopefully the industry titans are on watch, because Meow Wolf is presenting a clear vision of the next big thing.
… uhh, what was this question about? Oh yeah, analog horror!
youtube
19 notes
·
View notes
Text
iPhone 14 Pro Max Giveaway Free
Amazing new giving way idea iPhone 14 and 14 pro max.You can get Apple iPhone 14 for free by playing a quiz. This is open worldwide contest it’s meaning there are no country restrictions. Enter to win an free iPhone 14 Pro max This is incredible gadgets giveaways of the Apple latest smartphone.
Free iPhone 14 Pro Max Giveaway Today
Now how to get iPhone 14 for free. Just enter the details in the form above. As soon as you fill up the forms, you are automatically added to our giveaway list.
You do not need to pay anything to join this giveaway
Winners are chosen randomly
You may participate for multiple times within a month
Bot Protected, Don’t try to cheat our system
Absolutely Free Delivery
Free participate giveaway contest and get a chance to win the Apple’s 5G smartphone. Complete the online registration form the link of the giveaway iPhone 14
iPhone 14 Pro Max Features Specifications
Apple’s new iPhone 14 Pro and Pro Max have been floating in the market for a while now. Improve faster then old model’s iPhone 13 pro max even iOS. If you are interested in buying the iPhone 14 and want to know more about what is expected of it, read on to know more:
Apple’s new iPhone 14 should be a great improvement and a big hit among all iPhone’s. Apple iPhone 14 has been in the news for a long time, and people are eagerly waiting for its launch as it will be a great upgrade.
iPhone 14 Pro Max display
6.7-inch Super Retina XDR
Dynamic Island FTW
Size: 6.7 inches
Resolution: 2796 x 1290 pixels, 19.5:9 ratio, 460 PPI
Technology: OLED
Refresh rate: 120Hz
Screen-to-body: 88.45 %
Features: HDR support, Oleophobic coating, Scratch-resistant glass
Ambient light sensor, Proximity sensor
iPhone 14 Pro Max Camera System
Main camera: 48MP quad-pixel sensor. Specifications: Aperture size: F1.8; Focal length: 24 mm; Pixel size: 2.44 μm. Second camera: 12 MP Telephoto, OIS, PDAF. Specifications: Optical zoom: 3.0x; Aperture size: F2.8; Focal Length: 77 mm. Third camera: 12 MP ltra-wide, PDAF. Specifications: Aperture size: F2.2; Focal Length: 13 mm; Pixel size: 1.4 μm. Fourth camera: ToF 3D depth sensing Video recording: 3840x2160 4K UHD 60 fps, 1920x1080 Full HD 240 fps, 1280x720 HD 30 fps Front: 12 MP Auto focus, HDR Video capture: 3840x2160 4K UHD 24 fps System chip: Apple 16 Bionic Processor Hexa-core CPU Hexa-core 2x3.46 GHz Avalanche + 4x Blizzard
GPU Apple GPU 5-core graphics
RAM: 6GB
Internal storage: 128GB
Device type: Smartphone
OS: iOS (16.x)
Capacity: 4323 mAh
Type: Built��in rechargeable lithium‑ion
Charging : Fast charging, Qi wireless charging, USB
MagSafe wireless charging
Max charge speed: Wireless: 15.0W
Storage :128GB 6GB RAM, 256GB 6GB RAM, 512GB 6GB RAM, 1TB 6GB RAM
Bluetooth: 5.3
Wi-Fi: 802.11 a, b, g, n, ac, ax Wi-Fi 6; Wi-Fi Direct, Hotspot
Sensors: Accelerator, Gyroscope, Compass, Barometer, LiDAR scanner
Hearing aid compatible: M3, T4
16 notes
·
View notes
Text
Nikon D7100 24.1 MP DX-Format CMOS Digital SLR with 18-140mm f/3.5-5.6G ED VR Auto Focus-S DX NIKKOR Zoom Lens
Nikon D7100 24.1 MP DX-Format CMOS Digital SLR with 18-140mm f/3.5-5.6G ED VR Auto Focus-S DX NIKKOR Zoom Lens
The Nikon D7100 digital SLR camera features a specially designed 24.1-megapixel DX-format image sensor, superior low-light performance, ultra-precise autofocus and metering, advanced video recording features, built-in HDR, mobile connectivity and more. Enjoy speed, accuracy and convenience every step of the way, from shooting up to 6 fps to sharing your shots instantly with the optional WU-1a…

View On WordPress
#canon dslr#digital camera#dslr camera#Mirrorless DSLR Camera#nikon dslr#pentax dslr camera#sony dslr
2 notes
·
View notes
Text
Ultimate Guide to Auto Focus 4K Projectors for Movies: 5G WiFi, Native 1080P Full HD, and Android TV Home Theater with HDR Support

Auto Focus 4K Projector for Movies 5G Wifi 6 Native 1080P Full HD Android TV Home Theater 16000LM Daylight HDR Video Projectors
Buy now: https://youtu.be/GY2PY0QvCP8
Discount: 62%
In today’s fast-paced, technologically-driven world, home theaters are evolving rapidly. No longer do you need to invest in a bulky TV to enjoy high-quality entertainment. The rise of projectors with powerful features like auto-focus, 4K resolution, 5G WiFi, and HDR (High Dynamic Range) has transformed movie nights into an immersive cinematic experience right at home. A standout among these devices is the Auto Focus 4K Projector with 5G WiFi, Native 1080P Full HD resolution, Android TV integration, and 16,000 lumens brightness, designed for daylight viewing.
In this post, we will delve into everything you need to know about this cutting-edge projector, explaining how each feature enhances your home theater experience.
What is an Auto Focus 4K Projector?
Auto focus projectors are equipped with a sensor that detects the distance between the projector lens and the screen, automatically adjusting the focus to ensure a clear image. This feature eliminates the need for manual adjustments, which can be time-consuming and tedious.
The 4K resolution refers to the projector's ability to deliver ultra-high-definition visuals. Although many of these projectors offer Native 1080P Full HD resolution, they are capable of upscaling the image to 4K, offering excellent detail and clarity, ideal for both movies and video games. The combination of these two technologies ensures that your projector is always producing sharp, high-quality visuals without the hassle of constantly fine-tuning the focus.
Key Features That Make It Stand Out
5G WiFi for Lag-Free Streaming
One of the standout features of modern projectors is their support for 5G WiFi. Compared to traditional 2.4G networks, 5G WiFi offers significantly higher speeds and more stable connections, which means you can stream 4K content from platforms like Netflix, YouTube, or Hulu without buffering interruptions. Whether you're watching movies, sports, or even playing games, the faster data rates allow for smoother, lag-free experiences.
5G WiFi also provides a larger bandwidth, enabling multiple devices to connect to the network without any performance dips. This is crucial if you're using Android TV, as you’ll need a reliable connection to access streaming services and download apps.
Native 1080P Full HD Resolution with 4K Upscaling
While some projectors advertise 4K resolution, what they often mean is that they can upscale content to 4K. In the case of the Auto Focus 4K Projector, the native resolution is 1080P Full HD, which is still more than sufficient for most viewing situations. Native 1080P ensures that you're getting clear, crisp images straight out of the box, without the need for upscaling.
However, the ability to upscale to 4K means that even lower-resolution content can appear sharper and more detailed. This feature is particularly useful if you're watching older films or TV shows that weren't filmed in HD or 4K but still want them to look great on a big screen.
Android TV Integration
The integration of Android TV is one of the biggest draws for modern home theater projectors. Android TV turns the projector into a smart entertainment hub, allowing you to stream directly from popular platforms like Netflix, Disney+, HBO Max, and others. You also gain access to the Google Play Store, where you can download apps, games, and even productivity tools.
With Android TV, your projector becomes more than just a movie-watching device—it can also serve as a gaming console, media player, and even a tool for virtual meetings. The user interface is intuitive, with Google Assistant support allowing for voice controls, so you can search for content, adjust settings, or even ask questions without needing a remote.
HDR Support for Stunning Visuals
High Dynamic Range (HDR) is another key feature that dramatically enhances the visual quality of your projector. HDR provides a wider range of colors, more vivid highlights, and deeper shadows. This results in images that look more lifelike and closer to what the human eye sees in reality.
For movies shot in HDR, the difference is striking: bright areas pop, dark areas hold more detail, and colors are richer and more saturated. Whether you’re watching the latest Hollywood blockbuster or streaming a nature documentary, HDR provides an immersive viewing experience that standard projectors simply cannot match.
16000 Lumens Brightness for Daylight Viewing
One common issue with traditional projectors is that they often require a darkened room for optimal viewing. However, the Auto Focus 4K Projector solves this issue with a remarkable 16,000 lumens brightness. This level of brightness is strong enough to deliver a clear image even in rooms with daylight.
This is particularly useful for households that do not have dedicated theater rooms with blackout curtains. You can enjoy a movie during the day without worrying about washed-out visuals or low contrast. The 16,000 lumens ensure a sharp and vibrant picture no matter the lighting conditions.
How These Features Enhance Your Home Theater
The Auto Focus 4K Projector with 5G WiFi, Native 1080P Full HD, and HDR support is designed to create a truly immersive home theater experience. Let’s break down how each of these features contributes to the overall viewing pleasure.
Auto Focus: Ensures that your images are always sharp, regardless of where you place the projector or how you move it.
5G WiFi: Offers faster streaming speeds, reducing buffering times and allowing you to enjoy 4K content without interruptions.
Native 1080P Full HD: Provides a base level of clarity and sharpness, with the ability to upscale content for an even more impressive visual experience.
Android TV: Turns the projector into a smart hub, eliminating the need for additional streaming devices or cables.
HDR Support: Enhances color and contrast, delivering more lifelike and vibrant images.
16,000 Lumens Brightness: Allows you to watch content in any lighting conditions, even during the day.
Ideal Use Cases for the Auto Focus 4K Projector
Home Theaters: Whether you have a dedicated theater room or want to turn your living room into one, this projector is perfect for creating a high-quality movie experience at home.
Outdoor Movie Nights: With its high brightness and HDR support, this projector is ideal for outdoor settings like backyards or patios.
Gaming: The ultra-fast 5G WiFi and Android TV integration allow for smooth gaming sessions on a large screen.
Work Presentations: Thanks to its high resolution and brightness, this projector is also suitable for professional presentations in well-lit rooms.
Conclusion: A Smart Investment for the Modern Home
If you're looking to invest in a home theater projector, the Auto Focus 4K Projector with 5G WiFi, Native 1080P Full HD, HDR support, and Android TV integration is one of the best options available on the market today. Its combination of advanced features ensures not only top-notch visual quality but also ease of use and versatility. Whether you're watching movies, gaming, or even working, this projector delivers a premium experience that rivals traditional TVs and even many commercial theaters.
#projector#mini_projector#home_theater#smart#dlp#wireless_projector#video#android#3d#4k#cinema#led#5g#battery#game#bluetooth
0 notes
Text
Revolutionizing Self-Checkout: The Role of HDR USB Cameras in Enhancing User Experience

Self-checkout systems are getting more and more common in today’s hectic retail setting. They improve client happiness and expedite the purchasing process. Using HDR USB cameras is a key element of this breakthrough. An effective and user-friendly checkout process is made possible in large part by these cameras.
Understanding HDR USB Cameras
HDR USB cameras utilize High Dynamic Range (HDR) technology to capture images with greater detail in both bright and dark areas. This capability is essential in retail environments, where lighting conditions can vary significantly. By employing HDR technology, these cameras ensure that every product is clearly visible, leading to fewer errors during the scanning process.
Benefits of Using HDR USB Cameras in Self-Checkout
Enhanced Image Clarity
The primary advantage of HDR USB cameras is their ability to deliver exceptional image clarity. With improved detail in varying lighting conditions, customers can easily scan items without the frustration of blurry images or misreads.
Improved Scanning Accuracy
Accurate scanning is crucial for self-checkout systems. HDR USB cameras reduce the chances of misidentification by capturing more precise details of barcodes and product labels. This accuracy minimizes checkout time and enhances overall efficiency.
User-Friendly Experience
A well-designed self-checkout interface, combined with HDR USB cameras, creates a seamless user experience. Customers can swiftly navigate the checkout process, leading to increased satisfaction and repeat visits.
The Technology Behind HDR USB Cameras
Auto Framing Features
One of the standout features of many HDR USB cameras is their auto framing capability. This technology automatically adjusts the camera’s focus and zoom based on the user’s movements, ensuring that products are always in frame. This dynamic adjustment enhances usability, particularly in busy retail environments where customers may be moving quickly.
Compatibility with 8MP and 4K Systems
Many HDR USB cameras, such as the AR0821 4K HDR USB 3.0 Camera, offer compatibility with both 8MP and 4K resolutions. This versatility allows retailers to choose the best camera for their specific needs, whether they require high-resolution imaging for detailed product displays or standard resolution for everyday transactions.
Future of Self-Checkout Systems with HDR USB Cameras
As technology continues to advance, the integration of HDR USB cameras in self-checkout systems will only deepen. With ongoing improvements in camera technology and image processing algorithms, retailers can expect even greater enhancements in user experience. These innovations will empower self-checkout systems to adapt more effectively to varying customer needs and store environments.
Are you ready to elevate your self-checkout experience with cutting-edge technology? Discover how the AR0821 4K HDR USB 3.0 Camera can transform your retail operations. Embrace the future of checkout technology today!
By leveraging the capabilities of HDR USB cameras, retailers can not only streamline their operations but also provide an unparalleled shopping experience for their customers. The shift toward self-checkout systems equipped with these advanced cameras marks a significant step in the evolution of retail technology, paving the way for smarter and more efficient purchasing processes.
0 notes
Last Seen Blogs

oblivibear
58 y.o., fat, hairy, depressed, bipolar, gay Cajun

queen-big
Skarlatta

comicmycar
ComicMyCar

reportsanddata2
Untitled

claraapinii-blog
Claraa