#beginners guide for w3 total cache
Explore tagged Tumblr posts
Visit Tumblr Blog
Explore Tumblr blogs with no restrictions, modern design and the best experience.
Last Seen Tumblr Blogs


Fun Fact
Forty percent of Tumblr users are between the ages of 18 to 25.
Text
Fixing WordPress Update Issues Made Easy: A Beginner’s Guide to Smooth Website Maintenance

Keeping your WordPress website updated is one of the smartest things you can do for better security, performance, and features. But what happens when those updates don’t go as planned?
If you’ve ever seen your website freeze, crash, or show strange errors after clicking "Update," don’t worry—you’re not alone, and you don’t need to be a developer to fix it.
In this guide, we’ll explain why WordPress updates fail and share simple, beginner-friendly solutions to get your website back on track—quickly and safely.
⚠️ Common Reasons Why WordPress Updates Fail
WordPress is built on multiple moving parts—your core WordPress files, themes, and plugins. An update may fail if just one part doesn’t play nicely with the others.
Here are the top reasons why updates might not go through:
🌐 Weak or unstable internet connection
🔌 Plugin conflicts that interfere with the update
🎨 Themes that aren’t compatible with the latest WordPress version
🧠 Low server memory or execution time limits
🔒 Incorrect folder or file permissions
📁 Corrupted or incomplete update downloads
🛠️ Simple Fixes for WordPress Update Problems
✅ Step 1: Always Back Up Your Website
Before making any changes, install a backup plugin like UpdraftPlus or BackupBuddy and save a complete version of your site. This ensures that if something goes wrong, you can restore your site in minutes.
✅ Step 2: Clear Your Cache
Sometimes, the issue isn’t with the update—it’s with what your browser is showing.
Clear your browser cache (Ctrl+Shift+R or Command+Shift+R)
If you use a caching plugin (like WP Super Cache or W3 Total Cache), clear your site’s cache from the plugin dashboard
Then, try the update again.
✅ Step 3: Troubleshoot Plugin Conflicts
If an update causes your site to break, the issue might be a plugin.
Here’s how to find out:
Install the Health Check & Troubleshooting plugin.
Enable “Troubleshooting Mode”—this temporarily disables all plugins for you only.
Try running the update again.
If the update works now, reactivate your plugins one at a time. The one that breaks the update is your troublemaker.
✅ Step 4: Check Hosting Limits
Your hosting environment might be too limited for updates to complete properly.
Ask your hosting provider these questions:
Is my PHP memory limit at least 256MB?
Is my maximum execution time at least 300 seconds?
Can these settings be increased if needed?
If not, consider upgrading to a better hosting plan for smoother WordPress performance.
✅ Step 5: Perform a Manual WordPress Update
When automatic updates fail, a manual update is a reliable workaround:
Download the latest WordPress version from WordPress.org
Unzip the files on your computer
Use FTP software (like FileZilla) to access your site files
Replace the wp-admin and wp-includes folders with the new versions
Leave the wp-content folder as-is (it holds your themes and plugins)
Open your site and follow any update prompts for the database
This process ensures a clean, fresh installation—without losing content or settings.
✅ Step 6: Fix File Permissions
Improper file permissions can block updates.
Use a plugin like WP File Manager or ask your host to set:
All folders to 755
All files to 644
These settings help WordPress update safely without risking your site’s security.
✅ Step 7: Remove Stuck Maintenance Mode
If you see the message:
“Briefly unavailable for scheduled maintenance. Check back in a minute.” …your site update was interrupted and left in maintenance mode.
Here’s how to fix it:
Access your site files through FTP or your hosting file manager (like cPanel)
Go to your website’s root folder
Delete the file called .maintenance
Refresh your site—it should be back to normal
This takes less than a minute and often solves the issue instantly.
💡 When to Call in the Pros
If these solutions don’t work—or if you feel unsure about any step—don’t hesitate to get help from professionals.
Here are your options:
Contact your web hosting support
Hire a trusted WordPress expert
Reach out to a reputable company like Websenor for quick, affordable help
🎯 Final Word: Let Websenor Handle Your WordPress Maintenance
WordPress update problems are common—but they don’t have to be stressful. With some basic know-how and a methodical approach, you can often fix these issues yourself.
But if you'd rather skip the hassle, Websenor is here to help. Our team specializes in:
WordPress core and plugin updates
Website backups and security
Speed optimization and error fixes
We'll keep your website running smoothly, so you can focus on your business, not your backend.
👉 Ready to stop worrying about WordPress updates? Contact Websenor today and let us take care of everything behind the scenes.
0 notes
Text
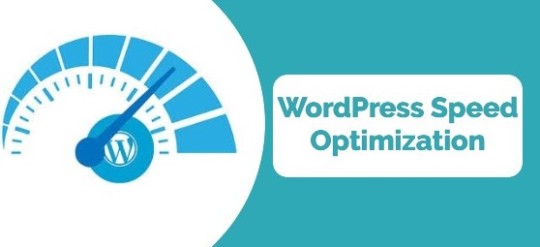
2024’s Most Effective WordPress Optimization Plugins for Better UX

Discover how to elevate your website’s performance and user experience with RocketPress-approved WordPress optimization plugins.
Table of Contents
Introduction to WordPress Optimization Plugins
Why Website Optimization Matters in 2024
Key Features to Look for in WordPress Optimization Plugins
Top 10 WordPress Optimization Plugins for 2024
Plugin 1: WP Rocket
Plugin 2: Smush
Plugin 3: Perfmatters
Plugin 4: W3 Total Cache
Plugin 5: Asset CleanUp
Plugin 6: Lazy Load by WP Rocket
Plugin 7: Autoptimize
Plugin 8: ShortPixel
Plugin 9: WP-Optimize
Plugin 10: RocketPress Optimization Suite
How to Choose the Right Plugin for Your Needs
Benefits of Using WordPress Optimization Plugins
Step-by-Step Guide to Installing and Configuring Plugins
Common Mistakes to Avoid in WordPress Optimization
Why RocketPress Recommends These Plugins
Conclusion: Boost UX with WordPress Optimization Plugins
Introduction to WordPress Optimization Plugins
Website optimization is the cornerstone of an engaging user experience (UX). WordPress, being a versatile CMS, offers countless plugins to enhance site speed, reduce unused code, and improve overall functionality. At RocketPress, we understand the importance of a fast-loading and user-friendly website, which is why we’ve curated this guide to the most effective WordPress optimization plugins of 2024.
Why Website Optimization Matters in 2024
In 2024, website performance is critical for both search engine rankings and user retention. A slow site can result in high bounce rates, lower SEO rankings, and decreased conversions. Here are the primary reasons why website optimization matters:
Improved SEO: Faster websites rank higher on search engines.
Enhanced User Experience: Visitors prefer smooth and responsive sites.
Higher Conversion Rates: Speed boosts customer trust and engagement.
Mobile-First Era: Mobile users demand lightning-fast performance.
RocketPress emphasizes leveraging the right optimization tools to address these challenges.
Key Features to Look for in WordPress Optimization Plugins
When choosing a plugin, keep the following in mind:
Ease of Use: A user-friendly interface is essential for quick implementation.
Caching Capabilities: Ensures faster load times by storing frequently accessed data.
Image Optimization: Reduces file sizes without compromising quality.
Minification: Eliminates unnecessary code from CSS, HTML, and JavaScript files.
Lazy Loading: Delays the loading of off-screen content for improved speed.
Top 10 WordPress Optimization Plugins for 2024
1. WP Rocket
WP Rocket remains a top choice for all-in-one optimization. Its advanced caching mechanisms, database cleanup tools, and lazy loading features make it ideal for beginners and experts alike.
2. Smush
Image-heavy websites benefit immensely from Smush. It compresses and optimizes images without losing quality, ensuring fast page loads.
3. Perfmatters
This plugin focuses on removing unnecessary features and scripts, reducing bloat, and improving load times.
4. W3 Total Cache
A classic optimization plugin, W3 Total Cache improves site performance by caching and minifying resources.
5. Asset CleanUp
Perfect for decluttering your WordPress site, Asset CleanUp allows you to selectively disable unused CSS and JavaScript.
6. Lazy Load by WP Rocket
A lightweight plugin that loads images and videos only when visible, Lazy Load significantly reduces initial page load time.
7. Autoptimize
Known for its code optimization capabilities, Autoptimize aggregates, minifies, and caches scripts and styles efficiently.
8. ShortPixel
This image optimizer excels in reducing file sizes, improving load times, and ensuring high-quality visuals.
9. WP-Optimize
Combining caching, database cleanup, and image compression, WP-Optimize is a robust all-rounder.
10. RocketPress Optimization Suite
Exclusive to RocketPress, this suite integrates advanced tools for caching, lazy loading, and code optimization, ensuring a premium UX.
How to Choose the Right Plugin for Your Needs
Selecting the ideal plugin depends on your specific requirements. Consider the following:
Site Size and Traffic
Budget Constraints
Technical Expertise
Required Features
Benefits of Using WordPress Optimization Plugins
Improved Speed: Faster load times for a better UX.
Reduced Bounce Rates: Keeps users engaged.
Enhanced SEO: Boosts rankings on search engines.
Better Resource Management: Optimizes server performance.
Step-by-Step Guide to Installing and Configuring Plugins
Access the WordPress Dashboard: Navigate to “Plugins” > “Add New.”
Search for the Desired Plugin: Enter the plugin name in the search bar.
Install and Activate: Click “Install Now” and then “Activate.”
Configure Settings: Customize the plugin as per your site’s needs.
Common Mistakes to Avoid in WordPress Optimization
Overloading your site with too many plugins.
Neglecting regular plugin updates.
Skipping performance testing after installation.
Ignoring mobile optimization.
Why RocketPress Recommends These Plugins
At RocketPress, we prioritize tools that offer measurable improvements in UX and performance. These plugins have been rigorously tested to ensure they deliver on their promises.
Conclusion: Boost UX with WordPress Optimization Plugins
By investing in the right WordPress optimization plugins, you can significantly enhance your site’s speed, user experience, and search engine performance. RocketPress encourages you to explore these tools and unlock the full potential of your website in 2024.
Ready to optimize your WordPress site? Let RocketPress guide you! 🚀
0 notes
Text
Creating an SEO-Friendly Website in WordPress: A Complete Guide

Building a website is only half the battle in today's digital age; ensuring it is optimized for search engines is equally, if not more, critical. WordPress, a versatile and user-friendly content management system, offers an incredible platform to create a website that is both visually appealing and SEO-ready. In this comprehensive guide, we will walk you through how to make an SEO-Friendly Website in WordPress, covering everything from choosing the right themes and plugins to optimizing your site's structure, content, and performance.
Why WordPress is Perfect for SEO
WordPress stands out as an ideal platform for creating an SEO-Friendly Website in WordPress for several reasons:
Built-In SEO Features: WordPress comes with features like customizable permalinks and responsive design support, essential for SEO.
SEO Plugins: With tools like Yoast SEO and Rank Math, WordPress simplifies on-page optimization.
Flexibility: WordPress themes and plugins allow endless customization, enabling users to craft a website tailored for search engines.
Community Support: A vast community ensures you have access to tips, tutorials, and troubleshooting for SEO challenges.
Step-by-Step Guide to Creating an SEO-Friendly Website in WordPress
1. Choose an SEO-Optimized Theme
Your theme sets the foundation for an SEO-Friendly Website in WordPress. Look for themes that:
Are lightweight and fast-loading.
Support mobile responsiveness.
Use clean, semantic HTML. Some popular SEO-friendly themes include GeneratePress, Astra, and OceanWP.
2. Install Essential SEO Plugins
Plugins enhance your site's SEO capabilities. Key plugins to consider are:
Yoast SEO: Offers features for meta descriptions, title tags, and XML sitemaps.
Rank Math: A competitor to Yoast, with additional features for free.
All-in-One SEO Pack: Perfect for beginners looking for simple solutions.
3. Optimize Your Permalink Structure
Permalinks are the URLs for your posts and pages. To improve SEO, set your permalink structure to "Post Name" in WordPress settings. For example:
arduino
Copy code
https://yourwebsite.com/your-post-title
4. Conduct Keyword Research
Keywords drive SEO success. Use tools like Google Keyword Planner, SEMrush, or Ahrefs to identify keywords related to your niche. For example, if your niche is WordPress websites, focus on terms like:
SEO-Friendly Website in WordPress
WordPress SEO guide
Optimize WordPress for search engines
Content Optimization
5. Create High-Quality, Engaging Content
Content remains king. Ensure your content is:
Relevant to your audience.
Includes target keywords like SEO-Friendly Website in WordPress naturally.
Structured with headings (H1, H2, H3) for better readability.
6. Use Internal and External Links
Link to other pages within your website (internal links) and to credible external sources to boost authority and user experience.
7. Optimize Media
Compress images using tools like TinyPNG or ShortPixel.
Add descriptive alt text with keywords to every image.
Use modern formats like WebP for faster loading.
Technical Optimization
8. Ensure Mobile-Friendliness
Google uses mobile-first indexing, so your website must be mobile-friendly. Test your site using Google’s Mobile-Friendly Test.
9. Improve Site Speed
Site speed directly impacts user experience and SEO. Steps to enhance speed:
Use a reliable hosting provider.
Install caching plugins like WP Super Cache or W3 Total Cache.
Minimize CSS and JavaScript using tools like Autoptimize.
10. Enable HTTPS
An SSL certificate ensures your site is secure, which is a ranking factor. Most hosting providers offer free SSL certificates.
Advanced SEO Strategies
11. Build a Sitemap and Robots.txt File
Generate an XML sitemap using Yoast SEO or Rank Math and submit it to Google Search Console.
Use a robots.txt file to guide search engine crawlers.
12. Leverage Schema Markup
Schema markup helps search engines understand your content better. Plugins like Schema Pro simplify this process.
13. Optimize for Local SEO
If your business targets a local audience, optimize for local SEO by:
Adding your business to Google My Business.
Including location-specific keywords like "SEO-Friendly Website in WordPress.
Regular Maintenance
14. Monitor Analytics and Performance
Use tools like Google Analytics and Search Console to track performance. Analyze metrics such as organic traffic, bounce rate, and page load speed.
15. Keep Your Content Updated
SEO is an ongoing process. Update your content regularly to keep it relevant and ensure it aligns with current SEO practices.
Common Mistakes to Avoid
Keyword Stuffing: Overusing keywords can harm your rankings. Focus on natural integration of terms like SEO-Friendly Website in WordPress.
Neglecting Mobile Users: A non-responsive design will drive visitors away.
Ignoring User Experience (UX): A cluttered website with poor navigation can increase bounce rates.
Final Thoughts
Creating an SEO-Friendly Website in WordPress is a combination of using the right tools, applying proven techniques, and continuously optimizing your site. WordPress simplifies this process with its plethora of themes, plugins, and community resources. By following the steps outlined in this guide, you can ensure your WordPress site not only ranks well on search engines but also provides an exceptional experience for your visitors.
Whether you're building your first website or looking to revamp an existing one, use this guide as your roadmap to success. Embrace SEO as an ongoing journey and adapt to changes in search engine algorithms to stay ahead.
0 notes
Text
The Ultimate List: 5 Best WordPress Cache Plugins to Enhance Site Speed
When it comes to running a WordPress website, speed is critical. A faster website not only provides a better user experience but also improves SEO rankings, reduces bounce rates, and can significantly increase conversions. One of the easiest and most effective ways to boost your website’s speed is by using a WordPress cache plugin.
A cache plugin helps by storing static copies of your pages, reducing the time it takes to load dynamic content from your server.If you are wondering that how to clear this cache from your website then we have full step by step guide prepared on "How To Clear Your WordPress Cache". Visit this blog for detailed guide. In this guide, we’ve curated a list of the 5 best WordPress cache plugins to help you enhance your site’s performance.
1. WP Rocket
WP Rocket Plugin is one of the most popular premium WordPress cache plugins, and for good reason. It’s beginner-friendly yet powerful, offering a range of features that optimize your site’s performance beyond just caching.
Key Features:
* Page caching is automatically enabled as soon as you activate the plugin.
* GZIP compression reduces the size of files, improving load times.
* Lazy loading for images, ensuring only the visible content is loaded at first.
* Database optimization to remove clutter and speed up your site.
* Compatible with WooCommerce and popular plugins like Yoast SEO.
If you want a comprehensive solution without having to dive into complex settings, WP Rocket is a top choice.
Pros:
* Easy to set up for beginners.
* Powerful features for advanced users.
* Excellent customer support.
Cons:
* Paid plugin, with no free version available.
2. W3 Total Cache
W3 Total Cache is a free, highly customizable caching plugin that’s been trusted by millions of websites. It’s packed with features to boost speed and optimize your site for better performance.
Key Features:
* Supports page caching, browser caching, object caching, and database caching.
* Integrates with CDNs (Content Delivery Networks) to serve your content faster.
* Minification of HTML, CSS, and JavaScript to reduce file sizes.
* Mobile caching for better performance on mobile devices.
While W3 Total Cache offers a wealth of settings, it can be a bit overwhelming for beginners. However, it’s ideal for developers or advanced users looking for deep customization.
Pros:
* Free plugin with robust features.
* Supports CDN integration.
* Excellent for advanced optimization.
Cons:
* Steeper learning curve for beginners.
* Some features require manual configuration.
3. WP Super Cache
WP Super Cache, developed by Automattic (the creators of WordPress), is a reliable and popular free cache plugin that is easy to set up and use. It’s ideal for anyone looking to speed up their site with minimal effort.
Key Features:
* Creates static HTML files from your dynamic WordPress content, significantly reducing load times.
* Offers three caching modes: Simple, Expert, and WP-Cache Caching.
* Supports GZIP compression and browser caching.
* CDN support for faster global delivery of your content.
WP Super Cache is great for users who want quick results without dealing with complex settings, though it may not offer as many advanced features as other plugins.
Pros:
* Simple and easy to use.
* Ideal for beginners.
* Supported by the official WordPress team.
Cons:
* Limited advanced options for power users.
* Interface is somewhat outdated.
4. LiteSpeed Cache
If your web host supports LiteSpeed Servers, then LiteSpeed Cache is a must-have. It’s free and offers a range of optimization features that go beyond just caching, making it an all-in-one performance plugin.
Key Features:
* Server-level caching for faster performance.
* Image optimization, CSS/JS minification, and lazy loading.
* Automatic database cleaning and optimization.
* Built-in CDN integration.
* WooCommerce and Multisite support.
LiteSpeed Cache also provides a crawler that refreshes cached content, ensuring that your users always see the latest versions of your site’s pages. It’s an excellent choice for users who want an advanced yet free cache plugin.
Pros:
* Powerful free plugin with many advanced features.
* Excellent for LiteSpeed server environments.
* Supports WooCommerce and multisite networks.
Cons:
* Limited to websites using LiteSpeed servers.
5. Cache Enabler
If you’re looking for a lightweight and straightforward caching solution, Cache Enabler might be perfect for your needs. Developed by KeyCDN, Cache Enabler is a minimalistic caching plugin that focuses on simplicity and efficiency.
Key Features:
* Static HTML caching to reduce server load and improve page load times.
* Supports WebP image format for smaller file sizes.
* Minification of HTML and JavaScript.
* Simple settings and easy-to-configure interface.
Cache Enabler is perfect for users who don’t want to deal with too many options but still want a noticeable improvement in site performance.
Pros:
* Lightweight and easy to use.
* Ideal for small to medium-sized websites.
* Supports WebP image format without additional plugins.
Cons:
Limited advanced features compared to other plugins.
Conclusion
Choosing the right caching plugin for your premium WordPress themes site depends on your specific needs and technical comfort level. Here’s a quick recap to help you decide
* If you want an all-in-one, user-friendly plugin, go for WP Rocket.
* For advanced customization and CDN integration, try W3 Total Cache.
* Beginners looking for a no-fuss option will benefit from WP Super Cache.
* If you’re using LiteSpeed servers, LiteSpeed Cache is your best bet.
* For a lightweight and efficient solution, Cache Enabler is a solid choice.
Whichever plugin you choose, implementing caching is a crucial step toward improving your website’s speed, user experience, and search engine rankings. Try one of these top cache plugins today, and enjoy a faster, more responsive website!
0 notes
Text
WordPress has evolved from a simple blogging platform to a versatile content management system (CMS) that powers millions of websites worldwide. Whether you're a beginner or an experienced user, there are always new ways to enhance your WordPress experience. In this comprehensive guide, we'll explore a myriad of WordPress tips and tricks to help you optimize your site, streamline your workflow, and make the most out of this powerful platform. 1. Choosing the Right Theme: Your WordPress theme sets the tone for your website's design and functionality. Choose a responsive and well-coded theme that aligns with your site's purpose. Premium themes often offer better support and customization options, allowing you to create a unique and professional-looking website. 2. Customizing the Site Title and Tagline: Make your website's brand memorable by customizing the site title and tagline. Navigate to Settings > General in the WordPress dashboard to update these details. This information is not only crucial for branding but also for SEO purposes. 3. Mastering the WordPress Editor: The WordPress editor is where you spend a significant amount of time crafting your content. Learn keyboard shortcuts, such as Ctrl + B for bold and Ctrl + I for italics. Familiarize yourself with the block editor's features, like adding tables, galleries, and more, to create engaging and visually appealing posts. 4. Understanding Permalinks: Optimize your site's URL structure for search engines and user readability. Go to Settings > Permalinks to choose a structure that includes the post name. This not only improves SEO but also makes your URLs more user-friendly. 5. Utilizing Categories and Tags: Organize your content effectively by using categories and tags. Categories provide a broad classification, while tags offer more specific descriptors. This not only helps your visitors navigate your site but also contributes to better SEO. 6. Implementing Featured Images: Capture your audience's attention by using featured images. These images are often displayed prominently on your site and in social media previews. Ensure that your chosen images are high-quality and relevant to your content. 7. Setting up a Static Front Page: By default, WordPress displays your latest blog posts on the homepage. However, for some websites, setting up a static front page makes more sense. You can do this by going to Settings > Reading and choosing a static page for your homepage and blog page. 8. Taking Advantage of Custom Menus: Custom menus give you full control over your site's navigation. Create a menu that reflects the structure of your content and makes it easy for visitors to find what they're looking for. You can manage menus under Appearance > Menus. 9. Installing Essential Plugins: Plugins extend the functionality of your WordPress site. While it's crucial not to overdo it, some plugins are essential for security, SEO, and performance. Consider plugins like Yoast SEO, W3 Total Cache, and Wordfence Security. 10. Enabling Comments and Managing Spam: Engage with your audience by enabling comments on your posts. However, be prepared to manage spam. Install the Akismet plugin to automatically filter out spam comments and keep your site's discussion space clean. 11. Conducting Regular Backups: Never underestimate the importance of backups. Use reliable backup plugins like UpdraftPlus or BackupBuddy to schedule regular backups of your site. This ensures that you can quickly restore your site if anything goes wrong. 12. Optimizing Images for Performance: Large image files can slow down your website. Optimize your images by compressing them without compromising quality. Plugins like Smush or EWWW Image Optimizer can help automate this process. 13. Creating a Custom 404 Page: When users encounter a broken link or a non-existent page, a custom 404 page can help retain their interest. Design a creative and informative 404 page to guide users back to relevant content.
14. Utilizing Excerpts Effectively: Craft compelling excerpts for your posts to entice readers to click and read more. This is particularly important for archive pages and can be customized for each post within the post editor. 15. Implementing SSL for Security: Ensure the security of your website and build trust with your visitors by implementing SSL. Many hosting providers offer free SSL certificates. You can also use the Really Simple SSL plugin to make the transition smoother. Mastering WordPress involves continuous learning and exploration. By implementing these tips and tricks, you'll not only enhance the performance and security of your site but also create a more engaging and user-friendly experience for your audience. Stay curious, stay updated, and unlock the full potential of your WordPress-powered website. Happy blogging!
0 notes
Text
How to Start a Successful Blog: A Step-by-Step Guide for Beginners

Starting a blog can seem daunting, but with the right guidance, it becomes an exciting venture that can lead to significant personal and financial rewards. This guide will walk you through the process of creating your blog, from choosing a platform to optimizing it for SEO and monetization. 1. Choosing the Right Blogging Platform WordPress: The Best Choice for Beginners WordPress is the most popular platform for bloggers and for good reasons. It’s user-friendly, versatile, and doesn't require any coding skills. There are two versions: WordPress.com and WordPress.org. - WordPress.com: This version is ideal for beginners who want to focus solely on content creation without worrying about hosting or maintenance. It’s straightforward but offers limited customization unless you opt for premium plans. - WordPress.org: This is a self-hosted option that provides full control over your site. It requires a hosting account and a domain name but offers extensive customization options and plugins. Why Choose WordPress Over Other Web Builders? - Ease of Use: WordPress’s drag-and-drop interface makes it easy for anyone to build a website without coding. - Free to Use: Unlike many other platforms, WordPress is free, though you’ll need to pay for hosting and a domain name. - Customization: Thousands of themes and plugins are available, allowing you to create a unique website. - SEO Friendly: WordPress is built with SEO in mind, helping you rank higher in search engine results. 2. Getting Started with WordPress Domain Name and Hosting - Choosing a Domain Name: Your domain name is your website’s address. It should be short, memorable, and relevant to your content. Avoid using numbers and special characters. - Registering Your Domain: You can register your domain name through platforms like GoDaddy, BigRock, or Google Domains. - Selecting a Hosting Provider: Bluehost is highly recommended for beginners due to its affordability and ease of use. They offer a simple setup process and excellent customer support. Installing WordPress - Sign Up for a Hosting Plan: Go to Bluehost or your chosen hosting provider and sign up for a plan that suits your needs. - Install WordPress: Most hosting providers offer a one-click WordPress installation process. Follow the prompts to complete the setup. - Login to WordPress Dashboard: Once installed, you can log in to your WordPress dashboard to start customizing your site. 3. Customizing Your WordPress Site Exploring the WordPress Dashboard - Navigation: Familiarize yourself with the dashboard where you can manage your posts, pages, and site settings. - Themes: Choose and install a theme that aligns with your blog’s niche. Customize it to match your brand. - Plugins: Install essential plugins for SEO (Yoast SEO), spam protection (Akismet), and performance optimization (W3 Total Cache). Creating Content - Categories and Tags: Organize your content with categories and tags to make it easy for readers to navigate your site. - Publishing Your First Post: Create engaging and informative posts. Use images, videos, and links to enhance your content. Essential Pages to Include - About Page: Share your story and the purpose of your blog. - Contact Page: Provide a way for readers to get in touch with you. - Privacy Policy and Terms of Service: Inform users about how you handle their data and the rules of using your site. 4. Optimizing Your Blog for SEO SEO Basics - Keywords: Use tools like Google Keyword Planner to find relevant keywords for your niche. - On-Page SEO: Optimize your titles, headings, and meta descriptions. Use alt text for images and ensure your URLs are clean and descriptive. - Content Quality: Focus on creating high-quality, valuable content that addresses the needs and interests of your audience. Advanced SEO Techniques - XML Sitemaps: Generate a sitemap and submit it to Google Search Console to help search engines crawl your site. - Backlinks: Build backlinks from reputable sites to improve your site’s authority and ranking. - Mobile Optimization: Ensure your site is mobile-friendly as more users are accessing content from mobile devices. 5. Monetizing Your Blog Traffic Generation - Social Media: Share your content on social media platforms to drive traffic to your blog. - Email Marketing: Build an email list and send regular newsletters to engage with your audience. - Guest Posting: Write guest posts on other blogs to reach a wider audience. Monetization Strategies - Affiliate Marketing: Promote products or services and earn a commission for every sale made through your referral link. - Google AdSense: Display ads on your blog and earn money based on the number of views or clicks. - Sponsored Posts: Collaborate with brands to create sponsored content. - Digital Products: Sell eBooks, courses, or merchandise through your blog. Conclusion Starting a blog is a rewarding endeavor that requires planning, dedication, and continuous learning. By choosing the right platform, customizing your site, optimizing for SEO, and implementing effective monetization strategies, you can build a successful and profitable blog. Source Starting a Blog - Blogging Guide For Beginners: How To Create Your Blog Step By Step Building A Profitable Website To Make Money. Read the full article
0 notes
Text
How to Design a WordPress Website: A Comprehensive Guide

Designing a WordPress website can seem daunting, but with the right approach, it can be a rewarding experience. Whether you're a beginner or looking to refine your skills, this guide will walk you through the essential steps to create a stunning and functional WordPress site. Our target keyword for this article is "design WordPress website."
Understanding Your Goals
Before diving into the design process, it's crucial to understand your website's purpose. Are you creating a blog, an e-commerce site, or a portfolio? Knowing your goals will help you make informed decisions about the design and functionality of your site.
Get your Wordpress website designs here.
Choosing the Right Theme
The theme you choose sets the tone for your website. WordPress offers thousands of free and premium themes. When selecting a theme, consider the following:
Responsiveness: Ensure the theme is mobile-friendly.
Customization Options: Look for themes that allow easy customization.
User Reviews: Check reviews and ratings to gauge the theme's reliability.
Essential Plugins for Functionality
Plugins extend the functionality of your WordPress site. Here are some must-have plugins:
Yoast SEO: Helps optimize your content for search engines.
WooCommerce: Essential for e-commerce sites.
Elementor: A drag-and-drop page builder for easy design customization.
WPForms: For creating contact forms and other interactive elements.
Designing Your Layout
A well-structured layout enhances user experience. Here are some tips:
Header and Navigation: Keep it simple and intuitive. Include your logo and main menu.
Homepage: Make a strong first impression with a clean and engaging design. Highlight key information and calls to action.
Footer: Use the footer for additional navigation links, contact information, and social media icons.
Creating Engaging Content
Content is king in the digital world. Here are some content creation tips:
Write for Your Audience: Understand your target audience and create content that addresses their needs and interests.
Use Keywords Naturally: Incorporate your target keyword, "design WordPress website," naturally throughout your content.
Multimedia: Use images, videos, and infographics to make your content more engaging.
Optimizing for SEO
Search engine optimization (SEO) is crucial for driving organic traffic. Here are some SEO best practices:
Meta Titles and Descriptions: Write compelling meta titles and descriptions that include your target keyword. For example:
Meta Title: "How to Design a WordPress Website: Step-by-Step Guide"
Meta Description: "Learn how to design a WordPress website with our comprehensive guide. From choosing a theme to optimizing for SEO, we've got you covered."
Headings and Subheadings: Use H1, H2, and H3 tags to structure your content. Include your target keyword in at least one heading.
Internal and External Links: Link to other relevant pages on your site and to high-authority external sites.
Ensuring Mobile Compatibility
With a significant portion of web traffic coming from mobile devices, ensuring your site is mobile-friendly is essential. Test your site on various devices and screen sizes to ensure a seamless user experience.
Get your Wordpress website designs here.
Speed and Performance
A fast-loading website improves user experience and SEO. Here are some tips to enhance your site's speed:
Optimize Images: Use compressed images to reduce load times.
Caching Plugins: Use plugins like W3 Total Cache to improve site performance.
Minimize Plugins: Only use essential plugins to avoid slowing down your site.
Regular Maintenance
Maintaining your WordPress site is crucial for security and performance. Regularly update your themes, plugins, and WordPress core. Backup your site frequently to prevent data loss.
Conclusion
Designing a WordPress website involves careful planning and execution. By following these steps, you can create a site that is not only visually appealing but also functional and optimized for search engines.
Remember, the key to a successful website is providing value to your visitors while ensuring a seamless user experience.
By incorporating these best practices, you can design a WordPress website that stands out and ranks well on search engines like Google and Bing. Happy designing!
Get your Wordpress website designs here.
#how to make a wordpress website#how to make a website#create a wordpress website#how to create a website#make a website#wordpress website#how to build a website#create a website#build a wordpress website#how to make a website using wordpress#how to create a wordpress website#how to make a wordpress website with elementor#wordpress tutorial#wordpress tutorial for beginners#make a wordpress website#wordpress website tutorial#wordpress
0 notes
Text
Wix vs WordPress who has the best SEO features? - IT Mindslab
Choosing the right platform for your website is a crucial decision, especially when it comes to SEO. Wix and WordPress are two popular options, each with its own set of features. In this SEO showdown, we’ll compare Wix and WordPress to determine which platform offers the best SEO features, helping you make an informed choice for your website.
Visit Wix vs wordpress who has the best seo features? - IT Mindslab
Understanding SEO on Wix
Wix is a user-friendly website builder known for its simplicity. When it comes to SEO, here’s what Wix brings to the table:
User-Friendly Interface: Wix’s drag-and-drop interface makes it easy for beginners to build websites. It offers on-page SEO tools that help you optimize titles, meta descriptions, and image alt text.
Mobile Optimization: Wix automatically optimizes websites for mobile devices, which is crucial for SEO, as mobile-friendliness is a ranking factor.
App Marketplace: Wix has an app marketplace where you can find SEO-related apps and plugins to enhance your website’s search engine optimization.
SEO Wizard: Wix provides an SEO Wizard that guides you through the optimization process, from keyword selection to meta tag customization.
URL Structure: You can customize your URL structure on Wix, which is essential for creating clean and SEO-friendly URLs.
However, Wix does have some limitations when it comes to advanced SEO features and flexibility.
The SEO Arsenal of WordPress
WordPress, on the other hand, is an open-source content management system (CMS) known for its flexibility and powerful SEO capabilities:
Customization: WordPress offers unparalleled customization options, allowing you to install SEO plugins like Yoast SEO or All in One SEO Pack. These plugins provide comprehensive tools for optimizing content, titles, meta descriptions, and more.
Content Management: WordPress excels at content management, making it easier to organize and categorize your content for better SEO. It also supports content siloing, a strategy for structuring content to improve search visibility.
Speed Optimization: You have more control over website speed optimization in WordPress, which can have a significant impact on SEO. Caching plugins like W3 Total Cache and WP Super Cache can help improve load times.
Technical SEO: WordPress allows for in-depth technical SEO improvements, such as optimizing schema markup, canonical tags, and handling redirects.
Community Support: The vast WordPress community provides access to an abundance of SEO resources, tutorials, and forums for troubleshooting and learning.
In the battle of Wix vs. WordPress for SEO features, WordPress emerges as the winner, particularly for those with in-depth SEO requirements and a desire for total control over their website’s optimization. Its flexibility, plugin ecosystem, and advanced SEO capabilities make it the preferred choice for many SEO professionals.
Wix SEO Features: A Closer Look
On-Page SEO Tools: Wix provides a user-friendly interface for optimizing on-page elements like titles, meta descriptions, and header tags. It also offers suggestions for improving content based on SEO best practices.
Mobile Optimization: Wix automatically optimizes websites for mobile devices, ensuring that your site is mobile-friendly—a crucial factor for SEO, as Google prioritizes mobile-first indexing.
App Marketplace: Wix’s App Marketplace includes various SEO-related apps and plugins, such as SEO Site Audit, SEO Booster, and Google Analytics integration, which can enhance your SEO efforts.
SEO Wizard: The SEO Wizard guides users through the SEO optimization process, making it easier for beginners to understand and implement SEO best practices.
Structured Data: Wix allows you to add structured data markup to your site, helping search engines understand your content better and potentially earning rich snippets in search results.
WordPress SEO Features: Going Beyond the Basics
Powerful Plugins: WordPress’s greatest strength lies in its vast library of plugins. SEO plugins like Yoast SEO and All in One SEO Pack offer advanced features such as XML sitemap generation, breadcrumbs, canonical tags, and schema markup.
Customization and Flexibility: WordPress is highly customizable, enabling you to create tailored SEO strategies. You can optimize individual posts and pages, manage categories and tags, and implement advanced SEO techniques.
Content Management: WordPress excels in content management, allowing you to organize your content effectively. Categories, tags, and hierarchical taxonomies enable you to structure your content logically, improving user experience and SEO.
Technical SEO Control: WordPress provides greater control over technical SEO aspects. You can configure settings for robots.txt, control indexing and crawling, optimize image alt attributes, and implement URL redirects with ease.
SEO-Friendly Themes: Many WordPress themes are designed with SEO in mind, ensuring clean code, fast load times, and mobile responsiveness.
Community and Resources: WordPress has a vast and active user community, making it easy to find SEO tutorials, guides, and forums for troubleshooting and improving your SEO knowledge.
The Role of Content Quality
Regardless of the platform you choose, remember that content quality is paramount for SEO success. Engaging, informative, and well-structured content will always be the foundation of a strong SEO strategy. Both Wix and WordPress allow you to create high-quality content, so invest time in content creation and optimization.
Consider Your Specific Needs
Ultimately, the decision between Wix and WordPress for SEO depends on your specific needs, technical expertise, and long-term goals. If you prioritize simplicity and have basic SEO requirements, Wix can serve you well. However, if you seek advanced SEO capabilities, complete control, and the ability to adapt to changing SEO trends, WordPress is the preferred choice for many SEO professionals and businesses.
However, Wix is not to be dismissed, especially if you prioritize ease of use and simplicity in website creation. For beginners and those with basic SEO needs, Wix can still help you establish a web presence and achieve decent search engine rankings.
Ultimately, the choice between Wix and WordPress should align with your specific website goals, technical proficiency, and SEO ambitions. Both platforms can be leveraged effectively for SEO success with the right approach and knowledge.
0 notes
Text
A Beginner's Guide: How to Create a Website on WordPress

Learn how to create a website on WordPress - the versatile and user-friendly platform for creating stunning online sites. Here Are the Following on how to create a website on WordPress: Step 1: Define Your Website's Purpose and GoalsBefore diving in, it's crucial to understand why you're creating a website. Is it a personal blog, an online portfolio, an e-commerce store, or something else? Clearly define your website's purpose and set achievable goals. Step 2: Choose a Domain Name and Hosting Your domain name is your website's address (e.g., www.yourwebsite.com). Select a domain name that reflects your brand or website's topic. Then, choose a reliable web hosting provider. Popular options include Bluehost, SiteGround, and HostGator. Many of them offer easy WordPress installation. Step 3: Install WordPress Most hosting providers offer a one-click WordPress installation. Log in to your hosting account, find the WordPress installer, and follow the on-screen instructions. You'll set up your admin username and password during this process. Step 4: Select a WordPress Theme WordPress offers a wide range of free and premium themes. Choose a theme that suits your website's style and objectives. You can customize it later to align with your branding. Step 5: Configure Essential Settings After installing WordPress, head to the dashboard. Here, you can configure important settings like site title, tagline, time zone, and permalink structure (URL format). Step 6: Install Essential Plugins Plugins enhance your website's functionality. Start with essential plugins like: - Yoast SEO: Helps with search engine optimization (SEO). - Akismet Anti-Spam: Protects your site from spam comments. - W3 Total Cache: Improves site speed and performance. - UpdraftPlus: Backs up your website regularly. Step 7: Create Key Pages Begin with fundamental pages: - Homepage: The front page of your website. - About Us: Tell visitors about your brand or yourself. - Contact Us: Provide contact information. - Blog: If you plan to blog, create this page. Step 8: Add Content Start adding content to your pages and blog posts. Use the WordPress editor, which is similar to a word processor, to format text, add images, and embed media. Step 9: Customize Your Website Use the WordPress Customizer to personalize your site's appearance. You can change colors, fonts, and other design elements. If your theme supports it, create a custom logo. Step 10: Optimize for SEO Optimize your content for search engines using the Yoast SEO plugin. Focus on keyword research, meta descriptions, and internal linking. Step 11: Set Up Analytics and Monitoring Connect your website to Google Analytics to track visitor data. Consider installing a security plugin like Wordfence to protect against threats. Step 12: Regularly Update and Back Up Your Website Keep your WordPress core, themes, and plugins up to date to ensure security and functionality. Regularly back up your website to prevent data loss. Step 13: Launch Your Website Once you're satisfied with your website's content and design, it's time to go live! Inform your audience through social media, email, or other communication channels. Step 14: Promote Your Website After launching, promote your website to attract visitors. Share your content on social media, engage with your audience, and consider other marketing strategies like email marketing and SEO. Creating a website on WordPress may seem daunting at first, but with these steps, you can build a professional and engaging online presence. Remember that practice makes perfect, and as you become more familiar with WordPress, you can explore advanced features to further enhance your site. Good luck on your web development journey! Read the full article
0 notes
Text
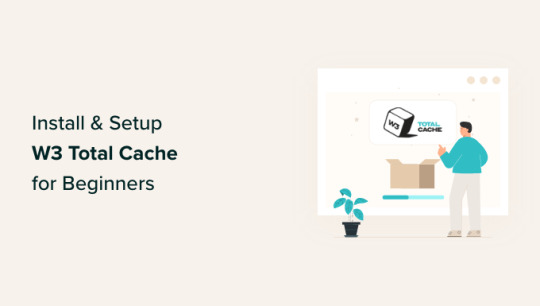
How to Install and Setup W3 Total Cache for Beginners
How to Install and Setup W3 Total Cache for Beginners
Want to install and configure W3 Total Cache on your WordPress website? W3 Total Cache is a popular WordPress caching plugin that helps you improve your website speed and performance. In this beginner’s guide, we’ll show you how to easily install and configure W3 Total Cache on your WordPress website. Editor’s note: We no longer use W3 Total Cache on our website and have switched to WP Rocket…
View On WordPress
#beginners guide for w3 total cache#best caching plugin for wordpress#best wordpress caching plugin#cdn in wordpress#cpanel hosting cname record#do i need w3 total cache#how to add cdn in firefox#how to create a cname record#how to improve wordpress yslow grade#how to install and setup w3 total cache and maxcdn for beginners#how to install maxcdn in wordpress#how to install w3 total cache#how to setup maxdn in wordpress#setup maxcdn#setup maxcdn in wordpress#setup w3 total cache#w3 total cache plugin
0 notes
Text
WordPress Update Problems? Here’s How to Fix Them (No Tech Skills Needed)

Keeping your WordPress website up to date is critical for security, speed, and access to new features. But let’s face it—when an update fails, it can feel like the whole site is crashing down, especially if you don’t have a technical background.
Don’t panic.
Most WordPress update errors are easy to fix with a bit of guidance. In this beginner-friendly guide, we’ll break down why updates fail and what you can do to resolve them—no developer required.
🛑 Why Do WordPress Updates Fail?
WordPress runs on a system of interconnected parts: the core platform, themes, and plugins. If one of these components doesn’t align properly during an update, things can break.
Here are some of the most common causes:
📡 Poor internet connection that interrupts the update
🔌 Conflicts between plugins
🎨 Theme incompatibility
💾 Insufficient server memory or time limits
🔐 Incorrect file and folder permissions
🧩 Corrupted or incomplete update files
The first step toward fixing any problem is understanding where it’s coming from.
🛠️ How to Fix WordPress Update Errors (Step by Step)
✅ 1. Back Up Your Site First
Before trying anything, create a full backup of your website using a plugin like UpdraftPlus or BackupBuddy. This gives you a safety net in case something goes wrong during the troubleshooting process.
✅ 2. Clear Your Cache (It Might Be That Simple)
Sometimes, your browser or caching plugin is the culprit—not the update itself.
Clear your browser cache (Ctrl+Shift+R or Command+Shift+R on most browsers)
If you use a caching plugin (like WP Super Cache or W3 Total Cache), clear your site cache too
Now try updating WordPress again.
✅ 3. Use Troubleshooting Mode to Find Plugin Conflicts
Conflicting plugins are a frequent reason for failed updates.
You can use the Health Check & Troubleshooting plugin to safely test your site:
Install and activate the plugin
Enable troubleshooting mode—this disables all plugins temporarily (just for you)
Try updating again
If it works, re-enable plugins one by one until the error returns
That last plugin activated is your likely culprit.
✅ 4. Check Your Hosting Settings
Shared hosting plans often limit memory and execution time, which can stop updates mid-process.
Ask your host:
What’s the PHP memory limit? (It should be at least 256MB)
What’s the maximum execution time? (Aim for 300 seconds)
Can they increase these limits for better stability?
Sometimes, simply switching to a better hosting plan solves everything.
✅ 5. Try a Manual WordPress Update
If automatic updates aren’t working, a manual update might do the trick.
Here’s a simple guide:
Download the latest WordPress version from WordPress.org
Unzip the files on your computer
Use FTP software like FileZilla to connect to your website
Replace the wp-admin and wp-includes folders with the new ones
Do not touch the wp-content folder (it holds your themes and plugins)
Open your site—if needed, it will ask to update the database. Just click the button
Done right, this is a safe and effective fix.
✅ 6. Adjust File Permissions (If You’re Getting Permission Errors)
WordPress needs the correct file permissions to update itself.
Use a plugin like WP File Manager or ask your hosting provider to set:
Folders to 755
Files to 644
These permissions allow WordPress to work smoothly without opening security risks.
✅ 7. Stuck in Maintenance Mode? Here’s How to Exit
Sometimes an update gets interrupted, leaving your site stuck in maintenance mode with this message:
“Briefly unavailable for scheduled maintenance. Check back in a minute.”
To fix this:
Log into your hosting account (e.g., cPanel or via FTP)
Go to the root folder of your WordPress site
Delete the file named .maintenance
Refresh your site—it should return to normal
This is one of the easiest fixes on the list.
💬 When You Should Call in the Experts
If you’ve tried everything and the update still won’t work—or if you're unsure about any step—it’s perfectly okay to ask for help.
Here’s who you can turn to:
Your web hosting support team
A WordPress specialist
Or a reliable web development company like Websenor
✅ Final Thoughts: Keep WordPress Simple with Websenor
WordPress update errors can seem intimidating, but most are fixable with a calm, step-by-step approach—even if you're not a tech expert. The key is to:
Back up first
Rule out the simple causes
Test safely before changing live settings
Know when to ask for help
If managing updates or troubleshooting problems ever feels like too much, Websenor is here to take the weight off your shoulders. Our team specializes in WordPress maintenance, bug fixing, and website performance tuning—so you can focus on growing your brand while we handle the backend.
Let Websenor be your WordPress safety net. With us, your website stays secure, updated, and stress-free.
0 notes
Text
5 Quick Wins to Speed Up WordPress Load Times
Your website’s load time can make or break its chances of success. This is important stuff, so it’s no wonder that “how to speed up WordPress” is always a hot topic in the WordPress-sphere. For lightning quick websites, lucrative rewards await:
Google has confirmed that site speed is a ranking factor in its algorithm. Fast websites rank higher and generate more traffic.

This is part 1 of our quick two-part series on how to speed up WordPress.
5 Quick Wins to Speed Up WordPress Load Times (Part 1)
Fast-loading websites improve the user experience, resulting in more page views, time on page, and other important metrics. Fast websites mean happy visitors.
A sluggish website can kill your conversion rate – a drop of 47% for an extra 2-second wait. Fast websites enjoy high conversion rates and a healthier bottom line.
We’ve heard all the upsides before, though, yet many of us still ignore the warnings and plod along with unoptimized websites.
What gives?
The easiest way to speed up WordPress in under an hour
In my opinion, it’s an issue of time and a lack of confidence. The ‘time’ part is self-explanatory, of course, but to inexperienced WordPress users, buzzwords like ‘optimization’ are intimidating. Articles on speed optimization contain lots of technical talk, resulting in many WordPress users (wrongly) believing that they can’t do it, so they focus their efforts elsewhere.
This simply isn’t the case, though. Anyone can speed up WordPress and enjoy lightning quick load times, and today, we’re going to prove it.
So here’s my promise to you: 5 steps, each taking less than 10 minutes (most take under 2), that even an absolute beginner can perform. The end result: a much faster website.
Before you start, test your website speed using the free Pingdom tool. In about an hour when we’re finished, I want you to test it again to see how much faster your website is!
1. Get yourself a good web host
If you only take one thing from this list, let it be this one.
No amount of on-site tweaking and optimization can undo the damage of a bad web host. So make life easier for yourself by spending 10 minutes or so selecting the right hosting provider for your website.
I know, I know – bargain-basement prices can be tempting. But these hosting services are cheap for a reason: they cram so many websites onto their servers that each site can only use a tiny fraction of the resources available.
Remember: running a successful website starts with choosing a good host. Get the foundations right, and everything else will click into place.
High-quality hosting doesn’t have to cost an arm and a leg either. ThemeIsle recommends SiteGround for shared hosting and Flywheel for managed WordPress hosting – prices start from $3.95/month and $15/month respectively.
To learn exactly why we recommend these companies and not the others, please check out our detailed reviews and comparisons over on the CodeinWP blog:
Best WordPress Shared Hosting Providers by the Numbers
Managed WordPress Hosting: The All-You-Need-to-Know Guide
Time taken: 10 minutes to sign up with one of our recommended hosting services.
2. Use a caching plugin
Behind your hosting service, caching is probably the next best way to speed up WordPress. It’s so effective that caching can result in a 10x speed gain over a non-cached website.
Adding caching is as simple as installing a caching plugin – and we recommend W3 Total Cache if you’re looking for a free solution.
If you’re willing to invest in your site speed, check out WP Rocket – noticeably better performance than W3 Total Cache.
The out-the-box default configurations work perfectly well with both plugins, so you can enjoy the speed benefits the moment you hit activate.
Time taken: 30 seconds to install a plugin.
3. Optimize the WordPress database
A well-organized filing cabinet helps you to find your files more quickly, right? This is the principle at play when it comes to database optimization – remove the clutter, and your server can retrieve and display your web pages faster.
Like caching, database optimization is something you can benefit from instantly – simply install and activate the WP-Optimize plugin.
WP-Optimize – Clean, Compress, Cache.WP-Optimize – Clean, Compress, Cache.
Author(s): David Anderson, Ruhani Rabin, Team Updraft
4. Remove unnecessary Plugins
Installing WordPress plugins is a trade-off between adding cool functionalities and slowing your website down.
Now, I’m not going to tell you to uninstall all of your plugins just to speed up WordPress – that would be silly, and deny you some of the features that make your site function.
s surprising how quickly our websites become overloaded with plugins, usually without us even realizing it. Test this out if you don’t believe me. Navigate to wp-admin / Plugins and see how many you have installed – I bet it’s more than you think.
Of course, there’s no “perfect number” of plugins. However, I’m going to go out on a limb here and say that the amount installed on your site right now is too many.
Work your way down the list of plugins, asking yourself, “Do I really need this one?” If your answer isn’t a resounding “yes,” you don’t need it. Trim the fat and uninstall any unnecessary plugins.
Time taken: 5 minutes to go through your plugin list and delete any surplus to requirements.
5. Update your website
Although we’re always told to update our websites, I know that I’m guilty of pretending I didn’t see the five or six update notifications waiting for me in the WordPress dashboard.
Failing to update is definitely bad practice, though – and we’re talking about updates to the core, theme, and plugins here.
Speed often isn’t a priority of updates – updates tend to focus on introducing new features and patching up known security issues. However, over time, any bloated code is improved and optimized, and gradually that translates into small speed improvements.
So if you’re using software that’s a few versions old, you can expect to see the biggest improvements from hitting the update button. You should be updating for reasons other than speed anyway – so just enjoy shaving a few fractions of a second off your site’s load time as an extra bonus.
Time taken: 30 seconds. Visit https://wpspeedworld.tumblr.com/ if you are looking for more Information.
1 note
·
View note
Link
The world’s two most popular WordPress caching plugins are WP Super Cache and W3 Total Cache (W3TC). Developed by Mashable’s CTO, W3 Total Cache is by far the most versatile WordPress caching plugin available, used in high traffic sites like Smashing Magazine, Mashable, MakeUseOf and Yoast. This tutorial is a beginner’s guide to configuring W3 Total Cache. Word of advice: W3TC has a plethora of advanced settings some of which I have a hard time comprehending. If you’re unfamiliar with a setting it’s best not to mess with it. Let’s begin!Install W3 Total CacheTo install the W3 Total Cache plugin, open your WordPress dashboard, followed by Plugins > Add New. Search for “w3 total cache” and install the first result. You can also manually download the plugin and upload it to the wp_content/plugins folder via FTP. If you have previously installed another caching plugin like WP Super Cache, you should disable it before activating W3 Total Cache. This would prevent the two plugins from conflicting. As a rule of thumb, don’t keep more than one WordPress caching plugin activated at any given time.Configuring W3 Total Cache – General SettingsW3 Total Cache creates a new menu entry called Performance in WordPress dashboard. The options that we’re looking for are under Performance > General. You’ll notice that this page has an overwhelming number of settings for a caching plugin (and a whole lot more if you’re into advanced stuff). Each setting is placed inside a box – called modules. I’ve discussed each of these modules with relevant screenshots. If you get stuck or are uncertain about a particular setting, simply follow the screenshots.The first module you’ll find is General. I’d recommend not to enable the all the caching options using the toggle checkbox. You might turn on settings that aren’t required (or even supported by) your host – which would inadvertently slow down your website. However, if you want to quickly disable all the modules, this toggle checkbox comes in handy! Before we proceed further, if you’re unfamiliar with the terms ‘page cache’ or ‘database cache’, I would recommend reading How WordPress Caching Works.Page Cache ModuleThe second module we’re going to configure is Page Cache. The Page cache method depends on your hosting environment. If you’re using a shared host, Disk: Enhanced is the best option. However, if you’re using a dedicated or virtual server and you have APC (or any other form of Opcode caching installed), you should select the respective option.Minify ModuleThe Minify module compresses the CSS and JavaScript files your theme uses, by removing unnecessary lines of code like comments and whitespaces. This reduces the filesize by ~10% which results in a faster site. Under Minify cache method you should select the appropriate option based on your server.Other Caching ModulesThe next two modules are Database Cache and Object Cache. Enable each of them and change their caching method to the one best fit to your hosting environment – just like you did under Page Cache and Minify.The last module that we want to enable is Browser Cache. Once you’ve enabled them, click on Save all Settings. That should do it! W3 Total Cache is now enabled in your server. We will now take an in-depth look into two specific modules – Page Cache and Browser Cache. The rest of the modules’ default values are just fine.Page Cache SettingsThe Page Cache settings can be found under Performance > Page Cache. The settings here are fairly self explanatory. I’ve enabled a couple of them – specially Don’t cache pages for the following user roles. This ensures that when an author is editing a post, he/she will able to view the latest version and not the one from the cache.Preloading the CacheBy default, W3 Total Cache caches a page when it is first requested. You also have the option to pre-generate copies of all the posts/pages. This way, regardless of when a visitor requests a page, the cache is ready and the page is served in the lowest possible time.You should configure the cache preload settings based on your hosting environment and the amount of traffic your website receives.The cache Update interval directly affects server resources – lower the time interval (i.e. higher the frequency), greater the server resource consumed. People on shared hosting servers should be very careful with this setting. Set a high enough frequency and you might just get your account suspended for abuse of server resources. A safe cache preload interval is one hour – i.e. 3600 seconds.If you’re unfamiliar with the Sitemap URL, install Google XML Sitemaps. It’s super easy to use and is in fact, a must-have plugin.Finally, you want to enable the last option which will trigger a cache preload operation when a post/page is published.Browser Cache SettingsThis is found under Performance > Browser. The idea is to leverage your visitor’s device. Enabling Browser cache would make the static files (such as CSS, JavaScript and images) to be served from your visitor’s browser cache. Of course, there’s an expiry time which would prevent the use of obsolete data. This removes a huge load from the server, saves bandwidth and greatly improves your site’s overall performance.It’s Alive!How do you know that W3 Total Cache is actually working? Well, the plugin page says so. You can also view the source code of your site find something like this:W3 Total Cache Performance BenchmarkI waited around 1 hour after I enabled caching and benchmarked the website’s performance using GTmetrix. This is without any caching plugin:This is one hour after W3 Total Cache was configured:Notice the difference? A 3% and 5% increase in Page Speed and YSlow Grade. Neat, right? Now imagine a thousand people visiting your site daily – imagine the amount of CPU cycles (fancy term for resource usage) you’ll save. Caching not only reduces you page size, but it also improves the overall site’s performance which paves the way to a great user experience.Troubleshooting W3 Total CacheYou might notice that your site’s load time has increased after installing W3 Total Cache. Is that even possible? Of course it is! In fact, this is a very common beginner’s mistake. There can be a lot of reasons behind this:The most probable reason is that you’ve conducted the website benchmark while preloading the cache. Building the cache consumes considerable server resources. Imagine your request on top of that – of course your site would become slow! Solution: wait for an hour and try again – this time it should be different.Another common reason is selecting the wrong caching methods. Let me tell you that anything other than Disk caching involves certain amount of A/B testing. You need to play with some of these settings in order to squeeze the best possible result.Sometimes on a shared server you might find APC or some other Opcode caching option available – and it’s likely that you’ve selected it. Don’t! Revert to ‘Disk’ or ’Disk Enhanced’. The reason being that those settings have been fine-tuned for the overall performance of the shared server – remember you’re not the only person using it. These settings might not work with W3 Total Cache.If you’re still facing problems and you’ve tried the default/recommended values, I recommend switching to WP Super Cache..htaccess File Permission ErrorDepending on your hosting environment, you might see an error message stating that your .htaccess file isn’t writable. This means that the webserver and/or PHP handler does not have the permission required to modify the .htaccess file. There are two solutions:You change the permission of the .htaccess file to 775 via FTP or cPanel, etc.You manually add the data to the .htaccess fileI must point out that the second method is safer and is considered a good security practice.Conclusion – Which Plugin Should I Use?You might be wondering which WordPress caching plugin to use. After all, I did write two separate tutorials to achieve the same goal. Should you go for WP Super Cache or W3 Total Cache? Well, to make a long story short – if you’re on a shared server and don’t want the hassle of A/B testing and/or troubleshooting, WP Super Cache is much easier to implement. However, if you’re using a virtual or dedicated server with Opcode caching (like APC or XCache) installed – and wouldn’t mind some extra work, then W3 Total Cache is for you. When configured properly with advanced methods, W3TC’s results are far superior.This concludes setting up our caching plugins. I’ll also discuss how to setup a CDN with each of these plugins. In the meantime, you could check out some of the best free CDNs for WordPress and stay tuned.Parting question: What’s your favourite caching plugin? How much difference did it make in your site’s performance? We’d love to hear from you!Source: WP Explorer
0 notes
Text
How to Install and Setup W3 Total Cache for Beginners
How to Install and Setup W3 Total Cache for Beginners
Do you want to install and set up W3 Total Cache on your WordPress website? W3 Total Cache is a popular WordPress caching plugin that helps you to improve your website speed and performance. In this beginner’s guide, we’ll show you how to easily install and set up W3 Total Cache on your WordPress website. Editor’s Note: We don’t use W3 Total Cache on our website anymore and have switched to WP…
View On WordPress
0 notes
Text
How to Install and Setup W3 Total Cache for Beginners
How to Install and Setup W3 Total Cache for Beginners
Do you want to install and set up W3 Total Cache on your WordPress website? W3 Total Cache is a popular WordPress caching plugin that helps you to improve your website speed and performance. In this beginner’s guide, we’ll show you how to easily install and set up W3 Total Cache on your WordPress website. Editor’s Note: We don’t use W3 Total Cache on our website anymore and have switched to WP…

View On WordPress
0 notes