#best ios tutorials
Explore tagged Tumblr posts
Visit Tumblr Blog
Explore Tumblr blogs with no restrictions, modern design and the best experience.
Last Seen Tumblr Blogs


Fun Fact
Tumblr Inc. is funded by 13 investors.
Text


guys we have a little problem
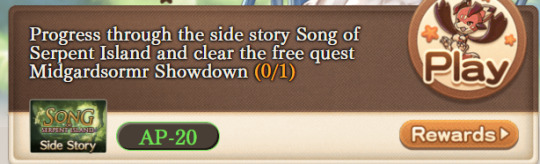
#stardust speaking !#person who doesnt read sidestories is dearly paying for it right now#BJKADBJKBJKADKABJDBJKDABJKDBAD HHHHHHH ILL READ THEM THEN ILL READ THEEEEMMMMMMMM#the stan & aliza is just 5 chs right....................#BJKADBJKADBJKADBJKADBJKAD THE LAST ONE IS THE TALES OF COLLAB LMFAOOOOO?????????????#was that the one they didnt translate when it happened or am i dreaming....its tiny too i should get thro it#anyway if anyone was interested in gbf anytime from now is an excellent time cuz these tutorial missions gives u a lot of early weapons +#1 character from each element who r fun to use imo (+ water lily is like sooooo helpful)#and then a free katalina/io/rosetta/eugen/rackam/dark ferry which is happy birthday to mainstory<333333#going thro my sidestories while writing this help I PROMISE NEXT HALF-OFF TREASURE IM FINISHING ALL OF THIS UP. maybe.....the issue is that#i always end up doing other stuff during halfoff....and i SHOULD be in the sandbox mines.............#shaking everyone i love granblu fantasy. no rain no rainbow is added to sidestories in the next couple days and its like. one of the best#events to exist. i can give u a reading list depending on what u like in stories (will list the same 3 events for everyone)#IM JOKING but no rain no rainbow & ranger sign bravo IS amongst the most endearing events
6 notes
·
View notes
Text
10 Best Free Budgeting and Personal Finance Tools
Managing money doesn’t have to be stressful or complicated. In fact, with the right tools, it can be empowering and even a little fun. The key is finding the best free budgeting and personal finance tools that fit your lifestyle and goals. Whether you’re trying to save for a dream vacation, pay off debt, or just stop overspending on takeout. Best Free Budgeting and Personal Finance Tools There’s…
#best budgeting apps#best budgeting apps 2024#best free budgeting apps#best ios and android budgeting apps#best personal finance budgeting apps for 2024#budgeting#budgeting apps#budgeting apps free#budgeting tips#budgeting tools#finance#finance tips#free budgeting apps#personal budgeting#personal finance#personal finance apps#personal finance dashboard#personal finance tips#personal finance tutorial#smart tools for budgeting and saving
0 notes
Text
⭐ So you want to learn pixel art? ⭐
🔹 Part 1 of ??? - The Basics!
Edit: Now available in Google Doc format if you don't have a Tumblr account 🥰
Hello, my name is Tofu and I'm a professional pixel artist. I have been supporting myself with freelance pixel art since 2020, when I was let go from my job during the pandemic.


My progress, from 2017 to 2024. IMO the only thing that really matters is time and effort, not some kind of natural talent for art.
This guide will not be comprehensive, as nobody should be expected to read allat. Instead I will lean heavily on my own experience, and share what worked for me, so take everything with a grain of salt. This is a guide, not a tutorial. Cheers!
🔹 Do I need money?
NO!!! Pixel art is one of the most accessible mediums out there.
I still use a mouse because I prefer it to a tablet! You won't be at any disadvantage here if you can't afford the best hardware or software.
Because our canvases are typically very small, you don't need a good PC to run a good brush engine or anything like that.
✨Did you know? One of the most skilled and beloved pixel artists uses MS PAINT! Wow!!
🔹 What software should I use?
Here are some of the most popular programs I see my friends and peers using. Stars show how much I recommend the software for beginners! ⭐
💰 Paid options:
⭐⭐⭐ Aseprite (for PC) - $19.99
This is what I and many other pixel artists use. You may find when applying to jobs that they require some knowledge of Aseprite. Since it has become so popular, companies like that you can swap raw files between artists.
Aseprite is amazingly customizable, with custom skins, scripts and extensions on Itch.io, both free and paid.
If you have ever used any art software before, it has most of the same features and should feel fairly familiar to use. It features a robust animation suite and a tilemap feature, which have saved me thousands of hours of labour in my work. The software is also being updated all the time, and the developers listen to the users. I really recommend Aseprite!
⭐ Photoshop (for PC) - Monthly $$
A decent option for those who already are used to the PS interface. Requires some setup to get it ready for pixel-perfect art, but there are plenty of tutorials for doing so.
Animation is also much more tedious on PS which you may want to consider before investing time!
⭐⭐ ProMotion NG (for PC) - $19.00
An advanced and powerful software which has many features Aseprite does not, including Colour Cycling and animated tiles.
⭐⭐⭐ Pixquare (for iOS) - $7.99 - $19.99 (30% off with code 'tofu'!!)
Probably the best app available for iPad users, in active development, with new features added all the time.

Look! My buddy Jon recommends it highly, and uses it often.
One cool thing about Pixquare is that it takes Aseprite raw files! Many of my friends use it to work on the same project, both in their office and on the go.
⭐ Procreate (for iOS) - $12.99
If you have access to Procreate already, it's a decent option to get used to doing pixel art. It does however require some setup. Artist Pixebo is famously using Procreate, and they have tutorials of their own if you want to learn.
⭐⭐ ReSprite iOS and Android. (free trial, but:) $19.99 premium or $$ monthly
ReSprite is VERY similar in terms of UI to Aseprite, so I can recommend it. They just launched their Android release!
🆓 Free options:
⭐⭐⭐ Libresprite (for PC)
Libresprite is an alternative to Aseprite. It is very, very similar, to the point where documentation for Aseprite will be helpful to Libresprite users.
⭐⭐ Pixilart (for PC and mobile)
A free in-browser app, and also a mobile app! It is tied to the website Pixilart, where artists upload and share their work. A good option for those also looking to get involved in a community.
⭐⭐ Dotpict (for mobile)
Dotpict is similar to Pixilart, with a mobile app tied to a website, but it's a Japanese service. Did you know that in Japanese, pixel art is called 'Dot Art'? Dotpict can be a great way to connect with a different community of pixel artists! They also have prompts and challenges often.
🔹 So I got my software, now what?
◽Nice! Now it's time for the basics of pixel art.
❗ WAIT ❗ Before this section, I want to add a little disclaimer. All of these rules/guidelines can be broken at will, and some 'no-nos' can look amazing when done intentionally.
The pixel-art fundamentals can be exceedingly helpful to new artists, who may feel lost or overwhelmed by choice. But if you feel they restrict you too harshly, don't force yourself! At the end of the day it's your art, and you shouldn't try to contort yourself into what people think a pixel artist 'should be'. What matters is your own artistic expression. 💕👍
◽Phew! With that out of the way...
🔸"The Rules"
There are few hard 'rules' of pixel art, mostly about scaling and exporting. Some of these things will frequently trip up newbies if they aren't aware, and are easy to overlook.
🔹Scaling method
There are a couple ways of scaling your art. The default in most art programs, and the entire internet, is Bi-linear scaling, which usually works out fine for most purposes. But as pixel artists, we need a different method.


Both are scaled up x10. See the difference?
On the left is scaled using Bilinear, and on the right is using Nearest-Neighbor. We love seeing those pixels stay crisp and clean, so we use nearest-neighbor.
(Most pixel-art programs have nearest-neighbor enabled by default! So this may not apply to you, but it's important to know.)
🔹Mixels
Mixels are when there are different (mixed) pixel sizes in the same image.

Here I have scaled up my art- the left is 200%, and the right is 150%. Yuck!
As we can see, the "pixel" sizes end up different. We generally try to scale our work by multiples of 100 - 200%, 300% etc. rather than 150%. At larger scales however, the minute differences in pixel sizes are hardly noticeable!
Mixels are also sometimes seen when an artist scales up their work, then continues drawing on it with a 1 pixel brush.

Many would say that this is not great looking! This type of pixels can be indicative of a beginner artist. But there are plenty of creative pixel artists out there who mixels intentionally, making something modern and cool.
🔹Saving Your Files
We usually save our still images as .PNGs as they don’t create any JPEG artifacts or loss of quality. It's a little hard to see here, but there are some artifacts, and it looks a little blurry. It also makes the art very hard to work with if we are importing a JPEG.

For animations .GIF is good, but be careful of the 256 colour limit. Try to avoid using too many blending mode layers or gradients when working with animations. If you aren’t careful, your animation could flash afterwards, as the .GIF tries to reduce colours wherever it can. It doesn’t look great!

Here's an old piece from 2021 where I experienced .GIF lossiness, because I used gradients and transparency, resulting in way too many colours.
🔹Pixel Art Fundamentals - Techniques and Jargon
❗❗Confused about Jaggies? Anti-Aliasing? Banding? Dithering? THIS THREAD is for you❗❗ << it's a link, click it!!
As far as I'm concerned, this is THE tutorial of all time for understanding pixel art. These are techniques created and named by the community of people who actually put the list together, some of the best pixel artists alive currently. Please read it!!
🔸How To Learn
Okay, so you have your software, and you're all ready to start. But maybe you need some more guidance? Try these tutorials and resources! It can be helpful to work along with a tutorial until you build your confidence up.
⭐⭐ Pixel Logic (A Digital Book) - $10 A very comprehensive visual guide book by a very skilled and established artist in the industry. I own a copy myself.
⭐⭐⭐ StudioMiniBoss - free A collection of visual tutorials, by the artist that worked on Celeste! When starting out, if I got stuck, I would go and scour his tutorials and see how he did it.
⭐ Lospec Tutorials - free A very large collection of various tutorials from all over the internet. There is a lot to sift through here if you have the time.
⭐⭐⭐ Cyangmou's Tutorials - free (tipping optional) Cyangmou is one of the most respected and accomplished modern pixel artists, and he has amassed a HUGE collection of free and incredibly well-educated visual tutorials. He also hosts an educational stream every week on Twitch called 'pixelart for beginners'.
⭐⭐⭐ Youtube Tutorials - free There are hundreds, if not thousands of tutorials on YouTube, but it can be tricky to find the good ones. My personal recommendations are MortMort, Brandon, and AdamCYounis- these guys really know what they're talking about!
🔸 How to choose a canvas size
When looking at pixel art turorials, we may see people suggest things like 16x16, 32x32 and 64x64. These are standard sizes for pixel art games with tiles. However, if you're just making a drawing, you don't necessarily need to use a standard canvas size like that.
What I like to think about when choosing a canvas size for my illustrations is 'what features do I think it is important to represent?' And make my canvas as small as possible, while still leaving room for my most important elements.
Imagine I have characters in a scene like this:

I made my canvas as small as possible (232 x 314), but just big enough to represent the features and have them be recognizable (it's Good Omens fanart 😤)!! If I had made it any bigger, I would be working on it for ever, due to how much more foliage I would have to render.
If you want to do an illustration and you're not sure, just start at somewhere around 100x100 - 200x200 and go from there.
It's perfectly okay to crop your canvas, or scale it up, or crunch your art down at any point if you think you need a different size. I do it all the time! It only takes a bit of cleanup to get you back to where you were.
🔸Where To Post
Outside of just regular socials, Twitter, Tumblr, Deviantart, Instagram etc, there are a few places that lean more towards pixel art that you might not have heard of.
⭐ Lospec Lospec is a low-res focused art website. Some pieces get given a 'monthly masterpiece' award. Not incredibly active, but I believe there are more features being added often.
⭐⭐ Pixilart Pixilart is a very popular pixel art community, with an app tied to it. The community tends to lean on the young side, so this is a low-pressure place to post with an relaxed vibe.
⭐⭐ Pixeljoint Pixeljoint is one of the big, old-school pixel art websites. You can only upload your art unscaled (1x) because there is a built-in zoom viewer. It has a bit of a reputation for being elitist (back in the 00s it was), but in my experience it's not like that any more. This is a fine place for a pixel artist to post if they are really interested in learning, and the history. The Hall of Fame has some of the most famous / impressive pixel art pieces that paved the way for the work we are doing today.
⭐⭐⭐ Cafe Dot Cafe Dot is my art server so I'm a little biased here. 🍵 It was created during the recent social media turbulence. We wanted a place to post art with no algorithms, and no NFT or AI chuds. We have a heavy no-self-promotion rule, and are more interested in community than skill or exclusivity. The other thing is that we have some kind of verification system- you must apply to be a Creator before you can post in the Art feed, or use voice. This helps combat the people who just want to self-promo and dip, or cause trouble, as well as weed out AI/NFT people. Until then, you are still welcome to post in any of the threads or channels. There is a lot to do in Cafe Dot. I host events weekly, so check the threads!
⭐⭐/r/pixelart The pixel art subreddit is pretty active! I've also heard some of my friends found work through posting here, so it's worth a try if you're looking. However, it is still Reddit- so if you're sensitive to rude people, or criticism you didn't ask for, you may want to avoid this one. Lol
🔸 Where To Find Work
You need money? I got you! As someone who mostly gets scouted on social media, I can share a few tips with you:
Put your email / portfolio in your bio Recruiters don't have all that much time to find artists, make it as easy as possible for someone to find your important information!
Clean up your profile If your profile feed is all full of memes, most people will just tab out rather than sift through. Doesn't apply as much to Tumblr if you have an art tag people can look at.
Post regularly, and repost Activity beats everything in the social media game. It's like rolling the dice, and the more you post the more chances you have. You have to have no shame, it's all business baby
Outside of just posting regularly and hoping people reach out to you, it can be hard to know where to look. Here are a few places you can sign up to and post around on.
/r/INAT INAT (I Need A Team) is a subreddit for finding a team to work with. You can post your portfolio here, or browse for people who need artists.
/r/GameDevClassifieds Same as above, but specifically for game-related projects.
Remote Game Jobs / Work With Indies Like Indeed but for game jobs. Browse them often, or get email notifications.
VGen VGen is a website specifically for commissions. You need a code from another verified artist before you can upgrade your account and sell, so ask around on social media or ask your friends. Once your account is upgraded, you can make a 'menu' of services people can purchase, and they send you an offer which you are able to accept, decline, or counter.
The evil websites of doom: Fiverr and Upwork I don't recommend them!! They take a big cut of your profit, and the sites are teeming with NFT and AI people hoping to make a quick buck. The site is also extremely oversaturated and competitive, resulting in a race to the bottom (the cheapest, the fastest, doing the most for the least). Imagine the kind of clients who go to these websites, looking for the cheapest option. But if you're really desperate...
🔸 Community
I do really recommend getting involved in a community. Finding like-minded friends can help you stay motivated to keep drawing. One day, those friends you met when you were just starting out may become your peers in the industry. Making friends is a game changer!
Discord servers Nowadays, the forums of old are mostly abandoned, and people split off into many different servers. Cafe Dot, Pixel Art Discord (PAD), and if you can stomach scrolling past all the AI slop, you can browse Discord servers here.
Twitch Streams Twitch has kind of a bad reputation for being home to some of the more edgy gamers online, but the pixel art community is extremely welcoming and inclusive. Some of the people I met on Twitch are my friends to this day, and we've even worked together on different projects! Browse pixel art streams here, or follow some I recommend: NickWoz, JDZombi, CupOhJoe, GrayLure, LumpyTouch, FrankiePixelShow, MortMort, Sodor, NateyCakes, NyuraKim, ShinySeabass, I could go on for ever really... There are a lot of good eggs on Pixel Art Twitch.
🔸 Other Helpful Websites
Palettes Lospec has a huge collection of user-made palettes, for any artist who has trouble choosing their colours, or just wants to try something fun. Rejected Palettes is full of palettes that didn't quite make it onto Lospec, ran by people who believe there are no bad colours.
The Spriters Resource TSR is an incredible website where users can upload spritesheets and tilesets from games. You can browse for your favourite childhood game, and see how they made it! This website has helped me so much in understanding how game assets come together in a scene.
VGMaps Similar to the above, except there are entire maps laid out how they would be played. This is incredible if you have to do level design, or for mocking up a scene for fun.
Game UI Database Not pixel-art specific, but UI is a very challenging part of graphics, so this site can be a game-changer for finding good references!
Retronator A digital newspaper for pixel-art lovers! New game releases, tutorials, and artworks!
Itch.io A website where people can upload, games, assets, tools... An amazing hub for game devs and game fans alike. A few of my favourite tools: Tiled, PICO-8, Pixel Composer, Juice FX, Magic Pencil for Aseprite
🔸 The End?
This is just part 1 for now, so please drop me a follow to see any more guides I release in the future. I plan on doing some writeups on how I choose colours, how to practise, and more!
I'm not an expert by any means, but everything I did to get to where I am is outlined in this guide. Pixel art is my passion, my job and my hobby! I want pixel art to be recognized everywhere as an art-form, a medium of its own outside of game-art or computer graphics!

This guide took me a long time, and took a lot of research and experience. Consider following me or supporting me if you are feeling generous.
And good luck to all the fledgling pixel artists, I hope you'll continue and have fun. I hope my guide helped you, and don't hesitate to send me an ask if you have any questions! 💕
My other tutorials (so far): How to draw Simple Grass for a game Hue Shifting
28K notes
·
View notes
Text
youtube
Best Hugo Themes For Blogs and Portfolio Sites
In this video I'll cover the best Hugo themes for blogs and portfolio sites. Whether you're looking for a clean blog theme or a modern portfolio theme, there's something for everyone.
I'll show you 8 top-notch Hugo themes that offer unique features like video support, responsive design, and more!
Plus, I'll walk you through how to install and customize them for your brand.
#best hugo themes#hugo portfolio themes#hugo blog themes#hugo themes#hugo blog template#hugo templates#hugo website templates#hugo website themes#hugo blog#hugo static site#hugo website#hugo site#hugo static website#hugo site generator#hugo ssg#hugo static site generator#hugo modules#hugo seo#hugo tutorial#hugo bootstrap#hugo cms#hugo framework#hugo#gohugo themes#gohugo io#gohugo#themes#ssg#jamstack#static site generators
1 note
·
View note
Text
youtube
A Deep Dive into Advanced Pathing in Green Screen by DoInk
Welcome to the Advanced Pathing Tool in Green Screen by DoInk! In this blog post, we'll unravel the intricacies of this powerful feature, allowing you to take your video editing skills to new heights. Whether you're a seasoned content creator or just starting, understanding advanced pathing opens up a world of creative possibilities.
Key Objectives:
Introduction to the Advanced Pathing Tool
Precision control for dynamic motion paths
Real-world educational examples showcasing advanced pathing
Elevating your video projects with creative pathing applications
Tips and tricks for mastering advanced pathing in Green Screen by DoInk
The Advanced Pathing Tool in Green Screen by DoInk opens up a realm of possibilities for those seeking precision and creativity in their video projects. Understanding its features and mastering the techniques presented can significantly enhance the visual impact of your content.
Embark on this journey of mastery with the Advanced Pathing Tool in Green Screen by DoInk. Share your creatively pathed videos with us, and let your imagination soar!
#Green Screen by DoInk#Advanced Pathing Tutorial#Precision Motion Paths#Keyframing Techniques#Dynamic Animation in DoInk#Elevate Your Video Editing#Creative Video Effects#In-Depth DoInk Tutorial#Visual Storytelling Enhancement#Tips for Advanced Pathing#DoInk#Do Ink#100 Day Project#100 day of school project#Best IOS App#Best edtech Apps#Youtube
0 notes
Text
Disclaimer: none of these answers are official, and may not work for your particular use case. If there is a specific feature that an unofficial app had that you don't know how to replicate on the AO3, let me know in the notes and we might can crowdsource a solution.
A lot of people used the Archive Reader app to access stories on Archive of Our Own, and have been upset that the app is now charging to read longer than an hour a day. AO3 (and its parent organization, the OTW) has made it extremely clear in recent days that this app is unofficial and that there *is* no official app. They encourage people to use the website.
However, there are MANY reasons you might want an app, and in a bunch of those cases, there are ways to do those things without having to provide your login information to a random person running an app. Here is a round-up of solutions to the most common reasons I've seen people give for wanting an app instead of the plain AO3 website.
These solutions are based on the following assumptions:
You know what Archive of Our Own is
You often or primarily access it through a mobile device running iOS or Android
You understand what a browser is
You understand what a browser bookmark is
You understand what a site skin is
Edits:
Edited to clarify that you must be logged in to use custom site skins
Edited to add more tips and tricks from the reblogs
Edited to add new entry about notifications/emails
Edited to add new entry about reading statistics and the tracking thereof
I need a widget on my phone's homescreen, not just a browser bookmark.
You can do this with any website, not just AO3! Instructions here: https://www.howtogeek.com/196087/how-to-add-websites-to-the-home-screen-on-any-smartphone-or-tablet/
I need Dark Mode.
AO3 has a default site skin for Dark Mode, it's just called Reversi. Find it here, or at the bottom of any page on the website. https://archiveofourown.org/skins/929/
If you'd like Dark Mode on your whole browser (and you're on Android), sorrelchestnut has advice here: https://www.tumblr.com/sorrelchestnut/737869282153775104/if-you-want-dark-mode-and-dont-want-to-mess
I need to be able to read stories when I don't have internet.
Every work on the AO3 has a download button, so you can click on that and download the story for offline reading in the ereader app of your choice. More info on how to do that is in the AO3 FAQs: https://archiveofourown.org/faq/downloading-fanworks?language_id=en#accesslater
I need to be able to change the text size of the website itself.
If you have an AO3 account (and you should!!) you can do this with a personalized site skin! There is a simple tutorial here: https://www.tumblr.com/ao3skin/667284237718798336/i-have-a-request-if-you-dont-mind-could-you
I need to be able to change the text size in downloaded stories.
My personal recommendation: Don't download in PDF format. All the other formats you can download in can scale the text size up and down, assuming you open the work in the correct app. For me, I download works in EPUB format and read them on the built-in Books app on my iPhone. I hear good things about Moon Reader on Android as well.
I need to be able to replace Y/N in fics with an actual name.
ElectricAlice has a bookmarklet for that here: https://archiveofourown.org/works/34796935
I need to be able to save specific tags and not have to search them up every time.
If you have an AO3 account (which you definitely should) then you can favorite up to 20 tags which will appear on the landing page. The AO3 FAQ explains how that works: https://archiveofourown.org/faq/tags?language_id=en#favtag
I need to be able to save specific filters and be able to apply them to any tag.
Reisling's beautiful bookmarklet has you covered: https://archiveofourown.org/works/33825019
I need to be able to permanently hide certain tags.
The best option is adding this to your site skin. (Must be logged in.) Instructions here: https://www.tumblr.com/ao3css/719667033634160640/how-to-permanently-filter-out-certain-tags-on-ao3
I also hear things about the AO3 Enhancements extension (just for Android/desktop, sorry iOS folks): https://www.tumblr.com/emotionalsupportrats/686787582579851265/browser-extension-everyone-on-ao3-should-know
I need it to save my place on the page and not reload.
This is really mostly a browser error--Firefox on iOS does this to me A LOT. Your best bet is to download the work and read it in an ereader app. A lot of people also will make an ao3 bookmark and write in the notes section which part they were at, but that assumes you aren't falling asleep while reading. (Which is the main reason I have this issue, lol.) For more info on bookmarks, see the FAQ: https://archiveofourown.org/faq/bookmarks?language_id=en#whatisbookmark
I need it to keep track of which stories I've already read/opened/kudos'd.
If you have an account (which you should) then the "My History" page keeps track of every fic you've ever clicked on. No, it isn't searchable or sortable, but it does exist. For fics you've kudos'd, I have yet to find a solution for iOS. For desktop or Android, you can use this excellent userscript: https://greasyfork.org/en/scripts/5835-ao3-kudosed-and-seen-history
@the-sleepy-archivist and @inkandarsenic have a solution for iOS here to use userscripts: https://www.tumblr.com/the-sleepy-archivist/737895174683885568/this-is-a-great-guide-one-thing-i-can-help-with and https://www.tumblr.com/inkandarsenic/737827438571192320/the-user-scripts-will-also-work-on-ios-there-are
I need an app because the website's search is terrible.
(I genuinely don't understand this one but I have seen it multiple times so on the list it goes!!) The search bar at the top of the screen is a keyword search. If you'd rather search within a specific field (like title or tag) then you'll want to click on the word "search" at the top of the screen and select Work Search or Tag Search. To search users, use People Search. To search Bookmarks, use Bookmark Search. (If this is you, please tell me what the heck you mean by "search is bad" and how an app helped with this.)
I need to be able to sort stories by date posted/number of bookmarks/alphabetical/etc.
You can do this using the filters sidebar. Pick a tag you want to filter on (like a fandom, character, or relationship) and then click on the "Filters" button. The sidebar will pop out and you can sort and filter on a boggling array of specifics. A good filtering guide: https://www.tumblr.com/saurons-pr-department/718665516093472768/if-there-is-something-you-dont-want-to-see-in
I need to be able to mark stories to read later.
AO3 has this feature built in! If you have an account (which you should) there is a "Mark for Later" option on every work.
Edit: Thispersonishuman reminded me that History and Mark For Later can be disabled, so if you're not seeing the Mark for Later option, check your settings.
I need to be able to listen to stories using text-to-speech.
Microsoft Edge web browser has a built in text to speech function. Supposedly it works on both iOS and Android, but I have not personally tested that. iOS also has a native accessibility feature in settings for text to speech that will work on the Books app, so I assume Android has a similar functionality. A bunch of people in the reblogs have more in-depth Android recommendations here: https://www.tumblr.com/protect-namine/737957194510794752/seconding-voice-aloud-on-android-for-tts-my, https://www.tumblr.com/smallercommand/737884523093704704/i-use-voice-for-tts-on-android-its-got-some, and https://www.tumblr.com/doitninetimes/737869463749263360/for-text-to-speech-on-android-you-can-also-check
I need to have in-app notifications for updates/I can't ever find story updates in among the rest of my emails/checking my email stresses me out.
Set up a separate email address using a free service like gmail, and use that email address JUST for AO3. Then the only emails in that inbox will be your story updates. I use Apple's Mail application for all my inboxes, but it's very easy to use the Gmail app instead, and you could log in to JUST the ao3 email and set it to notify for every email.
(Also as a general PSA: don't use your work, school, or military email as your AO3 email. Just don't.)
I want statistics like how many hours I spent reading, how many words I read, what my most read tags were, stuff like that.
So we've finally hit something that isn't easy and that requires a hell of a lot of manual work. Short version: AO3 does not track this data because they don't want to. (Mostly due to privacy concerns.) The lack of this tracking is a feature, not a bug. You can crunch these numbers yourself, but it will take a hell of a lot more effort, and it's something I personally found is not worth the effort the couple of times I have tried to crunch those numbers. If you are willing to download your history to an actual computer (not a tablet or chromebook) using Calibre, you can get a rough idea of your most popular tags via their tag browser, but it won't play nice with typos synned to a Common Tag (Canonical Tag/filterable tag) like ao3 does. (If anyone has used an app that gave you stats on this, please let me know in reblogs/replies/via ask how that worked because I am very curious.)
I need an app because <other reason>.
The AO3 Unofficial Browser Tools FAQ might cover your use case: https://archiveofourown.org/faq/unofficial-browser-tools?language_id=en If not, give a shout and we'll see what other tumblr users suggest!
#ao3#archive of our own#ao3 app#ao3 tips#if you want official answers please use the contact forms on the ao3 or otw websites#standard disclaimer that while i am an otw volunteer i do not speak for the organization#my opinions are my own and do not represent anyone else
3K notes
·
View notes
Text
Link's search histories
no totk spoilers pls also sorry obscure link fans and TP fans
Side note: oui oui baguette
Skyward Sword

what are those things that stop toddlers from falling off the bed
bed guard
bed guard for teenagers
elderly bed guard
which number is the card number on a debit card
debit card diagram
what is the shortest height you can die from
is a remlit a type of rat
is my friend gay quiz
am I gay quiz
how to tell your gf that you got 37% on the am I gay quiz
how to tell your gf that you got 37% on the am I gay quiz reddit
chandelier repairman
how to tell if another girl likes you
cool loftwing tricks YouTube
YouTube loftwing tricks tutorial
unblocked .io games
can I get arrested for searching blocked websites at knights academy?
unblocked .io games
papas wingeria
can I sue someone for dropping me out of his aircraft if I don't buy anything
can loftwings open windows
Ocarina of Time/Majora's Mask

Ocarina of Time
can dreams predict the future
how to change the colour of your fairy
can I get kicked out of kokiri forest if I beat mido up
lost woods full map
ghoma repellant spray
Hyrule map free no ads
who is Ganondorf
what is a desert
I got sealed in a coma and aged 7 years what do I do quora
WHAT THE FUCK IS THAT IN THE WELL AT KAKARIKO VILLAGE
kakariko village well monster
how to kill phantom Ganon wikihow
how to prevent cuccos from ganging up on you
can cuccos make gangs
DIY hookshot
how to kill a big boar tutorial
Majora's Mask
termina
Hyrule termina map
where is termina
how to not get mugged again
cursed masks
how to stop being a deku scrub
is it legal for an adult to strangle a child
why does the moon have a face
can the moon eat food
what is the moons favourite food
how to make others remember things if they forget
fierce deity mask fandom wiki
Wind Waker
how do I make my grandmas soup without knowing the recipe
coolmathsgames
girlsgogames
how to make slime no glue no borax
what is a hell ma rock
hell mah rock
helmaroc
are pirates legal
cool pirate accessories
are trees meant to have faces
beedles shop ship online
why is my boat such an asshole
how to control direction of your boat YouTube tutorial
will jet engines kill a sentient boat
guinness world record for number of joy pendants
boat wifi
what pirate am I quiz
Triforce of Courage all locations no ads
forsaken fortress urban legends
how to stop a bird being aggressive
coveted definition
Breath of the Wild

can clothes have water damage
can I go on YouTube on my sheikah slate
how to mod a sheikah slate
I have a red flashing circle on my body what does that mean
simmered fruits recipe
what is the nutritional value of dubious food
value of rupees 100 years ago
why does inflation happen
why don't we just make more money
can hylian teeth handle a rock roast
dentist near me
gerudo makeup tutorial
fake ids
what is the alcohol percentage in a noble persuit
100 horse names
is chocolate a good name for a horse
mahjong
is riding a horse while drunk considered drunk driving
is it cannibalism if rito eat kfc
cucco repellant spray
is it legal to kill a man who likes a child zora
morality of murder
best way to hide from a guardian
wikihow how to kill an eldritch monster to save my gf
#the legend of zelda#tloz#link#botw#breath of the wild#botw link#ocarina of time#oot#ocarina of time link#skyward link#skyward sword#skyward sword link#mm#majoras mask#majoras mask link#tloz ww#ww#ww link#tloz wind waker#wind waker link#wind waker#pls no totk spoilers#loz botw#loz oot#loz breath of the wild#loz#loz link#loz ocarina of time#loz ww#loz wind waker
142 notes
·
View notes
Text


Please can someone help me with 3D???
I can't even move his arms or anything and tutorials aren't helping as I don't have their things in the same versions specifically so it's tiring. The Internet isn't the best to help and I've been torturing myself the whole day for a simple thing people on the internet explain weirdly for a beginner like me. I just need a clear explanation to make the character hit that pose:

I use the app blender and used some add-ons as source io, blender source tools, and rigify
But I want to use the skeleton that is already on this model and when I move a part, the skin DOESN'T move with the bone.
The pic on the right is the model on Filmmaker and the one on the right is on blender.

Hmmm what are you looking at? (He looks better than in the games wtf???)
Edit: (wait now I did it)

17 notes
·
View notes
Text
So I'm playing Tribe Nine: Initial thoughts

The latest release from Kazutaka Kodaka/Kotaru Uchikoshi's joint venture, TooKyo Games, is here on mobile devices and Steam. And it's a top-down RPG with retro sprites that transitions into an third-person action system during combat encounters. It also has 3D-rendered Komatsuzaki-style character portraits during dialogue/story segments.

My initial thoughts:
"XB" baseball isn't totally in the past after all. Despite the official website talking about how XB has been left behind in favor of "XG," you'll find yourself in the middle of an "XB" match after about an hour of play. And it's tutoralized in a way that makes it clear this will be some kind of recurring mechanic. But if you're expecting actual sports-style gameplay... don't. DON'T expect that.

Baseball matches are basically Danganronpa/Rain Code-style debates/conversations. You (as either pitcher or batter) and your opponent (in the opposite position) exchange dialogue before each pitch. The deciding moment comes when your opponent says something that appears as a massive wall of 3D-rendered text. To throw the best pitch or swing the bat well at the pitch, you have to pick a good response to the opponent's text by moving your "aim" around a grid to see different response. Mind you, during the first matchup, you'll only have ONE choice of response... but it's the tutorial. You'll have more options later on. And obviously, I LOVE to see this.

The third-person action battles are pretty intense. You really have to get good at determining when you can execute light or strong attacks (the latter taking longer to "wind up"), the latter being necessary to build up meters to execute stronger "ultimate" moves that will do the REAL damage. Enemies are relentless, requiring a lot of dodges and counters. It's well-designed, don't get me wrong. But for someone like me who isn't very experienced in playing action games on a touchscreen, it can feel pretty hard to juggle at times. So although I suppose this is impressive for a mobile game, but I don't personally love handling such intense action on mobile...
The story plays up the life-or-death stakes pretty early on. If you're worried you won't see characters dying in this thing, you can worry no longer; people are definitely going to die. We meet AND lose some members of our crew before "Chapter 1" even starts! But I guess we'll see how often that will occur.

Don't worry, though; you can still play as dead characters. You're not going to lose a character whose levels you built up just because the story declared them dead. This is explained by giving you access to "holographic" incarnations of the characters. They won't participate in story sequences anymore if they're dead, but they are still controllable on the RPG-style map or in third-person combat. This same excuse also allows you to have people in your party that aren't physically supposed to be present during that par of the story.
The Steam version seems to run like crap right now? I've considered transferring my save file over from my iOS version to my Steam Deck so I can use the button-based controls there. But upon booting up the Steam incarnation of the game, it quickly becomes clear that it's full of freezes and slowdown, so it might not be worth the hassle. Seems like it's not very well-optimized, which might explain why it's currently getting such negative reviews. However, they've already pushed out like four updates in the 48 hours since launch... so hopefully this is going to get cleared up quickly.
There's a gacha element, but it's not clear how much it matters. You can only play with a party of three characters at a time, and you're gifted three to use as soon as you can have a full party. You can use the "Enigma Entity" you collect throughout the game to "pull" for support cards you can equip to your lead trio, OR for all-new characaters. The former is appreciated since equipping these cards can grant different bonuses/benefits in combat... but the latter always unlock at Level 1 when you get them. So that's a major disincentive EVER using characters beyond the starting trio... unless we eventually are given some way to rapid-level them?
This game seems like it's set up to have a distinct ending to its main story. That wouldn't be a first for mobile RPGs, of course... as someone who played Fate/Grand Order and Magia Record before this, I've seen the main narratives conclude while the devs try to keep us engaged via side stories or by creating in-game sequel narratives. But time will tell whether we'll see some kind of extension on Tribe Nine. Perhaps more importantly, how much of the main narrative is currently even available... ?
12 notes
·
View notes
Note
Dear Mr. T. S. 416
I am writing, because I have been intruiged by your works on Dracflowology. Several months ago, you published your peer review of Estrogenesis Flow, conducting such praise as "The best representation of the Dracula Flow style."
So, as the foremost expert in the field, I would petition your assessment of Cherry Sepphie Flow, as your peer review could lead to great growth in the field and great analysis of the work itself. I anticipate your response with great excitement, and hopes for further advancement and discussion in the field of Dracflowology.
Respectful Regards, Ms. P. S. Heather
Ms. P. S. Heather,
Sincerest apologies for the delay, but the life of a fry cook is a busy one, and occasionally posting on Tumblr must take a backseat to playing Hitman. In fact, since I have already sent you my review, I will now begin to talk about Hitman. You can't stop me, it's my post.
A common problem in open world games is on-boarding: you've designed a cool, intricate map full of things to discover, now how do you communicate this to the player? Hitman's tools for this are, on their surface, pedestrian, and perhaps even a little clumsy. The most common tool in IO's toolkit are Mission Stories, linear sets of instructions to isolate your targets for easy Silent Assassin kills. And yet, the ways these are used effectively tutorialize the player, both on the options available to them, and their targets' schedules.
Hitman essentially has three tutorials: Guided Training against "Calvin Ritter", The Final Test against "Jasper Knight", and The Showstopper, against Viktor Novikov and Dalia Margolis. It is that last one that most effectively functions as a tutorial, because it doesn't tell you it's a tutorial. And yet, each Mission Story functions as a guide for how Mission Stories will work, running you through a different assassination method, and what to expect from them. Both targets will, at some point, choose to have a drink you've had an opportunity to tamper with, but each time the game gives you a different poison: emetic for Viktor, lethal for Dalia. And because it's no longer a tutorial, you're paying that much more attention to their behavior, and what the different types of poison do and how you might want to use them in the future. It goes this way for other kills in Paris, too: dropping the light fixture on Viktor Novikov, securing a private audience with Dahlia Margolis by bidding in the auction, leading Viktor to the pavilion - if Guided Training is the game saying "here's how to play," and The Final Test is the game saying "here's how story missions work," then The Showstopper is the game saying "check out all this cool shit you can do," and you take that forwards. The game doesn't have to prompt you, in the future, to drop heavy objects on your targets, or push them from high drops, because it's already taught you that gravity is your friend, and taught you to seek out those opportunities. The game doesn't need to give you a waypoint to the nearest poison, because it's taught you that rat poison is in basements, and it isolates whoever consumes it.
But knowing your tools is only half the battle. It doesn't help a thing to know to poison a target's drink if you don't know what drink is theirs, and it doesn't help to know to drop heavy objects on your target if you don't know which heavy objects they'll walk under. This is the other helpful part of Mission Stories: familiarity with your target and their schedule. Each Mission Story will take you through one part of your target's schedule, and this is a part that will happen without 47's intervention. Not only that, it will give you a chance to survey a target's habitat, giving you a good look at any opportunities for mischief that may arise. This doesn't help you on a first playthrough, but the Level Mastery system gives you a strong gameplay incentive to return at least once, and the challenge board offers a tempting treat for completionists.
This is why Hitman 3's levels have felt largely empty to me: the standard for that game is three mission stories, while the standard for prior games was at least three per target, outside of the likes of Colorado. This apparent lack of business makes the likes of Marcus Stuyvesant and Imogen Royce feel less like parts of the world than even ostensibly reclusive targets like Janus and Silvio Caruso, and makes these gorgeous levels feel that much less alive.
Anyways, that's part of why Hitman is such a time sink. Sincerely, Mr. T. S. 416
P.S. - Though my role as a scholar obliged me to speak candidly of its flaws, Cherry Sepphie Flow was a real treat made by a rare genius. I look forward to hearing your next bars.
5 notes
·
View notes
Text
Celeste Map Reviews #30
This review is a bit shorter I think? But not really. I'm goung through a whole ass collab too after all. Let's meet our lucky THREE!
FIRST! - Difficulty Spike by Donker19 and Moladan! - Once meant for a collab that ceased to be, this map has released as a standalone, brought to us by two of modded's best, and with music by iosun!!! As the name may imply, this map is chock full of spikes! The refills are sharp, the floor, ceiling, blocks, stylegrounds; it's all spikes and it always have been! The gameplay is very dashful, featuring little tech Instead, the mosaic garden style of refills are used in conjunction with the vast amount of spiky gates to create semi-precise dashing sequences. I loved this gameplay style; it felt very fast paced without any speed tech and that is helped by the wonderful soundtrack composed by the awesome io herself! I was jamming out while navigating this spikefest and i enjoyed every minute! It's only about expert or so, so give it a go! Overall, no actual final room syndrome ZERO OUTTA TEN, 9.8/10
SECOND! - Winter Collab 3 by, well I'll let you know! - This supersurprise collab was put together in days! A quick meme it must be then right? WRONG! But not because of a gas leak, but because host Sapphire_Xer0 is insane and still managed to make a well decorated lobby and heartside for this thing! Anyway, I think I will do a rapid 7-review of this collab since it's small, here I go!!
UNO! - aon's Ultra by aonkeeper4! - Very fun, liked the 6a vibe. 9.6/10
DOS! - aon's Ultra R-side: Rambunctious Reverse Remix by 4repeeknoa! - ebiv a6 eht dekil ,nuf yreV, 01\6.9
TRES! - Ultras Can Go Back And Forth by aonkeeper4 and 4repeeknoa! - revese chain ultra wounce is a fun jaunty move. This map was cool too! 9.3/10
CUATRO! - The Heaven Below You by andytampan! - Keyhub!!! The custom bubbles were fun to see, 9.2/10.
CINCO! - Temple Tantrum by Daorex! - Fun, creative, though very routeful theo move block gameplay! Took me the longest of the seven! 9.1/10
SIX IN SPANISH! - The Mirror Inside by Daorex and andytampan! - Very cool fusion of the two ideas, thoroughly enjoyed it! Quite cheesy tho. 9.3/10
SEVEN IN SPANISH! - The Threeside by Sapphire_Xer0! - The 2 flags were huge bangers, the deco was sublime and the song choice was great too! The f1 wounce is a bit sideeye tho! 9.7/10.
What a cool (ha) collab! Go check it out! Overall, wait there's a FOURTH wollab in the works??, 10.2/10
THIRD! - Duetside by Crispybag! - This peak-filled journey will bring you on a trip down memory-lane, exploring not only the mapping history of creator Crispybag, but also the maps birthday recipient Donker19! A fusion style heartside of 2 epic mappers with cool looking deco? I expected a lot coming into this and crispy delivered it in spades! The map is impossibly beautiful; i love the overarching blue nature theme throughou and the stylegrounds and atmosphere are perfect. The music track is wonderful at conveying the celebration of maps old and new, and has a cool progression too! But of course the main focus is the fusion gameplay! There are 9 flags with varying amounts of tutorial rooms. Here's the thing, I never once really ran into anything I could say was amiss. EVERY FLAG was peak fiction gameplay, even the longer ones. If this map was in a try not to be fun challenge it is getting disqualified completely. It was so fucking GOOD! I've gotta play more crispy maps cuz I definitely recognized way more of the donker ones. Don't be surprised if cmr 32 is a crispybag special! (Yes cmr 31 is being reserved for something else). There's also a berry but I ain't routing allat sorry :3 But yeah yeah this map is perfect go play it. Overall, PLAY IT. 13.1/10
That'll do i think
4 notes
·
View notes
Text
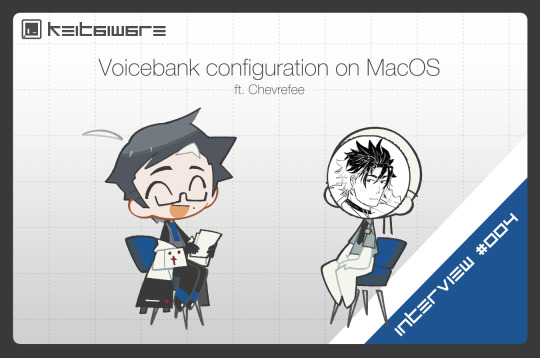
📁 Interview 004: "Voicebank configuration on MacOS." ft. chevrefee
Today's topic is something we've covered on this blog before in my voicebank configuration tutorial series! In my tutorial series we go over the basics of configuring your first CV-VV voicebank on MacOS. After practicing the fundamentals, you can explore other configuration types for UTAU. Our guest with us today is Chevrefee who specializes in C+V English voice banks! There are many ways to record an English voicebank. This format is more compact than the standard VCCV English configuration, which is daunting for most users. If you are interested in configuring an English UTAU, Chevrefee has a detailed tutorial on their C+V method, I will link that below if you would like to read more about it.
Q. To start off this interview, please introduce yourself and your work!
Chev: With pleasure, I'm Chevrefee, an animator and creator for UTAUs Ceta and Veria! People might know me best for my C+V English voicebanks and tutorial, since I've been dedicating a lot of time to promote the format.
Your materials on C+V English are incredible! I have watched through your tutorial on it and would love to make a voicebank some day! In today's interview, we will be discussing this subject more.
Q. For our first question, how long have you been doing UTAU for?
Chev: Thank you for your enthusiasm!! I've only been doing UTAU for only a little more than a year, but I have been using other vocal synthesizers for 2 years at this point!
Ah really? That's really impressive as you know so much already!! UTAU is a very expansive format as its very customizable.
Q. What other synthesizers do you have experience in?
Chev: I mostly used Synthesizer V prior to using UTAU! I loved creating designs for the mascot-less voicebanks and I realized that I loved that customizable aspect of it, so moving on to creating UTAUs was somewhat expected.
Ah! I went through your website and was looking through your SynthesizerV designs, I love them so much!! It's nice having a face to attach to the character's voice, my favorite out of them would be Ryo as I love characters with glasses.
Q. Returning UTAU, before we discuss anything on voicebank creation, I am curious to hear what your workflow on MacOS is like! I want to share the process with the audience so its not from my own experience.
Chev: I exclusively use OpenUTAU, RecStar and VLabeler for my UTAU works! I record the samples on my iOS Recstar and a USB microphone, oto in VLabeler and tune in OpenUTAU ( sometimes doing both at the same time ), and then I move on to Adobe Audition to mix and bring it all together! Seems like an odd choice for a DAW (since its barely one) but I mainly use Audition for its compatibility with other Adobe software, since I also create my MVs there! I also use Audition to clean my samples since there's a batch processing option.
Its so cool hearing someone take advantage of UTAU mainly on MacOS that's not me! I'm pretty much the same except I do most of my OTOing inside of UTAU-Synth! Can't break the habit as I've been working in there for 7 years now. OpenUTAU, VLabeler, and Recstar changed everything on MacOS when they released. We finally had proper applications for bank creation. So I feel like as someone on MacOS you got into UTAU in the golden era! (haha) I've got a few friends who use Adobe Audition, and I've used it once myself! Couldn't exactly navigate it well, but my friends who do use it make it look like a piece of cake. There are no batch export options for Garageband, and for UTAU, batch exporting is a very crucial feature.
Q. For our next question in bank creation, what are your recommendations for beginners in terms of recording and hardware?
Chev: I feel the same way! I feel really lucky that I got into UTAU when its at its most accessible for MacOS users, especially since I upgraded to a Mac Silicon device and lost access to Windows Bootcamp. For beginners I would recommend familiarizing using RecStar! I would suggest using the iOS or Android version of it especially if the user is recording in their bedroom space. I found that using a phone helps manage the space better when I stuff myself into a closet to record ( classic UTAU experience ). I think users should prioritize their comfort first when they record for a first time - Just relax, drink enough water before and during recording, and record something that's within comfortable talking or singing range. I would recommend recording a Japanese CV just to learn the ropes of UTAU recording! For hardware, I recommend podcast mics for a very budget friendly option! I use a Maono AU-PM360TR Condenser Mic to record all my voicebanks. I found that the usual recommended mics for UTAU ( namely the Blue Yeti ) can be way out of budget for a lot of people, especially in Southeast Asia (where I come from). I think a budget podcast mic is very much usable and can stand up against other more expensive microphones! I would also suggest having a pop filter to tame all those little nasty plosives. ( I DIY-ed mine with a sock and hangers! ) If users have access to a recording studio (perhaps a bookable mini studio from their college/university) I would also highly recommend using those resources as they usually have better equipment that's free to use.
Its really unfortunate the loss of features with every update. In my previous interview we discussed alternatives to Windows Bootcamp for MacOS Silicon devices! I would record on Recstar using my iPad… I will take note of this for myself! For beginner configuration, I made a complete tutorial series for getting started with your first JP CV-VV voicebank. That will be linked here.
Voicebank Configuration Series. . .
https://keitaiware.com/post/763148617255092224/macos-utau-voicebank-configuration-series
What my tutorials did not have were thorough hardware recommendations. I do not own a studio mic and record my voicebanks on a pair of Apple auxiliary earbuds. So these were very good recommendations! Outside of the UTAU scene, I have heard many topics on the Blue Yeti being difficult for beginners to use as well. I had asked my friend who is fascinated with audio engineering about mics before, and has recommended XLR mics. So I did mention those, but you would need an external audio interface to route them to your computer, which means, you cannot use them with Recstar. So the mic recommendation you gave is very appreciated! DIY pop filter sounds like a nice way to save money! Socks and a wire coat hanger would do very nicely, anything to absorb the sound before the mic. I do believe I mentioned renting a recording space too! If you live near a rentable recording space I highly recommend that as well.
Q. For our next question, how did you discover C+V and go about making your C+V English tutorial?
Chev: Earbuds!! I wasn't aware of the Blue Yeti's difficulty especially with the external audio interface. Glad I avoided buying that for my first mic… The way I discovered C+V is honestly somewhat funny - I actually discovered it in an oto commission list! At that time I was planning my second voicebank, Veria, and I looked around to see who I could commission for her oto. My frequent oto-er and current collaborator for my C+V English projects, Biggity Boy, had C+V English listed as one of the available formats he could oto. I tried to find any sort of info on the format but all I could find was an entry in the UTAU wiki that basically said "This is a joke format." with no reclist or anything. So I was like 'well that's kind of interesting.' The problem with English UTAU voicebanks to me was always the immense workload that comes with creating it, and I took a wild guess and expected C+V English to be the easiest way to record and English voicebank. I asked Biggity for the reclist and oto, and it all started from there! It's hard to imagine that all of my work wouldn't happen if I didn't take a look at Biggity's commissions list. Veria's beta tests were seen by a lot more people than I expected, and I held a poll asking if people wanted a tutorial for creating C+V English voicebanks. The poll ended with an overwhelming positive response, so I sought out to create the tutorial! An extensive tutorial was very much needed apart from the usual UTAU recording and otoing tutorial since prior to Cadlaxa's involvement with the dedicated phonemizer, C+V English relied on the EN ARPA phonemizer, and users needed to jump through extra optimization to use the voicebanks. 3 Months and tons of contributors and beta testers later, the tutorial has since been regularly updated with user feedback, and a refined tutorial via the upcoming website is being worked on! None of this could've happened without the hard work of contributors.
I remember looking into C+V after discovering your work, I do believe the wiki said that at the time of me reading it as well! Since your work on C+V English, I believe the reputation of the configuration has evolved completely since Veria's release. The Shelter cover (Link), showcasing Veria's voice left a long lasting impression on me! When it comes to resources in the UTAU community, they always catch my eye. This is souly because at the time when I started 7 years ago, there were no resources for MacOS and it lead to me frequenting the UTAforum. I started getting back into UTAU, with two other friends about two years ago? But one of those friends was a Mac user as well, and he was struggling to find resources. That's what lead up to me launching this blog! Your tutorials were very well put together, as I have not dabbled into video format, but aside from being insightful it was very fun to watch! Its absolutely brilliant. This being said, I hope more people are inspired to share what the create and know by seeing creatives like yourself!
Chev: I'm very aware of your work!! The Keitaiware blog is such a vital resource for MacOS users, especially for UTAU-Synth users! Just yesterday I sent an entry from your blog to someone trying to troubleshoot a problem with UTAU-Synth since I wasn't well versed at all with it. Truly it is my go-to resource when I need to troubleshoot the software. And thank you!! The video is more of a way to get more eyes on the written tutorial than anything, but I'm glad people enjoyed my editing :D
Q. To finish up this interview, do you have any future plans with your vocal synth work?
Chev: I have a lot in my cards at the moment with vocal synth work, but I'm currently finishing up work on a voicebank I recorded a year ago when I got an illness that made my voice drop into a Tenor male range!! Here's a preview of his work in progress artwork and voice.
I'm also heavily involved with IDN100%, a group that specializes in Indonesian UTAU synthesis, and we are working hard for our 2025 release!!
How exciting!! The project is looking super professional so far, I am rooting for the team to meet their deadlines!! I haven't seen many UTAUs with a knight motif, the armor is very well drawn! If you don't mind sharing some details, what is his name?
Chev: I'm thinking of sticking with Nisegane Julian, (偽金 ジュリアン ) - Nisegane being fake or fools gold, since I'm planning on this character to like flaunting and be full of himself while being a coward. I'm so glad you heard of IDN100%, thank you for your support!
Nisegane Julian is such a clever name.. fools gold to reflect his vain personality, I love that! I can't wait to see your current projects come to fruition Chev, these are very exciting! That concludes our interview for today, if you would like to see more of Chevrefee's work, C+V English tutorials, and are interested in the IDN100% project. All materials will be linked below. Thank you for sharing your time with the KEITAIWARE project today!
Bsky: https://bsky.app/profile/chevrefee.bsky.social Chevrefee’s Resources: https://chevrefee.wordpress.com/ C+V English Tutorial: https://youtube.com/watch?v=jeDmqo0wwkU&ab_channel=chevrefee IDN 100%: https://twitter.com/UTAU_IDN100
2 notes
·
View notes
Text
Best Platforms to Trade for Forex in 2025
Forex trading continues to captivate traders worldwide, offering a dynamic and lucrative avenue for financial growth. In 2025, identifying the best platforms to trade for forex has become more crucial than ever, as technology and market demands evolve. From user-friendly interfaces to advanced tools for technical analysis, these platforms are tailored to meet the needs of both novice and seasoned traders. Whether you're diving into major currency pairs, exploring exotic options, or utilizing automated trading strategies, choosing the right platform is the foundation for success.
Core Features of Top Forex Trading Platforms
Forex trading platforms in 2025 must combine advanced functionality with accessibility to meet diverse trader needs. The following core features highlight what distinguishes the best platforms.
User-Friendly Interface
A user-friendly interface enhances efficiency and reduces errors, especially for beginners. Key features include:
Intuitive navigation for rapid trade execution.
Customizable layouts to match user preferences.
Comprehensive tutorials for ease of onboarding.
Efficient design with minimal lag, even during high volatility.
Example Platforms: MetaTrader 4 (MT4) and MetaTrader 5 (MT5) are renowned for streamlined interfaces designed to accommodate traders at all levels.
Comprehensive Charting Tools
Forex trading requires precision, and advanced charting tools are critical for analysis. The following charting tools enhance strategy formulation:
Drawing Tools: Support for trendlines and channels.
Indicators: Integration of MACD, RSI, Bollinger Bands, and Fibonacci Retracement.
Timeframes: Options to analyze data across multiple periods.
Custom Indicators: Flexibility to program and integrate personal strategies.
Automation and Algorithmic Trading
Automation is indispensable for modern forex trading. Platforms like cTrader and NinjaTrader excel with features like:
Pre-built Strategies: Ready-to-use templates for scalping and trend following.
Custom Algorithms: Integration with programming languages such as C# and Python.
Backtesting: Evaluate strategies with historical data.
Integration with APIs: Seamless syncing with advanced trading bots.
Mobile Accessibility

Forex traders increasingly require the flexibility of trading on-the-go. Mobile accessibility ensures:
Synchronization: Real-time updates between desktop and mobile devices.
Push Notifications: Alerts for market changes and trade execution.
Compact Design: Optimized for smaller screens without losing functionality.
App Examples: MT4 and MT5 apps, offering full trading capabilities on iOS and Android.
Key Takeaway: Platforms combining a robust desktop experience with seamless mobile integration empower traders with unmatched convenience.
The best forex trading platforms for 2025 excel in usability, advanced charting, automation, and mobile functionality. By integrating these features, platforms like MT5, cTrader, and TradingView offer versatile solutions for traders of all expertise levels.
Trading Instruments Supported by Leading Platforms
The diversity of trading instruments available on forex platforms is crucial for building effective strategies and achieving long-term trading success. This section explores the breadth and advantages of various trading instruments.
1. Major Currency Pairs
Major currency pairs, such as EUR/USD, USD/JPY, and GBP/USD, dominate forex markets due to their high liquidity and tighter spreads. Leading platforms like MetaTrader 5 and TradingView offer advanced tools for analyzing these pairs, enabling traders to capitalize on predictable movements.
Key Features:
High liquidity ensures minimal price fluctuations during trades.
Access to real-time market data for precise decision-making.
Supported by most trading strategies, including scalping and swing trading.
These pairs are ideal for traders seeking consistent opportunities in stable market conditions.
2. Exotic Pairs
Exotic pairs combine major currencies with currencies from emerging markets, such as USD/TRY or EUR/SEK. While they offer higher potential rewards, they also come with increased volatility and wider spreads.
Risks and Rewards:
Volatility: Significant price movements create potential for larger profits.
Higher Spreads: Costs can be prohibitive for short-term trading strategies.
Economic Dependence: Price movements often correlate with specific geopolitical or economic conditions.
Platforms like cTrader often feature analytical tools tailored for exotic pair trading, helping traders manage the associated risks.
3. CFDs and Futures
Contracts for Difference (CFDs) and futures are derivatives enabling traders to speculate on forex price movements without owning the underlying assets. Futures contracts are often traded on platforms like NinjaTrader, while CFDs are supported on MetaTrader platforms.
CFDs vs. Futures in Forex Trading
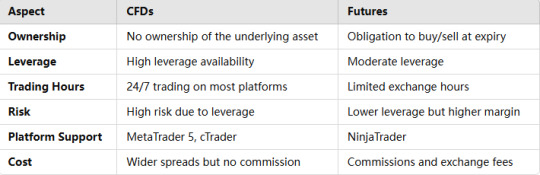
Wider spreads but no commissionCommissions and exchange fees
CFDs and futures cater to traders seeking flexibility and hedging opportunities in volatile markets.
4. Spot Forex vs. Forward Contracts
Spot forex trades settle instantly at prevailing market rates, making them ideal for day traders. Forward contracts, however, lock in future exchange rates and are often used by businesses to hedge against currency fluctuations.
Spot Forex:
Instant execution for quick trades.
Supported by platforms like TradingView, which offers robust charting tools.
Forward Contracts:
Customizable settlement dates.
Reduced risk of unfavorable exchange rate changes.
Forward contracts are frequently utilized for long-term strategies requiring stability.
5. Options Trading in Forex
Forex options provide traders the right, but not the obligation, to buy or sell currencies at a predetermined price. Options trading is supported on platforms like MetaTrader 5, offering flexibility for speculative and hedging strategies.
Advantages:
Defined risk due to limited loss potential.
Compatibility with advanced trading strategies like straddles and strangles.
Access to multiple expiration dates for tailored strategies.
Options trading is an excellent choice for traders seeking diversification and controlled risk in uncertain markets.

Market Indicators for Effective Forex Trading Forex trading in 2025 requires mastery of market indicators for successful trades. Platforms integrating technical tools like RSI, Bollinger Bands, and Fibonacci retracements provide invaluable support for analyzing currency pairs and spotting trends.
1: Moving Averages and RSI
Moving averages and RSI (Relative Strength Index) are staples in forex trading for spotting trends and identifying overbought or oversold market conditions. Here's how they work:
Moving Averages:
Smooth out price data for better trend analysis.
Common types: Simple Moving Average (SMA) and Exponential Moving Average (EMA).
Platforms like MetaTrader 5 (MT5) allow customizable moving average periods for traders’ needs.
RSI:
Measures the speed and change of price movements.
Values above 70 indicate overbought conditions, while below 30 signals oversold.
Both indicators are excellent for detecting market reversals and consolidations, making them essential for scalping and swing trading strategies.
2: Bollinger Bands and Fibonacci Retracements
Bollinger Bands and Fibonacci retracements are complementary tools for determining price ranges and potential reversals.
Bollinger Bands:
Comprised of a central moving average and two bands (standard deviations).
Highlights volatility and identifies breakout opportunities in exotic pairs and minor pairs.
Fibonacci Retracements:
Based on key levels derived from the Fibonacci sequence (23.6%, 38.2%, 61.8%, etc.).
Used to forecast retracement zones for entry and exit points.

Platforms like TradingView provide advanced integration of these tools for technical analysis.
3: Pivot Points and Volume Analysis
Pivot points and volume analysis serve as complementary methods for intraday traders.
Pivot Points:
Calculate potential support and resistance levels based on previous trading sessions.
Widely used in day trading to set intraday targets.
Volume Analysis:
Measures market activity to validate price movements.
Higher volume during breakouts confirms trends.
Together, these indicators help traders plan risk-reward ratios effectively and refine strategies. Platforms offering integrated market indicators like RSI, Fibonacci retracements, and volume analysis provide forex traders with precise insights for decision-making. Combining these tools with strategic risk management and discipline ensures a competitive edge in forex trading for 2025.
Risk Management Tools in Forex Platforms
Risk management is the cornerstone of sustainable forex trading. Platforms offering advanced tools like Stop-Loss Orders and Position Sizing empower traders to mitigate risks while optimizing potential gains.
1. Stop-Loss Orders
Stop-loss orders safeguard capital by automatically closing trades at pre-set levels. Key benefits include:
Capital Protection: Prevents losses from spiraling during volatile markets.
Emotional Discipline: Reduces impulsive decisions by automating exit points.
Wide Platform Integration: Available on MetaTrader 4, TradingView, and cTrader for seamless trading execution.
2. Take-Profit Orders
Take-profit orders lock in profits when the market reaches a target price. Steps for setting take-profit orders effectively:
Analyze Moving Averages and RSI to determine target levels.
Input the price level in trading platforms like NinjaTrader or MT5.
Monitor trade performance and adjust as needed.
3. Position Sizing Calculators
Accurate position sizing minimizes overexposure to any single trade. Here’s how these calculators work:
Calculate lot sizes based on account balance, risk percentage, and stop-loss distance.
Adjust trade sizes to align with Risk-Reward Ratios.
Enable traders to maintain diversified exposure.
4. Risk-Reward Ratio Analysis
Risk-reward ratios evaluate trade viability by comparing potential profits to losses. Tips for effective use:
Aim for a minimum ratio of 1:2 or higher.
Utilize tools like Bollinger Bands to estimate price movements.
Integrated calculators on platforms like MT4 simplify these computations.
5. Diversification Tools
Diversification spreads risk across multiple trading instruments. Features on platforms include:
Multi-asset trading options: CFDs, Futures, and Currency Pairs.
Portfolio analysis tools to track exposure by instrument type.
Real-time updates for Exotic Pairs and niche markets.
6. Backtesting Strategies
Backtesting allows traders to evaluate strategies using historical data. Its advantages are:
Testing risk management techniques like Stop-Loss Orders without live market risk.
Platforms such as TradingView support customizable backtesting scripts.
Insights into strategy weaknesses improve long-term profitability.
With advanced tools for Stop-Loss Orders, Position Sizing, and Backtesting, modern forex trading platforms empower traders to proactively manage risks. Leveraging these features leads to more disciplined and effective trading.
Psychological and Strategic Insights for Forex Trading
Mastering trading psychology is key to navigating the complexities of forex. Platforms enhance this through features that promote discipline, performance tracking, and trader confidence, empowering strategic growth and mitigating psychological pitfalls.
Building Discipline Through Alerts
Platforms offering robust alert systems, like MetaTrader 5, help instill discipline by:
Preventing Overtrading: Custom alerts signal market entry points, limiting impulsive trades.
Time Management: Reminders help traders stick to predefined schedules.
Market Trend Notifications: Alerts for moving averages or Relative Strength Index (RSI) changes enable focused decisions.
Tracking Performance Metrics
Trading platforms integrate tools that help traders evaluate performance, including:
Win/Loss Ratio Analysis: Shows trade success rates.
Equity Curve Monitoring: Visualizes account performance trends.
Journal Features: Logs trade entries and exits for review.
Customizable Dashboards
Platforms like TradingView allow traders to configure dashboards by:
Adding favorite currency pairs and indicators like MACD or Bollinger Bands.
Creating multi-screen setups to monitor multiple trades.
Integrating news feeds to stay updated with central bank announcements.
Educational Resources
The inclusion of in-platform education fosters confidence through:
Interactive Tutorials: Step-by-step videos on strategies like swing trading or technical analysis.
Webinars and Live Sessions: Experts discuss trading instruments like CFDs and options.
AI-based Learning Modules: Adaptive lessons based on trader performance.
By integrating tools for discipline, self-awareness, and strategy refinement, trading platforms empower users to overcome psychological challenges, enhance risk management, and make data-driven decisions for long-term success.
Conclusion
Forex trading in 2025 offers exciting opportunities, but success begins with choosing the right platform. As highlighted throughout this content pillar, top trading platforms like MetaTrader 4 (MT4), MetaTrader 5 (MT5), cTrader, and TradingView stand out for their robust features, diverse trading instruments, and advanced integrations. These platforms empower traders to navigate the complexities of the forex market through tools such as technical indicators like Moving Averages and RSI, risk management solutions like stop-loss orders and position sizing calculators, and integrations with vital economic indicators such as GDP, inflation, and central bank announcements.
The best forex trading platforms not only provide access to currency pairs, CFDs, and other instruments but also integrate cutting-edge charting tools, educational resources, and analytics to build confidence and discipline—critical factors in mastering the psychological demands of trading.
By understanding the interplay between platform features, market tools, and strategy development, traders can optimize their approach to trading forex in 2025. Whether you're focused on scalping, day trading, or long-term swing trading, the right platform will be your foundation for executing trades effectively, managing risk, and staying informed in a fast-paced market.
Take the insights from this guide to make an informed decision, choosing a platform that aligns with your trading goals and enhances your ability to trade forex with precision and confidence. With the right tools and strategies in hand, you're poised to navigate the evolving forex market and unlock its full potential in 2025 and beyond.
2 notes
·
View notes
Text
How I make my HDR edits
So someone asked me how I edit my edits of my photos to give them that detailed look to them. I decided to give a little tutorial on it I do it. Here’s how I edit my photos from the original screenshot to the bright and vibrant edit.
More under the cut
Which app do I use?
First off, let me clarify that this tutorial is specific to the app called ‘Snapseed’. It can be found on both IOS and Android. The app’s icon looks like this:

Just a heads up, Snapseed will only export on the .jpg format. If you import a .png file it will be turned into a .jpg file instead.
Note:
This editing tutorial is mainly geared towards Love Nikki screenshots.
Tutorial
Okay, so assuming you’ve got Snapseed downloaded, opened, and have loaded in the screenshot you want to edit, here’s how I do it.
First, go the tools section and select HDR Scape.
This filter will give a more detailed look to the screenshot. Note how there are different options for the filter - Nature, People, Fine, and Strong, along with a slider showing the strength of the filter.
The default settings are Nature with the filter strength set to 50. I find that the default tends to work just fine for what I go for, but on rare occasions, I may use the People option instead of Nature. I will usually increase the filter strength to 100 if I want that extra detailed look.
To change the filter strength, slide your finger to the left to decrease it and to the right to increase it. Play around with the filter strength slider until you’re satisfied with the results.
I don’t use the Fine or Strong options as they don’t usually give off the results I want.

Once you’ve found the settings you like for the HDR Scape filter, press the checkmark at the bottom-right corner of the screen to conform the changes.
Next, go to the tools tab again and go to Tune Image. Press the icon showing the three sliders and go down to Shadows.
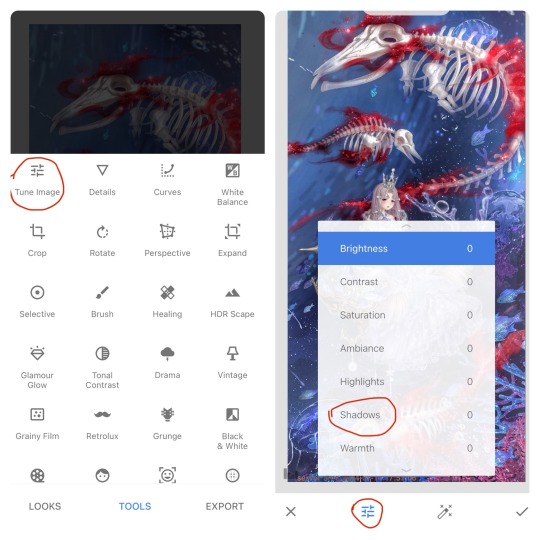
I use this to bring out the shadows a little bit. Typically, I slide the slider to around -30 or -25 for most of my edits, however, it the image has a darker elements in either the character or background, I will keep the slider at -15 to -10 instead to make sure the shadows don’t make the image too dark.
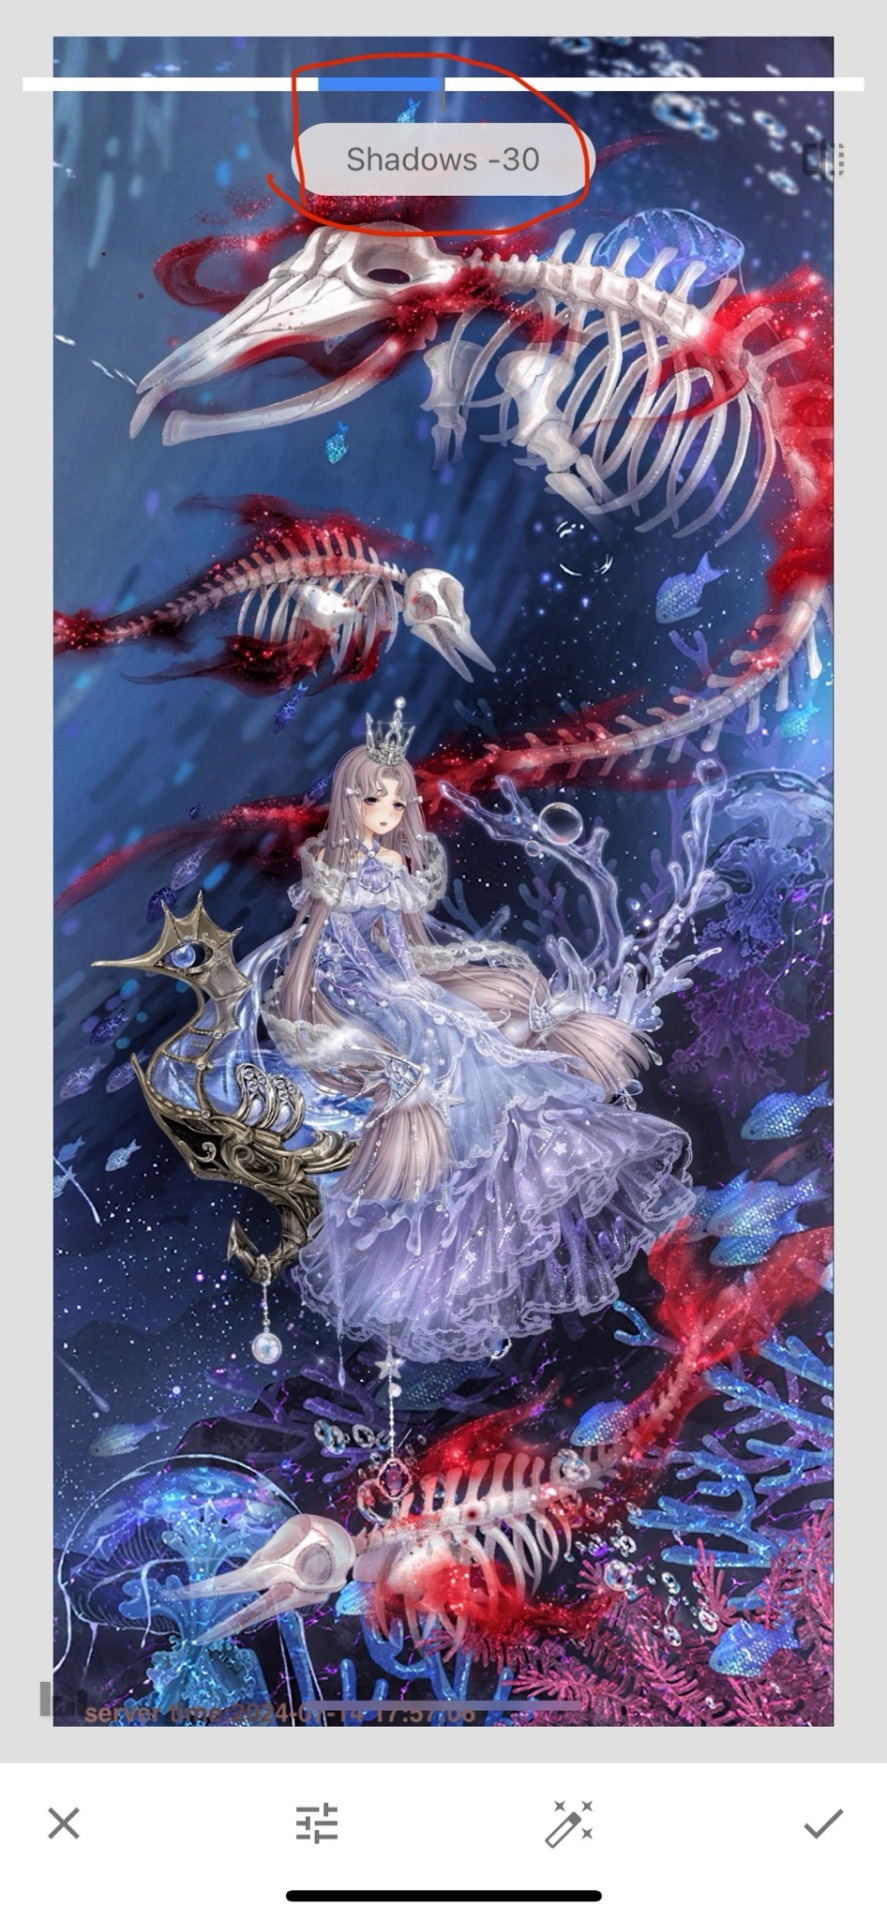
Once you’ve found what looks best to you, press the checkmark to confirm the filter.
Finally, navigate to the Looks section and find the ‘pop’ setting. I do this to give my edit a little bit of extra vibrance to it. This isn’t something that has a slider, it’s stuck at what it is.
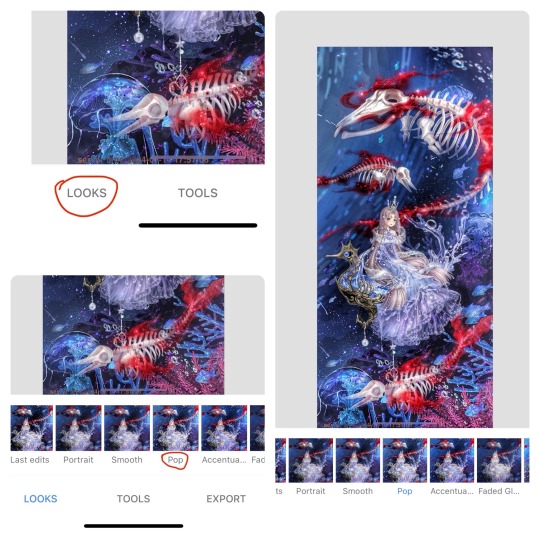
If you’re happy with the results, press the checkmark and confirm. This can be either a hot or a miss depending on your preferences.
All that’s left to do it export the image and you’re done!
Bonus:
If you’re looking to edit pictures of real life things, you can absolutely use this tutorial, but you may want to lower filter strengths for the HDR Scape and the Tune Image (Shadows) filters as the settings I use for Love Nikki screenshots look too intense for photos of real life stuff. The filter strength you do use will highly depend on the image in question. Here’s a brief example to what setting I’d use on a picture of a real thing. (I got the photo off Pinterest, so I have no idea who the real creator of said photo is.)
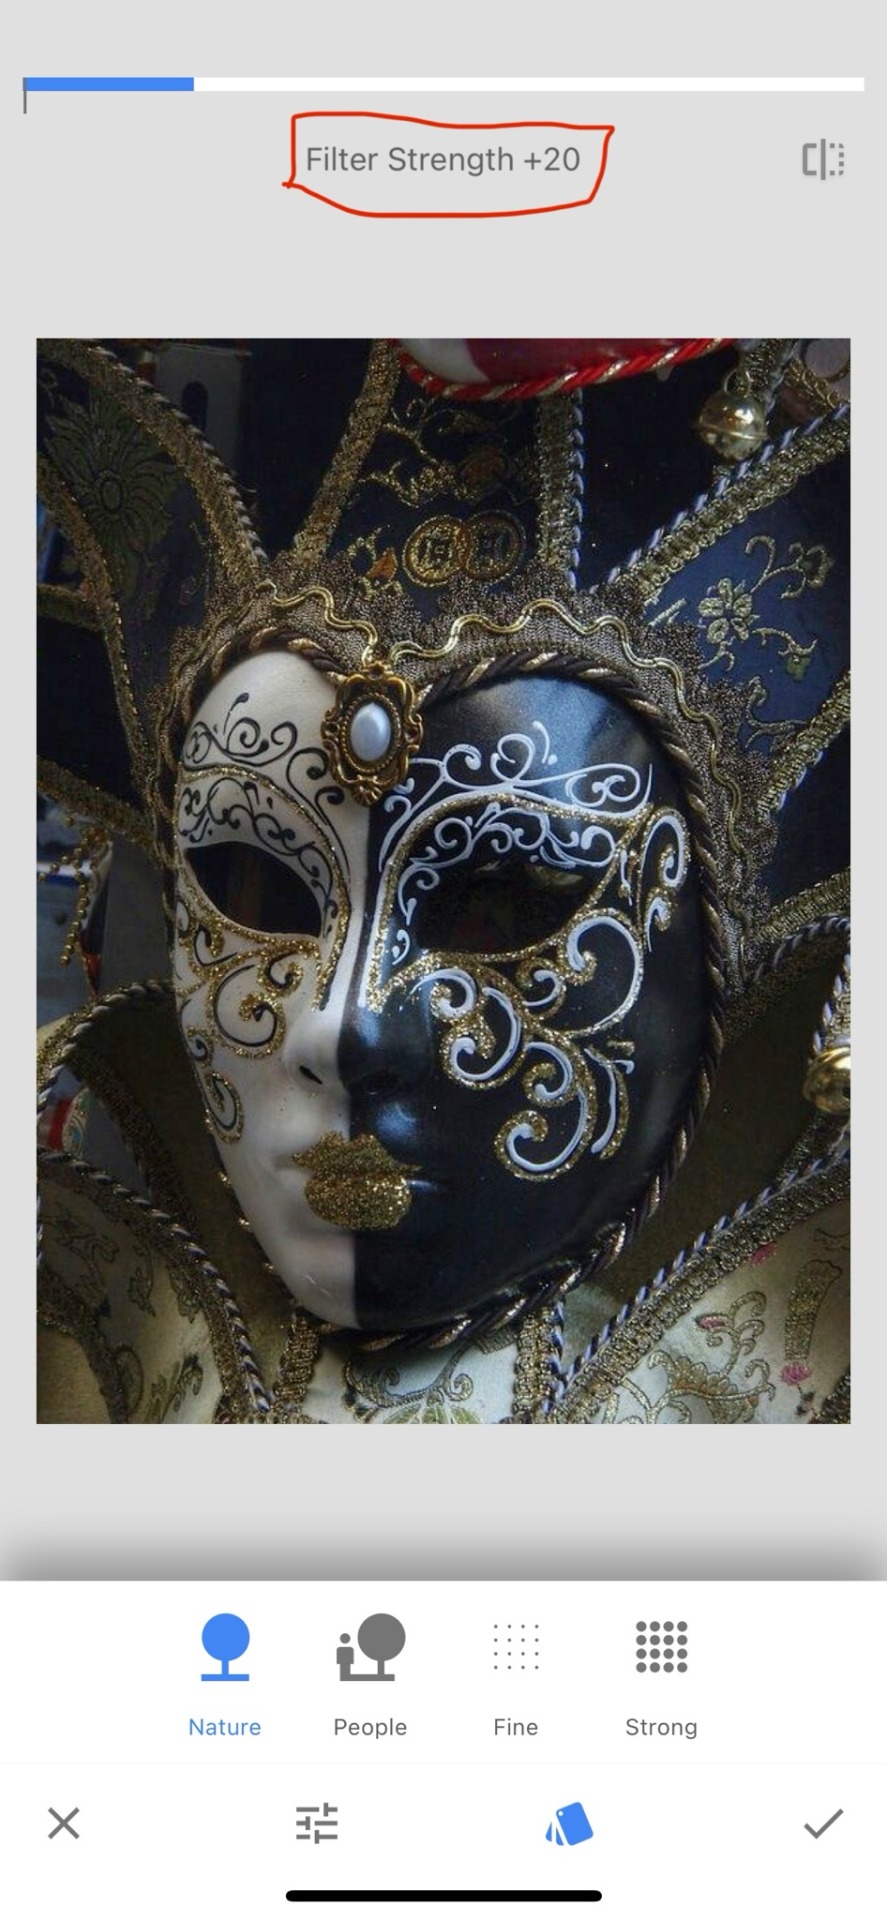
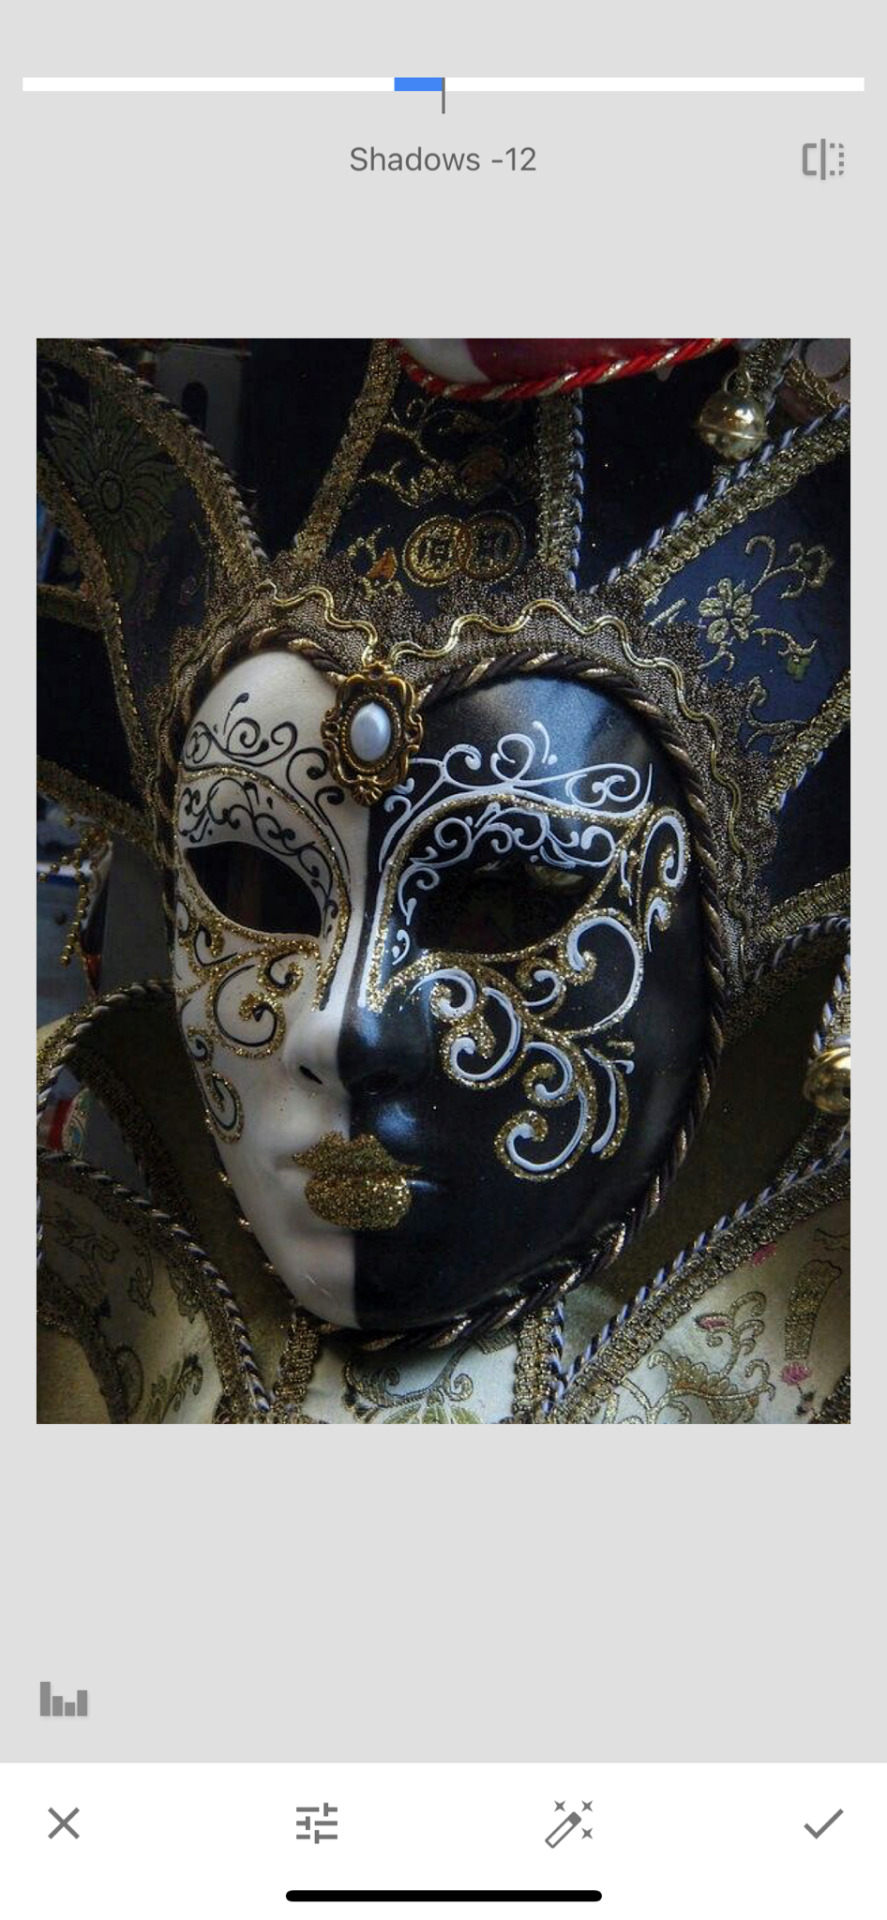

4 notes
·
View notes
Text
7 Reasons MovieBox is the Best Free App for Watching Movies & Series
If you're looking for a free, easy-to-use app that lets you watch a variety of movies and videos without paying a dime, MovieBox is the perfect choice! It’s filled with amazing features that make watching videos fun and simple. From the latest movies and TV shows to music videos and educational content, MovieBox has something for everyone—all for free! Here’s why it’s the go-to app for all your entertainment needs:
1. An Interface You’ll Love
MovieBox has a sleek and simple design that anyone can navigate. With clear categories and a reliable search bar, finding what you want is effortless. The app also suggests trending movies and popular content, so you’re never out of options.
2. Free, Yet Packed with Features
Unlike other movie Apps, which requires a subscription, MovieBox is completely free with no hidden fees. It still delivers amazing features like:
Playback Speed Controls: Adjust the speed to suit your mood—slow it down for details or speed it up for quick viewing.

Subtitles: Enjoy videos with clear, customizable subtitles for better understanding.

3. Wide Variety of Content
If you’re a fan of movies, MovieBox is your dream app. It offers reviews, ratings, and recommendations for trending titles, including Nollywood gems, Hollywood blockbusters, and indie hits. It also brings a great selection of Asian movies, including popular Kdramas, to your fingertips.
Here are the top trending movies you can check out:
4. Trending Kdramas to Watch Now
For Kdrama fans, MovieBox offers a variety of trending series straight from South Korea. Here are some of the hottest titles to watch:
Face Me
The Judge from hell
Family By Choice
5. Crystal Clear Video Quality
MovieBox prioritizes quality. If you're streaming a music video or watching a full-length movie, you can enjoy high-definition visuals without interruptions. The app adjusts playback to suit your device and internet speed, ensuring a smooth experience every time.
6. Why It’s Better Than other Movie App
While other Movie apps are great, it comes with a price tag, and some users find it overwhelming to navigate. MovieBox, on the other hand:
Costs Nothing: Perfect for anyone on a budget.
Simplifies Choices: Curates content directly from all platforms, ensuring you’re always watching the best.
Offers Flexibility: No commitments or subscription deadlines—just open the app and enjoy.
Offers Variety of Movies & Series in HD quality
7. Moviebox is an App for Everyone
MovieBox caters to all age groups and interests. If you’re:
A student looking for tutorials.
A movie enthusiast looking for the latest trends.

A parent searching for kid-friendly content.
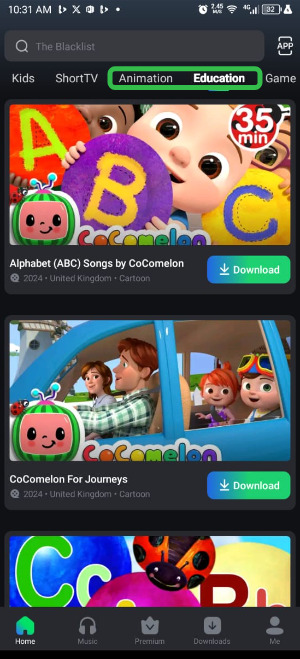
Moviebox Music Session has varieties of musics, Singles and DJ Mix
MovieBox delivers with ease.
Conclusion
MovieBox is more than just an app; it’s a free entertainment hub that rivals paid platforms. With its intuitive interface, trending content, top-notch quality, and unmatched features, it’s the ultimate choice for Movie lovers.
Download moviebox.ng today to watch Trending & Latest movies like Gladiator II, Wicked, and Moana 2, plus a variety of Kdramas, Hollywood, Nollywood and Asian movies. Experience why it’s better than the rest!
Download Now on Google Playstore Stream With your PC & iOS Via moviebox.ng Follow Moviebox Social Media Account for more Movie updates
Facebook
Instagram
Tiktok
Twitter
2 notes
·
View notes
Note
Hello, have you talker about your art process anywhere? I am very interested in how you got into glitch art/photomanipulation/however you’d call this, and i want to learn more. Do you have programs you use, plugins, do you use any physical media or scanography/scanner manipulation? I really want to hear about anything you wanna talk about regarding the creation process for your art. Thank you for sharing your work.
Yes! Unfortunately, I tried answering this question in a ton of detail but tumblr didn’t save it as a draft automatically - which was a frustrating experience to say the least - so this is my second attempt at answering this ask — you’ve asked a lot of really valuable questions here, I’ll do my best to be concise in my answers!
When I first began playing around with editing software, I was 16 and simply wanted to make memes and silly edits. This was around 2015-2016, whenever vaporwave was a fresh concept and Resonance was trending on Vine — which is a sentence that makes me feel fucking ancient. I was really entranced by vaporwave, which had this off-white nostalgia for post-consumerist 80s and 90s cultural trends. I later became interested in how many of those cultural trends persisted and evolved into Y2K culture and beyond.

these are some of the images I was working on during that period of time, which were loosely inspired by indie horror and jazz cups and soundcloud rap. I was so proud of learning how to make my own scanlines using GIMP :)
Late 2016 I began my freshman year at a hoighty-toighty art school that I was too poor to attend, and quickly entered a mental health downward spiral — but I learned many valuable things, most of that info was painfully basic; my education prior to that was not anything special. I would not consider myself someone with exceptional aptitude for art — I just have a chronic compulsion to break things.
So, where to begin? My recommendation to anyone who’s newly interested in this style of artwork and editing:
Glitchet is a repository of info regarding many different styles and methods of distortion - from sonification to slipscans, there’s a ton of good info to comb through. Most of the techniques and tools covered are free to use, but there is some paid stuff out there too - but if you know your way around, virtually everything is free. More on that shortly :)
As for my process, programs, plugins, etc - there is a lot, and I don’t think I can cover everything. Primarily: Photoshop, After Effects, GIMP, ArtStudio Pro for iOS, Procreate, DestroyPix, and a number of other pieces of software that perform smaller, specific functions - such as BigJpg for AI-upscaling. I also employ analogue/physical distortion techniques like circuit-bending, slipscan, and more. These require additional hardware and knowledge; such as access to a copier/scanner, old CRT screens, and the ability to solder + work with low voltage electronics without accidentally shorting them out. Best part is that you can ✨layer✨ anything and everything, collage style — which is my favorite aspect, very playful and exploratory.
Now, if you’re like me and can’t afford fuck-all, but wholeheartedly believe that money should not be a limiting factor for creativity, I recommend installing the Adobe Creative Suite from downloadpirate(dot)com - which is also where I’ve gotten many of my plugins, although I do also pay for the plugins that I come to really appreciate, as they’re typically done by independent developers who could actually use the scratch. Same risks as any pirate cove: intrusive ads, popups, and redirect chains - use Ublock Origin to kill these annoyances. I recommend performing a scan with Malwarebytes after using any sketchy-looking-download site, but I was raised to be a bit paranoid so that’s purely preferential.
As for plugins:
Filenames in this image may correspond with the developer of the plugin — you can just search the filename + ‘after effects plugin’ and you’ll almost certainly find your way.
Most commonly, I use Pixelsorter, Pixdither, Displacer Pro, Pixel Stretch, and Hacksaw — although some of the plugs that I use aren’t listed above, like Datamosher, which is a script-based solution that helps remove i-frames from a clip in After Effects, all without having to use VLC and any handwritten scripts (the ol’ fashioned way).


These are all from the last year or so, to show the relative growth I’ve experienced since my time spent as a creature of 16 years. Naturally, I’m also like, more of a person now - so the art is partly better because I’ve simply suffered more :p
When I started, I didn’t know any of the jargon or how to describe a specific effect I was trying to achieve - so I taught myself how to do stuff by googling around, and if I couldn’t find an answer (which was 90% of the time) I’d just try to figure shit out. Which rarely ever resulted in outright success, but was always a significant learning experience. That’s why I’m so quick to drop the link to Glitchet! Sometimes I can’t help but wonder what I’d be doing now if I had known there was an online library for info on how to produce different types of distortions - definitely would’ve spent less time trial-and-erroring my way through aesthetics.
In conclusion: there’s so much to try and you should try absolutely everything that interests you. It’s free if you’re cool enough to steal it; though some things (like hardware) are gonna cost. You don’t need talent or an exceptional education, though both of those things would certainly help — and you’ll never run out of things to learn because there are infinite ways to break shit. More so than anything else, you need a willingness to explore, experiment, and fail often. You’ll fail miserably at times, so a proclivity for humiliation is also a big plus. Eventually your failures will start looking like successes; but you’ll have forgotten the difference by then and will be free to make whatever the fuck you want :)
I’m glad that you enjoy the work! tumblr has always been the best place for me to share my lil jpegs and actually find a real sense of connection with others who are similarly jazzed. My life completely bottomed-out a few years ago and I was in a really bad place whenever I logged into my blog for the first time in half-a-decade and started posting again. My personal growth from then to now has been a strange and incredible experience, and I’m so glad that I had the art and the funny little gays on this website to help me through the toughest points and teach me valuable things about myself; so if I can give back a little knowledge, I’ll gladly take that opportunity! I hope these findings serve you as well as they’ve served me.
#my asks#THANK YOU!!#I hope this is formatted in a way that is easy to read - clarity and concision are not my strongest skills#godspeed!#documentation#reference
19 notes
·
View notes