#betaflight
Explore tagged Tumblr posts
Text

Setting Up Your Micro Indoor Unit with Betaflight
To configure your micro indoor unit using Betaflight, follow these essential steps to ensure your indoor drone is ready for flight:
Download Betaflight Configuration Software: Begin by downloading Betaflight, which is a widely used configuration software for micro indoor drones. This software runs on your computer or smart device, serving as the main tool for setting up and fine-tuning your drone.
Installation and Launch: After downloading Betaflight, install it on your computer or smart device. Once installed, launch the software.
Connecting Your Drone:
Connect your micro indoor drone to your computer using a USB cable. This connection is crucial for configuring the drone's settings.
In the Betaflight software, locate and select the appropriate COM port that corresponds to your aircraft.
Establishing a Connection: Click the "Connect" button within the Betaflight software to establish a connection between your computer and the micro indoor drone.
IMU Calibration:
Before you can take flight, it's essential to calibrate the Inertial Measurement Unit (IMU) of your drone.
Place the micro indoor aircraft on a flat surface in a horizontal position.
In the Betaflight software, initiate the IMU calibration process. This step ensures that your drone maintains stable flight and accurate orientation.
Configuring RC Channels:
Navigate to the RC (Radio Control) channel interface within the Betaflight software.
Set the channel arrangement to match the Frsky mode. Proper configuration of RC channels is vital to ensure your remote control can effectively communicate with your drone.
Save Your Configuration: After you've completed all the necessary configuration steps, don't forget to save your settings. Look for the "Save" option, typically located in the bottom right corner of the Betaflight interface.
By following these steps, you'll successfully set up your micro indoor unit using Betaflight. This preparation ensures that your indoor drone is configured correctly and ready for a safe and enjoyable flying experience.
0 notes
Text
Unleash Superior Performance with BetaFlight Stack for FPV Drone from The Darkmatter
Elevate your FPV drone experience with the BetaFlight Stack for FPV Drone from The Darkmatter. This high-performance stack, designed for seamless integration with BetaFlight firmware, offers unparalleled control and stability. Featuring a powerful F4 flight controller and a robust 45A ESC, it is built to handle intense aerial maneuvers effortlessly. Ideal for both racing and freestyle flying, this stack ensures precise responses and exceptional reliability.
Engineered for both beginners and seasoned pilots, the BetaFlight Stack for fpv drone enhances every aspect of your flight, making it smoother and more responsive. Experience the next level of drone performance with The Darkmatter’s BetaFlight Stack, where innovation meets excellence.
1 note
·
View note
Text
🛠️ Build the Sky: Aasma Aerospace's DIY Drone Kit for Innovators, Students & Tinkerers
At Aasma Aerospace, we’re redefining what it means to learn, innovate, and fly. With drones transforming everything from disaster response to precision agriculture, we believe it’s time that the power of flight lands in the hands of creators and learners across the country.
Introducing the Aasma DIY Drone Kit — a complete build-it-yourself drone experience tailored for tech enthusiasts, students, educators, and early-stage UAV innovators.
Whether you're in a classroom, a lab, or your backyard workshop, this kit is your personal launchpad into the world of aerial robotics and smart systems.
🎯 Why We Built the Aasma DIY Drone Kit
In India, there's a growing hunger for hands-on STEM experiences that go beyond the textbook. The Aasma DIY Drone Kit is designed to:
Bridge the gap between theory and practical application
Inspire the next generation of aerospace engineers
Provide an affordable testbed for experimentation and research
Empower local drone ecosystem development through maker culture
This kit is not just a toy — it's a real, functioning UAV platform that helps you understand how drones work, and more importantly, how they can be adapted to solve real-world problems.
📦 What Comes in the Kit?
Each Aasma DIY Drone Kit is a carefully engineered and field-tested package that gives you everything you need to get airborne.ComponentDetailsFrame (PLA+)Lightweight, durable, and locally 3D-printed at Aasma LabsBrushless MotorsFour high-efficiency BLDC motors with ESCs for flight stabilizationPropellersBalanced propeller set for thrust and torque efficiencyLi-Po BatteryRechargeable 3S/4S battery for extended flight timeFlight ControllerPre-configured with open-source firmware (e.g., ArduPilot or Betaflight)Transmitter & Receiver6+ channel radio control system with failsafe optionsGPS Module (optional)Real-time global positioning for autonomous flightsCamera Module (optional)Capture aerial footage or stream FPV videoAssembly GuidebookFull-color manual with diagrams, QR-coded video tutorials, and safety tips
🧪 Learn by Doing: Skills You’ll Gain
The DIY Drone Kit is designed to be modular, educational, and upgradeable, ensuring that learners gain core competencies in:
✈️ Aerodynamics and flight stability
⚡ Power system design and Li-Po safety
🔌 Wiring, soldering, and electronic integration
🧠 Sensor fusion and flight controller tuning
🧭 GPS navigation, waypoint control, and return-to-home protocols
🧑💻 Intro to Python/C++ coding for autonomous flight
🎓 Who Is This For?
Target GroupUse CaseSchool/College StudentsBuild science fair projects, robotics competitions, or capstone prototypesSTEM EducatorsUse in aerospace labs, technical workshops, and classroom experimentsMakers & HobbyistsExperiment with drone upgrades, payloads, or autonomous featuresStartups & FoundersRapidly prototype UAV-based solutions (e.g., delivery, surveillance)
Our kit is designed for all skill levels — from first-time builders to experienced engineers — and comes with mentorship support for institutions and clubs.
💡 What Makes Aasma’s DIY Drone Kit Unique?
✅ Made in India — Designed, sourced, and assembled by Indian engineers for Indian learners ✅ Modular Architecture — Supports future upgrades (camera, GPS, autopilot modules) ✅ STEM-Aligned Curriculum — Developed in consultation with educators and UAV pilots ✅ 3D-Printed Frame — Lightweight and crash-resistant PLA+ design for easy prototyping ✅ Support Community — Access to Aasma’s builders forum, Discord community, and helpdesk
🏆 Certified Learning, Real Recognition
All Aasma DIY Drone Kit users receive:
📜 Certificate of Completion (issued after successful build + flight test)
🔬 Access to Aasma’s exclusive UAV Bootcamp
🌐 Opportunities to showcase projects in national-level drone challenges and events
🧑🏫 Discounts for schools, colleges, and government skill programs under NEP/Atal Tinkering Lab initiatives
💰 Pricing & Packages
Package TypeInclusionsPrice (INR)Basic KitFrame, motors, FC, battery, manual control setup₹6,999Advanced Kit+ GPS, Camera module, FPV, expanded tutorials₹11,999Institution Pack5x Advanced Kits + workshop + trainer supportOn Request
📦 Bulk orders available for schools, ed-tech startups, and state tech missions 🎯 Early bird offer: Flat 15% off for first 100 customers — use code: AASMA15
📍 How to Get Started?
Ready to build your first drone?
Visit our website: www.aasmaaerospace.in
Choose your kit (Basic or Advanced)
Place your order & get doorstep delivery
Access our exclusive video portal and e-guide
Share your build using #AasmaDIYDrone and join our growing community
🚀 Drone Today, Mission Tomorrow
The Aasma DIY Drone Kit is more than a product — it’s a platform. A platform to learn, experiment, fail, fix, and fly. It’s your first step toward becoming a drone innovator, aerospace engineer, or aerial problem solver.
We’re not just selling parts. We’re delivering the spark of innovation — one flight at a time.
Follow Us Instagram | LinkedIn | YouTube | Discord 📩 For collaborations or academic tie-ups, email: [email protected]
Aasma Aerospace — Empowering India’s Skyborne Thinkers
1 note
·
View note
Photo

How to Setup Betaflight OSD: Configuration and Element Layout Examples
0 notes
Video
youtube
NEW!! Betaflight 4.5 & 10.10 Configurator Download & Flash Walk Through!
0 notes
Text
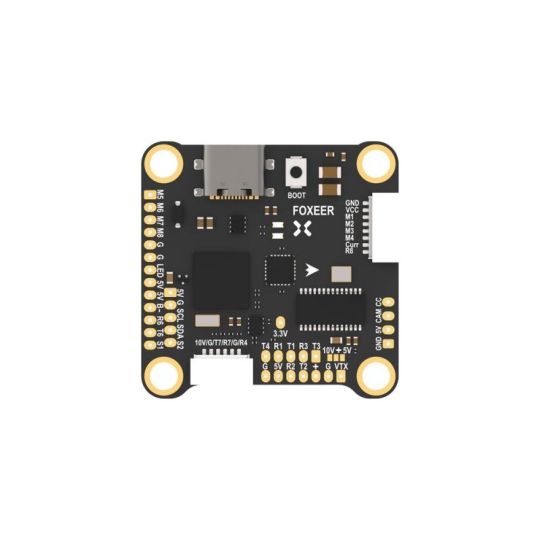
Foxeer H7 MPU6000 FC 8S Dual BEC Barometer X8
Foxeer H7 MPU6000 FC 8S Dual BEC Barometer X8

TECHNICAL CHARACTERISTICS
Model: Foxeer H7
CPU: FOXEERH743
Gyro: MPU6000
Barometer: DPS310
Power Supply: 4~8S Lipo
BEC Output: 3.3V/0.5A;DC5V/2A;DC10V/2A
OSD: BF OSD
Black Box: 16M Flash Memory
UART: 6 Sets+Rx8
ESC Telemetry: RX8
Buzzer: YES
Connector: DJI/HDZero
Smart Audio: YES
LED: 1 Set 2812 LED
USB: Type-C
Servo: S1,S2
X8: Supported
Firmware BetaFlight: FOXEERH743
Size: 37X37mm
Mounting Hole: 30.5X30.5mm,Φ4mm
Weight(g): 7.8g
Working Temperature: -20℃ ~ +55℃
Working Humidity: 20~95%
Storage Temperature: -20℃ ~ +70℃
Package Includes: 1 FC, 4 Rubbers Columns, 1 Cable
0 notes
Text
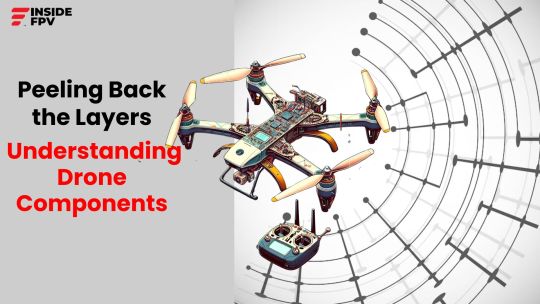
Peeling Back the Layers: Understanding Drone Components
Whether you’re a drone enthusiast or considering buying your first quadcopter, learning the basic anatomy of these impressive little machines goes a long way. Drone components may seem complex at first glance, but by understanding the core systems that go into building these drones, one gains better insight into critical factors like flight performance, safety, and overall capability.
In this blog, we’ll peel back the layers of drone technology and explore the essential hardware and software elements that give drones their unique superpowers of vertical flight and midair manoeuvrability. Let’s get better acquainted with the brains, nerves and muscles behind the drones!
The Frame: Skeleton of Drone
The frame serves as the structural foundation onto which all other drone components mount. Sometimes called the chassis, the frame ties everything together into one cohesive package. Most hobbyist drones use four-armed frames built from materials like plastic, aluminium, carbon fibre or magnesium. Arms extend diagonally from a central point, giving quads their distinctive “X” shape when viewed from above or below.
One can find several specifications when shopping for drones:
Size – Measured diagonally motor-to-motor. Common sizes range from ~110mm micro drones to ~500mm racers/freestyle quads
Material – Plastic frames are lightweight but fragile and deformable. Metal materials offer more durability and stiffness, at the cost of greater mass. Composite options like carbon fibre give excellent strength-to-weight ratios.
Geometry – Some frames use simple straight tubes, while more complex shapes and truss structures enhance stiffness. The motor/arm layout varies too – deadcat and X frames are quite common.
Replaceable arms – High end frames make it easy to swap damaged arms quickly after crashes
Advanced pilots may customise and design their own frames, though most casual users opt for off-the-shelf frames which readily accept standard components.
Flight Controller: The Electronic Brain
If the frame is the skeleton, the flight controller represents the brain of the drone body. This compact circuit board houses the sensors and processors that stabilise your drone flight- without it, drones cannot fly at all!
The aptly named flight controller constantly adjusts power to all motors using sensor and feedback. MEMS gyroscopes, accelerometers and other sensors feed orientation data to the processor up 2000 times per second. Advanced sensor fusion translates this data into precise positioning corrections that compensate for inevitable mid-air disturbances like wind gusts.
Most flight stacks run Cleanflight, Betaflight or iNav - open source firmware that processes sensor data and controls ESCs/motors accordingly via PID control loops. The values (gains) within these loops are highly tunable to dial in optimum stability and response across different frames. A well tuned quad should handle neutral and aggressive stick inputs with precision and grace!
Motors & Electronic Speed Controllers
Flight controllers influence movement by directly communicating with electronic speed controllers (ESCs) - the intermediaries that manipulate motor spin. This allows sophisticated auto-stabilisation of the entire platform during lift, hover and transit.
Brushless electric motors offer drones incredible power-to-weight - even models under 250 grams produce substantial thrust partially due to high Kv ratings (rpm per volt supplied). Leading motor brands like T-Motor, SunnySky and Cobra excel at efficiency across variable-pitch propeller loads. Materials range from aluminium to more exotic options like carbon fibre. Stators are like the outer shell, with thick coils of copper wire wrapped up tightly. When electricity runs through these wires, they create a powerful magnetic field, while rotors are the spinning part and have strong magnets attached. These magnets interact with the magnetic field from the stator, pushing and pulling to spin the rotor really fast, sometimes up to 100,000 rounds per minute (rpm)!
ESCs amplify the flight controller’s movement commands, pulsing voltage into the motors at differing widths to finely control rpm. Analog servo motors use variable Pulse width modulation (PWM) signals, while brushless motors require specifically designed ESCs to alternate voltage directions and switch polarity. This creates the shifting electromagnetic forces that spin rotors to staggering speeds within fractions of seconds.
Props and Landing Gear: The Wings & Legs
What goes up, must come down...hopefully slowly and upright! Besides generating upward lift, well designed props and landing gear make drones far less crash prone.
While complex at molecular levels, conceptually props are simple - angled blades that displace air downward to create reactionary force upward per Newton’s third law. Various prop geometries and pitches better tune drones for race pace sprints vs. long range endurance. Leading brands include DALProp, HQ Prop and Ethix. Materials usually consist of durable composites in the need for an elusive balance between strength, weight and aerodynamics.
Assisting safe touchdowns and awkward landings, the undercarriage absorbs ground impact when manoeuvring near surfaces. Materials like flexible thermoplastic urethanes provide a cushioning crush zone, while plywood or carbon fibre plate bases offer upper protection. Strong yet lightweight aluminium, fibreglass and carbon fibre legs mount everything securely to the central frame.
Battery and Power Distribution
Delivering power to all four motors plus onboard electronics requires serious amps and volts! Lithium polymer batteries are the source here - extremely impressive power-to-weight ratios. Common drone variants supply between 3S and 6S setups:
3S (3 cell) = 11.1 volts
4S (4 cell) = 14.8 volts
5S (5 cell) = 18.5 volts
6S (6 cell) = 22.2 volts
Voltage directly influences maximum motor rpm & thrust capabilities, while higher amp hour (Ah) ratings extend flying time per charge. Leading LiPo battery brands include GNB, TATTU and Dinogy.
Power distribution boards (PDBs) route energy flows from the main battery through separate ESCs to each motor. Soldered wiring harnesses link ESCs to motors as well. PDBs also tap battery power for LED lighting, FPV cameras, gimbals and other onboard peripherals as needed.
Radio Transmitter & Receiver
What good is an advanced flying robot without adequate controls? Radio communication gives pilots masterful command mid-flight. Transmitters send user inputs via 2.4 GHz or 900 MHz signals, while tiny receivers receive the signals, the drone passes those along to the flight controller.
Most quads operate on variations of familiar control schemes:
Throttle - Altitude up/down
Yaw – Left/right rotation
Pitch – Forwards/Backwards tilt
Roll – Sideways tilt left/right
Many transmitters include toggle switches, dials and multibutton inputs across the front face and back sides. Contemporary transmitters integrate Android touchscreens too for monitoring drone telemetry and configuring settings. Whether simple or deluxe, all aim for ergonomic intuitiveness to keep quadcopters gracefully in air!
First Person View (FPV) System
For next level flying thrills, first-person-view (FPV) video setups stream real time footage from drone-mounted cameras directly to the pilot’s eyes or mobile screen. This creates an exhilarating sensation just like actually sitting in the cockpit!
FPV camera sensors mounted on vibration-damping plates capture unique aerial perspectives. Circularly polarised or patch antennas then beam video downstream to the pilot’s receiver unit. Sensible latency measures around 20-40ms. Pilots don goggles containing one small display per eye, providing a wide field of view as they steer quads by line of sight. Some camera drones also record digital video straight to onboard microSD cards.
We’ve covered quite some ground exploring all the integral bits comprising today’s consumer drones. While advanced manufacturing processes allow remarkable performance from microscale components, creative open source software communities are equally responsible for the impressive flight capabilities drone pilots enjoy today. Developers continue building upon long proven aerodynamic, estimation and control theories to push drones potentials ever further.
Yet even with sophisticated auto-stabilisation and navigation intelligence behind the scenes, safety should always come first when operating any aerial vehicle. Before attempting tricks or long range flights, one should take time mastering basic flight skills in open areas away from people, buildings and other risks. Precision drone control requires diligent practice, but offers excitement, challenge and reward for those willing to properly progress from the first liftoff onwards!
FAQs
1. What is the role of the frame in a drone?
The frame serves as the structural foundation of a drone, holding all components together. It provides the base for mounting essential parts and influences the drone's overall stability and durability. The frame's design and material impact factors like weight, strength, and aerodynamics.
2. What is the purpose of the First Person View (FPV) System in drones?
The FPV system streams real-time video from the drone-mounted camera to the pilot's eyes or a mobile screen. This immersive experience allows pilots to navigate their drones as if they were sitting in the cockpit, providing an exhilarating flying sensation.
3. Which component of the drone is the most important?
Identifying the single most important component of a drone is challenging because each element plays a crucial role in ensuring the drone's overall functionality and performance. However, the flight controller stands out as a pivotal component that can be considered the "brain" of the drone. The flight controller processes data from various sensors, stabilises the drone during flight, and translates user inputs into precise motor commands. Without the flight controller, a drone would be unable to maintain stability, respond to pilot commands, or even achieve liftoff. While every part contributes to the drone's success, the flight controller is often regarded as the central hub orchestrating the harmonious collaboration of all components.

0 notes
Video
instagram
Random Weekend flights: SALT PONDS #fpv #fpvfreestyle #drone #sh #sh_fpv #quadcopter #racingdrone #miniquad #fpvvideo #quaddiction #dronestagram #multicopter #fpvracing #dronesaregood #carbon #dronepilot #acromode #vtx #betaflight #telemetry #speed #propellers #airvuz #youtube Check and SUBSCRIBE TO MY YOUTUBE CHANNEL - SH FPV #mountain #rock #jungle https://www.instagram.com/p/Bt_T5k_Hd_Z/?utm_source=ig_tumblr_share&igshid=pgcfioxo2zyt
#fpv#fpvfreestyle#drone#sh#sh_fpv#quadcopter#racingdrone#miniquad#fpvvideo#quaddiction#dronestagram#multicopter#fpvracing#dronesaregood#carbon#dronepilot#acromode#vtx#betaflight#telemetry#speed#propellers#airvuz#youtube#mountain#rock#jungle
1 note
·
View note
Photo

Puck! #doodles #postitdrawing #postit #art #comic #comicbook #freehanddrawing #warmup #postitpopart #Marvel #marvelcomics #Puck #EugeneMiltonaJudd #XMen #alphaflight #BetaFlight #EugeneJudd #GammaFlight #XForce https://www.instagram.com/p/ClSF5BiOq-b/?igshid=NGJjMDIxMWI=
#doodles#postitdrawing#postit#art#comic#comicbook#freehanddrawing#warmup#postitpopart#marvel#marvelcomics#puck#eugenemiltonajudd#xmen#alphaflight#betaflight#eugenejudd#gammaflight#xforce
0 notes
Text

Options for Mini Indoor Units
When it comes to the miniature indoor unit, you have a couple of choices. You can opt for the RTF (Ready to Fly) package, which allows you to start flying right away, or you can select the entire unit, which is prepared for flight once it's paired with the remote control. However, if you're confident in your skills, you also have the option to assemble it yourself.
Downloading Betaflight
The Betaflight configuration software, often referred to as the ground station or BF, is named because it operates on a computer or smart device on the ground and is currently the most popular configuration software for drones. After downloading the software, you'll need to perform the following configurations. Don't forget to click the "Save" button in the bottom right corner of the interface after completing the setup.
Connect your drone to the computer using a USB cable.
Launch the Betaflight ground station, choose the COM port associated with your drone, and click "Connect."
Ensure that the drone is placed horizontally and proceed to click on IMU calibration.
Navigate to the RC channel interface and configure the channel arrangement to Frsky mode.
Pairing the Remote Control
Here's how you can pair your remote control:
Start the remote control and access the model interface.
Enable the built-in signal transmitting HF head (Internal RF) of the remote control and select Frsky D8 protocol.
After connecting the drone to the computer via a USB cable, click the pairing button located near the edge of the flight control. The indicator on the flight control will change from flashing red to a constant light, indicating it has entered pairing mode.
Select "BND" (pairing) in the remote control interface.
When you toggle the remote control's telemetry or switches, you should be able to see the value changes on each channel.
0 notes
Video
Ready to rip on this circuit! #droneracer #team_multi #frsky #taranis #x4r #emax #turnigy #graphenne #tbsunify #4s #dronestagram #fpvlove #fpvlife #fpvbrazil #like #follow #share #gopro #betaflight #miniquad #fpvrace #fpvfreestyle (em Residencial 6 Alphaville) https://www.instagram.com/p/BqBerKInoqGPkh8_36IibE7yjA0nrtS3eOuMqw0/?utm_source=ig_tumblr_share&igshid=1qkp8gzwm0m2s
#droneracer#team_multi#frsky#taranis#x4r#emax#turnigy#graphenne#tbsunify#4s#dronestagram#fpvlove#fpvlife#fpvbrazil#like#follow#share#gopro#betaflight#miniquad#fpvrace#fpvfreestyle
1 note
·
View note
Photo

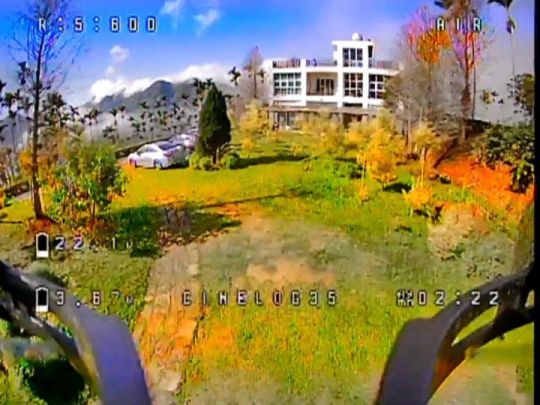
首飛穿越機 就直接上山拍雲海~ 前陣子消失就是天天狂練 又是全新的拍攝方式 期待之後的各種創作 FPV Cine Whoop in Taiwan @geprc @cai_image_studio @caillouwang #cine #cinewhoop #filmmaking #filmmaker #drone #sky #fly #landscape #scenery #gopro #osd #betaflight #acro #mode #pilot #fpv #first #fpvfreestyle #geprc #cinelog35 #dronestagram #learn #空拍 #穿越機 #無人機 #dvr #analog #analogcamera #analogvibes #Taiwan (at Taiwan) https://www.instagram.com/p/CZZXGF_puXj/?utm_medium=tumblr
#cine#cinewhoop#filmmaking#filmmaker#drone#sky#fly#landscape#scenery#gopro#osd#betaflight#acro#mode#pilot#fpv#first#fpvfreestyle#geprc#cinelog35#dronestagram#learn#空拍#穿越機#無人機#dvr#analog#analogcamera#analogvibes#taiwan
0 notes
Photo

How to Setup VTX Table in Betaflight - VTX Control Using SmartAudio or IRC Tramp
0 notes
Text
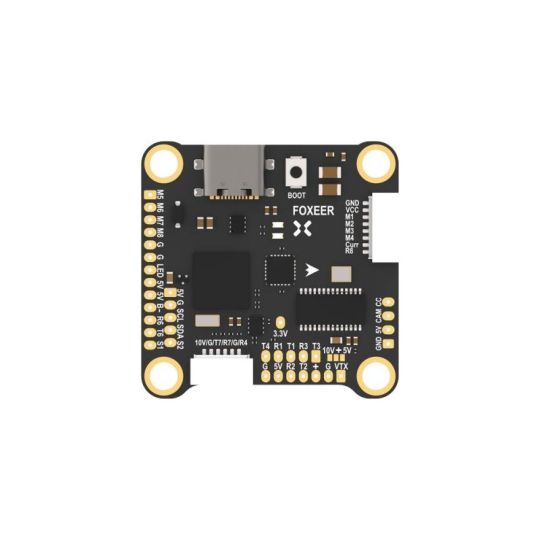
Foxeer H7 MPU6000 FC 8S Dual BEC Barometer X8
Foxeer H7 Mini MPU6000 FC 8S Dual BEC Barometer

TECHNICAL CHARACTERISTICS
Model: Foxeer H7
CPU: FOXEERH743
Gyro: MPU6000
Barometer: DPS310
Power Supply: 4~8S Lipo
BEC Output: 3.3V/0.5A;DC5V/2A;DC10V/2A
OSD: BF OSD
Black Box: 16M Flash Memory
UART: 6 Sets+Rx8
ESC Telemetry: RX8
Buzzer: YES
Connector: DJI/HDZero
Smart Audio: YES
LED: 1 Set 2812 LED
USB: Type-C
Servo: S1,S2
X8: Supported
Firmware BetaFlight: FOXEERH743
Size: 37X37mm
Mounting Hole: 30.5X30.5mm,Φ4mm
Weight(g): 7.8g
Working Temperature: -20℃ ~ +55℃
Working Humidity: 20~95%
Storage Temperature: -20℃ ~ +70℃
Package Includes: 1 FC, 4 Rubbers Columns, 1 Cable
0 notes
Video
youtube
Eachine Wizard X220 V2 - Any Good? 😀.......YES
0 notes