#big knob audio interface
Explore tagged Tumblr posts
Visit Tumblr Blog
Explore Tumblr blogs with no restrictions, modern design and the best experience.
Last Seen Tumblr Blogs


Fun Fact
Average visit duration of Tumblr.com is 10 mins and 25 secs.
Text
The Evolution of Audio Mixers: From Knobs to Touch Screens
The tools of the trade in audio mixing, whether you are mixing for live performances, studio recordings, or for broadcast, have gone a long way. Surely you've walked into a studio or watched a live concert where you saw those massive-looking mixing boards—rows of knobs and sliders that control every aspect of sound. Over the years, these physical, mechanical boards have given way to digital systems that often feature sleek touchscreens and complex software. But how did we get from analog knobs to touch screens? Let's take a look at the evolution of audio mixers and how they've shaped the world of sound.
The Early Days: Analog Mixers with Knobs and Faders
Audio mixing, in its infancy, was analog. The early audio mixing consoles were simple, manually operated machines designed to combine multiple audio signals into a single output. They had a pretty simple design: knobs, faders, and switches where sound engineers could adjust levels, balance frequencies, and add effects in real time.
Analog mixers really made things feel quite hands-on, especially for engineers. The feeling of the faders below their fingers really added to the experience. They were very precise but also laborious. Everything had to be done by hand, so for example, doing very minute, slight adjustments across a large board was really slow with complex signal chains.
Noise was also another weakness in analog mixers. Though analog mixers provided high-quality sound, the technology was highly prone to the unwanted hiss, hum, or distortion that it was introducing. Time proved that a clean and versatile solution had to be created, hence, giving birth to digital technology.

This was particularly useful for live sound engineers, who could easily switch between settings without having to physically turn each knob.
Improved Sound Quality: Digital technology enabled more accurate audio processing, thus reducing noise and improving the quality of sound.
Space and Portability: Digital mixers could fit lots of power in smaller, much more portable units than their big, bulky analog console cousins. It was great for live performances as well as for smaller recording studios.
All this aside, the digital audio mixing boards remained quite traditionally styled. They came with digital control, but they were using knobs, buttons, and faders for actual controls. With that came the higher functionality but also became pretty complex and somewhat frustrating to operate at times, especially when users are first trying it or the engineers weren't really knowledgeable of the inner software that operated them.
Touchscreen Revolution: The 2000s and Beyond
The 2000s and Beyond
Fast forward to the 2000s, and the audio industry saw a shift that mirrored what was happening in other technology sectors: the introduction of touchscreens. The touchscreen revolution, popularized by smartphones and tablets, made its way into the world of audio mixers, offering a new level of user interaction.
Touchscreen mixers offered a dramatic upgrade in usability and versatility. Where an engineer was previously required to turn thousands of knobs and pull hundreds of faders, this new interface enabled engineers to simply interact with the digital interface by using a touchscreen. Here's how this shift impacted the industry:
Intuitive Controls: Touch screens allow users to see the signal chain in their entirety, making it easier to change levels. No turning of a knob to change a level but simply tapping on the screen to change the same. The process of mixing was faster and more intuitive to those who are new to audio mixing.
Customization, therefore, made its way towards becoming much wider because with these touchscreen mixers, people began creating customized arrangements and configurations tailored to how a person wished their system interaction or work was delivered to them-that is, not seeing an overly clustered control surface-and more on actual important tasks instead.
Advanced Visual Feedback: Touchscreens made it easier to display and manipulate advanced visual feedback, like frequency analysis, signal levels, and waveform displays. This allowed for more precise adjustments and better insight into the audio being mixed. With DAWs and digital audio tools becoming more powerful, touchscreen mixers began to integrate seamlessly with these programs. Engineers could now control software features directly from their touchscreen mixer, which was a game-changer for live performances and studio recordings alike.
Touchscreen technology greatly improved the mixing process, but it had its negative aspects, too. Some engineers missed the tactile values experienced with traditional knobs and faders and just could not feel as satisfied with touchscreens. Moreover, touchscreen mixers were generally more burdensome to learn, since they demanded time getting accustomed to the variety of digital interfaces and features implemented in them.
Most audio mixers today are hybrid systems, where the traditional hardware controls are integrated with digital technology. Many of the modern mixers still feature physical faders and knobs because engineers appreciate that tactile feel, but it also offers intuitive touchscreen interfaces for flexibility and advanced control. The hybrid systems can often be controlled by DAWs, contain built-in effects, and allow remote control with tablets or smartphones.
Even more thrilling is the potential for integrating these touchscreens with artificial intelligence (AI) and machine learning. Soon, a mixer may make automatic real-time adjustments based on the acoustics of a room or how a performance is coming together. This can take the mixing process to a whole new level of efficiency and precision, allowing engineers to focus on the creative aspects of sound and less on technicalities.
Which One is Right for You?
For one, choosing whether to use the traditional mixers or touchscreen depends on what best suits your needs and preferences. Traditional analog and digital mixers provide hands-on knobs and faders that would give experienced sound engineers a comfortable feel and haptic feedback. For the most basic controls, it is simpler in terms of their operational uses, yet these can still render top-quality sounds.
The advantage of touchscreens is that they are much more flexible, easy to use, and provide visual feedback, so ideal for users who need advanced features or beginners in the audio world. You'll see everything set up in the interface and then tap or swipe to change any of those.
When choosing an audio mixer, it is quite important to consider the environment. Working in a studio or live event setting where things need to change quickly, an investment in a professional mixer from an audio shop can make a world of difference. Professional equipment has superior quality and durability, meaning that your setup will be reliable for years to come.
From analog knobs to touchscreen technology, sound has journeyed through audio mixers in ways revolutionizing the way we connect with it. Every development garners engineers and performers more control over their soundscapes, either on stage or behind a studio glass. The solution is not quite one size fits all, but the combination of tactile controls and intuitive touch screen interfaces represents the next chapter in the evolution of audio mixing. Technology keeps on evolving and developing. And in this area of audio mixers, one wonders what innovation it may bring into this world.
#audiogears#music#audio#dj#professional audio equipment#speakers#brooklyn#brooklyn audio shop#audio shops#musician
2 notes
·
View notes
Text
GEAR
Microphones:
Sure sm57
Sure sm58
Audix i5
Sure Beta 52
Blue Snowball
Behringer C-2 (pair)
Samson C01
Rode NT1A
Hardware:
Scarlett 18i0 audio interface
Mackie 1402-VLZ PRO 14 channel mic/line analog mixer
Guitar amps and pedals:
Helix HX STOMP
Ibanez Turbo Tube screamer
Guitars:
Fender GC140SCE Concert Acoustic-Electric
Yamaha FX335C Dreadnought Acoustic-Electric
Ovation 1311 Natural Acoustic
Fender Nashville Telecaster
Fender Squire Bullet Telecaster
Fender Squire Jazz Bass
Mitchell MU40 Soprano Natural Ukulele
Yamaha CGS 102A Classical Guitar
Keyboards:
Nektar Impact LX61+
Roland U-20
Drums and percussion:
1 big tambourine
1 small tambourine
LP Medium twist shakers
Simmons Titan 50 electronic drum set
Sound Monitoring:
JBL Professional Linear Spatial Reference 3 Series powered studio monitors (pair)
Sony Professional MDR-7506 studio headphones
Sennheiser HD 201 studio headphones
KRK Classic 5 studio monitors (pair)
Computers and visuals:
Apple MacBook Pro 13 inch
Dell flat panel monitor
DAW/software:
Logic Pro X
Pro Tools 12
GarageBand
Avid/Apple/Native Instruments/SoundToys/FabFilter/Waves plugins
Helix HX Edit
Plugins:
Digital EQ’s:
Waves V-EQ4
Fabfilter Pro-Q
Digital Reverbs:
Waves Abbey Road Chambers
Waves H-Reverb Hybrid Verb
Waves Renaissance Reverb
Waves Manny Marroquin Reverb
Relab Development LX480 Reverb
Digital Compressors:
Waves Renaissance Compressor
Waves CLA-3A Compressor/Limiter
Waves Smack Attack
Waves DeEsser
Extras:
Waves SSL G-Channel
Waves Nx Ocean Way Nashville
Waves Z-Noise
Waves WLM Plus Loudness Meter
Waves Tune Real-Time
Waves Vocal Bender
Waves Torque
Waves CLA Bass
Waves Abbey Road J37 Tape
SoundToys Echoboy
VST’s:
Spectronics Keyscapes
Native Instruments Battery
Toontrack EZdrummer 3
Native Instruments Kontakt Electric Guitar
Accessories/miscellaneous/other studio features:
4 XLR cables
4 1/4 inch jack cables
Power supply cables
USB outlet strip
High speed internet and free WIFI
Pencils, pens and paper
Wireless printer available
5 mic stands
Shock mount, pop filter, and 3 windscreens
HEAROS Ultimate Softness earplugs
Mini Samsung T.V. with Roku entertainment
RIF6 electric record player with built-in speakers
Dean Markley Pro Mag humbucker pickup
Culilux 1/4” audio splitter
Rioddas external ODD&HDD disc drive
Pack of CDs for burning
Guitar pick maker with appropriate paper
3 microphone clips
Alesis sustain pedal
Radial PRO-DI passive direct box
DeltaLab digital metronome
AKAI MPD218 beat pad
GiveBest electric heater
Behringer ULTRAACOUSTIC AT109 15-WATT acoustic guitar amplifier
OWC thunderbolt USB-C dock
APC surge protector
MOONGEL damper pads
Pick holder filled with guitar picks (floppy and hard) and a set of thumb picks
2 capos and clip on tuner
KORG TM-50 combo tuner and metronome
Mackie 1402-VLZ PRO 14 channel mic/line analog mixer
NEXIGO web cam
Big Knob passive monitor controller
The Bowman Studios, Dallas, Texas
Producers: Mason Bowman
3 notes
·
View notes
Text
Hidden Features in Pro Audio Gear That Most Users Overlook
When it comes to pro audio gear, most people focus on the obvious stuff — how loud the speakers are, how many channels a mixer has, or whether a mic is wired or wireless. But if you dig a little deeper, you’ll find that a lot of professional audio equipment is packed with hidden features that can make a huge difference in how you use it.
These features aren’t always advertised on the front panel or printed in bold letters on the box, but they’re there — quietly waiting to be discovered. Whether you’re a DJ, a live sound engineer, or just someone who likes to mess around with audio setups, knowing these hidden gems can save you time, improve your sound quality, and even help you avoid future headaches.
So, let’s break down some of the most overlooked features in pro audio gear, and why they deserve way more attention.

1. High-Pass Filters (Not Just for Mics)
High-pass filters (HPF) are usually associated with microphones, where they’re used to cut out unwanted low frequencies — like rumble from air conditioners or stage vibrations. But here’s the thing: many mixers, preamps, and even powered speakers also have high-pass filters built in, and a lot of users either forget they’re there or don’t understand how useful they can be.
A well-placed high-pass filter can instantly clean up your mix by removing low-frequency noise that eats up headroom and muddies your sound. If you’re setting up for a speech or acoustic performance, activating those filters can make everything sound sharper without needing to touch the EQ.
2. Built-In Limiting and Protection Circuits
Most people worry about blowing their speakers during a gig — but not everyone realizes that a lot of modern pro audio equipment has built-in limiters or thermal protection circuits. These features automatically reduce output if the system detects clipping, overheating, or dangerous voltage spikes.
The reason they get overlooked? They work silently in the background. But knowing they’re there (and understanding how to read the warning indicators when they activate) can save your gear from serious damage — and save you from a ruined show.
3. Phase and Polarity Switches
On some mixers, preamps, and processors, you’ll find tiny phase or polarity switches, and they’re usually ignored unless something sounds off. These switches reverse the polarity of the signal, which might sound like a minor tweak, but in certain setups, it can completely fix weird phasing issues, especially when using multiple mics on one instrument.
For example, if you’re miking both the top and bottom of a snare drum, flipping the polarity on one of the mics can eliminate that hollow, thin sound caused by phase cancellation. It’s a small adjustment with a big impact — and a lot of users forget to even check for it.
4. Hidden Routing Options
If you’ve ever used a digital mixer or an advanced audio interface, you’ve probably scrolled through some menus and discovered routing options you didn’t even know existed. Many pro audio devices let you reassign inputs and outputs, create custom monitor mixes, or set up internal subgroups — all without needing extra hardware.
These hidden routing options are especially useful if you need to record a live show while also running front-of-house sound, or if you want to create a completely separate mix for your stream audience. They’re often buried in menus, which is why so many users miss them — but once you start exploring, you’ll realize how much flexibility you’ve been sitting on.
5. Parametric EQ and Advanced DSP
Most audio gear comes with some kind of EQ, but not all EQ is created equal. Many mixers, powered speakers, and even some amplifiers include parametric EQ options that allow you to control not just the amount of boost or cut, but also the exact frequency and the width of the adjustment (Q factor).
This level of control is way more powerful than simple bass and treble knobs, letting you surgically remove problem frequencies (like feedback hot spots) without wrecking the rest of your mix. But because these features are often hidden in menus or digital interfaces, they don’t always get the attention they deserve.
6. Delay Compensation and Time Alignment
Time alignment isn’t just for massive concert rigs — even smaller PA systems often have hidden options for delay compensation, allowing you to match the timing between speakers placed at different distances.
If you’ve ever noticed a slight echo between your main speakers and a set of speakers placed farther back, that’s a time alignment issue. Many users don’t even know their gear can fix this, but digging into the system settings often reveals delay controls that let you align everything perfectly, making the whole system sound tighter and clearer.
7. Preset Scenes and User Libraries
Some mixers — especially digital ones — let you save entire scenes or user presets, capturing all your settings so you can instantly recall them later. If you run sound at multiple venues or for different bands, this feature can be a huge time-saver.
What’s wild is how many people never touch this feature, either because they don’t realize it exists or they think it’s too complicated to set up. In reality, saving and recalling scenes is usually super easy once you try it, and it can save you from starting from scratch every single time.

8. Remote Control and App Integration
A lot of pro audio gear now comes with companion apps that let you control the device from your phone or tablet — but you’d be surprised how many users never download the app. These apps can give you full remote control, often with better visibility and functionality than the physical controls themselves.
This is especially handy for adjusting monitors from the stage, making quick tweaks while walking around the venue, or even mixing from the audience’s perspective.
Why Exploring These Features Matters
Pro audio gear isn’t cheap, and the more you understand what your equipment can actually do, the more value you get from it. Many of these hidden features are designed to make your life easier — whether by improving sound quality, protecting your gear, or speeding up your setup process.
That’s also why it’s smart to purchase equipment from professional audio shops that not only offer high-quality products but also provide guidance on features and how to use them to their full potential — something you won’t always get if you’re buying from random online sellers.
Pro audio equipment has come a long way, and today’s gear is packed with powerful tools — if you know where to look. Taking the time to explore your equipment’s full feature set doesn’t just make you a better sound engineer; it helps you get the best possible performance out of your investment.So next time you’re setting up for a gig or a recording session, take a few extra minutes to dive into those menus, check those tiny switches, and explore the hidden features you might have been overlooking. You might just find the key to solving your next audio challenge — already built into the gear you’ve had all along.
#audio#audio gear#music#dj#professional audio#audio shop in brooklyn#brooklyn#musician#dj gears#car audio#pro audio gear#pro audio#audio shops#pro audio shop
0 notes
Text
Price: [price_with_discount] (as of [price_update_date] - Details) [ad_1] Product Description CUBETEK 3 IN 1 LCD DISPLAY V5.0 BLUETOOTH TRANSMITTER RECEIVER WITH BYPASS FUNCTION PRODUCT FEATURES: 2 IN 1 BLUETOOTH TRANSMITTER RECEIVER: One-button switch to shift between Transmitter(TX) and Receiver(RX) mode freely. PAIR 2 DEVICES SIMULTANEOUSLY: Can Connect 2 Bluetooth Speakers / Earphones at one time and get audio in both devices simultaneously BYPASS FUNCTION: Using the Bypass function if your TV only has ONE OPTICAL Output which is currently occupied by your AV receiver or soundbar. A simple switch without plugging and unplugging the device each time NO BATTERY, USB POWERED: Always On, run hassle free without worrying about battery, as product is always connected to any USB power source. 1.8”LCD DISPLAY: LCD display of nearby devices making your Bluetooth devices easily discoverable helping you to pair the desired device only VOLUME KNOB: Easy control Multifunction Rotary Volume knob helps to control volume and also in selecting desired Bluetooth device to pair with. MULTI CONNECTION: Connect by AUX 3.5mm, Optical RCA Port, giving all options to connect to any TV, Home Theater, PC BLUETOOTH V5.0: The device is equipped with latest ACTIONS IC supporting Bluetooth V5.0 to make it compatible with most Bluetooth devices including Airpods, Earbuds, TWS, Amazon Alexa and more. EASY SEARCH AND PAIRS UPTO 2 DEVICES SIMULTANEOUSLY WITH BIG LCD DISPLAY Searches upto 8 Nearby DevicesPairs Maximum 2 DevicesWith Reconnect button on device, allows you easy reconnect to last connected devicesUse Volume Knob to select desired device to connect withOnce First device connected, Click Bluetooth button to search other nearby devices MULTIPLE CONNECTIVITY OPTIONS: Connect by Aux, RCA, Optical Ports with all Cables in Package. Smart TV Connected by Optical Port, But No Sound : Change TV Audio / Sound Settings from DIGITAL OUTPUT to PCM Once PCM Selected, Audio will easily pass. SPECIFICATIONS: Bluetooth version: Actions V5.0 Bluetooth frequency: 2402-2480mHz Bluetooth TX/RX distance: >10M (no object) Bluetooth audio technology: SBC Dual stream: yes, can contact two devices at once TX/RX mode interface: Aux/OPT Bypass model interface: Aux/OPT Display size: 29*46*1.7MM Microphone: No Battery: No Power interface: Type-C 5V Product size: 112.5*84*32.7mm Product weight: 70.1g . . . PACKAGE INCLUDES: 1 x Bluetooth Audio Adapter 1 x Type C Power Cable 1 x Optical Cable 1 x Aux Cable 1 x RCA Cable 1 x User Manual 3 IN 1 V5.0 BLUETOOTH AUDIO ADAPTER: It has 3 modes (TX, RX and Bypass). TX transmits audio from your TV / computer to your Bluetooth headphones / speakers; RX mode for receiving Audio from your cellphone to home Stereos; Bypass mode can connect Tv / computer to speakers directly. In this way, you will be able to get rid of wires and enjoy high quality wireless audio freely in your home. LCD DISPLAY & VOLUME CONTROL KNOB: First
one of its kind Bluetooth Transmitter to Display nearby Available devices, thus making pairing easy and help connect to desired devices. Also with Volume Control knob you can easily control the audio directly from the Transmitter. Note: It cannot amplify the existing audio, but only control it. Displays upto 8 Nearby devices. FLEXIBLE CONNECTIONS (OPTICAL + 3.5mm AUX + RCA): Beside 3.5mm Aux/RCA connection, the audio Bluetooth transmitter for TV plus Bluetooth receiver for TV edge ahead by also supporting TOSLINK optical cable input and output so your TV with optical sound output can feed the adapter, and your audio system can also wireless connect with the Bluetooth Adapter for home stereo. CONNECT 2 DEVICES SIMULTANEOUSLY: Two Bluetooth headphones or speakers can pair at once so children can watch in silence and give parents a much needed break. ALWAYS ON: No need to Charge, as device does not come with any battery. Instead keep it powered and enjoy hassle free transmission of audio from the device. BLUETOOTH TRANSMITTER FOR TV: Easily transmit audio from TV to Bluetooth Headphones or Bluetooth Speakers. You can pair 2 devices at one time, and listen TV audio directly to your Bluetooth Audio system. [ad_2]
0 notes
Text
Sessions 1.0 - Now in Beta!

We’re delighted to announce that our next app, ‘Sessions’, is now in public beta, with the final release planned for later this year!
Sessions is a new Audio Unit plugin host designed for musicians of every kind, from keyboard players and guitarists, to composers, songwriters and sound designers. It’s refreshingly straightforward - nothing gets in the way when you just want to play. However, under the hood you’ll find an incredibly flexible app that scales from simple plugin chains to multi-layered keyboard patches all the way to mixing an entire live band complete with pre/post-fader sends, auxiliary channels and multiple outputs.
We’ll be announcing more details, including the release date a little later. For now, you can try the Sessions beta using this TestFlight link:
https://testflight.apple.com/join/JjkkVxGN.
We’d love to hear what you think!

Here’s a brief summary of the features planned for Sessions 1.0:
Plugins:
Support for Audio Unit v2 and v3 plugins
Instrument and Effect Libraries with search and favourites filter
Mixer:
Support for multi-channel audio interfaces and multiple MIDI keyboards and controllers
Unlimited number of Instrument, Audio and Auxiliary Channels
Instrument channel MIDI filters to support the creation of layers and splits
8 sends per channel (switchable pre / post fader)
Plugin Widgets:
Simple drag-and-drop interface
Collection of beautiful widget themes, many inspired by the classic hardware of yesteryear
Control up to 12 parameters per plugin
Scenes:
12 Scenes, each with its own independent Mixer
Seamless switching between scenes
Macro Controls:
16 Macros and 1 Big Knob per Scene
Each Macro can control multiple parameters, each with its own scaling and range
Always-on recorder:
Continuously record the last 5, 10 or 15 minutes of what you’ve been playing
Looping payback of recorded region
Export recorded region as M4A or WAV
Beat Clock:
Start / Stop, temp and time signature control
Internal, Ableton Link and external MIDI clock sync sources
Metronome with selectable tick sound
Misc:
Record to file for unlimited recording duration
MIDI controller support for switching scenes, controlling macros and more
Support for Light and Dark Mode
0 notes
Text
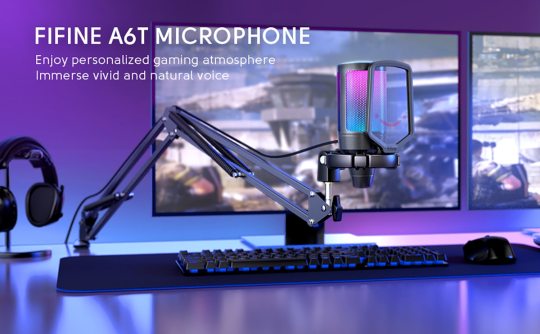
FIFINE USB Gaming Microphone Kit for PC,PS4/5 Condenser Cardioid Mic Set with Mute Button/RGB /Arm Stand,for Streaming Video-A6T

US $56.49
US $89.9937% off
1% OffStore Discount
US $2.00 OffStore Coupon
Description
Report Item
Right Out-of-the-Box-It is a plug-and-play USB microphone set, no need additional plug-ins or complicated device setup steps, which is compatible with Windows, Mac and PS4/5. The microphone end is type-c interface, which is reversible, no trouble to plug the right way in dim game atmosphere. The 8.3ft (2.5m) USB cable is long enough to extend from behind the host to the desktop for audio recording.
Cool Lighting Design-Two-tone automatic gradient RGB makes your microphone icing on the cake. With soft and coordinated light effects, your game video or live streaming will be more eye-catching. Make your channel stand out from ranking list. If you just a game player, the rich RGB matching with your flowing colors computer accessories can meet the needs of more game atmosphere.
Easier Function Use-Setting the touch-mute button on the top, you can easily tap it with one hand to mute, instead of holding the mic to press a button. Quick mute will not affect your keyboard operation, nor making a ticking sound. The big volume knob at the bottom makes fine-tuning easier, and you can adjust the volume at any time, but not leave your sights from the game screen.
Original Sound Reproduction-Working with 192kHZ high sampling rate, A6T can better achieve reproduction of original vocal, which make it sound like you and your teammates are playing in the same room. Cardioid condenser microphone is sensitive to pick up and owns high recognize to the front voice. It is very suitable for tactical games to effectively improve communication with teammates.
Effective Accessories-With wide extensibility, the boom arm is great for gamers who have various items on desk. You can pull it near by your mouth when in use, or fold it away to save more space. Shock mount is attached on the mic and will not loosen, further reducing machine noises and vibrations caused by gaming. External detachable pop filter can reduce popping noise but not block the computer game screen.
1 note
·
View note
Photo

Fluid Audio’s SRI-2 audio interface is the perfect combination of great-sounding pre-amps and audio flexibility at an affordable price. The intuitive design is great looking as well as ergonomic, with its large volume knob providing accurate control of the output. Its rugged Aluminium chassis belies its studio-quality functionality. It works equally well at home, or on the road, as its compact design fits easily in your backpack with your laptop for recording on the go.
0 notes
Note
genuinely really curious about your setup and the why of it. bc im guessing there is a cool and interesting why of it. god i hope this sounds sincere and not condescending bc i mean it for real but im also very stoned. you know how it goes. i like heaven laptop and wanna know more. if thats okay. pls. 👍
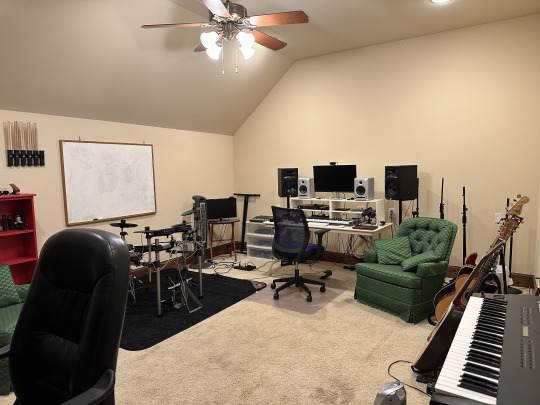
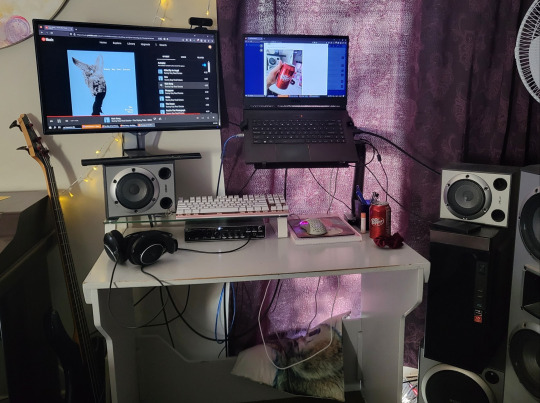
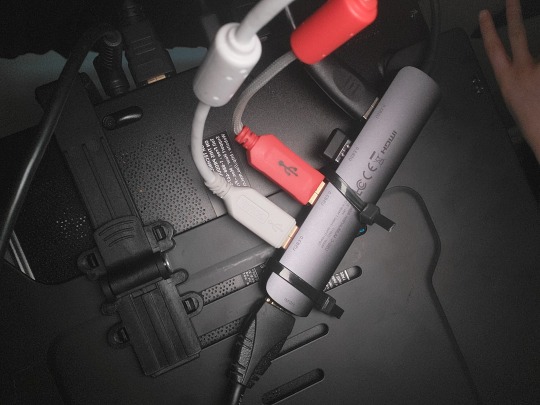
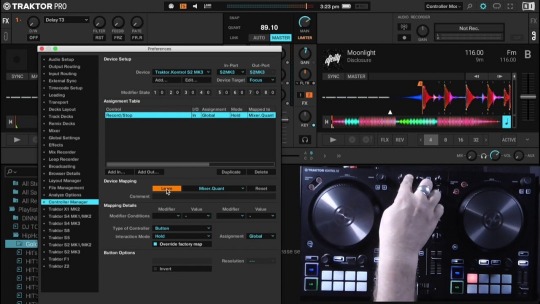
sure! basically it's a lot of me trying to work the best with what I've got and ending up with something that works pretty well actually but looks a bit odd (in a cool way I hope. like lain). it's evolved gradually. I'll put this under a cut because I am caffeinated and the explanation became rambly lol
^same image as before copied for illustration
I like big desks and having desk space to put things but my desk is not big at all, I also prefer my monitors higher up, and I like music and good audio. I don't like spending lots of money unnecessarily. so the solution that has emerged is this oddly tiered lovingly thrown together system. my monitor has little in the way of adjustability nor does it support VESA mounts, so having it set up on top of the speaker on top of the monitor stand gets it to a comfortable height for me. It's also conveniently a good position for the left speaker. the right speaker is at about the same height stacked on top of the subwoofer and my old desktop I don't really use anymore. I got a monitor arm with laptop holder attachment to allow me to set up my laptop to a matching height, it also frees up the desk space it would otherwise take up, and since I prefer to use an external keyboard + mouse anyway the angle of it doesn't matter to me. the plugging and unplugging is simplified by the USB-C hub I zip tied onto the bottom of the laptop holder but I still have More devices than it has ports.
connected to this is the monitor, keyboard, mouse, bluetooth keyboard+touchpad, and external HDD, respectively.
all of this results in having a lot of functionality while still having enough usable desk space on this small desk to not feel cramped.
as for audio, I have a nifty steinberg USB audio interface I scored on the cheap. I got this to do music stuff, I can plug my bass straight into it and it generally makes using ableton and the likes significantly smoother. it's also really great for switching between headphones and speakers, I just have to turn one up and turn the other down with the physical volume knobs. I have my headphones plugged into the headphone port of this, and the main output goes to a regular degular sony stereo amplifier below my TV which goes to the speakers on my desk and the floor standing speakers to each side of my TV. that's the secret power of this setup, I just have to turn on the TV, turn around the monitor and press a button on the amplifier to switch between the A and B speaker outputs to set it to Bed Mode.

^bed mode POV.
I keep the bluetooth keyboard + touchpad always plugged in, and the TV generally plugged in also so it's easy to smoothly transition to a reclined and relaxed PC using experience. The subwoofer is in a position that works well enough for either pair of speakers. I got all of these speakers and the amp as a set for $60 off of facebook marketplace, they're meant to be surround but there's no rules saying it can't just be two stereo in one. hope you enjoyed this bedroom tour of my weird computer setup 👍
16 notes
·
View notes
Text
Learning Music Log - Day 1:
I am someone that has never played an instrument, never been part of band, never even known how to start. For the past year I’ve been fascinated with Lo-Fi music, so I figured I’d try making some myself. Again, with no experience in anything myself, I figured I’d need some tools to make electronic music. An old friend of mine from high school had some songs signed and sold through Beatport, and I remember him using FL Studio at home. Just messing around with the tools was interesting to watch, but the interface and process always intimidated me.
Another artist I follow on my art blog, Artem Solop, is also big into making his own electronic music and beats. Although I do not know him personally, I have always liked his style. The unique thing about his method, is that he utilizes his Nintendo DS and Switch as instruments. Synths, Compressors, and Drum Machines have always intrigued me, but I could never tell one thing from the other, and here was this guy using them from his Nintendo consoles to make something sounds good. Cables routed from one system to another – how does he do it?
I figured I’d plunge in headfirst – well, as “headfirst” as I could while still adhering to baby steps…I know the hobby can be expensive if left unchecked.
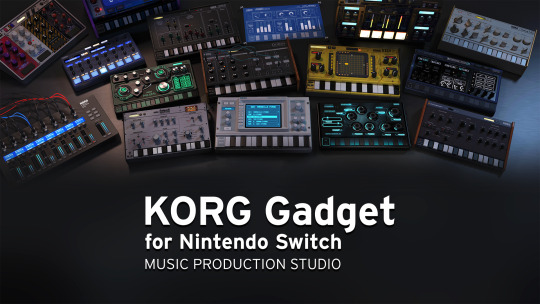
I bought KORG Gadget for Nintendo Switch about 2 weeks ago to start this journey – an inexpensive grab through Amazon for just 30$. I have no idea what it is, but it’s what Artem seems to use in his videos. The tool is described as such:
-Robust music composition/production tools in a compact cartridge
-Simple to use and easy to understand; anyone can create music anywhere and everywhere
-16 different synthesizer and drum machine gadgets with additional DLC gadgets available
-Gadgets have retro-inspired tactile control knobs that you can turn by rotating the Joy-Con controllers
And to be honest, it did not disappoint. It was a great way to wrap my mind around the synths, tracks, and “scenes” as they are laid out in the simple to use interface. I was determined to begin this journey in a self-taught, but organized manner. I had googled a few things before starting anything:
1. Simple music theory – I had no idea that notes/scales determine how well something sounds. A lot of you may think that that’s obvious, but again, my music knowledge started in 4th grade with a mandatory recorder recital and ended with the 5 colors on the guitar hero guitar. At the most basic level, I learned that scales could be set (C Major, A minor, etc.) and most tools used to create music (a digital audio workstation, or DAW for short) had a setting to allow “helpers” that would highlight keys in any given scale. From there on, I figured out that experimenting and playing randomly sounded better if I followed the scale guidelines.
2. How different chords on a piano/keyboard evoke different emotions depending on what scale you’re in. Major chord happy. Minor chord sad.
3. After talking to my fiancé (a former band geek that played flute!) I also learned that the concept of “chords” did not apply to the flute, so I also realized how different instruments were from one another…
Aside from those few things, I didn’t really look into anything else before attempting to ‘craft’ a song on the Switch.
Immediately, I could tell that the different synth gadgets varied and specialized in different things. The Marseille gadget had some great piano, electric piano, and orchestral instrument presets; the Helsinki gadget was great at ambient/relaxing sounds; the London drum gadget was great at…well…drum sounds and beats! Each of the city inspired gadgets brought something unique to the table. The Switch’s controls were intuitive. Copying and pasting, moving notes, playing tracks vs. just playing scenes was something that I was able to pick up in around 30 minutes without even ‘sniffing’ the user guide. By messing around I actually learned more about notes, half beats, and chord progressions all on my own.
Before I knew it, I had crafted a song that was about 3 minutes long. Deep, ambient intro, catchy simple melody, and the typical ‘lo-fi’ drums set to 79 BPM. I was impressed at how good it sounded. I knew there were things I was messing up, or could probably do better, but I was still proud of it.
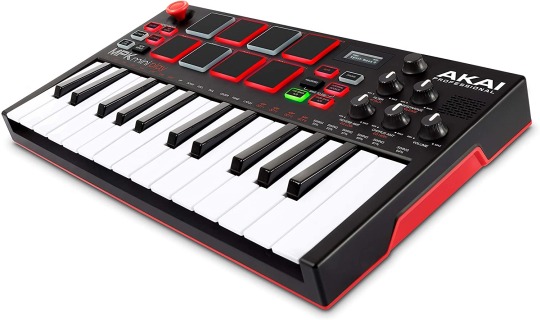
Hopping on to YouTube I found a TON of tutorials covering music theory, lo-fi beat making lessons, “dos and don’ts”, best plugins for DAWs and more. Before long, I invested in an AKAI Professional MPK Mini Play USB MIDI Keyboard controller (hastily, as it seems like the Arturia Minilab might have been a better grab? Lmk), got set up with a subscription to Melodics HQ to learn the basics of playing a keyboard, and installed FL Studio on my computer. After a week of using the Korg Gadget on Switch, I found that FL Studio had a bunch of the same principals in its interface, and I found myself digging in with minimal research into how to use the tool.
By purchasing the Korg Gadgets online, I was able to continue using the same tools I was already familiar with on the Switch inside of FL Studio’s more robust interface.
I was able to recreate the song I made on the Switch in FL Studio. This was a great way to familiarize myself with the tool in an almost step-by-step tutorial I had already made for myself.
After I had gotten a grip with using FL Studio at a basic level, I decided to try mirroring some Lo-fi beat YouTube tutorial videos. To my surprise, I found myself not really liking the final product, even after following the instructor’s guidelines. I don’t think I am a fan of “oh you NEED to do this and this for it to be a good song”. I do think that a basic understanding of music theory is key before even starting, but I don’t know how I feel about new and upcoming musicians following strict rules about how something should sound when it’s literally an art form used for expression and fun.
I was happier with the first song I made just messing around on my Switch than the song I made trying to emulate a Lo-fi beat guided by a professional producer on YouTube… and it got me thinking…I think Giorgio Moroder was right in that one Daft Punk song:
“Once you free your mind about a concept of
Harmony and of music being correct
You can do whatever you want
So nobody told me what to do
And there was no preconception of what to do”
I’m looking forward to learning more – after all, it’s only been a few days!
-Franco
#music#learning music#daw#fl studio#korg#korg gadget#nintendo#nintendo switch#keyboard#midi keyboard#akai mpk mini play#melodics hq#blog#music blog#music log#day 1#learning#education#lofi#piano#vst#plugins
11 notes
·
View notes
Note
firstly, thank you so much for your help! amps were actually my next question haha 😂 i’m very new to electric guitars and i was thinking about playing without an amp for a few months so that i can collect the money for one later. my neighbours have a new baby too and i don’t want to disturb them lol. do you think this is a good idea or should i splurge a little on the amp right now?
I glad! ^^
yeah, the amp issue is a little tricky; I already had a big one I got from when my dad gave me his bass guitar, although it doesn't have a distortion or overdrive circuit, luckily the guitar I have came with a little amp (I say little, but it can be really loud lol).

I'd say it's not a big problem to start without an amp, just while you get the grip of an electric guitar (I first started playing the bass and I was so embarrased of how bad I would sound, I spent like 5 months playing without turning the amp 😅), but what I would suggest is to get started into the EQ of the tone of your guitar; that is, playing around the bass/mid/treble knobs of either an amp or a DAW equalization plug-in, so you can find the best way to make it sound good.

Last December I got the UM2 audio interface and I must say it was a good option to get started in recording my instruments (I also found an interesting, open-source DAW called Cakewalk by Bandlab), and I can even play late at night without having my neighbors complaining about the noise hehe so yeah, these ones are pretty good choices 👀
#the other thing about DAWs is that you can skip the ''looking up effect pedals for your guitar'' step#since most of them already have some included 😅#good luck anon!
1 note
·
View note
Text
NI Traktor Pro 3 Crack v3.4.0 FULL VERSION DOWNLOAD
TRAKTOR PRO 3.4.0 Crack - TRAKTOR PRO 3 CRACK fixes an issue in version 3.4.0, and which led to possible crashes on macOS system. This updated version no longer crashes when you editing the Artist or writing Title field, when you loading tracks with empty artist or Title fields into Traktor Pro 3 deck, or when analysing such a tracks.
DOWNLOAD LINK HERE ====> Traktor Pro 3 Crack v3.4.0
DOWNLOAD LINK HERE ====> Traktor Pro 3 Crack v3.4.0
On our site now you can download full version of Traktor Pro 3 Crack totally FREE also with direct link for download and no waiting and boring ads.
Traktor is the pro platform that top DJs trust, and Traktor Pro with Remix Deck technology is the most advanced version of Features and Highlights ever. Perform your mix on up to four decks, featuring TruWave colored waveforms, powerful looping and cueing functionality and an exceptional effects suite.
STAY IN SYNC WITH TRAKTOR PRO 3 CRACK FIX
Traktor Pro 3 Crack DJ software is great for honing your beatmatching skills, but you can also do blend genres and bridge any BPMs by letting TRAKTOR PRO 3 DJ do some of the great work. clicking the Sync button quickly gets your DJ tracks beat-matched, so you have plenty specter of time to experiment with your super DJ mix.
REMIX WITH LOOPS, HOTCUES, AND BEATJUMPS
For those who want to put their stamp on a own set, the industry’s most reliable and seamless dj loop, Hotcue, or beatjump tools let you crop and edit tracks however you like in Traktor Pro 3 Crack. Unless you want realese cut things up outside of your beat, TRAKTOR PRO 3.4.0 will make sure you never skip out of the super dj groove.
FULL FX SUITE INCLUDED WITH TRAKTOR PRO 3 PATCH
Modulate your dj favorite tracks with more then 40 intuitive, high-grade effects. TRAKTOR’s most famous Deck FX now can twist and screw perfect your tracks with almost endless variation tips, while new Mixer FX part introduce easy-to-use effects in a single control on each channel. Turn them up, down, on, and off, for sonic exploration that’s out of this world.
NEW INTERFACE IN TRAKTOR PRO 3 ACTIVATOR DJ SOFTWARE We’ve overtake TRAKTOR’s PRO 3 user interface for extra and more clarity by flattening and sharpening it for everyone to be also user friendly, so now you can see everything you need to at a glance in newest Traktor Pro 3.4.0 which coming with Crack. We have also added new parallel waveforms for easy understand. New metering parameters means you can accurately gain your DJ mix with full visual feedbacks.
DOWNLOAD LINK HERE ====> Traktor Pro 3 Crack v3.4.0
DOWNLOAD LINK HERE ====> Traktor Pro 3 Crack v3.4.0
TRAKTOR PRO 3.4.0 CRACK NEW MIXER FX
Whether it’s heavy drops or smoothest transitions that can define your style, new Traktor pro 3 Mixer FX are designed for your one-knob modulation with big-sounding sound results. Choose from 8 extra effects and 3 newest filters to assign to every each channel, in addition to TRAKTOR’s popular Deck FX.
SCRATCH WITH ANY SOUNDCARD ON PC OR AUDIO INTERFACE
Native Instruments TRAKTOR SCRATCH is now included in TRAKTOR PRO 3, right out of the Traktor box. This means that every DVS DJs using timecode vinyl can now use any soundcard or audio interface they like, in addition to tried and tested, TRAKTOR PRO 3 SCRATCH Certified soundcards and mixers. So if there’s a model that does it for you, or if you’re have to playing back-to-back with somebody on a different setup, TRAKTOR can always adapt.
traktor 3 crack
traktor 3 torrent
traktor dj studio 3
traktor pro 3 soundcloud
traktor pro 3 mac crack
traktor pro 3 software
crack traktor pro 3
traktor 3.3
traktor dj pro 3
traktor pro 3 download crack
traktor pro 3 serial key
traktor pro 3.3
tractor pro 3
traktor pro 3 license key
traktor pro 3 price
traktor pro 3 compatible controllers
traktor pro 3 free download full version
traktor pro 3 crack reddit
traktor dj pro 3 full crack
traktor pro 3 ipad
traktor pro 3 catalina
traktor pro 3 free download full version mac
traktor 3 mac
soundcloud traktor pro 3
native instruments traktor 3
crack traktor pro 3 mac
traktor pro 3 crack windows 10
traktor pro 3.5
buy traktor pro 3
traktor 3 mac torrent
traktor 3 crack mac
traktor pro 3 effects
traktor pro 3 dvs
traktor pro 3 activation key
traktor 3 pro torrent
traktor pro 3 free download full version crack mac
traktor pro 3 upgrade
1 note
·
View note
Text
Did you know cleaning your audio gear regularly can extend its lifespan significantly?
When it comes to audio equipment, we often talk about performance, features, and upgrades. But how often do we discuss maintenance? Sure, investing in quality gear is a no-brainer for any audio enthusiast, but what about taking care of it? A simple habit like cleaning your audio gear can go a long way toward extending its lifespan and ensuring consistent performance.
Why Cleaning Audio Gear is a Big Deal
Think of your audio gear as a car. You wouldn’t drive it for years without changing the oil, would you? The same logic applies here. Over time, dust, dirt, and grime can accumulate in the nooks and crannies of your equipment. While it may seem harmless, this buildup can interfere with connectors, reduce sound quality, and even lead to permanent damage.
Cleaning isn’t just about aesthetics; it’s about preserving functionality. For professionals and hobbyists alike, well-maintained gear is a long-term investment that pays off in both performance and reliability.

The Hidden Dangers of Neglect
Here’s the thing: even a thin layer of dust can disrupt the intricate circuitry of your gear. This can result in:
Distorted Audio Output: Dust on speakers or microphones can muffle sound quality, making your gear less effective.
Reduced Connectivity: Dirty connectors and cables may cause intermittent signals or even complete audio dropouts.
Overheating: Dust inside amplifiers or other powered equipment can clog ventilation, causing the system to overheat.
What’s worse? Neglecting your gear might lead to expensive repairs—or worse, replacements.
How to Clean Your Audio Gear
So, how do you keep your audio equipment in tip-top shape? It’s easier than you think. Here’s a simple guide to get you started:
1. Unplug Before Cleaning
Always ensure your equipment is turned off and unplugged before cleaning. This is not just about safety; it also prevents accidental short circuits.
2. Use the Right Tools
Avoid using household cleaning products, as they may contain harsh chemicals that can damage sensitive surfaces. Instead, stick to these essentials:
Microfiber Cloths: For wiping surfaces without scratching.
Compressed Air Canisters: To blow out dust from hard-to-reach areas like vents and connectors.
Soft Brushes: For delicate components like speaker grilles and control knobs.
Isopropyl Alcohol (70% or higher): Perfect for cleaning connectors and cables.
3. Clean Your Cables and Connectors
Audio cables and connectors are the lifeline of your setup. A dirty connector can lead to poor signal transmission. Use a small amount of isopropyl alcohol on a cotton swab to clean the connectors.
4. Dust Off Regularly
Make it a habit to dust your equipment weekly. Use a microfiber cloth or a soft brush to gently clean the exterior surfaces of speakers, mixers, or amplifiers.
5. Don’t Forget the Filters
If your gear has air filters or vents, clean them to ensure proper airflow. This step is especially important for powered equipment like amplifiers and audio interfaces.
6. Store It Right
When not in use, cover your equipment with dust covers or store it in cases. This simple step can drastically reduce the amount of cleaning required.

When Professional Cleaning is Necessary
While regular maintenance can solve most issues, some tasks require professional expertise. For instance, if you notice persistent audio distortion or connectivity problems despite cleaning, it might be time to consult a technician. Many reputable audio shops offer maintenance services that can help extend the life of your gear.
How Clean Gear Enhances Performance
A clean setup doesn’t just last longer; it also performs better. Here’s how:
Improved Sound Clarity: Removing dust from speakers and microphones ensures crisp, clear audio.
Reliable Connections: Clean cables and connectors reduce the risk of audio dropouts during performances or recordings.
Enhanced Durability: Regular cleaning minimizes wear and tear, ensuring your gear remains functional for years to come.
For those who rely on their equipment for professional gigs or personal projects, these small maintenance habits can make all the difference.
The Long-Term Benefits of a Maintenance Routine
Cleaning your audio gear regularly is like investing in its future. By dedicating just a few minutes each week to maintenance, you can:
Avoid costly repairs.
Maintain consistent performance.
Preserve the resale value of your equipment.
And let’s be honest—there’s something incredibly satisfying about working with gear that looks and feels brand new.
A Quick Note on Where to Buy Gear
While maintenance is crucial, the quality of your equipment plays an equally important role. Investing in professional-grade gear from reputable audio shops ensures that you’re starting with a solid foundation. High-quality products are often built to withstand wear and tear, but they still need your care to stay at their best.
Wrapping Up
In the world of audio equipment, a little effort goes a long way. Cleaning your gear isn’t just about keeping it looking good; it’s about preserving its functionality and ensuring it performs at its best. Whether you’re a seasoned pro or just starting out, adopting a regular cleaning routine can save you time, money, and frustration in the long run. So, grab that microfiber cloth and show your gear some love—you’ll hear the difference.
#music#audiogears#audio#dj#audio shops#professional audio equipment#brooklyn#speakers#audio maintenance#dj gears#dj gear#pro audio#brooklyn audio shop
0 notes
Text
Professional Sound on a Budget: Affordable Audio Equipment for Beginners
Are you just starting your journey into the world of professional audio but don’t want to break the bank? You’re in luck! The good news is that you don’t need to spend a fortune to achieve high-quality sound. Whether you're setting up a home studio, planning to DJ your first gig, or simply want to impress your friends at your next house party, there's affordable audio equipment out there that's perfect for beginners.
Let’s dive into the wonderful world of budget-friendly audio gear. And don’t worry; we’ll keep it simple—no tech jargon or audiophile mumbo-jumbo here!
1. Microphones: The Voice of Your Setup
First things first, let’s talk about microphones. Think of them as the voice of your setup. A good microphone is essential whether you’re singing, recording podcasts, or just making sure your voice sounds buttery smooth on your latest TikTok video.
Budget Pick: Dynamic Microphones Dynamic microphones are a great choice for beginners. They’re durable, reliable, and, best of all, won’t cost you an arm and a leg. Plus, they can handle high sound pressure levels, so go ahead and belt out that high note!
Pro Tip: Don’t worry about going for the most expensive mic you see. Some of the best recordings were made with microphones that cost less than your last pair of sneakers!

2. Audio Interfaces: Your New Best Friend
Now, if you want your microphone to do more than just look pretty, you’re going to need an audio interface. This handy device connects your mic and instruments to your computer, converting the analog signal into digital. Think of it as your personal translator, turning your voice into a language your computer understands.
Budget Pick: 2-Channel USB Interfaces A basic 2-channel USB audio interface is perfect for beginners. It’s easy to use, portable, and won’t have your wallet screaming for mercy.
Pro Tip: You don’t need a spaceship dashboard of knobs and buttons to get started. A simple setup is usually more than enough for a beginner!
3. Headphones: Listen Like a Pro
Ah, headphones—the unsung heroes of audio equipment. A good pair of headphones can make all the difference when you’re recording, mixing, or just jamming out to your favorite tunes.
Budget Pick: Closed-Back Headphones Closed-back headphones are ideal for recording because they help prevent sound from leaking out and being picked up by your microphone. They’re also great for when you want to keep your terrible karaoke session private. We’ve all been there!
Pro Tip: You don’t need to buy those fancy $500 headphones to start. Some affordable options sound just as good (and they don’t come with the stress of having to sell a kidney).

4. Studio Monitors: Don’t Just Hear, Feel the Music
Studio monitors are speakers designed to give you an accurate representation of your audio. Unlike your regular computer speakers, they don’t boost any frequencies. What you hear is what you get, warts and all. And yes, even your off-key singing.
Budget Pick: 5-Inch Studio Monitors For beginners, 5-inch studio monitors are a great starting point. They’re small enough to fit on your desk but powerful enough to let you hear every detail.
Pro Tip: No need to go all out on giant speakers. Start small; your neighbors will thank you!
5. Cables and Accessories: The Unsung Heroes
Let’s not forget the unsung heroes of the audio world—cables and accessories. They might not be as exciting as a shiny new microphone, but they’re just as important. After all, what good is that fancy gear if you have nothing to connect it with?
Budget Pick: Good Quality, Affordable Cables Invest in a few good-quality cables and a sturdy mic stand. These small details make a big difference in the long run.
Pro Tip: Don’t trip over cables—literally and figuratively. A tangled mess is not a good look (and a quick way to damage your gear).
Final Thoughts: Start Small, Dream Big
Getting into professional audio doesn’t have to mean emptying your savings. With the right equipment and a little creativity, you can create amazing sounds without spending a fortune. Start small, learn as you go, and who knows? Maybe one day, you’ll be the next big thing!
And remember, whether you’re singing in your bedroom, recording your first podcast, or mixing your debut single, the most important thing is to have fun and keep experimenting. After all, that’s what music is all about! So, what are you waiting for? Visit some professional audio equipment shops like VIP PRO AUDIO in Brooklyn, Grab your gear, hit that record button, and let your creativity run wild. Your journey to pro sound starts here—and who knows, you might even discover that your shower singing deserves a wider audience! Happy recording, future audio superstar!
0 notes
Text
Free Vst Effect Pack

Disclosure: When you buy through our links, we may get a commission at zero cost to you.
Free Vst Effect Packs
Vst Effects Free Download
Free Sound Effects Vst
Vst Effect Plugins
Best Free Vst Plugins
Free Vst Instrument Pack
Free Vst Effects Pack
I guess you would have to agree with me that the best way to polish your vocal recording or a vocal sample is to sprinkle some effects, just like the way you would sprinkle a reasonable amount of ingredients on your food. If done right, it sounds delicious right, yum yum 😉
Improve your projects with quality free vst instruments & effects for download. Vst presets / patches and free synth vst plugins available for download. Vst4you: Big Source Of Free Vst's Loops And More Good Stuff To Start Create Music. 2Packs From last 2 successful fx alien loops releases, we are giving youopportunity to buy 2 packs.
Our list of the 55 best free VST plugins encompasses tons of categories, namely: best Guitar VSTs, best Synth VSTs, best VST plugins for vocals, bass VSTs best drum VSTs and a horde of slick effects – that one can download for FREE!
IZotope Ozone Imager. The Ozone Imager is an essential free VST plugin for trap beats. As the name suggests, this is an imaging tool you use to control your track's stereo width. To make a professional sounding track, you must control your stereo width. Commonly, your low frequencies are narrow, in mono, while you typically place your higher frequencies wide.
Vocal effects are no exception to the ingredient perspective, you need to add a reasonable amount of effects to make them sound lively, and enjoyable to the listeners.
Best Free Drum VST My mother always told me “march to the beat of your own drum”, but I guess she was wrong, because I found a bunch of really good free drum vsts. Amongst them, is the T.REX 606, a classic sound that could have easily cost hundreds of dollars, but for some reason is free. Best Free Synth VST Plugins Dexed by Digital Sub Urban Dexed is a Free multi platform and multi format frequency modulation Synth which is based on, or closely modeled to, the Yamaha DX7. You can download it here.
Don’t get me wrong, I ain’t saying you should stack effects upon effects on your vocal samples, too much of everything is bad. That said, let us look at the best free awesome VST effects plugin in the music production scene.
Let’s ride on…
Page Contents
5.) g200kg – KeroVee
10.) MGF – TimeWarp
1.) AegeanMusic – PitchProof
If you haven’t heard of PitchProof, then, you are definitely missing out, this is like the secret tool I use on Vocals but it wasn’t even developed for Vocal, it was actually designed to work on monophonic signals such as guitar solos, but I’ll give you a tip on how I have been using it:
You don’t want to apply it in realtime, what you should do instead is to first select the key of the harmony, then you turn the Blend knob all the way to the right; wet e.g:
Export the vocal result, add whatever effects plugins you gat on your toolbox (vocal, flangers, etc) to spice up the pitched vocal, and then stack it on top of the original vocal. Boom, you have something unique!
Note: You don’t have to always push it all through the wet side as this might cause artifacts, just experiment and stick with what works for you.
You can even export more vocal, and maybe this time, you can try by reducing the detune knob, anyways, experiment until you get your preferred test.
That said, let’s look at some of the features of PitchProof:
The Blend control knob would let you adjust the level of pitch shift, while the Pitch drop-down menu lets you select pitches like +7 or -7, or harmonies which are intelligent pitch-shift effects.
Moreover, there are also some options at the bottom of the PitchProof plugin which give you the option to switch between stereo and mono; mono could save your CPU, while the stereo option could cause a resource hog if used on multiple inserts.
Transient Fix can be switch on or off to spice things up a little!
Possible Harmony Options:HarmonyInfo2ndDissonant harmonies3rdThe Typical Major/minor Chord Harmony4thThe same as the +5 semitones setting except a few notes are flat.5thThe Same as The +7 Semitones Setting Except the Last Note of The Major Scale Is Flat Making It “diminished”.6thA nice-sounding alternative to typical harmony intervals.7thDissonant 7th Chord Sounds.
2.) Auburn Sounds – Graillon
This is an autotune VST plugins designed and developed by Auburnsounds. This plugin is superb in the way it handles pitch correction.

It not only supports pitch correction but supports the generation of throat sounds, making octave sounds, enriching, and enhancing vocal expressiveness.
Also, there is a pitch shift parameter that transposes vocals up and down in octaves and semitones.
Features:
Free Vst Effect Packs
Pitch Shifter cleanly transposes a voice up and down and has been optimized for voice.
Pitch Correction module brings an immediate robotic sound, while the Bitcrusher addition softly adds sparkles to the mix.
Freemium
System Requirements
Available as VST, VST2, AAX, and Audio Unit plugin for macOS and Windows platform.
Download Graillion Auto-Tune Plugin
3.) JHudStudio – Vocal King
Vocal King helps glue the vocal in a mix, and it comes preloaded cool parameters, that could help in customizing the audio signal of a vocal track.
The Pres Compressor knob helps in bringing out the clarity of a vocal, so, by turning up the gain of the Pres Comp brings out the presence in the vocal along with giving it a smooth compression. On the other hand, the Low cut, Tighten, and the Bass knob compliment the Pres Comp in taking out muddy frequencies without the vocal sounding too thin.
I also love playing with the Crispy knob as it sprinkles some sparkles to the audio signal.
Features:
Help vocals to stand out in a mix by giving them amazing presence, clarity, and compression. Can easily work on any other content.
Acts like are preamp giving the signal a strong boost.
Easy to use interface for fast results.
Easy to read meters
Very CPU efficient compared to other types of plugins.
It can be used on many other audio sources as well.
System Requirements
Vocal King supports MAC/Windows/32bit/64bit/VST2/VST3/AU. Supports MAC OS X 10.7 / Windows 7 and higher. Older systems may not work.
4.) Sonic Anomaly – Vola
Vst Effects Free Download
Vola is a Voice Optimized Leveling Amplifier made for broadcast voice dynamics processing, it also works with different kinds of audio material, like drums, percussive instrument, and synth pads.
Free Sound Effects Vst
This fantastic tool is solely for cleaning up sound files but can be used for extreme compression effects as well.
Features
Real-time Visual Metering for changes in dynamics
Upwards & downwards compression, each separately adjustable.
Stats Display and more compression settings
Download Vola Vst (Windows)
Download Vola Jsfx (Windows and Mac)
5.) g200kg – KeroVee
This is a pitch correction VST plugin tool and has strengthened to support natural pitch correction.
This tool is handy and can perform different and various types of voice effects, for example, a conversion of the male voice to a female voice and vice versa.
KeroVee comes bundled with useful parameters for the effectiveness of the auto-tuning process, Parameter includes:
Scale Button: This is for specifying the scale you want to tune. Setting a wrong scale would result in an awful result, in a simple sentence, Know your scale before you go into this one
TuneSpeed: This will allow you to set the speed of correcting the pitch.
Nuance: This is one of the best and lovely parameters, you can use this to set a fine vibrato of the original sound, use this to create all sorts of weird effects.
Amount: Set to zero (0) if you want no correction, setting to 100 will result in full correction of the pitch
and many more parameters like Transpose option, master volume, etc.
System Requirements
A compatible host program that supports the VST formats
6.) Martin Eastwood – Duet
Have you heard those natural double effects in some tracks! Do you wonder how those are created? I guess yes 😉
Let me introduce to you – Duet, a double-tracking effect designed to enhance your audio sample be it vocal or even instruments, Duet is well capable of sparkling them up. The way Duet work is by pitch-shifting both the left and right inputs individually using a novel synchronous overlap and add technique, allowing pitch to be manipulated in real-time while still maintaining the time duration of the audio.
One thing I love about Duet is the way it can accurately create the illusion of multi-voices and adds varied texture to the mix. Experiment with Duet to see how it works.
Note: This is only available for Window
7.) MaxSynths – DSP-2
DSP-2 is designed with an intelligent Dynamic Processor, a 4-band equalizer fixed on vocal key frequencies, a saturator, and a room emulator based on the Schroeder reverberator. DSP is super simple to use and can serve basically all your vocal processing needs, again, experiment and keep experimenting to get the best settings that would soothe your need.
Features:
Intelligent Dynamic Processor (IDP).
4 different automatic operative modes.
Selectable compression ratio.
Saturator with three different operation modes.
EQ fixed on vocal key frequencies.
Room emulator based on the Schroeder reverb model.
Transparent increment of the perceived volume level.
High precision input/output VU-meter.
Low CPU usage.
8.) Distorque – Azurite
Azurite is a vocal effect by Distorque which is built for multi-voice chorus with a focus on rich sounds and versatile controls.
According To Distorque:
My goal in designing it was to make as flexible a chorus as possible without losing great tones and ease of use. The result is an effect that will be handy for producers, guitarists, and glitch lovers alike.
One of the great features of this plugin is the way you can create multiple simultaneous voices. Each of these voices can be further customized with their own delay line that is modulated by a separate LFO. Adding multiple voices leads to a thicker, smoother, and less wobbly tone. It also makes vivid stereo spreading possible with a mono signal.
The voice control helps you to choose how many voices you want for the chorus, e.g one, two, four, or eight.
Features:
Stereo or mono operation.
Colour control emulates vintage analog choruses.
2 band EQ.
LFO tempo sync.
Feedback control allows for flanger sounds.
27 built-in presets.
Delay time from 0.2ms to 200ms.
7 LFO shapes: Sine, Triangle, Sawtooth, Ramp, Exponential, Inverse Exponential, and Random.
Spread control for a stereo widening of a mono signal.
Control randomizer.
Other controls: Depth, Speed, Wet Mix, Output, Separation, Dry Delay.
Note: This is only available for Window
Download Azurite Win 32 VST / Win 64 VST
9.) TerryWest – EasyVox
EasyVox contains a bunch of tool for vocal processing, such as:
Dynamic mono vocal compressor/limiter/enhancer
Three bands equalizer
Autogain and Pre-Limiter
Auto Noisegate
Auto Band-off
Three EQ models
Fine EQ option
EQ activity/bypass LEDs
Low-Mid-Hicut
Vocal Doubler effect
Pre in/Post out gain
In/out/reduction meters
Donate To The Developer, It helps him to build more exciting plugins
Note: This is only available for Window
10.) MGF – TimeWarp
Last on our list is Timewarp by MGF, which is a vibrato effect with 2 LFOs which can pan the pitch modulation amount for a stereo effect.
Features:
Vst Effect Plugins
Sine, Triangle, Saw and random waves with control over the shape and smoothing.
Optional 4x upsampling and a smooth modulation algorithm ensure clean sound with minimal aliasing. Normal quality
saves CPU and sounds brighter but less silky.
2 different interpolation algorithms are available (ALG).
Fast modulation settings possible and encouraged
That is it, Good luck and have fun with music!
Useful Related posts:
Native Instruments MOD PACK takes three classic modulation effects – chorus, flanger and phaser – and adds features never seen before. Each offers exciting new creative possibilities as well as stunningly convincing vintage-style results, making MOD PACK a must-have upgrade from the rest of modulation effects.
Best Free Vst Plugins
Native Instruments Choral: Drawing sonic inspiration from some of the most iconic chorus effects from the past 40 years – including iconic stands and unison synth effects. Add width, movement, sparkle and shimmer to any signal, or take advantage of the new Scatter feedback mode. This avoids unpleasant metallic sounds. Instead, a completely new effect similar to reverb is created. The classic effects contained a small number of settings – On, Off and Type are usually the only controls. Our plugin offers many customizable options. The number of voices can be set gradually from one to three, the sync speed can be manually changed, as well as the modulation speed, volume, mix, delay time, stereo width and feedback.
Free Vst Instrument Pack
Native Instruments Flair: Flips the classic head flanger effect. FLAIR adds a revolutionary new Voices mode that uses multiple delay lines to create custom harmonic flanger layers and resonances. It even has 24 chord settings, offering different chords and note intervals. In addition to revolutionary features, FLAIR is capable of rich tape saturation and pedal flanger, offering all the parameters you’d normally expect, such as tempo-synchronized pitch modulation.
Free Vst Effects Pack
Native Instruments Phasis: Offers endless phasing sounds – adding movement, soul, and creative magic to any signal. PHASIS takes inspiration from the classic phaser but adds powerful new features. For example, the Spread control changes the step spacing of a vocal style effect passage. Ultra Power Mode brings modulation to ultra-high speeds, creating unique FM-esque tones. The plugin adjusts the peak density and Q-factor of the slices in the spectrum and whether it is set to one value, applied in real time or with automation, or reversed with the “Invert” button, “Spread” provides a new effect for both the phasing process and vowel sounds of vocals. With its powerful stereo spread function, advanced sync options and all the controls, what you’d expect from a professional phaser, PHASIS is already a formidable modulation device, but the ULTRA parameter takes the effect to a new area of application. ULTRA boosts the maximum modulation rate from 8.37 kHz to an incredible 477.3 kHz, which generates unusual FM-style effects never heard before and is able to turn even white noise into immersive sound.
1 note
·
View note
Text
Big Knob Audio Interfaces
Get the Fluid Audio SRI-2, the big knob audio interface with a striking design and affordable price. The large knob provides accurate control of the output level for high quality studio recordings.
For more details please visit us at - https://www.fluidaudio.com/products/interfaces.html
0 notes
Text
Zoom LiveTrak L-12
This is a product review of the mixer and interface, the Zoom Livetrak-L12. Again, I will break this down into general information, first impressions, and then long-term review. Long-term will, again, be around 6 months.
So, some overall information about this board: it is a mixer, it is an interface, and it can be a standalone device. Standalone meaning it does not require a computer to actually record or function. The unit costs $599 at the time of writing.
This device is really cool, because it does a lot to set itself apart from traditional mixers or interfaces by combining the two. You are able to take in up to 14 different signals at once, and you can run these into a DAW (Digital Audio Workstation) or straight out to speakers from the master outs if you are doing something like a live performance. It is also capable of running up to five separate ear mixes, which means I can have completely different levels for each instrument for up to a five-piece band. On top of that, you have built in effects to send each sound to, mostly reverbs and delays. Also, this product is iOS compatible, so you can use it to track straight into your iPhone or iPad using Garageband. And finally, you have the ability to store scenes, which means if you run a podcast and have a band, you do not have to change the settings manually every time you switch. You simply choose the recall scene that you want, and you are back to how it was.
First impressions: When I first got this thing, I do not know quite what I was expecting, but it is big. I have quite a large desk, and it takes up a noticeable portion. It is about 18 inches wide by 11 inches deep. After looking around, this is actually fairly compact for a mixer of this capacity. The build leaves a little to be desired because it can feel sort of cheap on some parts. It is an all plastic build, but there is an upside to this as it is much lighter than it would be with an all metal design. The knobs are all plastic as well, but they feel very tactile and responsive. The faders all have a good resistance to them to get a slightly better feel. Even though the build is not metal, you still feel like you have a good product here though. It would be tough to recommend taking it on the road, but with proper storage, it would be fine. Just do not abuse it.
Long-term: In my nearly six months of using this thing, it has been quite incredible. It has held up very well and Zoom is very responsive to their customers. I had a question about when MacOS Catalina support would come, and I had an email back within the day. The unit is still just as tactile and responsive as it was before, the preamps are all still crystal clear, and the unit still looks cool sitting on my desk.
I say the L12 is worth the $599 price tag. It does a lot and has helped me time and time again when I needed to get creative with signal flow. This is perfect for anyone who is tracking drums, a band, or simply has a podcast with several hosts. I definitely recommend this product for anyone in the market of mixers.
#zoom#livetrak#l12#audio#audio engineer#audio gear#homeaudio#audio blog#music#music blog#review#legendary#home studio
2 notes
·
View notes