#boot mac in recovery mode
Explore tagged Tumblr posts
Visit Tumblr Blog
Explore Tumblr blogs with no restrictions, modern design and the best experience.
Last Seen Tumblr Blogs


Fun Fact
Tumblr was the first site to host the blog for President Barack Obama in 2011.
Text
2014 vibes like
so i may have accidently broken my mac and then i fixed ir but at least its fixed?? i tried to install mac os sonoma on it, it was working fine until i restarted it and it came with with like a fucking stop sign or something so i had to install the original os.. FROM 2014??? it took so long to get to the most recent version of mac os my mac supports, still have the original mac os dual booted tho cause it looks cool. but when i go into recovery mode ITS STUCK IN THE ORIGINAL OS RECOVERY.. so anytime i have to reinstall mac os its the STOCK OS.. before it was mac os big sur which is the maximum mac os my mac supports.
4 notes
·
View notes
Note
If your laptop is a PC, you should be able to boot in recovery mode if you're able to get to the pin entering part. From there you might need to roll back a previous backup/update. I think macs have something similar but I'm not as familiar w them
i tried that :(( my mom is going to take it to an it person at her work this week and well see what happens and my dad said he can just get me a new one if nothing works; i just feel bad bc theyre expensive
#dad is adamant that its fine if we need to get a new one but :((#also i need to re log in to all my uni stuff and im just Stressed(tm)#asks
2 notes
·
View notes
Text
Resolving Computer Startup and Login Challenges
Computers are essential tools in our daily lives, but they can sometimes present frustrating issues that disrupt our workflow. From a Mac failing to boot properly to being locked out of a Windows system due to a forgotten password, these problems can feel overwhelming. This article explores practical solutions to common computer startup and login issues, offering step-by-step guidance to restore access and functionality. Whether you're troubleshooting a sluggish system or regaining access to a locked account, these methods will help you navigate the challenges with confidence.
Understanding Startup Issues on a Mac
When a Mac refuses to start correctly, it can manifest as a blank screen, endless loading, or an error message. This issue, often described as How to Fix Your Mac Did Not Start Correctly, can stem from software glitches, corrupted files, or hardware malfunctions. The first step is to restart the device in Safe Mode. By holding the Shift key during startup, the system loads only essential components, which can help identify whether third-party software is causing the problem. If the issue persists, resetting the System Management Controller (SMC) can address hardware-related problems, such as power or thermal issues. This involves shutting down the device, then pressing a specific combination of keys—typically Shift, Control, Option, and the power button—for a few seconds before restarting.
Another approach is to use Disk Utility in Recovery Mode. By restarting the device and holding Command and R, users can access a recovery environment to repair disk errors. Running First Aid on the startup disk often resolves file system inconsistencies that prevent proper booting. If these steps fail, reinstalling the operating system from Recovery Mode can restore functionality without erasing personal data, provided a backup exists. Always ensure critical files are backed up before attempting major repairs, as unexpected issues can lead to data loss.
Addressing Windows Login Problems
Forgetting a password on a Windows system can lock users out entirely, leaving them searching for solutions to the issue of Forgot Windows Password & Cant Sign In. This problem is particularly frustrating when no password reset disk or secondary account is available. One effective method is to use Safe Mode to access a built-in administrator account. Restart the computer and press F8 or Shift and F11 (depending on the system) to enter the Advanced Boot Options. From there, select Safe Mode and check if an administrator account appears on the login screen. This account, if active, allows users to log in and reset the password for the locked account through the Control Panel’s user management settings.
If Safe Mode doesn’t provide access, a password reset disk is another option, though it requires prior creation. For those without such a disk, using a bootable USB drive with password recovery software can be a lifesaver. These tools, available online, allow users to create a bootable drive on another computer, which can then be used to reset the password. The process involves booting from the USB, following the software’s prompts, and selecting the user account to modify. This method requires caution, as downloading software from unverified sources can introduce security risks.
Preventive Measures for Future Access
Preventing these issues requires proactive steps. For Mac users, regular updates to the operating system can patch vulnerabilities that cause startup failures. Creating a bootable backup using an external drive ensures that data remains safe even if the system becomes unbootable. Enabling automatic backups through built-in tools like Time Machine adds an extra layer of protection. Additionally, keeping a record of system changes, such as recently installed apps or updates, can help pinpoint the cause of future problems.
For Windows users, creating a password reset disk or linking the account to an online profile can simplify recovery. An online account allows password resets through a web browser on another device, bypassing the need for complex recovery tools. Regularly updating passwords and storing them securely in a password manager reduces the likelihood of being locked out. Enabling two-factor authentication adds an additional security layer, ensuring that even if a password is forgotten, alternative verification methods can restore access.
When to Seek Professional Help
While many startup and login issues can be resolved independently, some situations require professional intervention. Persistent Mac startup errors, especially those accompanied by unusual noises or hardware warnings, may indicate failing components like the hard drive or logic board. In such cases, contacting a certified technician for diagnostic testing is advisable. Similarly, Windows users facing repeated login failures despite attempting recovery methods may need expert assistance to diagnose deeper system corruption or hardware issues.
Professional services can also help recover data from unbootable systems, ensuring minimal loss. When seeking help, choose reputable providers to avoid scams or further damage. For both systems, maintaining a regular maintenance schedule, such as clearing cache files or defragmenting drives, can prevent many issues from arising in the first place.
Final Thoughts
Encountering problems like a Mac failing to start or being locked out of a Windows account can disrupt productivity, but they are often solvable with patience and the right approach. By following systematic troubleshooting steps, such as booting in Safe Mode, using recovery tools, or resetting passwords via external media, users can regain control of their systems. Preventive measures, like regular backups and secure password management, further reduce the risk of future issues. For complex problems, professional assistance ensures a safe resolution. With these strategies, users can confidently tackle computer challenges and maintain seamless access to their devices.
1 note
·
View note
Text
Enable System Integrity Protection mac Instances in AWS

AWS Programmatically Manages EC2 Mac Instances' macOS System Integrity Protection
A key improvement from Amazon Web Services allows developers utilising Amazon EC2 Mac instances to programmatically manage Apple's System Integrity Protection (SIP). This new feature eliminates physical access and recovery mode reboots to modify SIP status, simplifying development and testing.
Allow mac system integrity protection
In 2015, Apple added rootless System Integrity Protection to OS X El Capitan 10.11. SIP is enabled by default on macOS to reduce root user account protection against dangerous apps. It secures the system by restricting access to system-owned files and directories, preventing unauthorised software from choosing a starting disc, and blocking changes to protected files and folders.
SIP quickly solved the security issue of unconstrained root access, which might allow malware to take control of a device with a single password or weakness. Apple added SIP to macOS to improve security, especially since many users use administrator accounts with weak or no passwords.
SIP provides effective malware protection for daily use, but developers may need to temporarily disable it for development and testing. Disabling SIP allows installing and testing new device driver or system extension code. SIP may also block system configurations needed by some apps.
When SIP is temporarily disabled, macOS development program optimisation permissions are given. Warning: This temporarily disables the vault door for approved maintenance, not permanently leaving it open. Disabling Spotlight indexing, driver development, and outdated software compatibility require offsetting SIP. To conserve CPU and disc I/O, Spotlight can be turned off when indexing is not needed. Spotlight is beneficial on desktops but not on servers for fast item searching.
macOS shut down system integrity
Before, SIP could only be disabled by entering the Mac. Restarting in recovery mode, disabling SIP with csrutil, then restarting were the steps. SIP management integration with the EC2 API and Amazon EC2 control plane was problematic due to physical access and recovery mode booting. Before this revelation, developers used EC2 Mac instances with default SIP settings.
This is fixed by the new AWS API. Developers can now dynamically enable and disable SIP on Amazon EC2 Mac instances. The process begins with CreateMacSystemIntegrityProtectionModificationTask, a new EC2 API. This asynchronous API request changes the instance's SIP status. Developers can track task progress with another new EC2 API, DescribeMacModificationTasks. These tasks only require the target EC2 Mac instance ID.
Preconditions must be met before using the new API on contemporary machines and Apple silicon-based EC2 Mac instances. Developers must login to the instance, specify the password, and enable a secure token for the ec2-user user account on macOS to setup it. Set the password with sudo /usr/bin/dscl. -passwd /Users/ec2-user then enable the secure token with sysadminctl -new.Password [password] and -oldPassword [password] must be run in the instance terminal. If the GUI has never been used, a Keychain error may appear, but the command activates the secure token. To verify, run sysadminctl -secureTokenStatus ec2-user.
If the prerequisites are met (on applicable instances) and the instance ID is known, the AWS CLI or other supported methods can toggle the SIP status. The create-mac-system-integrity-protection-modification-task command specifies the instance ID, preferred SIP state (such as “disabled”), root volume username (ec2-user), and credentials file password.
The API returns the modification task's initial status (typically “pending”) and task ID after completion. By showing statuses like “in-progress” and SIP configuration details, the describe-mac-modification-tasks command can be used to track task progress.
The API initiated a reboot process that makes the instance inaccessible. A whole surgery can take 60–90 minutes. After the operation is complete and the instance status is back in the AWS console, developers can access to the computer via SSH or EC2 Instance access. Run csrutil –status to verify the instance's new SIP status.
SIP on Amazon EC2 Mac instances requires careful thought.
The AWS Management Console, CLI, API, and SDKs can disable SIP.
Apple silicon has volume-based SIP. If the root volume changes, SIP must be disabled again. Intel instance SIP status is unaffected by root volume replacement because the configuration is Mac host-based.
Stop and restart the instance to enable and disable SIP. Instance SIP status is unaffected by reboot.
SIP status cannot be transferred between EBS volumes. If you construct an Amazon Machine Image (AMI) from an instance with SIP enabled or restore an instance from an EBS snapshot, SIP will be switched off again.
Availability
These new APIs are available in all AWS regions with Amazon EC2 Mac instances. AWS says these new SIP setup options are free.
This new functionality streamlines workflows that previously needed manual intervention and significant downtime, giving EC2 Mac clients additional build and development flexibility and control.
#AmazonEC2Mac#SystemIntegrityProtection#macOS#EC2Mac#EC2API#EC2Macinstances#technology#technews#technologynews#news#govindhtech
0 notes
Text
Mac Screen Issues Explained: Common Problems and How to Fix Them Like a Pro
Your Mac is a powerhouse of productivity and creativity—until the screen starts acting up. From flickering displays to black screens, Mac screen issues can be frustrating, but the good news is that many of them can be fixed without rushing to the repair shop. In this guide, we’ll break down the most common screen problems and provide expert solutions to get your display back to normal. If you’re searching for Mac screen repair solutions, you’ve come to the right place!
1. Mac Screen Flickering
Symptoms:
Screen flickers randomly or at specific times
Flashing horizontal or vertical lines
Brightness fluctuates unexpectedly
Causes & Fixes:
✅ Software Glitch – Update macOS to the latest version. Go to System Settings > Software Update and check for updates. ✅ PRAM/NVRAM Reset – Shut down your Mac and restart it while holding Option + Command + P + R for 20 seconds. ✅ Safe Mode Check – Boot into Safe Mode by holding Shift while restarting. If the problem stops, an app might be causing the issue.
If these fixes don’t work, a hardware issue might be the cause, and you may need professional Mac screen repair.
2. Mac Black Screen on Startup
Symptoms:
MacBook turns on, but the screen stays black
No Apple logo or startup progress bar
Backlit keyboard or startup chime works, but no display
Causes & Fixes:
✅ Power Cycle Your Mac – Hold the power button for 10 seconds to force shut down, then restart. ✅ Check Brightness & External Display – Sometimes, the brightness might be set too low. Try connecting an external monitor to see if the issue is with the internal display. ✅ Reset SMC (for Intel-based Macs) – Shut down your Mac, then press and hold Shift + Control + Option (on the left side) and the power button for 10 seconds, then release and turn it on.
If none of these steps work, you may need a professional Mac screen repair service.
3. MacBook Screen Has Strange Colors or Lines
Symptoms:
Pink, green, or purple tints on the screen
Horizontal or vertical lines appearing randomly
Colors look washed out or distorted
Causes & Fixes:
✅ Check Display Settings – Go to System Settings > Displays and adjust the color profile or resolution. ✅ Loose or Damaged Display Cable – If you recently dropped your Mac, a loose cable could be the issue. A technician can check and reconnect the display flex cable. ✅ Graphics Card Issue – If you have an older MacBook Pro, the graphics card could be failing. Running Apple Diagnostics (press D while booting) can help detect hardware issues.
For persistent issues, professional Mac screen repair may be necessary to replace faulty components.
4. Mac Screen Stuck on Apple Logo
Symptoms:
Screen freezes on the Apple logo
Progress bar gets stuck during startup
Mac won’t boot past the loading screen
Causes & Fixes:
✅ Boot into Safe Mode – Hold Shift while restarting to load macOS in Safe Mode, which can fix software conflicts. ✅ Reset NVRAM and SMC – Follow the steps in previous sections to reset these settings. ✅ Reinstall macOS – If the issue persists, boot into macOS Recovery Mode (Command + R during startup) and select Reinstall macOS.
If the problem continues, it might be a hardware failure requiring expert Mac screen repair.
5. Mac Screen Backlight Not Working (Flexgate Issue)
Symptoms:
Screen works but is extremely dim
Stage light effect (uneven brightness at the bottom of the screen)
Flickering when opening and closing the lid
Causes & Fixes:
✅ Try External Display – If the external monitor works fine, the issue is likely with your Mac’s backlight or display cable. ✅ Inspect for Flexgate Symptoms – MacBook Pro models (2016-2019) may have a defective display cable that wears out over time. Apple offers free repairs for some affected models. ✅ Screen Replacement – If the backlight fails completely, you’ll need a Mac screen repair to replace the display or backlight components.
When to Seek Professional Mac Screen Repair
If you've tried all the troubleshooting steps and your Mac screen still has issues, it’s time to seek professional help. A trained technician can diagnose whether you need a simple screen cable repair, a backlight fix, or a full display replacement.
Finding the Right Repair Service
Look for certified Apple repair providers or reputable third-party Mac repair specialists.
Check customer reviews and warranty options before committing to a repair.
Compare repair costs—Apple’s official repair services can be expensive, while third-party technicians may offer more affordable solutions.
Final Thoughts
Mac screen issues can be annoying, but many problems can be fixed with simple troubleshooting. Whether you’re dealing with flickering, black screens, or strange colors, try these solutions before opting for a professional Mac screen repair. If your display is physically damaged or has persistent problems, don’t hesitate to seek expert help to restore your Mac’s functionality.
Have you experienced any of these Mac screen issues? Let us know in the comments how you fixed them or if you need further help! 🚀
0 notes
Text
A Guide to Typical Problems with MacBook Repairs
Users renown Macs for their seamless experience and exceptional performance. But, with time, they can also pose issues for their users. When you turn on your device, the screen is blank. Or, your MacBook may not charge even after you have plugged it in.
These are the most frequent issues that MacBook repair near me. You might run into a lot more problems with the MacBook. Of these, we have addressed five major problems and provided easier fixes.
Problems in Charging
You may experience problems with charging your MacBook repair near me if you need a new battery. Replace your battery when it hits the largest cycle count. This ensures the best performance. A normal Mac battery should be able to sustain 1,000 cycles of charging and discharging. You can examine the battery's cycle count to see whether you need a new one.
Mac is not starting
If your MacBook won’t start after checking the outlet and power cord, try these steps:
Unplug all accessories.
Reset the System Management Controller (SMC).
Check the screen brightness.
Boot into safe mode.
If these solutions don’t work, try using Apple's Recovery Mode. It may help fix the startup disk or reinstall macOS. If the problem continues, get in touch with Apple Support for more help.
Issue with Mac screen flickering
Its accuracy and screen quality are the best on the market without any doubt. While it is the most reliable delivery technology, it can still have display issues. The flickering screen is one of the most common issues that MacBook owners face.
Here, we're dealing with the problem as well as the troubleshooting. Checking for hardware problems is the first thing you should do. To fix screen flickering on your Mac, follow these steps if there are no existing solutions.
Beach Ball Spinning on a Mac
When your Mac struggles with a task, it may show a colorful, round cursor. People call this cursor a spinning beach ball, rainbow wheel, or spinning pinwheel. It means the hardware is busy and needs time to finish. The WindowServer displays a spinning beach ball when an app has too much work to handle. This indicates that the computer is not responding.
Mac's sound is not working
The absence of sound on your MacBook always constitutes a bothersome situation. Your MacBook picks this moment to stop making sound. This happens during streaming shows and virtual meetings. We have you covered, though, so don't worry. Every day at Asurion, we assist people in fixing and resolving technical problems. If the sound on your MacBook stops, this tutorial will help you fix it fast. You’ll be back to enjoying music, making calls, or binge-watching in no time.
Overheating MacBook
Portable Macs, like the MacBook Air and MacBook Pro, use modern cooling tech. This keeps them from overheating. But they don't always prevent Macs from overheating. The system will operate slowly because overheating creates spinning fan effect. Users should learn the right steps to manage overheating in their Mac devices. Properly managing overheating will prevent damage to your computer hardware.
The device is unable to connect to Wi-Fi
If your MacBook won't connect to Wi-Fi, you have probably been left wondering what's going on. One of the most frustrating problems is this one. It needs some perseverance and troubleshooting. Good news! A MacBook often loses its Wi-Fi connection. Luckily, there are many ways to fix it and get your internet back.
Conclusion
If your MacBook needs repairs in Dubai, find a reliable and affordable service. Professional MacBook repairs provide expertise, warranty preservation, and peace of mind. You can find a repair service that fits your needs. Start by researching options. Check prices and look at trusted providers like uaetechnician. When you choose, focus on quality and experience. Hiring a skilled repairman helps you avoid stress and saves time and money. To keep your MacBook repair in dubai running well for years, follow preventive care guidelines. This will help reduce future issues.
1 note
·
View note
Text
MacBook Repair in Noida: know the details:
Is your MacBook not turning on? This can be very frustrating, especially if you need to use it for work or study. Many people face this issue, but the good news is that it can often be fixed. There are several reasons why your MacBook might not start. It could be a battery problem, a software issue, or even a faulty power button. Before you panic, try some simple solutions like checking the charger, restarting your MacBook, or resetting the system. If none of these steps work, you may need professional help. For expert MacBook Repair in Noida, visit a trusted service center. A skilled technician can quickly diagnose the problem and fix it, so your MacBook works like new again.
Let's figure out the reasons why the MacBook is not turning on:
Faulty Cable or Charger: A faulty cable or charger won't charge your MacBook. In case you are using a low-quality charger, these chargers are unable to provide any security features to protect the MacBook from power surges.
Battery Depletion: Check if your MacBook battery has some charge left or not. Connect your MacBook to the power adapter before turning it on.
Software Glitches: If the operating system gets affected by any critical errors or bugs, it can crash and force the MacBook to shut down randomly and prevent the MacBook from booting.
Hardware Malfunction: Hardware problems take place due to physical damage, wear and tear, manufacturing defects, extreme temperature, or poor-quality accessories. That can lead to power button failure, RAM issues, or damaged internal components and result in turn-on problems.
Overheating: MacBooks are not designed to withstand high temperatures, and they can lead to permanent damage, like a swollen battery, a warped screen, or even melt the internal components. And it can trigger the safety mechanism that prevents the MacBook from turning on.
Liquid Damage: Spilling water or any other liquid on your MacBook can be dangerous. It can short-circuit and damage the internal components.
Drops: Accidental drops can cause vulnerable damage, they can become dented and lead to permanent damage and even prevent the MacBook from turning on.
All the reasons mentioned above can prevent your MacBook from turning on. If your MacBook is also a victim of any such type of damage, MacBook Repair in Noida will provide you with the quick fixes that may help you to deal with it.
Check if your MacBook battery has charge:
Check if your Mac has any battery life left. Disconnect and reconnect the power adapter. If you have an older MacBook, your MagSafe cable will show you a green light if the computer is charged and amber if it’s still charging. Try to only use Apple-made cables. They are more likely to be safe for your MacBook and not put extra strain on your battery life. Also, don’t forget to check the power outlet, in case you’re using a faulty one.
Boot up: Try to turn on your MacBook by pressing the power button. Check if the fans are making a sound. If yes, then it might be a software-related issue. If it doesn't boot at all then it might be due to a hardware malfunction.
Disconnect the keyboard, mouse, USB, and external hard drive to make sure they don't get affected. If nothing has changed, you need to do a force restart.
Force Restart: Shut down your Mac by pressing the power button. Unplug all the power cables. Hold the power button for 10 more seconds. Restart the Mac as usual.
Initiate Recovery Mode: Make sure your Mac is completely shut down. Hold down command + R and turn your MacBook back on. You’ll see a new window pop up with some options to choose from. Click disk utility and continue. Select your hard drive, and click on First Aid. After the process is complete, turn your MacBook off and on.
Restart in Safe Mode: Press and hold shift, release shift when your MacBook starts up in safe mode.
Reset NVRAM: Hold down command + option + P + R and turn on your MacBook, release the buttons after hearing the second startup sound.
Reset SMC: Press shift + control + option and power up.
Reinstall OS: Take a backup, using a second MacBook and a thunderbolt cable. Connect the two MacBooks, turn off your MacBook, press and hold T and turn on your MacBook, until the cable icon appears. Now your MacBook's hard drive should appear as an external one on the other MacBook’s finder. Copy the files to the other MacBook. Restart your MacBook in Recovery Mode and select the reinstall macOS option from the menu.
What to do if your MacBook is not turning on?
Make a data backup: Make a backup copy of your critical data before starting any repairs to guard against possible loss in the event that the repairs cause more damage. To make a backup of your papers and files, use iCloud or Time Machine.
Seek Expert Assistance: Get in touch with a respectable repair provider that specializes in MacBook repairs. Using original Apple components, their team of knowledgeable specialists can evaluate the damage and perform the required repairs. If you don't know how to choose one. Here you go:
Apple Store: Go through the official Apple Store or visit an experienced repair provider for technical services. Apple Stores and repair providers have certified technicians who can identify the problems and repair your MacBook using genuine Apple parts. Log in to the Apple website to find the nearest Apple Store or authorized repair provider with positive reviews in your location. Book an appointment at the Genius Bar or walk in for assistance. They will guide you with estimated costs and time needed for the repair.
Third-Party Repair Shops: You can search in your location for a reputed third-party repair shop that has experience in repairing Apple products. Look for a shop that has good experience and specialization in repairing Apple products. Before visiting the shop check the reviews to ensure they are capable of repairing Apple products. Ask for the warranty for the repair, and the parts they would use, and inquire about the quality and the process.
Online Services: Mail-in repair service facilities are offered by some companies. You need to contact them through the mail. Need to provide them with the details about your MacBook and the problems that have happened. They will guide you and provide instructions on how to send your MacBook for repair. Choose a reputed service provider with good experience and positive feedback from the customers.
Independent Repair Provider: Skilled technicians with adequate knowledge to deal with Apple products can fix the MacBook properly. They will use genuine Apple parts in case of any replacement, and to maintain a long-term relationship with the customer, they may also offer some warranty on the repair.
Local Repair Shop: In every city, there are local repair shops available. Local technicians may repair your MacBook, it can be cheap. But not sure about the quality of the service, and whether the parts they will use are genuine or not. It is better not to take any risk and compromise the durability of your Mac by contacting an inexperienced technician.
Before selecting the repair provider, go through the reviews of other customers. Make sure the technician is skilled and can provide you with the service regarding MacBook Repair in Noida. A trusted repair provider will not take any risk by compromising the quality of repair.
0 notes
Text
iOS/iPadOS 18 Supported
Fixppo - Best Free iOS System Repair & Recovery Software
Downgrade iOS 18 to 17 or upgrade to iOS 18, no jailbreak. 
Repair 150+ iOS/iPadOS/tvOS system issues like stuck on Apple logo, boot loop without losing data.
Free enter/exit Recovery Mode on iPhone and iPad with one-click.
Factory reset iPhone/iPad/Apple TV without passcode/iTunes/Finder.
Back up and restore iPhone data without iTunes/iCloud.
Support all iOS versions and devices including iOS 17/18 and iPhone 15/16.
iMyFone 致力於為 iOS 和 Android 裝置、Windows PC 和 Mac 提供解決方案。
我們的產品可協助人們解決諸如恢復遺失的資料、解鎖 iPhone 或 Android 手機、修復各種系統問題等問題。
憑藉我們的領先技術,iMyFone 產品已被 120 多家權威媒體報導,並得到了優良的評分和評論。
遇到科技問題時,越來越多的人信賴並選擇我們的產品。我們致力於提供最好的產品和服務,並且始終如一。
服務經歷:
1. 9 年經驗。
2. 190 個國家/地區的。
3. 3500 萬用戶。
4. 5800 萬下載。
iMyFone,為智慧手機故障提供專業的解決方案。
LINE 資料管理:一鍵完成 LINE 轉移、備份、還原,最佳的 LINE 資料管理工具!
iOS 系統修復/資料救援:可從 iOS 裝置、iTunes 備份、iCloud 回復已刪除檔案。可救回照片、影片、訊息、聯絡人、備忘錄等 30 種 iOS 數據類型。
1 note
·
View note
Text
Losing important data is a catastrophe for any individual or business and there are a million ways for it to happen. Accidental deletion, virus attacks, OS crash or partition format. You might not even know when these hit you until you come face to face with inaccessibility of your precious data. That’s the reason the practice of taking backups is emphasized time and again. However, the best of us fall prey to the vicious ways of data loss and have to resort to Mac partition recovery software to regain our data. If you switch on your Mac to find that your familiar disk cannot be search by Finder or they appear to be empty, you should start coming to terms with the fact that you might have lost your Mac partitions. While this may lead to complete data loss, acting quickly to rope in great Mac partition recovery software like Stellar Phoenix Mac Data Recovery could help you recover all your data in time. This guide will be explaining this amazing software in detail so that you’re able to fight back data loss when you need to. Brief Overview Of Mac Partition Loss Many of us may think that it is impossible to recover Mac files after formatting. Well, it’s not! If you’ve just formatted your Mac partitions but not written new data to them, your previous data can very well be salvaged. This is because of the inherent way files are stored on the Mac. Your Mac hard drive maintains an index file that controls the entire file system. The standard formatting only changes the index file, not the actual data. Therefore, although the formatted files are inaccessible, you can recover them with the help of data recovery applications like Stellar Phoenix Mac Data Recovery. What NOT To Do If Partition Loss Occurs If you suspect that your Mac has suffered partition loss, DO NOT attempt the following at all: Re-formatting or re-partitioning of the drive Do not write new data or save new data to the drive or formatted partition Do not try to delete and recreate partitions Do not run any disk utilities or defrag utility Undertaking any of the above mentioned activities in a rush could make matters worse by overwriting data that can still be recovered. Hence, stay calm and resort to good quality software to recover Mac partitions. Recover Formatted Partition Using Stellar Phoenix Mac Data Recovery Stellar Phoenix Mac Data Recovery is a comprehensive Mac Data Recovery software to reclaim files, documents, images, music, movies lost or deleted from any HFS, HFS+, FAT, ExFAT and NTFS file system based storage media. It can recover all files with their original names and even perform RAW recovery to recover entire lost volumes on your Mac. If you can’t see your data on your iMac, MacBook Pro, Air, Mac Mini or Mac Pro, Stellar software can help you out by salvaging your files safely and accurately. Through evolved scanning modes like ‘Quick Scan’ and ‘Deep Scan’, this ultimate software can efficiently claw back your valuable data from formatted drives, volumes and even partitions. It also supports Boot Camp partition recovery. Step For Partition Recovery Here’s how to use this brilliant software: Step 1: Download And Install Download Stellar Phoenix Mac Data Recovery zip file and extract it. Then double-click the dmg file to mount a virtual volume called StellarPhoenixMacDataRecovery. Thereafter drag this application to the Applications folder to install it. Step 2: Run The Application Double-click on StellarPhoenixMacDataRecovery in the Applications folder of your Mac to run this software. You will see the main window of the software displaying the License agreement that you’ll need to accept to proceed. Step 3: Select The Target Partition Once you run the software, you will see all Mac drives and partitions listed on the left hand side of the main software window. Select the partition you want to recover. Step 4: Select Appropriate Recovery Level On selecting a partition, the recovery levels are displayed in a pane adjacent to where the partitions are listed.
Select the recovery level from the options – “Recover Data” (recover lost data), “Deleted Recovery” (recover lost volumes), “RAW Recovery” (recover data from severely corrupted storage media) or “Create Image” (create image of storage media). For partition recovery you should select “Deleted Recovery” by clicking on it. Step 5: Select Scanning Mode Once you select a recovery level, you will be prompted to choose a scanning mode – Quick Scan or Advanced Scan. Select the mode as per your requirement. Step 6: Click on Start Scan to start scanning Finally click on the Start Scan button to start the scanning. The progress of the scan will be shown through a progress bar on the next window. Step 7: Preview Your Files As files are found they will be listed in a preview pane. You can preview each file by right clicking on it and selecting preview or by selecting the file and then pressing the “Eye” button. Important Note: The trial version of this software supports functionality up to this point. You may download the trial version of this software and see if the files you seek are displayed after scanning. If they are and you are satisfied with their preview, you can purchase the full version of this software and recover your files with ease. Step 8: Select The Files You Want To Recover Now select the files you wish to recover. You can select multiple files or recover individual files. Step 9: Click On Recover To Complete The Process You could recover each file by right clicking on it and selecting Recover. Alternatively, you can select multiple files and click on the “Recover” button to recover them all at once. Step 10: Specify Target Location And Reclaim Your Data When you click on Recover, you will be prompted to select the location where you want to save the recovered files. Browse and specific your target location and watch the software restore all your critical data smoothly. Concluding Lines That’s all there is to it. See how easy it is to recover Mac partitions with Stellar Phoenix Mac Data Recovery! Try it out today and take a sigh of relief.
0 notes
Text
How do I factory reset iPhone without a passcode?
Solution 1: Factory Reset iPhone 6 with iCloud/iTunes
Solution 2: Put your phone into reply mode
Step 1: Use an original USB cable to connect your iPhone to a PC or Mac computer and then open iTunes. Step 2: Once your device is connected, you need to boot your iPhone to recovery mode. Step 3: Then iTunes will detect your iPhone in the recovery mode and choose the Restore option on iTunes. Step 4: Wait until the restoration is done, and your iPhone will be reset to the factory resettings.
Solution 3:Use TunesKit iOS System Recovery
TunesKit iOS System Recovery is a trustworthy and powerful one. It will help you remove any kind of screen passcode no matter it's a numeric one or a more advanced Touch ID or Face ID.
Besides iPhone 11, its full compatibility also enables users to restore other models including the latest iPhone 14, iPad, or devices that’s running the latest iOS 16, etc.
youtube
0 notes
Text
Fucking Macs are ruining my life
Have M1 mini, macOS install is just weird and filesystems kind of fucked up because finder is fucking stupid
Try to back up my old renoise projects to iCloud, they get deleted instead
>fuck it it’s been long enough asahi time
Don’t have enough space to make a partition big enough for asahi because it needs to preserve the Mac partition apparently?
Reinstall macOS from recovery mode boot, it doesn’t actually do anything.
Finally factory reset Mac, can finally install asahi but know that there’s like 40-50 GB in this non expandable ssd that just has a useless fucking macOS install
1 note
·
View note
Text
How To Enable System Extensions On Mac
You may feel that MacOS has limited in-built features. This means that you have not enabled the MacOS system extensions. System extensions, also known as kernel extensions, can unlock a new world of possibilities by adding powerful functionalities or tweaking existing ones. But many users wonder how to enable system extensions on Mac.
MacOS is known for its user-friendliness and tight security. The security features may hinder some customization options like installing third-party applications. However, to bypass this, you can enable system extensions on your Mac. However, that’s not completely safe and there’s risk involved.
In this article, we’ll discuss how to enable system extensions on Mac, its advantages and disadvantages.
Why Enable System Extensions On Mac?
Apple Macs with Silicon system chips (M1, M2, M3) have an enhanced security feature by default. This security feature might be a hurdle for installation of certain apps. The enhanced security on Mac with silicon chips restricts installation of execution of unsigned system files. So even if you allow installation from trusted developers, applications relying on legacy system extensions (kernel extensions or kexts) might encounter issues.
During the installation process of an application from a verified developer, a notification may appear indicating that a system extension installation attempt was blocked. This occurs because legacy system extensions are no longer enabled by default.. To ensure the application’s full functionality, you need to enable system extensions on Mac.
System extensions are like specialized tools that interact directly with the system, fine-tuning its performance or adding entirely new functionalities. These extensions can:
Enhance system performance: Utilities like memory management tools or antivirus software can leverage system extensions for deeper system access.
Add hardware support: Specific hardware, like graphics tablets or external hard drives with encryption, might require extensions for proper functionality.
Integrate with applications: Third-party apps often rely on extensions to interact with the core system or provide advanced features.
Modify user experience: Extensions can customize the way you interact with your Mac, like adding new keyboard shortcuts or window management tools.
How To Enable System Extension On Mac?
Now that we know the benefits of enabling the system extensions on Mac, let’s move on to the process. Keep in mind that enabling system extension on Mac only works on silicon chip system i.e. M1, M2 and M3. Here’s how its done:
Firstly verify your Mac’s processor by navigating to the Apple menu and selecting “About This Mac.” Check if you have an Apple Silicon chip such as M1, M2, or M3.
Now install an app upon which you encounter “System Extension Blocked” message during installation. Step-by-step instructions for enabling system extensions on your Mac to improve functionality.
In the error message, tap on click “Open Security Preferences.” If you have by mistake closed the error dialogue box, open Security settings through the Apple logo > System Preferences > Privacy & Security. Adjust security settings in the Recovery environment to enable kernel extensions using Startup Security Utility.
Locate the “Security” section and ensure “Allow applications downloaded from App Store and identified developers” is selected.
Then click on “Enable System Extensions.“
A pop-up might appear saying that modifications require Recovery Mode. In such a case, click “Shutdown” to power down your Mac.
Once completely off, press and hold the power button (Touch ID) until “Loading startup options” appears.
Select “Options” and then “Continue” to boot your Mac into macOS Recovery Mode.
From the top menu, choose “Utilities” and select “Startup Security Utility.”
Identify your startup disk and click “Security Policy…”
Under Startup Security Utility, choose “Reduced Security” and enable the option saying “Allow user management of kernel extensions from identified developers.”
Tap on “OK” to restart the device.
Is It Safe To Enable System Extension On Mac?
Enabling system extensions on macOS offers increased functionality but comes with a touch of caution. Here’s all you need to consider before modifying system settings.
Trusted Source: Download extensions only from reputable developers with a good track record. Check online reviews and ensure the developer website seems legitimate.
Specific Needs: Only enable extensions that address a specific need or enhance your workflow. Avoid enabling unnecessary extensions that might clutter your system or introduce vulnerabilities.
There are some potential risks while enabling the system extensions on your Mac. Here are some of them discussed.
Security Vulnerabilities: Un-trusted extensions can be malicious, potentially compromising your system’s security. Downloaded malwares can use extensions to gain deeper access compromising your personal data.
System Slowdown: Too many extensions can consume resources and slow down your Mac.
Security Tips While Enabling System Extension On Mac
As we know that while system extensions can be helpful in customization options, but can pose some security threats if not done with proper care and caution. Here are some security tips that you can consider after enabling system extensions on Mac.
Antivirus Software: Consider using a reputable antivirus software on your system. Apart from the software, use a bit of caution when downloading extensions.
Disable Unused Extensions: Regularly review your enabled extensions and disable any that you no longer use. This reduces the possibility of potential threats.
Frequently Asked Questions
Here are some questions that you can refer to in case of doubts.
How do I know if an extension requires system extension access?During installation, the application might prompt you for permission to enable system extensions. Also, if you encounter functionality issues with a specific app, check the developer’s website for information on extension requirements.
Are there any risks associated with enabling system extensions?Yes. Downloading extensions from untrusted sources or enabling unnecessary extensions can introduce security vulnerabilities or slow down your system. Always verify the developer’s reputation before installing an extension.
How can I disable a system extension?The method varies depending on the extension. Some offer built-in disabling options within their preferences. But you can also navigate to System Preferences > Security & Privacy > Privacy > Extensions and uncheck the box next to the extension you want to disable.
Conclusion
That’s all about enabling the system extensions on your Mac. Enabling system extensions on your Mac has certain advantages and disadvantages. So if you are unsure on whether to enable the extensions, make full research on the particular extension before enabling it. Also, in case of any doubts, do let us know in the comment section below.
0 notes
Text
How To Start Mac In Recovery Mode [2024 Updated]
To start your Mac in Recovery Mode, follow these steps:
Shut Down Your Mac: If your Mac is turned on, go to the Apple menu in the top-left corner of the screen and choose "Shut Down."
Start Up Your Mac: Press and hold the power button on your Mac to turn it on.
Press and Hold Command-R: As soon as you hear the startup sound, immediately press and hold the Command (⌘) and R keys on your keyboard. Keep holding them until you see the Apple logo or a spinning globe and the Mac boots into Recovery Mode.
Release the Keys: Once you see the Apple logo or the spinning globe, you can release the Command (⌘) and R keys.
Wait for Recovery Mode to Load: Your Mac will boot into Recovery Mode, which may take some time depending on your Mac's hardware and the version of macOS installed.
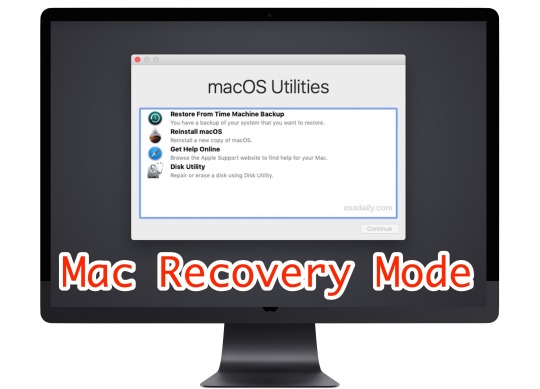
Use Recovery Mode: In Recovery Mode, you'll see options to restore your Mac from a Time Machine backup, reinstall macOS, get help online, or use Disk Utility to repair or erase disks.
Exit Recovery Mode: To exit Recovery Mode, simply restart your Mac by selecting "Restart" from the Apple menu, or by pressing the power button and choosing "Restart" from the menu.
That's it! You've successfully started your Mac in Recovery Mode.
#macbook#recovery#start#mode#macossonoma#macos#macbookair#macbookpro#macosventura#foryou#foryourpage#viralpage#viralposts#trendingtopic#trendingnow#sharepost#sharemypost#imacgeeks
0 notes
Text
Apple Technicians Specializing in Drive Recovery
If your Mac suddenly stops booting, files go missing, or your drive becomes unreadable, you're likely facing a hard drive issue. In today’s digital world, that can feel like a disaster. But don’t worry Apple technicians specializing in drive recovery are here to help. With the right tools, training, and experience, they can restore your lost data and get your Mac back up and running.
Why Drive Recovery Requires Expertise
Drive recovery isn’t just about plugging in software and hoping for the best. It requires a deep understanding of:
Apple’s hardware architecture
File systems like APFS and HFS+
Encryption and security measures (like FileVault)
Mac-specific backup and recovery tools (Time Machine, iCloud, etc.)
This is why trusting your Mac with just any technician is a risk. Apple-certified professionals bring precision and care to the table, ensuring your valuable files are handled safely and effectively.
What Sets Apple Technicians Apart?
Apple technicians go through specialized training to achieve certifications such as Apple Certified Mac Technician (ACMT) or Apple Certified Support Professional (ACSP). These certifications mean:
They know how to diagnose and repair both hardware and software issues.
They understand how to handle sensitive components like SSDs and logic boards.
They use Apple-approved tools and follow official repair guidelines.
More importantly, these experts know how to safely recover data from failing or corrupted drives without causing further damage.
Common Drive Issues They Handle
Apple technicians who specialize in drive recovery are well-equipped to handle a variety of problems, including:
Corrupted or unmounted drives
macOS that won’t boot
Files that won’t open or are missing
Drives with physical damage or failure
Encryption-related access issues
Accidentally formatted drives
Failed updates or system crashes
Whether you’re working with an older iMac with a traditional hard drive or a MacBook with an internal SSD, these pros can assess and recover your data safely.
The Professional Recovery Process
Here’s a breakdown of how Apple technicians approach drive recovery:
1. Diagnostic Evaluation
The technician uses tools like Apple Diagnostics, Disk Utility, and command-line checks to assess the condition of the drive and determine if the problem is physical or logical.
2. Data Preservation (Cloning)
If the drive is still somewhat functional, they often create a bit-level clone to preserve the existing data. This prevents further wear and tear on the original drive during the recovery process.
3. Recovery from Clone or Original Drive
Advanced recovery software (sometimes proprietary tools available only to Apple-certified professionals) is used to extract files. Apple techs know how to handle files from encrypted partitions or Time Machine backups as well.
4. Verification of Recovered Data
Once files are retrieved, they’re reviewed for integrity and usability. You’ll often receive a list of what was recovered before transfer.
5. Delivery and Post-Recovery Setup
Files are transferred to a new drive or a freshly repaired Mac. Apple technicians can also help set up Time Machine, restore macOS, and install updates to avoid future issues.
Why You Should Act Quickly
If you suspect your drive is failing, don’t delay. Here are some signs that should prompt immediate attention:
Your Mac is unusually slow or freezes often.
You hear clicking or grinding sounds (HDDs).
Disk Utility reports errors or can’t mount the drive.
The system boots into Recovery Mode or won’t start.
Apps or files won’t open properly.
macOS installs or updates are failing repeatedly.
Continuing to use a failing drive increases the risk of permanent data loss. The sooner a professional looks at it, the better your chances of full recovery.
The Security and Privacy Factor
Apple technicians understand that data privacy is non-negotiable. Whether you're recovering personal photos, financial records, or business files, they follow strict confidentiality protocols. Certified Apple repair centers typically operate under data privacy guidelines laid out by Apple itself, which means:
Your data is not accessed unless necessary for recovery.
Recovered files are handled securely.
Drives are returned or disposed of properly after service.
This peace of mind is something you won’t always get with a general tech shop or DIY attempt.
Prevention Tips from the Experts
Apple technicians don’t just fix problems—they help prevent them too. Here are a few best practices they often recommend:
Back up regularly with Time Machine and iCloud.
Avoid physical shock or heat exposure to your Mac.
Monitor disk health using Disk Utility.
Keep macOS updated to prevent system-level issues.
Shut down properly to avoid file system corruption.
They can also advise you on upgrading from older spinning HDDs to more reliable SSDs, or setting up redundant backup solutions for business-critical data.
Data loss is stressful, but you’re not alone. Apple technicians specializing in drive recovery offer the skills, tools, and professionalism needed to bring your Mac and your files back to life. From diagnosing mysterious errors to rescuing files from the brink, they’re your best bet when every byte counts.
If your Mac’s hard drive is showing signs of trouble, don’t risk it. Reach out to a certified Apple technician and give your data the expert attention it deserves.
0 notes
Text
How to Reset Your Admin Password on a Mac?
Your Mac’s admin password is the guardian of your digital realm. It protects your files, privacy, and system settings. However, there are moments in life when memory fails us, and we find ourselves locked out of our own device. Fear not! In this guide, we will explore the methods to reset your admin password on a Mac, empowering you to regain control and access your precious files.

Understanding the Significance of the Admin Password
The admin password on your Mac is more than just a combination of characters; it’s the key to your digital kingdom. It secures your data, prevents unauthorized access, and ensures the integrity of your system. Forgetting or losing this password can be a daunting experience, but fortunately, there are ways to reset it.
Methods to Reset Admin Password: Exploring Your Options
When it comes to resetting your admin password, Mac offers multiple avenues. The three primary methods include using your Apple ID, accessing Recovery Mode, and leveraging another admin account. Each method has its unique approach and prerequisites, ensuring there’s a solution for various scenarios.
Resetting Admin Password via Apple ID: A Lifeline in Your Pocket
If you’ve associated your Mac with your Apple ID, resetting your admin password becomes relatively straightforward. By entering your Apple ID credentials, you can reset your password and regain access to your Mac. This method is convenient and secure, provided you have a functioning Apple ID.
Using Recovery Mode to Reset Admin Password: A Deeper Dive
Recovery Mode is your Mac’s emergency response system. It allows you to perform various tasks, including resetting your admin password. By booting into Recovery Mode, you can access the Terminal and reset the password using command-line magic. However, be cautious: this method might lead to data loss if not executed carefully.
Resetting Admin Password with Another Admin Account: Teamwork Makes the Dream Work
If there’s another admin account on your Mac, you’re in luck. You can use the cooperative power of multiple users to reset the forgotten password. By logging in with another admin account, you can change the password for the locked account, granting you access once again. Collaboration, in this case, is the key to success.
Preventive Measures and Best Practices: Building a Strong Castle
Prevention is always better than a cure. To avoid finding yourself in a password-related predicament, it’s essential to create a robust admin password. Combine letters, numbers, and symbols, and avoid easily guessable information like birthdays or common words. Regularly updating your password further enhances your Mac’s security.
Common Issues and Troubleshooting: Navigating the Challenges
During the password reset process, you might encounter issues such as errors, failed attempts, or complications with Recovery Mode. Fear not! We’ve compiled a list of common problems and their solutions to guide you through the troubleshooting process. Remember, persistence and attention to detail can often resolve these challenges.
Conclusion: Your Mac, Your Control
In conclusion, your Mac’s admin password is the linchpin of your digital world. Losing it may seem like a daunting experience, but with the right knowledge and methods, you can regain control swiftly and securely. By understanding the significance of the admin password, exploring the available options, and following best practices, you can ensure a seamless Mac experience while keeping your digital kingdom safe and sound.
For more information: How to Reset Your Admin Password on a Mac? — ITMlab
0 notes
Text
Repaired A Mac Mini 👨🔧 That Had A Corrupted HD And Was Not Booting, For A Friend. I used the trusty /sbin/fsck -fy command. Apple’s Disk Utility could not repair the drive, even when booting into the recovery partition. It needed to be run in Single User mode, a few times, to fix all of the file and drive issues. Voila, the Mac mini booted up perfectly. As an Apple Certified Technician, these moments are gratifying. And my friend is happy again. 👏
https://www.instagram.com/reel/Cun7lR9LB2D/
0 notes