#cdn reactjs
Explore tagged Tumblr posts
Visit Tumblr Blog
Explore Tumblr blogs with no restrictions, modern design and the best experience.
Last Seen Tumblr Blogs


Fun Fact
The total number of visits Tumblr.com received during January 2021 is 327 million.
Text
Saí do desenvolvimento de sites WordPress há cerca de seis anos. Depois disso, construo principalmente sites usando ReactJS, VueJS e outros geradores de sites estáticos. Foi divertido. Tenho controle total sobre tudo. Quando eu implanto, eu uso Netlificar ou serviços de hospedagem estática semelhantes e, após atualizar o conteúdo, simplesmente o envio para o GitHub. Em poucos segundos, meu site está ativo em diferentes servidores de borda em todo o mundo. O CDN armazenará em cache todas as páginas e arquivos estáticos. Não preciso me preocupar com minificação, cache, otimização de imagem, etc. Todos são apenas uma forma de alternância. Adorei a experiência! Voltei ao WordPress para criar um blog sobre desenvolvimento. Sim, geradores de sites estáticos podem fazer isso. Mas não quero reinventar a roda e já sou um grande fã do WordPress. Voltando de sites estáticos, otimizar o WordPress é complicado. Quando saí do WordPress novamente, estava usando o W3 Total Cache! Fico feliz em ver que existem novos plug-ins de cache no mercado, como WP Rocket, cache LiteSpeed, Swift Performance etc. Todos são ótimos, mas configurá-los ainda é doloroso e o desempenho ainda está longe de sites estáticos. Quando voltei ao WordPress para o meu blog, perguntei a um dos provedores de hospedagem mais caros: “Ei, tenho tráfego dos EUA e da Índia, meu servidor está nos EUA, então o TTFB para a Índia é bem alto”. Eles responderam: “haverá latência de rede, pois seu site WordPress está no servidor dos EUA”. Eu senti algo errado. Muitas atualizações aconteceram nas tecnologias Cloud e parece que o WordPress ainda está atrasado. Precisamos de uma solução completa que possa funcionar como sites estáticos, sem deixar de lado as vantagens do WordPress. Deve ser fácil de configurar também. Diferente do W3 Total Cache! Por que não mais alguns plug-ins Flying * Quando comecei a construir uma solução completa chamada FlyingPress, alguns deles perguntaram “por que não criar mais plugins pequenos como você fez antes, que executam bem uma funcionalidade, como módulos. Então podemos escolher de acordo…” Um maior número de plugins cria mais conflitos. Se você estiver em nosso grupo no Facebook, poderá ver postagens todos os dias em que um dos meus plug-ins entra em conflito com algum outro plug-in de cache. Por exemplo, ao usar Imagens voadoras e Scripts Voadores juntos, temos que analisar o HTML duas vezes, o que consome um pouco de recursos. Se for um único plugin que faz ambos, teremos que analisar o HTML apenas uma vez. Outro exemplo, quando você ativa o plugin Cache Enabler, ele começa a capturar HTML antes dos Flying Scripts (já que 'C' começa antes de 'F' na ordem dos plugins). Então isso cria conflitos! Precisamos de uma solução única que cuide de tudo, sem criar conflitos, sem consumir muitos recursos, sem precisar de um especialista em otimização de velocidade. O que é FlyingPress FlyingPress é uma solução completa para sites WordPress que cuida de tudo. Do cache de páginas, CDN à otimização de imagens. Qualquer não-técnico deve ser capaz de criar sites WordPress super-rápidos sem precisar de muitos tutoriais ou vários plug-ins para otimização de velocidade. Deve automatizar todas as otimizações possíveis para que os usuários não tenham muitas dores de cabeça. Como o FlyingPress otimiza os principais sinais vitais da Web O FlyingPress desde o início foi para uma melhor experiência do usuário. Escrevemos inteiramente a geração crítica de CSS e outras bibliotecas do zero para obter o melhor desempenho. Tanto o cache WP Rocket quanto o LiteSpeed geram CSS crítico. Mas nunca fiquei feliz com seus resultados. Aqui está a comparação das principais métricas vitais da web em meu blog (www.wpspeedmatters.com) usando diferentes plug-ins de cache: Foguete WP: Cache LiteSpeed: FlyingPress: Se você observar atentamente as capturas de tela geradas, notará algumas coisas: Sem mudanças de layout – Como você pode ver nas capturas de tela, o FlyingPress a partir do segundo quadro é renderizado com qualquer mudança de layout.
Evitar essas mudanças de layout ajuda a reduzir as mudanças cumulativas de layout. Renderização rápida – Enquanto o cache WP Rocket e LiteSpeed exibiam a postagem do blog imagine o 6º quadro, o FlyingPress mostrava-o a partir do próprio segundo quadro, sem nem mesmo a necessidade de espaço reservado. FlyingPress usa várias técnicas como pré-carregar imagens acima da dobra, excluir imagens acima da dobra do carregamento lento, usar carregamento lento nativo, nossa própria biblioteca de carregamento lento JS super-rápida, etc. FlyingCDN – Otimizações em tempo real! Já transferimos 90% das otimizações externamente. Ao ativar VoandoCDNvocê pode descarregar a redução de CSS/JS e a otimização de imagem para CDN. Aqui estão alguns dos recursos: Cloudflare x FlyingCDN Cloudflare é um proxy CDN+. FlyingCDN é apenas um CDN. Portanto, FlyingCDN não é uma alternativa ao Cloudflare. Você pode usar Cloudflare junto com FlyingCDN. FlyingCDN oferece muitos recursos que atualmente não estão disponíveis no Cloudflare ou são muito caros. Um exemplo é a replicação geográfica. Ele replicará arquivos em diferentes regiões para que haja latência muito baixa, mesmo para arquivos não armazenados em cache. Aqui está uma comparação dos recursos FlyingCDN e Cloudflare: nuvemflare VoandoCDN Preços de largura de banda Livre US$ 3/100 GB Replicação geográfica ❌ ✔️ Roteamento PoP mais próximo Plano de negócios (US$ 200/m) ✔️ Compressão de imagem Plano Pro (US$ 20/m) ✔️ Conversão WebP Plano Pro (US$ 20/m) ✔️ Imagens redimensionadas para celular Plano de negócios (US$ 200/m) ✔️ Por que não há plano ilimitado ou LTD Muitos dos plug-ins pagos no ecossistema WordPress oferecem um plano ilimitado e, às vezes, LTD (ofertas vitalícias) também. Não sou contra planos ilimitados ou LTD. Funciona muito bem para alguns produtos, e até administrei o LTD em minha startup anterior. No entanto, isso não é possível no FlyingPress. Como mencionei antes, FlyingPress não é apenas um plugin. Realizamos muitas tarefas que consomem muitos recursos, como remover CSS não utilizado em nosso cluster de servidores do Google Cloud. Portanto, nossos custos de servidor são bastante altos. Planos ilimitados ou LTD são muito arriscados. Também queríamos evitar abusos ao usar a mesma conta por várias pessoas. Caso semelhante para LTD, nos ajuda a ganhar dinheiro rápido. Mas colocará o negócio em risco no longo prazo. Quero que o FlyingPress seja um negócio sustentável. Mais de 100 sites? Contate-nos para preços personalizados. Não vamos parar por aqui. Ainda não estamos perto do objetivo de entregar páginas HTML de servidores de borda com latência
0 notes
Text
Setting up a React Project sometimes comes with time-consuming steps, especially when you are a beginner to the React ecosystem. You need to worry about npx, create-react-app, accurate npm version, React associated libraries, etc. However, CDN ReactJs makes your life easier as a developer.
2 notes
·
View notes
Video
tumblr
Looking to develop your online shop, and sell your products online?
.
Tomsher provides the below integrations to your eCommerce website:
✅Payment Gateway Integration
✅Shipping API Integration
✅Omni-channel integration
✅ERP Integration
✅Google Content API integration
✅Meta Commerce
✅CDN integration
.
Our team is highly expertized in many eCommerce platforms including Adobe Commerce (Magento) WooCommerce, OpenCart, Shopify, and Optimizely, and can customize with ReactJS & PHP!
.
.
To know more details, please contact:
WhatsApp: https://wa.me/971555600966
☎ +971 43577356 📞 +971 555600966
📧 [email protected] 🌏 https://www.tomsher.com/ecommerce-website-design/
#commerce#ecommercewebsite#ecommerceportal#onlineportal#onlinewebstore#b2b#b2c#ecommercebusiness#business#onlineshopping#onlinestore#ebusiness#adobecommerce#magento#woocommerce#opencart#shopify#optimizely#onlinepayment#ecommercestore#ecommercedevelopment#webdesign#ecommercewebsitedesign#tomsher
0 notes
Text
Swiper carousel unpkg

#Swiper carousel unpkg free
From version 2.4.0, it requires Swiper ver >= 5.0.Find more info about Swiper custom build HERE.swiperswipeslidertouchiosmobilecordovaphonegapappframeworkframework7carousel. You can also use Swiper's original params too. Most modern mobile touch slider and framework with hardware accelerated.If you want to use Swiper custom build to reduce bundle size, you need to use extra props below. Swiper is not compatible with all platforms, it is a modern touch slider which is focused only on modern apps/platforms to bring the best experience and simplicity. Designed mostly for iOS, but also works great on latest Android, Windows Phone 8 and modern Desktop browsers. If you prefer CDN, just make sure constructor Swiper is defined in browser global environment. It is intended to be used in mobile websites, mobile web apps, and mobile native/hybrid apps. I wish to introduce Swiper in a project I am following using React v17.0.2 + Next.js v11.1.0 + Webpack v5.43.0 and, copying the basic docs example, I get the.
#Swiper carousel unpkg free
Swiper - is the free and most modern mobile touch slider with hardware accelerated transitions and amazing native behavior. Open Row settings by clicking the gear icon in the green toolbar. Search for the Blurb module and add it to the page. Using the Divi Builder on your page, add a section with 1 column row. A library to use Swiper as a ReactJs component Add CSS Class swiper-slide to each module.
0 notes
Text
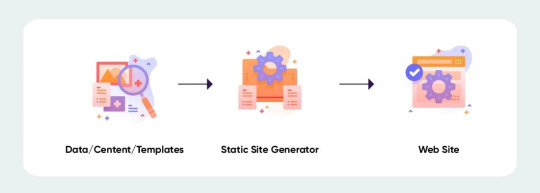
Top React Static Site Generators for 2022
Quick Summary:
Static site generators are generally used to create static contentful websites that make your content easy for consumption. Using SSGs, you create HTML pages ready for an HTTP server without server-side rendering. You can create your application using any programming language like Golang, Ruby, or Javascript. This blog post has adequate information on the advantages of static site generators and the top best React static site generators for 2022.
Why React with Static?
Front-end development is at the forefront owing to the intuitive APIs of ReactJS. Developers use React.js for component-based client-side application development, which aids excellent user experience.
React enables server-side rendering to reduce the users’ performance costs by saving their UX penalty for single-page applications SPA. There are no server-maintenance static websites with react, and these static sites perform much better in Google indexing.
Advantages of Static Site Generators
Below are the benefits of using SSG over CMS:
Loading Speed
A dynamic website built using a content management system pulls information from the database whenever the user requests a page of a content-heavy site.
This process may consume time and causes a delay, which frustrates the user. Whereas if you build your website using a static site generator, it provides a compiled file at the browser. This way, the SSG site loads faster and satisfies your user.
No Back-end
You do not need a web server or a database when building your website using SSG. You can directly host your site on the CDN (content delivery network), which improves your web performance.
Secure and Reliable
While you build your website using a CMS, it might require additional plugins, and with each plugin, there comes a higher security vulnerability.
On the contrary, when you use an SSG for your website development, you do not need to run any extra code on the server-side that gives a threat to security.
There is a negligible chance of a server crash compared to the CMS sites. All the pages of an SSG website are kept together. Thus, top static site generators build a reliable and secure website.
Flexible and Scalable
Websites built using SSG have no database calls that speed their performance, and this flexibility ensures quick results on the browser. When you host your site on the CDN, all the pages of your site can serve them in multiple places, improving your scalability.
Better Developer Experience
If you build your website using a headless CMS, you might have to keep separate technology stacks for your developers and the marketing team. Using SSG, you ensure loose coupling and much better debugging, which eases developers’ tasks.
Read more for React Static Site Generators
0 notes
Text
Saí do desenvolvimento de sites WordPress há cerca de seis anos. Depois disso, construo principalmente sites usando ReactJS, VueJS e outros geradores de sites estáticos. Foi divertido. Tenho controle total sobre tudo. Quando eu implanto, eu uso Netlificar ou serviços de hospedagem estática semelhantes e, após atualizar o conteúdo, simplesmente o envio para o GitHub. Em poucos segundos, meu site está ativo em diferentes servidores de borda em todo o mundo. O CDN armazenará em cache todas as páginas e arquivos estáticos. Não preciso me preocupar com minificação, cache, otimização de imagem, etc. Todos são apenas uma forma de alternância. Adorei a experiência! Voltei ao WordPress para criar um blog sobre desenvolvimento. Sim, geradores de sites estáticos podem fazer isso. Mas não quero reinventar a roda e já sou um grande fã do WordPress. Voltando de sites estáticos, otimizar o WordPress é complicado. Quando saí do WordPress novamente, estava usando o W3 Total Cache! Fico feliz em ver que existem novos plug-ins de cache no mercado, como WP Rocket, cache LiteSpeed, Swift Performance etc. Todos são ótimos, mas configurá-los ainda é doloroso e o desempenho ainda está longe de sites estáticos. Quando voltei ao WordPress para o meu blog, perguntei a um dos provedores de hospedagem mais caros: “Ei, tenho tráfego dos EUA e da Índia, meu servidor está nos EUA, então o TTFB para a Índia é bem alto”. Eles responderam: “haverá latência de rede, pois seu site WordPress está no servidor dos EUA”. Eu senti algo errado. Muitas atualizações aconteceram nas tecnologias Cloud e parece que o WordPress ainda está atrasado. Precisamos de uma solução completa que possa funcionar como sites estáticos, sem deixar de lado as vantagens do WordPress. Deve ser fácil de configurar também. Diferente do W3 Total Cache! Por que não mais alguns plug-ins Flying * Quando comecei a construir uma solução completa chamada FlyingPress, alguns deles perguntaram “por que não criar mais plugins pequenos como você fez antes, que executam bem uma funcionalidade, como módulos. Então podemos escolher de acordo…” Um maior número de plugins cria mais conflitos. Se você estiver em nosso grupo no Facebook, poderá ver postagens todos os dias em que um dos meus plug-ins entra em conflito com algum outro plug-in de cache. Por exemplo, ao usar Imagens voadoras e Scripts Voadores juntos, temos que analisar o HTML duas vezes, o que consome um pouco de recursos. Se for um único plugin que faz ambos, teremos que analisar o HTML apenas uma vez. Outro exemplo, quando você ativa o plugin Cache Enabler, ele começa a capturar HTML antes dos Flying Scripts (já que 'C' começa antes de 'F' na ordem dos plugins). Então isso cria conflitos! Precisamos de uma solução única que cuide de tudo, sem criar conflitos, sem consumir muitos recursos, sem precisar de um especialista em otimização de velocidade. O que é FlyingPress FlyingPress é uma solução completa para sites WordPress que cuida de tudo. Do cache de páginas, CDN à otimização de imagens. Qualquer não-técnico deve ser capaz de criar sites WordPress super-rápidos sem precisar de muitos tutoriais ou vários plug-ins para otimização de velocidade. Deve automatizar todas as otimizações possíveis para que os usuários não tenham muitas dores de cabeça. Como o FlyingPress otimiza os principais sinais vitais da Web O FlyingPress desde o início foi para uma melhor experiência do usuário. Escrevemos inteiramente a geração crítica de CSS e outras bibliotecas do zero para obter o melhor desempenho. Tanto o cache WP Rocket quanto o LiteSpeed geram CSS crítico. Mas nunca fiquei feliz com seus resultados. Aqui está a comparação das principais métricas vitais da web em meu blog (www.wpspeedmatters.com) usando diferentes plug-ins de cache: Foguete WP: Cache LiteSpeed: FlyingPress: Se você observar atentamente as capturas de tela geradas, notará algumas coisas: Sem mudanças de layout – Como você pode ver nas capturas de tela, o FlyingPress a partir do segundo quadro é renderizado com qualquer mudança de layout.
Evitar essas mudanças de layout ajuda a reduzir as mudanças cumulativas de layout. Renderização rápida – Enquanto o cache WP Rocket e LiteSpeed exibiam a postagem do blog imagine o 6º quadro, o FlyingPress mostrava-o a partir do próprio segundo quadro, sem nem mesmo a necessidade de espaço reservado. FlyingPress usa várias técnicas como pré-carregar imagens acima da dobra, excluir imagens acima da dobra do carregamento lento, usar carregamento lento nativo, nossa própria biblioteca de carregamento lento JS super-rápida, etc. FlyingCDN – Otimizações em tempo real! Já transferimos 90% das otimizações externamente. Ao ativar VoandoCDNvocê pode descarregar a redução de CSS/JS e a otimização de imagem para CDN. Aqui estão alguns dos recursos: Cloudflare x FlyingCDN Cloudflare é um proxy CDN+. FlyingCDN é apenas um CDN. Portanto, FlyingCDN não é uma alternativa ao Cloudflare. Você pode usar Cloudflare junto com FlyingCDN. FlyingCDN oferece muitos recursos que atualmente não estão disponíveis no Cloudflare ou são muito caros. Um exemplo é a replicação geográfica. Ele replicará arquivos em diferentes regiões para que haja latência muito baixa, mesmo para arquivos não armazenados em cache. Aqui está uma comparação dos recursos FlyingCDN e Cloudflare: nuvemflare VoandoCDN Preços de largura de banda Livre US$ 3/100 GB Replicação geográfica ❌ ✔️ Roteamento PoP mais próximo Plano de negócios (US$ 200/m) ✔️ Compressão de imagem Plano Pro (US$ 20/m) ✔️ Conversão WebP Plano Pro (US$ 20/m) ✔️ Imagens redimensionadas para celular Plano de negócios (US$ 200/m) ✔️ Por que não há plano ilimitado ou LTD Muitos dos plug-ins pagos no ecossistema WordPress oferecem um plano ilimitado e, às vezes, LTD (ofertas vitalícias) também. Não sou contra planos ilimitados ou LTD. Funciona muito bem para alguns produtos, e até administrei o LTD em minha startup anterior. No entanto, isso não é possível no FlyingPress. Como mencionei antes, FlyingPress não é apenas um plugin. Realizamos muitas tarefas que consomem muitos recursos, como remover CSS não utilizado em nosso cluster de servidores do Google Cloud. Portanto, nossos custos de servidor são bastante altos. Planos ilimitados ou LTD são muito arriscados. Também queríamos evitar abusos ao usar a mesma conta por várias pessoas. Caso semelhante para LTD, nos ajuda a ganhar dinheiro rápido. Mas colocará o negócio em risco no longo prazo. Quero que o FlyingPress seja um negócio sustentável. Mais de 100 sites? Contate-nos para preços personalizados. Não vamos parar por aqui. Ainda não estamos perto do objetivo de entregar páginas HTML de servidores de borda com latência
0 notes
Link
Which is the best framework – Angular or React?
To be honest, every framework has its pros and cons. Each of the frameworks has a lot to offer and therefore choosing the right framework for your business among the best two is difficult.
This article aims to educate its readers, whether a newcomer or a freelancer or an enterprise-grade architect, of how both the frameworks excel in their environments catering to the requirements matching them.
This blog is all about an in-depth comparison between Angular and React in a structured manner and how you can focus on the most suitable framework by customizing them as per your requirements.
Let us brush up the basics before diving deep into the topic.
How to start?
Before jumping on to any framework, you need to ask yourself the following questions:
How mature is the framework?
What are the features that make it best suitable for my project?
What architecture does it employ?
What ecosystem the framework has surrounded itself with?
How to test and update the app?
Who performs better?
Which is best suited for Mobile App Development?
When can React and Angular be used?
These set of questions will guide to start the assessment of any tool you are looking to opt for.
How mature is the framework?
To check the maturity of the framework, you need to do research right from their launch to the current state.
Let us walk through their maturity levels.
React
React is:
A declarative, efficient, and flexible JavaScript library created by Facebook.
A User Interface (UI) library
A tool used for building UI components
Facebook is responsible for developing and maintaining React. React has been involved in Facebook’s own products like Instagram and Whatsapp. So you can say, React has been around 6 years now entering to a mature state. It has been named as one of the most popular projects on GitHub. It has been leading with approximately 119,000 stars to its credit at the time of writing.
Angular
Though Angular isn’t old as React, it is in the house for 3 years now ruling the hearts of the developers. Maintained by Google, Angular has been able to find its place in more than 600 applications in Google such as Google Analytics, Google cloud platform, Firebase Console, and many more.
Popularity
As per Google trends, React is a winner in the search domain as it is leading. But people are more interested in Angular due to multiple options for ready-to-go solutions.
What are the features that make it best suitable for my project?
React
1. Component-Based
The application is divided into small modules known as components to create a view.
Passing of rich data through your app and keeping the state out of the DOM is easy as templates aren’t used for writing component logic. The visuals and interactions in the applications are defined by the components in React.
2. Declarative
React holds a record in creating interactive and dynamic user interfaces for web and mobile applications.
During any change in data, React has the capacity to update and render just the right components. All you have to do is for every state in your application, create simple views.
If you wish to have a code that is more readable and easier to debug, declarative views are the best to opt for.
3. JSX
A close resemblance with HTML, JSX is a markup syntax that is a combination of Javascript + XML.
Writing React components with JSX is easier. JSX makes easier to write the code by adding HTML to React and it converts HTML tags to react elements. JSX has always been one of the best ReactJS features and thus Web developers will always go for this easy way out.
4. One-way Data Binding
The organization of React apps is in a series of nested components. With the functional nature of the components, the arguments are the source through which the components receive information. They further pass the information through their return values. This process is known as a one-way data flow. Further, the data is passed from components to their children.
For the state of your app, the parent component will have a container. The snapshot of the state is passed to the child component by the parent component. This the parent component does via the read-only props. Further, the child component communicates with the parent for updating the state through callbacks bounded by button or form in the child component.
5. Virtual DOM
Virtual DOM is a virtual copy of the original DOM object. React provides this facility for every DOM object as manipulation in the virtual DOM is quicker than the original DOM as it is a one-way data binding.
React updates only those objects in the real DOM which have changed in the Virtual DOM. This improves the performance of the application more as compared to it would have while manipulating the real DOM directly. Thus this reason is behind React being considered as a high-performance JavaScript library.
To put it simply, the React makes sure that the DOM matches the state as per your requirement you need the UI to be in. The developer doesn’t need to know the attribute manipulation, event handling or the manual DOM updates happen behind the scenes. This is a priced benefit of being a React developer.
6. Event handling
React creates its event system which is compatible with the W3C object model.
Event handling with React elements is quite similar to event handling on DOM elements. The differences between the two are:
camelCase is used to write React events.
Curly braces are used to write React event handlers.
One of the good practices is using the event handler as a method in the component class.
The SyntheticEvent object wraps the event object inside the React event handlers. Performance drastically improves as the objects received at an event handler are reused for other events. Asynchronous access to object properties is not possible as the event’s properties are changed due to reuse.
Instances of synthetic events wrap the browsers’ native event. With a cross-browser interface to a native event, relax about any incompatibility with event names and fields.
To reduce memory overhead, event delegation in addition to the pool of event objects is used to implement React event.
7. React Native
A custom renderer for React, React Native makes use of native components instead of web components as building blocks.
With the basic concepts of React, like JSX, components, state, and props you can head towards React Native. You need to know about the Native components to React Native. Other than transforming React code to work on iOS and Android, React Native provides access to the features these platforms offer.
Angular
With the release of Angular 8, multiple improvements and features are introduced. Whether you are any angular development company or angular developer or anyone who is looking for an upgrade, Angular is making projects faster and smaller with every improvement thus driving the developer and user experience to the next level of perfection.
1. Differential Loading
In spite of angular being a complete framework with its own package for a network request, form validation, and many more, Angular has one disadvantage-the app/bundle size.
The challenge that we were facing with Angular 7 was the large bundle size due to the conversion of modern JS/TS code in JS. After the conversion, the final application bundle is created for all the browsers (new and old) concerning the app performance on all the browsers.
This challenge of large bundle size was overcome in Angular 8 by reducing the bundle size by the concept of differential loading.
When we build apps with ng build, two separate bundles are created for the production dedicated to the older and newer browsers respectively. The correct bundle gets loaded automatically by the browser, thus improving the performance for Angular 8 by loading less code by the newer browsers.
2. Ivy Renderer
According to a source, 63% of all US traffic comes from smartphones and tablets. It is further forecasted that the number will increase to 80% by the end of this year.
One of the biggest challenges for a front end developer is increasing the loading speed of the website. Unfortunately, mobile devices always stay behind in this race either due to slow or bad internet connectivity thus making it more challenging for the developers.
But we never run out of solutions. We can use CDN, PWA, and others for loading the application faster. But if you want to have some out of the box solution, then reducing the bundle size is the ultimate solution and thus, IVY comes into the picture.
IVY is meant to build a next-generation rendering pipeline for Angular 8.0
Ivy is an angular renderer that uses incremental DOM. Ivy modifies the working of the framework without any changes to the Angular applications. On completion of IVY, the angular applications become small, simple, and faster. IVY consists of two main concepts:
Tree shakable:To focus only on the code in use, the unused code is removed. This results in faster runtime and smaller bundles.
Local:For a faster compilation, the changing components are recompiled.
The benefits of Ivy are:
Bundles are smaller
Templates are debuggable
Tests are faster
Builds are faster
Lots of bugs fixed
It rewrites the Angular compiler and runtime code to reach:
Better compatibility with tree-shaking
Improved build times
Improvised build sizes
Loaded with features like lazy loading of components rather than modules.
3. Web Workers
With the newest release of Angular v8, web workers can now be easily integrated with Angular. Though you might be aware of web workers, let us have a small brush up. As defined by Sitepoint,
“Web workers is an asynchronous system, or protocol, for web pages to execute tasks in the background, independently from the main thread and website UI. It is an isolated environment that is insulated from the window object, the document object, direct internet access and is best suited for long-running or demanding computational tasks.”
Have you built an application that includes a lot of calculations on UI? Are you experiencing the UI to be slow?
Having heavy calculations, data table manipulations, and other complex computations results in a laggy UI. JavaScript running on the main thread is not the only thing. Other things like calculations also run on it thus resulting in a bad user experience. Thus, web workers come into the picture to resolve this issue.
Therefore you can say if your application is unresponsive while processing data, web workers are helpful.
Due to JavaScript being single-threaded, there is a possibility of asynchronous data calls to take place. Facilitating to run the CPU intensive computations in the background thread, Web workers are used. This is achieved by freeing the main thread and updating the user interface.
Put simply, web workers are useful if heavy computations are offloaded to another thread.
4. Lazy Loading
Lazy loading helps in bringing down the size of large files. The required files are lazily loaded.
Previously in the older versions of Angular, @loadChildren property was used by the route configuration. This property accepts a string. If any typo occurred or any module name has been recorded wrong, Angular doesn’t consider this as wrong. It accepts the value that was there until we try building it.
To overcome this, dynamic imports in router configuration is added in Angular 8 thus enabling the usage of import statement for lazy loading the module. Thus, errors will be easily recognized and we can put a stop on waiting till the build time to recognize the errors in the code.
5. Bazel Support
Now increase the possibilities to build your CLI application with Bazel. The Angular framework is built with Bazel. Since it is expected to be included in version 9, it is available as opt-in in Angular 8.
The main advantages of Bazel are:
Using the same tool in building backends and frontends.
The build time is faster
Incremental build for the modified part.
Ejection of hidden Bazel files that are hidden by default.
Cache on the build farm
Dynamic imports for the lazy loaded modules
6. CLI Improvements
With continuous improvement in the Angular CLI, the ng build, ng test and ng run has accorded themselves by 3rd-party libraries and tools. For example, with the help of a deploy command, the new capabilities are already in use by AngularFire.
Angular CLI is equipped with commands such as ng new, serve, test, build and add for quicker development experience.
With the new ng deploy in the house, developers can deploy their final app to the cloud. Just a few clicks from their command-line interface and the work is done.
One important thing to remember, add a builder as it accords your project’s deployment capability to a specific hosting provider. But, this has to be done before using the command.
With Angular 8, it has added new features to ngUpgrade. This new feature will make the life of developers easier for upgrading their Angular.js apps to Angular 8.
7. TypeScript 3.4
The most important part is TypeScript 3.4 as it is required to run your Angular 8 project. A new flag is introduced in TypeScript 3.4 known as –incremental.
From the last compilation, the TypeScript is asked to save the information of the project graph by the incremental. Every time –incremental invokes TypeScript, it will utilize the information for detecting the cheapest way of type-checking and emit changes to your project.
To know more about Angular 8 and its dominance, you can also read the blog on “Top Reasons to Choose Angular 8 for Your Next Web Development Project.”
What architecture does it employ?
Angular and React both have a component-based architecture. Component-based architecture means they consist of cohesive, reusable, and modular components. The major difference is during the technical stack. React uses JavaScript whereas Angular uses TypeScript for compact and error-free development.
Angular, a robust front-end development framework has the power to structure your application. It frees you from the worry of routing libraries during coding of the application.
The advanced functionalities provided by Angular are as follows:
Availability of templates for creating UI views with powerful syntax.
To add components and testing, command-line tools are provided.
Completing intelligent code with IDEs.
For faster and better scenario tests, Protractor is used.
For complex choreographies and animation timelines, intuitive APIs are used.
The infrastructure consists of ARIA enabled components.
Injected Dependency
XSS Protection
The crucial point between Angular and React for their architectural differences takes an important turn with the increasing popularity of React for building web applications. Some of the key functionalities of React to highlight are:
Syntax extension to JavaScript, JSX.
The React elements can be created easily.
To update and match React elements, React DOM.
For splitting UI into independent, reusable pieces, React accords Component API
XSS protection
What ecosystem the framework has surrounded itself with?
There are multiple tools created around the open-source frameworks. These tools are friendly and sometimes help more than the framework itself. Let us get into the details of the most popular tools and libraries that are associated with both frameworks.
Angular
1. Angular CLI
A CLI tool helps in bootstrapping the project without configuring the build yourself. This popular trend with modern frameworks allows in generating and running a project with a couple of commands. The responsible scripts for application development, starting a development server, and running tests are all hidden in node_modules. This can be used for generating new code during the development process and during the dependency installation.
Managing dependencies in your project is easy with Angular now. A dependency can be installed when ng add is used. This dependency will automatically get configured for usage. For instance, if you run ng add@angular/material, Angular Material gets downloaded by Angular CLI from the npm registry. Angular CLI runs its install script and enables the use of Angular Material by automatic configuring the application using Angular Schematics. Libraries are allowed by the Schematics, a workflow tool to make changes to your codebase. In other words, there is a provision for resolving backward incompatibility issues by library authors while installing a new version.
2. Ionic Framework
If you are interested in hybrid mobile applications, then Ionic is a popular framework. There is a Cordova container nicely integrated with Angular and has a material component library. This helps in easy setup and also for mobile application development. Ionic is a good choice if you prefer a hybrid app over the native one.
3. Angular Material
Angular has come up with a Material component library having great options for ready-made components.
4. Angular Universal
Bundling different tools are all about Angular Universal. This helps in server-side rendering for Angular applications. With the integration of Angular Universal with Angular CLI, it supports a number of Node.js frameworks, like express and hapi, also with .NET core.
5. Augury
A browser extension for Chrome and Firefox, Augury helps in debugging the running Angular applications in development mode. Augury can be used to monitor the change detection, the component tree, and helps in optimizing performance issues.
React
1. Create React App
If you are looking for a quick set up of new projects, this CLI utility called Create React App is all you need. Just like Angular CLI, it permits us to generate a new project, run the app during the ongoing development process or creating a production bundle.
Jest is used for unit testing for React apps. It also supports application profiling by using environment variables. Other features are proxies for the backend for local development, Flow and TypeScript, Sass, PostCSS, and many more features.
2. React Native
Developed by Facebook, React Native is a platform used for native mobile app development using React. React Native is capable of building applications with a truly native UI, unlike Ionic that specializes in hybrid applications.
React Native has made provisions for standard React components bounding to their native counterparts. Another advantage of using React Native is it allows you to create components of your own and bind them to native code written in Objective-C, Java or Swift.
3. Material UI
React has a Material Design Component library. As compared to Angular, this library with React is more mature and houses a wider range of components.
4. Next.js
React Applications on the server-side is done by Next.js framework. This option is flexible enough for application rendering partially or completely on the server, revert the result to the client, and continue in the browser. Next.js tries to simplify the complex task of creating universal applications with a minimal amount of new primitives and requirements for the structure of your project.
5. Gatsby
A static website generator, Gatsby uses React.js allowing us to use GraphQL to query the data for your websites. These websites may be defined in markdown, YAML, JSON, external API’s as well as popular content management systems.
6. React 360
Want to create virtual reality applications for the browsers? This library called React 360 will do the needful. React 360 has a provision for a declarative React API built on top of the WebGL and WebVR browser APIs. This makes it easier for creating 360 VR experiences.
React Developer Tools
For debugging React applications, React Dev Tools are a browser extension that allows traversing the React component tree and observe their props and state.
How to test and update the app?
Tools like Jasmine and Protractor can be used for Angular IO testing and debugging for a complete project. React lags here as a different set of tools are required for performing different sets of testing. For instance, Jest for JavaScript code testing, Enzyme for component testing, etc. This results in an increased effort in the testing process.
Ease of Update
With an improved CLI equipped with commands like ng_update, upgrading any app to higher versions of Angular has become easy. Thus, Angular app development has become painless with the automated updating process for most of the cases.
React has provisions for seamless transitions between the two versions. But updating and migrating third-party components is possible only with the use of external libraries. The developers always have to keep a check always whether the third-party libraries used are compatible with the latest versions of the JavaScript framework or not. This increases the job of the developers.
Who performs better?
React has one-way data-binding whereas Angular has two-way data binding. With one-way data-binding, changes are rendered in the UI element once the model state is updated. However, there is no change in the model state when a change in the UI element is made unlike in Angular. If the UI element in Angular changes, the change is rendered in the model state and vice versa. Though Angular is easier to grasp, React has proven a better data overview with an increase in the project size. This also provides an easy debugging process with React.
Any application has multiple states. The complexity increases with repeated data morphing. Once the data changes, the components of the UI are also modified. This makes the data to stay updated always. This state is handled by Redux in React whereas, Angular doesn’t accord any use of Redux to handle the state. But if the application is large enough, there are chances that Redux has to be involved.
Since the commonly used methodology of working with React components is passing the data from parent component to its child component, Flux, a pattern for managing the flow of data through a React application, assigns this model as a default one for data handling.
In the flux methodology, the distinct roles for dealing with the data are:
Stores
Dispatcher
Views
The main idea behind this is:
The stores are updated through triggering actions. The dispatcher is called by actions through which the stores subscribe for the modification of their own data. Once the dispatch is triggered, and the store is updated, a change event will be emitted. This change is rerendered accordingly by the Views.
Flux is basically used for controlling and managing the application state. In Angular, two-way data binding triggers updates in a flow. If any action is wrongly implemented as no code is created in complete accuracy, would result in multiple errors. Further, it may be hard to debug.
In a nutshell we can say,
React performs well because:
Component Reuse
Virtual DOM
Community Support
Building dynamic web applications is easier.
Support of handy tool
Rich JavaScript library
SEO friendly
Easy to test
Angular performs well because:
Higher quality code due to component-based architecture.
Higher scalability and cleaner code due to use of TypeScript.
Asynchronous programming is efficiently handled due to RxJS.
Mobile-first approach.
Higher performance due to hierarchical dependency injection.
Optimizing the bundle size with differential load.
Seamless update with Angular CLI
Powerful ecosystem
For building applications, React uses Virtual DOM and Fiber thus leading the race earlier. But with the introduction of Angular newer versions and their features like ShadowAPI, hierarchical dependency injection, differential loading, Angular CLI, the competition has become intense between the two frameworks. None of them are lacking behind in terms of performance anymore.
Which is best suited for Mobile App Development?
Both Ionic and React Native are solid frameworks for mobile app development. The choice solely depends on the team and the organization with respect to the vision and functionality of the app in the making. Moreover, evaluate your options on factors like design consistency, customization, platform independency, and many more.
This section provides you the difference between Native, Hybrid-Native, and Hybrid-Web applications on various factors.
NativeHybrid-NativeHybrid-Web
ExamplesiOS and Android SDKsReact NativeIonic
LanguagesObj-C, Swift, JavaJS + Custom UI Language / InterpreterHTML + CSS + JS
Reusable CodeEach platform has Separate Code BasesDifferent UI Codebases for shared business logicSame UI Codebase, One codebase
Target PlatformsiOS & Android Native Mobile AppsiOS & Android Native Mobile AppsiOS, Android, Electron, Mobile and Desktop Browsers as a Progressive Web App, and anywhere else the web runs
Investment for staff and timeLargest investmentMedium investmentLowest investment
UI ElementsNative UI Platform independentNative UI elements are platform dependent and not shared. Custom UI elements require split UI code basesWeb UI elements are shared i.e. platform independent. This adds to the native look & feel of wherever they are deployed. Custom UI elements are used easily.
API Access / Native FeaturesSeparate Native API & Codebases for each AppIn addition to the ability for writing custom plugins, native access for abstracted single-codebase through plugins is possible.In addition to the ability for writing custom plugins, native access for abstracted single-codebase through plugins is possible.
Offline AccessYesYesYes
PerformanceThe performance is Native with well written code.If implemented with well written code on modern devices, the difference is indistinguishable.If implemented with well written code on modern devices, the difference is indistinguishable.
When can React and Angular be used?
Each framework is used for front-end development and has its own set of capabilities with pros and cons. But still, it is difficult to answer which framework has won the battle?
React can be used when:
Your team holds expertise in JavaScript,HTML and CSS.
A requirement for highly customized and specific application solutions.
If your project involves active/inactive navigation items, dynamic inputs, user logins, access permissions, disabled/enabled buttons, etc.
Expecting to share the components across multiple applications with project expansion.
You are willing to spare some time on pre-development preparation.
Angular is considered when:
The team is holding expertise in Java, C#, and previous versions of Angular.
The complexity of the app is at the low to medium level.
Embracing ready-to-use solutions with higher productivity.
Regulating app size.
The requirement is for a large-scale, feature-rich application.
Conclusion
Both Angular and React are equally useful for writing applications. But they are entirely different frameworks to use. Some programmers may say that Angular is superior to React and vice versa. What’s in actuality best for an in-hand project is the way you utilize these frameworks.
Choose the right AngularJS development company or ReactJS development company
0 notes
Photo

How to Build a File Upload Form with Express and DropzoneJS
Let’s face it, nobody likes forms. Developers don’t like building them, designers don’t particularly enjoy styling them, and users certainly don’t like filling them in.
Of all the components that can make up a form, the file control could just be the most frustrating of the lot. It’s a real pain to style, it’s clunky and awkward to use, and uploading a file will slow down the submission process of any form.
That’s why a plugin to enhance them is always worth a look, and DropzoneJS is just one such option. It will make your file upload controls look better, make them more user-friendly, and by using AJAX to upload the file in the background, it will at the very least make the process seem quicker. It also makes it easier to validate files before they even reach your server, providing near-instantaneous feedback to the user.
We’re going to take a look at DropzoneJS in some detail. We’ll show how to implement it. and look at some of the ways in which it can be tweaked and customized. We’ll also implement a simple server-side upload mechanism using Node.js.
As ever, you can find the code for this tutorial on our GitHub repository.
Introducing DropzoneJS
DropzoneJS allows users to upload files using drag and drop. Whilst the usability benefits could justifiably be debated, it’s an increasingly common approach and one which is in tune with the way a lot of people work with files on their desktop. It’s also pretty well supported across major browsers.
DropzoneJS isn’t simply a drag and drop based widget, however. Clicking the widget launches the more conventional file chooser dialog approach.
Here’s an animation of the widget in action:
Alternatively, take a look at this most minimal of examples.
You can use DropzoneJS for any type of file, though the nice little thumbnail effect makes it ideally suited to uploading images in particular.
Features
To summarize some of the plugin’s features and characteristics, DropzoneJS:
can be used with or without jQuery
has drag and drop support
generates thumbnail images
supports multiple uploads, optionally in parallel
includes a progress bar
is fully themeable
includes extensible file validation support
is available as an AMD module or RequireJS module
comes in at around 43KB when minified and 13KB when gzipped
Browser Support
Taken from the official documentation, browser support is as follows:
Chrome 7+
Firefox 4+
IE 10+
Opera 12+ (Version 12 for macOS is disabled because their API is buggy)
Safari 6+
There are a couple of ways to handle fallbacks for when the plugin isn’t fully supported, which we’ll look at later.
Getting Set Up
The simplest way to get started with DropzoneJS is to include the latest version from a CDN. At the time of writing, this is version 5.5.1.
Alternatively, you can download the latest release from the project’s GitLab page. There’s also a third-party package providing support for ReactJS.
Then, make sure you include both the main JavaScript file and the CSS styles in your page. For example:
<!DOCTYPE html> <html lang="en"> <head> <meta charset="UTF-8"> <title>File Upload Example</title> <link rel="stylesheet" href="https://cdnjs.cloudflare.com/ajax/libs/dropzone/5.5.1/min/dropzone.min.css"> </head> <body> <script src="https://cdnjs.cloudflare.com/ajax/libs/dropzone/5.5.1/min/dropzone.min.js"></script> </body> </html>
Note that the project supplies two CSS files — a basic.css file with some minimal styling, and a more extensive dropzone.css file. Minified versions of dropzone.css and dropzone.js are also available.
Basic Usage
The simplest way to implement the plugin is to attach it to a form, although you can use any HTML such as a <div>. Using a form, however, means fewer options to set — most notably the URL, which is the most important configuration property.
You can initialize it simply by adding the dropzone class. For example:
<form id="upload-widget" method="post" action="/upload" class="dropzone"></form>
Technically, that’s all you need to do, though in most cases you’ll want to set some additional options. The format for that is as follows:
Dropzone.options.WIDGET_ID = { // };
To derive the widget ID for setting the options, take the ID you defined in your HTML and camel-case it. For example, upload-widget becomes uploadWidget:
Dropzone.options.uploadWidget = { // };
You can also create an instance programmatically:
const uploader = new Dropzone('#upload-widget', options);
Next up, we’ll look at some of the available configuration options.
Basic Configuration Options
The url option defines the target for the upload form, and is the only required parameter. That said, if you’re attaching it to a form element then it’ll simply use the form’s action attribute, in which case you don’t even need to specify that.
The method option sets the HTTP method and again, it will take this from the form element if you use that approach, or else it’ll simply default to POST, which should suit most scenarios.
The paramName option is used to set the name of the parameter for the uploaded file. If you’re using a file upload form element, it will match the name attribute. If you don’t include it, it defaults to file.
maxFiles sets the maximum number of files a user can upload, if it’s not set to null.
By default, the widget will show a file dialog when it’s clicked, though you can use the clickable parameter to disable this by setting it to false, or alternatively you can provide an HTML element or CSS selector to customize the clickable element.
Those are the basic options, but let’s now look at some of the more advanced options.
Enforcing Maximum File Size
The maxFilesize property determines the maximum file size in megabytes. This defaults to a size of 1000 bytes, but using the filesizeBase property, you could set it to another value — for example, 1024 bytes. You may need to tweak this to ensure that your client and server code calculate any limits in precisely the same way.
Restricting to Certain File Types
The acceptedFiles parameter can be used to restrict the type of file you want to accept. This should be in the form of a comma-separated list of MIME types, although you can also use wildcards.
For example, to only accept images:
acceptedFiles: 'image/*',
Modifying the Size of the Thumbnail
By default, the thumbnail is generated at 120x120px. That is, it’s square. There are a couple of ways you can modify this behavior.
The first is to use the thumbnailWidth and/or the thumbnailHeight configuration options.
If you set both thumbnailWidth and thumbnailHeight to null, the thumbnail won’t be resized at all.
If you want to completely customize the thumbnail generation behavior, you can even override the resize function.
One important point about modifying the size of the thumbnail is that the dz-image class provided by the package sets the thumbnail size in the CSS, so you’ll need to modify that accordingly as well.
Additional File Checks
The accept option allows you to provide additional checks to determine whether a file is valid before it gets uploaded. You shouldn’t use this to check the number of files (maxFiles), file type (acceptedFiles), or file size (maxFilesize), but you can write custom code to perform other sorts of validation.
You’d use the accept option like this:
accept: function(file, done) { if (!someCheck()) { return done('This is invalid!'); } return done(); }
As you can see, it’s asynchronous. You can call done() with no arguments and validation passes, or provide an error message and the file will be rejected, displaying the message alongside the file as a popover.
We’ll look at a more complex, real-world example later, when we look at how to enforce minimum or maximum image sizes.
Sending Additional Headers
Often you’ll need to attach additional headers to the uploader’s HTTP request.
As an example, one approach to CSRF (cross-site request forgery) protection is to output a token in the view, then have your POST/PUT/DELETE endpoints check the request headers for a valid token. Suppose you outputted your token like this:
<meta name="csrf-token" content="CL2tR2J4UHZXcR9BjRtSYOKzSmL8U1zTc7T8d6Jz">
Then, you could add this to the configuration:
headers: { 'x-csrf-token': document.querySelector('meta[name=csrf-token]').getAttributeNode('content').value, },
Alternatively, here’s the same example but using jQuery:
headers: { 'x-csrf-token': $('meta[name="csrf-token"]').attr('content') },
Your server should then verify the x-csrf-token header, perhaps using some middleware.
Handling Fallbacks
The simplest way to implement a fallback is to insert a <div> into your form containing input controls, setting the class name on the element to fallback. For example:
<form id="upload-widget" method="post" action="/upload" class="dropzone"> <div class="fallback"> <input name="file" type="file" /> </div> </form>
Alternatively, you can provide a function to be executed when the browser doesn’t support the plugin using the fallback configuration parameter.
You can force the widget to use the fallback behavior by setting forceFallback to true, which might help during development.
Handling Errors
You can customize the way the widget handles errors by providing a custom function using the error configuration parameter. The first argument is the file, the error message the second, and if the error occurred server-side, the third parameter will be an instance of XMLHttpRequest.
As always, client-side validation is only half the battle. You must also perform validation on the server. When we implement a simple server-side component later, we’ll look at the expected format of the error response, which when properly configured will be displayed in the same way as client-side errors (illustrated below).
Overriding Messages and Translation
There are a number of additional configuration properties which set the various messages displayed by the widget. You can use these to customize the displayed text, or to translate them into another language.
Most notably, dictDefaultMessage is used to set the text which appears in the middle of the dropzone, prior to someone selecting a file to upload.
You’ll find a complete list of the configurable string values — all of which begin with dict — in the documentation.
Events
There are a number of events you can listen to in order to customize or enhance the plugin.
There are two ways to listen to an event. The first is to create a listener within an initialization function:
Dropzone.options.uploadWidget = { init: function() { this.on('success', function(file, resp){ ... }); }, ... };
This is the alternative approach, which is useful if you decide to create the Dropzone instance programatically:
const uploader = new Dropzone('#upload-widget'); uploader.on('success', function(file, resp){ ... });
Perhaps the most notable aspect is the success event, which is fired when a file has been successfully uploaded. The success callback takes two arguments: the first a file object, and the second an instance of XMLHttpRequest.
Other useful events include addedfile and removedfile, for when a file has been added or removed from the upload list; thumbnail, which fires once the thumbnail has been generated; and uploadprogress, which you might use to implement your own progress meter.
There are also a bunch of events which take an event object as a parameter and which you could use to customize the behavior of the widget itself — drop, dragstart, dragend, dragenter, dragover and dragleave.
You’ll find a complete list of events in the relevant section of the documentation.
The post How to Build a File Upload Form with Express and DropzoneJS appeared first on SitePoint.
by Lukas White via SitePoint https://ift.tt/3cmivck
0 notes
Link
10 Useful Things That Front End Developers Should Learn In 2020
Front end developers are in high demand, find out what skills leading front end web design and development experts use the most.
2020 is here with us and from the look of things, it is going to be a great year for front end web design and everything to do with front end development. Unlike the recent times where front end developers in their space just had to something on jQuery, HTML or CSS, front end developers need to take the bull by its horns and face the dynamic ecosystem of skills necessary for developing libraries, tools and frameworks so that they can master the craft.
Delving into the past, it is evident that the past couple of years has blessed individuals in the front end development space with some amazing new frameworks and libraries including VueJS, Svelte and ReactJS that make use of JavaScript for powering up to major web applications. As a developer, you will find this article quite interesting while it sheds more light on some of the few core things you should strive to focus on to up your developing game in case you are an entry-level front end developer or already have a grip of things. Nowadays, there are many IT job opportunities for those who want to apply.
Here are the top 10 things to get you started this year.
JAMstack
This is a combination of JavaScript, API and markup. This combination is an interesting approach of developing apps and websites for purposes of bettering their performance and at the same time scaling down the costs involved. It functions to offer a developer a better experience while providing higher security. This makes learning this an interesting objective because all of them don’t depend on a webserver to function. For instance, if you take a look at a monolithic app that has some reliance on Node.js or Ruby back end or any site that is developed with such a server-side CMS as WordPress or Drupal, you will realise that all of them are not JAMstack developed. However, to learn working with JAMstack, some of the following best practices are crucial:
Automated builds: The use of automated builds is near perfect because every instance of markup is prebuilt with programs like cloud services or webhooks.
Instant cache validation: You definitely have to find a way of learning anything to do with instant cache validation because at that point any site goes live, it should be your responsibility to ensure that your CDN has the capacity to handle any form of instant cache purges for any kind of change to get visible.
Serving your project on a CDN: Since there is no need for a server, you can serve the whole of your project on a CDN, which gives you the ability to unlock performance and speeds that are unbeatable.
Atomic deploys: It would be in your best interest to avoid any case of inconsistent states by redeploying a large number of files in a large project. This practice will come in handy since it waits for every file to be uploaded just before any changes finally go live.
GraphQL
2020 should not pass before you get your way around working with GraphQL. This is despite the fact that for a long time now many people have considered REST as the effective measure for the design of web APIs since it offers concepts like stateless servers. This is because RESTful APIs are seemingly inflexible because they do not easily adapt to any changing clients wishing to access them. That is why Facebook developed GraphQL to fight the challenges that many developers face while dealing with RESTful APIs in the process of web development. The program will enable developers to send a query to its server with the data requirements, which would then return corresponding data with JSON object.
Testing
As an entry-level front end web developer, you should learn on the importance of testing because no code that is untested should go into production since they are mandatory in commercial projects. There are different tests you should keep in mind including:
Integration tests, which test any form of interaction between components.
End-to-end tests, which are instrumental in testing full-blown user flows in browsers.
Unit tests, which are essential in testing functions in isolation or a single component.
Soft Skills
As a front end developer, you might e tempted into overlooking the acquisition of skills but mark you they are just as important because they help in not only communication with team members but also help in the understanding of the technicalities of things. The most common soft skills you should learn to acquire in 2020 include:
Patience.
Problem-solving.
Teamwork.
Empathy.
Open-mindedness.
Communication.
Time management.
Creativity
Accountability
Git
This a form of a standardized version of control in web development. Therefore, it is only necessary that as a front end developer you strive to know and understand some of the basic concepts and workflows in order to effectively work in all sizes of teams plus understanding the underlying concepts. Some of the popular commands to know include:
git add
git config
git clone
git commit
git init
git branch
git push
git pull
Frameworks
There is a need for developers, especially those making use of JavaScript frameworks to focus on Vue and React since, in the recent years, these two have seen tremendous growth, especially in enterprise projects because the past year has sen two giants, VueJS and ReactJS starring a number of stars as compared to Svelte and Angular.
Progressive Web Apps (PWA)
PWA will soon catch up since more and more businesses and companies are choosing to go the PWA way over choosing native apps because they get a richer mobile experience from them. This has been mainly bolstered by the fact that PWAs are becoming more reliable because they can work without an internet connection with instant loading capabilities. These PWAs are also engaging in terms of user experience with that native-app feeling. This means that users can easily utilise the use of service workers for functionalities offline plus a full-screen experience that is enabled by a web-app manifest.
Code Editors/IDEs
VS Code by Microsoft will seemingly continue prevailing in 2020 as the go-to editor just as it did in 2019 for most front end developers. This is because the editor offers developers such IDE-like features as highlighting and code completion with the ability to extend infinitely through its extension marketplace, which is what makes the editor more appealing. Therefore, some great extensions to take note of include:
Prettier.
ESLint.
npm.
Vetur.
Live Sass Compiler.
JavaScript (ES6) code snippets.
Beautify.
Liver Server.
CSS Peek.
Debugger for Chrome.
Static Site Generators
These generators effectively combine the power of single-page applications and that of server-side rendering, which is very instrumental in initial load time and SEO. Therefore, if you believe you are serious in the front end developing, then you should consider projects like Gridsome and Nuxt which are Vue-based and Next and Gatsby, which are React-based. These projects will definitely draw some heat in 2020 since they come with such features as module bundlers, markdown support, integrated test runners and more.
Clean Code
The ability to write clean code is increasingly becoming more desirable and in high demand in many organisations. This means that learning the fundamentals of clean coding in order to strategically place yourself in 2020. Clean code should not only be pleasing to read and elegant but also focused. This means, as a clean coder, you will have to learn to:
Create codes that speak for themselves without the need for comments.
Create codes with functions that have few arguments and small in nature.
Create names for classes, methods, functions and variables that are meaningful.
All these things should have you encouraged to get busy to see to it that you have successful developing in 2020.
#10 useful things that front end developers should learn in 2020#website design#front end developers
0 notes
Text
Koodi: Senior Software Engineer (Remote - Contract)

Headquarters: Phillippines URL: https://koodi.ph/
Overview
This position is responsible for the entire pipeline of creating web apps in an agile environment. This includes creating technical specs, development, testing, documentation, deployment, maintenance, and post-implementation support. You will work closely with a team of remote developers and external partners to maintain and develop customized in-house applications and integrate with different third party API.
You will be working with management on the west coast of USA (Pacific timezone), and working with a remote team in the Philippines. Must be willing to be available for meetings with management between 10am-7pm Pacific timezone.
Qualifications
Minimum of 4 years of web app building experience.
Experienced in using vanilla HTML/PHP/JS/CSS.
Experienced in Laravel, VueJS, ReactJS, SASS
Experienced in web services, including REST and SOAP
Experience working with 3rd-party APIs that use JSON/REST/XML/SOAP.
Familiarity with caching services (e.g., Memcached, Varnish, CDN) preferred.
Experience working in a team-based development environment. Familiar with code branching methods (e.g., Gitflow Workflow) and software containers (e.g., Docker).
Ability to work directly with both customers and external partners to translate user needs into requirements documents and coordinate testing, implementation, and training for these requests
Capable of independently researching, analyzing, evaluating and documenting issues, products, and solutions
Excellent English verbal and written communication
Bonus points and Preference
Understands unit testing and E2E testing concepts. Experience with PHPUnit, Mocha, BrowserStack, Selenium WebDriver or Cypress.io a plus.
Have experience with an ad platform’s API (e.g., Facebook, Adwords, etc).
Have deployed in production a high-performance, scalable and public-facing scalable web application using PHP.
Experienced in affiliate tracking and ad tech
What we offer
We offer competitive compensation. You’ll be working from home but will get plenty of support (and dog selfies) from our friendly staff via Slack and Skype. This is a telecommute position with flexible schedule -- you can work from home from anywhere.
To apply: https://koodi-systems.breezy.hr/p/e273c7e0aa55-senior-software-engineer-remote-contract?source=weworkremotely
from We Work Remotely: Remote jobs in design, programming, marketing and more https://ift.tt/2QXvnxw from Work From Home YouTuber Job Board Blog https://ift.tt/2ORKuWm
0 notes
Text

How to get HTML and CSS code from Figma?
CopyCat scale your web development process and build UI faster. This plugin is easy to install and fully supported to Convert Figma to HTML CSS. Copycat also have a review on their website that says the tool helped save 30% of their development time (only one way to find out), but it’s safe to say that using this tool may eliminate some of the tedious work that makes coding miserable.
#Figma to HTML CSS#Figma to HTML#Figma to React#reactjs-popup edit css#reactjs-popup no trigger#reactjs popup#cdn reactjs#react.js cdn
0 notes