#Figma to HTML
Explore tagged Tumblr posts
Visit Tumblr Blog
Explore Tumblr blogs with no restrictions, modern design and the best experience.
Last Seen Tumblr Blogs


Fun Fact
Users from the US are the majority of Tumblr visitors.
Text

✧ PSD to HTML Magic ✧
Your stunning designs deserve flawless code ✨
At Xhtmlchop, we transform your PSDs into: ☑️ Pixel-perfect HTML/CSS ☑️ Buttery-smooth responsive layouts ☑️ Lightning-fast load speeds ☑️ SEO-friendly markup that ranks
🔥 Deal Alert: Homepage conversion → 199
Additional pages → 129 each
We include: ✓ 100% hand-coded solutions ✓ Cross-browser perfection ✓ Optional NDA protection ✓ Money-back guarantee
Let’s collaborate! → https://www.xhtmlchop.com/psd-to-responsive.html
(Reblog if you’ve been looking for PSD conversion services!)
#WebAlchemy#PSDtoHTML#CodeWizards#FrontEndDev#DigitalTransformation#webdesign#webdevelopment#figma to html#web graphics#website#psd to html#htmlcoding#html5#html css#javascript#css#html5 css3#web development
3 notes
·
View notes
Text
What are your biggest struggles with icons in Figma?
Hey fellow designers!
I'm curious to hear about your biggest pain points when it comes to finding and using icons in Figma.
Do you:
Spend hours searching through endless icon libraries?
Struggle to find icons that match your brand style consistently?
Get frustrated with inconsistent icon sizes and styles across your projects?
Have trouble finding icons that are high-quality and suitable for different screen sizes?
I'd love to hear your thoughts and any tips or tricks you've discovered for managing icons more efficiently in Figma. Let's share our struggles and maybe find some solutions together!
#Figma #UIUX #Design #Icons #Workflow #userexperience #figmadesigner
2 notes
·
View notes
Text
18.03.2024
Today was a decently normal Monday. My teachers informed me today that I might be getting an essay I completed a while ago and getting my science test results back soon.
After school, I tried to start the home page of the website I'm currently building Project.Spider and I would like to say that thanks to the help of Bing AI, ChatGPT and Visual Studio Code, I could finish one part.

🎧- Shut up my mom's calling - Hotel Ugly
🌲- 3hrs
#aesthetic#studying#books#bookish#bookworm#book community#booknerd#currently reading#bookstagram#student life#coding#python#programming#engineering#developer#html#html css#css#figma#figmadesign#figma to html#studyblr community#productivity#productivity challenge#productivityboost#study#study motivation#study notes#study tips#study with me
8 notes
·
View notes
Text
Learn how to seamlessly convert Figma designs to HTML code with our comprehensive guide. Master the art of Figma to HTML conversion for pixel-perfect websites.
0 notes
Text
0 notes
Text
youtube
Build Figma Layouts FAST | Build a Design System
#figma#youtube#web design#free education#educate yourself#ux wireframe#figmadesign#education#figma tutorials#figmatutorial#figma design#figma tips#figma to html#graphic design#figma tutorial#ux and ui design#ui ux design#uidesign#ux#ui#Youtube
1 note
·
View note
Text
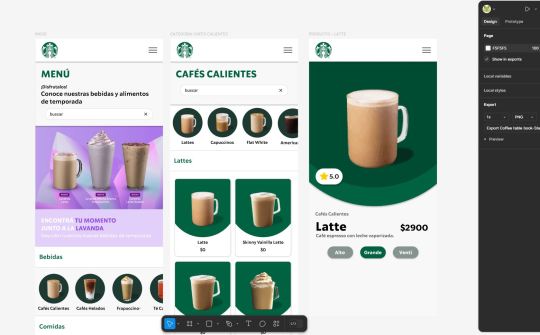

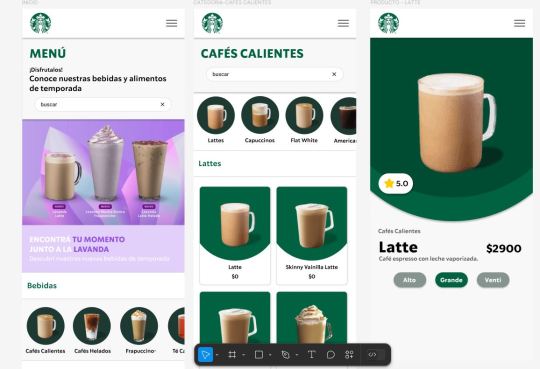
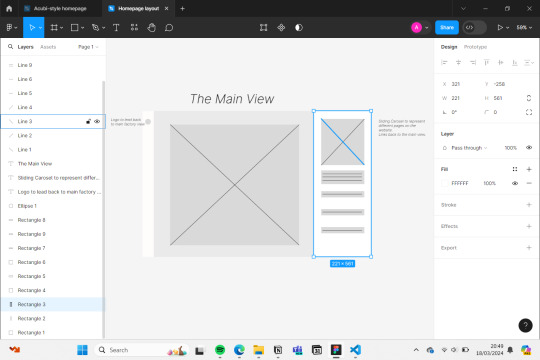
Working on a new project about redesigning how I would create a virtual menu/book table for Starbucks. Starting the prototype in Figma! 🥐☕✨
#web development#web design#web developers#htmlcoding#html css#html#html5#coding#programming#uxdesign#figma#figma to html#freelance#uidesign#figmadesign#visual studio code
1 note
·
View note
Text
Motorbike Company Hero
Addressing my latest hero redesign for a motorbike company's website! Bold visuals and elegant navigation make riding the wave of excitement and pleasure possible in the design.,
I drop a link for more design

#uidesign#ui#hero design#motorcycle#motorbike#motorsports#webshop#website#sector#web design#webcore#web development#figmadesign#figma#figma figure#figma to html
0 notes
Text
Convert Figma to HTML | Professional Figma to HTML Services
Transform your Figma designs into responsive and pixel-perfect HTML code. Our expert developers ensure your Figma to HTML conversion is seamless and efficient. Get started today!
1 note
·
View note
Text
Figma to HTML conversion Service
We can help you convert Figma design to HTML CSS. Build a fully responsive, clean, high-quality website with our Figma to HTML conversion services.

#figma#html#figma to html#figma to html conversion#create a figma to html#figma to html conversion servicers
0 notes
Text
Convert Your Figma Designs to a Fully Functional WordPress Website with Xhtmlchop!
Tired of struggling to turn your stunning Figma designs into a live WordPress site? Let Xhtmlchop handle the heavy lifting for you! 🛠️
✨ Why Choose Us? ✅ Pixel-perfect conversion from Figma to WordPress ✅ Clean, semantic, and responsive code ✅ Fast loading & SEO-friendly ✅ Custom WordPress theme development ✅ Full support & timely delivery
📩 Let’s collaborate! 🌐 www.xhtmlchop.com 📧 Email: [email protected]
#webdesign#web#figma to html#figmatowordpress#web graphics#wordpress#website#webdevelopment#html#figma to wordpress#web development
0 notes
Text
Revamping Your Shopify Store: A Guide to Incorporating Modern Design Elements

Transform your Shopify store with the latest design trends to enhance user experience and boost conversions.
Introduction
In the fast-paced world of e-commerce, staying ahead of design trends is not just beneficial; it’s essential. A well-designed Shopify store can significantly enhance user experience, increasing engagement and sales. This guide will walk you through incorporating modern design elements into your Shopify store, ensuring it remains fresh, relevant, and appealing.
Understanding Modern Design Elements
Modern design elements in e-commerce blend aesthetics with functionality, creating a seamless shopping experience.
Key components include intuitive color schemes, readable typography, and structured layouts.
These elements work together to form a cohesive look that resonates with your brand and appeals to your target audience.

Step 1: Evaluating Your Current Design
Start with a thorough audit of your existing Shopify store. Look at your site from a customer’s perspective and note areas for improvement. Consider user feedback, analyze your conversion rates, and assess the overall visual appeal. Identifying these areas will set a clear direction for your revamp.
Step 2: Choosing a New Color Scheme
Color significantly impacts consumer perception and behavior. Select a color scheme that reflects your brand’s personality and appeals to your target demographic. Utilize color psychology to evoke the desired emotions and actions from your visitors. Tools like Coolors or Adobe Color can help you create a modern palette that complements your products and branding.
Step 3: Updating Typography
Typography influences how users digest content on your site. Choose fonts that are easy to read and align with your brand’s tone. Consider using a combination of typefaces for headings and body text to enhance readability.
Shopify offers a range of customizable font options, allowing you to refresh your store’s look with just a few clicks.

Step 4: Rethinking Layout Structure
A well-structured layout guides visitors through your store, improving user flow and increasing the likelihood of purchase. To showcase your products effectively, embrace modern trends like minimalism, card layouts, or dynamic grids. Shopify’s theme store provides templates that adhere to contemporary layout standards, making finding one that suits your brand easier.
Step 5: Incorporating New Design Elements
Elevate your store’s aesthetic by adding modern design features such as animations, micro-interactions, or video backgrounds. These elements can enhance storytelling and engage users. However, ensure these additions do not slow down your site, as speed is crucial for retaining customers and improving SEO.
Conclusion
Regularly updating your Shopify store’s design is vital in maintaining a competitive edge. Incorporating modern design elements can create a more engaging and effective online presence. Remember, the goal is to enhance the shopping experience without overwhelming visitors.

Call-to-Action
Take the first step towards a more modern and effective Shopify store today!
Experiment with new design elements, but always prioritize your users’ needs and preferences.
For further inspiration and resources, visit Shopify’s design blog and explore the latest themes and features.
#shopify#e commerce#business#e commerce business#ux desgin#ui design#ux ui design#ui ux design#web design#graphic design#canva#adobe#adobe photoshop#adobe illustrator#adobe stock#adobe firefly#figma#figmadesign#figma to html#sketch#xd#liquid#apps#shopify agency#shopify app development#shopify developers#shopify development company#shopify development agency#shopify development services#outsourcing
1 note
·
View note
Text

Feel free to reach out to me to convert your Figma designs into code.
#software engineering#reactjs#figma#figma to html#startup#design#sales#money#drawing#digital art#social media
1 note
·
View note
Text
Learn how to transform your Figma designs into beautiful and functional websites using this step-by-step guide.
#Figma to HTML Code#Figma to HTML#Figma to HTML Conversion#Convert Figma to HTML#Figma to Code#Figma to HTML Conversion Services#Figma Designs to Websites#Figma to Websites#PSDtoHTMLNinja
0 notes
Text
What are some best practices for converting Figma designs to HTML?
Converting Figma designs to HTML can be a seamless process with the right approach. Here are some best practices to ensure an effective transition from Figma to HTML:
Prepare Your Design: Before you start coding, ensure your Figma design is clean and well-organized. Use proper layers, naming conventions, and components to make the conversion easier.
Export Assets: Export all necessary assets (images, icons, etc.) from Figma in the appropriate formats. SVGs are great for icons and logos, while PNGs or JPEGs are better for detailed images.
Use a Style Guide: Implement a style guide or design system. Ensure you capture all the typography, color schemes, and spacing in your CSS to maintain design consistency.
Responsive Design: Ensure your HTML and CSS code is responsive. Use media queries to adapt your design for different screen sizes and devices, reflecting the responsive design principles used in Figma.
HTML Structure: Build a semantic HTML structure based on your Figma layout. Use proper HTML5 elements like <header>, <nav>, <main>, and <footer> to enhance accessibility and SEO.
CSS Grid and Flexbox: Utilize CSS Grid and Flexbox to replicate complex layouts and alignments from Figma. These modern layout techniques will help you achieve the design as closely as possible.
Test Across Browsers: Test your HTML output across different browsers and devices to ensure cross-browser compatibility and fix any inconsistencies that arise.
Iterate and Refine: Compare your HTML output with the Figma design and make necessary adjustments. Iteration is key to ensuring the final result matches the design closely.
By following these best practices, you can effectively convert your Figma designs to HTML while maintaining design integrity and functionality.
0 notes
Text

This is our first job designing a figma from a picture. We have satisfied the client and the client gave us five stars. Hopefully we will improve further.
1 note
·
View note