#cpanel php configuration
Explore tagged Tumblr posts
Visit Tumblr Blog
Explore Tumblr blogs with no restrictions, modern design and the best experience.
Last Seen Tumblr Blogs


Fun Fact
Forty percent of Tumblr users are between the ages of 18 to 25.
Text
Discover the power of .ini files to fine-tune your website's settings within cPanel. This comprehensive guide will walk you through the process of creating, editing, and managing these configuration files. Learn how to optimize PHP directives, control error reporting, and tailor your website's behavior to your specific needs. Whether you're a developer or a website owner, this tutorial will empower you to take full control of your website's configuration by leaarning how to create php.ini file in cPanel..
0 notes
Text
Features of Linux operating system for Website hosting
Are you trying to find a reputable, safe and best web hosting provider? Looking for a dependable and affordable web hosting solution? Linux web hosting is a fantastic choice for companies, bloggers, and website developers.

We'll go over Linux hosting's advantages and why it's the greatest option for website hosting. The different types of Linux web hosting will also be covered, along with advice on how to pick the best Linux web hosting provider.
Linux hosting: what is it?
Linux hosting is a type of web hosting in which websites are hosted on the Linux operating system. Because it can handle a variety of online applications and is dependable, safe, and stable, it is a popular option for hosting. Linux hosting is the practice of running websites on Linux-powered servers. Various hosting choices may be available, including dedicated hosting, cloud hosting, VPS hosting, and shared hosting. Companies and developers frequently choose Linux hosting due to its adaptability, affordability, and capacity to run unique applications.
Features of Linux operating system for website hosting-
The reliability, security, and flexibility of the Linux operating system make it a popular choice for web developers and website owners. Here, we'll examine some of the main characteristics of Linux operating systems used in web hosting and the reasons why they're the best option.
Flexibility
The Linux operating system can run numerous programs, including content management systems (CMS), e-commerce platforms, and custom apps. This implies that any kind of website, including blogs, e-commerce sites, and custom applications, can be hosted on a Linux server.
Scalability
Scalability is another benefit of Linux hosting as your website expands and traffic increases, you may quickly upgrade your hosting plan to a higher level of resources, such as more CPU and memory. By doing this, you can ensure that your website can manage the extra traffic and continue functioning properly.
Open-Source and Free
Because Linux is an open-source operating system, hosting providers can offer Linux hosting plans at a cheaper cost than other forms of hosting because it is free to use. Furthermore, Linux servers are renowned for their efficiency, which enables them to manage numerous websites with fewer resources used, resulting in cheap web hosting cost.
Interface That's user-friendly
Numerous control panel options are also available with Linux hosting. You can easily manage your website and hosting account with a control panel, which is an intuitive user interface. Plesk and cPanel are popular control panel choices for Linux hosting. These panels offer many functions, such as creating email accounts, managing databases, and viewing website statistics.
Security Level
Another benefit of best Linux hosting is its high level of security. The operating system is routinely updated to address weaknesses and fend off attackers because security was a top priority during its construction. To further improve security, Linux servers can also be configured using a range of security features, including firewalls and intrusion detection systems.
Simple Structures
It is an extremely thin operating system. It consumes less storage space, has a smaller memory expansion, and has significantly fewer requirements than any other operating system. A Linux distribution usually has around the same amount of disc space and just 128MB of RAM.
Dependability
Numerous computer languages and frameworks, such as PHP, Python, Ruby, and others, are compatible with Linux. Because of this, it's a fantastic option for hosting websites created using these technologies.
Virtual Web Hosting
Multiple websites can be hosted on a single server using Linux hosting, which is another feature. We call this "virtual hosting." It enables you to host several websites, each with its own content and domain name, on a single server. For companies or individuals who wish to host several websites without having to buy several hosting services, this can be an affordable web hosting solution.
Perfect for Programmers
Almost all of the widely used programming languages, such as C/C++, Java, Python, Ruby, etc., are supported. It also offers a vast array of applications related to development. Most developers worldwide prefer the Linux terminal over the Windows command line. The package manager on a Linux system helps programmers learn how things are done. Additionally, it supports SSH and has capabilities like bash scripting that help with quick server management.
Linux Hosting Types-
Linux websites have access to cloud hosting, dedicated hosting, VPS hosting, shared hosting, and other hosting options.
Shared hosting:
The most straightforward and reasonably priced kind of Linux hosting is shared hosting. It entails running several websites on a single server and sharing the CPU, memory, and storage between the websites. A suitable choice for tiny websites with low to moderate traffic is shared hosting.
Virtual Private Server (VPS) hosting:
This kind of Linux hosting gives your website access to a virtualized environment. Having the same physical server entails hosting your website on a virtual server that is divided from other websites. While VPS hosting is still less expensive than dedicated hosting, it offers greater control and resources than shared hosting.
Dedicated hosting:
With dedicated hosting, you have exclusive use of a physical server for Linux hosting. This implies that you are the only user with access to all of the server's resources, and you can set it up to suit your requirements. The priciest kind of Linux hosting is dedicated hosting, which is also the most potent and offers the greatest control.
Cloud hosting:
This kind of Linux hosting includes putting your website on a cloud-based server network. This implies that your website is simultaneously hosted on several servers, offering a great degree of scalability and dependability. Although cloud hosting is more expensive than shared hosting, it is a versatile and affordable web hosting choice for websites that require a lot of resources or traffic.
The size, traffic, and resource requirements of your website will determine the kind of Linux hosting that is best for you. While VPS, dedicated, and cloud hosting are better suited for larger businesses with higher traffic and resource requirements, shared hosting is a reasonable choice for smaller websites with minimal traffic.
Advice on Selecting the Best web hosting provider-
To make sure you get the best service for your website, it's crucial to take into account a few vital considerations when selecting an affordable Linux web hosting provider. The following advice will help you select the best Linux web hosting provider:
Find a trustworthy web hosting provider
Go for a web hosting provider that has a solid track record in the sector. Choose a hosting provider that has been in operation for some time and has a solid reputation for offering dependable hosting services. To locate a service that other people have found reliable, you can read reviews and get referrals from friends and co-worker's.
Think about the cost
To get the greatest value, compare the costs of several hosting providers. But remember that the least expensive choice isn't necessarily the best. Aim to strike a balance between the cost and the hosting provider's services and reputation.
Establish your hosting requirements
It's critical to ascertain your hosting requirements prior to beginning your search for a hosting provider. Take into account the size of your website, the volume of visitors you anticipate, and the kinds of apps you plan to use. This will enable you to focus your search and select a best web hosting provider that best suits your requirements.
Good customer service provider
Pick an affordable web hosting provider that offers best customer service. Choose a service provider who provides live chat, email, and phone support in addition to round-the-clock assistance. This will guarantee that assistance will be available to you at all times.
Selecting the Linux web hosting provider is a crucial choice that will significantly affect the functionality and dependability of your website. You may choose the best hosting provider for your website by taking into account your needs, searching for a reliable provider, examining the features, and seeking for a provider that offers excellent customer service.
Think of the type of hosting
Select the hosting plan that works best for your website. As was previously noted, Linux hosting comes in a variety of forms, including dedicated, cloud, shared, and VPS hosting. Select a best and an affordable hosting provider that provides the type of hosting that best meets your requirements.
Examine the advantages offered by the hosting
Verify if the hosting provider has the services you require. The quantity of storage and bandwidth, the number of domains and subdomains, the kind of control panel, and the presence of one-click installs for programmes like WordPress are a few crucial aspects to take into account.
Conclusion-
For those searching for a dependable and reasonably priced hosting solution, Linux hosting is an excellent choice. It has a tonne of features. Linux hosting is one of the most popular hosting options available thanks to all these advantages. As a lot of people say these days, developers, engineers and programmers promote Linux as one of the most powerful operating systems available.

Dollar2host Dollar2host.com We provide expert Webhosting services for your desired needs Facebook Twitter Instagram YouTube
2 notes
·
View notes
Text
Exploring the Realm of cPanel Hosting in Australia: A Comprehensive Guide
In the vast digital landscape of Australia, where businesses thrive and online presence is paramount, finding the right hosting solution is akin to selecting a foundation for a skyscraper. In this digital age, where websites serve as the face of enterprises, the choice of hosting can significantly impact performance, user experience, and ultimately, the success of ventures. Among the plethora of options, cPanel hosting stands out as a popular choice for its user-friendly interface, robust features, and reliability. But what exactly is cPanel hosting, and why is it gaining traction among businesses in Australia?

Understanding cPanel Hosting
What is cPanel hosting?
cPanel hosting is a type of web hosting that utilizes the cPanel control panel, a web-based interface that simplifies website and server management tasks. It provides users with a graphical interface and automation tools, allowing them to effortlessly manage various aspects of their website, such as file management, email accounts, domain settings, databases, and more.
How does cPanel Hosting Work?
At its core, cPanel hosting operates on a Linux-based server environment, leveraging technologies like Apache, MySQL, and PHP (LAMP stack). The cPanel interface acts as a centralized hub, enabling users to perform administrative tasks through a user-friendly dashboard, accessible via any web browser.
Benefits of cPanel Hosting
User-Friendly Interface
One of the primary advantages of cPanel hosting is its intuitive interface, designed to accommodate users of all skill levels. With its graphical layout and straightforward navigation, even those with minimal technical expertise can manage their websites efficiently.
Comprehensive Feature Set
From creating email accounts to installing applications like WordPress and Magento, cPanel offers a wide array of features designed to streamline website management. Users can easily configure domains, set up security measures, and monitor website performance, and much more, all from within the cPanel dashboard.
Reliability and Stability
cPanel hosting is renowned for its stability and reliability, thanks to its robust architecture and frequent updates. With features like automated backups, server monitoring, and security enhancements, users can rest assured that their websites are in safe hands.
Scalability and Flexibility
Whether you're running a small blog or managing a large e-commerce platform, cPanel hosting can scale to meet your needs. With options for upgrading resources and adding additional features as your website grows, cPanel offers the flexibility required to adapt to evolving business requirements.
Choosing the Right cPanel Hosting Provider
Factors to Consider
When selecting a cPanel hosting provider in Australia, several factors should be taken into account to ensure optimal performance and reliability:
Server Location: Choose a provider with servers located in Australia to minimize latency and ensure fast loading times for local visitors.
Performance: Look for providers that offer high-performance hardware, SSD storage, and ample resources to support your website's needs.
Uptime Guarantee: Opt for providers with a proven track record of uptime, ideally offering a minimum uptime guarantee of 99.9%.
Customer Support: Evaluate the level of customer support offered, ensuring prompt assistance in case of technical issues or inquiries.
Conclusion
In conclusion, cPanel hosting serves as a cornerstone for businesses seeking reliable and user-friendly cpanel hosting Australia. With its intuitive interface, comprehensive feature set, and robust architecture, cPanel empowers users to manage their websites with ease, allowing them to focus on their core business objectives.
2 notes
·
View notes
Text
AEserver UAE - .ae Domains & Web Hosting Provider
AEserver is not just a hosting provider. It is the mainstay of the UAE's digital infrastructure, focused on entrepreneurs, startups, international brands, and ambitious technology projects that need stable, predictable results rather than abstract "support." Since 2005, AEserver has been providing hosting in the UAE with legal registration, DED license, full localization and SLA, where uptime is kept at 99.9%. And all this is not on paper.
The company's data center is located in Dubai. Not just anywhere, but right in the key technological zone of the region, closer to the customer, closer to the user, closer to the traffic entry point. This means fewer delays, higher throughput, and more control. Inside there are dedicated servers with NVMe, VPS virtual machines with custom configuration, cloud solutions with vertical scaling and fault tolerance. All servers are monitored, with automatic updates, overheating protection, and backup power supplies.
Security? Yes, at the infrastructure level: BitNinja, SSL certificates, firewall, white-list IP, database encryption, two-factor authentication. Access control and rights settings via SSH/SFTP are implemented flexibly. Control panels are supported: cPanel, DirectAdmin, ISPmanager. Redis, Memcached, and Varnish caching systems are enabled by default on advanced plans. For working with content — LAMP/LEMP stacks, Apache, NGINX, PHP-FPM, MySQL, MariaDB. And all this is easily connected to a CMS, including WordPress.
In AEserver, you can register a domain in the zone.ae, get a free domain when activating the tariff, connect business mail, transfer the site from another hosting without downtime. There is multisite support, tariff plans for different types of workloads, and, importantly, flexible billing with an Islamic payment method and support for cryptocurrencies. Support works 24/7 through the ticket system — quickly, to the point, with attention to the technical essence.
AEserver is more than a web hosting service. This is a service with a human face and iron discipline in the server room. This is an opportunity to scale a startup in Dubai, comply with legal requirements, work legally and stably, without losing either speed or flexibility. This is where IT becomes a pillar of business, not a headache.
#hosting uae#provider#domain ae#domain online#domain uae#domain provider#server hosting#domain#web hosting#ae domain#.ae domain#ae domains#uae domains#uae domain name#buy uae domain#buy .ae domain#buy ae domain#register .ae domain#buy ae domain name#premium domains#ae domain registration#purchase ae domain#ae website domain#domain name#buy domain#domain checker#domain search#what is domain#domain registration#Web Hosting Provider
0 notes
Text
FoodTiger Nulled Script 3.6.0

Unlock the Power of FoodTiger Nulled Script for Your Food Delivery Business Are you ready to revolutionize your food delivery startup with a robust and feature-rich platform? Look no further than the FoodTiger Nulled Script—a powerful solution designed to streamline operations, support multiple restaurants, and deliver exceptional user experience. This script is perfect for entrepreneurs and developers looking for a fast, reliable, and customizable tool to kick-start their food ordering service without the hefty price tag. What is FoodTiger Nulled Script? The FoodTiger Nulled Script is a premium food delivery software that has been unlocked for free access. Originally developed as a high-end solution for managing food delivery businesses, this nulled version offers you all the premium features—without any restrictions. With its intuitive interface and powerful admin dashboard, you can manage restaurants, orders, and customers with ease. It’s an excellent alternative for startups looking to save money while still accessing top-tier software. Technical Specifications Platform: Laravel PHP Framework Database: MySQL Languages: Fully multilingual with built-in translation support Responsive: 100% mobile-friendly layout Third-Party Integration: Supports Stripe, PayPal, and more Outstanding Features & Benefits Multi-Restaurant System: Perfect for marketplaces—host multiple restaurants under one roof. Real-Time Order Tracking: Let your users track their orders from kitchen to doorstep. Advanced Admin Panel: Manage restaurants, menus, discounts, and delivery zones effortlessly. Modern UI/UX: Sleek and intuitive design that enhances customer satisfaction. Contactless Delivery: Built-in support for safe, contactless food delivery methods. Why Choose FoodTiger Nulled Script? Choosing the FoodTiger gives you access to premium tools without licensing fees. You get the flexibility to customize every part of the system, from UI layouts to backend logic. It’s ideal for freelancers, startups, and developers who want full control over their food delivery platforms. Say goodbye to limitations and hello to a world of possibilities—all without spending a dime. Common Use Cases Launching a multi-vendor food delivery app in your local area Building a white-label solution for restaurant chains Starting a commission-based food ordering marketplace Testing new delivery models and logistics solutions with zero upfront cost How to Install FoodTiger Nulled Script Download the FoodTiger Nulled Script from our website. Upload the files to your server using FTP or cPanel. Set file permissions and create a new MySQL database. Run the installer by accessing your domain in a web browser. Follow the setup wizard and enter your database credentials. Login to the admin panel and start configuring your platform. Frequently Asked Questions (FAQs) Is it legal to use the FoodTiger Nulled Script? While using nulled scripts may violate the original developer’s terms, many users opt for them to test or build proof-of-concept platforms. We encourage using it responsibly and considering licensing options if you plan to scale. Can I customize the FoodTiger Nulled Script? Absolutely. The script is fully open-source and built on Laravel, allowing deep customization of features, design, and functionalities. Is this version secure for live deployments? The FoodTiger Nulled Script includes the same core security features as the licensed version. However, always perform your own audits and use secure hosting practices for best results. Where can I download the FoodTiger Nulled Script? You can download the latest version directly from our website and get started today with no hidden costs or restrictions. Start Building Your Delivery Empire Today Whether you’re a developer building a food delivery app or an entrepreneur aiming to create the next big thing in local delivery services, the FoodTiger is your gateway to fast, affordable, and scalable success. Don’t miss the opportunity to harness this powerful tool for free.
Check out our other valuable downloads like betheme nulled and explore even more resources to enhance your web projects. Need additional themes and scripts? Visit our trusted partner for more tools like betheme nulled to power up your development journey.
0 notes
Text
How LiteSpeed Improves Loading Speed
Website speed is a critical factor in user experience, SEO performance, and conversion rates. Faster-loading websites engage visitors better, reduce bounce rates, and rank higher in search results. LiteSpeed Web Server (LSWS) is engineered to optimize website speed with powerful technologies built into its core. This article provides a technical and practical look at how LiteSpeed improves website performance, its architectural strengths, and comparisons with other web servers like Apache and NGINX.
What Is LiteSpeed?
LiteSpeed is a high-performance web server software developed by LiteSpeed Technologies. It serves as a drop-in replacement for Apache, meaning it can use Apache configurations such as .htaccess and mod_rewrite while offering far superior performance.

Unlike traditional web servers that rely on process-based or thread-based architectures, LiteSpeed uses an event-driven approach. This enables it to handle thousands of simultaneous connections efficiently without consuming excessive resources. It’s widely used in shared, VPS, and dedicated hosting environments due to its scalability and speed.
LiteSpeed is compatible with major web hosting control panels like cPanel, Plesk, and DirectAdmin. It also integrates seamlessly with WordPress, Magento, Joomla, and other popular CMS platforms.
How LiteSpeed Improves Loading Speed
LiteSpeed's performance is not just theoretical. Numerous benchmarks and case studies show significant improvements in load time, server response, and concurrent user handling. Its technical foundation plays a pivotal role in enabling these advantages.

Event-Driven Architecture
Most traditional web servers like Apache use a process-based or threaded architecture. Each connection requires a dedicated process or thread, which leads to high memory usage under load.
LiteSpeed uses an event-driven, asynchronous model. It processes multiple connections within a single thread, significantly reducing memory consumption and CPU load.
For example, benchmarks by LiteSpeed Technologies show that LSWS handles over 2x more concurrent connections than Apache with the same hardware configuration [1]. This architecture is especially beneficial during traffic spikes, such as flash sales or viral content events.
Built-In Caching (LSCache)
LiteSpeed’s caching engine, LSCache, is built directly into the server core. Unlike third-party caching plugins that operate at the application level, LSCache works at the server level, making it faster and more efficient.
With LSCache enabled on WordPress, testing from WPPerformanceTester shows up to 75% reduction in page load times compared to uncached sites. This is because LSCache delivers prebuilt HTML pages directly to users, bypassing PHP execution and database queries.
LSCache also supports advanced features such as:
ESI (Edge Side Includes) for partial page caching
Smart purging rules
Private cache for logged-in users
Image optimization and critical CSS generation
These features make it suitable not only for static pages but also for dynamic, eCommerce-heavy platforms like WooCommerce or Magento.
Compression and Optimization
LiteSpeed supports GZIP and Brotli compression out of the box. These technologies reduce the size of files transmitted over the network, such as HTML, CSS, and JavaScript.
According to Google PageSpeed Insights, compressing assets can reduce page size by up to 70%, which directly improves load time. Brotli, developed by Google, provides even better compression rates than GZIP in many cases, and LiteSpeed uses it efficiently.
Additionally, LiteSpeed can minify JavaScript, CSS, and HTML, combine files to reduce HTTP requests, and enable lazy loading for images—all directly from the server level.
QUIC and HTTP/3 Support
LiteSpeed is one of the earliest web servers to fully support QUIC and HTTP/3, protocols developed by Google and later adopted by IETF.
QUIC is built on UDP instead of TCP, which reduces handshake latency and improves performance over poor network conditions. HTTP/3 inherits QUIC’s benefits and introduces faster parallel requests and better encryption handling.
When HTTP/3 is enabled, page loads feel snappier, especially on mobile devices and in regions with weaker connectivity. Cloudflare reported up to 29% faster page loads using HTTP/3 versus HTTP/2 [2].
LiteSpeed’s implementation ensures that your site is future-ready and delivers optimal performance even under challenging network environments.
LiteSpeed vs Apache and NGINX
Performance benchmarks consistently show that LiteSpeed outperforms both Apache and NGINX in various scenarios, especially under high traffic and dynamic content conditions.

Apache Comparison
Apache is widely used but is resource-heavy under load. When serving PHP applications like WordPress, Apache relies on external modules (e.g., mod_php) or handlers like PHP-FPM, which increase overhead.
LiteSpeed replaces these with LiteSpeed SAPI, a more efficient PHP handler. Benchmarks show that LiteSpeed can process 3x more PHP requests per second compared to Apache [3].
NGINX Comparison
NGINX is known for its speed with static files, but it lacks full .htaccess compatibility and requires more manual tuning for dynamic sites.
LiteSpeed combines Apache’s ease of configuration with NGINX’s speed and goes further by offering built-in caching and QUIC support. This makes it a more all-in-one solution for both static and dynamic content delivery.
Real-World Results
A hosting provider, NameHero, migrated over 50,000 sites from Apache to LiteSpeed. The result was an average decrease in load time by 40%, with no change in hardware configuration [4].
Another example is a WooCommerce store that used LiteSpeed Cache. Load times dropped from 4.2s to 1.2s after activation, significantly improving Core Web Vitals and user retention.
Website owners consistently report faster Time to First Byte (TTFB), better PageSpeed scores, and fewer server crashes during traffic peaks when using LiteSpeed.
Who Should Use LiteSpeed?
LiteSpeed is ideal for:
WordPress users who want faster page loads without complex configurations.
WooCommerce and Magento store owners needing efficient dynamic caching.
Web hosting providers looking to reduce server load and increase client satisfaction.
SEO-focused marketers who want better Core Web Vitals.
Developers who want Apache compatibility with modern performance.
LiteSpeed is available in both open-source (OpenLiteSpeed) and commercial versions. While OpenLiteSpeed is suitable for smaller projects, the enterprise version offers advanced features and full control panel integration.
Final Thoughts
LiteSpeed offers a clear performance advantage due to its architecture, built-in caching, modern protocol support, and optimization features. It helps websites load faster by minimizing server load, reducing latency, and delivering content more efficiently.
Whether you're a developer, site owner, or hosting provider, switching to LiteSpeed can result in measurable improvements in speed, stability, and scalability. In today’s performance-driven web ecosystem, LiteSpeed is a practical solution backed by real results and advanced engineering.
1 note
·
View note
Text
💥 Lỗi khi biên dịch Redis extension cho PHP 7.4: thiếu igbinary.h 💥
💥 Lỗi khi biên dịch Redis extension cho PHP 7.4: thiếu igbinary.h 💥 Bạn đang cài redis qua pecl install redis, nhưng bật thêm --enable-redis-igbinary=y, --enable-redis-msgpack=y, --enable-redis-zstd=y, v.v… mà hệ thống thiếu thư viện igbinary nên lỗi như sau: configure: error: Cannot find igbinary.h ✅ Cách Xử Lý Bước Này Chuẩn Cho PHP 7.4 (ea-php74 / cPanel) 🛠 1. Cài Extension igbinary và msgpack…
0 notes
Text
Why Petalhost is the Best FluxBB Hosting Provider in India
If you're looking for a reliable and high-performance FluxBB Hosting Provider in India, Petalhost stands out as the top choice. Designed specifically to meet the unique requirements of FluxBB, a lightweight and efficient forum software, Petalhost offers hosting solutions that are both powerful and affordable. Whether you're launching a new online community or migrating an existing one, Petalhost ensures a seamless, secure, and optimized hosting experience.
Optimized Hosting for FluxBB
FluxBB is known for its simplicity and speed, but to get the best out of it, your hosting environment needs to be properly configured. Petalhost specializes in hosting solutions tailored for FluxBB. Their servers are optimized to handle the lightweight nature of FluxBB, ensuring lightning-fast load times and smooth user experiences.
Petalhost’s hosting infrastructure supports the latest versions of PHP and MySQL, essential for running FluxBB efficiently. Additionally, they provide one-click installation of FluxBB through their intuitive control panel, allowing even beginners to set up a fully functional forum in minutes.
Affordable Plans with Maximum Value
One of the key reasons Petalhost is regarded as a leading FluxBB Hosting Provider in India is their commitment to offering high-quality services at competitive prices. Petalhost offers multiple pricing tiers to accommodate different needs — from personal projects to large-scale communities. Each plan includes generous storage, unlimited bandwidth, free SSL certificates, and automated backups.
This means you get enterprise-level hosting features without breaking the bank. Whether you’re a student, developer, or business owner, Petalhost has a plan that matches your budget and performance expectations.
Exceptional Uptime and Speed
Uptime is crucial for any online community. With Petalhost, you can expect a guaranteed 99.9% uptime, thanks to their robust cloud infrastructure and Tier-3 data centers located within India. This ensures low latency and high availability for all your visitors, whether they’re across the street or across the country.
In addition, Petalhost uses advanced caching mechanisms and SSD storage, which significantly improves your site’s loading speed — a critical factor for retaining users and improving SEO.
24/7 Technical Support
Even the most experienced webmasters occasionally run into technical issues. That’s why Petalhost provides round-the-clock customer support via chat, email, and ticketing systems. Their support team is well-versed in FluxBB hosting requirements and can assist with everything from installation and migration to troubleshooting and optimization.
This level of customer care makes Petalhost a dependable partner for your FluxBB hosting needs, giving you peace of mind and more time to focus on building your community.
Secure and Reliable
Security is a top priority at Petalhost. They offer built-in DDoS protection, regular malware scans, and server-side firewalls to protect your forum from malicious attacks. With free SSL included in all plans, your FluxBB site will be HTTPS-enabled, enhancing both security and trust for your users.
Moreover, Petalhost ensures daily automated backups of your entire website, making it easy to restore your forum in case of data loss or errors.
Easy Migration and Setup
If you’re currently hosting your FluxBB site with another provider and considering switching, Petalhost offers free site migration services. Their technical team handles the entire process for you, ensuring a smooth and hassle-free transition with zero downtime.
Combined with their user-friendly cPanel and one-click installer, launching or moving your FluxBB forum to Petalhost couldn’t be simpler.
Conclusion
When it comes to choosing a dependable FluxBB Hosting Provider in India, Petalhost ticks all the boxes: speed, security, affordability, and support. Whether you’re starting a small discussion forum or managing a large online community, Petalhost delivers the tools and performance needed to succeed.
Make the smart choice and host your FluxBB forum with Petalhost — the trusted name in Indian web hosting.
0 notes
Text
Unlock Powerful Hosting with cPanel Server Management by CloudMinister Technologies
In a digital environment where speed, security, and uptime determine the success of websites and online platforms, effective server management is critical. cPanel Server Management provides a robust foundation for web hosting, but it's the experience and expertise of a professional team that elevates server performance to enterprise-grade reliability.
This is where CloudMinister Technologies steps in—a company known for its dedicated focus on Linux server management, particularly for environments using cPanel and WHM (Web Host Manager). Let’s explore how CloudMinister helps organizations gain maximum value from their cPanel servers.
What is cPanel Server Management?
cPanel is a web hosting control panel that provides a graphical user interface (GUI) and automation tools designed to simplify the process of hosting a website. It allows users to manage files, databases, email accounts, domains, backups, and more—all from a central dashboard.
cPanel Server Management, however, goes far beyond what the software provides out of the box. It involves the continuous monitoring, configuration, optimization, securing, and troubleshooting of servers running cPanel. This ensures the hosting environment remains stable, secure, and high-performing at all times.
About CloudMinister Technologies
CloudMinister Technologies is an India-based IT services company specializing in server management, hosting solutions, and cloud infrastructure. With deep expertise in Linux environments, their team provides managed cPanel services to businesses of all sizes, ranging from solo web developers to enterprise-level organizations.
CloudMinister is recognized for combining technical excellence with responsive customer support, making it a preferred partner for businesses seeking reliable server management.
Key Features of CloudMinister’s cPanel Server Management Services
1. Advanced Security Implementation
Security is a top concern for any server exposed to the internet.CloudMinister applies multiple layers of protection to prevent unauthorized access, malware infections, and denial-of-service attacks.
Their security setup typically includes:
Configuring firewalls like CSF (ConfigServer Security & Firewall)
Installing and tuning ModSecurity (a web application firewall)
Enabling brute-force attack detection via tools like cPHulk
Scanning the server regularly for malware or rootkits
Disabling unused ports and services
Keeping software and kernel versions up to date with patches
This approach significantly reduces vulnerability and helps maintain compliance with security best practices.
2. Server Optimization and Speed Tuning
Out-of-the-box server configurations often aren't optimized for specific workloads or traffic levels. CloudMinister evaluates your server environment and implements performance enhancements tailored to your needs.
This may include:
Tuning Apache, NGINX, or LiteSpeed web servers for faster content delivery
Adjusting MySQL settings for better database response times
Implementing caching mechanisms like Memcached, Redis, or OPcache
Managing PHP versions and optimizing handlers like PHP-FPM
Monitoring resource consumption and load balancing, where necessary
These efforts ensure faster website load times, improved user experience, and better search engine performance.
3. Continuous Monitoring and Alerts
Downtime and service interruptions can affect user trust and business revenue. CloudMinister deploys monitoring tools that check the health of your server and its key services 24/7.
Their monitoring system tracks:
Server uptime and load averages
Web and database service availability
Disk usage and memory consumption
Suspicious activity or spikes in traffic
If any issue is detected, alerts are automatically generated, and their support team takes immediate action, often resolving problems before clients are even aware of them.
4. Automated and Manual Backups
Reliable data backup strategies are essential for disaster recovery and business continuity. CloudMinister sets up both automated and manual backups to safeguard your critical data.
Backup services include:
Daily, weekly, or monthly automated backups to local or remote locations
Snapshot-based backups for entire file systems or virtual machines
Backup integrity checks to confirm recoverability
Disaster recovery support for fast data restoration in case of failure
Clients can request custom backup schedules based on their operational needs.
5. 24/7 Technical Support
CloudMinister offers round-the-clock technical support, including holidays and weekends. Whether the issue is routine or critical, their support team responds promptly to resolve it.
Support includes:
Assistance with DNS, email, FTP, and database issues
Troubleshooting site errors, load problems, and misconfigurations
Help with third-party application installation or integration
Guidance on cPanel and WHM usage for non-technical users
Their support system is designed for fast response and resolution, helping minimize downtime and stress for business owners.
6. Software Installation and Upgrades
In many cases, users need to add new tools or features to their servers. CloudMinister handles software installations, compatibility checks, and upgrades as part of its managed service offerings.
Common installations include:
Content management systems like WordPress, Joomla, and Drupal
E-commerce platforms such as Magento or PrestaShop
Server-side enhancements like ImageMagick, FFmpeg, or GIT
Secure protocol support, including Let’s Encrypt SSL and SSH hardening
Upgrading PHP, MySQL, cPanel, or the operating system when necessary
Each installation is tested to ensure compatibility and optimal performance.
Who Benefits from CloudMinister’s cPanel Server Management?
CloudMinister’s services are suitable for a wide range of users and industries:
Web Hosting Providers benefit from white-label server management and reduced support workload.
Digital Agencies can offer hosting to clients without hiring in-house server administrators.
E-commerce companies enjoy improved performance and secure transactions during peak times.
Startups and Developers get technical expertise without the need for full-time staff.
Large Enterprises can ensure compliance, uptime, and scalable infrastructure with proactive support.
Why Choose CloudMinister Technologies?
The advantages of working with CloudMinister Technologies include:
Certified Expertise: Their team consists of Linux and cPanel-certified professionals with years of experience.
Cost Efficiency: Competitive pricing makes enterprise-grade support accessible to small businesses.
Scalability: Their solutions grow with your business, from shared servers to dedicated infrastructure.
Client-Centric Approach: Support plans are tailored to your actual needs—nothing more, nothing less.
Transparent Reporting: Regular performance and security reports give you insight and peace of mind.
Conclusion
Managing a cPanel server is more than just setting up hosting—it’s about ensuring consistent performance, hardened security, regular updates, and quick support when issues arise. With CloudMinister Technologies, your server is not just managed—it’s optimized, protected, and monitored by experts.
If you're looking for a trusted partner to handle your cPanel Server Management, CloudMinister offers a proven solution that allows you to focus on your business while they handle the backend.
Get in touch with CloudMinister Technologies today and experience professional, worry-free server management.
For More Visit:- www.cloudminister.com
#cloudminister technologies#servers#technology#hosting#information technology#cPanel Server Management
0 notes
Text
Which is More Scalable for Growing Websites: Plesk or cPanel?
When it comes to managing web hosting environments for growing websites, the choice of control panel plays a crucial role in scalability, user experience, and long-term success. Two of the most popular control panels in the web hosting industry are Plesk and cPanel. Both have their unique features, strengths, and weaknesses, but when it comes to scalability—particularly for websites that are expected to grow and scale over time—the right choice can significantly impact performance, management efficiency, and flexibility.

In this blog post, we’ll compare Plesk and cPanel to help you determine which is more scalable for growing websites and why one might be a better fit for your needs as your website expands.
What is Plesk and cPanel?
Before diving into scalability, let’s quickly define what each of these control panels is.
Plesk is a web hosting control panel that provides a graphical interface for managing websites, servers, and hosting accounts. It supports both Linux and Windows servers, which makes it ideal for users with varying hosting needs, whether they’re running PHP, WordPress, or ASP.NET websites.
cPanel is another widely used control panel, but it’s more popular with Linux-based hosting. cPanel offers a simple and user-friendly interface for managing websites, emails, and databases, and is often paired with WHM (Web Host Manager) to provide control over the server itself.
Both control panels allow users to manage their hosting environment easily, but they come with different features, pricing models, and performance considerations that influence scalability.
1. Server and Operating System Compatibility
When it comes to scalability, it’s important to consider the compatibility of each control panel with different hosting environments.
Plesk: One of Plesk’s key advantages is its ability to work on both Linux and Windows servers. If you plan to scale your website across different platforms—particularly if you have diverse applications (e.g., PHP, Python, or ASP.NET)—Plesk offers greater flexibility. As your website grows and you need to switch between operating systems or use mixed environments, Plesk allows you to do so without encountering significant compatibility issues.
cPanel: cPanel, on the other hand, is primarily designed for Linux-based servers. While it is highly optimized for Linux hosting and offers a broad range of features for Linux environments, it lacks native support for Windows-based servers. If you expect to grow in a mixed OS environment, cPanel might be limiting compared to Plesk.
Verdict: If you anticipate scaling across different operating systems, Plesk is more scalable in this regard.
2. User Interface and Management Flexibility
The user interface is a key factor for any web hosting control panel, especially for growing websites that may need more advanced configurations as they scale. Both Plesk and cPanel are known for their ease of use, but there are some differences in how they handle complexity.
Plesk: Plesk provides a more modern, user-friendly interface that is suitable for both beginners and advanced users. It has a customizable dashboard, which allows you to streamline your workflow. As you scale your website, you’ll appreciate the ability to manage multiple websites, domains, and even user permissions in a simple interface. Moreover, Plesk offers integrations with various third-party applications like WordPress, Joomla, and Drupal, which can be critical as your website grows and requires more advanced features or custom integrations.
cPanel: cPanel also provides a user-friendly interface, but its design and user experience can feel a bit more dated compared to Plesk. While it’s easy to use for smaller websites, as your website scales, you might find that navigating cPanel can become cumbersome due to the sheer number of features and options. However, cPanel still offers powerful functionality, especially when paired with WHM for managing multiple accounts.
Verdict: For users who want a more intuitive and customizable interface, Plesk may offer better long-term scalability in terms of usability and flexibility.
3. Performance and Resource Management
As your website grows, optimizing performance and managing server resources become increasingly important. Both control panels offer tools for monitoring and managing server resources, but how they handle these tasks can influence scalability.
Plesk: Plesk offers integrated resource management tools that allow you to monitor server performance, adjust resource allocation, and optimize resource usage. It has features that make it easy to scale hosting plans, manage databases, and adjust resource limits without affecting overall site performance. Additionally, Plesk allows you to handle multi-server environments, which is a major benefit for websites that need to distribute traffic and resources across multiple servers as they grow.
cPanel: cPanel provides excellent performance for smaller websites, but as you scale, you may find that it can require more manual intervention to ensure that server resources are allocated effectively. For large-scale websites with heavy traffic, WHM provides additional resource management features, but it may take more effort to configure and optimize compared to Plesk’s streamlined approach.
Verdict: Plesk is more efficient in resource management and offers better scalability for larger websites or those planning to scale across multiple servers.
4. Security Features
Security is a top priority for any website, especially as it grows. With more traffic, more sensitive data, and more complex hosting environments, robust security measures are necessary to protect both the website and user data.
Plesk: Plesk comes with a comprehensive suite of security tools out-of-the-box, including advanced firewall configurations, fail2ban, and automatic updates. Additionally, it integrates easily with various security applications, like Imunify360, which provides proactive protection against malware, hackers, and attacks. Plesk also offers customizable security settings for each user, allowing you to implement granular security measures as your website scales.
cPanel: cPanel provides essential security features, including SSL management, IP blocking, and password-protected directories. However, cPanel typically requires third-party integrations or manual configurations for more advanced security features, such as anti-malware or DDoS protection. While it is secure, you may need to add extra layers of protection as your website grows and faces increased security risks.
Verdict: For websites expecting significant growth, Plesk offers more integrated and flexible security options to scale with your website.
5. Support for Multiple Websites and Hosting Accounts
As your website grows, you may manage multiple sites or accounts. Both Plesk and cPanel offer options for managing several websites, but Plesk excels in this area when it comes to scalability.
Plesk: Plesk allows for the seamless management of multiple websites from a single dashboard. It also supports reseller hosting, meaning you can manage several hosting accounts from one platform. This is incredibly beneficial if you're expanding your digital presence, managing client websites, or offering hosting services to others.
cPanel: While cPanel offers WHM for managing multiple accounts, the user interface and experience can become cumbersome as the number of accounts or websites increases. For larger hosting environments, managing a large number of websites through cPanel can require more administrative overhead.
Verdict: For managing multiple websites and hosting accounts efficiently, Plesk is the more scalable option.
Conclusion: Which is More Scalable for Growing Websites?
When it comes to scalability, Plesk generally comes out on top, especially for websites that expect to scale across different operating systems, handle increased traffic, and require flexible resource management. Plesk’s modern interface, comprehensive security features, and support for multi-server environments make it the better choice for businesses looking for a control panel that can grow with them.
However, cPanel is still an excellent choice for smaller, Linux-based websites and users who are comfortable with a slightly more manual approach to management. It remains one of the most reliable and widely used control panels for hosting environments, especially in shared hosting.
Ultimately, the choice between Plesk and cPanel will depend on your specific needs, hosting environment, and scalability goals. If you’re planning to scale a large, complex website across multiple servers or platforms, Plesk is likely the more scalable solution. If your website is smaller and hosted on Linux-based servers, cPanel can still serve you well.
#WebHosting#PleskVsCPanel#Scalability#DigitalGrowth#WebsiteManagement#WebHostingControlPanel#Plesk#cPanel#TechForGrowth#WebsiteScaling
0 notes
Text
PHP Full-Stack Developer Certification Course
1. Introduction to Full-Stack Development
Understanding the full-stack ecosystem.
Role of PHP in modern web development.
Overview of front-end and back-end integration.
2. Frontend Development
HTML5 and CSS3: Building responsive and accessible web layouts.
JavaScript: Core concepts, DOM manipulation, and ES6 features.
Bootstrap: Designing responsive and mobile-first web pages.
React or Vue.js (Optional): Adding dynamic interactivity to your web apps.
3. Backend Development with PHP
PHP Basics: Syntax, variables, functions, and error handling.
Working with Databases: MySQL basics, CRUD operations, and PDO.
Advanced PHP Concepts: Object-Oriented Programming, sessions, and file handling.
Building APIs: RESTful APIs using PHP for dynamic data.
4. Full-Stack Integration
Combining front-end and back-end using PHP.
AJAX for seamless data exchange.
Creating and managing sessions for user authentication.
5. Database Design and Management
Normalization techniques for efficient databases.
SQL queries for complex data retrieval.
Using database management tools like phpMyAdmin.
6. Framework Mastery: Laravel
Setting up Laravel for rapid development.
Routing, controllers, and views.
Eloquent ORM for advanced database interactions.
Building scalable and secure applications.
7. Version Control with Git
Basics of Git and GitHub.
Managing code repositories and collaborating on projects.
8. Deployment and Hosting
Configuring web servers (Apache, Nginx).
Hosting on platforms like cPanel, AWS, or Heroku.
Managing domains and SSL certificates.
9. Capstone Project
Develop a complete full-stack application (e.g., an e-commerce site or blog platform).
Incorporate learned skills into a professional project.
10. Certification Exam
Online test to validate your knowledge.
Practical exam to demonstrate your development skills.
Who Should Enroll?
Aspiring full-stack developers.
Web designers aiming to enhance their back-end knowledge.
PHP developers seeking to expand their skill set.
Course Duration:
12–16 weeks (flexible learning pace).
Outcome:
Certification as a PHP Full-Stack Developer.
Portfolio of projects showcasing your skills.
Fullstack course in chennai
Fullstack developer course in chennai
Fullstack training in chennai

0 notes
Text
wp: More headaches PHP 8.3 on DigitalOcean Ubuntu 22.04
OK, as I finally get the following configurations in order. Note that from previous experience, we need at least a 2GB RAM server to not constantly run out of memory tongfamily.com is an add-on domain to richtong.net on InMotion Hosting. Runs PHP 8.3 nicely (they have a nice way to update versions with Cpanel) richtong.org this is our newest site, it’s a fresh DigitalOcean build with their…
0 notes
Text
How to deploying Laravel projects on a live server – Complete Step-by-Step Guide
Learn How to deploying Laravel projects on a live server with this comprehensive guide. Step-by-step instructions on setting up hosting, configuring files, and deploying your Laravel app smoothly.Read Laravel Docs
How to deploying Laravel projects on a live server, you’ll need to follow a structured process. Here’s a step-by-step guide to help you:

1. Purchase Domain and Hosting
Make sure you have a domain and a hosting plan. Most shared hosting plans (like cPanel-based ones) or a VPS will work for Laravel, but ensure your server supports PHP and MySQL and meets Laravel’s requirements (PHP version, required extensions, etc.).
2. Prepare Your Laravel Project
Make sure your Laravel project is working locally.
Run the following command to clear any cached configuration and to optimize the project:
php artisan cache:clear
php artisan config:clear
php artisan route:clear
php artisan view:clear
Set up your environment variables (.env file). Make sure they are correctly configured for the live server (e.g., database, mail, and app URL settings).
3. Zip and Upload Your Laravel Project
Compress your entire Laravel project folder (without the node_modules and vendor directories) into a .zip file.
Use FTP (with FileZilla or any other FTP client) or File Manager in cPanel to upload the .zip file to your server. Typically, upload the file to the public_html or a subdirectory within it if you want to run your Laravel app in a subdirectory.
4. Extract the Files
Once uploaded, use File Manager in your hosting control panel to extract the .zip file.
5. Set Up the Public Directory
By default, Laravel’s entry point is the public folder, which contains the index.php file. On a shared hosting server:
Move everything in the public folder (including the .htaccess and index.php files) to the root directory (usually public_html).
Edit the index.php file to update the paths:
Change:
require __DIR__.'/../vendor/autoload.php';
$app = require_once __DIR__.'/../bootstrap/app.php';
To:
require __DIR__.'/vendor/autoload.php';
$app = require_once __DIR__.'/bootstrap/app.php';
This ensures that Laravel can find the necessary files in the correct directory.
6. Set File Permissions
Ensure that the following directories are writable by the server:
/storage
/bootstrap/cache
Use the following command via SSH (if available) or through the hosting file manager:chmod -R 775 storage chmod -R 775 bootstrap/cache
7. Set Up a Database
Create a MySQL database and a user with privileges in cPanel (or via SSH if using VPS).
Update the .env file with your database credentials:
DB_HOST=localhost DB_DATABASE=your_database_name DB_USERNAME=your_database_username DB_PASSWORD=your_database_password
8. Install Composer Dependencies
If you have SSH access:
SSH into your server using a terminal or a tool like PuTTY.
Navigate to your project directory
cd /path/to/your/project
Run Composer to install the dependencies:
composer install --optimize-autoloader --no-dev
If you don’t have SSH access, you can run composer install locally, zip the vendor folder, and upload it to the server.
9. Run Migrations
If you have SSH access, run the following command to migrate the database:
php artisan migrate --force
If you don’t have SSH access, you can run the migrations locally and then export/import the database to the server via phpMyAdmin.
10. Set App Key
Generate a new application key if you haven’t already:php artisan key:generate
Ensure the key is set in the .env file:
Read Full Tutorials
0 notes
Text

How to Create php.ini file in cPanel?
Creating a php.ini file is one way to do this. This file allows you to alter many PHP configurations to better suit the demands of your website.
0 notes
Text
How To Redirect Old Domain To New Domain


Redirecting an Old Domain to a New Domain
When you change domains, it's crucial to maintain the integrity of your old URLs. This ensures anyone clicking a link to your old website gets directed to the corresponding page on your new domain. This redirection is achieved using a 301 redirect, which tells search engines the move is permanent and helps preserve SEO value. Here are several methods to redirect your old domain to your new domain:
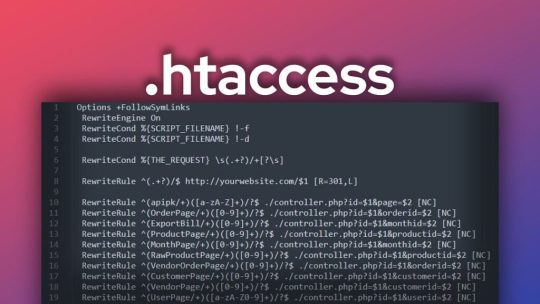
1. Using an .htaccess file: - .htaccess is a configuration file for Apache web servers. Even minor syntax errors can disrupt your content, so ensure you follow the instructions carefully. - Important: .htaccess is a hidden file. Make sure your FTP client is configured to show hidden files before proceeding. Here's a step-by-step guide: 1. Access your old domain's root directory through an FTP client. 2. Create a new text file using a text editor like Notepad and save it as `.htaccess` (ensure the filename starts with a dot). 3. Edit the contents of `.htaccess` with the following code, replacing `your-new-domain.com` with your actual new domain: ```apache RewriteEngine On RewriteBase / RewriteRule ^(.*)$ https://your-new-domain.com/$1 ``` - **Explanation:** - `RewriteEngine On` activates the rewrite engine. - `RewriteBase /` sets the base directory for the rewrite rules. - `RewriteRule ^(.*)$ https://your-new-domain.com/$1 ` defines the redirection rule: - `^(.*)$`: Matches any request URL. - `https://your-new-domain.com/$1`: The destination URL with the captured request path (`$1`) appended. - ``: Sets the redirect status code to 301 (permanent). - ``: Stops processing further rewrite rules after this one is applied. 4. Upload the `.htaccess` file back to your old domain's root directory.

2. Using PHP scripts: - You can leverage PHP scripts to redirect URLs using the header() function. This function sends an HTTP header instructing the client to redirect to a new location. Here's how to implement a PHP redirect script:- Create a new PHP file (e.g., redirect.php) using a text editor. - Add the following code to the PHP file, replacing https://your-new-domain.com/ with your new domain:```php ``` - **Explanation:** - `$newURL` stores the destination URL. - `header()` sends an HTTP header with the `Location` directive set to `$newURL` and a status code of 301 (permanent). - `exit()` terminates the script execution. - Upload the redirect.php file to your old domain's web server. - In your old website's code, link to redirect.php from the URLs you want to redirect.

3. Using DNS redirection: - Domain Name System (DNS) configurations can be used to point your domain to a new location. This method involves modifying your domain's DNS records at your domain registrar or DNS hosting provider. Here's a general process:- Log in to your domain registrar or DNS hosting provider's control panel. - Locate the DNS management section for your domain. - Create a new DNS record, typically labeled "URL Redirect" or "Forwarding." - Specify the destination URL (including http:// or https://) in the record. - Choose the redirect type (permanent or temporary). - Save the DNS record changes.Note: DNS propagation can take time (from a few minutes to several hours) for the changes to take effect globally.

4. Using cPanel (if your web hosting uses cPanel): Here's how to use cPanel's "Redirects" feature: - Access your cPanel account using your login credentials. - Navigate to the "Domains" section and locate the "Redirects" icon or option. - Within the "Redirects" section, you'll typically find options for different redirect types: - Permanent (301) Redirect: Use this for permanently moving visitors and search engines to a new URL. - Temporary (302) Redirect: Choose this for temporary redirects, like website maintenance or promotions. - Select the domain you want to redirect from the dropdown menu. - Enter the following details: - Redirects to: The full URL of the new destination page. - Source: The original URL or URL pattern you want to redirect from. - Choose whether to redirect with or without the "www" prefix (based on your preference). - (Optional) Enable wildcard redirection if you want all subdirectories within the old domain to redirect to the same path on the new domain. - Click "Add" or "Save" to apply the redirect configuration. - Test the redirect by entering the original URL in a web browser. It should automatically redirect to the specified new URL.

5. Using Cloudflare: - Cloudflare is a popular content delivery network (CDN) that also offers DNS management and redirection features. It provides free basic functionalities, including DDoS protection and SSL certificates. Here's a basic guide on using Cloudflare for redirection: Pre-requisite:- Sign up for a free Cloudflare account if you don't have one already.Steps: - Add your old domain to Cloudflare (it's a free process). - Update your domain's nameservers to point to Cloudflare's nameservers (provided during signup). This step propagates DNS changes, so allow some time for it to take effect globally. - Once your domain is active on Cloudflare, access the Cloudflare dashboard and navigate to the "Rules" section. - Create a new rule. - In the "For" field, enter your old domain name (e.g., your-old-domain.com). - Under "Settings," choose "Forwarding URL (301)" for a permanent redirect. - In the "To" field, enter your new domain name (e.g., https://your-new-domain.com/). - Click "Save" to activate the redirect rule.

Additional Considerations: - Testing: After implementing any redirection method, thoroughly test your redirects to ensure they work as expected. Use different browsers and devices to verify functionality. - SEO Impact: Using 301 redirects is generally SEO-friendly, as it signals to search engines that the content has permanently moved and helps transfer SEO value to the new domain. - Choosing the Right Method: The best method for you depends on your technical comfort level and hosting platform. If you're comfortable with editing configuration files, using .htaccess might be suitable. cPanel's "Redirects" feature offers a user-friendly interface for those using cPanel hosting. Cloudflare is a great option if you already use it for DNS management and want a convenient redirection solution. By following these methods and considerations, you can effectively redirect your old domain to your new domain, ensuring a smooth transition for your website visitors and preserving your SEO value. Read the full article
0 notes
Text
Live Support Chat Nulled Script 5.1.3

Unlock Real-Time Customer Engagement with Live Support Chat Nulled Script Looking for a powerful, real-time communication solution for your website? The Live Support Chat Nulled Script is the ultimate tool to boost user satisfaction and convert casual visitors into loyal customers. With seamless integration, robust features, and complete customization options, this nulled script gives you the edge of professional-grade live chat without the hefty price tag. What is Live Support Chat Nulled Script? The Live Support Chat Nulled Script is a feature-rich, real-time live chat system designed for businesses, startups, and agencies that want to provide instant customer support. This PHP-based solution is ideal for integrating directly into your website and allows your support team to chat with users, resolve issues, and convert leads — all in real time. Since this is a nulled version, you get complete access to premium features without any licensing restrictions or costs. Why Choose the Live Support Chat Nulled Script? Today’s digital consumers expect immediate responses, and this is where live chat becomes a game-changer. With the Live Support Chat , you’ll provide seamless support, monitor user activity, and increase customer satisfaction. No need to pay extra for live chat services — this nulled solution delivers high-end results for free. Technical Specifications Platform: PHP-based, compatible with all modern browsers Database: MySQL Responsiveness: Fully responsive and mobile-friendly UI Security: Role-based access control, chat encryption support Customization: Easy branding and UI modifications via built-in panel Key Features and Benefits Real-Time Messaging: Engage visitors with real-time conversations to resolve queries instantly. Multi-Agent Support: Allow multiple support agents to assist different users at once. User Monitoring: Track visitor movements, pages visited, and time spent on site. File Sharing: Securely send and receive files during chat sessions. Chat Transcripts: Save and review chat histories for quality and training purposes. Offline Messaging: Capture user inquiries even when your team is offline. Custom Alerts: Notify agents of new visitors, messages, and support tickets in real-time. Who Should Use This Script? The Live Support Chat Nulled Script is perfect for: E-commerce Websites: Help customers instantly with product queries and order assistance. Agencies: Provide immediate consultation and project updates to your clients. SaaS Platforms: Offer technical support without expensive third-party tools. Educational Platforms: Answer student queries and boost engagement. Easy Installation and Setup Guide Download the Live Support Chat Nulled Script from our secure platform. Upload the files to your web hosting account using FTP or cPanel. Configure the database settings by updating the config file. Run the installation wizard to finalize setup. Customize the chat interface to match your website branding. You don’t need to be a developer to get started. With detailed documentation and a user-friendly interface, this nulled script can be set up in minutes. Frequently Asked Questions (FAQs) Is it safe to use the Live Support Chat Nulled Script? Yes, the script is thoroughly scanned and tested for security vulnerabilities. Just ensure your website hosting is secure, and you’re good to go. Can I customize the interface to match my branding? Absolutely! The script includes a built-in customization panel where you can modify colors, fonts, logos, and more. Does it support multiple languages? Yes, the Live Support Chat is fully translation-ready, making it perfect for multilingual support environments. Can I use this script with WordPress? While it's not a native WordPress plugin, it can be easily integrated into any WordPress site using custom pages or widgets. Get More With Our Collection of nulled plugins Why stop at live chat? Explore our vast library of professionally nulled plugins to supercharge your site without spending a dime.
Whether you need SEO tools, backup systems, or security add-ons, we’ve got you covered. Need more advanced tools? Check out UpdraftPlus Premium nulled for hassle-free backups and restoration solutions at zero cost. Final Thoughts The Live Support Chat offers a reliable, scalable, and cost-effective way to provide instant customer service. Whether you’re a small business or a growing enterprise, this script has everything you need to support your users 24/7 — without draining your budget. Download it today and transform your customer experience forever.
0 notes