#php.ini cpanel
Explore tagged Tumblr posts
Visit Tumblr Blog
Explore Tumblr blogs with no restrictions, modern design and the best experience.
Last Seen Tumblr Blogs


Fun Fact
Average visit duration of Tumblr.com is 10 mins and 25 secs.
Text
Discover the power of .ini files to fine-tune your website's settings within cPanel. This comprehensive guide will walk you through the process of creating, editing, and managing these configuration files. Learn how to optimize PHP directives, control error reporting, and tailor your website's behavior to your specific needs. Whether you're a developer or a website owner, this tutorial will empower you to take full control of your website's configuration by leaarning how to create php.ini file in cPanel..
0 notes
Text
Hướng dẫn fix để đảm bảo allow_url_fopen hoạt động đúng trong CageFS + cPanel + ea-php (Easy Apache 4),
💖 Tuyệt vời, bạn đã sửa file php.ini tại: /opt/cpanel/ea-php83/root/etc/php.ini và đã chạy lệnh: cagefsctl --force-update 👉 Nhưng để đảm bảo allow_url_fopen hoạt động đúng trong CageFS + cPanel + ea-php (EasyApache 4), bạn cần kiểm tra thêm vài điểm quan trọng sau đây nhé 🌿🤔 ✅ BƯỚC KIỂM TRA BỔ SUNG CHO MÔI TRƯỜNG EA-PHP + CAGEFS: 🔍 1. Kiểm tra người dùng đã được bật CageFS chưa id username 👉 Nếu…
0 notes
Text
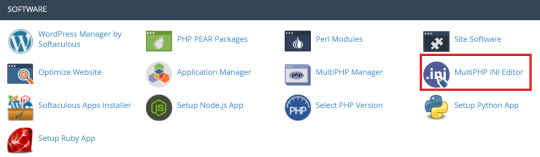
使用MultiPHP INI Editor修改 php.ini 即時生效【BlueHost cPanel示範】
你的網站使用類似BlueHost虛擬主機並且是多人共用方案,當你在使用一些外掛時會需要調整到php.ini檔案內的參數(例:max_input_vars)才能讓正常執行,但共用虛擬主機不會任意讓你修改並重新啟動機器,可以透過cPanel的MultiPHP INI Editor來達成修改php.ini並即時生效的需求… Continue reading 使用MultiPHP INI Editor修改 php.ini 即時生效【BlueHost cPanel示範】
0 notes
Text
Open Panel ve Open Admin Nedir?
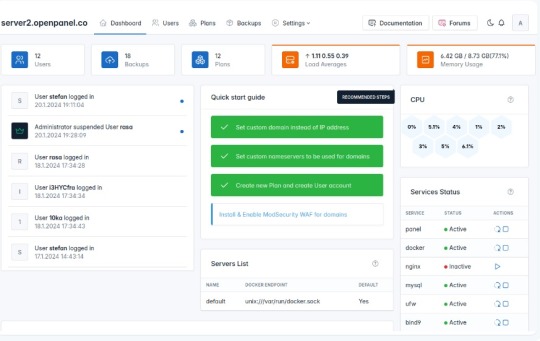
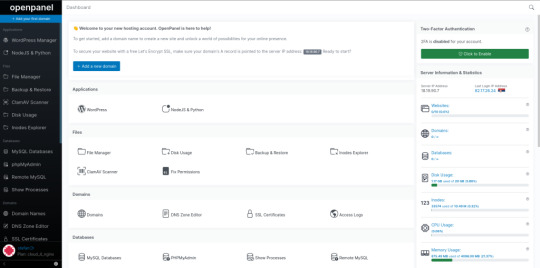
Cpanel, AApanel, Cyberpanel gibi çok çeşitli çözümlerinin yanına sağlam bir rakip geldi.İlk izlenim olarak bilgi bulunmasada sanki Sentora Panel temel alınarak geliştirilmiş gibi görünüyor.Şimdilik Beta aşamasında olsada sürekli gelişen ve umut vadeden bu yazılımı deneyebilirsiniz. Günümüzün ana bilgisayarları için özel olarak tasarlanan OpenPanel, ihtiyaçlarınızı karşılamak için bir küme oluşturmanız ve ölçeklendirmeniz gereken kapsamlı bir araç ve özellik seti sunar.OpenAdmin, kullanıcı oluşturma ve yönetme, barındırma planları oluşturma, yedeklemeleri yapılandırma ve OpenPanel ayarlarını düzenleme gibi görevleri verimli bir şekilde işleyebileceğiniz yönetici düzeyinde bir arayüz sunar. Gereksinimler Donanım Gereksinimleri İşletim sistemi ve sürümü İşlemci RAM Disk Alanı Mimari Ubuntu 22.04 veya daha yeni Minimum: 1,1 GHzÖnerilen: 2 GHz Minimum: 1 GBÖnerilen: 4 GB Minimum: 12 GBÖnerilen: 20 GB 64 bit Open Panel :(Müteri Arayüzü)OpenPanel, web ve sunucu yönetiminin karmaşıklıklarını basitleştirmeyi amaçlayan son kullanıcılar için sağlam bir arayüz sunar. Etki alanı eklemekten web sitelerinizi yönetmeye kadar, belgelerimiz arayüzde sorunsuz bir şekilde gezinmek için ihtiyacınız olan her şeyi kapsar. Open Panel
Open Admin:(Sunucu Yöneticisi Arayüzü)OpenAdmin, sunucu yapılandırmaları ve yönetimi üzerinde hassas kontrol isteyen yöneticiler için tasarlanmıştır. Belgelerimiz, sunucu ortamınızı özelleştirmenize ve güvence altına almanıza yardımcı olacak derinlemesine bilgi sağlar Open Admin
Demo:https://demo.openpanel.co/openadmin/ Ayrıntılar için : https://openpanel.co Web sunucuları Nginx Run Nginx web sunucusu hafif, açık kaynaklı bir çözümdür. Nginx web sunucusunun OpenPanel sürümü, alan adı başına önbellek hariç tutma, önbellek temizleme, URL yeniden yazma ve FastCGI önbelleğinin yapılandırılmasını sağlar. Apache Kullanıcı başına Apache web sunucusunu çalıştırın. Apache'nin .htaccess dosyaları desteği, kullanıcıların dizin başına genel yapılandırma ayarlarını özelleştirmesine ve geçersiz kılmasına olanak tanır. Kullanıcı hizmetleri Alan Adları Otomatik SSL yenilemelerine sahip etki alanı adları ekleyin, takma adlar ve alt etki alanları ekleyin (Uluslararasılaştırılmış etki alanları desteklenir), yönlendirmeler oluşturun, HTTPS'yi zorlayın ve vhost dosyalarını düzenleyin. Dosya Yöneticisi Herhangi bir yükleme sınırı olmadan aynı anda birden fazla dosyayı zahmetsizce yükleyin. Dosyaları düzenleyin, izinleri ayarlayın, dosyaları kopyalayın veya taşıyın, yeni dosyalar ekleyin ve çeşitli dosya yönetimi görevlerini gerçekleştirin. PHP sürümleri Kullanıcılar her etki alanı için farklı PHP sürümleri kullanabilir, yeni sürümler yükleyebilir, yeni etki alanları için varsayılan bir sürüm ayarlayabilir, php.ini dosyalarını düzenleyerek sınırları değiştirebilir. NodeJS ve Python NodeJS ve Python uygulamalarını zahmetsizce oluşturun ve yönetin. Proxy web siteleri bu uygulamalardan içeriği sorunsuz görüntülemek için. WP Yöneticisi Wp-admin'e otomatik giriş, seçenek düzenleme, isteğe bağlı yedekleme, hata ayıklama ve çeşitli ek işlevler gibi özelliklere sahip otomatik WordPress yükleyicisi. MySQL ve phpMyAdmin MySQL veritabanlarını ve kullanıcılarını kolayca oluşturun ve yönetin. PhpMyAdmin'e otomatik olarak giriş yapın, uzaktan MySQL erişimini etkinleştirin ve yapılandırma ayarlarını istediğiniz sınırlarla ayarlayın. SSL sertifikaları Otomatik SSL üretimi ve yenilenmesi, güncel SSL sertifikalarıyla sürekli koruma sağlayarak web sitenizin güvenliğinin zahmetsizce yönetilmesini sağlar. Nesne Önbellekleme Özel REDIS ve Memcached örneklerini kullanarak nesne önbelleği uygulayın. Bellek sınırlarını belirleyin, hizmetleri başlatın / durdurun ve günlükleri verimli bir şekilde görüntüleyin. SSH ve Web Terminali Terminale SSH üzerinden uzaktan erişin veya otomatik olarak Web Terminaline giriş yapın. Daha fazla kolaylık sağlamak için önceden yüklenmiş WPCLI ve NPM ile birlikte gelir! Sunucu ayarları Her kullanıcı, sunucu yapılandırmaları üzerinde tam kontrole sahiptir ve hizmetleri yüklemelerini veya yeniden başlatmalarını, sistem yapılandırmalarını düzenlemelerini ve diğer çeşitli idari görevleri yerine getirmelerini sağlar. Cron İşleri Planlanan eylemleri verimli bir şekilde planlamak ve yönetmek için cronjobs'u doğrudan OpenPanel arayüzünden planlayın ve düzenleyin. DNS Bölge Düzenleyicisi Etki alanlarınız için DNS bölge dosyalarını kolayca düzenleyin ve OpenPanel arabirimi aracılığıyla A, AAAA, CNAME, MX, TXT vb. Gibi çeşitli kayıtlar ekleyin. Kaynak kullanımı Gerçek zamanlı CPU ve bellek kullanımını izleyin, geçmiş eğilimleri kontrol edin ve performansı optimize etmek için sunucu yapılandırmasını gerektiği gibi ayarlayın. Ziyaretçi raporları Web sitenizin erişim günlüklerinden otomatik olarak oluşturulan, görsel olarak çekici ziyaretçi raporlarına erişin. Ziyaretçi konumlarını, erişilen sayfaları, IP'leri, hata sayfalarını ve daha fazlasını kolaylıkla keşfedin. Etkinlik günlükleri OpenPanel arabirimindeki her eylem kaydedilir ve kullanıcıların kimin ne zaman ve ne yaptığını kolayca izlemesine olanak tanır ve sunucu günlüklerini eleme ihtiyacını ortadan kaldırır. Hesap ayarları Kullanıcılar kişiselleştirilmiş bir deneyim için e-posta adreslerini ve şifrelerini değiştirebilir, 2FA'yı etkinleştirebilir, dil tercihlerini ayarlayabilir ve karanlık modu etkinleştirebilir. Sunucu yönetimi Basit sunucu dağıtımı OpenPanel'i birkaç dakika içinde yükleyin. Tek bir komutla kümenize yeni sunucular sağlayın. Kaynak kullanım yönetimi Barındırılan tüm web siteleriniz için tutarlı performans sağlamak amacıyla CPU, G / Ç bant genişliği, IOPS, nproc ve belleği kullanıcı başına sınırlandırın. Web sunucularını değiştirme Şu anda, web sunucusu olarak yalnızca Nginx desteklenmektedir, ancak LiteSpeed için yaklaşan destek yöneticilere tercih ettikleri web sunucusunu seçme seçeneği sunacaktır. Yapılandırmayı düzenle Yöneticiler, sistemi belirli gereksinimlere uyacak şekilde yapılandırma esnekliği sağlayarak panel erişimi için etki alanları belirleme, bağlantı noktalarını değiştirme ve hem OpenPanel hem de OpenAdmin arabirimleri için ayarları düzenleme yeteneğine sahiptir. Kaynak kullanım istatistikleri Gerçek zamanlı izleme ile CPU ve Bellek kullanımını, Ağı ve yükü izleyin. Hizmet Yönetimi Hizmetleri izleyin, yeniden başlatın, günlükleri görüntüleyin ve yönetici arayüzünden verimli bir şekilde ek yönetim görevleri gerçekleştirin. Akıllı Bildirimler Sunucunuzun durumu hakkında bilgi sahibi olmak için yeniden başlatma, yüksek kaynak kullanımı, web sitesi saldırıları, başarısız hizmetler ve diğer kritik durumlar gibi bildirimler alın. Terminal Komutları OpenCLI, Yöneticiler için terminal arabirimi olarak hizmet vererek, 100'den fazla kullanılabilir komuta erişimi olan çeşitli OpenPanel ayarlarının otomasyonuna izin verir. Kullanıcı arayüzü markalaşma OpenPanel'i, barındırma şirketinizin görünümünü ve hissini yansıtan renkler, logolar, yazı tipleri ve daha fazlası ile tamamen özelleştirin. Tamamen duyarlı Herhangi bir özellik sınırlaması olmadan masaüstü, tablet ve mobil cihazlarda OpenPanel'e erişin. Karanlık mod OpenPanel, kullanıcıların doğrudan arayüzden tek bir tıklamayla etkinleştirebileceği ve kullanıcı deneyimini geliştirebileceği yerleşik bir karanlık moda sahiptir. Sunucu Bilgisi Gerçek zamanlı kullanım verilerini, IP adresini, ad sunucularını ve diğer önemli sunucu bilgilerini doğrudan OpenPanel arayüzünde görüntüleyin. Gelişmiş Arama Güçlü bir arama işlevselliği ile aradığınızı hızlı ve kolay bir şekilde bulun. Çok dilli destek OpenPanel çeviriye hazır. Her oturum açma OpenPanel'i tercih ettikleri dilde görüntüleyebilir. Klavye Kısayolları OpenPanel, gelişmiş kullanıcılara odaklanarak tasarlandı ve arayüzde navigasyon hızınızı artırmak için 20'den fazla klavye kısayolu sunuyor. Kullanıcı yönetimi Hesapları askıya alma / silme OpenPanel erişimini ve web sitelerini anında devre dışı bırakmak için müşteri hesaplarını askıya alın. Artık gerekli olmadığında hesapları silin. Yükseltme / Aşağı indirme paketi Bir müşterinin paketini başka bir barındırma paketinize sorunsuz bir şekilde yükseltin veya düşürün. Özel IP adresi Kullanıcılara bir IPv4 adresi tahsis ederek web siteleri ve hizmetleri için özel bir IP sağlayın. kimliğe bürünme Bir müşterinin hesabına erişmek ve hesabınızdan ayrılmak zorunda kalmadan tam olarak ne gördüklerini görmek için otomatik giriş yapın. Kullanıcı başına Apache veya Nginx Yöneticiler her kullanıcı için web sunucusu olarak Apache veya Nginx'i seçebilir. Bu esneklik, yöneticilerin hepsi aynı sunucuda Apache ve Nginx kullanan diğer kullanıcıları kullanan kullanıcıların bir karışımını barındırmasını sağlar. Güvenlik Kullanıcı konteynerizasyonu Her kullanıcı hesabı kapsayıcıdır. Kapsayıcıların diğer kullanıcılara veya sunucu dosyalarına erişimi yoktur. Kaynak sınırlaması Yöneticiler, bağlantı noktası hızı, disk kullanımı, düğümler, web sitesi sayısı, MySQL veritabanları ve etki alanları dahil olmak üzere plan başına belirli sınırlar belirleme yeteneğine sahiptir. SSL / TLS Sertifikaları otomatik olarak şifreleyelim. Kullanıcılar yeni sertifikalar oluşturabilir ve tüm web sitesi trafiğini HTTPS'ye sorunsuz bir şekilde yönlendirebilir. ModSecurity Yöneticiler ModSecurity'yi tek bir tıklamayla etkinleştirebilir ve OWASP kural setini yapılandırabilir. Ayrıca, bireysel kullanıcılar alan adı başına ModSecurity'yi etkinleştirme veya devre dışı bırakma esnekliğine sahiptir. Güvenlik duvarı Yöneticiler (UFW) güvenlik duvarı kurallarını doğrudan yönetici arayüzünden yönetebilir. Yalnızca gerekli bağlantı noktaları kullanıcılar için açıktır ve yöneticiler bunlar üzerinde tam kontrole sahiptir. İki Faktörlü Kimlik Doğrulama Kullanıcılar, OpenPanel hesapları için İki Faktörlü Kimlik Doğrulamayı etkinleştirerek güvenliği artırabilir. Yöneticiler, herhangi bir kullanıcı için 2FA'yı uygulama veya devre dışı bırakma esnekliğine sahiptir. Sınırlı kabuk erişimi Son kullanıcılar, kapsayıcılarına kök düzeyinde erişimden kısıtlanır. Ayrıca, güvenliği artırmak için, bir kullanıcının kapsayıcısındaki tüm hizmetler farklı kullanıcı hesapları altında çalışır. IP engelleme Her kullanıcı, belirli IP adreslerini engelleyerek web sitelerine erişimi kısıtlamak için kişiselleştirilmiş bir araç sağlayarak, etki alanına özgü bir IP blok listesi yapılandırma yeteneğine sahiptir. Yönetici panelini devre dışı bırak Yöneticiler, OpenPanel'in temel işlevlerini korurken OpenAdmin arayüzünü tek bir tıklamayla zahmetsizce devre dışı bırakabilir. Ayrı hizmetler Hem OpenAdmin hem de OpenPanel, kullanıcı web sitelerinden tam bağımsızlığı koruyarak ayrı veritabanları ve web sunucuları kullanır. Özel bağlantı noktaları Yöneticiler, varsayılan bağlantı noktasını özelleştirme (ör. 2083'ten değiştirme) ve belirli tercihlere hitap etmek için dizin yolunu (ör. / Openpanel'den) değiştirme esnekliğine sahiptir. Entegrasyonlar (Yakında) WHMCS Modülü( Yakında gelmesi planlanıyor) Önde gelen web barındırma yönetimi ve faturalandırma yazılımı ile entegre edin. REST API'sı Güçlü RESTful API'mız, zaten kullandığınız 3. taraf sistemlerle entegre olmanızı sağlar. Read the full article
0 notes
Photo

Gzip Etkinleştirme ile Site Hızlandırma
Gzip, genelde SEO uzmanlarının Page Speed testlerinde “Gzip sıkıştırmasını etkinleştir” hatası ile karşına çıkan, bilenler için kolay bilmeyenlerin ise başını fazlasıyla karıştıran bir terimdir. Bu sorun kullanılan hosting paketinizde sıkıştırmasının etkin olmamasından kaynaklanır. Çözümü basit olan bu sorunu çözmeniz durumunda web sitenizin hızı yüksek oranda artacaktır. Özellikle WordPress siteleri hızlandırmak için yapılması gereken ilk işlemlerden […]
https://www.seocu.org/gzip-etkinlestirme/
#Cpanel#GNU Zip#Google Page Speed Test#GTMetrix#Gzip#Gzip Faydası#GZIP Sıkıştırma Etkin Mi?#İç Seo#Mod_Deflate#Nasıl Yapılır?#Page Speed#Php.ini#Seo#Site Hızlandırma#Teknik Seo#Tüm İçeriği Sıkıştırma
0 notes
Text

How to Create php.ini file in cPanel?
Creating a php.ini file is one way to do this. This file allows you to alter many PHP configurations to better suit the demands of your website.
0 notes
Photo

How to create custom php.ini file in CPanel? ☞ https://morioh.com/p/5e515670a78f #PHP #CPanel #Morioh
3 notes
·
View notes
Photo

How to create custom php.ini file in CPanel? ☞ https://morioh.com/p/5e515670a78f #PHP #CPanel #Morioh
1 note
·
View note
Photo

How to create custom php.ini file in CPanel? ☞ http://bit.ly/2mh5TxF #php #laravel
2 notes
·
View notes
Photo

How to create custom php.ini file in CPanel? ☞ http://go.codetrick.net/acefbd1437 #php #laravel
1 note
·
View note
Text
How to Edit the php.ini File in cPanel
How to Edit the php.ini File in cPanel
If you are familiar with PHP, you may heard about the php.ini file. There are some certain scenarios when you may need to change or update your PHP configuration in your cPanel. You can do it easily by editing the php.ini file. There are several options to edit your php.ini file. Let’s go through some methods for editing the php.ini file. What is php.ini file? You are most likely to encounter…
View On WordPress
0 notes
Text
Ananova named and listed Bluehost as the best Web hosting provider for personal and small businesses based on their cost-effective and reliable Web hosting services. Ananova is the leading web hosting review site that lists Web hosting companies based on competency, specialization & area of expertise. The visitor chooses the most powerful hosting company best fit for business or individual websites with that in mind. The website lists company reviews and web hosting technology, their features, reliability, performance, technical support, and affordability.

Ananova’s expert team considers Bluehost, founded in 1996, a trusted provider for Linux-based websites developed on PHP, Zend Framework, Ruby on Rails, Python, and Perl.
Bluehost is well established in the WordPress hosting market, offering Website Builder, WordPress Hosting, Managed WordPress, & WooCommerce Hosting. The company offers Shared, Dedicated, VPS hosting services, domains, Websites, and Online stores. Furthermore, it also provides a Microsoft 365 Email Essentials license that directly ties with the domain name and is free for 30 days, automatically renewed at the current renewal price until canceled.
A Shared hosting plan best suited for websites or blogs starts at $4.95/mon, VPS for growing sites that need more power and control starts at $18.99/mo, and Dedicated servers for ultimate speed and performance begin at $79.99/mo.
The hosting features include a simplified security domain and file management, a control panel cPanel to create a database, analyze statistics, monitor resource usage, self-developed SimpleScripts script installer, and do everything related to the hosting account. Furthermore, the company provides unlimited disk storage, bandwidth, email accounts, and advanced capabilities, including SSH, SSI, .htaccess, Cron Jobs and PHP.ini, high processor servers, SSD database storage, UPS power, diesel backup power, and Cloudflare CDN.
To read the in-depth BlueHost review, visit https://ananova.com/hosting-review-bluehost
0 notes
Text
php.ini wordpress
You could be looking for a solution to the aforementioned problem notice and wondering how to boost RAM in your WordPress website's php.ini wordpress. The following method will assist you in resolving the mistake in a matter of minutes without having to wait for a response from the support team.
The maximum amount of RAM that a script can use; keep in mind that this value should be bigger than the size of your file. Let's imagine you're running out of space on your memory card or on your hard drive.
The time it takes for each script to run. That is the time it takes for the server to respond to the file. For instance, if the time limit is exceeded, the server gate will be unlocked, allowing your files to enter the server. If your file is too large to upload in seconds, adjust the size limit.
PHP's maximum data size for a POST request. Set the limit to 0 to disable it. The POST method requests that the data in the body of the request message be accepted by a web server.
The maximum size allowed on the server is the key to increasing memory in WordPress php.ini. You may have noticed in your WordPress gallery that the article or image has a maximum upload size. It specifies the maximum file size that you can upload to the server in a single file. It's one of the best.
It specifies the maximum file size that you can upload to the server in a single file. It is one of the methods you may use to efficiently manage your server space. In the vast majority of cases, this command will assist you in resolving the RAM limit exhaust problem.
The memory exhausted issue is usually generated by the server rather than your theme or network speed. Of course, the latter two can cause problems, but this is a very unusual occurrence. Saying that we require access to your website's server in order to fix this server-side error.
To do so, you must first log onto your cpanel or server account. Find the WordPress root directory, which is the place where your WordPress installation is stored. When you get there, your WordPress directory should look like this.
Look for the php.ini or php5.ini file in the wp-admin directory. You must edit it if there is one. Create a new folder named php.ini if there isn't one in the wp-admin directory.
0 notes
Text
Youtube Activeer fout 500
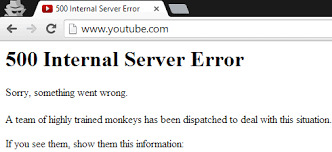
Als er een probleem is met de server of het bestandssysteem die uw site van stroom voorziet, verschijnt de interne server 500-fout op elke pagina. De meest waarschijnlijke reden is een probleem met de server van uw host, maar het kan ook een probleem zijn met uw WordPress-bestanden in de hoofdmap.
Dit is een van de meest verzwarende WordPress-blunders die je kunt maken. Het heeft nooit een eenvoudig antwoord en vereist altijd uitgebreide probleemoplossing, wat tijd en geduld kost. We zullen echter proberen een deel van deze angst weg te nemen door talloze oplossingen voor dit dilemma voor te stellen en te bespreken.
Wat veroorzaakt een interne serverfout in WordPress? WordPress is niet de enige die een intern serverprobleem krijgt. Dit kan voorkomen bij elke website die op een webserver wordt gehost. Vanwege de algemene aard van de fout, vertelt het niets aan de ontwikkelaar.
Plug-in- of themafunctionaliteiten zijn vaak de oorzaak van een interne serverfout in WordPress. Andere redenen voor een interne serverfout in WordPress zijn een corrupt.htaccess-bestand en een PHP-geheugenbeperking.
We hebben ook gehoord dat een probleem met de interne server alleen optreedt wanneer u probeert toegang te krijgen tot het beheerdersgedeelte terwijl de rest van de site actief is.
1. Controleren op corrupt .htaccess-bestand
De eerste stap bij het oplossen van een intern serverprobleem in WordPress is het zoeken naar een corrupted.htaccess-bestand. U kunt dit bereiken door uw main.htaccess-bestand te wijzigen in.htaccess old. U moet verbinding maken met uw site via het FTP-programma of bestandsbeheer in het cPanel-paneel van uw hostingaccount om het.htaccess-bestand te hernoemen.
Het.htaccess-bestand bevindt zich in dezelfde map als de bestanden wp-content, wp-admin en wp-includes zodra u bent ingelogd. Nadat u het.htaccess-bestand hebt hernoemd, gaat u naar uw site om te zien of de probleem is opgelost. Als dat het geval is, feliciteer jezelf dan met de achterkant voor het oplossen van het interne serverprobleem.
Voordat u doorgaat, moet u naar de pagina Permalinks-instellingen van het WordPress-beheergebied gaan en op de knop Opslaan klikken zonder wijzigingen aan te brengen. Hiermee wordt een nieuw.htaccess-bestand gemaakt met de nodige herschrijfregels om te voorkomen dat uw publicatiepagina's een 404-fout retourneren. Als het zoeken naar een oplossing voor een beschadigd.htaccess-bestand geen resultaten oplevert, moet u dit bericht blijven lezen.
2. De PHP-geheugenlimiet verhogen
Als u uw PHP-geheugenlimiet overschrijdt, kan er een interne serverfout optreden. Om dit probleem aan te pakken, volgt u onze handleiding over het verhogen van de PHP-geheugenlimiet in WordPress.
Verhoog de RAM-limiet als u een interne serverfout krijgt, net wanneer u verbinding probeert te maken met uw WordPress-beheerder of een afbeelding uploadt naar uw wp-admin:
Maak een leeg tekstbestand met de naam php.ini
Plak deze code hier: geheugen = 64 MB
Sla bestand op
Download het naar uw map / wp-admin / met FTP Verschillende gebruikers hebben verklaard dat dit het probleem van hun beheerderskant oplost.
Als het verhogen van de RAM-limiet het probleem voor u oploste, was dit slechts een tijdelijke oplossing. Je moet constant zoeken naar de factor die ervoor zorgt dat je geheugenlimiet wordt overschreden. Dit kan een themafunctie zijn of een slecht gecodeerde plug-in. We raden u ten zeerste aan om uw WordPress-webhost te vragen de serverlogboeken te onderzoeken om u te helpen bij het bepalen van de juiste diagnose.
Als het verhogen van de PHP RAM-limiet het probleem niet oplost, moet u wellicht naar alternatieve mogelijkheden kijken.
3. Kernbestanden opnieuw uploaden
Als de plug-in-optie het interne serverprobleem niet oplost, wordt aanbevolen dat de bestanden wp-admin en wp-includes worden gedownload van een nieuwe WordPress-installatie.
Hiermee worden uw gegevens niet verwijderd, maar het kan u wel helpen een probleem met een beschadigd bestand op te lossen. Ga om te beginnen naar WordPress.org en selecteer de knop Downloaden. Hierdoor wordt het WordPress-zipbestand op uw computer geïnstalleerd. Je ziet een WordPress-map nadat je het zipbestand hebt uitgepakt.
Maak vervolgens met behulp van een FTP-programma verbinding met uw WordPress-website. Ga naar de hoofdmap van uw website zodra u zich hebt aangemeld. De mappen wp-admin, wp-includes en wp-content bevinden zich allemaal in deze map. Open de WordPress-map op uw computer in de linkerkolom. De mappen wp-includes en wp-admin moeten nu worden geselecteerd, vervolgens met de rechtermuisknop worden geklikt en 'Uploaden' worden geselecteerd.
Deze mappen worden nu door uw FTP-client naar uw server verzonden. U wordt gevraagd of u de bestanden wilt overschrijven. 'Overschrijven' en vervolgens 'Altijd deze actie gebruiken' zijn de opties. Uw FTP-client zal nu uw oude WordPress-bestanden overschrijven met nieuwere versies. Deze stap repareert het interne serverprobleem als uw WordPress-bestanden beschadigd waren. wanneer het probleem zich blijft voordoen, moet u contact opnemen met het YouTube-ondersteuningsteam via YouTube Bellen.
0 notes
Text
11 Points to Protect Multiple Domains From Malware, Phishing, and Code Injections
Amine Our WP sites get hacked/compromized too many times for my liking. What do you guys use to protect multiple domains from malware, phishing and code injections? WordFence? CodeGuard? SiteLock? Sucuri? What's the best solution pricewise? 7 👍🏽 7 [filtered from 51 💬🗨]📰👈
🔗🏹
💬🗨
Raef I answered a similar question in another group. If it's not okay for me to copy and paste my own answer, please delete and may the fleas from a thousand camels infect my jockey shorts. These are best practices: Most of what I'll share with you is for Apache based websites. Nginx is different. 1. Keep hackers out of wp-includes and wp-admin with some .htaccess files. 2. If you have more than one website accessible from one cPanel, lock each site down individually with php.ini files. Use the open_basedir command to specify the exact path to each site. 3. Always use a good strong anti-virus program on your local computer. ALWAYS! It's astonishing to me how many websites we remove malware from that were hacked due to a password-stealing trojan on their computer. 4. Keep all plugins updated daily. There have been so many websites infected recently that were the result of the elementor-pro plugin not being updated. Recently. After the plugin was patched. 5. Me personally, I would never give someone an admin level account on my WordPress site. Never. If I did, as soon as they were finished, I would delete the account. 6. You must have file monitoring. No other way about it. You need to know that any files added or modified are safe or not. Not just notified that they've changed or been added, but are they safe. 7. Disable PHP in the wp-content/uploads folder. Nothing in there needs to be executed. Nothing. 8. Change your passwords frequently and change the password salts in wp-config.php just as frequently. 9. I have little faith in WAFs. Read their blogs and updates. They all say after finding a new vulnerability, "Now our customers are protected from this exploit". Really? Why wasn't this attack blocked before? Block SQL injection, cross-site scripting and other attack METHODS. Stop chasing the latest exploit. Block the methods hackers use and you'll be ahead of the game. 10. If you're on a Virtual Private Server (VPS) or Dedicated server, block countries by IP address. Do you need traffic from Ukraine, Russia or a host of other countries? If not, block them. It's one less avenue to worry about. However, don't do it at the application layer with a web application firewall (WAF). That's chewing up resources. Do it at the application layer. 11. You must have the logs monitored. Want to know what's going on with your website? It's all in the logs. (Even what Google is crawling, how long and how often they crawl too! 😉😉😉) Log monitoring along with file monitoring will tell you exactly how the sites were infected and when. From there, if your security needs tightening, it's relatively easy. Any questions? Fire away.
Adly Great checklist! thank you. may i ask which tools do you recommend for log and file monitoring? Raef » Adly I wrote my own. I stream logs from customers sites to my servers where I analyze them "on the fly". Kieran Awesome response. 💟1 Loga » Raef Thank you for taking the time to share this. Superb insights. Thanks. 💟1
Martinez Among other things we rename the login URLs. If hackers cannot find them they cannot break into them. I believe this is the most effective strategy.
Anton » Martinez How does this help? Users will have login buttons on top and find the page very easily. Igor That's only on sites that have accounts enabled. Most businesses don't have this. Martinez » Anton What Igor says is correct, but many of the bots used to attack login URLs are preprogrammed to go after a small number of URLs. If you rename the URLs the number of brute force dictionary attacks should decline. If you leave comments open on Posts or Pages, closing those off after a couple of weeks also helps. Most comments that are left after 15-30 days are just spambots anyway. Some of them will attempt to dump SQL injections into the comments,
Edward WordFence severely slowed our site down we had to ditch it. Sucuri does a fair job of spotting injections and vulnerabilities. Problem with WP is the update addiction. Every update - apart from potentially breaking the whole site - may fix one vulnerability, but may open up several others unknowingly. So you keep updating, and keep hitting the same problem going round in circles. Instead of doing minor dangerous updates often, I'm inclined to test and launch sites as-is, fix vulnerabilities in existing plugins manually where possible - then look at upgrading everything properly as a new project down the line. 📰👈

🔗🏹
These may satisfy you: » Some Advice if your Server Get Hacked » How to Delete Hacked Urls From Google SERPs? A New Owner Has Been Added on GSC
0 notes