#css replace image on hover
Explore tagged Tumblr posts
Visit Tumblr Blog
Explore Tumblr blogs with no restrictions, modern design and the best experience.
Last Seen Tumblr Blogs


Fun Fact
70% of Tumblr users say the Dashboard is their favorite place to spend time online.
Text

CSS Replace Image on Hover
#css replace image on hover#css animation tutorial#html css animation#css animation examples#codenewbies#html css#frontenddevelopment#html5 css3#pure css animation#css image hover effect#css
8 notes
·
View notes
Note
hi!!! i love for custom blog theme,, do you have a link to the code or creator 0:?
ya!
so my theme is actually a heavily modified version of redux edit #1 by lopezhummel (current url: holyaura). i always remind users that most tumblr themes are old and that you'll need to replace all instances of "http://" in the code with "https://" so tumblr will save the theme. i had to do it with this one
these are the modifications i made to the theme. i edited this theme over the course of at least a year or so and don't quite recall how i did all of these things. but to the best of my ability:
i moved the "left side img" to the right side of the screen. i also made this element "responsive" so the image will never get cropped when you resize your screen. this was a bitch and a half to figure out and i truthfully do not remember how i did it
i deleted the text in the drop-down navigation so it appears as a little line that is otherwise not noticeable. this type of theme, the "redux edit," used to be very popular because having a drop-down menu let you cram a bunch of links that lead to sub-pages on your blog. i've done away with my sub-pages, but i still like the format of the "redux style" tumblr theme, for its minimal UI and for its customization options.
i separated my mobile description from my web description for formatting reasons. basically, most elements in tumblr themes are connected to specific text fields and toggles. i simply went to the section that was connected to my blog description and deleted it. the web description has to be manually typed inside of the CSS/HTML editor when i want to change it. whereas my mobile description is whatever i type in the "description" box of the normal tumblr theme editors.

i added code someone else made ("NoPo" by drannex42 on GitHub) which allows you to hide posts with certain tags on them. i did this to hide my pinned post, as it looks bad on desktop.
i replaced the tiny pagination arrows at the bottom with images that literally say "next" and "back" because the arrows were far too small/illegible. i know they aren't centered in the container i'm not sure how to fix that lol

i added a cursor

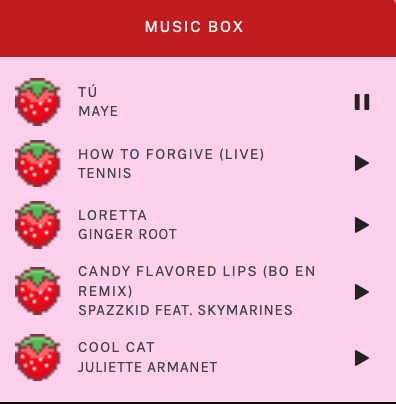
i installed a working music box ("music player #3" by glenthemes), and then added music by uploading MP3 files to discord and then using the links of those files as the audio sources. iirc i also had to make this element responsive and i aligned it so it would sit on the left side of my screen. i made the "album art" for each one the same strawberry pixel art
the moth is just a PNG i added and then moved around so it was behind my sidebar using the options that came pre-packaged with the theme
if you want something like the strawberry shortcake decoration at the top (called "banner" in the theme) your best bet is to google "pixel divider"
theme didn't support favicon so i added that in so i could have a little heart
ALSO:
this theme is. really weird about backgrounds. any background that i have ever set for it, i've had to do weird shit in photoshop. like making the background HUGE, mirroring it, etc. - because it would crop the image weird, or there would be a gap where there was no image. idk man, it's haunted. i'm sure there's a way to fix this but i am NOT tech savvy enough. anyway, patterns are probably your best friend. and if you DO want something that isn't a pattern, it's going to take a lot of trial and error. but i love this theme so i deal with it 😭
the sidebar image and the floating image do not scale. if your image is 1000 pixels, it will display at 1000 pixels. you'll either have to edit the code so that the theme scales the image for you, or resize any images before you add them
my white whale of theme editing (aside from the Weird Background thing) is that i cannot get infinite scrolling to work. i have tried every code out there. all of them break my theme. it makes me sad because like. i have music there for a reason. the idea is that people would listen to it while they scroll. unfortunately, the way it's set up now, the music will stop every time someone clicks "next" or "back" 💀
anyway sorry for rambling but i hope you enjoy the the theme and customizing it in the way that you want to!
24 notes
·
View notes
Text
AI in Frontend Development: How Artificial Intelligence Is Transforming UI/UX in 2025 and Beyond

Frontend development is no longer just about staying updated with the latest JavaScript framework or mastering slick animations. The real shift? It’s AI in frontend development a transformation that’s reshaping how we design, build, and optimize digital interfaces.
From wireframing to code generation, what once took hours now takes minutes, thanks to artificial intelligence. Whether you’re focused on UI design, UX optimization, or code implementation, AI is becoming a powerful design partner. Let’s dive into how AI is revolutionizing frontend workflows, tools, and user experiences in 2025.
What Is AI in Frontend Development?
AI in frontend development refers to the use of artificial intelligence to simplify, automate, or enhance the tasks involved in creating user interfaces. It can assist with:
Generating responsive layouts
Writing component code
Improving accessibility
Predicting user behavior
This doesn’t mean developers and designers are being replaced. Instead, AI enhances human creativity, handling the repetitive parts and enabling teams to focus on strategy, storytelling, and innovation.
Best AI Tools for UI/UX Designers Today
There’s a growing wave of intelligent tools designed specifically for UI/UX professionals. These tools help teams build faster and smarter.
Figma AI
Figma now offers built-in AI tools that assist with layout tweaks, accessibility insights, auto-labeling images, and content suggestions — right inside your workflow.
Framer AI
With Framer AI, just describe your layout in plain English (e.g., “Create a SaaS homepage with pricing and testimonials”), and it delivers a fully responsive, ready-to-go design.
Uizard & Galileo
Uizard turns text prompts or sketches into wireframes. Galileo takes it further, generating pixel-perfect UI based on your descriptions — speeding up the designer-to-developer handoff.
These AI UI design tools don’t just boost efficiency, they unlock a new level of creative freedom.
How Do Frontend Developers Use AI in Real Workflows?
For developers, AI is becoming a game changer, especially in simplifying repetitive and structural frontend tasks.
Generative UI
Generative UI enables devs to create layouts or UI components simply by describing them. AI generates the code, whether it’s for dashboards, landing pages, or product grids.
Frontend Design Automation
Today’s smart tools can handle:
Responsive grid systems
Color scheme suggestions
HTML structure from wireframes
CSS and Tailwind class generation
By automating these tasks, developers gain more time to work on logic, experience design, and performance tuning.
How Does AI Improve Accessibility in Frontend Design?
AI for accessibility is one of the most valuable applications in frontend development. It helps teams build interfaces that are inclusive and compliant from the start.
Key features AI supports include:
Contrast checking to catch poor color pairings
Alt text generation for images using context recognition
Keyboard navigation validation to ensure mouse-free usability
Tools like Stark AI for Figma and smart IDE plugins are already making accessibility easier and more accurate.
AI in UI/UX design isn’t just convenient, it’s a step toward a more inclusive digital world.
Using Prompts for AI-Generated UI Design
Prompt-based UI design is rapidly emerging as a go-to method for fast prototyping.
You provide a natural language prompt, and the AI handles the layout or code creation. For example:
“Create a login screen with email, password, and forgot password link.”
“Design a 3-column product grid with hover animations.”
“Build a pricing section with a toggle for monthly/yearly plans.”
By learning basic prompt engineering, designers and devs can go from idea to prototype in minutes.
Top AI UX Design Trends You Should Know
AI UX design trends are evolving fast, and they’re making digital experiences more personal, intuitive, and engaging.
1. Predictive Interfaces
AI anticipates what users need based on behaviour and context, adapting layouts and navigation dynamically.
2. Hyper-Personalization
User interfaces now adjust in real-time — think personalized colour schemes, font sizes, or feature prioritization.
3. Conversational Interfaces
Chatbot-style UIs and voice interactions are on the rise, making apps feel more human and responsive.
These AI-driven experiences go beyond aesthetics, they enhance usability and engagement like never before.
Will AI Replace UI/UX Designers or Developers?
It’s a valid concern, but here’s the truth: AI won’t replace designers or developers.
Why? Because AI lacks what makes us human:
Creativity
Emotional intelligence
Contextual understanding
Brand intuition
What AI does is eliminate the tedious stuff , letting you spend more time on ideation, testing, and crafting user experiences that actually matter.
Real-Life Example: Building a Website with Framer AI
Let’s say you need a personal portfolio website. Here’s how AI makes that easier:
Prompt: “Build a personal portfolio with a hero section, about me, project cards, and a contact form.”
Output: Framer AI instantly generates a layout with sections, styling, and sample content.
You Customize: Update fonts, images, and animations — all in under 30 minutes.
What used to take days can now happen before your next coffee break.
What’s Next for AI in UI/UX and Frontend Design?
AI isn’t slowing down. Here are some exciting areas to keep your eyes on:
Voice-to-UI: Speak your interface, and watch it build itself in real time
AI-assisted A/B testing: Interfaces adjust based on live performance metrics
Ethical design checks: AI flags dark UX patterns or manipulative flows
Live AI collaboration: Smart assistants suggest edits during real-time teamwork
The goal is no longer speed alone. It’s better outcomes for both users and creators.
Partner with Ahex Technologies — Experts in AI & Frontend Development
At Ahex Technologies, we’re not just writing about the future, we’re building it.
Whether you’re a startup looking to launch a responsive web app or an enterprise modernizing your UI/UX processes, our team leverages AI in frontend development to craft smart, scalable digital products.
End-to-end design & development
AI-integrated workflows
Accessibility-first approach
Expertise in tools like Figma AI, Framer, and Uizard
Need a UI/UX or frontend partner you can trust? Let’s talk.
Final Thoughts: AI Is Your New Design Partner
Embracing AI in frontend development doesn’t mean giving up control. It means gaining a creative partner who amplifies your ideas and accelerates delivery.
From prompt-based UI design to AI for accessibility, the tools we use are getting smarter, and so are we. Whether you’re a designer, developer, or somewhere in between, AI helps you work faster, smarter, and more creatively.
So the next time you launch Figma, VS Code, or Framer, don’t just ask “What can I build?”
Ask: “What can AI help me build better?”
AI in Frontend Development- FAQs
What are the best AI UI design tools right now?
Top tools include Figma AI, Framer AI, Uizard, Galileo, and Penpot AI. They offer features like auto-layouts, design suggestions, and real-time code generation.
How does AI support accessibility in frontend development?
AI tools can check contrast issues, generate alt text for images, suggest ARIA labels, and flag usability problems for keyboard navigation.
Can frontend developers rely on AI for code?
Yes, GitHub Copilot, Cursor, and others can generate UI components, write CSS, and assist with layout logic. But human review is still essential.
What is generative UI?
Generative UI involves creating components or layouts using AI-generated code from prompts, reducing manual work and enabling rapid prototyping.
Will AI replace UI/UX designers?
Not at all. AI helps streamline repetitive tasks, but creativity, strategy, and empathy are still human superpowers.
Want a deeper dive into AI-powered frontend workflows? Explore our full article on AI in frontend development over at Ahex.co.
0 notes
Text
And hey, new users, I know when you go to customize your blog, there's a whole bunch of custom themes that cost money? No need to pay! Those themes are pretty mid anyway.
Blog themes have been an art form on tumblr for YEARS. Most theme-makers will make them for free (and sometimes accept paid commissions for specialized themes too, but there's so many gorgeous themes that are 100% free and made out of love)
Here's a few of my old favorites I go back to time and again.
I recommend following the link or clicking through to their proper blog pages because they all have navigation that includes theme tags, rules for use, and instructions for how to get these lovely themes on your blog and tailor the colors and images for your heart's desires!
EvilQueenedThemes (@evilqueenedthemes) - Old school style themes. They haven't updated since back in 2017, but their themes are neat and easy to navigate. A style that's actually coming back into fashion online. If you know CSS their themes are also pretty easy to tweak if you want something a few pixels to the left or want to add or subtract elements. Just make sure to keep the credit because they worked hard on these themes. Their themes are good for blogs that need some basic navigation and are meant to be read (like writing blogs, comic blogs, research blogs, etc.)
Yukoki / Xuethms (@yukoki / @xuethms ) - A good variety from no-frills to all out party! They're older themes are on yukoki (click "view archive" on the moved blogs popup) and the newer ones on xuethms. Their themes are easy to use and tend to have a good blend of dynamic and stationary elements. One thing I love about their themes is just how customizable colors are! They build in a lot more color and image customization than most themes do. You can always edit colors in the CSS, but it's nice to not have to go into the code to do so. Though, honestly, a lot of their default theme color pallets are already so gorgeous. 10/10! Excellent choice if you have a specialized topic blog that you want to look schnazzy and fit with your content theme.
ShuDesigns (@shudesigns) - The first place I go when I need a theme! Easy to use both from the blogger and follower side! Their themes are clean, neat, stylish, and have a good variety of layouts. I can't recommend their themes enough! Hanging out in a blog with one of their themes is just a pleasant experience.
octomoosey (@octomoosey) - If you like style, if you like to be extra, if you like to go ALL OUT, then octomoosey is THE theme-maker for you. They're like a CSS god. You ain't seen the breadth of what a tumblr theme can be 'til you've seen an octomoosey theme. I don't have the words to describe how wild some of their themes are. Seriously, just take a look through their theme archive. Excellent choice if you want something cool and wild with that wow factor. Best for blogs with short form content, since most of their themes have relatively smaller containers for the posts.
These are just some of my favorite theme-makers here on tumblr. There's also plenty PLENTY more! If you search "theme hunter" or you can go to the actually blog Theme-Hunter (@theme-hunter), click on/hover over "More" on the navigation bar, and they have a whole system of tags to find just the right theme for you! They also have a lot of good resources if you're interested in learning theme-coding yourself, or just want some tips on tweaking pre-made themes.
Now go forth, my little ducklings! THEME yourselves!
(edit: with some old themes you may have to go into the css, search for "http" and replace all the "http" with "https" due to changes on tumblr a couple years back - it's a quick and easy fix, just something to be aware of if you use theme codes from before that change)
i think we should have a custom blog theme renaissance
#i live and breathe for custom themes#yes i like a clean minimalist look for my main blog here#but i go absolutely ham on some of my other blogs#and it brings me so much joy to see other people's custom themes#really sad that the theme-maker for my current theme is no longer around#their blog is gone#which makes me sad because they were another favorite
24K notes
·
View notes
Text
do you want your tumblr theme to have the cursor from Pathologic Classic? well now you can!
step one, download the file above. I made this from an image of the cursor that I got from the game files, so it should automatically be the right size.
step two, get this file into the form of a link somehow. what I did was send it to myself on discord and right click the attachment and hit copy link, but you could use dropbox or something in the same way.
step three, go to "edit theme" and scroll all the way down to "advanced options". At the bottom of that there is a box titled "add custom CSS". Paste this there: body, *, a, a:hover { cursor:url(IMG URL), auto; }
step four, replace the "IMG URL" part with the link you generated to the cursor file. if it worked, you should immediately see your cursor change when you hover it over the preview area. hit "save" in the top right corner and it should go into effect on your page
#pathologic#you can ask me if you have problems but I'm not an html expert I just google things until they work#it is very possible I did not do this in the Most Optimal Way#mine
87 notes
·
View notes
Note
i love your gasoline theme!!! it's so neat and pretty! is there a way to replace the skills bars in the about section with a side blog section?
thank you so much nonny! also i'm so sorry for making you wait lzdnbadnbk. anyways yes: there is a way to add sideblogs instead of skills bars. instructions are under read more. <3
so please go to the code and remove this part:

up until the last part which is:

and then replace it with this code (click here):
after doing that, go to the css part of the code and paste this code snippet anywhere:
.sideblog { align-items: center; border-bottom: 1px solid {color:Border}; display: flex; margin-top: 10px; margin-bottom: 10px; padding-bottom: 10px; }
.sideblog:first-of-type { margin-top: 0px; }
.sideblog:last-of-type { border-bottom: none; margin-bottom: 0px; padding-bottom: 0px; }
.sideblog-image { height: 50px; width: 50px; }
.sideblog-image img { border-radius: 5px; height: 50px; width: 50px; }
.sideblog-name { font-size: {select:Uppercase Font Size}; font-weight: bold; margin-left: 20px; text-transform: uppercase; }
.sideblog-name a { border: none; padding: 0px; }
.sideblog-name a:hover { background: none; color: {color:Link Hover}; }
i hope this helps! :D
3 notes
·
View notes
Note
Hey there, I hope you've been doing well. I'm using your Jupiter theme and it's beautiful, but I was wondering if there was a way to make the light/dark mode switch also work for custom cursors!
sure, i'm gonna go ahead and assume you're using an image (at most 128x128, or major browsers won't display them) for your custom cursor.
if you already have the images uploaded somewhere, add the following lines into your Custom CSS (instructions).
/* Both modes/Dark mode, default cursor */ html { cursor: url("https://YOURURLHERE.png"), default } /* Both modes/Dark mode, cursor for hovering over links */ html a { cursor: url("https://YOURURLHERE.png"), default } /* Light mode, default cursor */ html.light { cursor: url("https://YOURURLHERE.png"), default } /* Light mode, cursor for hovering over links */ html.light a { cursor: url("https://YOURURLHERE.png"), default }
you can delete
if you don't already have the images uploaded somewhere, go into the Edit HTML panel from the Customize page and Ctrl+F/Cmd+F to "Images" to find this section:

and add the following lines underneath the LM Avatar line:
<meta name="image:Cursor" content=""> <meta name="image:Link cursor" content=""> <meta name="image:Cursor" content=""> <meta name="image:LM Link cursor" content="">
then Ctrl+F/Cmd+F to "CustomCSS" to find this section:
and replace it with the following lines:
{block:IfCursorImage} {block:IfNotLinkCursorImage}a,{/block:IfNotLinkCursorImage} html { cursor: url("{image:Cursor}"), default } {/block:IfCursorImage} {block:IfLinkCursorImage} html a { cursor: url("{image:Link cursor}"), default } {/block:IfLinkCursorImage} {block:IfLMCursorImage} {block:IfNotLMLinkCursorImage}html.light a,{/block:IfNotLMLinkCursorImage} html.light { cursor: url("{image:LM Cursor}"), default } {/block:IfLMCursorImage} {block:IfLMLinkCursorImage} html.light a { cursor: url("{image:LM Link cursor}"), default } {/block:IfLMLinkCursorImage} /* Custom CSS */ {CustomCSS} </style>
hit save, and you'll now be able to add images directly from the Customize panel. again, (LM) Cursor is the default, and (LM) Link cursor is for hovering over links.

3 notes
·
View notes
Text
clow cards chinese names.
矢, shǐ. the arrow.
arrow; dart; old variant of 屎.
大, dà. the big.
big; great; vast; large; high.
泡, pào. the bubbles.
bubbles; suds; blister; soak.
替, tì. the change.
change; replace; substitute for.
雲, yún. the cloud.
cloud.
创, chuàng. the create.
to begin; initiate; inaugurate; start.
闇, àn. the dark.
close; shut; dark; dismal.
驱, qū. the dash.
* 駆 (jp) ku, kakeru 駆ける.
to expel; urge on; drive; run quickly.
夢, mèng. the dream.
dream; visionary; wishful.
地, dì. the earth.
earth; soil; ground; region.
消, xiāo. the erase.
vanish; die out; melt away.
闘, dòu. the fight.
struggle; fight; compete; contend.
火, huǒ. the firey.
fire; flame; burn; anger; rage.
浮, fú. the float.
to float; drift, waft; to exceed; superfluous.
花, huā. the flower.
flower; blossom.
翔, xiáng. the fly.
soar; glide; hover; detailed.
霧, wù. the mist.
fog; mist; vapor; fine spray.
冻, dòng. the freeze.
freeze; to feel very cold; congeal.
灯, dēng. the glow.
lantern; lamp; light.
幻, huàn. the illusion.
illusion; fantasy; mirage.
跳, tiào. the jump.
to jump; to skip over; bounce; leap.
秤, chēng. the libra.
balance; scale; to weigh.
光, guāng. the light.
light; brilliant; shine.
小, xiǎo. the little.
small; tiny; young; junior.
锁, suǒ. the lock.
* 錠 (jp) jō じょう.
lock; padlock; shackles; chains.
輪, lún. the loop.
wheel; to take turns; to rotate; classifier for recurring events.
迷, mí. the maze.
to bewilder; lost; confused.
镜, jìng. the mirror.
mirror; lens; glass; glasses.
移, yí. the move.
change place; shift; move about.
力, lì. the power.
power; strength; capability; influence.
雨, yǔ. the rain.
rain; rainy.
返, fǎn. the return.
返回, fǎnhuí.
* 戻 (jp) modoru 戻る, もどる.
return; revert to; restore; come (or go) back.
砂, shā. the sand.
sand; pebbles; gravel; gritty.
影, yǐng. the shadow.
shadow; image; reflection; photograph.
盾, dùn. the shield.
shield.
撃, jī. the shot.
strike; hit; beat; attack; fight.
静, jìng. the silent.
calm; quiet; still; motionless; gentle.
眠, mián. the sleep.
close eyes; sleep; hibernate.
雪, xuě. the snow.
snow; wipe away shame; avenge.
歌, gē. the song.
song; lyrics; sing; chant; praise.
风暴, fēngbào. the storm.
* 嵐 (jp) arashi あらし.
storm; violent commotion. fig. crisis (e.g. revolution, uprising, financial crisis etc)
甘, gān. the sweet.
sweet; willing.
剑, jiàn. the sword.
* 剣 (jp) ken.
sword; dagger; saber.
抜, bá. the through.
拔出, bá chū.
(jp) nuku 抜く, ぬく.
to surpass; to seize; to go beyond; to rise; to put forth.
雷, léi. the thunder.
thunder; mine (weapon). (Internet slang) terrifying; terrific.
时, shí. the time.
time; season; era, age, period.
双, shuāng. the twin.
set of two; pair; couple; both.
声, shēng. the voice.
sound; voice; tone; noise; reputation; classifier for sounds.
水, shuǐ. the watery.
water; river; liquid; beverage; additional charges or income (of clothes); classifier for number of washes.
波, bō. the wave.
wave; ripple; storm; surge.
風, fēng. the windy.
wind; air; manners; atmosphere.
樹, shù. the wood.
tree; plant; set up; establish.
notes:
* these kanji are the logographic used for the title on their respective card. i understand this is logical given CSS is a japanese work. however, the character in the story that created the cards is chinese and the cards themselves are based on daoist concepts. for this reason i did my best to translate them as this is a list of the chinese names that would be (in my opinion) the cards “true” names. the rest of the infographics are mutually understandable between chinese and japanese kanji.
not listed by hierarchy, just sorted alphabetically for easier navigation.
i’m not a native speaker. i’m at a hsk 2 level at best, so feel free to correct me if there’s any mistakes.
38 notes
·
View notes
Photo

My first attempt at a premium theme: Spring theme! The price is 2 euro or any donation you'd like to make! Send me an ask/im for it, even just a ‘hey I’d like your spring theme’ and I’ll link you my ko-fi or paypal.
previews in the source. If you buy like or reblog, if you don’t buy and you’d like to help me get some visibility, you can reblog anyway (and just like the post if you like it, or donate regardless to give a hand) <3
What do you get with this 'spring' theme, which is probably the first of a season collection, besides of course the exact look you see in the preview 1? (you can check the previews to see most of what I'm talking about)
This theme is first of all responsive: you will be able to see everything, from posts to links to sidebar, in every device no matter how small, down to 320w x 340h tiny mobile screens. [On tablets/phones the navi links will simply move above the screen, then you'll have the title, description and finally the container.]
There is an optional dropdown menu for your updates and a searchbar, npf posts fix ( @ glenthemes ) so photos uploaded from your phone always show correctly, pxu photosets so photosets always resize correctly, minimal soundcloud player, video resizing script ( @shythemes and @bychloethemes ), an askbox with a colorful button ( @eggdesign), the 'can't right-button click nor see the source' script to keep people from stealing it, rounded borders, and instructions all over the html in case you want to bring changes there. Sources are always visible when present, tumblr controls are smaller and grow when you hover over them. Icons by cappuccicons (follow html instructions if you want to replace them) and bgs from pixabay.
It also has animated title and navi links, and your custom pages will appear right under them. Only note is that if you pick 540px posts people with small laptops (1024px) will only be able to see one column of them before they are cut off so max 9 links or they won't fit for them.
Options from the customization page:
-you can upload your own background (toggling off the selectbg option), and a semi-transparent 'overlay’ image on top of your posts, right now it's the same as the overlay you can add to your background.
-you can select: post-size, type of blockquotes, font of your posts, or if you toggled on selectbg’ you can also select one of the 7 spring themed bgs present, as well as adding an optional overlay and gradient on top of them (to remove them you select the blank space instead). Instructions in the html if you want to add the overlay and gradient to a background you uploaded instead (because they conflict with the existence of a background-color and it needs to be removed). -you can toggle on and off: like I said the selectbg option which allows you to upload your own background instead of picking among provided ones, the visibility of the container decorations in case you want them without flowers on the top left and bottom right corners, the like button, your avatar/portrait on the sidebar, the ladybug icon which you can click on to show updates and searchbar, the unnested captions in textposts, the unnested captions in all other posts (if you pick them, the portrait and url of the person who wrote the post will be on top, editable in the unnested captions sections of the html), the background for post-titles which will show you the blog background, the border around unnested captions, the 'spring version' of the description which will be replaced by a regular rectangular one without flower crown, the minimal spotify player (as opposed to one that shows you the big album art), and the fade-out (how things fade when you refresh the page).
-you can type in: the font size of your regular text, the space between images in photosets, your posts background and description background colors (right now it's rgba(234, 211, 248, 80%) for both, except the description has a 90% of visibility, I used rgba because I liked the semi-transparency but you can use whatever you want), the linear-gradient of your container bg colors and of your tumblr audioplayer, the symbol next to your lists, the text of your update (when you click on the ladybug), 7 navigation links and their titles when you hover over them.
What can't you do from the custom page? you need to go to the html editor to edit fonts and sizes of everything else (just search for font-family and font-size) as they go hand in hand, and you need to manually delete the navigation links you don't want or the spinning flower will stay.
A reminder to always toggle on and off everything and to not trust tumblr preview when seen from the editor because it will hide things and mess with images positions, always open the blog in another tab to see your changes.
And because I’m a nervous wreck at the thought of not giving it for free, a reminder that I’m happy to answer questions - though I can’t guide you every day/through super long complicated editing if you decide to change the entire theme because I’m not always here. If you decide to edit everything you should have some html/css knowledge.
#premium theme#contained theme#spring#nature theme#nature#flowers#cute theme#responsive theme#themes#evansyhelp#dailyresources#spllcraft#mythemes
18 notes
·
View notes
Text

Replace the Image On hover
#replace image on hover#change image on hover#css change image on hover#html css animation#css animation examples#css animation tutorial#css animations#codenewbies#html#css#html5 css3#frontenddevelopment#pure css animation#html css#code
1 note
·
View note
Photo

Recreating the Google Homepage
An Odin Project Challenge
Diversifying Education
Until recently, I have focused solely on building projects for freeCodeCamp. While these experiences are certainly valuable, I wanted to extend the reach of my education (while also teaching myself how to multitask with separate goals in mind.) This intention brought me to the Odin Project. Here, I have learned a bit of Git and have now completed a Google Webpage clone. The following will detail some lessons absorbed from this experience.
Git Basics(, very basically)
My knowledge of Git is still very minuscule. At this point, I am capable of cloning remote repositories to my local repository with ‘git clone ([email protected]:username/example.git)’.
Once the desired repository is within my target directory (and any adjustments have been made), ‘git add (file.ext)’ [track specific file] | ‘git add -A’ [track all changes] | ‘git add .’ [track new files and modifications without deletions] | ‘git add -u’ [track modifications and deletions without new files])’ will appropriately stage new, deleted or modified elements. This indicates a move from ‘working tree’ to ’staging area.’
After all of my intended files and folders are safely moved to the staging area, I am then prepared to commit to my local repository. This can be achieved by using the command ‘git commit -m “-insert-message-here-”’ [each message will document progress].
Intermittently, I am able to use ‘git status’ to ensure I know the current state of my elements within the working tree, staging area and local repository.
Lastly, when my information has been modified, moved from ‘working tree’ to ‘staging area’ and from ‘staging area’ to ‘local repo’… I then have the option of pushing all material to a remote repository (Git Hub) by way of ‘git push origin main’. This final command will tell Git (DVCS) to push the elements in question onward to the pre-set location (origin: declared previously with the cloned SSH key) and to do so on the (main) branch.
Finally, ‘git log’ will display pertinent info (in regard) to each of my commits. These distinctions are: unique commit hashes, author, date and messages.
I have integrated a few more Git tools into my workflow. I will quickly state those, but wait until I have a more balanced comprehension of Git before going into depth about functionality. They are as follows: ‘git fetch’ [retrieves references/objects only] | ‘git pull’ [retrieves references/objects and merges] | ‘git reset - -soft HEAD~1’ [undo last commit without altering recent modifications of current branch HEAD] | ‘git reset - -hard HEAD~1’ [undo last commit and recent modifications of current branch HEAD].
Any time I updated my ‘README.md’ file during this project, I used ‘vi’ (screen-oriented visual editor). The editor can be opened with the command: ‘vi file.ext’. In command mode: ‘i’ will allow insertion of text, ‘:w’ saves modifications, ‘:q’ exits the editor, ‘:wq’ concatenates both previous commands and ‘esc’ shifts from ‘edit’ back to ‘command mode’.
In addition, ‘touch (file.ext)’ [create a new file within the current directory] | ‘echo “-insert-string-here-” >/>> file.ext [replaces all text with new string/adds string onto next line in a file]’ | ‘sed ’s/find/replace/’ file.ext’ [find and replace certain characters/strings]’ | ‘sed -i -e ’s/-insert-string-here-//g’ [edit/remove certain characters/strings in-place]’ | ‘> file.ext then ^C’ [clear all text from file] | ‘(dquote) resolved with !’.
Coding the Webpage
The Google homepage is relatively simple to recreate (after having already demonstrating many requisite techniques in previous projects.) That said, I will share some new processes and maneuvers I learned over the course of this challenge which helped me deploy a more polished final result.
As I created my files for HTML, CSS and JavaScript, I added a ‘reset.css’ file with ‘Meyer CSS reset v2’. This removed all default browser styles and allowed for full control of any CSS I would later add.
Using pseudo-class selectors (hover and focus,) my anchors and buttons became more customizable. The instances where I used these allowed me to better dial into the signature Google-page-experience.
Two JavaScript events (onmousedown | onmouseup) enabled me to call functions which let me achieve the click behavior of my ‘sign-in’ button.
As a bonus to the development of this project, I learned how to better create textual images with Photoshop. With attention to anti-aliasing, image size (width | height) and pixel density, I now understand how to implement smoother edges in these cases.

Conclusion
After completing this webpage, I am comfortable executing all I have learned until now. Of course, this is a small fraction of what is yet to come. However, I sense noticeable momentum and confidence after finishing this challenge. Now, onward to the next assignment.
1 note
·
View note
Text
Authentic French Baguette Recipe With Poolish
Intro
Ingredients
Method by hand
Method with mixer
Video
Tips
authentic french baguette recipe With poolish
hard
16 - 20 hours
france
Baguettes are pretty common across the world yet traditional hand-molded ones like these are hard to come by in many areas. The baguette uses many different techniques and in my opinion are one of the most challenging artisan breads to make. The challenge is the molding and also the confidence in using a couche and let's not forget the peel as you remove the baguettes from the baking stone. Difficult as they are, the search to continue to improve your baguette quality is an enjoyable challenge than can go on forever! The challenge is the moulding and also the confidence in using a couche and the peel to bake straight on to the baking stone. Difficult as they are, the search to continue to improve your baguette quality is an enjoyable challenge than can go on for months!
Share0
Tweet0
Pin0
Ingredients
For the poolish:
225g White bread flour
225g Water
0.9g Fresh yeast (0.4g dried)
For the dough:
750g White bread flour
435g 1st water
7.5g Fresh yeast (3g dried)
15g Salt
37.5g 2nd water
Click to Download the Bakers Formula
Method by hand
Using a dough mixer? CLICK HERE to scroll down
1
The poolish by whisking the yeast with the water first. Once the yeast is dissolved, add the flour and lightly mix to distribute for around 1 minute. Leave the biga for 12-16 hours to develop.
2
The next day, once the poolish has fermented. Add all the poolish, 1st water, flour and yeast to a bowl, gently mix until a fairly even structure is made. Leave to autolyse for 20-30 minutes.
3
Next, add the salt and set a 5 minute timer. Then with a plastic dough scraper make sweeping movements to combine the ingredients in the bowl. Once the dough forms a mass, knead slowly on a table, using a stretching motion. Continue this until the timer beeps, by now the dough should have an even consistency. Scrap the dough back into the mixing bowl, cover with a bag and place it in the fridge.
4
After 10 minutes, take the dough out onto the table and set a 5 minute timer. Knead fast using the stretch, slap and fold technique for maximum efficiency. When the timer ends, place back in the bowl with the second water and push the dough into the water with your hand. When the dough starts to incorporate the water turn it back out onto the table and knead for another 2-3 minutes.
5
Using a dough scraper, place the dough into a lightly floured bowl, cover and leave to rest for 20 minutes in the fridge.
6
Remove the dough from the bowl and complete a stretch and fold or lightly knead for 30 seconds. Cover the dough in the bowl again and leave in the kitchen side for another 20 minutes.
7
Repeat the stretch and fold or light knead and rest again on the kitchen surface for 20 minutes.
8
Lightly flour dust the surface and place the dough on top using a plastic dough scraper. Now, using a metal dough scraper, divide into 220g pieces and lightly shape into cylinders and leave to rest on the table for 20 minutes.
9
Once relaxed, from the centre of the dough, roll out using both hands until the length of the baguette is formed. This should be about 30cm, you can taper the ends if you wish. As you shape each one, transfer onto a floured couche or tea towel.
10
Once all the baguettes are shaped, cover with the couche and allow to proof for 1- 1 ½ hours. Get the oven with a baking stone preheated to 250C (480F).
11
Use a long peel to remove the baguettes from the couche. Either cut and drop them in the oven one by one or transfer 3-4 to a board and then cut and slide them all into the oven on the baking stone. Cut by making 4-5 cuts through the middle, holding the knife/lame at a slight angle. Add plenty of steam as they go into the oven.
11
Bake for around 25 minutes, you may wish to drop the heat to 240C (465F) but my oven isn’t powerful enough to get to that temperature quickly anyway so I don’t bother. If the baguettes are looking pale, consider using the top heat function near the end of baking to help caramelise the crusts.
11
Use a long peel to remove the baguettes from the couche. Either cut and drop them in the oven one by one or transfer 3-4 to a board and then cut and slide them all into the oven on the baking stone. Cut by making 4-5 cuts through the middle, holding the knife/lame at a slight angle. Add plenty of steam as they go into the oven.
11
Use a long peel to remove the baguettes from the couche. Either cut and drop them in the oven one by one or transfer 3-4 to a board and then cut and slide them all into the oven on the baking stone. Cut by making 4-5 cuts through the middle, holding the knife/lame at a slight angle. Add plenty of steam as they go into the oven.
Method using a dough mixer
1
The poolish by whisking the yeast with the water first. Once the yeast is dissolved, add the flour and lightly mix to distribute for around 1 minute. Leave the biga for 12-16 hours to develop.
2
The next day, once the poolish has fermented. Add all the poolish, 1st water, flour and yeast to a bowl, gently mix until a fairly even structure is made. Leave to autolyse for 20-30 minutes.
3
Next, add the mixture and the salt to a dough mixer fitted with a dough hook attachment. Mix at a slow speed for 6 minutes, then fast for 6 minutes. Slow the speed and add the second water at this point and increase the speed once absorbed and continue to mix for another 2 minutes (or until the structure is even).
4
Using a dough scraper, place the dough into a lightly floured bowl, cover and leave to rest for 20 minutes on the kitchen table.
5
Remove the dough from the bowl and complete a stretch and fold or lightly knead for 30 seconds. Cover the dough in the bowl again and leave in the kitchen side for another 20 minutes.
6
Repeat the stretch and fold or light knead and rest again on the kitchen surface for 20 minutes.
7
Lightly flour dust the surface and place the dough on top using a plastic dough scraper. Now, using a metal dough scraper, divide into 220g pieces and lightly shape into cylinders and leave to rest on the table for 20 minutes.
8
Once relaxed, from the centre of the dough, roll out using both hands until the length of the baguette is formed. This should be about 30cm, you can taper the ends if you wish. As you shape each one, transfer onto a floured couche or tea towel.
9
Once all the baguettes are shaped, cover with the couche and allow to proof for 1- 1 ½ hours. Get the oven with a baking stone preheated to 250C (480F).
10
Use a long peel to remove the baguettes from the couche. Either cut and drop them in the oven one by one or transfer 3-4 to a board and then cut and slide them all into the oven on the baking stone. Cut by making 4-5 cuts through the middle, holding the knife/lame at a slight angle. Add plenty of steam as they go into the oven.
10
Bake for around 25 minutes, you may wish to drop the heat to 240C (465F) but my oven isn’t powerful enough to get to that temperature quickly anyway so I don’t bother. If the baguettes are looking pale, consider using the top heat function near the end of baking to help caramelise the crusts.
How to make French baguettes with a video tutorial
.youtube-player { position: relative; padding-bottom: 56.23%; height: 0; overflow: hidden; max-width: 100%; background: #000; margin: 5px; } .youtube-player iframe, .youtube-player object, .youtube-player embed { position: absolute; top: 0; left: 0; width: 100%; height: 100%; z-index: 100; background: transparent; } .youtube-player img { bottom: 0; display: block; left: 0; margin: auto; max-width: 100%; width: 100%; position: absolute; right: 0; top: 0; border: none; height: auto; cursor: pointer; -webkit-transition: .4s all; -moz-transition: .4s all; transition: .4s all; } .youtube-player img:hover { -webkit-filter: brightness(75%); } .youtube-player .play { height: 72px; width: 72px; left: 50%; top: 50%; margin-left: -36px; margin-top: -36px; position: absolute; background: url("//i.imgur.com/TxzC70f.png") no-repeat; cursor: pointer; }
/* Light YouTube Embeds by @labnol */ /* Web: http://labnol.org/?p=27941 */ document.addEventListener("DOMContentLoaded", function() { var div, n, v = document.getElementsByClassName("youtube-player"); for (n = 0; n < v.length; n++) { div = document.createElement("div"); div.setAttribute("data-id", v[n].dataset.id); div.innerHTML = labnolThumb(v[n].dataset.id); div.onclick = labnolIframe; v[n].appendChild(div); } }); function labnolThumb(id) { var thumb = '<img src="https://i.ytimg.com/vi/ID/hqdefault.jpg">', play = '<div class="play">
'; return thumb.replace("ID", id) + play; } function labnolIframe() { var iframe = document.createElement("iframe"); iframe.setAttribute("src", "https://www.youtube.com/embed/" + this.dataset.id + "?autoplay=1"); iframe.setAttribute("frameborder", "0"); iframe.setAttribute("allowfullscreen", "1"); this.parentNode.replaceChild(iframe, this); }
Top tips for authentic French baguettes
New couche’s must be well floured to prevent the bagutte dough sticking to them. You can always use a pastry brush to remove some of the flour before cutting.
You can choose to retard these authentic baguettes in the fridge overnight in the couches. Just cut and bake without leaving them to proof or warm up.
Use French T55 or T65 for the most amazing French baguettes. If you can’t get hold of these try replacing 20g or white flour with wholemeal for a more flavourful flour.
A 220g dough piece makes the perfect size baguette for my home oven. If you have a larger or a professional oven, consider increasing the size to make longer baguettes.
Share0
Tweet0
Pin0
@media (min-width: 300px){[data-css="tve-u-1712146cfa1"].tcb-post-list #post-721 [data-css="tve-u-1712146cfa7"]{background-image: url("https://www.busbysbakery.com/wp-content/uploads/2018/09/sea-1337565_1920.jpg") !important;}[data-css="tve-u-1712146cfa1"].tcb-post-list #post-721 [data-css="tve-u-1712146cfa2"]:hover [data-css="tve-u-1712146cfa7"]{background-image: linear-gradient(rgba(255, 255, 255, 0.08), rgba(255, 255, 255, 0.08)), url("https://www.busbysbakery.com/wp-content/uploads/2018/09/sea-1337565_1920.jpg") !important;}}
A Bakers Holiday
@media (min-width: 300px){[data-css="tve-u-1712146cfa1"].tcb-post-list #post-726 [data-css="tve-u-1712146cfa7"]{background-image: url("https://www.busbysbakery.com/wp-content/uploads/2018/09/roll-6821_1920.jpg") !important;}[data-css="tve-u-1712146cfa1"].tcb-post-list #post-726 [data-css="tve-u-1712146cfa2"]:hover [data-css="tve-u-1712146cfa7"]{background-image: linear-gradient(rgba(255, 255, 255, 0.08), rgba(255, 255, 255, 0.08)), url("https://www.busbysbakery.com/wp-content/uploads/2018/09/roll-6821_1920.jpg") !important;}}
Adding Water To An Oven – The Best Way
@media (min-width: 300px){[data-css="tve-u-1712146cfa1"].tcb-post-list #post-733 [data-css="tve-u-1712146cfa7"]{background-image: url("https://www.busbysbakery.com/wp-content/uploads/2018/08/donuts-690281_1280.jpg") !important;}[data-css="tve-u-1712146cfa1"].tcb-post-list #post-733 [data-css="tve-u-1712146cfa2"]:hover [data-css="tve-u-1712146cfa7"]{background-image: linear-gradient(rgba(255, 255, 255, 0.08), rgba(255, 255, 255, 0.08)), url("https://www.busbysbakery.com/wp-content/uploads/2018/08/donuts-690281_1280.jpg") !important;}}
What It’s Like To Own A Bakery – 8 Reasons Why It Was Amazing
@media (min-width: 300px){:not(#tve) .thrv_symbol_2295 [data-css="tve-u-169627d1671"] button { border-color: rgb(255, 230, 229); background-image: none !important; background-color: rgb(229, 55, 43) !important; }:not(#tve) .thrv_symbol_2295 [data-css="tve-u-169627d1671"]:hover button { border-color: rgb(255, 244, 150) !important; }:not(#tve) .thrv_symbol_2295 [data-css="tve-u-169627d1670"] { font-size: 28px !important; }.thrv_symbol_2295 [data-css="tve-u-169627d1670"] { line-height: 0em !important; }.thrv_symbol_2295 [data-css="tve-u-169627d166f"] { padding-top: 0px !important; padding-bottom: 0px !important; margin-bottom: -7px !important; }.thrv_symbol_2295 [data-css="tve-u-169627d166e"] { border: 2px dotted rgb(0, 0, 0) !important; }.thrv_symbol_2295 [data-css="tve-u-169627d166d"] { max-width: 296px; float: none; width: 100%; margin-left: auto !important; margin-right: auto !important; padding-left: 10px !important; padding-right: 10px !important; margin-bottom: 0px !important; }.thrv_symbol_2295 [data-css="tve-u-169627d166c"] { max-width: 229px; float: none; width: 100%; padding-bottom: 0px !important; padding-top: 27px !important; margin-left: auto !important; margin-right: auto !important; }.thrv_symbol_2295 [data-css="tve-u-169627d166c"] .tve_sep { border-width: 1px; border-color: rgba(0, 0, 0, 0.22); }:not(#tve) .thrv_symbol_2295 [data-css="tve-u-169627d1669"] button { border-color: rgb(255, 230, 229); background-image: none !important; background-color: rgb(229, 55, 43) !important; }:not(#tve) .thrv_symbol_2295 [data-css="tve-u-169627d1669"]:hover button { border-color: rgb(255, 244, 150) !important; }:not(#tve) .thrv_symbol_2295 [data-css="tve-u-169627d1668"] { font-size: 28px !important; }.thrv_symbol_2295 [data-css="tve-u-169627d1668"] { line-height: 0em !important; }.thrv_symbol_2295 [data-css="tve-u-169627d1667"] { padding-top: 0px !important; padding-bottom: 0px !important; margin-bottom: -7px !important; }.thrv_symbol_2295 [data-css="tve-u-169627d1666"] { border: 2px dotted rgb(0, 0, 0) !important; }.thrv_symbol_2295 [data-css="tve-u-169627d1665"] { max-width: 373px; float: right; width: 100%; margin-left: auto !important; margin-right: 0px !important; padding-left: 10px !important; padding-right: 11px !important; margin-bottom: 0px !important; display: block; z-index: 3; position: relative; }.thrv_symbol_2295 [data-css="tve-u-169627d166b"] .tve-post-grid-title { font-size: 33px !important; line-height: 36px !important; }.thrv_symbol_2295 [data-css="tve-u-169627d1664"] .tve-post-grid-title { font-size: 33px !important; line-height: 36px !important; }:not(#tve) .thrv_symbol_2295 [data-css="tve-u-169627d166b"] .tve-post-grid-text, :not(#tve) .thrv_symbol_2295 [data-css="tve-u-169627d166b"] .tve-post-grid-title { font-family: var(--tve-font-family, Impact,Charcoal,sans-serif); font-weight: 400; color: rgba(0, 0, 0, 0.91); }:not(#tve) .thrv_symbol_2295 [data-css="tve-u-169627d1664"] .tve-post-grid-text, :not(#tve) .thrv_symbol_2295 [data-css="tve-u-169627d1664"] .tve-post-grid-title { font-family: "GFS Neohellenic"; font-weight: 400; color: rgba(0, 0, 0, 0.91); }.thrv_symbol_2295 [data-css="tve-u-169627d166a"] { max-width: 229px; float: none; width: 100%; padding-bottom: 0px !important; padding-top: 27px !important; margin-left: auto !important; margin-right: auto !important; }.thrv_symbol_2295 [data-css="tve-u-169627d166a"] .tve_sep { border-width: 1px; border-color: rgba(0, 0, 0, 0.22); }.thrv_symbol_2295 [data-css="tve-u-169627d166b"] { display: inline-block; --tve-font-weight:var(--g-regular-weight, normal); --tve-font-family:Impact,Charcoal,sans-serif; margin-bottom: 20px !important; margin-top: 20px !important; }.thrv_symbol_2295 [data-css="tve-u-169627d1663"] { width: 79px; border-radius: 94px; overflow: hidden; float: left; z-index: 3; position: relative; border: 2px solid rgb(236, 236, 236); margin: 0px auto !important; }.thrv_symbol_2295 [data-css="tve-u-169627d1659"] { margin-top: 1px !important; padding-top: 0px !important; padding-bottom: 0px !important; margin-bottom: -24px !important; }.thrv_symbol_2295 [data-css="tve-u-169627d1657"] { margin: 0px auto !important; display: block; float: none; z-index: 3; position: relative; }.thrv_symbol_2295 [data-css="tve-u-169627d165b"] { margin-bottom: -15px !important; margin-left: auto !important; margin-right: auto !important; float: none; display: block; }.thrv_symbol_2295 [data-css="tve-u-169627d165d"] { padding-bottom: 0px !important; padding-top: 26px !important; }.thrv_symbol_2295 [data-css="tve-u-169627d165f"] { max-width: 156px; padding-left: 17px !important; display: block; margin-left: auto !important; margin-right: auto !important; float: none; }.thrv_symbol_2295 [data-css="tve-u-169627d1658"] { border: 2px solid rgba(0, 0, 0, 0.12) !important; }:not(#tve) .thrv_symbol_2295 [data-css="tve-u-169627d1660"] { font-size: 18px !important; color: rgba(0, 0, 0, 0.78) !important; }.thrv_symbol_2295 [data-css="tve-u-169627d165a"] { line-height: 1.6em !important; }:not(#tve) .thrv_symbol_2295 [data-css="tve-u-169627d165a"] { font-family: Lato, sans-serif !important; }:not(#tve) .thrv_symbol_2295 [data-css="tve-u-169627d1663"] { width: 77%; float: none; margin-left: auto !important; margin-right: auto !important; margin-top: 8px !important; }:not(#tve) .thrv_symbol_2295 [data-css="tve-u-169627d165e"] { max-width: 49%; }:not(#tve) .thrv_symbol_2295 [data-css="tve-u-169627d1661"] { max-width: 51%; }.thrv_symbol_2295 [data-css="tve-u-1715570032b"] { display: block; max-width: 531px; float: left; z-index: 3; position: relative; }.thrv_symbol_2295 [data-css="tve-u-1715572e64f"] .tve-post-grid-title { font-size: 33px !important; line-height: 36px !important; }:not(#tve) .thrv_symbol_2295 [data-css="tve-u-1715572e64f"] .tve-post-grid-text, :not(#tve) .thrv_symbol_2295 [data-css="tve-u-1715572e64f"] .tve-post-grid-title { font-family: var(--tve-font-family, Lucida Sans Unicode , Lucida Grande ,sans-serif); font-weight: 400; color: rgba(0, 0, 0, 0.91); }.thrv_symbol_2295 [data-css="tve-u-1715572e64f"] { display: inline-block; --tve-font-weight:var(--g-regular-weight, normal); --tve-font-family: Lucida Sans Unicode , Lucida Grande ,sans-serif; margin-bottom: 20px !important; margin-top: 20px !important; }.thrv_symbol_2295 [data-css="tve-u-171557a9887"] { --tve-font-weight:var(--g-regular-weight, normal); --tve-font-family:Impact,Charcoal,sans-serif; --tve-font-size:16px; }.thrv_symbol_2295 [data-css="tve-u-171557e937a"] { display: inline-block; }.thrv_symbol_2295 [data-css="tve-u-171557f54e5"]::after { clear: both; }.thrv_symbol_2295 [data-css="tve-u-17155806cdb"]::after { clear: both; }}@media (max-width: 1023px){:not(#tve) .thrv_symbol_2295 [data-css="tve-u-169627d1670"] { font-size: 16px !important; }.thrv_symbol_2295 [data-css="tve-u-169627d166d"] { max-width: 458px; float: none; width: 100%; margin-left: auto !important; margin-right: auto !important; }:not(#tve) .thrv_symbol_2295 [data-css="tve-u-169627d1668"] { font-size: 16px !important; }.thrv_symbol_2295 [data-css="tve-u-169627d1665"] { max-width: 458px; float: none; width: 100%; margin-left: auto !important; margin-right: auto !important; }.thrv_symbol_2295 [data-css="tve-u-169627d165d"] { flex-wrap: nowrap !important; }.thrv_symbol_2295 [data-css="tve-u-169627d165f"] { max-width: 393px; }.thrv_symbol_2295 [data-css="tve-u-169627d1663"] { float: none; margin: 0px auto 20px !important; }.thrv_symbol_2295 [data-css="tve-u-169627d165e"] { max-width: 54.9%; }.thrv_symbol_2295 [data-css="tve-u-169627d1661"] { max-width: 45.2%; }.thrv_symbol_2295 [data-css="tve-u-169627d165d"] > .tcb-flex-col > .tcb-col { justify-content: center; }}@media (max-width: 767px){.thrv_symbol_2295 [data-css="tve-u-169627d166b"] .tve-post-grid-title { font-size: 28px !important; }.thrv_symbol_2295 [data-css="tve-u-169627d165f"] { max-width: 338px; padding-left: 1px !important; padding-bottom: 0px !important; margin-bottom: -10px !important; }.thrv_symbol_2295 [data-css="tve-u-169627d1663"] { float: none; margin: -10px auto 20px !important; }.thrv_symbol_2295 [data-css="tve-u-1715572e64f"] .tve-post-grid-title { font-size: 28px !important; }.thrv_symbol_2295 [data-css="tve-u-1715572e64f"] { padding-right: 1px !important; }.thrv_symbol_2295 [data-css="tve-u-1715570032b"] { padding-right: 20px !important; }}
Written by Gareth
"I'm sharing my love of artisan bread baking with others"
Focaccia Recipe with Biga
Soft Bread Rolls Made Easy
Gluten Free Bread Recipe – NO SKILL REQUIRED!!
Soft White Bread Recipe – Batch Bread
How To Make An Oil Slick To Make Kneading Easier
Join our mailing list
Sign Up
French Bread vs Italian Bread – Which One Is Best?
15 Stages of Bread Making By A Professional Baker
The Autolyse Process For Bread Bakers (Autoylase)
What Is The Difference Between Patisserie And Viennoiserie?
Join our mailing list
Sign Up
from WordPress https://ift.tt/2V7TKKf via IFTTT
1 note
·
View note
Photo


Stars and Moon
[$100 USD - SOLD]
The latest skin from my site, Hush. It has just been taken down and replaced with a new skin, so is now available for another site’s use. Images are from it in use on-site, but it is no longer live on Hush and has been re-installed on a different forum for preview. Pro FontAwesome has been downgraded; if I missed changing an icon over that is not available in the free version, I will fix this free of charge.
Includes:
Custom HTML templates
Mini profile with hover
Profile application set-up, with tabs
Toggled information boxes and lists for site information
Member groups statistics graph pre-set so all you do is change a single value to change a number of characters in the group
Information sections separated into webpages, outside of the main board wrappers, for easier editting
Posting templates (large and small)
Graphics used for accents
Banner image (text is changeable in the code)
Most CSS and scripting is organized into separate files
Member group specific skin colors
Can Include:
Adjustments to the group stats graph to add/remove columns [+$5 USD]
Main profile re-working, to take away application aspect [+$15 USD]
Any add-ons seen on my price list [prices vary]
Please contact me for Canadian pricing, if desired.
The skin (on a test site without custom fields set up) can be seen live here. Contact me via tumblr or discord (lux#5069) with inquiries.
5 notes
·
View notes
Text
So since tumblrs freacked custom themes up I reuploaded all teh images on tumblr and replace the imgur host links with tumblr image links so here’s the myspace theme except I remodeled it so that it doesn’t give u da https error message N.E.more >:D
COPY & PASTE EVERYTHING AFTER THIS OKAY!!
---------------------
<!DOCTYPE HTML PUBLIC "-//W3C//DTD HTML 4.01 Transitional//EN" "https://www.w3.org/TR/html4/loose.dtd">
<!-- Theme by conkersradfurday, massively edited from destroyer's theme -->
<html> <head>
<!-- DEFAULT COLORS --> <meta name="color:Background" content="#e5e5e5"/> <meta name="color:center background" content="#ffffff"/> <meta name="color:post" content="#f9d6b6"/> <meta name="color:sidebar" content="#ffffff"/> <meta name="color:interests title" content="#ffffff"/> <meta name="color:sidebox" content="#ffffff"/> <meta name="color:sidebox border" content="#6699cc"/> <meta name="color:sidebox left" content="#B0CFF0"/> <meta name="color:sidebox right" content="#D3E7FB"/> <meta name="color:sidebox bold:" content="#39658c"/>
<meta name="color:Orange Text" content="#ff6600"/> <meta name="color:Orange Background" content="#ffcc99"/>
<meta name="color:Text" content="#000000"/> <meta name="color:text headers" content="#000000"/> <meta name="color:bold text" content="#000000"/> <meta name="color:label background" content="#f4f4f4"/> <meta name="color:link" content="#003399"/> <meta name="color:link hover" content="#cc0000"/> <meta name="color:notes" content="#464646"/> <meta name="color:notes hover" content="#949494"/> <meta name="color:nav link" content="#ffffff"/> <meta name="color:nav link hover" content="#000000"/> <meta name="color:nav background" content="#6697cf"/> <meta name="color:header background" content="#003399"/> <meta name="color:asker background" content="#FF9933"/>
<meta name="text:Sex" content="Female"/> <meta name="text:Age" content="15 Years Old"/> <meta name="text:City" content="Hollywood"/> <meta name="text:Country" content="California"/> <meta name="text:Music" content=""/> <meta name="text:Movies" content=""/> <meta name="text:Tv" content=""/> <meta name="text:Books" content=""/> <meta name="text:Heroes" content=""/> <meta name="text:Headline" content="I'm back<br>on MySpace!"/>
<meta name="text:Background Size" content="25%" />
<meta name="text:Profile Song" content="https://mp3.qqkjkl.com/mp3/18/30336027.mp3" /> <meta name="text:Mood" content="Nostalgic" />
<meta name="text:Status" content="Single"/> <meta name="text:Orientation" content="Bisexual"/> <meta name="text:Ethnicity" content="r"/> <meta name="text:Religion" content=""/> <meta name="text:Occupation" content=""/>
<meta name="image:Portrait" content=""/> <meta name="image:Background" content=""/>
<meta name="if:Show Infinite Scroll" content="1" /> <meta name="if:Show Photo Caption" content="1" />
<meta name="font:Header Title" content="'Verdana', Impact, Gadget, sans-serif, Arial, Trebuchet MS, Helvetica, Tahoma, sans-serif" /> <meta name="font:Body" content="'verdana', arial, Trebuchet MS, Helvetica, Tahoma, sans-serif" />
<meta name="text:Custom Link One" content="" /> <meta name="text:Custom Link One Title" content="" /> <meta name="text:Custom Link Two" content="" /> <meta name="text:Custom Link Two Title" content="" /> <meta name="text:Custom Link Three" content="" /> <meta name="text:Custom Link Three Title" content="" /> <meta name="text:Custom Link Four" content="" /> <meta name="text:Custom Link Four Title" content="" />
<title>{Title}</title> <link rel="stylesheet" href="https://static.tumblr.com/usaykzx/o8Bku9w35/reset.css" type="text/css" /> <link rel="shortcut icon" href="{Favicon}"> <link rel="alternate" type="application/rss+xml" href="{RSS}"> {block:Description} <meta name="description" content="{MetaDescription}" /> {/block:Description}
{block:IfShowInfiniteScroll}<script type="text/javascript" src="https://codysherman.com/tools/infinite-scrolling/code"></script>{/block:IfShowInfiniteScroll}
<style type="text/css"> body{ margin-top:0px; text-align:justify; color: {color:Text}; font-family: {font:Body}; font-size: 11px; line-height: 12px; background-color:{color:Background}; background-image:url({image:Background}); background-attachment: repeat; background-position:top left; background-repeat: repeat; background-size:{text:Background Size};{text:Background Size} }
a, a:link, a:visited, a:active{color: {color:link}; text-decoration:none; font-family: {font:Body}; font-size: 11px; line-height:12px; } a:hover{color: {color:link hover}; line-height:12px;}
#tumblr_controls{ position:fixed!important;}
b, strong{color: {color:bold text}; font-family: {font:Body}; font-size: 11px; line-height:12px;}
#wtf { background-color:{color:center background}; margin-top:0px; width:750px; overflow: visible; margin-left: -375px; left:50%; position: absolute; padding-top:10px; color: {color:Text}; font-family: {font:Body}; font-size: 11px; line-height: 12px;}
#entry { background-color: {color:post}; border: 0px solid {color:post}; z-index:6; float:right; overflow:visible; width:400px; height: auto; padding: 6px; margin:0px 10px 6px 0px;}
#sidebar { position: absolute; overflow:hidden; margin-top: 0px; margin-left:-364px; left: 50%; background-color:{color:sidebar}; width: 304px; height: auto; padding: 0px;}
#sidebox { border-top:20px solid {color:sidebox border}; border-left:2px solid {color:sidebox border}; border-right:2px solid {color:sidebox border}; border-bottom:2px solid {color:sidebox border}; overflow:hidden; margin-top: 0px; background-color:{color:sidebox}; width: 300px; height: auto; padding: 0px;}
#sidebox b {color:{color:sidebox bold};}
#info { background-color: {color:post}; border: 0px solid {color:post}; z-index:6; float:right; overflow:visible; width:400px; height: auto; padding: 6px; margin:0px 10px 6px 0px;}
#notes { background-color: {color:post}; border: 0px solid {color:post}; z-index:6; float:right; overflow:visible; width:400px; height: auto; padding: 6px; margin:0px 10px 6px 0px;}
#entry img { max-width:400px;} p{ margin-top:0px; margin-bottom:0px;}
#question{ overflow:SHOW; padding-bottom:3px; margin-bottom:3px;}
#askr{ display:block; float:left; width:33px; overflow:hidden; margin-right:3px;}
ul { list-style: disc; padding: 4px 0px 6px 20px;}
blockquote{padding:0px; padding-left:5px; margin:5px; border-left:2px solid {color:label background};}
blockquote img{display:block; width:100%;}
blockquote p{padding:0px; margin:0px;}
blockquote blockquote{position:relative; left:6px; margin-top:0px; margin-right:0px; padding-right:0px;}
#bottominfo{ padding:2px 0px 0px 0px; display:block;}
.answer p{margin:0px;} .notes img{ width:10px; position:relative; top:1px;}
ol.notes, .notes li{ list-style:none; margin:0px; padding:0px;}
small {font-size:8px; line-height:8px; letter-spacing:0px;} big {font-family:arial black; color:{color:text}; font-size:14px;}
.audio {width:100%; background:black; border:0px dotted #D6D6D6;}
a img{border:none;}
.label { color: {color:bold text};font-weight: bold; line-height:12px;}
.odd { background-color:{color:label background};}
h1 { font-size: 12px; line-height: 12px; font-family: verdana; font-weight: bold; text-transform: normal; letter-spacing: -1px; color:{color:text headers}; text-align: left; margin:0px; padding-bottom:1px;}
h2 { font-size: 16px; line-height: 16px; font-family: impact; font-weight:normal; text-transform: uppercase; letter-spacing: -1px; color:{color:text headers}; text-align:left;}
h3 { font-size: 18px; line-height: 20px; font-family: {font:Header Title}; font-weight: bold; text-transform: normal; letter-spacing: -1px; color:{color:text headers}; text-align: left; margin:0px; padding-bottom:4px;}
h4 { font-size: 12px; line-height: 12px; font-family: {font:Header Title}; font-weight: bold; text-transform: capitalize; letter-spacing: -1px; color: {color:Orange Text}; text-align: left; margin:0px; padding-bottom:4px;}
h5 { font-size: 12px; line-height: 12px; font-family: {font:Header Title}; font-weight: bold; text-transform: capitalize; letter-spacing: -1px; color: {color:interests title}; text-align: left; margin:0px;}
a.links1 { text-align:center; margin-top:6px; margin-bottom:8px; color: {color:nav link}; display: inline-block; text-transform: capitalize; font-family:arial; font-weight:normal; font-size:12px; padding: 2px;}
a.links1:hover { color: {color:nav link hover};}
#ask { font-size:12px; line-height:12px;
padding:4px; margin-bottom:4px;}
img.middle { vertical-align:middle; margin-bottom:3px;}
#notez { margin-top: 0px; margin-bottom:4px; width:400px;}
#notez a { font-family: arial; font-size: 9px; line-height: 10px; letter-spacing:1px; text-transform: normal;}
table { border-collapse: separate; border-spacing: 3px;}
#header1 { padding:4px; margin-left:328px; margin-bottom:6px; width:404px; height: 12px; background-color:{color:Orange Background};}
#header2 { padding:4px; margin-left:328px; margin-bottom:6px; width:404px;}
#header3 { padding:4px; margin-left:328px; margin-bottom:6px; width:404px; border-style: solid; border-width: 2px; border-color:#000;}
#myspaceheader { width:750px; height:81px; background-color:{color:header background}; margin-left: auto; margin-right: auto;} {CustomCSS}
#navigation { width:750px; height:30px; background-color:{color:nav background}; margin-left: auto; margin-right: auto;} {CustomCSS} </style>
<script type="text/javascript" src="https://ajax.googleapis.com/ajax/libs/jquery/1.3.2/jquery.min.js"></script>
<script type="text/javascript" src="https://static.tumblr.com/3ikgvxs/0TGl4zgpu/jquery.min.js"></script>
</head>
<body>
<div id="myspaceheader">
<div align=right><a href="https://myspacerebirth.tumblr.com/theme"><font color="white">Sign Up</font></a></div>
<div align=center><form action="/search" method="get"> <input type="text" name="q" value="{SearchQuery}"/> <input type="submit" value="Search"/> </form></div> <div align=left><a href="https://myspacerebirth.tumblr.com"><img src="https://64.media.tumblr.com/1b2873c9d1ac08bac271de5607347f12/tumblr_pm2y4oLjpc1xm2awmo1_250.png" title="Join the MySpace rebirth!" /></div></a>
</div>
<div id="navigation"> <center> <a href="https://{name}.tumblr.com" class="links1">Home</a> | {block:AskEnabled}<a href="/ask" class="links1">Ask</a>{/block:AskEnabled} |
<a href="/archive" class="links1">Archive</a>|
{block:SubmissionsEnabled}<a href="/submit" class="links1">Submit</a>{/block:SubmissionsEnabled}|
{block:HasPages} {block:Pages} <a href="{URL}" class="links1">{Label}</a> {/block:Pages} {/block:HasPages}
{block:ifCustomLinkOneTitle}<a href="{text:Custom Link One}" class="links1">{text:Custom Link One Title}</a>{/block:ifCustomLinkOneTitle} |
{block:ifCustomLinkTwoTitle}<a href="{text:Custom Link Two}" class="links1">{text:Custom Link Two Title}</a>{/block:ifCustomLinkTwoTitle} |
{block:ifCustomLinkThreeTitle}<a href="{text:Custom Link Three}" class="links1">{text:Custom Link Three Title}</a>{/block:ifCustomLinkThreeTitle} |
{block:ifCustomLinkFourTitle}<a href="{text:Custom Link Four}" class="links1">{text:Custom Link Four Title}</a>{/block:ifCustomLinkFourTitle}
</center> </div>
<div id="wtf">
<div id="sidebar"> <h3>{Title}</h3> <table width="300" border="0" cellspacing="0" cellpadding="0"> <tr> <td> <div style="clear:both;"> <div style="float:left;"> {block:IfPortraitImage} <a href="https://{name}.tumblr.com"><img src="{image:Portrait}" width="200"></a> {/block:IfPortraitImage} </div>
<div style="float:right;"> <div style="margin-left:8px;"> "{text:Headline}" <br> <br> {text:Sex} <br> {text:Age} <br> {text:City} <br> {text:Country} <br><br> <img src="https://64.media.tumblr.com/tumblr_m2lh9lgwvA1qaxq5z.gif"> </div> </div> </div> </td> </tr> </table><br>
Last Login: <script type="text/javascript"> <!-- var currentTime = new Date() var month = currentTime.getMonth() + 1 var day = currentTime.getDate() var year = currentTime.getFullYear() document.write(month + "/" + day + "/" + year) //--> </script> <br><br> <b><color="{color:post}">Mood:</color></b> {text:mood}</a> <br> View My: <a href="https://{name}.tumblr.com/tagged/me"><b>Pics</b></a> | <a href="https://{name}.tumblr.com/archive"><b>Archive</b></a> <br> <br> <div id="sidebox"> <div style="position:absolute; margin-top:-16px; "><h5>Contact {title}</h5></div> <table width="300" border="0" cellspacing="6" cellpadding="0"> <tr> <td width="150" align="left"><a href="https://tumblr.com/send/{name}"><img src="https://64.media.tumblr.com/0a93cc58c3f4a461dfea38b0ef836d48/tumblr_pm2xxmy3H01xm2awmo1_250.gif" /></a></td> <td width="150"><a href="https://tumblr.com/follow/{name}"><img src="https://64.media.tumblr.com/d93107aec3ed9617c0dd3b8ca1749940/tumblr_pm2xxmy3H01xm2awmo2_250.gif"></a></a></td> </tr> <tr> <td width="150" align="left"><a href="/ask"><img src="https://64.media.tumblr.com/f0e56d21b9d1a2944f5a801651e7ed98/tumblr_pm2xxmy3H01xm2awmo3_250.gif" /></a></td> <td width="150"><a href="https://www.tumblr.com/settings"><img src="https://64.media.tumblr.com/07f9512077e1c8807cd33e99244879f1/tumblr_pm2xxmy3H01xm2awmo4_250.gif"></a></a></td> </tr> </table> </div><br>
<br> <br> <div style="border:1px solid {color:sidebox border}; width:302px;"> <h1>MySpace URL:</h1> https://{name}.tumblr.com </div><br> <br> <object type="application/x-shockwave-flash" data="https://flash-mp3-player.net/medias/player_mp3_maxi.swf" width="295" height="51"> <param name="movie" value="https://flash-mp3-player.net/medias/player_mp3_maxi.swf" /> <param name="bgcolor" value="#ffffff" /> <param name="FlashVars" value="mp3={text:Profile Song}&width=295&height=51&buttonwidth=54&sliderwidth=40&skin=https://66.media.tumblr.com/b777fd07dc5a523f8b1595a436b41ea0/tumblr_pm2y27A3cZ1xm2awmo1_400.jpg&sliderovercolor=310057&buttoncolor=140014&buttonovercolor=fcfcfc" /> </object> <config> <param name="mp3" value="{text:Profile Song}"/> <param name="width" value="295"/> <param name="height" value="51"/> <param name="buttonwidth" value="54"/> <param name="sliderwidth" value="40"/> <param name="skin" value="https://66.media.tumblr.com/b777fd07dc5a523f8b1595a436b41ea0/tumblr_pm2y27A3cZ1xm2awmo1_400.jpg"/> <param name="sliderovercolor" value="310057"/> <param name="buttoncolor" value="140014"/> <param name="buttonovercolor" value="fcfcfc"/> </config> <br><br>
<div id="sidebox"> <div style="position:absolute; margin-top:-16px; "><h5>{title}'s interests</h5></div> <table width="300" border="0" cellspacing="6" cellpadding="0"> <tr> <td width="100" align="left" bgcolor="{color:sidebox left}"><b>Music:</b></td> <td width="188" bgcolor="{color:sidebox right}">{text:Music}</td> </tr> <tr> <td align="left" bgcolor="{color:sidebox left}"><b>Movies:</b></td> <td bgcolor="{color:sidebox right}">{text:Movies}</td> </tr> <tr> <td align="left" bgcolor="{color:sidebox left}"><b>Television:</b></td> <td bgcolor="{color:sidebox right}">{text:TV}</td> </tr> <tr> <td align="left" bgcolor="{color:sidebox left}"><b>Books:</b></td> <td bgcolor="{color:sidebox right}">{text:Books}</td> </tr> <tr> <td align="left" bgcolor="{color:sidebox left}"><b>Heroes:</b></td> <td bgcolor="{color:sidebox right}">{text:Heroes}</td> </tr> </table> </div><br>
<div id="sidebox"> <div style="position:absolute; margin-top:-16px; "><h5>{title}'s Details</h5></div> <table width="300" border="0" cellspacing="6" cellpadding="0"> <tr> <td width="100" align="left" bgcolor="{color:sidebox left}"><b>Status:</b></td> <td width="188" bgcolor="{color:sidebox right}">{text:Status}</td> </tr> <tr> <td align="left" bgcolor="{color:sidebox left}"><b>Orientation:</b></td> <td bgcolor="{color:sidebox right}">{text:Orientation}</td> </tr> <tr> <td align="left" bgcolor="{color:sidebox left}"><b>Ethnicity:</b></td> <td bgcolor="{color:sidebox right}">{text:Ethnicity}</td> </tr> <tr> <td align="left" bgcolor="{color:sidebox left}"><b>Religion:</b></td> <td bgcolor="{color:sidebox right}">{text:Religion}</td> </tr> <tr> <td align="left" bgcolor="{color:sidebox left}"><b>Occupation:</b></td> <td bgcolor="{color:sidebox right}">{text:Occupation}</td> </tr> </table> </div> </div>
<div id="header3"><br><br><center><b><color="{color:post}"></color><font style="font-size:16px!important;">{title} is in your extended network.</b></center><br><br></font></div>
<div id="header1"><h4>{title}'s Blurbs</h4></div>
<div id="header2"> {block:Description}<h4>About Me:</h4> {Description}<br><br>{/block:Description} </div>
<div id="header1"><h4>{title}'s Posts</h4></div>
<div class="autopagerize_page_element"> {block:Posts} <div id="entry">
{block:IndexPage} <div id="notez"> <h1>{ShortMonth} {DayOfMonth} {Year} {12Hour}:{Minutes} {AmPm}</h1> <a href="{Permalink}">{NoteCount} Notes</a> - <a href="{Permalink}">View Post</a> - <a href="{ReblogURL}">Reblog</a> </div> {/block:IndexPage}
{block:Text}<h2>{Title}</h2>{Body}{/block:Text}
{block:Photo} {block:IndexPage} <center><a href="{permalink}"><img src="{PhotoURL-500}" width="400" border="0"></a></center> {block:IfShowPhotoCaption}{block:Caption}{Caption}{/block:Caption}{/block:IfShowPhotoCaption} {/block:IndexPage}
{block:PermalinkPage}{LinkOpenTag}<img src="{PhotoURL-500}" width="400" alt="{PhotoAlt}"/>{LinkCloseTag}{block:Caption}{Caption}{/block:Caption}{/block:PermalinkPage}{/block:Photo}
{block:Photoset}<center>{block:IndexPage}{Photoset-400}{/block:IndexPage}{block:PermalinkPage}{Photoset-400}{/block:PermalinkPage}</center>{block:PermalinkPage}{/block:PermalinkPage} {block:IfShowPhotoCaption}{block:Caption}{Caption}{/block:Caption}{/block:IfShowPhotoCaption} {/block:Photoset}
{block:Quote}<h2>"{Quote}"</h2>{block:Source}{Source}{/block:Source}{/block:Quote}
{block:Link}<a href="{URL}" class="link" {Target}><h2>{Name}</h2></a>{block:Description}{Description}{/block:Description}{/block:Link}
{block:Chat} {block:Title}{Title}{/block:Title} {block:Lines} {block:Label} <div class="{Alt}"><span class="label"><strong>{Label}</strong></span> <span class="line">{Line}</span></div> {/block:Label} {/block:Lines} {/block:Chat}
{block:Video}<center>{block:IndexPage}<div id="video">{Video-400}</div>{block:IfNotHidePhotoCaption}{block:Caption}{Caption}{/block:Caption}{/block:IfNotHidePhotoCaption}{/block:IndexPage}<img src="https://64.media.tumblr.com/ef1b939816dc9833a64075e85dde6ed5/tumblr_pm2y5zevEz1xm2awmo1_400.png"/>
{block:PermalinkPage}<div id="video">{Video-400}</div>{block:Caption}{Caption}{/block:Caption}{/block:PermalinkPage}</center> {/block:Video}
{block:Audio} <center><div class="audio">{AudioPlayerBlack}</div></center> {block:Caption}{Caption}{/block:Caption} {/block:Audio}
{block:Answer} <table style="border-bottom:1px solid #a0a0a0;padding-bottom:5px;margin-bottom:5px;"> <tr> <td style="vertical-align:top;padding-right:30px;padding-left:30px;padding-top:10px;padding-bottom:30px" bgcolor={color:asker background}><b>{Asker}</b><br><br><img src="{AskerPortraitURL-96}"></td> <td style="vertical-align:top;"><strong></strong><br>{Question}</td> </tr> </table> {Answer} {/block:Answer} </div>
{block:PermalinkPage} {block:Date} <div id="info"><div id="bottominfo">
Posted: <a href="/day/{year}/{monthnumberwithzero}/{dayofmonthwithzero}">{ShortDayOfWeek} {Month} {DayOfMonth}{DayOfMonthSuffix}, {Year}</a> at {12Hour}:{Minutes}{AmPm}{block:RebloggedFrom}<br>Originally posted by <a href="{ReblogRootURL}">{ReblogRootName}</a>.{/block:RebloggedFrom}
{block:Photo}{block:HighRes}<br>HighRes: <a href="{PhotoURL-HighRes}">view</a>{/block:HighRes}{/block:Photo}
{block:Answer}<BR>Ask: <a href="/ask">{AskLabel}</a>{/block:Answer}
{block:Audio}<BR>Plays: {FormattedPlayCount}{block:ExternalAudio}<BR>Download: <a href="{ExternalAudioURL}">here</a>.{/block:ExternalAudio}{/block:Audio}
{block:HasTags}<BR>Tagged: {block:Tags}<a href="{TagURL}">{Tag}</a> {/block:Tags}{/block:HasTags}{block:NoteCount}<BR>Notes: {NoteCount}{/block:NoteCount}
</div></div> {/block:Date} {/block:PermalinkPage}
{block:PostNotes} <div id="notes">{PostNotes}</div> {/block:PostNotes}
{/block:Posts}
</div> </*Infinite Scroll*/>
{block:Pagination} <div id="entry"> <center> <table width="400" border="0" cellspacing="0" cellpadding="0"> <tr> <td width="200"> {block:PreviousPage}<div align="left"><a href="{PreviousPage}">◄ Previous</a></div>{/block:PreviousPage} </td>
<td width="200">{block:NextPage}<div align="right"><a href="{NextPage}">Next ►</a></div>{/block:NextPage} </td> </tr> </table></center> </div> {/block:Pagination}
<center><img src="https://64.media.tumblr.com/tumblr_m2lokcAnTG1qaxq5z.png" width="750" height="2"><br></center> <center><small>©2003-<script type="text/javascript"> <!-- var year = currentTime.getFullYear() document.write(year) //--> </script> MySpace.com. Theme by conkersradfurday. All Rights Reserved. </small></center>
<style type="text/css"> ul#likes { list-style-type: none; margin: 0 0 0 0; padding: 0 0 0 0; }
li.like_post { /* Should match the width specified in the Likes tag */ width: 150px; padding: 0 40px 0 0; float: left; }
li.like_post img { max-width: 100%; }
li.like_post blockquote { margin: 0; padding: 0 0 0 10px; border-left: 1px solid #eee; }
li.like_post ol, li.like_post ul { margin: 0 0 0 15px; padding: 0; }
li.like_post .like_link a { font-weight: bold; }
li.like_post .like_title { font-weight: bold; }
li.like_post .post_info_bottom { margin: 10px 0 0 0; display: block !important; } </style>
</head>
</html>
3 notes
·
View notes
Text
Why one should use SVG over PNG ?
The Scalable Vector Graphics (SVG) format has become an increasingly popular choice as a web image format in recent years. Compared to traditional image formats such as JPEG and PNG, SVG offers many advantages including scalability, compatibility across platforms and browsers, a smaller file size, and support for animation and interactivity. With all of these advantages, it is easy to see why SVG has become the preferred choice for many web designers and developers.
SVG is a graphics format that enables you to create images with the same quality as PNG but without the file size. This makes it a good choice for images that will be used in web applications or on websites where space is important.
In this blog post, we will discuss the various benefits of using SVG over PNG and why one should consider using it over other image formats. By the end of this article, you should have a better understanding of why SVG is often the preferred choice for web images and why it should be considered when choosing an image format.

Let’s have a look at the differences between SVG and PNG:
Scalable Vector Graphics (SVG)
It is used for 2-D-based vector graphics which is an XML-based markup language. It uses geometric forms like points, lines, curves, and shapes (polygons) which represent different parts of the image.
Portable Network Graphics (PNG)
It is a replacement for Graphics Interchange Format (GIF). The file format is raster graphics and the data compression is lossless. It is used for high-quality images, detailed icons, or need to prevent transparency.
Scalability difference in SVG over PNG:
The scalability of SVG and PNG is an important topic for graphics designers and developers. Both formats are used to create images that can be viewed on many different devices. However, scalability can be a challenge for both formats.
In SVG, the scale change does not change the pixels of the graphics. In other words, the scale does not get pixelated. While working with PNG, developers may face issues with file size and stability. The reason Free SVG icons are scalable without altering the quality.
File size:
In comparison to other graphics, the size of the SVG file is relatively small. They can be edited directly even in svg code.
Performance:
It helps in enhancing the website’s performance. The inline CSS of SVG is loaded faster than calling a PNG file to display on a website.
Style control:
Style in SVGs can be controlled by color, size, fill color, and stroke color. This is mostly used when we have different Actions on a button. Like hover, Active, Disable, etc. That is not feasible with PNG.
0 notes
Text
Best json formatter

BEST JSON FORMATTER REGISTRATION
BEST JSON FORMATTER CODE
BEST JSON FORMATTER FREE
The data structure is simple to comprehend.
For most programming languages, a gazillion JSON libraries are available for.
Parsing is simple, particularly in JavaScript.
Unlike XML, it’s lightweight because it doesn’t use a complete markup structure.
It’s readable by humans if it’s formatted correctly.
There are lots of reasons why you would like JSON to be used:
This JSON formatter online can also be used as a JSON lint.
Store data for the last Formatted JSON locally in Browser Local Storage.
It’s the only JSON tool that displays the image in a tree view on the Image URL hover.
It helps to verify JSON via Error Messages online.
BEST JSON FORMATTER CODE
If the JSON is invalid, it will search the correct JSON code for errors and point out the errors. You can paste or upload the data from your computer to JSON Parser Online. It will automatically detect invalid JSON documentation or syntax automatically and get instant results in an easy-to-read format. All you require to do is paste your JSON code into the specified space. JSON formatter is an online application that uses the online JSON schema validator to validate JSON code.
BEST JSON FORMATTER REGISTRATION
No need for installation or registration is necessary! Online JSON Tools JSON Formatter It’s quick and easy with such apps, fill in the editor and click on the desired action button. This can be useful for embedding JSON in code, for instance. Finally, you can also use JSON data to escape/unescape. It’s also possible to minify your JSON (The opposite of pretty JSON, it removes all unnecessary characters). Your JSON data is automatically checked when you fill in the editor, and a message tells you whether or not your JSON is correct. These tools are also a validator and a JSON checker: you can check JSON online without pressing. This tool allows JSON to be read and debugged easily by humans. For a human (without line breaks), JSON strings are not always very readable, mainly if they are bulky. To help debug JSON, the JSON formatter tool was developed. It is a widespread data format with a diverse range of applications, such as serving as a replacement for XML in AJAX systems. It is an open standard file format and data exchange format that uses human-readable text to save and transmit data objects consisting of attribute-value and array data types. JSON is “self-describing” and easy to understand. JSON is often used when information is sent from a server to a webpage. No data will be stored in our server.JSON is a lightweight form for storing and transporting data. Yes, our JSON formatter online tool is privacy friendly and formatting JSON is done locally in your browser. Copy the JSON formatted code by clicking on copy button. To use JSON Formatter online, paste your tidy JSON code inside the input box, then select indent and click on format JSON button. It can be used as JSON validator, editor and viewer tool. JSON Formatter is an online tool that can be used to format JSON.
SQL formatter – SQL formatter beautifies tidy SQL with your desired indentation level.
CSS Formatter – Use this CSS formatter online tool to format/beautify CSS code.
JavaScript Formatter – Online JS formatter helps to format or beautify JavaScript.
It also be used as JSON formatter and validator.
JSON Formatter– Online JSON formatter helps to quickly format JSON.
HTML formatter – Online HTML formatter beautifies ugly/tidy HTML code by making it readable and pretty, with proper indentation level.
Online tools to format JSON, JS, CSS, HTML and SQL
You can use this JSON formatter as JSON validator, JSON viewer or JSON editor.
It allows you to copy formatted JSON data.
It allows you to upload JSON file and format it instantly.
It’s the best JSON formatter online tool to format/beautify your JSON.
Choose indentation level ( 4 spaces by default) as your choice to format your JSON code.
JSON formatter supports 5 indentation levels: 2 spaces, 3 spaces, 4 spaces, 8 spaces and tabs.
This JSON formatter beautifies JSON locally on your device, which means no data is uploaded to the server.
BEST JSON FORMATTER FREE
Free and easy-to-use online JSON formatter tool for developer.If you Want to format or beautify JSON? then simply paste your JSON file in the code editor and let JSON formatter format, validate and print your JSON data into pretty, human-readable format.Step 4: Feel free to use the quick copy button to copy the code.Step 3: If you’ve done it correctly, the formatted JSON code should now appear in the output box (bottom side).Step 2: Click the “Format JSON” button and wait for the JSON formatter tool to finish formatting your code.Step 1: Paste your JSON code inside the input box (top side).
0 notes