#denoising software
Explore tagged Tumblr posts
Visit Tumblr Blog
Explore Tumblr blogs with no restrictions, modern design and the best experience.
Last Seen Tumblr Blogs


Fun Fact
Tumblr has 4 main sources of revenue.
Text
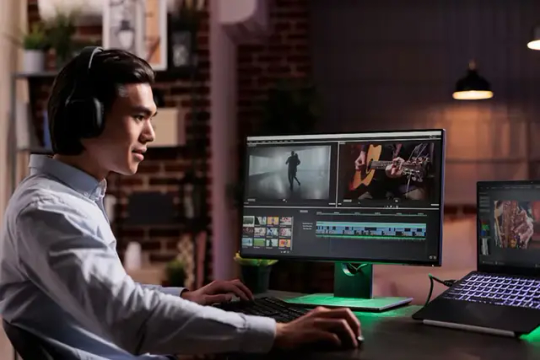
Optimizing Your Workflow with Denoise AI: Say Goodbye to Noise
The Importance of Denoising in Video Optimization When it comes to video production, noise can be a major issue that affects the overall quality of your content. Whether you’re filming in a busy street or a crowded room, unwanted noise can distract viewers and take away from the message you’re trying to convey. This is where denoising technology comes in to save the day. Denoising in video…
View On WordPress
#Artificial Intelligence#automatic noise removal#denoise ai#denoising software#enhance post-production#improve video quality#noise reduction tool#seamless editing#video noise removal#workflow optimization
0 notes
Text
Top 10 AI Video and Image Denoise Software
🚀 Exciting news for photographers and videographers! 📸🎥 Check out this fantastic blog post about the Top 10 AI Video and Image Denoise Software. 🌟 Say goodbye to noisy photos taken in low light and hello to crystal-clear, detailed images! 💯✨ Capturing stunning shots in low-light conditions at high ISOs can be a real challenge. That annoying noise can seriously affect the quality of your images. 😓 But fear not! With the help of AI denoise software, you can effectively reduce noise while still preserving those important fine details. 🤩 In this article, we explore the top 10 AI video and image denoise software options available. 🙌 Don't miss out on this opportunity to enhance your photography and videography skills. Check out the full blog post here: [Link to Blog Post] Happy shooting! 📷✨ 🌐 [Link to blog post:](https://ift.tt/EJVf857) 🐦 Follow us on Twitter: @itinaicom List of Useful Links: AI Scrum Bot - ask about AI scrum and agile Our Telegram @itinai Twitter - @itinaicom
#itinai.com#AI#News#Top 10 AI Video and Image Denoise Software#AI News#AI tools#Analytics Vidhya#Innovation#itinai#K.sabreena#LLM#Productivity Top 10 AI Video and Image Denoise Software
0 notes
Text
Niki Lauda and James Hunt — Friday 18th July 1975 Silverstone - Practice Runs for the Grand Prix
ATV Sports Reporter Gary Newbon interviews championship leader, Niki Lauda from Austria and Britain's James Hunt, about the race and the new car they will soon be driving. In 1975 James Hunt was driving for Hesketh Racing and Lauda was driving for Scuderia Ferrari.
In the race, Niki Lauda would hold fourth place off the start, but soon a heavy shower brought a flurry of tyre changes. A wheel had not been fastened when Niki was released and fell off within 20 meters, resulting in a scramble to reattach it. He stopped again a lap later for it to be tightened properly, and rejoined a lap down.
As the track dried, he showed blistering speed: four seconds a lap faster than the rest, but then came another deluge and the field was decimated by a series of aquaplaning shunts and the race red-flagged. The official results announced shortly afterwards were based on a count-back lap, which meant that Niki was classified eighth despite being third across the line. Ferrari protested, but without result.
James hunt would make it to the final lap without major incident, before retiring along with many other drivers. His final position: fourth, was unaffected.
A miserable race for the both of them, all in all.
[Comparisons between versions and editors notes are below the cut.]

Clipped and Cropped • Colour Corrected • Removed Colour Cast • Upscaled with Artemis • Denoised • Sharpened and Enhanced • Recovered Original Detail • Added Noise and Film Grain • 60fps Frame Interpolation • Edited Gamma and Exposure • Stabilised • Audio Cleaned • Manual Cleaning of Degraded Film
• While the lower logo is a lost cause, I had a real good go at cleaning up the upper logo. Despite it being easy to remove in James' zoom sections, where it hovered and moved over the banner made the erasure too disruptive and time intensive to clean up in whole.
• I did all the film cleaning manually, therefore it's very likely I missed out on some damage. I got all the major stuff though.
• At the beginning, for god knows what reason, the upscaler has a hissy fit and throws up coloured blocks. Incredibly annoying, but I couldn't find a way to fix it.
• The video is dark at the start due to cloud cover, and it's more noticeable without the colour cast, there's better lighting by the end.
• There's much more to the original video: cars practising at the track, a later interview by Niki in 1977, and a separate one of James the same year. I cut those, so I could focus on this interview, and because the film degradation of the practice runs is noticeably severe. But, if people are interested, I'm very happy to also tidy those.
• I'm here nor there on the cleaned up audio. I wish there was an easy software where I could more manually tune it.
• I snipped off like a second of the end because the degradation got so bad it was easier just to cut it since James had finished talking by that point anyway.
Despite all this, please enjoy.
116 notes
·
View notes
Text
☆ UPSCALING LOW QUALITY FOOTAGE
what i used: • 2021 macbook pro with m1 chip (390/500gb storage used she's hanging in there) • photoshop 2020 • mpv (for screencaps but this isn't needed!) • handbrake (available for linux, mac and windows here) • video source to gif
what is handbrake? basically its a software that helps you change the format of videos, such as for certain devices or screens, or in the case that we're going to utilise, quality and frame rate!
disclaimer: handbrake is super easy to use and very beginner friendly for this procedure and it can make a video go from 30fps to 60fps however it does not replace the quality of true 4k/blue/master-pro res files. in the gif below, this is the level of detail in a master pro-res file.

getting started it's easiest first to note the timestamps of the video you want to encode, and keep in mind that unless your computer is incredibly powerful, i wouldn't try to encode an hour worth of footage in one run! my laptop could handle about 30 seconds in one go before she started toasting.
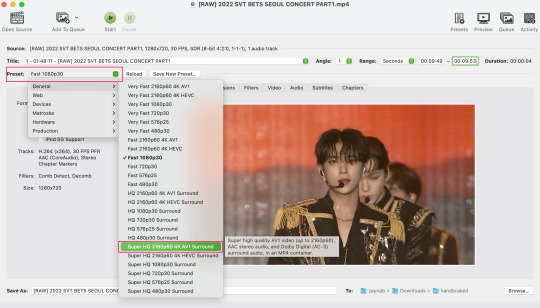
using handbrake: once you've downloaded the software, open the software and it will come up with a pop up window asking you to open the video source (that is presumably saved within your folders) and go ahead and do so!
in the range section, use the drop down button to navigate to seconds and enter your timestamp. the duration on the side will show how long of the footage you're gonna encode is!

then go down to the save as, and give your footage 'to be snipped' a name. this isn't necessary but useful because if you're planning to say, encode 3 or 4 small parts of footage in one sitting, each encoding instance will overwrite the previous one. so i just call mine 'cut 1', 'cut 2' and so on.

next go to preset, and there you'll see such a wide variety of options that you can play around with, with differing qualities, frame rates, sound options, and so on. for the sake of this tutorial, i'm using 'superhq 2160p60 4k av1 surround' and i've used the drop down menu to select it! then go ahead and press start! the time taken to complete depends on the duration of footage that you sent to encode! you'll find your encoded video as an .mp4 file in your designated folder (which you can change via browse at the bottom)
what next? • if you prefer to open footage directly into photoshop (my ps can't handle it), then go for it! • if you screencap as i do, then just use mpv or whatever screencapping program you prefer to make the screencaps and open in ps in your usual manner. • you can use the timestamps to further process the video through vapoursynth to denoise, but i've yet to try that!
the results for this first set of example footage, i used footage from the be the sun concert file, which is almost 2 hours in length and 4gb in file size.


you can see the difference in the smooth frame rate of the footage, as well as the quality of the sharpening!
and to utilise the bane of gifmaking, a gose episode, notorious for dodgy pixelated frames and less hd quality in 1080p on youtube, i ran it through the same settings!

these are the exact same files, downloaded using 4k video downloader and with the same sharpening, but see how on the original file, the sharpening looks a bit more harsh and 'outlined' while it seems to sit softer on the encoded 4k version!
so i mainly use handbrake for dvd files, or not-so-hd 1080p youtube videos or videos that seem a bit clunkier but i had never tried them on a tv/film file so take a look below! i used a 1gb (so not very good quality) of a show (as compared to its 4gb files).
as i said at the start in the disclaimer, handbrake can't replicate true file quality, as you'd expect to see in a proper hd bluray/t*rrent file of a show but there's an interesting difference in the frame rate. personally it's not something i would utilise much there but its all up to individual preference on how someone prefers to have their gifs <3
this is a very basic run-through of how i used handbrake, as i haven't really explored all its features and i use this as a quick process when i'm running through seventeen dvd/dl files but i feel like it would work well on general youtube videos (such as interviews, episodes, behind the scenes) and feel free to send an ask/message for any help/clarification! <33
#ps help#usergif#gif tutorial#kpop gif tutorial#seventeen#completeresources#2605#userace#niniblr#emification#usershreyu#heymax#arieslofi#tusermlee#userbloomingwarrior#uservivaldi#userzil#userfanni#userrozza#usermoonchild#userraffa#tuserjen#usernik
370 notes
·
View notes
Note
so like I know this is a ridiculously complicated and difficult thing to pull off so I obviously can't expect you to just give me a full tutorial or something, but do you think you could give me some pointers on how to get started training my own ai?
The software you should research is called KohyaSS, and the best kind of model to practice training on is a LoRA. Basically an add-on to a base model that adds a new style or concepts.
I haven't trained anything new in a few months, so my recommendations are most likely very outdated. I heard that OneTrainer is a more user friendly alternative to Kohya, but I haven't tried it myself.
Just one thing before you start training though, make sure you understand basic AI techniques before trying to jump into making your own model. Checkpoints, denoising, seeds, controlnets, LoRA, IP adapters, upscaling etc. InvokeAI is a good interface to practice with and their tutorials are good. Free to run too.
17 notes
·
View notes
Note
Hi Rose! A friend introduced me to you. I love your voice. Do you have any tips on voice training or voice acting in general?
oh hi omg ^-^ that's so cool!
on voice training: uhhhhhhhhhhhhhh (i never did any, all i can really give ya is to try talking from the roof of your mouth instead of from your throat if that makes sense? idk. i found my voice like a week before i started recording audios and it was kinda just "i wonder if i could try to... ah. neat.")
on voice acting in general:
you don't need a crazy expensive mic or software. here's my recording setup:
blue yeti (imo the best USB mic available, plus it does a great job with stereo, and it isn't ridiculously expensive)
reaper (it will harass you about paying for it, you should but if you can't afford it you can just click through the prompt, and also it's wayyyy cheaper than smth like fl studio) — you can use tenacity if you want to but it's not very good by comparison because you can't do things like add reverb to a track and then remove it later. it's the ms paint of the audio world.
i have a lot of plugins that i use but really all you need are an eq (there are free ones in basically any daw, reaper included), a compressor (same), and some kind of noise suppression (you can get away with just using a noise gate most of the time and there's usually one built in, but there are also a lot of free denoisers that work well). i also like to use reverb plugins to add some space in my audios, there's a free plugin called protoverb by u-he and it's a little jank but i really like it because you can get it to sound like a real room (bathroom, bedroom, whatever is appropriate to your audio) instead of just a generic "space"
a lot of other vas i know record everything in one take and you totally can but honestly i prefer to record until i like misspeak, stop the recording, cut off the last few seconds and then start again from where i left off. there's a setting in reaper that i use to make it play like 5ish seconds of audio before the recording starts, and i try to talk along with it so that it doesn't sound like there's a cut.
also, i like to record speaking really really quietly really close to the mic, that way a) my voice doesn't get tired as fast, b) if i start whispering it doesn't actually end up being much quieter than the "normal" speaking so you can still hear it and c) there isn't as much noise because i can turn the gain way down on the mic
also if you're using a proper denoiser, record like 10s of audio on another track before you start actually recording, and then as long as you don't move the mic or your fan or whatever you can use that to train the denoiser and it'll sound a lot better than the "real time" setting where it trains itself on the fly
lastly, i highly recommend monitoring (hearing yourself through your headphones as you record) if you can, because it makes it way easier to notice when you accidentally bump the mic, speak too loud, etc., and that way you can catch it and stop the take to cut it out.
i could keep rambling for a long time but this is getting rly long lol if you have questions please dm me i love chatting ^-^
9 notes
·
View notes
Text
crazy to find out that most gig photographers (but also just photographers in general!) these days use the embedded AI features in their editing software to, at the least, denoise/degrain their photos, if not actually removing unwanted objects and stuff as well. i dont reeeally have any particular ethical condemnation of this (any more than im condemning like, video games for using a lot of energy) but it DOES piss me off because im absolutely too stubborn to ever use anything like that and my photos ARE much worse because of it
9 notes
·
View notes
Text
hello! my gifmaking mutuals that use a mac, can u help me get topaz or any other king of denoising software?
#not vapoursynth ive tried five hundred times but its just not compatible w macos sequoia#i tried w homebrew i tried w everything
3 notes
·
View notes
Text
I blocked this guy for spreading misinformation, but I want to address the points they made so people don't buy into this shit.
"Have you really never heard of a denoiser?" Glaze and Nightshade cannot be defeated by denoisers. Please see the paper I link in #2. This point is amazingly easy to debunk, and I'm not sure why people are still championing it. Both programs work by changing what the software "sees." Denoising can blur these artifacts, but it does not fundamentally get rid of them.
"White knighting for amoral techbro apps." This was a very early techbro attack on Glaze to try to convince people it was another way to steal data. As I said in an earlier post, it does use a dataset to enable it to add artifacts to your work. It is essentially using AI against itself, and it is effective. There's a whole peer-reviewed paper on how it works. I've posted it before, but if you missed it, you can read it here: https://arxiv.org/abs/2310.13828 (and unlike Generative AI apps, this paper explains exactly how the technology works.)
"Wasting resources." The point is to make the machines unusable, which ultimately will reduce the stress on our infrastructure. If the datasets no longer work, the use of them decreases. Unfortunately, the inability for people to adequately protect their work has led to massive electricity-wasting farms for generative AI, just like what happened with NFTs and cryptocurrency. If enough people inject unusable data in the the systems, the systems themselves become unusable, and the use decreases.
"My artistic vanity." I'm not a good artist. But my artwork HAS been scraped and used. I don't know why I have to keep saying this to make my anger and pain valid, but a few months back, all my artwork was revenge-scraped and stuffed into Midjourney. The person who did it also stripped my name from it, so I am not even able to HOPE to have it removed. I have nothing left to lose. I want to make those motherfuckers pay.
"The google thing only defeats weak watermarks." This is true. But a "strong" watermark must be completely different on each work you post, and also must cover most of the work. This is easily researched. I don't know about you, but I don't have time to make a new watermark on each piece I post, and I also don't want it to cover most of the artwork. Just so you know, the watermark detector works by looking for the same pattern on multiple works by the same person. If you use the same watermark on each piece, it doesn't matter how strong you think it is. It's removable. If you have the time to do it, then yes, this is effective. But it needs to be complex and different on each piece.
Next, I've seen a couple posts going around today stating that you can't even have an account on Glaze because they're closed.
They're not. But to prevent techbros from making accounts, you have to message the team so they can make sure you aren't using AI in your work. The instructions are here: https://glaze.cs.uchicago.edu/webinvite.html
Nightshade is not available on the web yet, but Glaze is. Nightshade will be soon, and they are planning a combo web app that will both Glaze and Nightshade your work.
In the meantime, if you want someone to Nightshade your work for you, please let me know. I have offered this before, and I will offer it again. Email me at [email protected] with your artwork, and let me know you'd like me to Nightshade it for you. There will always be some artifacts, but I will work with you until you are happy with the result.
Lastly, I know my messages are working because I keep getting people spreading misinformation that these things don't work. Please know that I have done the research, I do have a personal stake in this (because hundreds of my pieces are part of Midjourney now) and I am only posting this because I truly believe this is the way to fight back against plagiarism machines.
I don't know why people are so angry when I post about them. I know people don't all have access, which is why I'm offering my resources to help. I know this is a new technology, which is why I read through the boring scientific paper myself so I can validate the claims.
This is the last post I'll make on the matter. If you want to ask questions, fine, but I don't really have the mental capacity to argue with everyone anymore, and I'm not going to.
8 notes
·
View notes
Note
Hello and good day imiging team! I'd like to point out that the work of petitmonsieur1 that you reblogged recently is not photography, but an AI-generated image. Thus it can not be categorized as original photography on account of it not involving a photographer, a camera and a subject.
I know you caption your reblogs with "daily original photographs and creations", so I guess it still counts as some form of a creation. Although the rest of your reblogs are actual photography, not what petitmonsieur1 is doing.
You'll notice that their creations are entirely digitally created by taking a closer look. Skin, metal, and cloth appear way too smooth, the background is sepia like from a painting, icons and writings are indecipherable. They've even uploaded videos showing how they mess with the creation process, either by adding skeleton makeup to a person (who is posing exactly the same in both frames) or moving a person's head, covered in a knit wool ski mask, up and down from their scarf like a piston. To me those are clear indicators that their creations are not authentic as the photos, paintings and art you showcase here.
With this I hope you at the very least consider removing petitmonsieur1 from the pool of your following. One can argue whether AI-art is art, but since the focus of your page is on photography, that really doesn't have a place here.
Thank you for receiving my input. Kindest regards!
As we are obviously unable to answer directly to this anonymous expert in AI, our response is outlined below.
Dear anonymous,
You will, undoubtedly, be disappointed to learn of our disavowal of your "expertise" in this particular instance as we wish to inform you that AI was not involved in the creation of this image. As we had reservations about your claim and explanations of same, we deemed it patently obvious that our first step should be to direct ourselves to the creative source. Therefore, we messaged Petitmonsieur in order to determine exactly his process and his medium. His response was clear : "I mainly use photos, old paintings, wallpapers...and I crush the pixels as much as possible to obtain a painting effect. If I used AI, the rendering would be of better definition. In fact, I'm tinkering with Photoshop, and I find that the AI stereotypes the images too much."
Upon viewing this particular photo we were, of course, unaware of the creative process (other than what the tags indicated) but we found it to be interesting and quite striking at first sight which resulted in it being chosen.
Furthermore, one might ask, what exactly defines a true photograph these days especially in the world of digitization? With the advent of digital cameras and advances in photography software (Photoshop, Lightroom, etc.) how many of these photographs, including those that started life as a film negative, use some form or other of "digitization" in the making of the final product?
AI is just another step (granted a large one) in that direction and not really so much different than using a "dehaze" or "clarity" filter in Lightroom, Healing Brush Tool in Photoshop or DeNoise AI, to name but a few of the tools used by a growing number of photographers. Even film can be "manipulated" in the darkroom or made into a digital negative and then reworked on a pc. These are all tools used to enhance the artistic aspects/creation of a great number of photographs which are regularly posted and reblogged on the Tumblr platform. (Our apologies to those of you that shoot raw and only post unedited photographs -- we love them too!)
At Imiging, our shared opinion on AI is that it has the potential for making the unreal appear real and believe it has numerous other risks and drawbacks. We have to say that it truly alarms us if only for no other reason than the obvious geo-political implications when AI is used by unscrupulous individuals or governments for nefarious purposes.
Sincerely,
The Editors of imiging
#photographers on tumblr#curators on tumblr#anonymous#original photography#artists on tumblr#A.I.#imiging
18 notes
·
View notes
Note
hi!!!
can i ask you how you usually make your gifs? ^^
Hii anon .. awww of course i usually use vapoursynth software and photoshop to make gifs, and i start by dragging the orginal video into vapoursynth script in order to trim the video and enhance its quality, using vapoursynth denoise and sharpening filters, then, i select ' encode script ' to export it into a gif file, and once the encoding is finished i import the output file into photoshop.
And then i just start editing the gif by using photoshop adjustment layers, which include:
Brightness/contrast: for adjusting highlights and shadows
Vibrance: for modifying the level of saturation of all colors
Levels: for modifying highlights and shadows
Curves: for more precise control of highlights and shadows
Hue/saturation: for adjusting lightness and saturation of all colors
Color balance: for adjusting a particular mixture of colors
Selective color: for modifying a particular color without altering the other colors
ohh anon i just hope i’ve been helpful to you and i’m so thankful to you for passing by 💐 i hope you’re having a wonderful day
5 notes
·
View notes
Text
day one as an ex-maya blender user, things i am extremely pleased by:
-builtin alt layouts for different workflows
-construction history is not a thing unless you intentionally create a nondestructive modifier/geometry node
-default builtin material is actually physically based and mirrors modern workflows instead of a shading model that is 30 years old
-shader graph doesn't crash if you look at it funny
-cycles and eevee are both built in
-cycles and eevee SHARE SHADING NODES despite being wildly different types of renderers and your shaders can translate between pipelines
-cycles' denoiser
-geometry nodes bc i <3 proceduralism
-you can just directly render your sequences as video with the codec you want without going to another software to comp/convert it (why is this not a basic feature in so many softwares)
-the whole thing is fucking free????????????
9 notes
·
View notes
Note
hello! beginner at gifmaking here.
i was wondering if you use any specific program/setting for better frame capturing, or if you do it manually, screen capturing frame by frame.
i’m asking this bc i was using potplayer’s consecutive capturing in order to do my gifs, but only after finishing with the speed i realized it looked weird bc it jumped frames. i’m also asking u specifically bc i admire yall’s work at yingtan lol you guys are the best
hi anon! i've been giffing properly since like 2019 so i've gone through various methods actually!
currently i use mpv and use consecutive capturing which basically does it frame by frame! i think the problem with jumping frames might be bcs of the software! with mpv i can't use the latest version bcs that jumps frames so i'm on mpv 0.36.0 and that works fine for me!
a method i previously used was using vlc to record the screen and importing the video in ps using video frames to layers! i found the quality of this wasn't the best and hence moved away from this.
i also sometimes use something called vapoursynth to process a video and crop it which i got into using bcs of kpop gifs! it's really helpful for videos that are really low quality because of its denoising effects!
i would recommend the mpv method as it's what i'm using now and i'm seeing really good results. these are my screencap settings in my mpv config file for reference:

if you need any help setting mpv up let me know!
#asks#anon#hope this helped!#if you feel comfortable to get off anon - feel free to dm me any more questions <3333
2 notes
·
View notes
Text
The Complete Beginner's Guide to Visionize AI
Visionize AI - Introduction
Welcome to my Visionize AI Review post. Where innovation meets intelligence, at Visionize AI, we are dedicated to pushing the boundaries of what's possible with artificial intelligence technology. Our mission is to empower businesses and organizations of all sizes to harness the transformative power of AI to drive growth, efficiency, and success.
With a team of experts at the forefront of AI research and development, Visionize AI is committed to delivering cutting-edge solutions that address our client's unique challenges and opportunities. Whether you're looking to streamline operations, optimize processes, or unlock new insights from your data, Visionize AI provides the expertise and technology needed to achieve your goals.
From machine learning algorithms to natural language processing systems, our comprehensive suite of AI solutions is designed to meet the diverse needs of modern businesses. Join us on a journey of innovation and discovery with Visionize AI.
Visionize AI – Overview
Creator: Bizomart
Product: Visionize AI
The official page: >>> Click here to access.
Niche: Software
Bonus: Yes, Huge Bonus
Guarantee: 30-day money-back guarantee!
What is Visionize AI?
Visionize AI is a pioneering technology company focused on harnessing the power of artificial intelligence to drive innovation and transformation. At Visionize AI, we develop cutting-edge AI solutions tailored to the specific needs of businesses across various industries. Our expertise lies in creating intelligent systems that automate processes, analyze data, and generate valuable insights to help organizations make informed decisions and achieve their goals.
Through advanced machine learning algorithms, natural language processing techniques, and computer vision capabilities, Visionize AI enables businesses to unlock new opportunities, streamline operations, and stay ahead of the competition in today's rapidly evolving digital landscape. Whether it's optimizing workflows, enhancing customer experiences, or predicting market trends, Visionize AI is dedicated to delivering high-impact AI solutions that drive tangible results and propel businesses toward success in the age of artificial intelligence.
How Does Visionize AI Work?
Leveraging Visionize AI is a seamless endeavor, characterized by a user-friendly interface where individuals can simply log in, input keywords or utilize voice commands, and witness the rapid generation of desired visual content. This intuitive workflow ensures swift and efficient production of captivating visuals, requiring minimal effort on the part of the user.
Get Instant Access
Benefits Of Using Visionize AI
Streamlines the process of visual content creation for users of all skill levels
Facilitates the rapid generation of high-quality visuals across a multitude of formats
Provides a seamless avenue for monetizing generated visuals through a dedicated marketplace
Diminishes the reliance on costly design tools and professional services
Empower individuals and businesses to embrace the AI-driven future of visual content creation.
Visionize AI Review - Key Features
AI-powered Graphics and Image Generation
Video Generation without the need for recording or editing
Access to a Marketplace boasting 10,000,000 active buyers
Inpainting, Colorization, and Denoising capabilities for images
Recognition, Synthesis, and Noise Removal functionalities
Mobile Compatibility, facilitating on-the-go visual creation
Comprehensive Training Videos and Round-the-Clock Support
Visionize AI Review- Pros and Cons
Pros:
The comprehensive suite of visual content creation features
One-time fee structure with no monthly costs, offering excellent value
Free commercial license, enabling users to sell their creations
Mobile compatibility for convenient access across various devices
Streamlined workflow catering to both novices and seasoned professionals
Cons:
Limited availability of licenses due to server capacity constraints
Potential future increase in price to a monthly subscription model
But That's Not All
In addition, we have several bonuses for those who want to take action today and start profiting from this opportunity.

1. Bonus: Exclusive Special Training (Valued at $997)
Enhance your skills with our exclusive Special Training program, meticulously crafted to complement VisionizeAi. Uncover advanced techniques, deepen your knowledge, and unlock the full potential of state-of-the-art artificial intelligence. Empower your creative vision today.
2. Bonus: 200+ Mascot Cartoon Characters (Valued at $247)
Introducing 200 vibrant mascot cartoon characters by VisionizeAi, each embodying a unique aspect of innovation and creativity. From tech-savvy bots to imaginative thinkers, these characters inject charm and personality into the realm of artificial intelligence.
3. Bonus: Infographic Blackbook (Valued at $367)
Unlock the secrets of crafting visually compelling infographics with the Infographic Blackbook, perfectly complemented by VisionizeAi's cutting-edge automated design tools. Together, they empower users to effortlessly create engaging visual narratives with precision and flair.
4. Bonus: Video Marketing Graphics Pack (Valued at $327)
Enhance your video marketing endeavors with our Graphics Pack, meticulously curated to complement VisionizeAi. Featuring stunning visual elements, dynamic animations, and customizable templates, effortlessly elevate your videos and captivate your audience like never before.
Get Instant Access
Why Recommended?
Recommended for its cutting-edge AI solutions, Visionize AI stands out for its commitment to innovation and excellence. With a track record of delivering tangible results, Visionize AI empowers businesses to thrive in today's competitive landscape.
Its advanced machine learning algorithms and natural language processing capabilities enable organizations to streamline operations, optimize processes, and uncover valuable insights from data. Backed by a team of AI experts, Visionize AI offers tailored solutions that drive measurable impact and propel businesses toward success.
Choose Visionize AI for unparalleled expertise and transformative AI solutions that drive growth and innovation.
Money Back Guarantee - Risk-Free
Look, VisionizeAi is not one of those “trash” or untested apps. We know what it’s capable of…However, in the unlikely event that you fail to use VisionizeAi for ANY REASON. We insist that you send us an email…It is simple if you don’t make money. We don’t want your money…We make more than enough with VisionizeAi. And no need to keep your money if you’re not gonna use it.
Not just that…We will send you a bundle of premium software as a gift for wasting your time. Worst case scenario, you get VisionizeAi and don’t make any money you will still get an extra bundle of premium software for trying it out.
Final opinion:
In conclusion, Visionize AI emerges as a leader in the realm of artificial intelligence, offering unparalleled expertise and transformative solutions. With a commitment to innovation and excellence, Visionize AI empowers businesses to thrive in today's dynamic environment.
Through advanced machine learning algorithms and natural language processing capabilities, Visionize AI enables organizations to streamline operations, optimize processes, and unlock valuable insights from data. Backed by a dedicated team of AI experts, Visionize AI delivers tangible results and drives measurable impact.
Overall, Visionize AI stands as a trusted partner for businesses seeking to harness the full potential of AI to achieve their goals and propel growth.
Get Instant Access
FAQ
What is Visionize Ai?
Vision AI is a peculiar sports-changing model crafted by complex algorithms and AI technology. It aims to just do that (don’t use double words). Specifically, its objective is to take the world’s imagery design to another next level. It does this by the way of using simple automatic techniques and additional design alternatives.
How does Visionize Ai differ from other design tools like Canva?
Visionize AI became quickly famous as a tool that can simplify the design usually performed by the industry’s front runner. Therefore, it is referred to as a Canva killer. It utilizes modern AI-driven models that offer personalized design suggestions, templates, and layouts. Also, it supplies libraries of inspiration and designs.
How does Visionize AI work?
The Visionize AI understands data in large volumes and skips the job of humans for many design work. It will offer advice and recommendations specific to each project, as well as different templates and layouts that have a personalized touch. Plugging the AI into the development process dramatically speeds up the workflow of design and gives a considerable library of inspirations and design objects.
Who can benefit from using Visionize AI?
Our solution focuses on meeting two major groups’ needs, those who are professional at the same time and beginners. Its easy-to-use interface can be mastered by all levels of users and can even be managed by drag and drop. Professionals with design skills are going to be flattered by the ability to use AI’s advanced automation abilities to save time and the creative work left off by the newcomers would only be their costly templates and design inspirations.
What sets Visionize Ai apart from other AI models?
It is indeed true that Visionise Ai is the “Daddy of all AI Models”. Advancements in Modern Artificial Intelligence (AI) technology will ensure Visionise is ahead of other design solution providers. Those powerful si eleenes have API that allows user customization, they fo seek to remain cutting edge in the designer sector simply because they are now superior among their peers.
What are the advantages of using Visionize AI?
The Visionize Ai technological solutions offer several benefits over the improvisations. First, its automation characteristics save time for designers leaving them to rationally work on their more strategic endeavors. Then, you use this AI base with its suggestions and templates to enable you to add more creative ideas and this inspires you. Finally, Visionize Ai’s (this company’s) top technology makes the most recent design trends and the most advanced features available as well as up-to-date.
How can Visionize Ai unlock my design potential?
Whether a seasoned expert in graphic design or a toddler, this tool frees your creativity and enables you to innovate. In line with its user-friendly interface, the strong AI components empower experiments, experiments, and artistic visualization using advanced models making the audience involved and intrigued.
Is Visionize Ai suitable for all types of graphic design projects?
Visionize Ai does all of the graphic design projects that are mentioned here. Its collection of templates as well as design elements gives many options to users who can modify them to suit their design needs, as they are versatile and can work for a range of designs.
#VisionizeAi#VisionizeAireview#VisionizeAiapps#VisionizeAisoftware#VisionizeAisoftwarererviews#VisionizeAidemos#VisionizeAiscam#VisionizeAife
2 notes
·
View notes
Text
Welcome to my Visionize Ai Review post, In the powerful domain of computerized content creation, Visionize artificial intelligence arises as a distinct advantage. This imaginative stage dependably works with state of the art advancements to enable makers, patrons, and affiliations. Might we at some point jump into the universe of Visionize Ai, where the inventive cerebrum meets data?
Funnel Information
Front End : Visionize Ai Premium ($17)
Ai Animated Videos
Cartoon Videos & Images
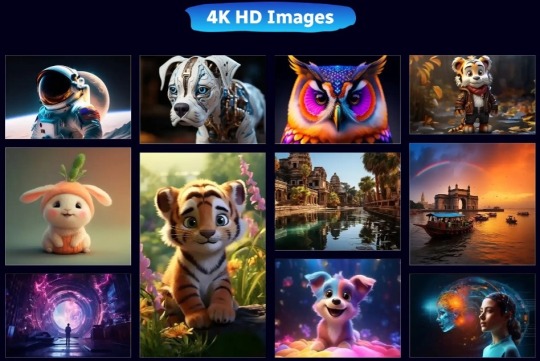
AI 4k HD Image
Instagram Posts & Reels
Facebook & Youtube Videos
Ai Drawing & Images
Sketch Images
Story Telling Images & Videos
Image Synthesis
Image Reconstruction
Image Style Transfer
Image Super-Resolution
Image Colorization
Image Inpainting
Image Denoising
Image Enhancement Filters
OTO 1 Pro : Visionize Ai Unlimited ($47)
Get Unlimited Everything
Unlimited Videos, Graphics & Content
OTO 2 DFY : Visionize Ai DFY ($247)
Get Everything Done for you
DFY Package To Sell High Ticket Offer
OTO 3 Pro : Visionize Ai Pro ($47)
AI Image Editor
AI SlideCraft & AI MemeMaster
AI SoundSlice & AI BackDrop Eraser
AI ClipSizer & AI Video Content Transcription
AI MotionGIF Creator
AI SoundFlicks & AI ClipSynth
AI SubText Creator & AI ScriptCraft
AI Audio Extraction Maestro
AI Visual Soundtrack Generator
OTO 4 Agency : Visionize Ai Agency ($57)
Agency License to Serve 100/ Unlimited Clients & add 100 / Unlimited team members
Sell It To Anyone You Want And Keep 100% Of The Profits in Your Pocket on Main Product
No Product, Sales Page, Marketing Material Creation
Quick start - Software Business in 3 Simple Steps & Keep 100% Profit
OTO 5 : Reseller : Visionize Ai Reseller- ($197)
Sell It To Anyone You Want And Keep 100% Of The Profits in Your Pocket on Main Product
No Product, Sales Page, Marketing Material Creation
Quickstart - Software Biz. 3 Steps. Keep 100%
100 License-$97
Unlimited License- $197
OTO 6 Whitelabel : Visionize Ai Whitelabel - ($297)
Rebranding
Add Your Own Logo & Brand Name
Feature:
Generate AI Images
Generate ANY Logo & Graphic
Generate Sketches & Drawings
Generate AI Videos
Generate AI Animation
Generate 3D Designs
Generate Instagram & Facebook Reels
Generate YouTube Shorts
Generate 4k HD Images
Reconstruct Images
Image Colorization
AI Images Inpainting
AI Image Denoising
AI Images Recogninzation
AI Images Synthesis
AI Cartoon Generator
AI Background Eraser
AI Image Filters
Free Commercial License
30 Days Money-Back Guarantee
Who Needs It?
Affiliate Marketers
CPA Marketers
Blog Owners
Product Creators
eCom Store Owners
Local Business Owners
Agency Owners
Get More Info
#affiliate marketing#Visionize Ai Review#Visionize Ai#Visionize Ai Software#Ai Apps#Animated Video#Artifical Intelligence#Affiliate Marketing#AI Video Creation#AI Graphics
2 notes
·
View notes
Note
May I ask what software you use to make your gifs? ( with that quality etc
oh my, of course! i use vapoursynth and ad*be photoshop 2022! i do the sharpening etc on vapoursynth and i just colour the gifs on photoshop. to be fair like 80% of the content i gif is already from high quality videos so i don't think i do much.
also, my vapoursynth settings are usually like this BUT a lot of times i skip denoise filters altogether and play around with finesharp.


5 notes
·
View notes