#discovermyflow
Explore tagged Tumblr posts
Visit Tumblr Blog
Explore Tumblr blogs with no restrictions, modern design and the best experience.
Last Seen Tumblr Blogs


Fun Fact
There were a total of 171.5 billion posts on Tumblr in 2019.
Text
30th August 2019
Discover my flow test post
Welcome to our new NQ Photographers
Follow our blog!
Like this post to follow your fellow NQ Photographers on their learning journey!
“Your first 10,000 photographs are your worst.” – Henri Cartier-Bresson
24 notes
·
View notes
Text
Colour contact sheet
24 images of the colour burgundy

5 notes
·
View notes
Text
Contact Sheet (Hadrian’s Wall)

This is a contact sheet I made in class using photographs from a trip to ‘Hadrian’s Wall’ in England.
I used Adobe Lightroom Classic to make this.
The first thing I did was create a new catalogue and named it ‘Contact sheet’.
I then found 12 images I thought went well together and Imported them.
After Importing, I clicked on Print and chose a page grid of 4 rows and 3 columns
Selecting the grid I wanted, I then went to Page Setup and changed it from A3 to A4
During this I noticed I didn't have any data on my sheet so I went down to the right side of Lightroom to find the Page Tab and tick the Photo Info box and select Exposure so that each photograph would have the exposure details on it.
Being pleased with everything I selected Printer.. to check that everything was going to print out okay (and make sure it was only one copy) I went down to the library to collect my Contact Sheet.
After this I wanted to post my image on tumblr so I made the image into a JPEG rather than a PDF which it was originally saved as.
I saved the image as PDF onto my desktop, after doing that I selected the image again from the File not Lightroom.
I then went up to file on the above tab of the image and exported it onto my drive as ‘Contact Sheet’ but not before changing it from a PDF to a JPEG.
I then logged onto my Tumblr and created a new post, inputting my image.
6 notes
·
View notes
Text
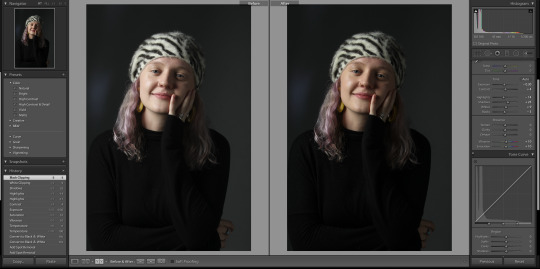
Photo Optimisation Comparison
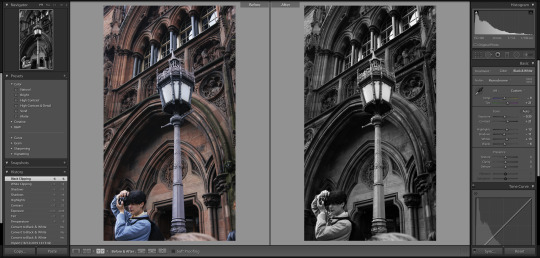
Zac in Edinburgh
-Changed to black and white.
- Exposure -0.35
Contrast +21
Highlights + 13
Shadow -11
Whites +13
Blacks -6
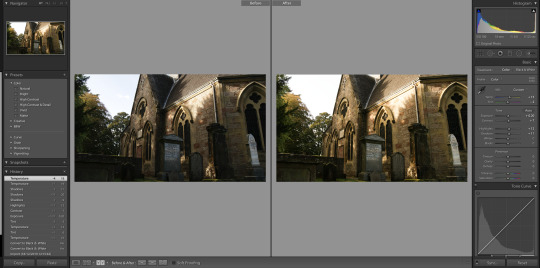
Church in Less
Temp +0.20
Tints -2
Contrast +7
Highlights +12
Shadow +11
Cara Dose Rickson
Spot Removal.
Exposure -0.30
Contrast +4
Highlights -14
Shadows +25
Whites +9
Blacks -3
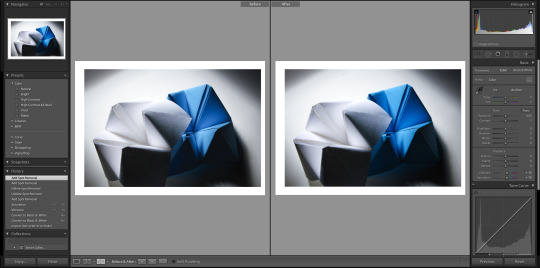
Absurd Brief

Spot Removal
Exposure -0.65
Highlights -14
Shadows -14
Whites +14
Blacks +4
Vibrance +14
Fortune Teller
Vibrance +15
Saturation +15
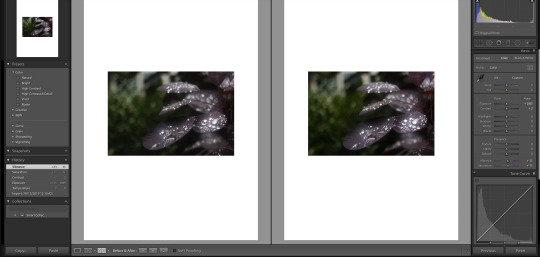
Shallow Depth of field
Exposure +0.05
Contrast +2
Vibrance +11
Contrast +11
2 notes
·
View notes
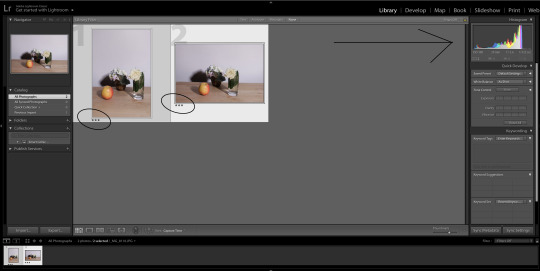
Text
software comparison


2 notes
·
View notes
Text
Carrot Orange Colour Task 🥕


All taken in Croatia.
🥕
3 notes
·
View notes
Text
Alphabet Challenge

I was quite excited about our class alphabet challenge. Our task was to take a photo of the objects that will create our first name and place them into collage. At first, I was seeing all different letters but not the ones I needed :) Finally I found all of them, I was using my iPhone to take photos. I downloaded a "Layout" app and then I added photos to the right collage. I shrink images, added borders, saved in my gallery and posted on Tumblr.
5 notes
·
View notes
Text
Software Comparison


2 notes
·
View notes
Text
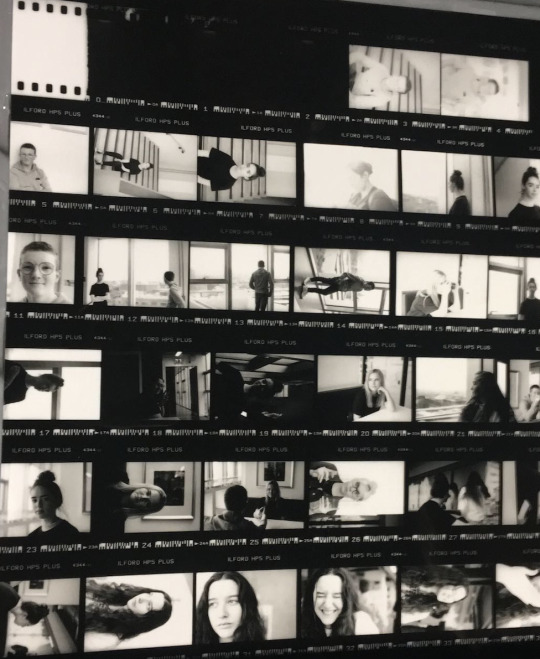
Contact Sheet
A contact sheet is a piece of photographic paper that contains thumbnails of photos from a shoot allowing the photographer to have small previews of their photographs. this makes it easy for the photographer or client to pick out the good ones and chose the ones they want to print out.
4 notes
·
View notes
Text
30th August 2019
Discover my flow test post.
5 notes
·
View notes
Text
How to Import, Optimise and Export Images using Adobe Bridge
7th November 2019
For Friday mornings Imaging Class we learned how to import optimise and export our studio photographs using Adobe Bridge.
Below are three key buttons which you will use they are located at the top of the screen.
The button with a camera and plus icon is used to import photos from your hard drive or SD card.
The button with the icon of an arrow pointing down and multiple pages can be used to view your photos and select the ones you like the most.
The final button is camera raw this allows you to edit the photos you have selected.

When you are importing images your screen will look similar to this below. Here you can select and download the folder of image you want to edit


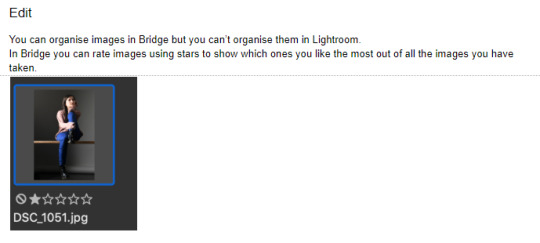
This is what View Mode looks like you can also add a rating to your images and reject the ones that you don't want if you want to close review mode click ‘X’ or ESC.

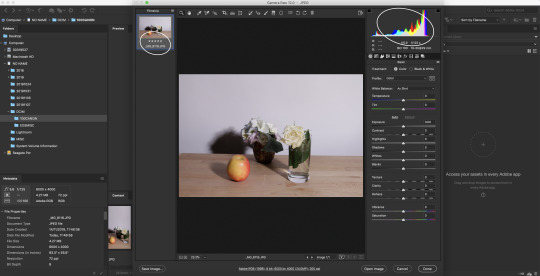
Camera Raw looks like this here you can start optimising your selected images you also have an option you to look at the comparison before and after optimisation.

When you export your optimised images you can rename your files, change the file destination and adjust the quality of your images.
2 notes
·
View notes
Photo

04/10/19
My first digital contact sheet. These are the portraits we done the other week.
(Bonus)
A cool seagull boi
3 notes
·
View notes
Text
how to: adobe bridge
+ below is a link that shows a few easy ways of how to use adobe bridge for the following;
1) import
2) edit/select
3) optimise
4) export

https://wakelet.com/i/invite?code=7d347df
3 notes
·
View notes
Text
Photo Safari info-graphic

2 notes
·
View notes