#essentially a tutorial post.
Text

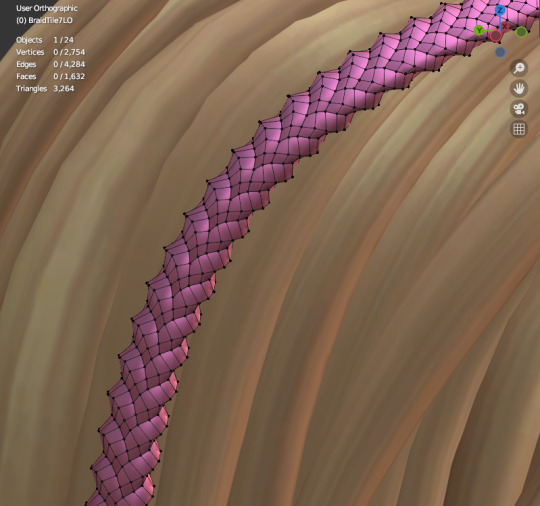
ok hi and lo poly versions of each braid shape now. the low poly ones are a little pointy BUT they significantly reduce the overall poly count of the braid. so if you're gonna be having a lot of small braids, or even just any amount of small (diameter, not length) braids, then lo poly is probably the way to go. If the braid is meant to be a centerpiece/object that draws attention/large chunky radius/just one braid in the whole hair, then a hi poly would be a better choice.
(these braids are the exact same length and shape, as they were both following the same exact curve, and you can see the triangle count (which should be the poly count in s4s) drop from 13k to only 3k. 13k would be pushing it for an entire hair's polycount, so its definitely still pretty demanding to put a braid in, but not as demanding as it would be to literally braid 3 strands of geometry like i've seen a bunch of tutorials demonstrating. im not even gonna try that.)
#i like these theyre fun#i would love to sit on them longer and like. add some more shape variety#but tbh like. a braid is a braid and i pretty much have covered every base i can think of#for this style of braid facade anyway.#i might try one day faking a braid that looks like it's *more* than 3 strands#but not anytime soon as i have no need for that personally lol.#well i will probably have these ready for release soon but i will have to write up like.#essentially a tutorial post.#and i hate doing that. so it might be a while#but i cant stop playing with them lol#simoleon
38 notes
·
View notes
Note
Do you like video games? What's your favorite genre if so?
I do, but at a more casual level than other people. I'm not one of those intense gamers that know everything about the medium. I just play a couple of games and thats it.
The kinds I like are mostly stuff that uses my brain a lot. Puzzles, strategy, the like. I play a lot of online chess and strategy RPGs.
Recently, though, my dad had been trying to get me into turn-based RPGs (Specifically ones from the Shin Megami Tensei franchise because those are the ones he played a lot of when he was my age)...but I got absolutely destroyed in Nocturne's tutorial and haven't touched them ever since. Of course, it doesn't help matters when I'm now in a boarding school several kilometers away from my dad at all times.
My current favorite game rn, however, is Uplink, the hollywood hacking simulator. Both because its genuinely good and because I like poking fun at its portrayal inaccuracies while playing.
#einstein talks#banter ask#i really need to get through nocturne's tutorial but i cant#the enemies have so many turns#//#code lyoko#not going to even try tagging all of the games mentioned in this post#but yeah jeremie likes strategy#go figure#hes essentially a navigator in a persona game
8 notes
·
View notes
Text
tbh replaying pmdgti makes me curious if any good pmd rom hacks are out there
#also wonder if anyone's hacked conquest#sometimes a difficulty boost to pmd is desired#i saw a cool pmdeos hack that adds more post gen 4 starters#but i want a bit more than that tbh#also conquest can still be pretty challenging to this day#especially after you beat what is essentially the fucking multiple hours long TUTORIAL CAMPAIGN#and start getting into the actual meat of the game#...now i wanna replay conquest#use one of the pokemon event codes to get a cool mon for my character to bond with#i actually have an old conquest oc that's bonded with a gible and deino#using the dragon pseudolegends in the game from start to finish is fun#even though they're powerful the game gives you plenty of powerful opponents as you go to start humbling you lmao#plus the rng of evolving some pokemon like whether you even get the special merchant to show up#to buy evolution items#they should make more pkmn side games man#i love the rescue team remake and technically the legends series is a side game#but i crave pokemon being used in different mechanics#new ranger game when...#you could easily make a ranger game using gyro controls#like okami hd port does with the joycon controls#it'd be fun!#or just use the joystick to do circles#or in handheld the touch screen#possibilities.#HIRE ME#hades.txt
3 notes
·
View notes
Note
I am so sorry to bother you with this stupid question, but Bisan has asked for a complete stop in economic activity. Can I still donate to help Palestinians or is it better to avoid any transactions for the week ? Thank you so much for what you're doing
hello anon. don't apologise, you're a breath of fresh air after the recent visitors in my inbox. I think a slightly more accurate description of Bisan’s ask is to stop or minimise all economic activity not in direct support of Palestine. Now more than ever, I would encourage people to donate to escape funds for Palestinians, to direct aid organisations like CareforGaza and the PCRF, and to buy e-sims as they’re running low.
Below I’ve compiled a list of resources below but this is definitely just a small sample size of what you can do to help during this strike. This post here is an extremely comprehensive resource that I’d recommend you have a look at.
credible organisations that are doing work on the ground in Palestine:
Care for Gaza:non-profit charity that distributes money, food and other resources directly to families in Gaza.They maintain a regular presence on Twitter and Instagram. You can donate to them via Paypal here.
PCRF / Palestine Children's Relief Fund: non-profit organisation that distributes essential food and resources to families in Gaza. Most recently, they delivered 30 tons of vital medicine, and 82,000 pounds of flour.
Medical Aid For Palestinians: deploys medical teams to treat Palestinians suffering under Israel's malicious bombardments.
Donate e-sims to Palestine: massive post with tutorials and relevant links, with discount codes included in the post and in the replies.
help people leave palestine (donate what you can)
Help a Family Evacuate Gaza (GoGetFunding)
Save Sanaa and her Family (Gofundme)
Save Amjad Saher and his family (Gofundme)
Help a family of 13 escape Gaza (Gofundme)
Help a Palestinian children's book illustrator save her family of 12 (Gofundme)
#donate what you can!!!#there are fandoms on here that have forked up truly lifechanging amounts of money for things significantly less important than this#so give generously#<3#palestine#free palestine#free west bank#free gaza
29K notes
·
View notes
Text
Like... when I'm pointing out that a recipe image is AI, the purpose is not to shame them for posting AI, because even people who are familiar with the tells will sometimes fall for it.
I want you to have reasonable expectations about your food.
Because when I see this:
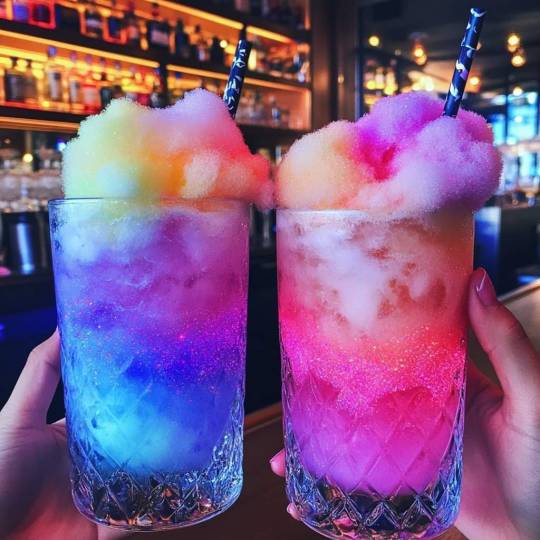
I remember this:

Which was a full decade prior to AI-based misinformation, and just how many people were pissed off that the Pinterest post misled them.
And even more-working in a craft store during the Pinterest heyday:
"We want to make this." Shows a picture of:
-a marimo moss ball terrarium in a light bulb.
-a resin-treated natural wooden shelf with glow in the dark resin in the cracks
-a really complex diorama made using museum grade resin and hand-painted figures by a miniatures artist
...to name a few.
"I'm sorry, but we do not carry (unfinished wood pieces, light reactive resin powders, live marimo moss balls, museum grade resin). Is there a tutorial attached with a materials list? No? I'm sorry, we don't have those. You can make something like this with what we have, but it won't turn out the same as in the photo. You want it exactly like the photo? I'm sorry, we can't special order these items, they're not featured on our list of vendors. I'm sorry, no, I don't know where to get them. Oh, you want me to walk you through the steps of making it since there's no tutorial? I can really only guess, but it looks like... oh, you want someone who knows for sure? I'm sorry, but no one here is terribly familiar with the process. You might see if you can reverse image search and find the source of the image. You say you want to speak to my manager? You say I'm being rude to you? You say I should be going out of my way to make you happy? You say you'll leave a 1 star review?..."
Etc.
If you ask a bartender to make you the 'celestial milkshake' and show them the photo, they are going to go through the same course that I just went through, but with mixology. They are going to explain that cotton candy dissolves when put in liquid, that edible glitter doesn't look like that, that the liquers listed in the recipe don't interact well, and that the image you have given them is essentially concept art by someone who has never even worn an apron.
Having reasonable expectations for your food is not by any means shaming you for falling for AI. It is saving you the embarrassment and them the frustration.
#the lady arguing that these can be done#has doubled down#and people keep pointing it out that these are not real things#and she refuses to believe them#its embarrassing
1K notes
·
View notes
Text
QoL as Kindness: ISAT's diagetic tutorials
This is the hopefully first of a series of posts I'll be doing reinterpreting ISAT's Loop through the lens of START AGAIN: a prologue's context. As such....
Major spoilers for both ISAT (all acts, including optional content) and SASASAP (all endings).
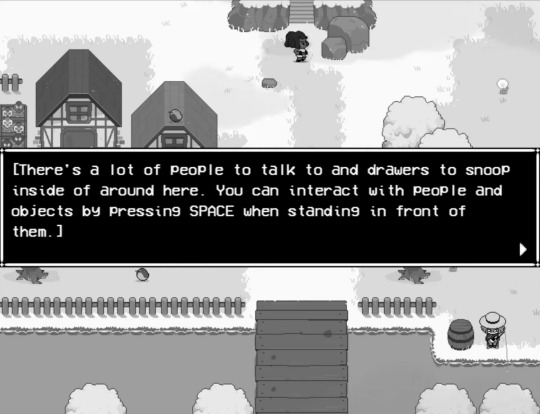
One of the biggest differences between ISAT and SASASAP is it’s QoL – it’s Quality of Life. QoL refers to all the little things that make a game just that little bit more playable; quick to navigate menus, quicksaving… tutorials.
It’s not really a surprise that SASASAP is as RPGmaker as RPGmaker gets. This isn’t a criticism, just an observation, and also a compliment to how much Adrienne’s skills with the engine improved between releases. Still, there’s some things that ISAT has over SASASAP.
ISAT’s QoL is absolutely essential to making it bearable. Anyone ever watch an ISAT playthrough where the player sighed in relief as the tutorial on picking where you loop came up?
SASASAP lacks a lot of ISAT’s QoL because it’s an earlier project without a studio backing it, but what impresses me is how this change ties into narrative.
Because the greatest chunk of ISAT’s greatest QoL is provided by Loop.
Even before you ever meet them, they’re already over your shoulder. Loop is the tutorial, speaking to you inside your brain.
It’s genius, in that no player is ever going to question this. Hell, SASASAP’s movement tutorial is the exact same thing with less flavoring
This reframes what the QoL is – it’s not just a convenience to the player, it’s a convenience to Siffrin, too. It’s diegetic. It’s not something the game is giving you, it’s something Loop is giving you.
Let’s look at what Loop gives you, and more importantly, why.
Zone Out
The first of the QoL features I want to talk about is the Zone Out function, the absolute bread and butter of not making this game a total slog.
The Zone Out feature as is did not exist in SASASAP (because Adrienne didn’t know how to do it yet) – instead, some doubled scenes let you just skip them entirely outright. There’s only two extremes: listen to all of it again, or none of it.
ISAT’s zone out system is much more dynamic, since it fast forwards dialogue line by line, letting you zone in whenever you’d like, and forcing you to zone in whenever a) something notably new happens, or b) whenever Siffrin speaks.
The way this feature is introced by Loop is kind of genius. Because Loop’s tutorial is about one thing – it’s okay to skip.
“You might miss what your party is saying, but who cares, right? If you make them mad, you can always loop back and they'll have forgotten all about it!”
It’s a cruel joke, or at least it seems that way on the surface. It’s also genuine advice. And a cruel joke at the same time. For Siffrin, freshly starting the loops, this is scandalous, but for Loop, who’s long since desensitized, it’s the same old same old.
What Loop’s doing here, by joking about Siffrin not listening to the party, is alliviate Siffrin’s guilt when they inevitably take Loop up on the offer. Because, even though Loop loves their party members…
From SASASAP, when sitting outside the bathroom:
(Will you get farther this time?)
(Will you live this time?)
(Or are you stuck listening to the same lines forever?)
(…)
(Stars, you’re so tired.)
Loop knows intimately well that Siffrin is going to drive themself insane trying to be a people pleaser every single loop, so this joke is telling the outright – don’t bother.
At first, Siffrin (and the player) still might. I really enjoyed reading the same conversations five times minimum because they’re fun and I’m deranged, but at some point I did start skipping them. And it was a relief to know there wouldn’t be anything new.
Siffrin: “Should I check everything again?”
Loop: “You mean, should you check the same barrels, the same closets, the same objects on tables every loop?”
Loop: “I mean, you can, but… You know things won’t change, right?”
Loop: “If you really want to get a certain item again, or listen to your friends repeat something funny, you should!”
Loop: “I personally would only check two or three things every loop, and ignore the rest.”
Loop: “It will just make you crazy to expect something to change, when nothing will.”
Loop: “All that might change is your reaction to it!”
The game is telling you, Loop is telling Siffrin, don’t drive yourself insane playing, please. The characters aren’t going to remember if you skipped something.
In the course of my script wizard activities, I’ve gotten an in-depth view of just how much that actually holds up. Pretty much all major differences are by Act, unrelated of how often you’ve done something. Minor variations apply for other things, but… those variations are minor.
And this also points out what all those variations are. Siffrin’s reactions!
Loop’s pre-empting Siffrin’s guilt, cuz they probably felt it themself. Hell, we do know they felt the pressure to perform and make sure nobody notices anything’s wrong, in SASASAP! Right up until the finale, Loop was driving themself up the wall.
(You have to act, you can't crack, you have to fake it and play it exactly as you did the first time for the whole way through so your friends don't find out anything is wrong)
(You don't want to know what would happen if they knew their quest was in vain)
(If they knew their quest for justice and change always ends in stillness and death!)
Acting everything out perfectly is one of the ending paths for SASASAP, which results in… complete and utter failure. Obviously.
(You acted perfectly normally, didn't you?)
(Nothing out of place, nothing weird, every line the same as it might've been the first time?)
(Ah…That was your mistake, wasn't it…?)
(Because… Didn't your very first time… end exactly like this?)
(The King throws the Housemaiden's body onto the floor again.)
Zoning out for too many conversations actually awards weird points in SASASAP, locking you out of the Perfect Ending. On the other hand, acting “perfectly” in ISAT… has no awards whatsoever. No special scene or or optional event or anything at all. You get nothing for paying attention!!!
So spare yourself the pain already, m’kay?
(On that note: I don’t think Loop not being sarcastic about it would’ve like… worked. At the start of ACT 2, Siffrin isn’t going to believe Loop when they say “Stop forcing yourself to relive the same thing over and over because you’ll start seeing your friends as disposable actors and lose touch with reality.” That all comes later, when Siffrin can look back on Loop’s words and see how right they were.)
Loop Back
The second biggest sigh of relief in any given ISAT playthrough is probably this specific tutorial.
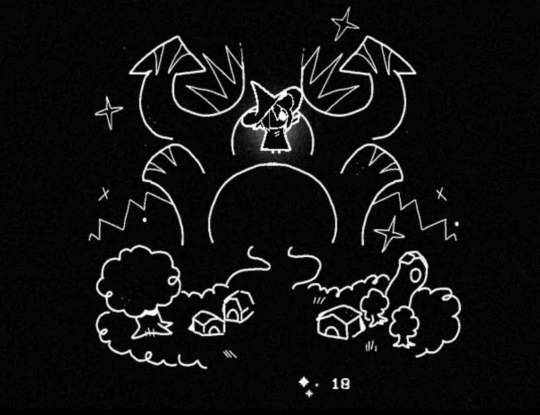
Loop graciously shows you that you don’t need to loop back all the way to the beginning every single time. You can pick and choose where to go, even going forward by paying up with Memories of Skirmish.
This is a feature SASASAP does not possess, for the reason that it is much, much shorter, only covering about as much as one floor of ISAT’s three floor House.
But… since this is a character showing this to you, Loop showing this to you, we can ask… when did Loop learn this? After all, START AGAIN, Loop’s loops, do not have this feature.
“It'll save you time, so it's important, so listen up!”
This feature not existing in SASASAP means this is a thing that Loop did not know exists during their own time as Siffrin.
And that’s just the thing, isn’t it? SASASAP’s Siffrin does not know how to do this. They cannot pick and choose where they end up, as demonstrated wonderfully by SASASAP’s True Ending.
There’s an even more wonderful implication, though –
On SASASAP’s Perfect End path, when exiting the final room before the King, Isabeau says this:
Isabeau: “…I'm glad you're feeling better, though!”
Siffrin: (…?) “What do you mean…?”
Isabeau: “Oh!!! Um, you were…”
Isabeau: “Well! You were acting a little weird when we were way closer to the Castle's entrance……”
Isabeau: “You weren't really listening to us, you were kinda smiling the way you do when you're actually not happy…”
Isabeau: “…and you like, almost acted like you knew exactly where you were going?”
Isabeau: “But clearly you're feeling better now! You're acting just like normal!!!”
SASASAP’s Siffrin knew how to do this, somehow managed to lock themself into the House’s last floor… and then forgot how to get back. By making this tutorial, Loop is ensuring that Siffrin never will.
“What can I do next?” – SASASAP’s greatest flaw
So, if you’ve had the pleasure of playing START AGAIN START AGAIN START AGAIN: a prologue yourself (as you should), then you’ve probably faced this scenario, or some variation of it:
I got to the end, I died to the King, but… what do I do next? The game tells me to go for the extremes, but how do I do that?
(edit: apparently some of yall just managed to speedrun sasasap in two loops. You're gonna need to stay with me here, please. Suspend your disbelief a bit, because a lot of people [including me] were dumbasses about it)
Maybe you try another loop, but just get the same ending again (or a differnet one, depending on a coinflip). You’re getting frustrated. Getting the Perfect Ending demands pinpoint precision to avoid everything weird, the True Ending demands good memorization of every single damn key in the game, and the order you do everything in. (Though, to be fair, the requirements on that one are actually more merciful than one might expect.)
Point is, in SASASAP, it’s incredibly easy to get stuck in that endless loop of “What the fuck do I do now?” It’s not uncommon to think you got it right only to get the same result anyways.
What does one do in this situation?
They consult a guide, obviously.
START AGAIN’s ending requirements are frustrating. They are. When I tried to go for either the Perfect or the True Ending, I saved inside every single room, just so I could get right back to it when I inevitably fucked up five times minimum. This is both criticism… and praise.
Because Loop is the major reason that ISAT does not suffer from this same problem.
Whenever you’re stuck in ISAT, Loop is just a single loop or call away at any times. And besides that, no plot requirement in ISAT demands nearly as many moving pieces all at once as SASASAP does – the “Sus Route” has been relegated to an optional ACT 4 exclusive event, instead of the game’s True Ending.
Instead of consulting an external guide on how to progress, you have one right there in the game, always ready with the next tip. They’re not infallible, mind you – enough time in Isatcord’s #game-help proves that, but Loop solved all of the moments I got stuck and frustrated in ISAT for me.
(Primarily that one time you need to figure out that a photo is similar to being stuck in time. That moment in particular is actually commendable, as you need to ask Loop about it twice before they tell you, leaving you a last shot to try and figure it out on your own.)
Loop is a feature that nullifies SASASAP’s greatest flaw in its successor, and they choose to do so.
Memory of Keys
In my humble opinion, Loop does this because… they do not want Siffrin to suffer as they did. They want Siffrin to escape. And there is no greater example of their kindness than how Loop treats keys.
First of all, all keys in the game have a sparkling effect on them if you’ve picked them up at least once before, making it immediately clear where in the room they are. This means you don’t need to search every single room top to bottom for them, as you had to do for any keys and Star Crests in SASASAP. It’s some nice QoL that just means you don’t have to re-search the same area if you happened to forget which specific cupboard the key was in.
Key point being: SASASAP did not have this feature. In SASASAP, you did have to memorize where all the keys are, and doing so is expected if you want the True Ending.
Loop does not want Siffrin to have to do this. Because…
From SASASAP’s True End:
(The torch in the infirmary? That’s important!)
(The key in the book? Soooo important.)
(The names of your friends, that have been by your side throughout this entire adventure?)
(Not worth remembering.)
Compared to ISAT’s ACT 2:
Siffrin: “How come I can see where the keys are?”
Loop: “Whaaaaat? You caaaaaan? How can that beeeeeee?”
Siffrin: “Is it thanks to you?”
Loop: “Maybe.”
Loop: “I figured you'd have other things to worry about than where a stupid key is.”
Loop: “No need to thank me.”
To Loop, that they memorized the House’s layout over their friends’ names is a defining moment to their own failures. After all, in all likelihood, the True End of SASASAP is the last loop before they called it quits. It’s a traumatic experience from them, one that came from having to remember all the dumb fucking keys.
They do not want Siffrin to experience this. They do not want Siffrin to have to memorize the House, to push away what actually matters in favor of efficiency. So Loop is directly, personally, giving them a boon, so that Siffrin does not have to.
Conclusion
There’s probably more tutorial things I could talk about, but I feel like you’re seeing the pattern now, even if I don’t bring up saving level ups or keeping equipment or the “You’re stuck” signifier, least of all cuz they don’t have direct points of comparison with SASASAP like my other examples do (SASASAP has no changeable equipment, and saving levels doesn’t matter if you only have one floor, and you can’t softlock either.). So.
Loop’s tutorials all belie a fundamental kindness to their character. Everything that made their own experience trapped in the timeloop just that bit worse, they’re choosing to do away with it for Siffrin. They are choosing to make Siffrin’s time here easier.
Zoning out too much lead to them never paying attention to their friends, forgetting their names, so they make sure that Siffrin can still zone back in whenever something new happens.
Loop trapped themself for years on the final floor, locking themself out of progress that might lie further back, so they’re ensuring Siffrin knows exactly how to loop forwards and backwards so it doesn’t happen again.
Loop lets Siffrin keep equipment across loops to cut down on time spent doing the exact same thing over and over.
They are saving Siffrin time, and they are giving Siffrin comfort.
At every single turn, Loop is saving Siffrin from the same pitfalls they fell into without anyone to guide them out.
It's honestly incredible to transform an increase in skill into an actual narrative element. Yes, SASASAP sucks more to play. But ISAT sucks less, because Loop wants it to. It's the perfect marriage of real world circumstance and storytelling. I could... probably pull another comparison here, saying it's like a game and its remake - overhauled graphics, expanded story, and loads and loads of QoL, because the makers of the remake realized something. They love the original, but parts of it do suck, and there's so much that can be done to make a new player's experience smoother. Metanarrative commentary,,,, woah,,,,,
Every single one of these QoL elements I’ve mentioned function as a crutch for a player’s failing memory, but also Siffrin’s (similar to what I talked about in my previous essay on ISAT’s ludonarrative - the player and Siffrin are always in sync, even in how tutorials benefit them). Loop doesn’t know the player exists though (only the Change God does), so they do everything for Siffrin.
To keep Siffrin from forgetting. To help Siffrin focus on what’s important. To make Siffrin’s journey just a little bit less miserable.
Loop directly improves ISAT’s QoL. For you. For Siffrin.
From Loop’s introduction:
Loop: “See, I’m useful! I’m very useful! That’s why I’m here, helpful Loop.”
Siffrin: “Why are you helping me?”
Loop: “…”
Loop: “Because I think you should be helped.”
Loop: “I won’t always have the answers, but… I think having someone on your side to talk to is better than dealing with this alone.”
Loop: “Right?”
From Loop’s hangout:
“But it’s fine.”
“Whether you believe me or not, I’m here to help you.”
“So you can escape this loop.”
And finally, from the start of ACT 3:
Siffrin: “Are you really here to help me?”
Loop: “Stardust…”
Loop: “…”
Loop: “Yes.”
Loop: “If you can believe anything, believe that.”
Loop: “I asked to be here, so I could help you.”
And I do believe them. Loop’s feelings on Siffrin are… complex, to say the least. They love Siffrin, and they hate him in equal measure. They’re jealous, and spiteful, but underneath everything…
In SASASAP, if you die to a Sadness thrice, you get this monologue:
(Sometimes, when you loop back here…)
(In the corner of your eye, you can sometimes see someone that looks just like you.)
(Is it a you from another loop? Remnants of your past failures?)
(Are you going crazy?)
(May they succeed where you cannot.)
#feli speaks#in stars and time#isat spoilers#start again: a prologue#sasasap#LOOP TIME BABEYYYYYYYYYYYYYY#WATCH OUT IT'S FELI TALKING ABOUT LUDONARRATIVE AGAIN
944 notes
·
View notes
Text
How to start a pair of punk patch pants
(a potentially really shitty tutorial)
I've seen a couple videos on this but a lot of them seem to skip out on some really key information and tricks so I thought I'd just write a probably really long and really rambly post about it!!!
Step one: gathering supplies
In terms of supplies the main things you'll need are:
The pants
Approximately 4 rolls of dental floss (this can change depending on number of patches and your pant size)
A needle with a big enough eye to fit the floss through
Acrylic paints
Brushes
Scrap denim or other scraps of fabric for the patches
Pins
Some kind of marker or pencil that will work on the fabric you've chosen
I will be going into some detail below about why you need each of these items!!
The pants themselves
personally I prefer either using a pair of jeans I already own or thrifting a pair to be as sustainable as possible, however if you really need to go out and buy a new pair for whatever reason get a high quality pair, this will help in the long run with preventing them from falling apart as easily.
The second main point I want to make is that the pants should not be skinny jeans. This is because when you sew on patches it slightly cinches in the fabric, and with skinny jeans generally being stretchy, this is going to result in the thread of the patches stretching out and snapping. Your patches will all just start falling off and it'll ruin your hard work.
This is why I'd recommend using a pair of jeans or pants that are a bit looser of a fit, such as straight legged pants or a pair of pants a size up from your actual size if possible!
Dental floss
The reason it's generally suggested to use dental floss rather than actual thread is because dental floss tends to overall be a lot stronger than your average thread, as well as often being more easily accessible to buy.
Needle
This ones pretty self-explanatory, just make sure you get a needle with a long/wide enough eye (the hole the thread goes through) for your floss to be able to fit through without trouble.
Acrylic paints
You may be wondering why I'm suggesting acrylics over fabric paints and there are a few reasons!
The first is simply that they're both cheaper and far easier to purchase for the average person than fabric paints, and I want this tutorial to be as accessible as possible for as many people as possible.
The second reason is that fabric paints require a lot of fucking around with setting the paint, whereas acrylics can just be left to dry and be finished, and so long as your pants are hand washed, the paints won't come out (unless you layer it on super thick or are really rough when you clean them).
Brushes
Another pretty obvious one, these are needed so you can actually paint your patches!!!
Fabric/spare denim
You need fabric or scraps to be able to actually create patches for your pants, so this is essential.
Any kind of scrap fabric can do, a lot of fabric stores tend to have bins of scrap fabric that are either pre-priced or priced by weight and that can be a really good opportunity to acquire the fabric you need!
Another way (the method I tend to use) is thrifting a few pairs of jeans alongside the pair I want to patch and then ripping them up into patch-sized pieces!
Either way, I really advise against buying straight up new fabrics by the metre for this as it kinda goes against the entire idea of sustainability and reuse.
A really big tip I have for when you're cutting the fabric of your choice up for patches is to actually only cut a little slit, and then rip. This produces a really nice distressed edge and will help add some texture and more of a fucked up look to your pants a lot quicker than if you waited for the fabric to fray by itself!
Marker/pencil
This is literally just so you can draw your designs onto your patches! I've personally found that either a black or white (depending on how dark the fabric you're using is) pastel pencil is generally good enough to get the general gist of what you want down well enough for you to paint it on.
Pins
These are literally just to hold your patches in place and literally any kind from proper sewing pins to safety pins will work! (just don't forget they're in the jeans before you put them on I promise you it isn't fun to put on a pair of jeans full of pins).
Optional: a sketchbook
You may want a sketchbook or alternatively scraps of paper if you have any kind of original concept for a patch so you can draw it out a few times first to really nail it, and it's also helpful to have if you aren't as confident in your painting and drawing abilities!
Step two: patch making
I personally pre-rip/cut all of my patches before I paint anything on them generally speaking and then fit whatever design I want onto whatever piece I think it would fit on, however if you want to paint your patches and then rip/cut the design out that's also an option (and probably a much smarter one I'm just incredibly stubborn).
For punk pants you want a good mix of both punk bands, politics, and also maybe something a bit daft (I have the "he scream at he own ass" possum on the back pocket of a patched skirt for example). If you don't have bands and such, it kinda defeats the point of them being punk patched pants.
I personally generally pick a theme (eg. colourful patches, all black and white) when making anything patched because I think it makes everything look a bit more cohesive, but that is by no means a rule you actually have to follow I'm just autistic a fuck tbh.
Step three: the assembly
I personally put my main/bigger patches on first and put them on in a few different places until I get the placement I like, and then sew them on with the floss like this:
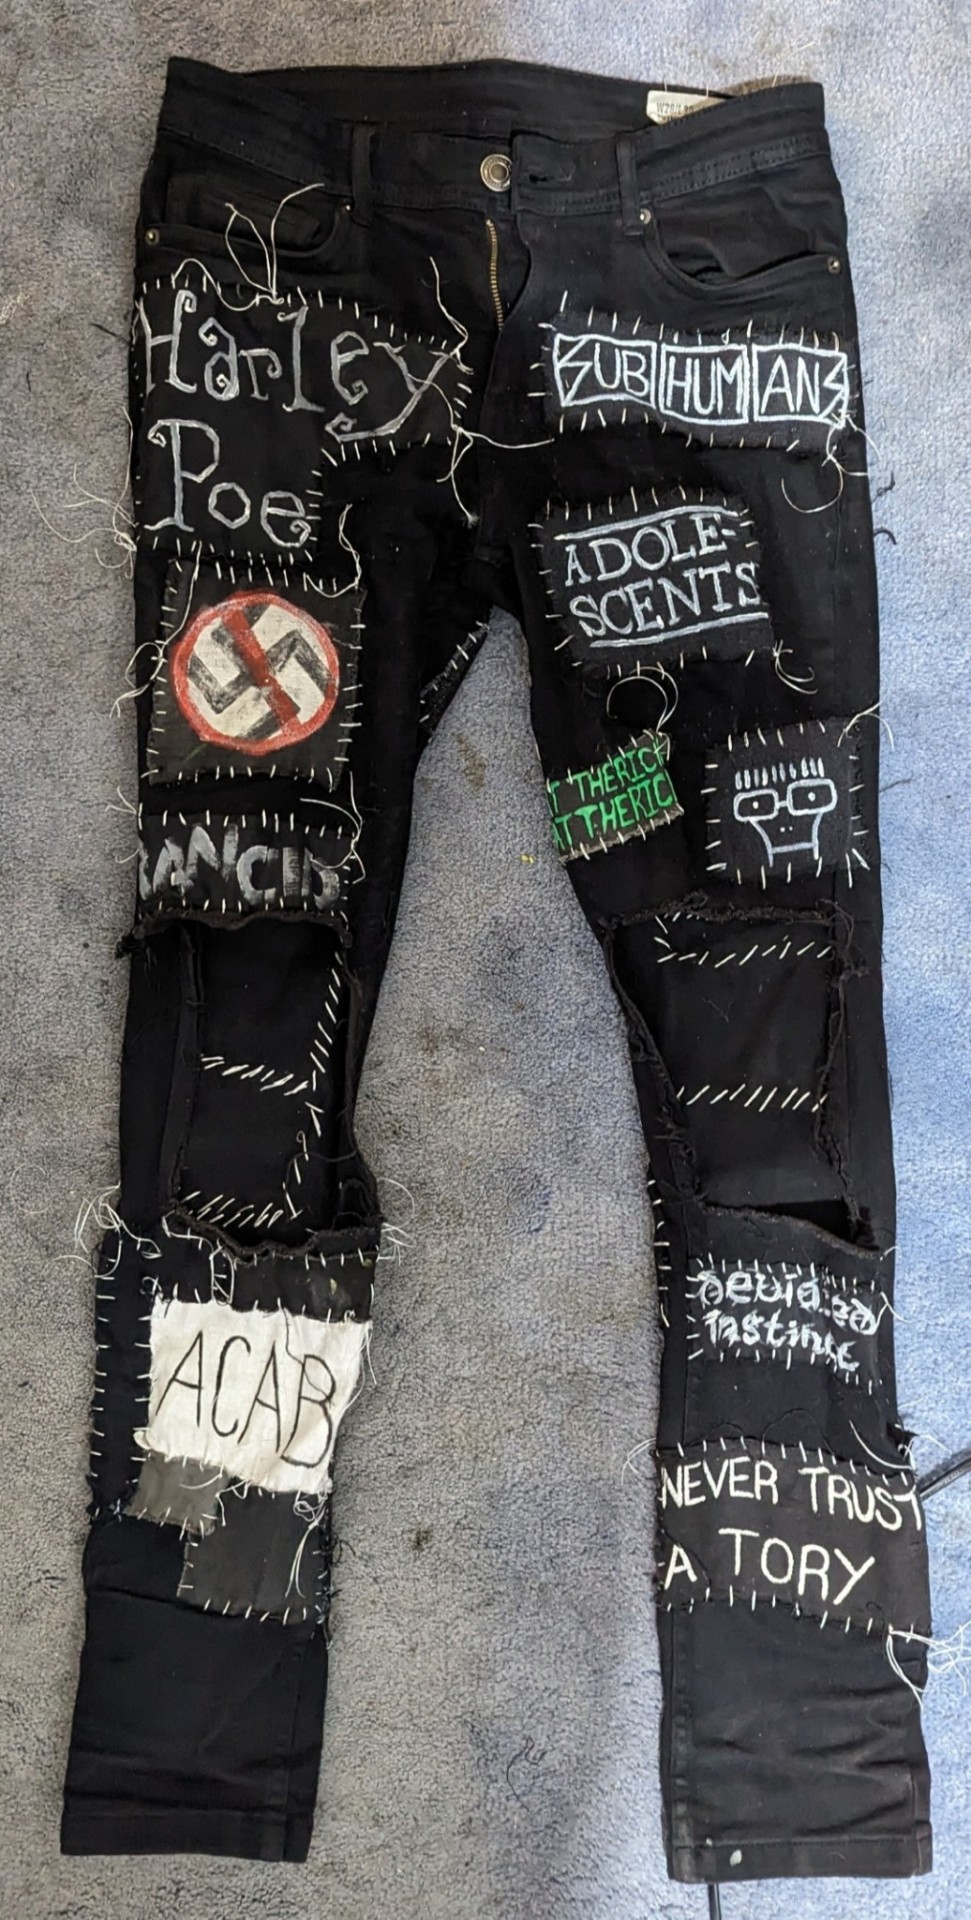
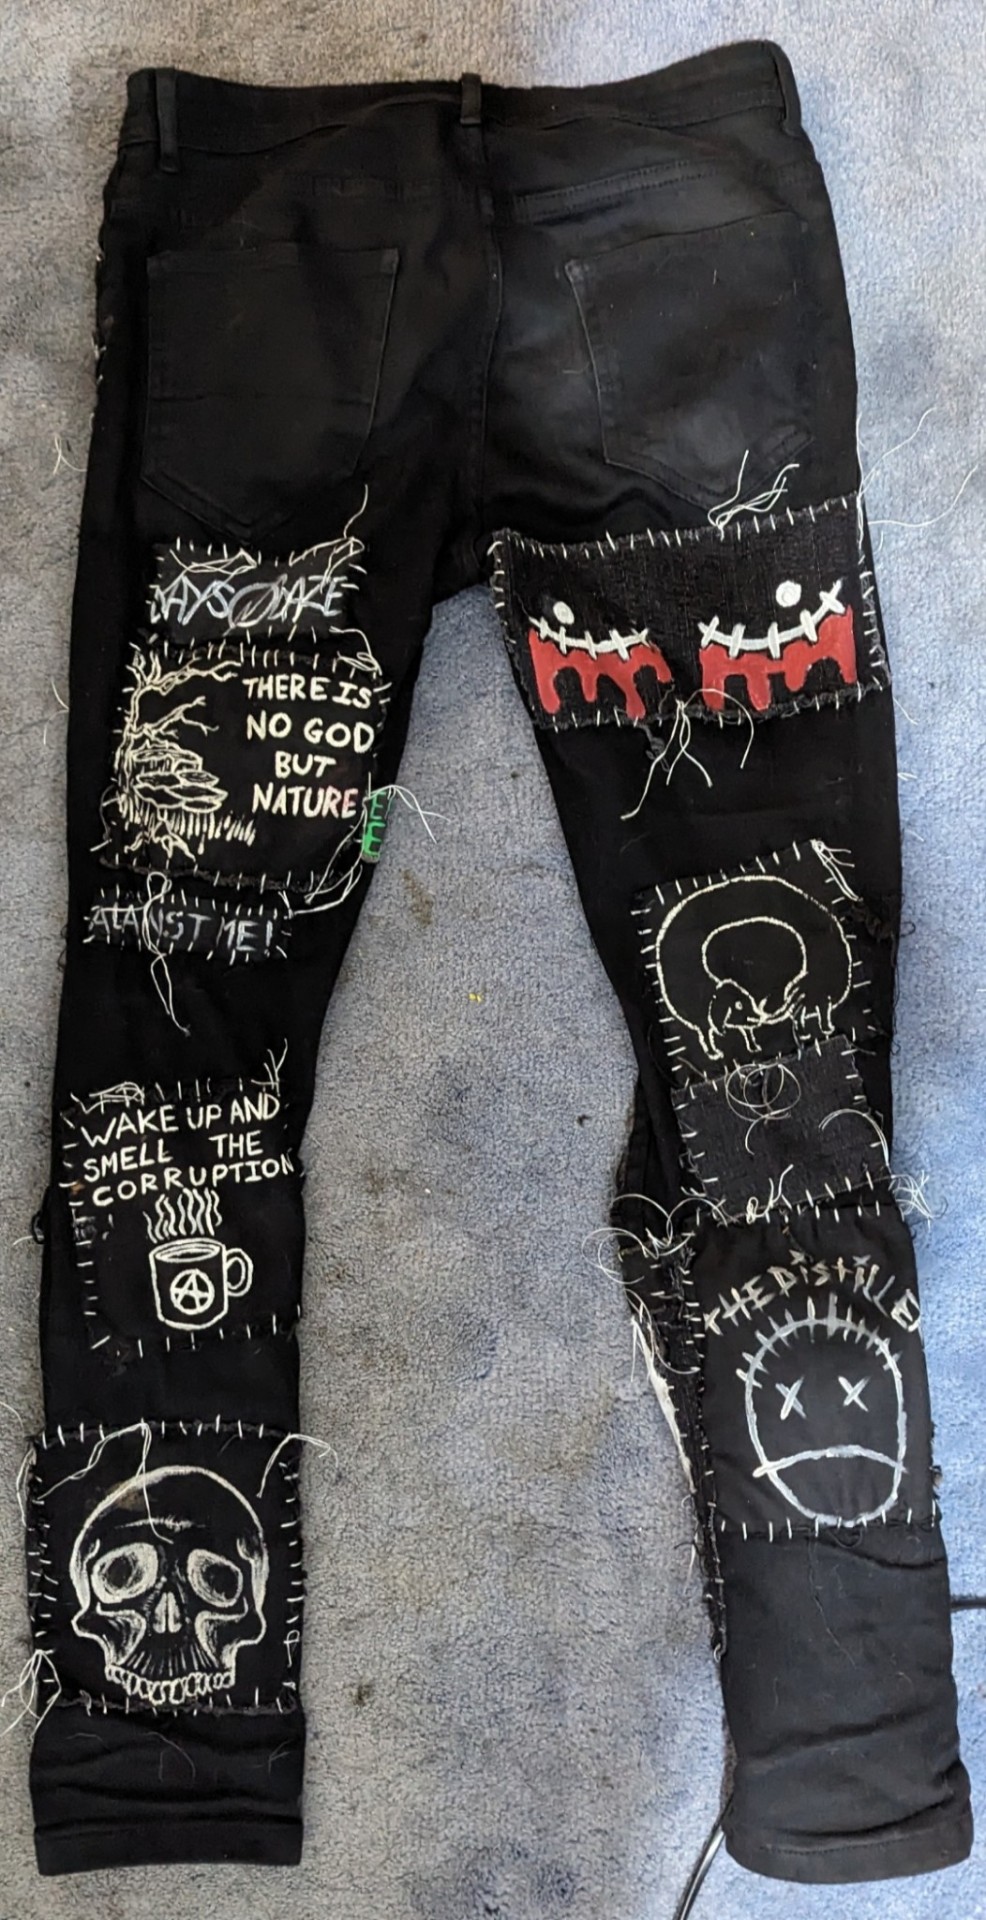
The main thing you want to do to make sure your pants don't wind up looking a bit weird or bare is to fill in any gaps between your painted patches with small, blank patches. Like this:
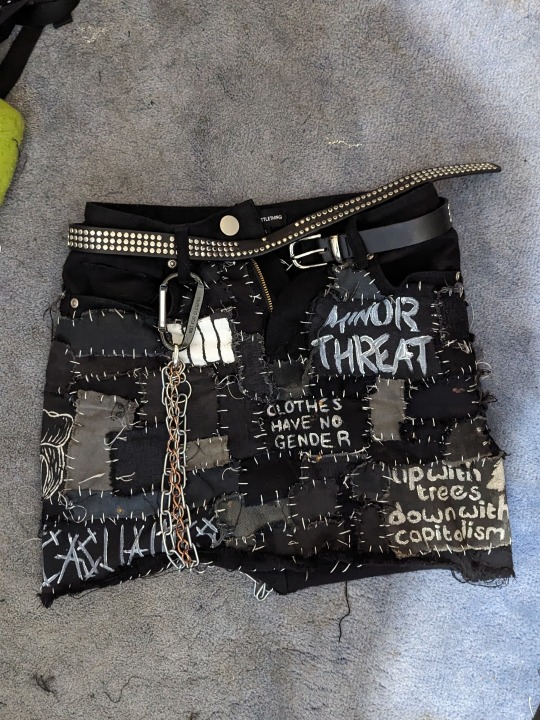
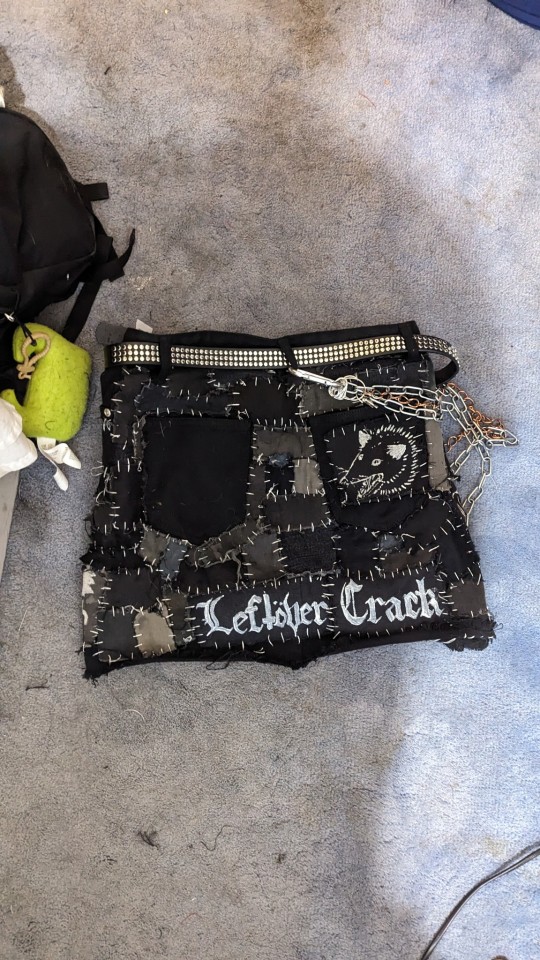
and that's pretty much it!!! I can't really explain via written text how to sew and how I personally tie off etc but if anyone would like a video tutorial lmk!!!
#punk#alternative#cripple punk#queer punk#diy or die#punk patches#diy punk#punk diy#patched pants#crust pants#patched skirt#punk skirt#crust skirt#punk pants#crust punk#punk style#punk fashion#punk culture
2K notes
·
View notes
Text
ask from over on cohost that i wanted to crosspost over here!!

hi!!! i'm assuuuuming you're talking about the effect in this one?

i'm using something called parallax mapping!! i know most people know what parallax is and how it works in the realworld but im just gonna demonstrate it real quick just so i dont have to keep going "ok now imagine how parallax works"
so imagine you have two windows. in the middle of the window on the left, there is an Orb. it is directly in the middle of the window. the window on the right also has an Orb, but this one is pushed backwards outside the window quite a bit. now if you look at the two windows, and turn them, you get this:
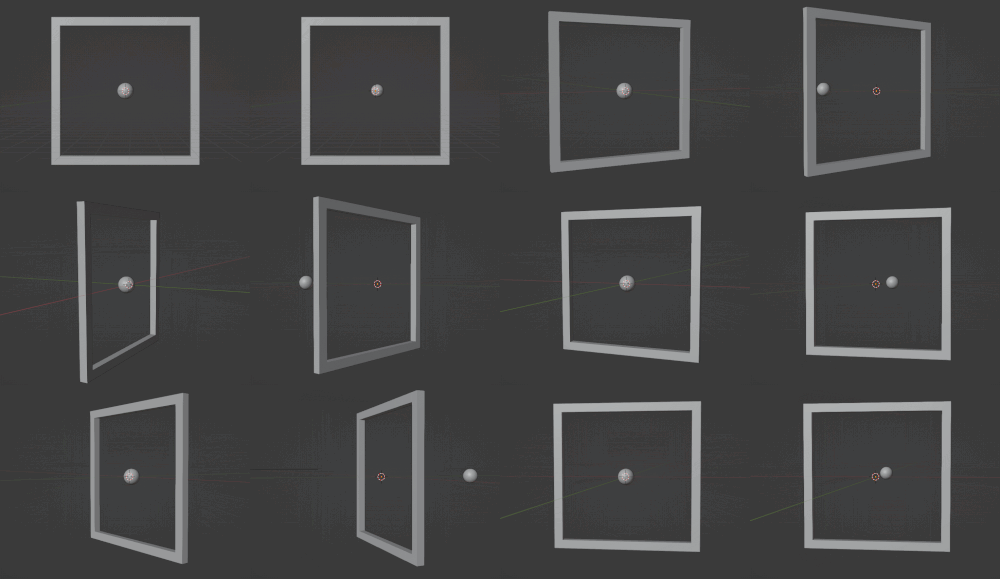
for the first window, the Orb stays basically in the center of the window. but in the second window, if you turn the window right, the Orb "looks like" it's moving left
parallax mapping is essentially taking this assumption, that if you change the angle you are looking at an object, the further away an object is, the more it will move in the opposite direction. i will spare you on the matrix math involved but you can get the exact relation you need by getting the Tangent Space View Direction. you dont need to understand the math behind this to use it
so, lets go back to the window example, how would you make the same effect, but with just this 2d texture of the Orb?

what if, whenever the object it was attached to turned right, you just moved the texture to the left, by X amount, where X is how far into the window the orb is. you would essentially be cheating god and "faking" the parallax. it would look like it's moving like it's far out of the window, but really, it's still a 2d texture. it would look like this:

i was too lazy to make the shader and record another gif but i dont need to because functionally it would look almost identical because when you turn it right the Orb moves left
again, you can just Know the right direction to push the texture in based on the current angle by getting the Tangent Space View Direction. ok another example. what if you had a black and white noise texture, like this

now what would happen if, instead of moving the whole texture X amount. you moved each pixel a proportional amount based on how bright it is. a 100% black pixel would not get moved at all, and a 100% white pixel would get moved the furthest along the Tangent Space View Direction. a pixel thats right down the middle would move half that distance etc etc. well it would look something like this!!!
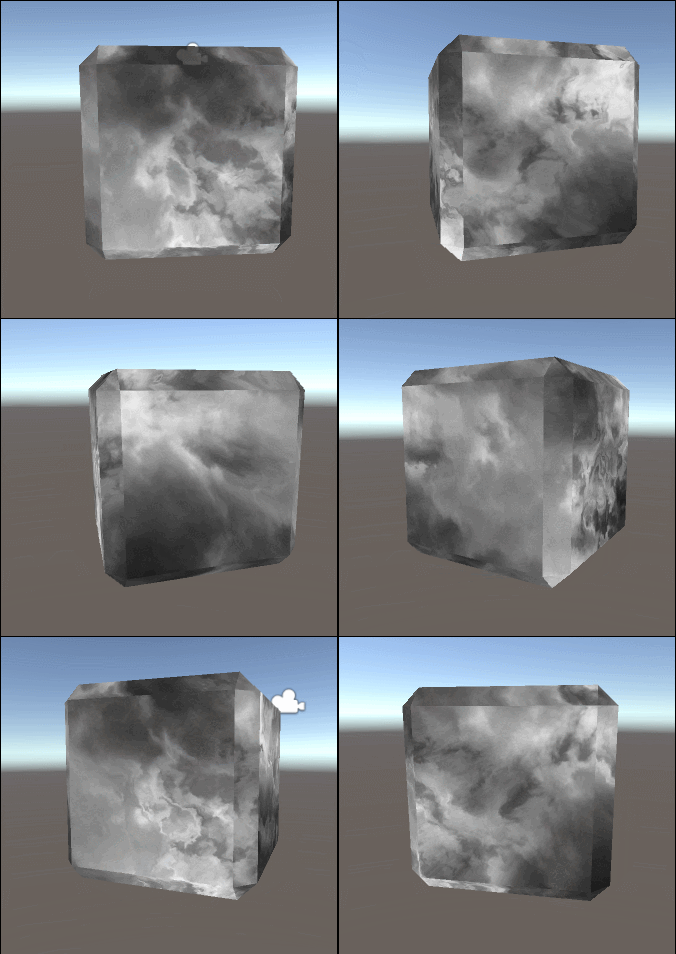
thaaat's the basics behind it!!! it's also used for effects like faking room interiors through windows with just a 2d texture in biig cityskapes and the like

you can see how the cube example looks kind of like an ice cube with the distortion, that's Not intentional and how parallax mapping artifacts. i do not care about it, because i make crystals. but some people do care about it, so you can use parallax occlusion mapping, which is like parallax mapping but a step up
here's some more reads on it if you are interested!!!
https://simonschreibt.de/gat/windows-ac-row-ininite/
https://www.patreon.com/posts/playing-with-29753575
https://catlikecoding.com/unity/tutorials/rendering/part-20/
https://halisavakis.com/my-take-on-shaders-parallax-effect-part-i/
873 notes
·
View notes
Text
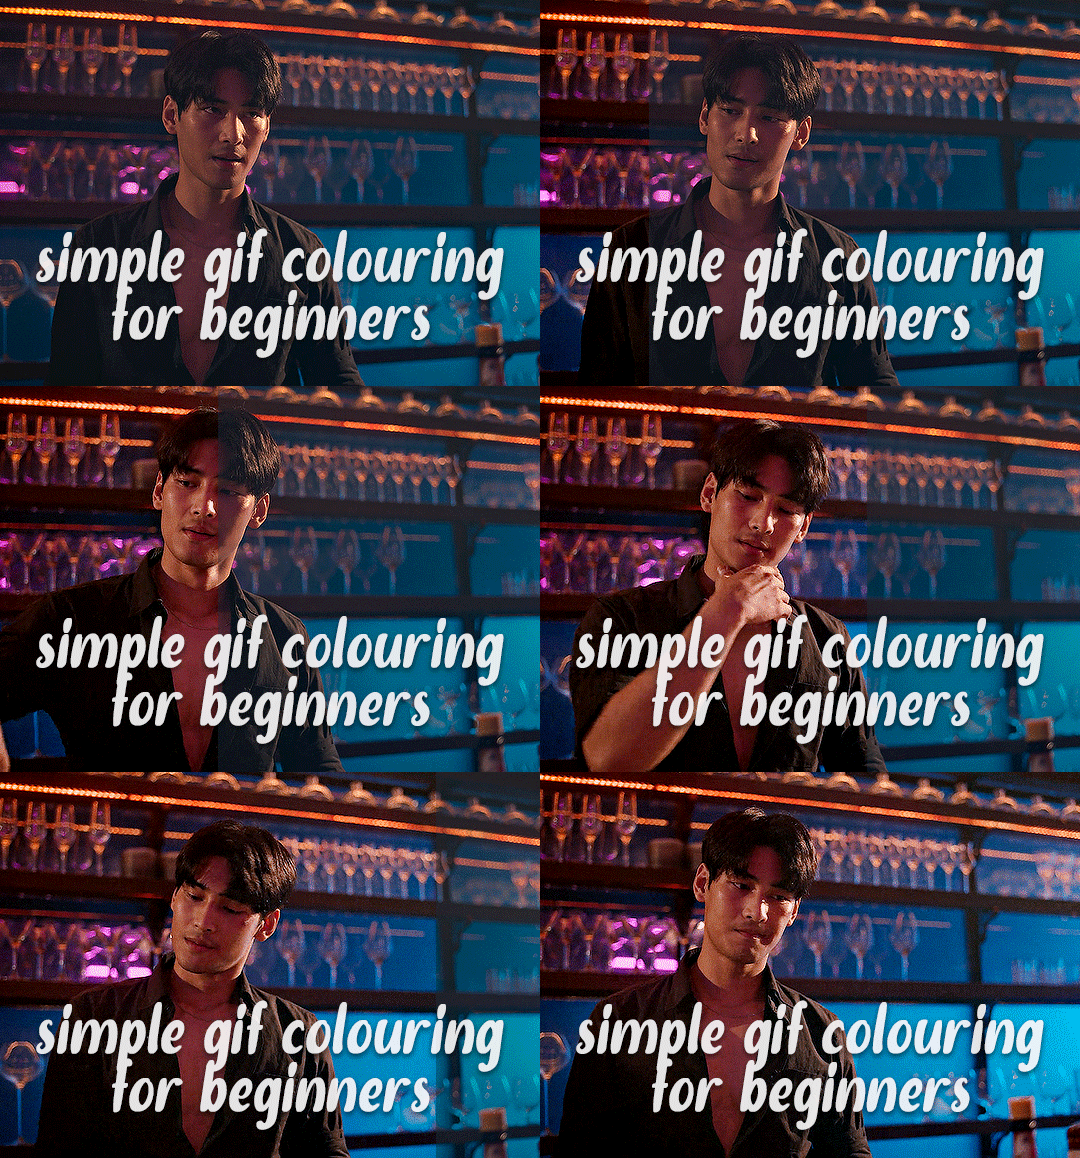
✨ Simple Gif Colouring for Beginners ✨
I wrote up my basic gif colouring process for a friend recently, but a couple of people here mentioned they'd also find it helpful! so, as requested, this is a beginner-friendly walkthrough of the way I colour my gifs :) it's aimed at brand new gif makers with no prior experience with photoshop or photo editing.
when I first started gif making I found colouring and photoshop in general suuuper daunting, so I've tried to simplify everything here as much as possible. hopefully this will be relatively easy to follow and not too intimidating!
a couple of things to begin with:
I'm only talking about colouring here - this is not a full gif making tutorial. I've linked to some of my favourites of those here!
I personally like to make bright, 'clean' looking gifs with vibrant but natural colours, so that is the style of colouring this tutorial is geared towards. most of gif colouring is subjective and about personal taste - the only thing that I'd say is possible to get wrong is skin tones, which I talk about a lot in this guide.
as I mostly gif Thai dramas, most of the advice is geared towards colouring for East Asian/South East Asian skin tones - but the techniques should be fairly universally applicable (and here are some tutorials that talk about gif colouring for other skin tones).
I'm not an expert! I'm not claiming this is the best or the only way to colour gifs - it's just how I do it.
this post is very image-heavy. if the images aren't loading (or the gifs are running slowly or cutting/looping weirdly), then try viewing the post in its own tab (rather than on the your dash or someone's blog) and refreshing the page.
okay, full walkthrough beneath the cut!
contents:
1. intro
a. natural gif colouring goals
b. very very basic colour theory
2. super simple colouring (the essentials)
a. curves
b. selective colour (and skin tone correction)
c. hue/saturation
d. saving and reusing colouring
e. another simple colouring example
3. other adjustment layers
a. brightness/contrast
b. levels
c. vibrance
d. colour balance
e. channel mixer
4. troubleshooting
a. curves
b. saturation
5. fin!
1. intro
the colouring part of gif making can be super overwhelming, especially if (like me when I first started!) you're completely new to photoshop and/or have no experience with colour theory or photo/video editing.
if you're opening photoshop and making gifs for the first time, I highly recommend getting used to making a few basic, uncoloured gifs to begin with. just to practice, rather than post anywhere (though you can always come back and colour them later if you want) - but it'll make the rest of the process much easier if you're already beginning to get used to working in timeline mode of photoshop. give yourself a bit of time to practice and get a feel for things like how many frames you tend to like in a gif, where you like to crop them for the best loop, what kind of aspect ratio you like etc* - so that you're not trying to navigate all of that for the first time on top of everything else!
* frames: for me between 60-90 frames is ideal, but 40-120 frames is the absolute min-max I'd personally use in a normal gifset
loops: for the smoothest loops, try to avoid cutting someone off mid-movement or mid-word if possible.
aspect ratio: for full-size (540px) gifs, I tend to go for either 8:5 (slightly 'skinnier' gifs), 7:5, or 5:4 (particularly big, thick gifs lmao)
✨ natural gif colouring goals
part of what can be so daunting about starting gif making is not knowing where to start or what you want to achieve. this is definitely something that gets easier with practice - the more gifs you make, the more you'll get a feel for what kind of look you like and the more instinctively you'll know how to get there. it also helps to see if any gif makers you like have made "before and after colouring" posts - these can help with getting a sense of the kinds of changes made through gif colouring. here's one I made!
in general, I like to make my gifs bright and 'clean' looking, with vibrant but natural colours. these are the things I'm usually hoping to achieve with colouring:
brighten dark scenes
remove muddy, yellowish lighting or filters
saturate colours
correct any skin lightening filters or overexposure
make lighting and colours as consistent as possible between gifs within a single gifset, especially gifsets featuring gifs from multiple scenes/episodes/videos
this guide is focusing on natural colouring, but of course there are many cool ways to make stylised/unnaturally coloured gifs. imo you'll need to master these basics first, but if you want to learn how to do things like change the background colour of gifs or use gradients or other cool effects, then @usergif's resource directory has loads of super helpful tutorials!
✨ very very basic colour theory
[disclaimer! I don't know shit about fuck. I do not study light or art. this is just an explanation that makes sense to me exclusively for the purposes of gif making.]
the primary colours for light/digital screens are red, blue, and green. having all three colours in equal measures neutralises them (represented by the white section in the middle of the diagram).
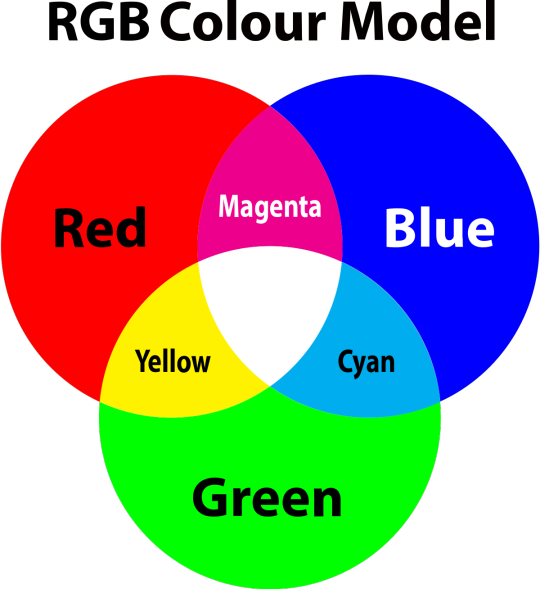
so to neutralise a colour within a gif, you need to add more of the colour(s) that are lacking.
in practice this usually means: the scene you want to gif is very yellow! yellow is made of red and green light, so to neutralise it you need to add more blue into your gif.
it can also mean the reverse: if you desaturate the yellow tones in a gif, it will look much more blue.
looking at the colour balance sliders on photoshop can make it easier to visualise:
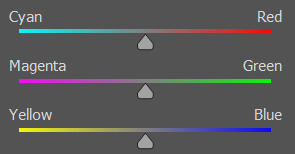
so making a gif more red also means making it less cyan.
removing green from a gif means adding magenta.
taking yellow out of a gif will make it more blue.
tl;dr:
neutralise yellows by adding blue (and vice versa)
neutralise reds by adding cyan (and vice versa)
neutralise green by adding magenta (and vice versa)
2. super simple colouring (the essentials)
starting with a nice sharpened gif in photoshop in timeline mode. (these are the sharpening settings I use!)
some scenes are much harder to colour than others - it helps to start out practising with scenes that are bright/well-lit and that don't have harsh unnaturally coloured lights/filters on. scenes with a lot of brown/orange also tend to be harder.
I usually save a base copy of my gif before I start colouring just in case I end up hating it, or find out later that it doesn't quite fit right into a set and need to redo it etc.
so here is my base gif!

it's an okay gif, but it has a bit of a yellow tint to it that I want to reduce.
colouring is easiest to do in adjustment layers, which can be found under layer -> new adjustment layer - or for me they are here:
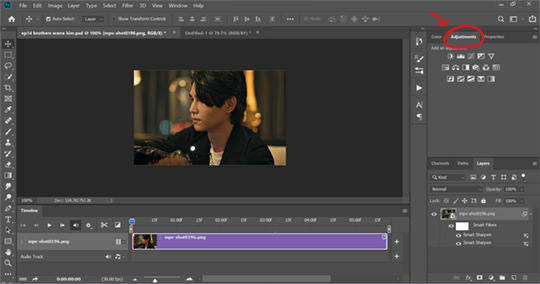
there are lots of different types of adjustment layers that do lots of different things - but for me the absolute essentials for colouring are curves, selective colour, and hue/saturation.
I also use brightness/contrast, levels, exposure, vibrance, colour balance, and channel mixer sometimes, depending on the gif - but I use curves, selective colour, and hue/saturation on every single gif.
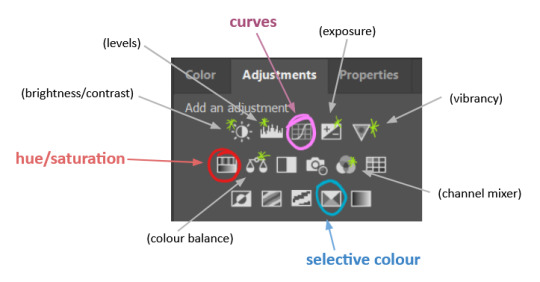
✨ curves layer
the first thing I always do is a curves layer. when you first open one it will look like this:
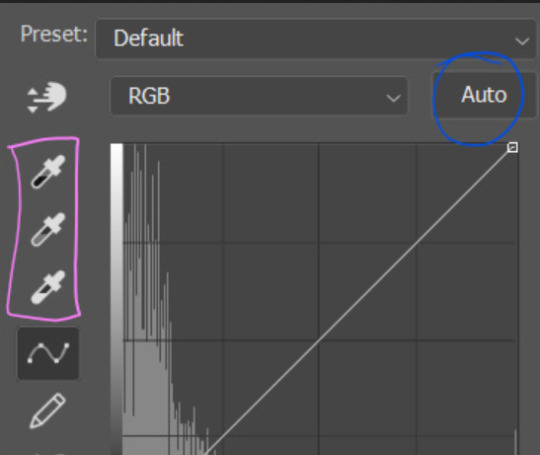
first I usually click the ‘auto’ button, just to see what happens. sometimes it makes a big difference (it usually brightens the gif a lot) - but on this gif it didn’t do much.
if it had made the gif look nicer then I would have kept it and added a second curves layer on top to do the rest of these steps.
the next step is selecting the white and black points with the little eyedropper tools.
the bottom eyedropper lets you pick a white point for the gif. click somewhere super light on the gif to see what happens - for this gif, I clicked on the lampshade on the left. if it looks weird, I just undo it and try somewhere else - it usually takes a few goes to find something that looks good.
here's what that did to the gif:

then I pick the top eyedropper and use it to pick a black point by clicking somewhere really dark, again playing around until I find a black point that looks good.
here's what the gif looks like after picking the white and black points:
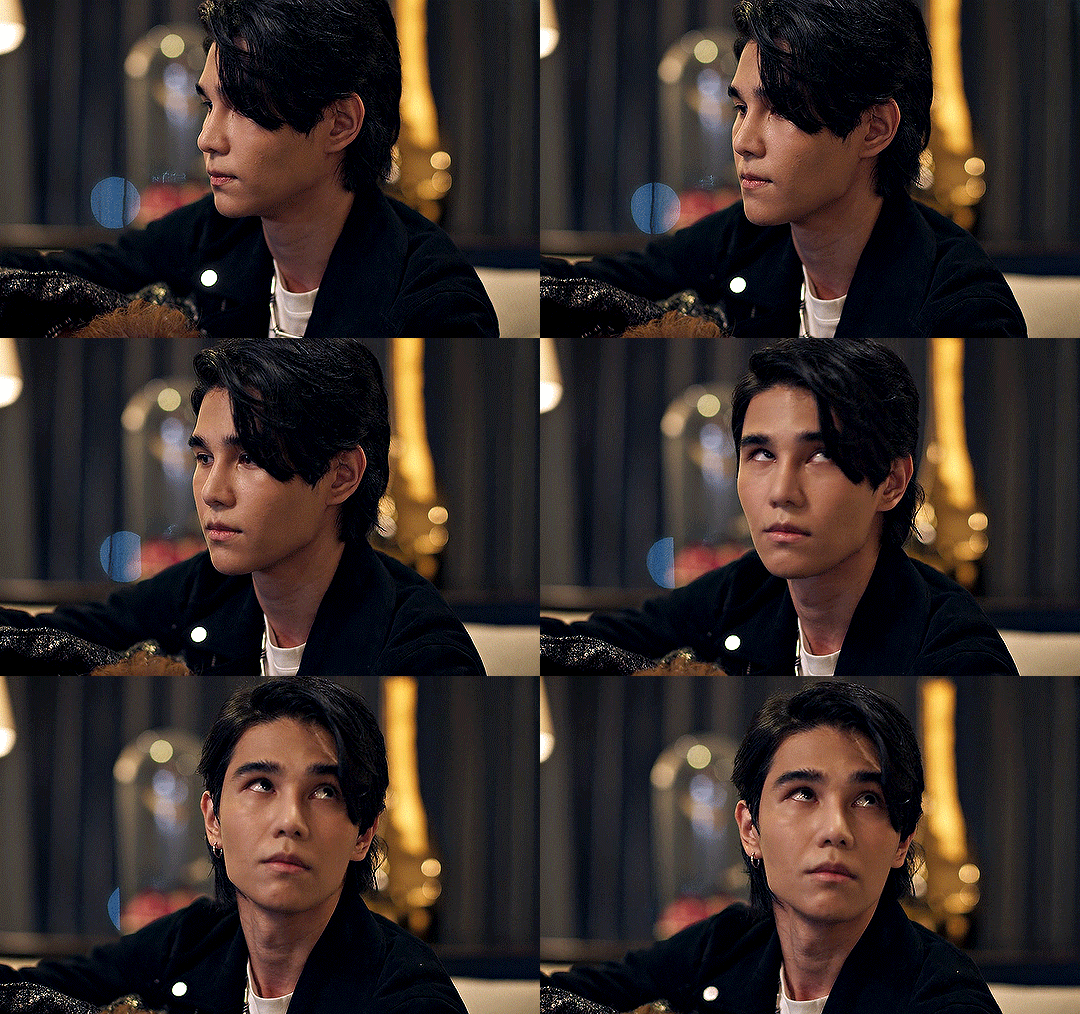
this can take some experimenting, but you can make super easy drastic changes to your gif just with this. in this case, the curves layer took out a lot of that yellowy tint.
and this is what the curves graph looks like now:
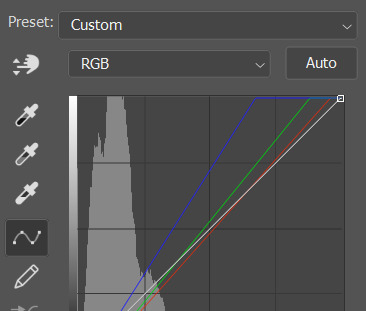
you can click and drag those lines to make further changes if you want - I usually leave them alone though. the colours of the lines indicate which colours have been changed in the gif - for example, you can see from that steep blue line on the graph that blue has been added to neutralise those yellows.
next I usually do another curves layer and just press the ‘auto’ button again to see what happens. usually it brightens the gif a bit more, which I like.
‼️if nothing is working: usually with a bit of fucking about a curves layer works well - but sometimes you can’t find a good white and black point anywhere, and instead your gif turns wacky colours and nothing looks good. this happens more often with very heavily colour tinted scenes :( the troubleshooting section at the end goes over some options, including starting with a levels layer instead.
✨ selective colour (and skin tone correction)
skin tones are made up of a mixture of yellow and red.
removing yellow (or adding blue or red) to a gif will make the skin-tones too red - and removing red (or adding cyan or yellow) to a gif will make the skin-tones too yellow.
adding blue to this gif with the curves layer took out the yellowy tint, which I wanted - but it also took the yellows out of Kim's skin tone, which I don’t want. so I need to put yellow back into the skin tones specifically - without putting it back into the rest of the gif.
selective colour layers let you select an individual colour and adjust the levels of other colours within that colour. you can change how yellow the green shades are, or how much cyan is in the blues, for example.
I need to add yellow back into the red tones to correct the skin tones on this gif. this is the case for most gifs in my experience - the vast majority of the time, unless a scene is very heavily tinted in another colour, a curves layer will add blue/remove yellow.
in the 'colors' dropdown, select the 'reds' section and drag the 'yellow' slider higher - this will add more yellow into just the red shades within the gif.

the amount of yellow you need to add back into the reds depends on how much yellow was taken out of the gif initially - I just play around with the slider until it looks right. if you're not sure, it helps to have some neutrally-coloured (not white-washed!) reference photos of the people in your gif to compare to.
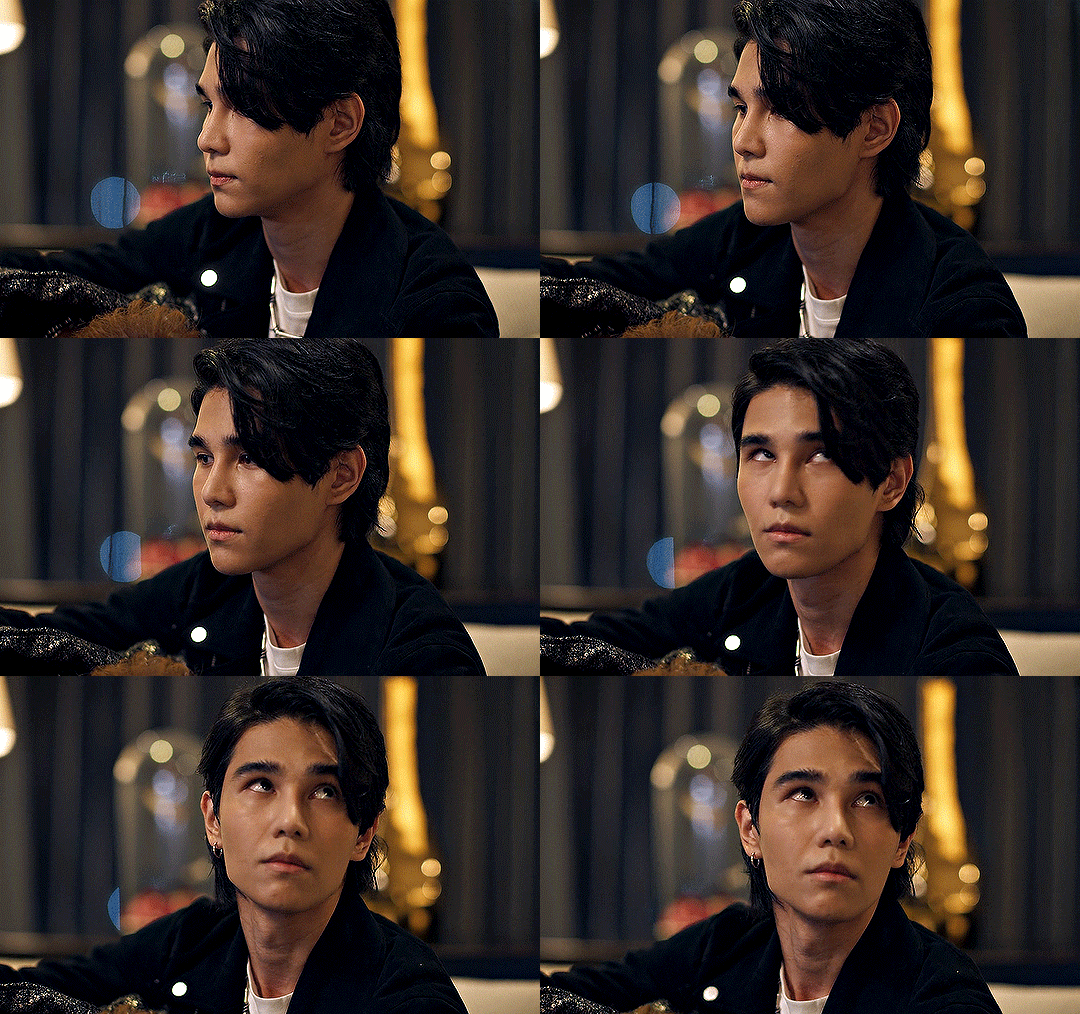
here's the result. Kim's skin is a lot less pink toned and much more natural looking:
✨ hue/saturation
this adjustment layer lets you adjust the hue and saturation of the gif as a whole, and also of each colour individually.
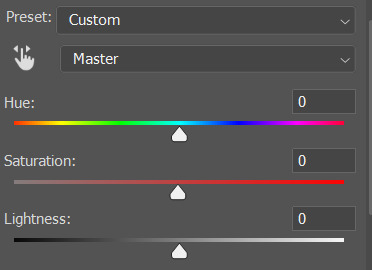
I don't use the hue or lightness sliders unless I'm trying to do something more complicated with the colouring.
clicking the dropdown menu that says 'master' lets you edit the saturation of each colour individually. this is useful if your gif is still super tinted in one colour.
I thought the yellows on this gif were still slightly too bright, so I switched to the yellow channel and desaturated them slightly. (remember if you do this then you need to go back to selective colour and add more yellow into the red skin tones to balance out the desaturation!)
then I increased the 'master' saturation of all the colours to +5:

I usually find the right amount of saturation is somewhere between +5 and +12, but it depends on the gif.
‼️if the gif feels undersaturated, but the saturation slider isn't helping/is making the colours worse, try a vibrance layer instead.
done!
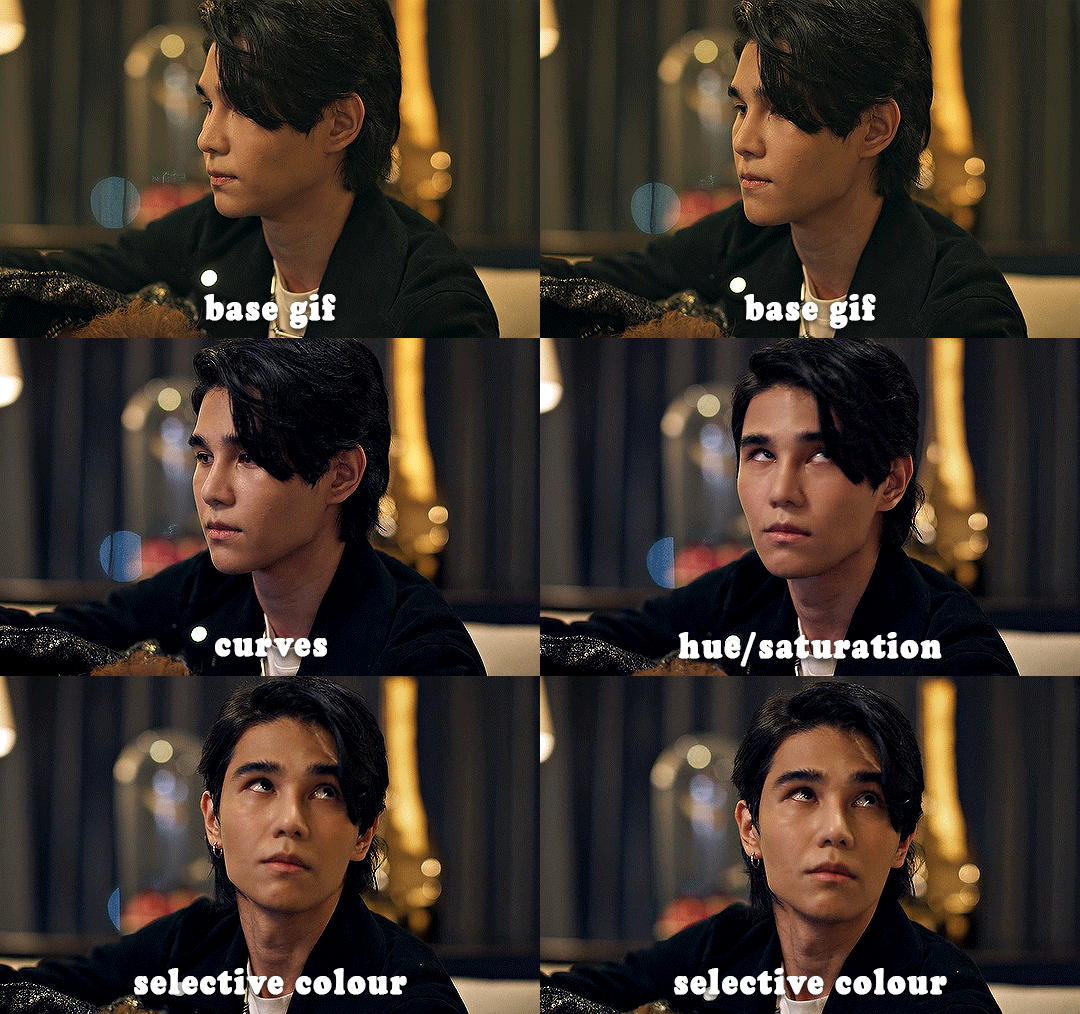
✨ saving and reusing colouring
you can copy and paste adjustment layers between gifs to make your colouring even across each of your gifs for one scene - so if you're making a set of multiple gifs of the same scene, or you think you might want to gif the same scene again in the future, you can save it as a psd so you can reuse the colouring again later.
each gif's colouring will then still need tweaking - different cameras/angles/shots of the same scene can still start out with slightly different colouring.
I recommend uploading the gifs as a draft post on tumblr so you can see what they all look like next to each other and catch any inconsistencies.
✨ another one! (speedrun!)
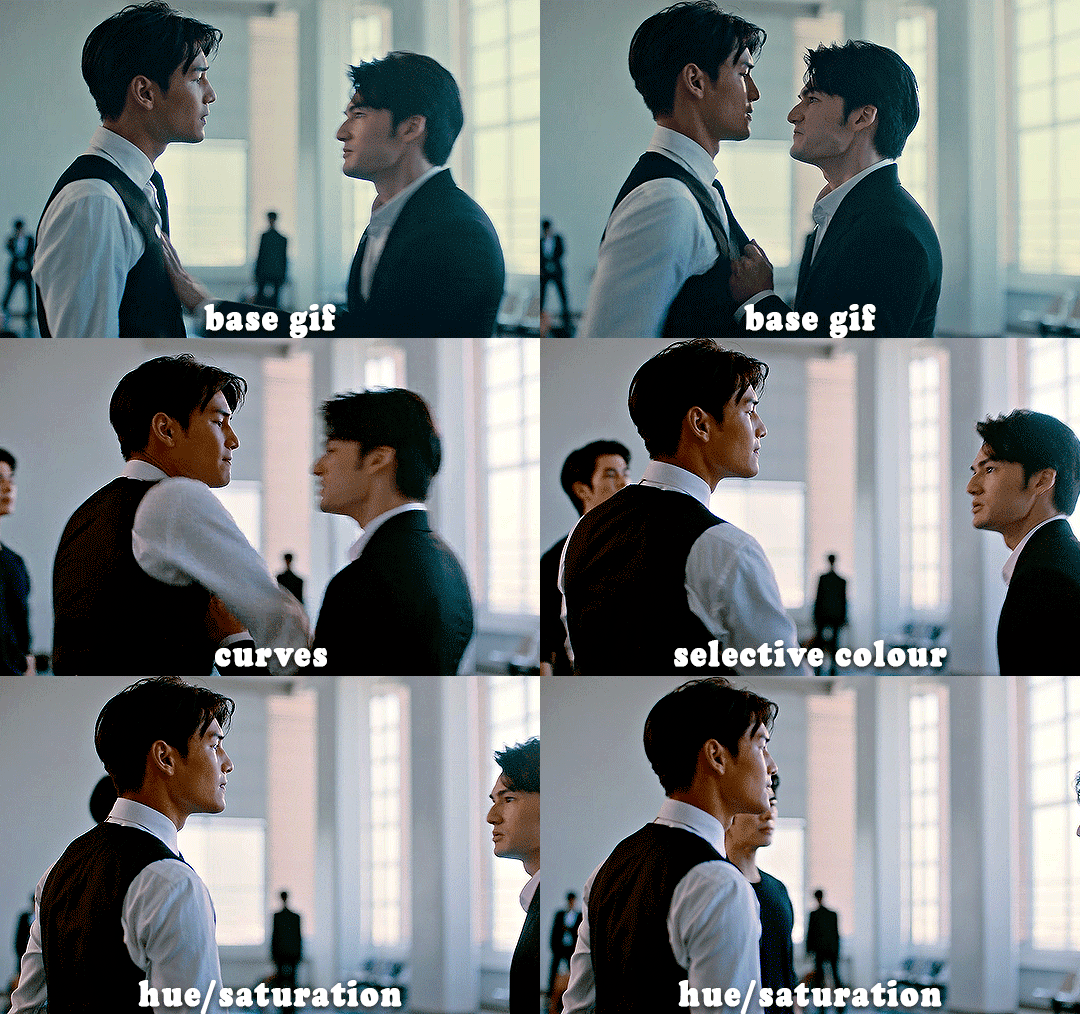
HI KEN!
the white point for the curves layer was in the window behind them.
the curves layer removes the muddy yellow tint, but again it makes their skin tones (especially Ken's) very red toned, which is adjusted by the selective colour layer.
3. other adjustment layers
imo many many gifs can be coloured really nicely with just those three adjustment layers, but some need different adjustments.
✨ brightness/contrast
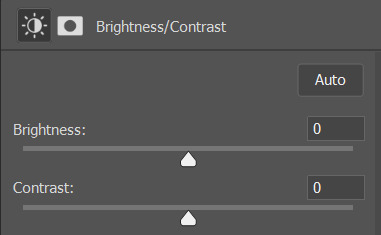
pretty self explanatory!
I personally usually avoid using the 'brightness' slider because I rarely like the effect - I only tend to use the 'contrast' one.
the 'auto' button is sometimes useful though, especially if you’re struggling with the curves layer.
✨ levels

levels alters the white and black points of the gif, like curves - but unlike curves it doesn't also alter other colours.
use the sliders beneath the graph to alter how dark/light the gif is. you can slide the black slider further to the right to make the blacks darker, and the white slider to the left to make the whites lighter.
levels is a good place to start if your curves layer isn't working.
(I'm going to hit the image limit for this post lol so here are some screenshots of a table I made to demonstrate this rather than actual gifs. sorry!)
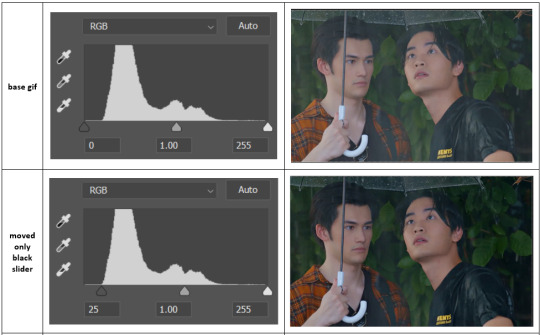

on both sides, I dragged the sliders up to where the big jumps are on the graph - this is usually a good place to start!
✨ vibrance
vibrance... makes the colours more vibrant. it's more subtle than saturation.
it's really helpful for gifs that feel grey. sometimes adjusting saturation just makes the greys kind of weirdly tinted, but a vibrance layer can fix that.
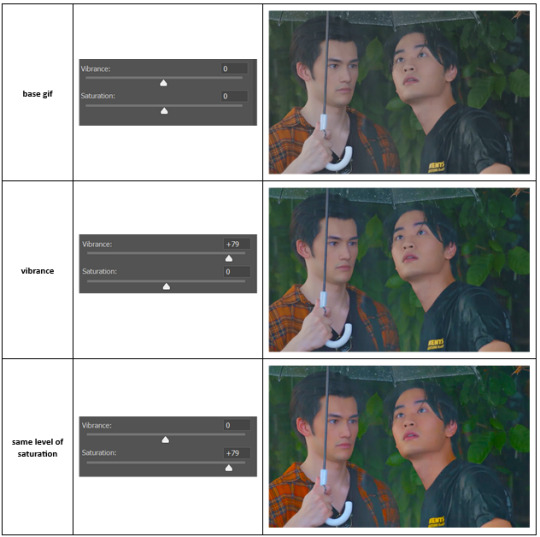
vibrance is much more subtle!
✨ colour balance
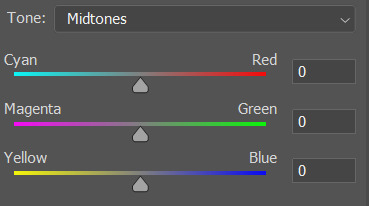
colour balance affects the overall balance of colours within a gif.
it's good for scenes with heavy tints.
I tend to stick to the 'midtones' dropdown, but you can also alter the colour balance within the shadows and highlights if you want.
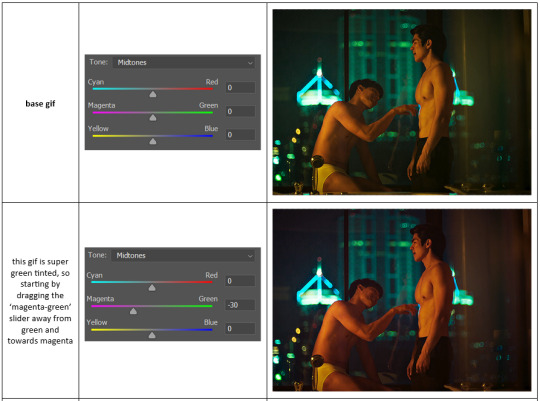

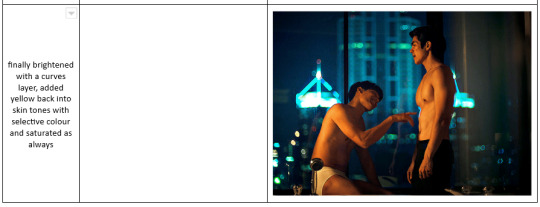
✨ channel mixer
I avoided channel mixer for such a long time because it scared me. but it's great for scenes that are very heavily tinted in one colour.
basically, it works with the levels of red, green, and blue within a gif. you select an output colour and then play around with the levels of the colour you selected within each other colour.
kind of the reverse of selective colour?
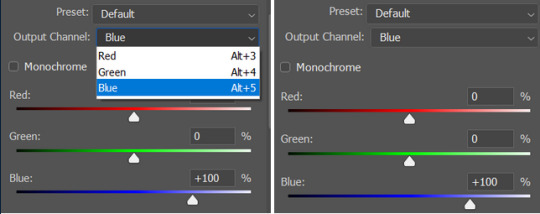
so in the 'blue' channel, the levels of blue are at 100%, and the levels of red and green are at 0% - but you can impact how much blue is in the reds and greens and blues.
this tutorial explains it well - but imo the best way to get to grips with channel mixer is just to play around with it a bit (sorry)
(when I made this guide for my friend, I also made a slightly more complicated gif colouring walk-through that included using channel mixer. there isn't space to include it within this post, but if anyone is interested I could always upload it as an 'intermediate' gif colouring tutorial - lmk!)
4. troubleshooting
‼️curves
usually with a bit of fucking about a curves layer works well - but sometimes you can’t find a good white and black point anywhere, and instead your gif turns wacky colours and nothing looks good. this happens more often with very heavily colour tinted scenes :(
for example, with this base gif:
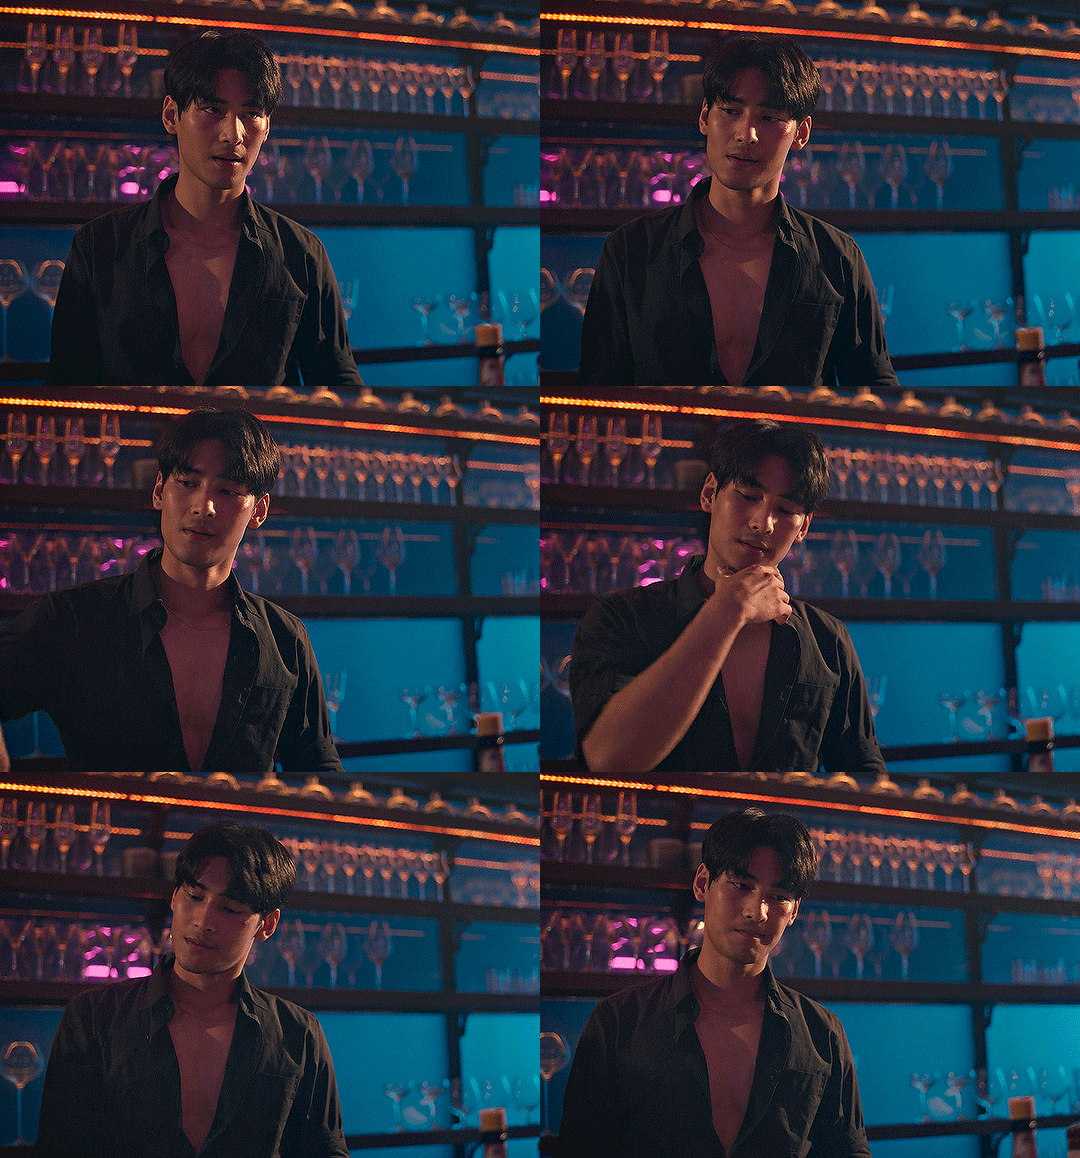
using many of the brightest points as a white point turn it wacky colours, like this:

yikes :(
some options for these cases:
try brightening the gif first with the 'auto' button on the curves layer or with a levels layer. having a brighter gif to start with can give you better options for picking a white point.
try finding an alternate, whiter/brighter white point. look for places the light reflects - on this gif, using the light on Porsche's cheekbone works well as the white point. it also helps to find places that would be white if the scene wasn't tinted - the lightest part of a white shirt is often a good place to start, for example.
skip the curves layer, and instead use a levels layer to alter your white/black points, and colour balance or channel mixer to balance the colours.
‼️over/undersaturation
if your gif (especially the skintones) is looking a little washed out or lifeless, it might be undersaturated. boost that saturation - or if that's not working, try a vibrance layer.
oversaturation is often easiest to spot in the mouths and ears of any people in a gif. if the mouths are looking unnaturally, vibrantly red, then you've gone too far with the saturation.
5. fin!
and done! I hope this was coherent helpful to somebody.
if there's anything that I've missed or that doesn't make sense pls feel free to shoot me an ask or a message and I'll do my best to help! I've also collated a bunch of additional reading/resources below.
happy gifmaking 🥰
✨ some links!
photoshop basics by @selenapastel
gifmaking for beginners by @hayaosmiyazaki
gifmaking guide for beginners by @saw-x
dreamy's gif tutorial by @scoupsy-remade (includes instructions on how to blur out burned-on subtitles or annoying video graphics)
beginner's guide to channel mixer by @aubrey-plaza
how to fix orange-washed characters by aubrey-plaza
colour correcting and fixing dark scenes by @kylos
does resampling matter? by usergif
how to put multiple gifs on one canvas by @fictionalheroine
watermarking using actions by @wonwooridul
resource directory by @usergif
#i got a couple of asks about this so i figured i'd type it up as a post#it's been sitting in my drafts for a while now though i'm so sorry omg.#i had to replace my laptop and it took me a while to get round to downloading photoshop on the new one#but i hope this is helpful!!#gif making#tutorial#photoshop tutorial#colouring tutorial#coloring tutorial#gif colouring#gif coloring#photoshop resources#gif tutorial#gif resources#userbunn#uservik#darcey.txt#darcey.gif#usergif
620 notes
·
View notes
Text
So you just joined Tumblr?
Tumblr basics + Fandoms/Gifmaking
Congratulations, you just landed at Tumblr! This hellsite (affectionate) can seem intimidating and complicated at first, but once you grasp the basics of it it’ll quickly turn into your own personal little hut in the forest. Tumblr is a website where you and only you curate your dashboard, you’ll see the content that you seek on your own. In this post, I’ll explain the basics of Tumblr and the basics of how fandoms function here with the help of Bob. Okay, let’s get started.
1. Blog customization
The first thing you should do as soon as you land on Tumblr is add a profile picture and header before you interact with people. You want to be distinguishable from bots and therefore avoid getting blocked. You can also add anything to your bio, there's no character limit. Some folks add their name and pronouns, but there are no rules about that. There are also no rules about profile pictures. It can be a picture of you, a picture of your dog, a picture of a rock, or a picture of your favorite character. If you plan on staying on the fandom side, you might notice that a lot of fandom blogs have colorful-looking icons (a cutout of a character on a colorful background), for these icons and also headers I suggest checking out source blogs that make those icons. For starters, @iconheadersource is a goldmine where you definitely going to find something that’d suit you and your blog.
Tumblr on mobile and Tumblr on desktop are two different creatures when it comes to customization. On the desktop, you can customize your blog with coding (HTML + JS). Now Bob will demonstrate to us some examples of blogs on desktop.


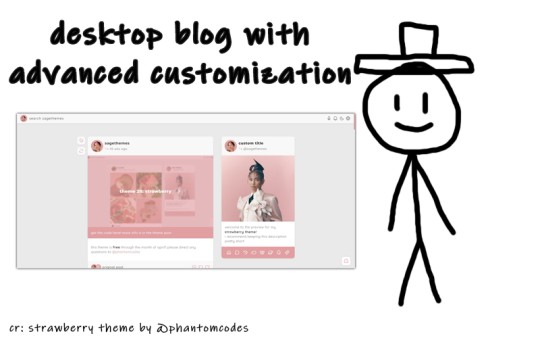
If you want to customize your desktop blog, I suggest checking out @phantomcodes and @glenthemes for the codes.
Tutorial on how to install themes
Using javascript on Tumblr pages
2. Search Engine
Nice! You've made your blog look pretty! Now, let's shift our focus to the search engine and ways to discover content. As mentioned earlier, you curate your dashboard by looking for things you enjoy and like. Search using hashtags or the names of your interests (TV shows, movies, birds, music, etc.) to find your piece of cake. For instance, folks who create posts about TV shows you like use tags to ensure their posts reach others interested in the same thing. So, let's go ahead and search for something right now.

Once you search for that specific tag, you are redirected to the corresponding tag page. Here, you can see that posts are sorted by "Latest" or "Top" (indicating posts with the most notes). On the right side, you will find related tags and blogs which are frequently using the searched tag. By following the tag, both the tag itself and the posts tagged with it will automatically appear on your dashboard in the "Your tags" section. You have the option to filter tags according to your preferences. In the settings, you can choose to block specific tags if you prefer not to see content related to some particular topics.
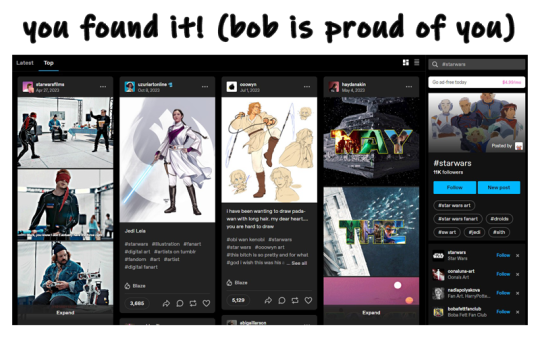
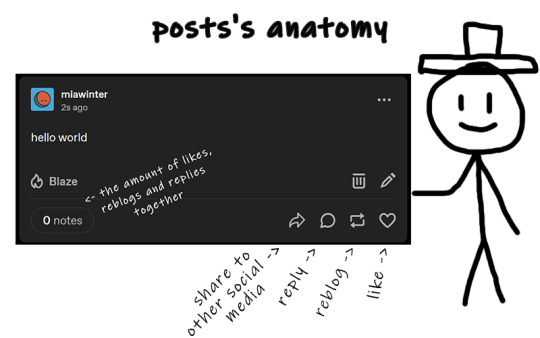
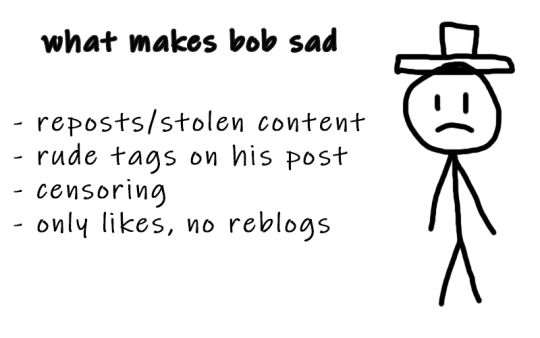
The only method for sharing posts and content on this website is through reblogging. On Tumblr, reposting others' content, including art, gifs, and fics, is not accepted. Reposting means downloading art, gifs, etc., creating your own post, and then sharing it. And that's a big no-no, strongly discouraged. Your likes essentially function as bookmarks, and you have the option to set them to be private. When you save something, it doesn't appear on your friends' dashboards.
We don't censor things here, and I advise you not to do so too. If you need to mention a word that might be potentially triggering or could be flagged on another social media, feel free to say it. Many users have specific topics and tags filtered out, so if you use variations like "K!tKat" instead of "KitKat" in the tags, it can bypass the tag filter, potentially causing more harm as people will see content that triggers them. And remember to always tag posts that have flickering or flashing!!!
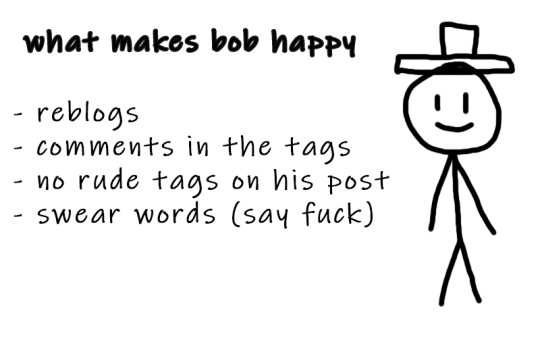
If you want to organize your reblogs or make comments on a reblog, use the tags section and not the comments section itself. This is called "#add tags." Feel free to type whatever you want, but keep in mind that the original poster receives notifications when someone reblogs their post and adds tags. Yes, all tags are visible to us.
Okay, so let's quickly recap this information with the help of our dear friend, Bob.
3. Social interactions
So let's move on to one of the crucial topics - how to make friends on Tumblr? Personally, I don't think there's one particular formula for that. Sometimes you just see a funny bloke posting about something as random as desert rain frogs, grab them, and go "You're my friend now" and that's how you become mutuals.
However, there are other, more common ways to become friends with someone. You can start by reblogging someone's post, adding tags to the reblog, and then following the person. Create your own posts, tag them to ensure they reach the folks who are interested in the same things as you, and participate in fandom events and challenges if you're into that. Interact with people you want to befriend, message them, send them asks. You will eventually find your crowd. You'll also find swifties, and fans of supernatural who never moved on from that destiel love confession four years ago, they also can be your friends, at some point, you will become friends and chill with each other. Be open to new interests to make sure your dashboard is not dull and boring.
Tumblr doesn't have the supposed hierarchy, and you don't have to listen to anyone who tells you otherwise, you curate your own experience and blocking is pretty normalized here. Notes and followers (which are private for everyone) don't really matter, stick to your beliefs and your vibe and you'll be fine. We're all equal losers here.
4. Fandom / Gifmaking
Fandoms play a significant role on Tumblr, they're closely tied with gifmaking. As a fellow creature of fandom, I'm adding this part because we don't gatekeep - more gifmakers and fandom enthusiasts mean a better fandom experience. As I mentioned earlier, everything has its tag, making it easy to find your favorite TV show fandom by searching for the tag. This is also how you can connect with people who share an interest in that specific TV show. Upon entering the tag, you'll stumble upon numerous moving pictures – these are GIFs. People create GIFs of everything, from their "blorbo" (the term for favorite character) to beloved ships and favorite moments. There are also plenty of creative GIFs with different coloring and complicated effects. And the best part? You can do it too!
There are a lot of ways to make GIFs. Some people use Photoshop, and some use Photopea which is an excellent accessible option. I'll be linking posts for Photoshop under this text. For Photopea tutorials and guides, please check out @photopeablr.
I've been making GIFs for three years at this point, and those are the tutorials I used when I was just starting out:
how to make a gif:
comprehensive guide 101
basic gif making tutorial + mvp player installation
gifmaking for beginners
how to install MVP player on a PC
film downloading & screen-capping tips
correct photoset dimensions
coloring
how to fix orange-washed characters
how to: coloring east & southeast asian celebs
channel mixer
colored background
color manipulation
vibrant coloring
how to brighten dark scenes
color isolation
effects
glitch effect
blending
crossfade transition
gradient effect in the text
gradient text
red colour accent on the b&w gifs
how to add a gif in a template
blurring gif backgrounds
using templates
text
text tutorial 1
font resources
understanding fonts and typefaces
split text
subtitles
other
icon tutorial
gif headers
For more tutorials, inspirations, and resources - please check out @usergif. It's a good source blog for all gifmakers.
Wait but what's a source blog? These are blogs that center around a specific theme, creating content for a particular topic. They are managed by multiple editors, these blogs track their own tags to reblog content related to the theme. They can be source blogs dedicated to gifmaking (just like @usergif), a TV show, a movie, a character, a celebrity, a sports team, or literally anything else. Typically, these blogs incorporate terms like "network," "source," "central," "creators," "hub," or "daily" in their usernames, making them easily distinguishable from regular personal blogs. Examples of source blogs that come to my mind right now are @dailyanakin, @heartstoppercentral, and @nancywheelercentral.
Let's also talk about tracking tags, which are often included in blogs's bios, whether they're from source blogs or solo gifmakers. You can add these tags to your posts when creating a gifset related to a specific source blog or something you know a particular gifmaker would appreciate. Basically, the gifmaker can search their tracking tag, much like a regular Tumblr tag, and view the most recent sets in which someone used their tag.
The last thing I want to talk about are usernames, and main and side blogs. On Tumblr, we have two types of blogs: the main blog and the side blog. The main blog is the initial blog created when you sign up for your account. This blog has full functionality and all features, allowing you to follow other blogs, like posts, and send asks to other blogs. In addition to the main blog, you can create side blogs on your account. Side blogs lack some of the features of main blogs; you can't like posts, follow other blogs, or send asks from a side blog. They have slightly different functionality – a side blog can be password-protected, have multiple users, and allow you to send direct messages to people. Other users can follow your side blog, and you can receive asks from them.
Many people use side blogs as URL holders. For instance, when a new TV show is announced, someone might be the quickest to save all canonical character names. You can then message that empty side blog to inquire if they're willing to trade that specific URL or if it's available for a giveaway. Canonical URLs are often challenging to obtain, so many people add letters in between or at the end or use symbols like "-", and they also mix names and surnames of different characters.
5. The End
Okay, so we've just covered how Tumblr works, how fandoms operate, and how to get into gifmaking. I hope this guide by me and Bob has been helpful to you. If you have any questions, feel free to send them to my ask box or simply ask Bob. I hope you enjoy your stay here, and that your experience with this website will be a positive one.

#tumblr#welcome to tumblr#tumblr etiquette#how to tumblr#fandom community#fandom culture#photoshop tutorial#gif tutorial#gif resources#kas.txt#mine
700 notes
·
View notes
Note
I just wanted to say I think your art style is awesome! I was wondering if you had any tutorials on how you draw anatomy in your style (hips and legs especially)? Sorry if there's already one posted and I just didn't see it 🥲. Happy New Year :>
thanks for the kind words. i tend to draw people pretty stylized and then some so a good bit of artistic licence gets used. these tips are just what i use so feel free to take them with a grain of salt. with anatomy in particular you can kind of talk in circles because human/animal bodies are that complex so ill just zone in on the points you specified. here's a little image with a bunch of pointers:

the above image condenses a lot of the points I'd make, but basically the key parts are to start with the bare essentials and build up that complexity. using a line of action is a good way to get a quick, rough start. you draw a line out in the general direction of the pose and do your best to adhere to it to give the pose a sense of flow.
you can also draw smaller, thumbnail versions that throw a lot of caution to the wind but capture the basic energy of what you're going for. even having a tiny little stick figure version of your idea can make for a good guideline of where to take it forward.
when it comes to actual limbs, you wanna consider how they integrate and work together, kind of like how chains do. you can see on some of the parts of pear i've drawn out these wireframes to kind of portray how the mass of her legs works in a three dimensional space. for aspects like the waist/hips, i use that X technique i highlight above a lot, particularly for the lower torso. a lot of the times, even when drawing a character totally naked, imagining them wearing things like skintight underwear can help a lot to guide you in the right direction.
its also a good idea to consider things like gravity and weight to a degree. humans are essentially big meat sacks and gravity is always pulling down on that, but theres all kinds of aspects that effect that, such as character build or clothing. pear technically isn't naked in this, but i've tried to imagine her as such and take that into account.
if you are drawing digitally, don't be afraid to take advantage of the convenience you get with that workflow. you can retry and iterate on things a lot faster that pen and paper, and do things that aren't really feasible at all when it comes to editing and modifying your existing work. things like resizing certain bodyparts, instantly flipping the canvas, or using selection tools to completely adjust the positions of parts of your drawing. to give you an example heres a timelapse with all the little edits i made just to this demo drawing:

you don't have to use these techniques linearly, either. sometimes ill have a really solid idea for a piece in my head, and go back to basics with certain elements if they’re not coming out right or i just want to brush them up a bit more. some of the tutorial-y parts i added in i didn't actually use during the drawing but often do use so they're there just for demonstration. not every drawing i do starts as building blocks or a really basic version, often ill just start with a face and build it out from there.
i always encourage liberally using references (this can include yourself) and trying out stuff like life drawing or looking at things like existing photographs of real people/places/things if you can, the more you use learning material the better you'll draw up a mental inventory in your head that you can rely on more and more. some of these tips are things i've learned from other artists over the years (the chin one especially i remember seeing a tutorial about lol), so this is a lot of knowledge i've amassed from other sources over time myself. there are plenty of times ill use all sorts of reference material and its all in service of arriving at the final destination as smoothly as possible. learn by doing, as they say. hope this helps!
825 notes
·
View notes
Text
something I’ve been thinking about is like, the internet is this magical system of technologies, never before seen in human history, and one of its capabilities is to answer virtually any question you ask of it. Which is not even remotely a novel observation obviously lol. But I’m thinking about this in the context of a point that Adorno & Horkheimer made (in The Culture Industry I think?) about the radio: that to expedience the radio, to live in a social context where there is this vast incomprehensible system of technological infrastructure that you do not understand or control, and which allows you, a mere peasant, to listen to news broadcasts, music, and advertisements, is effectively like listening to the voice of god. Like the average person’s relationship to modern telecommunications is so mystifying, incomprehensible, and abstract that we experience technologies like the radio as an all-powerful, indestructible authority, and this (obviously) shapes our relationship to the information that is shared through it. People make jokes on here about how transmission towers are angels, but like tbh that is essentially how we experience them - vast, incomprehensible, highly dangerous objects whose impact on our lives are at once all-consuming and unknowable. We do not just turn on the radio and listen to the news, we tune into what the voice of god has to say today - right now he’s selling toilet cleanser!
and all that to say, I always find something a bit incomplete about discussions about wilful ignorance online - that we live in an age of mass information and yet people still seem as ignorant as feudal peasants, or whatever. Nobody googles things, nobody tries to branch out and experience new kinds of art, nobody educates themselves on important topics they don’t understand. and like this frustration is very real and well taken, I feel it frequently, but what I’m grappling with is whether this is the correct framing - that maybe “why don’t people just google things” is the wrong question to ask, because I tend to find the explanations offered unsatisfactory. Like specifically I’m thinking of discussions on here that are about like, “anti-intellectualism”, kids these days are so ignorant even though they grew up with the internet, reading comprehension is piss poor, and so on. Recently I’ve seen a lot of weirdly moral-panicky posts about children not knowing how to type on computers because back in my day we were forced to learn how to touch-type by age 8 even though we couldn’t look up any tutorials on YouTube to help us, etc etc. And like I just do not buy that people are individually choosing to be ignorant, that people are “getting dumber,” and that this state of getting dumber is inversely related to the amount of information we have access to (which makes “getting dumber” even more dumb). An unstated assumption that goes into a lot of these “anti-intellectualism” discussions is that “information” is this universal object that has a standardised enlightening effect on the people who interact with it - that the only reason to have an ignorant, sheltered, or ill-formed opinion on something is because you have individually chosen not to Look At Information that will cure you of your ignorance. And so going back to the god radio thing, having regular access to the google search bar is not just having access to an encyclopaedia or dictionary - it is like having a direct line of communication to god, this authority that can answer any question you ask of it. But it’s not just one answer, it’s many answers, more answers than you could ever possibly read through. Google reports the number of hits it returns for whatever you type in - you will regularly get millions of answers to your question. And these answers are embedded with advertisements, just as radio news broadcasts are. Like if god is selling you toilet cleanser while telling you the number for a suicide hotline or news about what’s happening in the world, how do you psychologically deal with that, how is your relationship to capital-I Information shaped by this relationship?
The corollary to “we live in an age of mass information” is “we live in an age of mass misinformation,” but they both show up as answers on google (again, not a novel observation). but in the face of that how do you not simply stop asking questions? & of course this decision to stop asking questions is given form and substance by social circumstance, it reinforces systemic privileges and violences, and so this decision is not one free from consequence, and in many cases it is not an innocent decision. a white person deciding not to read the news because it’s too hard to figure out what is happening/too frightening/etc has the consequence of reinforcing the white supremacist outlook that is foundational to the social context of white people because they’re not reading anything that challenges that outlook. ignorance has many social contexts and many of them are violent. etc. like the consequence of “why does nobody google anything” is just a continuation of the status quo, just with this supposedly glaring and easy fix to it (simply google it). but that just leads us back to a discourse of individual choice, of people individually choosing not to “google shit.” it is a deeply individual fix to a systematic social problem. and so maybe the question is not, why doesn’t anyone google shit, but rather, why is the primary delivery system of knowledge a god that sells you toilet cleanser
263 notes
·
View notes
Photo
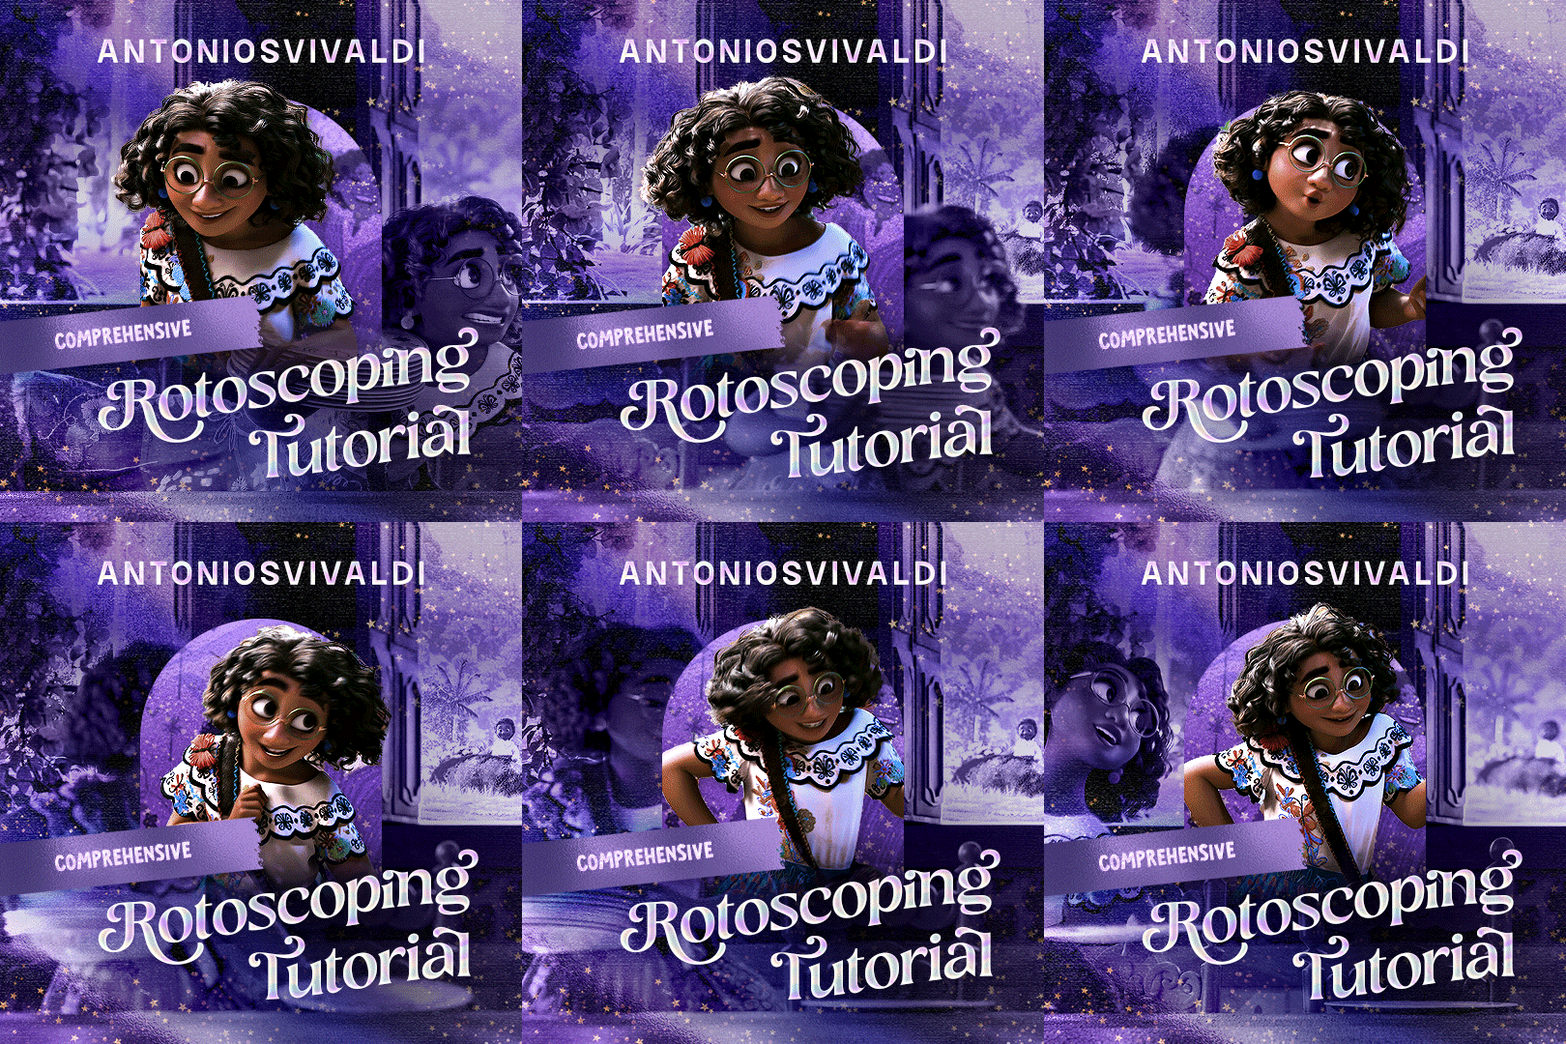
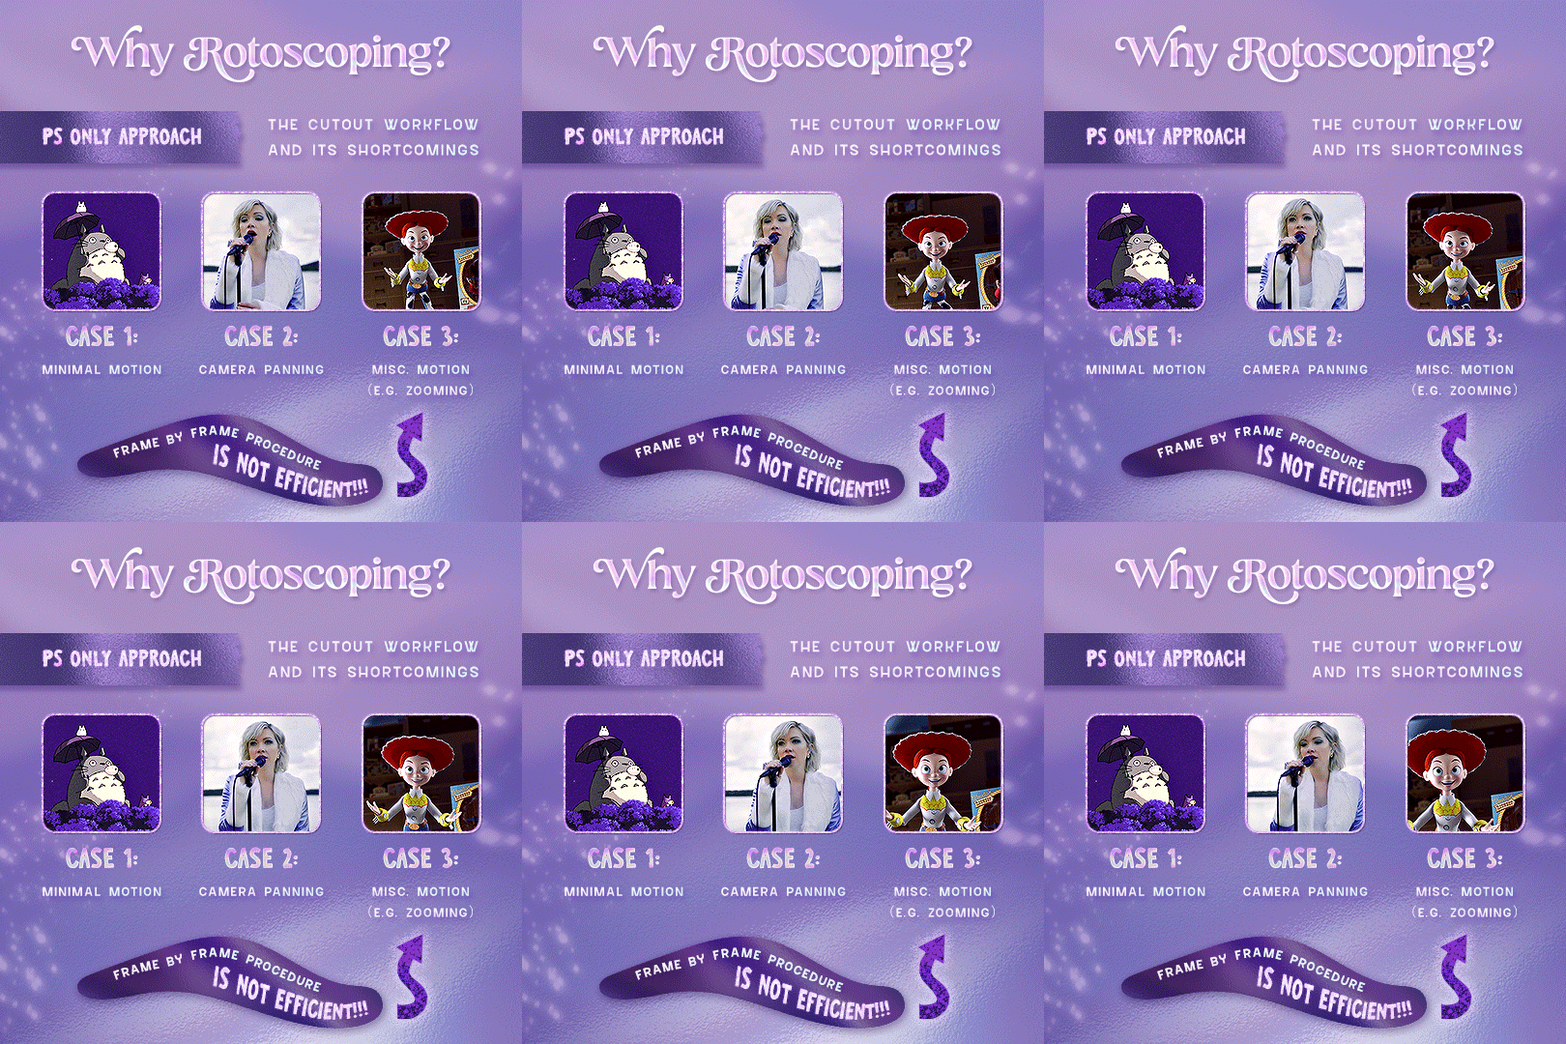

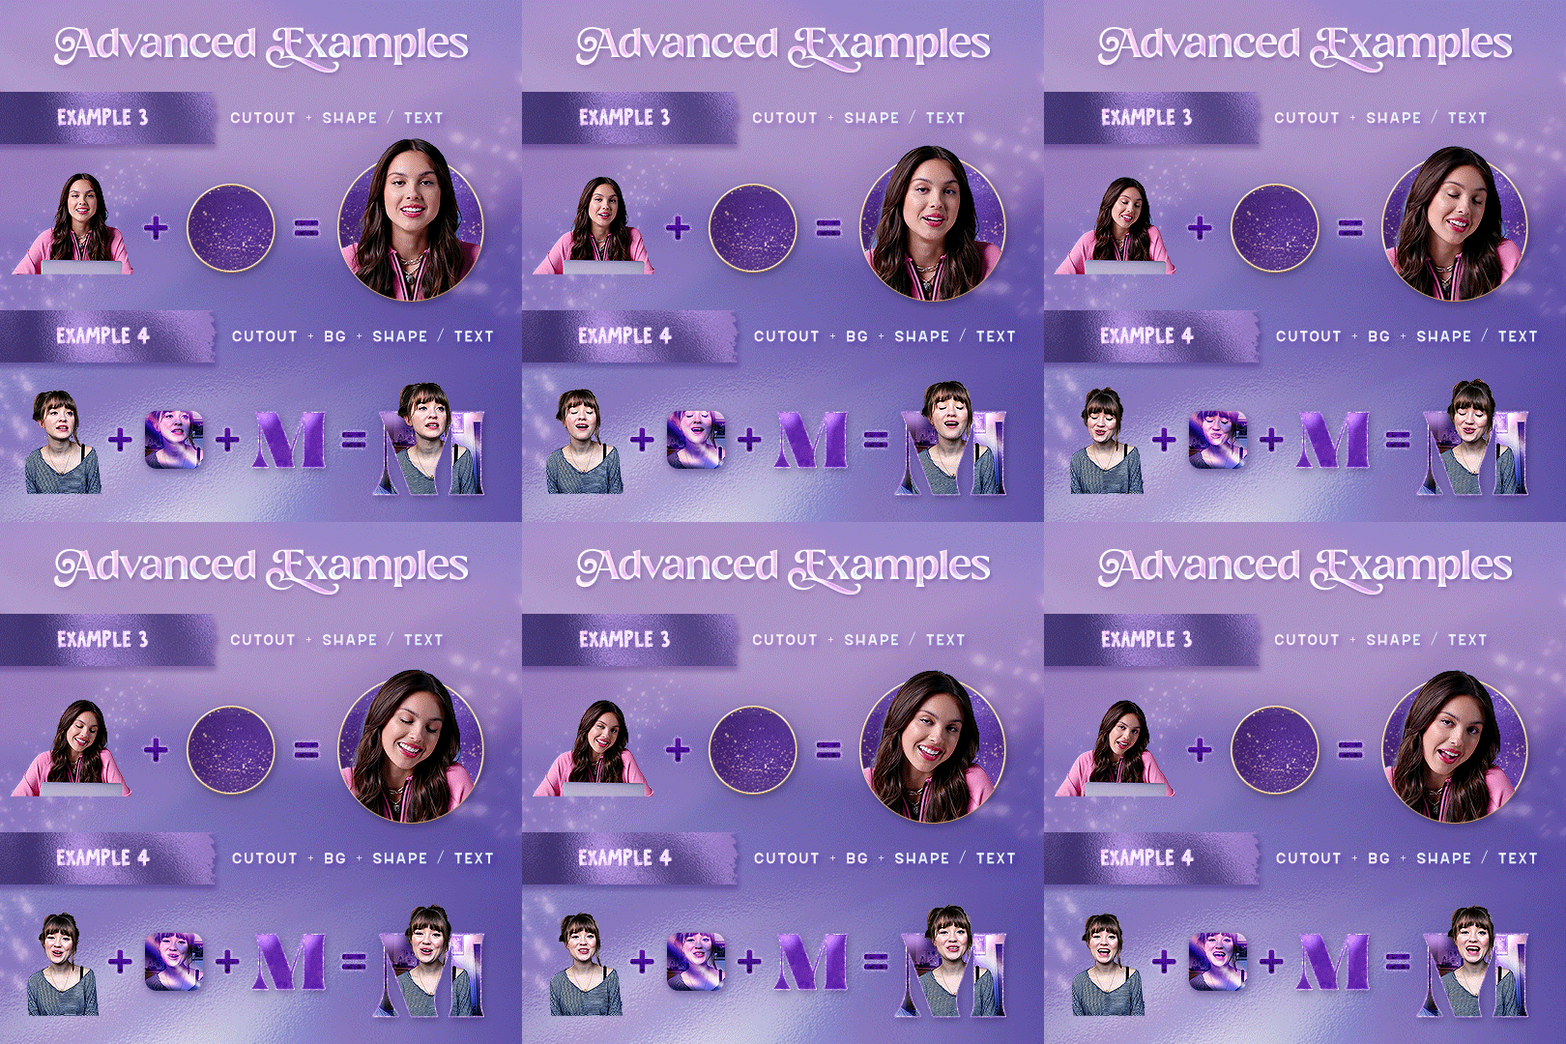
Rotoscoping Tutorial by @antoniosvivaldi
Hi everyone! I’m excited to announce my long-delayed Rotoscoping Tutorial - requested by a number of people over the past calendar year.
In this tutorial, I will show you how to create the cutout gifs like this (and seen in most of my gifsets under this tag) with Rotoscoping on After Effects. I’ll also provide additional examples and a number of things that I do to optimise my giffing / Rotoscoping workflow (e.g. useful shortcuts & other things to be aware of).
This is the structure of the tutorial:
Why Rotoscoping? Photoshop video timeline’s limitations
Photoshop workflow pt 1: Preparing your gif
After Effects workflow: Interface, shortcuts, and Rotoscoping tools
Photoshop workflow pt 2: Assembling your gif; with multiple examples
Bonus content: Rotoscoping tips* & workarounds to common issues
For quick reference, here are example gifsets (and where Rotoscoping is used in the posts) that I will mention in the tutorial:
Example 1: Cutout gif effect | panels 2 + 4
Example 2: Changing a gif’s background colour | all panels
Example 3: Cutout gif effect in a shape | all panels
Example 4: Putting it all together | panels 1, 3, & 5
What you need & need to know:
Software: Photoshop & After Effects (After Effects 2021 or later for Rotobrush 2.0)*
Hardware: 16GB RAM required to run later versions of AE*
Difficulty: Advanced; Knowledge in making gifs, applying layer masks, and using video timeline interface assumed
Key concepts: Rotoscoping (AE) / Video Timeline (AE+ PS) / Layer Masks & Groups (PS)
Supplementary files: tutorial resources
*I’m currently running the latest version of PS & AE on an M2 Mac, but I’ve also used older versions (CC 2015 & 2020) on Intel-based Macs. I’ll outline some known compatibility & performance issues, and workarounds later in this tutorial that could help streamline your giffing workflow.
Tutorial under the cut. Like / Reblog this post if you find this tutorial helpful. Linking this post / the example gifsets in your post caption, will be greatly appreciated if you read this to create effects seen in Examples 3 + 4.
1) Why Rotoscoping?
My Rotoscoping journey is motivated by the shortcomings on Photoshop - namely the limited options to manipulate the Layer Mask keyframes in the video timeline interface, as well my need to gif more efficiently.
Suppose I want to cutout this subject or recolour the background of a gif on Photoshop: I personally classify the gifs that I prepare on PS into 3 types based on the motion of the subject
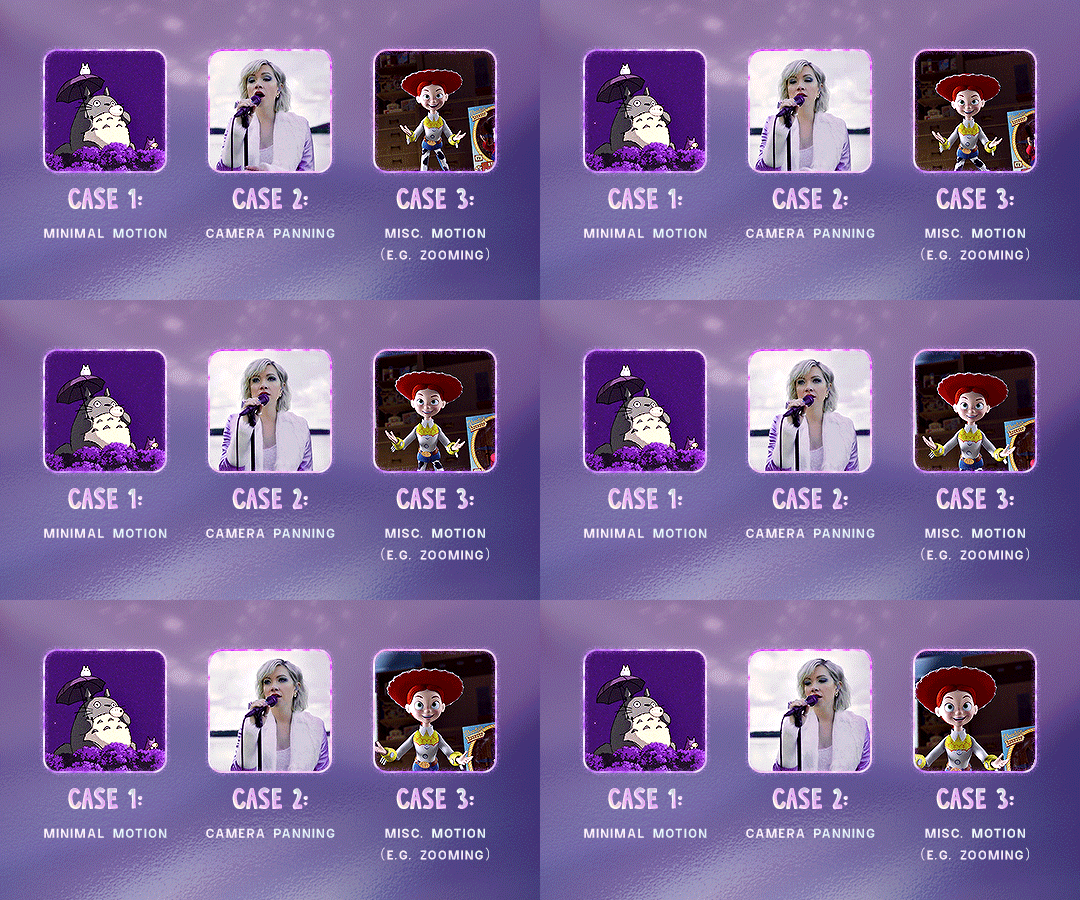
These are the common Photoshop-only approaches when attempting to mask the subject in the gif.
Case 1: minimal motion in the subject → a simple layer mask will do the trick
Case 2: some linear panning of the subject in the gif → using the Layer Mask Position keyframes in the video timeline interface will do the trick
Case 3: subject moves around a lot (e.g. zoom motion) → Unfortunately this is where a Photoshop-only workflow will require frame by frame masking. Layer Mask Position keyframes only apply positional translation (but not transformation / rotation) on the layer mask
Enter Rotoscoping on After Effects: Instead of resigning to frame by frame procedure on Photoshop, I opted to make my life easier by learning to Rotoscope on After Effects. This essentially provides me an opportunity to cutout / recolour a wider range of gifs with relative ease.
2) Photoshop pt. 1: Preparing your gif
Prepare your gif the usual way - whether you screencap or import frames from video.
Then your Photoshop should look like this:
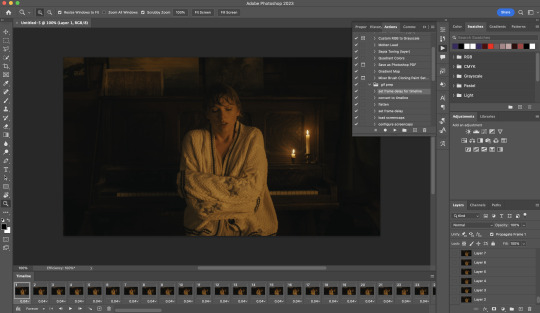
Now, I shall walkthrough & explain my personal giffing workflow (as of 2023) after loading the gif frames. To speed up the process, import my gif prep action file to Photoshop.
Going to Window > Action, you’ll see a set of actions under the “gif prep” folder.
"set frame delay for timeline” (highlighted in yellow) will set all of your entire gif’s frame delay to 0.03s
“convert to timeline“ (highlighted in red) will take you to the Video Timeline interface
To play an action, press on the Play button (highlighted in green)
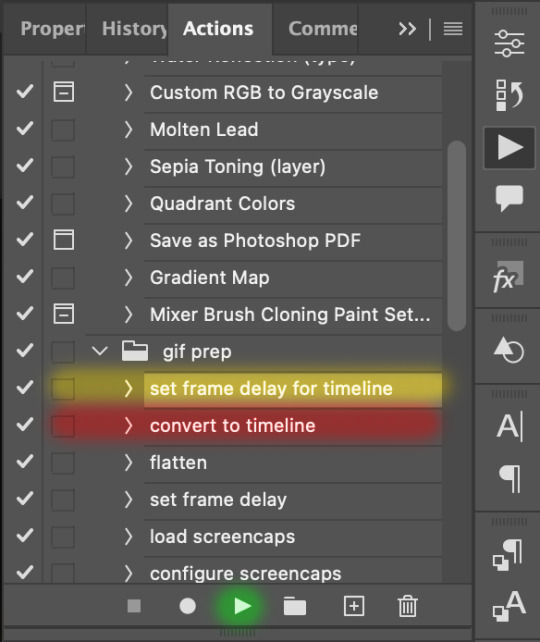
i. Set the frame delay of the entire gif to 0.03s. (play “set frame delay for timeline” from my gif prep action pack)
I work with everything in 0.03s frame delay (or equivalently 30fps) at first. It’s always possible to change the frame delay of the final gif to 0.05s before uploading onto Tumblr.
ii) Convert this gif to a Smart Video Layer (play “convert to timeline” from my action pack)
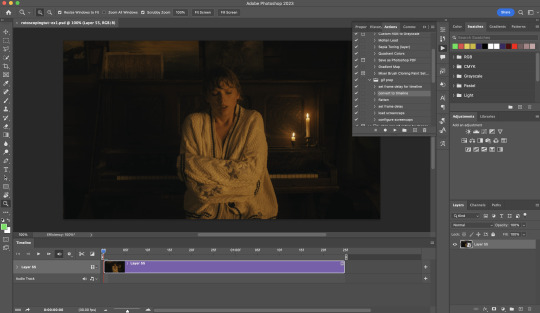
Note: I personally don’t resize the gif just yet. That’s because Rotoscoping in full video resolution will render higher quality details around the edges as well as more flexibilities later on in the editing process.
Performance optimisation: If your computer has 8GB of RAM or less, you might find it helpful to crop / resize your gif to Tumblr dimensions now for a less sluggish performance in After Effects later on.
(I have giffed on a desktop with 8GB of RAM and it’s quite slow at rendering individual frames of a 1080p short clip on AE)
iii) Add colouring adjustments on the gif. This will save you A LOT of time when you Rotoscope gifs that are originally very dark / poorly lit (e.g. the uncoloured Taylor Swift gif shown just above).
If you usually colour your gifs at the very end of your giffing process (i.e. after sharpening), this will be a bit of a change.Nevertheless I still highly recommend adding some base colourings now to at least increase the contrast between the subject and the background.
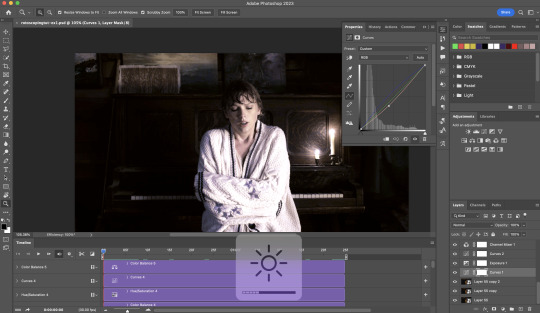
iv) To minimise lagging on After Effects, simplify this gif file as follows:
Flatten / Unsmart this gif file back to frame animation mode: play “flatten” (highlighted in red) from my gif prep action pack
Set the frame delay to 0.03s: play “set frame delay for timeline” (highlighted in green)
Convert the simplified gif file back to the video timeline interface: play “convert to timeline” (highlighted in yellow)
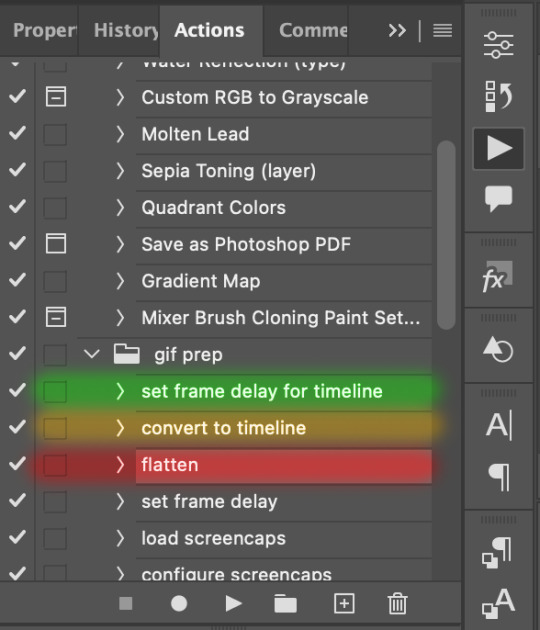
After “unsmarting” and converting back to the video timeline, your interface should look like this

And voila! This gif PSD is now ready to be imported to After Effects for Rotoscoping work!
3) After Effects: Interface and useful shortcuts
Open After Effects and Import (Cmmd / Ctrl + I) your gif PSD that you’ve just prepared.
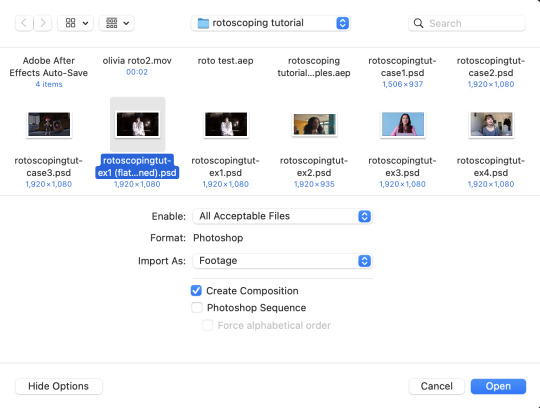
After importing your gif PSD to After Effects, the interface should look like this.
In the screenshot below, there are two compositions: the imported gif (highlighted in green) & another composition file made from selecting the imported gif (highlighted in red)
For the rest of the workflow, we will edit from the clone composition (the one highlighted in red), so select this one.
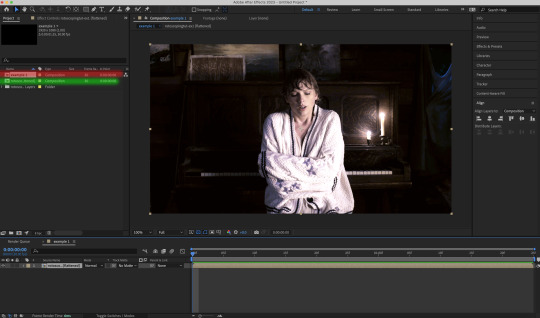
Before we take our plunge into the Rotoscoping, here are a few useful shortcuts to remember. I’ll explain the Roto Brush tool in the next section.
Preview the previous: fn + up arrow
Preview the next frame: fn + down arrow
Add to Roto Brush selection: holding Shift while you’re using the Roto Brush Tool
Subtract from Roto Brush selection: holding Alt while you’re using the Roto Brush Tool
Change Roto Brush size: while holding Cmmd / Ctrl, click + drag your mouse left / right
4) After Effects: The Rotoscoping Process
To access the Rotoscoping tools, click on the Roto Brush icon (highlighted in red in the screenshot below)

Then you’ll get the following dropdown options with two Rotoscoping Tools

Roto Brush Tool: This is where you add / subtract your Rotoscoping selection in your composition
Refine Edge Tool: Paint around the edge of your selection for more refined edges. Very helpful for Rotoscoping fuzzy edges / hairs
To make some Rotoscoping selection, first grab the Roto Brush Tool and click on the subject you want to cut out from your composition.
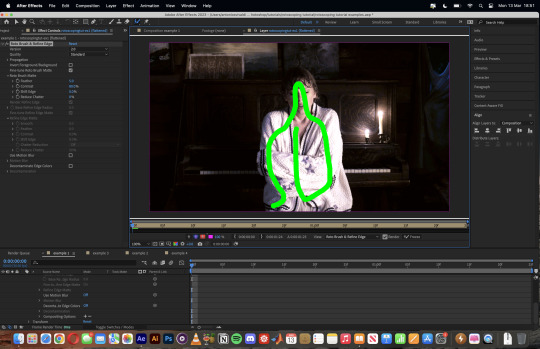
When you’re Rotoscoping you’ll see this in the Effect Controls panel.
There are two versions of Roto Brush:
Version 2.0: The Rotoscoping selection is powered by AI for higher accuracy when you propagate the frames.
Version 1.0 (Classic): This is the legacy Roto Brush Tool that uses a lesser algorithm. Recommended only if Roto Brush 2.0 is unstable on your machine due to RAM issues.
And two quality settings for Roto Brush 2.0:
Standard
Best
Note: I am currently unable to use Roto Brush 2.0 with Best quality model on my machine to compare the differences myself, so I’ll link this page that explains the two quality settings.
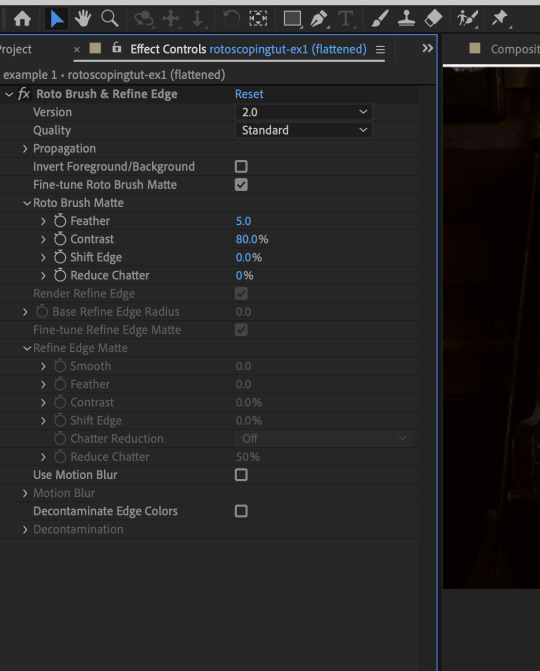
Note: if you’re using an older version of After Effects you’ll see this instead. This corresponds to Roto Brush 1.0 / Classic in the newer versions of AE.
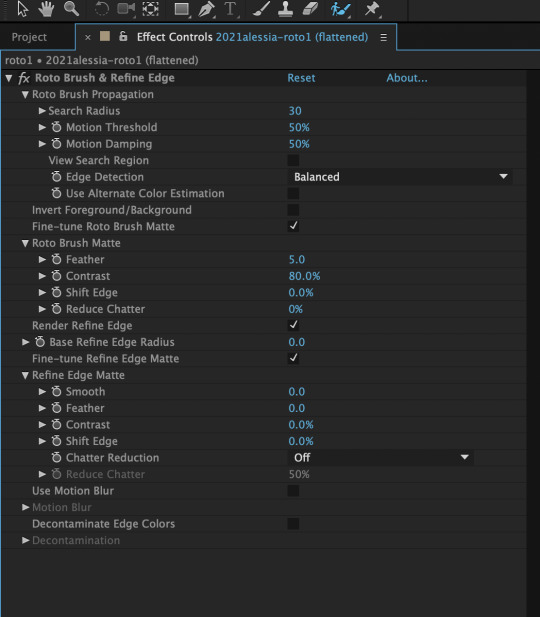
When you’ve made a selection using the Roto Brush Tool, you’ll see the pink lines around the subject. This is the region that you’ve selected to Rotoscope!
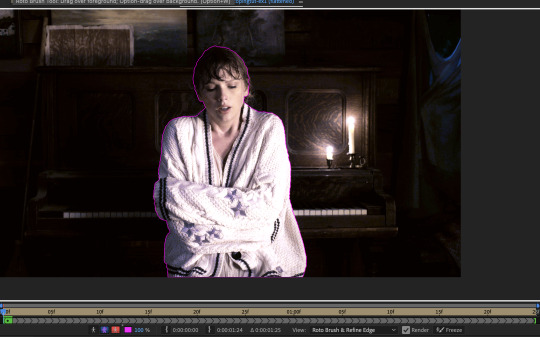
To bring out some details around the edges, grab the Refine Edge Tool and paint around the edges
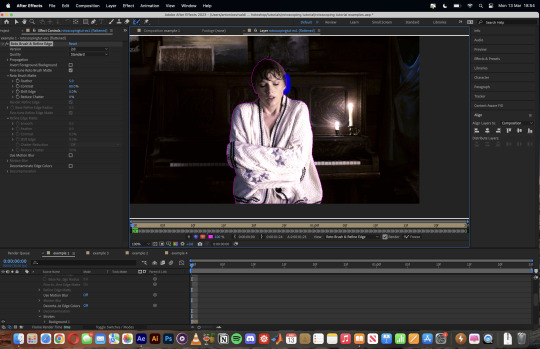
Then the interface will look like this
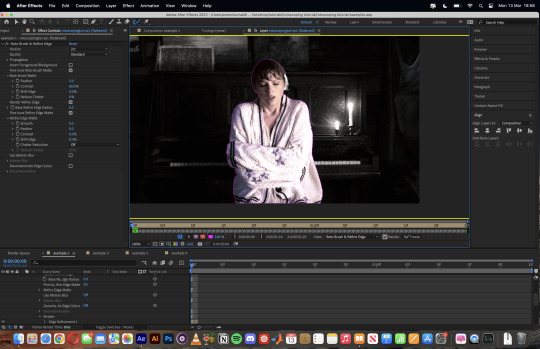
To view the Rotoscoping selection that you’ve made more intuitively, you could click on the following buttons.
Personally I like the viewing my selection using Toggle Alpha (the second box from the left) & Toggle Alpha Boundary (the 3rd box from the left)

Toggle Alpha
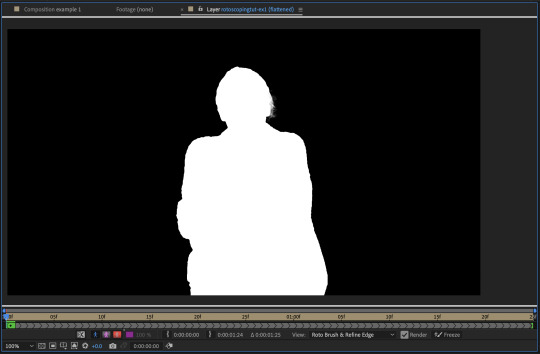
Toggle Alpha Boundary

Note: If you aren’t happy with the initial Roto Brush selection, you can always add (press Shift while using the Roto Brush Tool) / subtract (press Alt / Option using the Roto Brush Tool) your selection.
After you’re happy with your Rotoscoping selection in the first frame of your composition, press fn + down to view the next frame.
Repeat pressing fn + down and fix the selection along the way (e.g. I subtracted a small area from my Rotoscoping selection with the Roto Brush tool to make the edge look cleaner).

After fixing the selection along the way, go back to the composition file (select the clone composition again) and you will see that a cutout gif is made!
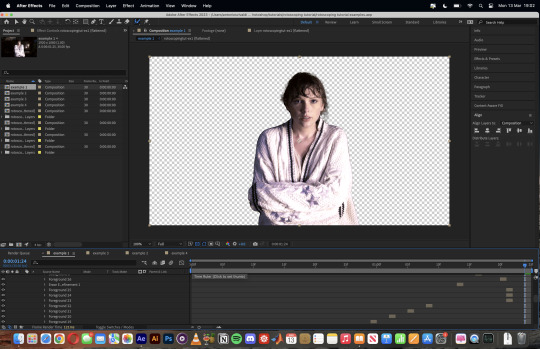
To export this, go to File > Export > Add to Render Queue. You’ll be redirected to the Render Queue panel at the bottom of After Effects.
Highlighted in red: click to change export setings
Highlighted in green: click to change save destination
Highlighted in yellow: click to render video

To preserve the transparency of your cutout gif, you need to change your export settings in the Output Module.
Under the Video Output section, change your Channels to RGB + Alpha. Press OK. Then Render the video.
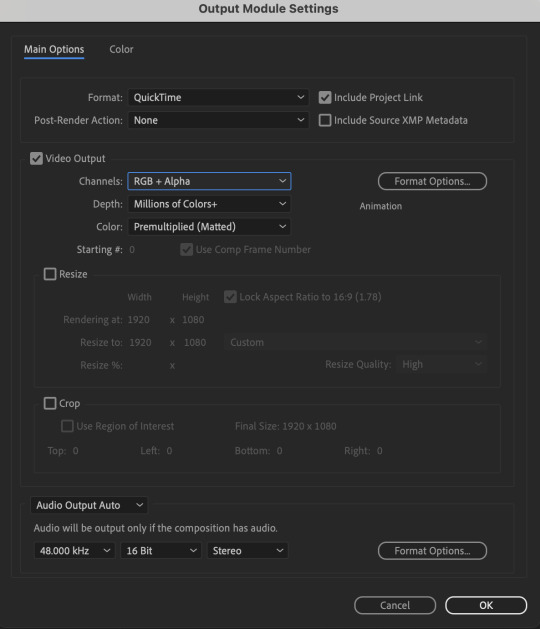
5) Photoshop pt. 2: Assembling your final gif
The essence is to drag the cutout gif (aka the video file that you’ve just rendered on AE) into a new PSD composition file. This will be where you’ll do the rest of your giffing. Your workflow will contain the follow steps:
Make a new blank PSD composition file in Tumblr dimensions
Enable the Video Timeline
Follow the instructions detailed in the individual examples i.e. drag the cutout gif into the PSD & adjust the timeline start / end points
Exporting the final gif. If you’ve worked in 0.03s frame delay all the way up to here, just play the action that I’ve provided in the tutorial in the following order to set the frame delay to 0.05s.
EXAMPLE 1: finalising your cutout gif | sample gifset
After enabling the Video Timeline in your PSD composition file you’ll see something like this
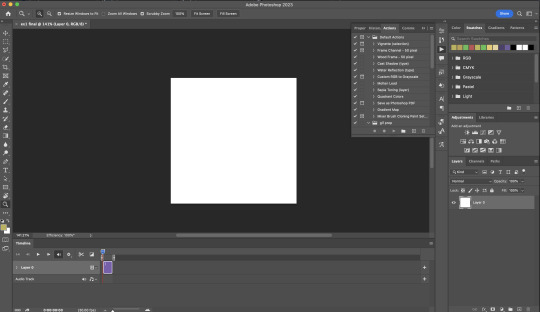
Go to your folder, drag the cutout gif you’ve made on After Effects, resize / reposition, then press Enter.
And also make sure to adjust the Video Timeline’s start / end values.
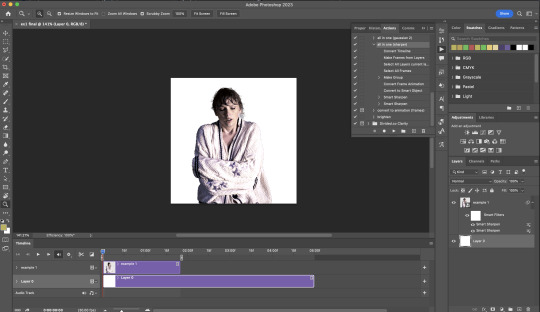
Add some finishing touches. Because I did the Rotoscoping at full HD resolution, I’ll also need to sharpen my gif in this step.
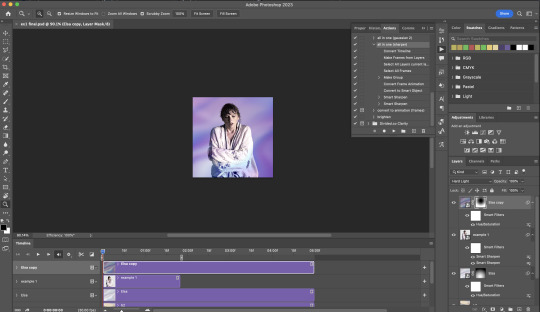
After you’re happy, you can export this into a gif file and do what you usually do to change the frame delay to 0.05s.

Notes on my “Unsmarting” approach:
To prevent accidentally writing over a PSD composition file that I’ve spent time editing, I personally render this into a short video (File > Export > Render Video) and use the following export settings (to prevent quality loss)
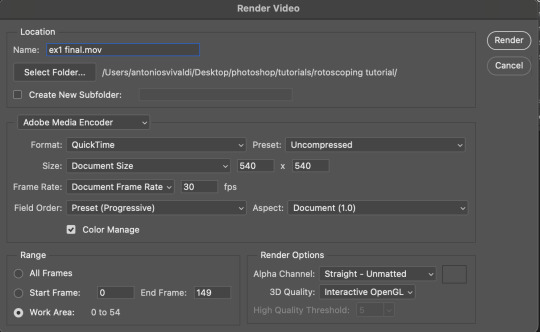
Then I open the rendered clip and play the actions in my gif prep action pack as follows:
flatten: this “Unsmarts” the clip / video
set frame rate: this sets all frames to have 0.05s frame delay
This is the final interface that I get before I pull up the Save For Web window.
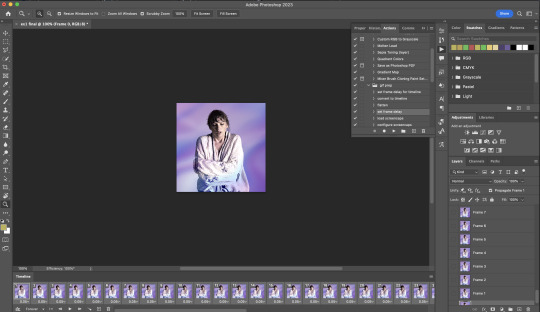
EXAMPLE 2: changing your gif’s background colour (for Case 3 gifs) | sample gifset
From your folder, drag BOTH the cutout gif (rendered on AE) and the original gif to your blank composition.
Important: you need to make sure that both layers are properly lined up in the composition file (i.e. selecting both layers when repositioning / resizing)
On Photoshop, press Enter twice and place the cutout gif on top of the original gif from the Layers panel. Then you should get something like this
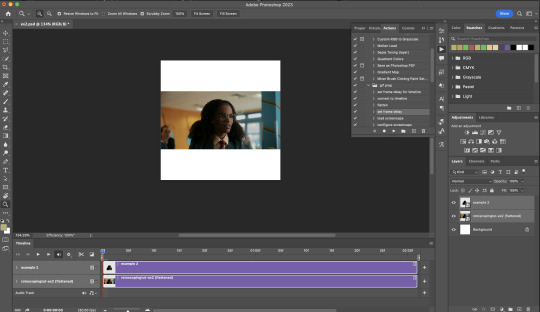
Select both layers and resize / reposition them in your PSD composition until you’re satisfied with the placements.
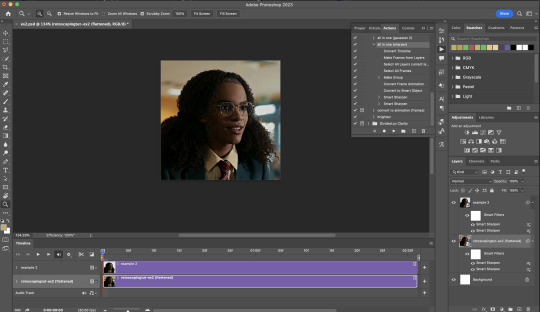
The basic idea here is to add some adjustment layers / other things in between the cutout gif and the original gif. To do this, select the original gif layer in the Layers panel.
Then you can start adding.a bunch layers e.g. textures, onto the composition.
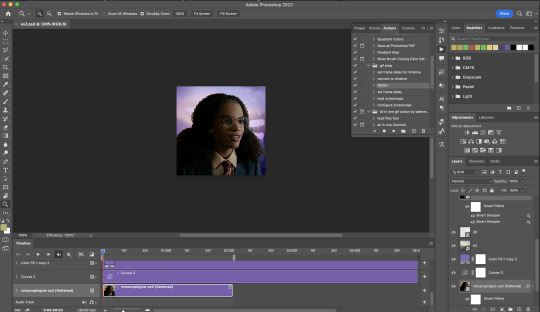
And then here’s the exported gif!
6) Fancier Rotoscoping examples
Note: knowledge in using layer masks / groups and making shape / text layers assumed
In the next two examples, I’ll show you how to combine the two previous examples with shape / text layers.
EXAMPLE 3: Placing your cutout gif into a shape / text layer | sample gifset
Add a text / shape layer to your blank PSD composition
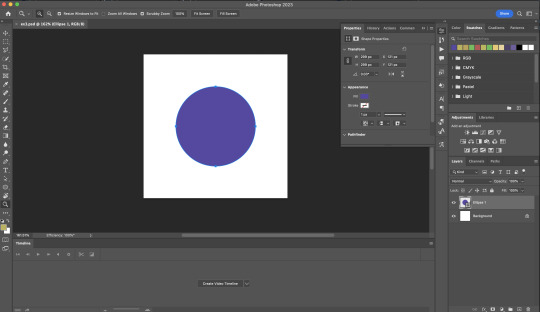
We want to prepare a masked group so in the Layers panel:
Make selection from layer: Cmmd / Ctrl + Click (highlighted in red)
Make a new group: click on the folder icon (in yellow)
Create layer mask: click on the icon (in green)
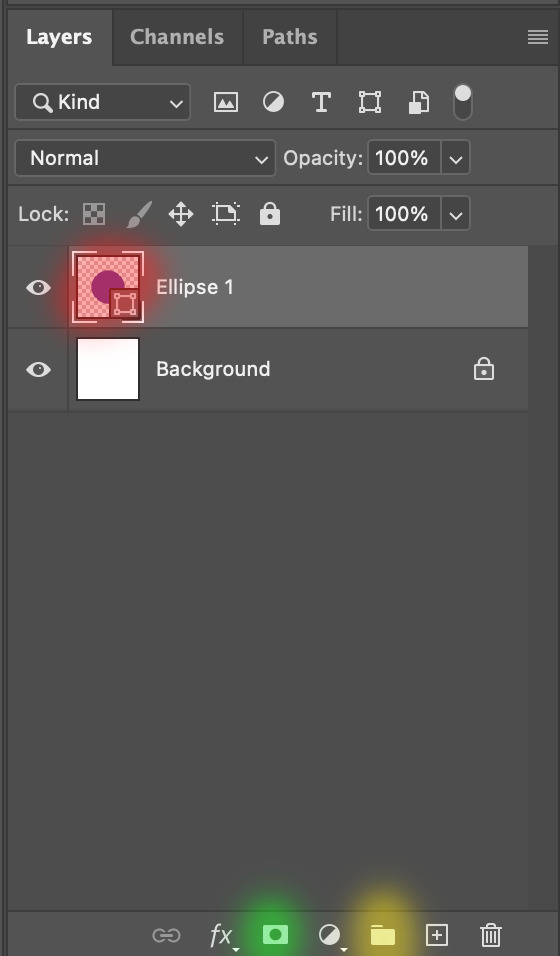
After duplicating the masked group you’ll get something like this in the Layers panel
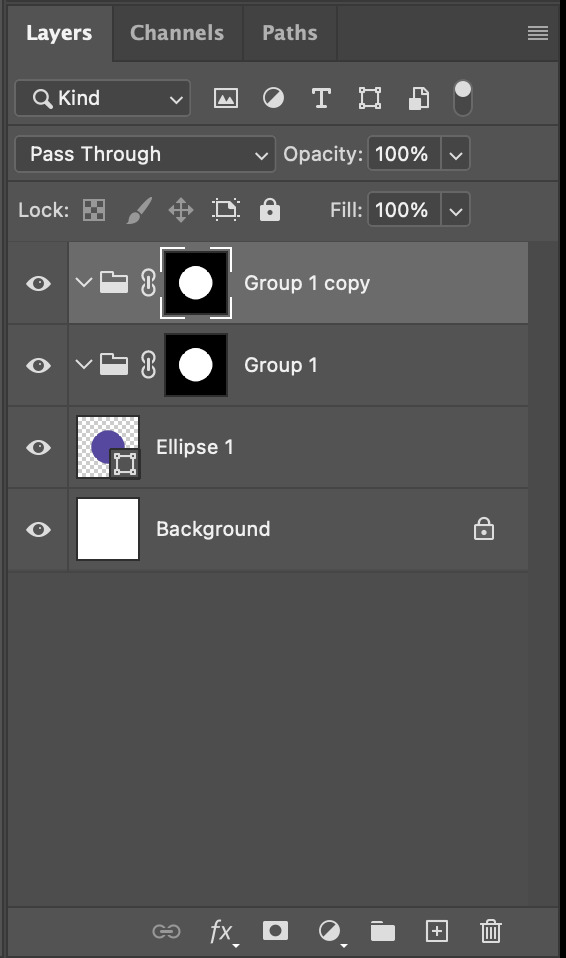
Drag your cutout gif into the PSD composition
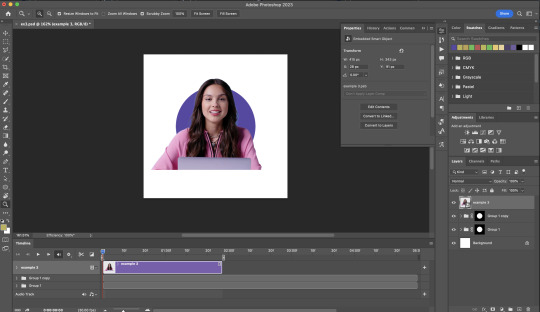
Place the cutout gif into the masked group on top
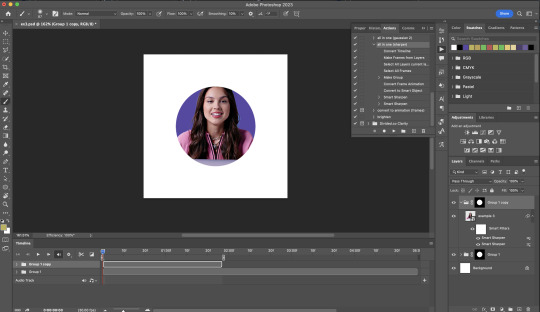
Select the mask of the top group and paint (in white) over the region you want to reveal for the cutout gif
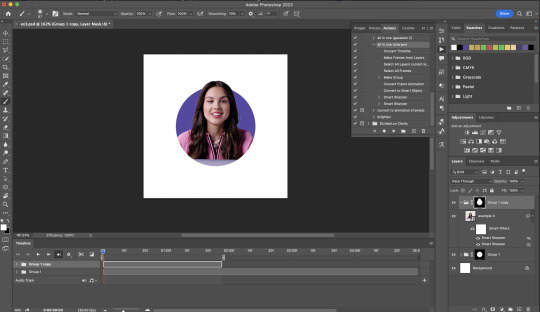
Add some finishing touches & export the gif!

EXAMPLE 4: Putting it all together | sample gifset
You follow the same approach as in Example 3 to prepare the masked groups, but you need to drag two gif layers in (and resize them using the approach outlined in Example 2)
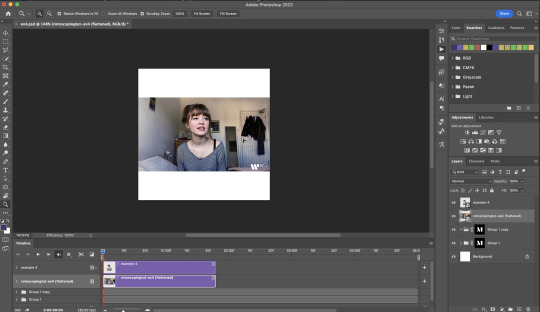
Place the gif layers as follows
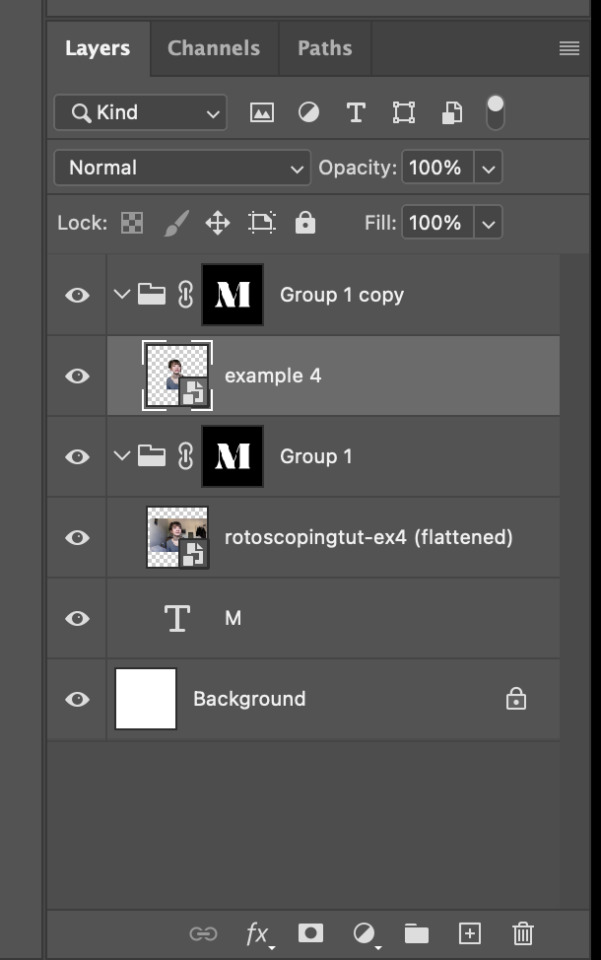
While selecting the mask of the group on top, paint (in white) over the region that you want to reveal in the cutout gif
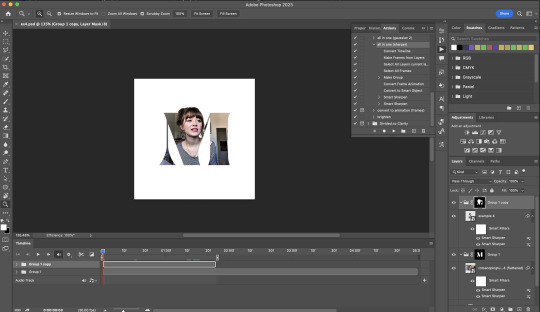
Now select the original gif (placed within the other group) and add some adjustment layers
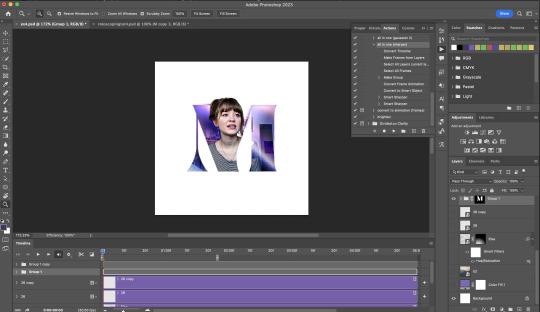
After adding some finishing touches & exporting the gif, I get this!

Note: you can do even more overlay effects in the background portion of example 4. There will just be more masked groups + adjustment layers
7) Bonus: Some useful Rotoscoping / giffing lifehacks
GIFFING LIFEHACKS:
— Use best quality footage that you could find & Rotoscope in full video resolution, for better details around the edges
— Poorly lit scenes & low contrast edges are harder to Rotoscope (e.g. Toy Story set / TS evermore set).
If you’re new to AE, I would recommend choosing videos with well-lit gifs with simpler backgrounds and high contrast edges (e.g. Maisie Peters Cate’s Brother set)
— Use Rotobrush 2.0 if you’re using After Effects 2021 or later. It’s more difficult to Rotoscope / change background colour for gifs with a lot of movements with the classic Rotobrush tool. If the scene is tricky, you might want to switch to the “Best” quality model.
HARDWARE-RELATED PERFORMANCE OPTIMISATION:
— The recent versions of Photoshop require at least 8GB of RAM. If you have less RAM, it will still work provided you have enough scratch disk space. For better performance, it’s best to close other applications when you’re using Photoshop.
— The recent versions of After Effects require at least 16GB of RAM. If your machine has less RAM than this, there are some workarounds to prevent your machine from hanging:
Essential: close other applications that you’re running on your computer
Resize your gif down to Tumblr dimensions & sharpen it before importing to After Effects.
Install an older version of AE
8) Bonus: Some known software + hardware issues, and workarounds
KNOWN ISSUES ON PHOTOSHOP:
I currently have minimal issues in my giffing workflow, but I’ll nevertheless outline a few common known Photoshop issues for anyone who needs some workarounds.
— Video Timeline interface missing: this affects Apple Silicon Macs (i.e. M1 / M1 Pro / M1 Max / M1 Ultra / M2 / M2 Pro / M2 Max)
Update to newer version of Photoshop (updated 2022 or 2023)
Open Photoshop with Rosetta
— Scratch disk full error: This is a common issue with machines that lack RAM & have nearly used up internal storage. Editing video layers in the timeline interface uses a lot of memory hence will require a lot of scratch disk space.
Make sure that you have enough free storage space while using Photoshop. Alternatively you can use an external hard drive as a scratch disk.
KNOWN ISSUES ON AFTER EFFECTS:
These are a few issues that I have personally ran into over the course of giffing on multiple devices & multiple versions of After Effects.
Note: Inputs from M1 / M2 Mac users with regards to experiences on using the After Effects Rotoscoping tools are welcome!
— Rotobrush 2.0 set to “Best” quality model causes AE to crash: this affects anyone who’s using MacOS Ventura
I’m currently experiencing this issue on my M2 Mac. The workaround right now is to change the Roto Brush 2.0 quality setting to Standard.
This is due to some software compatibility issues on Adobe’s side specifically with MacOS Ventura. Fingers crossed that they will properly fix this bug in the future updates!
— Cannot re-open project files with Rotoscoping: this affects anyone using the initial release of After Effects 2020 (I had installed this on an Intel-based machine and it sucked)
The only option here is to update to a later version of After Effects.
8) More useful Rotoscoping resources
Rotoscoping + Keyframes Tutorial by @jenna--ortega
Rotoscoping + Masking Tutorial by @usergif
Rotoscoping For Beginners in After Effects | Motion Graphics Tutorial
I hope you enjoy reading this! If you have any questions / need any help related to this tutorial, feel free to send me an ask!
#after effects#tutorial#gif tutorial#photoshop tutorial#dearindies#tusermelissa#usernik#useryoshi#usershreyu#usercim#userrobin#useralison#userannalise#userkosmos#userisaiah#usergiu#userives#*#my resources#my tutorials
2K notes
·
View notes
Text

In Gaza, journalists are passing out from exhaustion and famine. Despite the ICJ ruling, the US and Australia are intentionally defunding UNWRA based on baseless claims by Israel that members of the aid group are Hamas-sympathizers. Netanyahu, of course, has ignored the ICJ ruling. Israel has banned insulin pens from arriving in Gaza, a particularly cruel and inhumane crime to add to their laundry list of offences. Nothing has changed, and things are getting worse.
It is not that hard to not buy things. To not watch things. Perhaps it is inconvenient, and makes you go out of your way, and costs a little more to buy alternatives. But if you were to attend a funeral a day for every child that has died in Gaza so far, it would take you over 27 years. When the worst that will happen to you is that you don't watch a TV show featuring a zionist, you don't buy a specific brand that donates to and supports zionism, how could that possibly compare to the plight of Palestinians who must amputate limbs without anesthesia?
Once again, this is the BDS list of brands to boycott.

Here is a comprehensive post about more actions you can take in support of Palestine.
Here is a list of verifiable orgs that provide aid on the ground.
credible organisations that are doing work on the ground in Palestine:
Care for Gaza:non-profit charity that distributes money, food and other resources directly to families in Gaza.They maintain a regular presence on Twitter and Instagram. You can donate to them via Paypal here.
PCRF / Palestine Children's Relief Fund: non-profit organisation that distributes essential food and resources to families in Gaza. Most recently, they delivered 30 tons of vital medicine, and 82,000 pounds of flour.
Medical Aid For Palestinians: deploys medical teams to treat Palestinians suffering under Israel's malicious bombardments.
Donate e-sims to Palestine: massive post with tutorials and relevant links, with discount codes included in the post and in the replies.
Direct Aid: humanitarian fund distributing supplies such as blankets and winter jackets directly to Palestinian families.
help people leave palestine (donate what you can)
Help a Family Evacuate Gaza (GoGetFunding)
Save Sanaa and her Family (Gofundme)
Save Amjad Saher and his family (Gofundme)
Help a family of 13 escape Gaza (Gofundme)
Help a Palestinian children's book illustrator save her family of 12 (Gofundme)
Today, tomorrow and until Israel faces justice for their crimes, learn how to prioritise Palestine over your own comfort.
#the defunding of the unwra as israel further escalates their unimaginable cruelty produces an indescribable rage#these western leaders deserve to be fucking stoned#nothing comes in the way of western hegemony and their commitment to upholding unforgivable cruelty for profit#palestine#free palestine#free gaza#free west bank#fuck israel
18K notes
·
View notes
Text
MASTERLIST


★Support me on KO-FI :)
★PAID READINGS
★paid reviews masterlist
my thoughts on astrology and how to use it
Tutorials
Checking the overall composition of planet and elements in your birth chart (+ finding the dominant planet and elements)
Relocation chart tutorial
Astrocartography chart tutorial
Asteroid persona Chart tutorial
Nine Persona Chart tutorial
Planet persona chart tutorial
Astro observations:
Part 1.
Part 2
Part 3
Part 4
Part 5
Part 6
Part 7
Part 8
Part 9
Part 10
Part 11
Part 12
Part 13
Part 14
Part 15
Learn Western Astrology
Skin health in astrology
Career astrology
your birthday and Profection years
what life tips i learnt from astrologers i have met
electional astrology: social media charts
essential dignity and debility in astrology
sects in astrology
understanding draconic charts
natal transits through your entire life
antiscia and contra anstiscia in astrology
astrocartography and relocation charts
Informative posts in astrology
what could end your relationship through your venus sign
manifesting through your jupiter sign
part of fortune and what can be fated in your life
understanding your relationship to astrology and its impacts
your moon sign and your relationship to your mother
lilith in a man's chart
how do people perceive me (persona charts edition)
my personal opinions on your big 3
what can your birth time say for you through chinese astrology
My suggestions on where to get tattoo through astrology
the ruler of 11th through the houses and what are you admired for
relationship advice for your rising sign
Pick a card/tarot
channeled messages from someone
what do you need to know about this separation/no contact
messages from universe
what do your tumblr followers think about your blog
who is thinking about you?
how can you embrace your main character energy
where is this crush heading?
what next big thing is coming for you
messages for collective
Aspects and Placements in Astrology
Moon square Mars
Jupiter sextile Uranus
Pluto conjunct asteroid Hekate
Pluto in 12th house
moon in 8th house
Asteroids in Astrology
academia (829) in aries
academia (829) in virgo
asteroid bella in 8h
Chiron in 12th house SR
asteroid ops (2736)
Jupiter sextile Uranus
Pluto conjunct asteroid Hekate
Chart analysis of famous people
Neville Goddard
©lilacstro all rights reserved, please DO NOT copy, rephrase or plagiarize without my permission on any platforms whatsoever to avoid the copyright strikes and other resulting consequences.
#astrology#astro notes#astrocartography#astro thoughts#astro#astro community#astro observations#astro tumblr#astro tutorial#astrology placements#astrology community#asteroid astrology#astrology notes#astrology observations#astro placements#astro posts#astroloji#lilacstro observations#lilacstronotes#lilacstro#solar return#tarorcards#tarot cards#tarot#tarot reading#pac tarot#pac reading#pac#tarot witch#pick a reading
214 notes
·
View notes
Text
Quick tutorial on how to paint still water?
Whatever idk i just gotta document what i have learned recently before i forget and the best way is to explain it.
What you will need:
- Any art software that have layers and especially some sort of layer mask feature. (i use clip studio paint)
1: (first image) You can start by first adding the core objects of the artworks before adding any water. You can start on a gray or dull brown canvas if thats your thing. The rock here is going to be half-submerged in the water so thats why only the top part is more rendered here. But depending on the setting and your own style you pribably can render the lower half too, just remember to have the submerged part in a separate layer since the reflection of the water will be placed between the top-rock layer and above the bottom-rock layer.
2: (second image) Now you add the color of what the bottom of the river is. Most rivers where i live have muddy bottoms so im going with a brown color. Depending on how deep or shallow the river is, the more objects is visible. Note how i added a darker shade close to the grass but also at the bottom of the canvas. It’s not mandatory but i’ve noticed that it helps to give more depth.
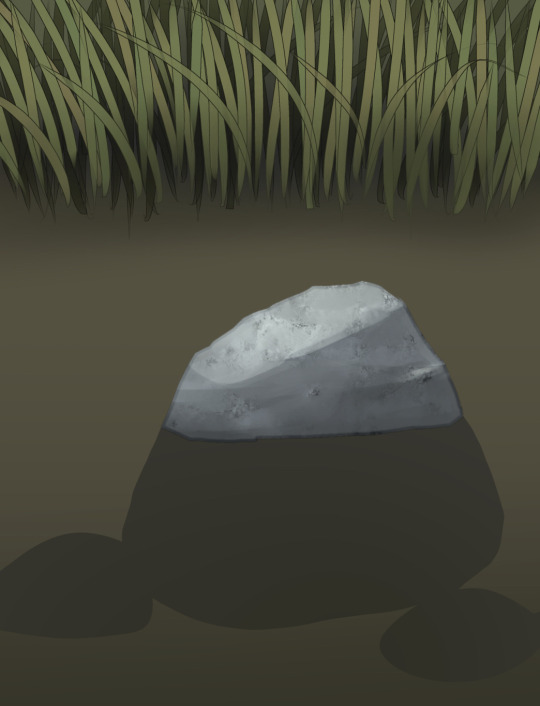
3:
Now i make a new layer (or in my case a layer folder because i never end up using just one layer) and just add a sky! You can make it daylight or evening or lit up by the moonlight probably. Use either your favourite brushes, the default round brush, or some weird custom brushes for the clouds - whatever suits your style and fancy! Just keep in mind that the angle of the clouds should match the angle the overall painting has - but you can also just give the cloud an unspecific shape that works in any angle.
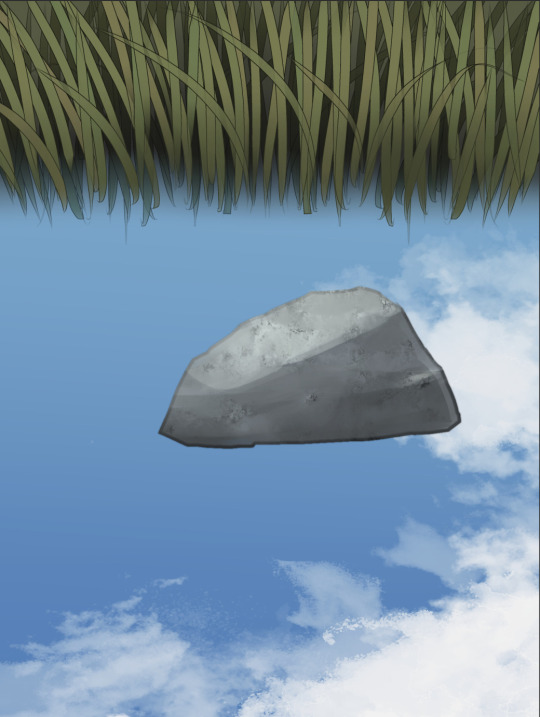
4 and 5:
Okay so this is where the layer masks are your friend. You can probably be brave and just use the eraser but that method is quite unforgiving imo.
In the first image i used a big soft airbrush eraser (you can use a gradient tool as well) to lower the opacity on the bottom part of the water. I have noticed that, in certain angles, the sky reflection on water is more faint the closer it is to the viewer.
This isn’t necessary but i used two layer masks here, the first gradient one is on the layer folder. The second layer mask is on the blue sky layer. I know that not all art programs might have this, so you can just do all of this on one layer mask if thats all you got.
Now technically these are reflections of the rock and the grass that i am masking away. But since theyre so close to the water we dont get much visible details and mostly just the silhouette. If i had just added a 100% mirror-like reflection here it probably would make the water look like liquid metal or something. However, reflections in water can vary a lot depending on the setting, so look up references that match the setting you wanna go for and take notes.
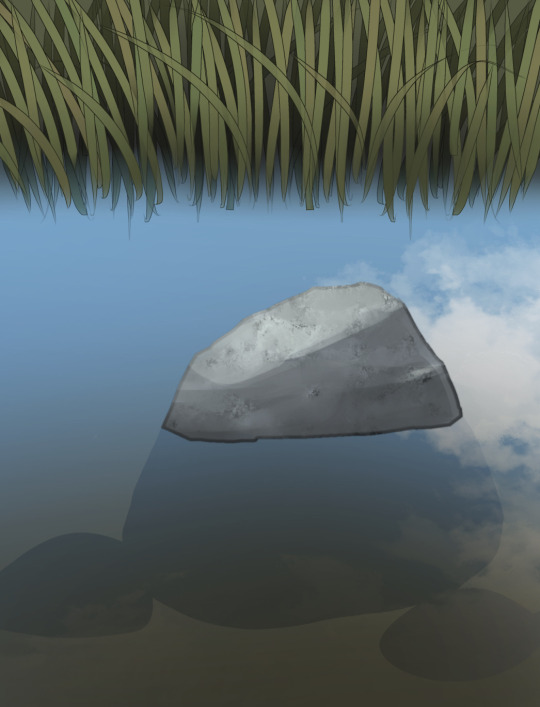
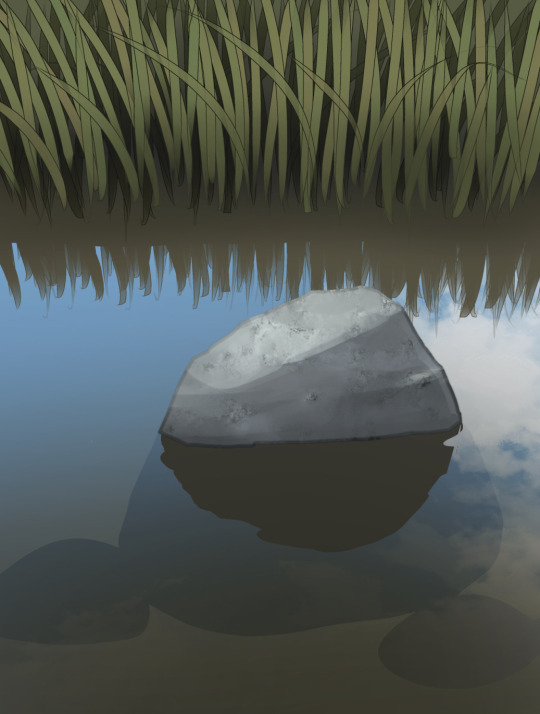
And this is essentially it!! Yes i know the example image isnt a masterpiece, but i didnt wanna expand this post even further and wanted to keep this simple. You can absolutely go further with this and add more vegetation or animals or droplets or rim light or 50000 overlay layers. I hope this made sense and is of any use or help for y’all out there!
#protip#art tutorial#tutorial#digital art#undescribed#(i dont have the energy rn to add alt text to all these images so if anyone wants to add thats totally fine)
726 notes
·
View notes