#feather wiki tutorial
Explore tagged Tumblr posts
Visit Tumblr Blog
Explore Tumblr blogs with no restrictions, modern design and the best experience.
Last Seen Tumblr Blogs


Fun Fact
69% of Tumblr users are millennials.
Text
Decided to try and swap out the text editor on this for suneditor, like is discussed here on the feather wiki website
it's actually surprisingly easy, following the instructions from the website you just Save the SunEditor extension file that is a small script downloaded off the website to the same folder as your Feather Wiki file and add <script src="./suneditor-replacement.js"></script> to the "Custom Head" text area in Wiki Settings. After that go to the github repo of SunEditor and download the suneditor.min.css and suneditor.min.js codes and put them in the same folder as feather wiki as well.
The hardest part which wasn't terribly hard at all, open up the suneditor-replacement.js script in notepad or notepad++ and go to where it says css.href= and replace the link in quotes with this "suneditor.min.css"
Then go to where it says script.src= and replace the link in quotes with this "suneditor.min.js" the whole lines should look like css.href="suneditor.min.css"; and script.src="suneditor.min.js";
respectively, the punctuation is important and so is the capitalization!!!
after that save the script, make sure the wiki page is saved and reloaded and it should be up and running, but in order to enable video, you'll want to modify one last thing in the script. Look for where it says buttonList in the code, and you'll see a sort of list where it shows the options for the text editor that you want enabled, like ['undo', 'redo'], and so on. you can highlight all the options and replace them with this chunk:
['undo', 'redo'], ['font', 'fontSize', 'formatBlock'], ['paragraphStyle', 'blockquote'], ['bold', 'underline', 'italic', 'strike', 'subscript', 'superscript'], ['fontColor', 'hiliteColor', 'textStyle','lineHeight'], ['removeFormat'], ['outdent', 'indent'], ['align', 'horizontalRule', 'list'], ['table', 'link', 'image', 'video', 'audio'], ['fullScreen', 'showBlocks', 'codeView'], ['preview', 'print'], ['save', 'template'] So the whole thing should look like
buttonList: [ ['undo', 'redo'], ['font', 'fontSize', 'formatBlock'], ['paragraphStyle', 'blockquote'], ['bold', 'underline', 'italic', 'strike', 'subscript', 'superscript'], ['fontColor', 'hiliteColor', 'textStyle','lineHeight'], ['removeFormat'], ['outdent', 'indent'], ['align', 'horizontalRule', 'list'], ['table', 'link', 'image', 'video', 'audio'], ['fullScreen', 'showBlocks', 'codeView'], ['preview', 'print'], ['save', 'template'] ],
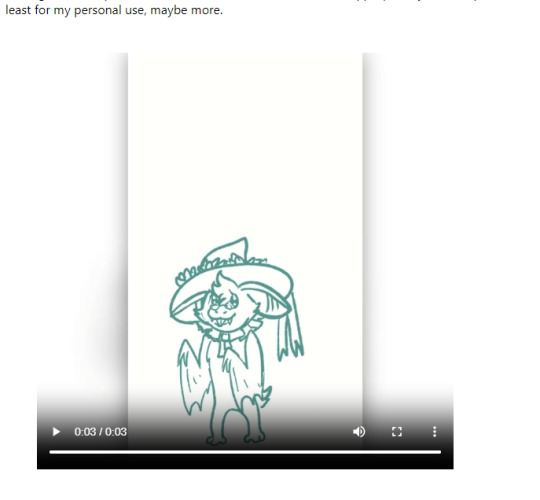
Remember, punctuation is important. If anything borks it's likely you accidentally erased a comma or parenthesis. Don't panic. You can always just redownload the vanilla script and try again as there's not a lot to modify in this code. If you've done it correctly however, it should work as soon as you save and reload, so you should be able to embed media like this:
An amazing little personal wiki doodad
Once again trawling itch.io I came across another amazing thing, this time it is a wiki framework called Feather Wiki that loads up and can be edited on your browser, pretty much no more tech skills needed than being able to use tumblr. Here's a test page that I made copying some content from wikipedia to see how it works. The hyperlinks all lead to wikipedia straight from pasting in, but I could easily change it to my own nested pages. It took all of 5 minutes to figure out and get up and running. It's super lightweight and fast as well. I'm planning on using it to put down all the accurate info and stuff I come across on the web so I can at least have something to reference back to for when my memory loss gets worse. My wiki is completely offline and hosted on my desktop. I just click on the shortcut and I can edit, so I do like it a lot, but it can also be hosted on a web server according to the info page.
Tbh in an age of disinfo and misinfo, having your own personal wiki where you can log accurate information you find may not be a bad idea. Especially if it's something not only free but simple and easy to run, and useable offline to ensure privacy.
6 notes
·
View notes
Note
hi i’m very very new to the community and just trying to figure myself out! do you have any general resources for people new to the therian/alterhuman community?
also, do you have tips for a mourning dove, whitetail deer, or general feline and canine tips? sorry if that’s too much you can just do one if you want
thank you and no pressure!
(from @it-might-be-a-creature)
Hi and welcome to our community! 𖡼𖤣𖥧𖡼𓋼𖤣
To find reliable information on alter/nonhumanity, I recommend the Youtube channel of therian territory and pink dolphin, I find it very interesting.
You can also search the therian wiki/otherkin wiki/alterhuman wiki, but take this information with a grain of salt, as some information may be wrong, missing, or even completely invented. But generally it's pretty decent.
Therian guide is also a nice source.
For tips, know that I'm a feline therian, so I have more tips for felines, but I'll do my best for the rest :3
⚝Tips for mourning dove :
Put a blanket on your back and hold the ends with your hands to simulate wings (a classic)
Make or buy a shawl with feather patterns, I've already seen some crocheted ones on tumblr, it's gorgeous.
If you can, try to climb a tree (be careful though) or something high up.
Try vocals! You can try making bird calls(There are many tutorials on YouTube)!
Listen to nature sounds (especially bird chirping) by going outside, or indoors by listening to nature soundtracks on Spotify, for example.
Go outside to a windy place, close your eyes and imagine yourself flying.
Wears clothes with wide sleeves, which can resemble wings.
⚝Tips for whitetail deer:
Try deer vocals!
Focus on your sense of smell, and smell all the little odors that are barely visible in your environment (to be done in nature, if possible)
Learn the body language of white-tailed deer!
Gently tap your fingers on a hard surface to imitate a hoof sound
White-tailed deer are most active at dawn and dusk, you may be able to walk during these hours, if you can (be careful, be accompanied if possible). They usually rest during the day, so you could take advantage of this time to have a little nap!
⚝Tips for felines:
Practice purring, growling, meowing, (yes, even big cats can purr, although it's a little different than for cats)
Hunt for stuffed animals before eating and imagine eating what you hunted.
Create your own paper claws, it's easy to do and you'll find various tutorials everywhere.
Do your makeup to look like a feline (you don't have to cover your whole face, a little eye shadow under your nose, a line in the small hollow that connects your nose to your mouth and black on the the lower lip can be really euphoric)
Take care of your hair! Don't forget it's your fur.
Climb high (without putting yourself in danger and without doing things your body can't handle), because cats generally feel safer up high.
"claim" your territory! It can be in your garden/house or in a public place (just don't forget that in the latter case this land does not officially belong to you), It is very effective in satisfying one's territorial instincts.
⚝Tips for canines:
Makes canine vocals.
Canines often live in packs or groups, so try to spend more time with loved ones.
Try quadrobics if you can, but be sure to hydrate well and especially not to overdo it if you have arm, leg, heart, ect problems. It's normal that it hurts your fingers and joints a little and that it's difficult to find your balance, but it will pass with time. But if you really suffer a lot every time you try, don't insist, it's okay.
Wrap yourself in a blanket and imagine sleeping with your pack.
Take a nap outside if it's hot, it always feels good.
You can watch the movie "Wolves Walker", I haven't watched it myself yet but apparently it's very popular with canine therians (and many alterhumans in general).
I hope this helped you :3 I posted a list of things to do when you're a newly awakened alter/nonhuman, if you're interested, This might be useful to you. (no forcing)
https://www.tumblr.com/unetherian/760241665074233344/things-to-do-when-youre-a-newly-awakened?source=share
Have a great day/night! Bye!
#alterhuman#therian#nonhuman#therianthropy#therian community#therian safe space#therians#therian tips#alterhuman safe place#nonhuman safe place
13 notes
·
View notes
Note
do you know about lord Krishna (a deity) of the Hindu mythology? I'm not much of a religious person but i know ab him a lot bcz of coming from a religious household and somethings ab him and kaeya just clicks so much
I actually thought ab it bcz kaeya's constellation is a peacock and Krishna is often symbolized with peacock feathers, so i looked into it . I think there might be some links connecting the both but I can't say for sure everything is connected but somethings might be telling us what might happen in the future lore.
And if i really post it rather than keep it in my mind can I tag you?
Thank you for asking, anon! I do know a bit about Krishna (my mom had a Bollywood phase and Krishna was frequently mentioned) but I have a feeling you know better than me. I wish I knew more than just the basics, but there are a lot of similarities between them other than just the peacock symbolism!
I also realized while seeing some Desi!Kaeya fanart that he gives the same energy as to when I see images of Krishna (the fanarts are so good. Probably one of my favorite types of Kaeya art)
I will be using some texts from wiki to better explain my MAIN points because my mind is a mess and I need to learn to control my blabbering!! If i didn't do this, who knows how long this post will get...
Feel free to use this as a basis as well! I'd be happy to get tagged when you post about his possible future for in-game lore. For people knowledgable in Hindu, please feel free to expand on this as well!
"He is the god of protection, compassion, tenderness, and love"
-Kaeya has been portrayed as a protective force of Mondstat along with the rest of the knights.
-Noteworthy moments are him being said to protect a nun's family and his roundabout way in protecting Diluc's identity as the darknight hero
-"Specializes in awakening knightly virtues in others." - Text in TCG card
-he is the guy who planned a birthday party for a friend in secret and passed the praise to someone else.
-several instances of Klee mentioning him being like a big brother to her (him making her a survival handbook and teaching her tcg)
- he has a cryo vision. Love has always been a main topic when it concerns them, especially since their archon representative is the Goddess of Love
"They portray him in various perspectives: as a god-child, a prankster, a model lover, a divine hero, and the universal supreme being."
-his father has dubbed him as their last hope, already putting him on a (very bad for a child) pedestal. He is clearly seen as a possible hero for them and the entirety of Khaenri'ah
-seemingly the only curseless Khaenri'ahn thus far (hope we learn more in 3.5), and perhaps even "blessed" to have a vision
-known to prank and tease people enough that most descriptions of him are exactly about that
-was said to be the elderly's top choice for grandson-in-law
-crack idea but the game has this habit of inserting anecdotes or comments about Kaeya as much as possible to make sure to remind you of him. Suspicious, but so far its mostly funny things. He also seems to be a universal representative in-game oddly enough (frequently the face of tutorials or is part of the character trials).
Kaeya having Desi themes is definitely the biggest indicator to this. Were he not designed and named in such a way, many of us would have probably brushed this off (probably wouldnt have even connected the dots)
I hope this inspires further discussion. This topic is genuinely interesting in my opinion :)
18 notes
·
View notes
Text
Icon Tutorial
Anon asked me for an icon tutorial, specifically for this icon:

I am using Windows and Photoshop CC 1. finding pictures 2. cutting out 3. resizing and placing 4. coloring 5. gradient and sharpen
Let’s go:
1. first you need to find a base image. either you use screencaps or episode stills
for screencaps put the name of your show/movie and "screencaps" into google. chances are it will lead you to one of these sites:
screencapped.net (zip dowloads) kissthemgoodbye.net & grande_caps (gallery & zip downloads) homeofthenutty.com (gallery)
for episode stills I have two sites:
farfarawaysite.com daydreaming (this one sadly hasn't been updated since 2019, but the gallery is still HUGE)
other places to find images are the IMDB galleries, fandom wiki's and, again, google.
the image for this icon is an episode still from daydreaming HERE
2. now that we have our image, we need to get rid of the background.
lately i've been using remove.bg which has saved me SO MUCH time. it works on most pics suprisingly well, and when it doesn't work (mostly because the screencap is just TOO DAMN DARK) I go back to using the pen tool in photoshop.
Pen Tool How-To: click around the edge of your subject as shown in this tutorial. then right-click -> make selection -> set feather radius to 0,5 px. When you have your selection, set a layer mask by clicking this
at this point I like to save the pic as a png, just in case I want to use it again in the future, but that is of course up to you.
for this image I used remove.bg and got a pretty good result
3. now we finally have our pic cut out and ready in photoshop, it's time to make the actual icon!
select the crop tool and at the top put in 100px by 100 px (some people like to use 200px by 200px or 128px by 128px. again, up to you. it's just what i'm used to)
cut out your icon. at this point it doesn't matter yet to place it right, we'll do that in a moment.

when you have it cut press ctrl + t to resize and place it how you want (depending on your version of photoshop you might need to hold the shift key while resizing or click this to not mess up the proportions of your image)

4. time for some color! first choose a background color. i went with a bright pink

now to coloring our person. in this case, because I used an episode still and they already have good brightness, contrast and color, there isn't as much to do as with a screencap.
Important: all the adjustment layers are clipped to the cutout so they don't affect the background. to do this either hold alt and click on the line between layers in the layer panel or right-click on the adjustment layer and select "create clipping mask" or (my way) in the properties panel click this
curves (to brighten it up)

selective color (to get rid of some of the yellow. something i do almost always with pink and purple backgrounds)

levels (more brightening and I also use levels to get the contrast right. usually I start by dragging up the midtones and bringing down the shadows. in this case I also dragged up the highlights)

vibrance (because all that brightening really washed the color out, we're bringing it back!)

that's it for adjustment layers, the next layer isn't clipped anymore.
5. add a gradient fill layer with these colors set it to softlight. adjust the opacity (for this icon it's 53%) and the angle of the gradient by double-clicking on it in the layer panel and then adjusting this

because I always use the same gradient for every icon, I made myself a handy little photoshop action that adds the gradient fill and sets it to softlight so I only have to adjust it. It's here if you want it
and lastly, sharpen! I use a mix of topaz clean and smart sharpen. I also made a photoshop action for this, you can find that HERE (obviously you need topaz clean installed for this to work) then save it as png and done!
And that's it! That's the finished icon!
if you have any more questions, or if anything is unclear come into my askbox or send me a message. I'm always happy to help.
also, now that I have this detailed tutorial, I am up for making just coloring tutorials for icons as well, so if you want to know how I colored a specific icon, let me know!
147 notes
·
View notes
Text
Live2D viewer usage guide
jp.rika.ren offers a lot of tools for Magia Record players - from an in-game news mirror, through a user look-up, a place to download the game’s APKs, a file mirror, a background gallery, a video player for transformation animations, and a lot more. Lots of these are useful for editors, but today I’ll focus on the usage of their L2D viewer, found at jp.rika.ren/live2d/
1. Basic

The L2D viewer has a lot of buttons, but it isn’t very complicated. The biggest problem may be locating a character at first - I recommend learning hiragana, as most characters use it in their first names. In other cases, this tool is very helpful: magireco.fandom.com/wiki/User:MaidenOfHope1702/Sandbox/IDList
Keep in mind that some browsers (for example, older versions of Mozilla Firefox) may export the images without the extension. Just add .png to the filename if that happens.
The image shows what-does-what pretty well. Keep in mind that while regular alts (except April Fools ones) get tagged under the character’s main ID (for example, 1001 for Iroha) in costumes, dual units tend to be scattered. Rika&Ren unit is entirely under 3501 - クリスマス (Christmas), but Yachiyo&Mifuyu one is partially under 1002 - Nanami Yachiyo; only Mifuyu’s uniform is under Mifuyu. Tsuruno&Felicia unit is entirely under Tsuruno.
It’s also worthwhile to memorize what some costume names means. The character name outfit is the girl’s Magical Girl outfit, 変身前 refers to “personal clothes” (usually school uniforms, but not always - Yozuru, Livia, Mitama, Yachiyo, Sudachi and a few others wear regular casual outfits). シャドウ refers to Shadow - Magical Girl clothes but with a darker overlay and hidden eyes. 部屋着 and 寝巻き are sleepwear, クリスマス is Christmas, 水着 is swimsuit, 晴れ着 is haregi, バレンタイン is Valentine, PAPA is magirepo-style stickers, 制服 refers to uniforms if a girl doesn’t already have one, 黒 / 黒羽根 refers to Black Feather’s robes, ハロウィン is Halloween, メイド refers to maid. You probably don’t need to memorize all of this.
2. Advanced
This was only using the built-in features. You can extend the functionality with some tampering.
umaar.com/dev-tips/174-drag-drop-image-local-overrides/
This tutorial will introduce you to overrides. I recommend testing it out with some texture recolor - you can find the base ones at jp.rika.ren/magica/resource/image_native/live2d/XXXXXX/ , XXXXXX being the costume’s ID. The textures can be found in either model.1024 or model.2048. Keep in mind that you cannot add anything like additional hair decorations or bracelets by tampering with the textures. You’d need to edit the model, which I cannot help with. You can, however, delete elements by erasing them. This may be used to get rid of accessories, but also may make changing the character’s hands easier (you’d need to do it in some image editing program though).
You can also swap a girl’s motions with another character’s. Download a motion you want to use, and go to your overrides folder. Make a mtn folder in the first one’s costume’s folder, and paste the motion. Keep in mind that the motion will look a lot different - especially when it comes to hands and arms. You can also dig deeper into the file. I recommend always deleting some lines that refer to the mouth’s movement - sometimes they completely block expressions.
So that’s it! Now you can export your own L2D model transparents from Magia Record!
EDIT: Recently, a new version of Live2D was implemented into the game. Thus, all characters and outfits released after July 29th, 2021 are inaccessible via the L2D viewer linked above. Please follow this link instead. Note that currently, the “unfollow” function does not work. To bypass that, use the “tab” trick described in the screenshot above in light blue. EDIT 2: The Unfollow function now works correctly. However, keep in mind the L2D V4 viewer still has issues regarding facial animations, especially eyebrows - you need to be very quick to capture them before they change.
71 notes
·
View notes
Text
Resources for mask builders
It's getting to be that time of year again. I'm working on a Maratus volans costume, or at least a similarly-designed jumping spider.
Making the skull
I generally start from an existing open-licensed 3d model of the skull or head I'm working from. In the past, I've used a scan of a fossil from Thingiverse, and a lowpoly triceratops model from Thingiverse.
Supplies, ho boy. This is a list of everything that went into my 2016 triceratops skull. It's a substantial investment in things.
At bare minimum, you're going to need a printer, scissors, glue, and paint.
I would recommend that you lose your own printer and print your model on a copy shop's three-foot-wide printer that prints from a roll of paper. It saves so much time during assembly, completely eliminating the "cut out the parts of the parts, then join the parts of the parts together" stage.
It may take multiple triees to get the correct size of print. To make this easier, I recommend finding a 3d model of a construction helmet and a human head, and putting them into your model. Measure how big your head is, create a ruler shape in the model that you can say, "This should be 15.5 inches long." Using Blender's native units support is helpful.
Once you have the model how you like it, figure out how to get it out of Blender. I used to use a script to export it from Blender as a papercraft SVG, but the linked wiki page is gone. You could try this github page for that tool or this unrelated tool?
After I exported the SVG from Blender, I opened it in Inkscape, and scaled the SVG so that the ruler would be the correct size when printed. Then I looked at all the tabs and rearranged and resized numbers so that they'd be legible once the model was printed. I then rearranged pieces for a more-compact print size, suited to my print shop's 36-inch paper reel. 36 inches wide, more than 15 feet long. Export the SVG as a PDF. Bring a rubber band to the print shop.
If you're printing on a home printer, there are tools that will make your job easier. Depending on your operating system, search the Internet for things like "how to print poster on Windows". This was my workflow on Linux in 2015 and 2016: split an image then print en masse.
Don't bother gluing the tabs of the papercraft work; use masking tape instead. You don't have to wait for glue to dry. Don't use medical tape; its sawtooth edges are impossible to hide.
Fill the weird gaps in the model where your tape ran awry with wood putty.
There is no need to paper-maiche on top of the printer paper. Buy a can of cheap windows-and-doors spray foam (not the very-expandy kind!) and fill up all the insides of your skull with that. Before filling with foam, add wire for rigidity and attachment points.
If you're not going to fill the innards with foam, then you'll need to paper-maiche or you'll need to glue the printer paper on top of posterboard before cutting it out. You can cut paper with scissors just fine, but posterboard deserves a sharp xacto knife.
Use a construction helmet as a base for your headpiece. Helmets are built to stay on the wearer's head despite strange impacts. Baseball caps are inadequate if you plan to bend over; they will not hold the skulll onto your head. Cut the crown off of the helmet with a hacksaw blade, drill some holes through the hatband, and zip-tie the helmet to the wire you placed in the skull before filling it up with foam. Trim the zip ties with wire cutters.
Does your paint emit fumes? It probably does. Find a way to do that outside, or find a way to ventilate the area where it'll be drying. If your bathroom has an exhaust fan, you can put newspaper on your bathroom floor, paint the mask outside, and then bring the skull into the bathroom to dry. This is particularly useful if it's too cold outside for the paint to cure properly. Look at the paint can; look at the thermometer. If the air is not at least 10 degress Fahrenheit above the paint's minimum temperature, you're going to have a verrrrry slow drying. Screen porches are handy things to have.
If your mask has more than one piece, figure out how to attach it to your head. For the lower jaw of a triceratops, I pinned the jawbone to a zentai, which wasn't the worst thing I've ever done. For the lower jaw of a much-better-planned deinonychus, I built a hinge from eyehooks. And then I put a rod on the jaw so that I could puppet the jaw. For this year's Maratus spp. head, I'm thinking some sort of Lego assembly will probably work best. Or copious quantities of elastic.
Polymer clay and air-dry clay are pretty much the same. What's your tolerance for fumes? That determines your tolerance for polymer clay, which must be baked. For air-dry clay, I molded the teeth around toothpicks. To attach the teeth to the model, I piked holes into the skull, filled the hole with hot glue, and then shoved the toothpick in until the tooth hit the bone.
For stretching gauze or tights or spandex across gaps, use pins to hold the fabric in place, but use Gorilla Glue to fix nylon in place, not hot glue or super glue. Spandex holds up under hot glue, but make sure that the hot glue is being bonded to a roughened surface on the skull side of the connection.
Do not use superglue on anything that is going to be near your eyes within 12 hours of the superglue application. Superglue offgasses straight chlorine gas, which stings exactly like pool water. Except more painfully.
Make something reusable. I've worn my 2015 Lewis skull to ... at least 5 venues that I can remember. The triceratops I wore twice before retiring it to a wall mount. The deinonychus I've worn at least 4 times.
Finally, do something that you'll have fun doing. Here's my thoughts on one con's worth of cosplay.
Miscellaneous other tutorials:
@rah-bop's Eye and Articulated Eyelid Tutorial
@nambroth has pretty feathers
2 notes
·
View notes
Text
How to Get a Perfect Pelt – Red Dead Redemption 2 Wiki Guide
Final Edited: November 2, 2018 at 6:04 PM
Should you’re on the lookout for recommendations on the right way to get an ideal pelt in RDR2, you’ve got come to the suitable place. Looking in Crimson Lifeless Redemption 2 has a superb little bit of nuance to it and requires gamers to get exact kills to take care of an animal’s high quality.
It is necessary to get good pelts not solely to promote them for a better worth, but additionally for crafting. The trapper solely accepts good pelts for making uncommon gadgets, and you’ll solely fulfill Looking Requests with good pelts.
Beneath are directions on the right way to make getting good pelts simpler, beginning with an enormous kill. For extra recommendations on the place and the right way to promote your carcasses, try the total Looking Suggestions and Technique information.
This process is extremely necessary to make good pelts simpler to get. Should you’re up for a little bit of a experience after unlocking the Fence with Hosea in The Spines of America mission, head northwest from the Valentine space to the city of Strawberry.
On the western foot of Mount Shan you’ll discover the territory of a Legendary buck – hunt it down and produce its antler again to the fence and craft the Buck Antler trinket. This can enhance the standard of the entire pelts you pores and skin whereas looking, making it method simpler to craft upgrades and new gadgets.
Goal the Proper Animal…[edit]
After finding out or killing an animal, Arthur can decide an animal’s high quality simply by it. Animals in pristine high quality are identifiable by the three stars that seem subsequent to their title and are the one animals that may yield an ideal pelt.
Pristine animals seemingly seem at random with others, so take a minute to scope out animals within the space earlier than approaching. Should you discover that animals run away too rapidly, you should utilize your binoculars to review animals from a distance.
Should you’re having a very onerous time looking, strive utilizing the Cowl Scent Lotion. This blocks human scent and reduces animal detection. You will additionally wish to think about using bait.
commercial
…Then Kill it With the Proper Weapon and Ammo[edit]
The weapon and ammo you employ to kill an animal have an effect on its high quality. For example, should you use a shotgun to kill a raccoon, that raccoon goes to be filled with holes and almost nugatory. Usually, you will wish to use your bow and arrow on small animals, and use Crimson Lifeless Redemption 2’s snappy concentrating on system to get clear headshots. Because the looking tutorial mission taught us, capturing an animal within the flawed place degrades its high quality too.
For the largest animals, like bears and elk, you should utilize rifles to take them down. Once more, give attention to getting headshots for the cleanest kills to yield higher carcass high quality. Should you’re having hassle touchdown these clear kills, particularly on small animals, you should utilize Lifeless Eye — particularly after it is leveled up — to focus on a particular level.
Each animal’s “info” tab tells you which ones weapon you must get a clear kill. You can too view this info within the animal Compendium. For example, you want a Varmint Rifle to get a clear kill on a rabbit. Irrespective of how nice of headshots you get on it with a bow, you will not get an ideal pelt. You may, nevertheless, experiment with stronger ammo varieties, just like the bolstered arrow, for taking down massive recreation like bears.
The ammo you employ issues simply as a lot because the weapon. It might be somewhat apparent, however be sure to use non-explosive or non-flammable ammo.
Commonplace ammo is passable for many kills, however should you’re making an attempt to get an ideal carcass from a small hen like a crow or a squirrel, you will wish to craft Small Recreation Arrows at a campfire. You needn’t study a recipe for these. All you want is the next gadgets in your stock:
Flight Feather x1
Arrows x1
Shotgun Shells – Common x1
Small Recreation Arrows do not work on animals just like the Black-tailed Jackrabbit or Raccoon. It solely injures them. You will wish to use these decrease injury arrows on squirrels, rats, snakes and different small animals.
Get Cleaner Headshots[edit]
It isn’t too tough to get headshots on deer, elk, and different medium-sized animals, however you wish to give your self as a lot of a bonus as you possibly can when looking. Positioning when firing is massively necessary. Listed below are some ideas for making headshots a bit simpler:
Transfer to the excessive floor. If the animal you are huntings is uphill from you, you are minimizing your likelihood to get a clear kill.
Ensure you’re dealing with the animal’s facet, not their behind and even straight at their head. Should you’re their facet, there’s much less of an opportunity you will by chance shoot one other half.
Should you’re utilizing a bow and arrow, be sure to pull again the arrow all the way in which, even in Lifeless Eye. Should you do not, you will not be doing most injury (even should you hit the animal’s head) and it will cut back the animal’s high quality immediately.
Be affected person.
Different Looking Methodology[edit]
Your lasso is sweet for extra than simply wrangling your enemies. You should utilize it to tie up and kill animals too. Should you do select to make use of this technique, be ready to stab the animal you wrangle within the coronary heart. This does not work for small animals like rabbits or something smaller, however should you can observe it in your horse, the lasso will work.
Do not forget to make use of Lifeless Eye should you’re having a tough time touchdown the lasso! Get as shut as you possibly can to the animal and when the reticle turns purple, throw your lasso on the animal. Arthur will instantly get off his horse when he catches an animal.
This type of exact kill will all the time provide you with an ideal pelt should you hunted an animal in pristine situation.
That is all now we have! Good luck looking, and you probably have some other ideas or tips, tell us within the feedback or be at liberty so as to add a piece your self by signing in and enhancing the web page.
Was this information useful?
YESNO
PREVIOUS
Looking Suggestions and Technique
NEXT
Camp Information – Improve, Quick Journey, and All Upgrades
from SpicyNBAChili.com https://www.spicynbachili.com/how-to-get-a-perfect-pelt-red-dead-redemption-2-wiki-guide/
0 notes
Text
FEBRUARY 24: Judith Butler (1956-)
It’d be kind of difficult to write about queer women without mentioning once Judith Butler, the American philosopher and theorist whose work has profoundly influenced modern thought, especially in the fields of feminist and queer theory.
Her academic achievements are impressive; and so is her list of publications, among which we can find some of the groundbreaking texts on gender, identity, sexuality, bodies, ethics, queerness, and Jewishness of the 20th-century: Gender Trouble is usually the most well-known of her books, as it helped develop the idea of gender performativity in feminist and queer theories, and has had impacts in film studies and literary theory as well.

Judith Butler at a lecture at the University of Hamburg, April 2007, photo from Wiki Commons taken by Jreberlein
Butler was born in Cleveland, OH; her family is of Jewish descent, hailing from Hungary and Russia. Out of her early education probably arose her deep interest in ethics and political philosophy, as she attended Hebrew school and special tutorial classes on Jewish ethics when she was a teenager. She was a philosophy student in college and grad school, and she obtained her PhD from Yale in 1984. She’s taught at numerous prestigious universities since then, and she’s now the Maxine Elliot Professor in the CompLit department of Berkeley, where she’s taught since 1993, and where she founded the Critical Theory Program. She also currently works at the European Graduate School, where she’s the Hannah Arendt Chair. She lives in California with her partner, Wendy Brown, who’s also a professor at Berkeley, working in political science and critical theory (birds of a feather really do flock together), and their son.
Obviously, you can’t have that kind of public visibility without some form of criticism. She’s been under fire for anything from her views on gender to her prose style, which her detractors often consider to be pointlessly obtuse. As always, there’s definitely valid criticism in all this, but one can’t help but notice how often Butler’s been vilified by mainstream media and conservative thinkers whenever she challenges deeply ingrained concepts (she was basically demonized as the antichrist when marriage equality became a hotly debated issue in France a few years ago).
Wikipedia has a pretty exhaustive bibliography for her. For more reading, there’s this piece on the NYT where she breaks down why “All Lives Matter” is wrong, and a Youtube search brings up plenty of her lectures, which may be in a more comprehensible format than her more academic texts. Finally, in this interview with The TransAdvocate, she explains her views on transgender identities and TERFs (spoiler alert: she fully supports any trans person’s right to self-definition, and completely opposes the latter).
youtube
And if you’re into that kind of thing, here’s a panel discussion between Butler, Cixous, and Ronnell from back in 2012.
- AK
#365daysoflesbians#judith butler#20th century#21st century#wlw#lesbian#queer#gender#usa#people#lgbt#lgbt rights#lgbt history#philosophy#ethics#academia#jewish lesbians
53 notes
·
View notes
Text
What would Donna do? Seven lessons learnt from Suits’ Donna Paulsen
Aspiring lawyer Christianah Babajide thinks there’s plenty law students can learn from the iconic TV character
Image credit: Suits Wiki
Like every other law student with a Netflix subscription, I am obsessed with the US legal drama Suits, and even more obsessed with Harvey Specter’s long-time secretary, Donna Paulsen.
Far from an ordinary assistant, Donna’s sassy attitude, witty personality and smart comebacks make her an icon, plus Donna’s character has taught aspiring lawyers the dos and don’ts of working in a corporate firm. From displaying exceptional problem-solving skills and unwavering loyalty to your boss, to thinking on your feet and having an outstanding memory, solicitors would be wise to take a leaf out of Donna’s book.
And students would be, too. Here are seven lessons you can learn from the amazing Donna.
1. Always be prepared
Donna never approaches a sticky situation without preparing first. This very desirable trait is why Harvey relies on her to supplement his arguments and proofread his work.
Being a law student is no walk in the park, so you need to be prepared. This means always being one step ahead: do your research before a meeting or an important legal event and print off the recommended reading before your tutorial. Remember: ‘By failing to prepare, you are preparing to fail.’
2. Stay cool, calm and collected
Donna approaches every situation with composure — nothing can ruffle her feathers. She’s able to think clearly, focus on solutions and get the job done efficiently, often before Harvey has even asked for her input. So, if something goes wrong or you’re not sure what to do, take a second to pause, breathe and think: What would Donna do? Approaching a situation with a clear head is only going to help, not hinder!
3. Have a sense of humour
When you’re in the office as long as lawyers and their secretaries are, having a good sense of humour is what will get you through the day. Donna’s ability to make friends and form relationships with lawyers stems from her good sense of humour — she doesn’t take herself too seriously. So, loosen up, be it at university, at work or at an event. You never know who you’ll end up cracking a joke with — it may even be your next employer!
4. Be a team player
Donna is the ultimate team player and fiercely loyal to everyone she works with, be it when assisting her colleagues in a mock trial or helping with legal research. In a law firm, you’ll need to be a good team player to reach the best possible outcome for your client, whether in transactions, mediations or arbitrations. The ability to work collaboratively and effectively with others is of fundamental importance to working successfully in law — so start practicing now.
5. Be ready to make sacrifices
There are numerous occasions in Suits where Donna has to make personal sacrifices to prove how seriously she takes her job. Being a good law student means sacrificing your social life to catch up on the reading and writing you need to do. There is little time for fun in law school and you have to accept that to get the best grade possible.
6. Expand your network
Between organising two tickets to the ballet and a dinner with Mikhail Baryshnikov for Louis Litt and finding out the dirt on opposition lawyers for Harvey, there is no information Donna can’t find through her connections. Law students must take every opportunity to network with legal professionals. You never know when that solicitor you met six months ago could help you out with a job.
7. Learn from your mistakes
In season two — spoiler alert — Donna accidentally destroys important evidence for one of Harvey’s cases. As a result, she loses her job, endures a mock trial and (almost) ruins her relationship with her boss.
But she works incredibly hard to get back to where she was, and eventually returns to her position. She remained confident in her abilities to do her job and proved her worth to the firm. We all make mistakes along the way, whether that be in our careers, during our time at university or our personal lives. Don’t beat yourself up! Instead, commit yourself to finding a solution and never lose faith in your ability — there’s a reason why you’re in the role you’re in.
Moral of the story: Be Donna at uni. Be Donna after uni. Be Donna always.
Christianah Babajide is a student at City Law School.
The post What would Donna do? Seven lessons learnt from Suits’ Donna Paulsen appeared first on Legal Cheek.
from Legal News And Updates https://www.legalcheek.com/2018/05/what-would-donna-do-seven-lessons-learnt-from-suits-donna-paulsen/
0 notes
Text
What would Donna do? Seven lessons learnt from Suits’ Donna Paulsen
Aspiring lawyer Christianah Babajide thinks there’s plenty law students can learn from the iconic TV character
Image credit: Suits Wiki
Like every other law student with a Netflix subscription, I am obsessed with the US legal drama Suits, and even more obsessed with Harvey Specter’s long-time secretary, Donna Paulsen.
Far from an ordinary assistant, Donna’s sassy attitude, witty personality and smart comebacks make her an icon, plus Donna’s character has taught aspiring lawyers the dos and don’ts of working in a corporate firm. From displaying exceptional problem-solving skills and unwavering loyalty to your boss, to thinking on your feet and having an outstanding memory, solicitors would be wise to take a leaf out of Donna’s book.
And students would be, too. Here are seven lessons you can learn from the amazing Donna.
1. Always be prepared
Donna never approaches a sticky situation without preparing first. This very desirable trait is why Harvey relies on her to supplement his arguments and proofread his work.
Being a law student is no walk in the park, so you need to be prepared. This means always being one step ahead: do your research before a meeting or an important legal event and print off the recommended reading before your tutorial. Remember: ‘By failing to prepare, you are preparing to fail.’
2. Stay cool, calm and collected
Donna approaches every situation with composure — nothing can ruffle her feathers. She’s able to think clearly, focus on solutions and get the job done efficiently, often before Harvey has even asked for her input. So, if something goes wrong or you’re not sure what to do, take a second to pause, breathe and think: What would Donna do? Approaching a situation with a clear head is only going to help, not hinder!
3. Have a sense of humour
When you’re in the office as long as lawyers and their secretaries are, having a good sense of humour is what will get you through the day. Donna’s ability to make friends and form relationships with lawyers stems from her good sense of humour — she doesn’t take herself too seriously. So, loosen up, be it at university, at work or at an event. You never know who you’ll end up cracking a joke with — it may even be your next employer!
4. Be a team player
Donna is the ultimate team player and fiercely loyal to everyone she works with, be it when assisting her colleagues in a mock trial or helping with legal research. In a law firm, you’ll need to be a good team player to reach the best possible outcome for your client, whether in transactions, mediations or arbitrations. The ability to work collaboratively and effectively with others is of fundamental importance to working successfully in law — so start practicing now.
5. Be ready to make sacrifices
There are numerous occasions in Suits where Donna has to make personal sacrifices to prove how seriously she takes her job. Being a good law student means sacrificing your social life to catch up on the reading and writing you need to do. There is little time for fun in law school and you have to accept that to get the best grade possible.
6. Expand your network
Between organising two tickets to the ballet and a dinner with Mikhail Baryshnikov for Louis Litt and finding out the dirt on opposition lawyers for Harvey, there is no information Donna can’t find through her connections. Law students must take every opportunity to network with legal professionals. You never know when that solicitor you met six months ago could help you out with a job.
7. Learn from your mistakes
In season two — spoiler alert — Donna accidentally destroys important evidence for one of Harvey’s cases. As a result, she loses her job, endures a mock trial and (almost) ruins her relationship with her boss.
But she works incredibly hard to get back to where she was, and eventually returns to her position. She remained confident in her abilities to do her job and proved her worth to the firm. We all make mistakes along the way, whether that be in our careers, during our time at university or our personal lives. Don’t beat yourself up! Instead, commit yourself to finding a solution and never lose faith in your ability — there’s a reason why you’re in the role you’re in.
Moral of the story: Be Donna at uni. Be Donna after uni. Be Donna always.
Christianah Babajide is a student at City Law School.
The post What would Donna do? Seven lessons learnt from Suits’ Donna Paulsen appeared first on Legal Cheek.
from Legal News https://www.legalcheek.com/2018/05/what-would-donna-do-seven-lessons-learnt-from-suits-donna-paulsen/
0 notes