#gradient maps are very fun
Explore tagged Tumblr posts
Visit Tumblr Blog
Explore Tumblr blogs with no restrictions, modern design and the best experience.
Last Seen Tumblr Blogs


Fun Fact
Women make up for the other 50% of Tumblr’s audience.
Text

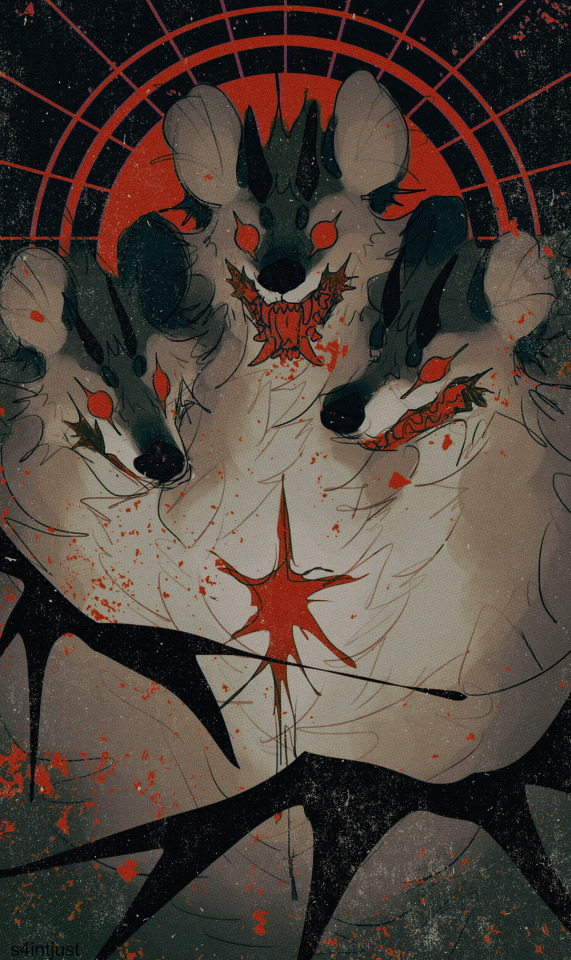
Had another go at doing a sorta poster-esqe design
This time inspired by the IF Blood Choke by @blood-choke , since it's a very visceral read I felt I had to do something up to par with that
All that was going though my head making this was "squish heart" and "gradient map with lesbian flag"
#blood choke#blood choke if#fanart#Blood choke fanart#lesbian#colourful gore#cw heart#cw realistic heart#cw blood#gradient maps are very fun#defiantly helps with more funky colour designs#I struggled for ages on this with whether or not to do shading or hatching#eventually I messed around with some halftones and it just really hit the vibe I was going for#read blood choke its very good if you love lesbian vampires
34 notes
·
View notes
Text
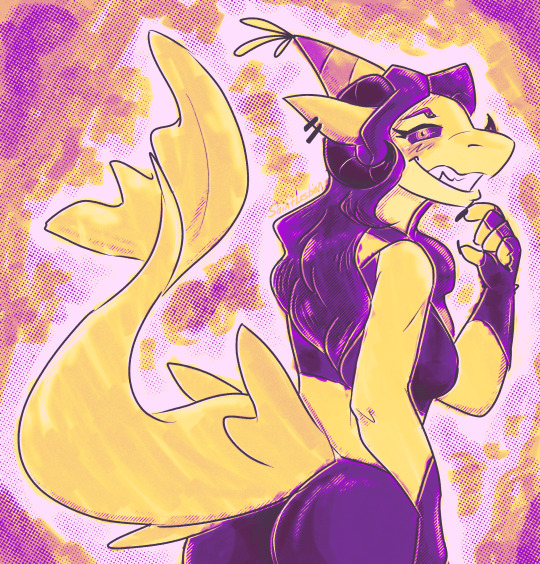
hey. wake up. they've invented a new kind of citrus fruit that is also a Girl. and they're calling her Mabel
happy birthday @girlballs! here is shark picture 4 u.
+ lemonade variants

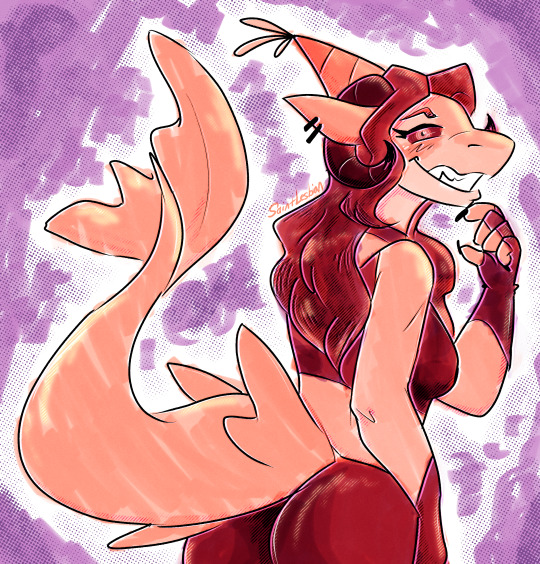
#pentadraws#art#furry#friend's oc#i don't really draw shark anthros very much so i figured i'd get some practice in#drawing only took abt an hour and a half i think? very very sketchy work#originally the party hat was supposed to be a dorsal fin but then i looked at a pic of lemon and realized she didn't have one#i liked the shape of it too much to get rid of it tho so. modified it into a party hat :)#fun fact! the reddish/purple color scheme is actually what the raw colors looked like when i was drawing!#i just used some gradient maps to get the pic to the right colors in post#im happy with how this came out. i need to do more quick sketchy drawings like this for enrichment#oh also happy birthday mabel ok byeeeeeee
277 notes
·
View notes
Text

Porcelain hands
You can‘t fall down the stairs to see yourself
#ninjago#ninjago Kai#ninjago Cole#ninjago morro#sandstorm#more vampire au stuff inspired by the shiki ending !! :D#was rlly fun to do I‘m trying to work on composition by using only greyscale and gradient maps#middle one didn‘t come out the way I wanted it too it looks better in greyscale I feel like#but like I don‘t wanna spend too much time on it#Or I‘m gonna implode and shrivel up#capition are lyrics from Porclaine hands by Weatherday#Come In is still an Album I heavily associate with Kai#it‘s very him#cw blood#very little but theyre burning to death so#starling‘s art
214 notes
·
View notes
Text


some of my favourite Callie outfits/personas, been messing about w it for A While lol
#gleniferskydays dot biz fork found in kitchen moments#calliope petrichor#naddpod#not another dnd podcast#ba2mia#ba2mia fanart#naddpod fanart#callie petrichor#my art#naddpod c3#id in alt text#still not sure im doing it right but hopefully it's ok/helpful!#o ya Lots of gradient map usage in these#a very fun way to colour trainers n tracksuits imo! just vague out some values and see what happens lol
172 notes
·
View notes
Text

sleepy senchou 💤
#my art#hololive#houshou marine#i posted this TWICE on twitter before realising i had a bunch of shit i needed to fix with the face#but it's ok she's fixed now#also i learned about tone curves and gradient maps with this one#very fun !!
157 notes
·
View notes
Text

ive preemptively blocked all the exits
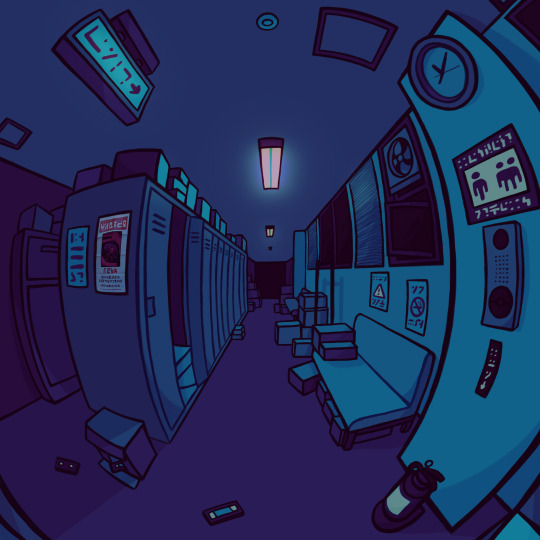
#rick and morty#rick sanchez#artsbotz#urmmm this was just a perspective/bg study rlly. and practicing using gradient maps#but i wanted to put rick in it so. there we go#very fun!! took soooo long tho lol#thanks 4 all the notes on my last art btwwww </3
234 notes
·
View notes
Note
hi, sorry if you’ve answered this before, but how do you pick your colours? in general but also when you draw the idv characters, I think it might be the way that they shade the character artworks but I find deciding what colours to use when I draw them really hard, thank you for your time !!!!
i usually eyeball the initial colors! i tend to just look at their official concept art since thats the main piece of art that deliberately doesn't muddle their palette with environmental shading and stuff. you don't have to be wholly accurate to their canon color palette, i usually just go for colors that are similar but nothing rigid.
as a standard for myself i try to stick to only several colors drawing a specific character so they're more visually cohesive, so i also eyedrop colors that i used earlier in the coloring process. (so basically if theres pieces of a characters outfit that are a similar color i usually just make it all one color unless i feel like separating them slightly is necessary) i also like having a bolder color underneath the clipping mask base, then lower the opacity of that base in the 90-96 range so theres also an undertone to make it feel more uniform. (the undertone for this vera is purple)

#in general i would stick to character concept art to get your colors from and allow yourself to mess around w it with filters and overlays#depending on what you want to go for#gradient maps are also very fun!#ask#anon
68 notes
·
View notes
Text
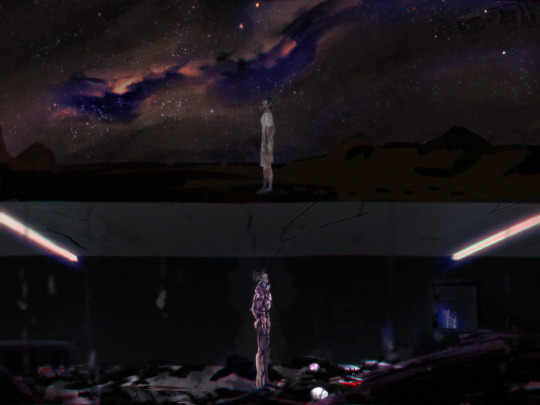
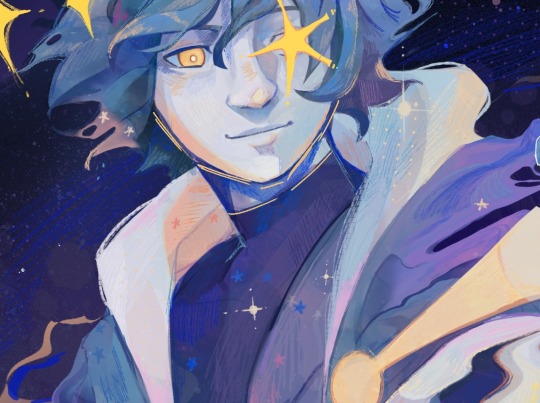
A little gift for @cigarettesandinevitablebetrayal who did the equivalent of letting off a small explosion in the group chat with some first escape vs bad end parallels.
And the visuals it inspired were like! Really fucking good!!! So. Started scribbling.
#Rashad basri#fhr#fallen hero#fallen hero spoilers#insofar as tattoos etc (which I almost forgot!!)#fallen hero sidestep#sadbh art#fun trivia and facts:#there are blue specks around Rashad in the bottom half to very slightly mimic stars but you have to zoom in a lot to find them#Rashad had a little ‘halo’ in the bottom panel that’s got#kinda to mimic the Galaxy up top#and uhh the Gradient map I used to add some nice saturation at the end is the same one I used drawing the heartbreak suit for the first time#oh also it’s the same Rashad just flipped with eyes repainted and a little bespoke scribbling on the hair#in case that wasn’t obvious#sadly no speedpaint bc the canvas is TOO fuckin LONG and the details are fiddly enough that it wouldn’t be fun to watch#alas
40 notes
·
View notes
Text


all my artfights attacks so far!!
[fight me]
#youni originals#artfight#artfight 2024#original art#my art#sorry i'm not tagging anyone because some are tumblr mutuals and some aren't and i. do not feel like looking for the ones who aren't.#I posted the first one already on my starwar account#but now you get to see the rest#i'm especially proud of the garfed pome. probably the highlight of my week.#also everyone notice the gallons of radiation open like pet food cans#very funny detail to me. that i added for my own amusement.#another fun detail is the last one was colored with gradient maps‚ except for the gifts which have a real color overlaid
6 notes
·
View notes
Note
Hi again, sorry for my request, but could you make some adorable drawings of Momo and Okarun? Sorry and thank you very much, have a good day or night...I hope everything goes well for you :3

"Laser Focus"
Thank you very much, Hel-wey! Always happy to see you in my inbox!! Your wish is my command. Hope this is cute enough 💖 I had a lot of fun drawing it (and experimenting with Gradient Maps in CSP for the colors) ✨
#my art#asks answered#hel-wey#momokarun#okarun#ken takakura#momo ayase#dandadan#dan da dan#maybe someday there will be a day when these two don't have complete and total control of my brain. but today is not that day 💖#drawing backgrounds is pure pain y'all. 2/10 do not recommend
1K notes
·
View notes
Text


before/after some postprocessing!
#on pieces like this i dont really do comprehensible coloring- i just highlight lighter/darker parts and then apply gradient maps/filters#its fun! i love messing around with these things#hovewer it takes a lot of time. like really a lot#because i do many variations and try out different things to see what wokrs best#even if it ends up looking not very much-time-spent-on-it-esque#like this one! there were many variations but i ended up with pretty simple dull/vintage-y coloring#but you know. its about the process. its about exploring and trying out different things
37 notes
·
View notes
Text
My Favorite Cheap Art Trick: Gradient Maps and Blending Modes
i get questions on occasion regarding my coloring process, so i thought i would do a bit of a write up on my "secret technique." i don't think it really is that much of a secret, but i hope it can be helpful to someone. to that end:

this is one of my favorite tags ive ever gotten on my art. i think of it often. the pieces in question are all monochrome - sort of.

the left version is the final version, the right version is technically the original. in the final version, to me, the blues are pretty stark, while the greens and magentas are less so. there is some color theory thing going on here that i dont have a good cerebral understanding of and i wont pretend otherwise. i think i watched a youtube video on it once but it went in one ear and out the other. i just pick whatever colors look nicest based on whatever vibe im going for.

this one is more subtle, i think. can you tell the difference? there's nothing wrong with 100% greyscale art, but i like the depth that adding just a hint of color can bring.
i'll note that the examples i'll be using in this post all began as purely greyscale, but this is a process i use for just about every piece of art i make, including the full color ones. i'll use the recent mithrun art i made to demonstrate. additionally, i use clip studio paint, but the general concept should be transferable to other art programs.


for fun let's just start with Making The Picture. i've been thinking of making this writeup for a while and had it in mind while drawing this piece. beyond that, i didn't really have much of a plan for this outside of "mithrun looks down and hair goes woosh." i also really like all of the vertical lines in the canary uniform so i wanted to include those too but like. gone a little hog wild. that is the extent of my "concept." i do not remember why i had the thought of integrating a shattered mirror type of theme. i think i wanted to distract a bit from the awkward pose and cover it up some LOL but anyway. this lack of planning or thought will come into play later.
note 1: the textured marker brush i specifically use is the "bordered light marker" from daub. it is one of my favorite brushes in the history of forever and the daub mega brush pack is one of the best purchases ive ever made. highly recommend!!!
note 2: "what do you mean by exclusion and difference?" they are layer blending modes and not important to the overall lesson of this post but for transparency i wanted to say how i got these "effects." anyway!
with the background figured out, this is the point at which i generally merge all of my layers, duplicate said merged layer, and Then i begin experimenting with gradient maps. what are gradient maps?
the basic gist is that gradient maps replace the colors of an image based on their value.

so, with this particular gradient map, black will be replaced with that orangey red tone, white will be replaced with the seafoamy green tone, etc. this particular gradient map i'm using as an example is very bright and saturated, but the colors can be literally anything.

these two sets are the ones i use most. they can be downloaded for free here and here if you have csp. there are many gradient map sets out there. and you can make your own!
you can apply a gradient map directly onto a specific layer in csp by going to edit>tonal correction>gradient map. to apply one indirectly, you can use a correction layer through layer>new correction layer>gradient map. honestly, correction layers are probably the better way to go, because you can adjust your gradient map whenever you want after creating the layer, whereas if you directly apply a gradient map to a layer thats like. it. it's done. if you want to make changes to the applied gradient map, you have to undo it and then reapply it. i don't use correction layers because i am old and stuck in my ways, but it's good to know what your options are.

this is what a correction layer looks like. it sits on top and applies the gradient map to the layers underneath it, so you can also change the layers beneath however and whenever you want. you can adjust the gradient map by double clicking the layer. there are also correction layers for tone curves, brightness/contrast, etc. many such useful things in this program.
let's see how mithrun looks when we apply that first gradient map we looked at.

gadzooks. apologies for eyestrain. we have turned mithrun into a neon hellscape, which might work for some pieces, but not this one. we can fix that by changing the layer blending mode, aka this laundry list of words:

some of them are self explanatory, like darken and lighten, while some of them i genuinely don't understand how they are meant to work and couldn't explain them to you, even if i do use them. i'm sure someone out there has written out an explanation for each and every one of them, but i've learned primarily by clicking on them to see what they do.
for the topic of this post, the blending mode of interest is soft light. so let's take hotline miamithrun and change the layer blending mode to soft light.

here it is at 100% opacity. this is the point at which i'd like to explain why i like using textured brushes so much - it makes it very easy to get subtle color variation when i use this Secret Technique. look at the striation in the upper right background! so tasty. however, to me, these colors are still a bit "much." so let's lower the opacity.

i think thats a lot nicer to look at, personally, but i dont really like these colors together. how about we try some other ones?

i like both of these a lot more. the palettes give the piece different vibes, at which point i have to ask myself: What Are The Vibes, Actually? well, to be honest i didn't really have a great answer because again, i didn't plan this out very much at all. however. i knew in my heart that there was too much color contrast going on and it was detracting from the two other contrasts in here: the light and dark values and the sharp and soft shapes. i wanted mithrun's head to be the main focal point. for a different illustration, colors like this might work great, but this is not that hypothetical illustration, so let's bring the opacity down again.

yippee!! that's getting closer to what my heart wants. for fun, let's see what this looks like if we change the blending mode to color.

i do like how these look but in the end they do not align with my heart. oh well. fun to experiment with though! good to keep in mind for a different piece, maybe! i often change blending modes just to see what happens, and sometimes it works, sometimes it doesn't. i very much cannot stress enough that much of my artistic process is clicking buttons i only sort of understand. for fun.
i ended up choosing the gradient map on the right because i liked that it was close to the actual canary uniform colors (sorta). it's at an even lower opacity though because there was Still too much color for my dear heart.

the actual process for this looks like me setting my merged layer to soft light at around 20% opacity and then clicking every single gradient map in my collection and seeing which one Works. sometimes i will do this multiple times and have multiple soft light and/or color layers combined.
typically at this point i merge everything again and do minor contrast adjustments using tone curves, which is another tool i find very fun to play around with. then for this piece in particular i did some finishing touches and decided that the white border was distracting so i cropped it. and then it's done!!! yay!!!!!
this process is a very simple and "fast" way to add more depth and visual interest to a piece without being overbearing. well, it's fast if you aren't indecisive like me, or if you are better at planning.

let's do another comparison. personally i feel that the hint of color on the left version makes mithrun look just a bit more unwell (this is a positive thing) and it makes the contrast on his arm a lot more pleasing to look at. someone who understands color theory better than i do might have more to say on the specifics, but that's honestly all i got.

just dont look at my layers too hard. ok?
2K notes
·
View notes
Text
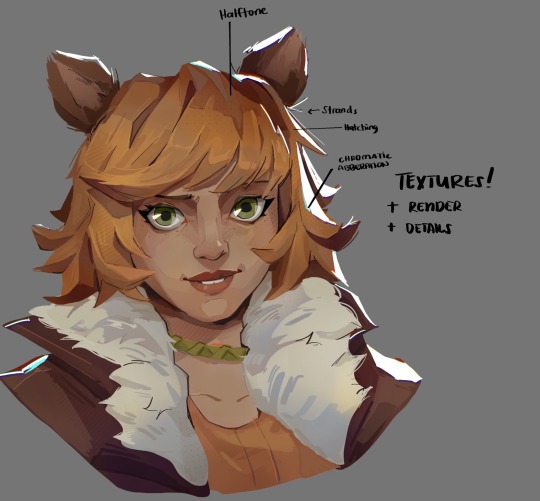
Art style breakdown /tutorial(??)

Some friends asked so here we go : disclaimer im bad at explaining (so feel free to send an ask or smth)
Final art (long read so theres a timelapse at the end)


If its not for something important (commissions), i dont usually make a lineart for a drawing but just clean up the sketch , it wont be used anyway

I usually separate them by colors , mostly so i can Alpha lock them and not worry about coloring over parts

When coloring i use a soft airbrush to have gradients within the shading , so its not one solid color . How i shade is very blocky , lots of triangles lol (if im using CSP i love using the lasso fill tool ) but there are parts especially in the skin where I keep it smooth and blended, usually nose and cheek area . Using an asaro head is usually a good start to learning how to shade faces with planes in mind

Depends on the character, but I like adding shadows on the lashes/brows itself , make it look solid and 3d , it makes the eyes pop more imo

Using multiply layer to make the shadows darker for more contrast
At some point I’d merge everything together so i can just paint in one layer, easier to fix things with liquify too ; if im in CSP i keep the separate layers in one folder just in case i need em later but i cant really do that in Procreate cos of layer limits

This is the part where i make the shading more painterly .,To make the shading look sharper , i like adding lines on the edges .
The fun part : adding the ✨
This is the part where I add textures , either from texture images or with screentone/hatching brushes. This is also around the part where i add the character’s accessories and stuff like scars and freckles (its just easier to add smaller things near the end than having them accidentally painted over at the start)
Whenever I feel like the drawing looks too much of a similar shade / temperature , I use a gradient map+layer effects (masked) on parts to give it variety . Technically you can do this by just having a layer effect on and manually adding colors but gradient maps make me go “ooooh didnt think of that color there “
CSP also has a posterization filter that i like using when i feel like some part looks too smooth to me.
I sometimes add in sketchy lines , and seeing how cool it looks in Marvel Rivals art ive been adding it more lol
Artists that influenced me are : Nesskain, Toni Infante , Valorant’s 2d art(their main artist is Suke) ,Arcane , Spiderverse and the most recent one ive been obsessing over is Marvel Rivals ( its got everything i want my art to be when it grows older lmao )
574 notes
·
View notes
Text

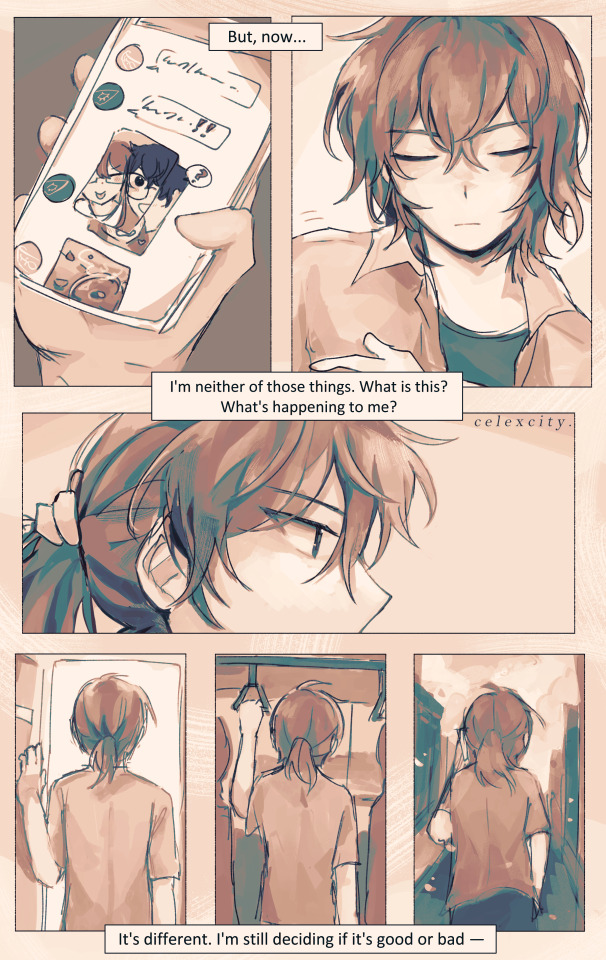
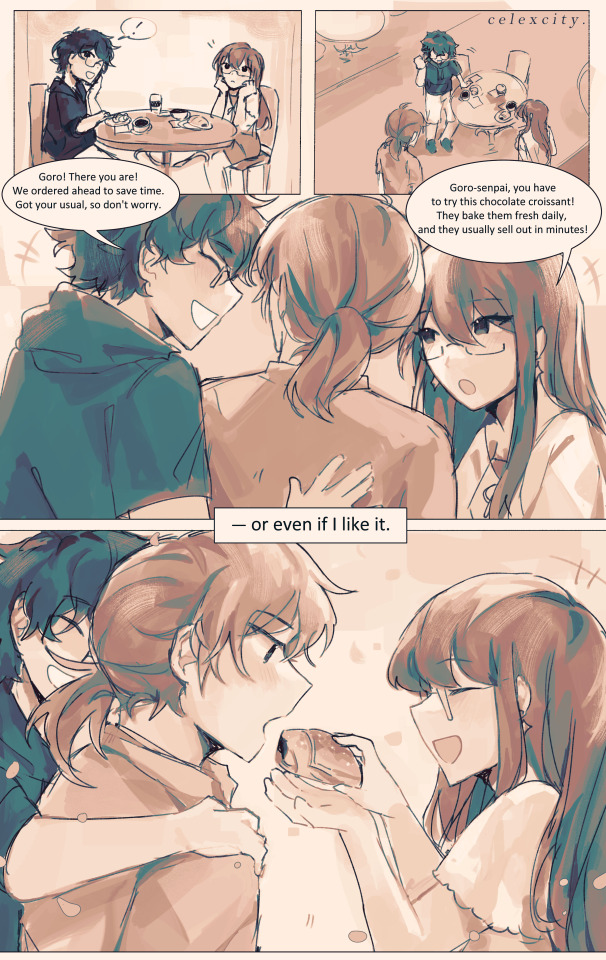
present day
if every day will be like this from now on, i'll look forward to every single one.
ok. Sits down. help meeee i tried using csp's comic tools for once (and also gradient maps + coloring w monochrome) to save time bUT I ENDED UP SPENDING THE USUAL AMT ANYWAY SO. . erm. WELL IT WAS FUN ANYWAYS
hiiiiiiiii i wrote this script 4 months ago nd finally did it (had this on the backburner for 20 million yrs bc i wanted to get out other angst bullshit first)
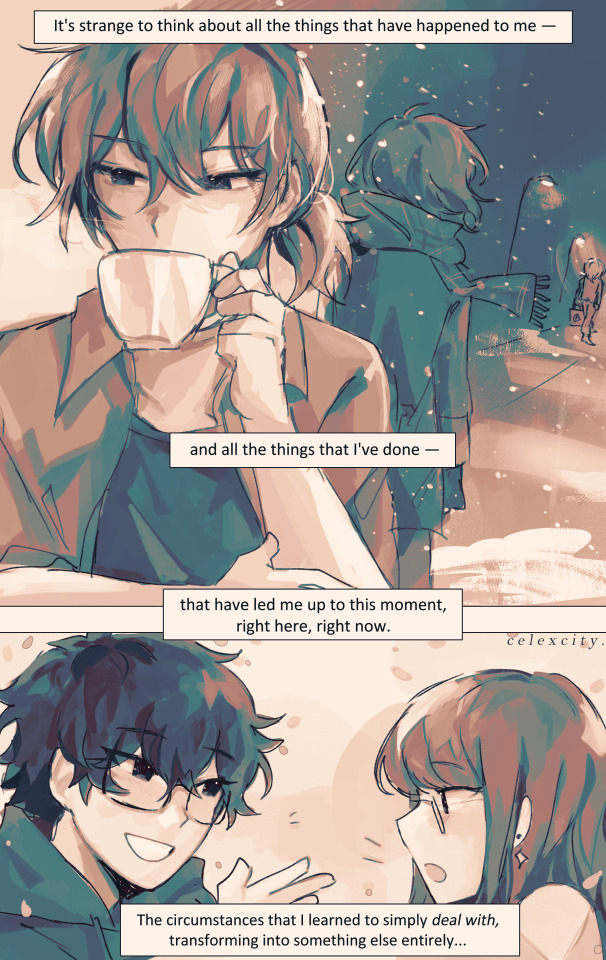
the parallels of goro's back (x3) on the first 2 pgs are kinda not 1:1 as i'd like but REGARDLESS i still like them. goro, who had utmost control over his life, running it like a machine, regardless of how he feels or if he's tired or if he wants to give up.......he was in control. knowing, of course, that his life is on the line at every waking moment, but since he was always on edge, always alert, he was still in control.
but now, surviving the long winter and coming out to the other side, he's lost that control AND that edge. now what is he left with? what is there left?
very speficially in the 2nd page.... i think its so <3 YAY <3 that goro, now, doesn't feel the need to take such spic-and-span clean-cut care of his appearance.., guy who rolls out of bed and throws on a shirt to go hangout w akira and sumire. he decides to tie up his hair and forgoes his gloves... feels more "comfortable" to change his apperance, to let down his guard a little. <- was the rough symbolism JKDSHKFS
sumire getting the choco croissant but letting goro have the first bite YEAHHHH WHATEVER
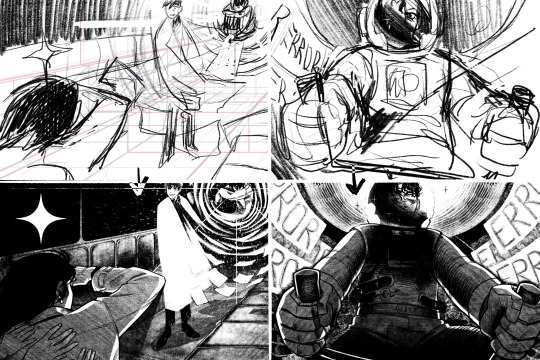
4th page symbolism is also rough i didnt think abt it too hard LMAO. 3rdsem goro watching his detective prince self leave. he knows acutely well that chapter of his life is over - whether he survives the long winter or dies in it. all that he knew - even though it was miserable and awful and frustrating and dangerous - is gone.
and now there's just this: the present day. whatever that means.
i think something important to me abt royal trio is just the idea of Learning To Just Exist: no need for a "purpose" or a "calling" or some overarching "goal". they just learn to exist.
and of course none of them really have a benchmark for "wow i like this i want to live like this" so they just roll with the punches, as they always have, but yknow. finally getting to live their honest student life as they always deserved
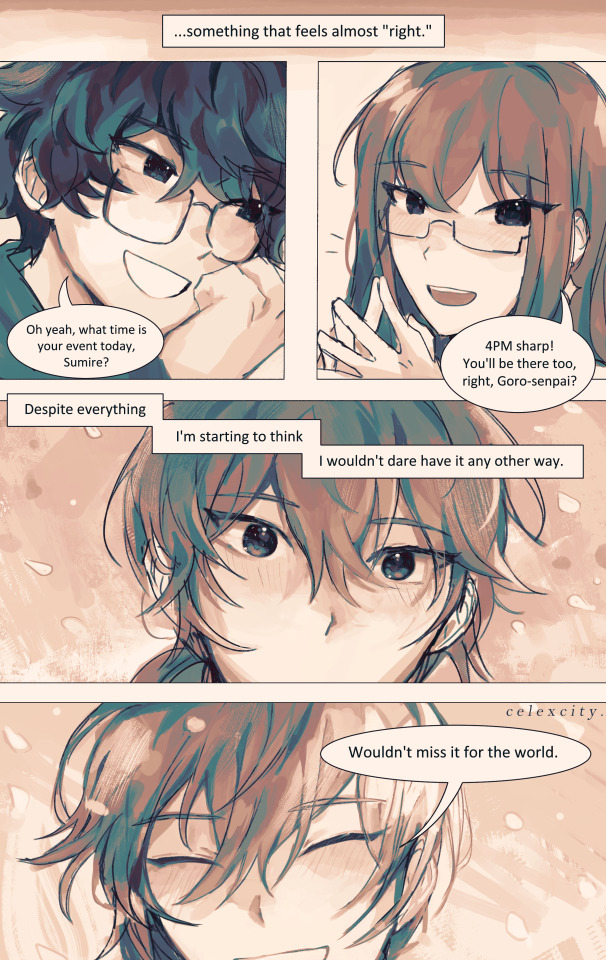
edit: and most importantly for goro, i think, is learning to cut himself some slack. "despite everything" he says, despite all the shit he's endured AND all the shit he's done, he feels like this is "right." whatever that means, he's ready to take it day by day to figure it out. AND THATS THE WHOLE THING Punches wall really hard
edit: I ALSO FORGOT. i think the sentiment of "being waited for" for goro means a lot. since he had to do everything by himself, fight for himself, decide everything for himself frm such a young age, the idea of akira and sumire waiting for him, inviting him out simply for him to be there -> is really meaningful to him, more than they could know.
edit AGAIN: also goro sleeping in means a lot to me. i imagine that guy has pretty terrible insomnia. ALSO HE HAS A BEDFRAME! i like the thought of his apartment being so /r/malelivingspaces throughout the game. he doesn’t deserve a bedframe. BUT HE HAS ONE NOW!
goros expressions in the last page gve me a hard time. sparkly....
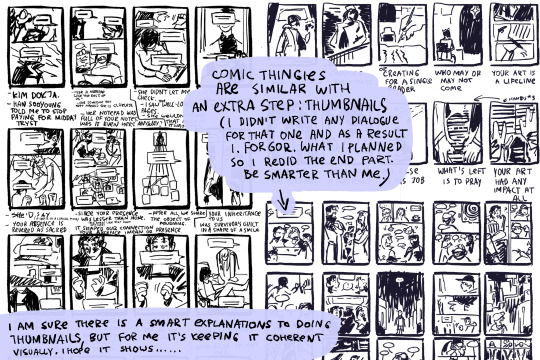
also im SO freaking sorry if his voice isnt too well-written... i had a crisis over the wording while draiwng htis so much DSKHASKDASJK AND THE PANELING AND WHATEVERRR IDEK WHAT IM DOINGGG but it was fun!!!! exploratory..... regardless i will keep workign to do him and royaltrio justice. THUMBSUP EMOJI.
#4am again no problem. chokes#goro akechi#sumire yoshizawa#akira kurusu#persona 5 royal#royal trio#shuakesumi#cele draws#long winter#<- technically but its also good w canonverse#cele comics
577 notes
·
View notes
Text

i use a lot of subtle, low-opacity gradient maps when colouring and i've always liked making wacky ones like this which don't have any real use and kind of obfuscate details when used on real art. but they are an absolutely perfect for illustrating me kobolds. this is the actual skin colour
so i decided to go all in on temperature zones & phases being very important to them and i did mention (somewhere?) their physical traits changing based on external temperature and i thought it would be fun to assign each one a gradient (unique to them, can be any series of colours but usually one end is dark and one is light) based on those temperature fluctuations, making each one essentially a big heat map of their body. the colour change takes weeks, it's not quick, but it is always in a state of flux.
it's based on the images captured by heat sensitive cameras. the hottest areas are the face (particularly around the eyes), the chest, armpits, and groin. the 'cold' areas are those which experience the least amount of heat loss (the extremities are 'cold' because the body doesn't waste resources trying to heat them up). in this pic darker = these areas are cool to the touch, and lighter = warm to the touch (so 'cold phase' is full heat conservation mode, and 'hot phase' is actively trying to lose heat so more areas are warmer). the skin colour has no effect on temp gain or loss it's just a side effect. maybe if they ever saw sunlight in their normal lives it might, but in a cave? doesn't matter
the hair & juvenile down is also affected but of course only the roots will change, which means over time if an individual experiences prolonged periods in different temperature zones, their hair can grow in stripy
#i'm honestly kind of excited to finally assign some of my never-used wild gradient maps to some characters#colour in greyscale. map to gradient. overpaint to fix the sclera/tongue/teeth etc (as i did not here)#these lines are from the same pic as the baby i was making a whole chart#but took this one out to fiddle with the colours#dog knight story
241 notes
·
View notes
Note
Sorry if this is a question that's already been asked, but what's your typical drawing process like?
an ask about it exists somewhere but honestly. my process is easier than the process of looking for that ask so!!
i don't do much with art to be fair. it's all flat colors, some blushing and a shadow slapped over it. sometimes some gradient maps to make in more fun?


(forgot to add, refs are not just for the pose - i collect character refs and additional things on boards in Vizref, so if need be. i just splitscreen it ^^ very useful, i have those for my fandoms and for commissions. and feels better that reference function inside of procreate)
black and white pencil pictures are even easier. almost one layer "keep at it until it's done" with 6b pencil in procreate.
the ones with watercolors are also easy... honestly the most difficult part about my process is owning watercolor brushes 🥲


Additionally i do have a few timelapses around here, but that's the last one?
youtube
[video ID: a timelapse of an art, it's Lee Hyunsung holding up Yoo Joonghyuk body with a mournful expression on a background of a crumbling wall and a torn portrait. End ID]
so yeah. tldr my process is just very rough sketch - sketch to figure out colors - make the first sketch readable - finish the colors up. :")
#id in alt#orv spoilers#due to the examples i made....#sorry if that is not as exciting as you expected... alas i am a simple person#unless you look at the sketchy lineart like on lhs pic#then i am of questionable priorities. i suppose. ^^
181 notes
·
View notes