#i love adding new woodland spaces to my little love list
Text


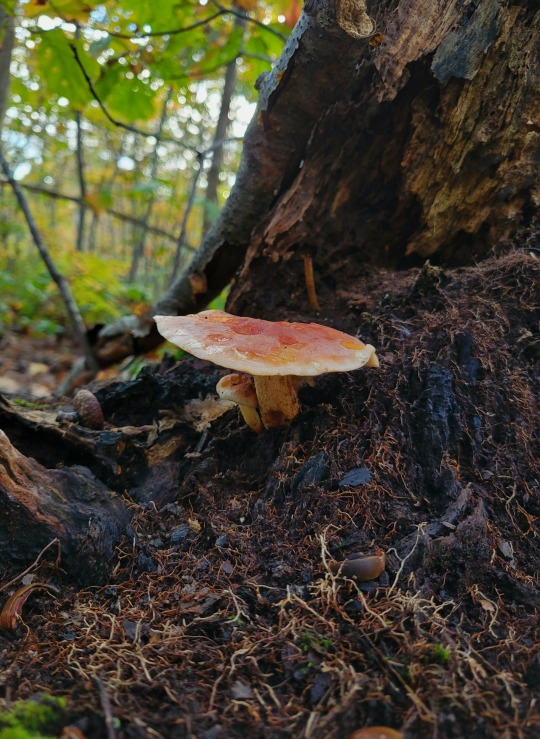
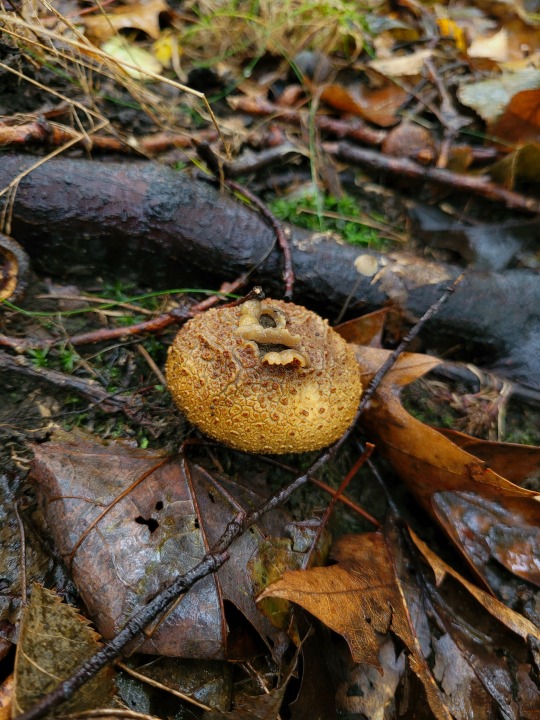
a few photos from today:]
#i love adding new woodland spaces to my little love list#(it is not a little list)#but i don't find safety anywhere like i do in the woods#i mean. i've been heavily observed by a bear and all sorts but#in the sense of- there are no obligations in the woods#the life of me is as . i don't know.. just in situ!! it's as gently existent as everything- and boy is there a lot of everything-#around me#there are no people there are no expectations there's no mirroring of the face or tone checking in my voice#my life isn't being put up against anything#i'm just there#and everything else is there too#and we're all just fucking there#i know that i'm alive when i'm in the woods#and it's undeniable that i am surrounded and enveloped by it likewise#that we are all part of this extensive energy chain#i find a lot of comfort and comradery in the whole thing#woods!!!! can't wait to go back tomorrow!!!#my photos#nature#mushrooms#fungi#autumn
42 notes
·
View notes
Photo


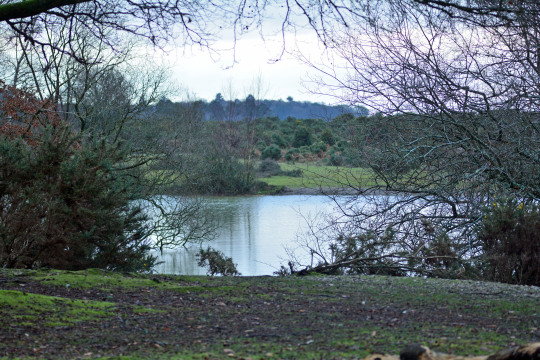
3rd October 2021: Beetles, birds of prey and more at Ibsley Common and Blashford Lakes
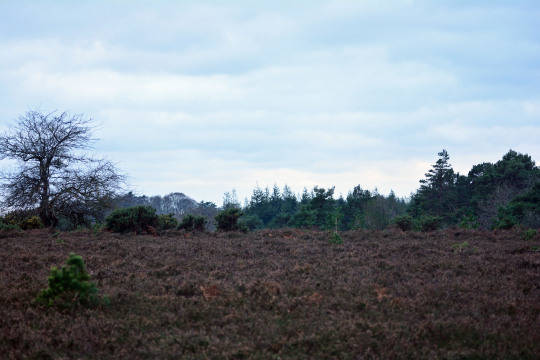
I enjoyed seeing another Grey Silverfish in my en suite last night, and admired a hanging basket with yellow flowers in the garden this morning which I took the first picture in this photoset of. I took the second of a view out the back with the sun shining nicely on dark clouds and some trees visible with bits of red autumnal colour which looked nice.
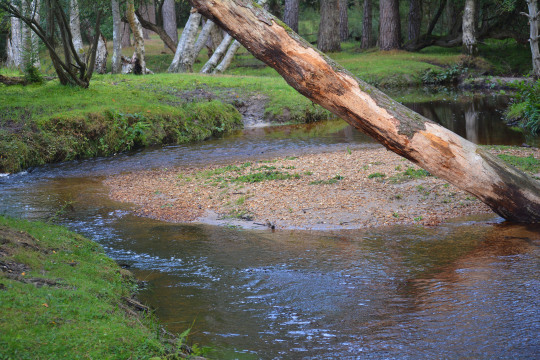
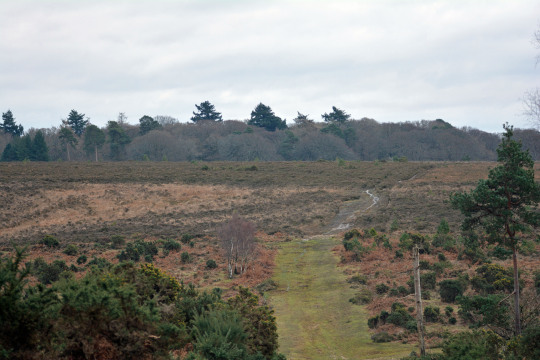
This afternoon we walked at Ibsley Common in the New Forest, the first time I had been here since Boxing Day 2019 and it was nice to be greeted by a cheery Grey Wagtail flying up the stretch of Dockens Water here on arrival. I took the seventh picture in this photoset of this stream. Getting out of the nice woodland and onto the beautiful hilly moor and heathland walk it looked really nice carpeted in the nice brown colour turning orange as the heaths always go in autumn largely stepping away from the purple heather that I saw this common covered in when viewing it from Rockford Common the opposite side of the road when we walked there last month. With showers and bright bursts of sun today the area looked exceptional with dark and lighter fluffy clouds strewn across the sky creating some breathtaking scenes of great scale its a brilliant walk for just taking in the sense of space. I took the third, fourth and fifth pictures in this photoset on the walk.
Bird wise there were many sweet coloured Meadow Pipits bounding about which was lovely to see. It did become a bit of a raptor fest with two or three Buzzards soaring high over the heath and Kestrel characteristically hovering and circling overhead nicely too. I also caught sight of a Hobby quickly which was nice I have had another great year for them.
On the heath also beetles very much stole the day with a pretty quirky long devil’s coach horse beetle which was lovely to see. And in for me what will go down as one of the most impressive wildlife moments I have witnessed this year a blue tinted dor beetle which I got the sixth picture in this photoset of was just visible in some manure I believe pony. And it was exceptional as we saw it push the piece of dung attempting to roll it. This piece of dung was quite big so we didn’t see it fully roll it over like the dung beetles which this one is a type of is famous for doing and it then took interest in more broken up bits possibly of its making. But this felt so inspiring and joyous to see this key part of nature and witness why these beautiful beetles are so important to this ecosystem with breaking down the waste. What a moment.
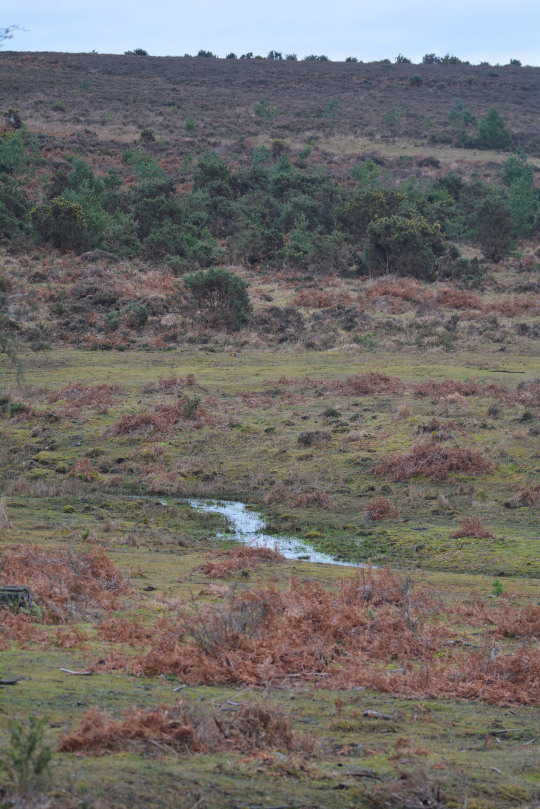
What we believe were two hornets joined together and tormentil which still continues to do so well in the forest, gorse, little bits of purple heather still which looked great and ragwort in the woods as a list of wildflowers added to the strong small and important things of nature vibes to the walk. As did a nice big and shiny mushroom something I had wanted to look for here today in the woods on the way back out as I drunk in a delicious scene of sun re-emerging to illuminate the heath behind a marshy type area which I took and tweeted a photo of tonight I tweeted one of the mushrooms too. I took the eighth picture in this photoset on the way out. A great walk.
We then called into Blashford Lakes’ Tern hide where my Mum’s partner had been the whole time to see if the Grey Phalarope that had been around lately was about. It wasn’t but as a shower dramatically moved across the large body of water that is Ibsley Water which the hide overlooks which is always special to watch as I have done before here I took the ninth picture in this photoset showing this, I also very much valued seeing streams of House Martins flitting over the water getting some exceptional binocular views of their sweet blue and white plumage as they swerved around. As someone else in the hide acknowledged too these won’t be around for long as they migrant back to Africa so it was good to make the most of them. A precious species that I have had a brilliant year for.
Soon it will be time to bid them farewell, we won’t know it’s goodbye for now of course it’ll just be when I stop noticing them that I know they’re gone all of a sudden like the Swifts before them and that may too have already happened with Swallows for me this year. Whenever it is, it will bring feelings of the gradual shutting down of another year and hope for their return in the blossoming of spring next year.
I took the tenth and final picture in this photoset of another colourful hanging basket in the garden which I saw when home this evening, seeing nice sky scenes as well tonight in a very relaxing evening where I enjoyed a lot of natural history TV. The end to the brilliant ‘Chris and Meg’s Wild Summer’ series which I have loved seeing on Sunday evenings such relaxing viewing showcasing some of the greatest wildlife and locations the UK has to offer including so many I know, and also showing their wonderful bond with each other presenting many funny and down to earth moments. And the dawn of a new Sir David Attenborough narrated series ‘The Mating Game’ which looks set be another epic and splendid celebration of nature. This was another great weekend in the New Forest and at home, I hope you all had a nice one and have a good new week.
Wildlife Sightings Summary: (Ibsley Common) One of my favourite birds the Buzzard, Kestrel, Hobby, Meadow Pipit, House Martins there too, Long-tailed Tit, Chiffchaff, Grey Wagtail, Blackbird, a decent few Carrion Crows, Woodpigeon, dor beetle, devil’s coach horse beetle, hornet and an interesting caterpillar too. (Blashford Lakes) Another of my favourite birds the Great Crested Grebe, Tufted Duck, Wigeon, Mute Swan, a line of nice Lapwings on a shingle island, Grey Heron well on one of those too, Cormorants, a nice array of gulls including large Herring Gulls, Lesser Black-backed Gull and Black-headed Gull and House Martins.
#house martin#ibsley common#blashford lakes#home#england#world#beautiful#lovely#happy#photography#birdwatching#wigeon#cormorant#lapwing#buzzard#hobby#kestrel#devil's coach horse beetle#hornet#dor beetle#dung#new forest pony#cow#cattle#mushroom#hampshire#europe#rain#day#shower
5 notes
·
View notes
Text
Tagged by @zetaaa, and because I loved their post, and the others I’ve seen, here’s mine. Except that I don’t have 20 stories to list, even including a few WIPs, and I don’t tag people. Consider yourself tagged if you haven’t been tagged before but have thought about doing this. I want to read them!
(In doing this, I realised I’ve posted 16 stories and have several WIPs, so I do have 20! And I’ve never posted a story that wasn’t written as an exchange gift. How odd.)
Rules: List the first lines of your last 20 stories (if you have less than 20, just list them all!). See if there are any patterns. Choose your favourite opening line. Then tag 10 authors!
Complete and Posted (AO3 Archive Warnings Noted)
“The corn maze is the best!” Betty’s ponytail bobs as she bounces down the hall, books clasped to her chest. (Does the Wolf Apologize, Riverdale (TV 2017), Betty/Veronica, M, No Archive Warnings Apply, Trick or Treat 2018)
“Still the little cinder girl.” (Little Cinder Girl, Cinderella (1950), Cinderella/Stepmother, M, Creator Chose Not To Use Archive Warnings, Trick or Treat 2018)
Red smells the Wolf long before she sees him. (Find Me in the Stars, Avengers Grimm, Cinderella/Red Riding Hood, T, No Archive Warnings Apply, Yuletide 2018)
Dawn broke before they finished getting people settled. (Not a Lick of Sense, Avengers Grimm, Cinderella/Red Riding Hood, M, No Archive Warnings Apply, Yuletide 2018)
“Well looky here.” Dahl sat at the top of the ramp, legs folded together, hands loose on her knees. (Bad Company, Riddick series, Dahl & Riddick, T, No Archive Warnings Apply, Chocolate Box 2019)
Kase gets fucked slow most times. (Pretty Little Pussy, Trials in Tainted Space, Kase/Steele, E, No Archive Warnings Apply, Shipoween 2019) (The pun in the title is terrible and makes me laugh every time I see it.)
Stupid. (Plant Specimen: Unknown, OW, Tentacle Monster/Xenobotanist, M, Rape/Non-Con, Trick or Treat 2019)
Jack Steele would never visit New Texas as a lowly tourist. (Public Use, Trials in Tainted Space, Jack Steele/Steele, M, No Archive Warnings Apply, Trick or Treat 2019)
The statue was so realistic that, in the flickering light, he seemed to breathe. (Breath and Blood, OW, Minotaur/Curious Female Historian Who’s Surprisingly Into That, E, No Archive Warnings Apply, Chocolate Box 2020)
Flynn Rider sagged sideways against the wall, nearly falling out of the chair they’d propped him in. (Golden Girl, Tangled, Pub Thugs/Rapunzel, E, Rape/Non-Con, Chocolate Box 2020)
Every step was agony, but she ran. (Desperation, OW, Feral Female Alpha Werewolf/Male Omega Living Alone in an Idyllic Woodland Cottage, M, Creator Chose Not To Use Archive Warnings, Chocolate Box 2020)
“It’s a shame,” the guard said as he stripped her, methodical. (Punished, OW, Male Dungeon Monsters/Servant Girl Thrown Into Dungeon as Punishment, E, Rape/Non-Con, Smut 4 Smut 2020)
Run, little Red, run, run away. (Run, Red, Run Away, Little Red Riding Hood (fairy tale), Big Bad Wolf/Red, Wolf Pack/Red, E, Rape/Non-Con, Smut 4 Smut 2020)
Lah trembled as Steele eyed him, but his chin stayed high and he burned with anger. (Broken Promises Made, Trials in Tainted Space, RK Lah/Steele, Able/Steele, E, No Archive Warnings Apply, Shipoween 2020)
Caine is a lot, sometimes. (Breathe Me In, Jupiter Ascending, Jupiter/Caine, M, No Archive Warnings Apply, Yuletide 2020)
“On a scale of accidentally burning down my shop to going to prison because you tried to steal a cow, how bad is this plan of yours?” Trish asks. (Lynette’s Worst Christmas Pageant Ever, Lynette- SouthernASMR Sounds webseries, G, No Archive Warnings Apply, Yuletide 2020)
WIPs
Brienne of Tarth still pissed blood the day she found the war hammer. (Mjolnir AU, 60% GOT 40% ASOIAF (for now, it started as 95% to 5% and keeps leaning more toward book canon), Jaime/Brienne (with possibly others to be added), probably M)
Brienne Tarth’s clearest memory of her childhood included her older brother, Galladon. (Brienne’s Mother is from Dorne and Brienne is Elia’s sworn shield canon divergence, ASOIAF, Jaime/Brienne, probably M)
After the Great Council, Brienne avoided personal conversation with Lord Tyrion for as long as she could. (post-GOT Brienne and Jon are sent to hunt down a dragon, Brienne/Addam with other pairings to come, probably M)
Selwyn Tarth did not know what to do with his only surviving child, his warrior daughter with her ugly, strong body and her maiden heart. (Brienne is sent to be a ward of Ned Stark because of Robert’s obsession with Lyanna Stark canon divergence, ASOIAF, Jaime/Brienne, probably T, may also include things like Mormonts literally turning into direbears and Starks into direwolves)
Oh, right, analysis! I tend to open with dialog, and I’m surprised so many of these don’t. Most of the first lines are not about the main character, at least until we get to the WIPs in which case Brienne of Tarth is clearly my go to girl, my world, my focus of everything.
5 notes
·
View notes
Text
A Yard and Garden Design Can Set Your Home Apart
The design and execution of a strategy for a beautiful lawn and garden can set your house apart. It may also have other significant benefits, including raising the value of your home, reducing the expense of producing and raising satisfaction while reducing the time necessary to keep it beautiful and personal.
There are a number of ways to make a design strategy for a lawn and garden including hiring a custom designer, buying and using design software, or simply by doing your own research via the many magazines and do-it-yourself publications. The purpose is to update a lawn or garden from average or poor to good or good. It's been researched and proven that the fiscal return could be anywhere from 7 to 14 percent when a home is sold. It might be the attraction that places your house above the competition if you opt to sell your residence.
There are many suggestions to think about when creating a lawn and yard design. The most obvious is cost and time. You'll also need to take into account the size of the region, your personal style and environment you reside in. It's been common practice to have a yard chiefly of grass and a garden of green plants. Alternatives can include choosing to use natural elements, planning for maintenance efficiency, including an assortment of size and height, and picking décor to emphasize the natural plantings of your lawn and garden. In this market, another alternative is to consider ways to put in a vegetable garden into the décor of your lawn and garden, either by place planting or container gardening.
A nicely designed lawn and yard should include colour. When choosing plants for your design, don't forget to give serious consideration to their life and their space requirements. You will need to evaluate the quantity of sun, water and shade your regions provide and what plants work well in these environments. In addition, you need to take into account the wide variety of colour and color compliments. Request a backyard specialist or a university extension agent if you require help.
Gardens can also supply décor to draw birds. Lots of men and women are bird lovers, but even those people who know little about birds may enjoy their playful antics and enthusiasm for life. There's a vast array of garden décor items which lure our feathered friends to get your lawn and garden home-such as bird feeders, bird houses and bird baths. These aren't the only garden décor items which add to the eye appeal of a backyard. You also need to consider figurines, statues, trellises, stepping stone, lights, and planters. Each should be chosen based on your style and design.
Together with your special touch, your lawn and garden will be an extension of your house where you and your family will enjoy time together. If done properly, your lawn and garden design preparation will reduce needing to re-plan and replant at a later time. It will increase the curb appeal of your home and offer a place of relaxation and joy.
Top 7 Home and Garden Books For Every Gardener and Designer
My husband and I have been gardening together for more than thirty years. He has a degree in horticulture and I've got a degree in library science. So, once we combine our love of gardening and books, we end up with a huge gardening resource library.
I need to share my favorites and believe they'll become your favorites also. Below I have listed my top 10 favorite home and garden books that I think beginners and professional designers alike should consider buying for your home reference library.
Top 7 Home and Garden Books For Every Beginner and Designer
1. Well Tended Perennial Garden: Tracy is well known in the gardening world for her 20 plus years experience in maintaining gardens and in this book she tells you precisely how to prune perennials. In addition, in the very first chapter, she talks of designing a garden with its maintenance in mind. Her advice is to ask yourself"Who is going to keep this garden, a professional team?" Fantastic question!
2. Landscaping With Perennials by Emily Brown is another favorite of ours. Advice on garden designs for slopes, color, bogs, parking strips, making cutting gardens, island beds, or a fairytale woodland garden is here. Included are line drawings, photographs, plant lists and much more. A true delight to read.
3. Gardening With Color by Mary Keen. A garden designer and consultant herself, Mary has filled this book with stunning full page photos. Exceptional advice on designing with the six colour categories for gardens such as: blues, reds, greens, grays and white, and yellows makes this book another fantastic option for your library.
4. Armitage's Garden Annuals: A Color Encyclopedia by Allan Armitage helps the gardener pick proven specimen annuals which are interesting, important, and frequently overlooked. Armitage is a horticulturalist, instructor, and respected expert in his field and this plant reference guide is the ideal companion to his earlier Manual of Annuals, Biennials, and Half-Hard Perennials. Attractive and easy to use with inspirational images.
5. All New Square Foot Gardener by Mel Bartholomew is my new favorite gardening book. This method has existed for 25 years so you know it works. I was skeptical at first. How do you"develop more in less space" like he says in 4'x4' square boxes? Photographs with detailed instruction explains how to create those raised beds for your deck or garden. Great for everyone in addition to children and wheelchair bound gardeners.
6. The Complete Compost Gardening Guide by Barbara Pleasant and Deborah Martin helps gardeners to become compost failures. Unique, easy to implement techniques using heaps, bins, or enclosed composters make composting a lot easier to make and tend.
7. How We Garden Now by Katherine Whiteside is a wonderful book if you feel overwhelmed by your backyard. This book enables you to pick-and-choose from ten simple, manageable jobs like adding edibles, planting bulbs, coping with hedges, setting up deer fencing and even container gardening. Entertaining and engaging to read.
Any one of those books listed above will provide you a lot of insight on the way to get an awe inspiring garden which will make your garden a heaven for you and your loved ones. That is why the are my top 10 books on home and garden that each and every gardener and designer should consider having on their bookshelf.
Permission is granted to reprint this article, unedited, provided appropriate attribution is made and the signature line -- the above resource paragraph - is retained intact.
0 notes
Text
How to Create the Book Nook of Your Dreams

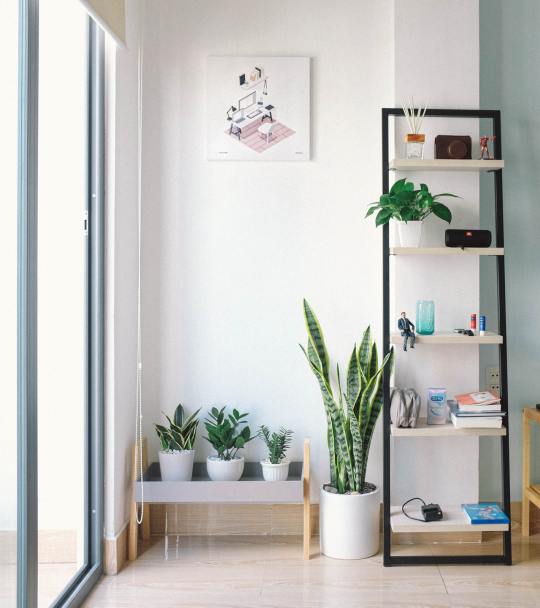
As a part of my latest New Years resolution, I thought it was about time that I made one of my childhood dreams a reality by crafting my very own book nook. What you see in the picture above is a result of the fruits of my toiling, crafting, and laboring to make this childhood dream a reality. Now, if you;re asking yourself:
“What exactly is a book nook and how can I have one of my very own?”
Then you have come to the right place because I am here to help! After many long hours of scrolling through Pinterest, Tumblr, and various other websites and spending time creating my own literary retreat, I was able to compile a list of things that are essential to any book nook, as well as a few tried and true tutorials to make your space an ideal environment for devouring your novel of choice!
For starters, here is a link to my Reading Nook Inspired Pinterest Board to get those creative juices flowing. This Pinterest Board and this post in general is by no means the “end all be all” of book nook possibilities. Ultimately, the space is supposed to be tailored to what makes YOU comfortable!
1. Choose a Color Scheme/Theme
When I decorate, I almost always gravitate towards the earthy colors: greens, browns, etc. However, for this nook I wanted something whimsical, light, and airy. To choose a color scheme, I looked for a piece that I wanted to center the colors around and I decided on a specific throw pillow that I knew that I wanted to have in the space and then went from there. I also wanted the space to have a sort of fantasy/ethereal/fairy-ish theme so I tried to keep the accessories and colors soft.
2. Find a Comfy Chair
After choosing a scheme I had to find some sort of starting point, so I began thinking about the type of vessel that on which I could take my literary journey. It had to be appealing to the eyes, affordable, but most of all it had to be comfy. I looked at all my options and spent time looking up prices and weighing the pros and cons and finally decided on the papasan chair. It’s round, cushy, and the perfect chair for reading. I scrolled through sites like Pier 1 and other home furnishing sites and was appalled at the prices. Just the cushion alone costed $80! On a whim, decided to look on Craigslist to see if there was any in my area for a reasonable price. By a stroke of luck, one lone papasan chair was listed in my area at the low price of $20 (including the chair itself and the cushion!). With a price that couldn’t be beat, I picked the chair up that same day and it was in excellent condition! The cushion of the chair was a faded red sort of color and didn’t really fit with the color scheme I was going for so I had an alternative idea. I had a few spare fitted sheets around the house, so I found one with a cute little fern pattern on it. I wrapped the cushion in the fitted sheet and voila! Instant comfy, stylist cushion! The fitted sheet I used is a size “Full” from Target, you can get it here for $35.99, but you can use whatever sheets you have available to you!

3. Add some Festive Throw Pillows
To make the space even more comfy, I made it a priority to include tons of soft pillows to cuddle up with when my face is buried deep into a book. I tried to buy pillows in all sorts of shapes, sizes, and textures to use when I’m in all those odd reading positions! I also wanted at least one pillow related to reading to encourage me to read more. Society6 has an endless collection of fantastic artists who put their work up and turn it into usable products like throw pillows! I ordered a throw pillow from Society6 artist nyxsullivan. It’s currently in production right now but I can’t wait to receive it! To order this particular pillow you can click here for $27.00 (this includes the pillow insert itself and the slip cover with the design - side note: she sells them without the pillow insert for $20.00, so if you have an old pillow lying around that you don’t want, just buy the cover)! The other throw pillows that I have are all from Target and I got them from various prices ranging from $15 to $30.

4. Invest in an Electric Blanket
I don’t know about all of you, but I am almost always freezing. To solve my frigid dilemma, I finally purchased an electric blanket! While I’m in the throes of a well-written historic fiction novel the last thing I want to be distracted by is my frosty feet so the fuzzy, warm comfort of an electric blanket is exactly what the doctor ordered. I’ve been eyeing up electric blankets for months but have hesitated purchasing one because I was under the impression that they were extremely expensive. Surprisingly, I found a reasonably sized one at Target that didn’t break my bank, and it was the exact color I was looking for. You can click here to view the specific one that I purchased for $26.99 (the one that I have is the color Prague Green).
5. Designate the Space as a Reading Nook with a Curtain or Canopy
Nothing says “nook” like separating your space from the rest of an ordinary room. Without my canopy, my reading nook would just be a corner with a chair in it. The canopy, in my opinion, is what makes my book nook mine. All I do is close the drapes and sink into my own little world. While you could always go out and buy a canopy, I took pride in trying to craft my own. Thanks to the DIY canopy tutorial I found on Pinterest by littlegreenbow, I was able to craft the canopy of my dreams. Fortunately for me, the canopy is fairly easy to make and is certainly a cost-effective way to bring some style to your nook. The materials that I used to create my canopy were:
a hula hoop (I chose the largest one available) - Walmart $8
ceiling hooks - $2
3 packs of 84 inch sheer curtains - $7/pack
15lb test clear fishing line - $3
3 spools of 18ft in length of satin ribbon - I had this laying around from various other projects
twinkle lights - I had these around from the Christmas holiday
Scotch tape
To find the full tutorial that I used from littlegreenbow, click here
6. Add Ambiance Lighting with Tiny Lanterns
While the twinkle lights themselves add a warm, cozy glow, I wanted to add a little more whimsy so I purchased some lanterns to add to the effect. I headed to Walmart and bought these pretty star lanterns for $12! You can click here to find the ones that I purchased!


7. Give Yourself some Flat Surfaces
For me, it was essential to have some flat surface space to put things on. Whether it be candles to add some scent and mood lighting or an end table to allow for various genres and your hot beverage of choice to be close at hand, flat surfaces are always handy. On my table, I always have a coffee cup (Bronte sister themed of course), my book journal, which serves as a log for all the books I read, and a few books that are reading “works in progress.” To hold the books in place, I used my Himalayan crystal salt lamp on one side of the stack and on the other a Himalayan crystal tea light holder. In total, I have 2 flat surfaces that I use: one shelving unit and a super cute, unique end table both from Target (can you tell I am obsessed with Target?). The shelving unit (which you can find here) was only $20 (see picture below) and the end table (which was a HUGE splurge on my part, but I couldn’t pass it up) was $85 which can be found here. Despite the cost, I definitely do not regret buying either of these surfaces because they’re perfect for keeping all of my reading accessories within reach.


8. Scent your Space
To get myself in the reading mood I find it necessary to light at least one candle. Overall, candles are one of my favorite things because they add such a gentle, warm glow while smelling amazing. When I light a candle, my brain is immediately put in the reading mindset and I’m ready to crack open a good book. Frostbeard Studios and LiberdeStella on Etsy have some excellent choices when it comes to candles inspired by literature, however at $18, they are more of a splurge purchase for me. In the near future, I plan on purchasing one from both Etsy sellers as a gift from myself to myself! Normally, I choose candle scents that are warm and inviting like cinnamon bun or vanilla icing (what person doesn’t love smelling bakery goods on a daily basis?). However, when choosing candles for my nook, I wanted to choose scents that were fresh, fruity, and uplifting to invigorate my senses. I tend to drift off when reading because it is so relaxing to me, but with the help of my candles my senses stay sharp so I can stay focused! I also wanted to select candles that were of various sizes and designs to add a sort of visual interest.

9. Finally...Add some Greenery!
I don’t know about you but just the sight of some greenery and plant life makes me feel more relaxed and comfortable. To incorporate the outdoors in my nook I bought a tiny vase with some silk flowers (perfect for a little corner that doesn’t get much sunlight) and I also constructed a tiny mason jar filled with fairy lights. To make the mason jar, I just used one that I already owned, stuffed some moss that I purchased from Michael's awhile back, placed the fairy lights in the jar, added a few pearl-looking beads and stacked more moss on top of it to create a whimsical woodland effect.


10. Go Out there and Create Your Own Book Nook!
Once you have all the bits and pieces together, assemble it to your heart’s content! Good luck and happy reading :)
For more posts follow my Instagram: bookish_elf
#booklr#booknook#book nook#reading nook#thebookishelf#instagram#bookstagram#books#bibliophile#booklover#create your own book nook#book nook tips#diy book nook
334 notes
·
View notes
Text
Wood Inlay Ornament with German Glass Glitter
Hi friends! And hi to new friends visiting from the #CreativeChristmas Challenge hosted by Remodelaholic!
youtube
To those of you who don’t know me yet: welcome. Everyone else has already started drinking and saying really embarrassing things (about themselves, not you… we’re not a super judgmental bunch). To those of you who already know me: cheers. As always, you rock. And I was just kidding about the drinking thing (unless it’s football season and a Saturday, which yes to both).
Anyway, from time to time, I like to throw my hat in on a DIY challenge or two because nothing excuses buying more power tools like overcommitting to a deadline for fun (like the 2×4 summer challenge and boom: new coffee table!). This time around, the theme was making something for Christmas. I’ve already been finding inspiration for my color scheme this year in the form of acorns, snowflakes, owls, and other wintery-woodland things, so I figured: why not see if I can fill up the inevitable empty parts of my tree with what I have on hand, rather than buying a bunch of new ornaments? I also just happened upon a set of carving bits for my Dremel and have been itching to experiment with epoxy/inlays/resins, so I started playing around until this happened:
And as a fun little bonus: I actually made a video of it too!
Tools and Materials
affiliate links of items I recommend and use are listed in this post, which support this site at no cost to you… thanks!
scrap wood (I had 1″ x 4″ poplar)
scissors
printer paper
inkjet printer
acetone or nail polish remover
Dremel 200
Dremel engraving/carving kit
band saw or scroll saw
random orbit sander
wood stain (I used Minwax Ipswich Pine and washed while it was still wet with Early American… I’ll have to show you guys more about this as I’ve done it a number of times to get the colors I like)
Mod Podge
small detail paint brush
Miss Mustard Seed’s German Glass Glitter in Silver Tiara
Martha Stewart Crafts extra fine glitter in Smoky Quartz
clear spray sealer (gloss)
small drill bit
thread (I used stuff from my cross stitch stash)
First things first: print out the image (mine is available for download near the end of the post) and cut it out. I used a scrap piece of poplar that was bound for the burn pile, so I wasn’t really expecting perfection (in fact as you can see, I first used a different image that was WAY too intricate for a first-time experiment and then decided on the final design).
To transfer the ink from the printer paper, I swabbed the back with an acetone nail polish remover. As you can see, the image didn’t transfer perfectly, but it was good enough (I got the idea from my buddy Brad’s video here — then went with the option that wouldn’t require changing out of my pajama pants or going into the cold garage that morning).
Next, I took out my Dremel and a new engraving/carving set I’d recently purchased for another inlay project. In my opinion, crafting is a good intro before graduating to larger pieces, so I figured this would help me practice with diamond tips, how to control the carve, etc. A good method is to create the hard outline first, then carve out the middle, and continue to make the inlay deeper and deeper until it’s got enough depth to hold the inlay material (glitter, epoxy I assume, whatever).
Next, I sketched out the overall shape (spoiler: it wasn’t at all even, so I highly recommend using the template) and then went to cut out the piece. And this is when it seemed like things were conspiring against me: my new scroll saw was broken… right out of the box. Womp, womp.
To make the situation a little stickier, I was about 5 hours away at this point from needing to head out of town to Raleigh, NC (recap here), and I had no other tools that would give me the right depth and shape. Disappointed but undeterred, I figured the next best thing would be to ask to borrow tools from the person I’d be visiting (thankfully, it was a trip to visit some DIY blogging friends just for fun — my pal Brittany just so happened to have a band saw in her garage). Of course, now I want one of those, too.
Of course, I’d never actually used a band saw before, so despite the general don’t-cut-your-fingers-off rule, the piece still came out a little wonky (mostly due to my non-templating sketch). I was able to shape it a little more with an orbital sander. I also carved the edges out a little more and did a final sanding with high grit sandpaper before stain.
Since the overall concept was to make this look like an inlay, I wanted to use glitter with a little more grit and sparkle: enter, German glass glitter. It’s really amazing stuff in person. To paint it into place, I relied on a small paint brush (tip: if the brush starts to fray a little, spin it as you’re dipping it into the glue to get the point fine again… check out my video to see a demo of that).
You can layer the glitter in, too: after giving it some time to dry, paint another bit of glue on top of the glitter and add more into the recessed areas. It will add depth!
I added extra-fine gold glitter around the edge and sealed the whole thing with a clear gloss spray, then drilled a hole through the top and threaded it so it could hang on the tree.
Caveat: before I sealed with a clear gloss, I actually tried to seal with an old polycrylic which unfortunately made the top and bottom tips look faded/cloudy once it dried. At first I thought I’d lean into the mistake by painting the back and sides with chalk paint and sanding to make it look rustic, but it looked really sad instead and totally detracted from the sparkle on the front. I wanted to get this done in time for the blog hop, so I just continued on with sealing again and adding the glitter around the edge. So, if you try a project like this, don’t make my mistake and you’ll get even better results!
You can also try other inlay methods, other glitter colors, fill in the center vs the outer rings with opposite hues, etc… the possibilities are pretty endless!
All in all, I think it’s going to make a nice addition to my white/gold/chrome/woodland Christmas decor theme this year (and the less I need to spend on ornaments, the more budget I have to make Christmas cocktails, hehe).
Want to try this for yourself? You can download my template here.
To be perfectly frank, I think the photos really don’t do the sparkle on this piece enough justice (in fact, I worried that it was looking too drab in photos). So, I made a video tutorial too (I’d love it if you subscribed if you haven’t already… with what I’ve learned in making this tutorial, there is more to come no doubt!).
youtube
As I mentioned, this DIY was part of a blog hop, with 25 other bloggers participating — aka, enough DIY Christmas ideas to keep you busy right up until the actual holiday (if you were so ambitiously inclined). So, check out a preview of the other projects and bloggers participating in the images below. You can also head over to the Remodelaholic post (who is hosting this hop) to check out other DIYers submitting their inspired ideas (on social media, you can look for #CreativeChristmas to find them all).
DIY Christmas Trees and Ornaments
Wintry Silver Dollar Store Christmas Tree Decor | Remodelaholic
Marbled Christmas Ornaments | Doodlecraft
Scrap Wood Inlay Ornaments | The Ugly Duckling House (you’re here!)
Woodburned Wood Slice Ornaments | Sisters What
Flocked Pine Cones | Practical and Pretty
Abstract Monogram Ornaments | Domicile37
Concrete Christmas Ornaments | The Palette Muse
Wood Slice Deer Ornaments | Our Crafty Mom
Vintage Gumball Machine Ornaments | Beth Watson Design Studio
Etched Glass Ornaments | Just Call Me Homegirl
Unicorn Inspired Christmas Tree | The DIY Mommy
Driftwood Reindeer Ornaments | Sustain My Craft Habit
DIY Christmas Gifts and Decor
Christmas Pine Hoop Wreath | This Mama’s Dance
Gingerbread Man Candles | Nourish and Nestle
Wire and Glass Chandelier | Home with Cupcakes and Crinoline
Christmas Scroll Wall Art | Grace In My Space
Lighted Wood Trees | Frazzled Joy
Crocheted Christmas Hat | Luz Patterns
Christmas Card Photo Display| Hertoolbelt
JOY Porch Sign | Ginger Snap Crafts
Folding Bar Cart Table | Everyday Party Magazine
Wood and Burlap Christmas Sign | Leap of Faith Crafting
Wood Block Snowman | Anika’s DIY Life
Holiday Candle Wrap | Dragonfly & Lily Pads
Christmas Pom Pom Pillow | Small Home Soul
Handlettered Wall Art | Smiling Colors
Those of us who did videos for this hop can be found in the playlist below, so those of you who would rather watch than read (or just want to blow off work for a few more minutes) have something, too! *If you’re having difficulty playing it, you can jump over to the playlist here.*
youtube
There you have it! Hope you’re getting into the holiday spirit just in time. Will you be working on any decor ideas this Christmas? This is going to be a very busy holiday season for me, so be sure to check back in for more DIYs (I’m going to give that epoxy inlay idea a shot, and a few more scrap ideas are just bubbling in the ol’ brain). Have a great weekend!
You'll Also Love
25 Great Gift Ideas for the Craft Beer Lover
DIY Wooden Couch Sleeve
It’s Pronounced “Damn Good Cookie̶...
Lots of Sneak Peeks: Riding the Buildathon Wave
.yuzo_related_post img{width:170px !important; height:170px !important;} .yuzo_related_post .relatedthumb{line-height:14px;background:#ffffff !important;color:#454747!important;} .yuzo_related_post .relatedthumb:hover{background:#ffffff !important; -webkit-transition: background 0.2s linear; -moz-transition: background 0.2s linear; -o-transition: background 0.2s linear; transition: background 0.2s linear;;color:#454747!important;} .yuzo_related_post .relatedthumb a{color:#102a3b!important;} .yuzo_related_post .relatedthumb a:hover{ color:#113f5e}!important;} .yuzo_related_post .relatedthumb:hover a{ color:#113f5e!important;} .yuzo_related_post .relatedthumb:hover .yuzo__text--title{ color:#113f5e!important;} .yuzo_related_post .yuzo_text, .yuzo_related_post .yuzo_views_post {color:#454747!important;} .yuzo_related_post .relatedthumb:hover .yuzo_text, .yuzo_related_post:hover .yuzo_views_post {color:#454747!important;} .yuzo_related_post .relatedthumb{ margin: 0px 6px 0px 6px; padding: 0px 0px 0px 0px; } jQuery(document).ready(function( $ ){ jQuery('.yuzo_related_post .yuzo_wraps').equalizer({ columns : '> div' }); });
The post Wood Inlay Ornament with German Glass Glitter appeared first on The Ugly Duckling House.
Website // Subscribe // Advertise // Twitter // Facebook // Google+
Wood Inlay Ornament with German Glass Glitter published first on http://ift.tt/2qxZz2j
0 notes
Photo


04/01/2021: New Forest walks-My first Treecreeper, Goosander and Dartford Warbler of the year and more (10 different photos in this set to those I tweeted tonight)
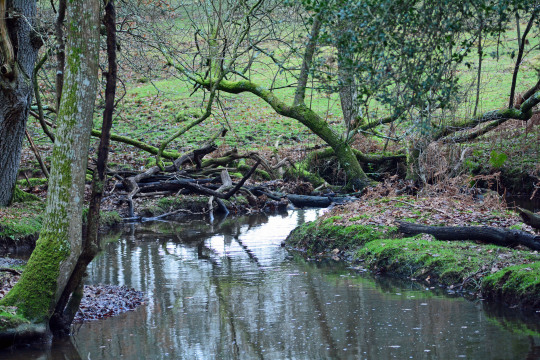
We did some more walking in the New Forest on my first weekday of leave for my long awaited week off today. On the way in I liked seeing my first New Forest ponies and Grey Squirrel of the year, two of three additions to my nicely booming compared to my normal starts mammal year list now on six which is pleasing my most mammals seen at this stage in a year ever. We first called into a semi iced Eyeworth Pond which was great, and alongside a Pied Wagtail on the ice which it was brilliant to watch I took a picture of this I was pleased with which I tweeted on Dans_Pictures tonight I was happy to see my first Marsh Tit and Coal Tit of the year always an important year tick and one I’ve been lucky to see so early on in years for so many years these two key New Forest birds so I felt so lucky to see them again. This set the tone for another top day of birdwatching whilst walking with three more year ticks later on taking my year list to 82 still keeping pace with how many I had seen at this stage last year six behind the figure I ended 4th January 2020 on. I took the first picture in this photoset at Eyeworth Pond.
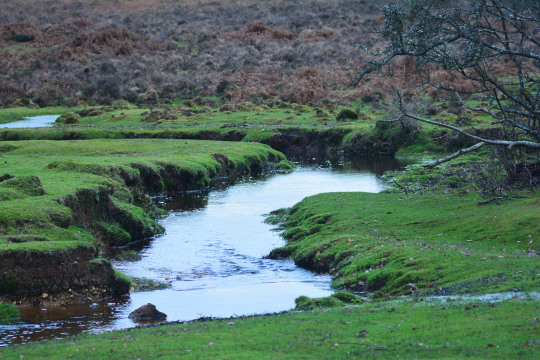
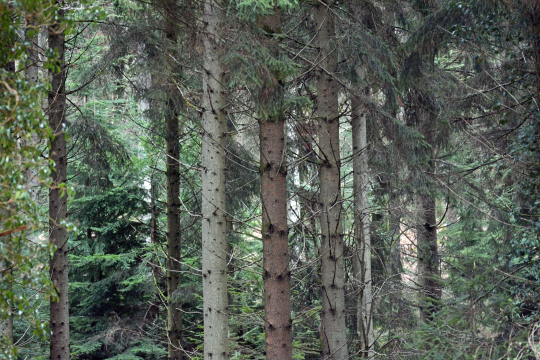
We went on to walk at Cadmans Pool in the New Forest today, by contrast to its one of the hottest day of the year temperatures when I last came here last on an amazing summer’s day for wildlife for me in early August 2020 as it was very cold today. I took the second-sixth pictures in this photoset of views here today there were lots of lovely wet views with the pond itself and the streams. On the walk the wind revealed its presence by shaking some trees. It’s been a theme of today and yesterday with us looking for birds so much with so many year ticks available of seeing leaves being blown about on the ground and mistaking it for bird movement momentarily which is an interesting quirk. On the walk we were delighted to spot a Green Woodpecker flying into a tree then minutes later another of my favourite birds the Jay in the same area. I have had a phenomenal start to the year for seeing some of my favourite birds which continued later on as I mention below. There is a good little group of bird species that I’ve had such a good start to the year for seeing them again and again, these two are part of that alongside Dunnock, Wren and Song Thrush which I saw also today. When seeing the Song Thrush today I remarked on how as a Lakeside Country Park New Year’s Day walk mainstay for me in recent years I have not I don’t believe seen or heard their delightful song at Lakeside at all since working from home meant I walked there every lunch time when I’m working and other times too. So I thought would I struggle for them this year early on but I have not seeing them three out of the four days in January so far.
Walking into trees I was thrilled that we spotted a little bird on a tree’s trunk climbing up, of course it was one of only a few it could be, the wonderful Treecreeper. I enjoyed a top few minutes watching this bird. Another species so typical of this divine woodland habitat which it did feel special to see. It really was a splendid sighting of a beautiful and spectacular species. A very worthy species to be my 80th bird of the year, something I always feel so proud to achieve and this happening so early this year again was amazing. This species was in the forefront of my mind as a target in recent days something its always brilliant to have in new year target birds. The big thrill in new year for me is getting as many species seen as possible, enjoying them no matter how much I see of them or for how long and seeing how my totals each day compare to my previous years which I do all year. That’s why I have a week or time off in New Year rather than between Christmas and New Year if I can to have days to lay the foundations of my new bird year list. But this year we have the added element of impending further COVID restrictions, which is definitely and so desperately needed for the health of the nation I would never argue against that. So this year especially I felt today I wanted to get as many birds seen in as I can before. There are birds I am yet to see and I know they will be something to look forward to after lockdown in many cases too, but I did very much enjoy seeing this bird today.
On the newly announced lockdown by the way I just wanted to clarify a few points for people who may see my photos and posts what the new restrictions will mean for us. I would say as I have before that daily exercise is a permitted reason to leave the house, and I shall of course be doing my walk still for the physical and mental benefits and as was the case in the first lockdown beginning in March that shall be just once per day in line with restrictions.
I would clarify that I am sure in a way millions of others will with a mobile phone, I will have my camera and binoculars with me on walks excluding any where I decide not to due to weather conditions. So there will be pictures and sightings still, some of them may be year ticks and I shall still continue to post these on social media to a level I feel comfortable with as I always enjoy doing. The walks will be walks, my primary form of exercise in a day for my physical and mental health and any photos or sightings will be during them. So I shall not be lingering in areas, waiting for significant time for a species to appear or staying in a spot taking many photos for a long time or anything like that.
For this week as I have said I am on a week’s annual leave with my birthday coming up on Thursday too, so these walks will not be limited to Lakeside the country park we are very fortunate as I have said so much live right next door to as is the case when I work from home but other nearby open spaces will likely be utilized. As I can, in line with restrictions with me not working for this week as I will do on weekends during the lockdown, join the other members of our household including our dog for their daily walk.
I would advise as I have done in each previous national lockdown and my area’s placement in tier 4 that I reserve the right to omit locations from photos and blogs from and about certain walks we do, and obviously any species I do see on that walk from any posts about it. This is something I always reserve the right to do and I do it when rare or sensitive species are involved. I just feel that whilst I do not believe with the people I reach on social media hoards of people are suddenly going to turn up and look for a bird or something I have said I saw at or posted a picture of at a site, you just never know what a post could prompt. And the point is that I will have a camera with me and binoculars as long as weather and other factors permit, and during a lockdown I may not feel that it is always appropriate for the posting of something being at a location or where some nice views are to be a so public and the main point of posting is to show the species or views and remark on what I may have seen whilst taking a walk. If I feel it is safe to do so in terms of the species and I trust that the person will follow all restrictions to stay safe in order to try to see the species or place themselves, then I am happy to discuss with local people via private messaging means. Not something I imagine will come up during the coming weeks and maybe months, but once again you just never know.
Needless to say that every walk we do will be following social distancing rigorously, we tend to stay well over two metres away from anyone and we always sanitize our hands at appropriate points when out and wash our hands when home. We do have vulnerable people within the household and are very aware to the risks of this awful virus, especially the greater risk with the faster spreading new variant, so do take this all very seriously In circumstances where masks are to be worn we have always done this, and will follow any further advise given about this whilst walking.
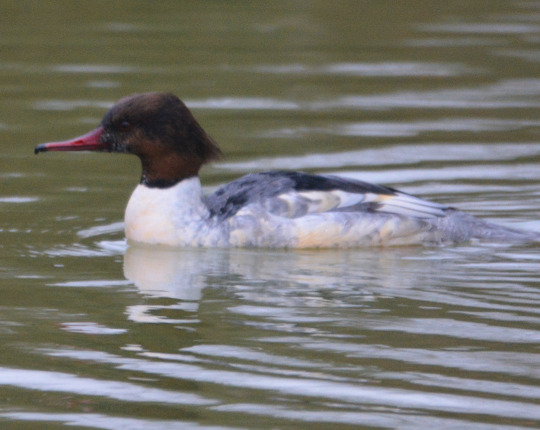
Back to today and at the end of the walk back looking around the pool which we had not inspected earlier on, my Mum’s husband had sent word that a Goosander was on the water a bird we needed to see this year. We were thrilled to look through the binoculars and spot this super duck. We then walked over to the pond and were happy and entertained to follow it around the water to try and get a picture. I took the seventh in this photoset of it. A perfect consideration for what I was just saying regarding lockdown in fact, that taking a walk within a tier 4 area as we did today does say recreation is allowed outside so within regulations we were able to walk around the pond a few times if needed to try for a picture of this bird in my mind. Had this been a lockdown daily exercise walk, if I could get a picture of it as we walked past the lake and saw it initially then fine but I will certainly not be deviating from intended walking routes or spending time specifically trying to take one picture in line with regulations at that time as I said above. It seemed to go round in a large circle of the area getting further and further from us as it went. We did manage pictures in the end though I tweeted one of it tonight too. Always a very valuable and beautiful bird to see in years. It was one of my first ever bogey birds for the year in 2014 so the bird I normally see easily but don’t for a while in a year but since I have always managed to see this species fairly early on and easily with them being at a nice range of water locations in the New Forest and nearby.
Whilst watching this bird we were thrilled to spot another of my favourite birds the Kingfisher over the water and land in a small tree. A cracking view of a fourth individual Kingfisher I have seen this year quite brilliantly. An exciting view of yet another of my favourite birds I have had surely my best ever start to the year for seeing birds on my list of favourites which I am over the moon with. A smashing and very precious wildlife moment with one of the birds I have loved most since I was a child. At the end of the walk I saw my first Brown Rat of the year. My Mum also thanks to ticking Long-tailed Tit, Green Woodpecker and Chaffinch here which I had got as ticks on my Lakeside New Year’s Day walk and the Goldcrest she got on hers which I have not yet seen did overtook me by one bird as the little friendly race within the household hotted up which is always a fun bit of New Year.
We then had a little bit of time walking at the wonderful Milkham where I took the final three pictures in this photoset of two views and a lovely New Forest pony. A fun moment seeing the ponies then a Grey Squirrel in a tree two of my mammal year ticks in one moment. I had a good day for ponies today. The Milkham walk was headlined though by a fleeting view of yet another of my favourite birds, a Dartford Warbler flying into vegetation. A fantastic bird to see, another year tick I am so proud of this year one of my best in the early days. I was so elated to see this bird, by far my earliest ever sighting of one in a year. We saw Dunnock and Green Woopecker at Milkham too. A wonderful end to a fantastic Monday off enjoying the richly wild habitats of the New Forest with a real variety seen once more. I wish everyone who may be reading this but this shall especially apply to those in the UK I suppose all the best as we enter as the Prime Minister has said probably some of the toughest weeks/months to come in this pandemic. Stay safe, keep talking and connecting to nature and know that I am always only a message away if needed.
Wildlife Sightings Summary: My first of one of my favourite birds the Dartford Warbler this year, my first Marsh Tit, Coal Tit, Treecreeper and Goosander of the year, my first of one of my favourite mammals the New Forest pony this year, my first Grey Squirrel and Brown Rat of the year, three more of my favourite birds the Kingfisher, Jay and Green Woodpecker, Song Thrush, Blackbird, Robin, Dunnock, Long-tailed Tit, Blue Tit, Great Tit, Nuthatch, Chaffinch, Pied Wagtail, Wren, Carrion Crow, Woodpigeon, Mallard, Canada Goose and Moorhen.
#lakeside#lakeside country park#milkham#cadmans pool#eyeworth pond#new forest#wildlife#biodiversity#uk#marsh tit#coal tit#nuthatch#robin#thrush#birds#bird#birdwatching#kingfisher#green woodpecker#jay#brown rat#woodpigeon#grey squirrel#new forest pony#treecreeper#goosander#dartford warbler#england#hampshire#world
4 notes
·
View notes
Text
Wood Inlay Ornament with German Glass Glitter
Hi friends! And hi to new friends visiting from the #CreativeChristmas Challenge hosted by Remodelaholic!
To those of you who don’t know me yet: welcome. Everyone else has already started drinking and saying really embarrassing things (about themselves, not you… we’re not a super judgmental bunch). To those of you who already know me: cheers. As always, you rock. And I was just kidding about the drinking thing (unless it’s football season and a Saturday, which yes to both).
Anyway, from time to time, I like to throw my hat in on a DIY challenge or two because nothing excuses buying more power tools like overcommitting to a deadline for fun (like the 2×4 summer challenge and boom: new coffee table!). This time around, the theme was making something for Christmas. I’ve already been finding inspiration for my color scheme this year in the form of acorns, snowflakes, owls, and other wintery-woodland things, so I figured: why not see if I can fill up the inevitable empty parts of my tree with what I have on hand, rather than buying a bunch of new ornaments? I also just happened upon a set of carving bits for my Dremel and have been itching to experiment with epoxy/inlays/resins, so I started playing around until this happened:
And as a fun little bonus: I actually made a video of it too!
Tools and Materials
affiliate links of items I recommend and use are listed in this post, which support this site at no cost to you… thanks!
scrap wood (I had 1″ x 4″ poplar)
scissors
printer paper
inkjet printer
acetone or nail polish remover
Dremel 200
Dremel engraving/carving kit
band saw or scroll saw
random orbit sander
wood stain (I used Minwax Ipswich Pine and washed while it was still wet with Early American… I’ll have to show you guys more about this as I’ve done it a number of times to get the colors I like)
Mod Podge
small detail paint brush
Miss Mustard Seed’s German Glass Glitter in Silver Tiara
Martha Stewart Crafts extra fine glitter in Smoky Quartz
clear spray sealer (gloss)
small drill bit
thread (I used stuff from my cross stitch stash)
First things first: print out the image (mine is available for download near the end of the post) and cut it out. I used a scrap piece of poplar that was bound for the burn pile, so I wasn’t really expecting perfection (in fact as you can see, I first used a different image that was WAY too intricate for a first-time experiment and then decided on the final design).
To transfer the ink from the printer paper, I swabbed the back with an acetone nail polish remover. As you can see, the image didn’t transfer perfectly, but it was good enough (I got the idea from my buddy Brad’s video here — then went with the option that wouldn’t require changing out of my pajama pants or going into the cold garage that morning).
Next, I took out my Dremel and a new engraving/carving set I’d recently purchased for another inlay project. In my opinion, crafting is a good intro before graduating to larger pieces, so I figured this would help me practice with diamond tips, how to control the carve, etc. A good method is to create the hard outline first, then carve out the middle, and continue to make the inlay deeper and deeper until it’s got enough depth to hold the inlay material (glitter, epoxy I assume, whatever).
Next, I sketched out the overall shape (spoiler: it wasn’t at all even, so I highly recommend using the template) and then went to cut out the piece. And this is when it seemed like things were conspiring against me: my new scroll saw was broken… right out of the box. Womp, womp.
To make the situation a little stickier, I was about 5 hours away at this point from needing to head out of town to Raleigh, NC (recap here), and I had no other tools that would give me the right depth and shape. Disappointed but undeterred, I figured the next best thing would be to ask to borrow tools from the person I’d be visiting (thankfully, it was a trip to visit some DIY blogging friends just for fun — my pal Brittany just so happened to have a band saw in her garage). Of course, now I want one of those, too.
Of course, I’d never actually used a band saw before, so despite the general don’t-cut-your-fingers-off rule, the piece still came out a little wonky (mostly due to my non-templating sketch). I was able to shape it a little more with an orbital sander. I also carved the edges out a little more and did a final sanding with high grit sandpaper before stain.
Since the overall concept was to make this look like an inlay, I wanted to use glitter with a little more grit and sparkle: enter, German glass glitter. It’s really amazing stuff in person. To paint it into place, I relied on a small paint brush (tip: if the brush starts to fray a little, spin it as you’re dipping it into the glue to get the point fine again… check out my video to see a demo of that).
You can layer the glitter in, too: after giving it some time to dry, paint another bit of glue on top of the glitter and add more into the recessed areas. It will add depth!
I added extra-fine gold glitter around the edge and sealed the whole thing with a clear gloss spray, then drilled a hole through the top and threaded it so it could hang on the tree.
Caveat: before I sealed with a clear gloss, I actually tried to seal with an old polycrylic which unfortunately made the top and bottom tips look faded/cloudy once it dried. At first I thought I’d lean into the mistake by painting the back and sides with chalk paint and sanding to make it look rustic, but it looked really sad instead and totally detracted from the sparkle on the front. I wanted to get this done in time for the blog hop, so I just continued on with sealing again and adding the glitter around the edge. So, if you try a project like this, don’t make my mistake and you’ll get even better results!
You can also try other inlay methods, other glitter colors, fill in the center vs the outer rings with opposite hues, etc… the possibilities are pretty endless!
All in all, I think it’s going to make a nice addition to my white/gold/chrome/woodland Christmas decor theme this year (and the less I need to spend on ornaments, the more budget I have to make Christmas cocktails, hehe).
Want to try this for yourself? You can download my template here.
To be perfectly frank, I think the photos really don’t do the sparkle on this piece enough justice (in fact, I worried that it was looking too drab in photos). So, I made a video tutorial too (I’d love it if you subscribed if you haven’t already… with what I’ve learned in making this tutorial, there is more to come no doubt!).
As I mentioned, this DIY was part of a blog hop, with 25 other bloggers participating — aka, enough DIY Christmas ideas to keep you busy right up until the actual holiday (if you were so ambitiously inclined). So, check out a preview of the other projects and bloggers participating in the images below. You can also head over to the Remodelaholic post (who is hosting this hop) to check out other DIYers submitting their inspired ideas (on social media, you can look for #CreativeChristmas to find them all).
DIY Christmas Trees and Ornaments
Wintry Silver Dollar Store Christmas Tree Decor | Remodelaholic
Marbled Christmas Ornaments | Doodlecraft
Scrap Wood Inlay Ornaments | The Ugly Duckling House (you’re here!)
Woodburned Wood Slice Ornaments | Sisters What
Flocked Pine Cones | Practical and Pretty
Abstract Monogram Ornaments | Domicile37
Concrete Christmas Ornaments | The Palette Muse
Wood Slice Deer Ornaments | Our Crafty Mom
Vintage Gumball Machine Ornaments | Beth Watson Design Studio
Etched Glass Ornaments | Just Call Me Homegirl
Unicorn Inspired Christmas Tree | The DIY Mommy
Driftwood Reindeer Ornaments | Sustain My Craft Habit
DIY Christmas Gifts and Decor
Christmas Pine Hoop Wreath | This Mama’s Dance
Gingerbread Man Candles | Nourish and Nestle
Wire and Glass Chandelier | Home with Cupcakes and Crinoline
Christmas Scroll Wall Art | Grace In My Space
Lighted Wood Trees | Frazzled Joy
Crocheted Christmas Hat | Luz Patterns
Christmas Card Photo Display| Hertoolbelt
JOY Porch Sign | Ginger Snap Crafts
Folding Bar Cart Table | Everyday Party Magazine
Wood and Burlap Christmas Sign | Leap of Faith Crafting
Wood Block Snowman | Anika’s DIY Life
Holiday Candle Wrap | Dragonfly & Lily Pads
Christmas Pom Pom Pillow | Small Home Soul
Handlettered Wall Art | Smiling Colors
Those of us who did videos for this hop can be found in the playlist below, so those of you who would rather watch than read (or just want to blow off work for a few more minutes) have something, too! *If you’re having difficulty playing it, you can jump over to the playlist here.*
There you have it! Hope you’re getting into the holiday spirit just in time. Will you be working on any decor ideas this Christmas? This is going to be a very busy holiday season for me, so be sure to check back in for more DIYs (I’m going to give that epoxy inlay idea a shot, and a few more scrap ideas are just bubbling in the ol’ brain). Have a great weekend!
You'll Also Love
25 Great Gift Ideas for the Craft Beer Lover
DIY Wooden Couch Sleeve
It’s Pronounced “Damn Good Cookie̶...
Lots of Sneak Peeks: Riding the Buildathon Wave
The post Wood Inlay Ornament with German Glass Glitter appeared first on The Ugly Duckling House.
Website // Subscribe // Advertise // Twitter // Facebook // Google+
via Primary Ideas http://ift.tt/2mesqe5
0 notes
Text
KZ Mauthausen
One of mine, November 19th, 2013
It’s no sort of a boast to say, ‘I’ve been to a few concentration camps’. Opera houses; perhaps: art galleries; perhaps: concentration camps, hardly. It’s true nonetheless, I have visited a few concentration camps.
It’s not that that the camps hold a lurid fascination for me, or that I am impelled to visit and tick them off on a list. Concentration camps are not munros.
When I try to analyse my reasons for visiting, they multiply, become elusive, and I struggle to apprehend and organise them. They are definitely manifold. There is an historian’s interest – longstanding now - perhaps an integral part of my make up, inescapable. There’s also muted sense of obligation on my part, a sense of ‘ought to’. That sense pervades other aspects of my travel, too – it takes me to battlefields and war cemeteries wherever I find myself: USA, Turkey, Tunisia, France, Belgium, Russia. The ought to is, I think, a way of grappling with, and trying to understand big questions – questions about war, about sacrifice, about the deepest human motivators. Standing on the ground where things happened helps me focus my mind, offers me a degree of clarity, helps me draw out the physical threads of place and time and interweave them with the cognitive threads of what I know. It’s invariably humbling.
I have a sense, too, courtesy of those who deny the Holocaust (I think of David Irving, in particular), that the Shoah needs contemporary witnesses, people who have been, have seen, have been humbled and upset, and can testify to it.
There’s one more reason, which is more deeply personal: recognition that it could have been me. More: that it could still be me. This sense of personal involvement stems from being homosexual. When I say, ‘It could have been me’ I recognise that I always cast myself as a victim – never a perpetrator. And I always think I wouldn’t have survived.
In those camps where there is a book of visitors’ remarks, perhaps the most common entry is ‘Never again’. I think that an empty slogan. The Nazis didn’t invent genocide, though they industrialised and perfected it in ways that are so perverse that they call into question our shared humanity. But, if I speak of a shared humanity, I have always to pose the question – might I have been the one who slammed the Gaskammer door shut on someone else? I recall a German TV documentary where the teenage children of Holocaust survivors revisited the places their parents or grandparents had been so brutally treated. Sitting with them, sifting through photographs and documents, were German teenagers. One of the Jewish youngsters said, ‘I’m always scared that I will see the face of someone I recognise’. ‘So am I’, replied the German youngster. Yes. That captures it, perfectly. It is important to sift yourself. And some locations, because of their poignancy, or power, or pain, make that demand urgent and insistent.
As I noted above, I don’t believe in Never Again. I’ve lived through the Srenbrenica and Rwanda. Never Again is a cheap shot. Conventional piety. Wishful thinking.
I have no truck with it.
I believe in vigilance and respect…
I crossed from Germany into Austria in the late evening of October 19th, at Passau, where the rivers Inn and Ilz combine with the Danube. The Hitler family lived in Passau from 1892-4, moving there when Adolf was three.
My driving route took me along the right bank of the Danube, heading south east, towards Linz. A full moon was reflected in the river and, on the left bank, a sequence of picturesque villages with their churches and castles illuminated. I arrived in Linz a little before 9pm and headed straight to the hostel. It’s a purpose-built, post war edifice with clean 1950’s lines and interior spaces to match. The rooms, all en-suite, are impressively comfy and airy. It looked a very efficient set up. I slept well.
The following morning, when I drew back the curtain, the window was misted with condensation. Wiping it aside, I could see autumnal leaves outlined crisply against a cornflower white sky. That boded well for the day. After a good breakfast (a typical Austrian affair of cold meats, cheese, fruit, yoghurt, breads and cakes), I organised myself and went into town.
Linz is as lovely as you might expect a baroque town on the Danube to be. I spent the morning meandering, stopping off to admire churches and the architectural fancies that offered themselves up. The High Mass was drawing to a close when I got to the New Cathedral (a 19th CE Neo-Gothic build), so I sat quietly and waited for the dismissal, so I could then take a few photos without disturbing the service. There was a small choir – five or six voices – singing a glorious polyphonic mass setting.
As midday approached, I returned to the car, crossed the river, and followed the left bank. The Danube was actually blue, for once: generally-speaking it’s a mucky brown. Following the river downstream, Mauthausen is a bare 12 miles from Linz.
I was there in 20 minutes.
To get to the camp, you turn off the main road and drive through the village, climbing the valley side until you reach the ridge line.
The first thing you note when you park and get out is the view. It’s a beautiful situation – to the south lies village, the river and the Danube valley – lots of woodland and rolling hills with isolated houses and farms.
The camp looks like a granite-built fort. Its towers and retaining walls are imposing, not to say intimidating. It has permanence and power written all over it. Exactly as intended.
Mauthausen was a Grade III camp, intended to be the toughest environment conceivable for the incorrigible political enemies of the Reich. The Nazis intended that the intelligentsia of Europe come to Mauthausen and be worked to death. Its nickname among the staff of the Reichssicherheitshauptamt (Reich Security Main Office) was the Knockenmühle – the Bone Grinder. It was founded immediately after the Anschluss (1938) and was one of the last camps to be liberated.
The Bone Grinder… therein lies the key. Mauthausen was founded because of the adjacent granite quarry. Its stone had been used to pave the streets of Vienna: now it was used to build the camp itself (inmates transferred from Dachau) and then the grandiose Nazi monuments that glowered down on the subjects of the 1000 Year Reich. Some of its stone was used in the Congress Hall, and other buildings, of the Reichsparteitagsgelände (Nazi Party Rally Grounds), in Nuremburg, which I had left only the day before.
As the war progressed, and Germany secured direct and indirect control over more and more of Europe, the inmates became more diverse in their origins – to the Germans and Austrians were added Poles, Czechs, Hungarians, Spaniards, French, Greeks. Teachers, doctors, lawyers, trade unionists, socialists, Jehovah’s witnesses, homosexuals, Sinti and Roma, Jews, Russian (and other) prisoners of war, partisans from Yugoslavia: in their hundreds of thousands, they came to Mauthausen and its sub-camps and were worked to death in the quarries, or gassed, shot, hung. Estimates vary – but it is reasonable to believe that 320,000 people came to Mauthausen and its sub-camps. 75% of them didn’t survive. But death was profitable: in 1944, the camp turned a profit of 144 million Euros (at 2013 exchange rate).
When I came to Mauthausen I knew what to expect.
The first camp I ever visited was KZ Sachsenhausen. It lies to the north of Berlin, in the village of Oranienburg. I went there in a bitterly cold February, in 1996, to stand before the memorial to the homosexuals done to death by the Nazis, and leave a poem and some rainbow ribbons. That same trip, I went to the Haus am Wannsee, which hosted the conference convened in January, 1942 at which the planned extermination of European Jewry was formalised, organised and rubber stamped.
If Sachsenhausen brought tears, Wannsee brought an even icier chill – the hand of the perpetrators. Crunching up the drive towards that familiar building, sited on an idyllic lake (Heydrich intended it to be his home after the war), there was menace in the air.
In January 2005, I went to Prague with Peter, and intended to make a side trip to Theresienstadt. Peter said he’d skip that but then changed his mind and came with me. I think he regretted it: it was grim. As I knew it would be.
Almost exactly a year later, Gordon, Richard and I went to Krakow in Poland. Inevitably, we went to Auschwitz. It was a bitter winter, and the camp was a snow-covered expanse. It was easy, in the mind’s eye, to step back in time and imagine being there in the winter of 1944: the war lost but the exterminations more frantic than ever, the levels of degradation surpassing even the obscenities that preceded them.
As I walked towards the camp entrance at Mauthausen, I brought these experiences with me. I had an idea of what lay behind that forbidding perimeter. I didn’t expect to be surprised. I did expect to be upset – as I had been before. I expected to be rattled. To be provoked. To be made to squirm and feel uneasy.
The visit is self-directed, though an excellent audio-guide and a simple map make sure you don’t get lost.
Some of the camp buildings are no longer there: the SS barracks are gone: the site is now the memorial garden. Some barrack blocks are demolished but others remain to suggest what they were like when the camp was in use, others are exhibition spaces.
The prison, the execution rooms, the crematoria, are all extant.
The exhibition spaces are sensitively and comprehensively detailed, and give a genuine insight into the camp’s history. You are uncompromisingly confronted by the filthiness of Nazism. Each camp I have visited offers a unique experience, though each share common threads. Each has shown me something I hadn’t grasped until that point. At Mauthausen, it was the level of brutality dispensed to children. Looking at the youthful faces in inmate photographs was very disturbing.
The barrack blocks are stark: the triple bunks, kapos’ day rooms, and the washrooms stood empty and silent. The washrooms rattle me: they were favoured suicide locations for prisoners in extremis. I’ve seen photos of emaciated victims, strangulated on taps, pipes and even toilet fixtures.
I moved on. The triple bunks – top bunks were the most sought after – men topped and tailed – perhaps three per level, nine in all. The ones on the lower bunks were subject to the dysenteric effluvia of those on the upper ones. When a transport arrived, overcrowding became endemic.
In the prison block, you can see the ‘interrogation’ rooms, placed so the screams could be heard throughout the cell block. Below, in the basement, the exectution rooms. Prisoners were shot in the back of the neck (I saw such a set up at Sachsenhausen) or hung from a pulleyed hook, or gassed, or injected with petrol, or stripped, sprayed with water and left to freeze to death outside in the winter temperatures, or pushed off the quarry heights, or made to push others off the quarry heights and then shoved after them. Others were driven onto the electrified fence, or shot whilst penned into the garage courtyard. The bodies were cremated by prisoners who were themselves shot and subsequently cremated.
Mauthausen has two double ovens in situ and complete. They stand open-mawed and stark. Topf and Sons Ltd, produced them. They were manufacturers of industrial malting ovens for breweries, and commercial incinerators. Their chief executive saw a brilliant opportunity to expand operations and submitted designs for ovens that could operate continually as crematoria: the Nazis were more than happy to sign the contracts. As Topf’s letterhead said on their Auschwitz correspondence: Always ready to serve you…
This is what concentration camps are like.
This is why it’s important for me to come, and stand, and be upset, and remember.
At Sachsenhausen it was the crematorium that brought me close to dissolution.
At Auschwitz, the gas chamber.
At Theresienstadt, it was the sight of that vile slogan, glimpsed through a flurry of snow: ARBEIT MACHT FREI.
At Mauthausen, I felt more composed than I had expected. Reflective, quiet, brimful of thoughts and the clamour of the past but it was manageable and I felt able to ‘hold the ring’.
Having paid my respects at the memorial plaques, I left the camp proper and walked slowly through the memorial garden, towards the quarry. I made a mental note to pay my respects at these formal monuments on the way back, and continued to make my way to the stone works.
The well-made path gave out and I noted that I was now walking on the uneven setts and broken stones that led along the edge of the quarry, to the Death Steps.
I was alone by now. Everything was quiet, save for the crunch of my footfalls on the stones. Their unevenness threatened to throw me off balance, and I found myself looking at my feet and paying close attention to the sensation of planting my foot, feeling my ankle adjust to keep me upright.
As I type now, I can recall the sensations and sounds with absolute clarity.
As I got nearer and nearer to the Steps I began to feel genuinely unsteady; there was an upwelling of panic, a constriction in the chest, a stomach-churning gripe: I was unable to proceed. I feared that I was going to crumple to the ground and cry uncontrollably.
I stood stock still. I had to physically regain my balance. If there’d been something close at hand to grasp, I would have held on to it. But there wasn’t. I had to be still, gather my scattered self, recognise what was happening, compose myself, regain a measure of control.
When I’d done so, the sudden realisation dawned that I couldn’t walk down the Steps. I knew it would be sacrilegious to trip down those stairs in my Fitflops. But I also knew I had to get down. I had to stand in the quarry. This was the place where remembrance meant most.
To me, it felt an age, but it can only have been a few seconds: the solution was plain. I must go unshod. Bare-foot, I could do it.
It all felt OK then. After a deep breath the urge to cry and the unsteadiness left me. There was still the hypersensitivity, as I placed my feet on the uneven stones, but I could make my way to the Steps.
I had another lurch as I stood at the top. But I was able to quieten that, and sit down.
I unlaced my shoes and slipped them and my socks off. A young family was coming up: the kids were counting the number of steps aloud: Ein hundert sechs und achtszig – 186.
They passed by, making no remark.
The stones were cold but supportive.
Berries and twigs and clusters of fallen leaves were scattered on the granite steps, and I could feel their imprint as I descended. Down I went, where so many had gone before me, beaten and driven.
In the quarry itself, the workings reared up before me: a cliff. Nature had softened and reclaimed some of it. There were two great water-filled pits that reflected the autumnal leaves and blue sky. It was strangely reaffirming.
There were stone chips underfoot, as well as springy grass. I stooped to pick one up and carry away with me. Once home, I will put it alongside the brick-flake from Auschwitz, in plain view, where it will help me remember.
I walked for some time, occupied with my thoughts, wondering at the strength and unexpected immediacy of my upset at the top of the quarry. I remembered seeing ‘Bent’ – firstly a play by Martin Sherman (1979), later a film by Sean Mathias. It dealt with two gay men sent to Dachau in 1934. A scene in it had them working moving heavy stone blocks. There was some clue there to my distress.
And there was an incongruity: I remembered that beautiful polyohonic mass setting, 12 miles and 20 minutes away....
And I had been bare-foot once before. 20 + years ago, in Lourdes. I had make my way around the massive, verdisgris’d Stations there, It was my leave-taking from the Friars Minor. The circumstance was very different, but the motivation shared some ground. Standing bare-foot on the bare earth and experiencing things for what they actually are; there is comfort in this discomfort.
For me, Mauthausen had brought home again the reality. Not an issue of ‘there and then’ but ‘here and now’.
And so it must remain, to me.
Without vigilance and respect, I believe it will come again, and swallow our humanity.
2 notes
·
View notes
Text
Wood Inlay Ornament with German Glass Glitter
Hi friends! And hi to new friends visiting from the #CreativeChristmas Challenge hosted by Remodelaholic!
To those of you who don’t know me yet: welcome. Everyone else has already started drinking and saying really embarrassing things (about themselves, not you… we’re not a super judgmental bunch). To those of you who already know me: cheers. As always, you rock. And I was just kidding about the drinking thing (unless it’s football season and a Saturday, which yes to both).
Anyway, from time to time, I like to throw my hat in on a DIY challenge or two because nothing excuses buying more power tools like overcommitting to a deadline for fun (like the 2×4 summer challenge and boom: new coffee table!). This time around, the theme was making something for Christmas. I’ve already been finding inspiration for my color scheme this year in the form of acorns, snowflakes, owls, and other wintery-woodland things, so I figured: why not see if I can fill up the inevitable empty parts of my tree with what I have on hand, rather than buying a bunch of new ornaments? I also just happened upon a set of carving bits for my Dremel and have been itching to experiment with epoxy/inlays/resins, so I started playing around until this happened:
And as a fun little bonus: I actually made a video of it too!
Tools and Materials
affiliate links of items I recommend and use are listed in this post, which support this site at no cost to you… thanks!
scrap wood (I had 1″ x 4″ poplar)
scissors
printer paper
inkjet printer
acetone or nail polish remover
Dremel 200
Dremel engraving/carving kit
band saw or scroll saw
random orbit sander
wood stain (I used Minwax Ipswich Pine and washed while it was still wet with Early American… I’ll have to show you guys more about this as I’ve done it a number of times to get the colors I like)
Mod Podge
small detail paint brush
Miss Mustard Seed’s German Glass Glitter in Silver Tiara
Martha Stewart Crafts extra fine glitter in Smoky Quartz
clear spray sealer (gloss)
small drill bit
thread (I used stuff from my cross stitch stash)
First things first: print out the image (mine is available for download near the end of the post) and cut it out. I used a scrap piece of poplar that was bound for the burn pile, so I wasn’t really expecting perfection (in fact as you can see, I first used a different image that was WAY too intricate for a first-time experiment and then decided on the final design).
To transfer the ink from the printer paper, I swabbed the back with an acetone nail polish remover. As you can see, the image didn’t transfer perfectly, but it was good enough (I got the idea from my buddy Brad’s video here — then went with the option that wouldn’t require changing out of my pajama pants or going into the cold garage that morning).
Next, I took out my Dremel and a new engraving/carving set I’d recently purchased for another inlay project. In my opinion, crafting is a good intro before graduating to larger pieces, so I figured this would help me practice with diamond tips, how to control the carve, etc. A good method is to create the hard outline first, then carve out the middle, and continue to make the inlay deeper and deeper until it’s got enough depth to hold the inlay material (glitter, epoxy I assume, whatever).
Next, I sketched out the overall shape (spoiler: it wasn’t at all even, so I highly recommend using the template) and then went to cut out the piece. And this is when it seemed like things were conspiring against me: my new scroll saw was broken… right out of the box. Womp, womp.
To make the situation a little stickier, I was about 5 hours away at this point from needing to head out of town to Raleigh, NC (recap here), and I had no other tools that would give me the right depth and shape. Disappointed but undeterred, I figured the next best thing would be to ask to borrow tools from the person I’d be visiting (thankfully, it was a trip to visit some DIY blogging friends just for fun — my pal Brittany just so happened to have a band saw in her garage). Of course, now I want one of those, too.
Of course, I’d never actually used a band saw before, so despite the general don’t-cut-your-fingers-off rule, the piece still came out a little wonky (mostly due to my non-templating sketch). I was able to shape it a little more with an orbital sander. I also carved the edges out a little more and did a final sanding with high grit sandpaper before stain.
Since the overall concept was to make this look like an inlay, I wanted to use glitter with a little more grit and sparkle: enter, German glass glitter. It’s really amazing stuff in person. To paint it into place, I relied on a small paint brush (tip: if the brush starts to fray a little, spin it as you’re dipping it into the glue to get the point fine again… check out my video to see a demo of that).
You can layer the glitter in, too: after giving it some time to dry, paint another bit of glue on top of the glitter and add more into the recessed areas. It will add depth!
I added extra-fine gold glitter around the edge and sealed the whole thing with a clear gloss spray, then drilled a hole through the top and threaded it so it could hang on the tree.
Caveat: before I sealed with a clear gloss, I actually tried to seal with an old polycrylic which unfortunately made the top and bottom tips look faded/cloudy once it dried. At first I thought I’d lean into the mistake by painting the back and sides with chalk paint and sanding to make it look rustic, but it looked really sad instead and totally detracted from the sparkle on the front. I wanted to get this done in time for the blog hop, so I just continued on with sealing again and adding the glitter around the edge. So, if you try a project like this, don’t make my mistake and you’ll get even better results!
You can also try other inlay methods, other glitter colors, fill in the center vs the outer rings with opposite hues, etc… the possibilities are pretty endless!
All in all, I think it’s going to make a nice addition to my white/gold/chrome/woodland Christmas decor theme this year (and the less I need to spend on ornaments, the more budget I have to make Christmas cocktails, hehe).
Want to try this for yourself? You can download my template here.
To be perfectly frank, I think the photos really don’t do the sparkle on this piece enough justice (in fact, I worried that it was looking too drab in photos). So, I made a video tutorial too (I’d love it if you subscribed if you haven’t already… with what I’ve learned in making this tutorial, there is more to come no doubt!).
As I mentioned, this DIY was part of a blog hop, with 25 other bloggers participating — aka, enough DIY Christmas ideas to keep you busy right up until the actual holiday (if you were so ambitiously inclined). So, check out a preview of the other projects and bloggers participating in the images below. You can also head over to the Remodelaholic post (who is hosting this hop) to check out other DIYers submitting their inspired ideas (on social media, you can look for #CreativeChristmas to find them all).
DIY Christmas Trees and Ornaments
Wintry Silver Dollar Store Christmas Tree Decor | Remodelaholic
Marbled Christmas Ornaments | Doodlecraft
Scrap Wood Inlay Ornaments | The Ugly Duckling House (you’re here!)
Woodburned Wood Slice Ornaments | Sisters What
Flocked Pine Cones | Practical and Pretty
Abstract Monogram Ornaments | Domicile37
Concrete Christmas Ornaments | The Palette Muse
Wood Slice Deer Ornaments | Our Crafty Mom
Vintage Gumball Machine Ornaments | Beth Watson Design Studio
Etched Glass Ornaments | Just Call Me Homegirl
Unicorn Inspired Christmas Tree | The DIY Mommy
Driftwood Reindeer Ornaments | Sustain My Craft Habit
DIY Christmas Gifts and Decor
Christmas Pine Hoop Wreath | This Mama’s Dance
Gingerbread Man Candles | Nourish and Nestle
Wire and Glass Chandelier | Home with Cupcakes and Crinoline
Christmas Scroll Wall Art | Grace In My Space
Lighted Wood Trees | Frazzled Joy
Crocheted Christmas Hat | Luz Patterns
Christmas Card Photo Display| Hertoolbelt
JOY Porch Sign | Ginger Snap Crafts
Folding Bar Cart Table | Everyday Party Magazine
Wood and Burlap Christmas Sign | Leap of Faith Crafting
Wood Block Snowman | Anika’s DIY Life
Holiday Candle Wrap | Dragonfly & Lily Pads
Christmas Pom Pom Pillow | Small Home Soul
Handlettered Wall Art | Smiling Colors
Those of us who did videos for this hop can be found in the playlist below, so those of you who would rather watch than read (or just want to blow off work for a few more minutes) have something, too! *If you’re having difficulty playing it, you can jump over to the playlist here.*
There you have it! Hope you’re getting into the holiday spirit just in time. Will you be working on any decor ideas this Christmas? This is going to be a very busy holiday season for me, so be sure to check back in for more DIYs (I’m going to give that epoxy inlay idea a shot, and a few more scrap ideas are just bubbling in the ol’ brain). Have a great weekend!
You'll Also Love
25 Great Gift Ideas for the Craft Beer Lover
DIY Wooden Couch Sleeve
It’s Pronounced “Damn Good Cookie̶...
Lots of Sneak Peeks: Riding the Buildathon Wave
The post Wood Inlay Ornament with German Glass Glitter appeared first on The Ugly Duckling House.
Website // Subscribe // Advertise // Twitter // Facebook // Google+
from mix1 http://ift.tt/2mesqe5 via with this info
0 notes
Text
Wood Inlay Ornament with German Glass Glitter
Hi friends! And hi to new friends visiting from the #CreativeChristmas Challenge hosted by Remodelaholic!
To those of you who don’t know me yet: welcome. Everyone else has already started drinking and saying really embarrassing things (about themselves, not you… we’re not a super judgmental bunch). To those of you who already know me: cheers. As always, you rock. And I was just kidding about the drinking thing (unless it’s football season and a Saturday, which yes to both).
Anyway, from time to time, I like to throw my hat in on a DIY challenge or two because nothing excuses buying more power tools like overcommitting to a deadline for fun (like the 2×4 summer challenge and boom: new coffee table!). This time around, the theme was making something for Christmas. I’ve already been finding inspiration for my color scheme this year in the form of acorns, snowflakes, owls, and other wintery-woodland things, so I figured: why not see if I can fill up the inevitable empty parts of my tree with what I have on hand, rather than buying a bunch of new ornaments? I also just happened upon a set of carving bits for my Dremel and have been itching to experiment with epoxy/inlays/resins, so I started playing around until this happened:
And as a fun little bonus: I actually made a video of it too!
Tools and Materials
affiliate links of items I recommend and use are listed in this post, which support this site at no cost to you… thanks!
scrap wood (I had 1″ x 4″ poplar)
scissors
printer paper
inkjet printer
acetone or nail polish remover
Dremel 200
Dremel engraving/carving kit
band saw or scroll saw
random orbit sander
wood stain (I used Minwax Ipswich Pine and washed while it was still wet with Early American… I’ll have to show you guys more about this as I’ve done it a number of times to get the colors I like)
Mod Podge
small detail paint brush
Miss Mustard Seed’s German Glass Glitter in Silver Tiara
Martha Stewart Crafts extra fine glitter in Smoky Quartz
clear spray sealer (gloss)
small drill bit
thread (I used stuff from my cross stitch stash)
First things first: print out the image (mine is available for download near the end of the post) and cut it out. I used a scrap piece of poplar that was bound for the burn pile, so I wasn’t really expecting perfection (in fact as you can see, I first used a different image that was WAY too intricate for a first-time experiment and then decided on the final design).
To transfer the ink from the printer paper, I swabbed the back with an acetone nail polish remover. As you can see, the image didn’t transfer perfectly, but it was good enough (I got the idea from my buddy Brad’s video here — then went with the option that wouldn’t require changing out of my pajama pants or going into the cold garage that morning).
Next, I took out my Dremel and a new engraving/carving set I’d recently purchased for another inlay project. In my opinion, crafting is a good intro before graduating to larger pieces, so I figured this would help me practice with diamond tips, how to control the carve, etc. A good method is to create the hard outline first, then carve out the middle, and continue to make the inlay deeper and deeper until it’s got enough depth to hold the inlay material (glitter, epoxy I assume, whatever).
Next, I sketched out the overall shape (spoiler: it wasn’t at all even, so I highly recommend using the template) and then went to cut out the piece. And this is when it seemed like things were conspiring against me: my new scroll saw was broken… right out of the box. Womp, womp.
To make the situation a little stickier, I was about 5 hours away at this point from needing to head out of town to Raleigh, NC (recap here), and I had no other tools that would give me the right depth and shape. Disappointed but undeterred, I figured the next best thing would be to ask to borrow tools from the person I’d be visiting (thankfully, it was a trip to visit some DIY blogging friends just for fun — my pal Brittany just so happened to have a band saw in her garage). Of course, now I want one of those, too.
Of course, I’d never actually used a band saw before, so despite the general don’t-cut-your-fingers-off rule, the piece still came out a little wonky (mostly due to my non-templating sketch). I was able to shape it a little more with an orbital sander. I also carved the edges out a little more and did a final sanding with high grit sandpaper before stain.
Since the overall concept was to make this look like an inlay, I wanted to use glitter with a little more grit and sparkle: enter, German glass glitter. It’s really amazing stuff in person. To paint it into place, I relied on a small paint brush (tip: if the brush starts to fray a little, spin it as you’re dipping it into the glue to get the point fine again… check out my video to see a demo of that).
You can layer the glitter in, too: after giving it some time to dry, paint another bit of glue on top of the glitter and add more into the recessed areas. It will add depth!
I added extra-fine gold glitter around the edge and sealed the whole thing with a clear gloss spray, then drilled a hole through the top and threaded it so it could hang on the tree.
Caveat: before I sealed with a clear gloss, I actually tried to seal with an old polycrylic which unfortunately made the top and bottom tips look faded/cloudy once it dried. At first I thought I’d lean into the mistake by painting the back and sides with chalk paint and sanding to make it look rustic, but it looked really sad instead and totally detracted from the sparkle on the front. I wanted to get this done in time for the blog hop, so I just continued on with sealing again and adding the glitter around the edge. So, if you try a project like this, don’t make my mistake and you’ll get even better results!
You can also try other inlay methods, other glitter colors, fill in the center vs the outer rings with opposite hues, etc… the possibilities are pretty endless!
All in all, I think it’s going to make a nice addition to my white/gold/chrome/woodland Christmas decor theme this year (and the less I need to spend on ornaments, the more budget I have to make Christmas cocktails, hehe).
Want to try this for yourself? You can download my template here.
To be perfectly frank, I think the photos really don’t do the sparkle on this piece enough justice (in fact, I worried that it was looking too drab in photos). So, I made a video tutorial too (I’d love it if you subscribed if you haven’t already… with what I’ve learned in making this tutorial, there is more to come no doubt!).
As I mentioned, this DIY was part of a blog hop, with 25 other bloggers participating — aka, enough DIY Christmas ideas to keep you busy right up until the actual holiday (if you were so ambitiously inclined). So, check out a preview of the other projects and bloggers participating in the images below. You can also head over to the Remodelaholic post (who is hosting this hop) to check out other DIYers submitting their inspired ideas (on social media, you can look for #CreativeChristmas to find them all).
DIY Christmas Trees and Ornaments
Wintry Silver Dollar Store Christmas Tree Decor | Remodelaholic
Marbled Christmas Ornaments | Doodlecraft
Scrap Wood Inlay Ornaments | The Ugly Duckling House (you’re here!)
Woodburned Wood Slice Ornaments | Sisters What
Flocked Pine Cones | Practical and Pretty
Abstract Monogram Ornaments | Domicile37
Concrete Christmas Ornaments | The Palette Muse
Wood Slice Deer Ornaments | Our Crafty Mom
Vintage Gumball Machine Ornaments | Beth Watson Design Studio
Etched Glass Ornaments | Just Call Me Homegirl
Unicorn Inspired Christmas Tree | The DIY Mommy
Driftwood Reindeer Ornaments | Sustain My Craft Habit
DIY Christmas Gifts and Decor
Christmas Pine Hoop Wreath | This Mama’s Dance
Gingerbread Man Candles | Nourish and Nestle
Wire and Glass Chandelier | Home with Cupcakes and Crinoline
Christmas Scroll Wall Art | Grace In My Space
Lighted Wood Trees | Frazzled Joy
Crocheted Christmas Hat | Luz Patterns
Christmas Card Photo Display| Hertoolbelt
JOY Porch Sign | Ginger Snap Crafts
Folding Bar Cart Table | Everyday Party Magazine
Wood and Burlap Christmas Sign | Leap of Faith Crafting
Wood Block Snowman | Anika’s DIY Life
Holiday Candle Wrap | Dragonfly & Lily Pads
Christmas Pom Pom Pillow | Small Home Soul
Handlettered Wall Art | Smiling Colors
Those of us who did videos for this hop can be found in the playlist below, so those of you who would rather watch than read (or just want to blow off work for a few more minutes) have something, too! *If you’re having difficulty playing it, you can jump over to the playlist here.*
There you have it! Hope you’re getting into the holiday spirit just in time. Will you be working on any decor ideas this Christmas? This is going to be a very busy holiday season for me, so be sure to check back in for more DIYs (I’m going to give that epoxy inlay idea a shot, and a few more scrap ideas are just bubbling in the ol’ brain). Have a great weekend!
You'll Also Love
25 Great Gift Ideas for the Craft Beer Lover
DIY Wooden Couch Sleeve
It’s Pronounced “Damn Good Cookie̶...
Lots of Sneak Peeks: Riding the Buildathon Wave
The post Wood Inlay Ornament with German Glass Glitter appeared first on The Ugly Duckling House.
Website // Subscribe // Advertise // Twitter // Facebook // Google+
from car2 http://ift.tt/2mesqe5 via as shown a lot
0 notes
Text
Wood Inlay Ornament with German Glass Glitter
Hi friends! And hi to new friends visiting from the #CreativeChristmas Challenge hosted by Remodelaholic!
To those of you who don’t know me yet: welcome. Everyone else has already started drinking and saying really embarrassing things (about themselves, not you… we’re not a super judgmental bunch). To those of you who already know me: cheers. As always, you rock. And I was just kidding about the drinking thing (unless it’s football season and a Saturday, which yes to both).
Anyway, from time to time, I like to throw my hat in on a DIY challenge or two because nothing excuses buying more power tools like overcommitting to a deadline for fun (like the 2×4 summer challenge and boom: new coffee table!). This time around, the theme was making something for Christmas. I’ve already been finding inspiration for my color scheme this year in the form of acorns, snowflakes, owls, and other wintery-woodland things, so I figured: why not see if I can fill up the inevitable empty parts of my tree with what I have on hand, rather than buying a bunch of new ornaments? I also just happened upon a set of carving bits for my Dremel and have been itching to experiment with epoxy/inlays/resins, so I started playing around until this happened:
And as a fun little bonus: I actually made a video of it too!
Tools and Materials
affiliate links of items I recommend and use are listed in this post, which support this site at no cost to you… thanks!
scrap wood (I had 1″ x 4″ poplar)
scissors
printer paper
inkjet printer
acetone or nail polish remover
Dremel 200
Dremel engraving/carving kit
band saw or scroll saw
random orbit sander
wood stain (I used Minwax Ipswich Pine and washed while it was still wet with Early American… I’ll have to show you guys more about this as I’ve done it a number of times to get the colors I like)
Mod Podge
small detail paint brush
Miss Mustard Seed’s German Glass Glitter in Silver Tiara
Martha Stewart Crafts extra fine glitter in Smoky Quartz
clear spray sealer (gloss)
small drill bit
thread (I used stuff from my cross stitch stash)
First things first: print out the image (mine is available for download near the end of the post) and cut it out. I used a scrap piece of poplar that was bound for the burn pile, so I wasn’t really expecting perfection (in fact as you can see, I first used a different image that was WAY too intricate for a first-time experiment and then decided on the final design).
To transfer the ink from the printer paper, I swabbed the back with an acetone nail polish remover. As you can see, the image didn’t transfer perfectly, but it was good enough (I got the idea from my buddy Brad’s video here — then went with the option that wouldn’t require changing out of my pajama pants or going into the cold garage that morning).
Next, I took out my Dremel and a new engraving/carving set I’d recently purchased for another inlay project. In my opinion, crafting is a good intro before graduating to larger pieces, so I figured this would help me practice with diamond tips, how to control the carve, etc. A good method is to create the hard outline first, then carve out the middle, and continue to make the inlay deeper and deeper until it’s got enough depth to hold the inlay material (glitter, epoxy I assume, whatever).
Next, I sketched out the overall shape (spoiler: it wasn’t at all even, so I highly recommend using the template) and then went to cut out the piece. And this is when it seemed like things were conspiring against me: my new scroll saw was broken… right out of the box. Womp, womp.
To make the situation a little stickier, I was about 5 hours away at this point from needing to head out of town to Raleigh, NC (recap here), and I had no other tools that would give me the right depth and shape. Disappointed but undeterred, I figured the next best thing would be to ask to borrow tools from the person I’d be visiting (thankfully, it was a trip to visit some DIY blogging friends just for fun — my pal Brittany just so happened to have a band saw in her garage). Of course, now I want one of those, too.
Of course, I’d never actually used a band saw before, so despite the general don’t-cut-your-fingers-off rule, the piece still came out a little wonky (mostly due to my non-templating sketch). I was able to shape it a little more with an orbital sander. I also carved the edges out a little more and did a final sanding with high grit sandpaper before stain.
Since the overall concept was to make this look like an inlay, I wanted to use glitter with a little more grit and sparkle: enter, German glass glitter. It’s really amazing stuff in person. To paint it into place, I relied on a small paint brush (tip: if the brush starts to fray a little, spin it as you’re dipping it into the glue to get the point fine again… check out my video to see a demo of that).
You can layer the glitter in, too: after giving it some time to dry, paint another bit of glue on top of the glitter and add more into the recessed areas. It will add depth!
I added extra-fine gold glitter around the edge and sealed the whole thing with a clear gloss spray, then drilled a hole through the top and threaded it so it could hang on the tree.
Caveat: before I sealed with a clear gloss, I actually tried to seal with an old polycrylic which unfortunately made the top and bottom tips look faded/cloudy once it dried. At first I thought I’d lean into the mistake by painting the back and sides with chalk paint and sanding to make it look rustic, but it looked really sad instead and totally detracted from the sparkle on the front. I wanted to get this done in time for the blog hop, so I just continued on with sealing again and adding the glitter around the edge. So, if you try a project like this, don’t make my mistake and you’ll get even better results!
You can also try other inlay methods, other glitter colors, fill in the center vs the outer rings with opposite hues, etc… the possibilities are pretty endless!
All in all, I think it’s going to make a nice addition to my white/gold/chrome/woodland Christmas decor theme this year (and the less I need to spend on ornaments, the more budget I have to make Christmas cocktails, hehe).
Want to try this for yourself? You can download my template here.
To be perfectly frank, I think the photos really don’t do the sparkle on this piece enough justice (in fact, I worried that it was looking too drab in photos). So, I made a video tutorial too (I’d love it if you subscribed if you haven’t already… with what I’ve learned in making this tutorial, there is more to come no doubt!).
youtube
As I mentioned, this DIY was part of a blog hop, with 25 other bloggers participating — aka, enough DIY Christmas ideas to keep you busy right up until the actual holiday (if you were so ambitiously inclined). So, check out a preview of the other projects and bloggers participating in the images below. You can also head over to the Remodelaholic post (who is hosting this hop) to check out other DIYers submitting their inspired ideas (on social media, you can look for #CreativeChristmas to find them all).
DIY Christmas Trees and Ornaments
Wintry Silver Dollar Store Christmas Tree Decor | Remodelaholic
Marbled Christmas Ornaments | Doodlecraft
Scrap Wood Inlay Ornaments | The Ugly Duckling House (you’re here!)
Woodburned Wood Slice Ornaments | Sisters What
Flocked Pine Cones | Practical and Pretty
Abstract Monogram Ornaments | Domicile37
Concrete Christmas Ornaments | The Palette Muse
Wood Slice Deer Ornaments | Our Crafty Mom
Vintage Gumball Machine Ornaments | Beth Watson Design Studio
Etched Glass Ornaments | Just Call Me Homegirl
Unicorn Inspired Christmas Tree | The DIY Mommy
Driftwood Reindeer Ornaments | Sustain My Craft Habit
DIY Christmas Gifts and Decor
Christmas Pine Hoop Wreath | This Mama’s Dance
Gingerbread Man Candles | Nourish and Nestle
Wire and Glass Chandelier | Home with Cupcakes and Crinoline
Christmas Scroll Wall Art | Grace In My Space
Lighted Wood Trees | Frazzled Joy
Crocheted Christmas Hat | Luz Patterns
Christmas Card Photo Display| Hertoolbelt
JOY Porch Sign | Ginger Snap Crafts
Folding Bar Cart Table | Everyday Party Magazine
Wood and Burlap Christmas Sign | Leap of Faith Crafting
Wood Block Snowman | Anika’s DIY Life
Holiday Candle Wrap | Dragonfly & Lily Pads
Christmas Pom Pom Pillow | Small Home Soul
Handlettered Wall Art | Smiling Colors
Those of us who did videos for this hop can be found in the playlist below, so those of you who would rather watch than read (or just want to blow off work for a few more minutes) have something, too! *If you’re having difficulty playing it, you can jump over to the playlist here.*
youtube
There you have it! Hope you’re getting into the holiday spirit just in time. Will you be working on any decor ideas this Christmas? This is going to be a very busy holiday season for me, so be sure to check back in for more DIYs (I’m going to give that epoxy inlay idea a shot, and a few more scrap ideas are just bubbling in the ol’ brain). Have a great weekend!
You'll Also Love
25 Great Gift Ideas for the Craft Beer Lover
DIY Wooden Couch Sleeve
It’s Pronounced “Damn Good Cookie̶...
Lots of Sneak Peeks: Riding the Buildathon Wave
.yuzo_related_post img{width:170px !important; height:170px !important;} .yuzo_related_post .relatedthumb{line-height:14px;background:#ffffff !important;color:#454747!important;} .yuzo_related_post .relatedthumb:hover{background:#ffffff !important; -webkit-transition: background 0.2s linear; -moz-transition: background 0.2s linear; -o-transition: background 0.2s linear; transition: background 0.2s linear;;color:#454747!important;} .yuzo_related_post .relatedthumb a{color:#102a3b!important;} .yuzo_related_post .relatedthumb a:hover{ color:#113f5e}!important;} .yuzo_related_post .relatedthumb:hover a{ color:#113f5e!important;} .yuzo_related_post .relatedthumb:hover .yuzo__text--title{ color:#113f5e!important;} .yuzo_related_post .yuzo_text, .yuzo_related_post .yuzo_views_post {color:#454747!important;} .yuzo_related_post .relatedthumb:hover .yuzo_text, .yuzo_related_post:hover .yuzo_views_post {color:#454747!important;} .yuzo_related_post .relatedthumb{ margin: 0px 6px 0px 6px; padding: 0px 0px 0px 0px; } jQuery(document).ready(function( $ ){ jQuery('.yuzo_related_post .yuzo_wraps').equalizer({ columns : '> div' }); });
The post Wood Inlay Ornament with German Glass Glitter appeared first on The Ugly Duckling House.
Website // Subscribe // Advertise // Twitter // Facebook // Google+
Read more http://ift.tt/2mesqe5
Areas served: Winston-Salem, High Point, Yadkinville, Mocksville, Advance, Clemmons, Kernersville, Greensboro, Walnut Cove, Statesville, NC, North Carolina
Services: House painting, roofing, deck building, landscaping, Carpentry, Flooring, tile, hardwood, remodeling, home improvement, interior, exterior
0 notes
Text
Wood Inlay Ornament with German Glass Glitter
Hi friends! And hi to new friends visiting from the #CreativeChristmas Challenge hosted by Remodelaholic!
To those of you who don’t know me yet: welcome. Everyone else has already started drinking and saying really embarrassing things (about themselves, not you… we’re not a super judgmental bunch). To those of you who already know me: cheers. As always, you rock. And I was just kidding about the drinking thing (unless it’s football season and a Saturday, which yes to both).
Anyway, from time to time, I like to throw my hat in on a DIY challenge or two because nothing excuses buying more power tools like overcommitting to a deadline for fun (like the 2×4 summer challenge and boom: new coffee table!). This time around, the theme was making something for Christmas. I’ve already been finding inspiration for my color scheme this year in the form of acorns, snowflakes, owls, and other wintery-woodland things, so I figured: why not see if I can fill up the inevitable empty parts of my tree with what I have on hand, rather than buying a bunch of new ornaments? I also just happened upon a set of carving bits for my Dremel and have been itching to experiment with epoxy/inlays/resins, so I started playing around until this happened:
And as a fun little bonus: I actually made a video of it too!
Tools and Materials
affiliate links of items I recommend and use are listed in this post, which support this site at no cost to you… thanks!
scrap wood (I had 1″ x 4″ poplar)
scissors
printer paper
inkjet printer
acetone or nail polish remover
Dremel 200
Dremel engraving/carving kit
band saw or scroll saw
random orbit sander
wood stain (I used Minwax Ipswich Pine and washed while it was still wet with Early American… I’ll have to show you guys more about this as I’ve done it a number of times to get the colors I like)
Mod Podge
small detail paint brush
Miss Mustard Seed’s German Glass Glitter in Silver Tiara
Martha Stewart Crafts extra fine glitter in Smoky Quartz
clear spray sealer (gloss)
small drill bit
thread (I used stuff from my cross stitch stash)
First things first: print out the image (mine is available for download near the end of the post) and cut it out. I used a scrap piece of poplar that was bound for the burn pile, so I wasn’t really expecting perfection (in fact as you can see, I first used a different image that was WAY too intricate for a first-time experiment and then decided on the final design).
To transfer the ink from the printer paper, I swabbed the back with an acetone nail polish remover. As you can see, the image didn’t transfer perfectly, but it was good enough (I got the idea from my buddy Brad’s video here — then went with the option that wouldn’t require changing out of my pajama pants or going into the cold garage that morning).
Next, I took out my Dremel and a new engraving/carving set I’d recently purchased for another inlay project. In my opinion, crafting is a good intro before graduating to larger pieces, so I figured this would help me practice with diamond tips, how to control the carve, etc. A good method is to create the hard outline first, then carve out the middle, and continue to make the inlay deeper and deeper until it’s got enough depth to hold the inlay material (glitter, epoxy I assume, whatever).
Next, I sketched out the overall shape (spoiler: it wasn’t at all even, so I highly recommend using the template) and then went to cut out the piece. And this is when it seemed like things were conspiring against me: my new scroll saw was broken… right out of the box. Womp, womp.
To make the situation a little stickier, I was about 5 hours away at this point from needing to head out of town to Raleigh, NC (recap here), and I had no other tools that would give me the right depth and shape. Disappointed but undeterred, I figured the next best thing would be to ask to borrow tools from the person I’d be visiting (thankfully, it was a trip to visit some DIY blogging friends just for fun — my pal Brittany just so happened to have a band saw in her garage). Of course, now I want one of those, too.
Of course, I’d never actually used a band saw before, so despite the general don’t-cut-your-fingers-off rule, the piece still came out a little wonky (mostly due to my non-templating sketch). I was able to shape it a little more with an orbital sander. I also carved the edges out a little more and did a final sanding with high grit sandpaper before stain.
Since the overall concept was to make this look like an inlay, I wanted to use glitter with a little more grit and sparkle: enter, German glass glitter. It’s really amazing stuff in person. To paint it into place, I relied on a small paint brush (tip: if the brush starts to fray a little, spin it as you’re dipping it into the glue to get the point fine again… check out my video to see a demo of that).
You can layer the glitter in, too: after giving it some time to dry, paint another bit of glue on top of the glitter and add more into the recessed areas. It will add depth!
I added extra-fine gold glitter around the edge and sealed the whole thing with a clear gloss spray, then drilled a hole through the top and threaded it so it could hang on the tree.
Caveat: before I sealed with a clear gloss, I actually tried to seal with an old polycrylic which unfortunately made the top and bottom tips look faded/cloudy once it dried. At first I thought I’d lean into the mistake by painting the back and sides with chalk paint and sanding to make it look rustic, but it looked really sad instead and totally detracted from the sparkle on the front. I wanted to get this done in time for the blog hop, so I just continued on with sealing again and adding the glitter around the edge. So, if you try a project like this, don’t make my mistake and you’ll get even better results!
You can also try other inlay methods, other glitter colors, fill in the center vs the outer rings with opposite hues, etc… the possibilities are pretty endless!
All in all, I think it’s going to make a nice addition to my white/gold/chrome/woodland Christmas decor theme this year (and the less I need to spend on ornaments, the more budget I have to make Christmas cocktails, hehe).
Want to try this for yourself? You can download my template here.
To be perfectly frank, I think the photos really don’t do the sparkle on this piece enough justice (in fact, I worried that it was looking too drab in photos). So, I made a video tutorial too (I’d love it if you subscribed if you haven’t already… with what I’ve learned in making this tutorial, there is more to come no doubt!).
As I mentioned, this DIY was part of a blog hop, with 25 other bloggers participating — aka, enough DIY Christmas ideas to keep you busy right up until the actual holiday (if you were so ambitiously inclined). So, check out a preview of the other projects and bloggers participating in the images below. You can also head over to the Remodelaholic post (who is hosting this hop) to check out other DIYers submitting their inspired ideas (on social media, you can look for #CreativeChristmas to find them all).
DIY Christmas Trees and Ornaments
Wintry Silver Dollar Store Christmas Tree Decor | Remodelaholic
Marbled Christmas Ornaments | Doodlecraft
Scrap Wood Inlay Ornaments | The Ugly Duckling House (you’re here!)
Woodburned Wood Slice Ornaments | Sisters What
Flocked Pine Cones | Practical and Pretty
Abstract Monogram Ornaments | Domicile37
Concrete Christmas Ornaments | The Palette Muse
Wood Slice Deer Ornaments | Our Crafty Mom
Vintage Gumball Machine Ornaments | Beth Watson Design Studio
Etched Glass Ornaments | Just Call Me Homegirl
Unicorn Inspired Christmas Tree | The DIY Mommy
Driftwood Reindeer Ornaments | Sustain My Craft Habit
DIY Christmas Gifts and Decor
Christmas Pine Hoop Wreath | This Mama’s Dance
Gingerbread Man Candles | Nourish and Nestle
Wire and Glass Chandelier | Home with Cupcakes and Crinoline
Christmas Scroll Wall Art | Grace In My Space
Lighted Wood Trees | Frazzled Joy
Crocheted Christmas Hat | Luz Patterns
Christmas Card Photo Display| Hertoolbelt
JOY Porch Sign | Ginger Snap Crafts
Folding Bar Cart Table | Everyday Party Magazine
Wood and Burlap Christmas Sign | Leap of Faith Crafting
Wood Block Snowman | Anika’s DIY Life
Holiday Candle Wrap | Dragonfly & Lily Pads
Christmas Pom Pom Pillow | Small Home Soul
Handlettered Wall Art | Smiling Colors
Those of us who did videos for this hop can be found in the playlist below, so those of you who would rather watch than read (or just want to blow off work for a few more minutes) have something, too! *If you’re having difficulty playing it, you can jump over to the playlist here.*
youtube
There you have it! Hope you’re getting into the holiday spirit just in time. Will you be working on any decor ideas this Christmas? This is going to be a very busy holiday season for me, so be sure to check back in for more DIYs (I’m going to give that epoxy inlay idea a shot, and a few more scrap ideas are just bubbling in the ol’ brain). Have a great weekend!
You'll Also Love
25 Great Gift Ideas for the Craft Beer Lover
DIY Wooden Couch Sleeve
It’s Pronounced “Damn Good Cookie̶...
Lots of Sneak Peeks: Riding the Buildathon Wave
.yuzo_related_post img{width:170px !important; height:170px !important;} .yuzo_related_post .relatedthumb{line-height:14px;background:#ffffff !important;color:#454747!important;} .yuzo_related_post .relatedthumb:hover{background:#ffffff !important; -webkit-transition: background 0.2s linear; -moz-transition: background 0.2s linear; -o-transition: background 0.2s linear; transition: background 0.2s linear;;color:#454747!important;} .yuzo_related_post .relatedthumb a{color:#102a3b!important;} .yuzo_related_post .relatedthumb a:hover{ color:#113f5e}!important;} .yuzo_related_post .relatedthumb:hover a{ color:#113f5e!important;} .yuzo_related_post .relatedthumb:hover .yuzo__text--title{ color:#113f5e!important;} .yuzo_related_post .yuzo_text, .yuzo_related_post .yuzo_views_post {color:#454747!important;} .yuzo_related_post .relatedthumb:hover .yuzo_text, .yuzo_related_post:hover .yuzo_views_post {color:#454747!important;} .yuzo_related_post .relatedthumb{ margin: 0px 6px 0px 6px; padding: 0px 0px 0px 0px; } jQuery(document).ready(function( $ ){ jQuery('.yuzo_related_post .yuzo_wraps').equalizer({ columns : '> div' }); });
The post Wood Inlay Ornament with German Glass Glitter appeared first on The Ugly Duckling House.
Website // Subscribe // Advertise // Twitter // Facebook // Google+
from Home Improvement https://www.uglyducklinghouse.com/wood-inlay-ornament-german-glass-glitter/
via http://www.rssmix.com/
0 notes
Text
Wood Inlay Ornament with German Glass Glitter
Hi friends! And hi to new friends visiting from the #CreativeChristmas Challenge hosted by Remodelaholic!
To those of you who don’t know me yet: welcome. Everyone else has already started drinking and saying really embarrassing things (about themselves, not you… we’re not a super judgmental bunch). To those of you who already know me: cheers. As always, you rock. And I was just kidding about the drinking thing (unless it’s football season and a Saturday, which yes to both).
Anyway, from time to time, I like to throw my hat in on a DIY challenge or two because nothing excuses buying more power tools like overcommitting to a deadline for fun (like the 2×4 summer challenge and boom: new coffee table!). This time around, the theme was making something for Christmas. I’ve already been finding inspiration for my color scheme this year in the form of acorns, snowflakes, owls, and other wintery-woodland things, so I figured: why not see if I can fill up the inevitable empty parts of my tree with what I have on hand, rather than buying a bunch of new ornaments? I also just happened upon a set of carving bits for my Dremel and have been itching to experiment with epoxy/inlays/resins, so I started playing around until this happened:
And as a fun little bonus: I actually made a video of it too!
Tools and Materials
affiliate links of items I recommend and use are listed in this post, which support this site at no cost to you… thanks!
scrap wood (I had 1″ x 4″ poplar)
scissors
printer paper
inkjet printer
acetone or nail polish remover
Dremel 200
Dremel engraving/carving kit
band saw or scroll saw
random orbit sander
wood stain (I used Minwax Ipswich Pine and washed while it was still wet with Early American… I’ll have to show you guys more about this as I’ve done it a number of times to get the colors I like)
Mod Podge
small detail paint brush
Miss Mustard Seed’s German Glass Glitter in Silver Tiara
Martha Stewart Crafts extra fine glitter in Smoky Quartz
clear spray sealer (gloss)
small drill bit
thread (I used stuff from my cross stitch stash)
First things first: print out the image (mine is available for download near the end of the post) and cut it out. I used a scrap piece of poplar that was bound for the burn pile, so I wasn’t really expecting perfection (in fact as you can see, I first used a different image that was WAY too intricate for a first-time experiment and then decided on the final design).
To transfer the ink from the printer paper, I swabbed the back with an acetone nail polish remover. As you can see, the image didn’t transfer perfectly, but it was good enough (I got the idea from my buddy Brad’s video here — then went with the option that wouldn’t require changing out of my pajama pants or going into the cold garage that morning).
Next, I took out my Dremel and a new engraving/carving set I’d recently purchased for another inlay project. In my opinion, crafting is a good intro before graduating to larger pieces, so I figured this would help me practice with diamond tips, how to control the carve, etc. A good method is to create the hard outline first, then carve out the middle, and continue to make the inlay deeper and deeper until it’s got enough depth to hold the inlay material (glitter, epoxy I assume, whatever).
Next, I sketched out the overall shape (spoiler: it wasn’t at all even, so I highly recommend using the template) and then went to cut out the piece. And this is when it seemed like things were conspiring against me: my new scroll saw was broken… right out of the box. Womp, womp.
To make the situation a little stickier, I was about 5 hours away at this point from needing to head out of town to Raleigh, NC (recap here), and I had no other tools that would give me the right depth and shape. Disappointed but undeterred, I figured the next best thing would be to ask to borrow tools from the person I’d be visiting (thankfully, it was a trip to visit some DIY blogging friends just for fun — my pal Brittany just so happened to have a band saw in her garage). Of course, now I want one of those, too.
Of course, I’d never actually used a band saw before, so despite the general don’t-cut-your-fingers-off rule, the piece still came out a little wonky (mostly due to my non-templating sketch). I was able to shape it a little more with an orbital sander. I also carved the edges out a little more and did a final sanding with high grit sandpaper before stain.
Since the overall concept was to make this look like an inlay, I wanted to use glitter with a little more grit and sparkle: enter, German glass glitter. It’s really amazing stuff in person. To paint it into place, I relied on a small paint brush (tip: if the brush starts to fray a little, spin it as you’re dipping it into the glue to get the point fine again… check out my video to see a demo of that).
You can layer the glitter in, too: after giving it some time to dry, paint another bit of glue on top of the glitter and add more into the recessed areas. It will add depth!
I added extra-fine gold glitter around the edge and sealed the whole thing with a clear gloss spray, then drilled a hole through the top and threaded it so it could hang on the tree.
Caveat: before I sealed with a clear gloss, I actually tried to seal with an old polycrylic which unfortunately made the top and bottom tips look faded/cloudy once it dried. At first I thought I’d lean into the mistake by painting the back and sides with chalk paint and sanding to make it look rustic, but it looked really sad instead and totally detracted from the sparkle on the front. I wanted to get this done in time for the blog hop, so I just continued on with sealing again and adding the glitter around the edge. So, if you try a project like this, don’t make my mistake and you’ll get even better results!
You can also try other inlay methods, other glitter colors, fill in the center vs the outer rings with opposite hues, etc… the possibilities are pretty endless!
All in all, I think it’s going to make a nice addition to my white/gold/chrome/woodland Christmas decor theme this year (and the less I need to spend on ornaments, the more budget I have to make Christmas cocktails, hehe).
Want to try this for yourself? You can download my template here.
To be perfectly frank, I think the photos really don’t do the sparkle on this piece enough justice (in fact, I worried that it was looking too drab in photos). So, I made a video tutorial too (I’d love it if you subscribed if you haven’t already… with what I’ve learned in making this tutorial, there is more to come no doubt!).
As I mentioned, this DIY was part of a blog hop, with 25 other bloggers participating — aka, enough DIY Christmas ideas to keep you busy right up until the actual holiday (if you were so ambitiously inclined). So, check out a preview of the other projects and bloggers participating in the images below. You can also head over to the Remodelaholic post (who is hosting this hop) to check out other DIYers submitting their inspired ideas (on social media, you can look for #CreativeChristmas to find them all).
DIY Christmas Trees and Ornaments
Wintry Silver Dollar Store Christmas Tree Decor | Remodelaholic
Marbled Christmas Ornaments | Doodlecraft
Scrap Wood Inlay Ornaments | The Ugly Duckling House (you’re here!)
Woodburned Wood Slice Ornaments | Sisters What
Flocked Pine Cones | Practical and Pretty
Abstract Monogram Ornaments | Domicile37
Concrete Christmas Ornaments | The Palette Muse
Wood Slice Deer Ornaments | Our Crafty Mom
Vintage Gumball Machine Ornaments | Beth Watson Design Studio
Etched Glass Ornaments | Just Call Me Homegirl
Unicorn Inspired Christmas Tree | The DIY Mommy
Driftwood Reindeer Ornaments | Sustain My Craft Habit
DIY Christmas Gifts and Decor
Christmas Pine Hoop Wreath | This Mama’s Dance
Gingerbread Man Candles | Nourish and Nestle
Wire and Glass Chandelier | Home with Cupcakes and Crinoline
Christmas Scroll Wall Art | Grace In My Space
Lighted Wood Trees | Frazzled Joy
Crocheted Christmas Hat | Luz Patterns
Christmas Card Photo Display| Hertoolbelt
JOY Porch Sign | Ginger Snap Crafts
Folding Bar Cart Table | Everyday Party Magazine
Wood and Burlap Christmas Sign | Leap of Faith Crafting
Wood Block Snowman | Anika’s DIY Life
Holiday Candle Wrap | Dragonfly & Lily Pads
Christmas Pom Pom Pillow | Small Home Soul
Handlettered Wall Art | Smiling Colors
Those of us who did videos for this hop can be found in the playlist below, so those of you who would rather watch than read (or just want to blow off work for a few more minutes) have something, too! *If you’re having difficulty playing it, you can jump over to the playlist here.*
youtube
There you have it! Hope you’re getting into the holiday spirit just in time. Will you be working on any decor ideas this Christmas? This is going to be a very busy holiday season for me, so be sure to check back in for more DIYs (I’m going to give that epoxy inlay idea a shot, and a few more scrap ideas are just bubbling in the ol’ brain). Have a great weekend!
You'll Also Love
25 Great Gift Ideas for the Craft Beer Lover
DIY Wooden Couch Sleeve
It’s Pronounced “Damn Good Cookie̶...
Lots of Sneak Peeks: Riding the Buildathon Wave
.yuzo_related_post img{width:170px !important; height:170px !important;} .yuzo_related_post .relatedthumb{line-height:14px;background:#ffffff !important;color:#454747!important;} .yuzo_related_post .relatedthumb:hover{background:#ffffff !important; -webkit-transition: background 0.2s linear; -moz-transition: background 0.2s linear; -o-transition: background 0.2s linear; transition: background 0.2s linear;;color:#454747!important;} .yuzo_related_post .relatedthumb a{color:#102a3b!important;} .yuzo_related_post .relatedthumb a:hover{ color:#113f5e}!important;} .yuzo_related_post .relatedthumb:hover a{ color:#113f5e!important;} .yuzo_related_post .relatedthumb:hover .yuzo__text--title{ color:#113f5e!important;} .yuzo_related_post .yuzo_text, .yuzo_related_post .yuzo_views_post {color:#454747!important;} .yuzo_related_post .relatedthumb:hover .yuzo_text, .yuzo_related_post:hover .yuzo_views_post {color:#454747!important;} .yuzo_related_post .relatedthumb{ margin: 0px 6px 0px 6px; padding: 0px 0px 0px 0px; } jQuery(document).ready(function( $ ){ jQuery('.yuzo_related_post .yuzo_wraps').equalizer({ columns : '> div' }); });
The post Wood Inlay Ornament with German Glass Glitter appeared first on The Ugly Duckling House.
Website // Subscribe // Advertise // Twitter // Facebook // Google+
from The Ugly Duckling House https://www.uglyducklinghouse.com/wood-inlay-ornament-german-glass-glitter/
0 notes
Text
Wood Inlay Ornament with German Glass Glitter
Hi friends! And hi to new friends visiting from the #CreativeChristmas Challenge hosted by Remodelaholic!
youtube
To those of you who don’t know me yet: welcome. Everyone else has already started drinking and saying really embarrassing things (about themselves, not you… we’re not a super judgmental bunch). To those of you who already know me: cheers. As always, you rock. And I was just kidding about the drinking thing (unless it’s football season and a Saturday, which yes to both).
Anyway, from time to time, I like to throw my hat in on a DIY challenge or two because nothing excuses buying more power tools like overcommitting to a deadline for fun (like the 2×4 summer challenge and boom: new coffee table!). This time around, the theme was making something for Christmas. I’ve already been finding inspiration for my color scheme this year in the form of acorns, snowflakes, owls, and other wintery-woodland things, so I figured: why not see if I can fill up the inevitable empty parts of my tree with what I have on hand, rather than buying a bunch of new ornaments? I also just happened upon a set of carving bits for my Dremel and have been itching to experiment with epoxy/inlays/resins, so I started playing around until this happened:
And as a fun little bonus: I actually made a video of it too!
Tools and Materials
affiliate links of items I recommend and use are listed in this post, which support this site at no cost to you… thanks!
scrap wood (I had 1″ x 4″ poplar)
scissors
printer paper
inkjet printer
acetone or nail polish remover
Dremel 200
Dremel engraving/carving kit
band saw or scroll saw
random orbit sander
wood stain (I used Minwax Ipswich Pine and washed while it was still wet with Early American… I’ll have to show you guys more about this as I’ve done it a number of times to get the colors I like)
Mod Podge
small detail paint brush
Miss Mustard Seed’s German Glass Glitter in Silver Tiara
Martha Stewart Crafts extra fine glitter in Smoky Quartz
clear spray sealer (gloss)
small drill bit
thread (I used stuff from my cross stitch stash)
First things first: print out the image (mine is available for download near the end of the post) and cut it out. I used a scrap piece of poplar that was bound for the burn pile, so I wasn’t really expecting perfection (in fact as you can see, I first used a different image that was WAY too intricate for a first-time experiment and then decided on the final design).
To transfer the ink from the printer paper, I swabbed the back with an acetone nail polish remover. As you can see, the image didn’t transfer perfectly, but it was good enough (I got the idea from my buddy Brad’s video here — then went with the option that wouldn’t require changing out of my pajama pants or going into the cold garage that morning).
Next, I took out my Dremel and a new engraving/carving set I’d recently purchased for another inlay project. In my opinion, crafting is a good intro before graduating to larger pieces, so I figured this would help me practice with diamond tips, how to control the carve, etc. A good method is to create the hard outline first, then carve out the middle, and continue to make the inlay deeper and deeper until it’s got enough depth to hold the inlay material (glitter, epoxy I assume, whatever).
Next, I sketched out the overall shape (spoiler: it wasn’t at all even, so I highly recommend using the template) and then went to cut out the piece. And this is when it seemed like things were conspiring against me: my new scroll saw was broken… right out of the box. Womp, womp.
To make the situation a little stickier, I was about 5 hours away at this point from needing to head out of town to Raleigh, NC (recap here), and I had no other tools that would give me the right depth and shape. Disappointed but undeterred, I figured the next best thing would be to ask to borrow tools from the person I’d be visiting (thankfully, it was a trip to visit some DIY blogging friends just for fun — my pal Brittany just so happened to have a band saw in her garage). Of course, now I want one of those, too.
Of course, I’d never actually used a band saw before, so despite the general don’t-cut-your-fingers-off rule, the piece still came out a little wonky (mostly due to my non-templating sketch). I was able to shape it a little more with an orbital sander. I also carved the edges out a little more and did a final sanding with high grit sandpaper before stain.
Since the overall concept was to make this look like an inlay, I wanted to use glitter with a little more grit and sparkle: enter, German glass glitter. It’s really amazing stuff in person. To paint it into place, I relied on a small paint brush (tip: if the brush starts to fray a little, spin it as you’re dipping it into the glue to get the point fine again… check out my video to see a demo of that).
You can layer the glitter in, too: after giving it some time to dry, paint another bit of glue on top of the glitter and add more into the recessed areas. It will add depth!
I added extra-fine gold glitter around the edge and sealed the whole thing with a clear gloss spray, then drilled a hole through the top and threaded it so it could hang on the tree.
Caveat: before I sealed with a clear gloss, I actually tried to seal with an old polycrylic which unfortunately made the top and bottom tips look faded/cloudy once it dried. At first I thought I’d lean into the mistake by painting the back and sides with chalk paint and sanding to make it look rustic, but it looked really sad instead and totally detracted from the sparkle on the front. I wanted to get this done in time for the blog hop, so I just continued on with sealing again and adding the glitter around the edge. So, if you try a project like this, don’t make my mistake and you’ll get even better results!
You can also try other inlay methods, other glitter colors, fill in the center vs the outer rings with opposite hues, etc… the possibilities are pretty endless!
All in all, I think it’s going to make a nice addition to my white/gold/chrome/woodland Christmas decor theme this year (and the less I need to spend on ornaments, the more budget I have to make Christmas cocktails, hehe).
Want to try this for yourself? You can download my template here.
To be perfectly frank, I think the photos really don’t do the sparkle on this piece enough justice (in fact, I worried that it was looking too drab in photos). So, I made a video tutorial too (I’d love it if you subscribed if you haven’t already… with what I’ve learned in making this tutorial, there is more to come no doubt!).
youtube
As I mentioned, this DIY was part of a blog hop, with 25 other bloggers participating — aka, enough DIY Christmas ideas to keep you busy right up until the actual holiday (if you were so ambitiously inclined). So, check out a preview of the other projects and bloggers participating in the images below. You can also head over to the Remodelaholic post (who is hosting this hop) to check out other DIYers submitting their inspired ideas (on social media, you can look for #CreativeChristmas to find them all).
DIY Christmas Trees and Ornaments
Wintry Silver Dollar Store Christmas Tree Decor | Remodelaholic
Marbled Christmas Ornaments | Doodlecraft
Scrap Wood Inlay Ornaments | The Ugly Duckling House (you’re here!)
Woodburned Wood Slice Ornaments | Sisters What
Flocked Pine Cones | Practical and Pretty
Abstract Monogram Ornaments | Domicile37
Concrete Christmas Ornaments | The Palette Muse
Wood Slice Deer Ornaments | Our Crafty Mom
Vintage Gumball Machine Ornaments | Beth Watson Design Studio
Etched Glass Ornaments | Just Call Me Homegirl
Unicorn Inspired Christmas Tree | The DIY Mommy
Driftwood Reindeer Ornaments | Sustain My Craft Habit
DIY Christmas Gifts and Decor
Christmas Pine Hoop Wreath | This Mama’s Dance
Gingerbread Man Candles | Nourish and Nestle
Wire and Glass Chandelier | Home with Cupcakes and Crinoline
Christmas Scroll Wall Art | Grace In My Space
Lighted Wood Trees | Frazzled Joy
Crocheted Christmas Hat | Luz Patterns
Christmas Card Photo Display| Hertoolbelt
JOY Porch Sign | Ginger Snap Crafts
Folding Bar Cart Table | Everyday Party Magazine
Wood and Burlap Christmas Sign | Leap of Faith Crafting
Wood Block Snowman | Anika’s DIY Life
Holiday Candle Wrap | Dragonfly & Lily Pads
Christmas Pom Pom Pillow | Small Home Soul
Handlettered Wall Art | Smiling Colors
Those of us who did videos for this hop can be found in the playlist below, so those of you who would rather watch than read (or just want to blow off work for a few more minutes) have something, too! *If you’re having difficulty playing it, you can jump over to the playlist here.*
youtube
There you have it! Hope you’re getting into the holiday spirit just in time. Will you be working on any decor ideas this Christmas? This is going to be a very busy holiday season for me, so be sure to check back in for more DIYs (I’m going to give that epoxy inlay idea a shot, and a few more scrap ideas are just bubbling in the ol’ brain). Have a great weekend!
You'll Also Love
25 Great Gift Ideas for the Craft Beer Lover
DIY Wooden Couch Sleeve
It’s Pronounced “Damn Good Cookie̶...
Lots of Sneak Peeks: Riding the Buildathon Wave
.yuzo_related_post img{width:170px !important; height:170px !important;} .yuzo_related_post .relatedthumb{line-height:14px;background:#ffffff !important;color:#454747!important;} .yuzo_related_post .relatedthumb:hover{background:#ffffff !important; -webkit-transition: background 0.2s linear; -moz-transition: background 0.2s linear; -o-transition: background 0.2s linear; transition: background 0.2s linear;;color:#454747!important;} .yuzo_related_post .relatedthumb a{color:#102a3b!important;} .yuzo_related_post .relatedthumb a:hover{ color:#113f5e}!important;} .yuzo_related_post .relatedthumb:hover a{ color:#113f5e!important;} .yuzo_related_post .relatedthumb:hover .yuzo__text--title{ color:#113f5e!important;} .yuzo_related_post .yuzo_text, .yuzo_related_post .yuzo_views_post {color:#454747!important;} .yuzo_related_post .relatedthumb:hover .yuzo_text, .yuzo_related_post:hover .yuzo_views_post {color:#454747!important;} .yuzo_related_post .relatedthumb{ margin: 0px 6px 0px 6px; padding: 0px 0px 0px 0px; } jQuery(document).ready(function( $ ){ jQuery('.yuzo_related_post .yuzo_wraps').equalizer({ columns : '> div' }); });
The post Wood Inlay Ornament with German Glass Glitter appeared first on The Ugly Duckling House.
Website // Subscribe // Advertise // Twitter // Facebook // Google+
Wood Inlay Ornament with German Glass Glitter published first on http://ift.tt/2qxZz2j
0 notes
Photo
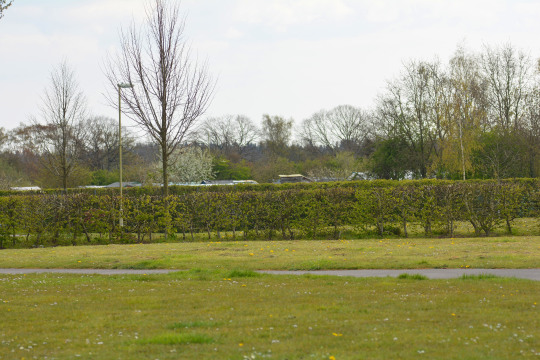
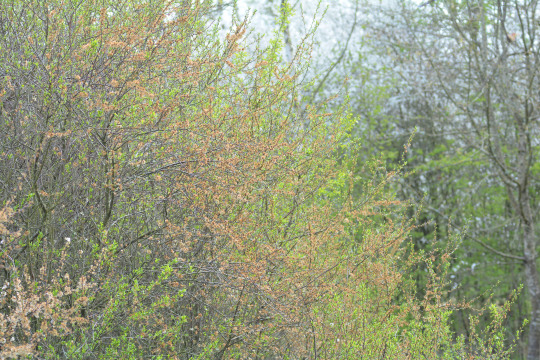
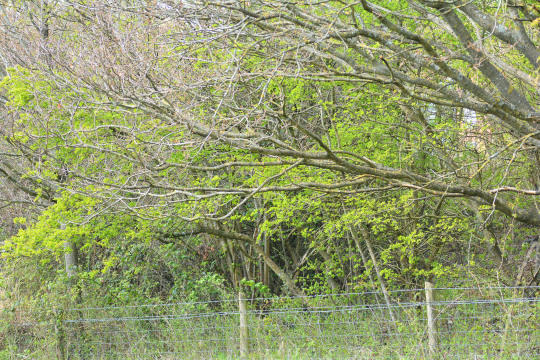


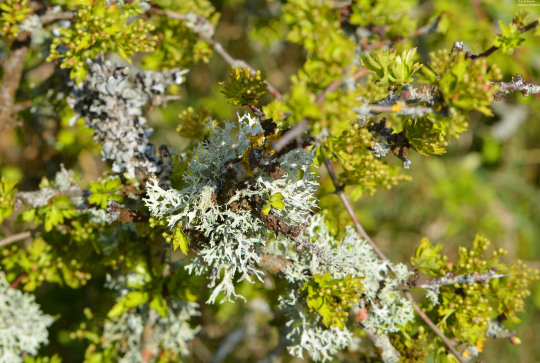

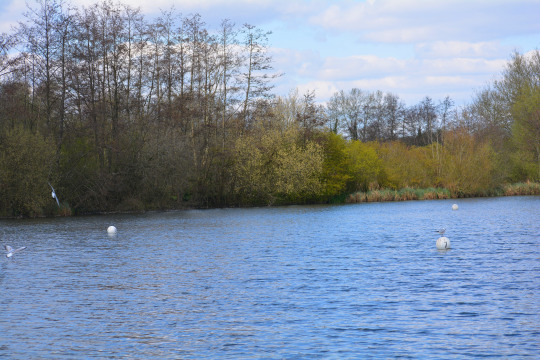
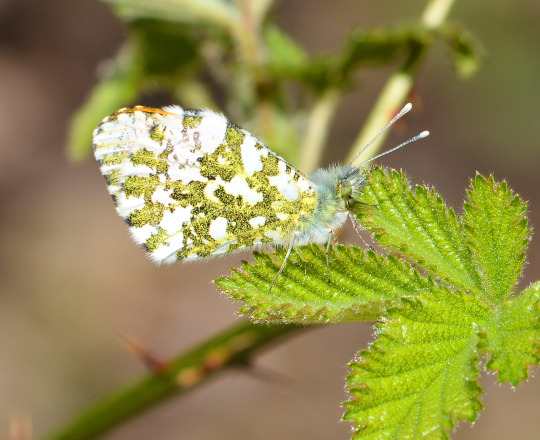
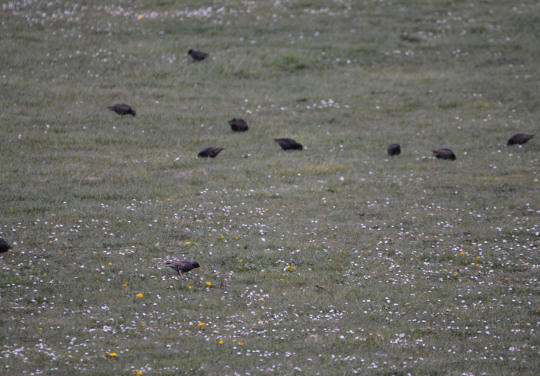
16/04/2021-Orange Tip and more at Lakeside and photos at home: Five pictures in this photoset are different to those I tweeted tonight which are the first three, seventh and tenth in this photoset
I took the first three pictures in this photoset as I went on my last lunch time Lakeside walk before a week’s annual leave next week, replacing what would have been our Pembrokeshire holiday which due to the pandemic we have now postponed until next year and we are hoping to do some special day trips with restrictions eased enough to allow, I am hoping the week can be as good as recent patches of annual leave/bank holidays, my week off in January and the similar week off instead of a postponed Welsh holiday in June last year when everything had unlocked enough to allow some further afield day trips including to surrounding counties.
I wanted another look at the snake’s-head fritillaries as I may not necessarily come to Lakeside during the week off and may not be walking here until 26th April, so I think these smashing flowers may have ended or thereabouts by that point. So I did this by scouting out groups of them I had not yet seen in my best ever year of them here this year a flower I am loving so much here over the last few years as I walked to the far east of the southern fenced off nature reserve area and walked in a path that takes you right along the fence from the back of trees and along. Here I stumbled across indeed a group I had not seen yet this year, including the one in the fourth picture in this photoset it was beautiful to take lots of them in but this as a single flower stood out most to me I had a lot of great moments taking in single flowers today including daisy and dandelion. The fritillaries are such succulent looking flowers. I then indulged as the sun was in and out a little again but shining very brightly when out in some landscapes using this as a great vantage point across the nature reserve and taking in some beautiful sweeping views from this area I took the fifth picture in this photoset of a fantastic green looking view a big theme of my week. The green continued as I loved seeing some more lichen in this area this year I enjoyed it in the winter especially one day which I took the sixth picture in this photoset of today. I then took the seventh picture in this photoset of one of the group of snake’s-head fritillaries I discovered towards the end of last week. I took this with my big lens, the closeup one before was with my macro. This was not before I tried a shot I wanted to and perhaps rarely for me I suppose had in my head to try out with the snake’s-head fritillaries with my general lens, a landscape shot with the beautiful flowers in the foreground and I sat on the now quite dry floor you know its spring when that happens as this can be one of the wettest parts of the country park in winter with the mud and bog. I was quite pleased with how this came out and I tweeted on Dans_Pictures the photo I took.
It was another pre-planned photo as I moved on out the gate and towards beach lake, the eighth picture in this photoset. This is because as I said I’m taking part on a Facebook group I’m in, in a themed Facebook challenge this week where each day its a different letter to post photos on the theme of and over the week it spells out April. Having managed to think of an A, P, R and I some more challenging than others I knew L was the easiest letter for me as my day would involve a walk at Lakeside. I went very literal for that and wanted a picture of one of the lakes today, which I have managed at various points all week too, and I got it with this one. This was a beautiful scene and I loved taking in the water birds as I walked through the lake area and over the bridge again, such as Lesser Black-backed Gulls with one of them having a spat with one of the many Black-headed Gulls as things get a bit territorial which is interesting and two of the Great Crested Grebes. As I tweeted a picture of I got very close to a Greylag Goose as I got over the bridge a brilliant photo opportunity.
I then decided I wanted to go through a hidden little area in the trees where there is a high seat to take me into the woods and along the woodland path as planned for my route today. As the drumming of a Great Spotted Woodpecker which was fantastic to hear at Lakeside again after a couple of weeks ago was enticing me into the woodland, I was wondering whether if I finished work early enough I would do an evening walk tonight. One of my key targets for the last couple of weeks at Lakeside has been an Orange Tip butterfly the all important spring species for me so an evening walk would be one last chance before going on leave to try and see this one of my favourite butterflies here. I hadn’t seen any butterflies today by that point as the sun just started to settle on being out for a long period. I was thrilled to see one I fully expected to in the woods a Speckled Wood fly back into the nice little area with a bench where I had seen my first Comma of the year near on my last patch of annual leave. A nice memory of packed minutes on last Friday’s walk where I saw my first Speckled Woods of the year. As I watched it I was over the moon to see a white butterfly and instantly I knew it was a male Orange Tip and then I saw it fly around a bit battling with the Speckled Wood a little which I always love seeing with butterflies. I made out its ice lolly tip to pure white majority wings and was so happy to see this butterfly. I said when I saw my first of 2018 that they make me feel in love with life and I could hardly contain my excitement for this moment in 2021 which is one of my real favourite moments in any spring seeing my first Orange Tip of the year. This butterfly took my year list to eight competing well with how many I had seen on this date in 2019 and 2020 my top two butterfly year list totals I am pleased with this. I spent a fantastic few minutes enjoying this butterfly and didn’t feel the need to come back tonight as I had achieved my latest wildlife goal on lunch time walks.
The Orange Tip then landed and closed its wings, and I with my big lens on at this point took a safety shot. But then I was stunned as I managed to get my macro lens on and edge gently closer to it and take a picture with it! An Orange Tip is a butterfly that so rarely stops so any kind of picture of one and at any stage in their year is brilliant. But to get one with my macro where you do have to get quite close to it and it has to stay still for a long time at the start of the season where normally not much lands with temperatures moderate so not as many warm sun basking opportunities so they can be flighty. Obviously it could have been newly emerged which would account for more stillness too which is amazing if so. I felt an interesting rush of adrenaline as I limbered up to the nettle it had settled on and took the picture with my macro which showed how I was so intoxicated by wildlife it really made me stupidly happy as so many moments have this year for wildlife.
What I hadn’t realised until recording the year tick and checking my past lists is today is ten years to the day since I first ever saw an Orange Tip it was along the River Itchen which felt fantastic. What a way to celebrate this day. On Monday I made a big thing about it being ten years since I saw my first Cuckoo and I had overlooked for years the magnitude of seeing both my first Cuckoo and Orange Tip ever in that short space of time over that glorious Easter holidays when I was still at school where so much else happened for me that fortnight as both became one of my favourite species being added to those lists in the years not so long after. Orange Tip is a butterfly I find so immaculate and so beautiful with the males and their stunning bright colour scheme which gives them the name and the female’s intricate and bold markings. This species sybolises the hope and passion of a blooming spring and they just provide you with a moment of splendour every time you are lucky enough to see one. They are one of nature’s finest works of art and one of Britain’s best species and key riverine species. I took these butterflies to my heart very quickly over the last decade where I have been so lucky to be able to see them so much and it is something I look forward to every year the Orange Tips coming out. I walked along to the monks brook halt steam railway platform entrance and along the northern path which I would take home I spotted a Brimstone flying and also more white butterflies I didn’t get to see what they were but they could have been female Orange Tips along the part of the park I learnt last year that they are here and something that can be seen. This was the first time ever that Lakeside was the place I ticked Orange Tip as we snuck a female in the river Itchen and males and females at Stoke Park Wood before the first Lakeside one on lockdown daily exercise walks last year. Of the eight butterflies I’ve seen this year six have been for the first time at Lakeside now and I am so proud once more of how I have used this wonderful local country park to get my butterfly season really well underway with a variety of species. Lakeside did dominate the location field of my butterfly year list last year with working from home and everything there are some species I tend to see at Lakeside first anyway as I really awoke to the fact of knowing there was so much on my doorstep and I’m glad I’ve done it again so far.
On the way home I took a third planned picture which I tweeted as I photographed a patch of blossom and greenery just outside the park as it goes towards the bridge to the new development and road which is a nicely shaped bush and I noticed it shine in the dark on my Wednesday evening walk. I remember photographing this one last year too on a lunch time walk and its interesting its flaired up nicely again around this time of year.
At home this afternoon I took as I tweeted a nice range of landscape and sky out the window and wildlife photos, including Rex the Feral Pigeon we have nicknamed who as well as his partner Violet was around a lot today which was great. I was also transfixed just before sunset by a large group of Starlings on the green out the front among the daisies and dandelions which looked really pretty as I processed my photos from today I just loved watching them. I took the tenth and final picture in this photoset of these. I hope you all have a nice weekend.
Wildlife Sightings Summary: My first of one of my favourite butterflies the Orange Tip this year, one of my favourite birds the Great Crested Grebe, Brimstone, Speckled Wood, Mallard, Moorhen, Greylag Goose, Lesser Black-backed Gull, Black-headed Gull, Magpie, Jackdaw, Starlings with a brilliant view of some with food at times too along the northern path at Lakeside at lunch time too likely the same group as on the green, House Sparrow, Great Tit well at Lakeside in the hidden little bit, Woodpigeon, Collared Dove, Feral Pigeon, Robin and I heard both of the woodpeckers two of my favourite birds the Green and Great Spotted Woodpecker.
#orange tip#anniversary#cuckoo#lakeside#river itchen#snake's-head fritillary#speckled wood#hampshire#england#uk#europe#world#nature#photography#power#powerful#lovely#sunny#spring#sunny day#sun#woodpigeon#jackdaw#feral pigeon#rex#starling#starlings#focus#lake#photos
1 note
·
View note
Last Seen Blogs

unized-3
all this attention's intentionally cruel!

trashhr
shouldve made this blog in 2015 smh

alfatarian
The World of Digitalization

halemari
If there is trouble, i shall find it!

thwiddleston
—yours