#i used that for some help dimensioning and I think they automatically add in like connectors and stuff
Explore tagged Tumblr posts
Visit Tumblr Blog
Explore Tumblr blogs with no restrictions, modern design and the best experience.
Last Seen Tumblr Blogs


Fun Fact
China blocked Tumblr because of pornography and censorship problems in 2013.
Text


im a CAD expert
I'm tasked with designing our little internal 80-20 shelving unit that goes inside our oven and I've never used this stuff before or designed or built basically anything so this is exciting, if a little daunting. but there's an online little CAD program by the 80-20 company itself that can help u draft up your concept. and mine is basically a box frame with some support bits for like, drawer slides... and probably cable management, somehow.
#literally just now only today stumbled thru the concept of 'assembly'#listen in my defense i took a 2D cad class when i was in a fake program (non-accredited) and haven't had a 3D cad class#like it's not super terribly difficult but i am searching things all of the time#im a engieneeerr#OH YEAH also this is onshape not the 8020 designer#i used that for some help dimensioning and I think they automatically add in like connectors and stuff
5 notes
·
View notes
Note
I hope you don’t mind asking but you consistently have some of the best 911 gifs. How are your gifs so sharp? And the coloring so good? Could you do a little tutorial about your giffing?
omg thank you!!! this gets pretty long so i’m putting the tutorial under the cut
so firstly, i use kmplayer to screencap. the most important part though is the quality of the episode you have. you always want to work with 1080p, and my file is around 2gb. that is how my gifs always turn out ‘the best’ as you say 🤗 of course, colouring and sharpening help a lot, but if you don’t have a good download, your gifs can be helped but won’t be the best possible.
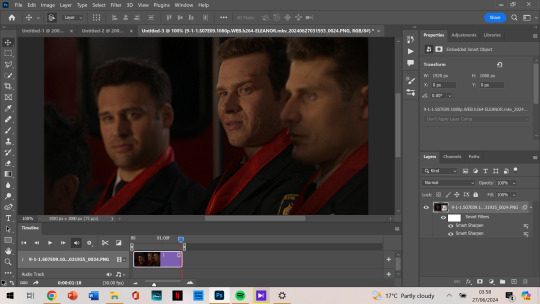
this is the gif i’m making having only been cropped and sharpened. i’m gonna show you how i make a gif and my colouring process (which, for this one, is admittedly pretty short and simple compared to what i usually do.) as you can see, it’s dark and pixelated and doesn’t look that appealing, no matter how handsome they both are.

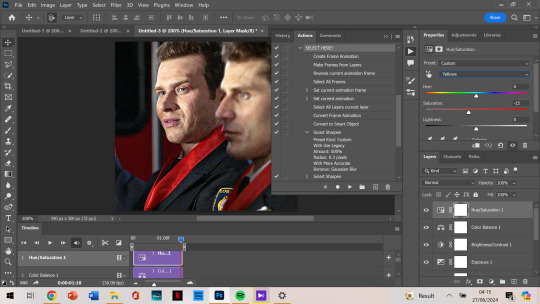
also, i forgot to screenshot this before i started but the screenshot below shows the action i use to basically get all my screencaps organised to make one gif. this is after you’ve got the screencaps into photoshop in a stack.
i can’t find the original post with the action, and i’m not sure how to share it on this post… but if it’s not that important in the scheme of this post, there are many other posts out there with actions you’ll be able to easily find and download.
anyways. so this is gonna go through the process of making a gif assuming you’ve done the process of importing the frames and sharpening. (i would normally cut out my taskbar but there are so many screenshots, it would take foreverrrr)
the next step would be cropping. this is the original:
and i’m doing a 540 x 500 gif. i like mine to be bigger so i can only get the person/people i want in the gif (sorry eddie) but sometimes if i want that it’ll be smaller, usually 540 x 400.

anyways, i crop from the edge and make it a little smaller so i don’t get the white border around it. and then i move the gif away from the top and right edge of the gif just by 3-5 pixels. which i already did here and then zoomed in:
next, image size. i honestly didn’t know about cropping it and then using image size for a few months when i started giffing (i don’t even know what i did back then not knowing that.)
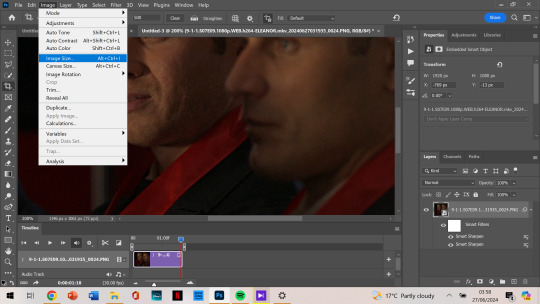
then as you can see, it’s 540 x 500. if you’ve cropped it to the size you want beforehand, it’ll be automatically those dimensions.

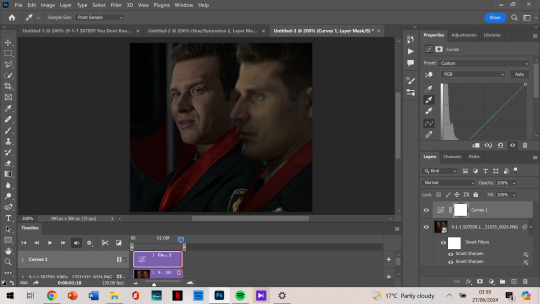
next, we’re finally starting on colouring. i always tend to start with curves and use the middle brush on the left. the top one you use to make it darker, and the bottom you find the whitest point on the gif to make it a lot brighter. but i find the middle one colour corrects too, so it’s not too bright or dark, and is less yellow or whatever colours you don’t want.
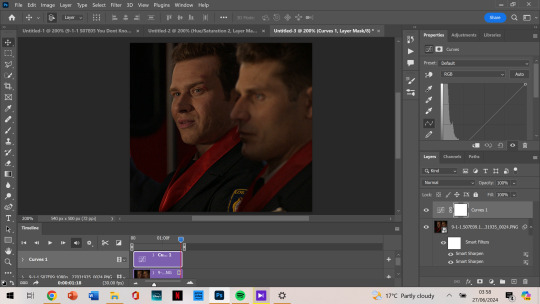
it depends on where you click to get this result, i’m not sure how to explain what i do but i just click all over and try to get the yellows off and the skin colour to look generally the same as what they have. most of the time, if i get this accurate enough, the rest of the colouring process is just to brighten up the gif.
so, then after i got my desired result, we’re brightening it up because you can’t really see them all that well. i use brightness/contrast but i tend to use exposure the most.
as you can see, i am at +2.78 exposure which is crazy high (imo). but as that and the curves layer did a lot of the work for me, i mostly have the colouring i want.
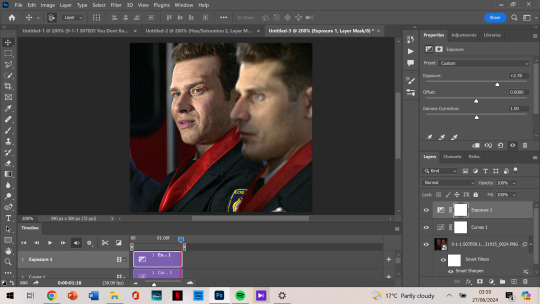
although i think it could be a little lighter, so i add a new layer of brightness and contrast this time. i don’t brighten it all that much after that. i want to make it so that either one of their faces aren’t shining, and with too much of the exposure, it can make that happen.

next, i notice that tommy is kinda green/yellow, so i want to fix that up and make him more natural. i go to colour balance for that this time. most of the time i go to selective colour -> yellow or red, depending on how much i want to change. with selective colour, it gives you a few options in shades: cyan, magenta, yellow and black to alter, all for your specific colour.
meanwhile, colour balance changes the whole thing. since i wouldn’t mind that in this instance, i just go with colour balance.

tommy is looking less yellow and green, but still, he’s not where i want him to be. (plus oliver’s scruff area is naturally ginger so it shows up as yellow, and i want to decrease that a little.) so i go to hue/saturation, choose yellow, and decrease it a little more.
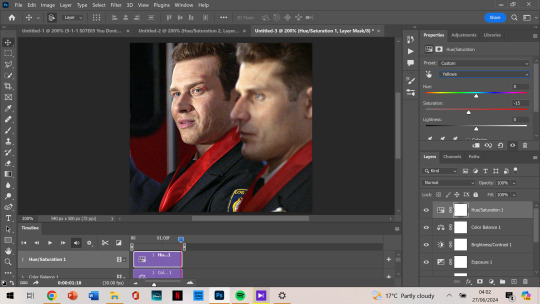
now, after this, i messed around with selective colour as i mentioned earlier and with the colour yellow and red specifically. but after comparing where i was at before, vs with those selective colour layers, i just liked that previous one more. so my last layer is the hue/saturation one. and i’m done colouring!
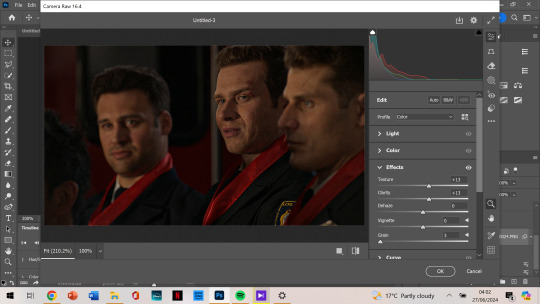
next, i go to my trusty camera raw filter to make them stand out more and be a little crispier.
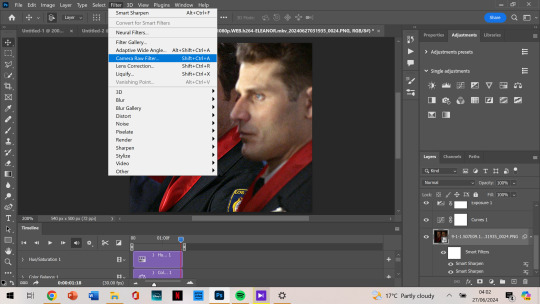
i tend to stick to + 10 up to 30, somewhere in that range. sometimes the texture and clarity match, sometimes they don’t. it’s all up to you, but for this one, i knew it would end up a little too crispy so i didn’t go too high.
i also like to add some grain so that it’s less pixelated (it admittedly annoys me a lot when it’s got those visible square pixels all over.) i never go higher than 5 in grain, it does the job well.
after that, i’m finished with my gif!

next, we want to export the gif.
as you can see, the gif is less than 10mb, is set to loop for forever, and is made with selective diffusion. admittedly, i don’t think about that setting that much, but sometimes if it’s a lower quality gif, i’ll change it to selective/adaptive pattern instead. but that’s not relevant here.
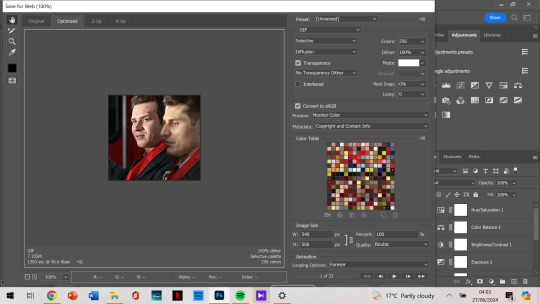
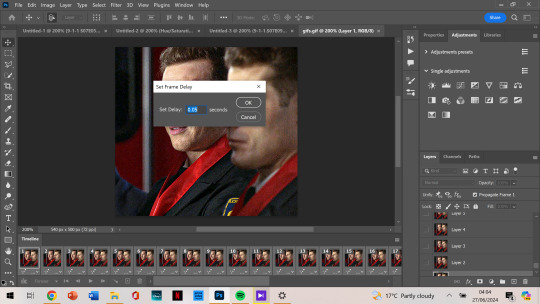
after that, we open our gif that we just made into photoshop again. this time we want to select all frames:
and change the frame delay so it’s not as jumpy. for some reason, it automatically changes so that they alternate in frames from 0.03 to 0.07, but i want them all to be 0.05.
now that’s the last step and you just export the gif again!
this is the final gif!!!
i hope this was easy to understand! thank you for the kind words, and for asking me about my process because i’ve honestly always wanted to make a tutorial. if you have any more questions, or want to see my process colouring something more difficult to work with, let me know! 🫶
93 notes
·
View notes
Note
Hey, are you open to giving a tutorial on how you make gifs?
i don't know why one would ask me because
my gifs suck and
i'm not great at explaining but lemme try
also.. sometimes i check other people's tutorials and i'm like.. either they do something stupid or it's me.. so it's probably me..
i tried to bold the most important things to get you through the rambling quicker.
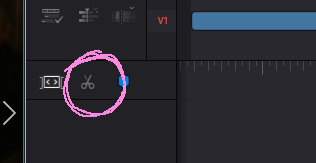
i personally use davinci resolve to cut clips (it's free!)

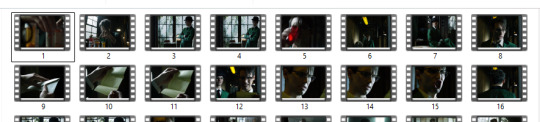
so basically, what i do is i sort of.. swipe (?) through the episode, cut the scenes with, in this case ed, very quickly and when I'm left with just his scenes i split every separate shot
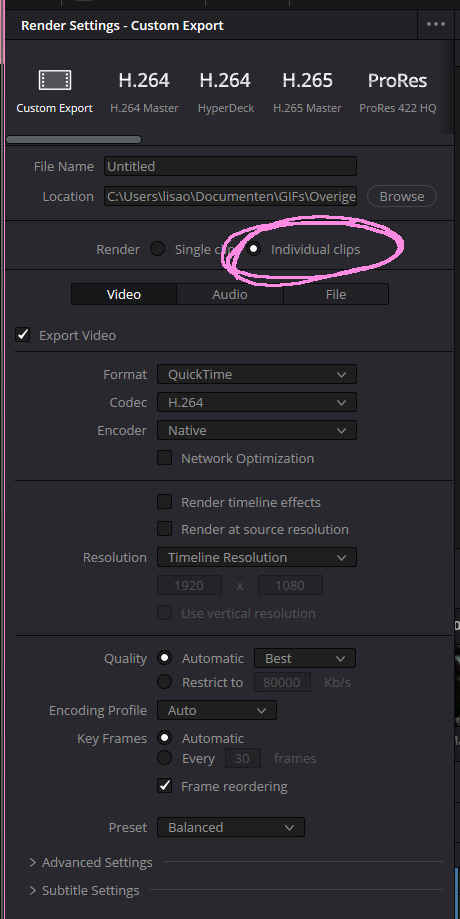
then i export them:
(i use these settings, i don't remember if i found them online somewhere but they work for me, and don't forget to check 'individual clips' (i only found this out a couple months ago and i don't wanna talk about the time before that))
now i have a folder with these files (folder is usually either the name of the movie or the episode number)

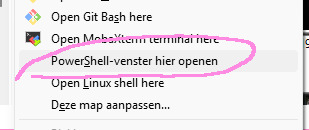
i'm very much NOT against ai so i had chatgpt write a line of code to change all the names quickly, which you do by shift + right mouseclick and open the powershell in that folder (MAKE SURE THE LOCATION IS RIGHT OR YOU'LL BREAK YOUR PC) and then paste $i=1; Get-ChildItem -File | Sort-Object Name | ForEach-Object { Rename-Item $_ -NewName "$i$($_.Extension)"; $i++ } into it, this will rename all files to numbers, which i prefer so i can easily open photoshop and just.. Untitled-1, Untitled-2.. you get the gist.

then i open photoshop (don't ask me how i get it for free, i pay the (now) €18 a month literally just for gifmaking (if you want to donate i have a ko-fi!)
(mind you, my photoshop is in dutch so i'll translate as best as i can)
you start by going to file > import > import videoframes to layers (?)

now you see this.. .

if you don't see the frame by frame line at the bottom go to Window > and check 'Timeline'
because i cut every shot up i usually have one or two frames from the previous shot so i delete them.
when i import the video the time per frame is usually 0,04 seconds, some people say it should always be 0,06 seconds, i personally prefer to set the speed to 0,05 seconds for gifs over 70 frames and 0,06 for gifs with under 70 frames

that's a good start
then i crop the video, i usually use the 2 : 3 dimensions, for some gifs like.. scenes with text i use 5 : 7..
then i modify the the size by ctrl + alt + i (i genuinely don't know how to find it in the menu) and set it to 540px (which is the standard size for a full width tumblr gif)
THEN I SAVE!!!!!!!!!!!!
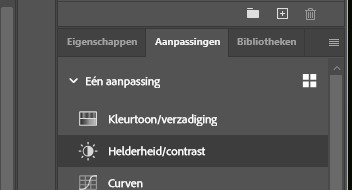
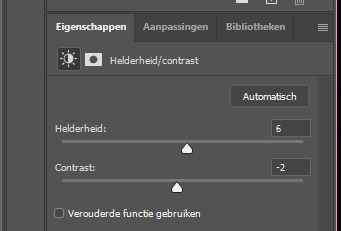
now comes the lazy part.. i go to adjustments on the right and click brightness/contrast (i think it's in english) and usually just press 'automatic' and see what happens and then just.. adjust it a little to where i like it. sometimes, with for example.. eddie's beautiful green suit i also add an adjustment layer with a hue/saturation layer and make the green a bit brighter
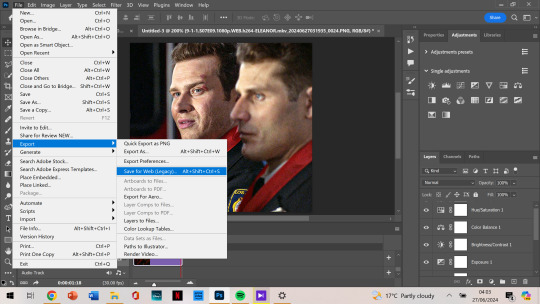
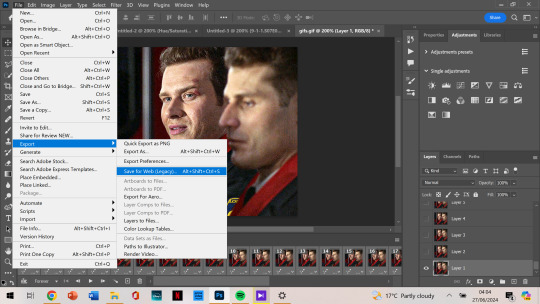
then i go to file > export > export for web (legacy), aka shift + ctrl + alt + S
which opens this window, (i'm sorry i got distracted with the pen)

i prefer to check the gif here before exporting, because the timeline is just too slow, i check the size.. now the max right now on tumblr is 10mb per gif, now there are 3 things that usually happen when they're over 10mb:
i have a gif that's just.. very long, so i play it and decide to cut it shorter and remove a shit ton of layers
i see that it's like.. 10.43mb, so i just usually cut a few layers off at the start or the end of the gif and check the size again until it's under 10mb
or it's just straight up too big and i change the size to 268px wide, which is tumblr's standard size for half width (?) gifs
and then you have this beautiful man:
i hope this is helpful in any way, shape or form.
thank you for coming to my ted talk and now imma go and slap this freaking fly that has been in my room annoying for the past 24 hours ✌️
7 notes
·
View notes
Text
Making an engine plate model:
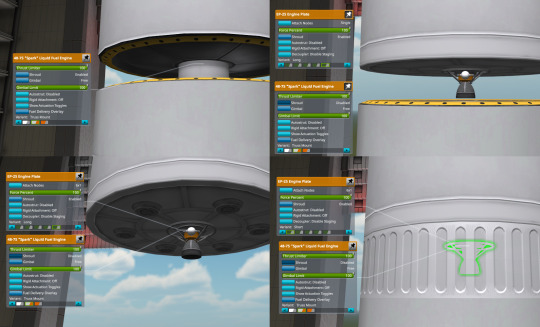
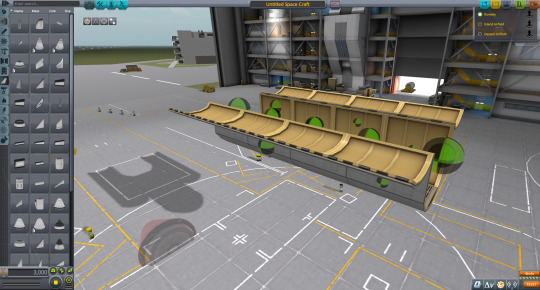
Before I started to model the engine plate, I wanted to decide on whether I add connectors to the plate like in Kerbal Space Program or have it as a plain looking base.
Kerbal Space Program:
Saturn V:

I felt that the engine plate looks a bit plain compared to the engine plates in Kerbal Space Program. If I made it this plain, it would make it a quick process. However, it would be good to have a model that shows where you can attach the engines like in Kerbal Space Program. I asked my friend Dan on what he thinks is best. His conclusion was that I could make it with the connectors on it if I wanted to stylize it. However, if I needed a more time efficient option, I should go with a plain base.
Conclusion:
I feel that I could in theory make a plain engine plate as I don't think I need those connectors. If I use these assets in a game I make, I could have an indicator of where you can attach parts in Kerbal Space Program.
Making the model:
Firstly, I opened up Blender and clicked on 'General'.
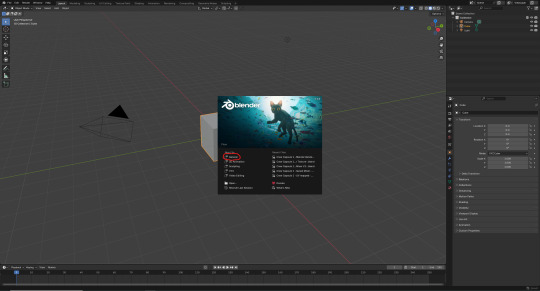
After that, I saved the file as "Engine Plate 1". I saved it now to so I can quickly save the file as I progress.

I then set the size to be 9m on its 'X' and 'Y' axis.
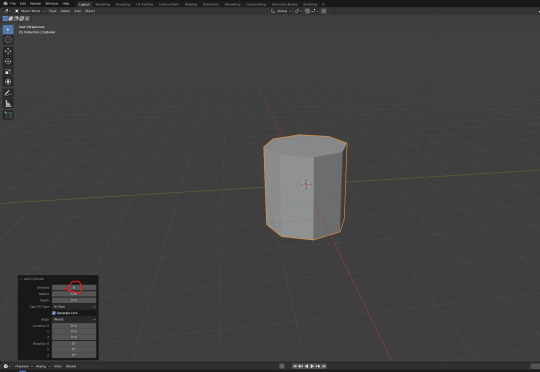
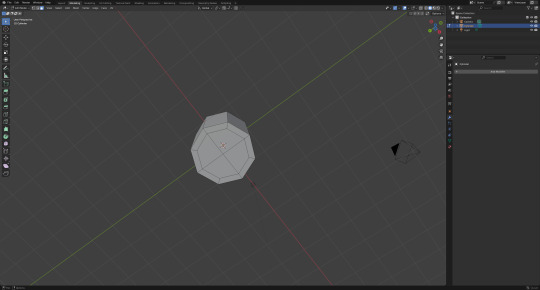
After that, I went to see if Daniel could help me with setting the faces quarts so that the UV map and topology are as good as they can possibly be. However, I had to delete my cylinder and add a new one so that I can use that table that allows me to change the number of vertices. I set it to 8 vertices.
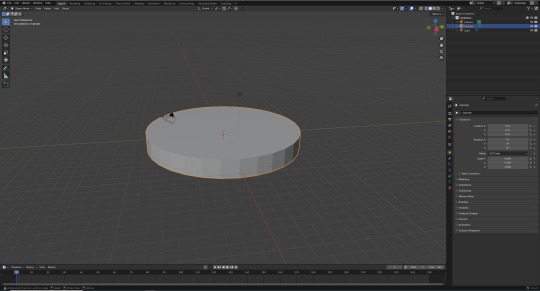
I pressed 'E' to extrude and 'S' to scale to make a lip. I held 'Ctrl' while I did it for precision. After that, I did it again until it joined at the centre.
Next, I joined the faces together by selecting two of the faces and pressed 'F' to combine them. This left 4 faces instead of 8.

Here, I had to repeat the past steps on the bottom face.
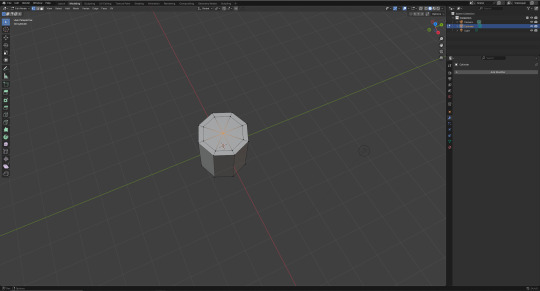
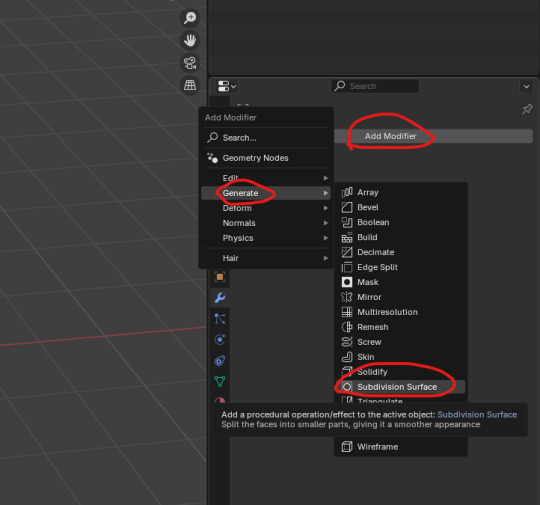
At this point, I added a 'Subdivision Surface' modifier. This was to smoothen out the cylinder mesh. I clicked on 'Add Modifier', 'Generate', and then on 'Subdivision Surface'.
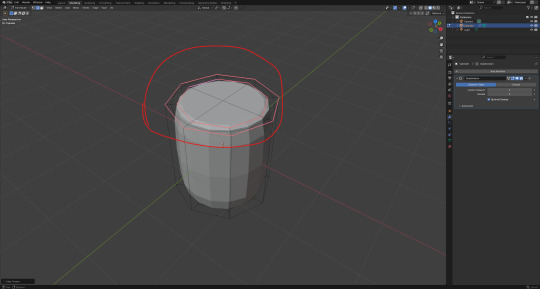
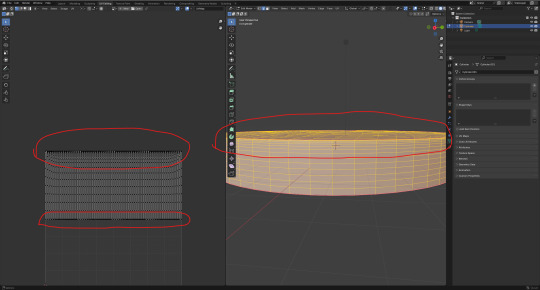
I selected the edges and held 'Shift' + 'E' which increases the sharpness of the edge. I dragged it out until the edges appeared pink. I then set the 'Levels Viewport' to 3.
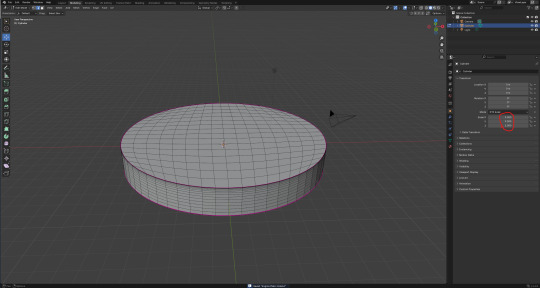
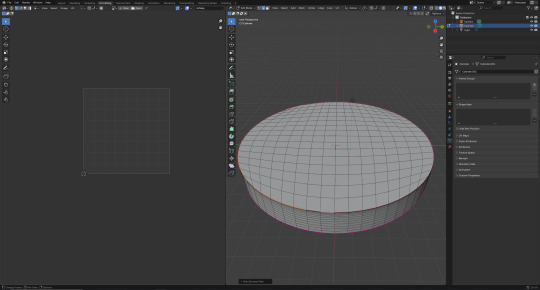
This is what the topology now looks like.

After that, I made it have a 9m diameter on its 'X' and 'Y' axis.
I found a You Tube video on how to give a cylinder good topology. I can use this video to help with future models. It uses a slightly different method to what I used, but mostly the same.
youtube
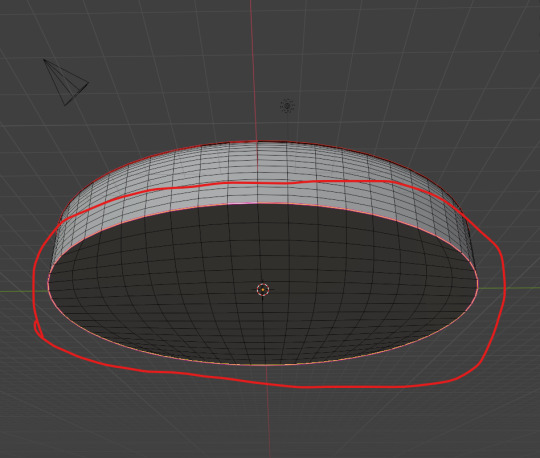
At this point, I decided to add seams to the model. However, I realized that there was a problem. The problem was that the faces were too close together. This made the job much harder.
While holding 'Ctrl' I clicked on a face near the edge I needed to select so that it automatically selects the nearest edge that I needed. I don't like the look of how some of the edges don't look illuminated.
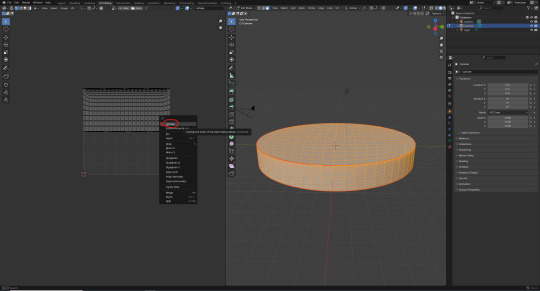
Next, I right clicked in the viewport and then left clicked on 'Mark Seam'.

Here, I selected the edges on the bottom of the cylinder and marked it as a seam.
In the case that my seams would cause an issue, I saved the file as a new one.

I found a video that I have put on an earlier blog post to help check I'm ready to unwrap my UV map for my model.
youtube
Here, I pressed 'Ctrl' + 'A' after entering 'Object Mode' to pop up a table. From there, I clicked on 'Scale' to make the dimensions of the mesh as the new 1,1,1 scale. I did this to prevent blender from skewing the texture.


Next, I entered 'Edit Mode' again and pressed '3' for 'Face Select' selection mode. I then right clicked on the 'UV Editing' viewport and left clicked on 'Unwrap'. The problem was that the model wasn't unwrapping.
I then remembered that I had to select all the faces in the 'UV Editing' tab. After that, I tried it again.

Personally I feel that it unwrapped well enough for texturing.

At this point, I decided that it was time to save the file as a new one in case the texturing process ruins the model. I saved it as "Engine Plate 1 -Textured-".

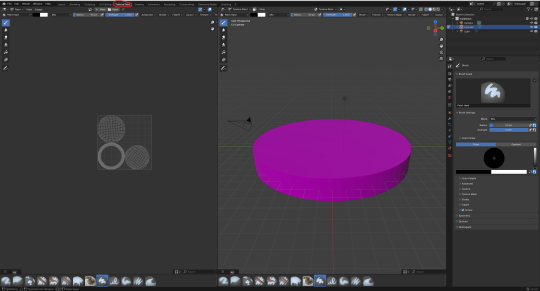
Here, I entered the 'Texture Paint' workspace to texture the model. However, I wasn't sure why the model was showing up as purple.
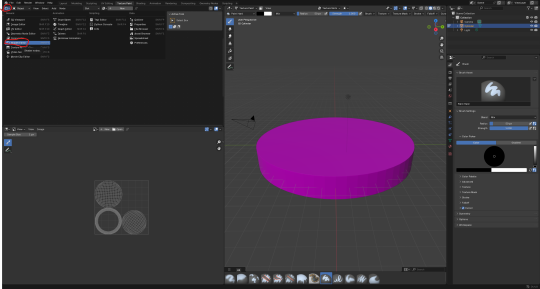
Next, I dragged down a new window. From there, I clicked on the paint bucket icon and then onto 'Shader Editor'.
To add a texture to the model, I clicked on 'Texture Slots', the plus icon and then 'Base Color'.
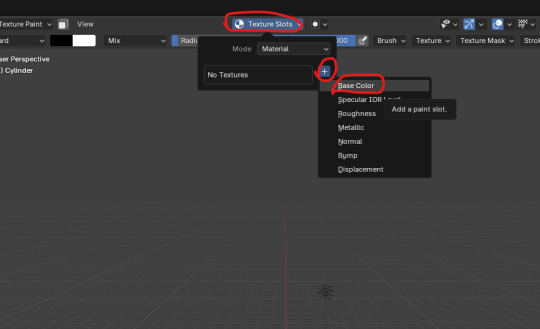
It then brought up this box. I changed the resolution for both the 'Width' and 'Height' to '2048 px' for 2K resolution. I then unticked the 'Alpha' box. Once I was happy with it, I clicked on 'Add'.

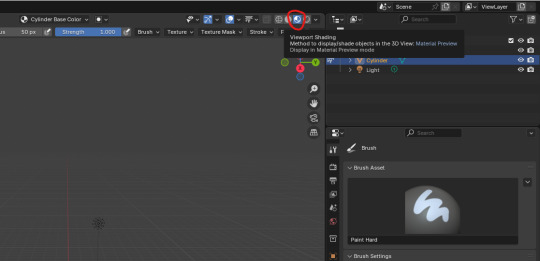
Next, I clicked onto 'Viewport Shading' so that I can view the texture.
0 notes